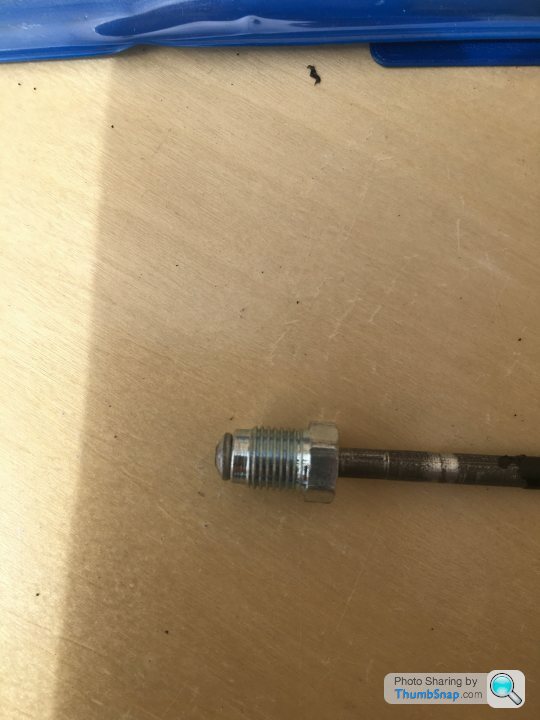
Corroded brake line unions
Discussion


stevieturbo said:
None of the tools I mentioned are £200.
Apologies I meant £100 but still an unwarranted generalisation. I'm assuming the Flaremaster 2 is what professionals use in garages? Looks like a nice bit of kit, and could be a good investment should I take this hobby further. I'm assuming they hold value well for future resale.steveo3002 said:
is it the din tool?
are you setting the length of the pipe before tightening the nuts...youre making some silly mistake it really is childs play
should be set pipe to length ...nip up pinch bolts ...wind in flare thead ...done
email if you get stuck i can take pics and send over
The only tool is me... you are correct, I was making an obvious mistake. First mistake was me getting too excited and trying to get it working whilst I was still doing my day job. Second mistake was how you set the stopper, which I've now resolved.are you setting the length of the pipe before tightening the nuts...youre making some silly mistake it really is childs play
should be set pipe to length ...nip up pinch bolts ...wind in flare thead ...done
email if you get stuck i can take pics and send over
Thanks for everyones patience and advice, it's much appreciated. See below my second flare (slightly better than my first):

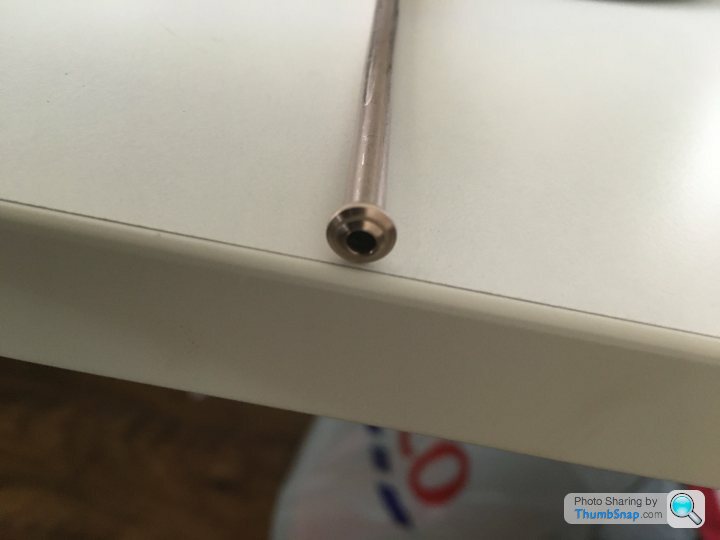
Criticism welcome.

CrutyRammers said:
Not waste, learning. Can't expect to get these things right first time.
Very true - flared another 2 just for the sake of itInitialDave said:
Little late here, but those ebay compact flaring tools will flare a steel pipe while still on the car without issue.
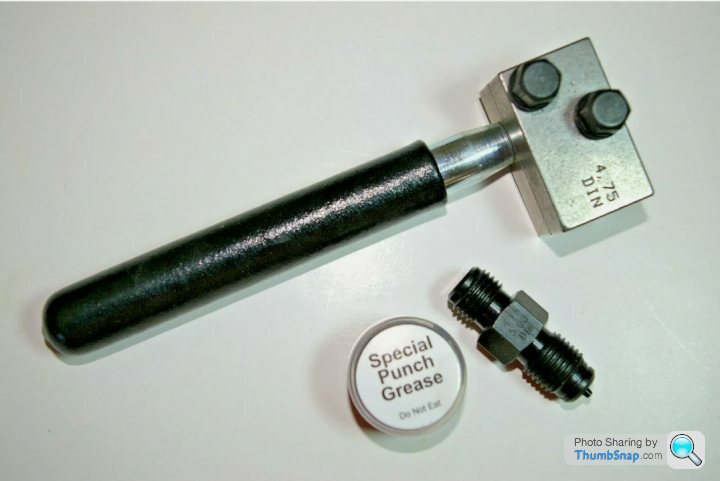
Thanks, there's a small section of pipe in between 2 Flexi hoses I'm going to replace, which I'll test the tool on first. I'll just need to make sure I remove all of the plastic coating.On another note, during my mistake I seem to have damaged the threads on the die part - the nut size if 16mm. Do you think this thread file would do the trick:
https://www.ebay.co.uk/itm/Metric-Thread-Restorati...

Is the best way of checking against an old connector? Will need to hope I can remove one. Haynes doesn’t tell me and most Q&A on forums regarding this is American.
Another DIN/SAE question, the connectors you linked to don’t specify which flare it’s suitable for, is the clue in that it’s metric?
Another DIN/SAE question, the connectors you linked to don’t specify which flare it’s suitable for, is the clue in that it’s metric?
steveo3002 said:
metric = din
im 99.9% sure its 10x1mm but theres several lengths avail
Agree on 10x1mm - will need to see if I can remove one to check, or check on the Honda forum I'm a member of.im 99.9% sure its 10x1mm but theres several lengths avail
Sorry another question - a stevieturbo mentioned any joins must involve steel, is it likely the male nuts you linked to are steel (can't see that it confirms the material)?
I might be over thinking this but want to get this right first time seeing as it's the most important safety feature on my car I'm working on.
Thanks Stevie - the ones Steve recommended have arrived.
There's a small section of hard pipe between 2 Flexi hoses on each side at the rear, so my plan is to cut the hard pipe as close to the mail nut as possible so I can get a socket on there; apply a little heat and it SHOULD come free. I should then find out if it's a short or long male connector.
It seems a lot of effort but I want to practise flaring on a scrap bit of OEM pipe before I cut the main pipe coming from the front, to tackle that badly rusted union I posted a picture of.
Yogioes said:
Apologies for the late response.
I use this little pipe bender for some bends. Pretty sure I used it for the U bend near the end of the pipe.
For a lot of the bends, I use whatever is handy and roughly the correct radius, e.g. a spray can, the jack handle.
Work it round the curve. It is possible to do a large curve just with your fingers but it is quite easy to kink or flatten the pipe, especially if using copper.
I use Kunifer and after some practice have found it very easy to get flares.
Flaring the original steel pipe on the car is usually a bit harder.
Lots of good advice on this thread from others, particularly about checking the length of the fittings. A supplier sent me unions for joining pipe. I tightened them up and it leaked. The male thread was not long enough for the female part of the union.
And I wonder if there is anybody who has never forgotten to add the fitting before flaring the end of the pipe?
Thanks - I actually went ahead and bought a pipe bender just like that, but as you say the radius of each bend can vary so will use what I can. I use this little pipe bender for some bends. Pretty sure I used it for the U bend near the end of the pipe.
For a lot of the bends, I use whatever is handy and roughly the correct radius, e.g. a spray can, the jack handle.
Work it round the curve. It is possible to do a large curve just with your fingers but it is quite easy to kink or flatten the pipe, especially if using copper.
I use Kunifer and after some practice have found it very easy to get flares.
Flaring the original steel pipe on the car is usually a bit harder.
Lots of good advice on this thread from others, particularly about checking the length of the fittings. A supplier sent me unions for joining pipe. I tightened them up and it leaked. The male thread was not long enough for the female part of the union.
And I wonder if there is anybody who has never forgotten to add the fitting before flaring the end of the pipe?
I’ve ordered a replacement rear sub frame from a breakers as mine is in a terrible way, and it happens to have sections of the original brake pipe and male connectors so can check/practise etc before I attack my car.
So I tested the flare tool I purchased on a small section of OEM steel plastic coated brake pipe and it flared no problem, so very chuffed. I removed the plastic coating, enough so the tool would grip the pipe properly:
I feel much more confident now flaring in situ, so thanks all for your help. The true test will be whether it seals or not, which I'll know in a few weeks when I replace my rear subframe.
I feel much more confident now flaring in situ, so thanks all for your help. The true test will be whether it seals or not, which I'll know in a few weeks when I replace my rear subframe.
Thanks both - surprisingly I find flaring the steel better. It’s a little tougher but once it’s finished there’s just no more give, with the Kunifer it feels you can keep on compressing.
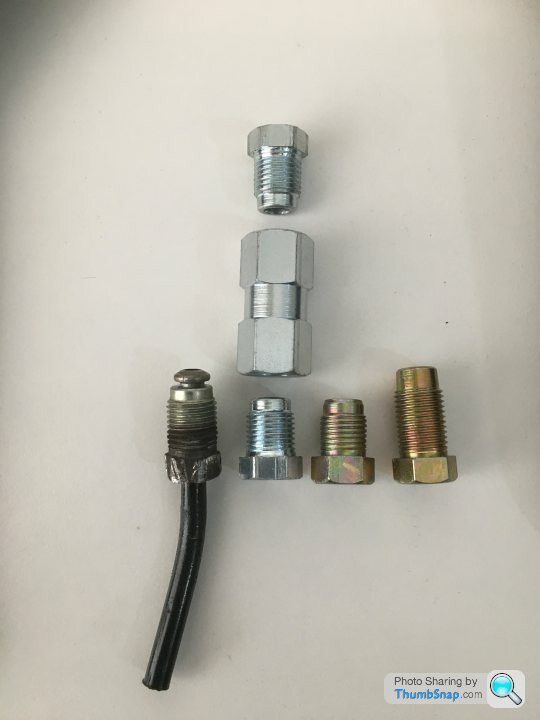
I’ve discovered I need the long version (I couldn’t see a medium length version) of the male metric connector so I’ve ordered some from eBay. The pitch appears to be the same (1mm) as I tested the OEM connector in the connector in union I bought and it fits fine.
I’ve discovered I need the long version (I couldn’t see a medium length version) of the male metric connector so I’ve ordered some from eBay. The pitch appears to be the same (1mm) as I tested the OEM connector in the connector in union I bought and it fits fine.
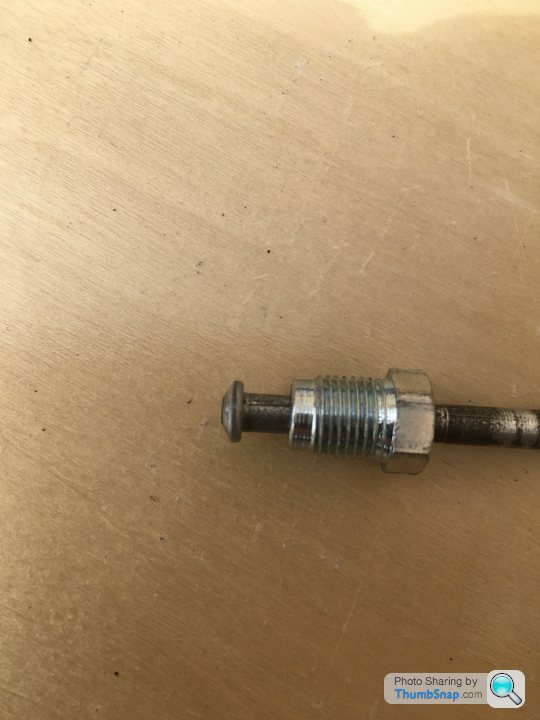
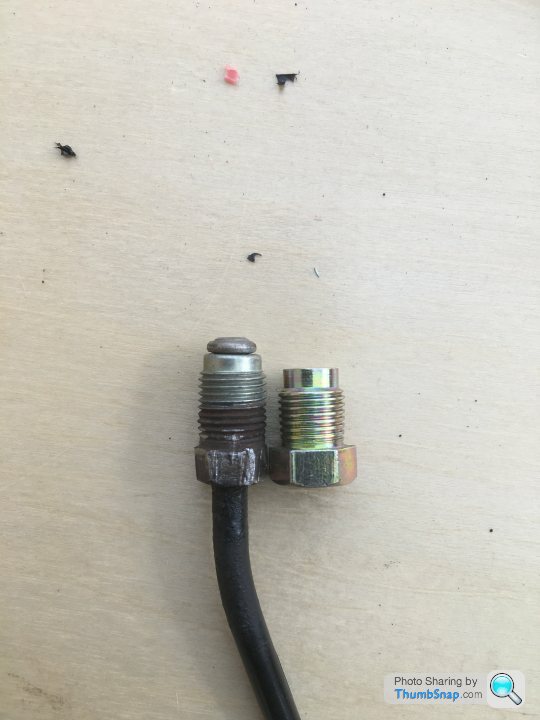
So I'm thinking of using the long connector rather than the short - my OEM one of the left appears to be a 'medium' size which isn't available anywhere.
Also, the short and long connectors are made from mild steel with a zinc coating, is the union made from stainless steel? Just curious.
Also, the short and long connectors are made from mild steel with a zinc coating, is the union made from stainless steel? Just curious.
So I created my first “soon to be live” brake line - I bought a second hand rear axle and have just had it blasted and coated, so I can now start fixing in the brake lines/hoses.
Do you think this looks ok:
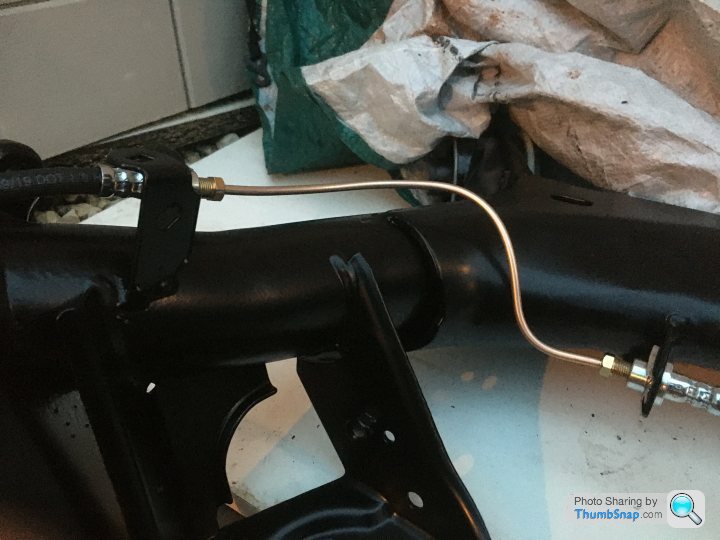
Closest it gets to the beam is about 1cm but it’s not touching it anywhere so there’s little risk of chafing. I tried to follow the pattern of the original piece but it looked a mess, so I thought as it’s only a small section I’ll do it free-hand in situ.
When it comes to replacing the OEM sections on the car I’ll be sure to use the piece I cut off as a guide.
Do you think this looks ok:
Closest it gets to the beam is about 1cm but it’s not touching it anywhere so there’s little risk of chafing. I tried to follow the pattern of the original piece but it looked a mess, so I thought as it’s only a small section I’ll do it free-hand in situ.
When it comes to replacing the OEM sections on the car I’ll be sure to use the piece I cut off as a guide.
Gassing Station | Suspension, Brakes & Tyres | Top of Page | What's New | My Stuff