Exige S1 over-winter Refresh
Discussion


Not a WHOOOLE lot has gone on of late, I've been busy organising stuff.
Late last week I bought my nice shiny new Arrow rods and these are about to be shipped for balancing... works of art they are (pic stolen from mikelr because I've obviously not got them with me! )

I've just tonight finished crating up my clutch cover, flywheel and pulleys to go to Vibration Free for balancing with my crank, as well as mycylinder head to get some nice DVAPower loving God speed my little mechanical componenty friends!


Late last week I bought my nice shiny new Arrow rods and these are about to be shipped for balancing... works of art they are
(pic stolen from mikelr because I've obviously not got them with me! )I've just tonight finished crating up my clutch cover, flywheel and pulleys to go to Vibration Free for balancing with my crank, as well as mycylinder head to get some nice DVAPower loving
God speed my little mechanical componenty friends!
Another small but significant step today... my alcantara for the dashboard gauge pod arrived today. I can now start doing the work to mould this piece up secure in the knowledge I can upholster it when done and get it looking nice In the ziplok bag is also a couple of fresh snubber washers for my front suspension

In the ziplok bag is also a couple of fresh snubber washers for my front suspension 
Every little bit gets me that much closer to project completion
Painting hasn't been hung yet as I need my front clamshell out of my bedroom before I've the wall space!! It's currently on display leaning up against said clamshell carefully positioned on top of a soft bean bag! I still look at it every night before I go to sleep for inspiration
Painting hasn't been hung yet as I need my front clamshell out of my bedroom before I've the wall space!!
It's currently on display leaning up against said clamshell carefully positioned on top of a soft bean bag! I still look at it every night before I go to sleep for inspiration 
Esprit said:
Every little bit gets me that much closer to project completion
Painting hasn't been hung yet as I need my front clamshell out of my bedroom before I've the wall space!! It's currently on display leaning up against said clamshell carefully positioned on top of a soft bean bag! I still look at it every night before I go to sleep for inspiration
haha thats brilliant Painting hasn't been hung yet as I need my front clamshell out of my bedroom before I've the wall space!!
It's currently on display leaning up against said clamshell carefully positioned on top of a soft bean bag! I still look at it every night before I go to sleep for inspiration 
Righto,
Well I've been busy lately so I've had precious little time to cavort around doing car stuff sadly. Busy as fook at work, but fingers crossed I'll be able to steal an hour or two here and there to do stuff.
I've decided that after all this work, bolting my rusty old Koni LSS shocks and springs back on the car just won't do, so I'll be making the call to Hofmann's before too long to order some of the Randy-tuned Nitrons for it. I'll be taking Chris's advice as to spring rates etc just as soon as I've given some thought to ride-heights and usage. But here's a pretty picture of them anyway:

I've been doing a bit of work on the ergonomics side of things for the oil pressure/temperature gauge install. As I've said before I'm installing it in the blanked-off radio slot in the dash. I don't intend to ever run a radio on this car so it seems a logical place to put it.

It's not in line-of-sight really, but that matters little as I've got the audible warning circuit (as detailed earlier in this thread) as well as some blindingly bright LEDs to back it up.
This is the blanking plate moulding as removed from the dashboard sitting on my desk.

I then used a couple of measurements as to the radio location from the driver's head (thanks to SELOC's Alex/"dt95aac" and Danny/"Chopperver1") to figure out some viewing angles and reaches so that I could do a lay-out of the new "Gaugepod" blanking plate replacement.
I decided to quickly draft it up to make sure I could get a decent shape when I came to cut the buck from plywood and so that I could play around getting it looking right first before I cut wood and began moulding any glassfibre.
A couple hours on SolidWorks later and bingo, one raw moulding ready to go!

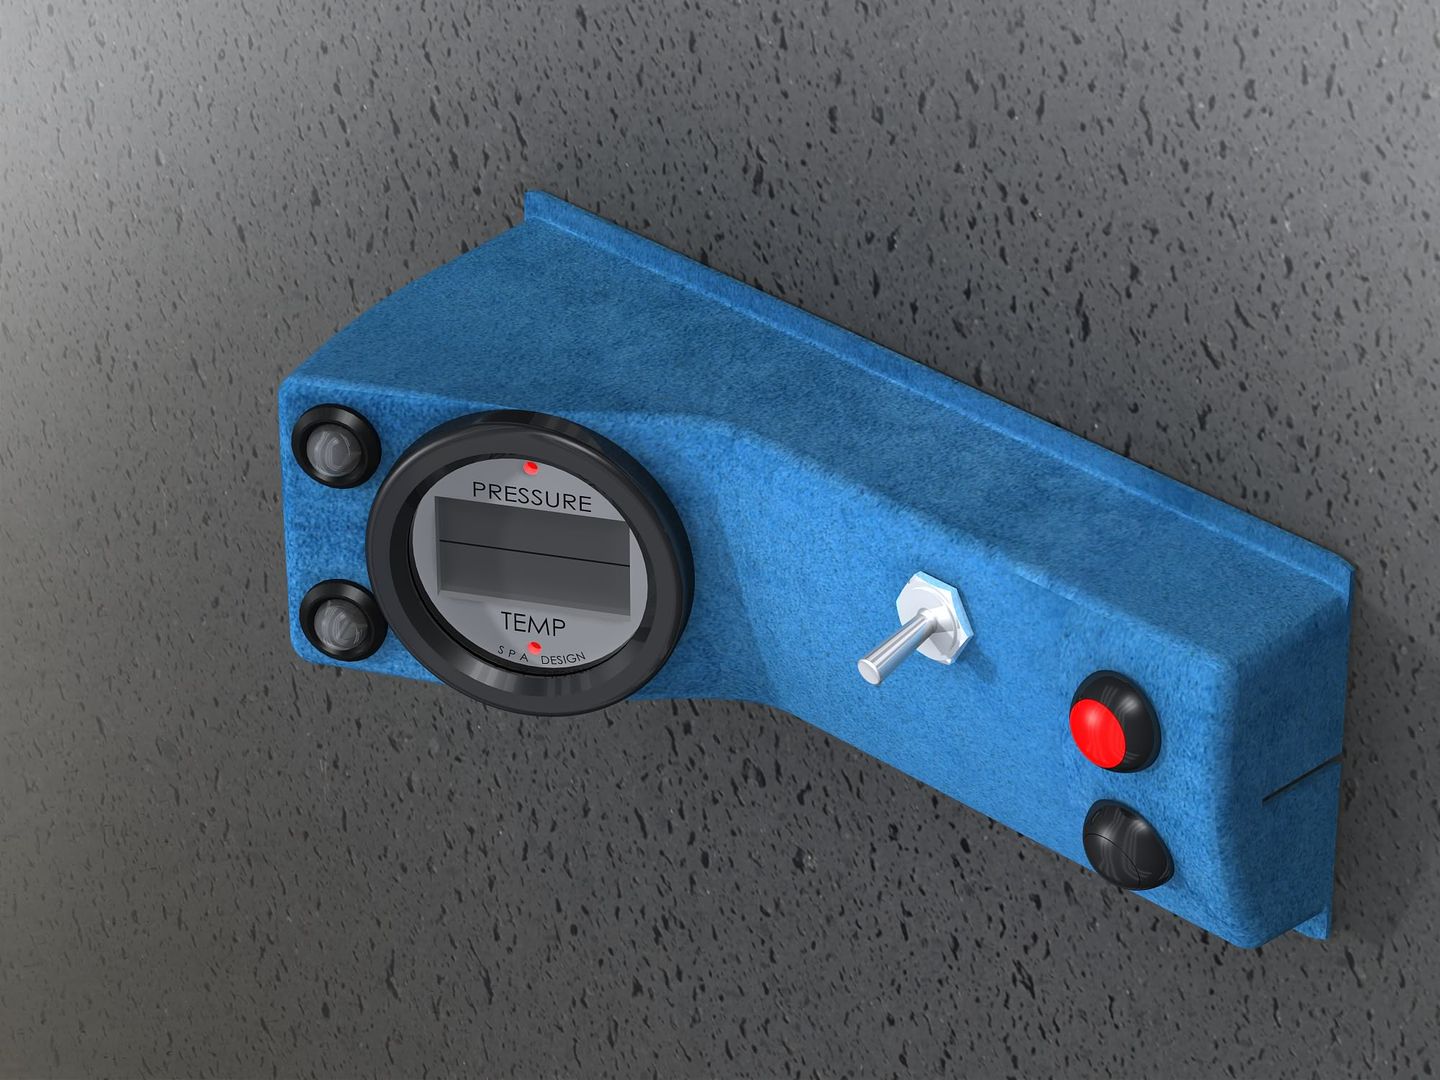
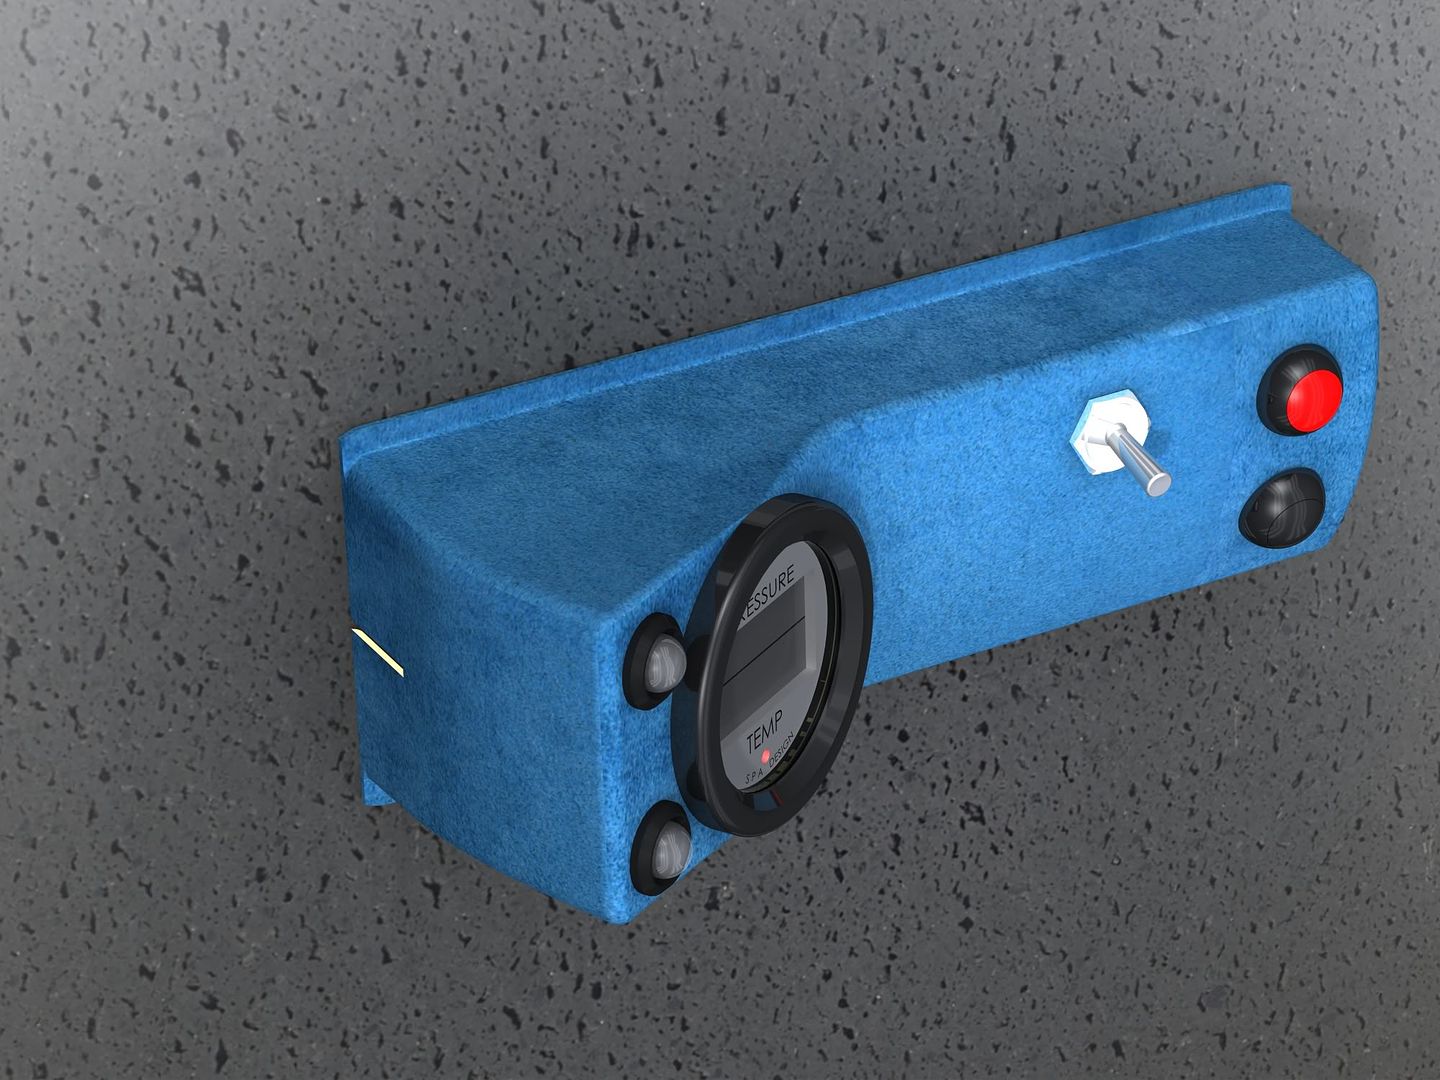
Of course in typical fashion, I then got carried away and wanted to check how everything would look so a couple more hours on the SolidWorks and I produced a couple of "artists impressions" (click photos for MEGASIZED pics) so that I could see what it'd roughly look like all finished up and upholstered in the OEM alcantara:


The gauge and warning LEDs are positioned to the far left (worse for line-of-sight) because I wanted to use the right hand side of the moulding to mount the buttons. This is because when harnessed in, I won't be able to reach beyond about halfway along the panel and I want the controls within reach when on track.
I'll use these to generate some 2D templates for cutting the plywood and then there'll be a lot of hand-shaping to get the buck looking right before it's ready to take a mould. Watch this space over the next few weeks.
Oh... and one more thing, flicking through a copy of "Top Gear" magazine while on the bog today and the buttons I chose to programme the gauge and silence the alarm are exactly the same as the ones used on the cockpit/steering wheel of the Le Mans-winning Audi R10 racer... how f*cking sad am I to notice that?!?! I think I need help.
Well I've been busy lately so I've had precious little time to cavort around doing car stuff sadly. Busy as fook at work, but fingers crossed I'll be able to steal an hour or two here and there to do stuff.
I've decided that after all this work, bolting my rusty old Koni LSS shocks and springs back on the car just won't do, so I'll be making the call to Hofmann's before too long to order some of the Randy-tuned Nitrons for it. I'll be taking Chris's advice as to spring rates etc just as soon as I've given some thought to ride-heights and usage. But here's a pretty picture of them anyway:
I've been doing a bit of work on the ergonomics side of things for the oil pressure/temperature gauge install. As I've said before I'm installing it in the blanked-off radio slot in the dash. I don't intend to ever run a radio on this car so it seems a logical place to put it.
It's not in line-of-sight really, but that matters little as I've got the audible warning circuit (as detailed earlier in this thread) as well as some blindingly bright LEDs to back it up.
This is the blanking plate moulding as removed from the dashboard sitting on my desk.
I then used a couple of measurements as to the radio location from the driver's head (thanks to SELOC's Alex/"dt95aac" and Danny/"Chopperver1") to figure out some viewing angles and reaches so that I could do a lay-out of the new "Gaugepod" blanking plate replacement.
I decided to quickly draft it up to make sure I could get a decent shape when I came to cut the buck from plywood and so that I could play around getting it looking right first before I cut wood and began moulding any glassfibre.
A couple hours on SolidWorks later and bingo, one raw moulding ready to go!
Of course in typical fashion, I then got carried away and wanted to check how everything would look so a couple more hours on the SolidWorks and I produced a couple of "artists impressions" (click photos for MEGASIZED pics) so that I could see what it'd roughly look like all finished up and upholstered in the OEM alcantara:
The gauge and warning LEDs are positioned to the far left (worse for line-of-sight) because I wanted to use the right hand side of the moulding to mount the buttons. This is because when harnessed in, I won't be able to reach beyond about halfway along the panel and I want the controls within reach when on track.
I'll use these to generate some 2D templates for cutting the plywood and then there'll be a lot of hand-shaping to get the buck looking right before it's ready to take a mould. Watch this space over the next few weeks.
Oh... and one more thing, flicking through a copy of "Top Gear" magazine while on the bog today and the buttons I chose to programme the gauge and silence the alarm are exactly the same as the ones used on the cockpit/steering wheel of the Le Mans-winning Audi R10 racer... how f*cking sad am I to notice that?!?! I think I need help.
Edited by Esprit on Tuesday 27th January 13:15
Edited by Esprit on Tuesday 27th January 14:00
shirt said:
you need to stop updating this esprit, its making me sick
seriously, its shaping up to be one of the nicest exiges in the world with all the things you keep coming up with. good work
Haha well thankyou... I severely doubt it'll be one of the nicest in the world, but I'm aiming for a tidy, useable car that'll give me a good number of years pleasure once it's back in one piece. It really has ended up being a much larger (and more expensive!) undertaking than I'd intended but I'm enjoying the challenge/learning that's going into it and quite aside from the finished result, it'll have taught me a lot by the time I'm done seriously, its shaping up to be one of the nicest exiges in the world with all the things you keep coming up with. good work
TonyHetherington said:
I am SO excited to see what it's going to be like when finished. Utterly stunning!
Thanks Tony... should be done by your summertime, just in time to sit in my garage sheltering from our winter  Means a lot that I've got a true Lotus nutjob like you interested
 Oh blimey, I'm uber-interested, very very much so. It's exactly the sort of thing I'd like to do myself and am extremely envious. Love the updates so please do continue to do them!
Alas, this paarticular Lotus-nut-job is probably going to be Lotus-less from Monday. The Exige has been up for sale for a couple of months and on Monday someone is coming to drive it away forever more (he's leaving me money though ). I simply don't drive it enough to warrant owning. What a gutting shame. I will still be here though, checking up on what you're doing
Alas, this paarticular Lotus-nut-job is probably going to be Lotus-less from Monday. The Exige has been up for sale for a couple of months and on Monday someone is coming to drive it away forever more (he's leaving me money though
). I simply don't drive it enough to warrant owning. What a gutting shame. I will still be here though, checking up on what you're doing Aww, 'tis a shame you're selling Tony (I'd seen that it was for sale) and I'm not really worried because I know that you'll be without it for about 6 weeks before you realise what a hideous, hideous mistake you've made and you'll get another. Given that sort of usage, I think a nice S1 Exige would suit you just fine

Hello Esprit,
I have been lurking here following your for most of this thread i just wanted to say i am a jealous as hell. I claim to myself that I will do similar to my S1 elise when time and space permit, but i am to much of a lazy arse.
Just a susgestion but as you have a model for your gauge mount would it not be easier to sent the iges to be rapid prototyped
Thumbs
Gassing Station | Elise/Exige/Europa/340R | Top of Page | What's New | My Stuff