Custom 500+ Horsepower LS6 1972 TVR Vixen Wide Body build
Discussion


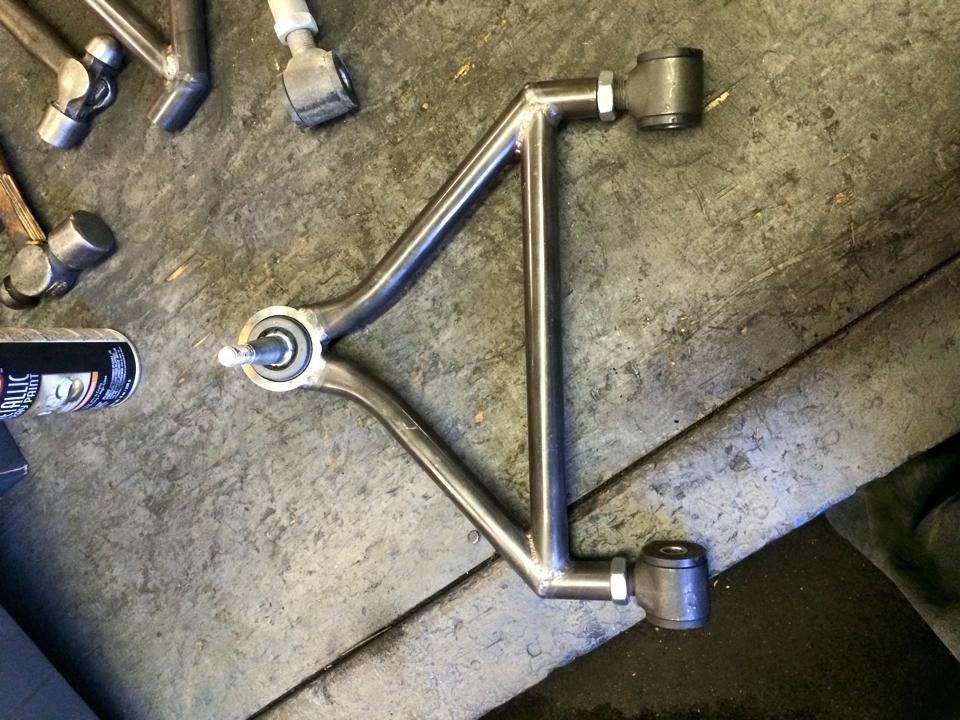
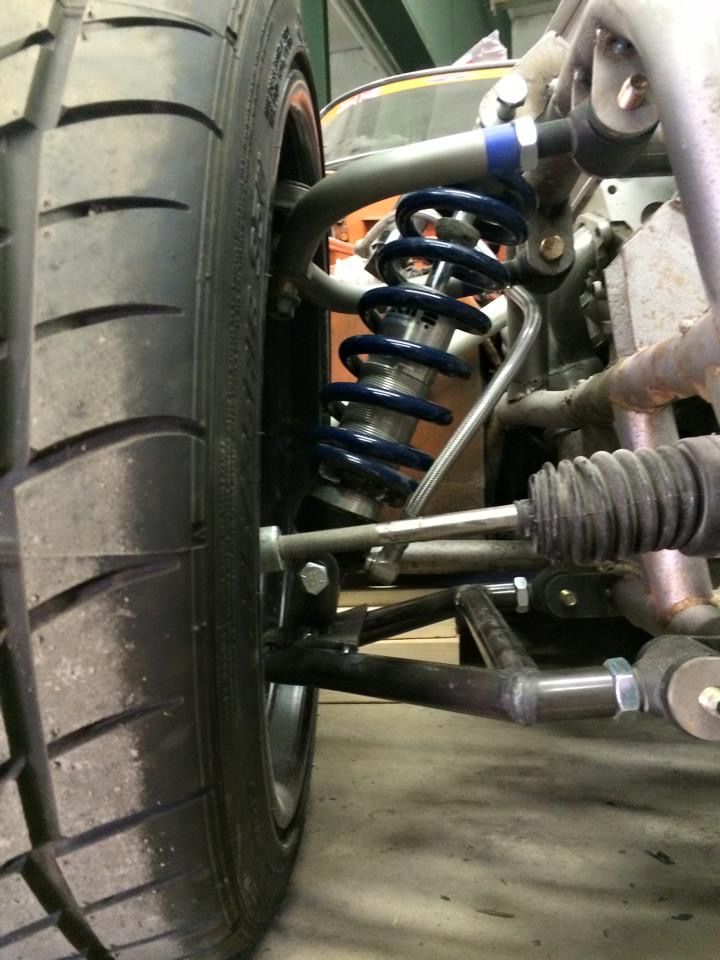
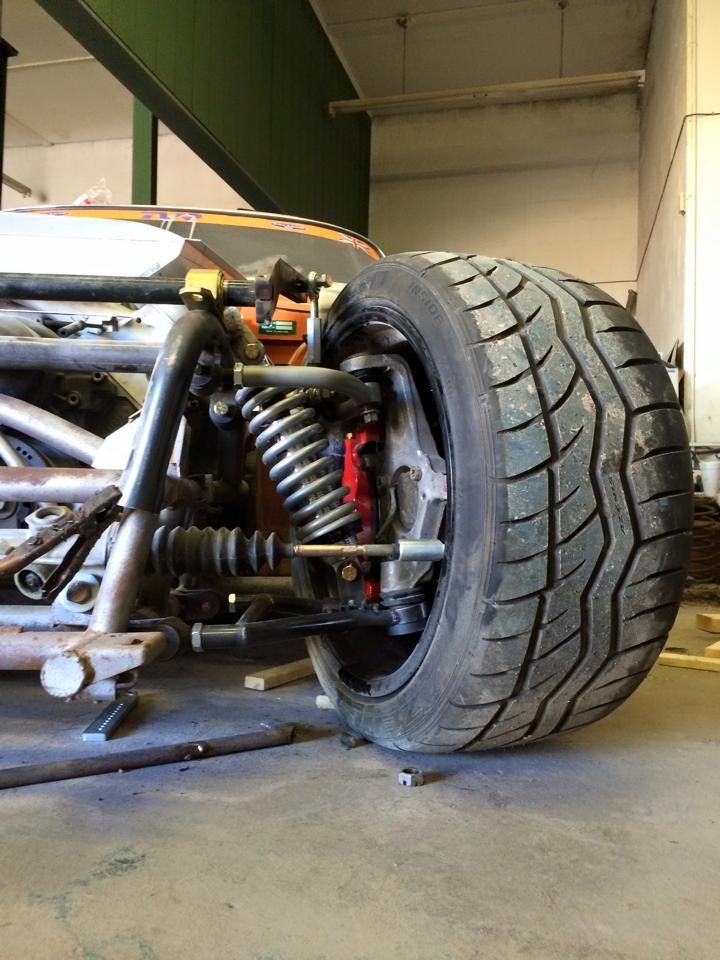
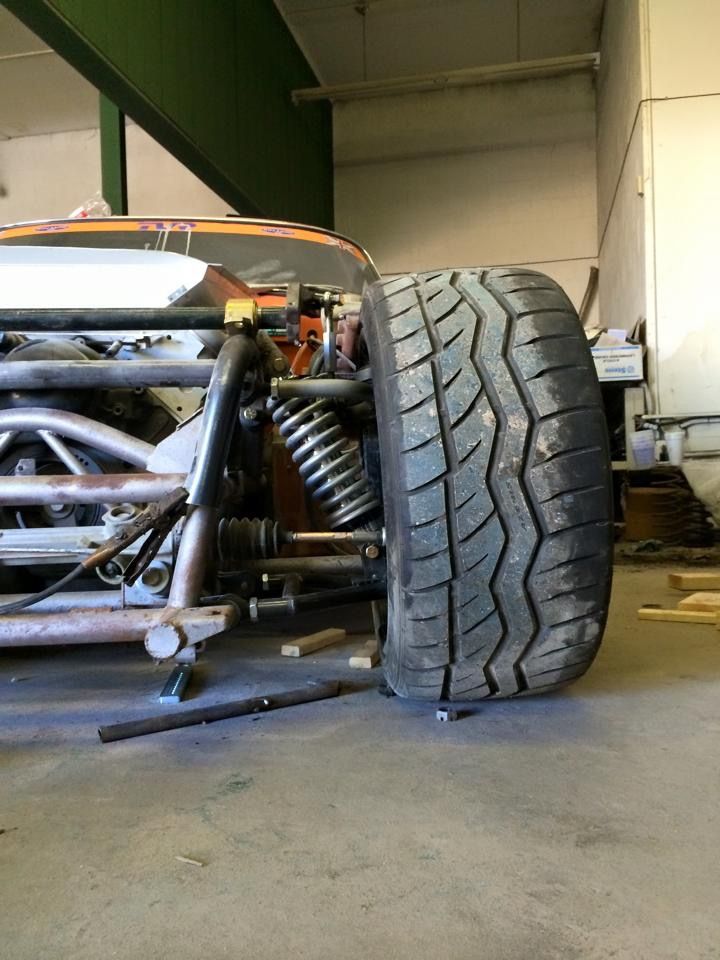
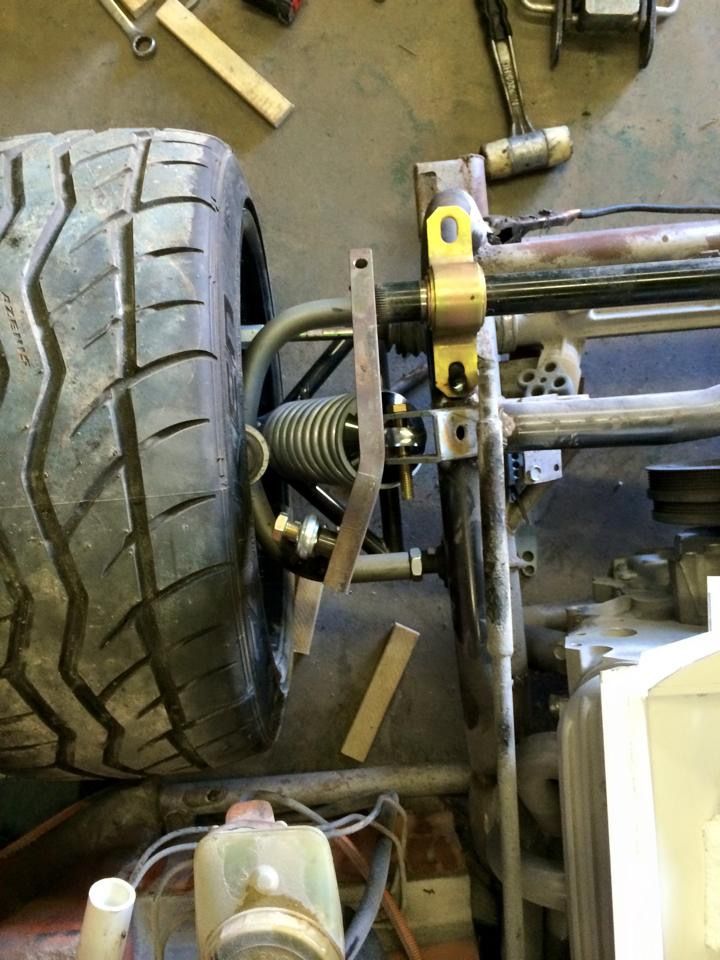
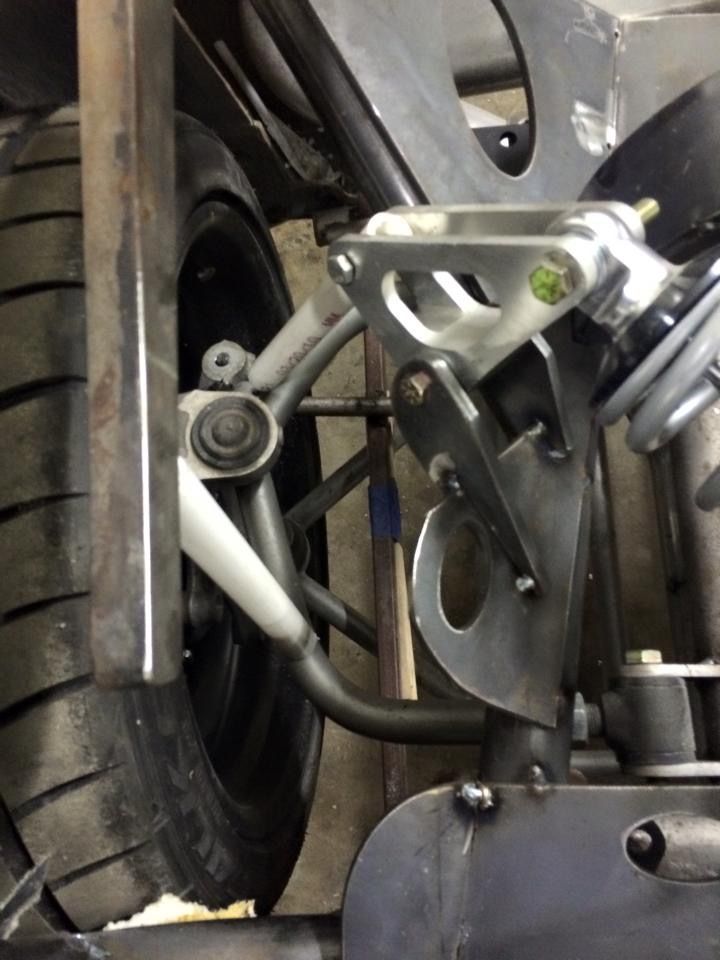
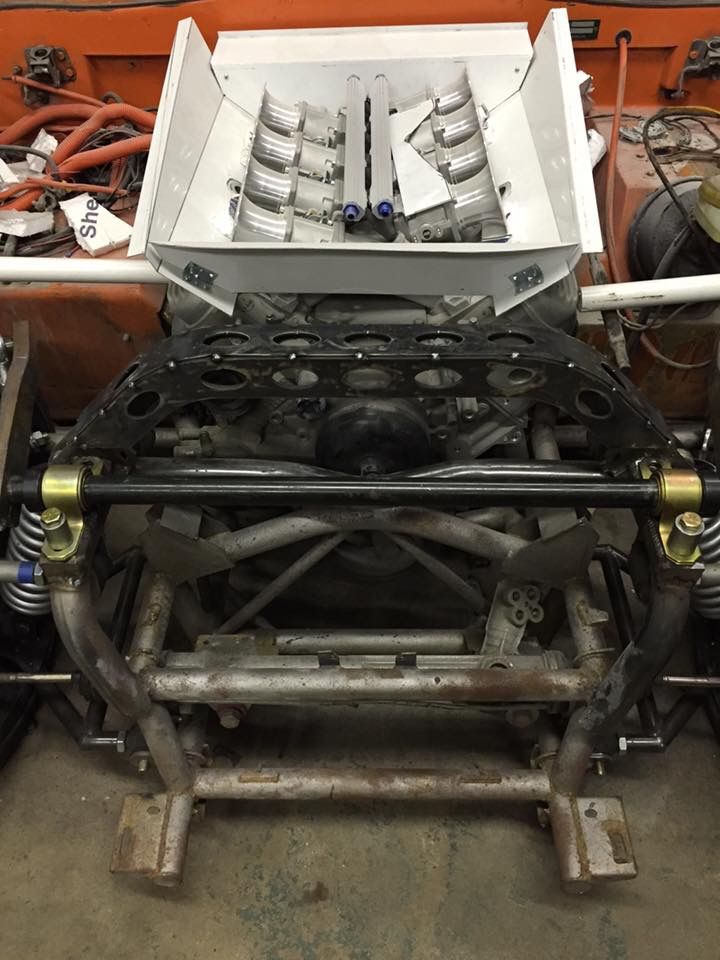
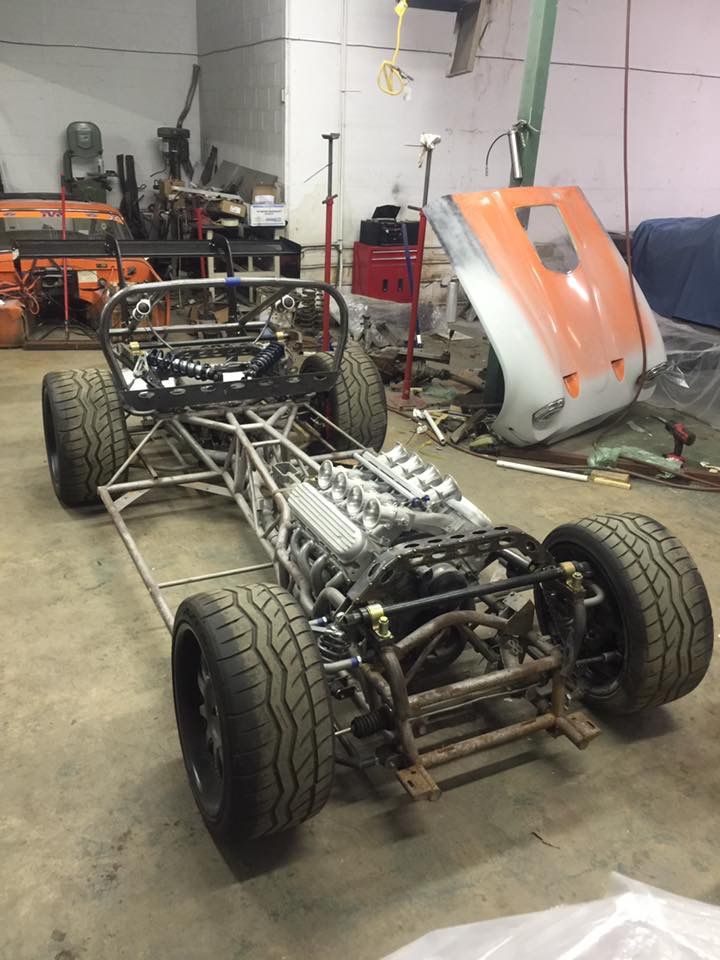
Well I have the control arms all sorted and the mounting tacked together, along with the best mounting position for the Ridetech Triple Adjust coil overs giving use a base adjustable ride height of 7 inches measured from the bottom of the center frame rails, but that is fully adjustable up or down from that point.
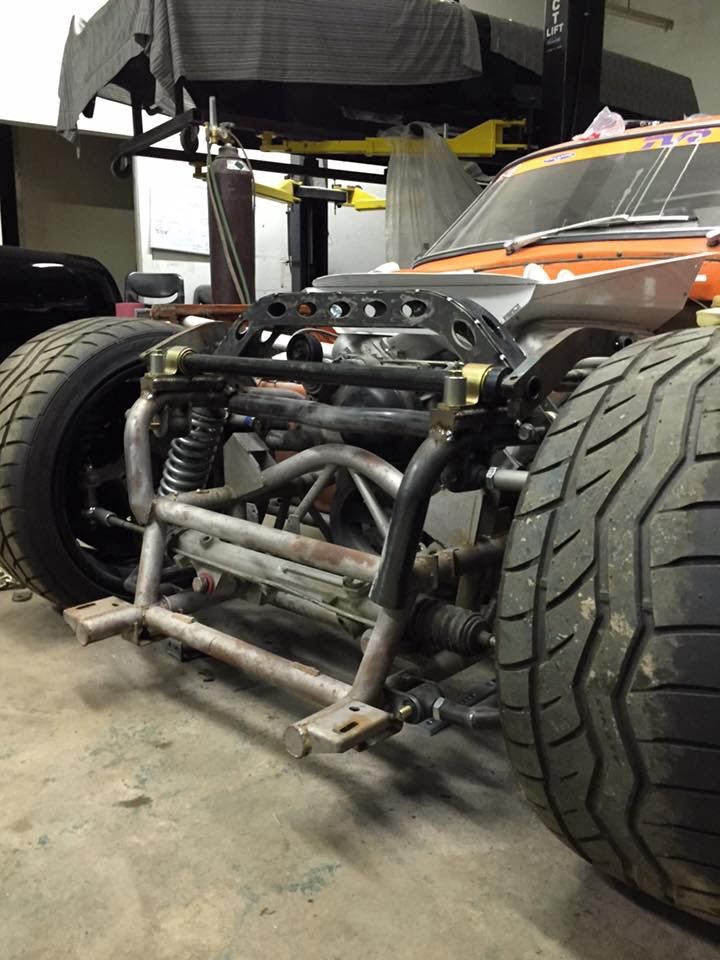
The new control arms give us great clearance for proper steering with the 18x10in wheels now that new arms are narrower avoid contact with inner barrel of the wheel, I had to redesign them because the previous wider control arms didn't allow adequate steering due to sitting so deep in the wheel that the lower control arm made contact way too early. The Ford power rack and pinion worked out great for steering, and the full lock to lock within the rack and pinion works perfectly for this application, so there is no need to add any steering stop tabs anywhere for one less item to deal with in the grand scheme of things.
The new control arms give us great clearance for proper steering with the 18x10in wheels now that new arms are narrower avoid contact with inner barrel of the wheel, I had to redesign them because the previous wider control arms didn't allow adequate steering due to sitting so deep in the wheel that the lower control arm made contact way too early. The Ford power rack and pinion worked out great for steering, and the full lock to lock within the rack and pinion works perfectly for this application, so there is no need to add any steering stop tabs anywhere for one less item to deal with in the grand scheme of things.


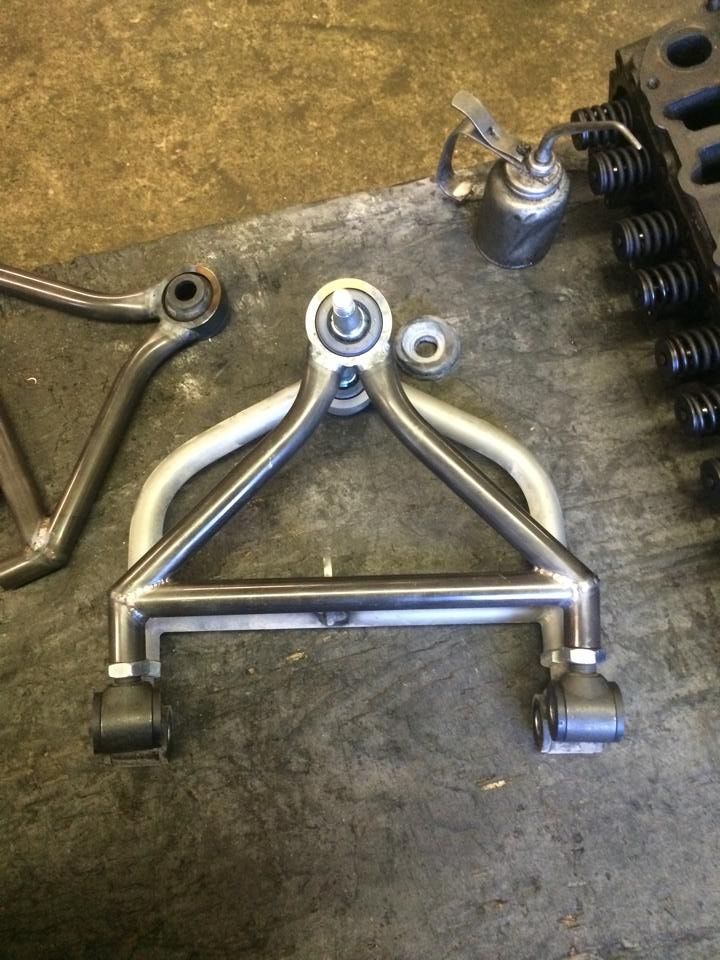
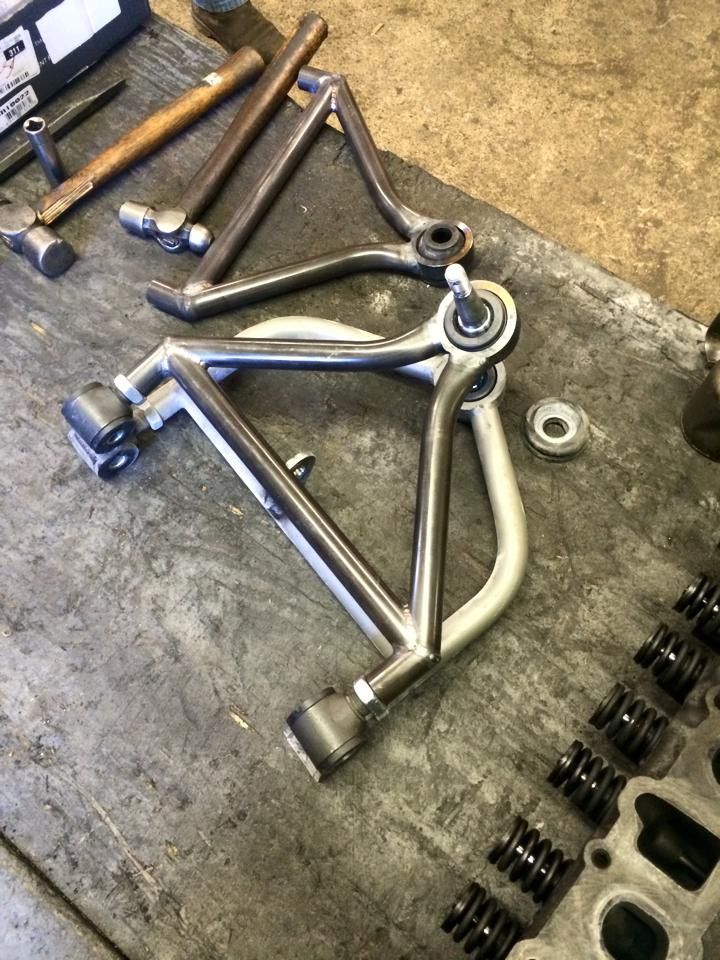
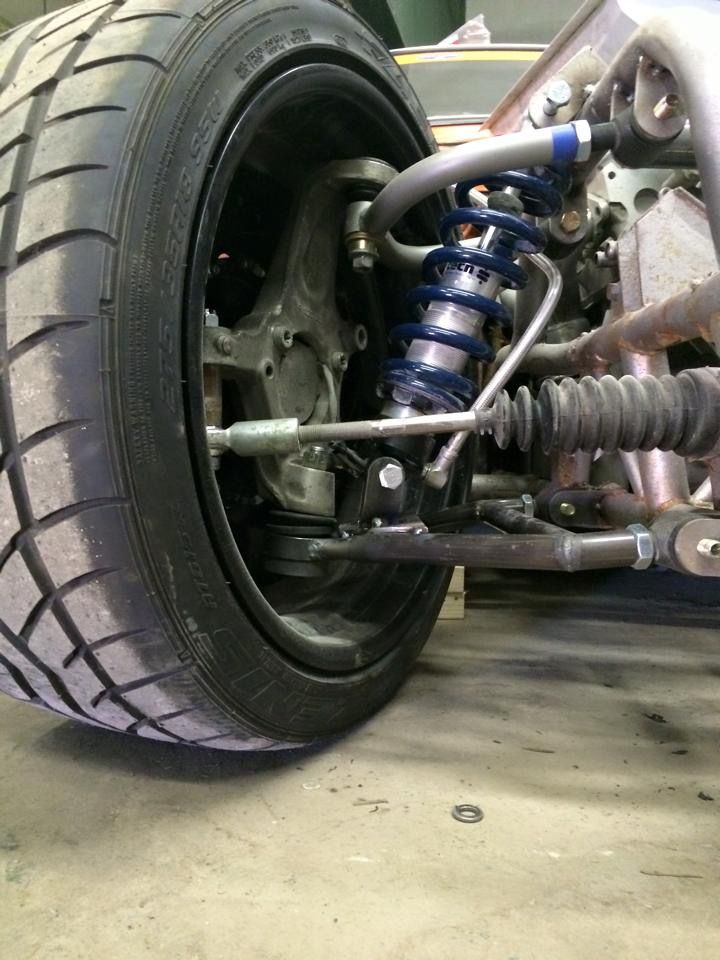
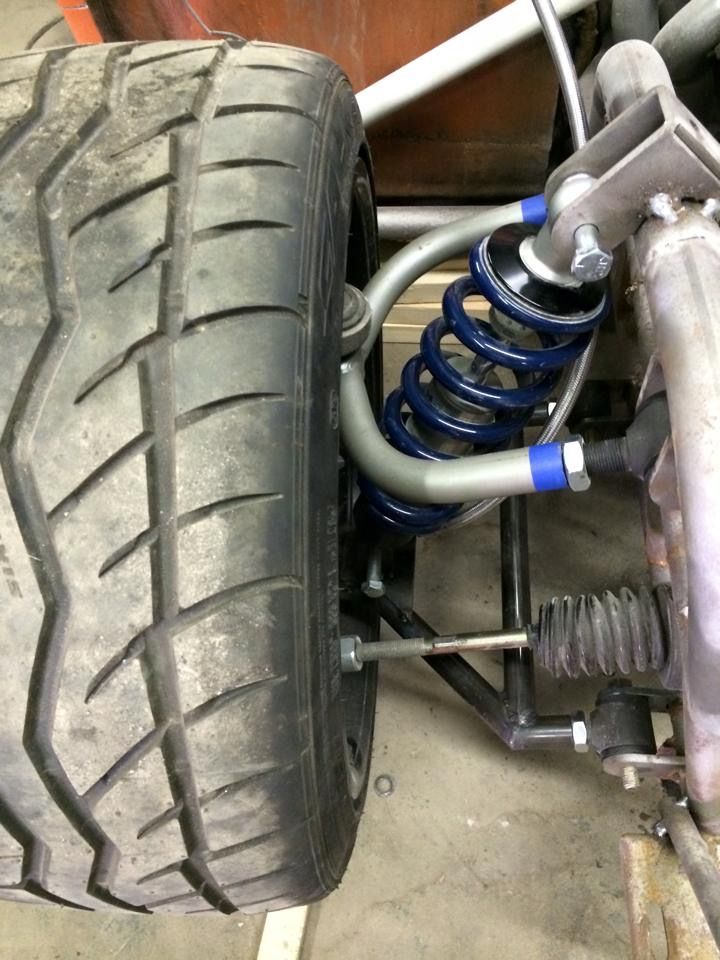
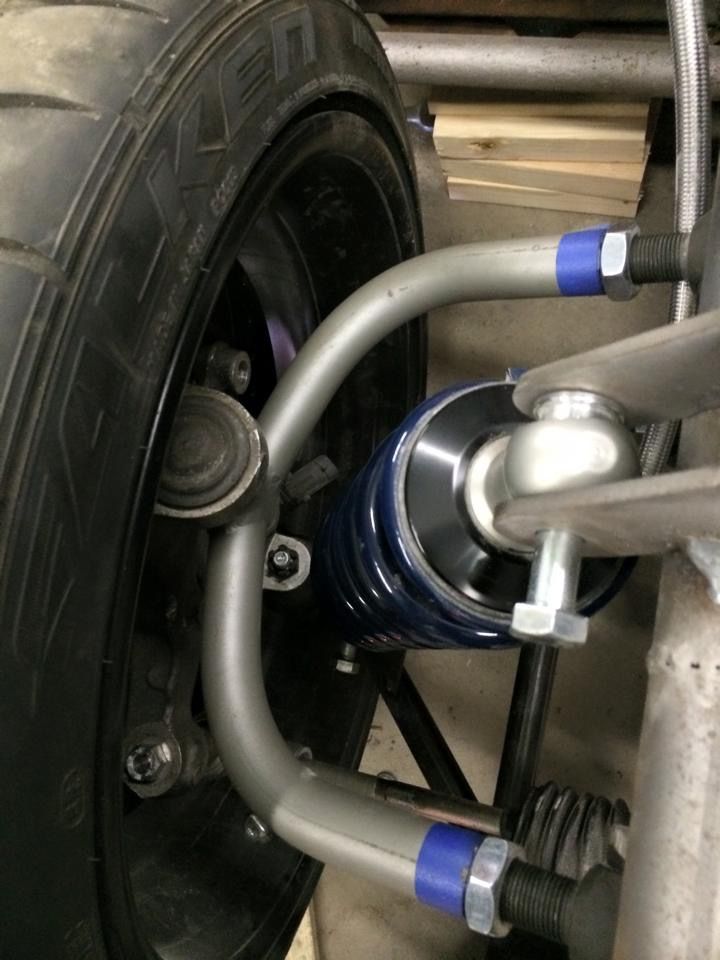
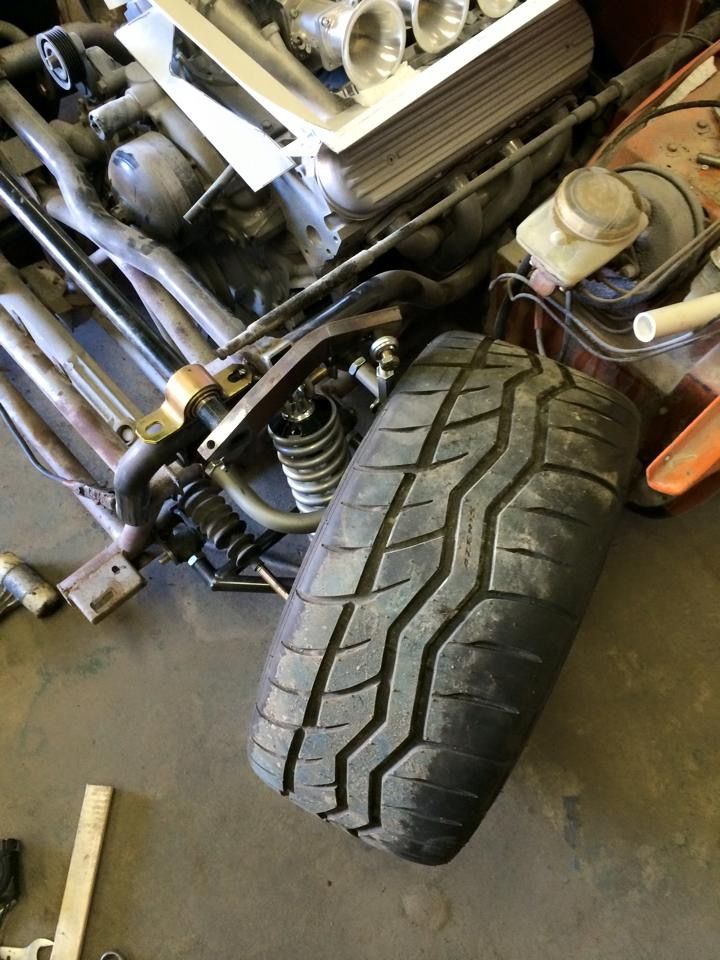
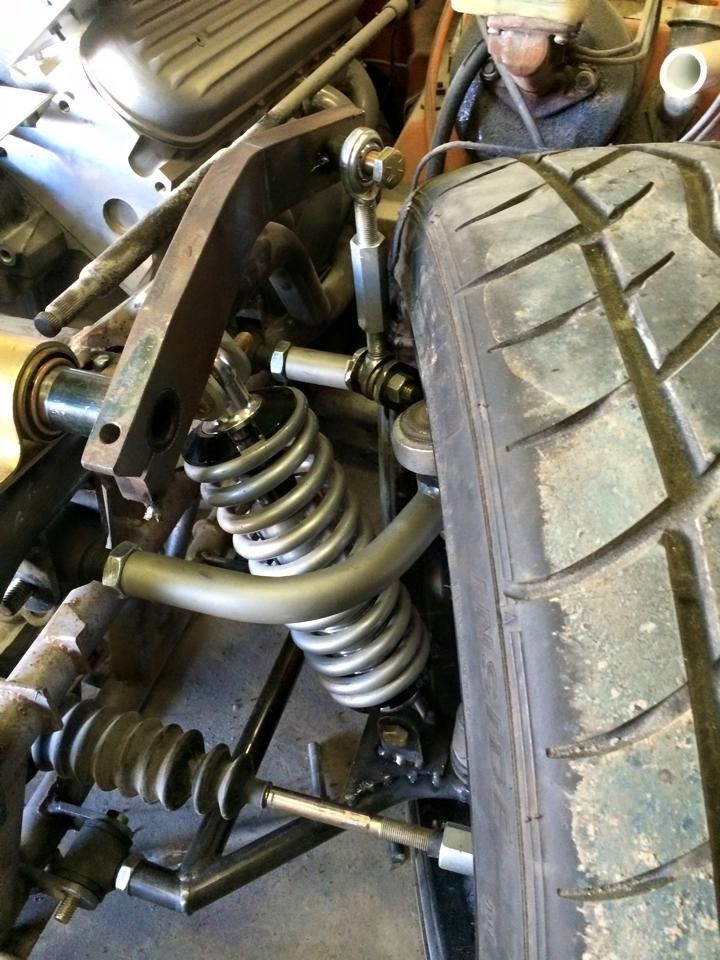
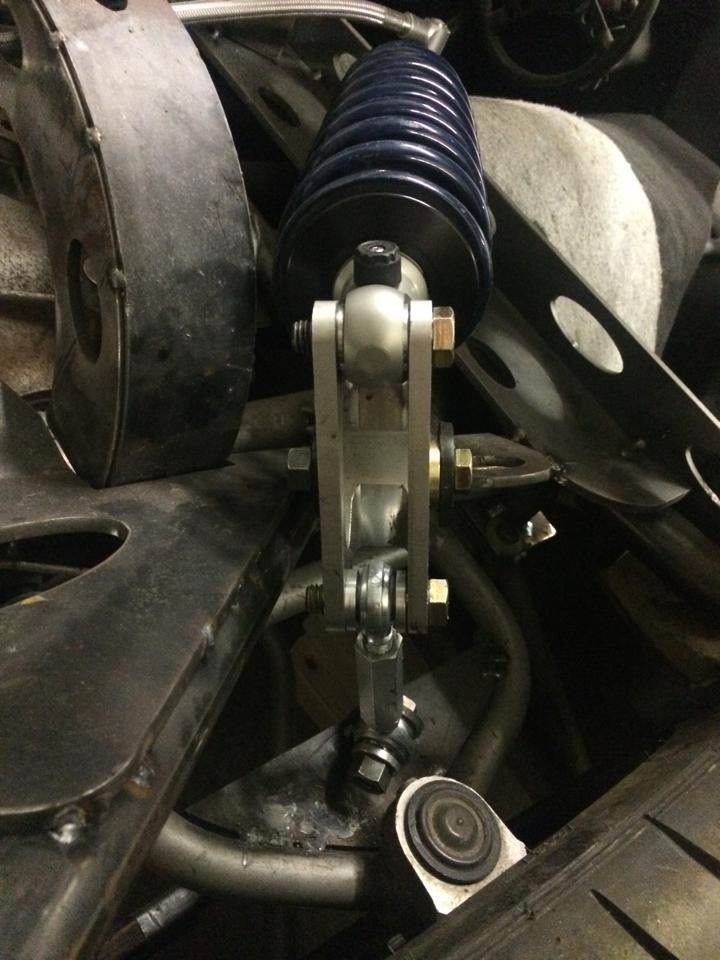
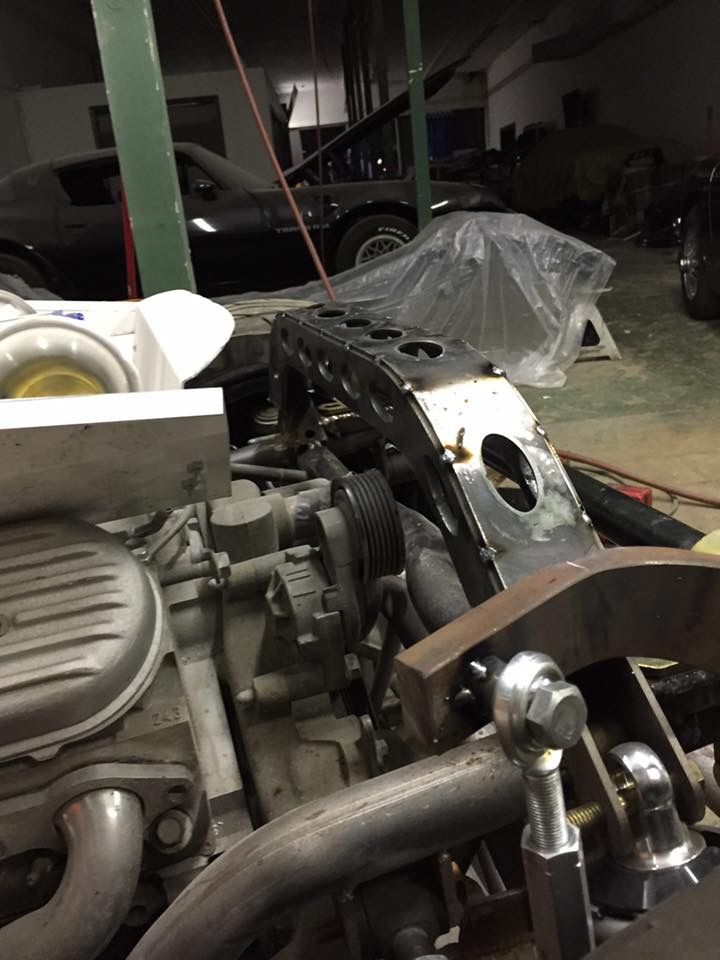
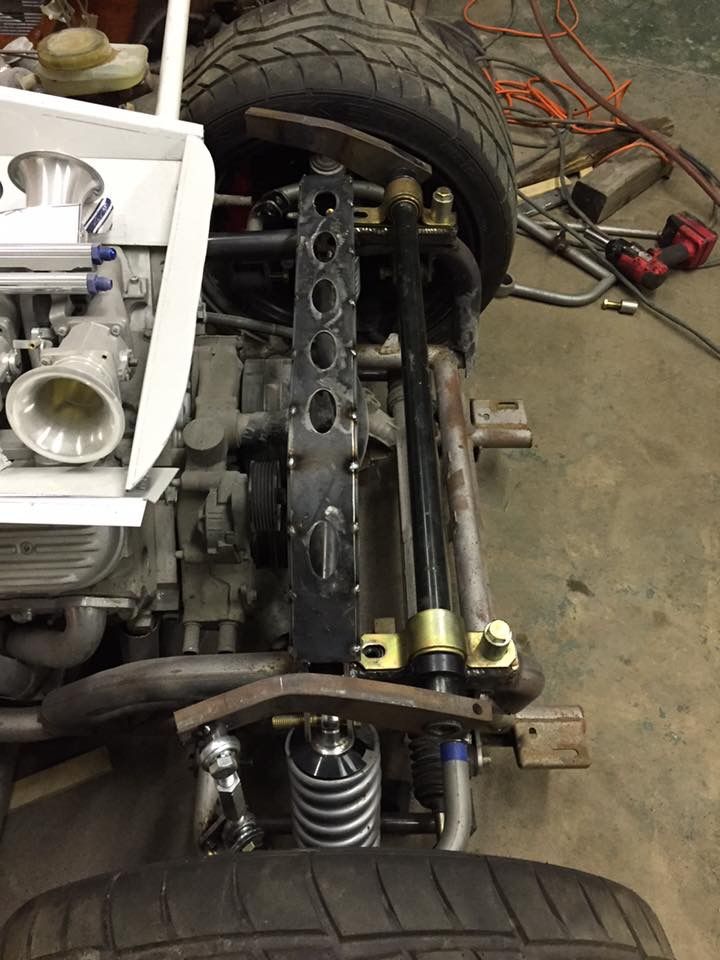
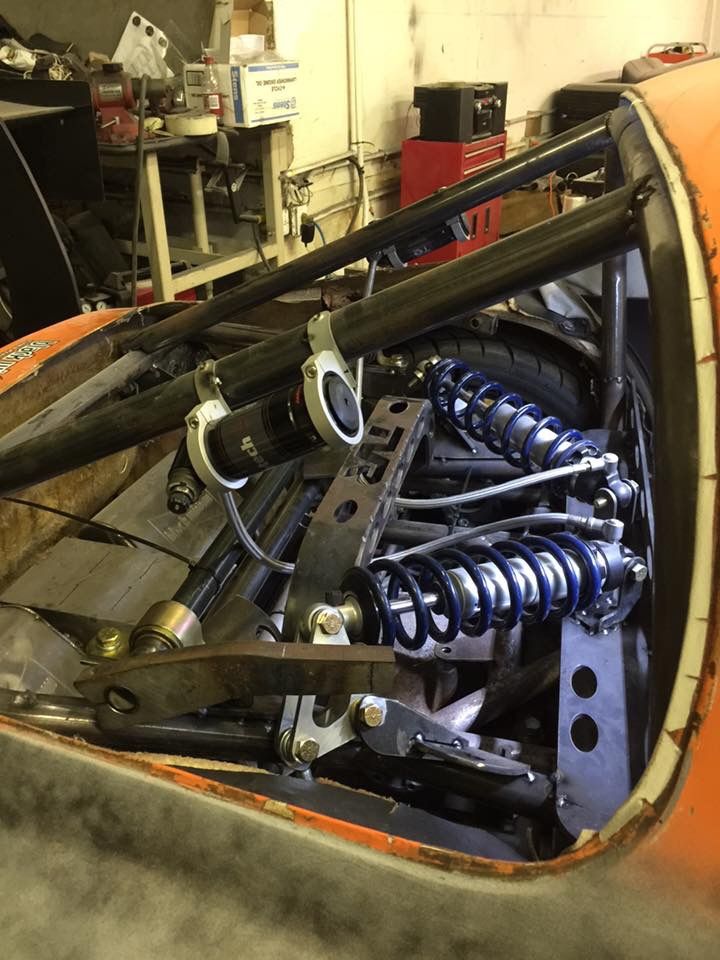
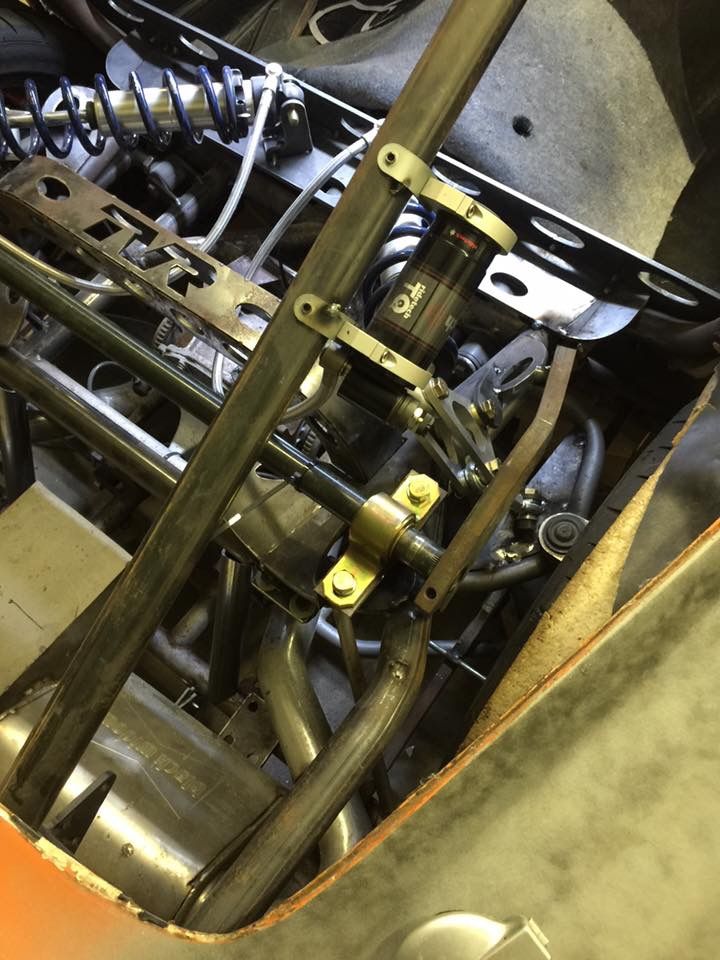
Ok it is feedback time from the guys that know, and it has to do with the sway bar mounting and link kit attachment pictured here. I see no problem using the upper control arm as the attachment point, and there is way more room if the sway bar is mounting in this higher position, so please do let me know if there are any Pro's or Con's with the way I have this setup?
It is all tacked together other than my final bar mounts pads, so I can make some adjustments of there is any insight I am not aware of? I still obviously have some finishing grinding and shaping of the sway bar arm, along with some drilling large holes in it to lighten it up and look better, but this should give an idea of the full front suspension layout.
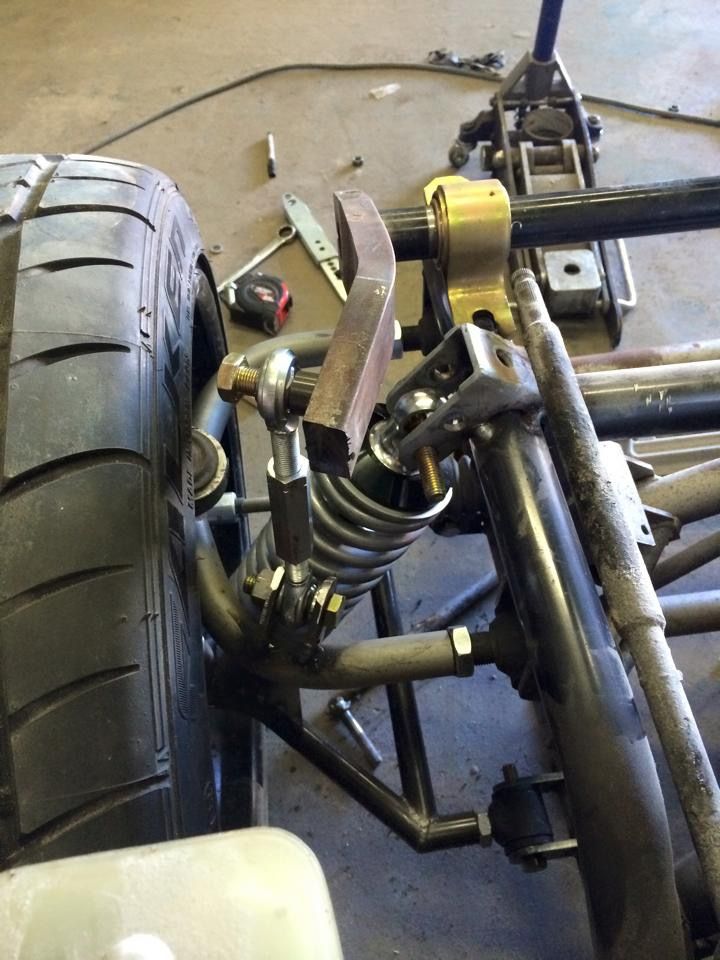

It is all tacked together other than my final bar mounts pads, so I can make some adjustments of there is any insight I am not aware of? I still obviously have some finishing grinding and shaping of the sway bar arm, along with some drilling large holes in it to lighten it up and look better, but this should give an idea of the full front suspension layout.


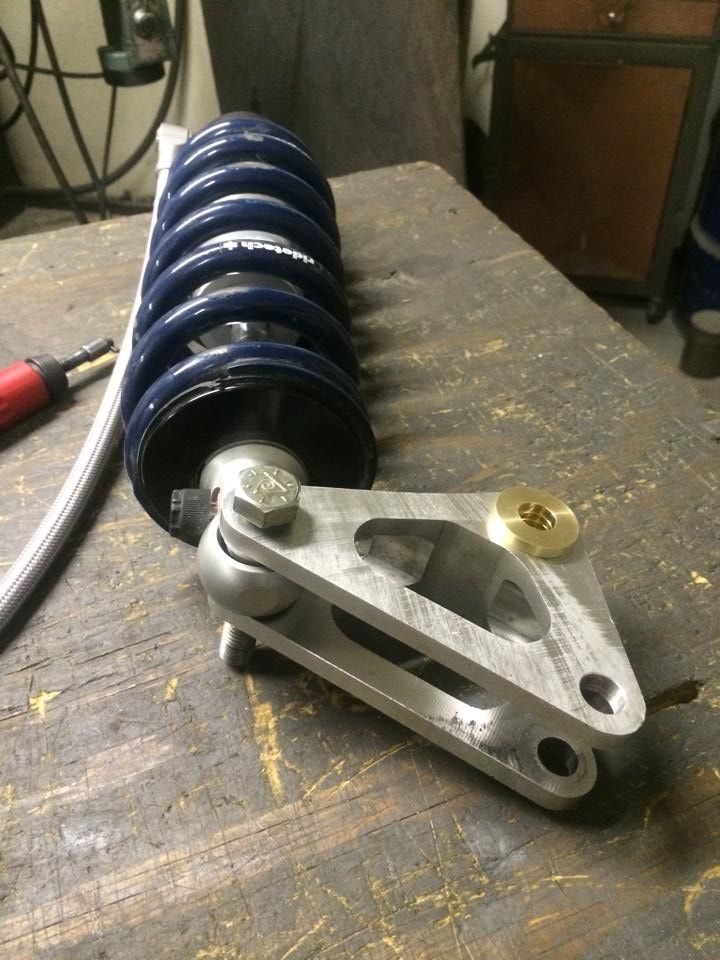
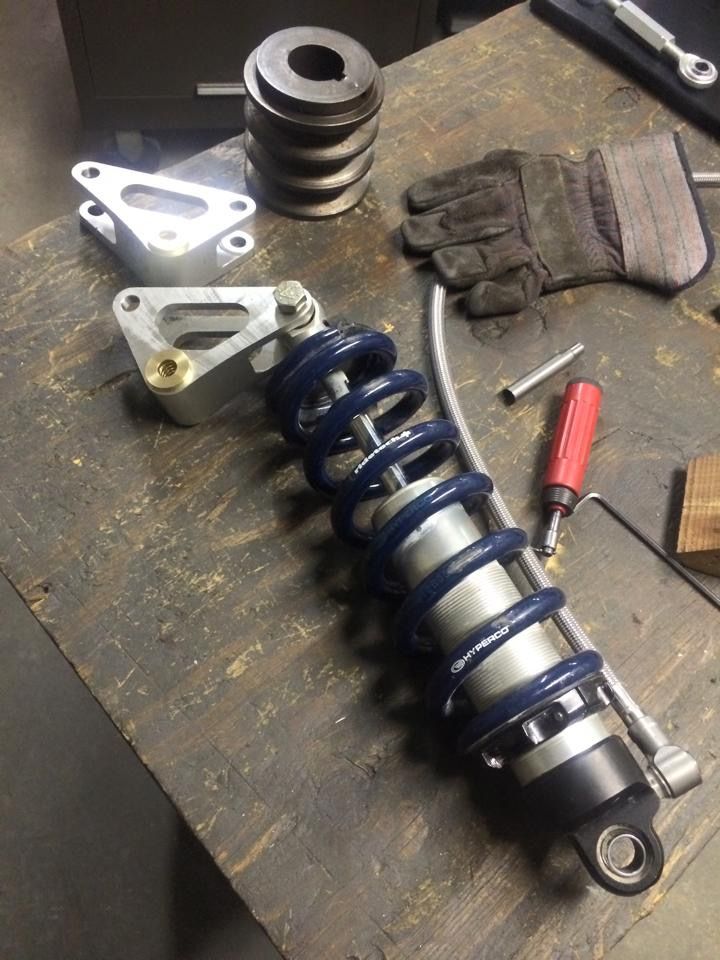
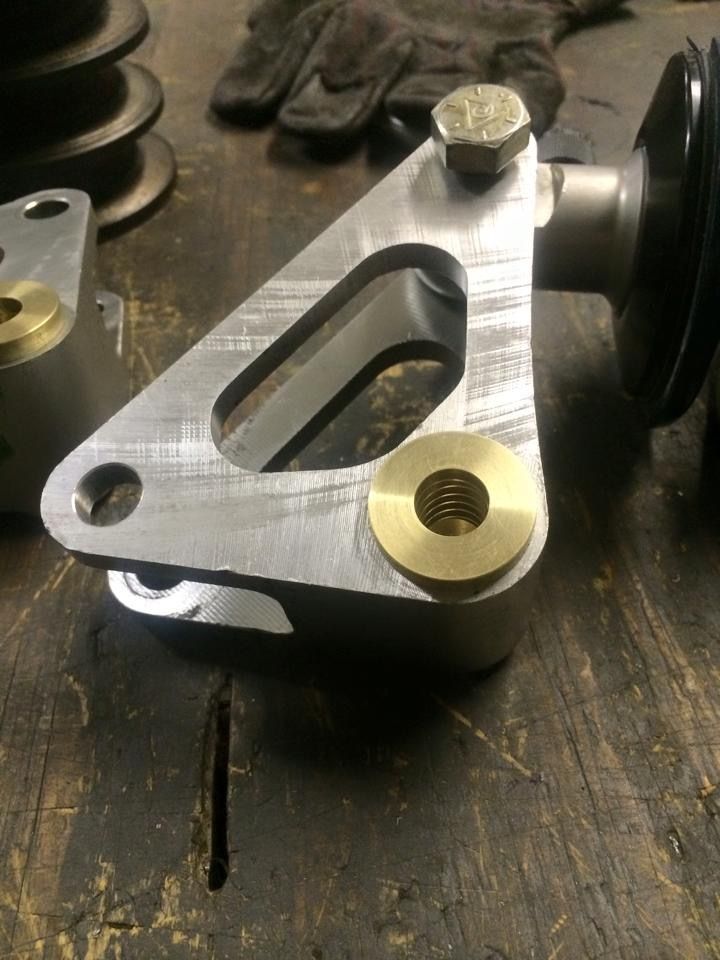
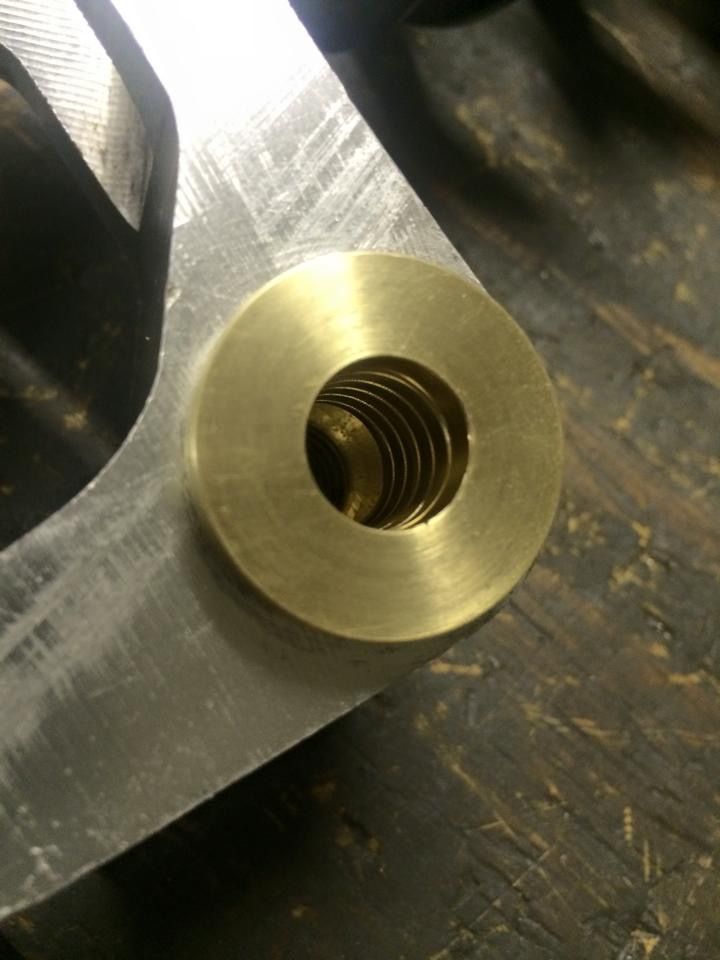
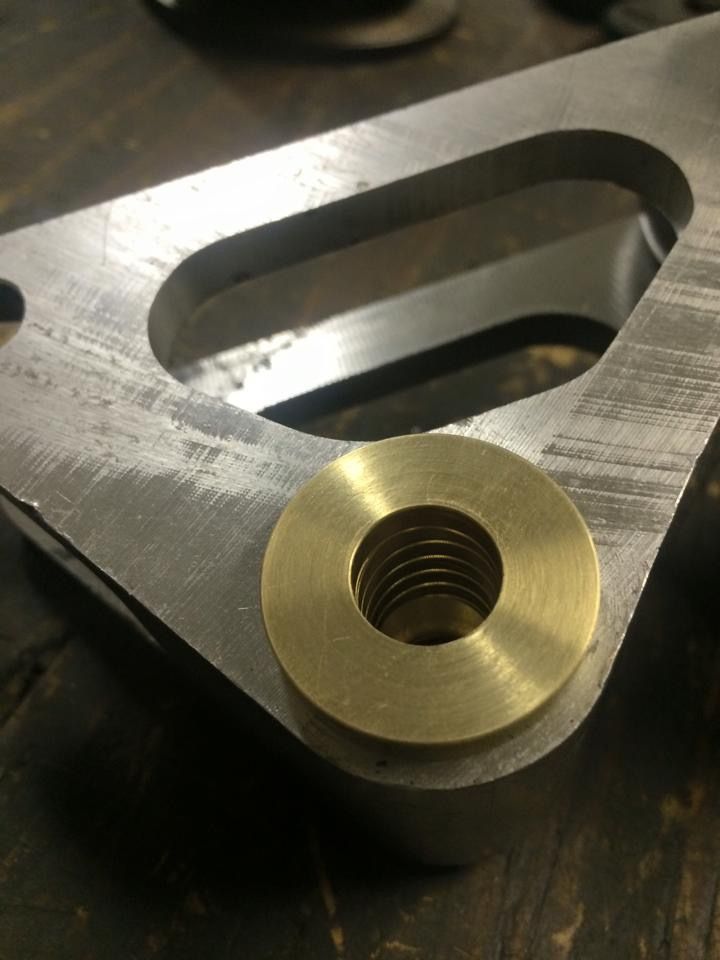
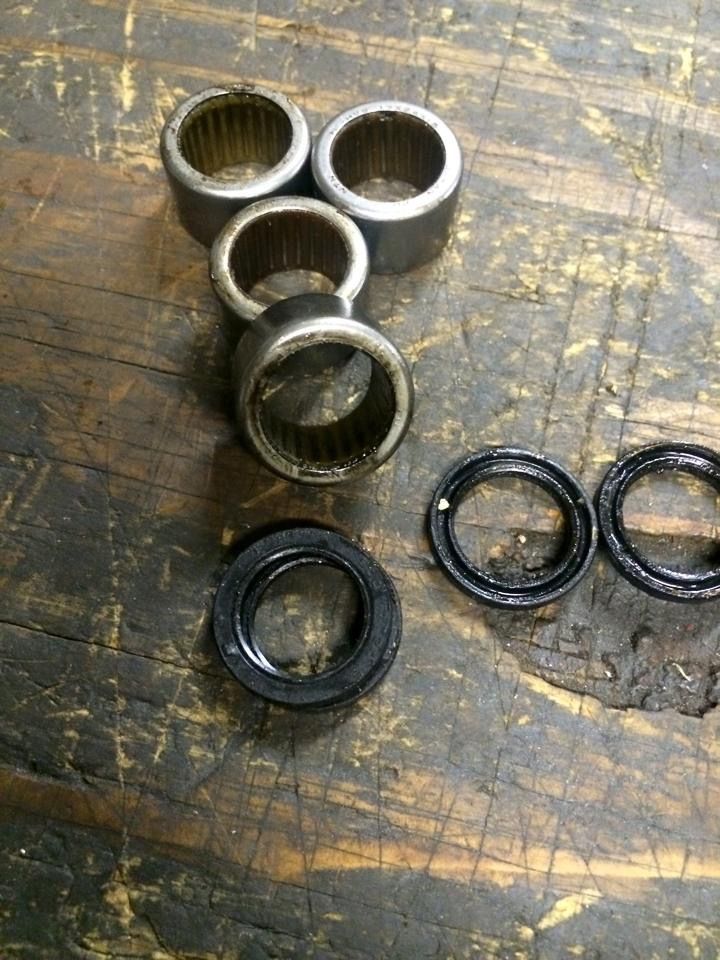
I have the final machine work and alterations to the Yamaha R1 cantilevers I am using for the TVR rear suspension, and with a few simple alterations like replacing the factory roller bearing with a more durable and dependable greasable Brass/bronze bushing, I now have a readily available and reasonable cost replacement part if necessary


Boosted LS1 said:
Crikey, what an awesome project. Huge amounts of work. The cylinder heads, have you changed them since the start of the project? Later, they are ls6 heads but in earlier pics I wasn't sure?
Thanks.. They are the same heads all the way through, it is a new built LS6 with some cam and internal mods, and I have a customer tuner person who comes to the shop to road tune and dial them in once the car is done..MPoxon said:
That is f king awesome! Good work.
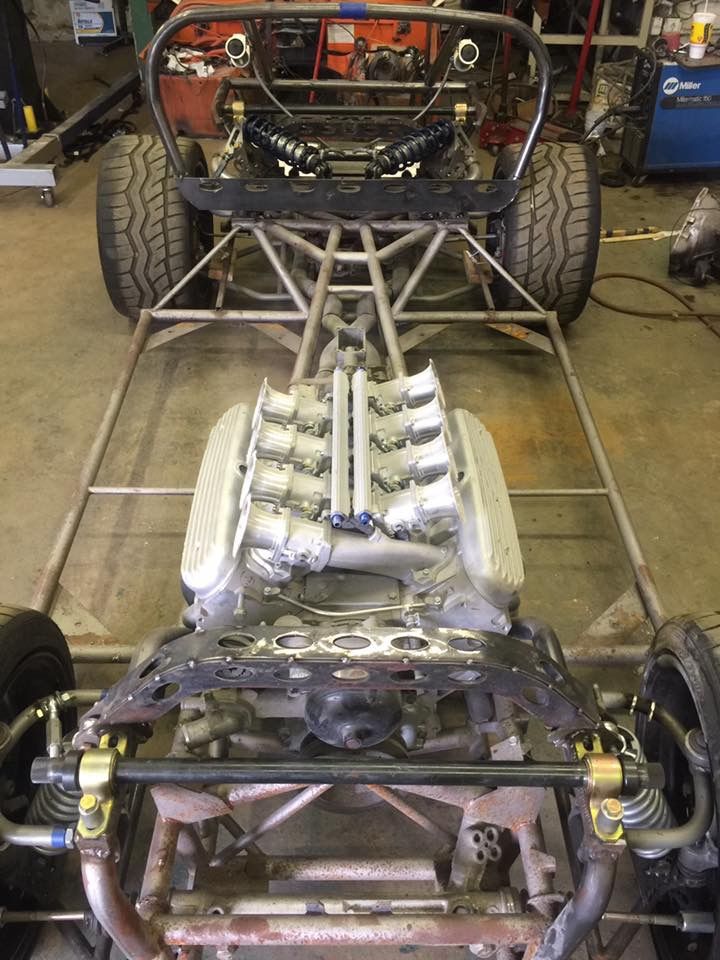
Attention to detail is great as well, love the subtle things like the classic style rocker covers for the LS engine. I bet that will sound epic with those throttle bodies.
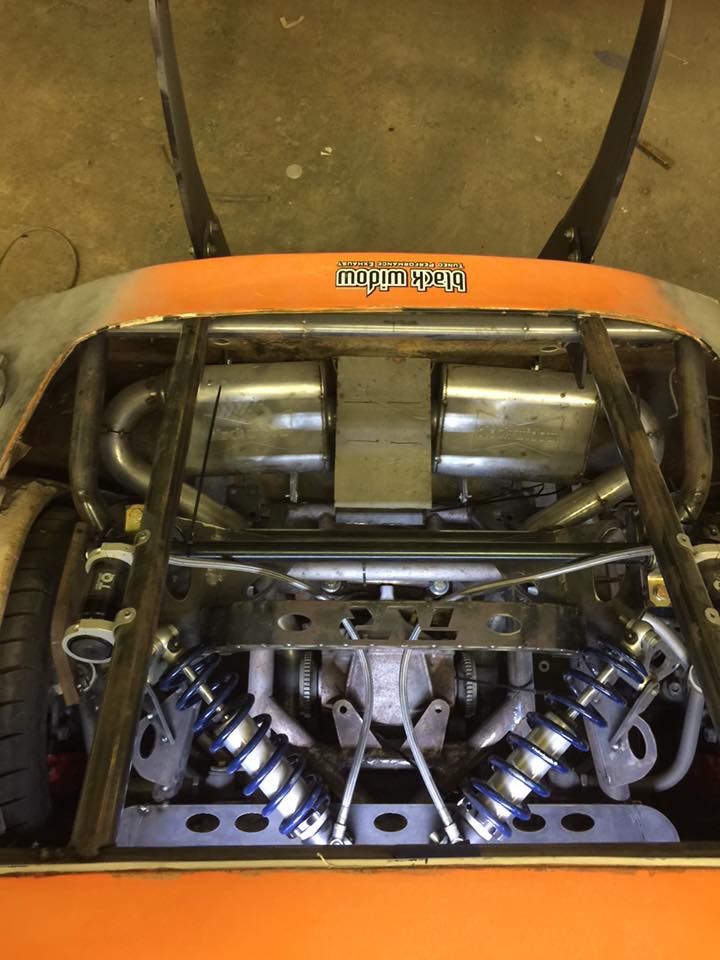
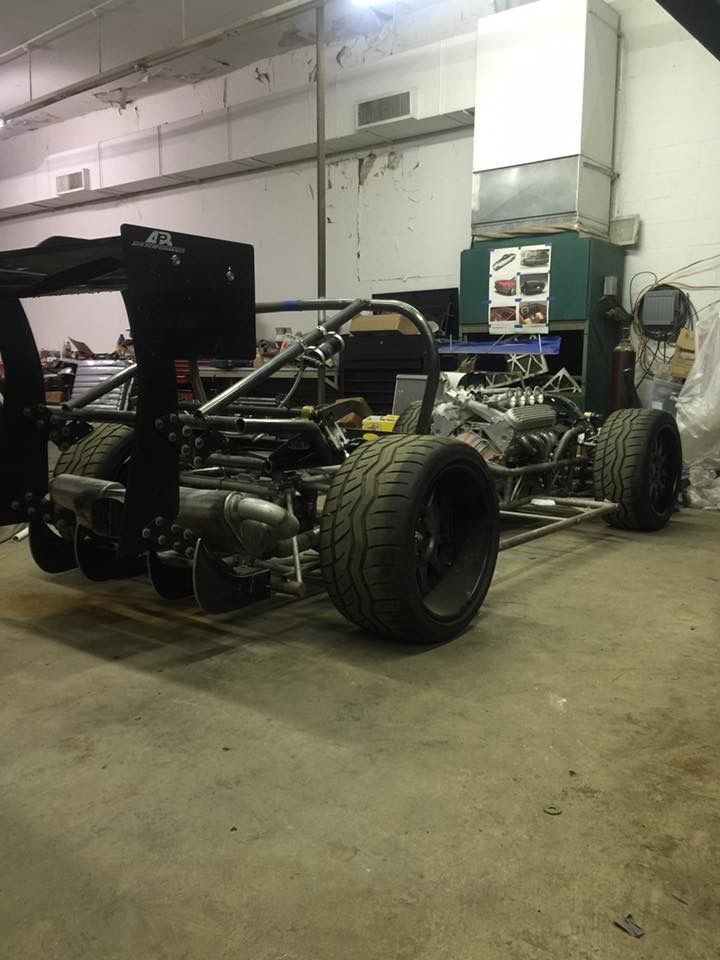
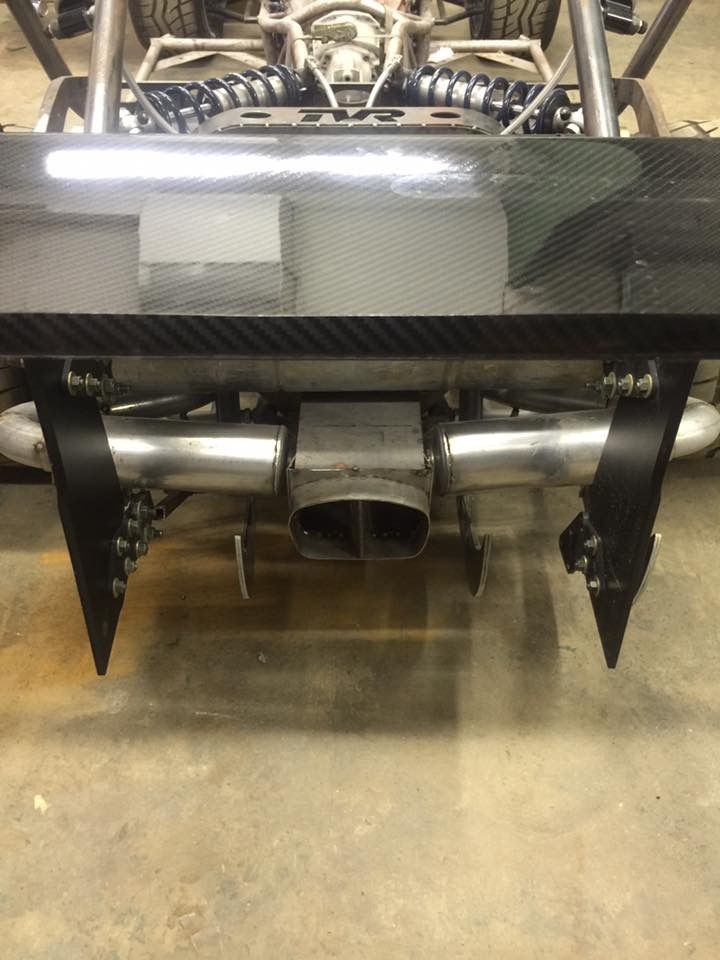
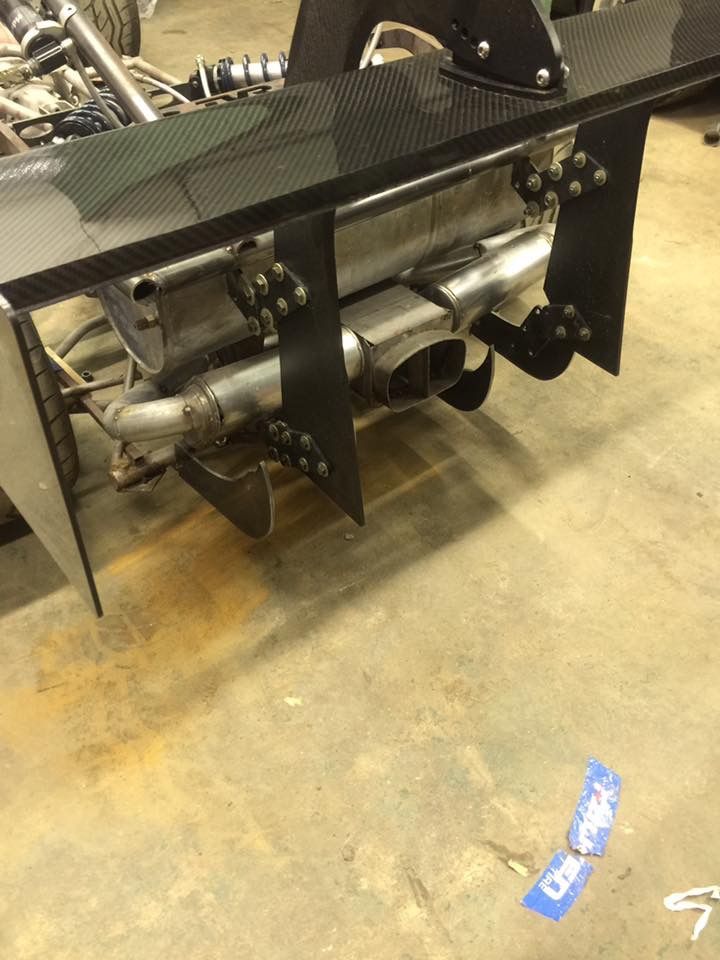
The Throttle bodies should give it a great sound, but I am more curious about the exhaust layout I built to fit within the body and chassis, because I am not familiar with that rear muffler/collector box setup I built...king awesome! Good work.Attention to detail is great as well, love the subtle things like the classic style rocker covers for the LS engine. I bet that will sound epic with those throttle bodies.
I have done a quite a few of LS conversions and my goal is to always take the LS look out of it where I can and go back to some sort of retro or custom style, and that is because the LS is the perfect motor available for transplants but that doesn't mean all builds have to have the appearance of the LS under the hood.. This is an 600 horsepower LS3 conversion I did in a 1967 Volvo Amazon

Edited by BadassVixen on Tuesday 9th February 18:36
MPoxon said:
Very impressive, I have no idea what a stock 1967 Volvo Amazon looks like under the hood but that certainly doesn't look like a modern engine swap. Certainly in keeping with the car. Love the attention to detail and good work sir.
Thanks.. And not to go off topic, but I can surely answer that question with these pics.. LOL 


Du1point8 said:
Excluding the vixen itself, what kind of ball park figure is that conversion, would it suit a fast road (minus the wing) and more creature comforts?
Wow. That is kind of a loaded question.. LOL There is a lot of this build that is being done to make it more unique, and that would be the rear cantilever suspension for instance, because there is a lot of time and money put into that when it could be done in a simpler way and more standard to the TVR setup. With this build, and the fact that my shop is building it versus someone doing it on his own also adds cost due to labor rates, so a Turn Key shop build is again something else all together..The particular build will be over the 100k by the time the starter car is figured in at about 15k, but there are obvious things that are way over the top with this build as compared to a much simpler LS conversion in a base starter car that could be done in the 30k-50k shop built capacity, and you have to take into account the 4k custom wheels, 4k worth of Brakes, over 3K Coil Overs, 3k Rear Wing just as a few examples, along with all the Wide Body and other body mod's done to the car that eat up a lot of time and money to achieve.
I didn't mean to get into a long explanation by no means, but there are so many variables that affect overall completion price when it comes to builds like this, and this build actually started with about a 20k budget and only escalated from there because this customer really liked the idea's I was suggesting and wanted to go for it.. He wasn't too crazy about some of the idea's like the rear wing initially because he wasn't seeing the vision in my head and only had my words to describe where I was wanting to go, so there was somewhat of a While We Are Here domino affect that he supported with the checkbook to see what we ended up with and I worked with him to achieve as reasonable as possible, but at the end of it all he will have what I think will be a Stand Out and very Unique car...
Edited by BadassVixen on Sunday 14th February 21:08
Edited by BadassVixen on Sunday 14th February 21:14
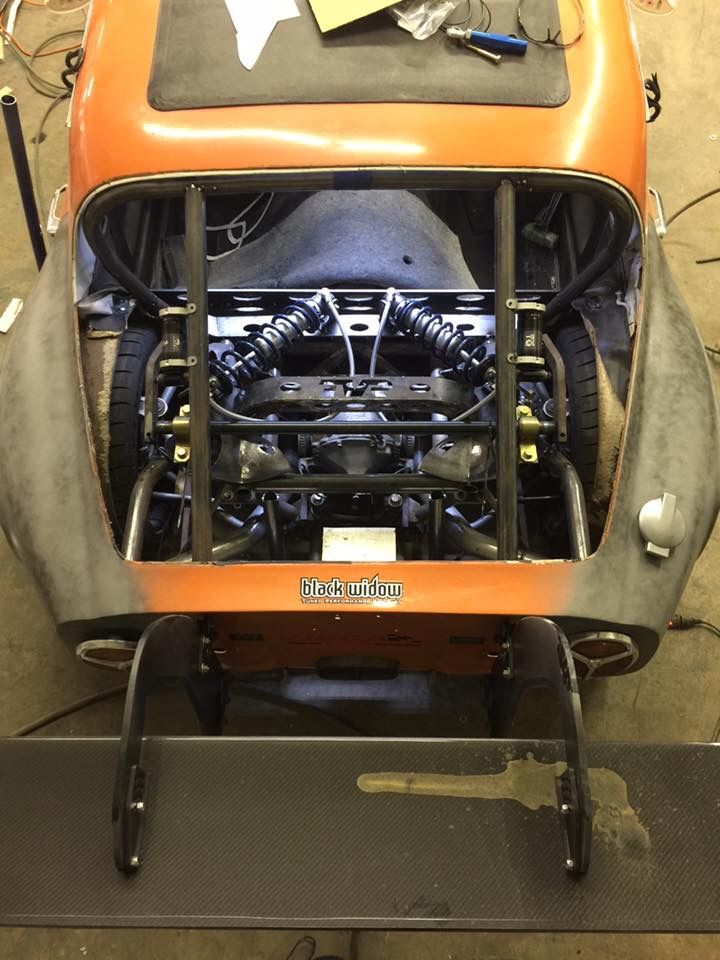
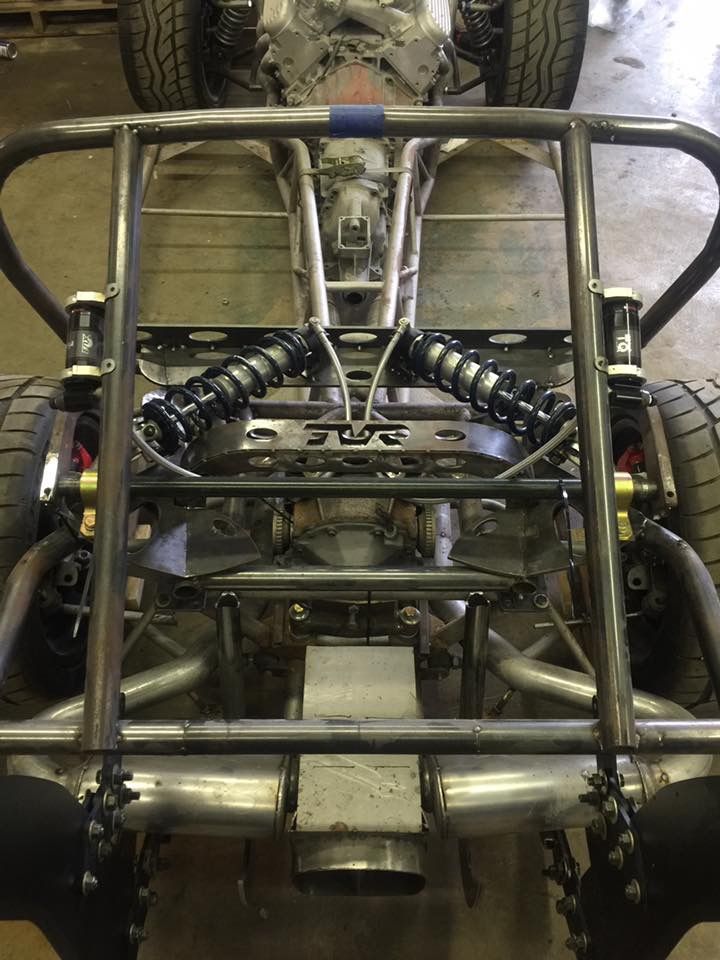
The TVR is sitting on sprung suspension right now, and it all seems to be very fluid movement through full suspension travel with no issues, so now it is time to start getting ready for final fab and welding of the rear cage/cantilever setup after I get the rear sway bar mounted and additional link tabs added to the upper rear control arms.
I will have to get with the experts at Ridetech for our spring rate analysis soon so I can get that dialed in eventhough the 275# rear and 350# front springs I had on hand seem very close. I will of course replace the pictured mock up hiem joint linkage to a more bulky piece for strength and durability , because I was only using the cheaper pieces pictured to avoid ordering the wrong high dollar parts by getting impatient.
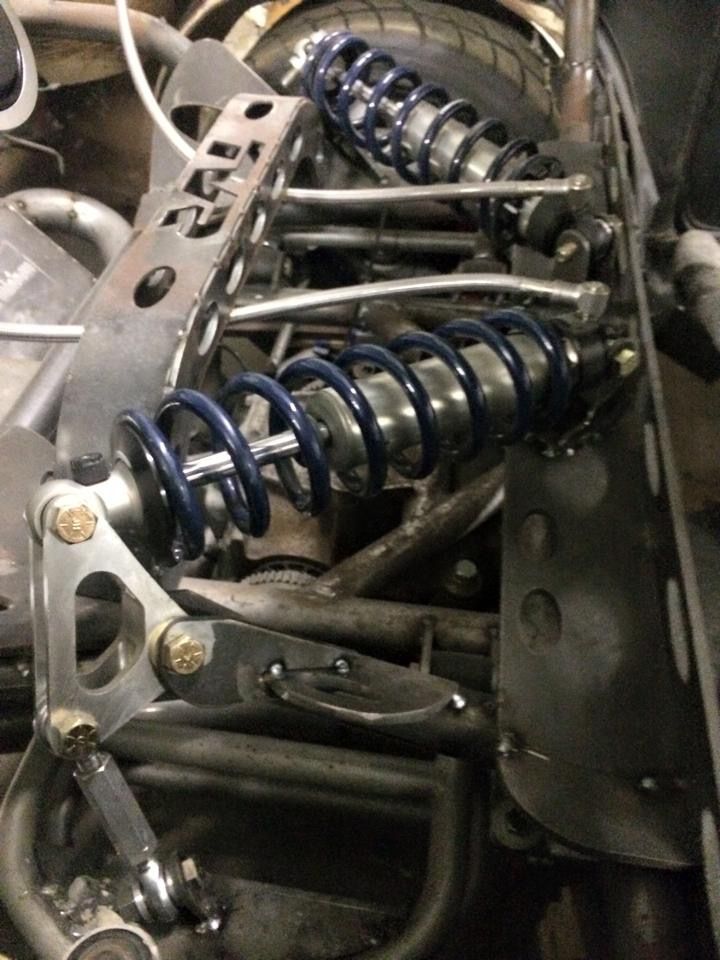
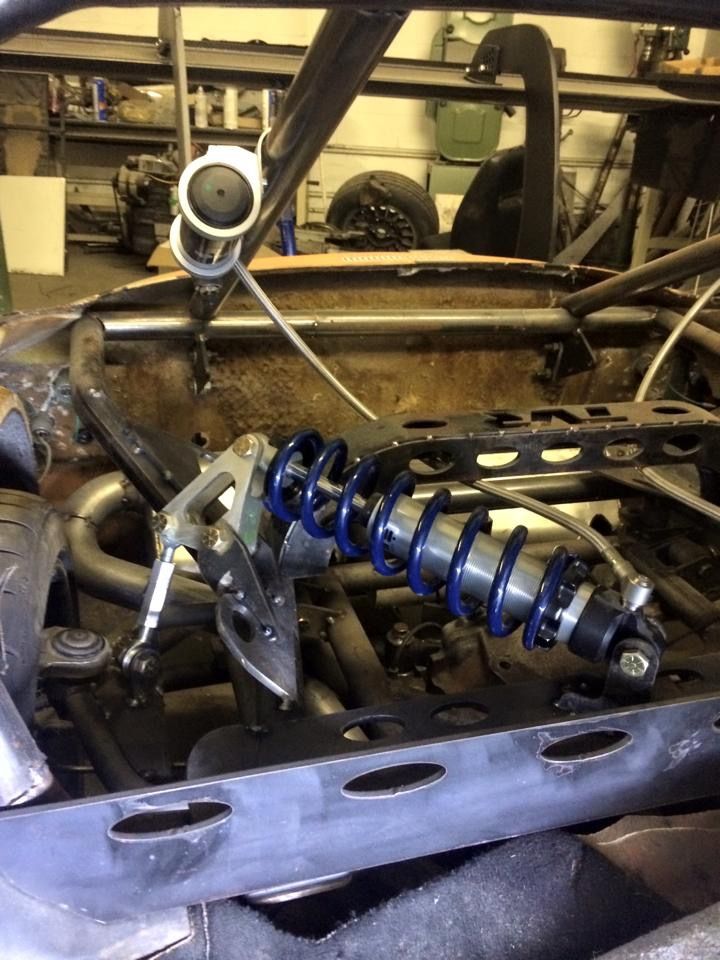
I will have to get with the experts at Ridetech for our spring rate analysis soon so I can get that dialed in eventhough the 275# rear and 350# front springs I had on hand seem very close. I will of course replace the pictured mock up hiem joint linkage to a more bulky piece for strength and durability , because I was only using the cheaper pieces pictured to avoid ordering the wrong high dollar parts by getting impatient.


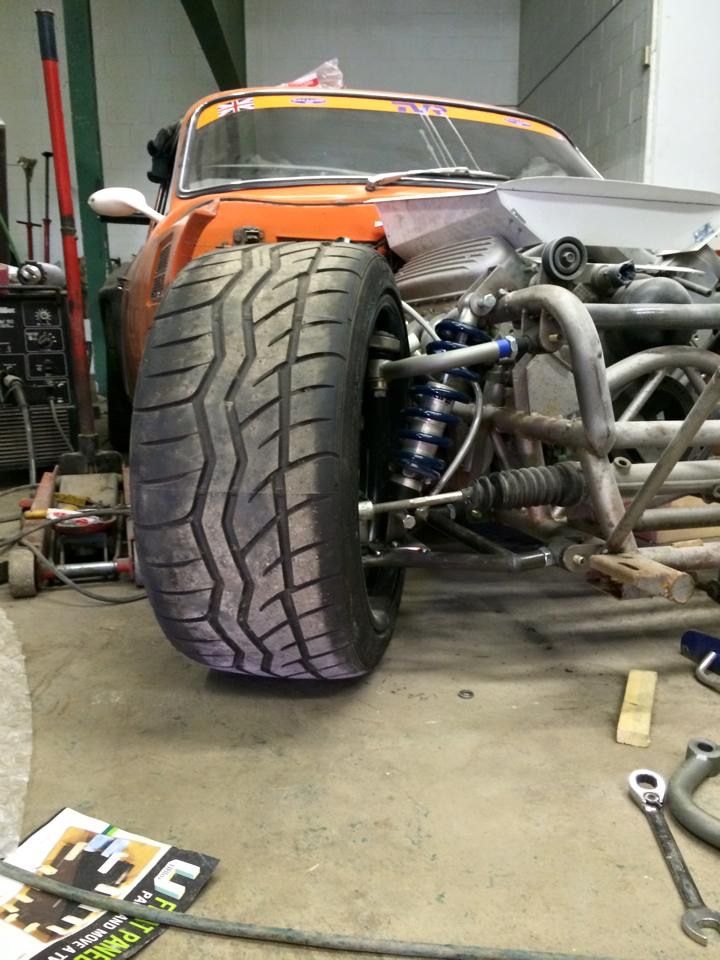
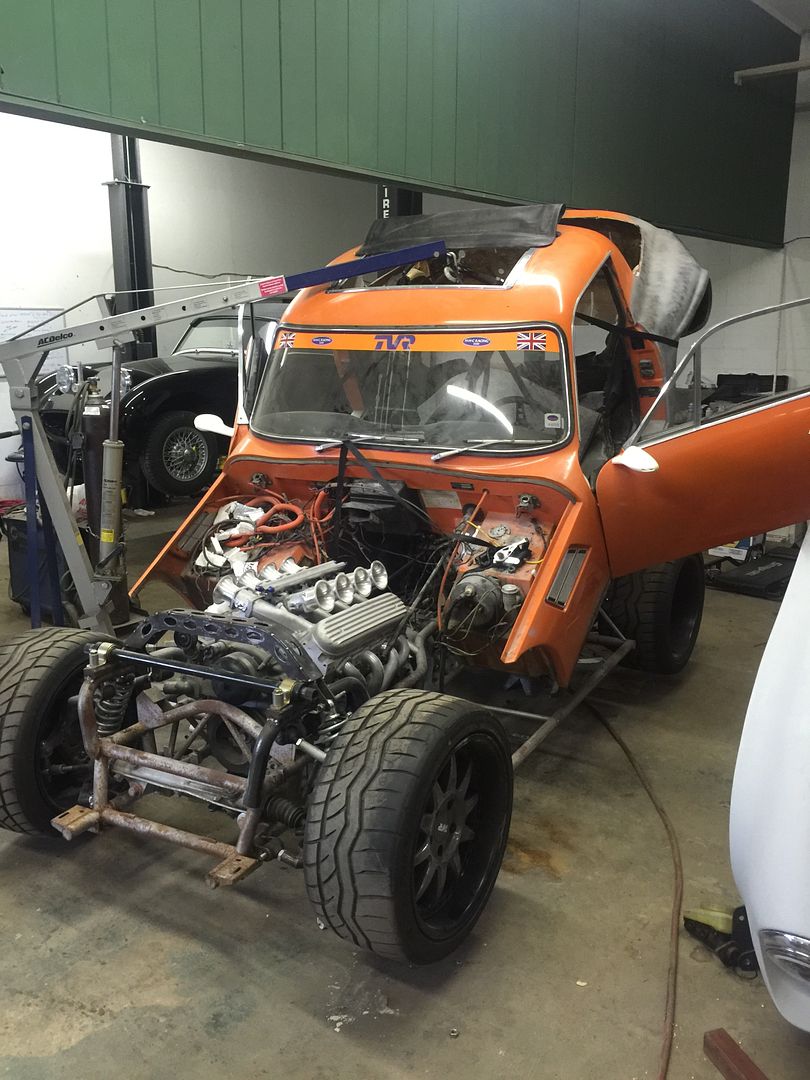
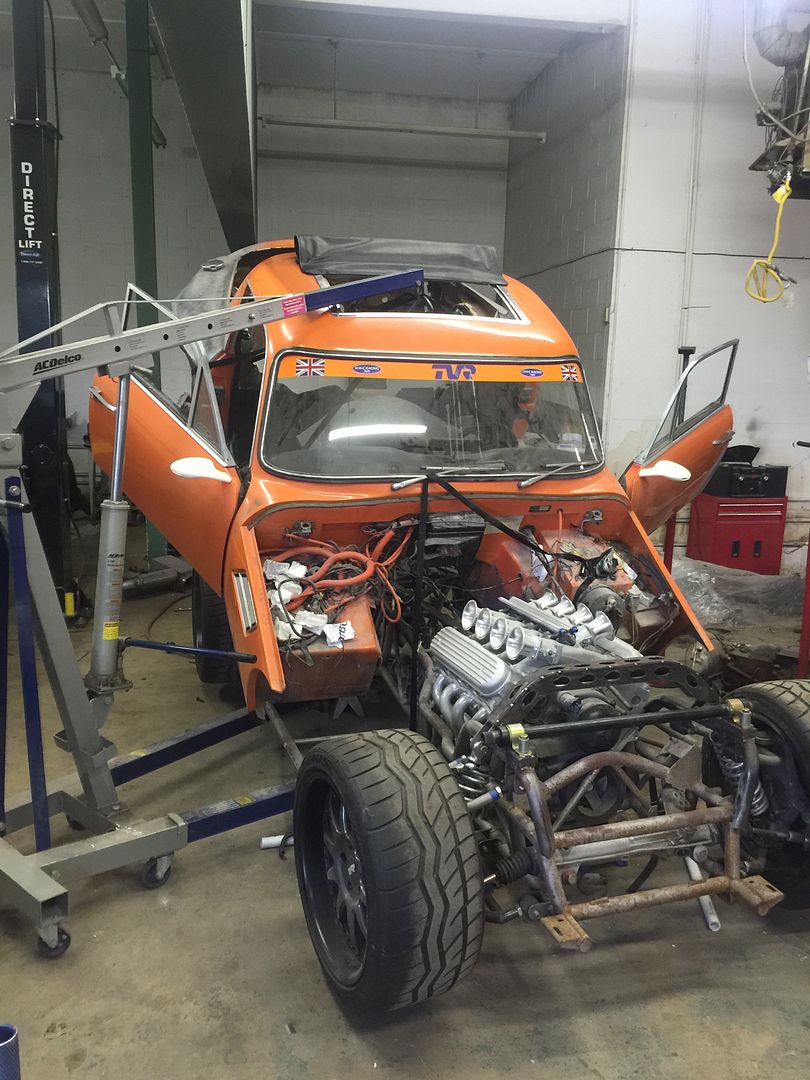
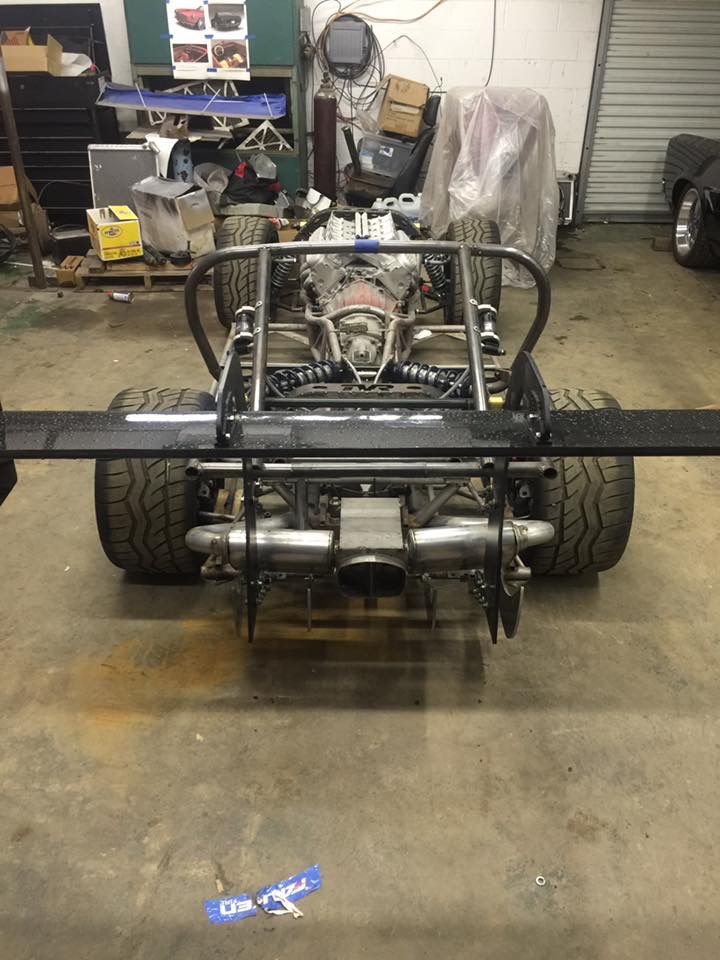
What do we think about this front chassis cross brace design? It will bolt into place with hidden hardware when I am done, and it will provide a lot of extra strength to the upper coil over mounts, while tying into the same style as the rear brace that can be seen through the back glass.
The Top Bent Bar in the pictures will be removed and is only there to keep everything square and sturdy until final welding of the chassis.. And on a side note, Just look at the Motor Position relative to the tires and how well the motor is sunk right into the tread.. LOL
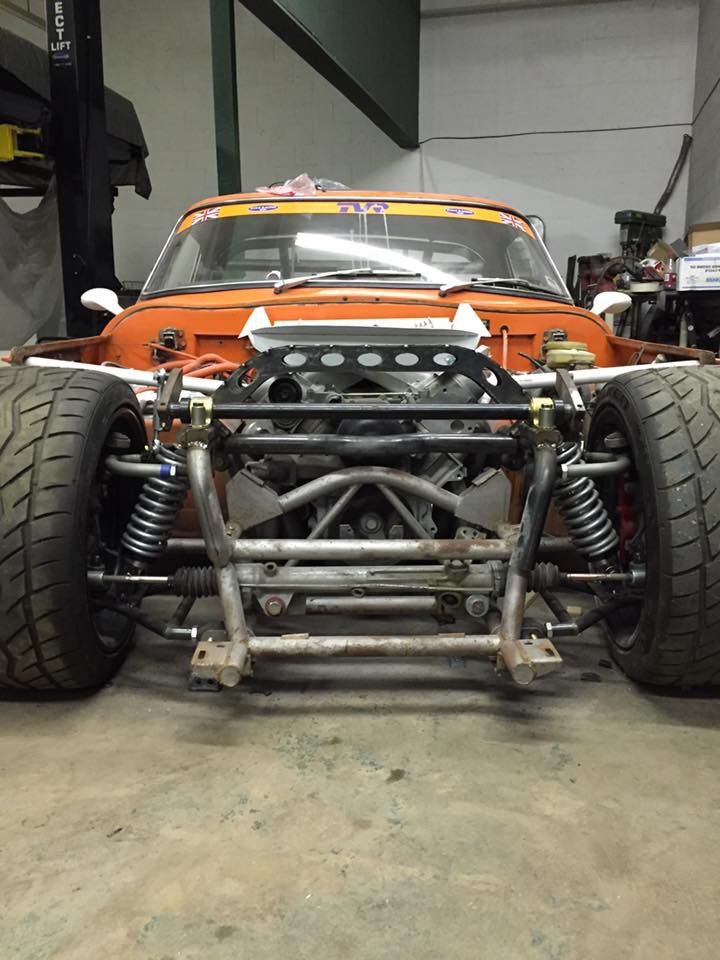
The Top Bent Bar in the pictures will be removed and is only there to keep everything square and sturdy until final welding of the chassis.. And on a side note, Just look at the Motor Position relative to the tires and how well the motor is sunk right into the tread.. LOL


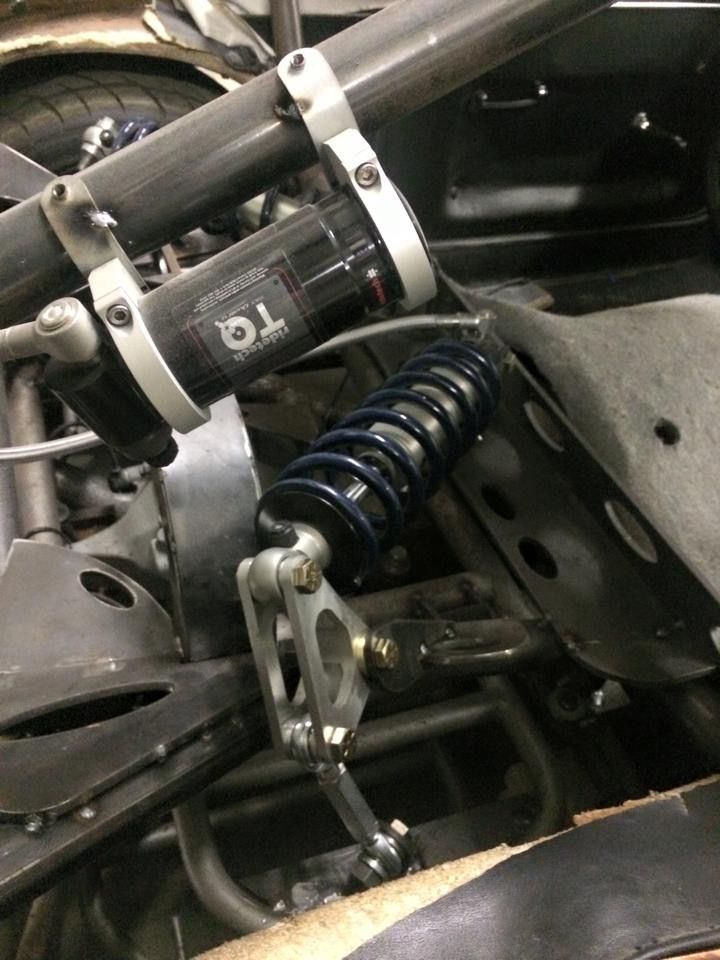
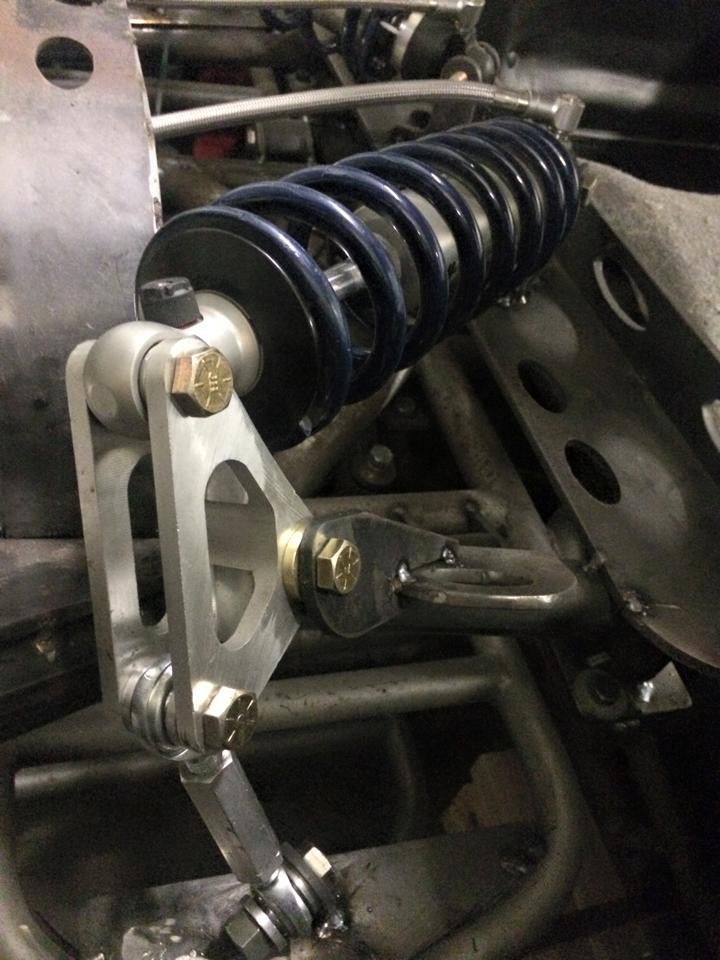
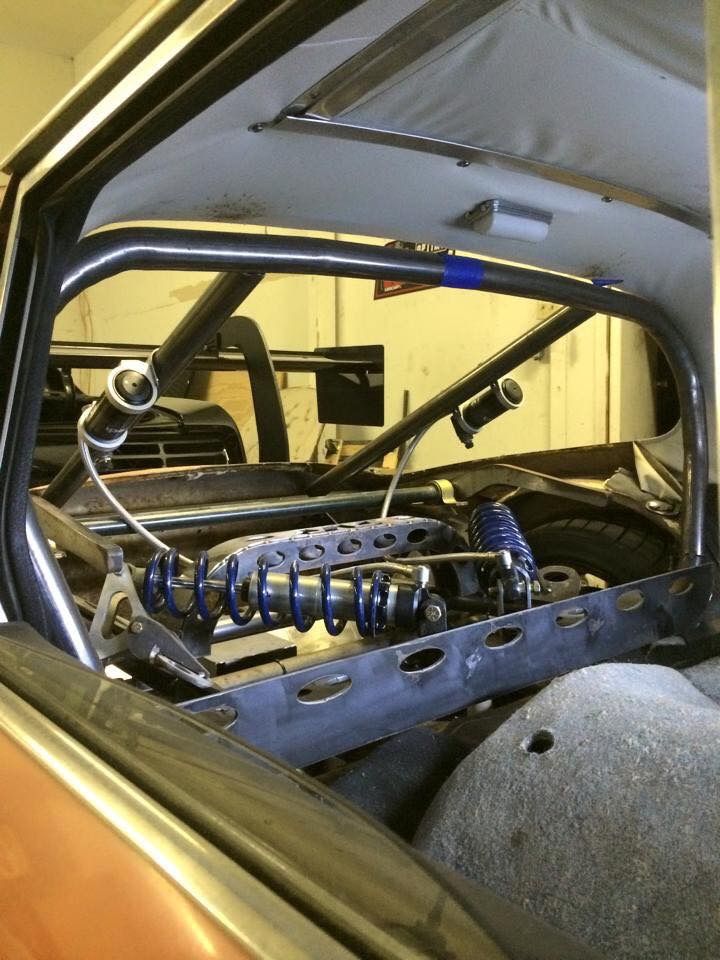
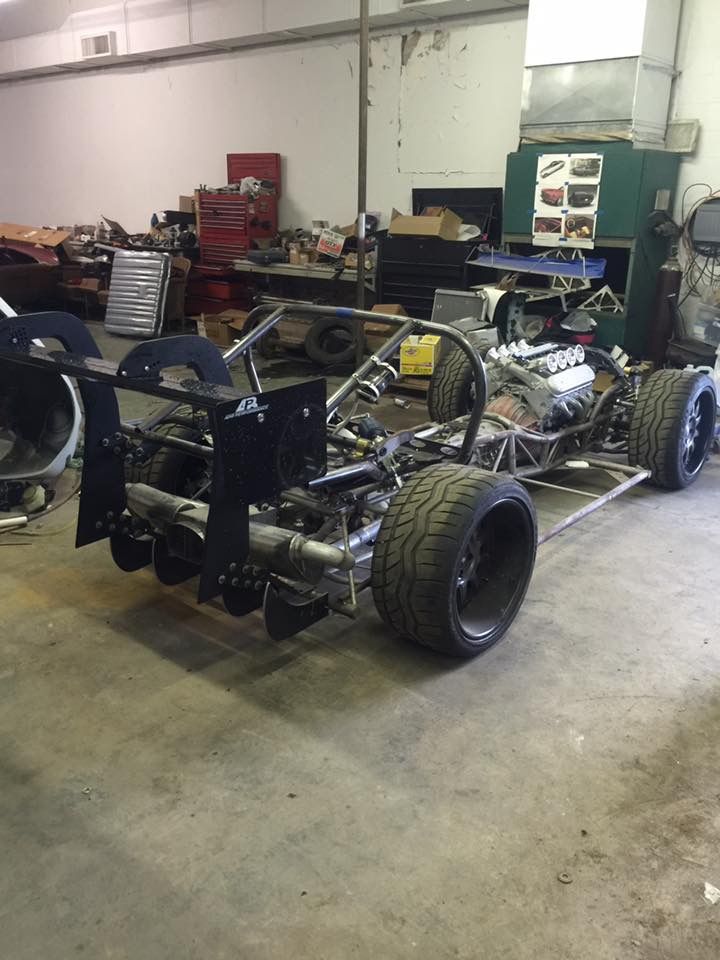
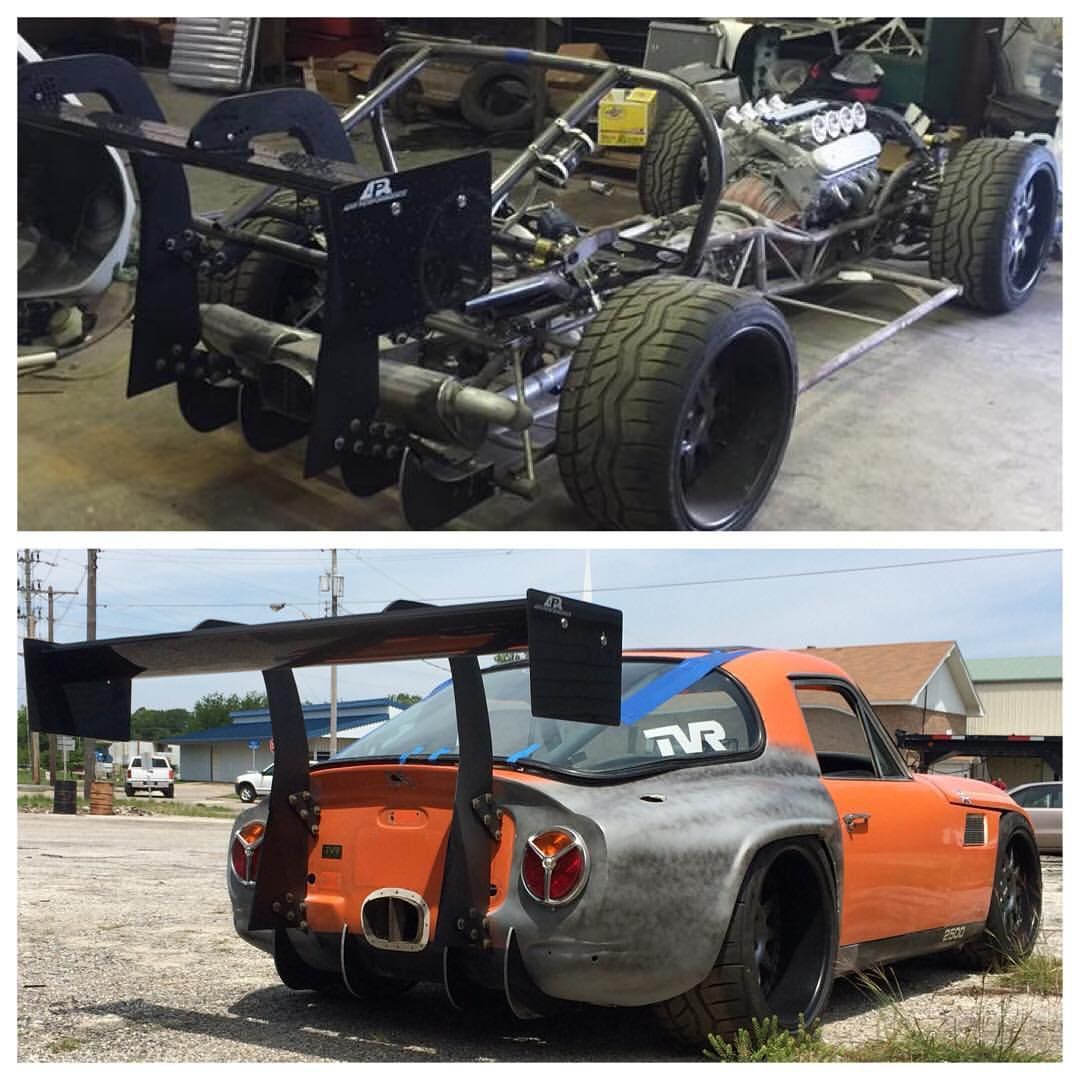
I have the rear sway bar mounted in position, and it all looks like it is going to layout and work nicely. This freehand and space necessity design is coming out pretty damn cool, and I am really liking the complex mechanical look that will be seen through the rear glass, because it allows this car to stand out even more with uniqueness that won't be seen on other cars at spectator events.
It is hard to capture everything with the camera, but some of the clutter should disappear once the floor and wheel wells are built. And yes the heim joint links are going to be larger, I am just using those less expensive ones for mock up, and the bulky sway bar arms are going to be drilled or dimpled once the chopped ends are all smoothed out and rounded.
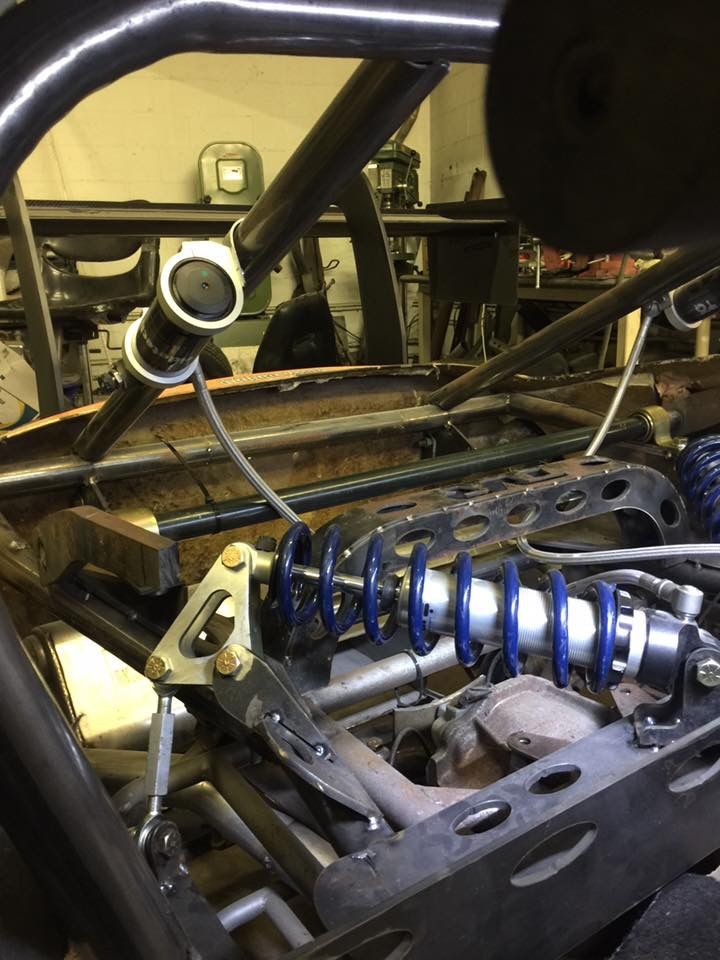
It is hard to capture everything with the camera, but some of the clutter should disappear once the floor and wheel wells are built. And yes the heim joint links are going to be larger, I am just using those less expensive ones for mock up, and the bulky sway bar arms are going to be drilled or dimpled once the chopped ends are all smoothed out and rounded.


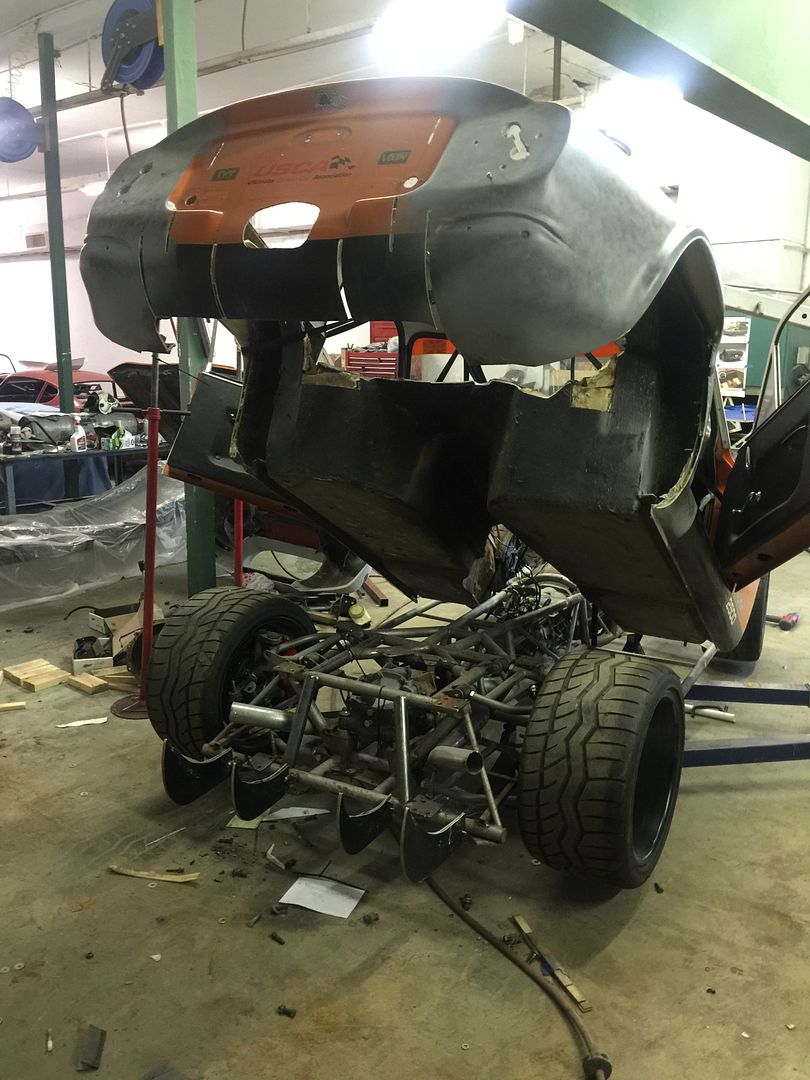
Tired of building parts inside the body of the car due to all the One Off Items and lack of catalog sales for this build of any kind, so it was time remove the body since I have all the major components mock up good enough in their place on the chassis that I can build some better brackets and mountings, so hopefully this makes the task at hand much easier.


Edited by BadassVixen on Sunday 10th July 04:01
Edited by BadassVixen on Sunday 10th July 05:18
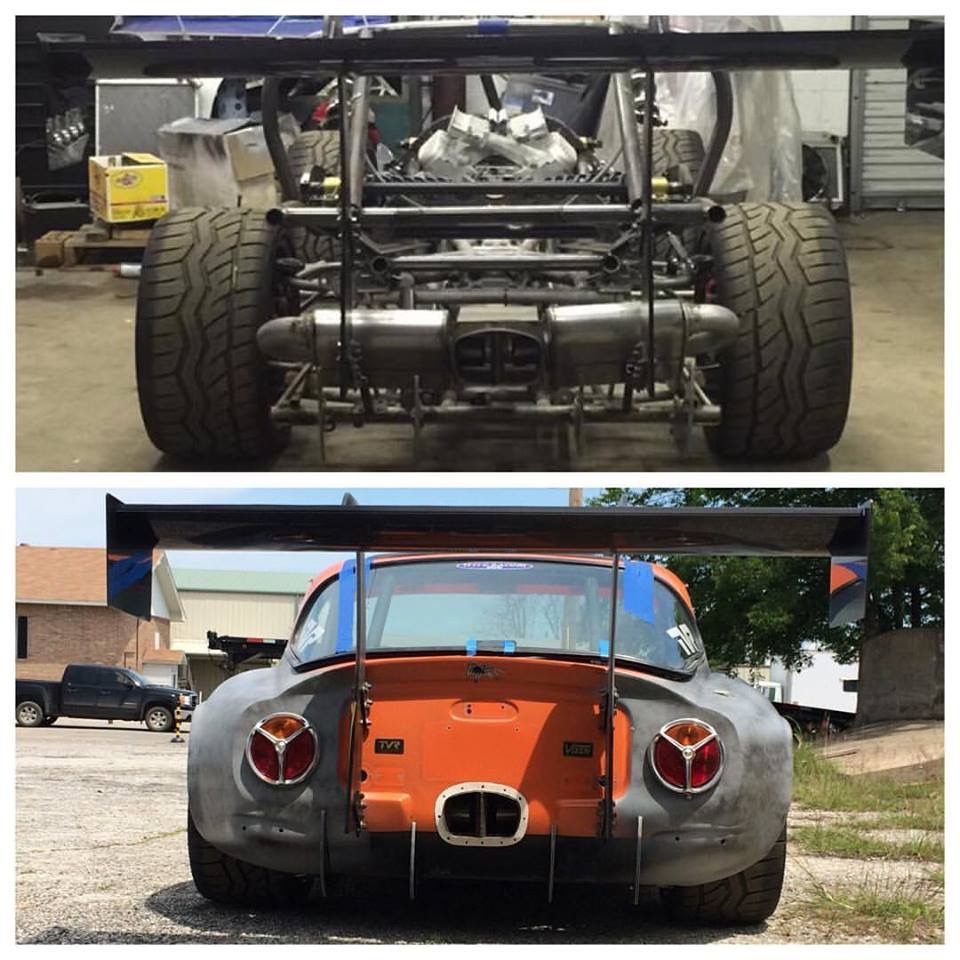
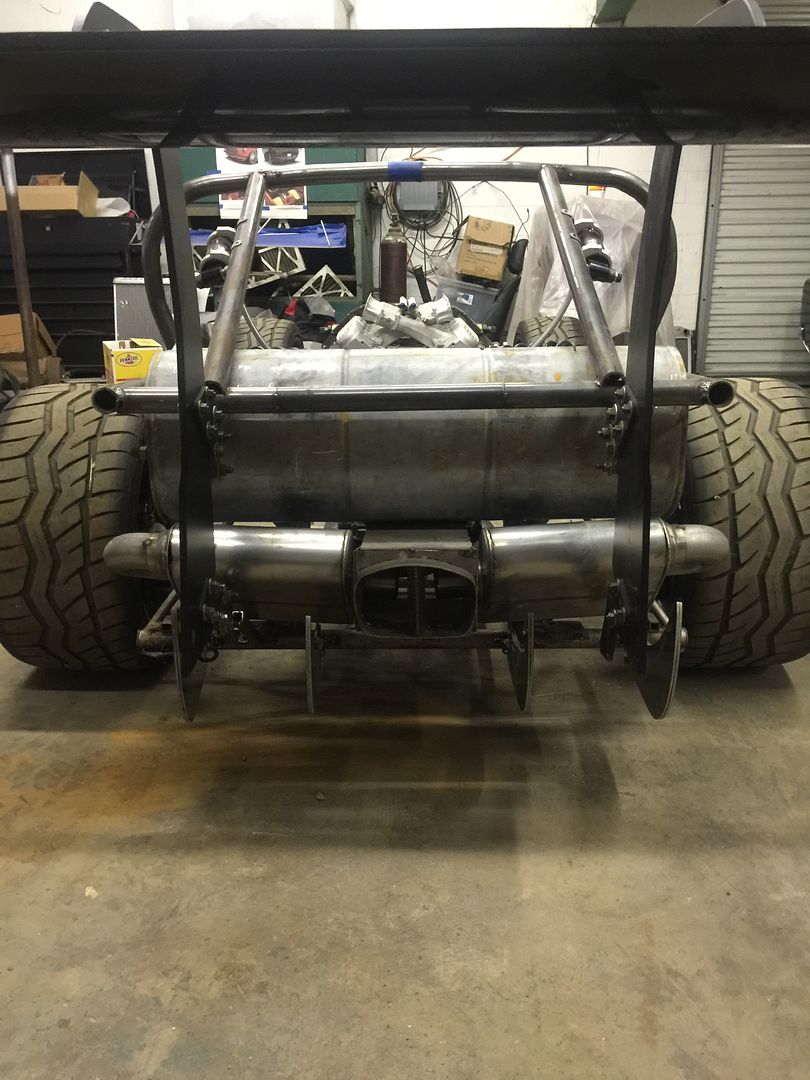
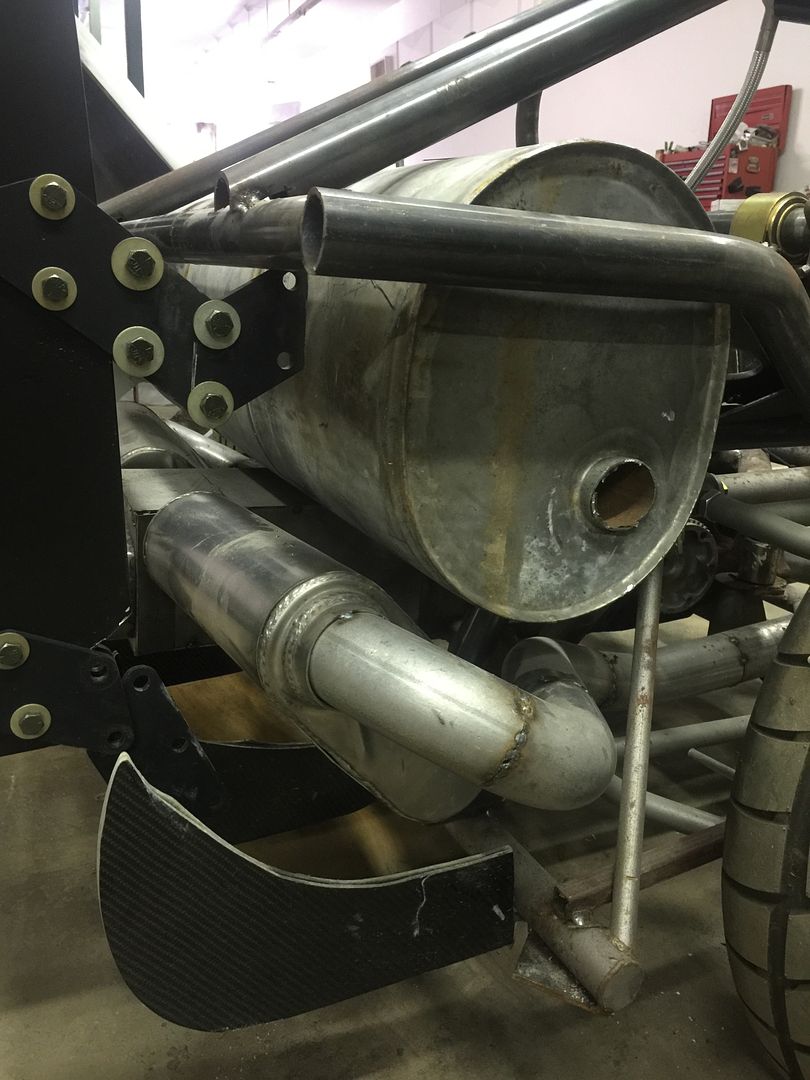
I knew the fuel tank position was going to be a challenge when I started this project, and the rear cantilever suspension and wanting to keep the complete exhaust tucked up in the chassis/body was only going to complicate it further, but I think it will all work out nicely.
The whole back end of the car is going to be open at the bottom of the body, so it will not necessarily be Trapped Heat versus Captured Heat at the floor of the body where the fuel tank is situated, but there should be adequate drawing of hot air out while the car is moving. I had planned on building a air space shield that will be insulated against Direct Heat, but Hot Air Heat is another issue that I am not sure will be that much of a factor if the tank is also insulated with basically open bodywork from the front of the back wheels all the way back?
I wanted the Cockpit Floor to separate the fuel tank from interior access for obvious reasons in the event of a collision of fuel pressure line issues, so it made more sense to set it up in this configuration for safety.
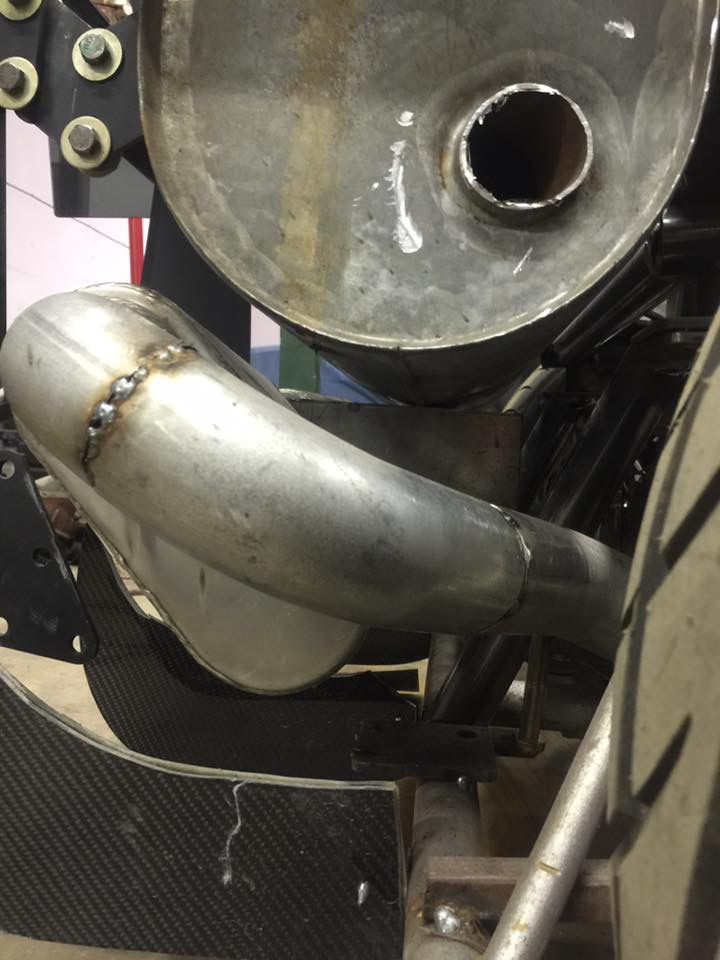
Side note. The original tank pictured will be modified for an internal pump with baffle, and the passenger side fill will be changed to a Top Center fill to compensate for its higher mount and to help take care of autocross/track sloshing during maneuvers. I will also do the finish modification and trimming to the exhaust resonator box to also give adequate clearance.
The whole back end of the car is going to be open at the bottom of the body, so it will not necessarily be Trapped Heat versus Captured Heat at the floor of the body where the fuel tank is situated, but there should be adequate drawing of hot air out while the car is moving. I had planned on building a air space shield that will be insulated against Direct Heat, but Hot Air Heat is another issue that I am not sure will be that much of a factor if the tank is also insulated with basically open bodywork from the front of the back wheels all the way back?
I wanted the Cockpit Floor to separate the fuel tank from interior access for obvious reasons in the event of a collision of fuel pressure line issues, so it made more sense to set it up in this configuration for safety.
Side note. The original tank pictured will be modified for an internal pump with baffle, and the passenger side fill will be changed to a Top Center fill to compensate for its higher mount and to help take care of autocross/track sloshing during maneuvers. I will also do the finish modification and trimming to the exhaust resonator box to also give adequate clearance.


Gassing Station | TVR Major Mods | Top of Page | What's New | My Stuff