Tamiya 1:72 Spitfire Mk1 + Details
Discussion


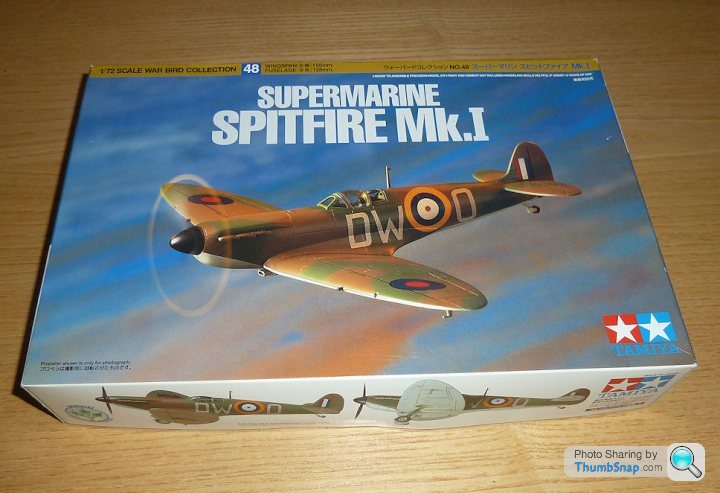
So, after re-decorating the downstairs toilet, I've got permission to start modelling again. This time it's the Tamiya 1:72 Spitfire Mk1:
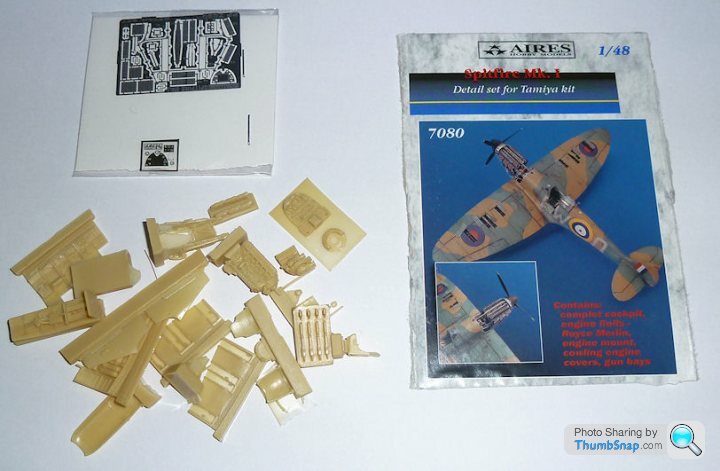
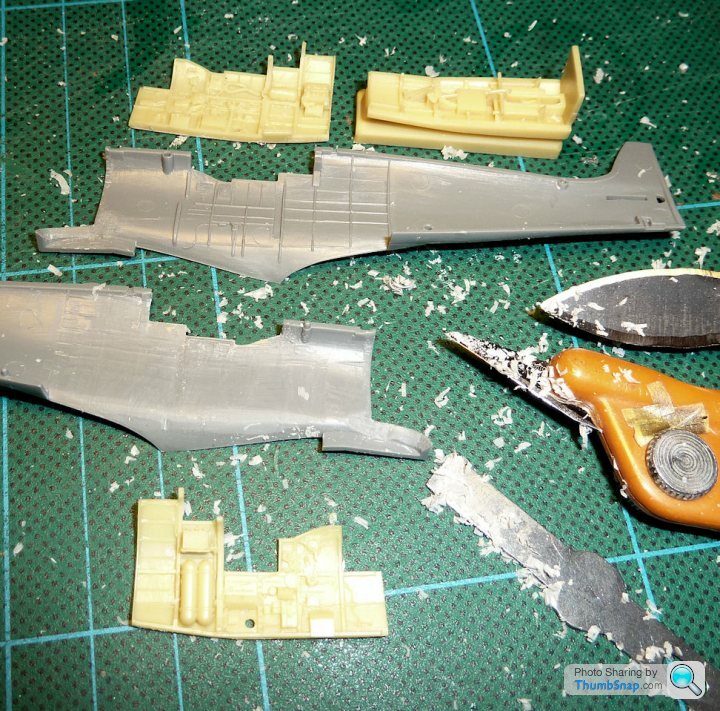
and Aires (resin & photo etch) interior, wing and engine detail set:
IMO, the make-or-break essentials for a great 1:72 model are good surface detail, and good transparent parts. If these features are poorly executed, they are extremely difficult to correct - especially the surface detail. This kit has both qualities in abundance:
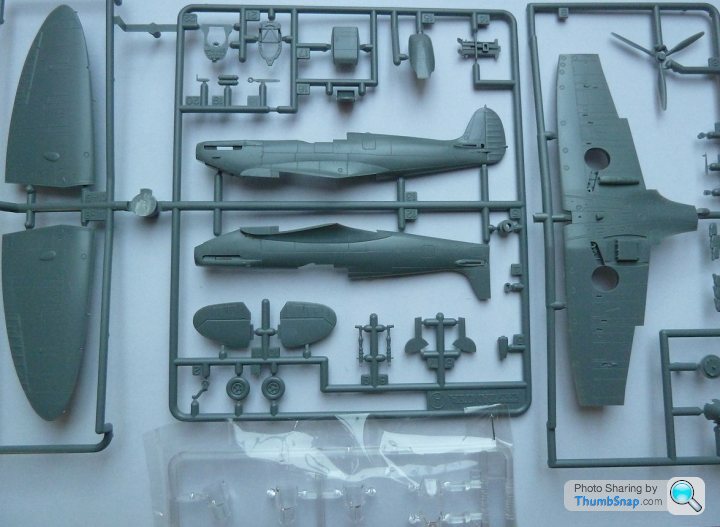
I can live with poorly fitting parts, but, as expected form a quality manufacturer like Tamiya, fit is perfect. These are a few parts just pushed together, even so there are virtually no gaps:
 |http://thumbsnap.com/byGlJyDq[/url]
and Aires (resin & photo etch) interior, wing and engine detail set:
IMO, the make-or-break essentials for a great 1:72 model are good surface detail, and good transparent parts. If these features are poorly executed, they are extremely difficult to correct - especially the surface detail. This kit has both qualities in abundance:
I can live with poorly fitting parts, but, as expected form a quality manufacturer like Tamiya, fit is perfect. These are a few parts just pushed together, even so there are virtually no gaps:
|http://thumbsnap.com/byGlJyDq[/url]Edited by dr_gn on Sunday 21st April 22:13
Edited by dr_gn on Tuesday 14th May 12:54
72twink said:
Perfect timing - I've just re-read First Light and am currently on Malta Spitfire.
Excellent. First Light is a great book.Bit more progress: Believe me, I hesitated for a few seconds before hacking the beautifuly moulded nose section off the fuselage, but looking at the resin bulkhead and Merlin engine, they are even more beautiful!
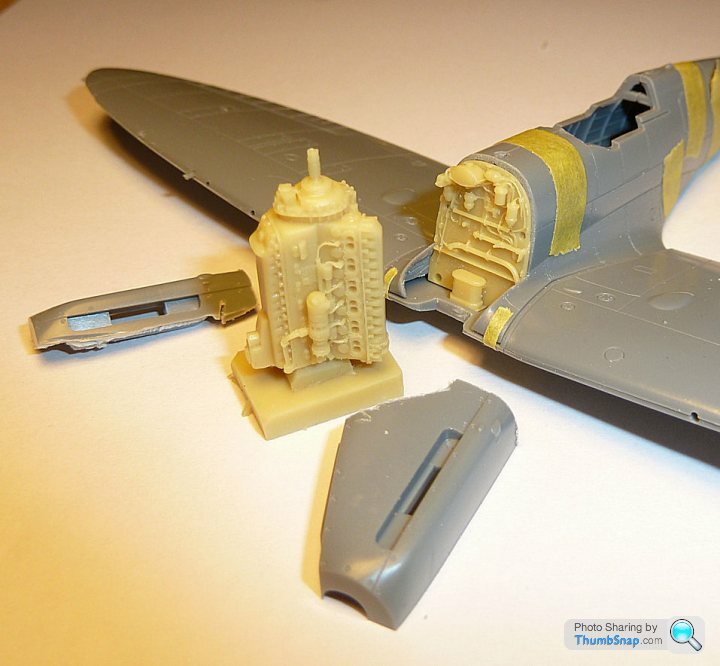

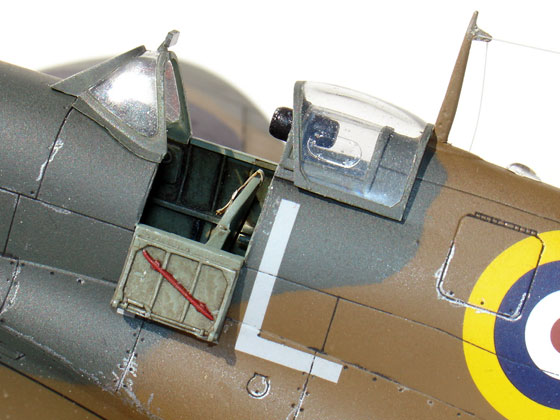
Again, surgery required to fit the resin cockpit: the existing sidewall detail is scraped off, and the fuselage sides thinned to compensate for the thickness of the resin sheets. A good tip is to hold the fuselage up to a bright light to see the bits that are thin, and where more material needs removing:
Looks like great progress so far and the resin bits look superb. Not sure if they corrected it on the 72nd spitfire but on the 1/48th the proportions of the fuselage are a bit off, they missed out a couple of mm between the front and rear bulkheads of the cockpit. this has the effect of putting the trailing edge of the winf in the wrong place and the whole fuselage ends up too short. It's a shame as the panel lines, detail and enginerring is really nice.
lufbramatt said:
Looks like great progress so far and the resin bits look superb. Not sure if they corrected it on the 72nd spitfire but on the 1/48th the proportions of the fuselage are a bit off, they missed out a couple of mm between the front and rear bulkheads of the cockpit. this has the effect of putting the trailing edge of the winf in the wrong place and the whole fuselage ends up too short. It's a shame as the panel lines, detail and enginerring is really nice.
Thanks! I'd probably never notice something like incorrect overall fuselage proportions on a model like this. In fact (I've said before) if I saw a really good model that didn't look quite right, I'd probably assume I'd remembered the real thing incorrectly!Two things I did pick up on re. this Tamiya kit are the curvature of the nose top panel - may be too 'angular'? It's irrelevant in this case because the entire nose section is now in the bin. The other thing was the blend between the wing fillet and the fuselage looks too harsh to my eyes. It seems to form a swage line where it should be a smooth transition. I think this may be exacerbated a bit by poor painting techniques on the ones Ive seen built-up and in photos (see box lid image, first post).
Anyway, no kit is perfect, some errors are easier to correct than other though.
HereBeMonsters said:
So I presume the Tamiya one is better than the Airfix I'm currently building then? 
I have the Airfix one too, it looks lovely.A far better one than any previous Airfix Spit I've seen (I don't include the 1/48th though, never seen them)
The panel lines look quite like what we can see on dr_gn's kit
I have a while before I can start building mine though
The resin you are using looks blinking good doc, I will be along for the ride
b
HereBeMonsters said:
So I presume the Tamiya one is better than the Airfix I'm currently building then?
IMO, in terms of surface detail, yes, but about the same in terms of fit. I bought the new Airfix version recently, but the panel lines were too much to deal with, so I ended up binning it. I got this Tamiya version off EBay for about the same money. It also came with an Aires resin cockpit, which is now surplus to requirements if anyone wants it.dr_gn said:
lufbramatt said:
Looks like great progress so far and the resin bits look superb. Not sure if they corrected it on the 72nd spitfire but on the 1/48th the proportions of the fuselage are a bit off, they missed out a couple of mm between the front and rear bulkheads of the cockpit. this has the effect of putting the trailing edge of the winf in the wrong place and the whole fuselage ends up too short. It's a shame as the panel lines, detail and enginerring is really nice.
Thanks! I'd probably never notice something like incorrect overall fuselage proportions on a model like this. In fact (I've said before) if I saw a really good model that didn't look quite right, I'd probably assume I'd remembered the real thing incorrectly!Two things I did pick up on re. this Tamiya kit are the curvature of the nose top panel - may be too 'angular'? It's irrelevant in this case because the entire nose section is now in the bin. The other thing was the blend between the wing fillet and the fuselage looks too harsh to my eyes. It seems to form a swage line where it should be a smooth transition. I think this may be exacerbated a bit by poor painting techniques on the ones Ive seen built-up and in photos (see box lid image, first post).
Anyway, no kit is perfect, some errors are easier to correct than other though.
lufbramatt said:
dr_gn said:
lufbramatt said:
Looks like great progress so far and the resin bits look superb. Not sure if they corrected it on the 72nd spitfire but on the 1/48th the proportions of the fuselage are a bit off, they missed out a couple of mm between the front and rear bulkheads of the cockpit. this has the effect of putting the trailing edge of the winf in the wrong place and the whole fuselage ends up too short. It's a shame as the panel lines, detail and enginerring is really nice.
Thanks! I'd probably never notice something like incorrect overall fuselage proportions on a model like this. In fact (I've said before) if I saw a really good model that didn't look quite right, I'd probably assume I'd remembered the real thing incorrectly!Two things I did pick up on re. this Tamiya kit are the curvature of the nose top panel - may be too 'angular'? It's irrelevant in this case because the entire nose section is now in the bin. The other thing was the blend between the wing fillet and the fuselage looks too harsh to my eyes. It seems to form a swage line where it should be a smooth transition. I think this may be exacerbated a bit by poor painting techniques on the ones Ive seen built-up and in photos (see box lid image, first post).
Anyway, no kit is perfect, some errors are easier to correct than other though.
http://www.modelaces.com/148_scale_model/spitfire_...
I only noticed it as I've been working on my own set of spitfire GA drawings in my spare time using the supermarine offset tables for the fuselage, wing and tailplane. The supermarine drawings were not drawn very accurately and don't reflect the shape of the real aircraft very well. Tamiya missed nearly 3mm between frame 8 and 12 in the 1/48th kit.
Edited by lufbramatt on Wednesday 24th April 15:32
dr_gn said:
HereBeMonsters said:
So I presume the Tamiya one is better than the Airfix I'm currently building then?
IMO, in terms of surface detail, yes, but about the same in terms of fit. I bought the new Airfix version recently, but the panel lines were too much to deal with, so I ended up binning it. I got this Tamiya version off EBay for about the same money. It also came with an Aires resin cockpit, which is now surplus to requirements if anyone wants it.Did you buy the Airfix 1/72 Spitfire Vc?
This was a very slightly revised version of their old (1974) Spitfire Vb. In its day, the Vb was not a bad little kit. It is pretty accurate in outline but has raised panel lines (normal back then) and sparse cockpit detail. The Vc kit came out about 10 years ago and included a new set of wings for the "c" version.
This was a very slightly revised version of their old (1974) Spitfire Vb. In its day, the Vb was not a bad little kit. It is pretty accurate in outline but has raised panel lines (normal back then) and sparse cockpit detail. The Vc kit came out about 10 years ago and included a new set of wings for the "c" version.
lufbramatt said:
I only noticed it as I've been working on my own set of spitfire GA drawings in my spare time using the supermarine offset tables for the fuselage, wing and tailplane. The supermarine drawings were not drawn very accurately and don't reflect the shape of the real aircraft very well. Tamiya missed nearly 3mm between frame 8 and 12 in the 1/48th kit.
How does that manifest itself in terms of the picture I posted? Is it 3mm (144mm) spread over 3 frames, or in one particular area?Edited by lufbramatt on Wednesday 24th April 15:32
Sorry for the basic image, the only thing I could make it with on this laptop was powerpoint! Hopefully this will show that correcting the tamiya 1/48th fuselage isnt a case of adding a plug to make the tail longer.

A= overall length from frame 0 (front ring of cowl) to frame 21 (rudder post). Too short on Tamiya 1/48
B= frame 0 to frame 8, this is OK
C= frame 8 to frame 12, 3mm too short, mainly between frame 8 and 11
D= frame 12 to frame 21, also ok
E= trailing edge of wing to apex of wing fillet, also ends up short as the wing chord measures out ok.
the two blue lines, frame 11 and the trailing edge, should almost line up. the lost distance in the cockpit area makes the gap too big.
lufbramatt said:
Sorry for the basic image, the only thing I could make it with on this laptop was powerpoint! Hopefully this will show that correcting the tamiya 1/48th fuselage isnt a case of adding a plug to make the tail longer.
A= overall length from frame 0 (front ring of cowl) to frame 21 (rudder post). Too short on Tamiya 1/48
B= frame 0 to frame 8, this is OK
C= frame 8 to frame 12, 3mm too short, mainly between frame 8 and 11
D= frame 12 to frame 21, also ok
E= trailing edge of wing to apex of wing fillet, also ends up short as the wing chord measures out ok.
the two blue lines, frame 11 and the trailing edge, should almost line up. the lost distance in the cockpit area makes the gap too big.
I see. Thanks for taking the time to draw the diagram. I think the 1:72 version is actually proportionately the same (simply by extending the rear of the access door downwards to the root fillet).A= overall length from frame 0 (front ring of cowl) to frame 21 (rudder post). Too short on Tamiya 1/48
B= frame 0 to frame 8, this is OK
C= frame 8 to frame 12, 3mm too short, mainly between frame 8 and 11
D= frame 12 to frame 21, also ok
E= trailing edge of wing to apex of wing fillet, also ends up short as the wing chord measures out ok.
the two blue lines, frame 11 and the trailing edge, should almost line up. the lost distance in the cockpit area makes the gap too big.
It amuses me on Britmodeller or wherever, when someone corrects or 'improves' a kit to the nth degree of accuracy in shape, and then paints it like it was done by a 5 year old, thus rendering it an even worse replica than the original kit would have been if finished with a bit of finesse. Ah well, each to their own.
I see. Thanks for taking the time to draw the diagram. I think the 1:72 version is actually proportionately the same (simply by extending the rear of the access door downwards to the root fillet).
It amuses me on Britmodeller or wherever, when someone corrects or 'improves' a kit to the nth degree of accuracy in shape, and then paints it like it was done by a 5 year old, thus rendering it an even worse replica than the original kit would have been if finished with a bit of finesse. Ah well, each to their own.
It amuses me on Britmodeller or wherever, when someone corrects or 'improves' a kit to the nth degree of accuracy in shape, and then paints it like it was done by a 5 year old, thus rendering it an even worse replica than the original kit would have been if finished with a bit of finesse. Ah well, each to their own.
Gassing Station | Scale Models | Top of Page | What's New | My Stuff