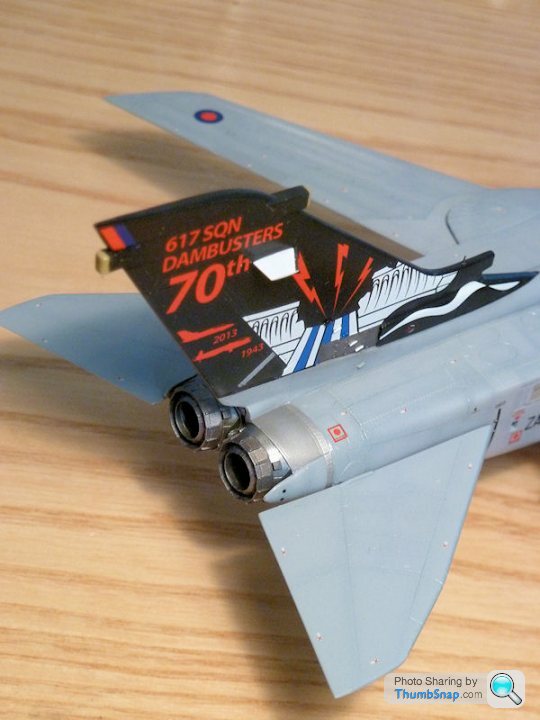
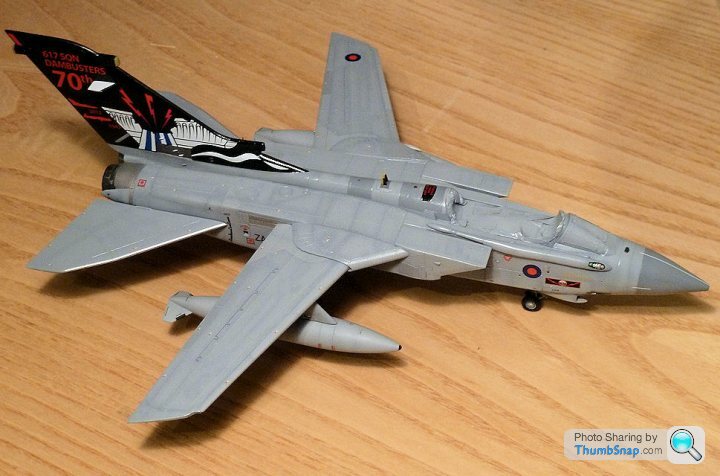
1:72 Tornado GR4, Dambusters70th Anniversary
Discussion


Thank you. But at only twelve months old, I was too young to remember them. The greater tragedy was that my parents and I were piggy-backing on my fathers' younger brothers' honeymoon. My father, mother, uncle and new aunt were all travelling to a safari camp just over the border in Tanzania, leaving me with my paternal grandparents. All four were killed!
Yes, the Frogeye kit is very poor (I've just looked in the box for the first time in a couple of decades!). But I think it's the only large scale kit produced. I retire in twenty years. Watch this space.....
Yes, the Frogeye kit is very poor (I've just looked in the box for the first time in a couple of decades!). But I think it's the only large scale kit produced. I retire in twenty years. Watch this space.....
dr_gn said:
No matter how small the job, my bench always instantly ends up looking like a bomb hit it
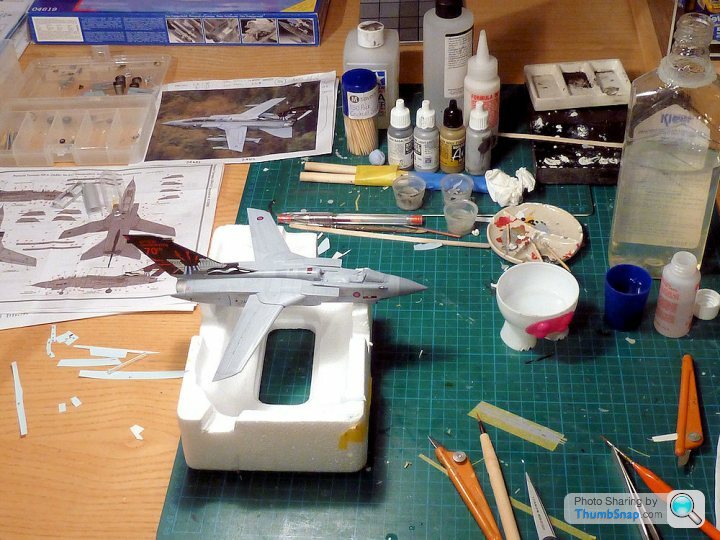
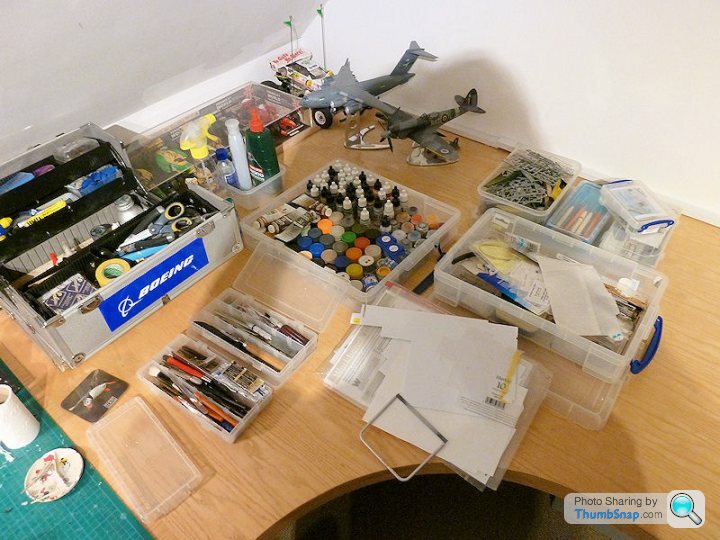
That looks refreshingly well-adjusted, compared to some of the modelling dens I've seen on Britmodeller, which have every paint shade and filler type yet devised. I'm attempting to keep all my gear within the confines of an ArtBin (which is like a big fishing tackle box).That photo wasn't the whole story - here's the view just to the right of that:
So I've polished the second canopy to a degree that I can see that even if I eliminate the flaws, the distortion remains, so in other words it's useless AFAIC.
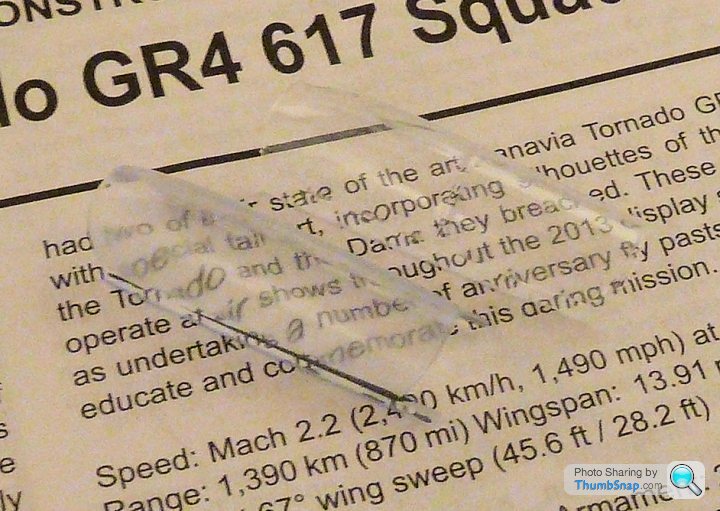
I cut out the Pavla vacform canopy, and while the distortion is low, the size and shape is hopelessly wrong for the Revell kit:

So that leaves me with fannying about making a new canopy, which isn't strightforward. The frames on the lower edges are moulded as part of the transparency, with no step between them and the 'glass'. This means that if I make three separate hoops to fit over a new canopy, their lower ends have nothing to butt against, and will leave a step. They also have tiny fillet radii in the corners. I'd have to try to make a pair of lower rails and either mate them to the lower edges of the vacform (structurally very weak), or glue them on top of the vacform lower rails (difficult to get the correct step, in the correct position.
In other words a complete pain in the arse.
So I've polished the second canopy to a degree that I can see that even if I eliminate the flaws, the distortion remains, so in other words it's useless AFAIC.
I cut out the Pavla vacform canopy, and while the distortion is low, the size and shape is hopelessly wrong for the Revell kit:
So that leaves me with fannying about making a new canopy, which isn't strightforward. The frames on the lower edges are moulded as part of the transparency, with no step between them and the 'glass'. This means that if I make three separate hoops to fit over a new canopy, their lower ends have nothing to butt against, and will leave a step. They also have tiny fillet radii in the corners. I'd have to try to make a pair of lower rails and either mate them to the lower edges of the vacform (structurally very weak), or glue them on top of the vacform lower rails (difficult to get the correct step, in the correct position.
In other words a complete pain in the arse.
Edited by dr_gn on Friday 13th February 19:47
I epoxied the main gear doors on tonight. Not sure how long they will stay in place, the locating points are tiny:
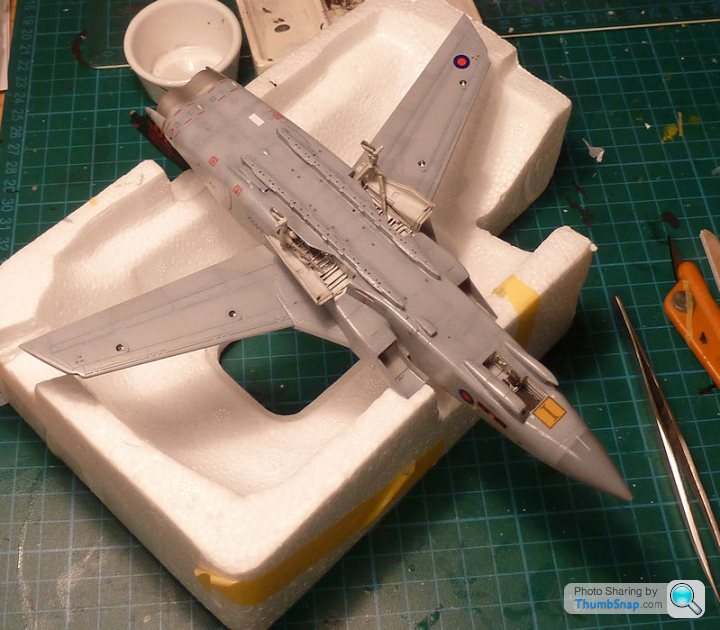
I also discarded the kit gear door actuators becasue they were too fat. I've made a start on making some out of brass tube, which look far more realistic. The just need a bit more work on the outer fixing points and a couple of hydraulic lines adding. They will help to brace the doors in place hopefully:
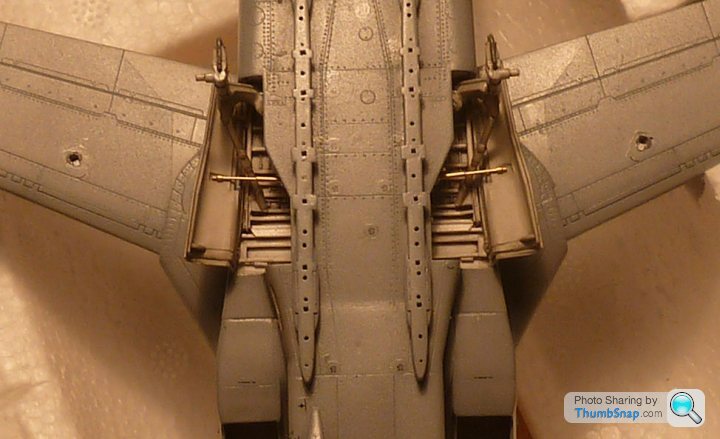
I also misted some grey over the 1500 litre tank stencils. The stencils stood out like a sore thumb, so this has reduced contrast massively. I considered doing this to the rest of the black stencils on the fuselage, but I think I'll leave them alone:

I also discarded the kit gear door actuators becasue they were too fat. I've made a start on making some out of brass tube, which look far more realistic. The just need a bit more work on the outer fixing points and a couple of hydraulic lines adding. They will help to brace the doors in place hopefully:
I also misted some grey over the 1500 litre tank stencils. The stencils stood out like a sore thumb, so this has reduced contrast massively. I considered doing this to the rest of the black stencils on the fuselage, but I think I'll leave them alone:
Edited by dr_gn on Monday 16th February 22:36
I usually cock something up at this stage, and so to be consisent, I've been messing about repairing some paint damage to the nose...I'll not go into it.
Anyway, I finished the tanks, and sprayed them with Humbrol acrylic #49:
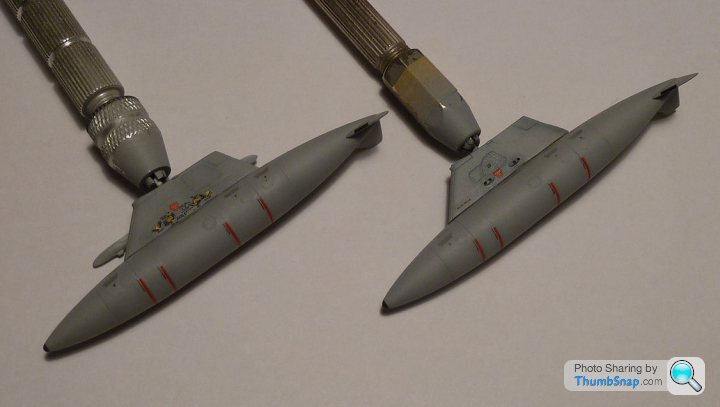
The changes to contrast and colour with varying clear coats (Klear/Matt) is frightening.
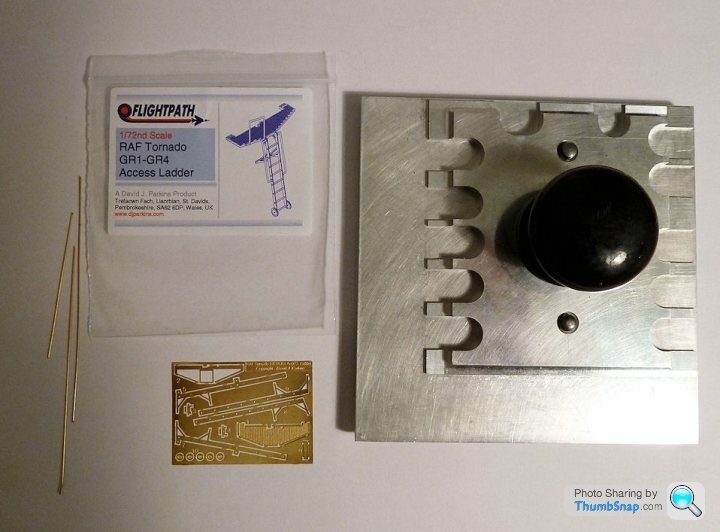
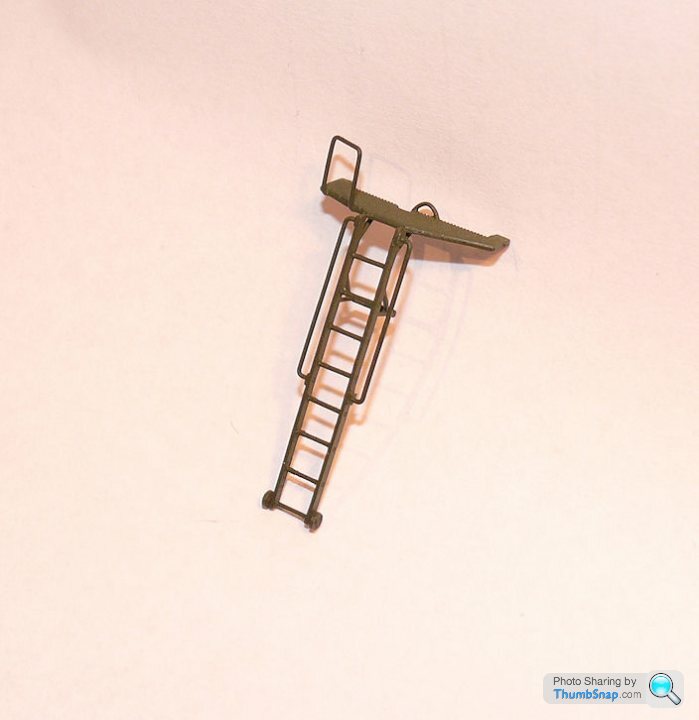
Also got a Flightpath ladder. Very nice - ordered on Thursday night, arrived this morning. Looking forward to using my home-made etch bending tool again:
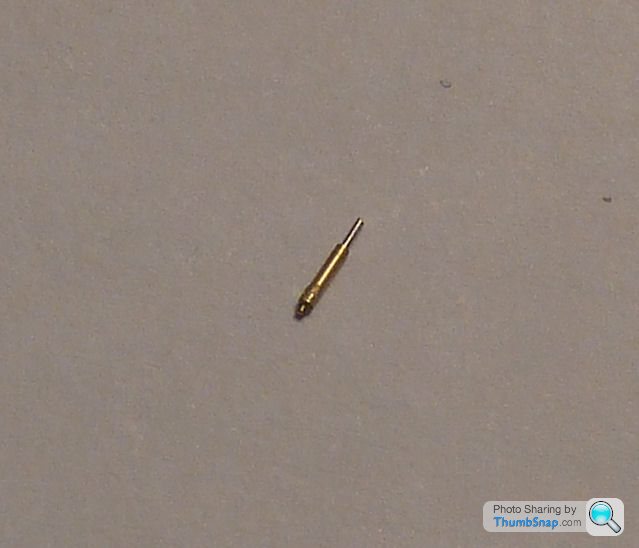
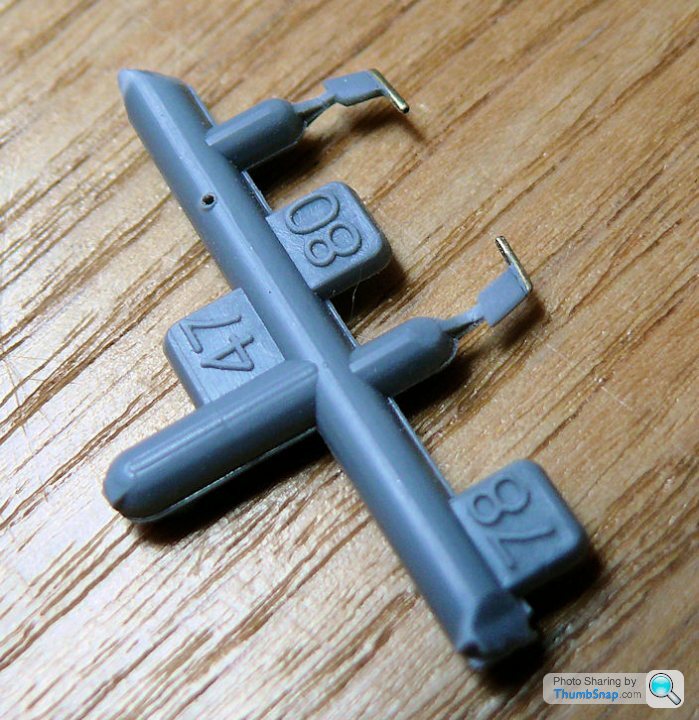
In other news, made this small antenna/thing that fits abouve the intake on the fin:
I also snapped off the main gear doors (deliberately). They just didn't seem to fit right, with a sizable gap along the hinge line. No idea how I'm going to change it to look better, but it was definitely wrong as per the instructions. If anyone can shed any light on exactly how the doors are supposed to look when fited I'd appreciate some images.
Anyway, I finished the tanks, and sprayed them with Humbrol acrylic #49:
The changes to contrast and colour with varying clear coats (Klear/Matt) is frightening.
Also got a Flightpath ladder. Very nice - ordered on Thursday night, arrived this morning. Looking forward to using my home-made etch bending tool again:
In other news, made this small antenna/thing that fits abouve the intake on the fin:
I also snapped off the main gear doors (deliberately). They just didn't seem to fit right, with a sizable gap along the hinge line. No idea how I'm going to change it to look better, but it was definitely wrong as per the instructions. If anyone can shed any light on exactly how the doors are supposed to look when fited I'd appreciate some images.
Edited by dr_gn on Saturday 21st February 20:47


Bosshogg76 said:
Just in case you're interested that little probe you fitted above the Primary heat exchanger inlet, is the anti-icing probe.
Thanks, good to know what I've just built! What is the stub in front of the FLIR pod? Looks like an antenna of some sort, but strange it appears to be directly in front of the pod window.
dr_gn said:
Thanks, good to know what I've just built! What is the stub in front of the FLIR pod? Looks like an antenna of some sort, but strange it appears to be directly in front of the pod window.
Sorry can't help you there, I spent my time on the Air Display Variant as a rigger. I only recognise that aerial as a back scratcher when getting to the CB panels. Edited by Bosshogg76 on Monday 23 February 10:56
Murph7355 said:
Do you ever do models "in flight" dr_gn?
I love the Tornado, but it looks especially ungainly on the ground.
Then again, I suspect most modern aircraft do.
Yes, I used to build most of them in flight and hang them on my son's ceiling. I think extended undercarriages can add more interest to a model, but I agree that it doesn't show many aircraft in their best light.I love the Tornado, but it looks especially ungainly on the ground.
Then again, I suspect most modern aircraft do.

johnS2000 said:
I got "another" question for you Dr ?
Having recently drilled the exhausts on 2 Mosquitoes and , at this moment in time ,considering drilling the exhaust on a P40 , does anybody ever notice ??
Yes - I would. I've come to the conclusion that a combination of lots of tiny, almost invisible detail touches like that make a disproportionalely large difference to a model. Having recently drilled the exhausts on 2 Mosquitoes and , at this moment in time ,considering drilling the exhaust on a P40 , does anybody ever notice ??
Gassing Station | Scale Models | Top of Page | What's New | My Stuff