Tamiya 1:12 McLaren MP4/6 Rebuild/Upgrade
Discussion


Got some CNC'd front suspension components on back order from Thunder Valley today:
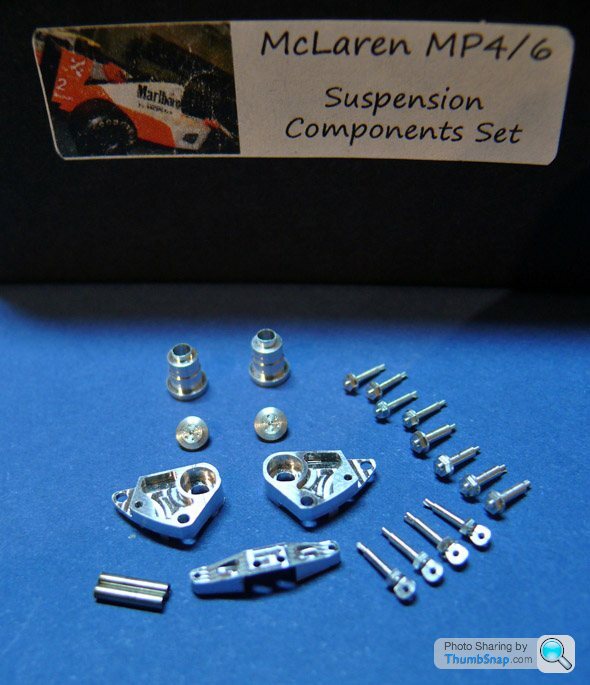
I can only describe them as exquisite. I've got the Top Studio front suspension detail kit as well, so these parts are duplicated, however, the rockers in that set are built-up from layers of photo-etch, and the roll bar lever is from folded photo-etch. Don't get me wrong - the Top Studio stuff is excellent, and incredible value, but there is no comparison with genuine CNC'd aluminium. In conjunction with the more refined TVF1 dampers, the two sets complement each other very nicely in fact.
I can only describe them as exquisite. I've got the Top Studio front suspension detail kit as well, so these parts are duplicated, however, the rockers in that set are built-up from layers of photo-etch, and the roll bar lever is from folded photo-etch. Don't get me wrong - the Top Studio stuff is excellent, and incredible value, but there is no comparison with genuine CNC'd aluminium. In conjunction with the more refined TVF1 dampers, the two sets complement each other very nicely in fact.
vonmarshall said:
Really loving your work here. Any updates?
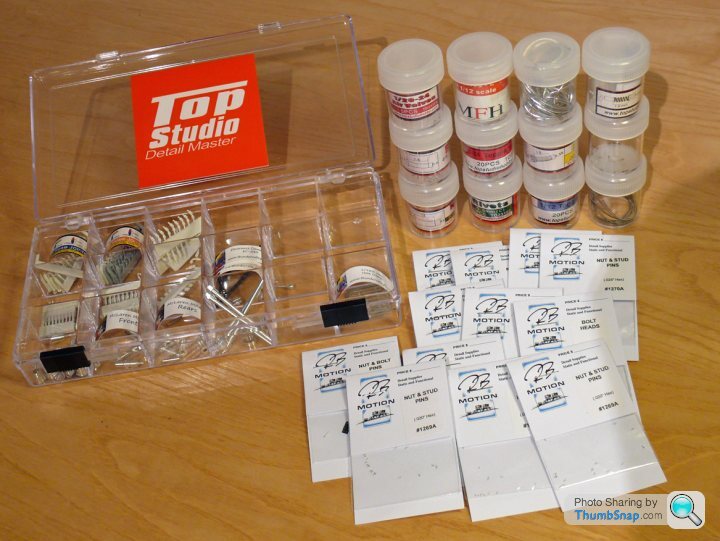
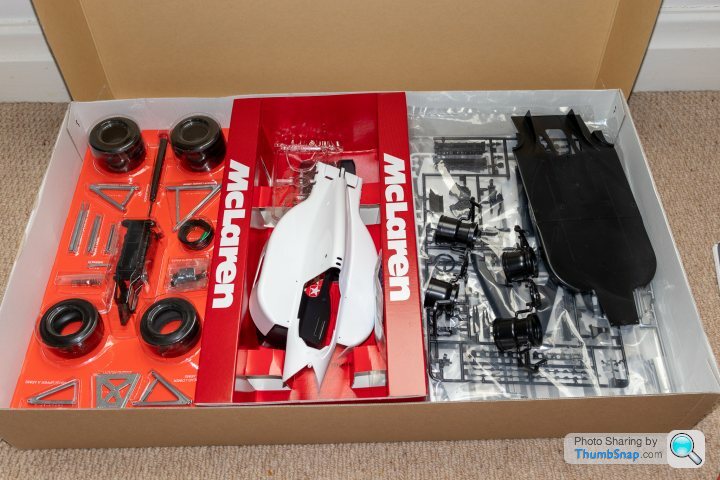
Thanks! Yes, I recently got some "clear" carbon decals, and now just need to experiment with base colours. Then I can get on with it. Which carbon decals to use has been puzzling me on this car, and the 1:20 Top Studio MP4/4 I've got in the stash too.Here is the dismantled "kerbside" original car, along with all the detail parts I've collected:

Depending on what type of UV causes the fading a glass case would be worth investing in, as it blocks UVB pretty effectively. You can also get UV window film which blocks most of the remaining light quite nicely too.
Loving the build, wish I had the skills/patience to do a model so thoroughly.
Loving the build, wish I had the skills/patience to do a model so thoroughly.
dr_gn said:
vonmarshall said:
Really loving your work here. Any updates?
Thanks! Yes, I recently got some "clear" carbon decals, and now just need to experiment with base colours. Then I can get on with it. Which carbon decals to use has been puzzling me on this car, and the 1:20 Top Studio MP4/4 I've got in the sktash too.Here is the dismantled "kerbside" original car, along with all the detail parts I've collected:

DAVEVO9 said:
dr_gn
Did you ever finish this
Not exactly. No further progress - I got stuck on which carbon fibre went where, and despite asking loads of people, still haven’t really sorted it out. The main tub is male mould, so the outside has a rough texture. My OCD has some kind of issue with it. Did you ever finish this
Well good luck I'm sure you will sort it.
I feel the OCD thing
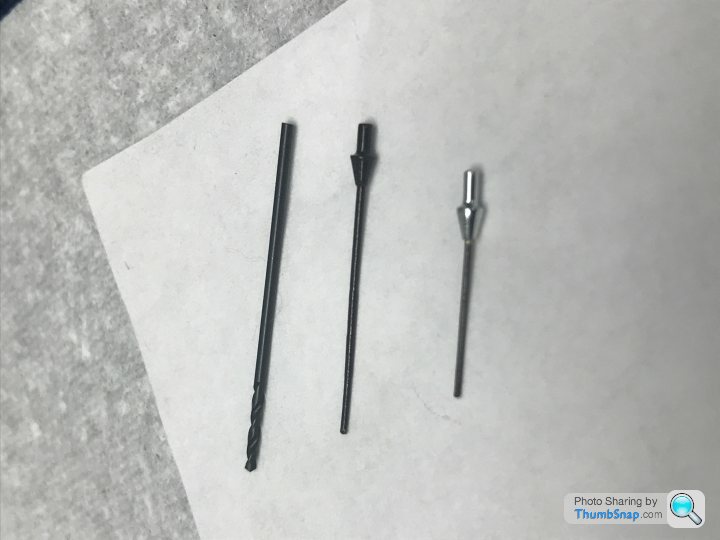
I have just finished making some antenna for a 1/18 exoto I'm selling .5 mm wire which I zinc plated, then black passivated along with
the bases which I managed to turn up on the lathe.
The cone shaped base is brass 2.3 mm high 2.8 mm wide. 1 mm pin for the mounting.
So I appreciate some of the bits you are doing with yours. 1 mm drill bit in the last pic.
I feel the OCD thing
I have just finished making some antenna for a 1/18 exoto I'm selling .5 mm wire which I zinc plated, then black passivated along with
the bases which I managed to turn up on the lathe.
The cone shaped base is brass 2.3 mm high 2.8 mm wide. 1 mm pin for the mounting.
So I appreciate some of the bits you are doing with yours. 1 mm drill bit in the last pic.
DAVEVO9 said:
Well good luck I'm sure you will sort it.
I feel the OCD thing
I have just finished making some antenna for a 1/18 exoto I'm selling .5 mm wire which I zinc plated, then black passivated along with
the bases which I managed to turn up on the lathe.
The cone shaped base is brass 2.3 mm high 2.8 mm wide. 1 mm pin for the mounting.
So I appreciate some of the bits you are doing with yours. 1 mm drill bit in the last pic.
Nice bit of fanatical detail right there I feel the OCD thing
I have just finished making some antenna for a 1/18 exoto I'm selling .5 mm wire which I zinc plated, then black passivated along with
the bases which I managed to turn up on the lathe.
The cone shaped base is brass 2.3 mm high 2.8 mm wide. 1 mm pin for the mounting.
So I appreciate some of the bits you are doing with yours. 1 mm drill bit in the last pic.

OK as a result of my latest existential crisis, I decided to get on with this (I think that's about 6 model projects simultaneously now).
I thought I'd get on with the engine of the 'open' version, so cracked open the box of the new model:
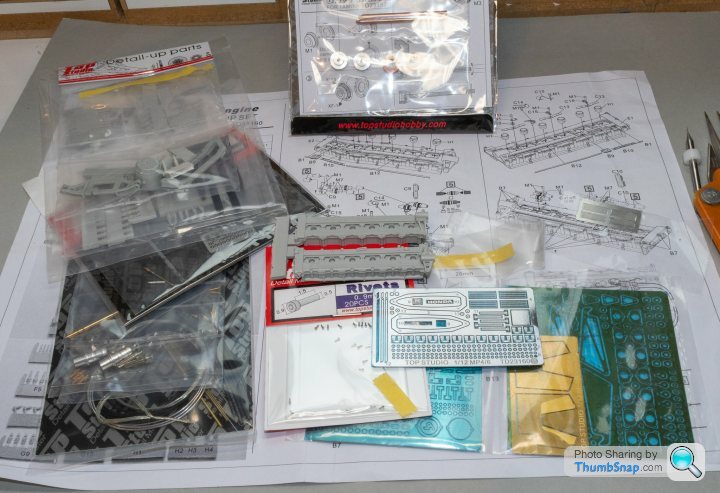
And the Top Studio detail set, with additional stuff from RB Motion and Formula Perfect in the 'States:
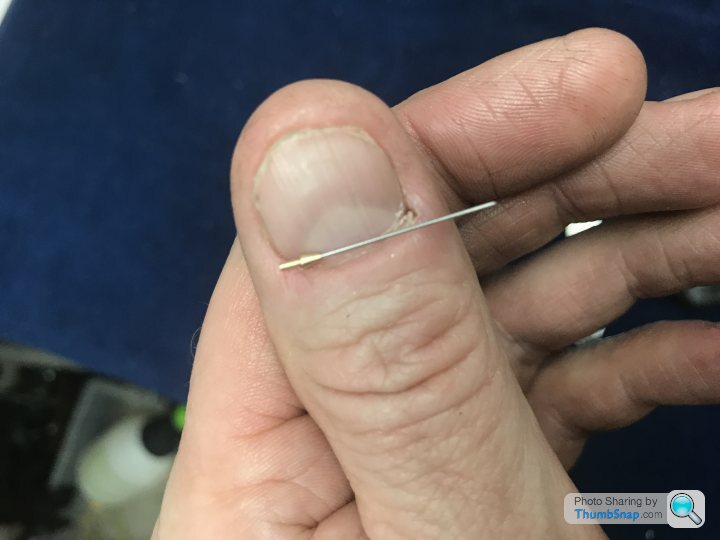
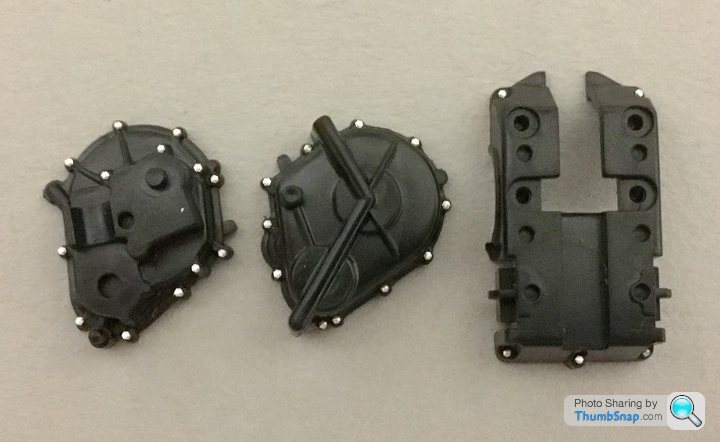
First job I fancied was replacing the moulded-in stubs with RB Motion turned stud and nuts:
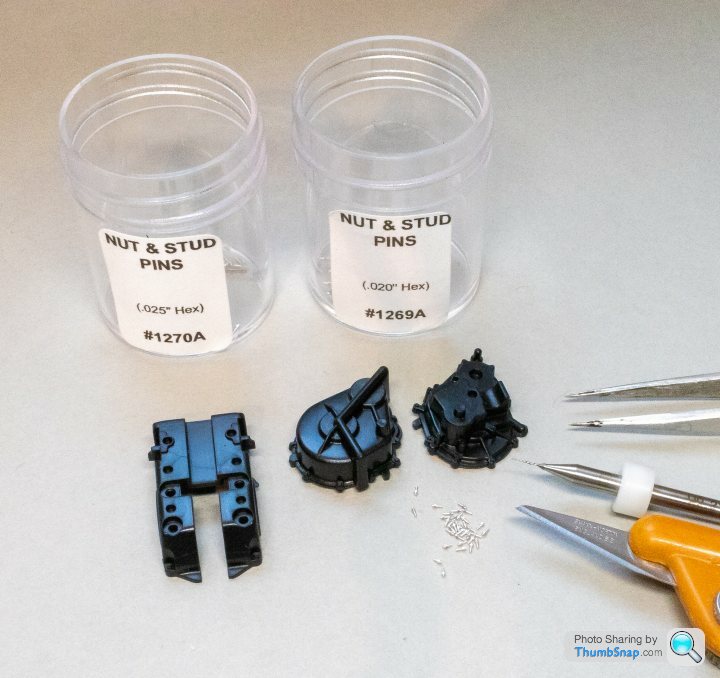
I'd previously selected the 0.025" (0.635 mm) ones for the main casings, and the 0.020" ones for the secondary casings. You just drill a hole and glue the tail of the stud into it:
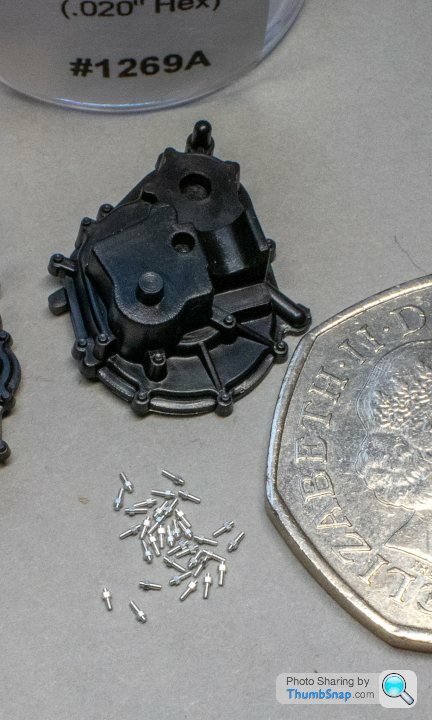
So we'll see how that goes...
I thought I'd get on with the engine of the 'open' version, so cracked open the box of the new model:
And the Top Studio detail set, with additional stuff from RB Motion and Formula Perfect in the 'States:
First job I fancied was replacing the moulded-in stubs with RB Motion turned stud and nuts:
I'd previously selected the 0.025" (0.635 mm) ones for the main casings, and the 0.020" ones for the secondary casings. You just drill a hole and glue the tail of the stud into it:
So we'll see how that goes...
The detail kit includes several resin replacement parts that are higher fidelity than the originals:

among these are the cam covers, which need detailing with various bits of photo-etch. I want to get the Honda logos looking like machined aluminium, so I set about Aralditing the various bits together:
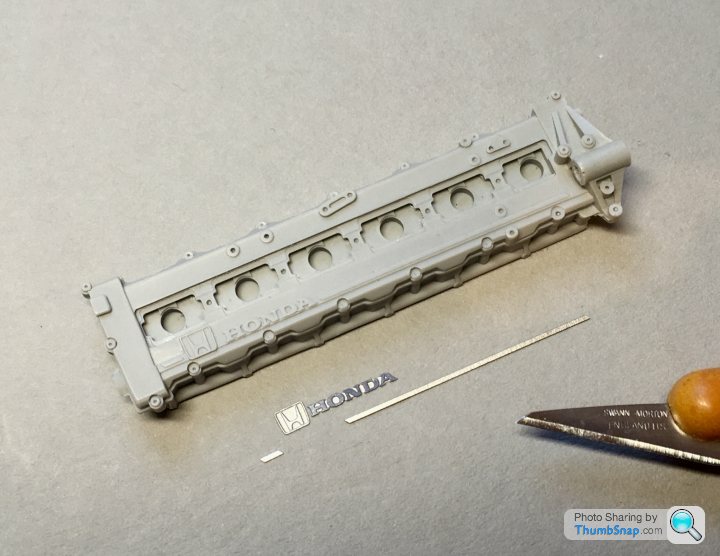
The issue here is that it’s impossible to orientate all the photo-etch to reflect light identically. I therefore experimented by priming with Chaos Black, masking around the badges and flatting the raised metal with wet and dry on a Mylar backing. Eventually I got equal reflections:
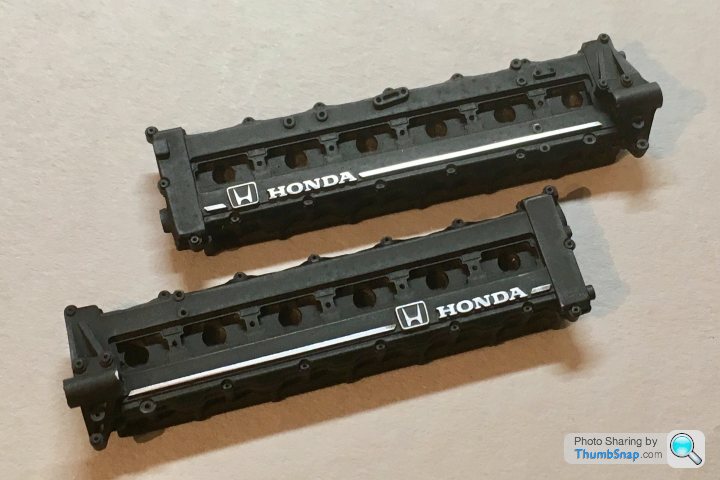
Now for a coat of Tamiya satin black, and detail painting the coil/cap recesses.
among these are the cam covers, which need detailing with various bits of photo-etch. I want to get the Honda logos looking like machined aluminium, so I set about Aralditing the various bits together:
The issue here is that it’s impossible to orientate all the photo-etch to reflect light identically. I therefore experimented by priming with Chaos Black, masking around the badges and flatting the raised metal with wet and dry on a Mylar backing. Eventually I got equal reflections:
Now for a coat of Tamiya satin black, and detail painting the coil/cap recesses.
caterhamnut said:
I can't find where I saw it now!! In the last week or so, it was a 'preview' (ie: not released yet) of a cockpit detail set - I *think* it was Top Studio....I'll keep looking...
I know they were working on sets for the FW14B and 641, but I’ve not seen anything recently. They usually update their Facebook page with latest news etc.ETA Just seen a preview on the "Top Studio Family" FB page, looks like it's the cockpit set first for the FW14B.
Edited by dr_gn on Monday 2nd September 09:07
Gassing Station | Scale Models | Top of Page | What's New | My Stuff