Tamiya 1:12 McLaren MP4/6 Rebuild/Upgrade
Discussion


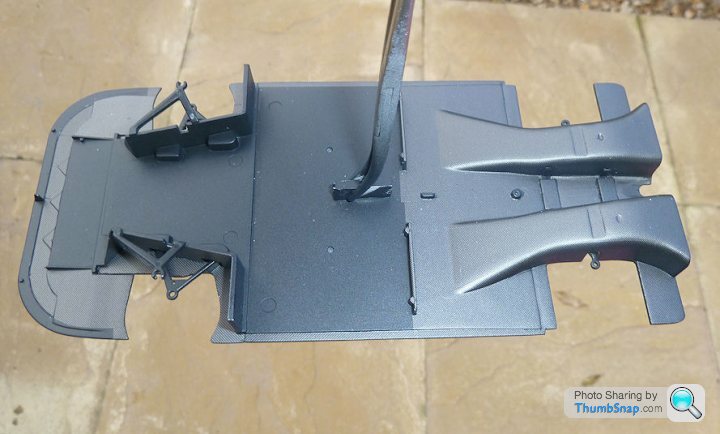
I used some Mr.Surfacer to fill the small gaps between the p/e and the plastic on the brake ducts:
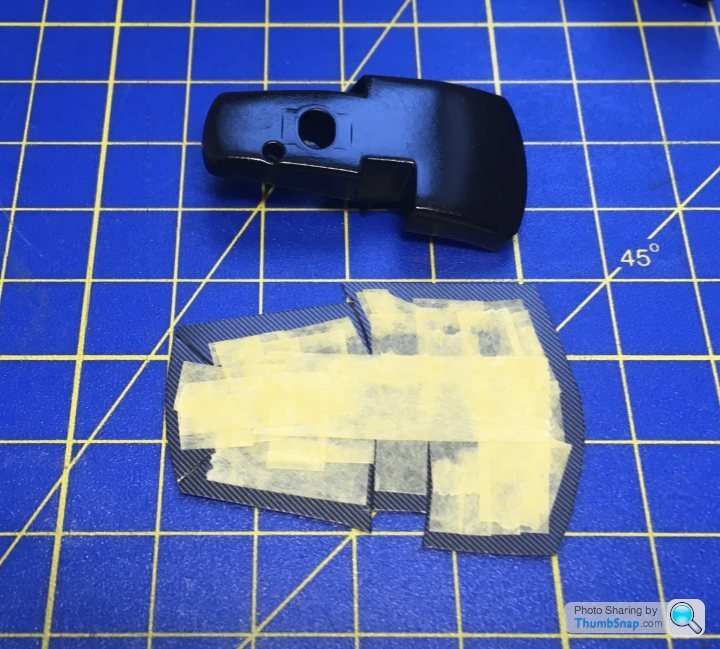
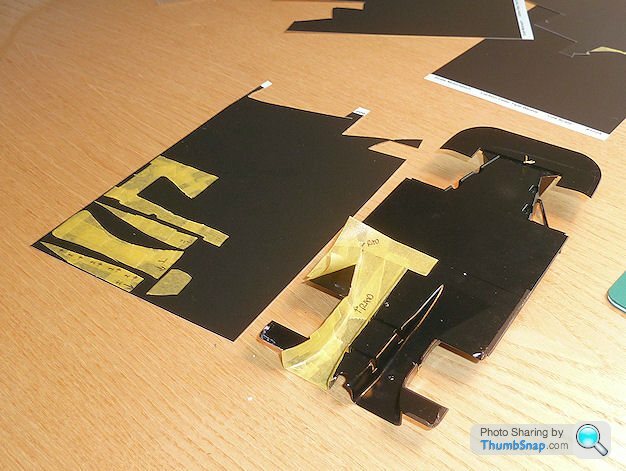
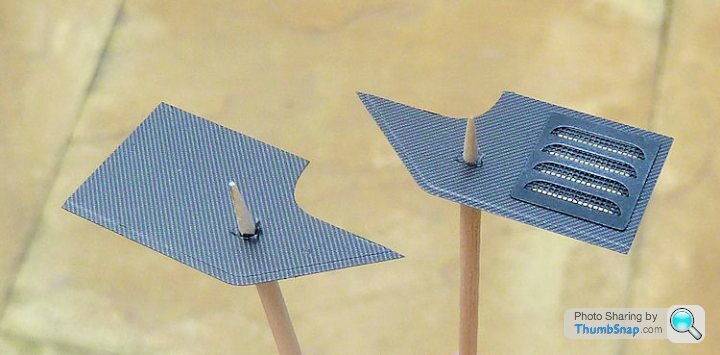
Last time I used carbon decals was on the XJR-9 many years ago. I started by applying tape to the surface to make a template:
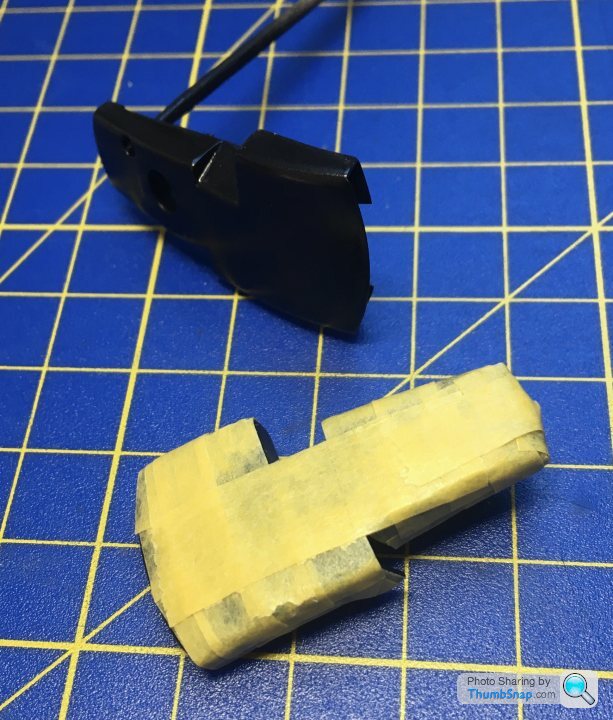
Then cut out the profile on the decal sheet, plus a bit for good luck:
After applying to the duct with copious amounts of MicroSol and heat, the result was a perfect wrinkled mess. So into the trusty pot of brake fluid:
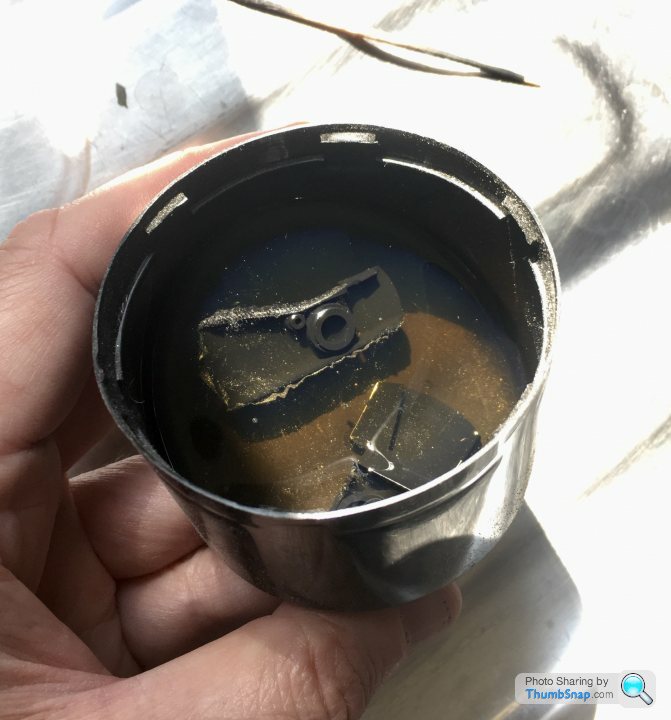
I should have re-read my XJR-9 thread. I’d have reminded myself that these decals need to be applied to flat, or single curved surfaces; they hate compound curves. I must have been thinking about the wood grain decals I used on the ‘bare’ DH Mosquito, which seemed to conform to anything. Oh well, now to make many more templates...
Last time I used carbon decals was on the XJR-9 many years ago. I started by applying tape to the surface to make a template:
Then cut out the profile on the decal sheet, plus a bit for good luck:
After applying to the duct with copious amounts of MicroSol and heat, the result was a perfect wrinkled mess. So into the trusty pot of brake fluid:
I should have re-read my XJR-9 thread. I’d have reminded myself that these decals need to be applied to flat, or single curved surfaces; they hate compound curves. I must have been thinking about the wood grain decals I used on the ‘bare’ DH Mosquito, which seemed to conform to anything. Oh well, now to make many more templates...
generationx said:
I feel your pain with c/f decals doc, sometimes I love them, sometimes I can’t be arsed! BestBalsa always have lovely stuff in stock, haven’t used them for a while, I’m glad they’re still going.
Heads off to website with credit card...
Yep. At least with a hobby like ours we’ll never be bored!Heads off to website with credit card...
My first contribution to this thread as the most I have been able to do is look on in awe.
Have you though how you might do the cf on the duct?
Something I have done (although it may not be suitable at your level) is to apply the cf decal in pieces trying to align the weave as best as I can. It usually looks okay.
Personally I have never got a large single piece to conform as it disintegrates through too much microsol or end up with bubbles under it.
robemcdonald said:
Something I have done (although it may not be suitable at your level) is to apply the cf decal in pieces trying to align the weave as best as I can. It usually looks okay.
Thanks - yes, that's exactly the plan.I did that with my Jaguar build - I should have re-read my own thread before starting I guess.
In the end it worked OK, but it must have taken a long time.
henryk001 said:
I might be telling you how to suck eggs but i believe the Studio decals are quite fine, if your not already using them
I'm using Scale Motorsport decals, which I've used before - at least I think I did. I bought quite a few sheets to have in stock, so I guess I'll have to try and use them. As an aside, I did a check on scale against a Jordan 191 wing flap I've got, and the 1:12 SM decals are too big - the 1:20 versions are closer to reality (TBH the 1:12 versions always looked too big on 1:12 cars to me eyes).
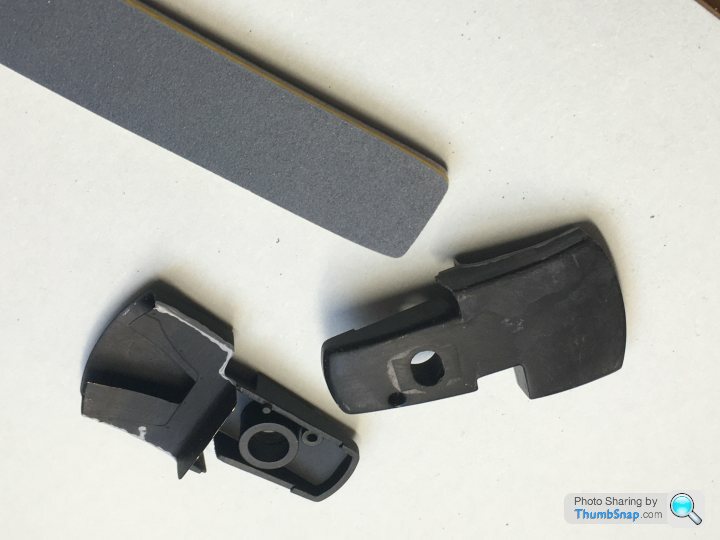
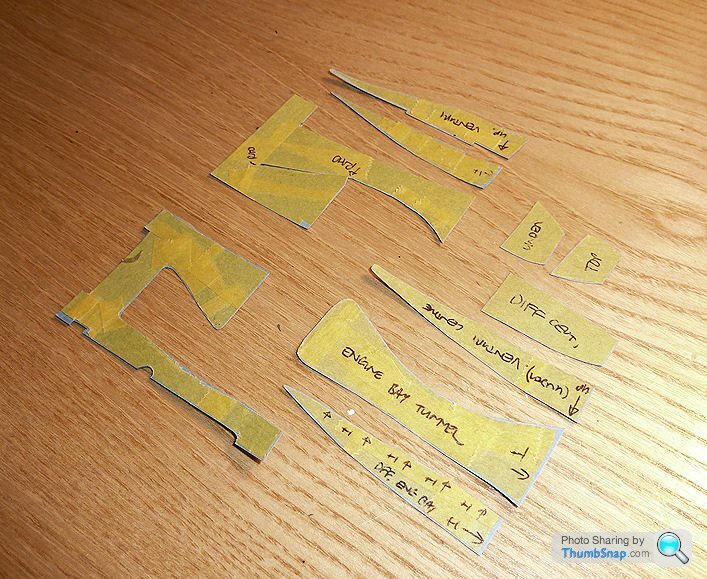
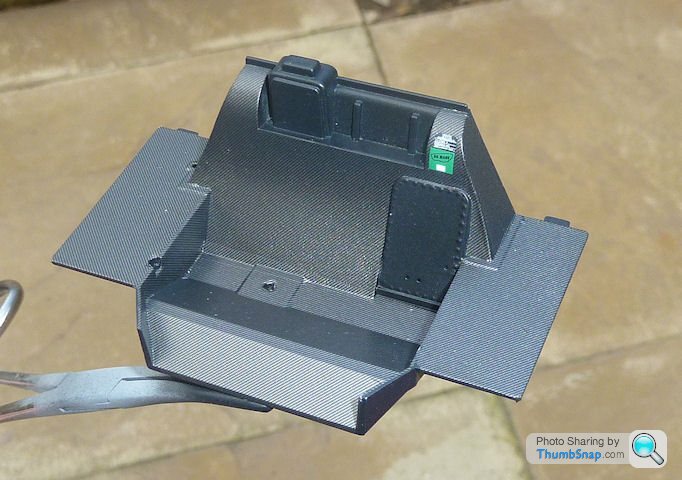
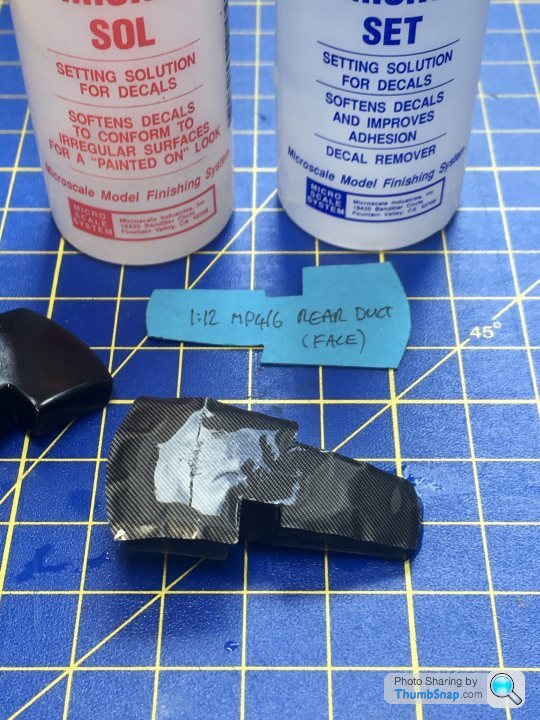
I ended up doing the inevitable, and templating most of the facets of the duct:

There are 11 pieces in total. Even so, it still took a lot of coaxing with Set and Sol, moist cotton buds and tissues to de-wrinkle everything:
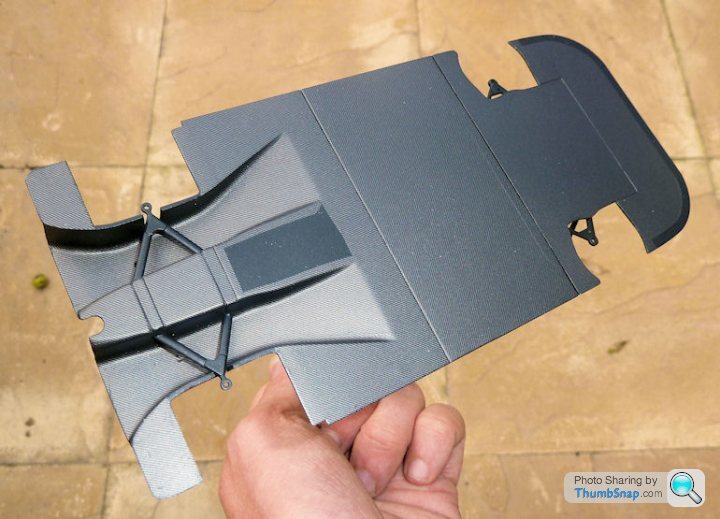
Once finished, I gave it a coat of Tamiya satin:
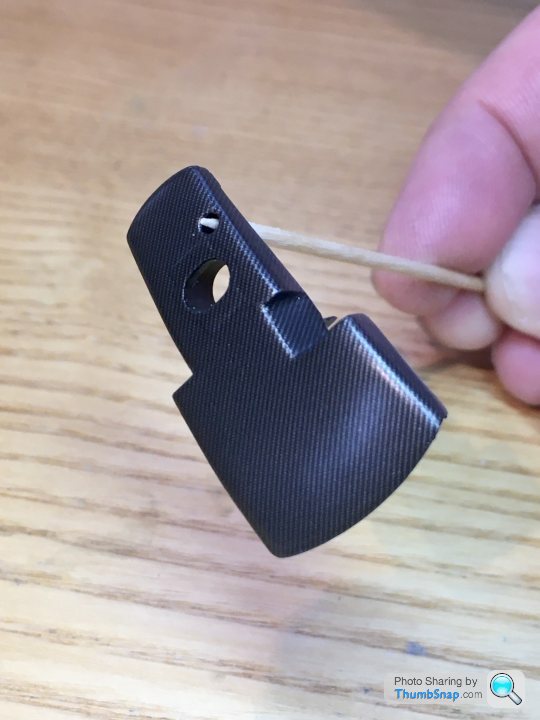
The outsides are acceptable, but the insides are a bit meh. I think it’s an example of where photo-etch is too thin. It’s also a bit wavy, and has the removable panel etched in. It all looks a bit wrong:
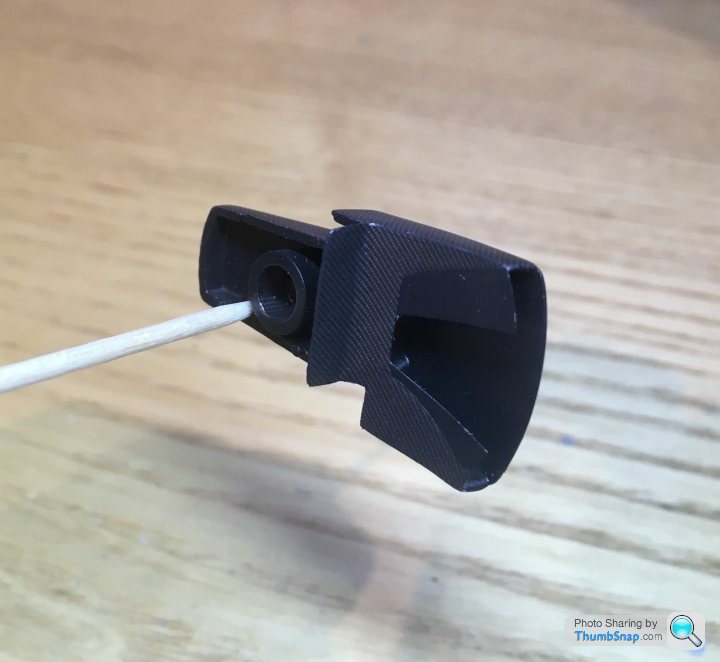
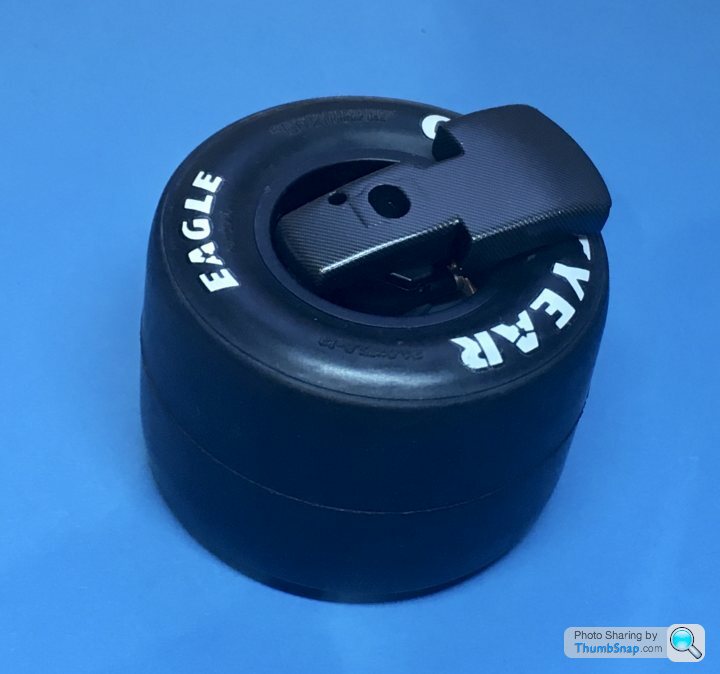
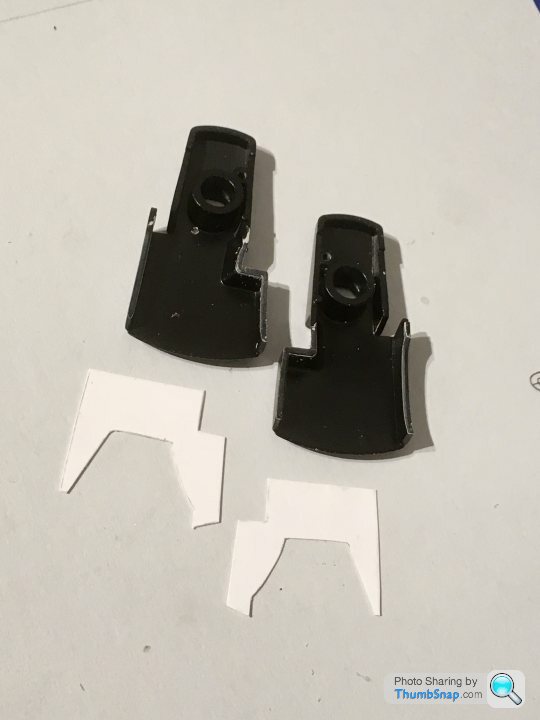
I’m going to start again on another duct, but substitute the p/e with a two-piece plastic card inner plate. I think it will look more defined, and more consistent thickness with the original plastic. The p/e versions will still be OK for the ‘kerbside’ version where the inners are hidden by the tyre:
There are 11 pieces in total. Even so, it still took a lot of coaxing with Set and Sol, moist cotton buds and tissues to de-wrinkle everything:
Once finished, I gave it a coat of Tamiya satin:
The outsides are acceptable, but the insides are a bit meh. I think it’s an example of where photo-etch is too thin. It’s also a bit wavy, and has the removable panel etched in. It all looks a bit wrong:
I’m going to start again on another duct, but substitute the p/e with a two-piece plastic card inner plate. I think it will look more defined, and more consistent thickness with the original plastic. The p/e versions will still be OK for the ‘kerbside’ version where the inners are hidden by the tyre:
dr_gn said:
The outsides are acceptable, but the insides are a bit meh. I think it’s an example of where photo-etch is too thin. It’s also a bit wavy, and has the removable panel etched in. It all looks a bit wrong:
mcdjl said:
dr_gn said:
Sometimes I think you go that thing where people overly critisise themselves to get attention. The rest of the time I think you've got something like anorexia where what you see when you look at a model and what the rest of us see is totally different. Or you posted the wrong pictures.If you think its wrong then it must be wrong, if you assemble it you will always see it your self even though others might not.
For what its worth either as you say thicker plasticard or feather the inside edges of the cowl to match the PE as the black area inside wont be seen? If you know what i mean.
For what its worth either as you say thicker plasticard or feather the inside edges of the cowl to match the PE as the black area inside wont be seen? If you know what i mean.
henryk001 said:
If you think its wrong then it must be wrong, if you assemble it you will always see it your self even though others might not.
For what its worth either as you say thicker plasticard or feather the inside edges of the cowl to match the PE as the black area inside wont be seen? If you know what i mean.
Yep, that sums it up. There aren’t many excuses for imperfections at 1:12 scale either, especially on a pristine F1 car.For what its worth either as you say thicker plasticard or feather the inside edges of the cowl to match the PE as the black area inside wont be seen? If you know what i mean.
I did feather the front of the duct a bit, but then the back end is pretty difficult to access, so it all looked a bit odd. The p/e shroud has a cut-out, so when viewed from the disc side, the interior is actually quite visible (along with an unfortunately placed ejector pin mark). That is part of the issue. I think its sortable though.
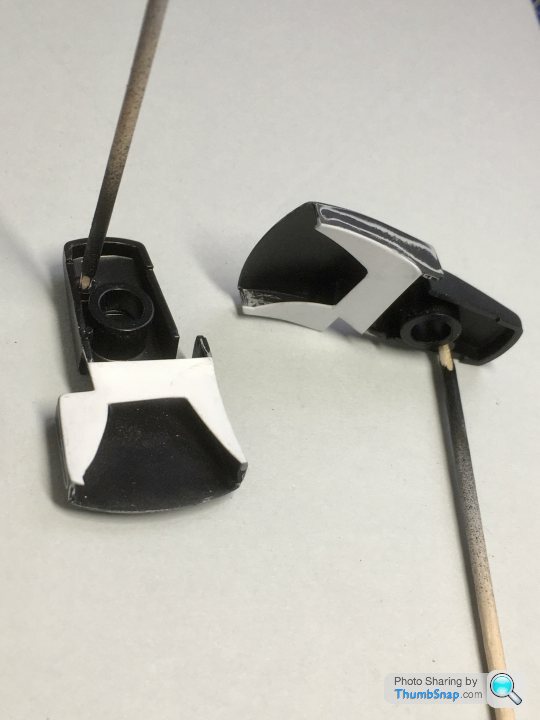
I made some replacement duct inners out of plastic card, and fitted them with thin cement. I'll add the 90 degree vane with PVA afer finishing them separately. Also I have to make the plain black inner piece that will fit behind the cut-out. That was the main reason for re-making them - to get a perfect demarcation and a bit of a step. They're now waiting for decals:
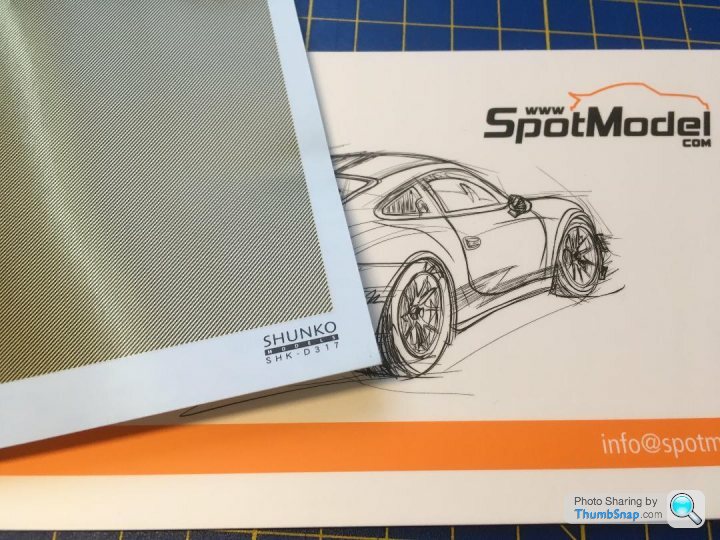
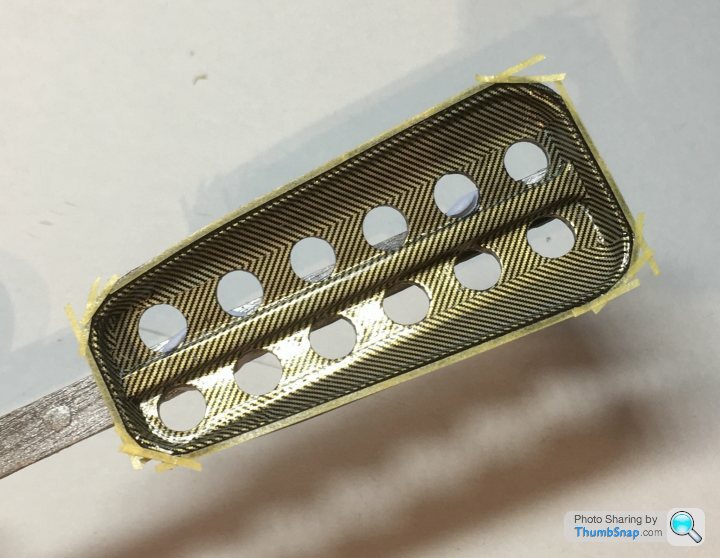
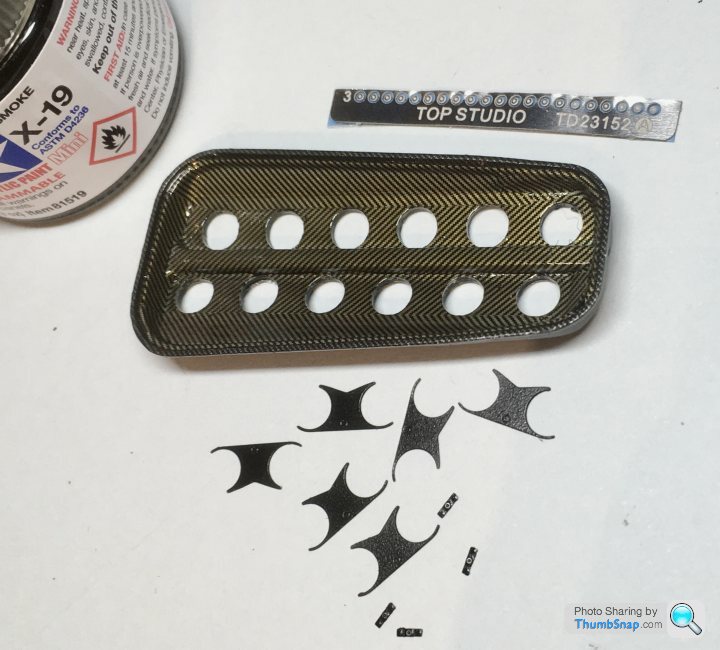
Also finally got some Carbon/Kevlar decals that I liked the look of, from Spot Model in Spain:
As with the brake ducts, templating is essential becasue they don't like double curves:
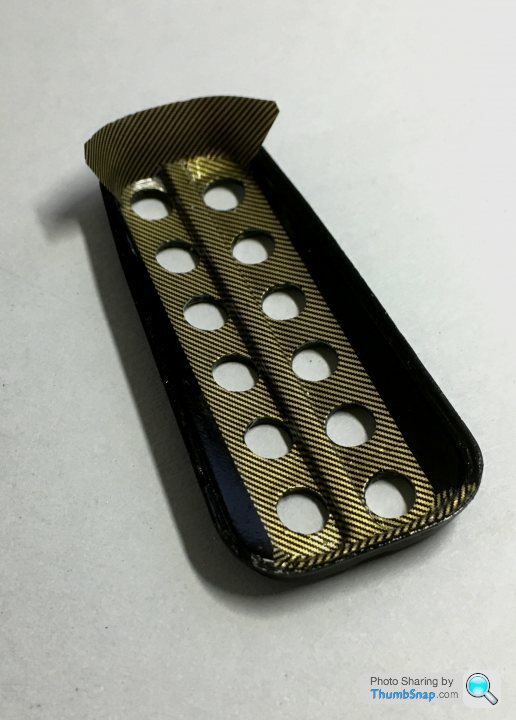
Lots of MicroSet, Sol and heat required:
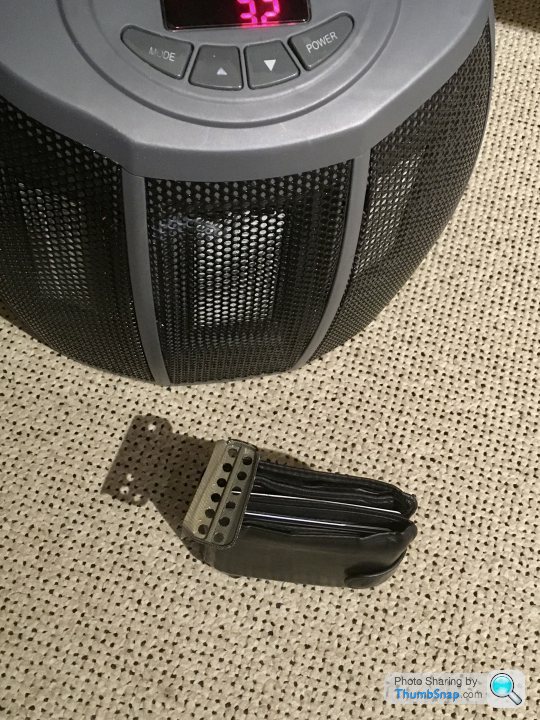
I'm surprised my wallet stood up to the weak output of the fan heater - there's not much left in it.
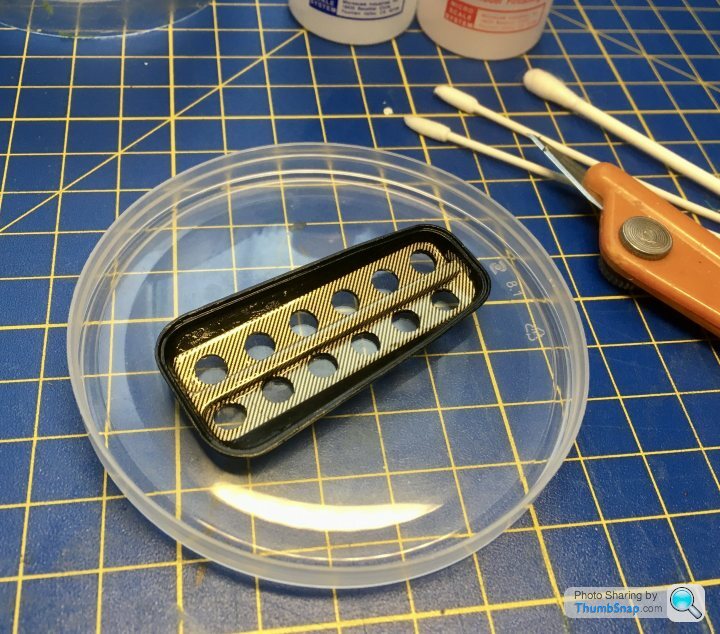
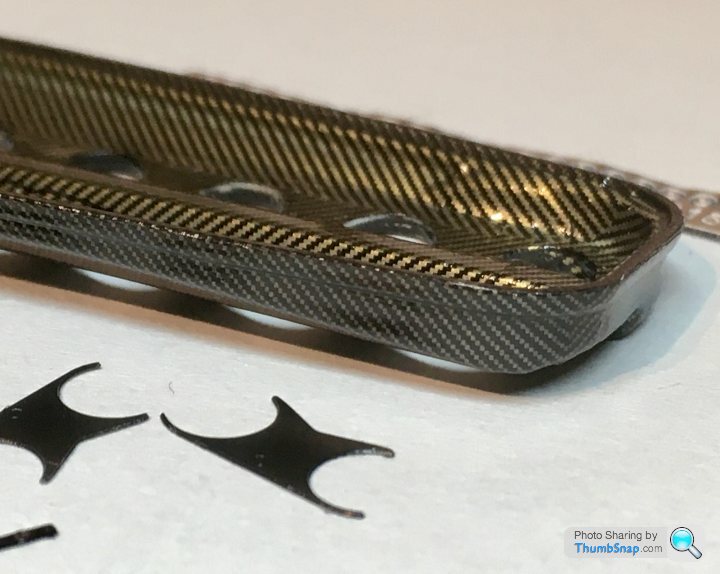
This is the bare-bones result - 7 pieces altogether for the insides. I think I might have a go at one of those WW1 dazzle camoflauged ships next!
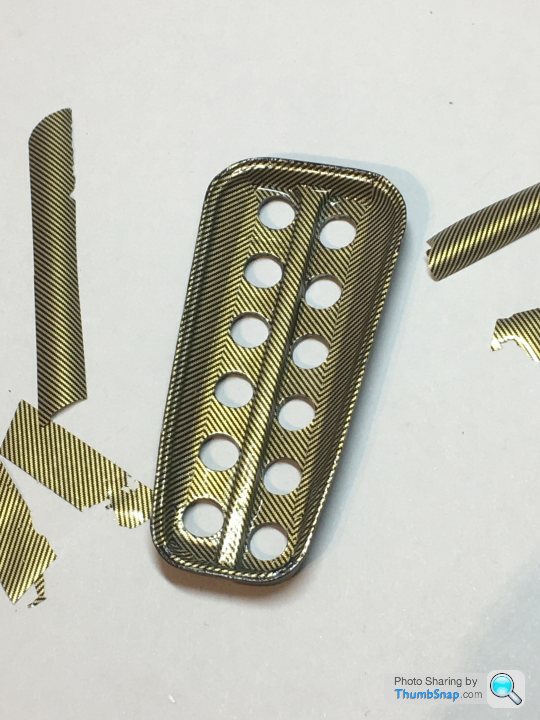
You can see from the discarded pieces that the decals are very, very brittle.
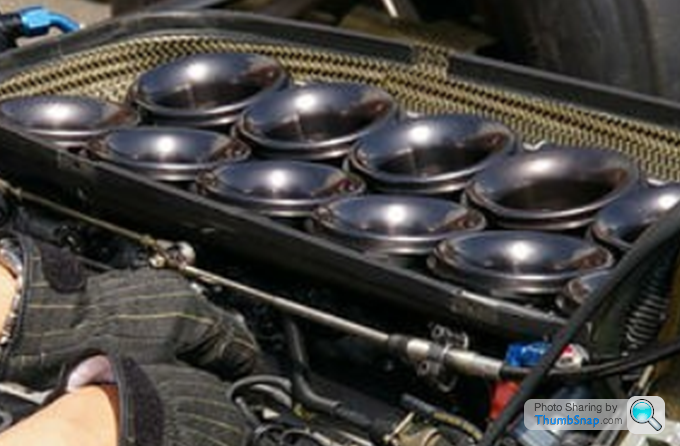
I'll give it a few coats of Tamiya Smpke to tone the gold down. This is the real thing - mines obviously not 100% acurate but good enough to suggest reality:
Next jobs to do on these are to apply normal carbon decal to the outer surfaces, make a notional sealing strip to go around the inner rebate (this will neatly demarcate the kevlar inner and carbon outer), then add the trumpets, retainer plates and various fasteners.
Then back to the brake ducts.
Also finally got some Carbon/Kevlar decals that I liked the look of, from Spot Model in Spain:
As with the brake ducts, templating is essential becasue they don't like double curves:
Lots of MicroSet, Sol and heat required:
I'm surprised my wallet stood up to the weak output of the fan heater - there's not much left in it.
This is the bare-bones result - 7 pieces altogether for the insides. I think I might have a go at one of those WW1 dazzle camoflauged ships next!
You can see from the discarded pieces that the decals are very, very brittle.
I'll give it a few coats of Tamiya Smpke to tone the gold down. This is the real thing - mines obviously not 100% acurate but good enough to suggest reality:
Next jobs to do on these are to apply normal carbon decal to the outer surfaces, make a notional sealing strip to go around the inner rebate (this will neatly demarcate the kevlar inner and carbon outer), then add the trumpets, retainer plates and various fasteners.
Then back to the brake ducts.
Thanks guys.
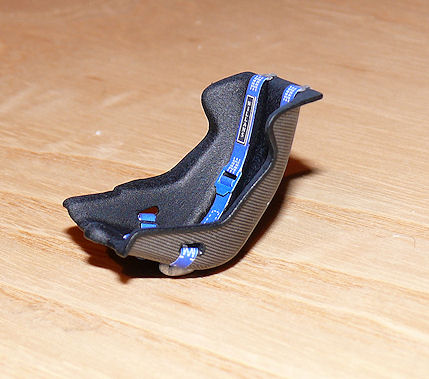
Next job was to decal the sides and top edge with plain weave carbon/carbon. That was a tricky job:

Once the Sol and Klear was set, masked the edge ready for a few coats of Smoke to tone down the contrast of the carbon/Kevlar:
So now I’ve pretty much got the look I was after:
Next job is to fit the trumpet retainers, their fasteners, and the airbox retainers. Then it’ll have a coat of satin to get rid of the unrealistic reflections:
I think this has been to most difficult decal job I’ve done on any model so far - and it’s only a single part...
Next job was to decal the sides and top edge with plain weave carbon/carbon. That was a tricky job:
Once the Sol and Klear was set, masked the edge ready for a few coats of Smoke to tone down the contrast of the carbon/Kevlar:
So now I’ve pretty much got the look I was after:
Next job is to fit the trumpet retainers, their fasteners, and the airbox retainers. Then it’ll have a coat of satin to get rid of the unrealistic reflections:
I think this has been to most difficult decal job I’ve done on any model so far - and it’s only a single part...
Gassing Station | Scale Models | Top of Page | What's New | My Stuff