Tamiya 1:12 McLaren MP4/6 Rebuild/Upgrade
Discussion


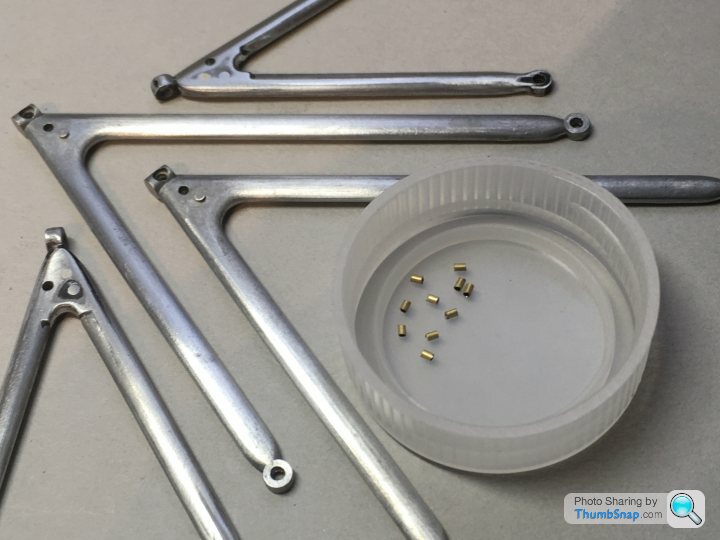
I’ve been addressing a few clunky details like the over-long screws that hold the wishbones and associated brackets together. My plan is to cut them to length, sand the heads down to the absolute minimum, then stick fastener heads on top of them:
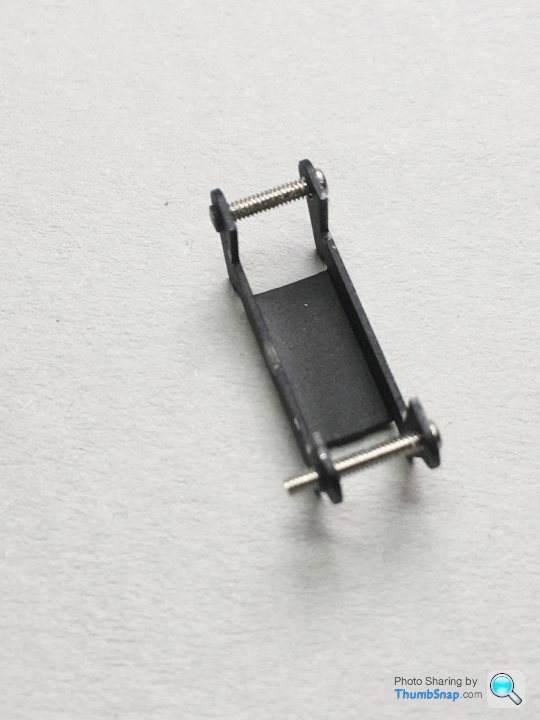
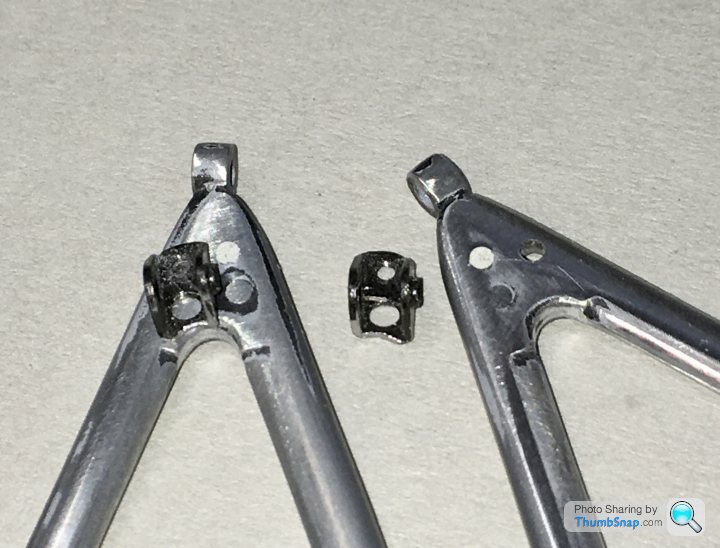
This is the rear lower mount for the wishbone and track control arm. I’ve cut some heat shrink tube to cover the exposed central threads on final assembly.
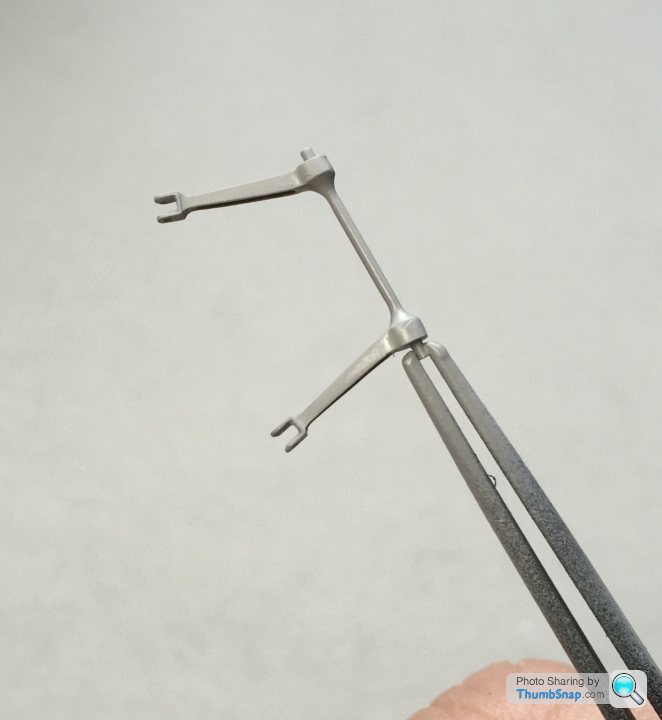
Also the anti-roll bar; I used Araldite to secure in the right orientation, then put Milliput around the joints to represent the dressed fillet welds of the real one:
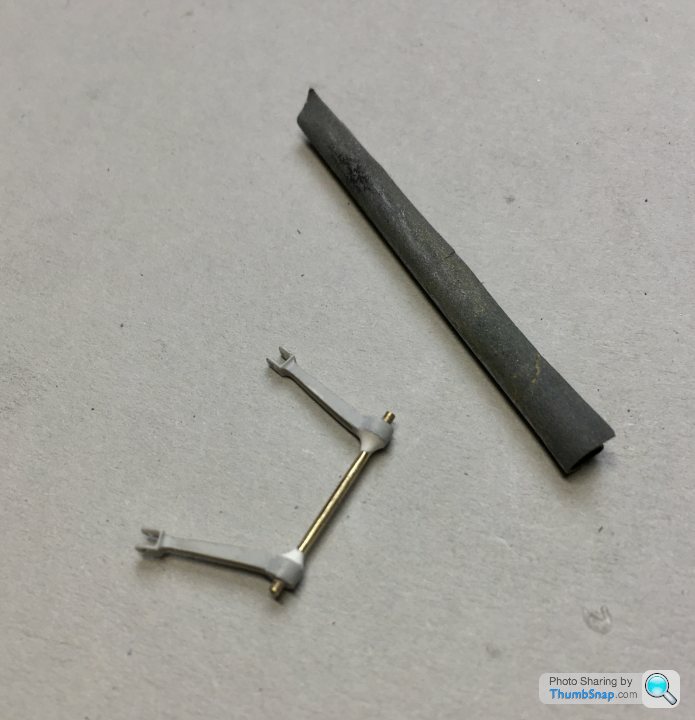
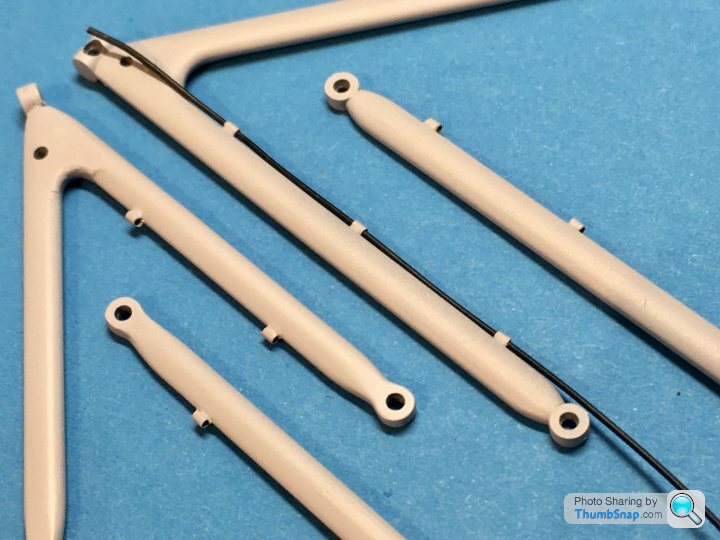
Did a guide coat of primer. I think it needs a bit more profiling, then it’ll be ready for some pale gold paint:
This is the rear lower mount for the wishbone and track control arm. I’ve cut some heat shrink tube to cover the exposed central threads on final assembly.
Also the anti-roll bar; I used Araldite to secure in the right orientation, then put Milliput around the joints to represent the dressed fillet welds of the real one:
Did a guide coat of primer. I think it needs a bit more profiling, then it’ll be ready for some pale gold paint:
I didn’t intend to go down the front suspension rabbit hole just yet, especially since I’ve gone backwards on the rear of late. However, in the interests of getting things like suspension arms and roll bars the same colour, I opened the box. Although not included in the set, I wanted a robust and realistic enough way of attaching the brake lines to the wishbones. The originals had small saddles welded on, with a zip-tie used to secure. I approximated these with brass tube sections:
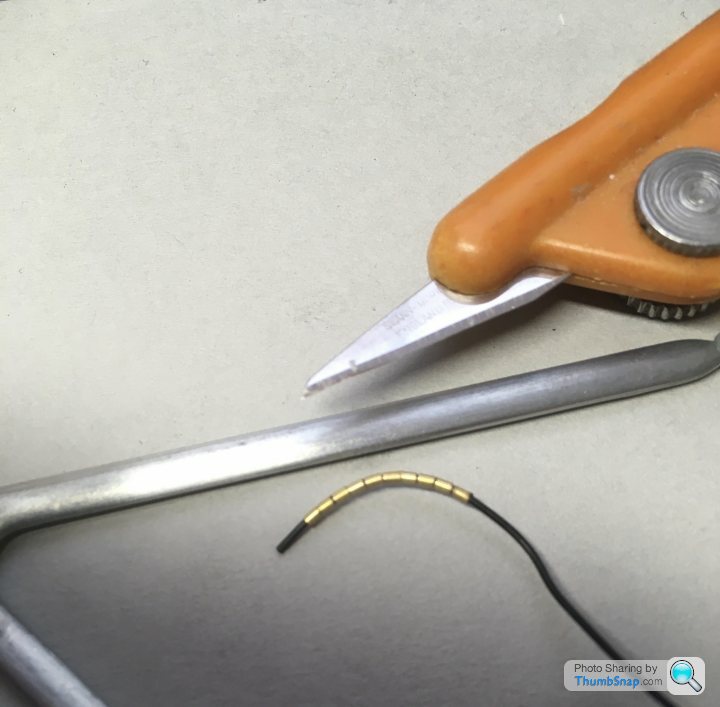
These were jigged in place with stainless wire and tape, and cyano’d:
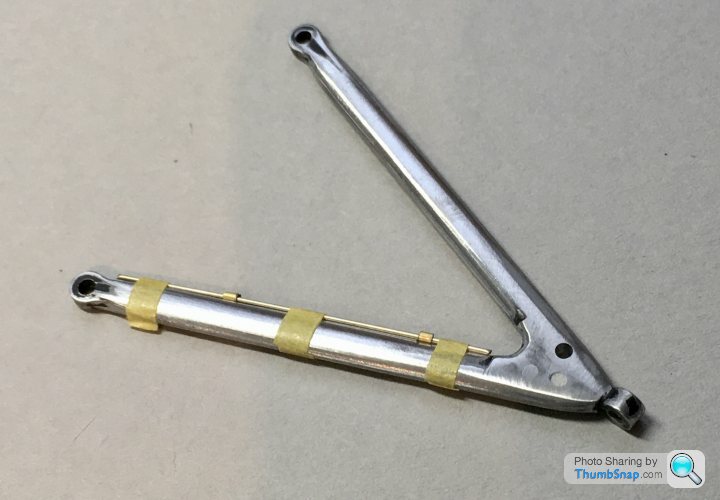
Worked fine:
Once finally in place, I’ll represent the zip ties with strips of matt black painted tape.
Also profiled the re-positioned pushrod mounts to match the wishbones a bit better, not that they are really visible once the uprights are fitted:
These were jigged in place with stainless wire and tape, and cyano’d:
Worked fine:
Once finally in place, I’ll represent the zip ties with strips of matt black painted tape.
Also profiled the re-positioned pushrod mounts to match the wishbones a bit better, not that they are really visible once the uprights are fitted:

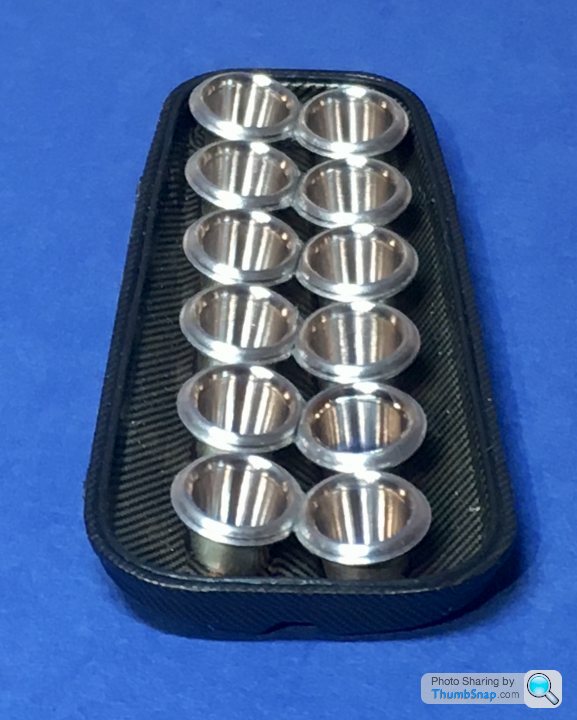
Just to keep this going I fitted the inlet trumpets. They were a real nightmare to align. I used standard Araldite to give some adjustment time, but even so, I’m not sure they’re 100% right even now.
I polished them up a bit with Autosol on a cotton bud:
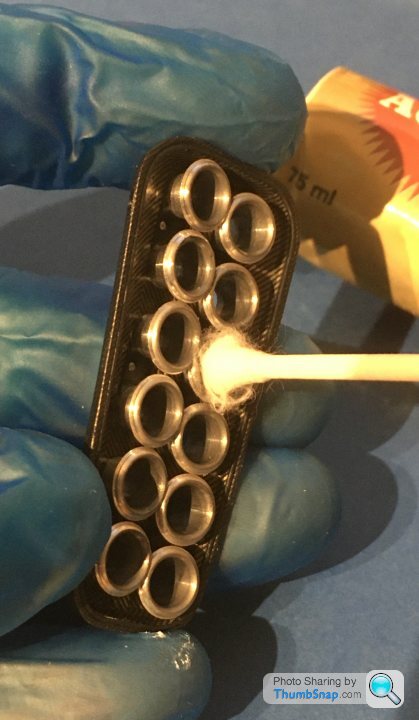
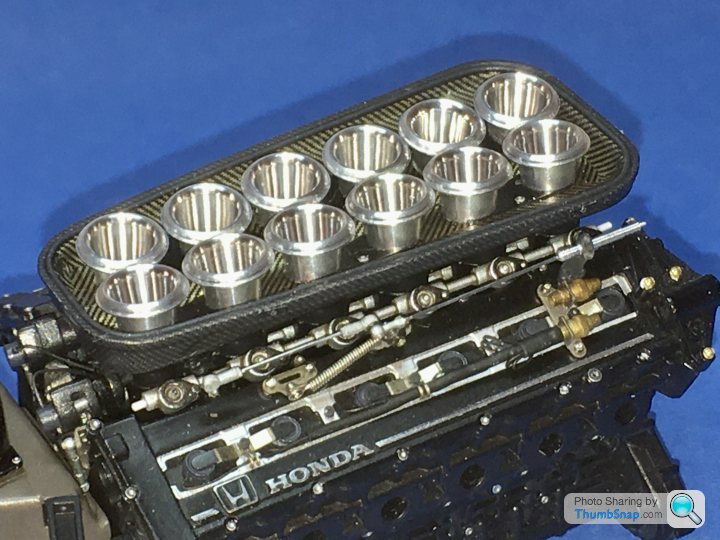
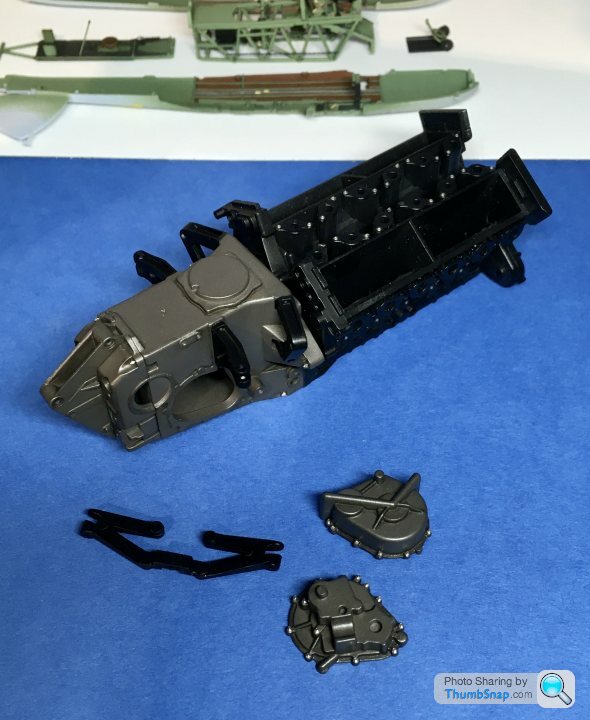
Couldn’t resist balancing a few bits of engine together to see how it looked:
I polished them up a bit with Autosol on a cotton bud:
Couldn’t resist balancing a few bits of engine together to see how it looked:
henryk001 said:
The detail of the engine build alone would be a lovely display in itself
To be honest it probably will be displayed on its own at this rate!Went to a Flying Boat museum/ “Heritage Centre” - whatever it’s called these days - yesterday to drop something off, and got inspired to build my 1:72 Airfix Swordfish and Matchbox Seafox (and a load of other stuff I saw they’d got built-up on display there).
dr_gn said:
To be honest it probably will be displayed on its own at this rate!
Went to a Flying Boat museum/ “Heritage Centre” - whatever it’s called these days - yesterday to drop something off, and got inspired to build my 1:72 Airfix Swordfish and Matchbox Seafox (and a load of other stuff I saw they’d got built-up on display there).
Where was that? Sounds interesting!Went to a Flying Boat museum/ “Heritage Centre” - whatever it’s called these days - yesterday to drop something off, and got inspired to build my 1:72 Airfix Swordfish and Matchbox Seafox (and a load of other stuff I saw they’d got built-up on display there).
new_bloke said:
dr_gn said:
To be honest it probably will be displayed on its own at this rate!
Went to a Flying Boat museum/ “Heritage Centre” - whatever it’s called these days - yesterday to drop something off, and got inspired to build my 1:72 Airfix Swordfish and Matchbox Seafox (and a load of other stuff I saw they’d got built-up on display there).
Where was that? Sounds interesting!Went to a Flying Boat museum/ “Heritage Centre” - whatever it’s called these days - yesterday to drop something off, and got inspired to build my 1:72 Airfix Swordfish and Matchbox Seafox (and a load of other stuff I saw they’d got built-up on display there).
https://www.sunderlandtrust.com/
I've got an old switch block that was used in the cockpits of Coastal Command Sunderland flying boats, and Lockheed Hudsons, so I thought I'd loan it to them. They are gradually restoring parts of a Mk1 Sunderland, that they are recovering from a wreck in the adjacent river, and putting them on display. We've been visiting for many years, and have watched the museum grow. It's only a small place, but they are enthusiastic and I think they deserve a bit of support.
dr_gn, there was an MP4/6 at Goodwood, Retro Rides took some pictures https://www.instagram.com/p/CG0a46mnScM/?igshid=2f...
It had the body off, posting here as it might be some reference for something with your build.
It had the body off, posting here as it might be some reference for something with your build.
ajprice said:
dr_gn, there was an MP4/6 at Goodwood, Retro Rides took some pictures https://www.instagram.com/p/CG0a46mnScM/?igshid=2f...
It had the body off, posting here as it might be some reference for something with your build.
Thanks very much for that AJP. It had the body off, posting here as it might be some reference for something with your build.
TBH, it's really more detail of the layup of the undertray I'm after. Long story, but I ended up in touch with the senior chassis designer on the MP4/6 project on Facebook (I'd posted an old 1989 Silverstone pits photo which had him in it on an FB group). Very friendly and helpful guy. There are lots of subtleties on the male-mould chassis layup that pretty much every modeller gets wrong. I want to get it right, but...it's not easy. I wrote a summary on the details on the F1M forum; I can re-post it here if anyone is interested.
As usual I've got sidetracked by other projects again, although I was really pleased with how it was going.
This is a slightly edited version of the post I made over on the F1M forum (images removed due to not having permission to reproduce them on another forum):
This information may be well known, maybe not. I thought I’d share it anyway, since it explains some features evident in many photographs of the MP4/6 tub:
I’m currently building the Tamiya 1:12 McLaren MP4/6, and have seen many methods of replicating the rough surface of its male-moulded tub. I’ve been putting off doing mine for several reasons, including:
• It’s difficult to find photographs which consistently show the surface detail of the real tub.
• Getting the correct colours is tricky, since they vary so much depending on lighting.
• Having rough tub sides exposed under the forward bodywork didn’t seem to ring true with McLaren’s reputation for attention to detail. I’ve seen these cars close-up in the pits in 1991, and others in the MP4/x series at historic racing events, and don’t remember noticing much inconsistency in external finish.
• There is little consistency in how the tub is represented in models.
I’ve recently got some clarifications to these points: I posted a series of my old ‘80’s & ‘90’s F1 photographs on a Facebook group dedicated to F1 Testing. Someone replied to one particular photograph of the MP4/5C, and it turned out to be Matthew Jeffreys. Matthew is a former Senior Design Engineer and Project Leader for chassis design at McLaren International. He was heavily involved in the design and manufacture of the MP4/6 chassis (and other McLaren cars of that era). Obviously I took the opportunity to ask a few questions...
To summarise, as is well known, the tub was formed using a male mould, which gave the distinctive rough/wrinkled outer surfaces. This however isn’t the full story: The vertical forward sides of the tub (those exposed to the airflow), were not rough, but in fact quite smooth. This also applied to the flat surface under the front dampers. These smooth surfaces were achieved by incorporating “caul plates” into the moulding process. The caul plates were sheets of smooth aluminium placed in contact with the outer surfaces of the tub in the appropriate places. Once cured, both the inner and outer surfaces of the tub were therefore smooth in these areas. In some images, reflections, combined with the translucence of the resin can make the sides look rougher than they are in reality.
The radii along the tub edges were rougher, since the caul plates didn’t extend around them. Where the edges of the front bodywork contacted the tub, strips of protective helicopter tape were applied. This gives rise to what at first glance appears to be an overlap of carbon sheets over the edge of the tub.
The caul plates extended to somewhere hidden behind the radiator ducts, because the entire visible area of the rear tub (ie behind the ducts) is rough - i.e. no caul plates.
The tub was made up of a patchwork of layers of unidirectional carbon fibre, and the tub colour is described by Matthew as “Dark Olive Drab”.
The radiator ducts were also male-moulded, but using a lower cure temperature resin. That’s why they are a different colour, described as “Dark Grey”.
The nose box was described as “Black” (I think this may be a plain or twill weave carbon).
When I asked about colours being affected by flash, the colours stated were described as “true colours”.
Just to confuse matters, some early development tubs had different caul plate arrangements, possibly having additional, locally applied plates on the angled parts of the tub for seating electrical boxes etc., so beware of relying 100% on photographs!
Hopefully the above will be of some use – I know I’m relieved that the amount of textured surfaces that need addressing has vastly reduced, although getting a realistic finish remains a huge challenge. I think if you look at photographs of other male-mould McLarens (eg the MP4/5x), you can, to an extent, work out how they were made and where the caul plates were used.
I'm very grateful to Matthew for taking the time to patiently answer my questions. I'll update this thread, should any further information become available.
Hope this might be of interest to anyone here on PH who'se building a '4/6 - or for general interest.
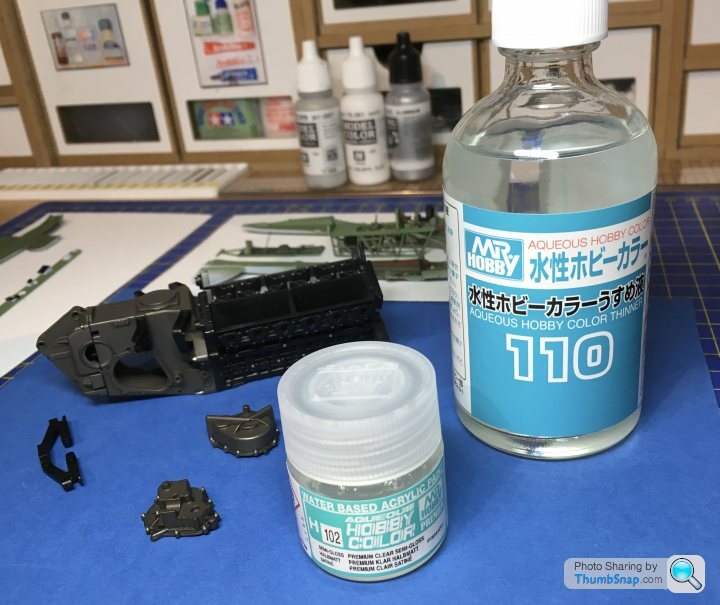
I left this one back in August because I couldn’t find a satin varnish I was happy with. I managed to find some Mr.Hobby Aqueous online, which arrived the other day:
Having spent a long time on the Airfix Swordfish, I was keen to get back to this one. Strange thing is, now I look at the finish I wasn’t happy about, it looks fine:
Not sure whether the old satin varnish needed a long time to dry, or whether I was being over critical, or whether I’m just going senile. Anyway, hopefully I’ll be able to complete the engine and transmission now...
Gassing Station | Scale Models | Top of Page | What's New | My Stuff