Tamiya 1:12 McLaren MP4/6 Rebuild/Upgrade
Discussion


Great thread to follow, as I am about to start the same kit.
As a great Senna fan, I'm keen to get it as good as I can.
Also lucky enough to have looked around McLaren a few times, so a few links there - so I have actually ended up buying quite a few McLaren kits (95% Tamiya 1/20) to work on - but of course this 1/12 kit is the highlight.
I've splashed out on the Thunder Valley detail parts as well (no issues with communication or purchase!)
So some great tips from 'Doc' here
I am sure I'll have some questions going forward...
I was modelling a bit in the UK years ago (Caterhams - obviously, but I'll do a new thread for that)
Amazing how much more 'stuff' is available now (decals, detail kits, die cut parts etc) a few years later!
caterhamnut said:
Great thread to follow, as I am about to start the same kit.
As a great Senna fan, I'm keen to get it as good as I can.
Also lucky enough to have looked around McLaren a few times, so a few links there - so I have actually ended up buying quite a few McLaren kits (95% Tamiya 1/20) to work on - but of course this 1/12 kit is the highlight.
I've splashed out on the Thunder Valley detail parts as well (no issues with communication or purchase!)
So some great tips from 'Doc' here
I am sure I'll have some questions going forward...
I was modelling a bit in the UK years ago (Caterhams - obviously, but I'll do a new thread for that)
Amazing how much more 'stuff' is available now (decals, detail kits, die cut parts etc) a few years later!
I've got plenty of questions too...As a great Senna fan, I'm keen to get it as good as I can.
Also lucky enough to have looked around McLaren a few times, so a few links there - so I have actually ended up buying quite a few McLaren kits (95% Tamiya 1/20) to work on - but of course this 1/12 kit is the highlight.
I've splashed out on the Thunder Valley detail parts as well (no issues with communication or purchase!)
So some great tips from 'Doc' here
I am sure I'll have some questions going forward...
I was modelling a bit in the UK years ago (Caterhams - obviously, but I'll do a new thread for that)
Amazing how much more 'stuff' is available now (decals, detail kits, die cut parts etc) a few years later!
The Thunder Valley stuff is very good, but having assembled the wheel spindles, there is quite a bit of "figure out for yourself how to build it" - as with any aftermarket stuff. The detail in the TV kits only amounts to a fraction af what's needed to build a true replica; dozens of small custom parts will need to be made. RB Motion used to do a fairly comprehensive kit, but unfortunately none currently.
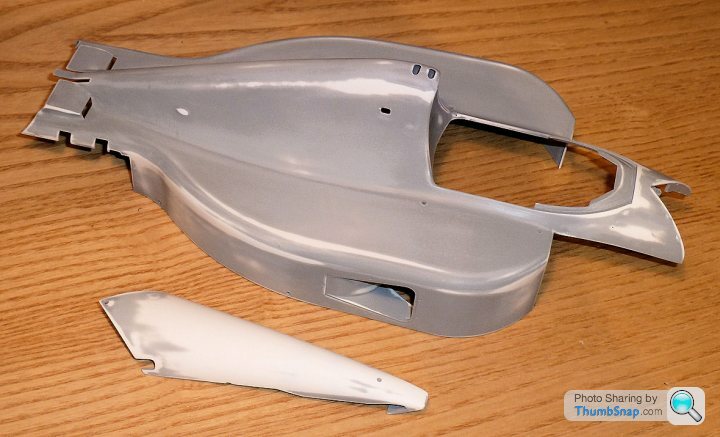
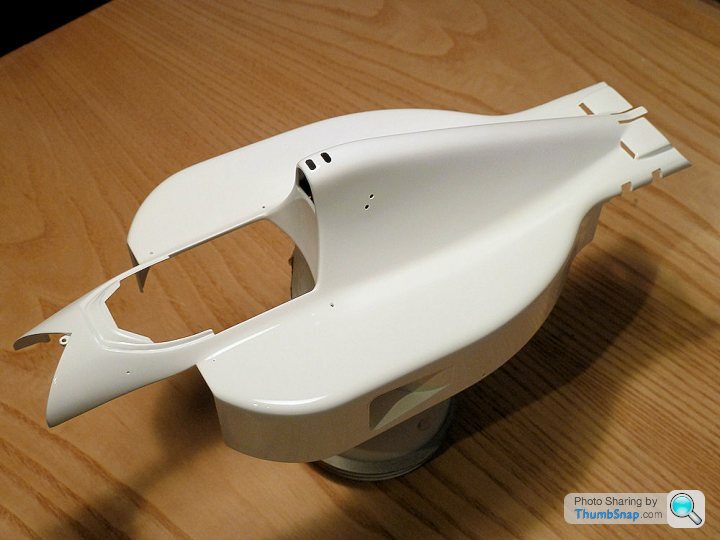
So I primed the body with Tamiay white primer, and rubbed it down. I also drilled counterbores for p/e rivets that will replace the plastic bumbs that represented body fasteners:
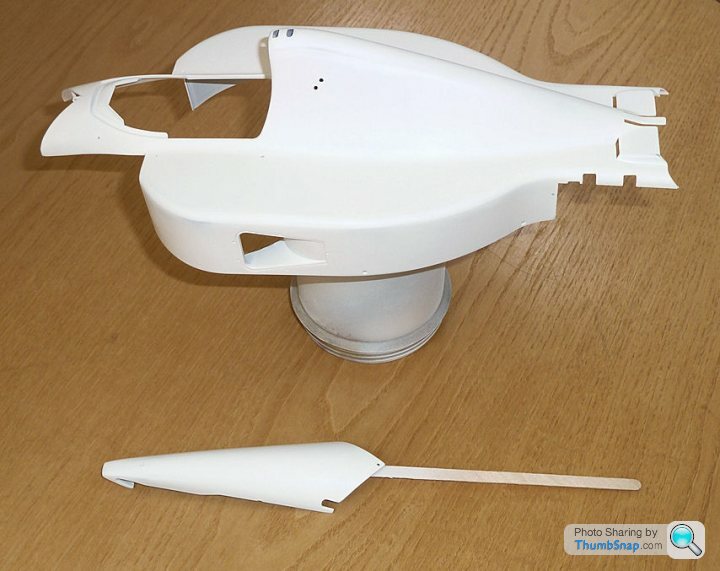
The decanted some TS White into a container and degassed it. Into the airbrush and applied a few coats. This is where the inevitable trial and error kicks in:
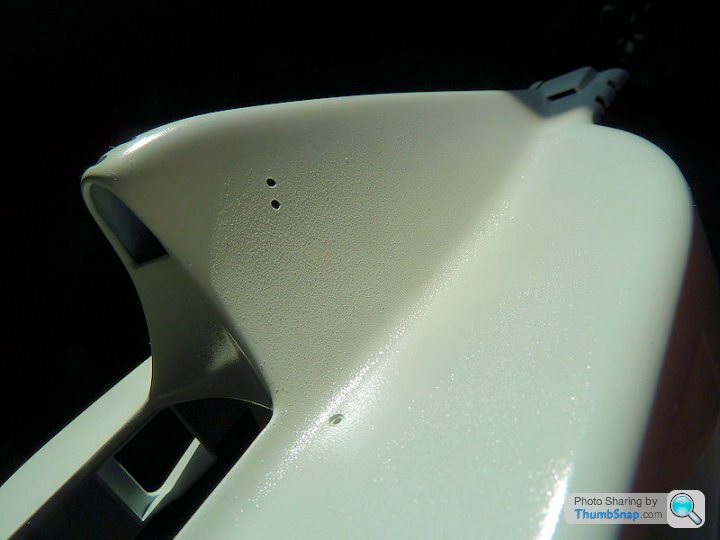
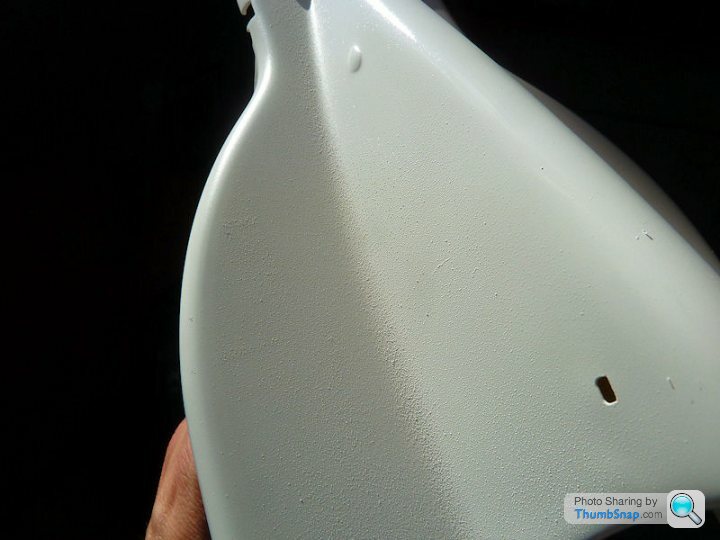
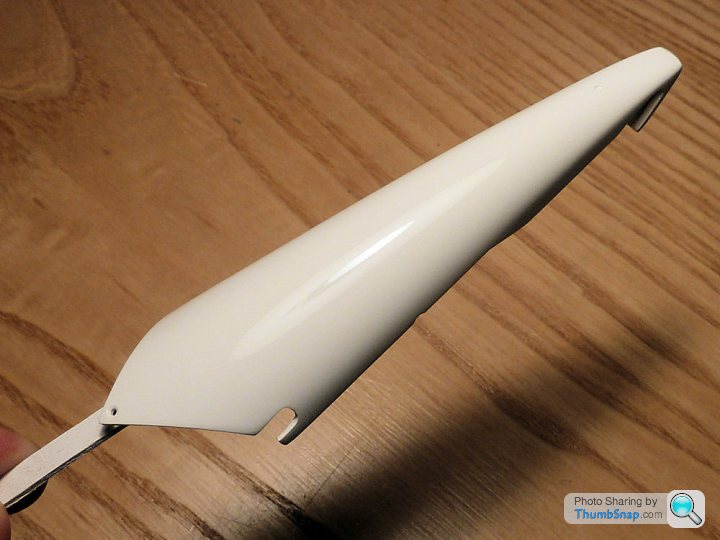
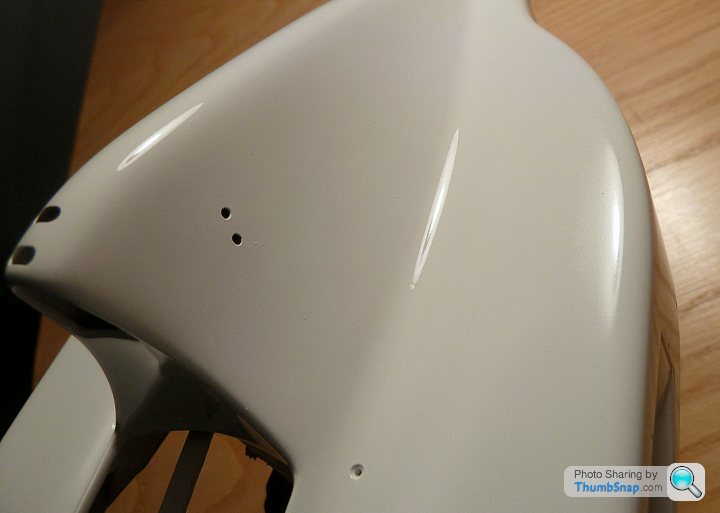
Parts of the body (e.g. the nosecone) turned out great, but here you can see where the paint has dried before it hit the surface. It's basically a coat of dust. The larger particles are not stuck to the paint, they landed there after it had flashed off.
So I'll leave it a few days and flat it back before trying again, but holding the airbrush closer to the part, and applying more paint. I'm scared stiff of getting runs, but this is the result of being over cautious. In fact I'm wondering whether to just paint straight form the can at this scale. I got great results airbrushing decanted paint at 1:24 on the Jaguar XJR9, but this is a much bigger area to keep wetted with paint.
The decanted some TS White into a container and degassed it. Into the airbrush and applied a few coats. This is where the inevitable trial and error kicks in:
Parts of the body (e.g. the nosecone) turned out great, but here you can see where the paint has dried before it hit the surface. It's basically a coat of dust. The larger particles are not stuck to the paint, they landed there after it had flashed off.
So I'll leave it a few days and flat it back before trying again, but holding the airbrush closer to the part, and applying more paint. I'm scared stiff of getting runs, but this is the result of being over cautious. In fact I'm wondering whether to just paint straight form the can at this scale. I got great results airbrushing decanted paint at 1:24 on the Jaguar XJR9, but this is a much bigger area to keep wetted with paint.
The painting/airbrushing scares me the most - mainly because of the amount of work getting it back to what it needs to be to start again!
I've only browsed through the TV parts - but I agree they could do with a few more instructions (with pics ideally!) - I don't have the equipment to drill the very precise holes (in terms of depth) needed on the wheels. I'm actually wondering whether I send my wheels (confession - I splashed out on the annodised ali ones from http://www.bestbalsakits.com, so I don't want to arse it up.
I'm also wondering about these cast parts you find in a lot of the detail kits.
They seem to require a lot of finishing - in SOME cases, what is the advantage of using these over some of the 'original' plastic parts - some of the metal parts have obviously been cast from the plastic parts anyway....?
caterhamnut said:
The painting/airbrushing scares me the most - mainly because of the amount of work getting it back to what it needs to be to start again!
I've only browsed through the TV parts - but I agree they could do with a few more instructions (with pics ideally!) - I don't have the equipment to drill the very precise holes (in terms of depth) needed on the wheels. I'm actually wondering whether I send my wheels (confession - I splashed out on the annodised ali ones from http://www.bestbalsakits.com, so I don't want to arse it up.
I'm also wondering about these cast parts you find in a lot of the detail kits.
They seem to require a lot of finishing - in SOME cases, what is the advantage of using these over some of the 'original' plastic parts - some of the metal parts have obviously been cast from the plastic parts anyway....?
Painting can be a pain in the arse. I won't bother re-priming this lot, just flat the errors back and re-spray it. Any orange peel can be T-Cut out once it's hardened.I've only browsed through the TV parts - but I agree they could do with a few more instructions (with pics ideally!) - I don't have the equipment to drill the very precise holes (in terms of depth) needed on the wheels. I'm actually wondering whether I send my wheels (confession - I splashed out on the annodised ali ones from http://www.bestbalsakits.com, so I don't want to arse it up.
I'm also wondering about these cast parts you find in a lot of the detail kits.
They seem to require a lot of finishing - in SOME cases, what is the advantage of using these over some of the 'original' plastic parts - some of the metal parts have obviously been cast from the plastic parts anyway....?
The cast parts in the TV sets are, I'm almost sure, from moulds taken directly from the original plastic parts. The only advantage is that they can be polished, but with decent metal paint on plastic (e.g. Alclad II lacquers) the effect is hardly worth the bother.
Bestbalsa kits prices seem crazy. I remember them listing TV detail parts for massively more than you could buy them direct from Paul, even considering postage.
I think for the aluminium wheels you'd need a lathe to modify the wheels. You'll need to drill them for valve stems too. TBH, as with the cast parts, once the plastic wheels are painted, you can't tell whether they are metal or not, so it seems a bit of unecessary hassle.
So after a cup of tea, I had another look at the paint, and since it seemed to be pretty dry, I rushed into wet sanding it back smooth with some #1500 paper (there seemed little to gain by waiting for the paint to cure any further). After it dried, and briefly considering trying the spray can, I had another go with the paint decanted into the airbrush. This time I worked more slowly, and held the airbrush closer to the surface. Turned out nicely considering the first attempt:
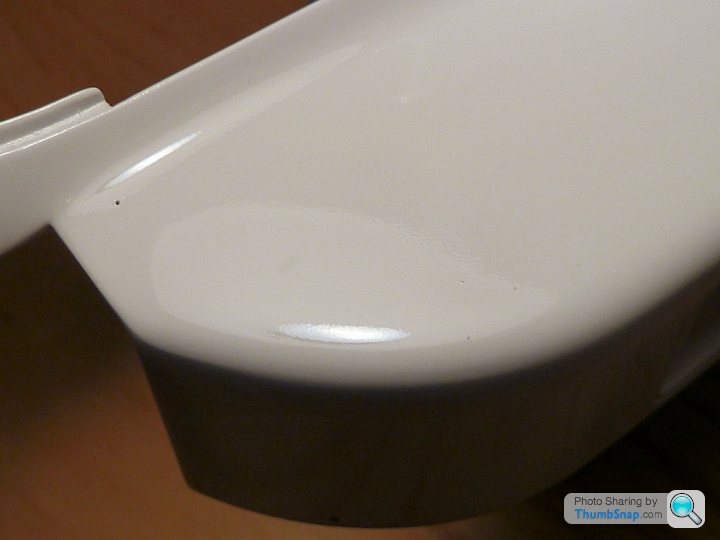
This now needs flatting and then the red applying.
This now needs flatting and then the red applying.
 loved the jag!
I've secretly been praying for this to happen...
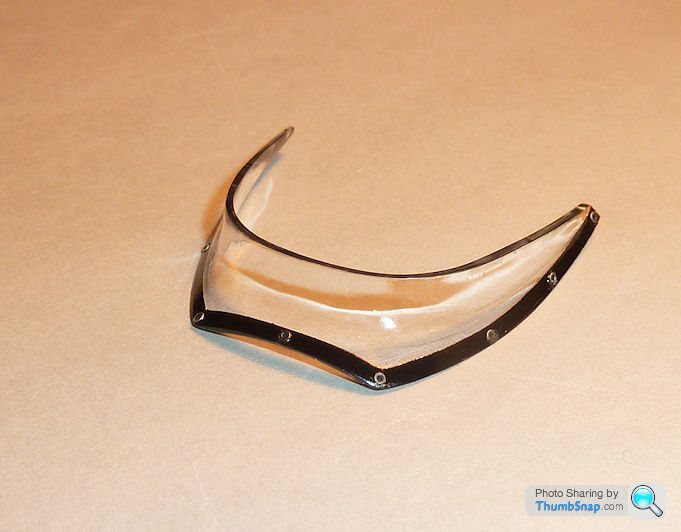
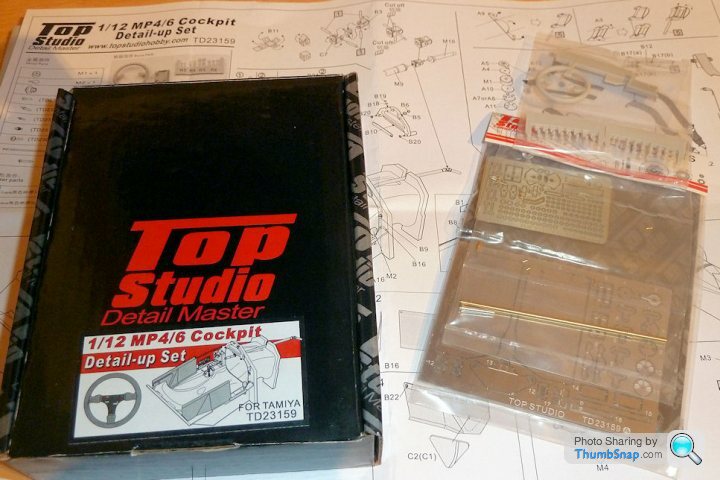
Top Studio have at last produced a range of super detail sets for this kit. They consist of:
Cockpit and Antennae (which arrived today):

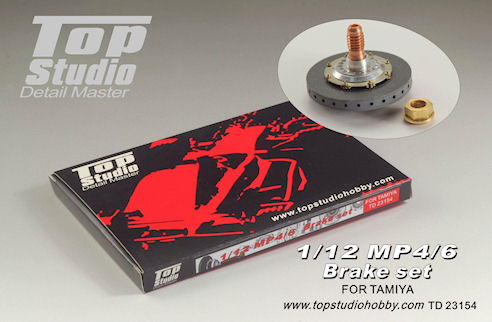
Brakes, engine and driveshafts, which I've got on back order:
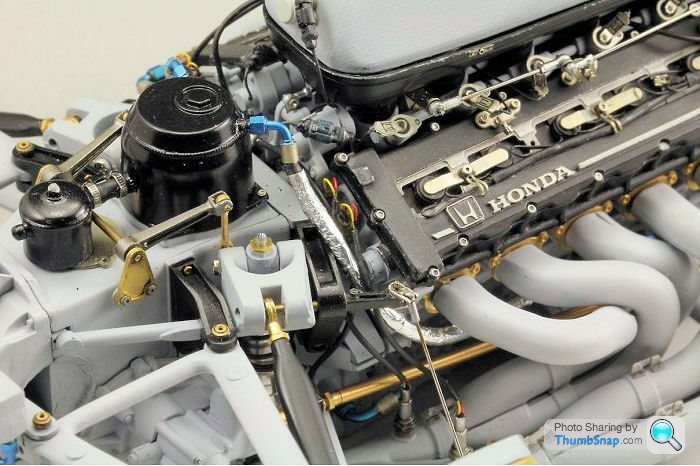

Combined with the Thunder Valley parts for the suspension etc., it pretty much covers every aspect of the car in minute detail. All the work figuring out which sizes of switch, connector and bracket to buy, not to mention tiny turned parts that weren't even available is now done.
Just have to put it together.
I only hope they do similar for the FW14-B and Ferrari 641 - I've heard on the grapevine that sets are being developed for both.
Top Studio have at last produced a range of super detail sets for this kit. They consist of:
Cockpit and Antennae (which arrived today):
Brakes, engine and driveshafts, which I've got on back order:
Combined with the Thunder Valley parts for the suspension etc., it pretty much covers every aspect of the car in minute detail. All the work figuring out which sizes of switch, connector and bracket to buy, not to mention tiny turned parts that weren't even available is now done.
Just have to put it together.
I only hope they do similar for the FW14-B and Ferrari 641 - I've heard on the grapevine that sets are being developed for both.
tyrrell said:
Can't Waite for this, have been hoping you would get back to this project 
Ha ha - might make it a priority if this is anything to go by:http://www.ebay.co.uk/itm/1991-McLaren-Honda-Type-...
Comlete with anorexic coil springs, terrible braided hoses and missing monocoque brakets/ignition details. And that's just after a cursory glance...If mine doesn't turn out at least as good as that by the time its finished, I'll be gutted. In fact TBH it wouldn't get finished at all.
EagleMoto4-2 said:
I saw a few Andy Mathews models in the Tamiya model magazine. The amount of detail was mind blowing. His Ferrari 641 had a working throttle for instance!
I have a Top Studio detail up set for a Ducati Panigale, and like you say the instructions aren't the best.
I think the EBay auction is a model of it's time, some early work maybe from what I can gather. I have a Top Studio detail up set for a Ducati Panigale, and like you say the instructions aren't the best.
dr_gn said:
EagleMoto4-2 said:
I saw a few Andy Mathews models in the Tamiya model magazine. The amount of detail was mind blowing. His Ferrari 641 had a working throttle for instance!
I have a Top Studio detail up set for a Ducati Panigale, and like you say the instructions aren't the best.
I think the EBay auction is a model of it's time, some early work maybe from what I can gather. I have a Top Studio detail up set for a Ducati Panigale, and like you say the instructions aren't the best.
EagleMoto4-2 said:
dr_gn said:
EagleMoto4-2 said:
I saw a few Andy Mathews models in the Tamiya model magazine. The amount of detail was mind blowing. His Ferrari 641 had a working throttle for instance!
I have a Top Studio detail up set for a Ducati Panigale, and like you say the instructions aren't the best.
I think the EBay auction is a model of it's time, some early work maybe from what I can gather. I have a Top Studio detail up set for a Ducati Panigale, and like you say the instructions aren't the best.
Gassing Station | Scale Models | Top of Page | What's New | My Stuff