Tamiya Caterham 1/12 - modified
Discussion


Ok - as I have started the work on these again, I thought I'd open a thread on here.
I'll post a few pictures from when I started these *cough* about 10 years ago.
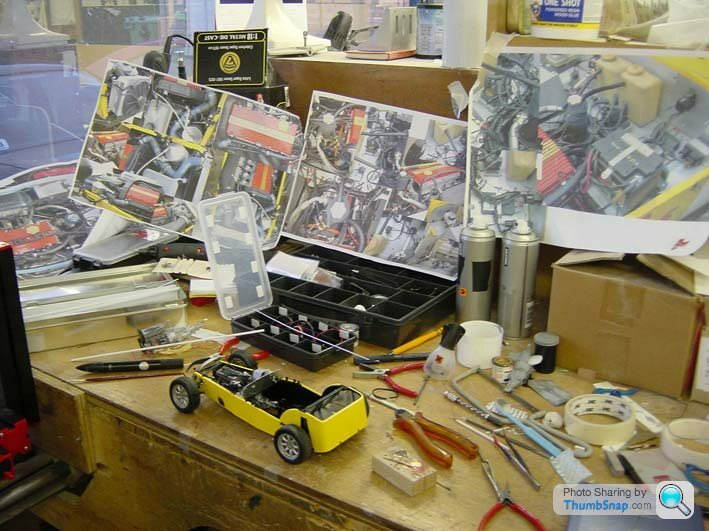
Brief history: I was made redundant, and before starting back at a design consultancy I had previously worked at, I occupied a corner of their workshop,and started these models. The idea was to make some money in between jobs..
I tapped the Lotus 7 Club community, and got a few 'commissions' to make peoples cars, based on the Tamiya 1/12 kit.
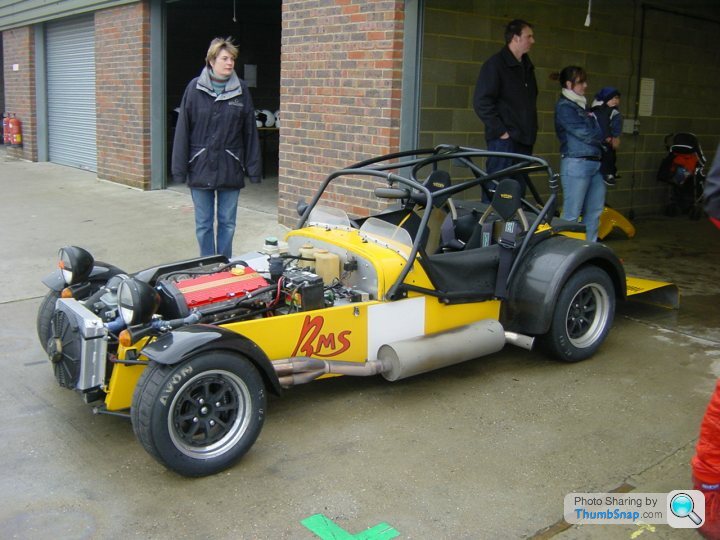
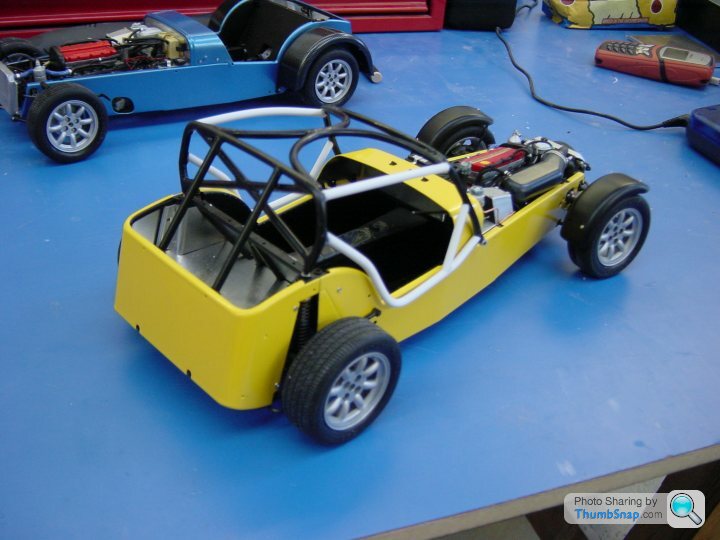
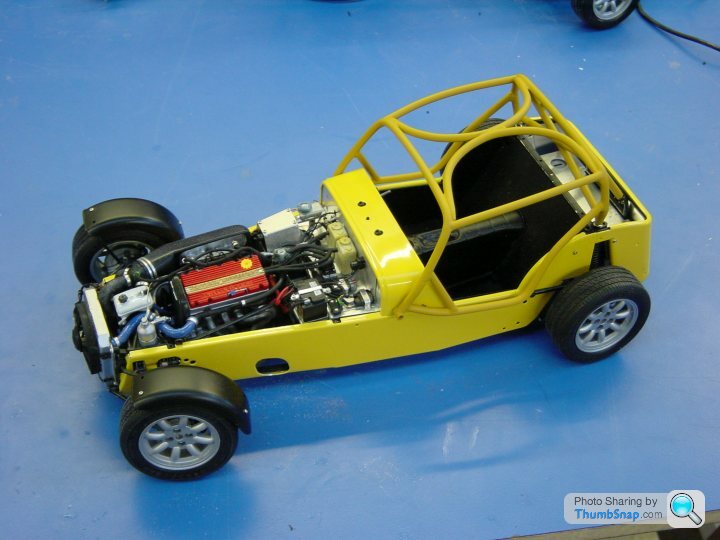
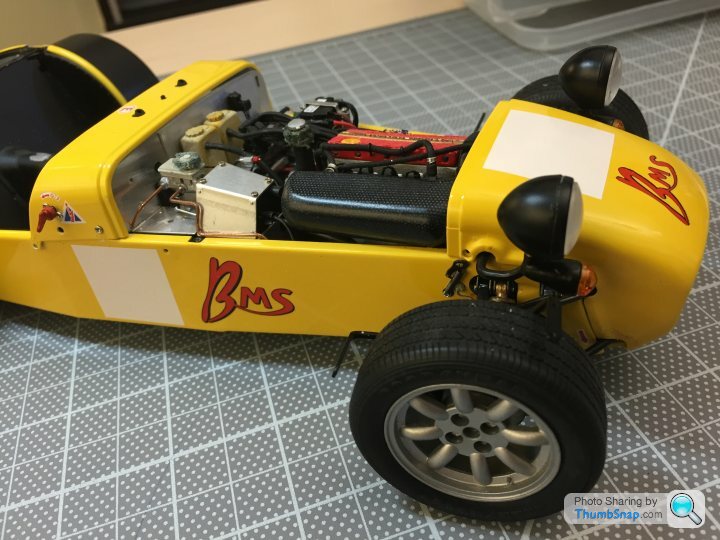
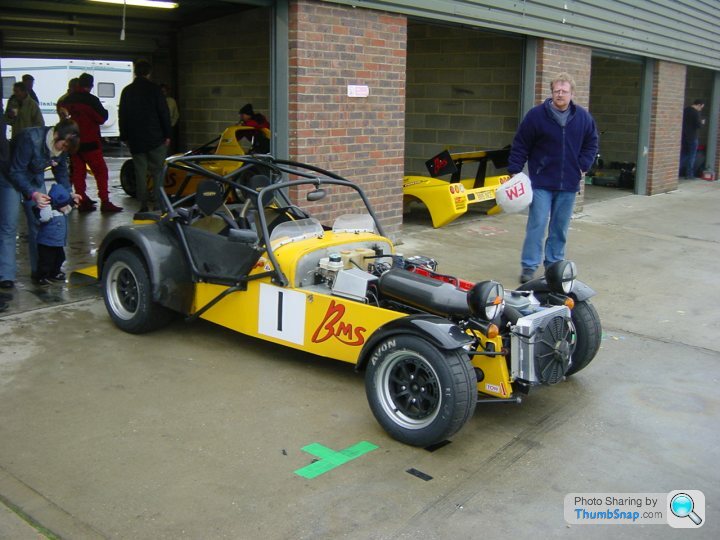
These two models were owned by the same chap - both R500's that he race, before moving on to Radicals. The yellow car was the star of a very early 'Ring lap video...
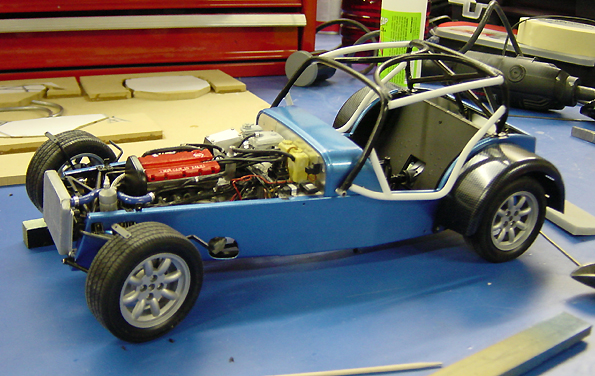
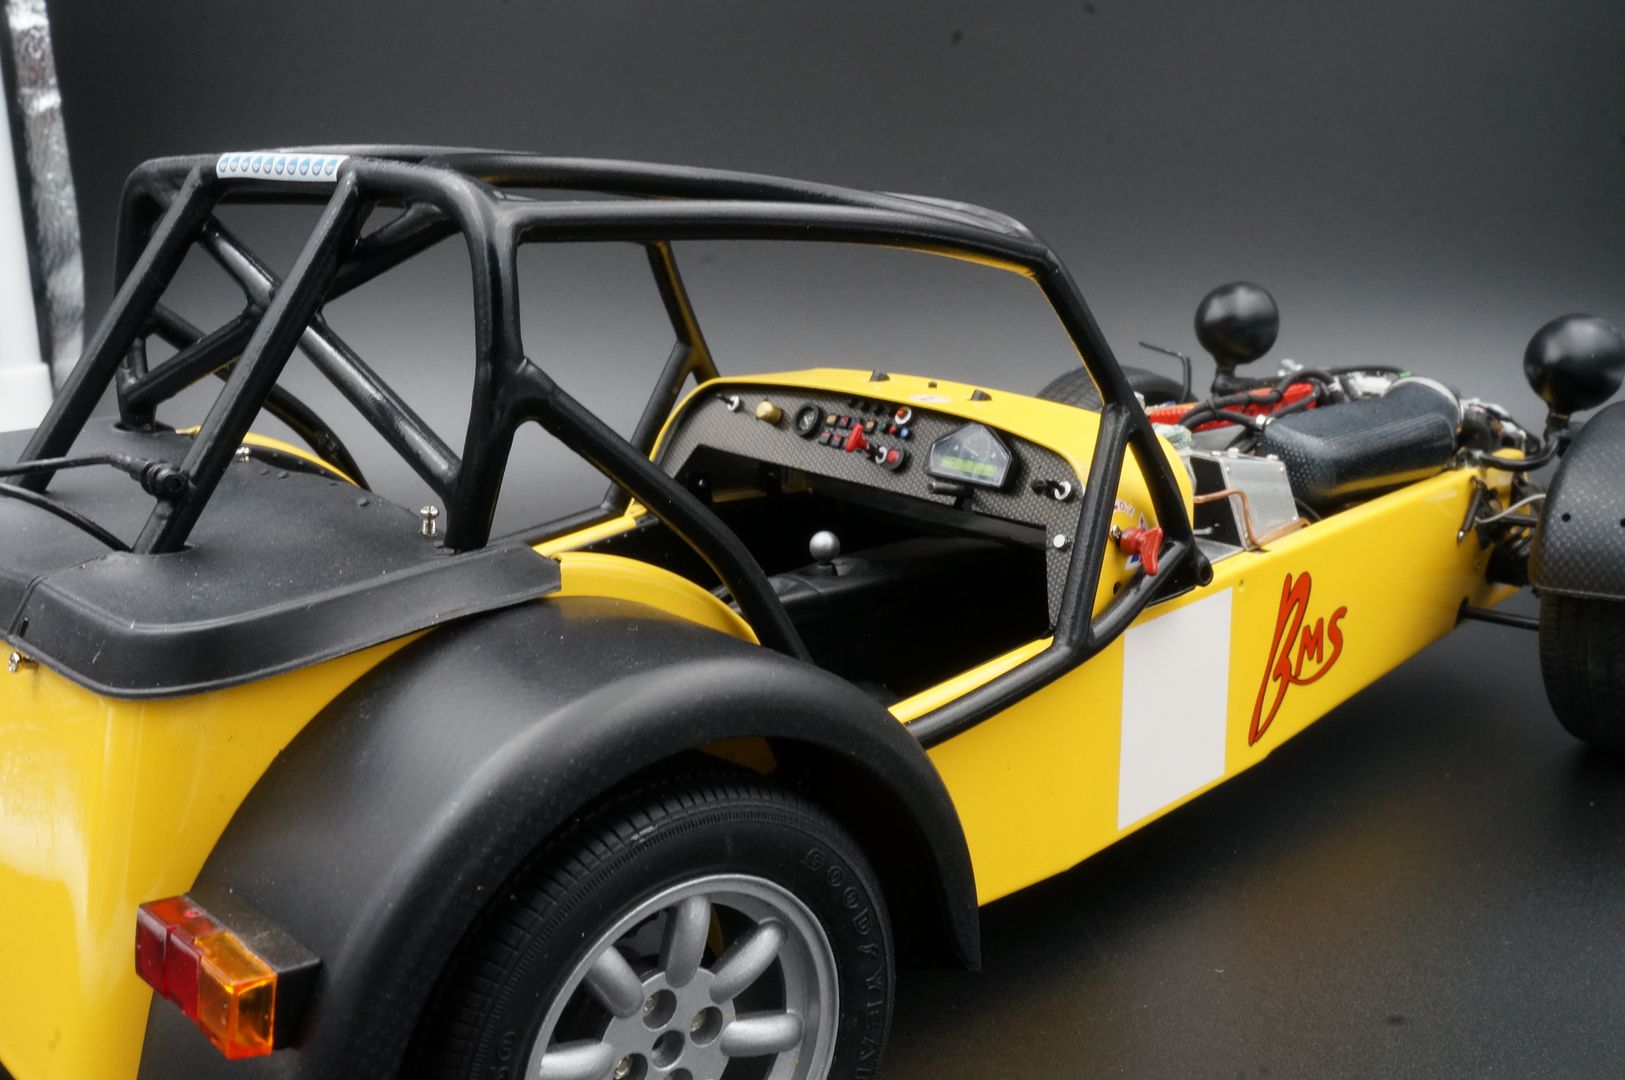
Anyway - I took loads of source pictures of the cars up at Snetterton, and started the cars. I was making them as close to the actual cars as I could. This included changing the engine from a BDR to a 'K-series', adding a full cage, tillet seats etc etc.
I started with crazy detail (same wiring etc!) and of course once you have started, you have to carry on with that level of detail! As any of you who do this to a far higher standard know - this stuff takes a HUGE amount of time...real life took over, I got a new 'proper' job, and the model making took a back seat. I was also stuck at a certain point where I could not make what I had to make - particularly the Tillet seats and a few other details such as rims and tyres....this is not my profession and I did (and don't) have access to mini lathes etc - the shop did vacuum casting, but 3D printing did not exist like it does now. I had to learn software to draw stuff etc etc...
Throughout this, my 'customer' exhibited massive patience...I think he probably gave up. But I was always going to finish the models, and now the time is right, for various reasons. 3D printing is more accessible, as is the supply of modelling supplies via the web! I have an airbrush now!! (everything was hand painted up to now - halfords spray cans for the bodywork!
These models are a bit different from the ultra-detail plastic/diecast kits you can see elsewhere - I'm scratch building by hand, so nothing is measured to 'nth degree etc -
These Tamiya kits are amazing - I rebuilt my 'real' Caterham and it is exactly the same! They have shot up in price though. Wish I had had the funds to buy more 10 years ago - they have doubled now.
I posted more pictures years ago on my website, so you can see them here:
http://mycaterham.com/17619/15191.html
I'll repeat a few here then move onto the recent stuff of the last week...
The Real Car!
There are other threads on here showing the construction of the Tamiya kit, so I'll bypass that - you can see it on my website link above...
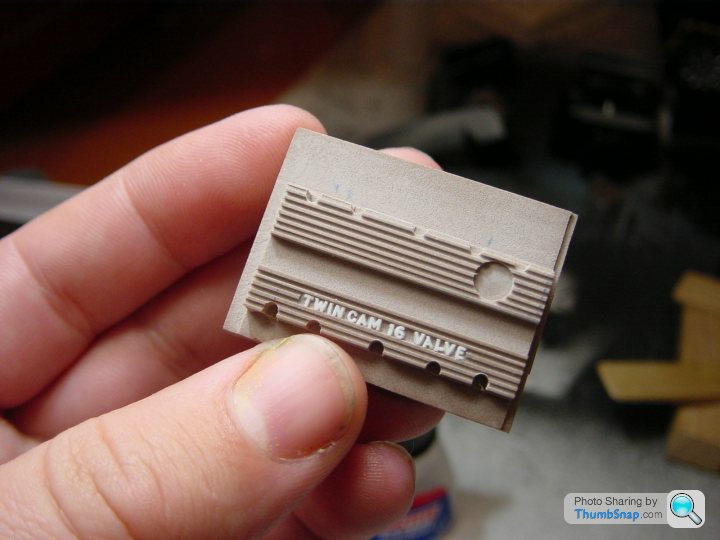
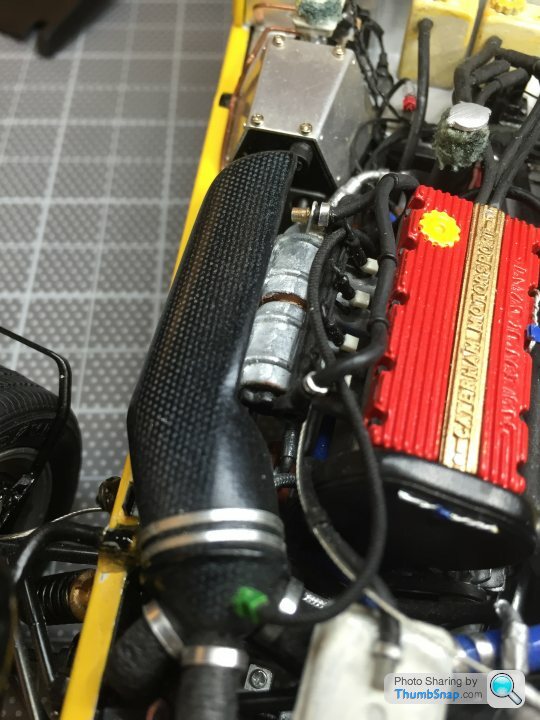
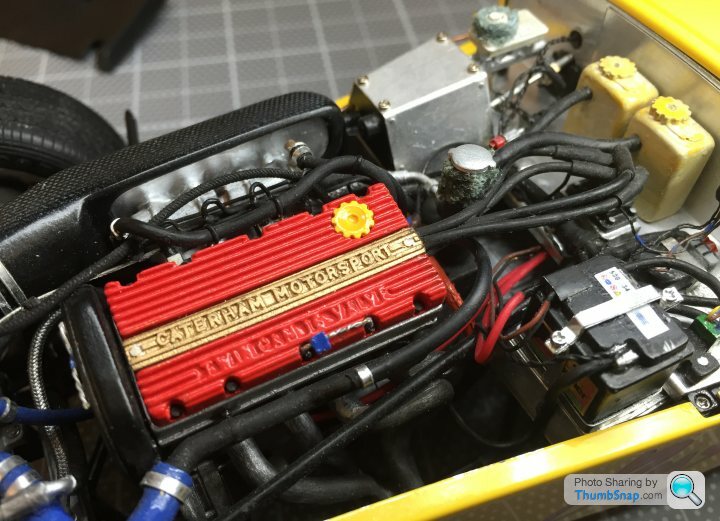
'K series' cam cover
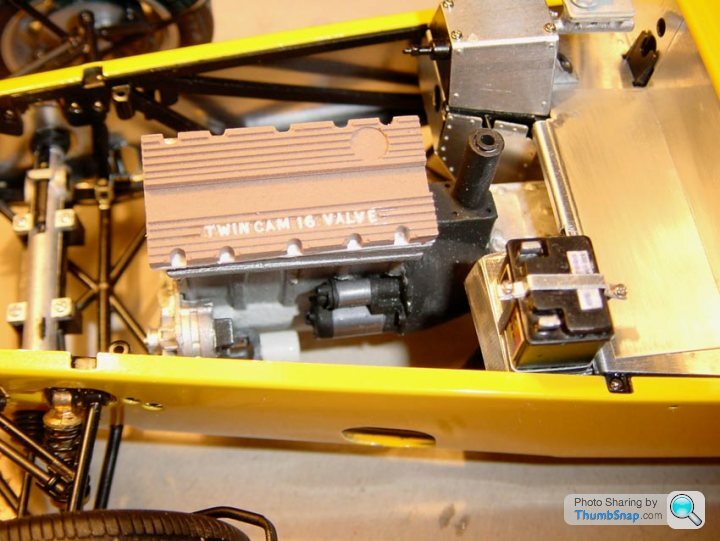
Real!

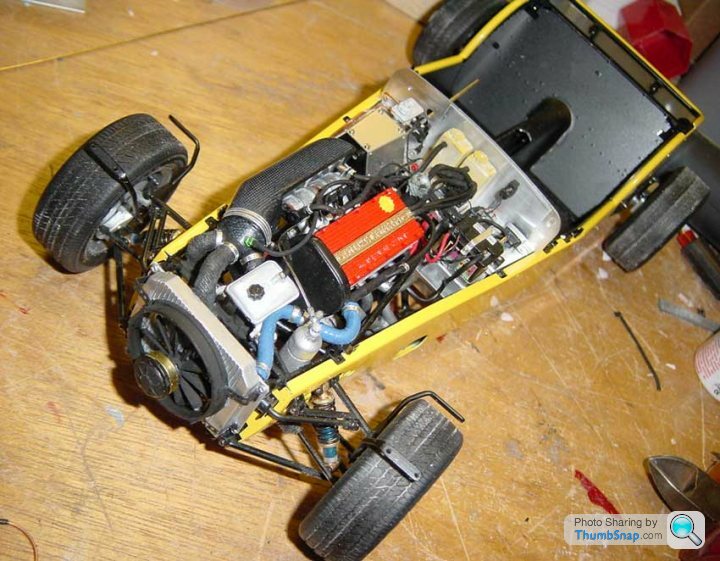
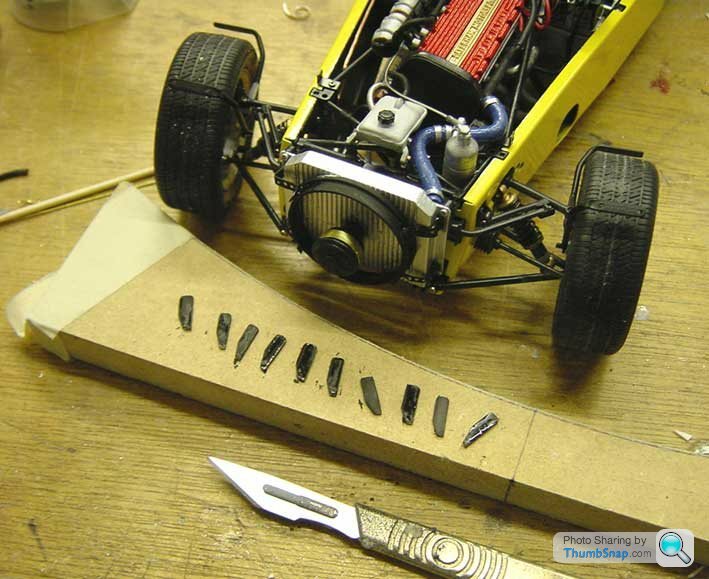
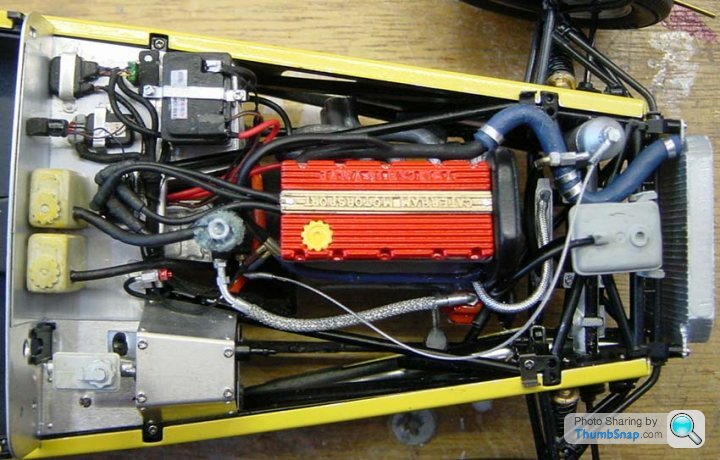
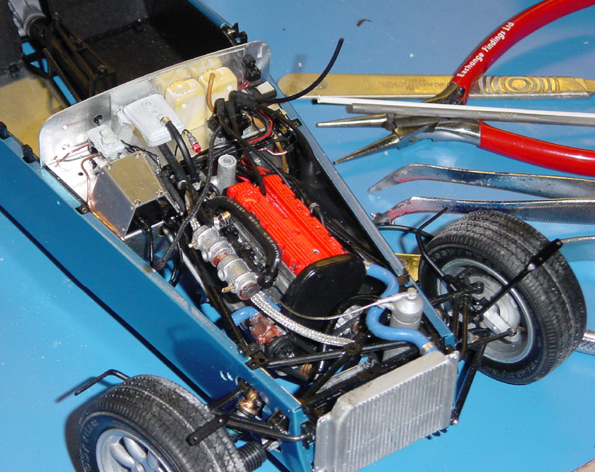
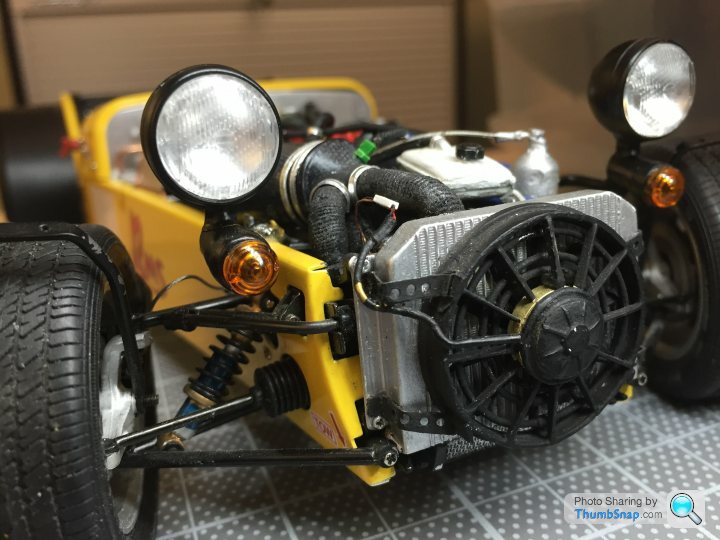
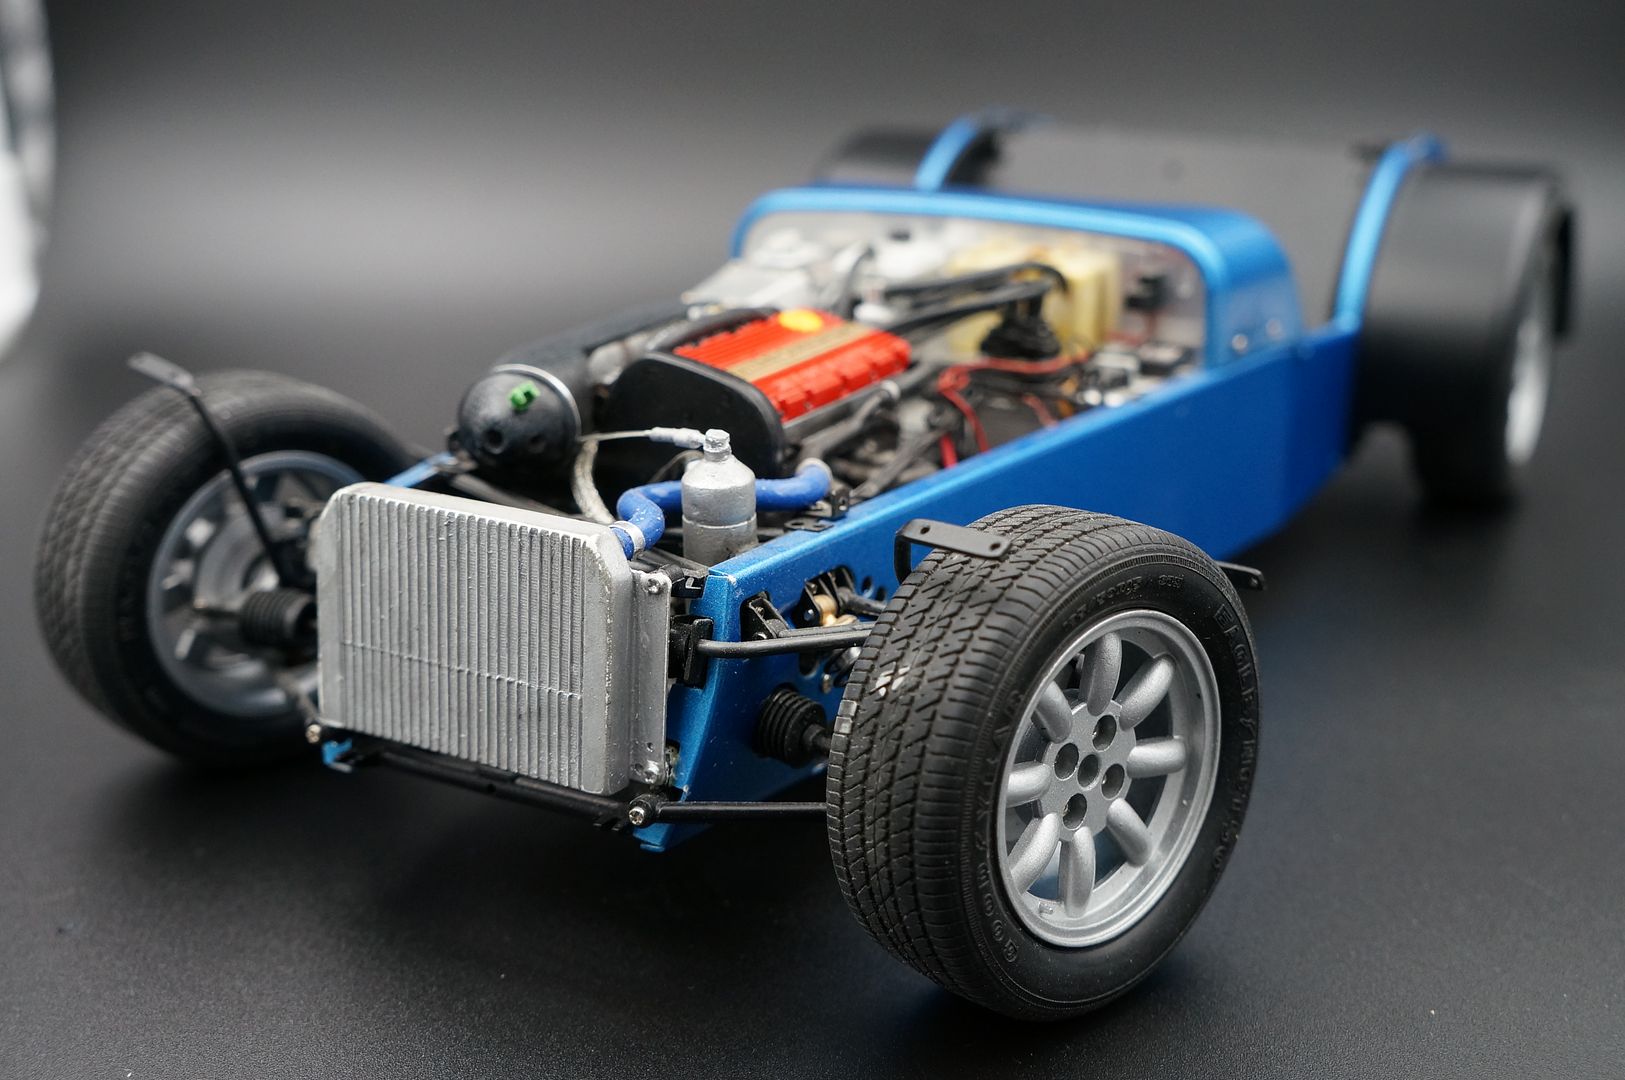
The 'old' R500 exhaust (and induction!) were a nightmare of curves to fit in a small engine bay - even harder this size!
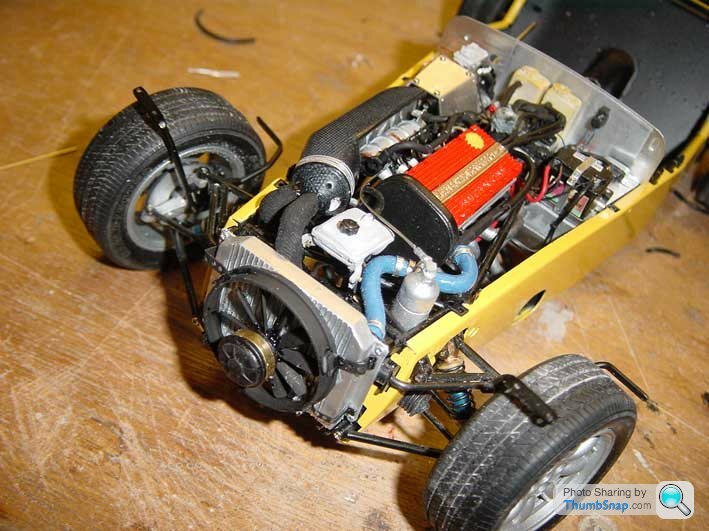
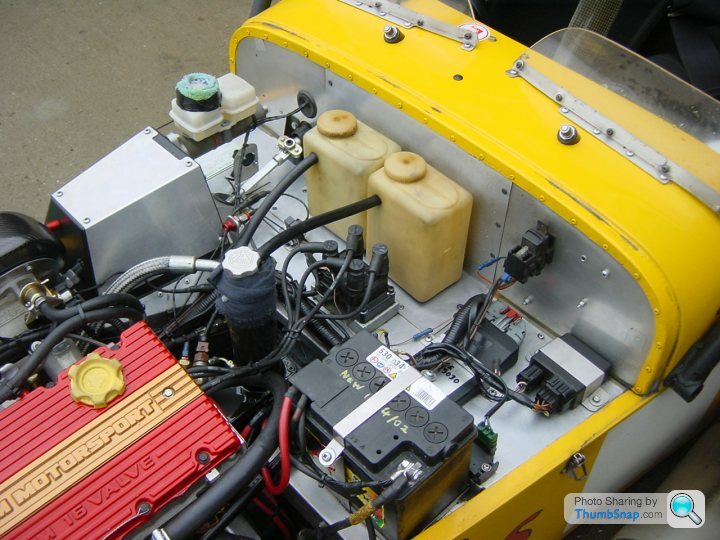
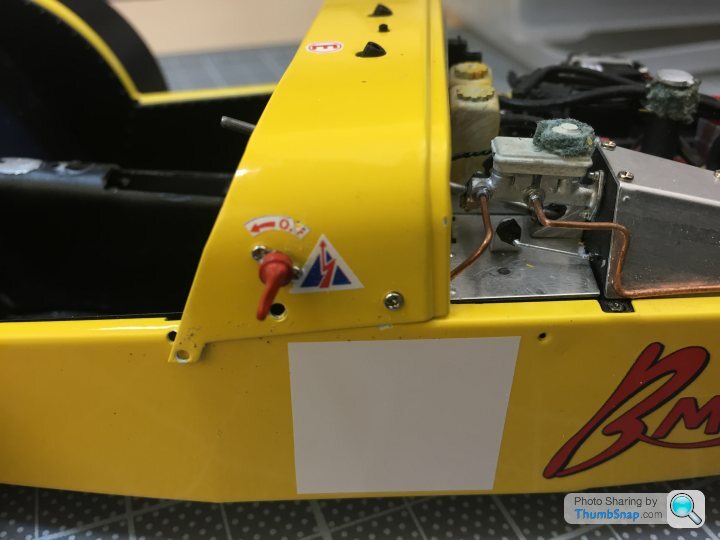
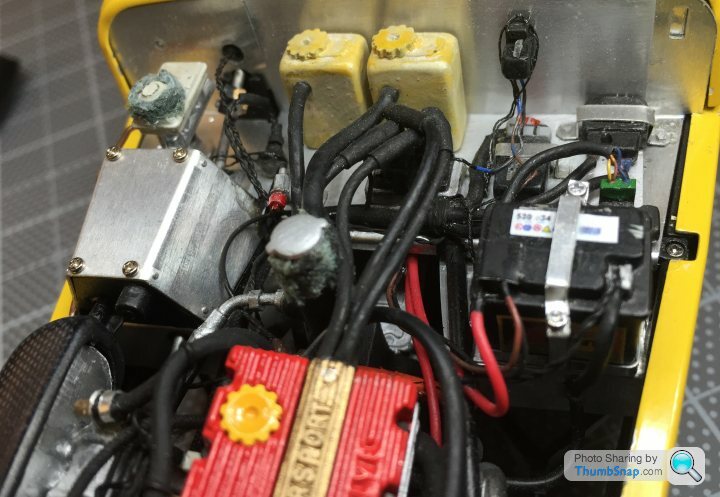
Only things carried over from the kit are the brake fluid reservoir, the coolant tank and pedal box - everything else is scratch built...
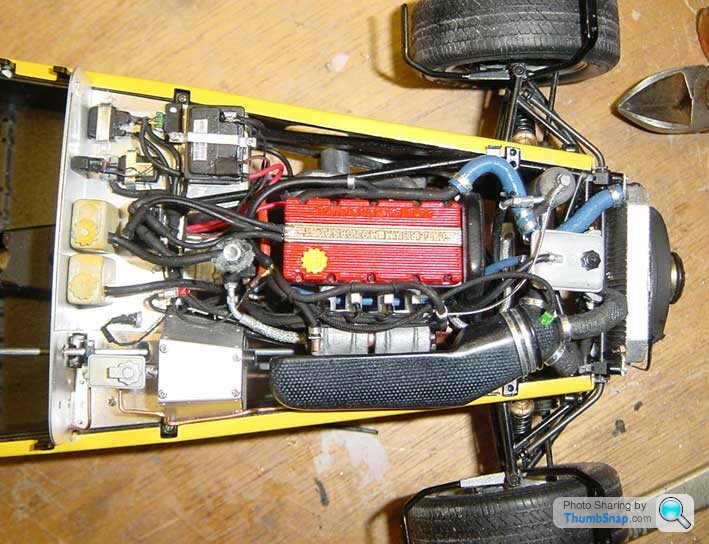
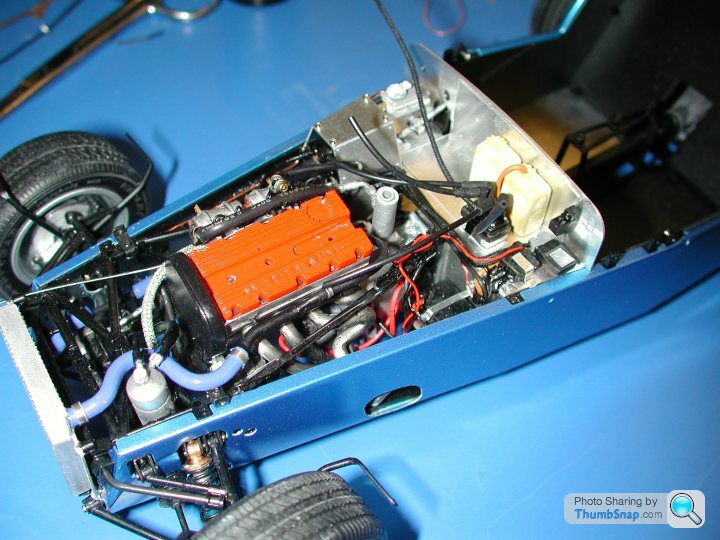
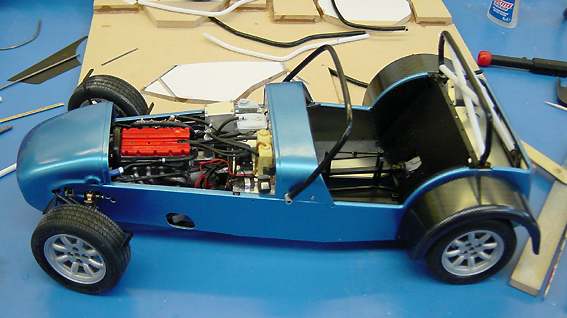
Engine bay was complete - except of course there are 2 cars - and the engine bays are subtly different...
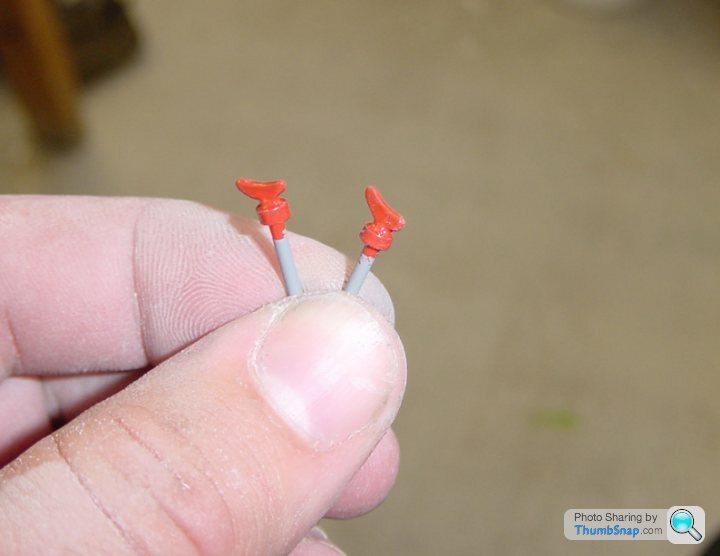
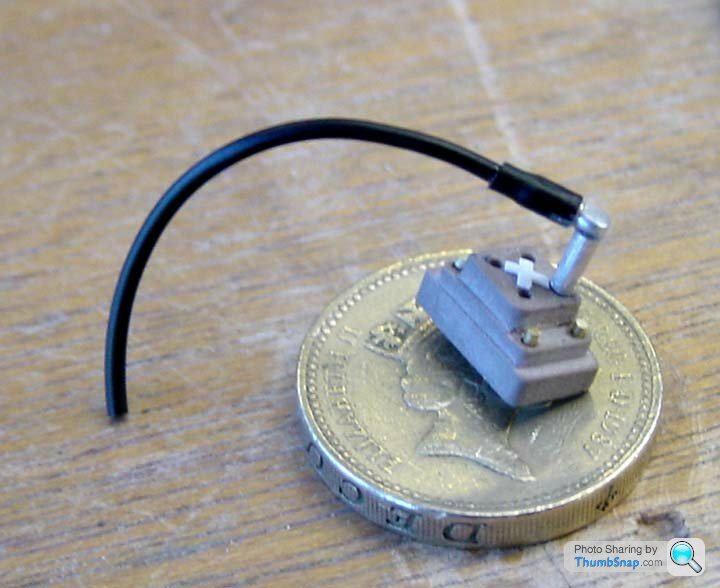
FIA cut-off keys!
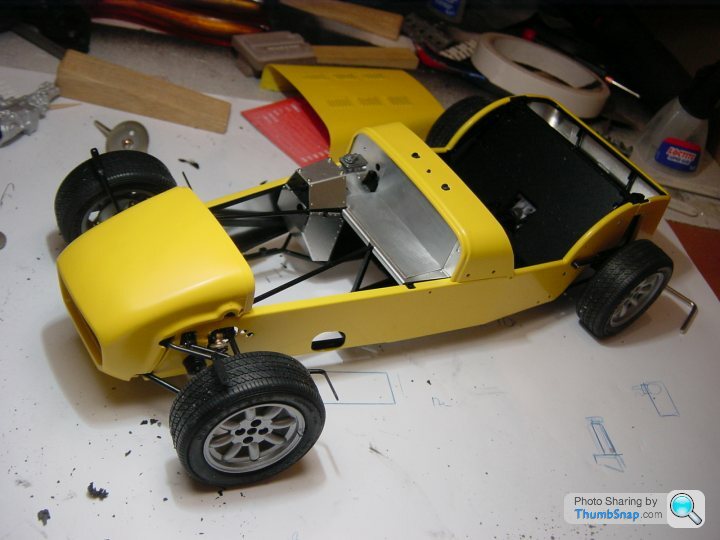
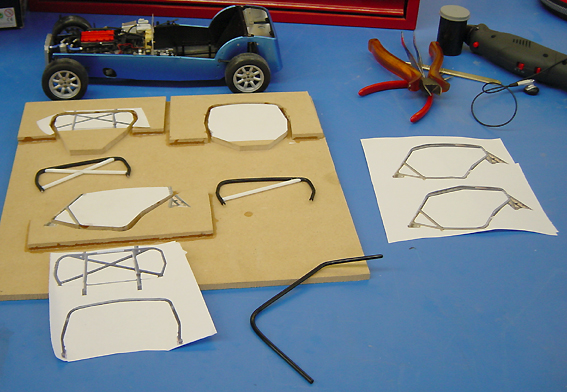
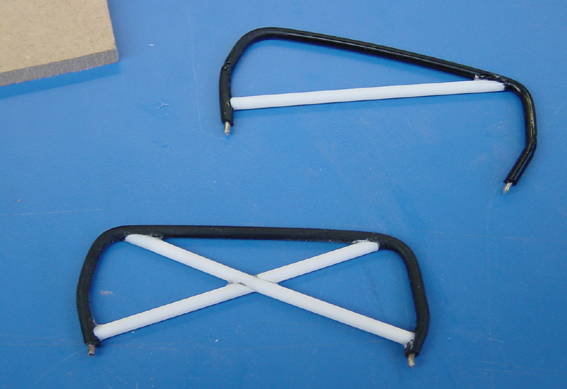
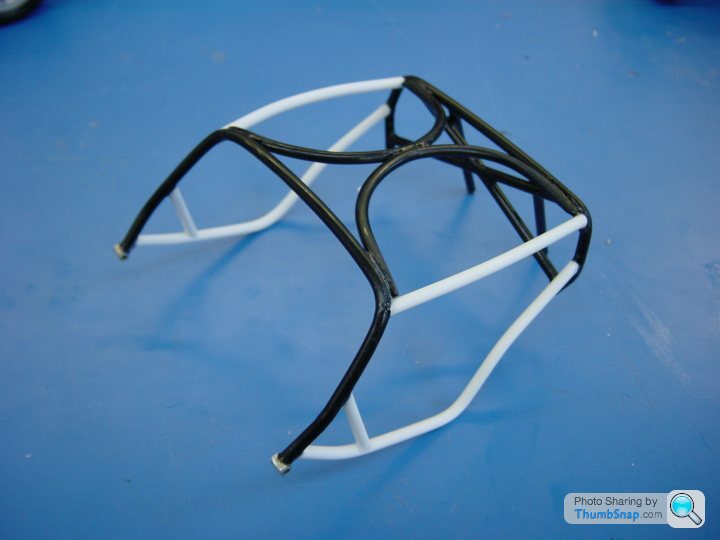
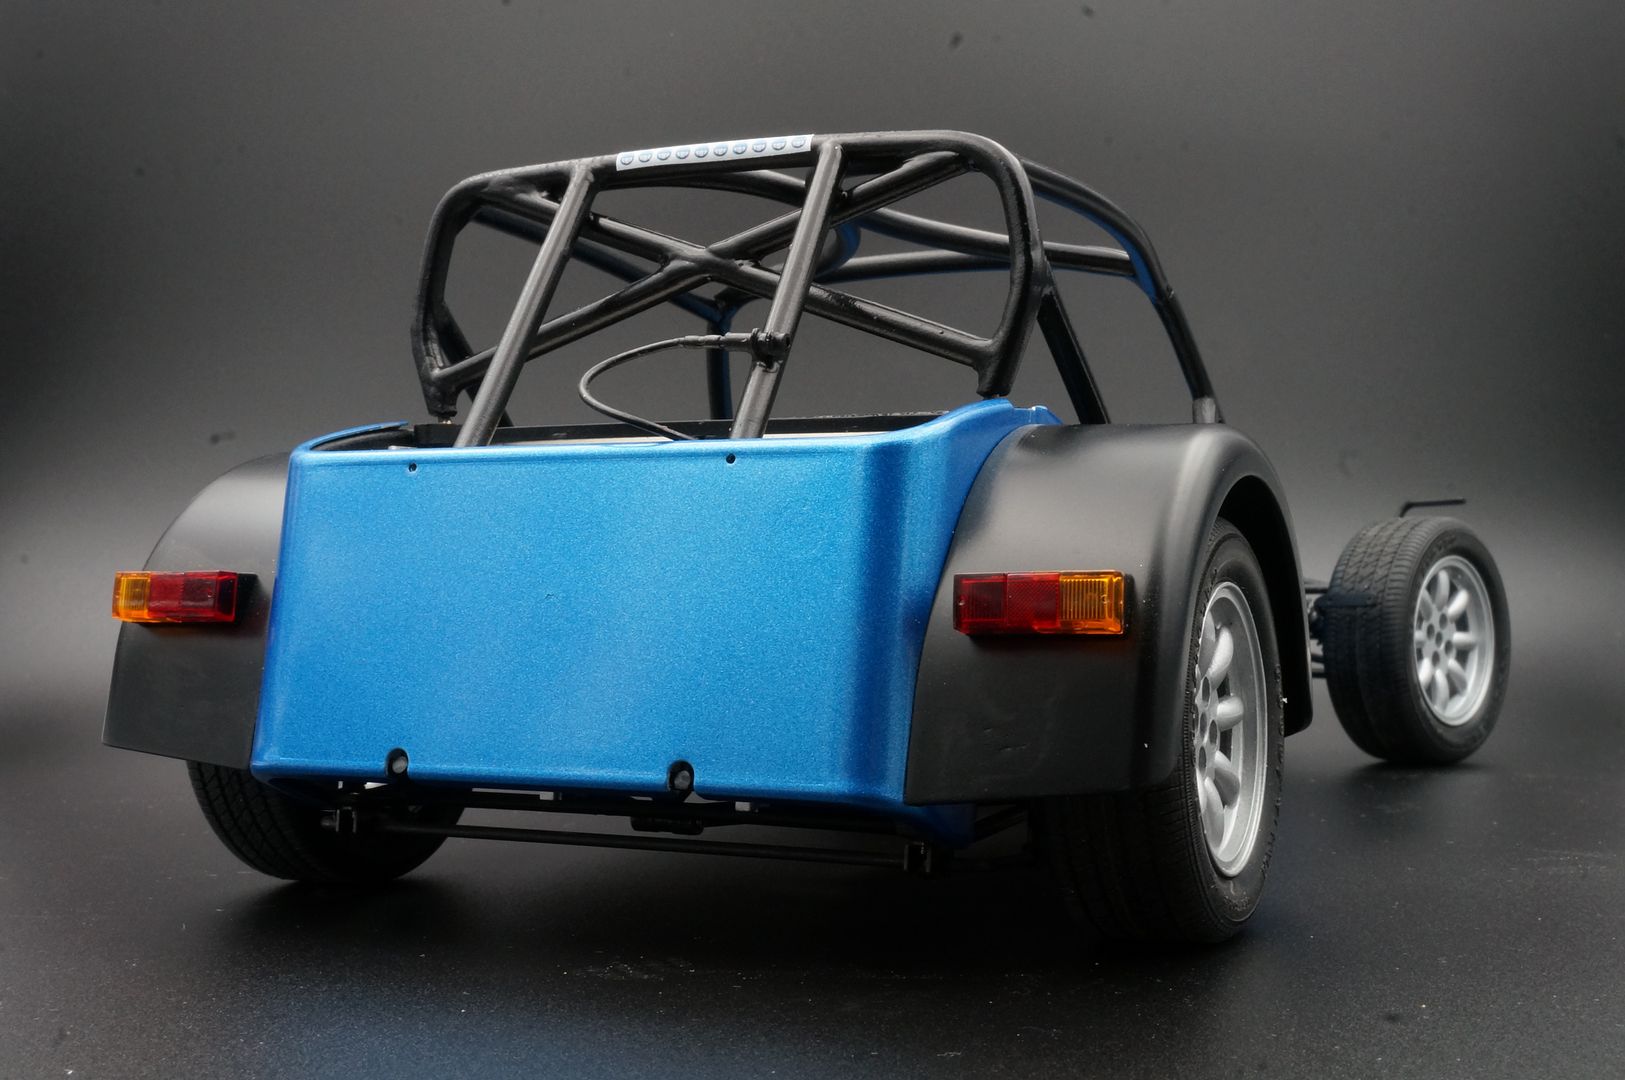
I'm actually most proud of the SLR roll cages I had to scratch make. Scaled from photos, I put coat-hanger wire inside black plastic tube, made some formers and bent the wire. They came out really well, and look amazing on the models - IMO!
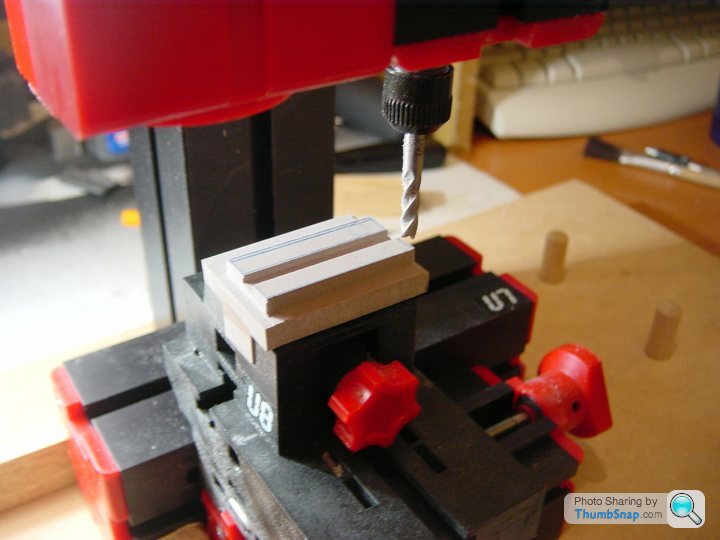
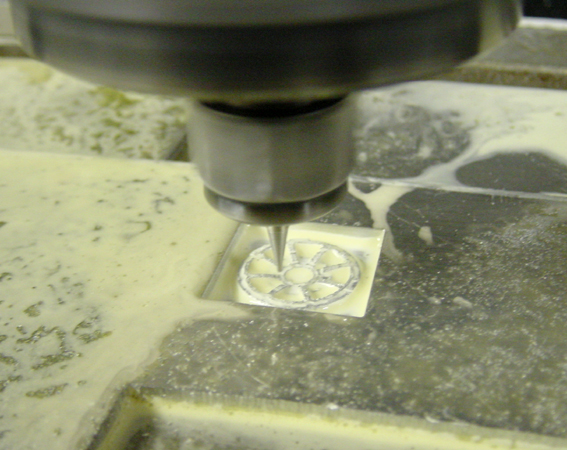
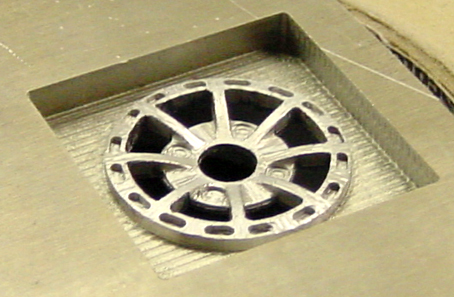
I drew up the Mike Barnby mag wheel hubs in Pro E (back then!) and the only CAD CAM bit so far was milling these hubs out of plastic (after testing using aluminium) - I'll make a cast of these for future!

...and that is pretty much where everything stayed for 10 years!!
When I came out to NYC to work, I gradually carried all the kits over here to force myself to get on with the damn things!
So - another few years later -I am!
List of things to do:
Dash boards
Tillet seats - biggest job!
Wheels - rims and tyres
Exhaust system
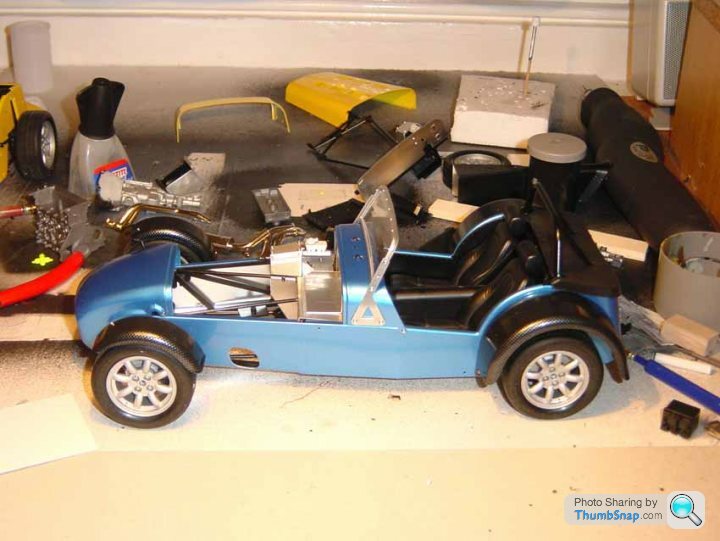
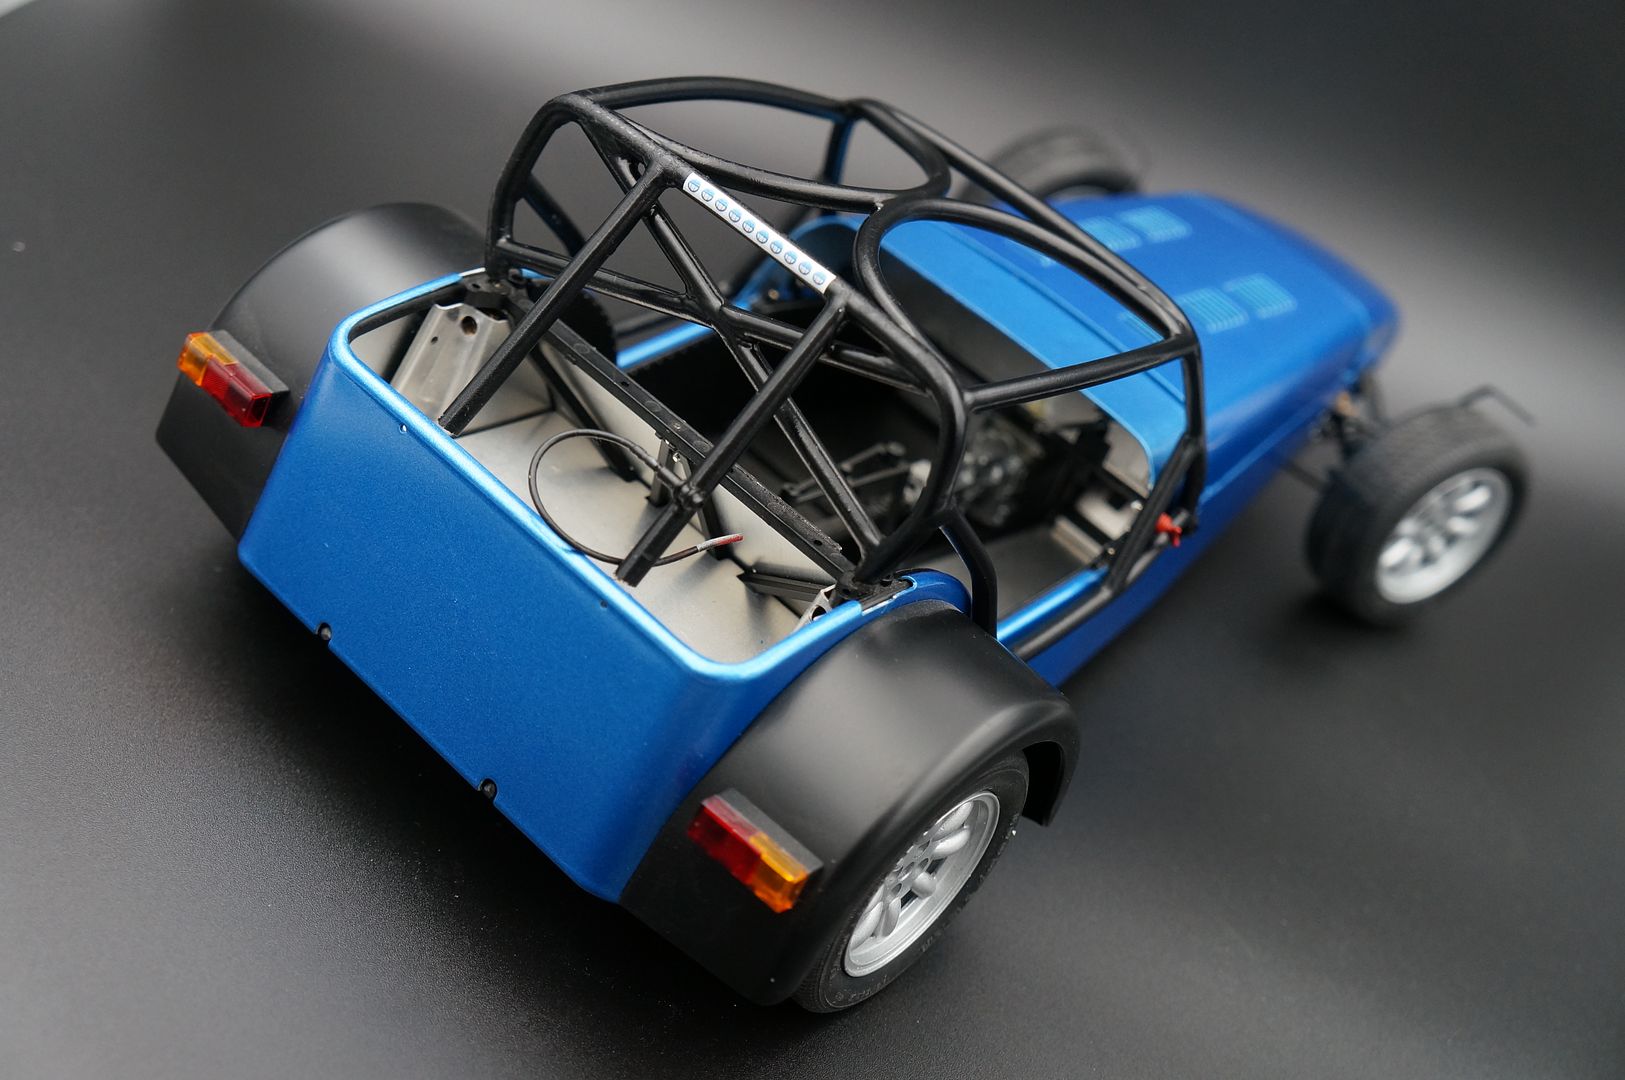
Find the Blue model!!
Interior (tunnels, seatbelts etc)
Decals! Another sticking point years ago...
Half 'Doors'
Screens
Fog lights etc, number plates
and loads of little wiring details...
So everything from now on is from the 'present'!
I'll post a few pictures from when I started these *cough* about 10 years ago.
Brief history: I was made redundant, and before starting back at a design consultancy I had previously worked at, I occupied a corner of their workshop,and started these models. The idea was to make some money in between jobs..
I tapped the Lotus 7 Club community, and got a few 'commissions' to make peoples cars, based on the Tamiya 1/12 kit.
These two models were owned by the same chap - both R500's that he race, before moving on to Radicals. The yellow car was the star of a very early 'Ring lap video...
Anyway - I took loads of source pictures of the cars up at Snetterton, and started the cars. I was making them as close to the actual cars as I could. This included changing the engine from a BDR to a 'K-series', adding a full cage, tillet seats etc etc.
I started with crazy detail (same wiring etc!) and of course once you have started, you have to carry on with that level of detail! As any of you who do this to a far higher standard know - this stuff takes a HUGE amount of time...real life took over, I got a new 'proper' job, and the model making took a back seat. I was also stuck at a certain point where I could not make what I had to make - particularly the Tillet seats and a few other details such as rims and tyres....this is not my profession and I did (and don't) have access to mini lathes etc - the shop did vacuum casting, but 3D printing did not exist like it does now. I had to learn software to draw stuff etc etc...
Throughout this, my 'customer' exhibited massive patience...I think he probably gave up. But I was always going to finish the models, and now the time is right, for various reasons. 3D printing is more accessible, as is the supply of modelling supplies via the web! I have an airbrush now!! (everything was hand painted up to now - halfords spray cans for the bodywork!
These models are a bit different from the ultra-detail plastic/diecast kits you can see elsewhere - I'm scratch building by hand, so nothing is measured to 'nth degree etc -
These Tamiya kits are amazing - I rebuilt my 'real' Caterham and it is exactly the same! They have shot up in price though. Wish I had had the funds to buy more 10 years ago - they have doubled now.
I posted more pictures years ago on my website, so you can see them here:
http://mycaterham.com/17619/15191.html
I'll repeat a few here then move onto the recent stuff of the last week...
The Real Car!
There are other threads on here showing the construction of the Tamiya kit, so I'll bypass that - you can see it on my website link above...
'K series' cam cover
Real!
The 'old' R500 exhaust (and induction!) were a nightmare of curves to fit in a small engine bay - even harder this size!
Only things carried over from the kit are the brake fluid reservoir, the coolant tank and pedal box - everything else is scratch built...
Engine bay was complete - except of course there are 2 cars - and the engine bays are subtly different...
FIA cut-off keys!
I'm actually most proud of the SLR roll cages I had to scratch make. Scaled from photos, I put coat-hanger wire inside black plastic tube, made some formers and bent the wire. They came out really well, and look amazing on the models - IMO!
I drew up the Mike Barnby mag wheel hubs in Pro E (back then!) and the only CAD CAM bit so far was milling these hubs out of plastic (after testing using aluminium) - I'll make a cast of these for future!
...and that is pretty much where everything stayed for 10 years!!
When I came out to NYC to work, I gradually carried all the kits over here to force myself to get on with the damn things!
So - another few years later -I am!
List of things to do:
Dash boards
Tillet seats - biggest job!
Wheels - rims and tyres
Exhaust system
Find the Blue model!!
Interior (tunnels, seatbelts etc)
Decals! Another sticking point years ago...
Half 'Doors'
Screens
Fog lights etc, number plates
and loads of little wiring details...
So everything from now on is from the 'present'!
Edited by caterhamnut on Saturday 11th July 00:32
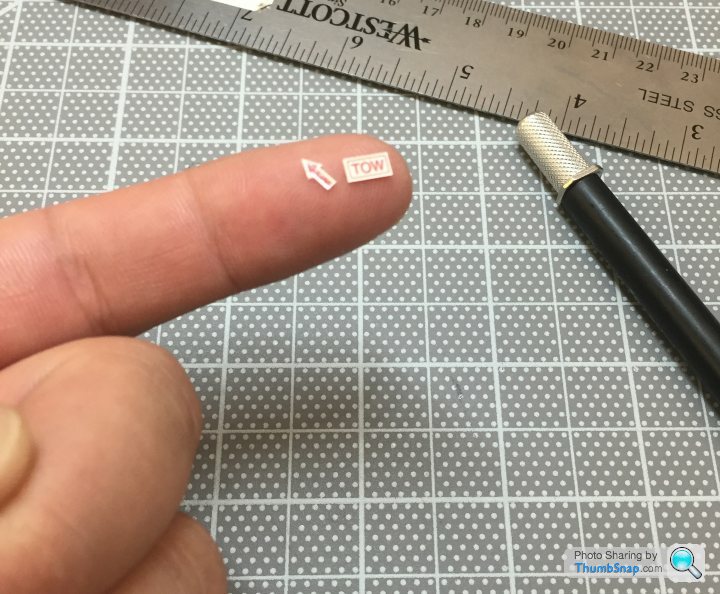
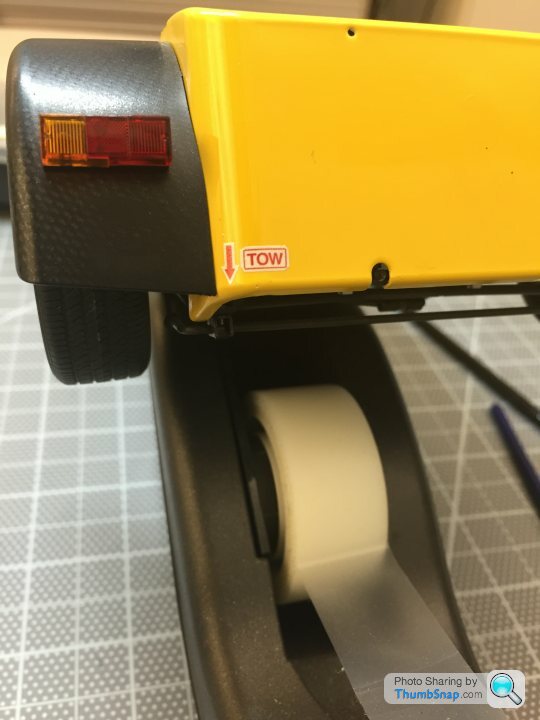
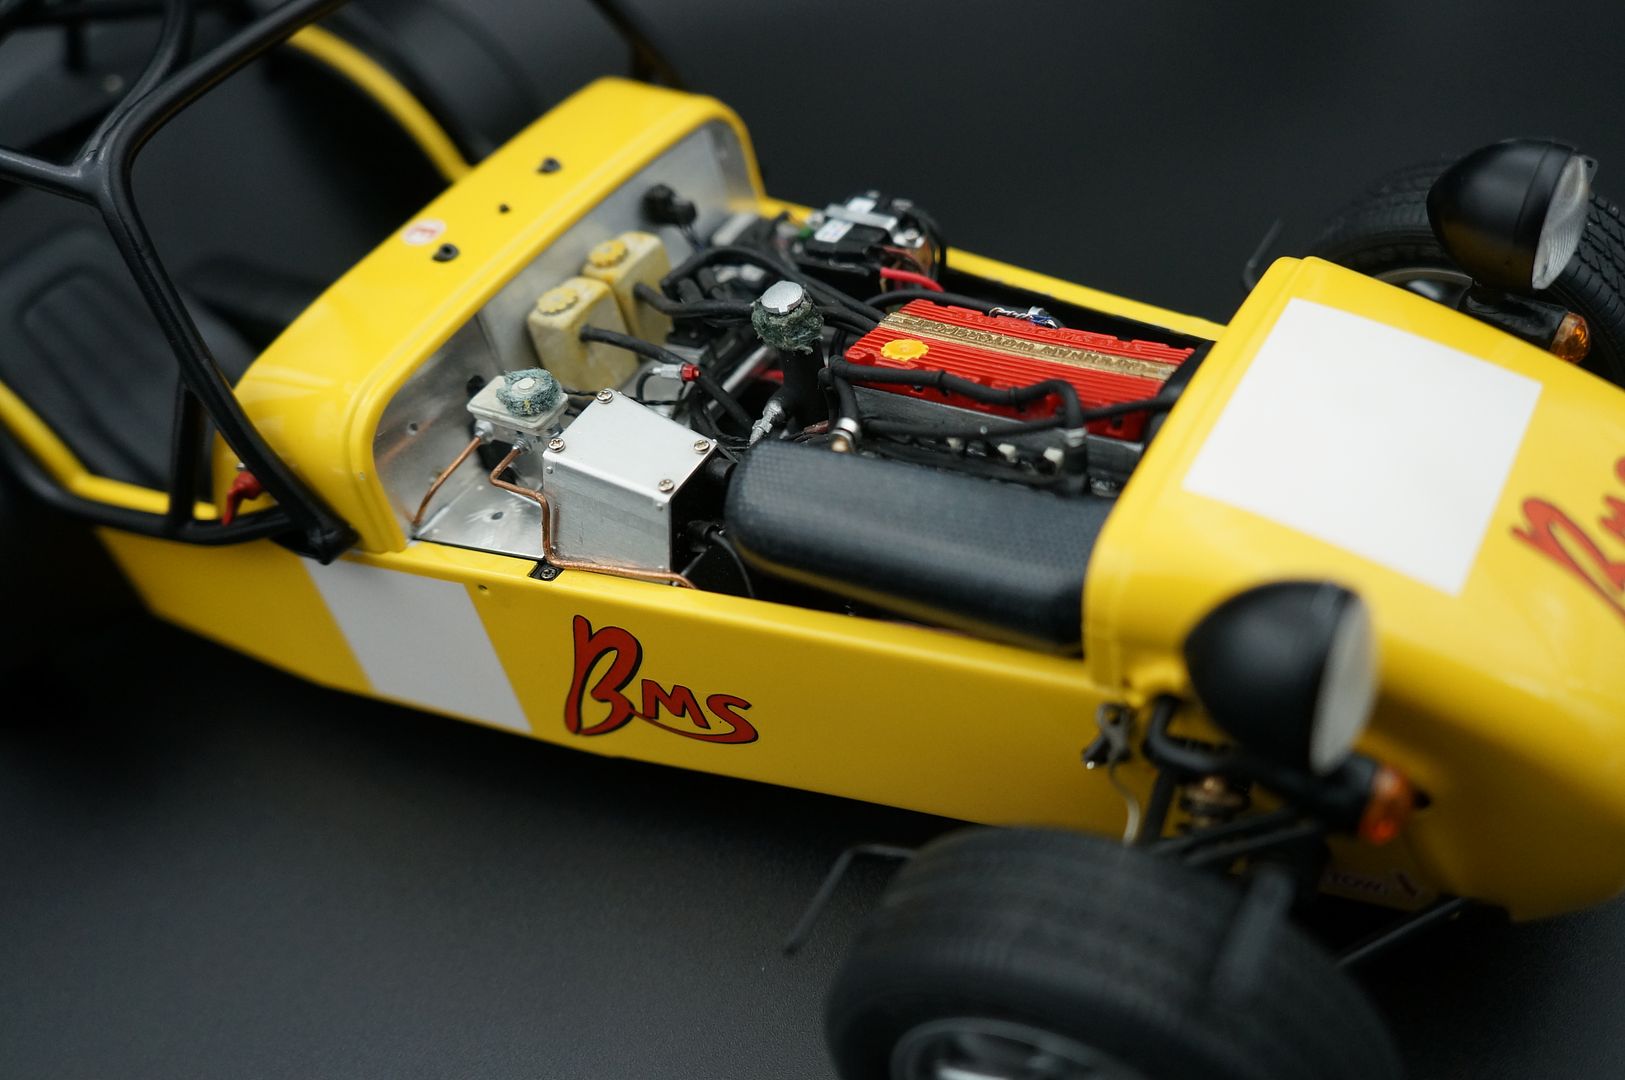
ok - so tried some of those decal sheets. Used one for the laser printer. Had to use clear and white for various decals. Pretty pleased with the results. Had to recreate all the graphics myself. Need to resize a few. Fun cutting them out (they are tiny!) but using the decal solution works well...
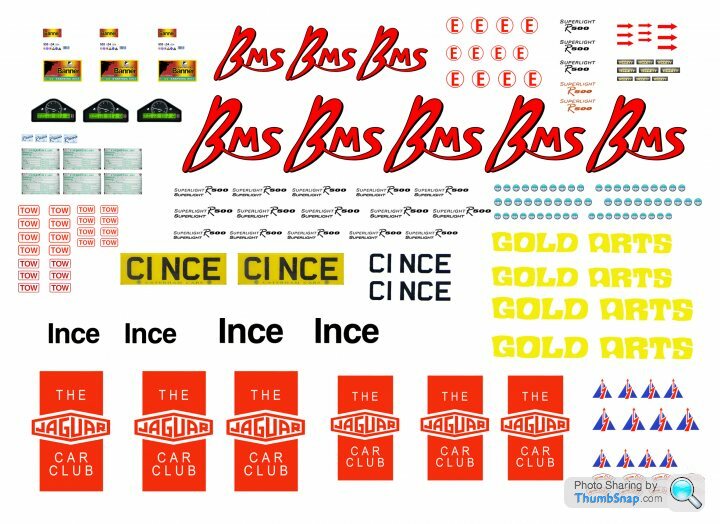
Made lots of spares! (also - two cars!)
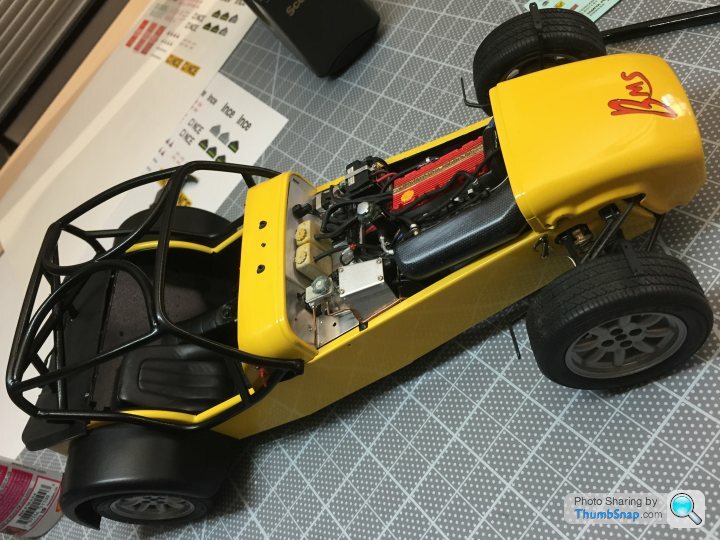
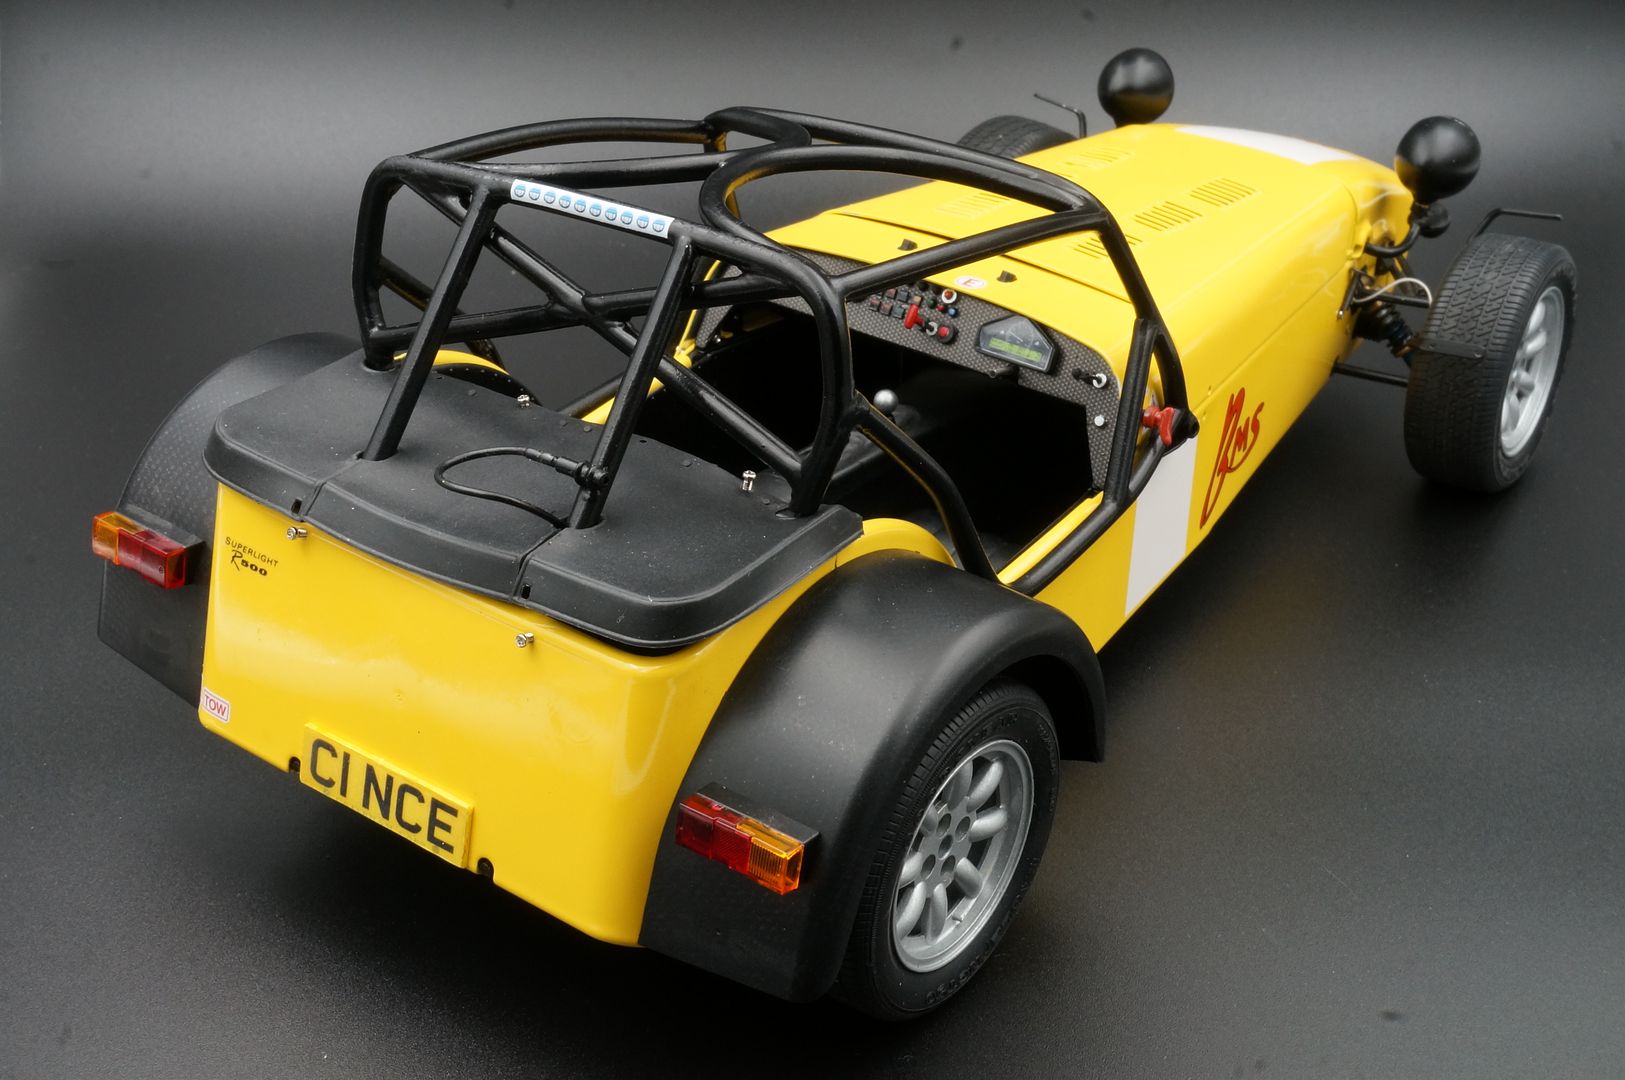
Incidentally - if you look at the rear wing on this shot, you can see my 'carbon' effect.
Back then, I didn't know you could get carbon scale decals (used a lot in the F1 models) so I made mine by holding a fine brass mesh over the model piece and lightly spraying primer. This gave a nice subtle effect, which I sprayed lightly again with black (all spray cans) to tone it down. I like the effect.
I actually find the carbon decals too 'strong' on some models, so I am leaving these as-is. However, I have used some carbon decals on the dash boards (next set of pictures!) where they work ok...
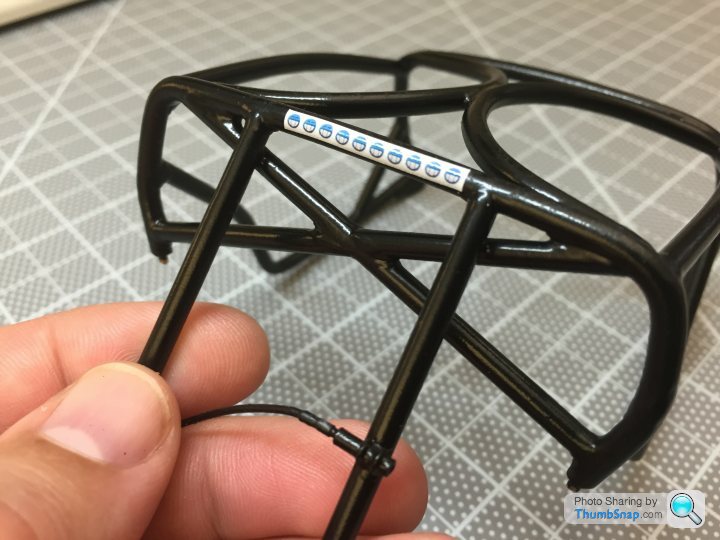
Note the timing equipment sensor on the roll cage.
Made lots of spares! (also - two cars!)
Incidentally - if you look at the rear wing on this shot, you can see my 'carbon' effect.
Back then, I didn't know you could get carbon scale decals (used a lot in the F1 models) so I made mine by holding a fine brass mesh over the model piece and lightly spraying primer. This gave a nice subtle effect, which I sprayed lightly again with black (all spray cans) to tone it down. I like the effect.
I actually find the carbon decals too 'strong' on some models, so I am leaving these as-is. However, I have used some carbon decals on the dash boards (next set of pictures!) where they work ok...
Note the timing equipment sensor on the roll cage.
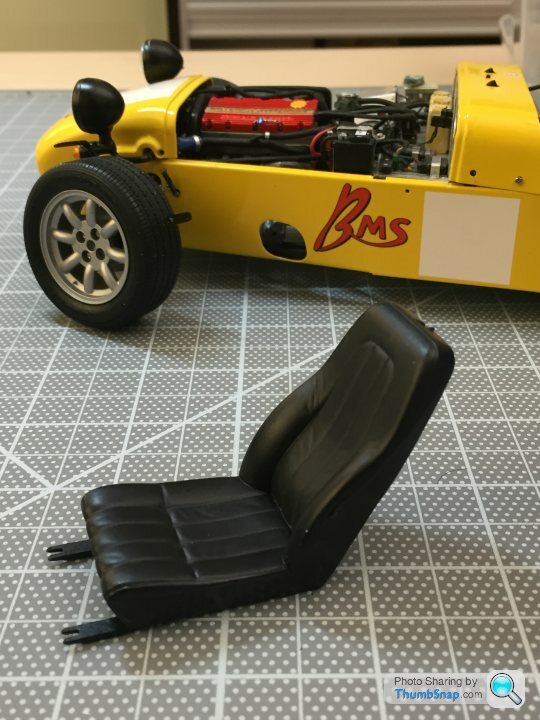
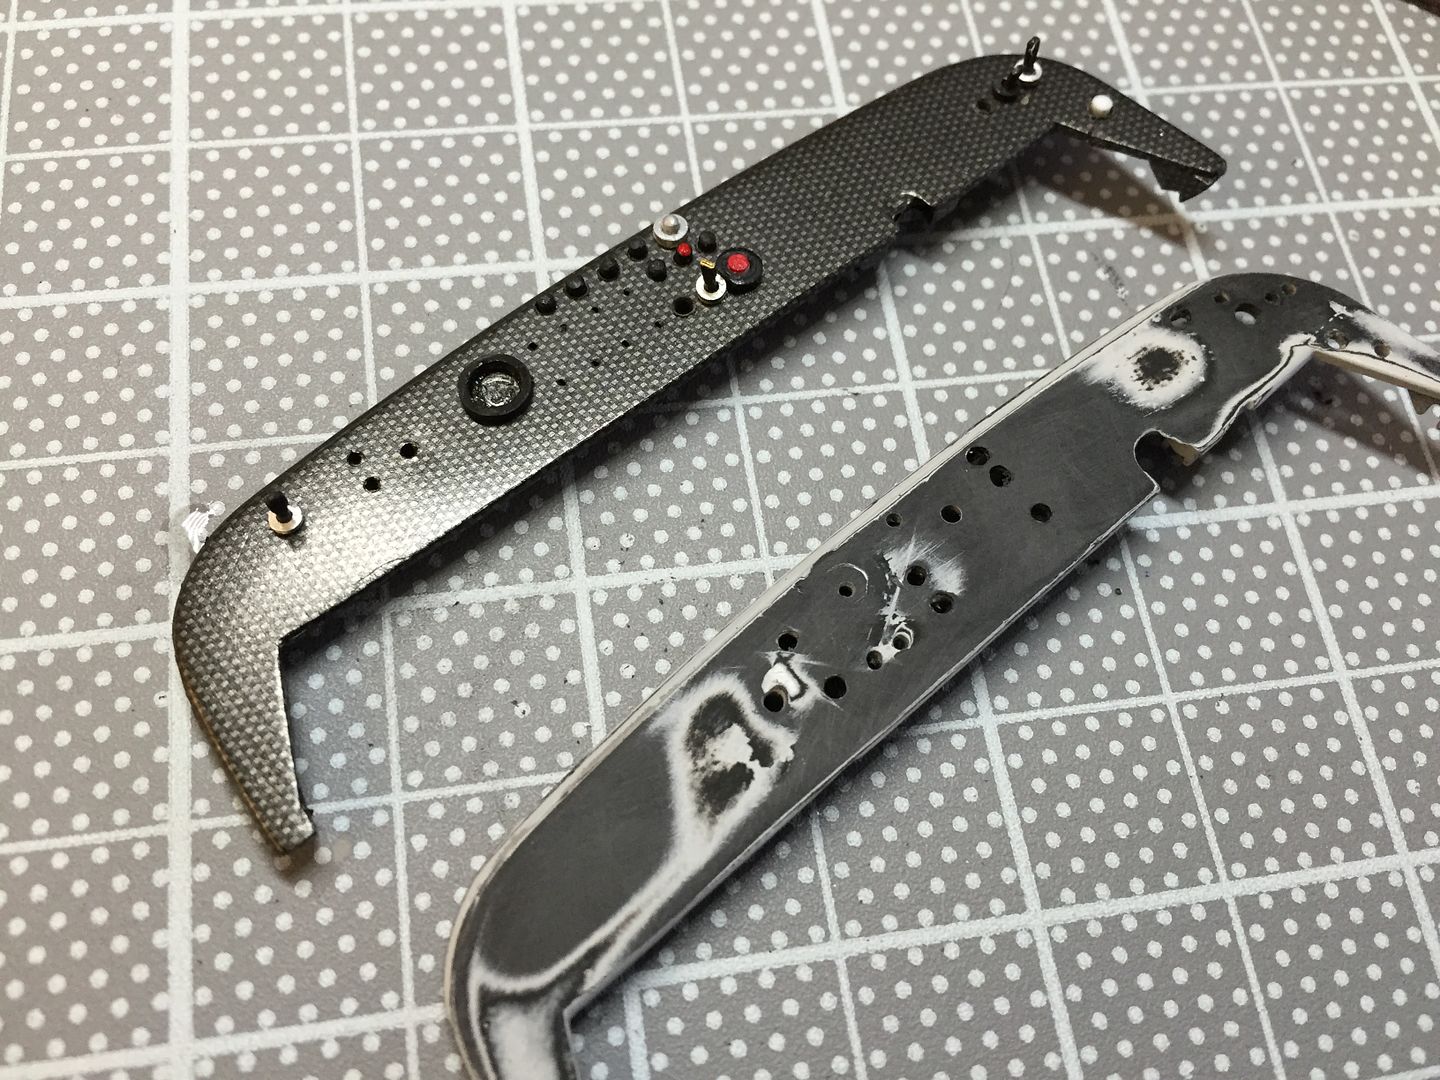
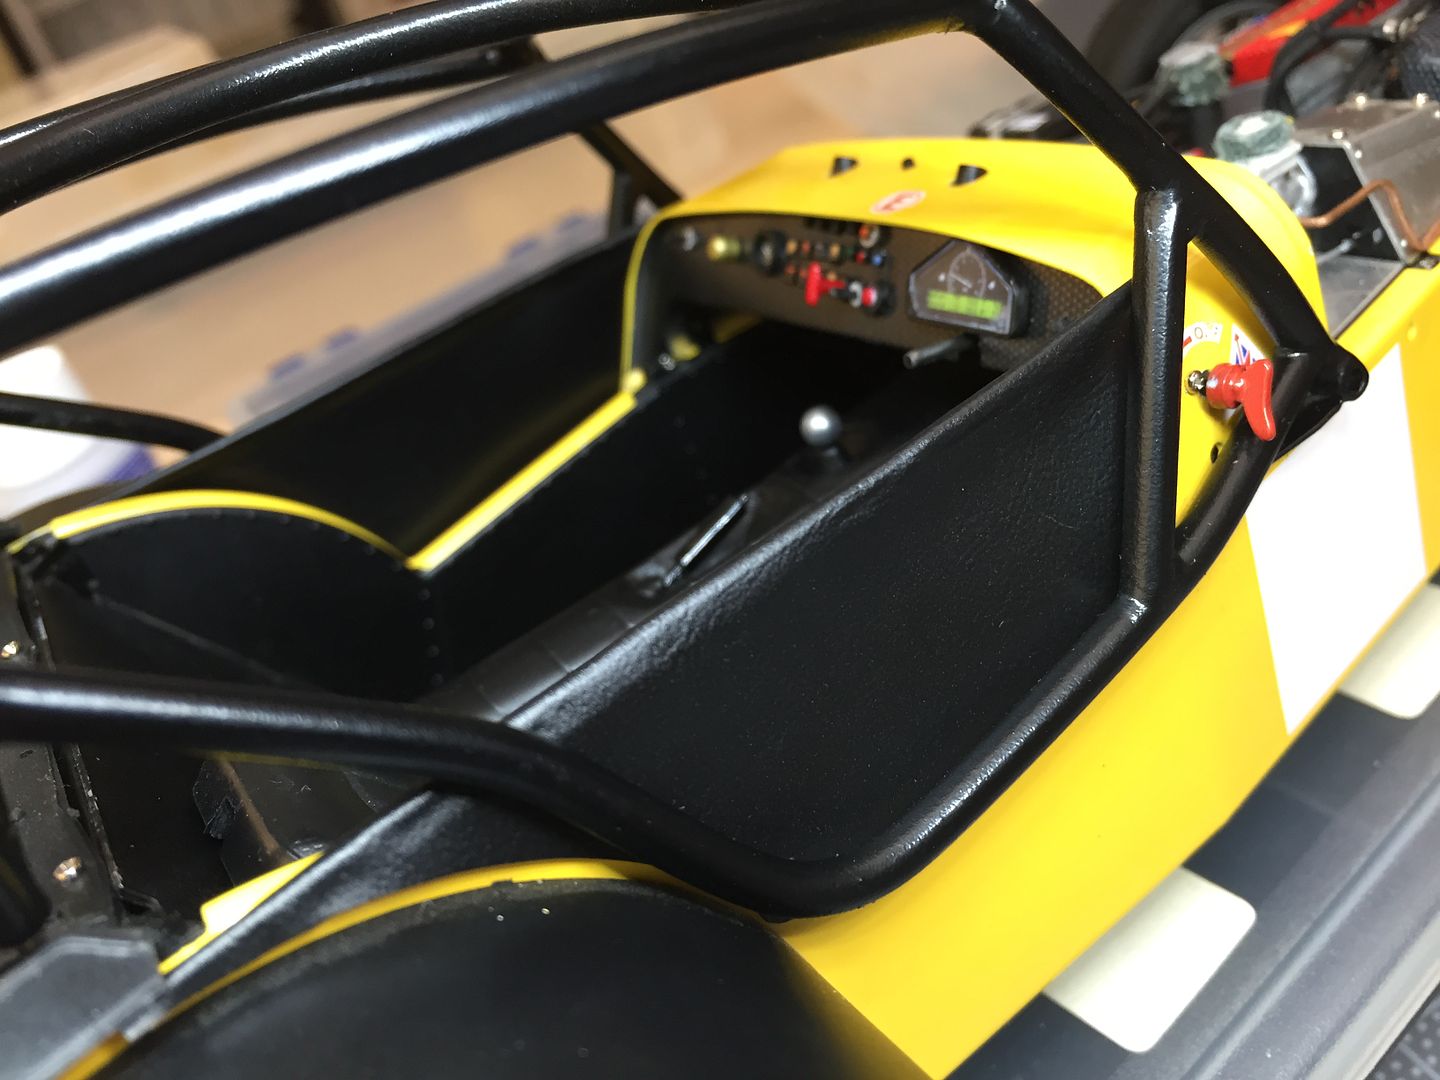
This seat has to become a carbon Tillet Race seat...
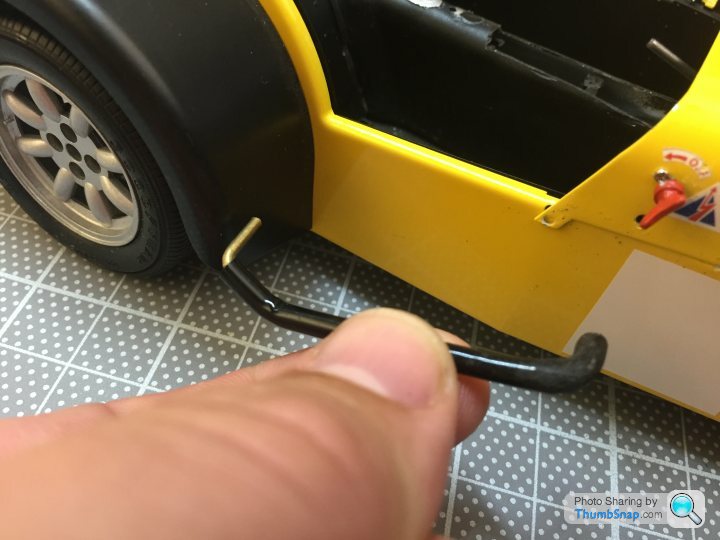
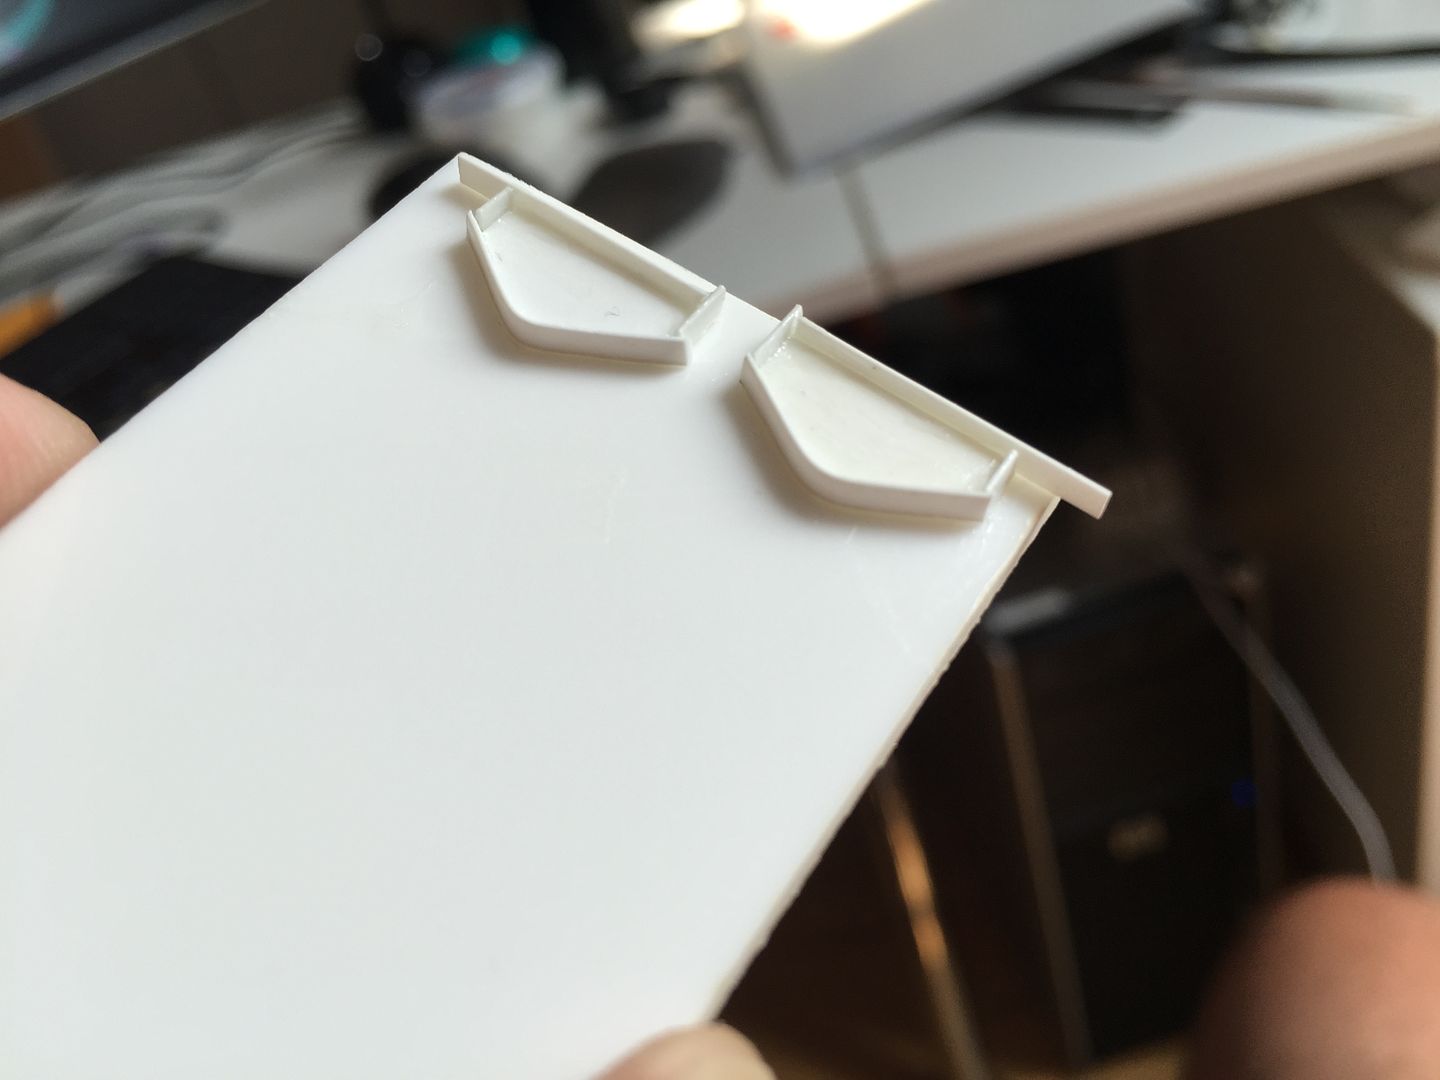
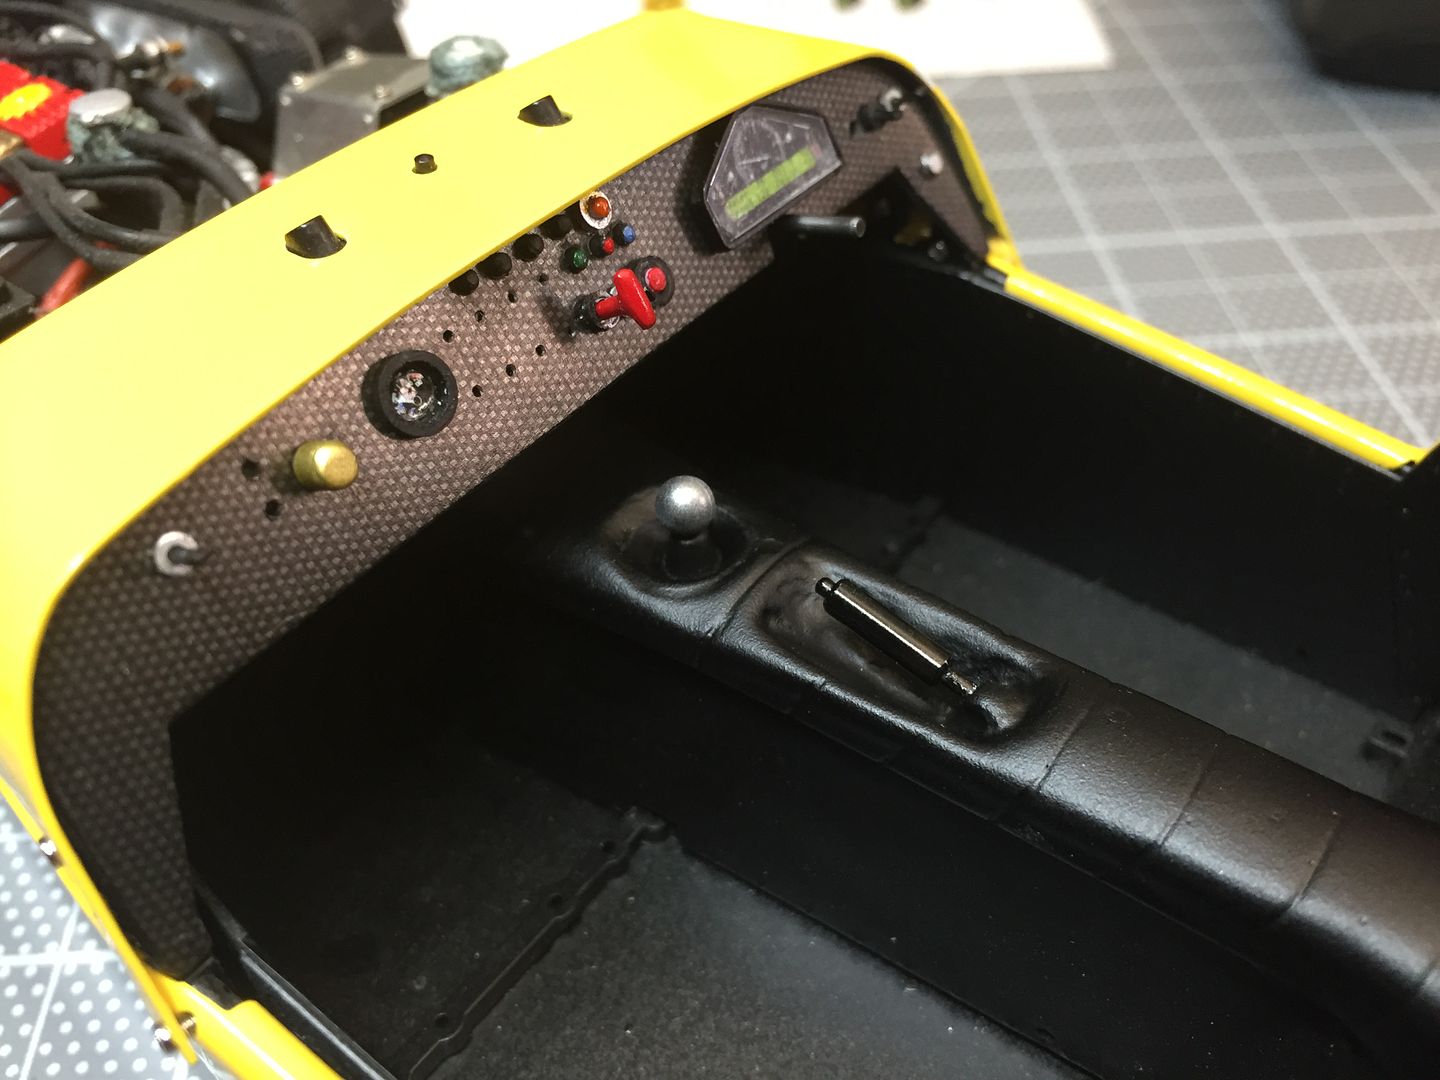
The Tamiya kit comes with an ali central tunnel (over the driveshaft) that is covered in flocking sheet to replicate carpet. The JPE version comes with a 'leather' cover molding, which has a gear lever boot molded in...the handbrake appears under the scuttle, as on the cars of that period.
Of course, I need the 'leather' version, but with a hand brake as well - this only appeared on Caterhams after the tamiya model was tooled - (*Interesting fact* - my car was the first chassis with the handbrake mounted on the central tunnel - it was the 1995 British Car show car)
- so I had to scratch build (10 years ago!) - I then took a cast so I can make more...bottom version is the one I have just finished for this model...

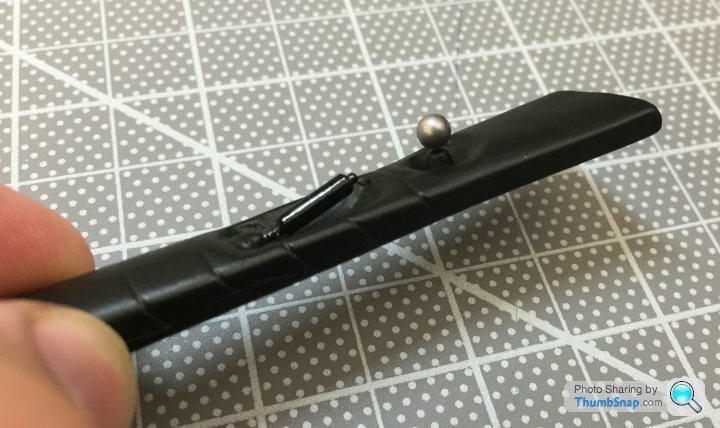
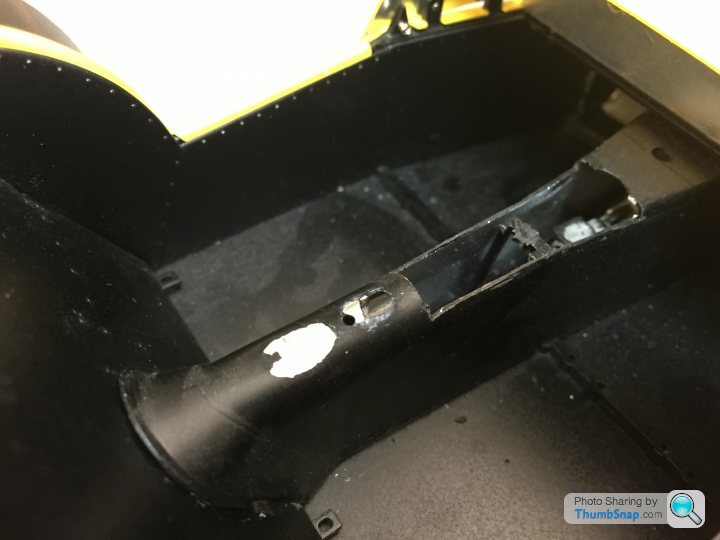
Ali tunnel on the kit, with piece cut away to allow the scratch built hand brake to fit...
The Tamiya kit comes with an ali central tunnel (over the driveshaft) that is covered in flocking sheet to replicate carpet. The JPE version comes with a 'leather' cover molding, which has a gear lever boot molded in...the handbrake appears under the scuttle, as on the cars of that period.
Of course, I need the 'leather' version, but with a hand brake as well - this only appeared on Caterhams after the tamiya model was tooled - (*Interesting fact* - my car was the first chassis with the handbrake mounted on the central tunnel - it was the 1995 British Car show car)
- so I had to scratch build (10 years ago!) - I then took a cast so I can make more...bottom version is the one I have just finished for this model...
Ali tunnel on the kit, with piece cut away to allow the scratch built hand brake to fit...

Hi Eric - yep, hardly go there now. Can't explain why - new website/blatchat was a pain (wouldn't let me log on etc for ages) and lack of interesting chat...plus a lot of people I chat with are elsewhere more, on more 'accessible' sites - use FB a lot, simply because it is so easy to post pictures!
Anyway - getting back into modelling a bit now - had an ebay fit a few weeks ago and suddenly have a cupboard (or 3) full of kits - mainly all the 1/12 Tamiya F1 kits (but also a lot of the 1/20 versions) and a few oddities - really fancy that new large scale Mosquito one day....
Anyway - getting back into modelling a bit now - had an ebay fit a few weeks ago and suddenly have a cupboard (or 3) full of kits - mainly all the 1/12 Tamiya F1 kits (but also a lot of the 1/20 versions) and a few oddities - really fancy that new large scale Mosquito one day....
Right - major update time!! These models were started about 2002 - all the pictures above are from that era, apart from the last bunch with decals etc, which were taken in New York 4 years ago...its time to finish these cars!
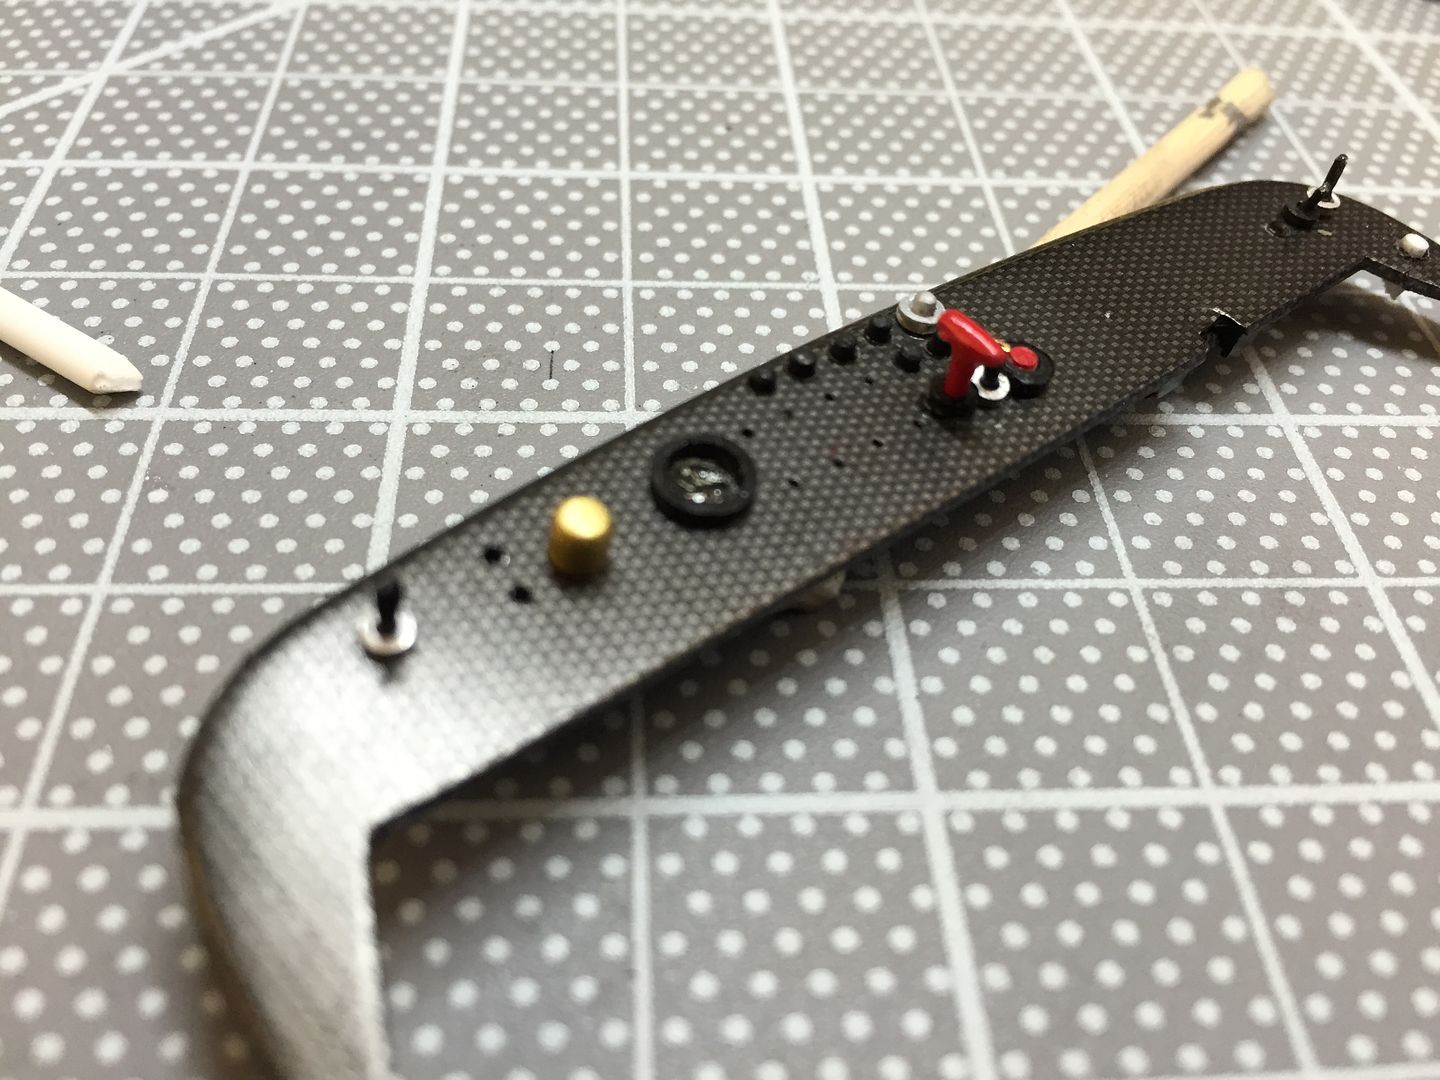
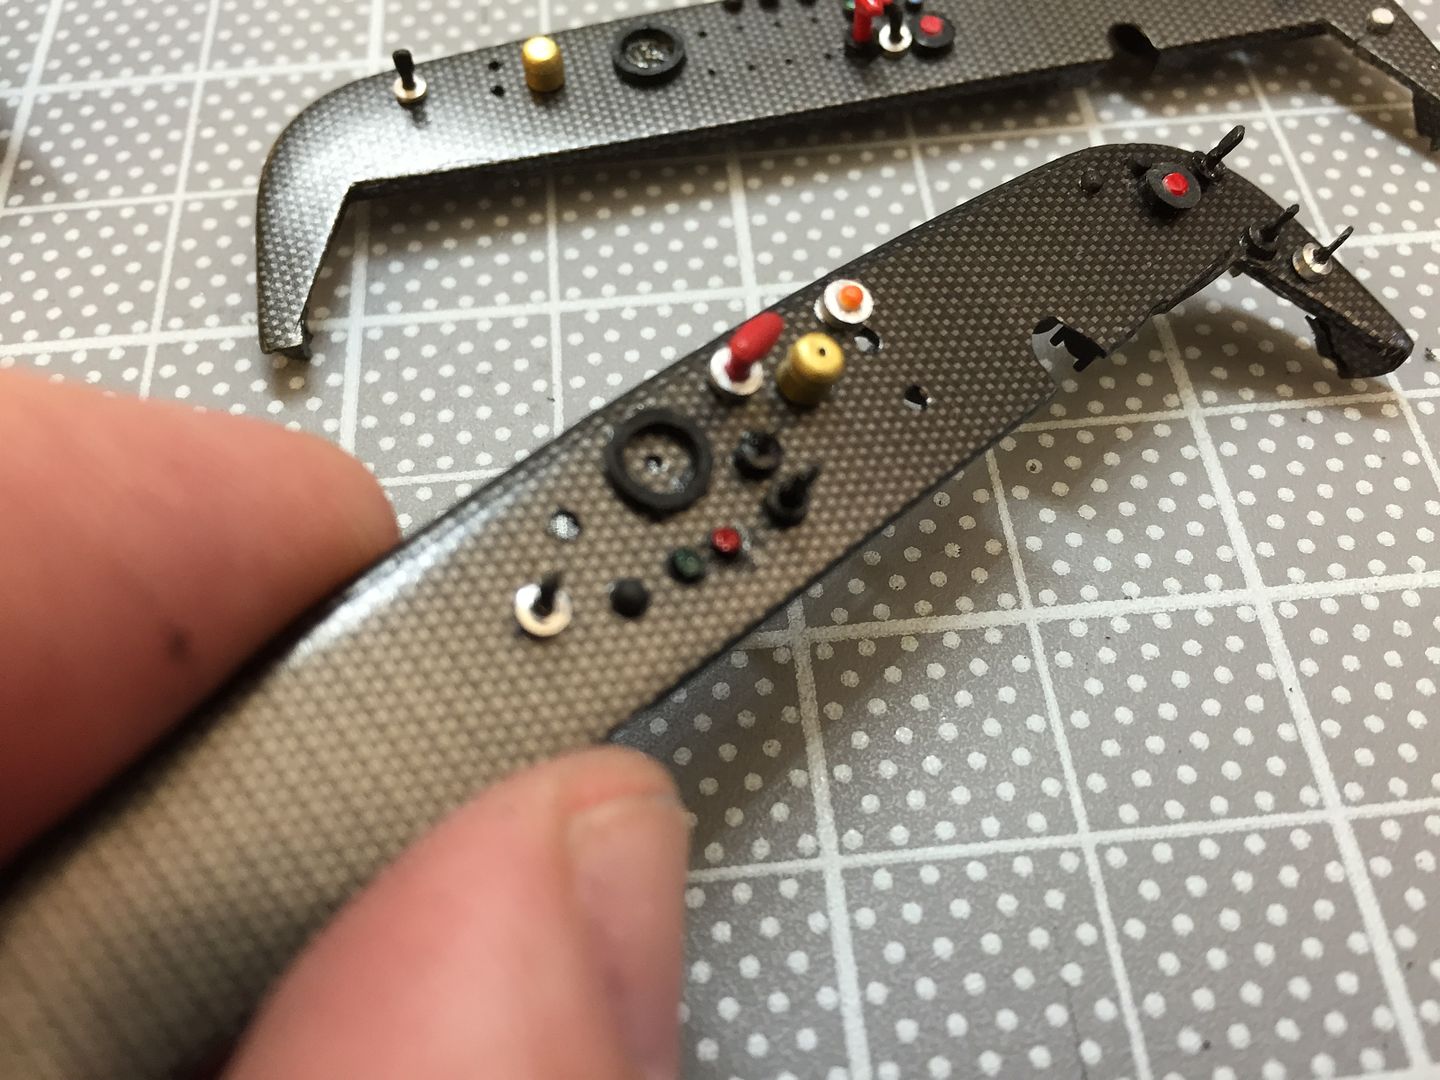
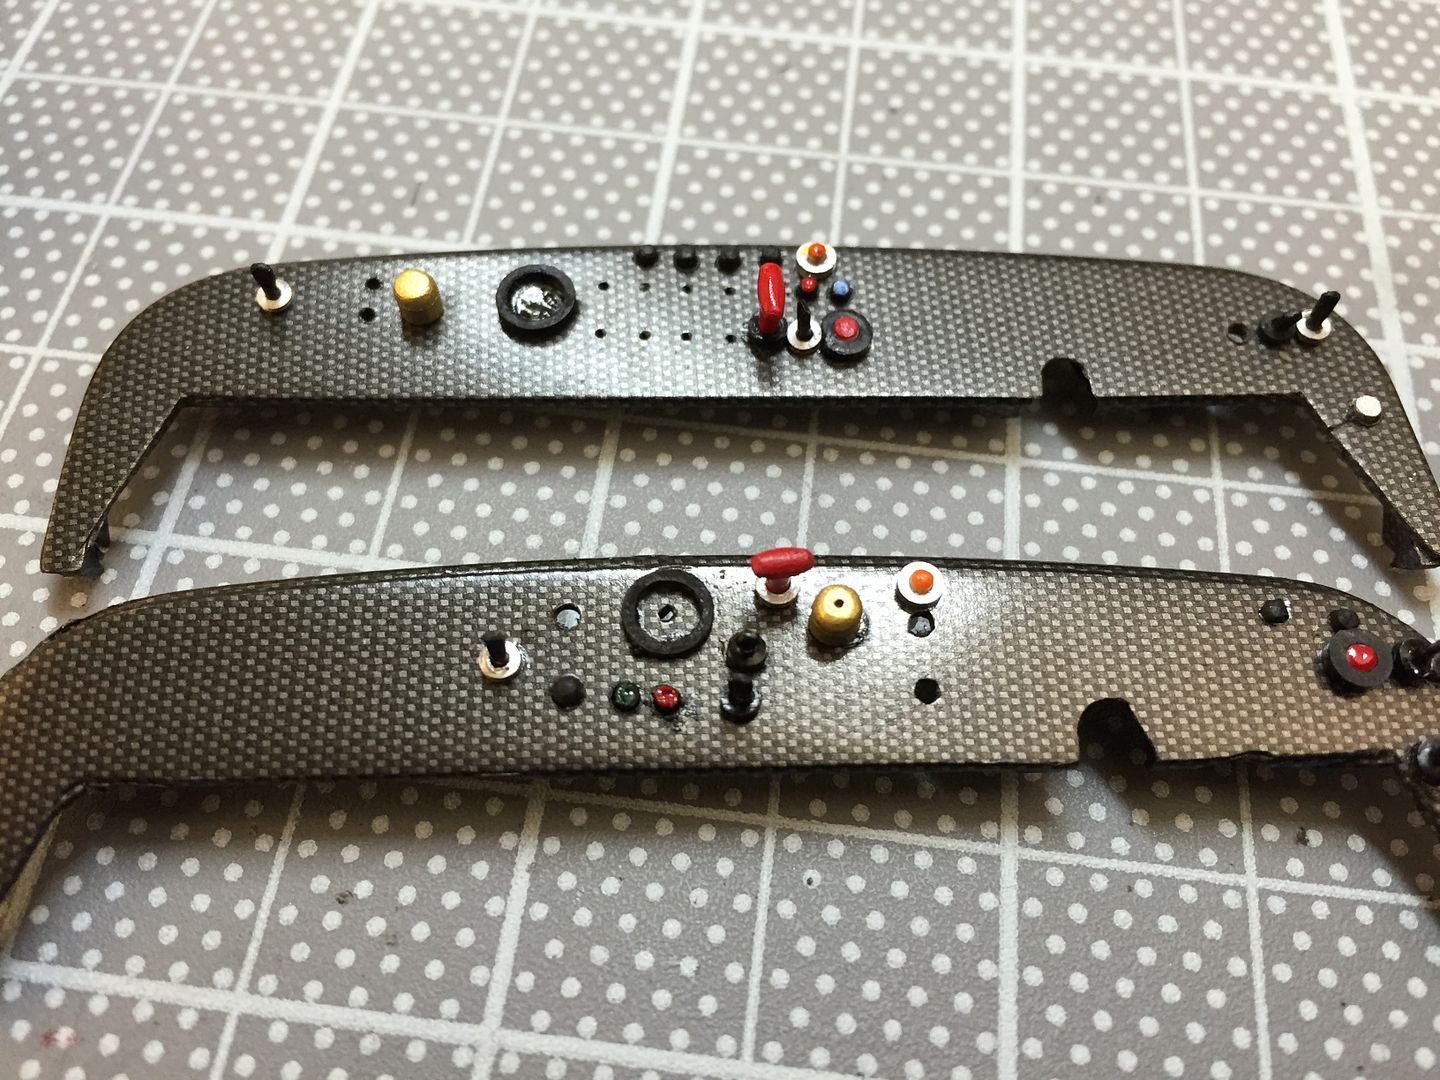
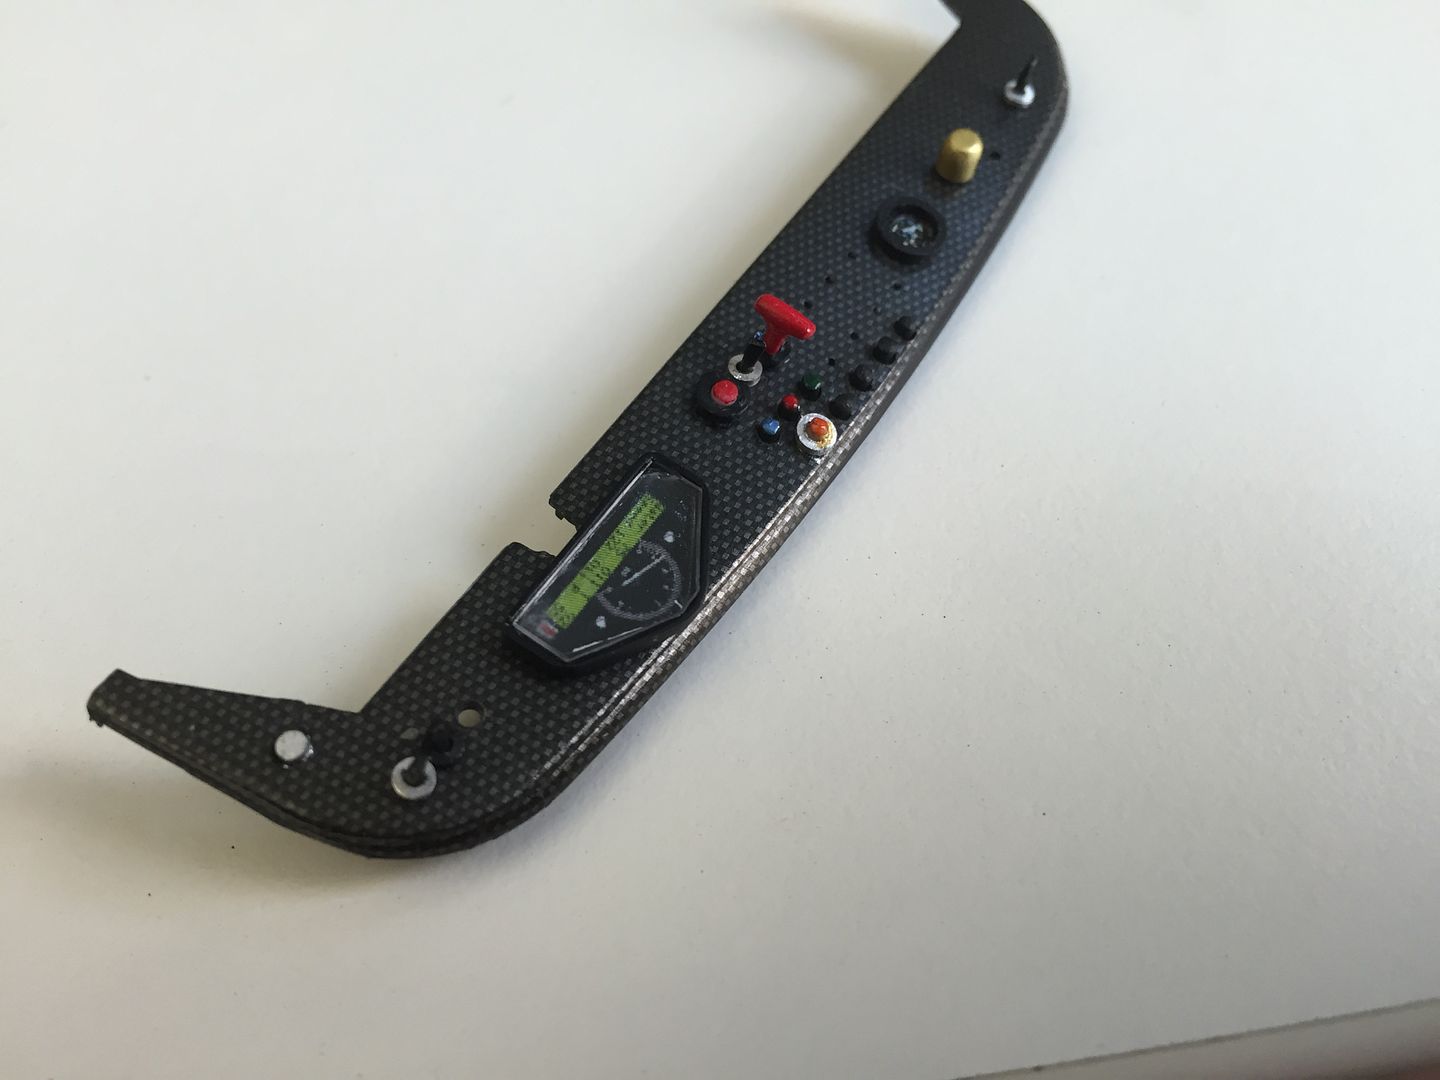
The break-through is the purchase of a resin 3D printer - but more of that later - I'd better get up tp speed with the New York work first, which apart from the decals mainly consisted of finishing the dash and stack display....so a few quick photos of that process...
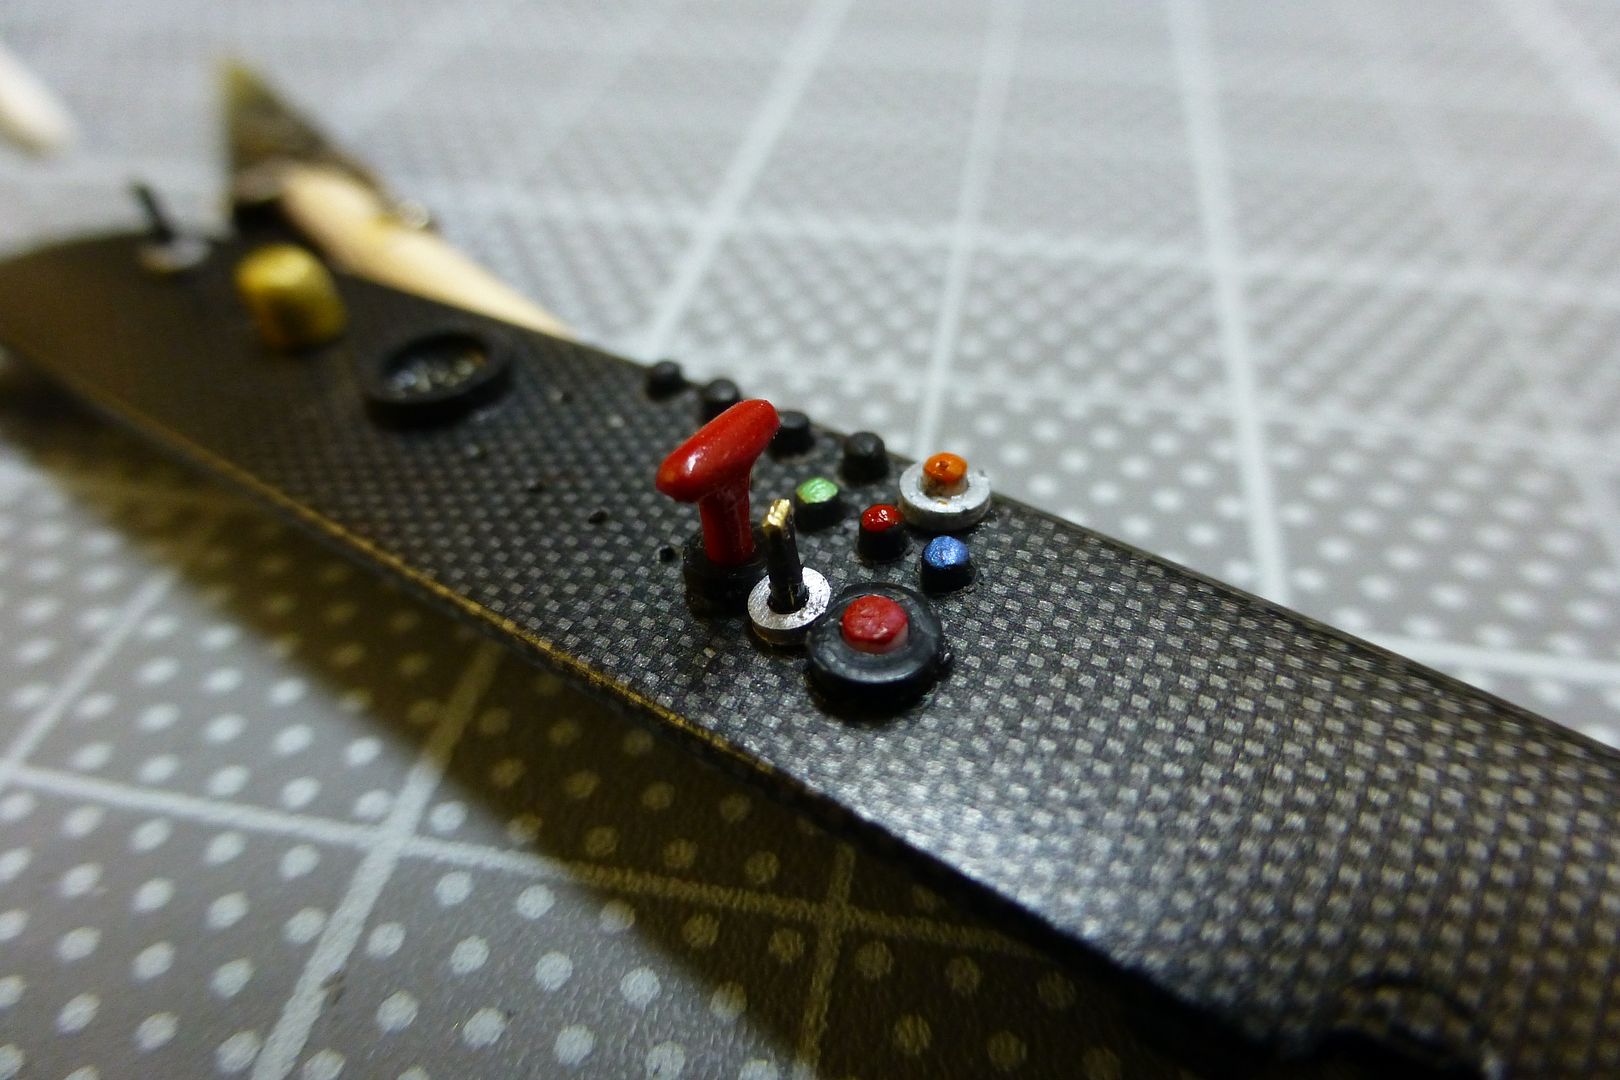
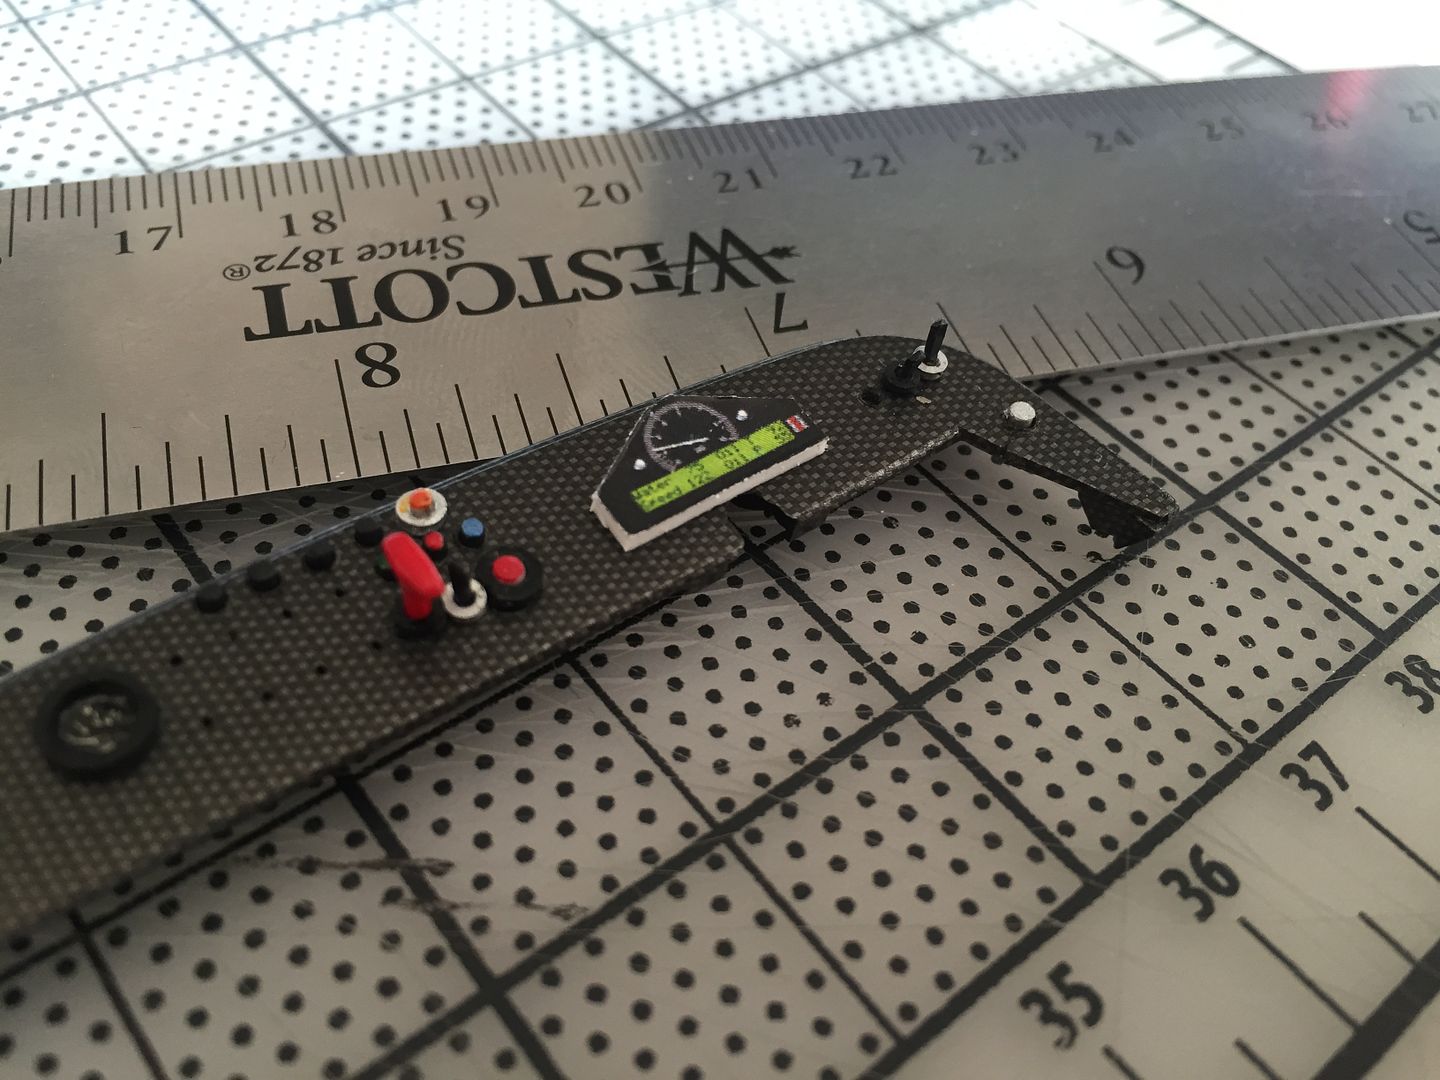
So that is pretty much where I was at when I came back to the UK - biggest challenge to finish the cars was the Tillet carbon race seats and the wheels and tyres - plus lots of little details...
While I was there, I thought I'd try the office 3D printer - a $13k machine, but as you can see - no where good enough for model making of this type - I needed a full-on resin printer - as seen in most F1 design studios!
The white centers are the ones I had machined on a CAD milling machine back in 2003...I have to make the rims and the tyres...the CAD files look nice!

....but I need real ones, 1/12 scale...
I took some nice piccies in the photo cube while I tried to figure out how to make them!
Sooooooo - on to 2019!!
The break-through is the purchase of a resin 3D printer - but more of that later - I'd better get up tp speed with the New York work first, which apart from the decals mainly consisted of finishing the dash and stack display....so a few quick photos of that process...
So that is pretty much where I was at when I came back to the UK - biggest challenge to finish the cars was the Tillet carbon race seats and the wheels and tyres - plus lots of little details...
While I was there, I thought I'd try the office 3D printer - a $13k machine, but as you can see - no where good enough for model making of this type - I needed a full-on resin printer - as seen in most F1 design studios!
The white centers are the ones I had machined on a CAD milling machine back in 2003...I have to make the rims and the tyres...the CAD files look nice!
....but I need real ones, 1/12 scale...
I took some nice piccies in the photo cube while I tried to figure out how to make them!
Sooooooo - on to 2019!!
In the mean time I had taken up model making again in the States. New skills and techniques mean that I just know I am not going to be able to resist going back and adding more detail to these kits - particularly when it comes to paint finished and washes/panel wash etc.
But the biggest issue was the damn seats.
I've kept up to date with the 'home' 3D printer market, but the FDM printers (the ones that swqeeze molten plastic out of a tube - think toothpaste - and build up layers) simply don't have the resolution required. Cheap though - you can pick up a descent kit for £150 - good enough for learning and 'rough' stuff - although actually they are still pretty good now! - and clean...as soon as you start to use resin you have mess, smell, clear-up everytime etc etc..
Resin printers, that use a laser to 'set' UV sensitive resin in very thin layers, are a different level of cost!
You are looking at £2-3k for a good, small model....
....until now! There are now a handful of small printers available for less than £350.
These use a UV emitting LCD screen to 'set' each layer - the resolution (thickness of the layers!) is way higher than any FDM printer - in fact you can even see the pixels of the 2K LCD screen being printed if you really zoom in.
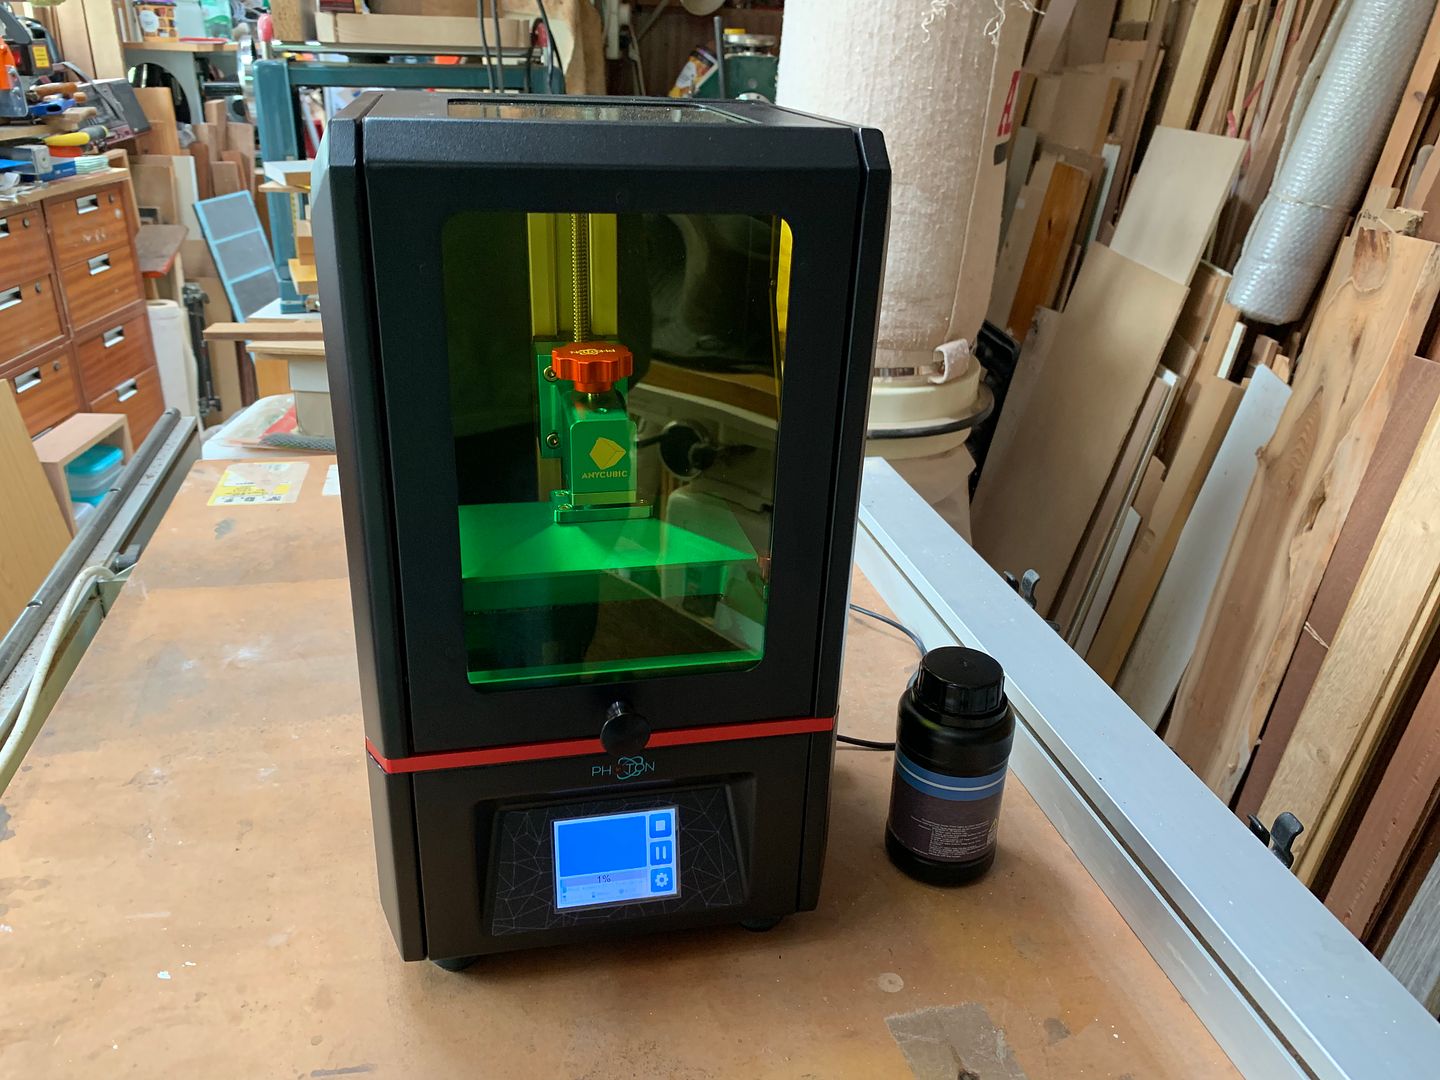
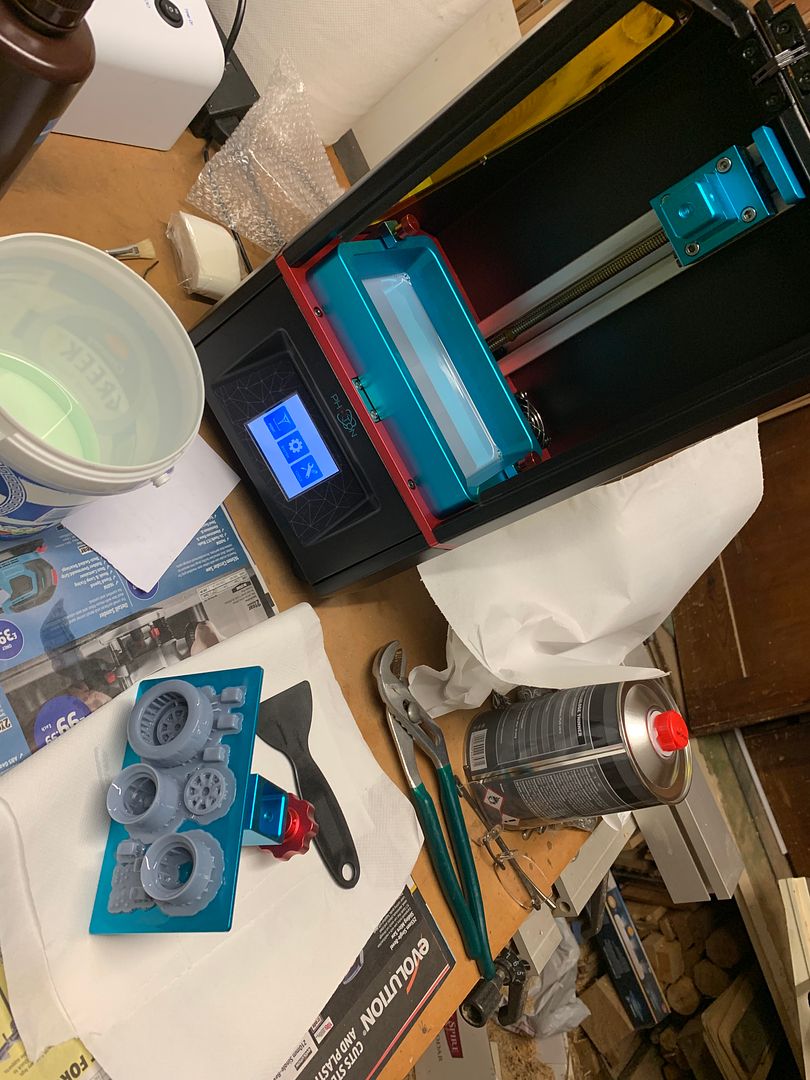
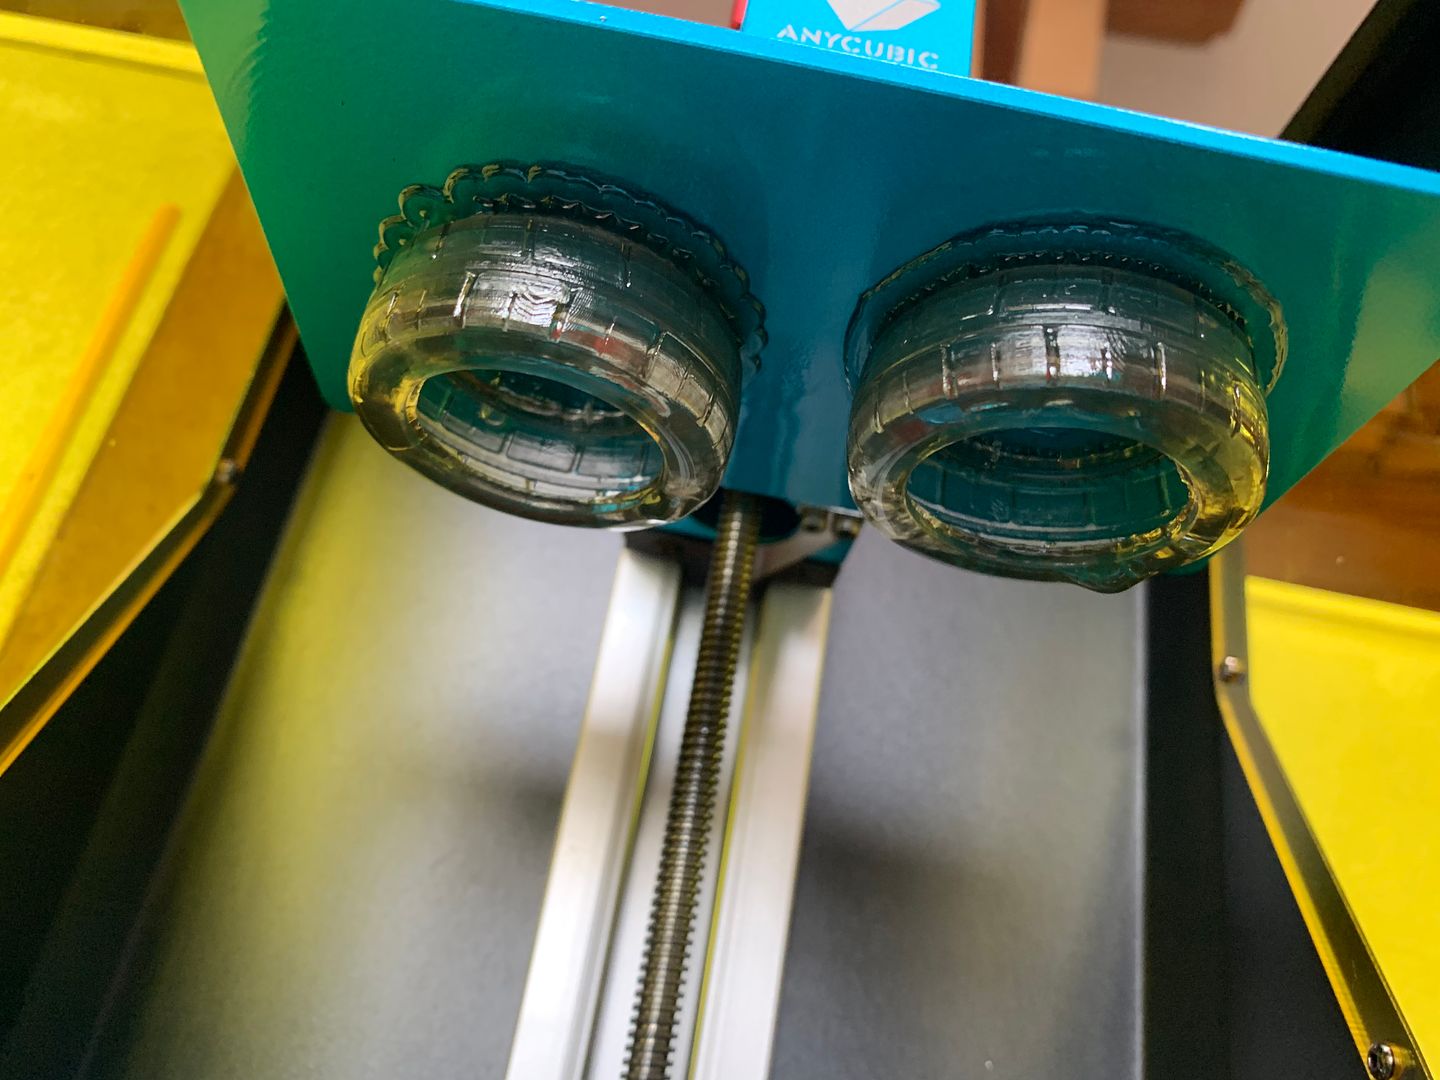
So last week I invested in an Anycubic Photon - a very popular Chinese printer you can get from Amazon. It produces stunning results....
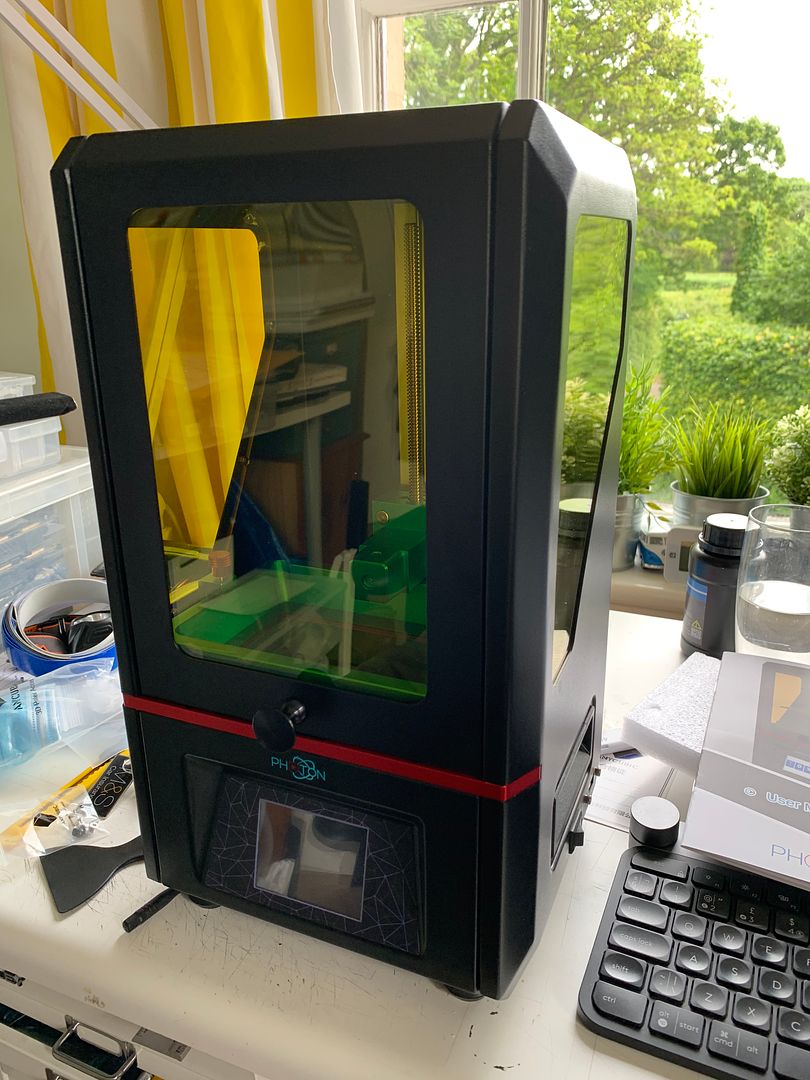
It has a small print area, but for the size of parts I want to make, it is fine.
DO NOT READ AHEAD IF YOU DON'T WANT TO BE TEMPTED - THE RESULTS YOU CAN GET FROM THIS PRINTER ARE AMAZING!
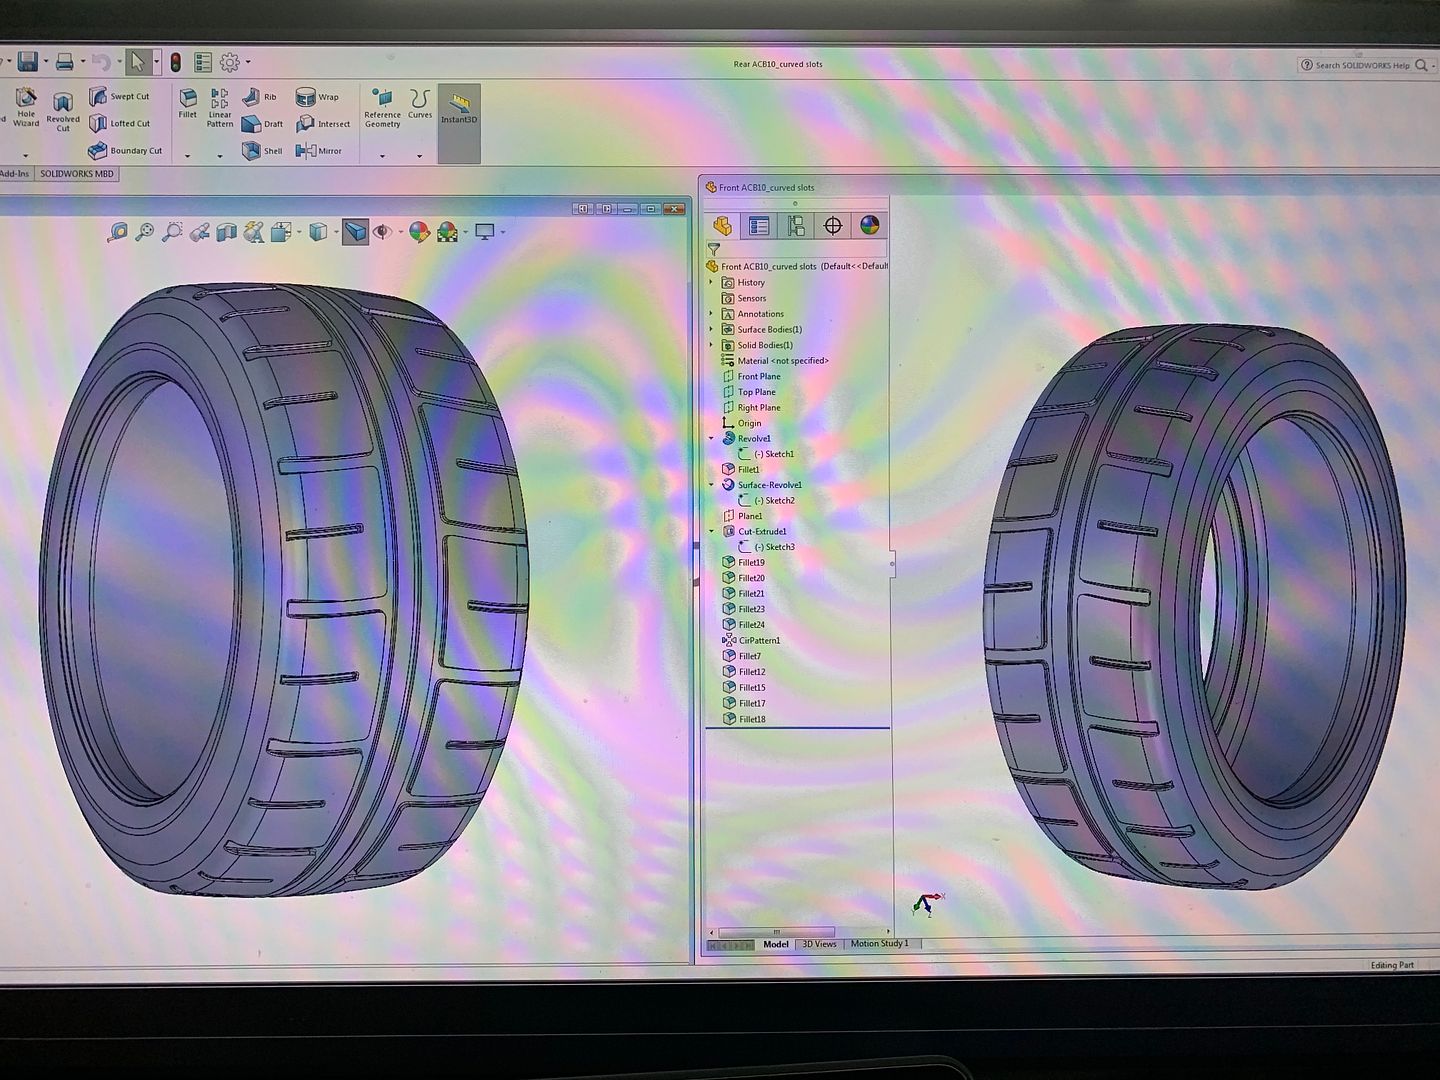
Of course you have to draw the 3D cad files to print - I have access to Solidworks, which I have used in work - but I am not an expert user by any means - I have been drawing boxes and shelves in NYC - so the learning curve to draw a complex shape like a Tillet seat is large!
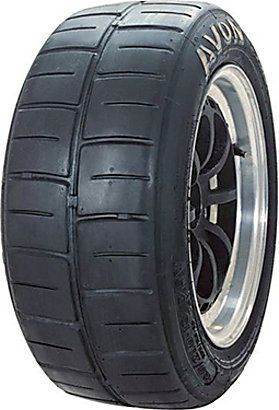
I thought I'd start with some wheels and tyres - these models have ACB 10 tyres, which have to be the simplest tread to try and draw up as well - result!!
So - I worked through some tutorials, and...
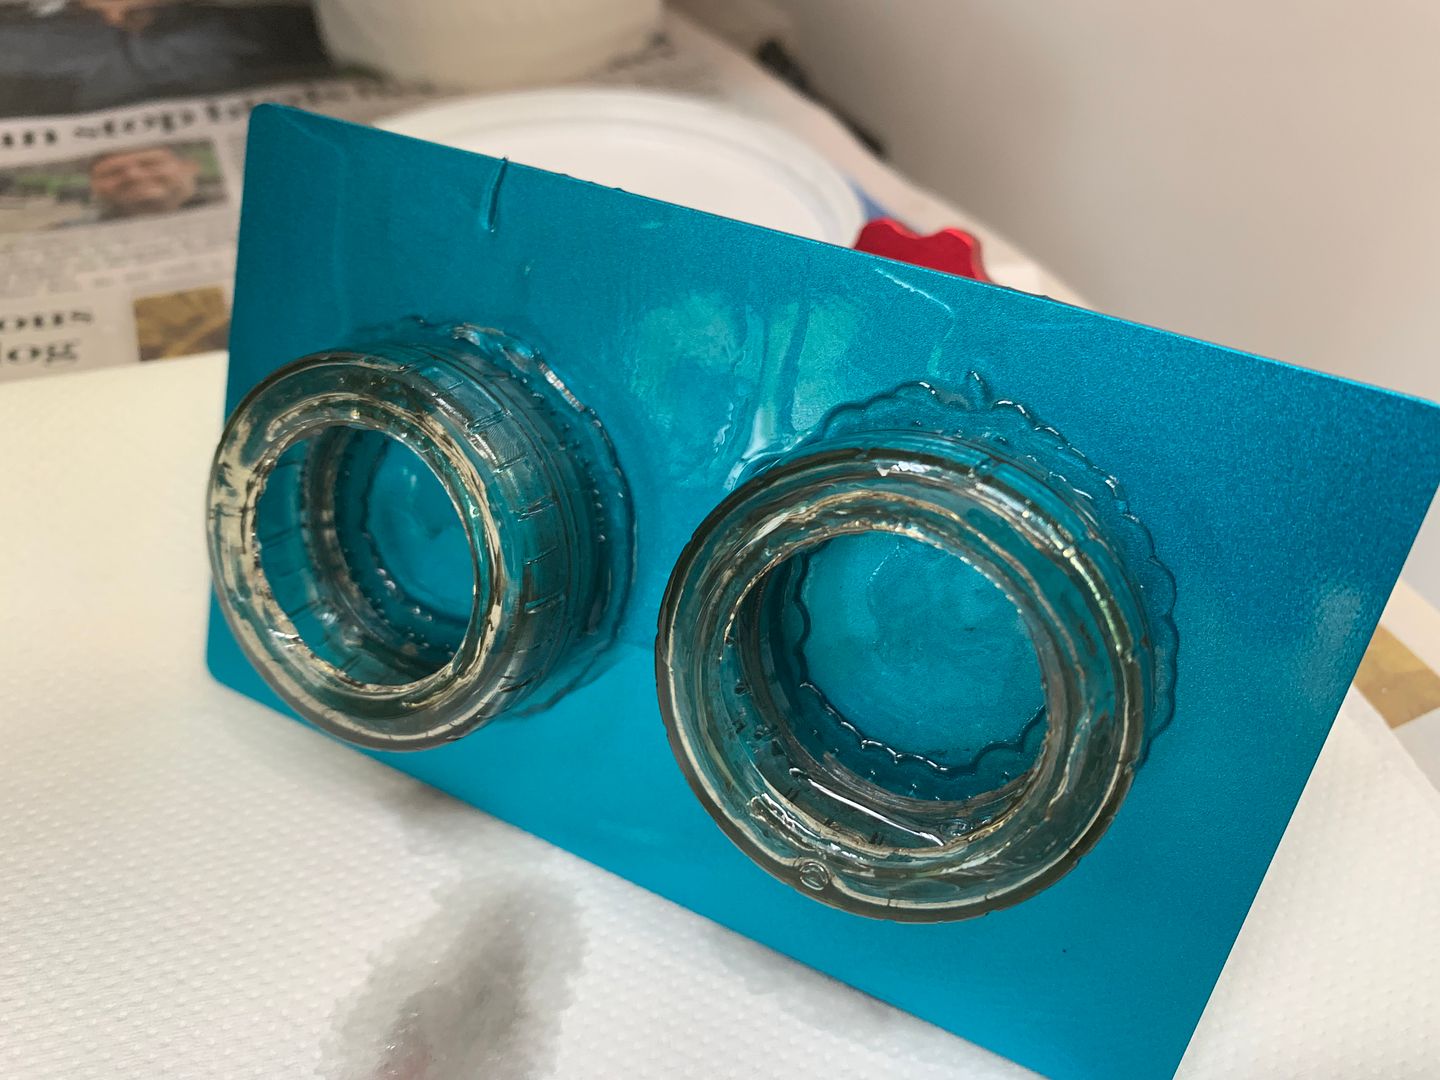
So on to the first print - the printer comes with some resin to try - in this case, translucent green...out to Dads workshop....
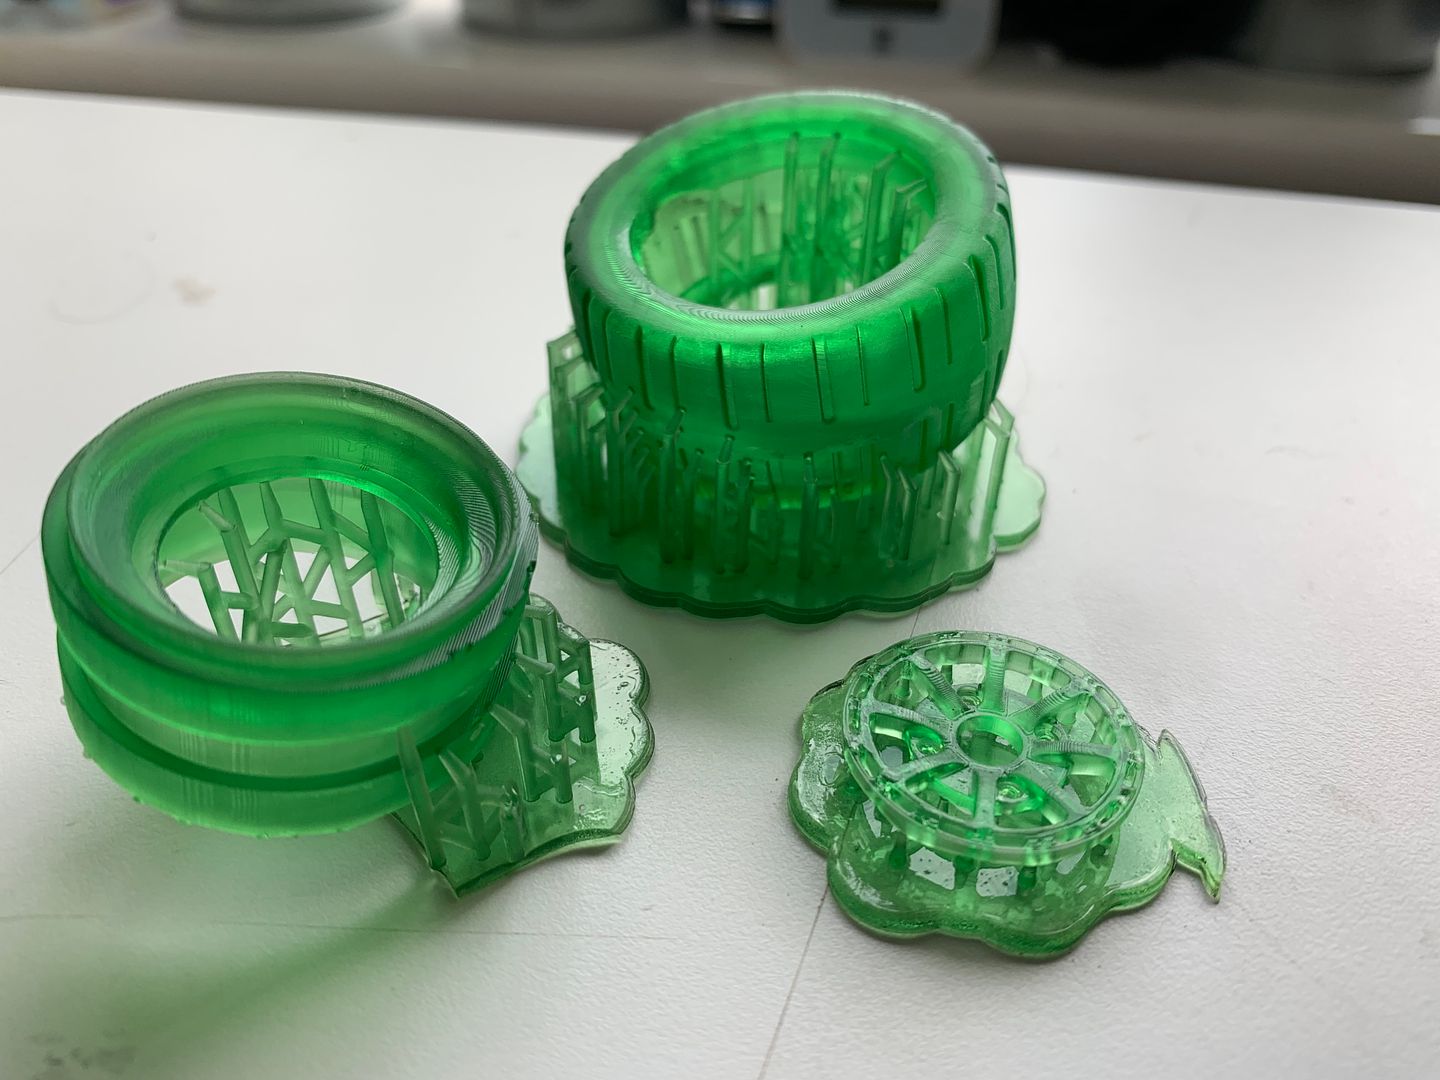
BOOM! I was amazed at the results...and please note, these are not at the highest resolution I can print, so you can see some layers - if you go finer the prints take much longer - these are already at about 4hrs plus...
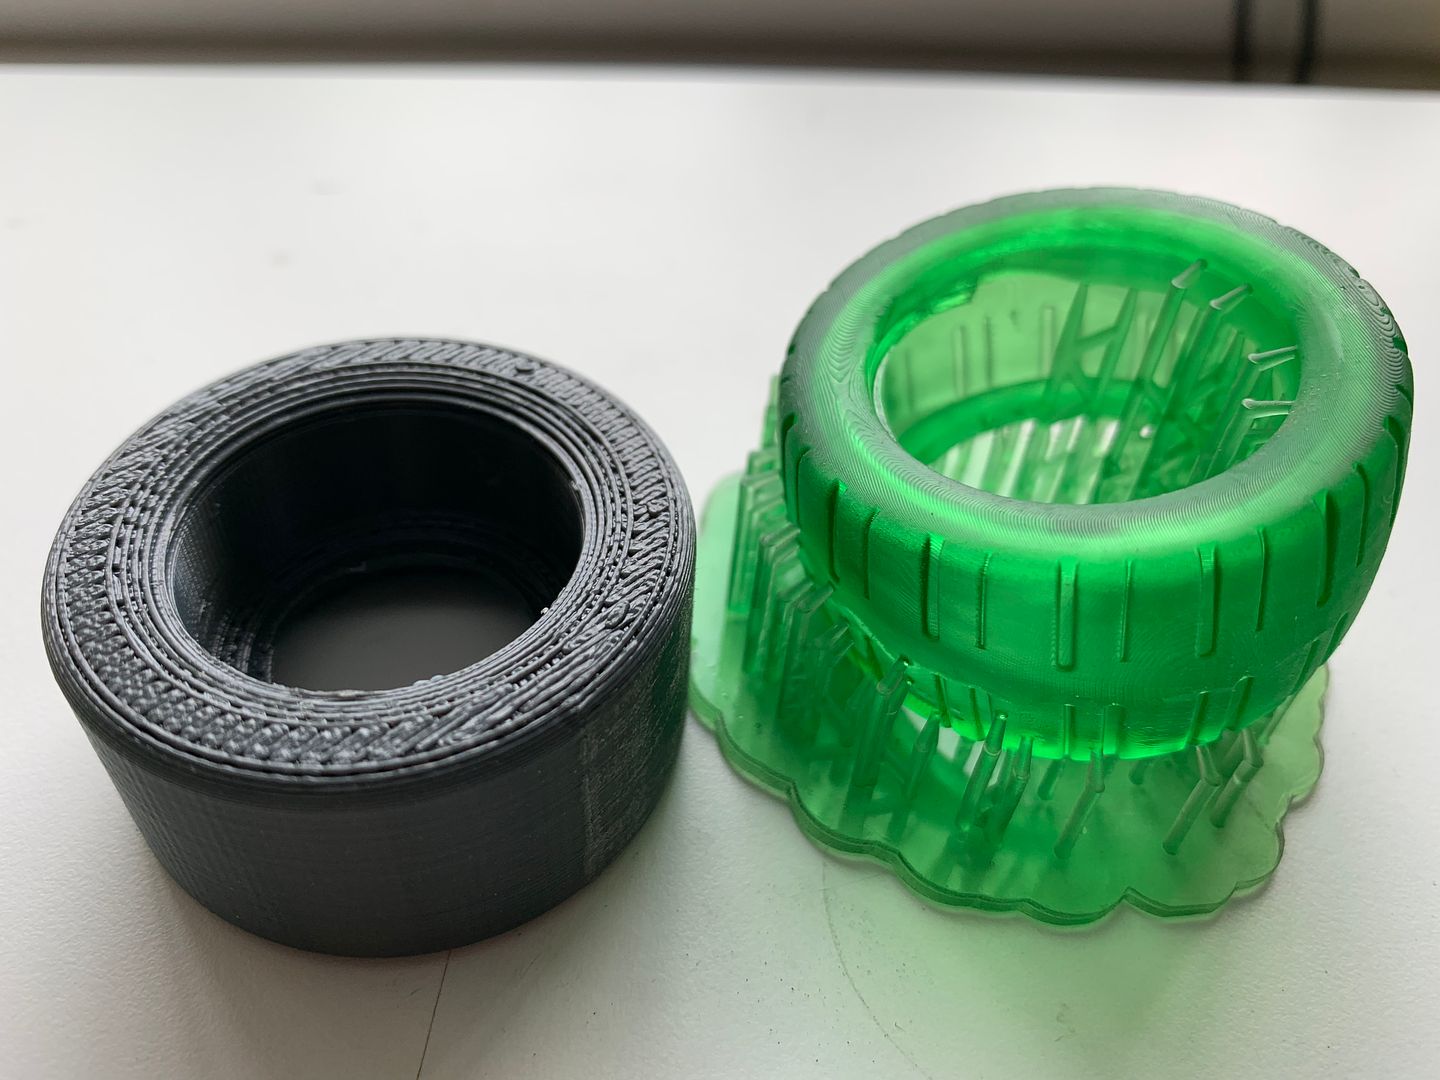
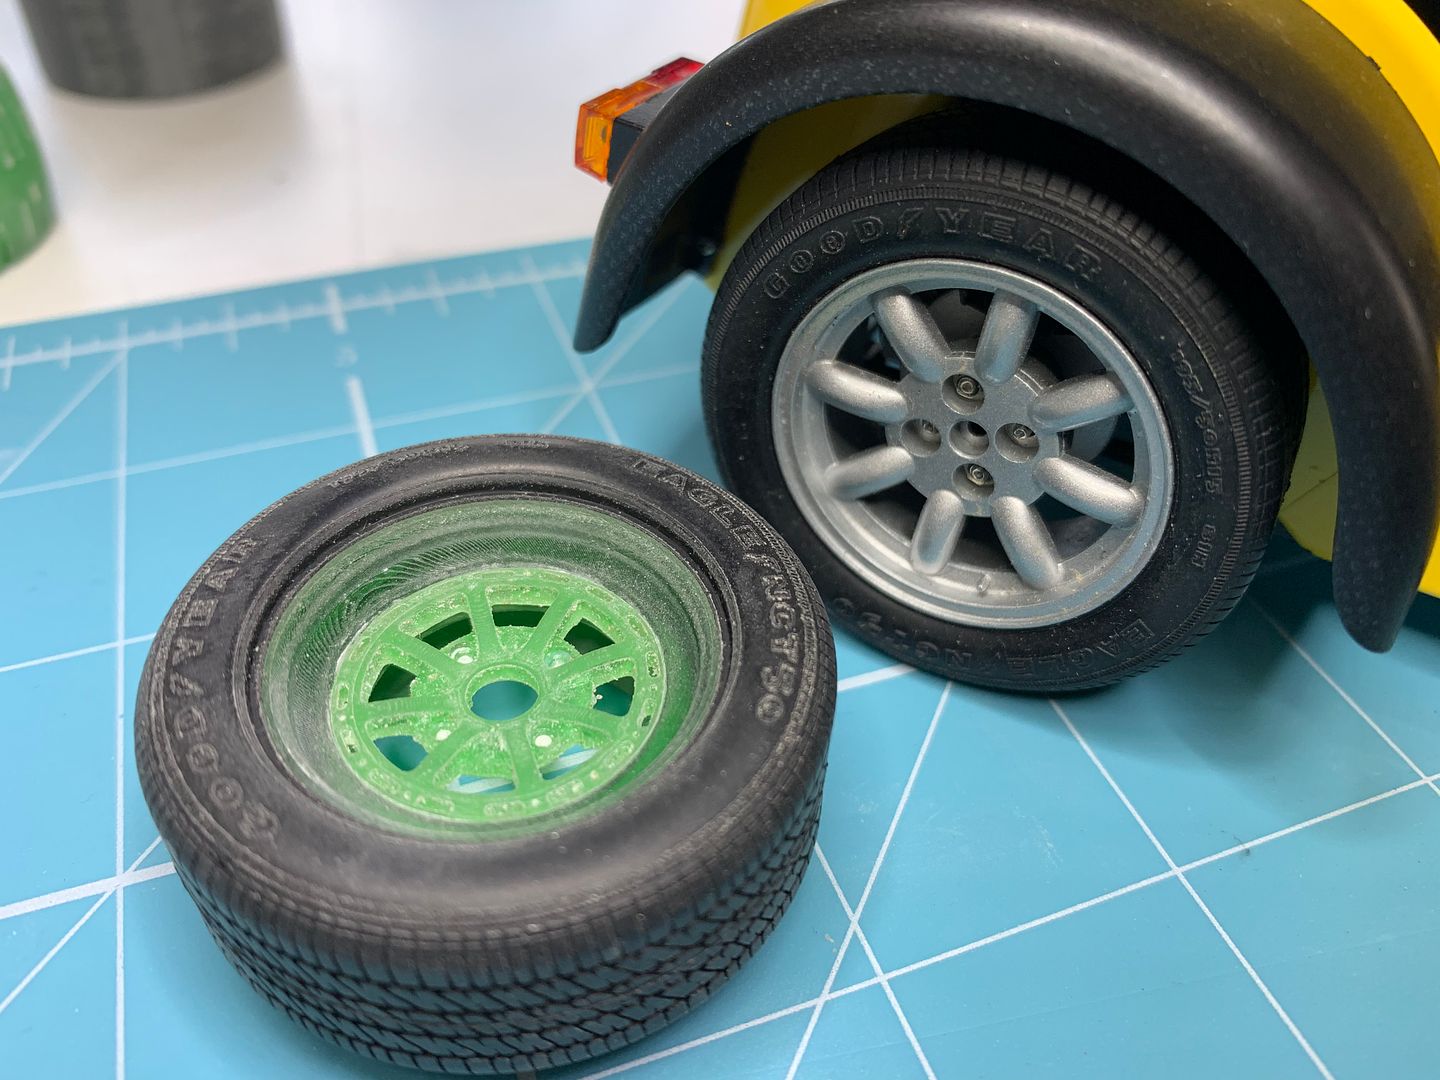
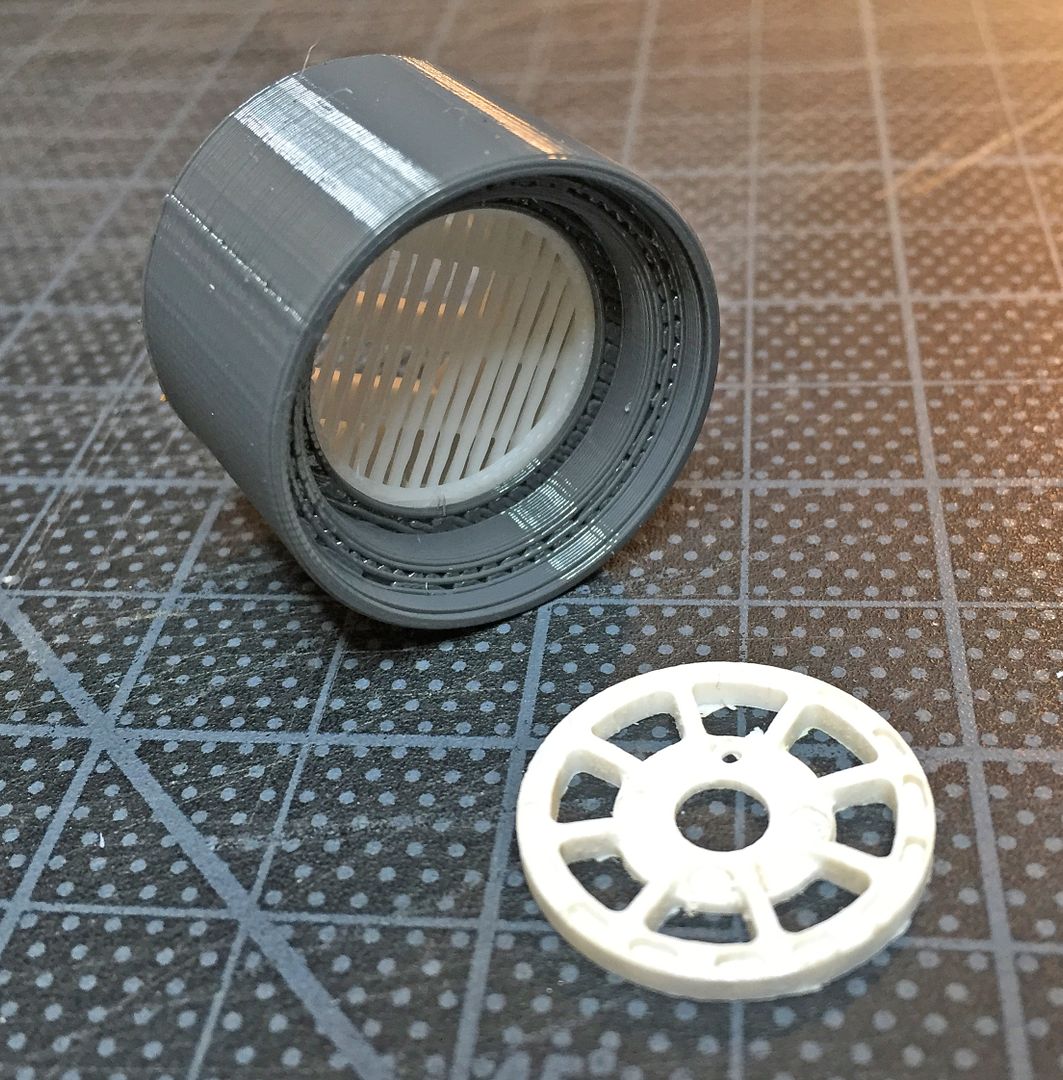
Moved on to some grey resin...
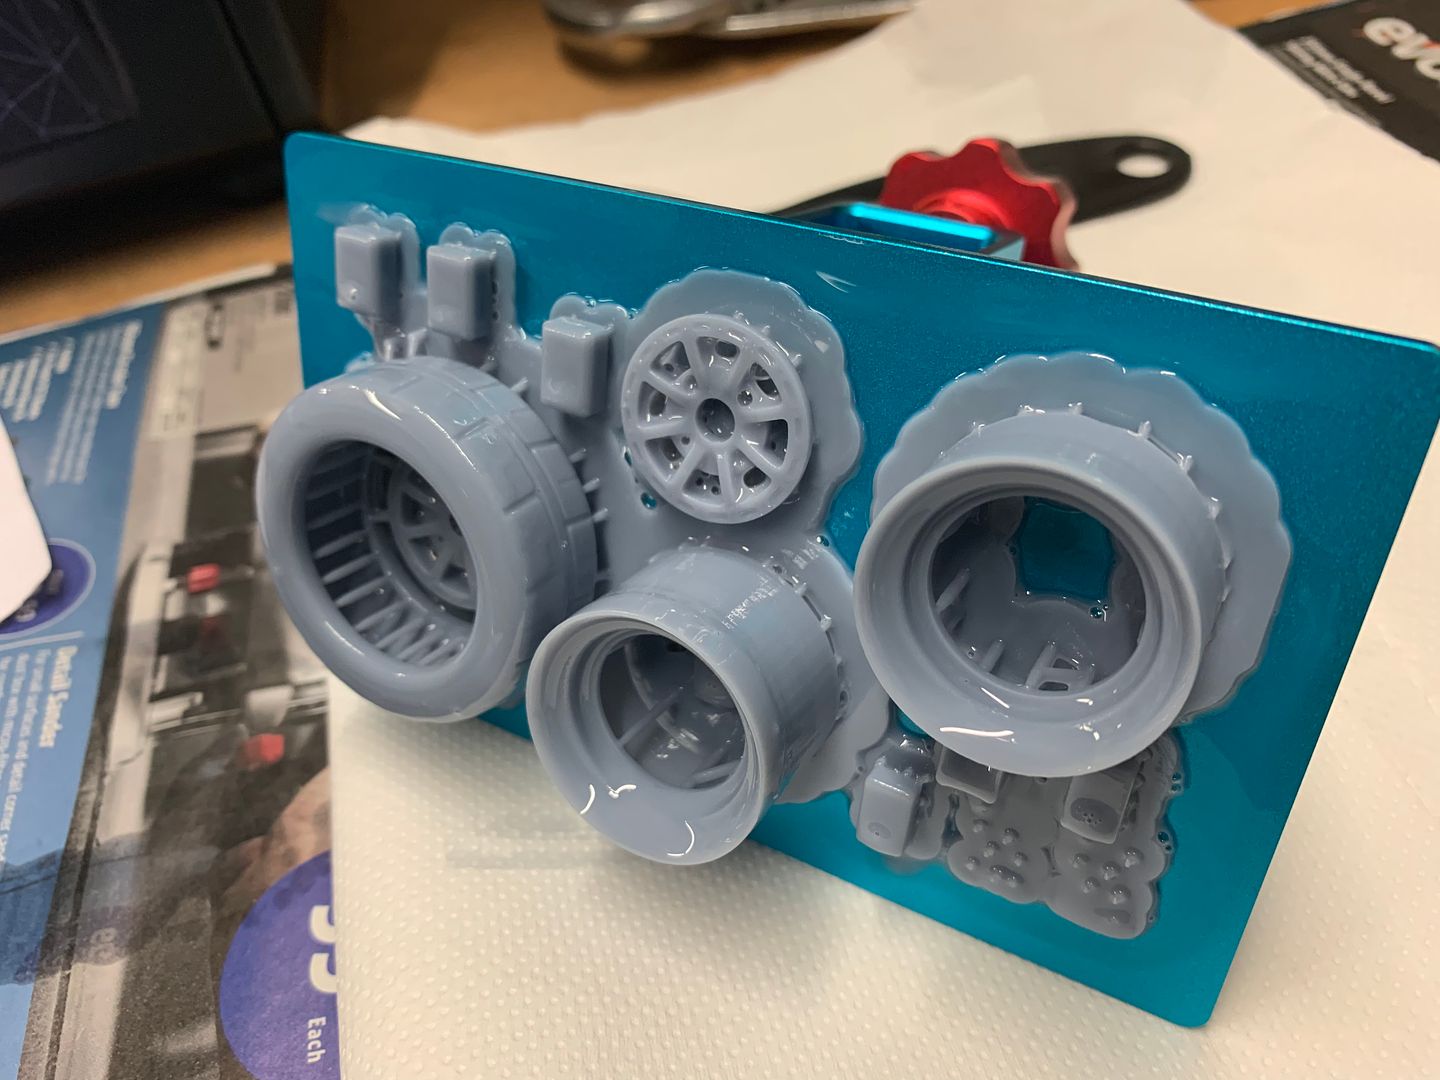
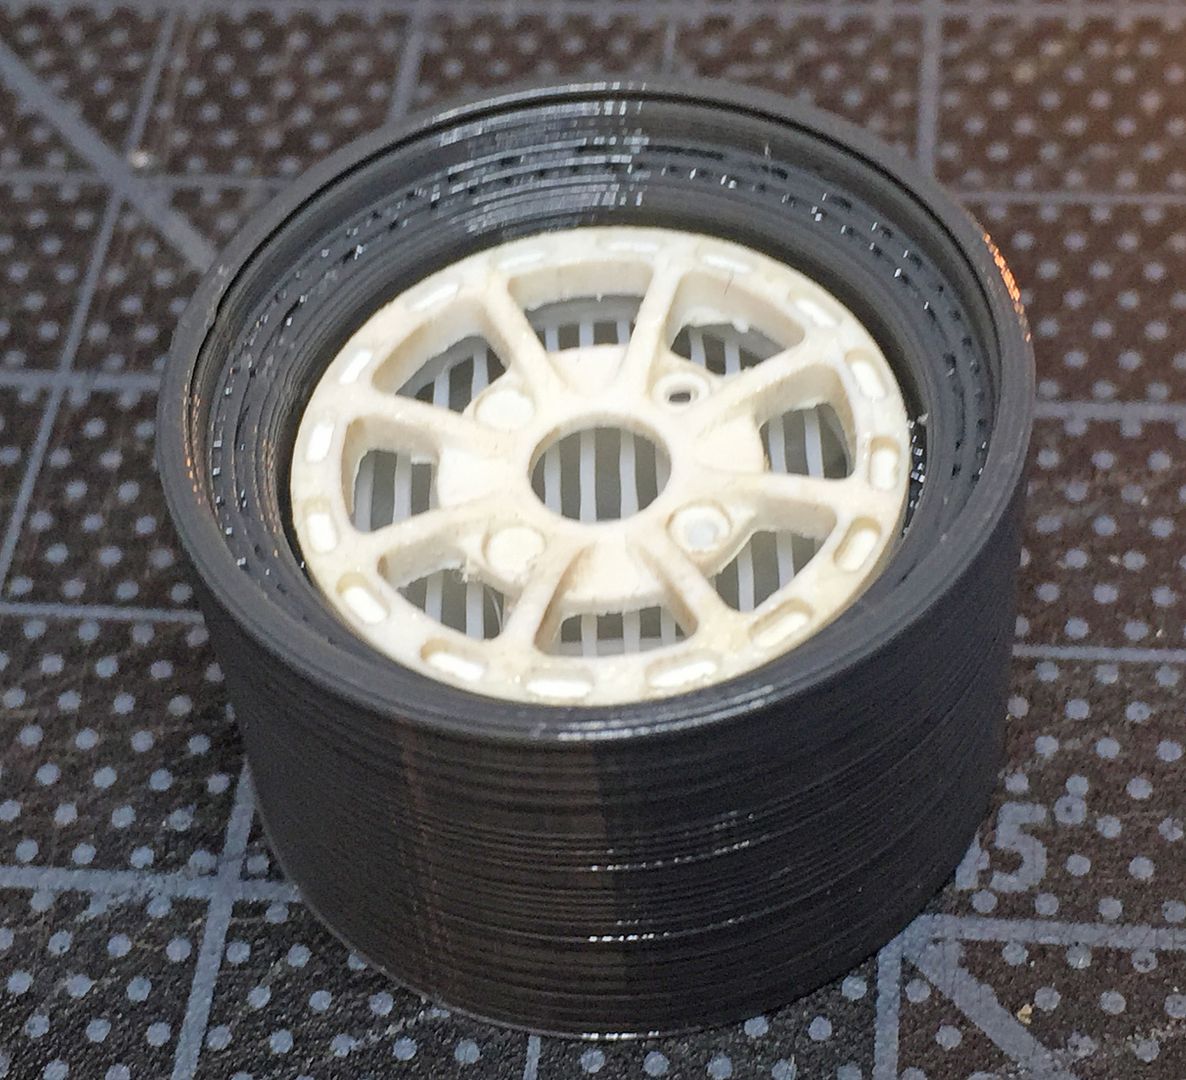
...as I had the file for the central cast hub, I am able to reproduce those as well - lucky as I can't find the plastic sheet with 8 hubs machined onto it from 2003!
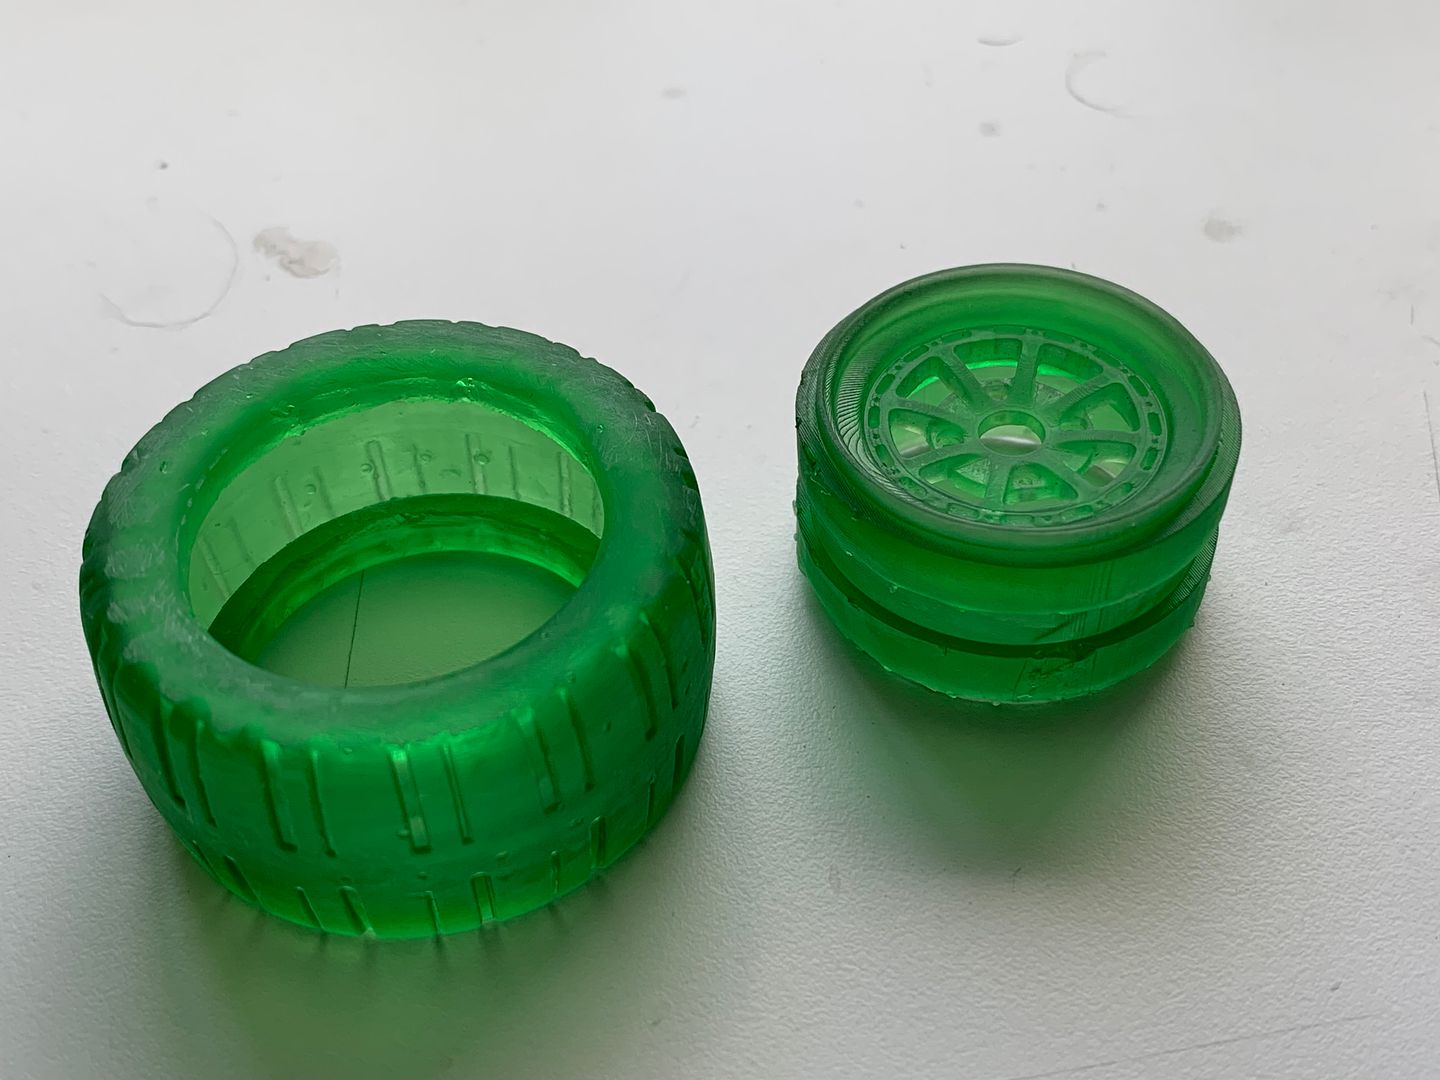
So this is a 3 piece wheel:
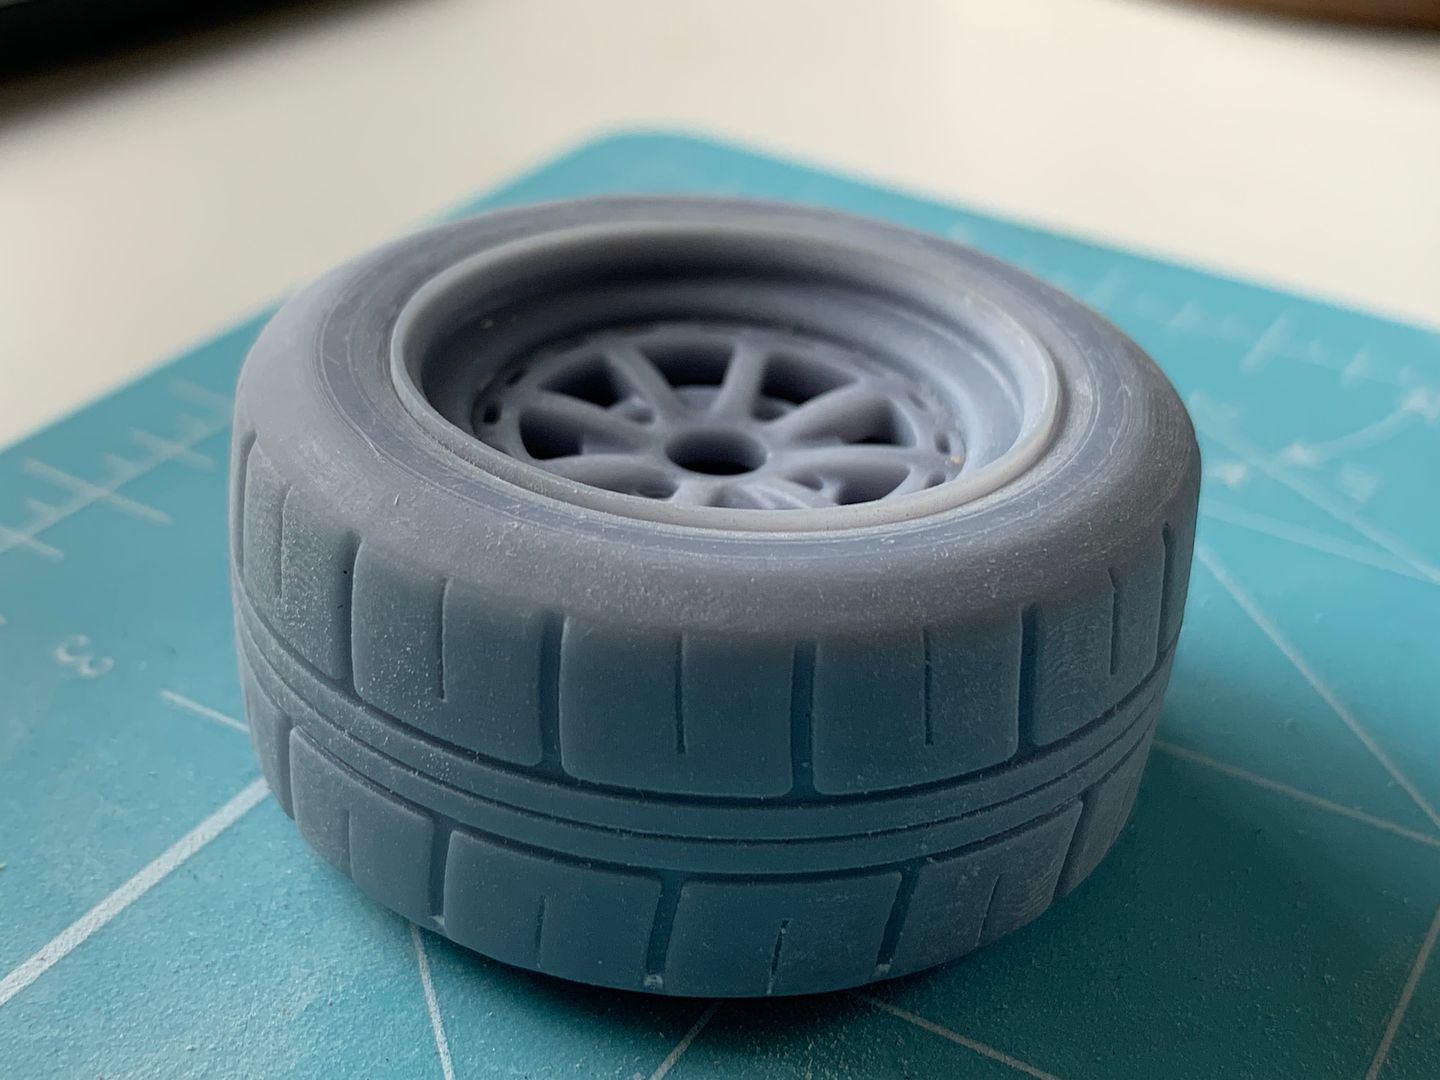
I have to play around with sizes to allow for paint clearance etc - but it works brilliantly.
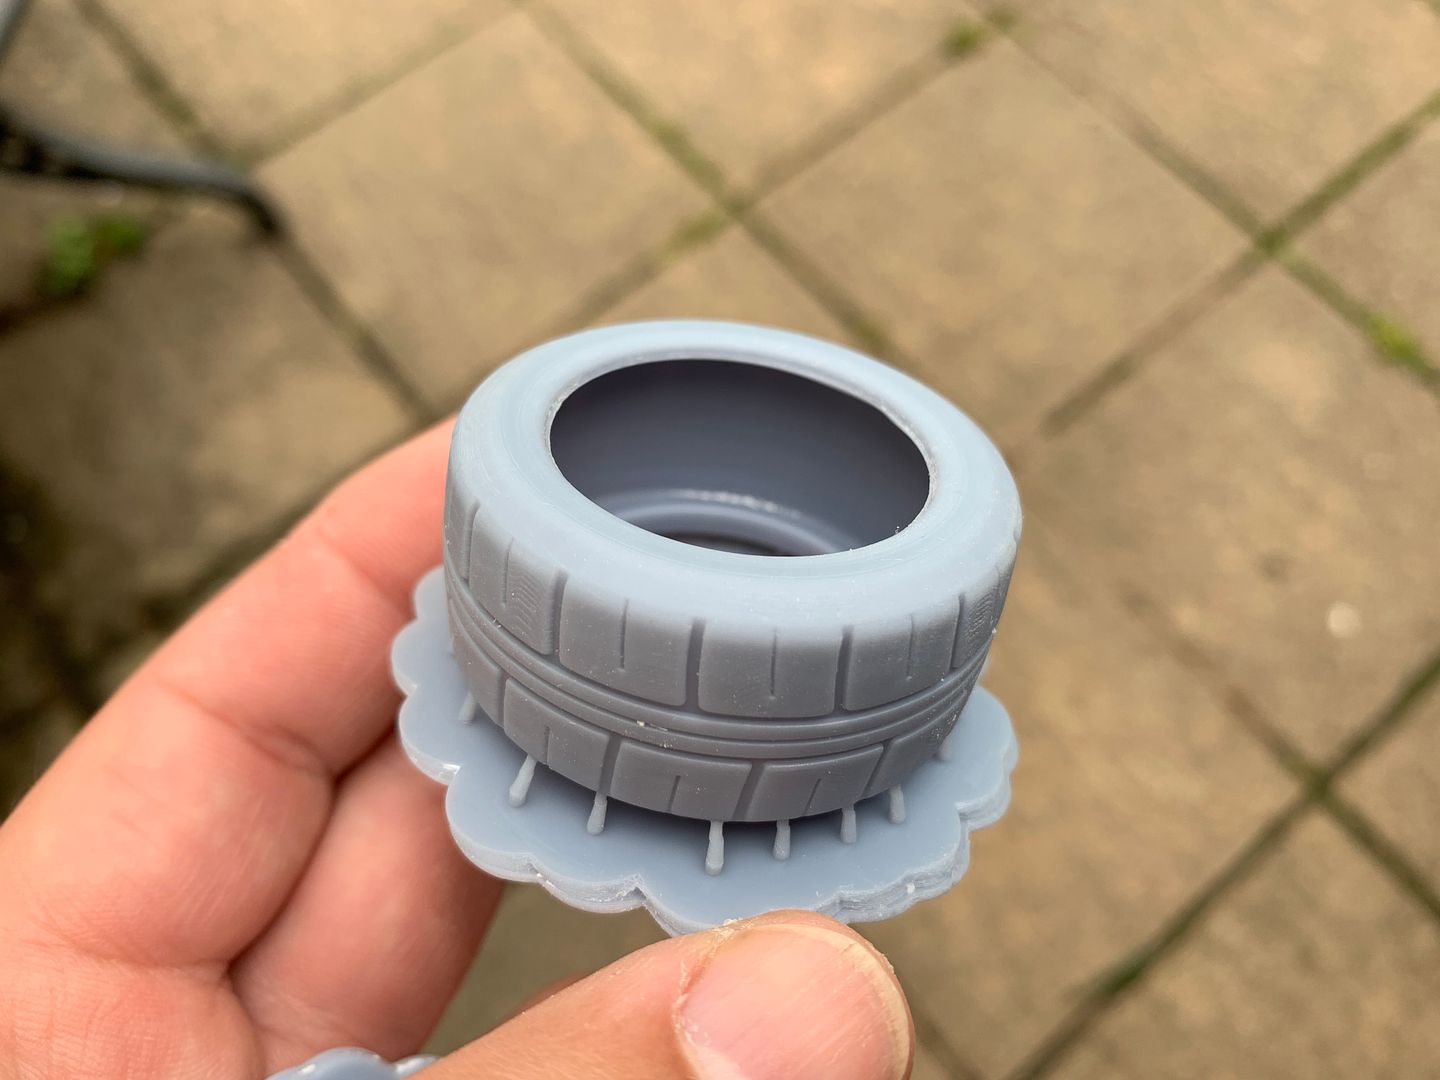
You can get different types of resin - so I have got some flexible resin to try and make 'real' tyres - I'll have to reduce the wall thickness right down, and make sure I can use pigment on the resin to make it black - as the flex resin is clear - but that is to come. I'l probably use the grey hard resin and spray for now...
More updates tomorrow - I'm staying up waaaay too late every night working on this - but it is good to get the modelling MOJO back after 18 mths....
But the biggest issue was the damn seats.
I've kept up to date with the 'home' 3D printer market, but the FDM printers (the ones that swqeeze molten plastic out of a tube - think toothpaste - and build up layers) simply don't have the resolution required. Cheap though - you can pick up a descent kit for £150 - good enough for learning and 'rough' stuff - although actually they are still pretty good now! - and clean...as soon as you start to use resin you have mess, smell, clear-up everytime etc etc..
Resin printers, that use a laser to 'set' UV sensitive resin in very thin layers, are a different level of cost!
You are looking at £2-3k for a good, small model....
....until now! There are now a handful of small printers available for less than £350.
These use a UV emitting LCD screen to 'set' each layer - the resolution (thickness of the layers!) is way higher than any FDM printer - in fact you can even see the pixels of the 2K LCD screen being printed if you really zoom in.
So last week I invested in an Anycubic Photon - a very popular Chinese printer you can get from Amazon. It produces stunning results....
It has a small print area, but for the size of parts I want to make, it is fine.
DO NOT READ AHEAD IF YOU DON'T WANT TO BE TEMPTED - THE RESULTS YOU CAN GET FROM THIS PRINTER ARE AMAZING!
Of course you have to draw the 3D cad files to print - I have access to Solidworks, which I have used in work - but I am not an expert user by any means - I have been drawing boxes and shelves in NYC - so the learning curve to draw a complex shape like a Tillet seat is large!
I thought I'd start with some wheels and tyres - these models have ACB 10 tyres, which have to be the simplest tread to try and draw up as well - result!!
So - I worked through some tutorials, and...
So on to the first print - the printer comes with some resin to try - in this case, translucent green...out to Dads workshop....
BOOM! I was amazed at the results...and please note, these are not at the highest resolution I can print, so you can see some layers - if you go finer the prints take much longer - these are already at about 4hrs plus...
Moved on to some grey resin...
...as I had the file for the central cast hub, I am able to reproduce those as well - lucky as I can't find the plastic sheet with 8 hubs machined onto it from 2003!
So this is a 3 piece wheel:
I have to play around with sizes to allow for paint clearance etc - but it works brilliantly.
You can get different types of resin - so I have got some flexible resin to try and make 'real' tyres - I'll have to reduce the wall thickness right down, and make sure I can use pigment on the resin to make it black - as the flex resin is clear - but that is to come. I'l probably use the grey hard resin and spray for now...
More updates tomorrow - I'm staying up waaaay too late every night working on this - but it is good to get the modelling MOJO back after 18 mths....
Gassing Station | Scale Models | Top of Page | What's New | My Stuff