Tamiya Caterham 1/12 - modified
Discussion


4321go said:
That’s very cool.
Now, here’s a challenge...... Although a Caterham doesn’t weigh very much, do your new-found CAD skills go as far as being able to squash and bulge the tyres to replicate the weight of a real car (rather than a featherweight plastic kit) bearing down on them?
- they do flexible resin Now, here’s a challenge...... Although a Caterham doesn’t weigh very much, do your new-found CAD skills go as far as being able to squash and bulge the tyres to replicate the weight of a real car (rather than a featherweight plastic kit) bearing down on them?
 - so I'm playing with wall thickness to see if I can get exactlythat to work - the issue is painting, the flexi resin is clear, and paint will crack - so you have to use pigment...
dr_gn said:
Oh. My. God.
I know, right!!Thought of you when I said 'warning', because you WILL end up with one lol - I did wonder if you used them 'at work' - the resin is UV cured as it prints, and then you use a UV light source to cure it once finished - £12 nail varnish curer from amazon!
after washing with IPA - all very simple, if a little messy....caterhamnut said:
dr_gn said:
Oh. My. God.
I know, right!!Thought of you when I said 'warning', because you WILL end up with one lol - I did wonder if you used them 'at work' - the resin is UV cured as it prints, and then you use a UV light source to cure it once finished - £12 nail varnish curer from amazon!
after washing with IPA - all very simple, if a little messy....
dr_gn said:
Any chance you could give one of the wheels a quick coat of Tamiya Grey primer to get rid of the reflections? Ta.
ETA - and post an image, obviously
which ones Doc? ETA - and post an image, obviously
The green ones were first ever tests - so not representative of the quality....and in fact I haven't gone full-blown detail yet because it significantly increases print time! I'm doing some more now for the actual models - I'll show those 'in progress' (before any sanding etc)
It is a bit smelly, yes - one of the disadvantages. My machine is in the workshop - I tried upstairs in the house with the window open, but with prints taking many hours sometimes, It just wasn't going to work.
However, plenty of people put them in cabinets with extractor hoses and carbon filters - just like a spray booth....and some resins are no or low odour...
caterhamnut said:
dr_gn said:
Any chance you could give one of the wheels a quick coat of Tamiya Grey primer to get rid of the reflections? Ta.
ETA - and post an image, obviously
which ones Doc? ETA - and post an image, obviously
The green ones were first ever tests - so not representative of the quality....and in fact I haven't gone full-blown detail yet because it significantly increases print time! I'm doing some more now for the actual models - I'll show those 'in progress' (before any sanding etc)
It is a bit smelly, yes - one of the disadvantages. My machine is in the workshop - I tried upstairs in the house with the window open, but with prints taking many hours sometimes, It just wasn't going to work.
However, plenty of people put them in cabinets with extractor hoses and carbon filters - just like a spray booth....and some resins are no or low odour...
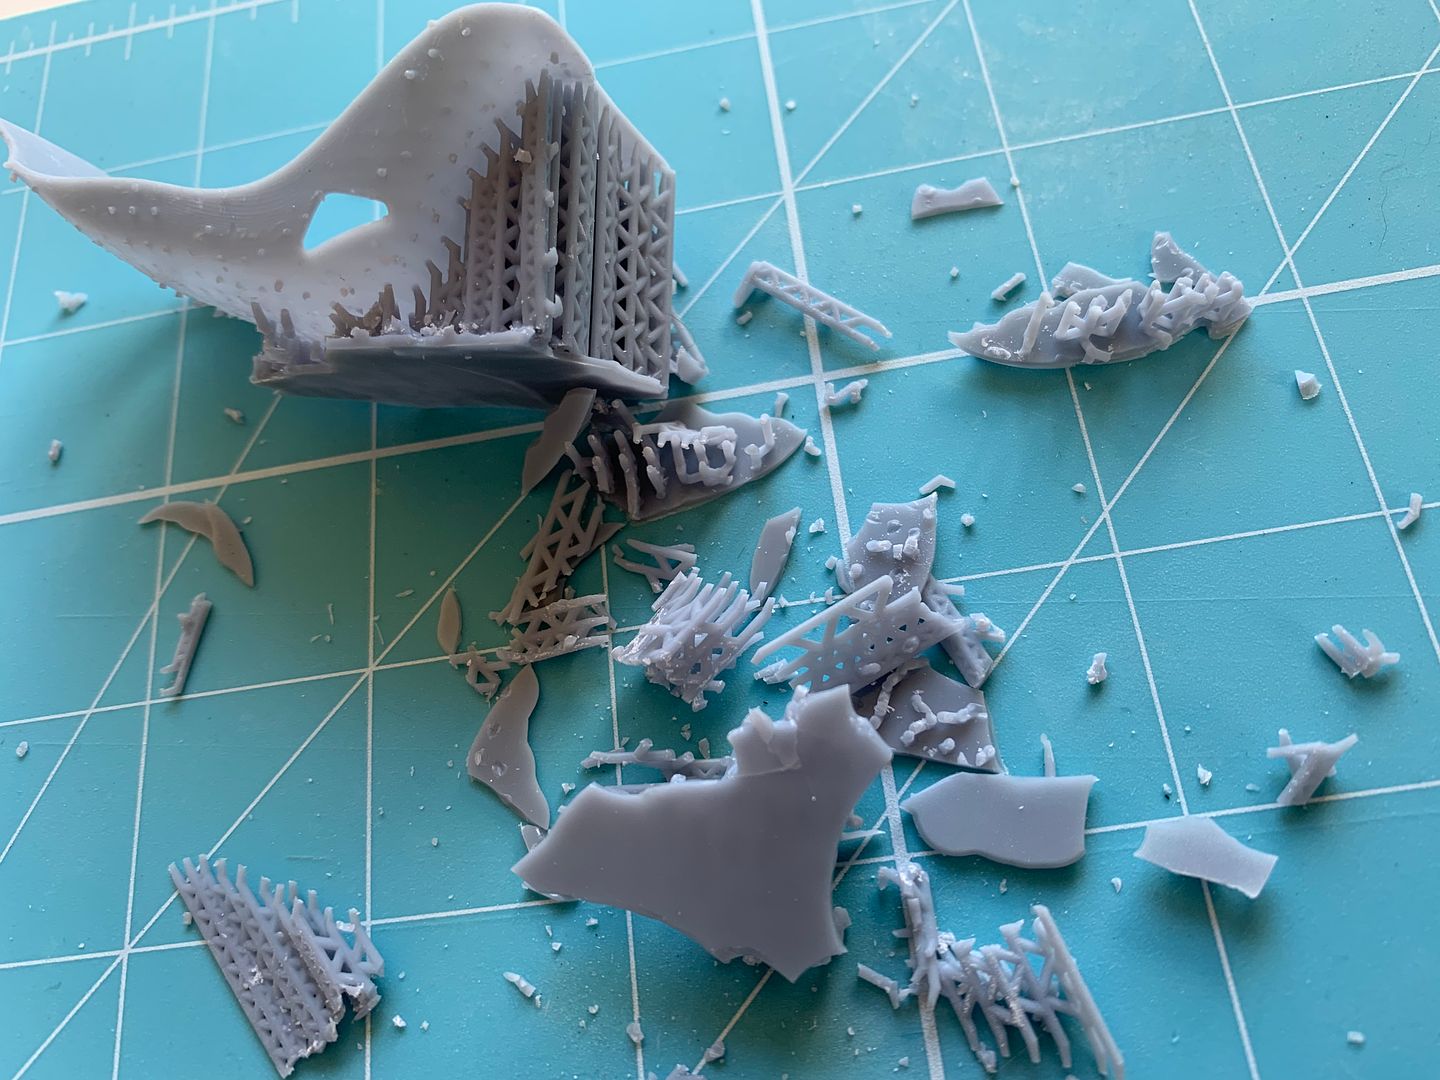
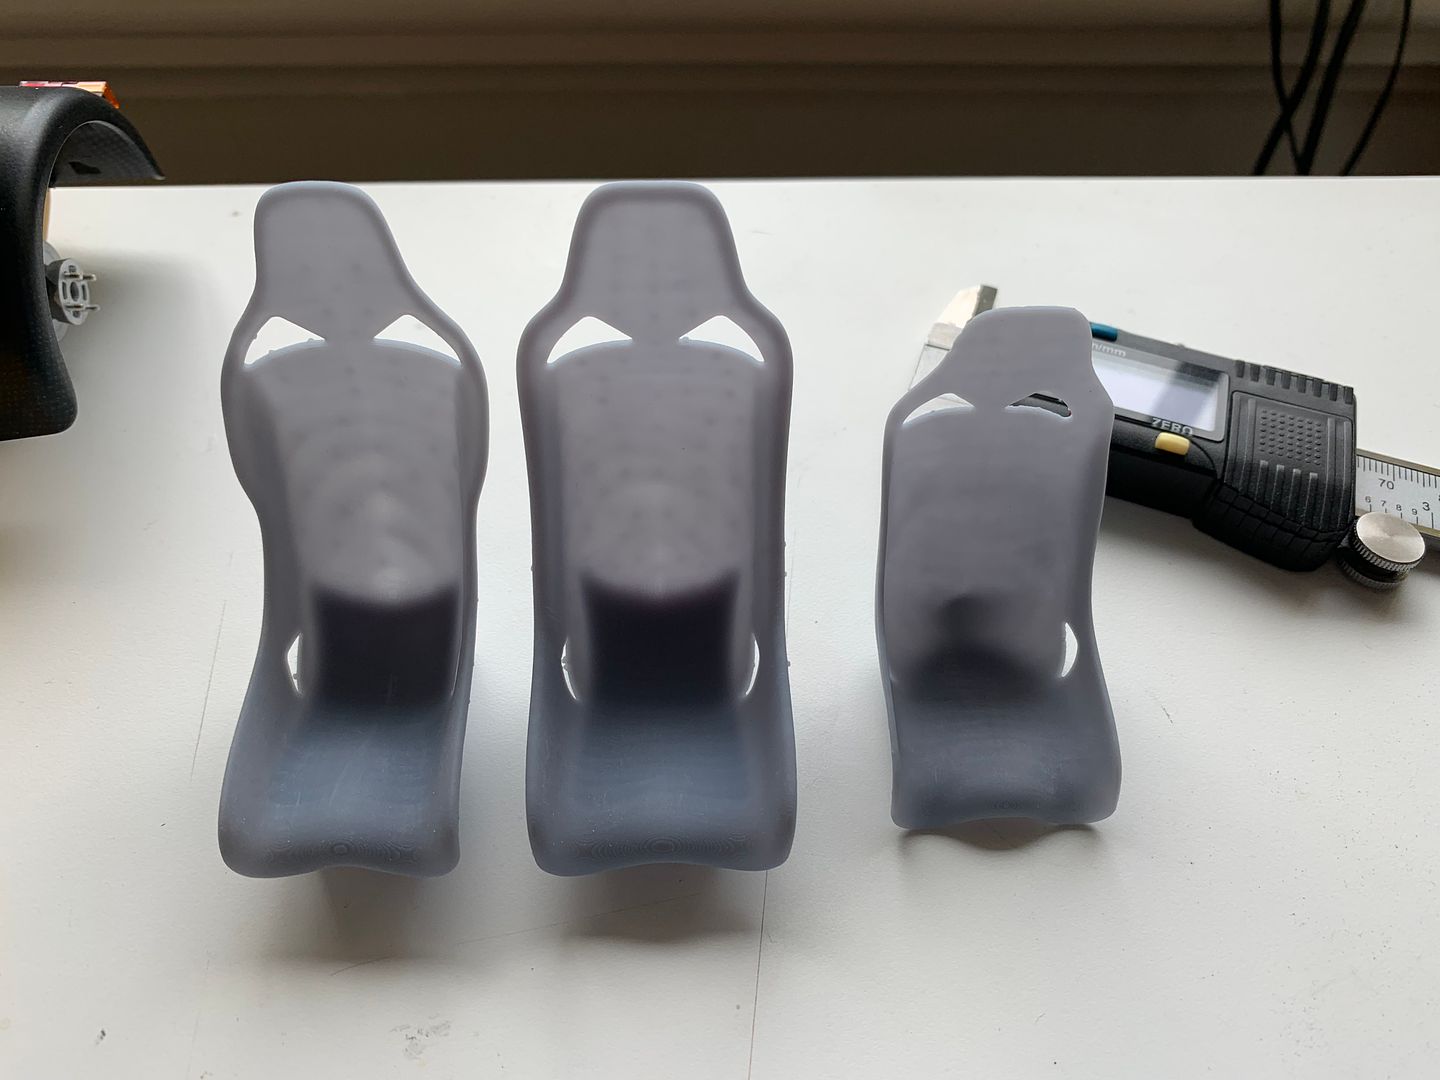
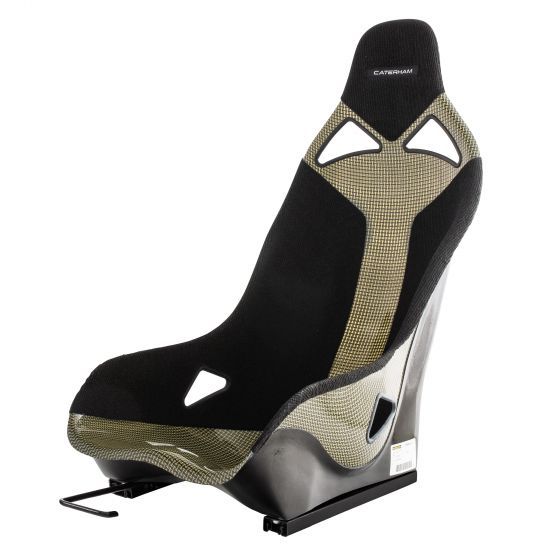
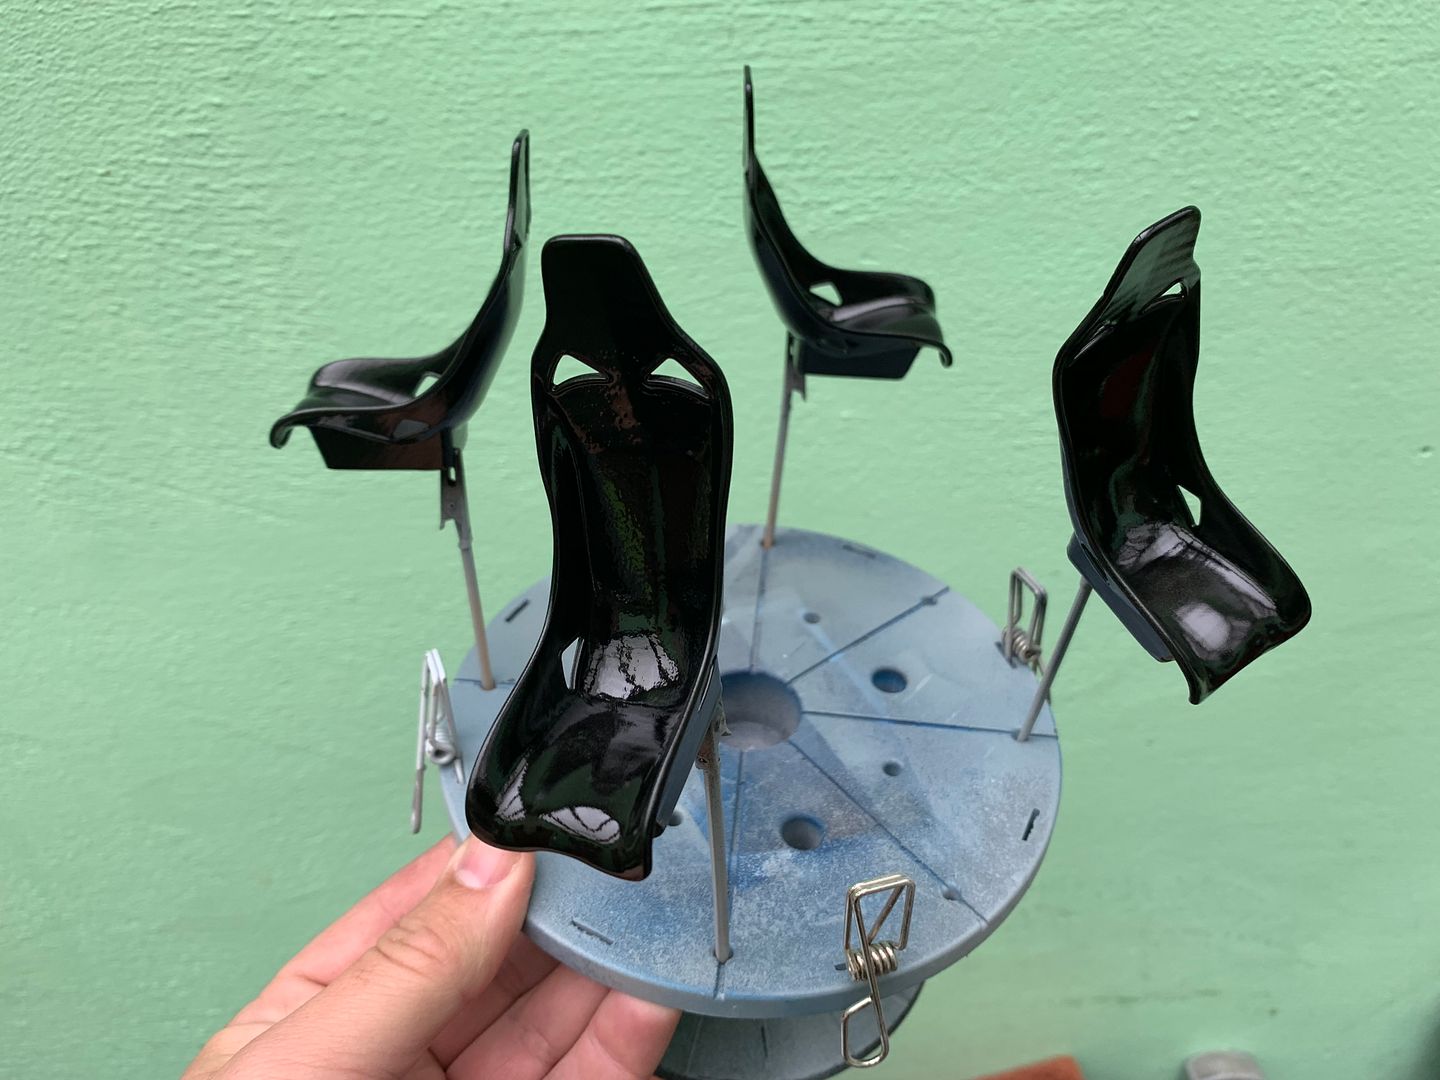
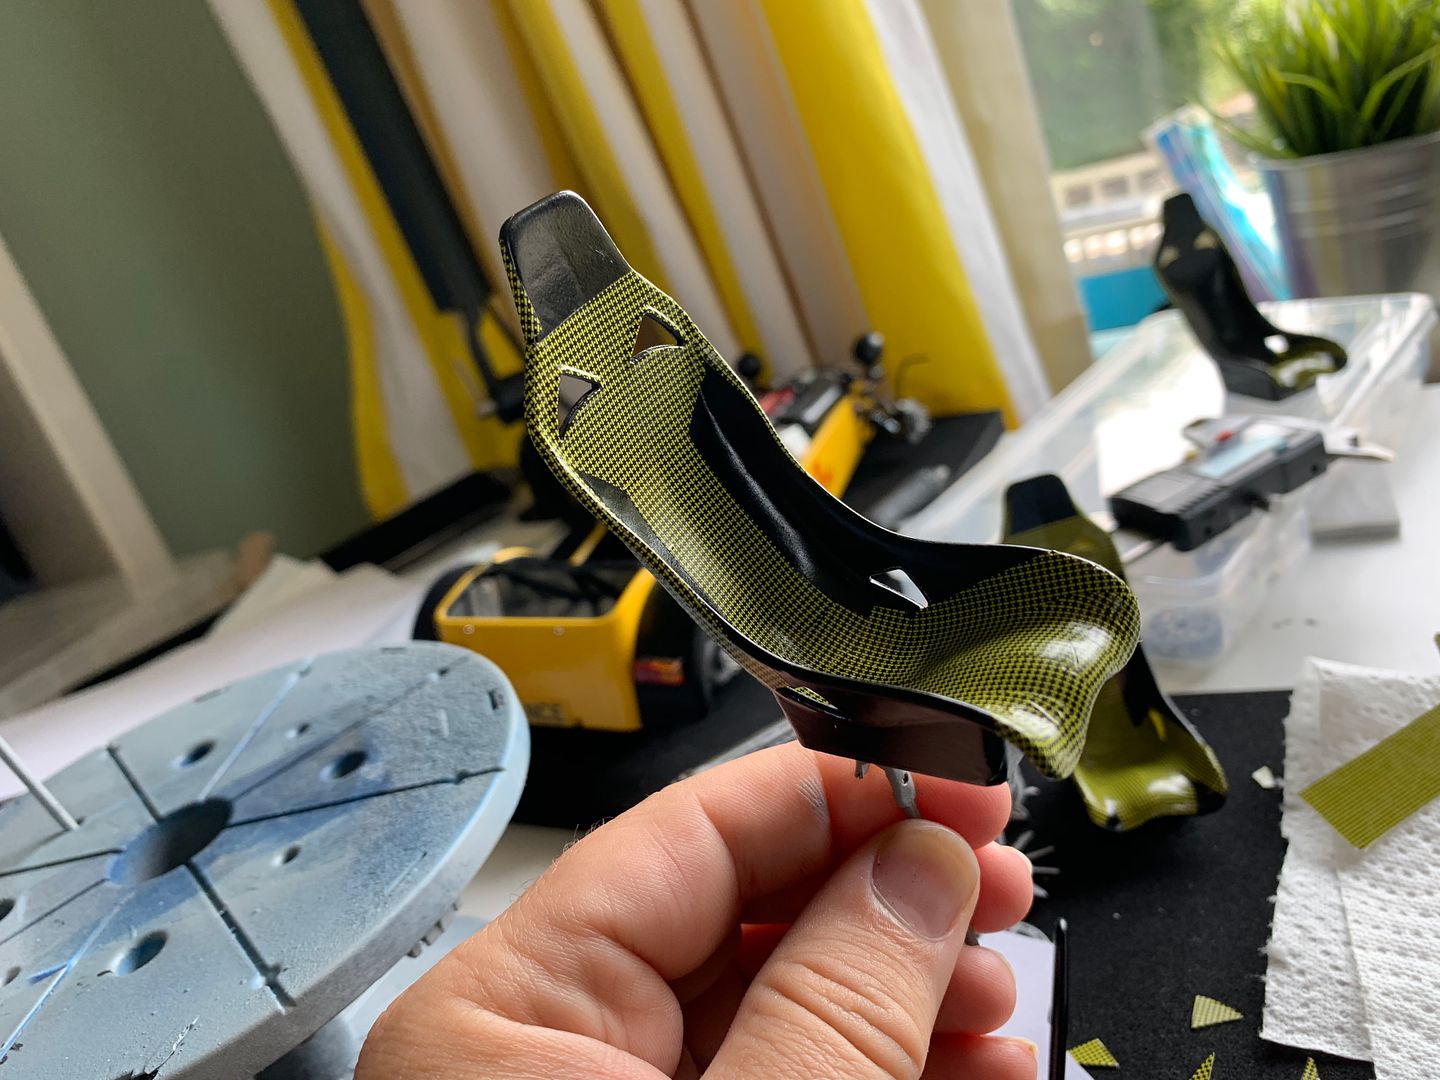
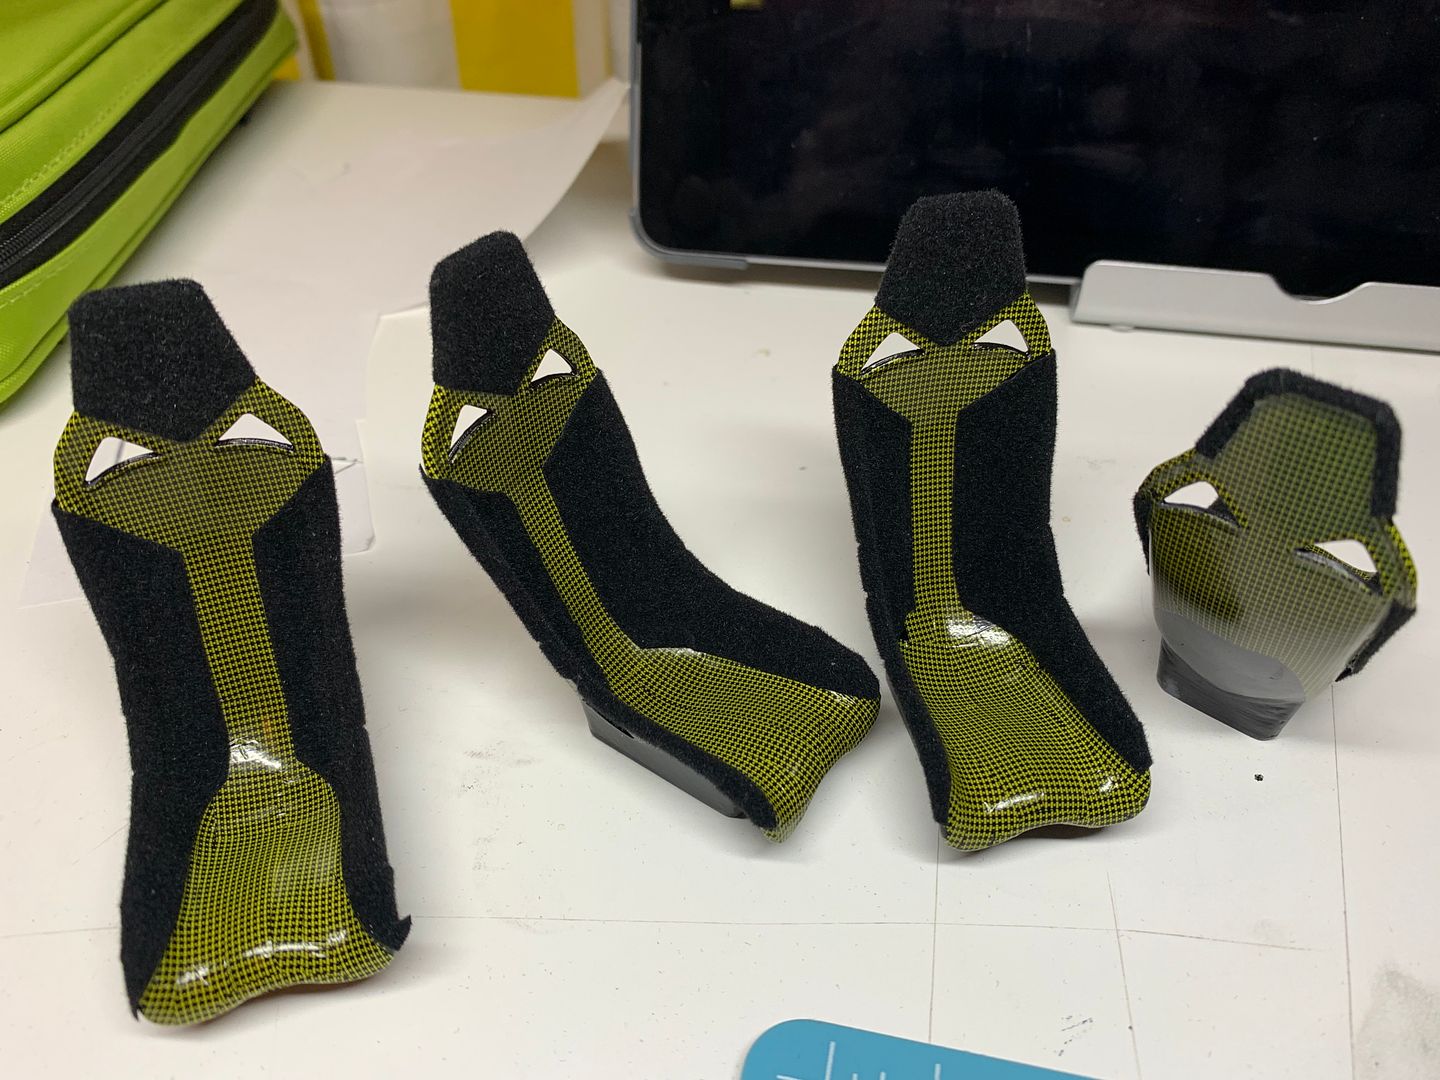
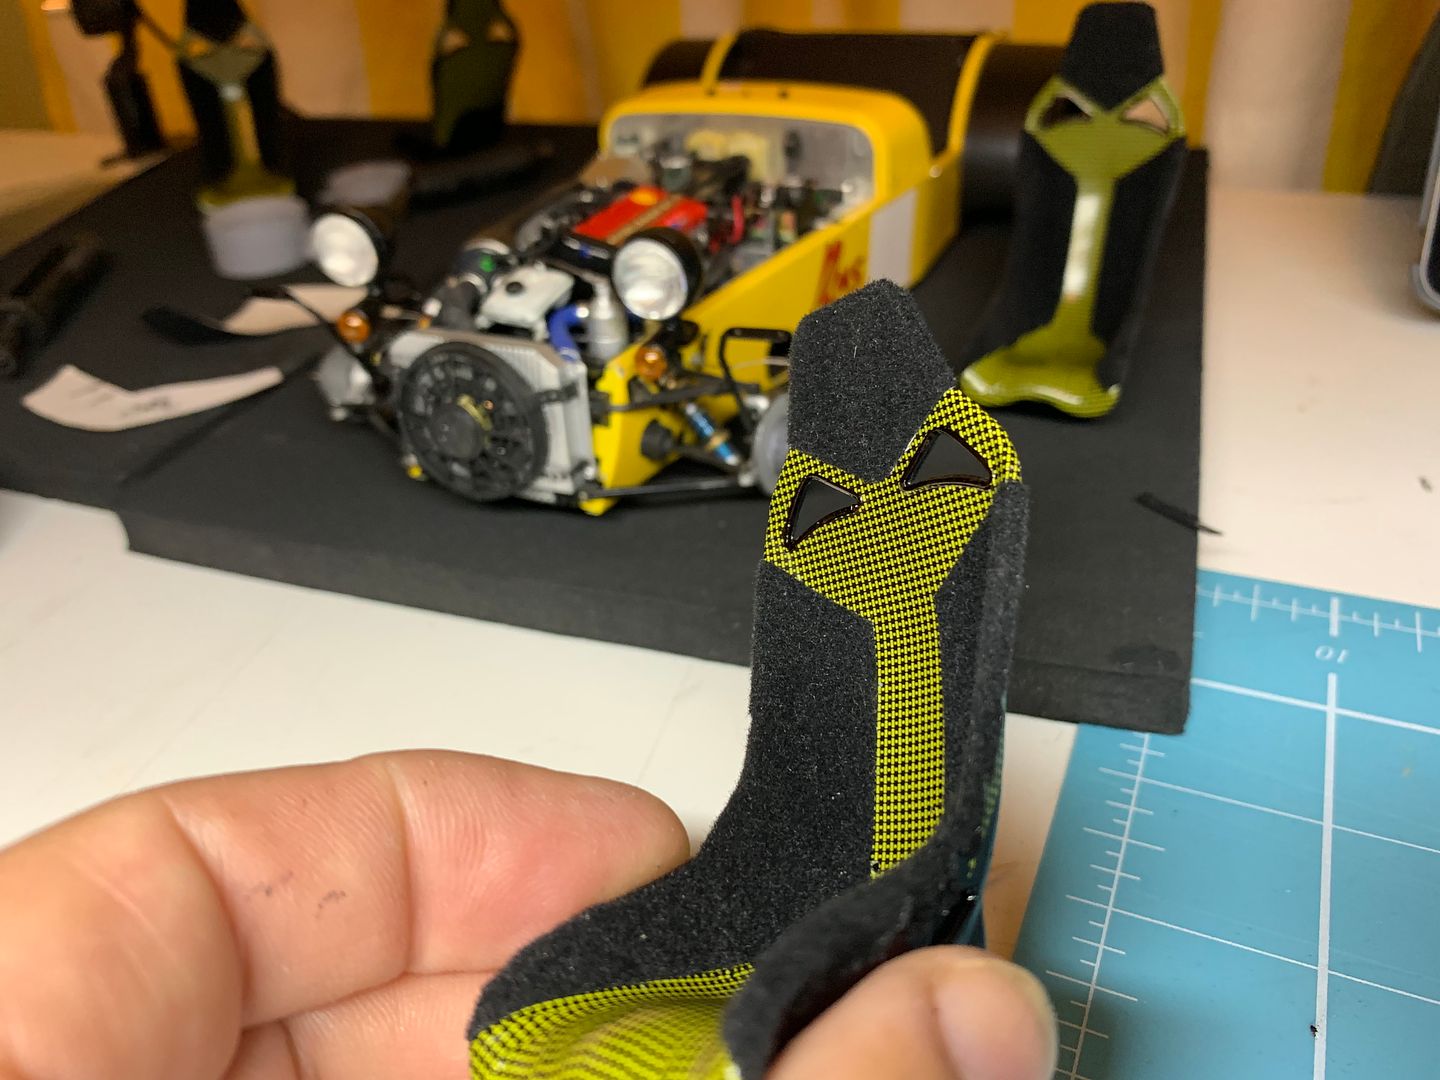
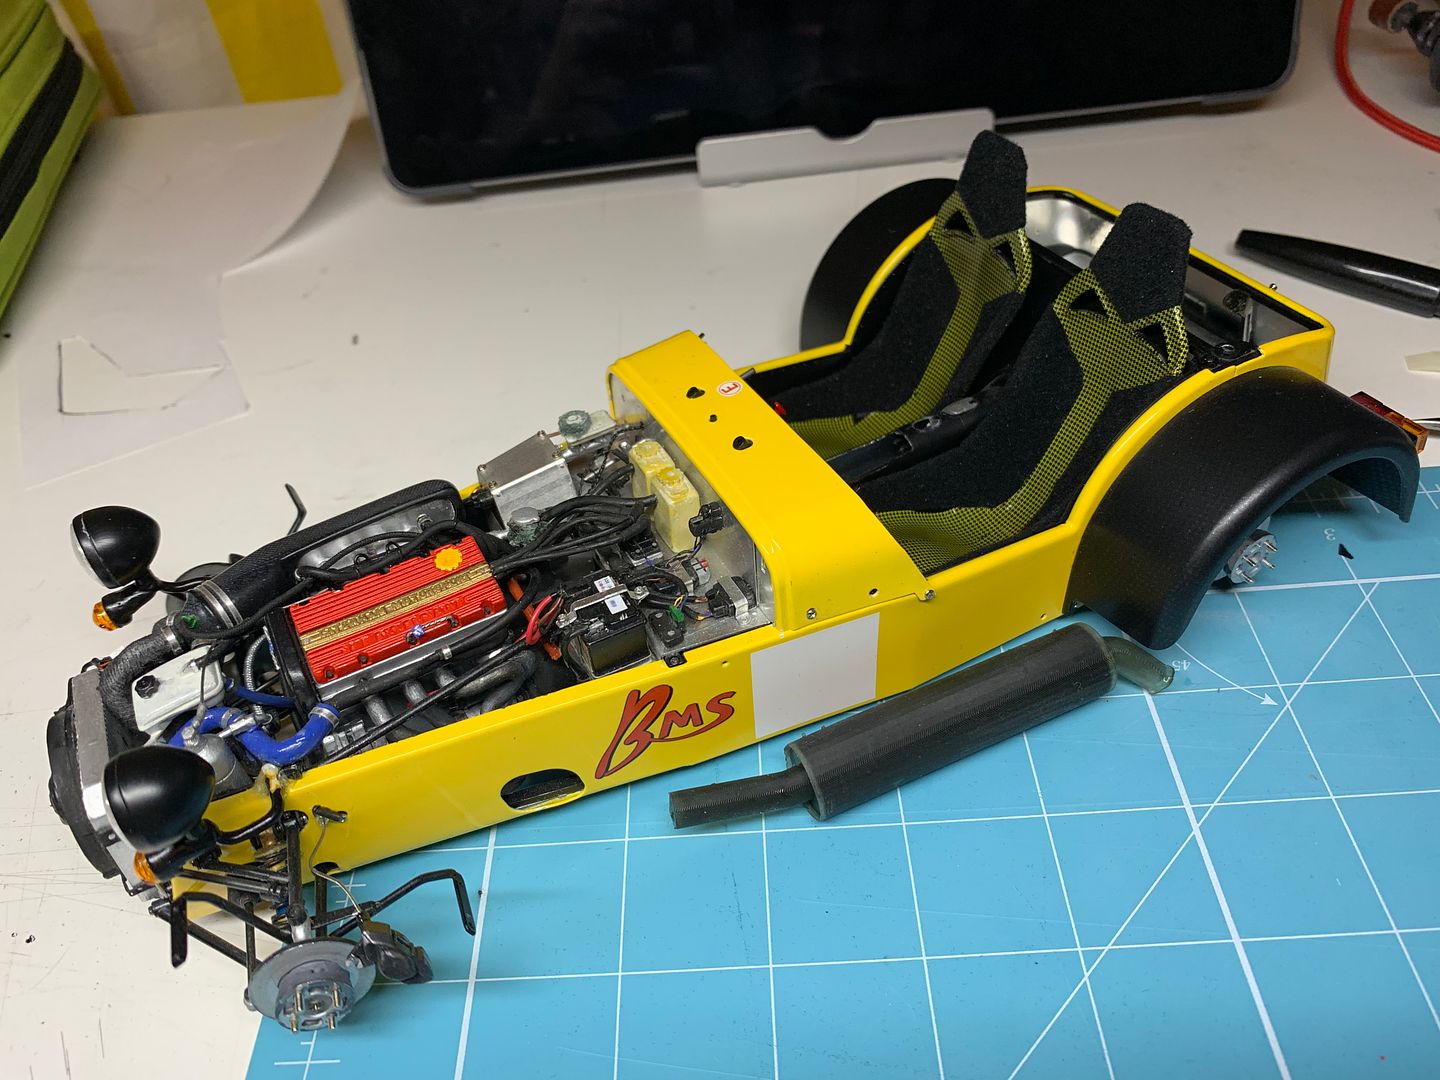
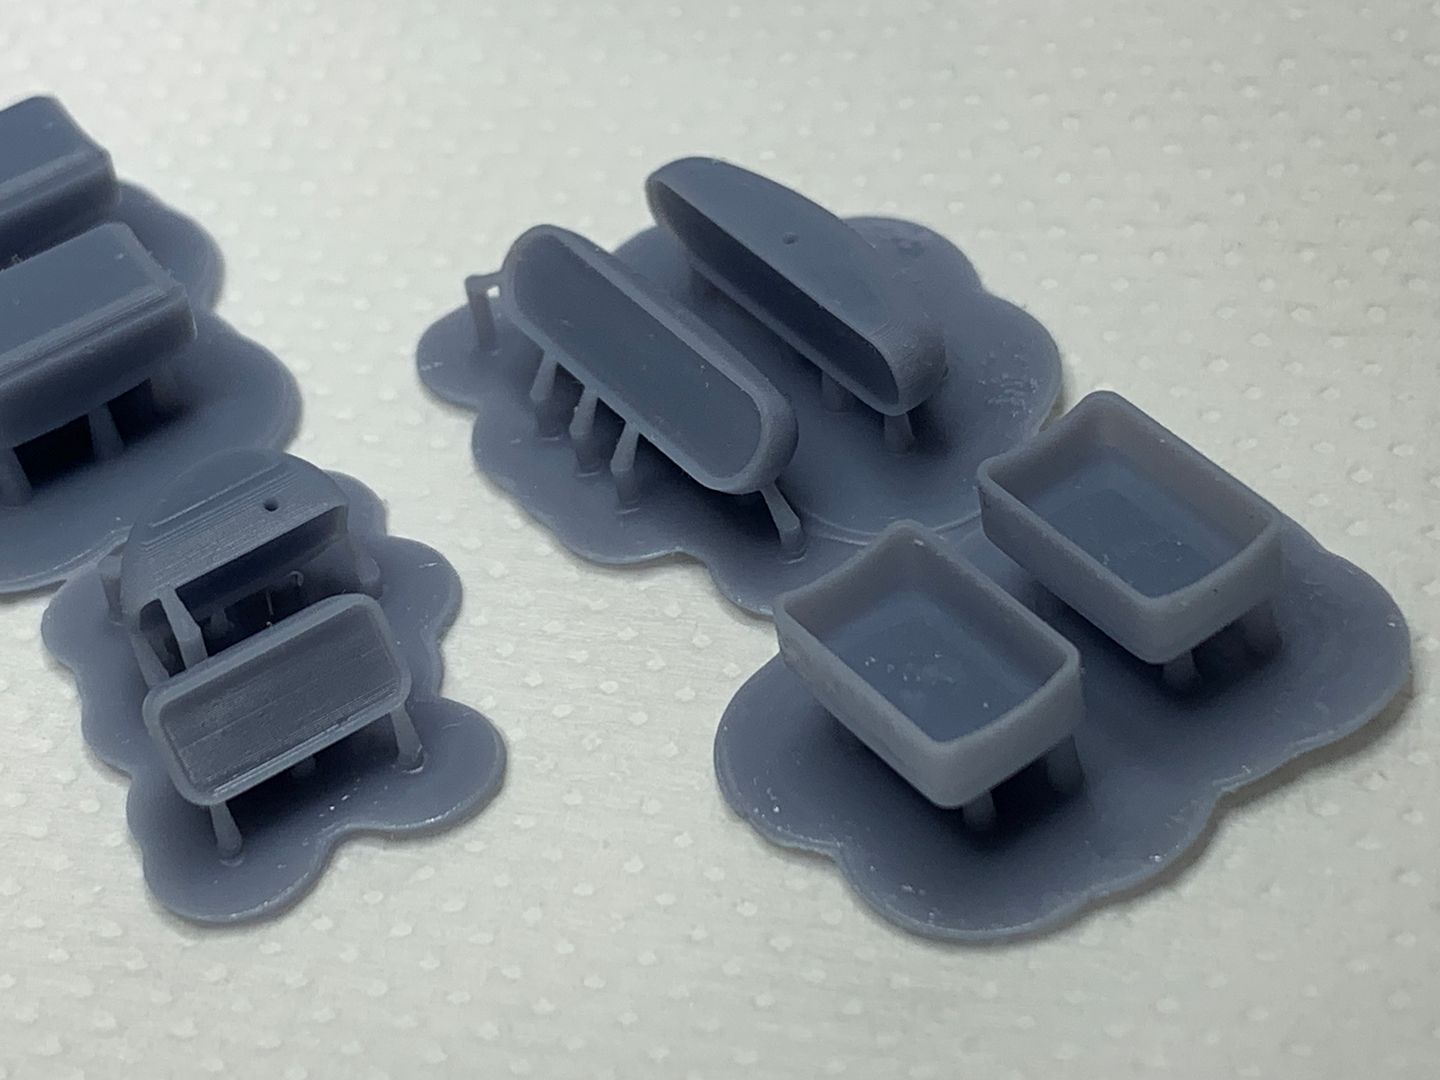
Next job was the tillet seats - carbon fibre race seats which are only about 4mm thick in 1/1, and are very curvy.
Now I had the tool to print them, I still had to create the 3D file - youtube solidworks tutorials to the rescure:
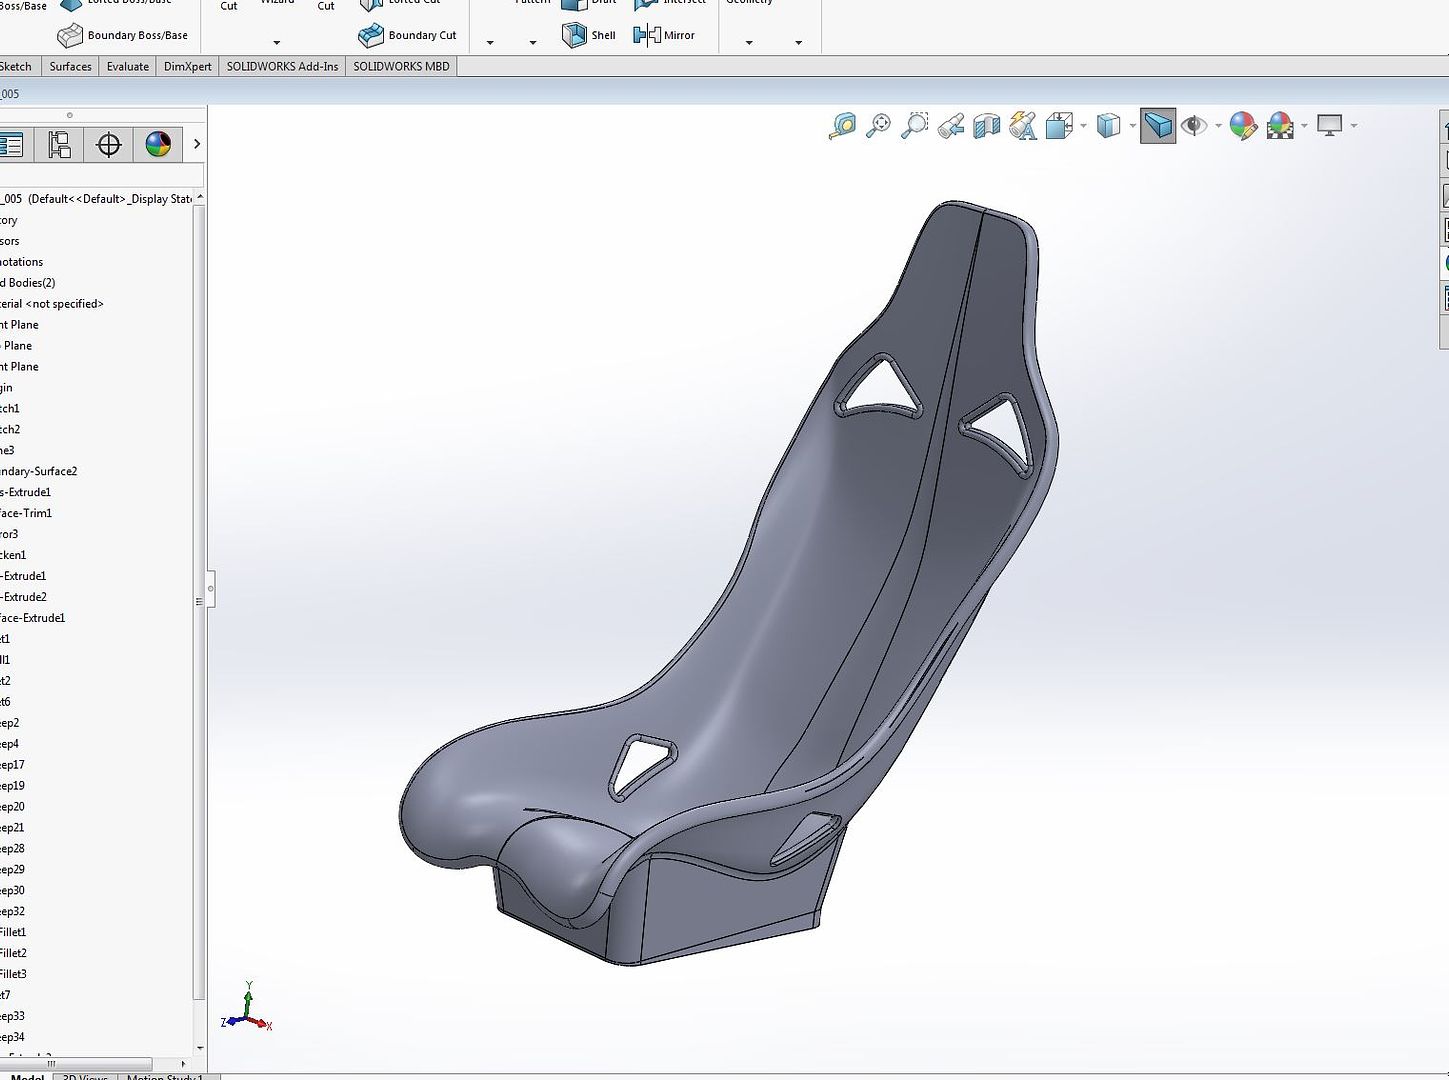
Not perfect in terms of 3D drawing, but good enough for my use!
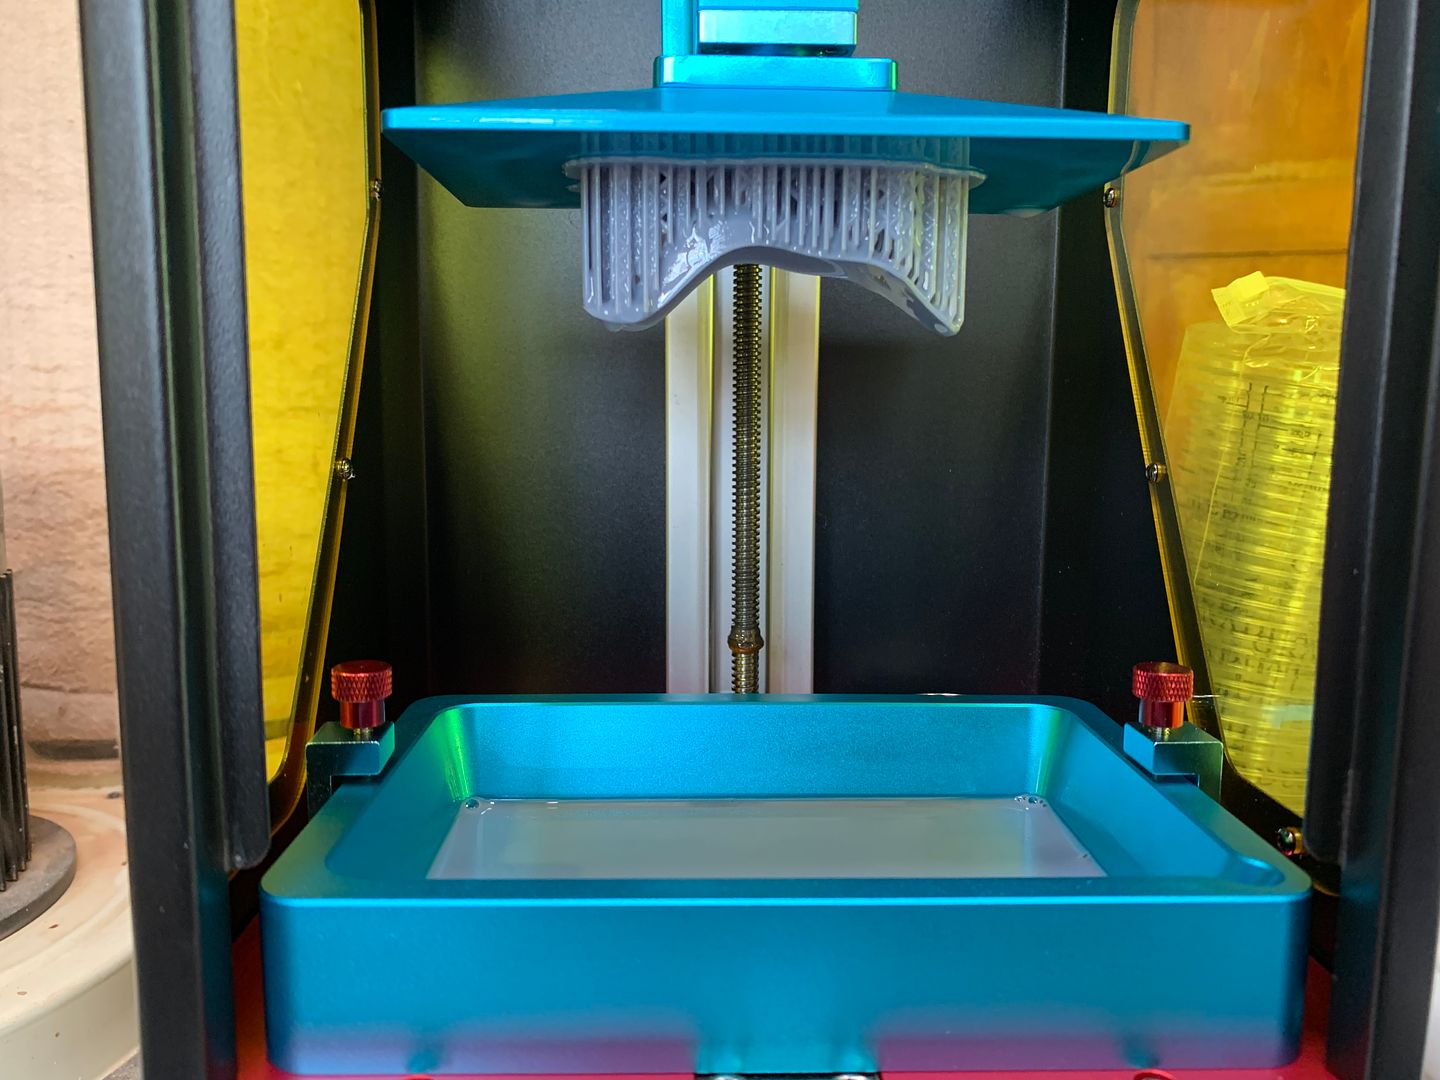
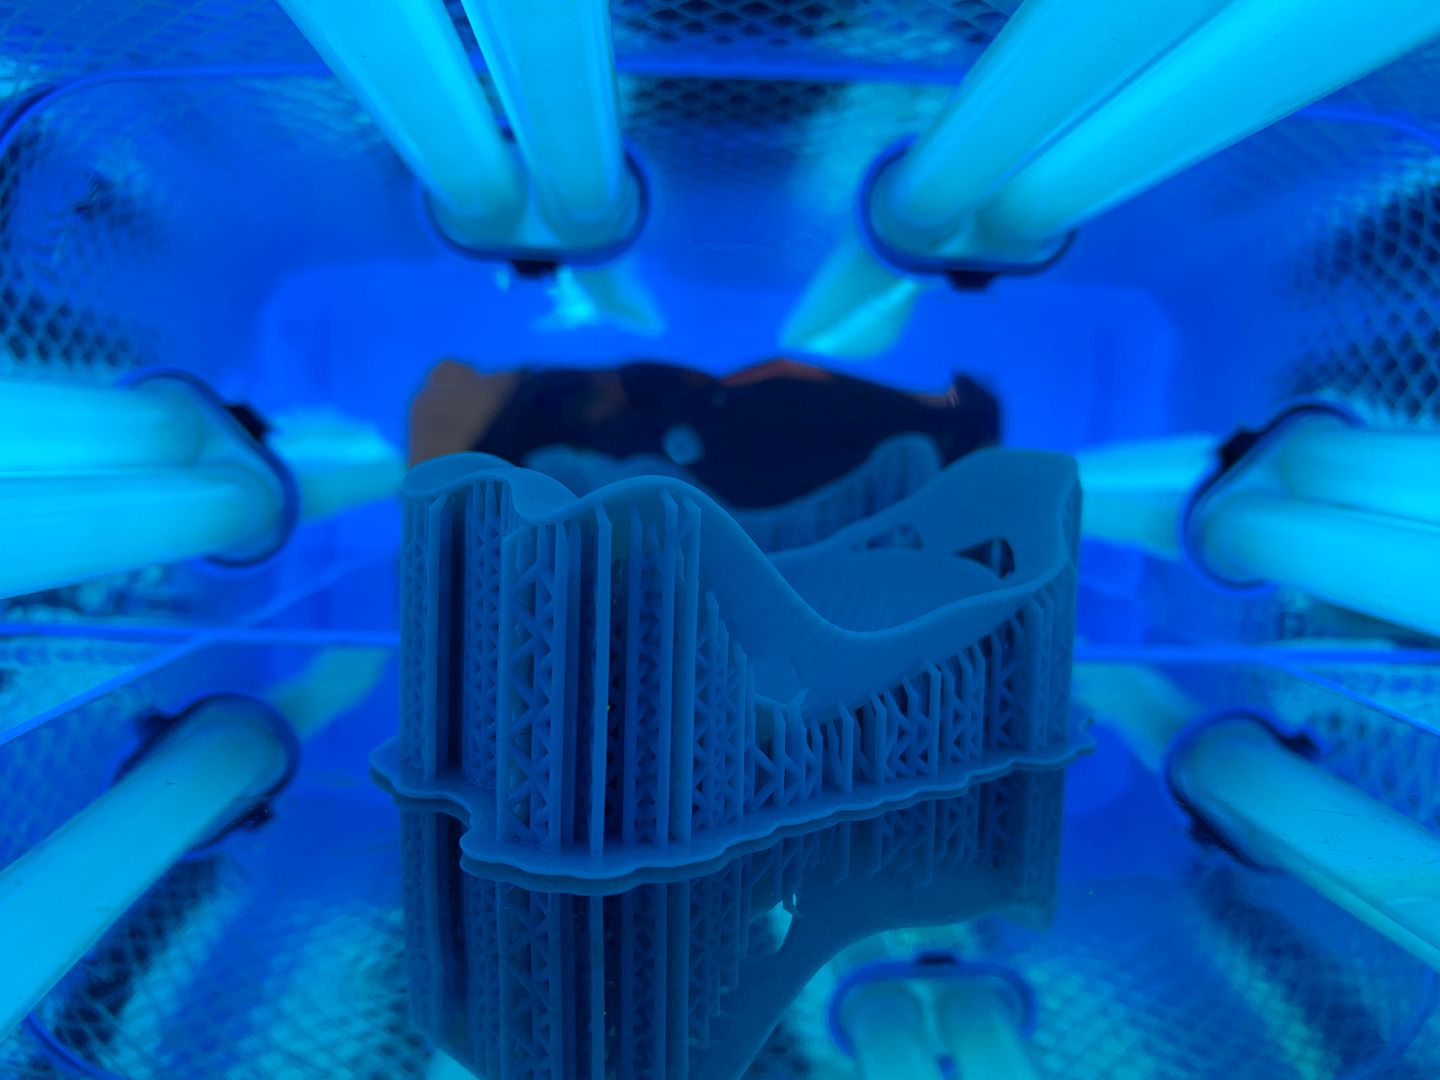
UV curing:
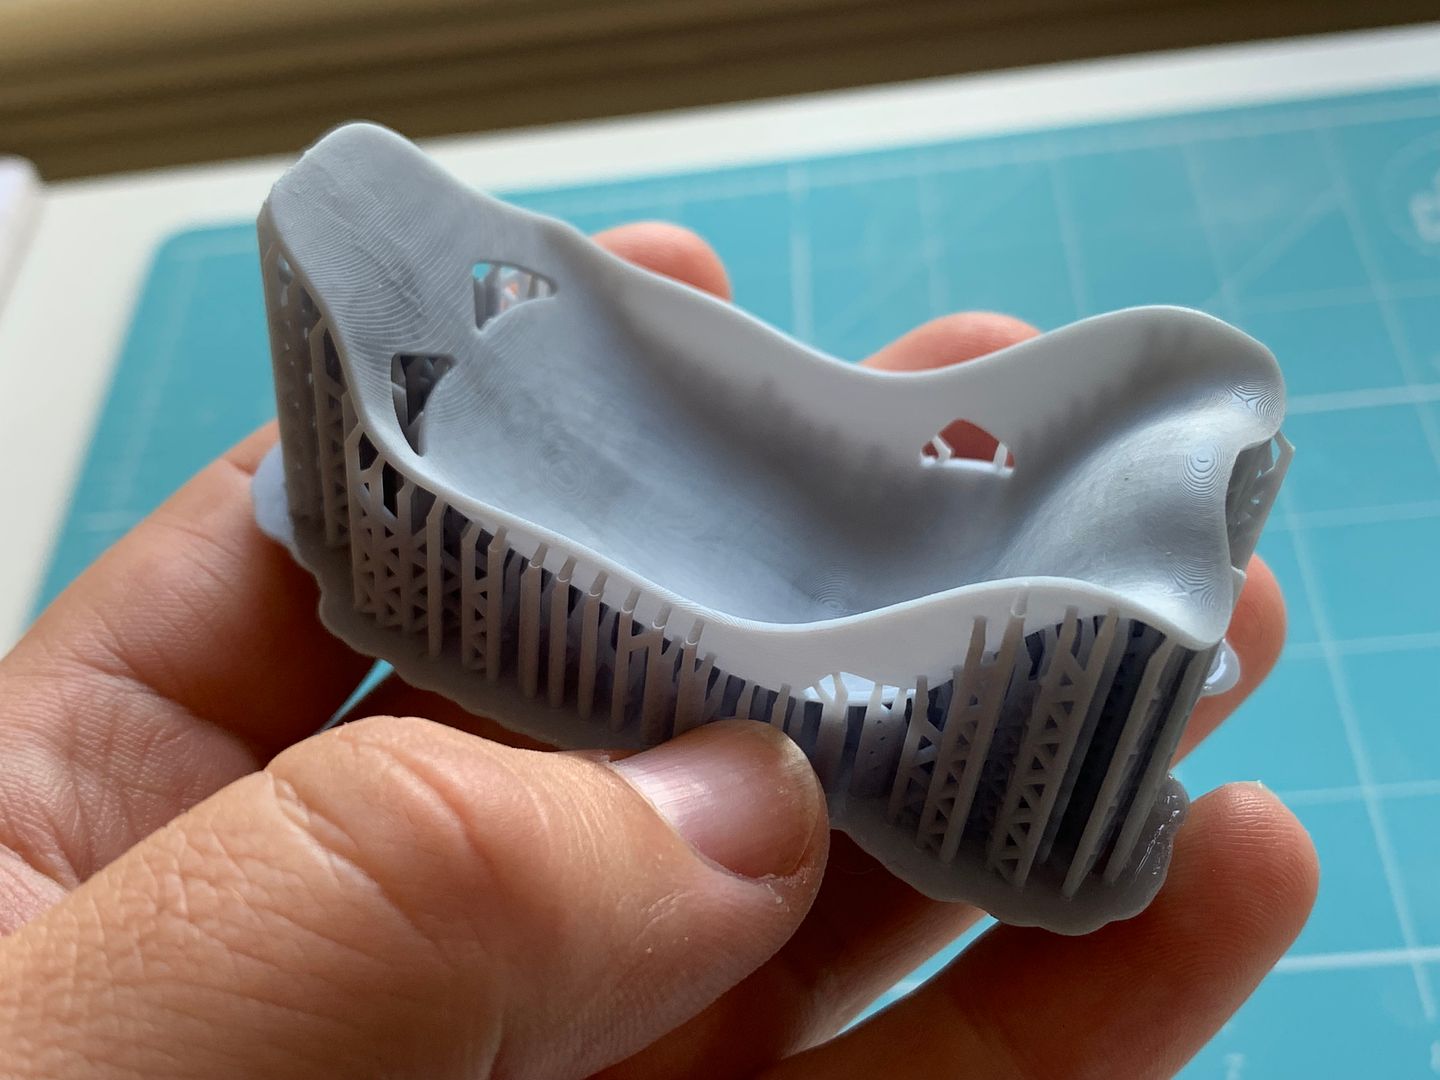
Had to get the scale right, and played around trying to get the shoulder 'bulge' correct - this had to fit in the model...
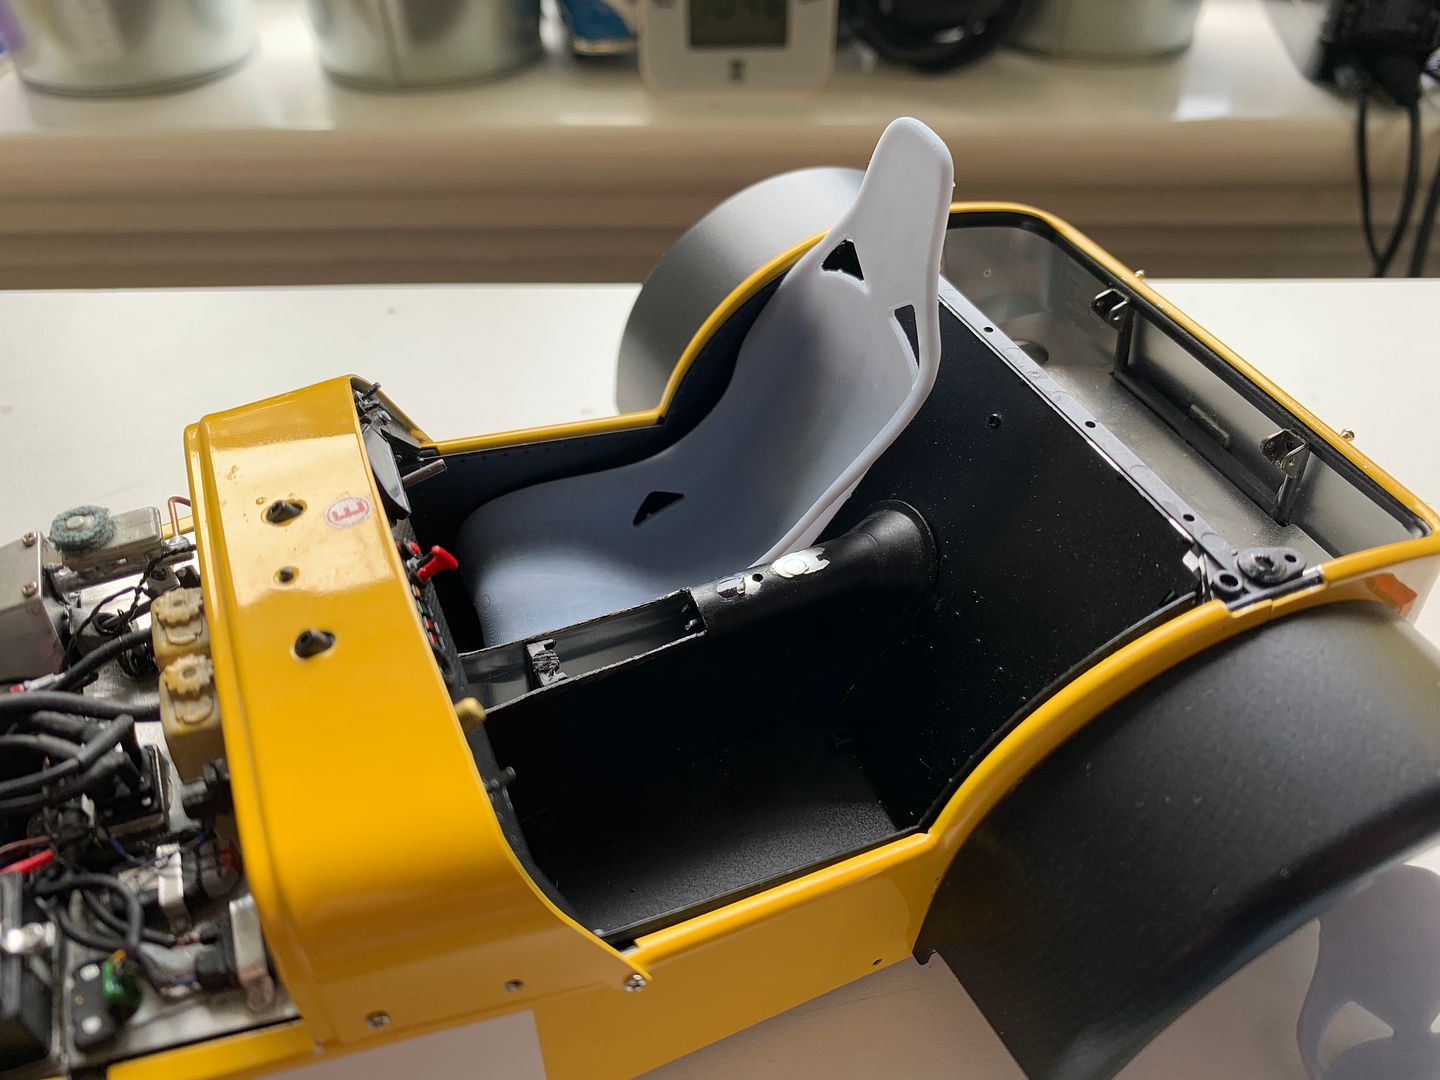
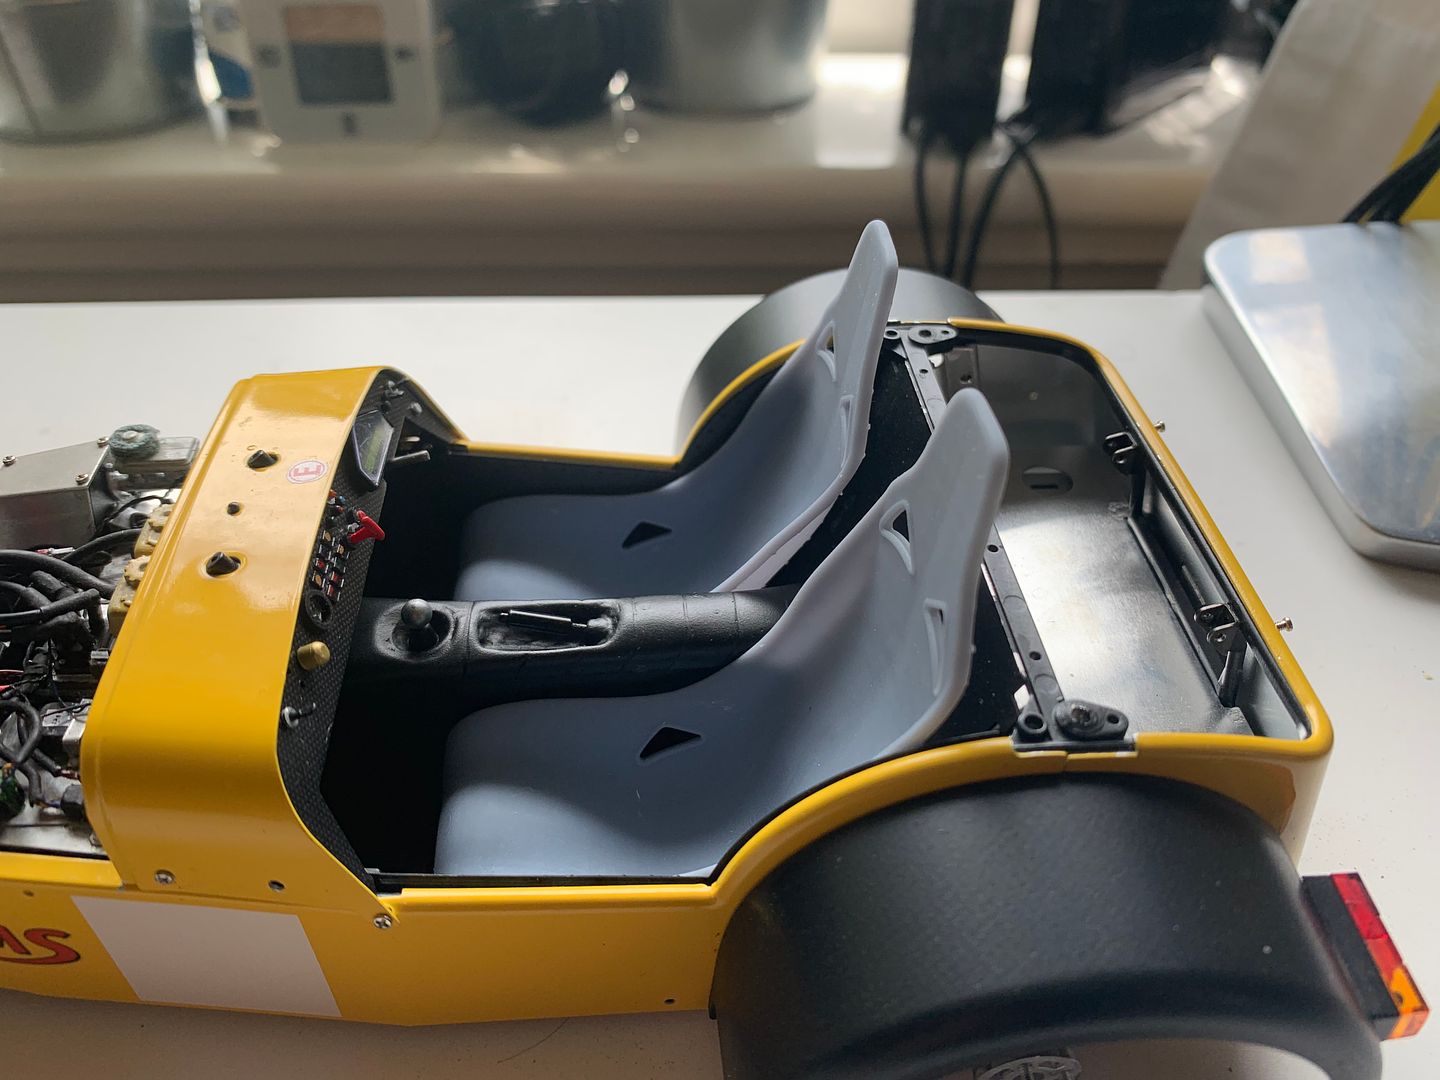
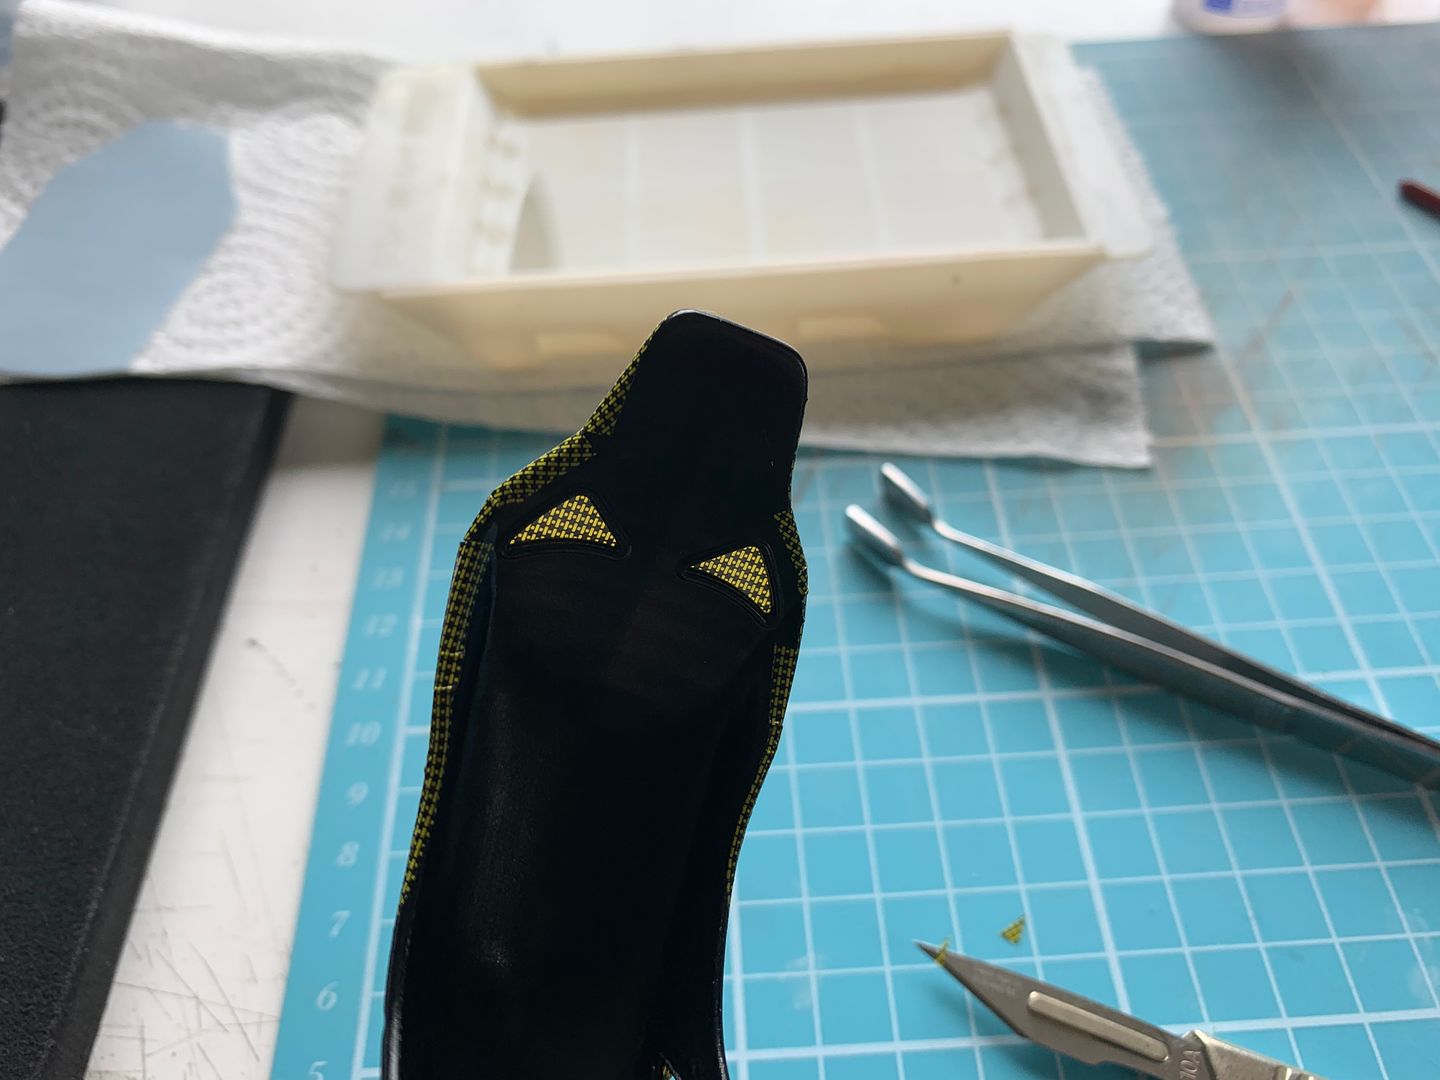
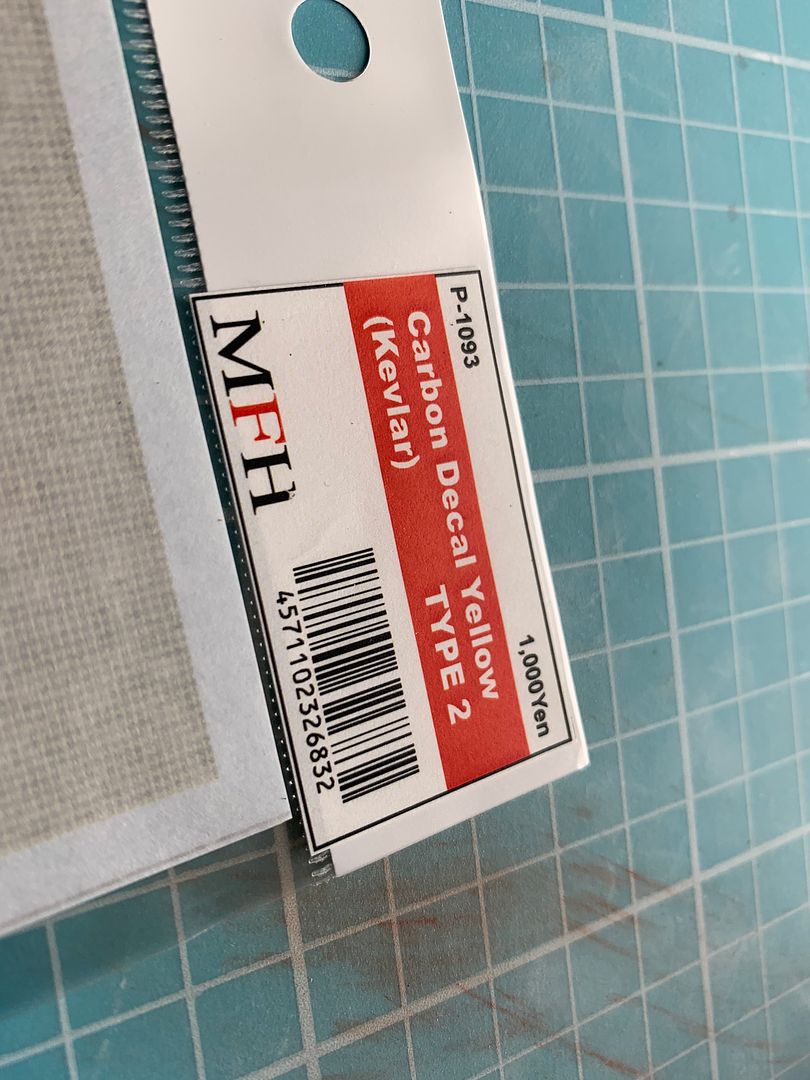
Once I was happy with the size and shape I primed and sprayed black - although the seat was kevlar, so it would be covered with decal and also some fine flocked sheet to represent the fabric on the real thing...
Fun shape to try and cover!
The rears would not be seen, so ignore those creases...
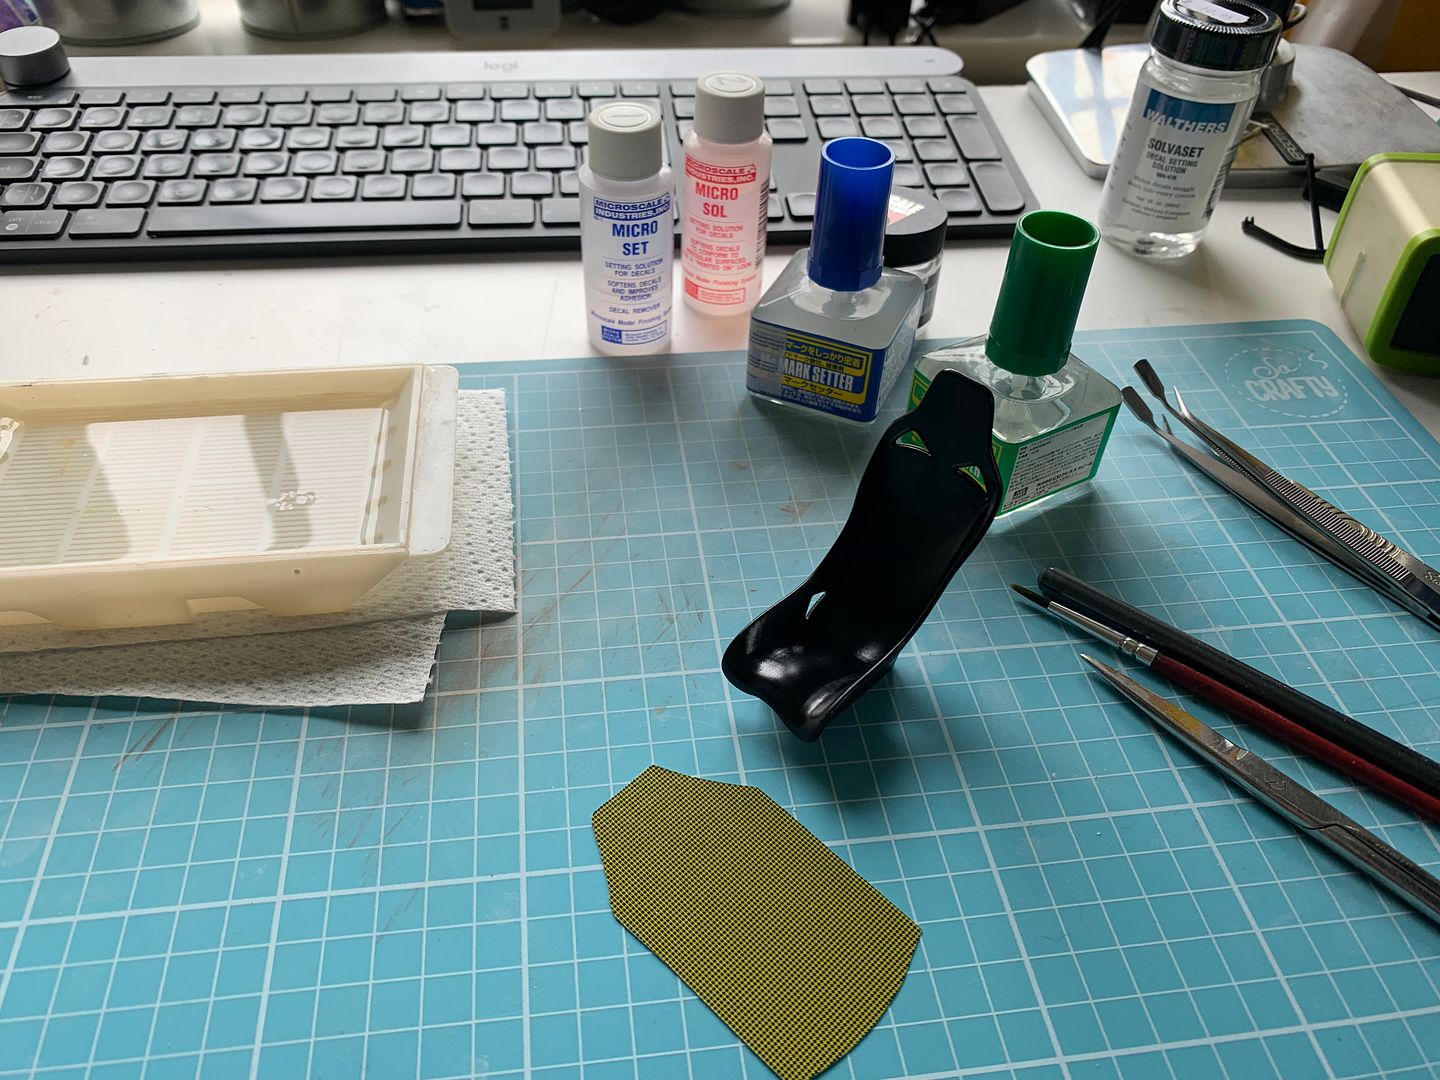
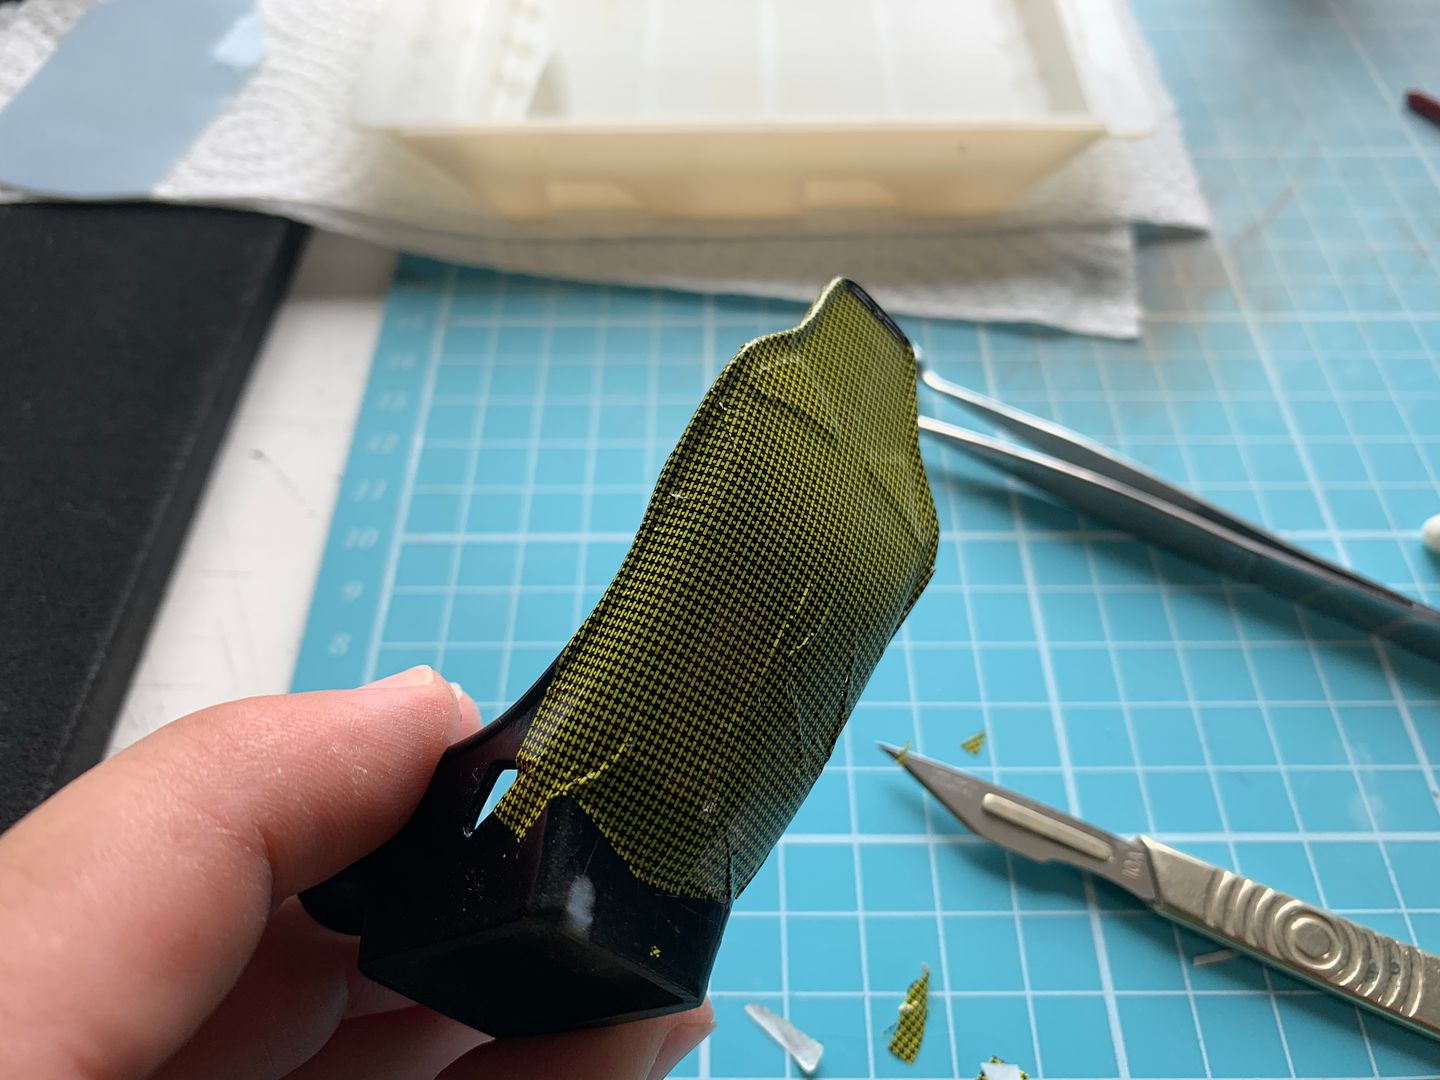
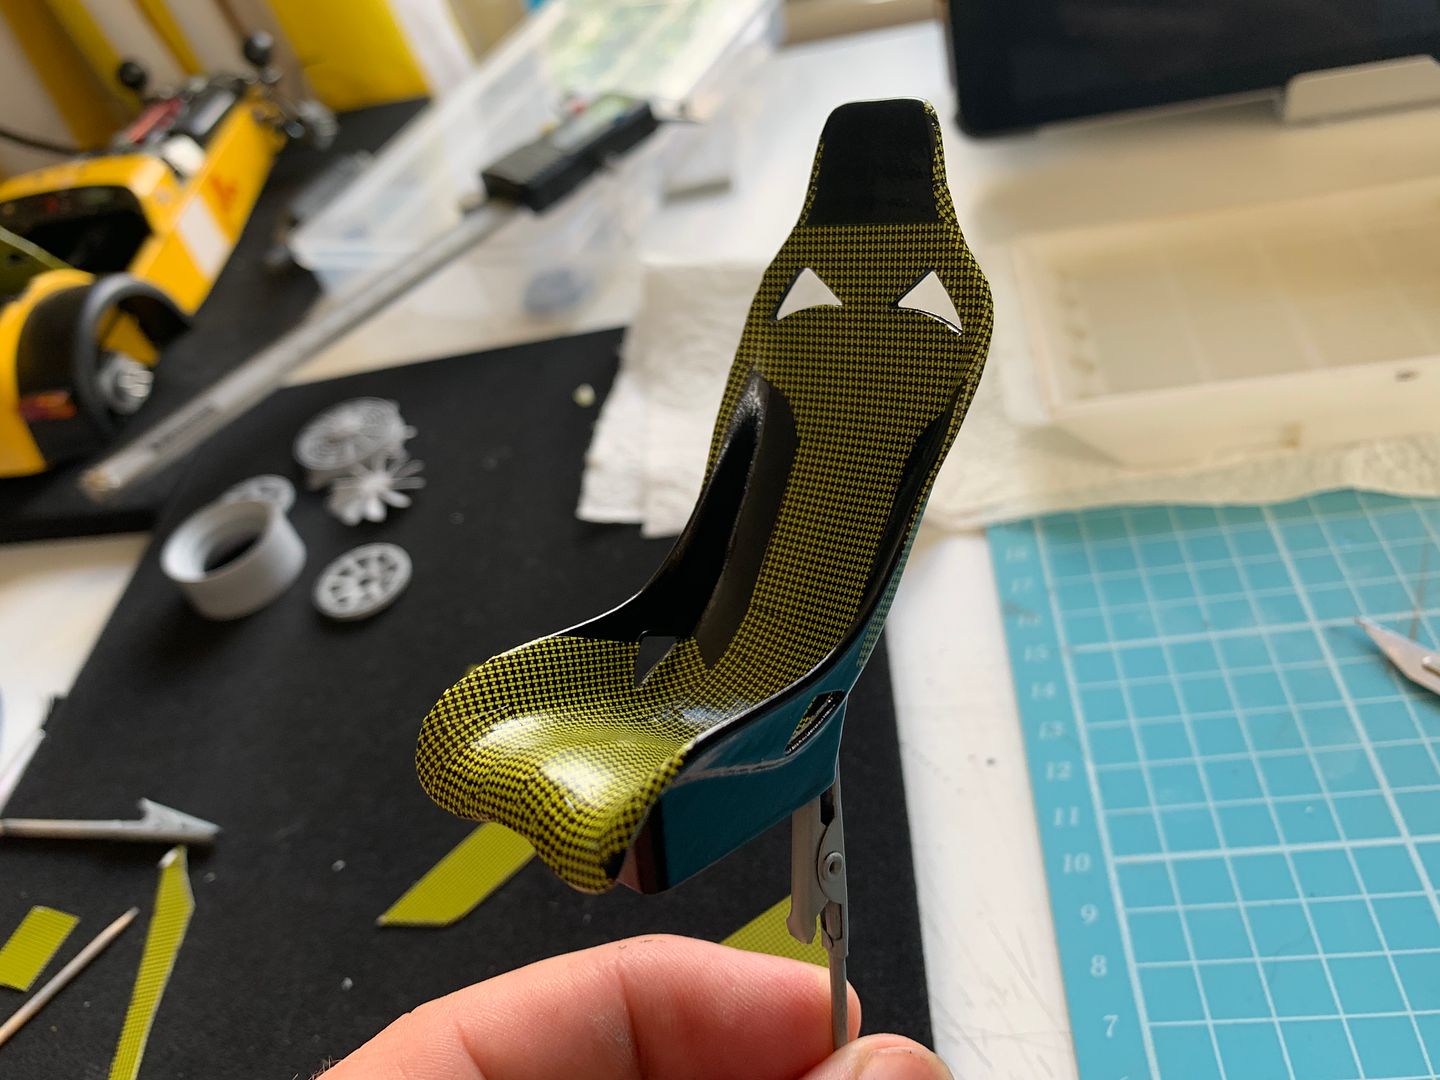
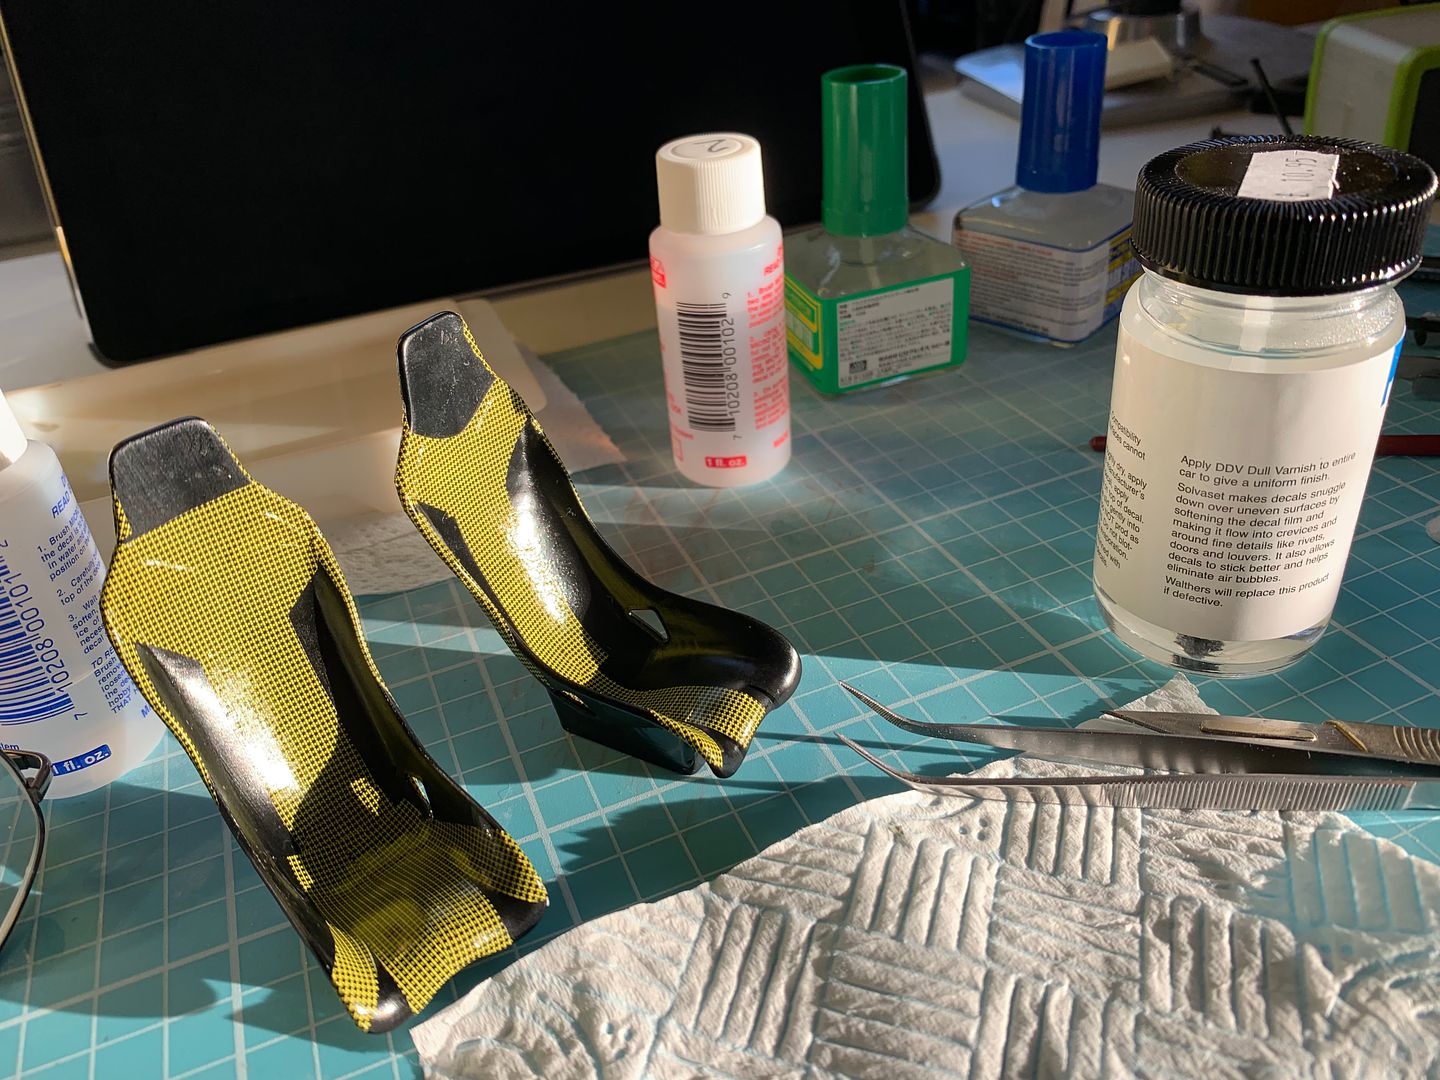
Once I had added the kevlar, I thought it looked a bit too yellow, so I sprayed a few layers of Tamiya 'smoke' to darken it a little...much better. Quick coat of satin clear to seal it all up.
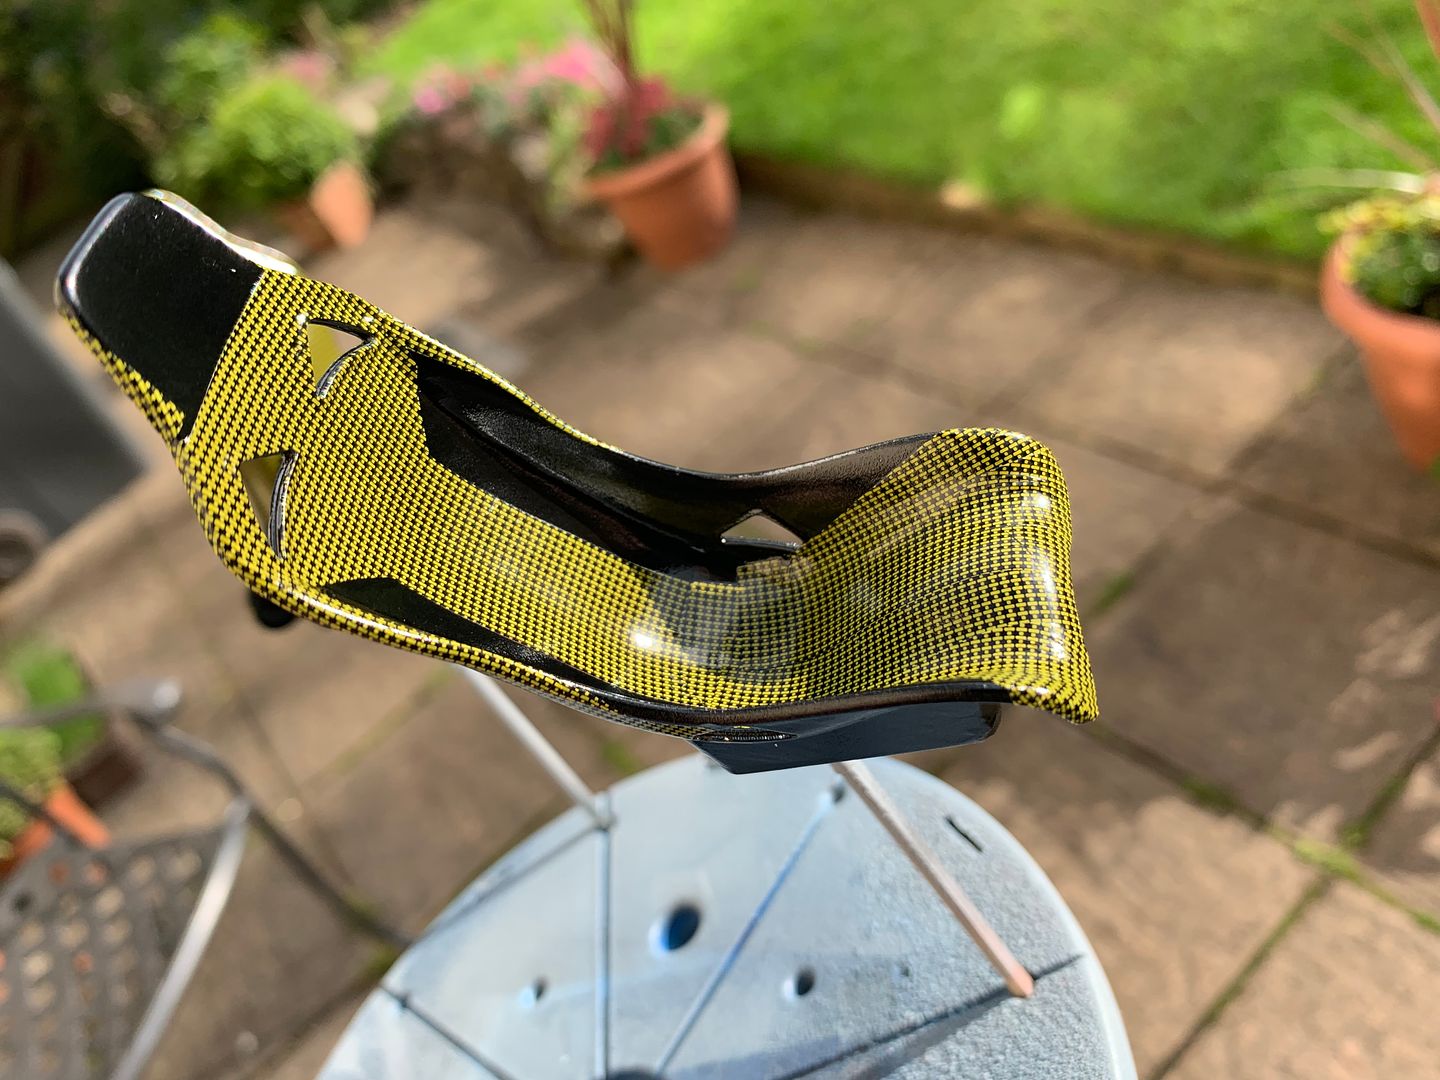
Then the self-adhesive flocking material - bugger to get the shape right for the side pieces...some of these pictures are when testing shapes, so the finished result is neater...

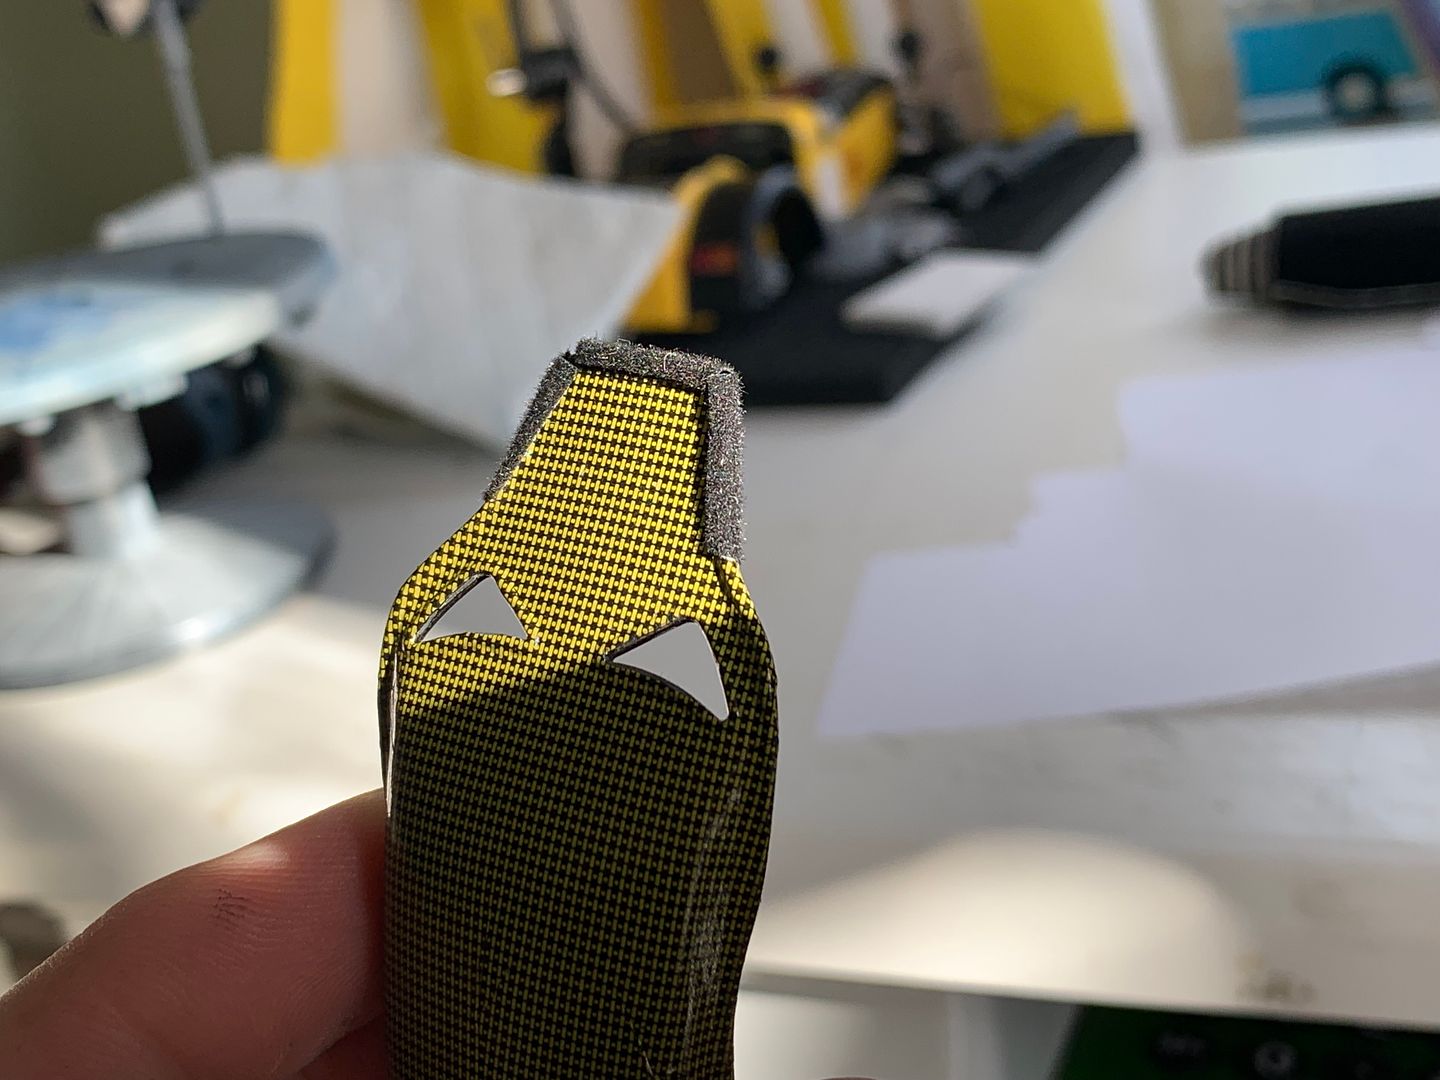
Most of the rear and lower sides of the seat would not be seen, so I saved materials...still have a few bits to patch up, but overall - done!
These seats were the biggest issue to figure out - its only taken 15 years lol
Now I had the tool to print them, I still had to create the 3D file - youtube solidworks tutorials to the rescure:
Not perfect in terms of 3D drawing, but good enough for my use!
UV curing:
Had to get the scale right, and played around trying to get the shoulder 'bulge' correct - this had to fit in the model...
Once I was happy with the size and shape I primed and sprayed black - although the seat was kevlar, so it would be covered with decal and also some fine flocked sheet to represent the fabric on the real thing...
Fun shape to try and cover!
The rears would not be seen, so ignore those creases...
Once I had added the kevlar, I thought it looked a bit too yellow, so I sprayed a few layers of Tamiya 'smoke' to darken it a little...much better. Quick coat of satin clear to seal it all up.
Then the self-adhesive flocking material - bugger to get the shape right for the side pieces...some of these pictures are when testing shapes, so the finished result is neater...
Most of the rear and lower sides of the seat would not be seen, so I saved materials...still have a few bits to patch up, but overall - done!
These seats were the biggest issue to figure out - its only taken 15 years lol
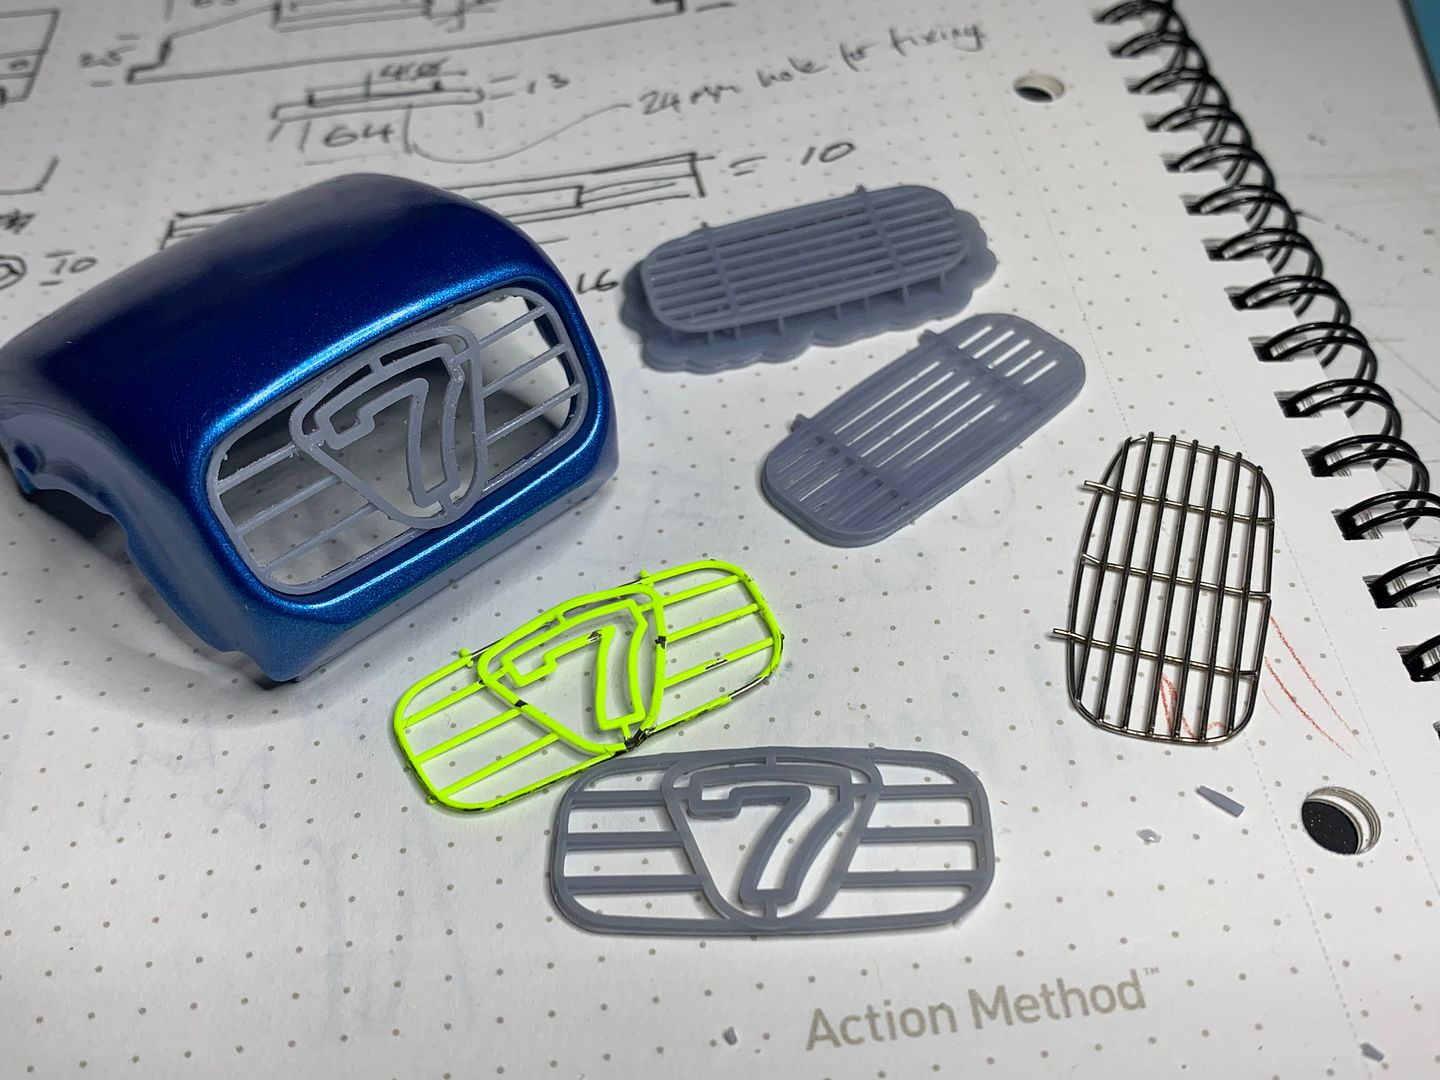
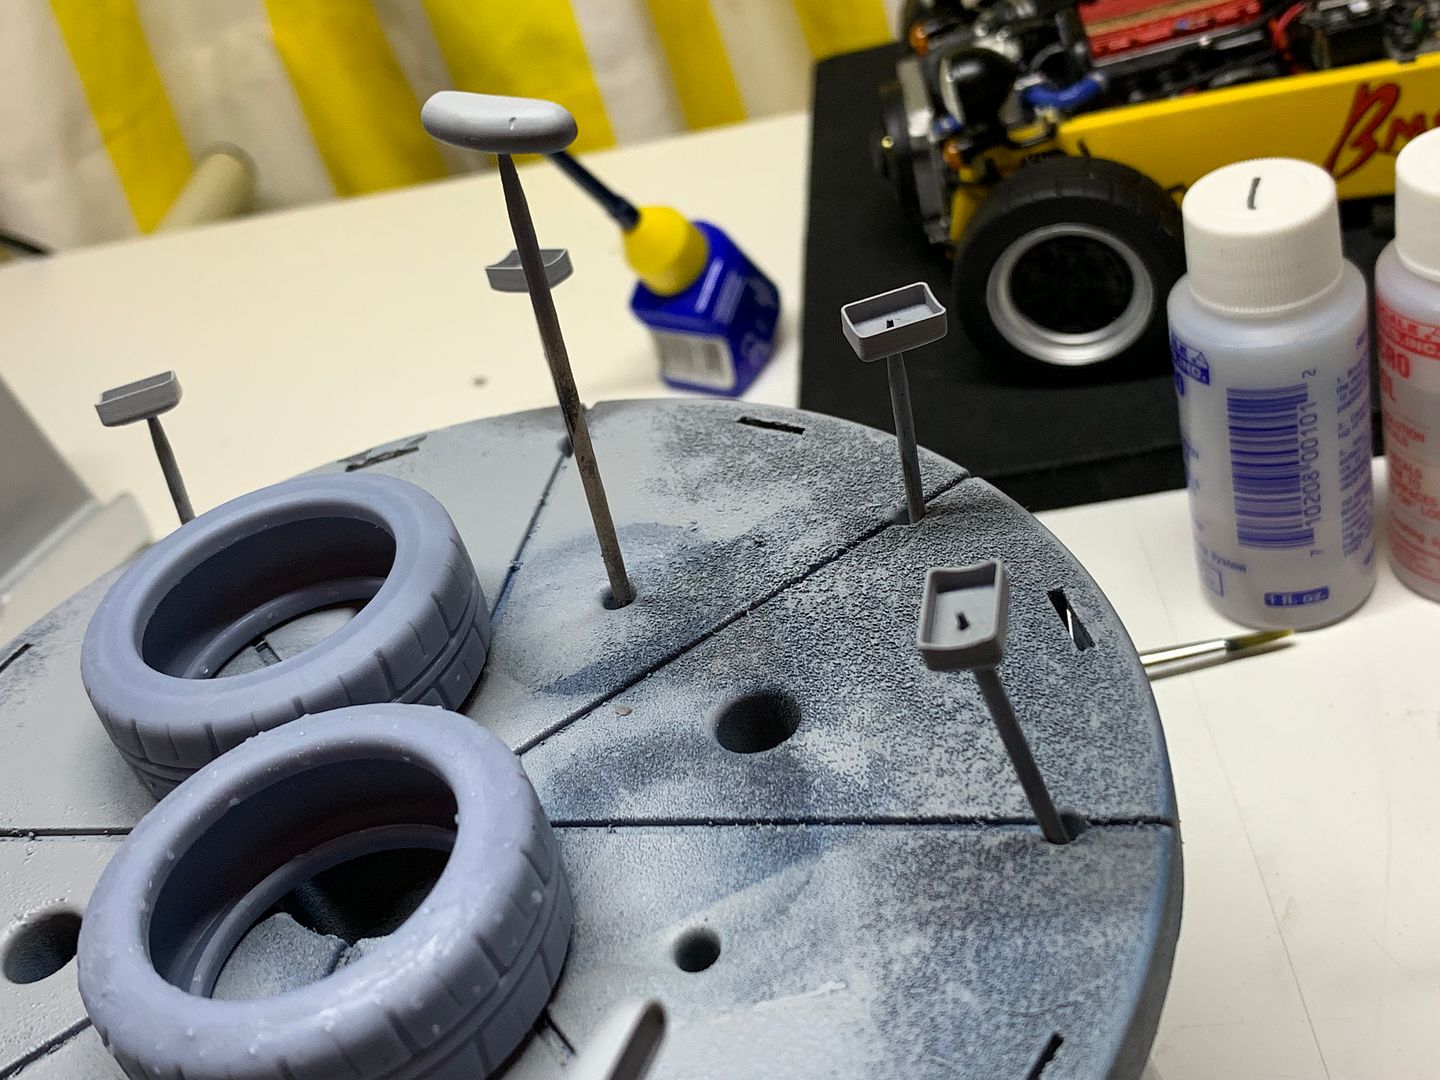
On a mission now, so I also drew up some other parts - the tiny ones like fog lights, rear view race mirrors etc - none of which are correct in the kit for what I need. I also drew up the '7' grill, which printed amazingly - years ago I had tried to resin cast the original wire one that came in one of the Tamiya kits (The VX powered JPE) as I needed more than one, but it was impossible - not now!
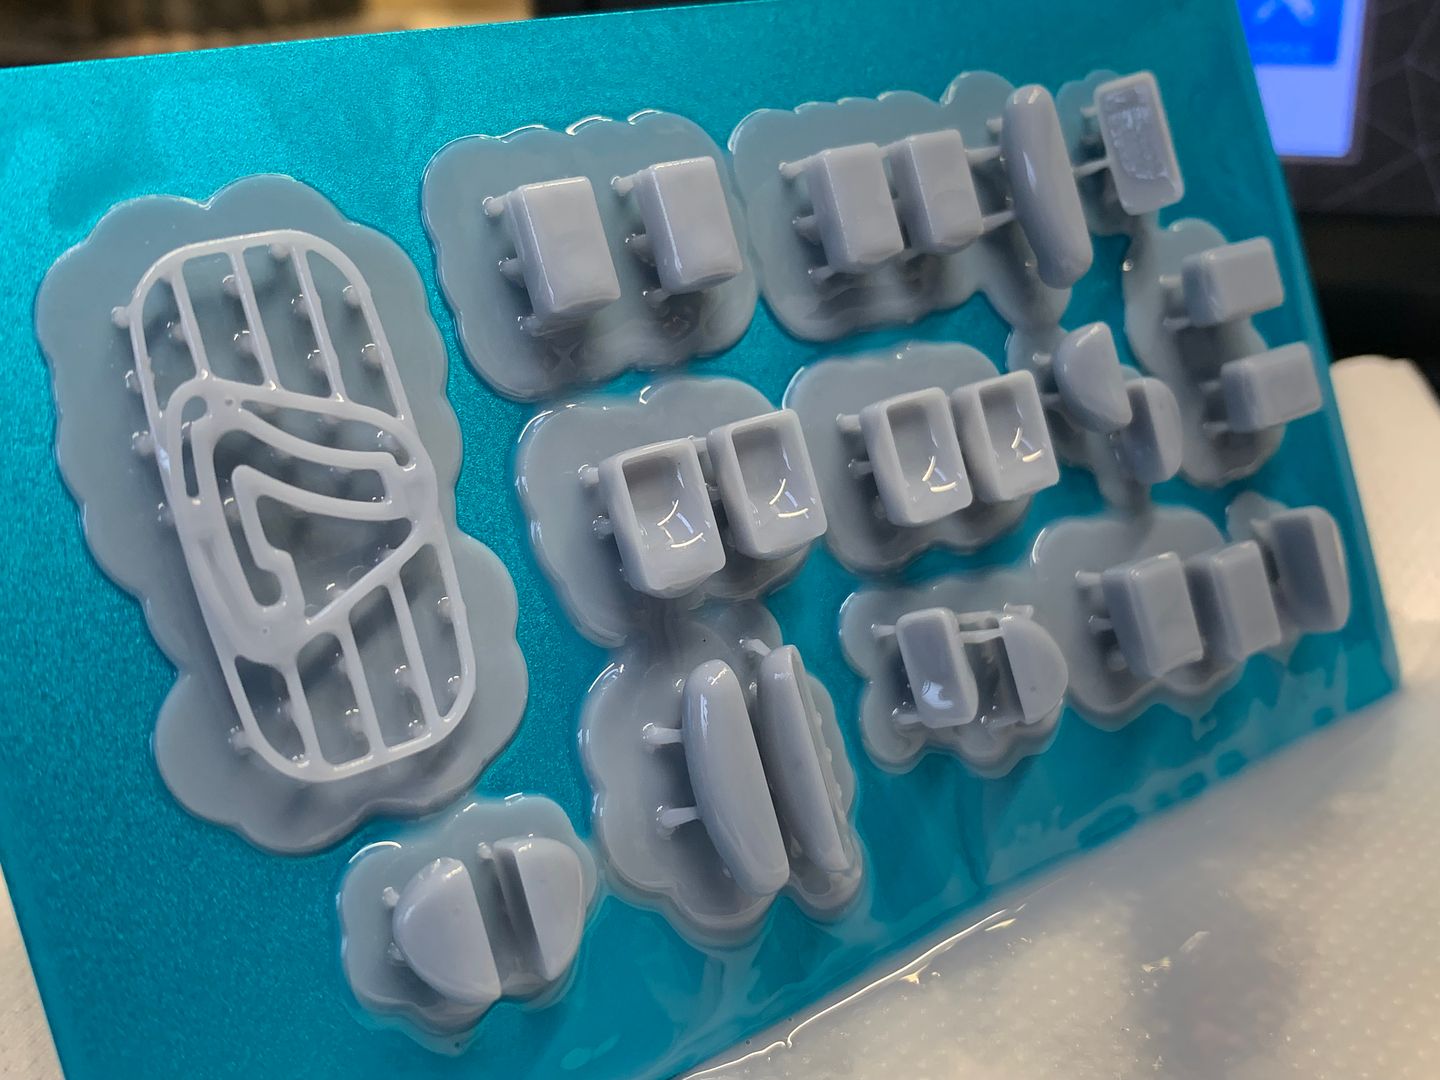
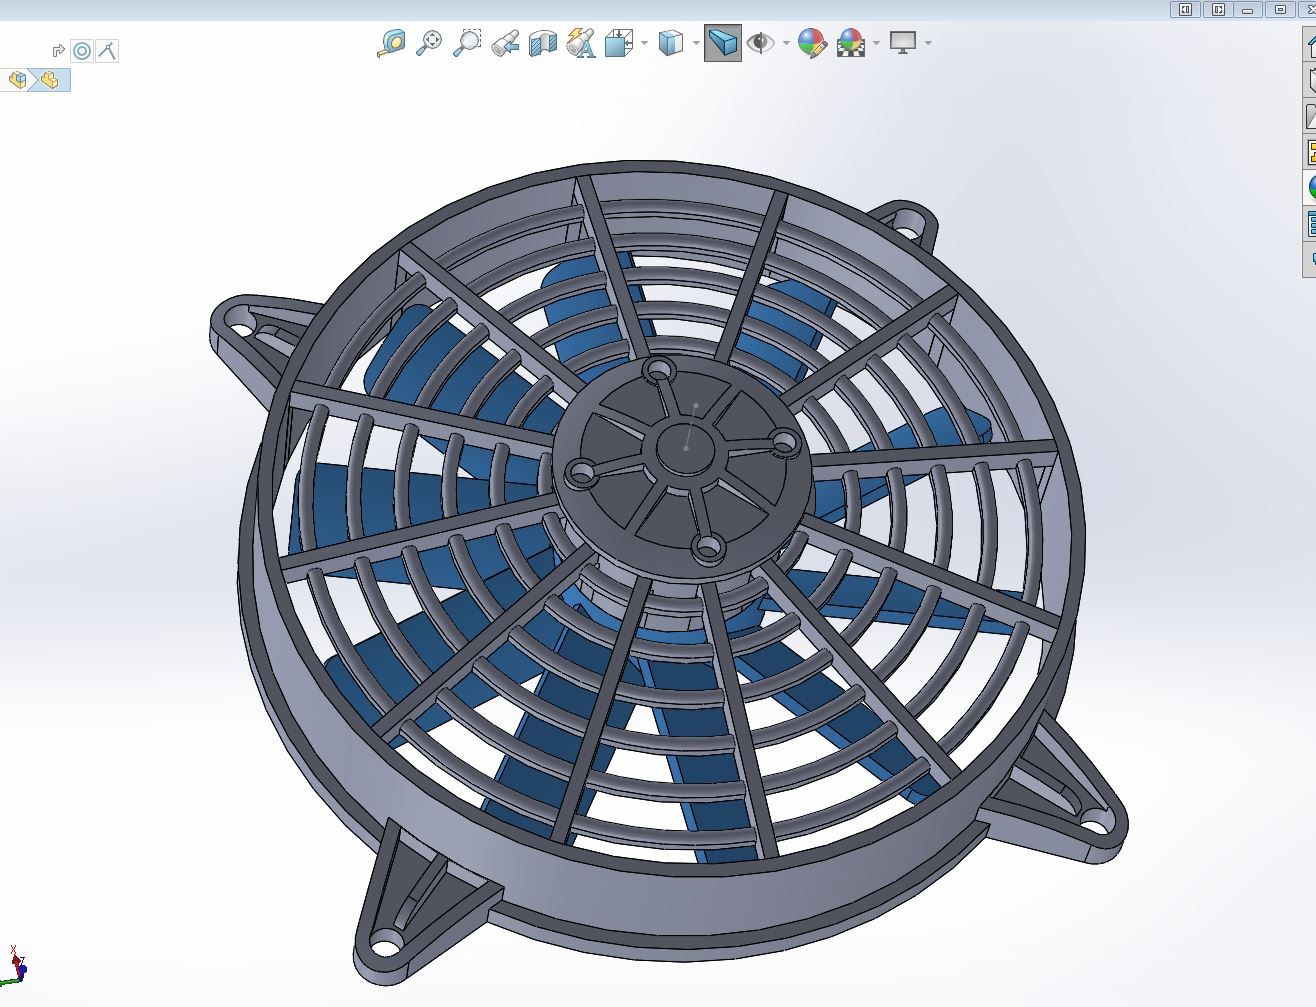
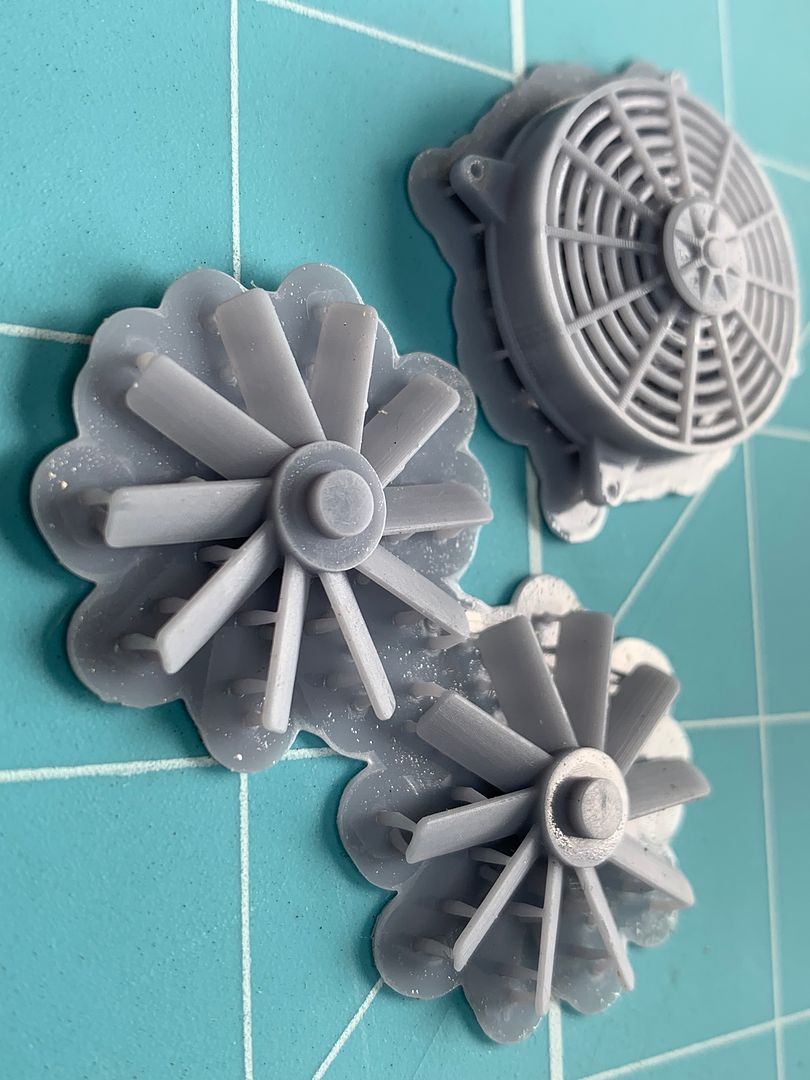
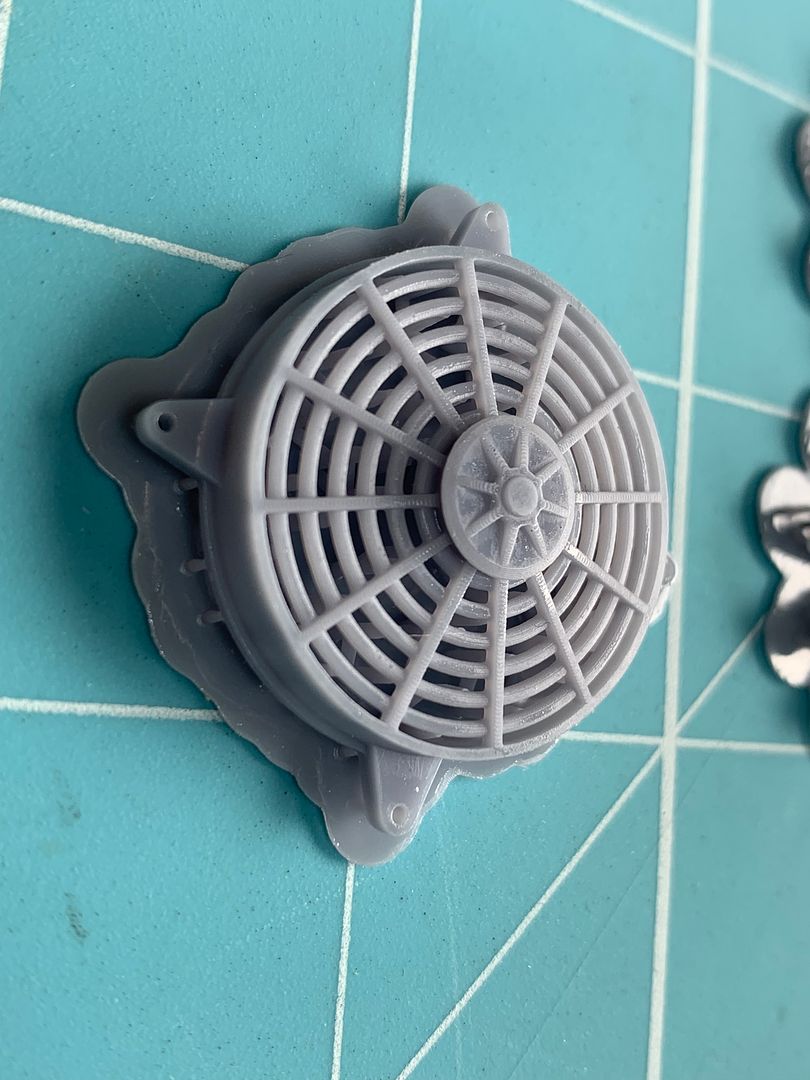
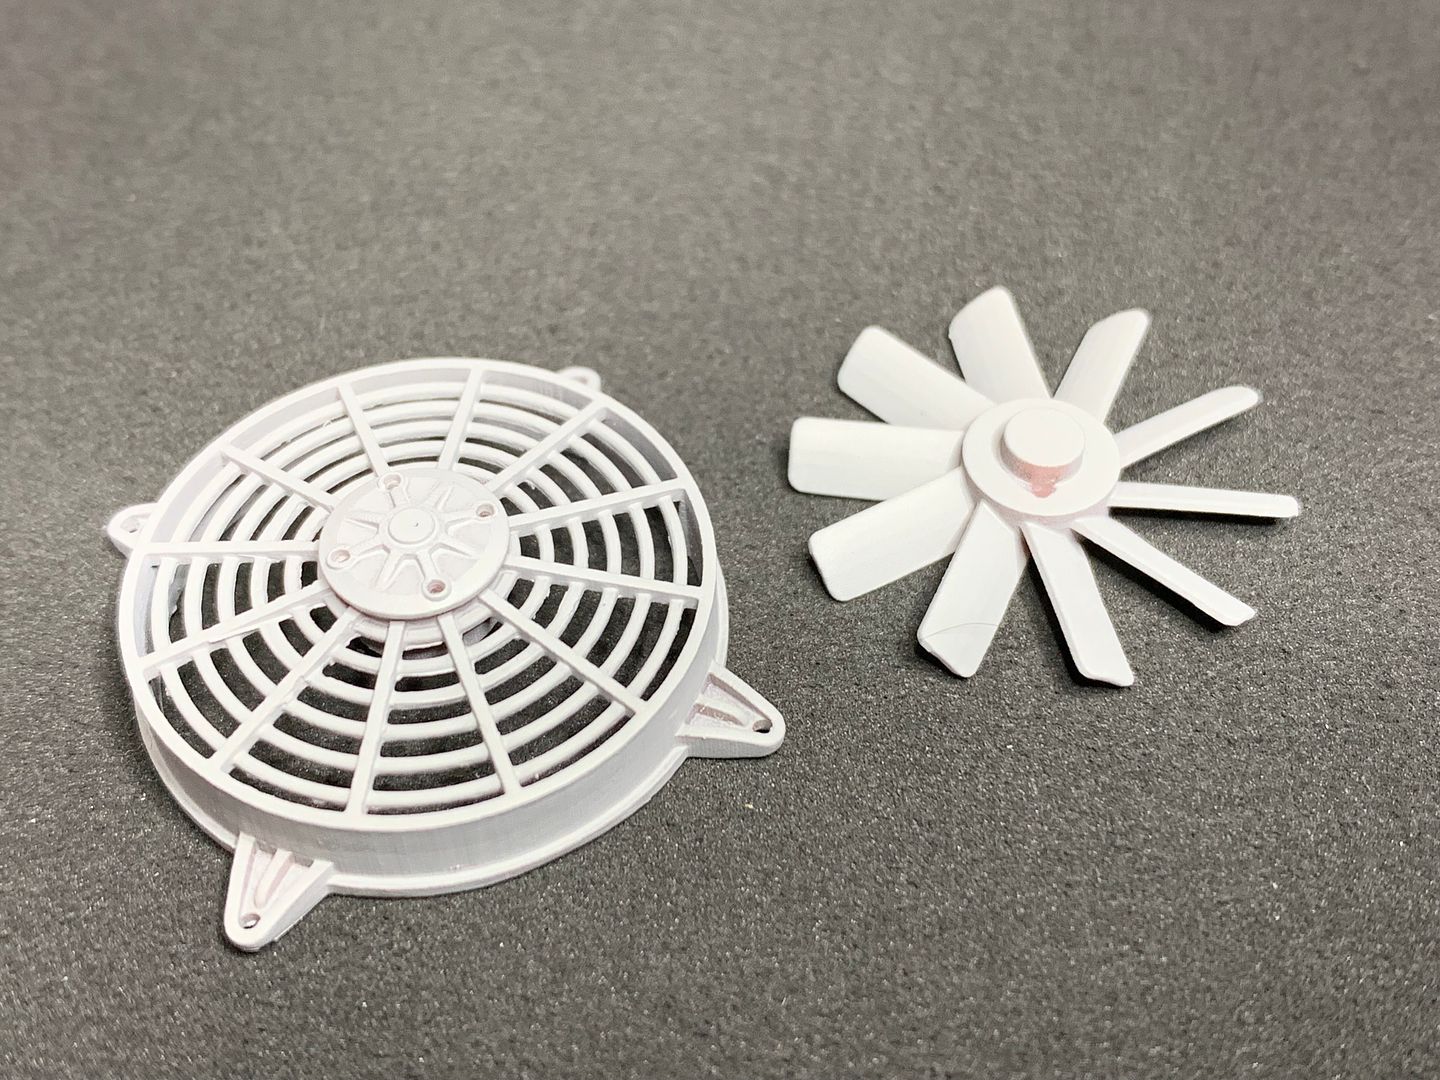
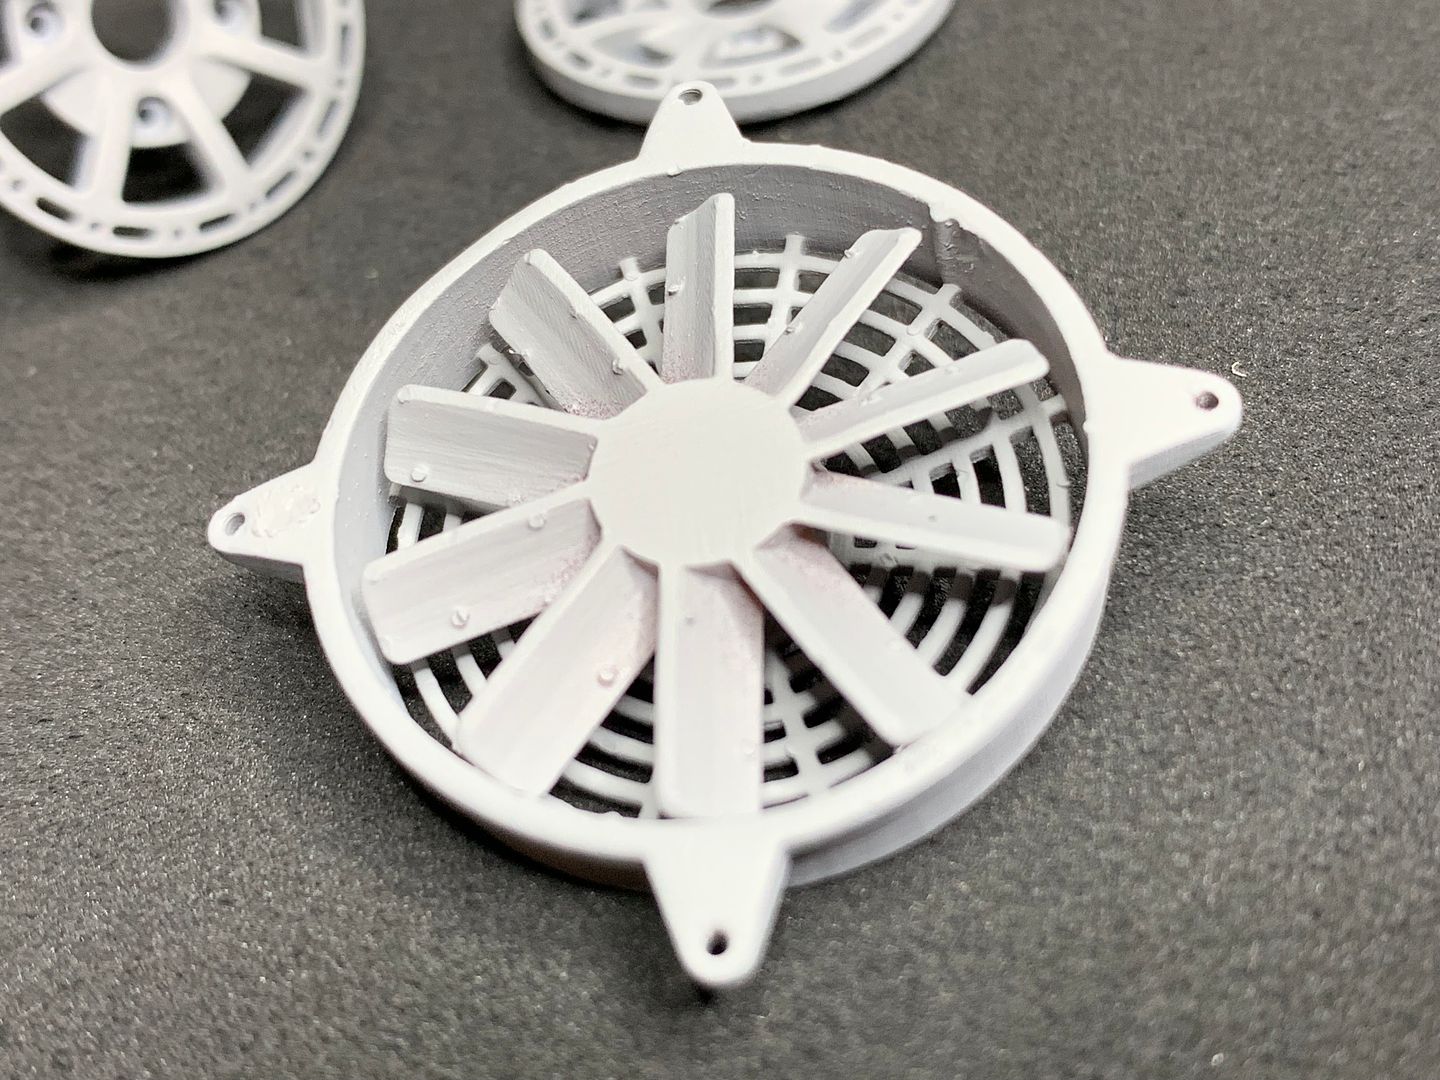
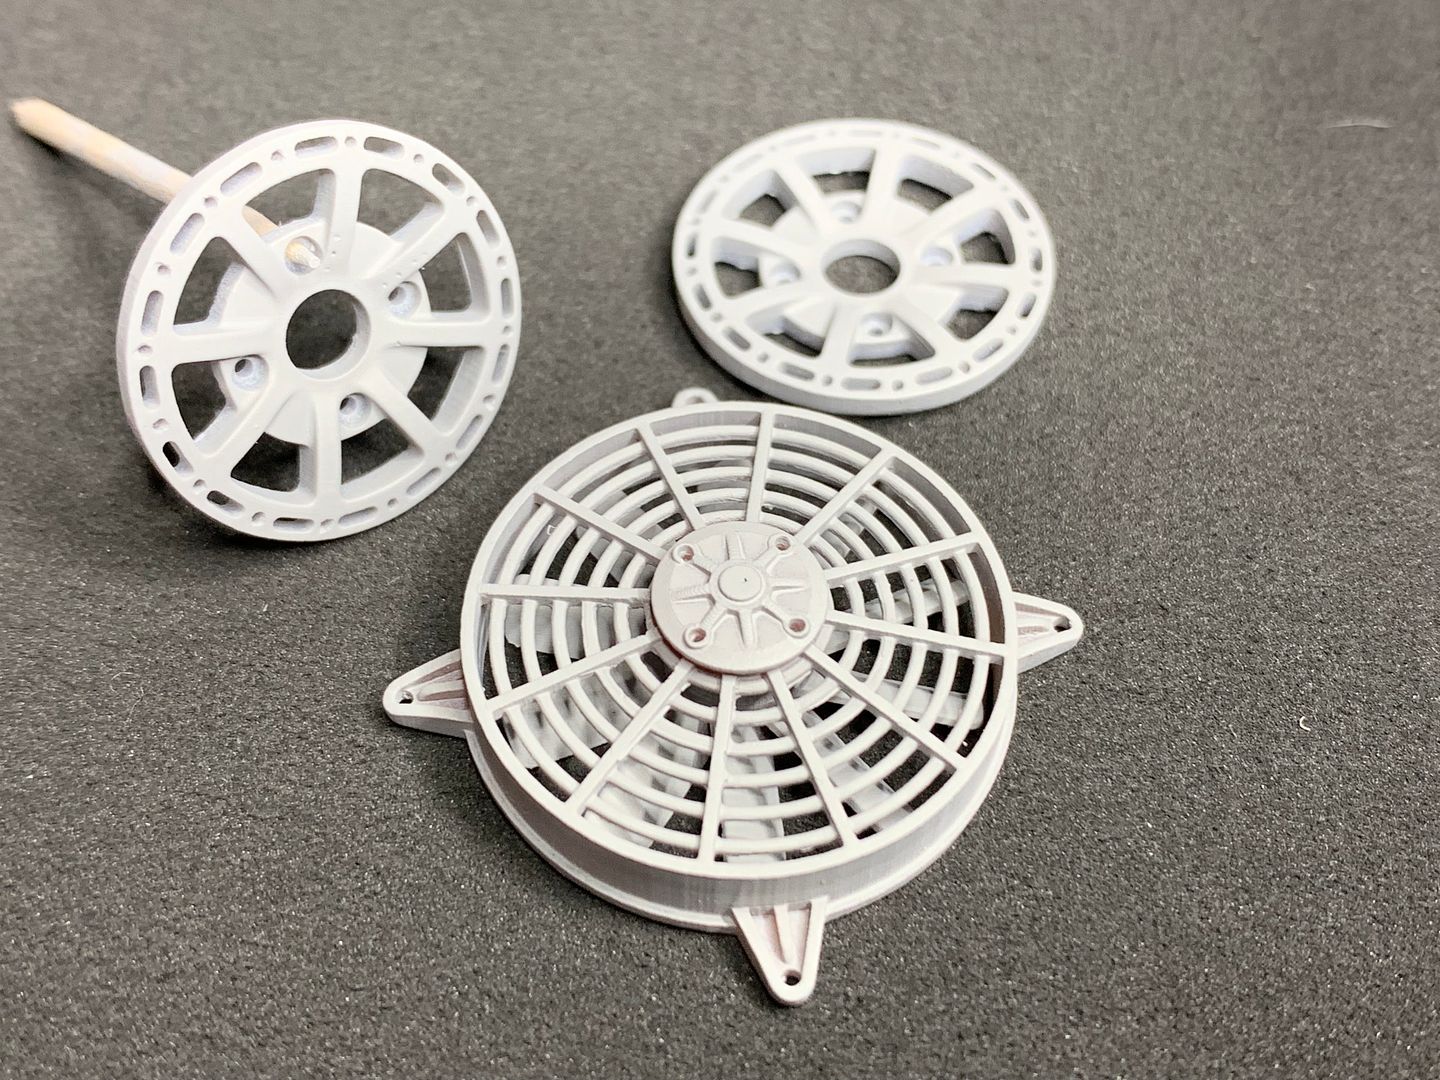
I had to make another cooling fan for the radiator of the blue car - the yellow one consisted of part of a camera film case, carefully bent wire, carved fan blades etc etc - huge amount of labour. I drew up this one, made the fan separately so I could paint more easily,.
I'm currently trying to get the wheel/tyre sizes spot on so I can manufacture those, and am about to start finishing and painting all those parts to assemble...
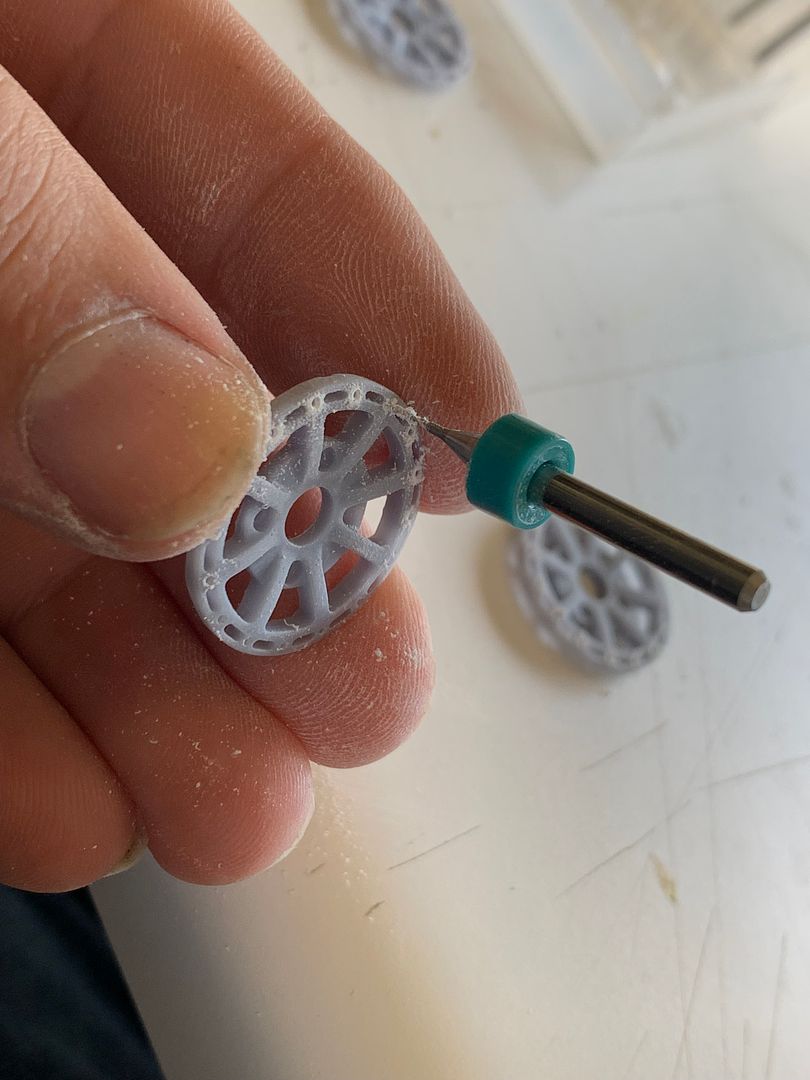
The parts look absolutely awesome. After curing, how much work did they need?
Looks like some bubbling on the primer coats, but that seems common with printed things. Presumably just flat it off?
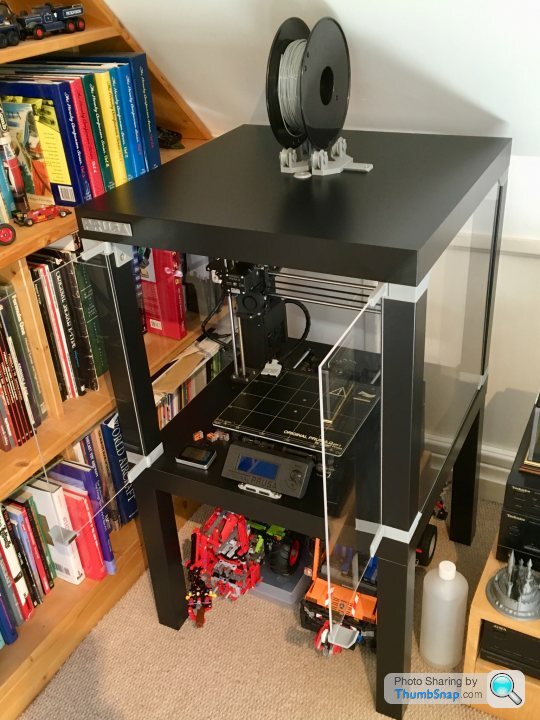
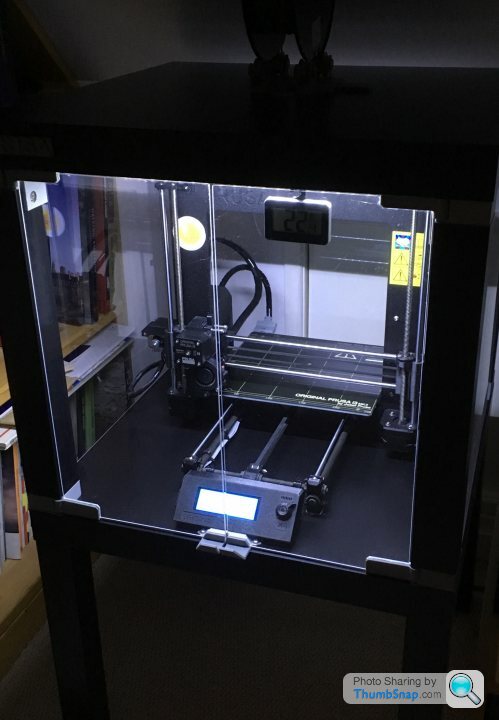
Off topic, but I finished an enclosure for my FDM printer yesterday - 2 Ikea Lack tables with printed brackets (God bless the internet). Would look great with another table next to it with a resin printer...
Looks like some bubbling on the primer coats, but that seems common with printed things. Presumably just flat it off?
Off topic, but I finished an enclosure for my FDM printer yesterday - 2 Ikea Lack tables with printed brackets (God bless the internet). Would look great with another table next to it with a resin printer...
Nice - I am sure I'll get an FDM printer sometime for 'bigger' stuff - more structural things...
The bubbling' you are seeing is probably just the mark left by the supports when they are snapped off - light sanding gets rid of them - as I say, a lot of the pics I have posted have been 'quick' test shots...
Some parts require no finishing - depends on print angle, what etc etc....but a very light sand is all that I am doing - finish is superb.
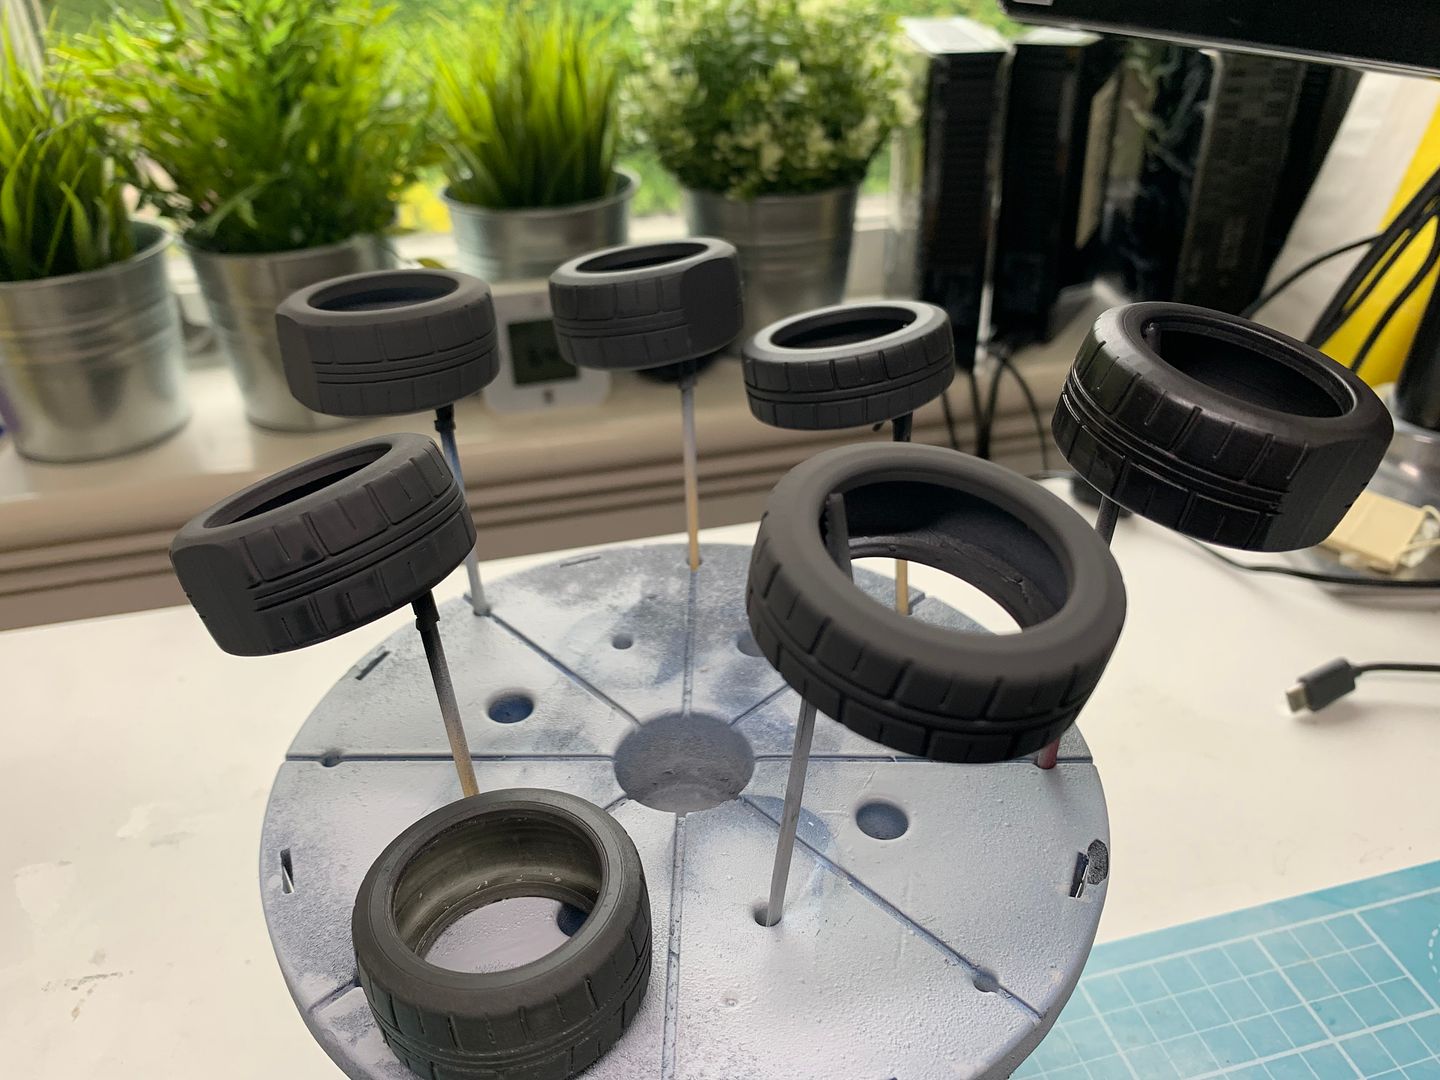
Finished the wheels (or at least the main parts - need to add the air valves etc!)
Printing the tyres was a pain - teied different angles etc, sometimes they would 'sag' as they printed due to the number of supports - still learning all that!
Had a few flats!
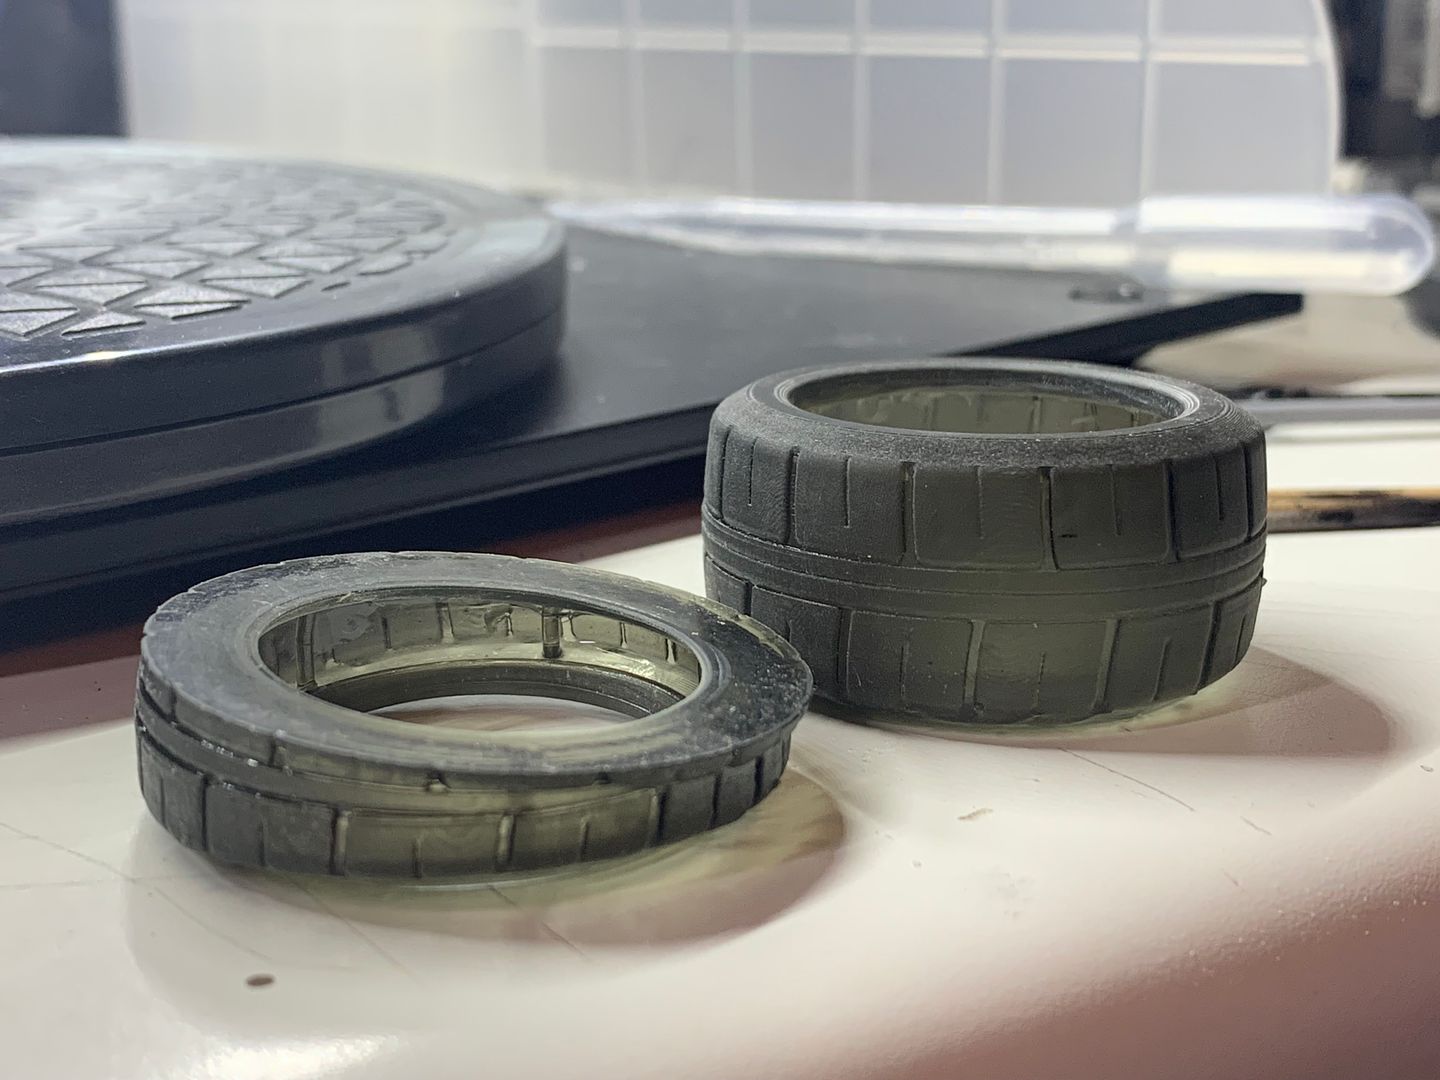
But once done, and cleaned off - I primed and sprayed with Tamiya Rubber Black (or tyre black - can't remember) - I am going to print a mask to spray 'AVON' on the tyres.
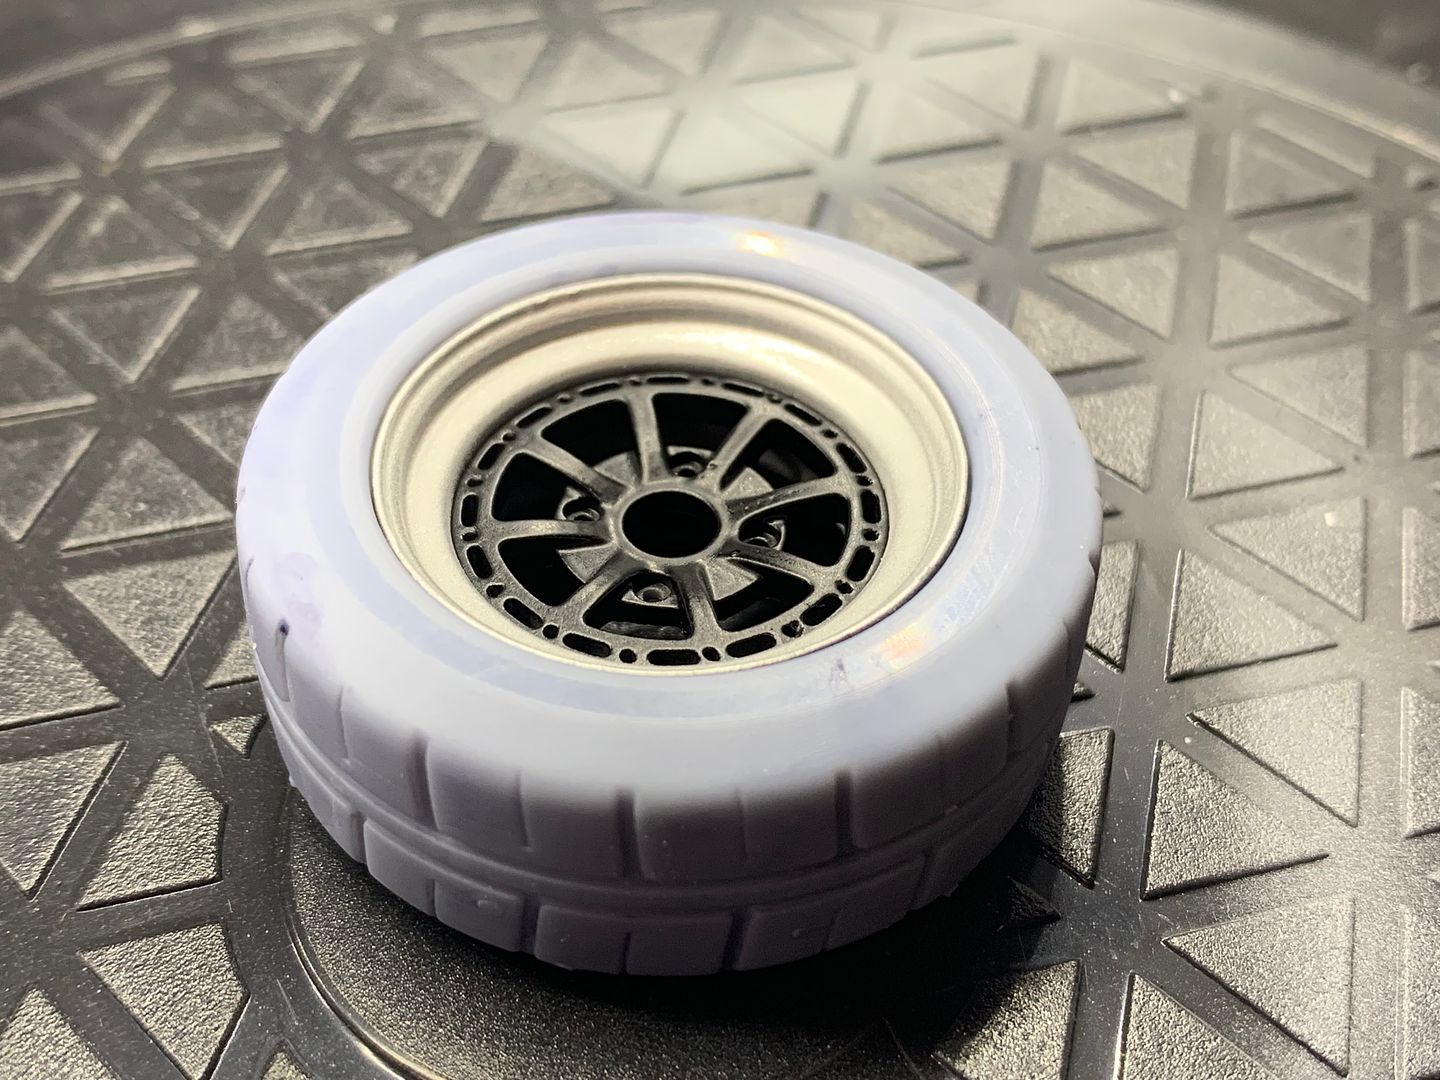
I ended up using Alclad Chrome on the rims - but not to full 'shine' effect - just enough to glint a little bit. I did try the Spaz chrome you can see, but wasn't impressed - far more to do with prep. and not fiddling with the airbrush - alclad gave me a 'hint' of chrome over the top of the other...

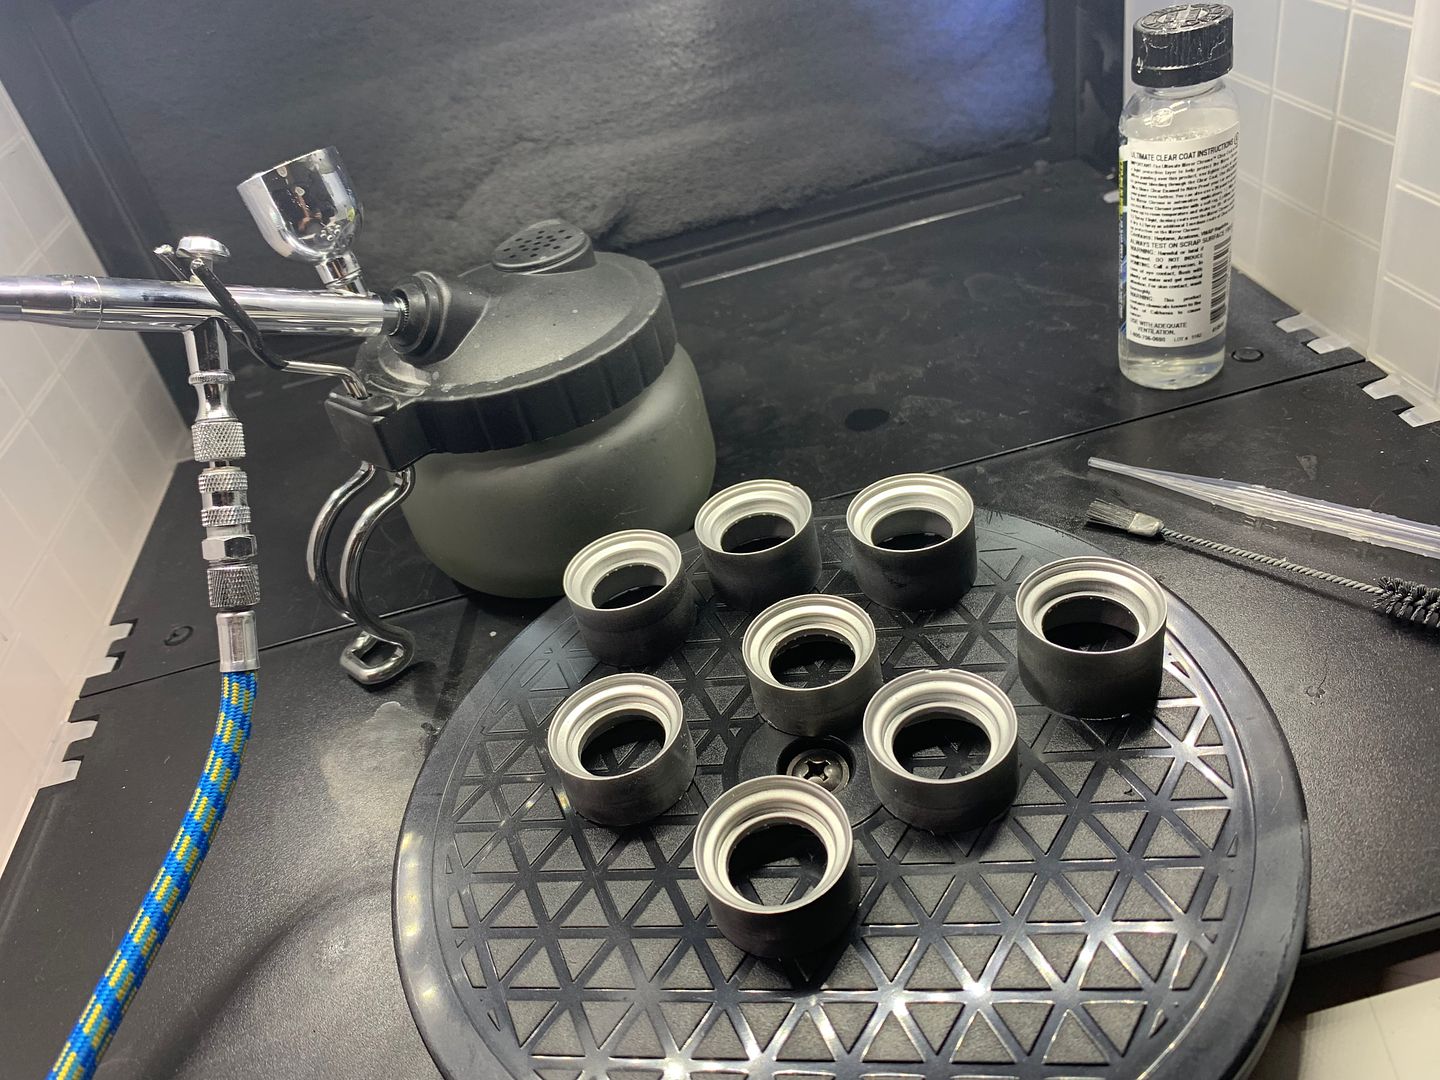
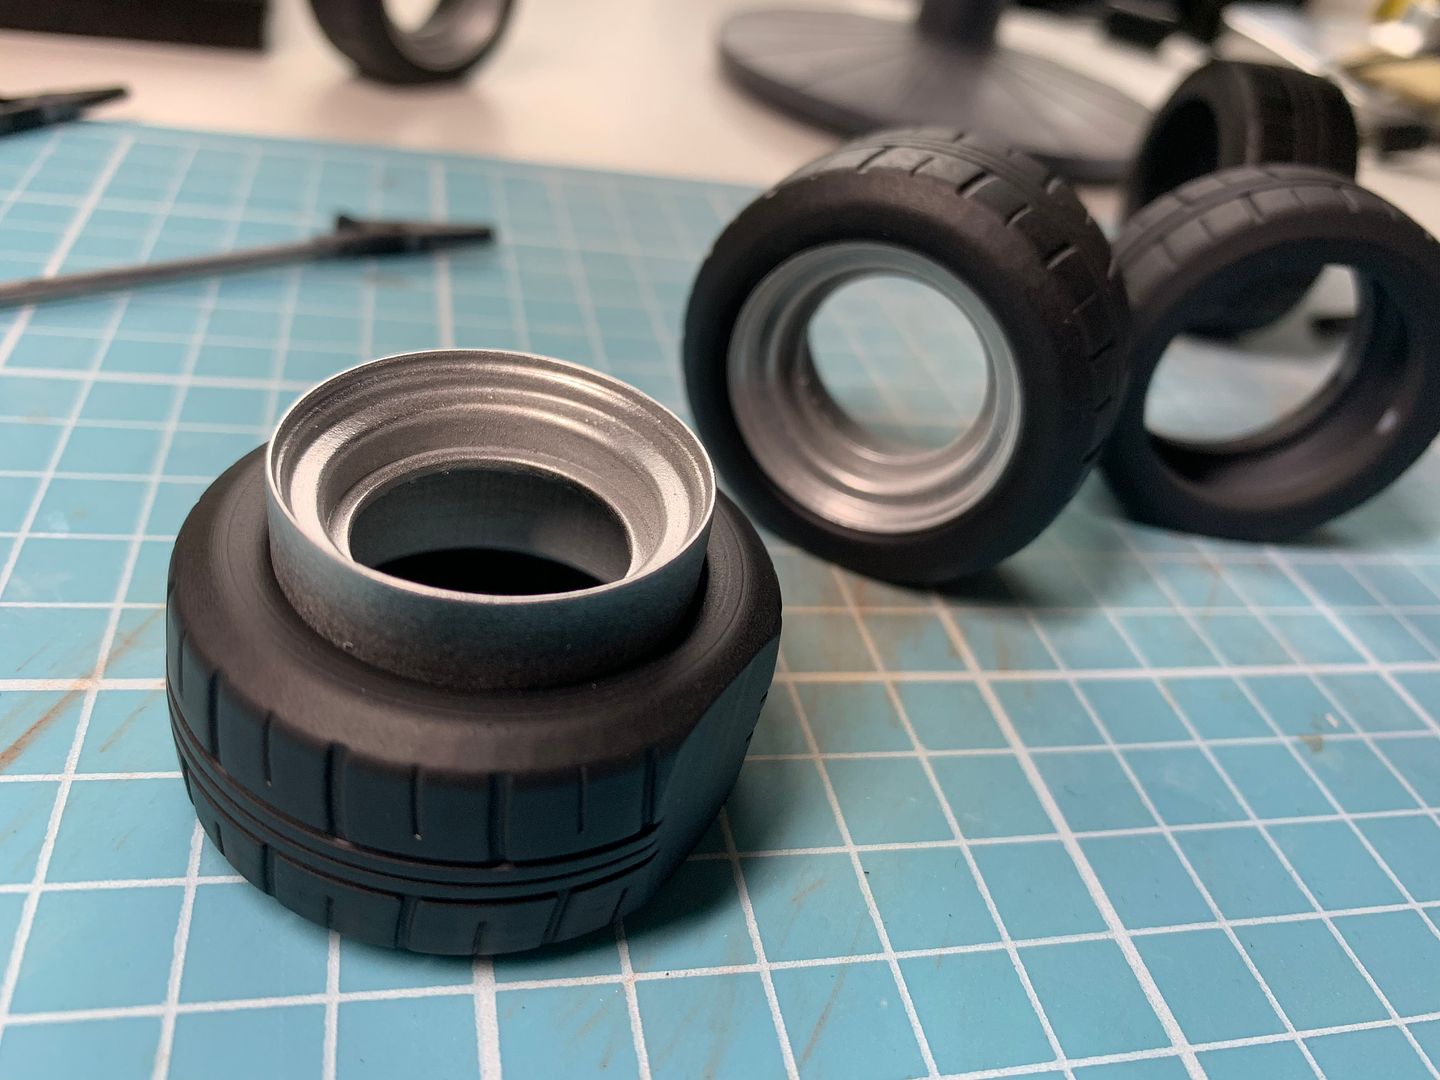

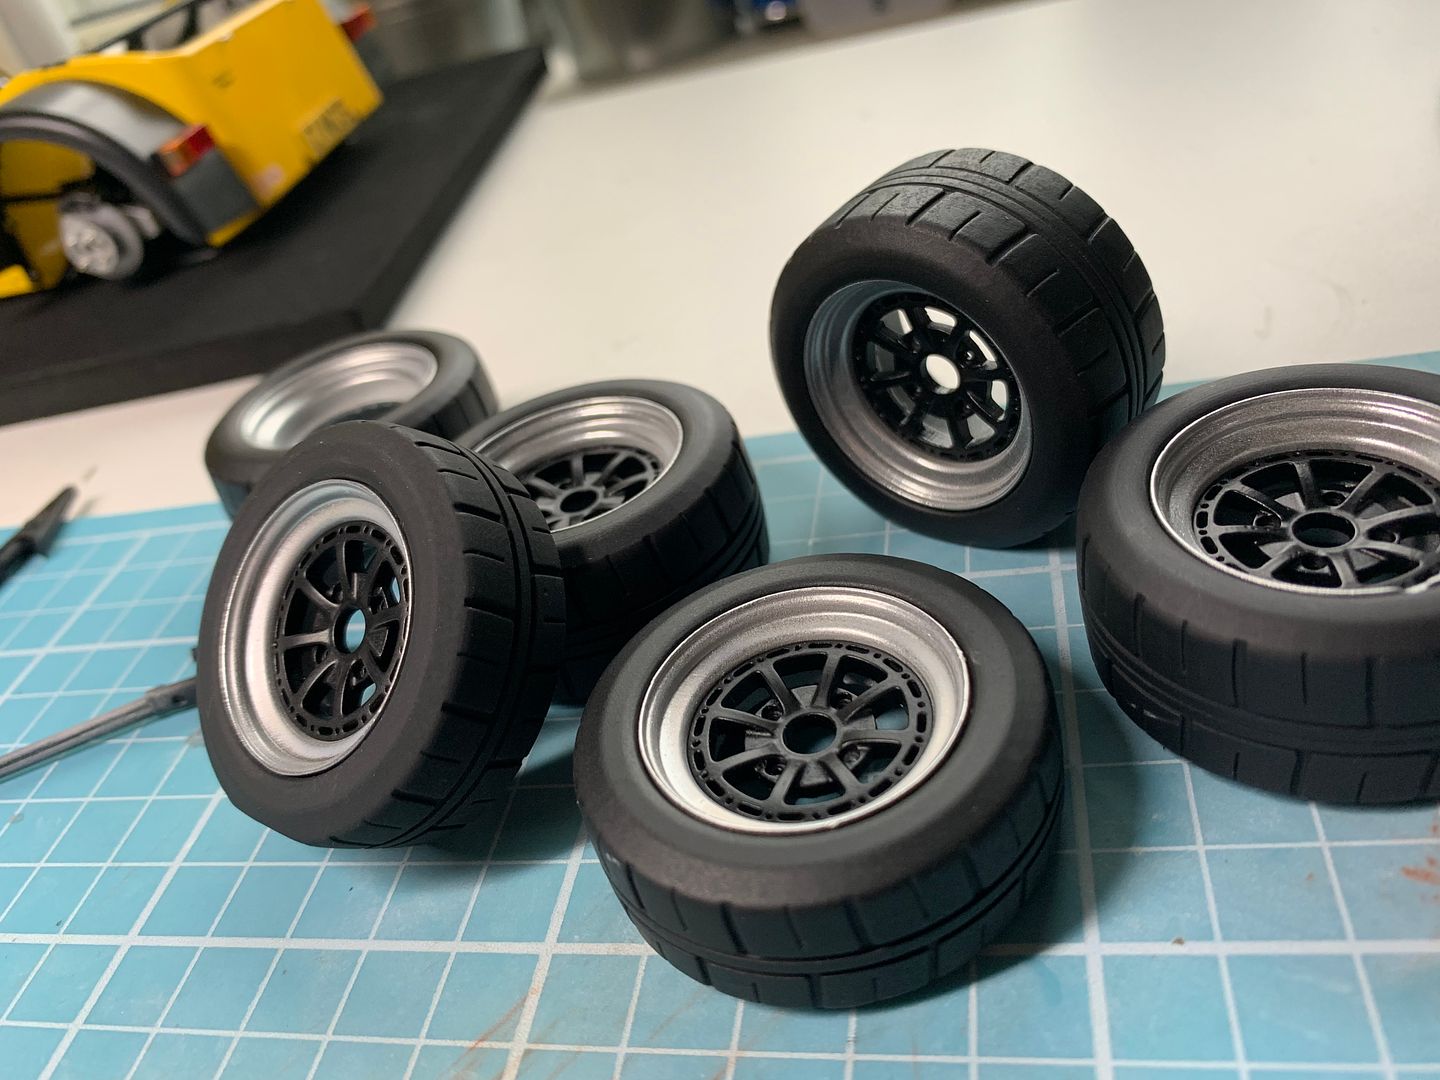
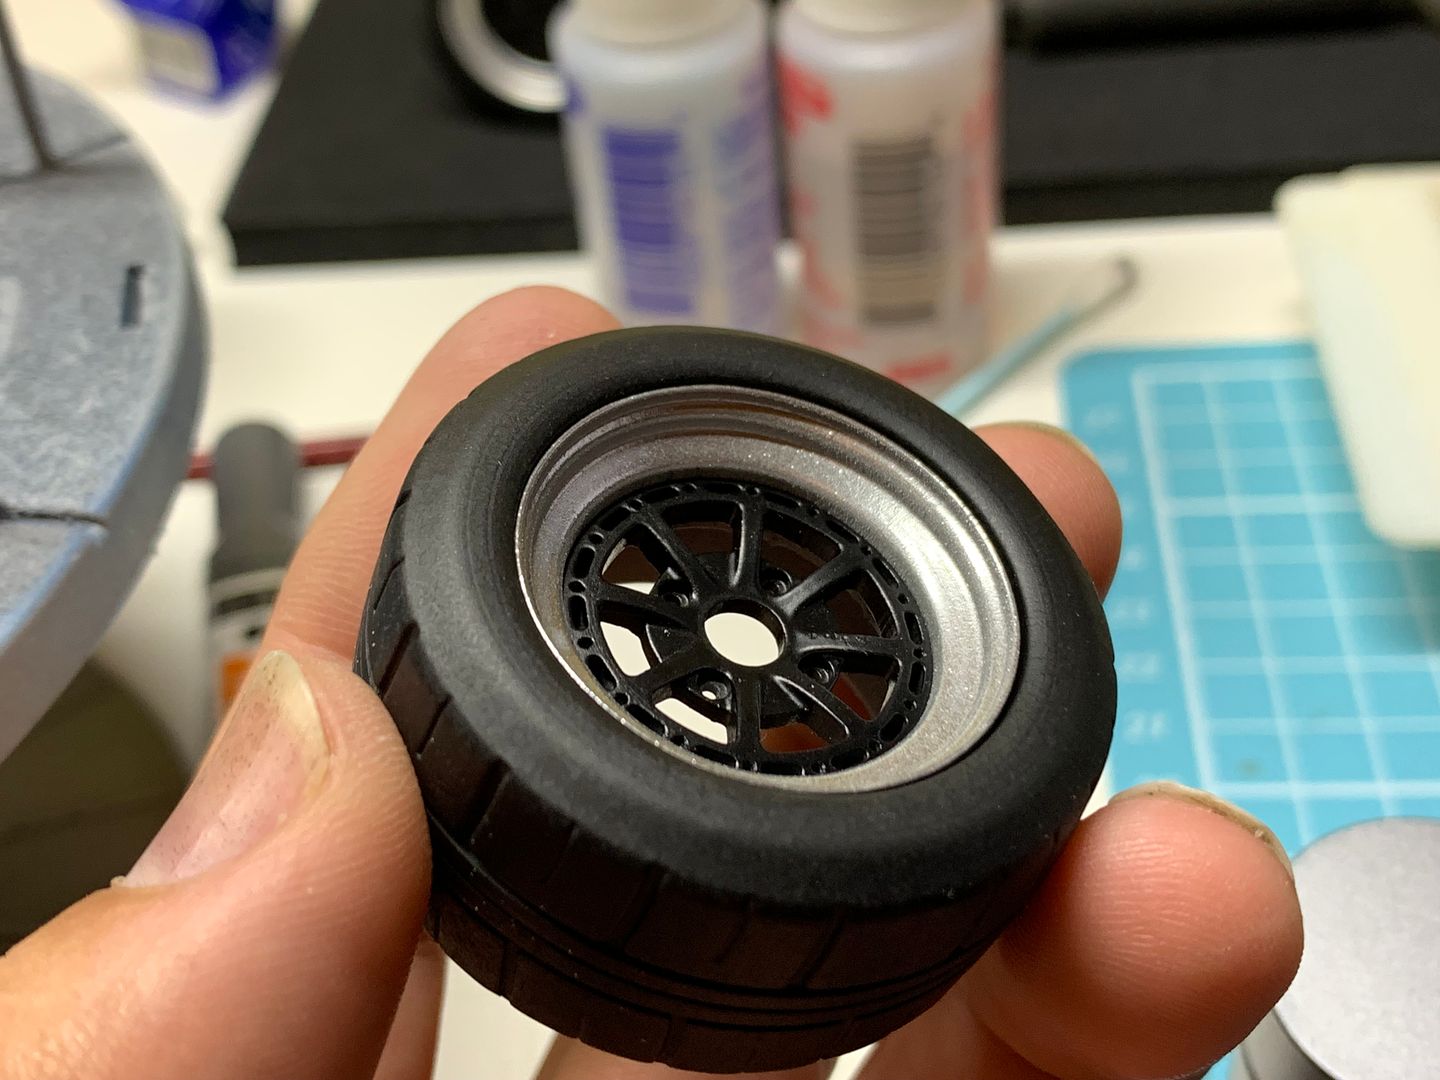
Nothing fixed or attached yet...
Lots of small bits next - mirrors, fog/reverse lights mainly...
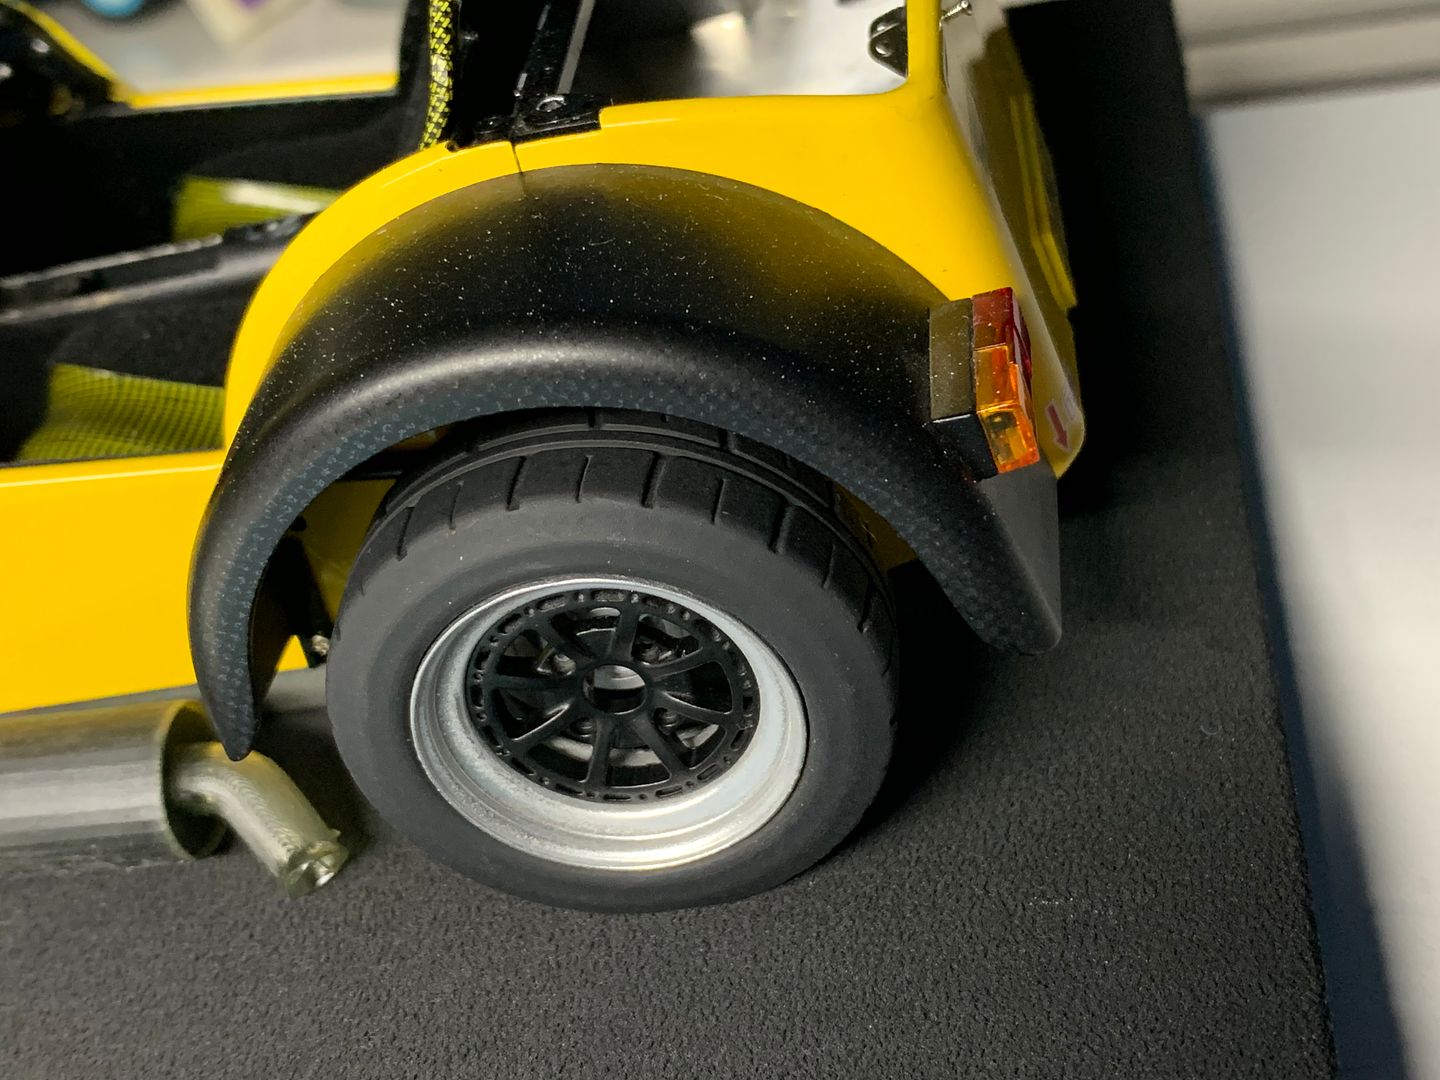
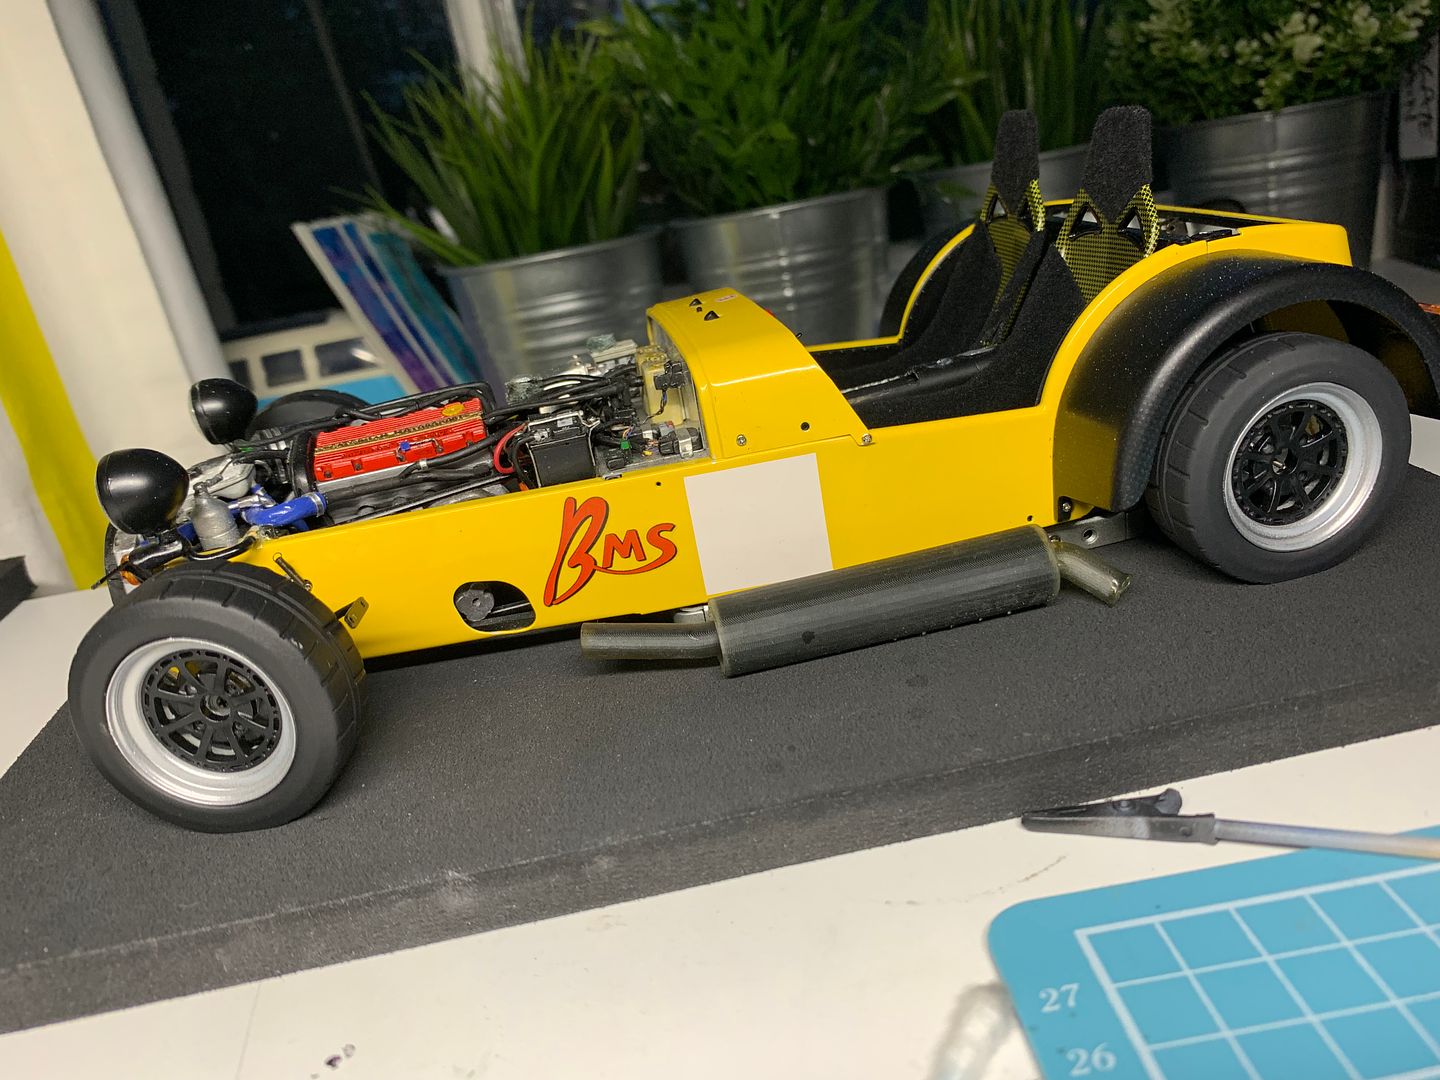
Getting pretty close to assembling these parts to the cars and....finishing!!
Not THAT close - obviously...
The bubbling' you are seeing is probably just the mark left by the supports when they are snapped off - light sanding gets rid of them - as I say, a lot of the pics I have posted have been 'quick' test shots...
Some parts require no finishing - depends on print angle, what etc etc....but a very light sand is all that I am doing - finish is superb.
Finished the wheels (or at least the main parts - need to add the air valves etc!)
Printing the tyres was a pain - teied different angles etc, sometimes they would 'sag' as they printed due to the number of supports - still learning all that!
Had a few flats!
But once done, and cleaned off - I primed and sprayed with Tamiya Rubber Black (or tyre black - can't remember) - I am going to print a mask to spray 'AVON' on the tyres.
I ended up using Alclad Chrome on the rims - but not to full 'shine' effect - just enough to glint a little bit. I did try the Spaz chrome you can see, but wasn't impressed - far more to do with prep. and not fiddling with the airbrush - alclad gave me a 'hint' of chrome over the top of the other...
Nothing fixed or attached yet...
Lots of small bits next - mirrors, fog/reverse lights mainly...
Getting pretty close to assembling these parts to the cars and....finishing!!
Not THAT close - obviously...
Gassing Station | Scale Models | Top of Page | What's New | My Stuff