Tamiya Caterham 1/12 - modified
Discussion


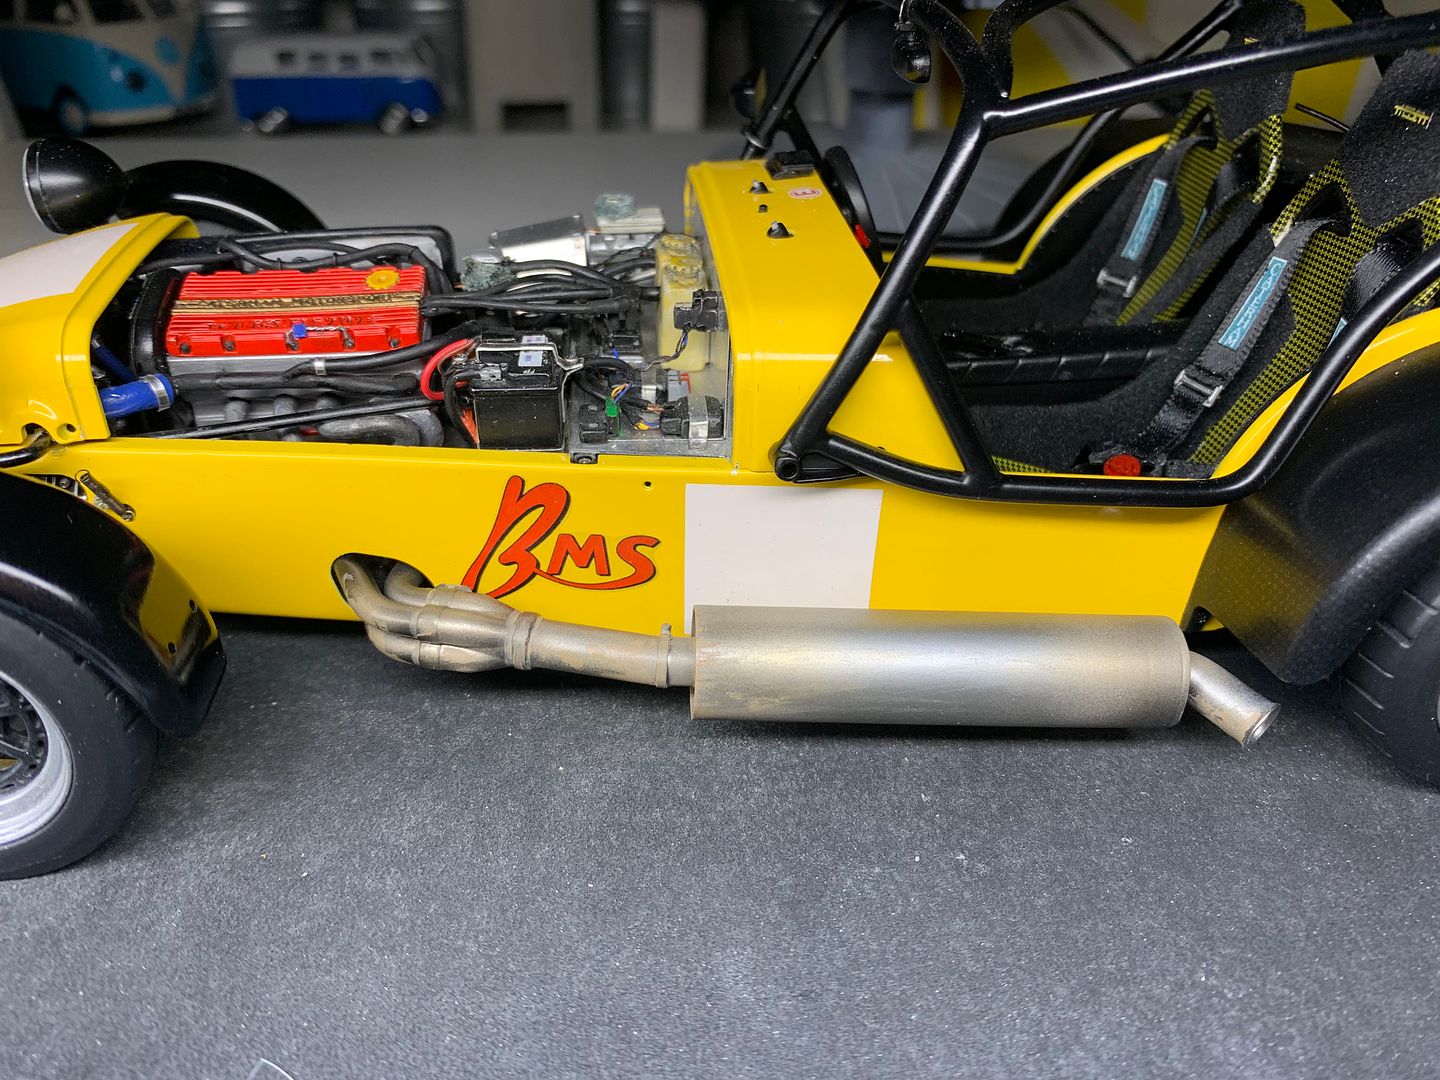
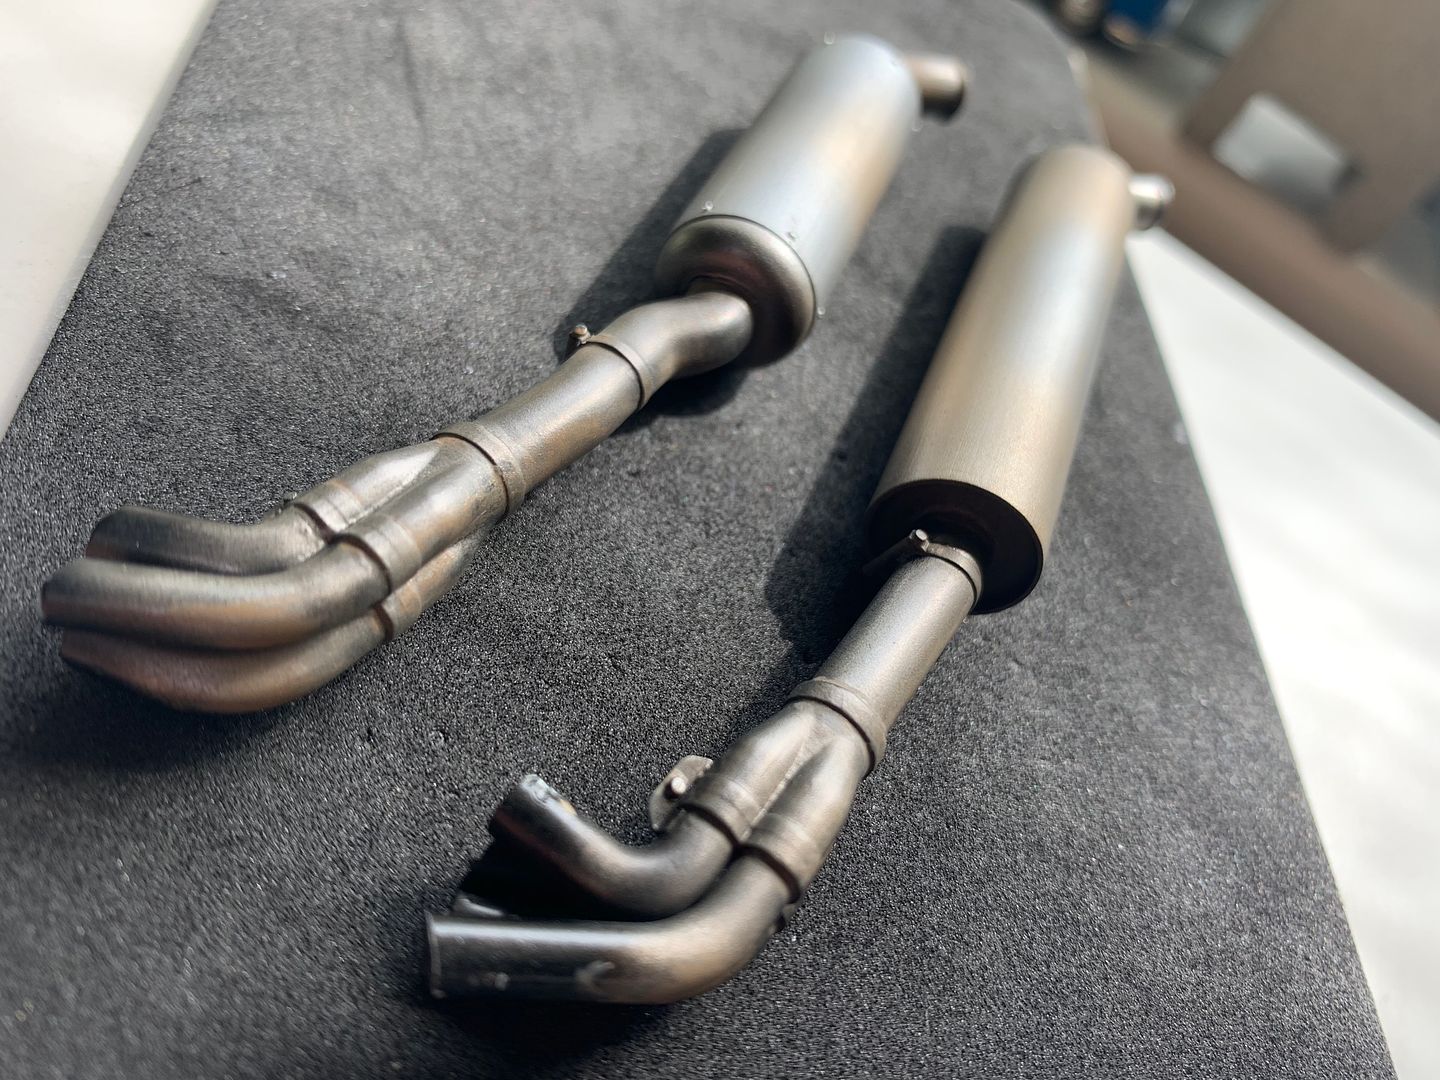
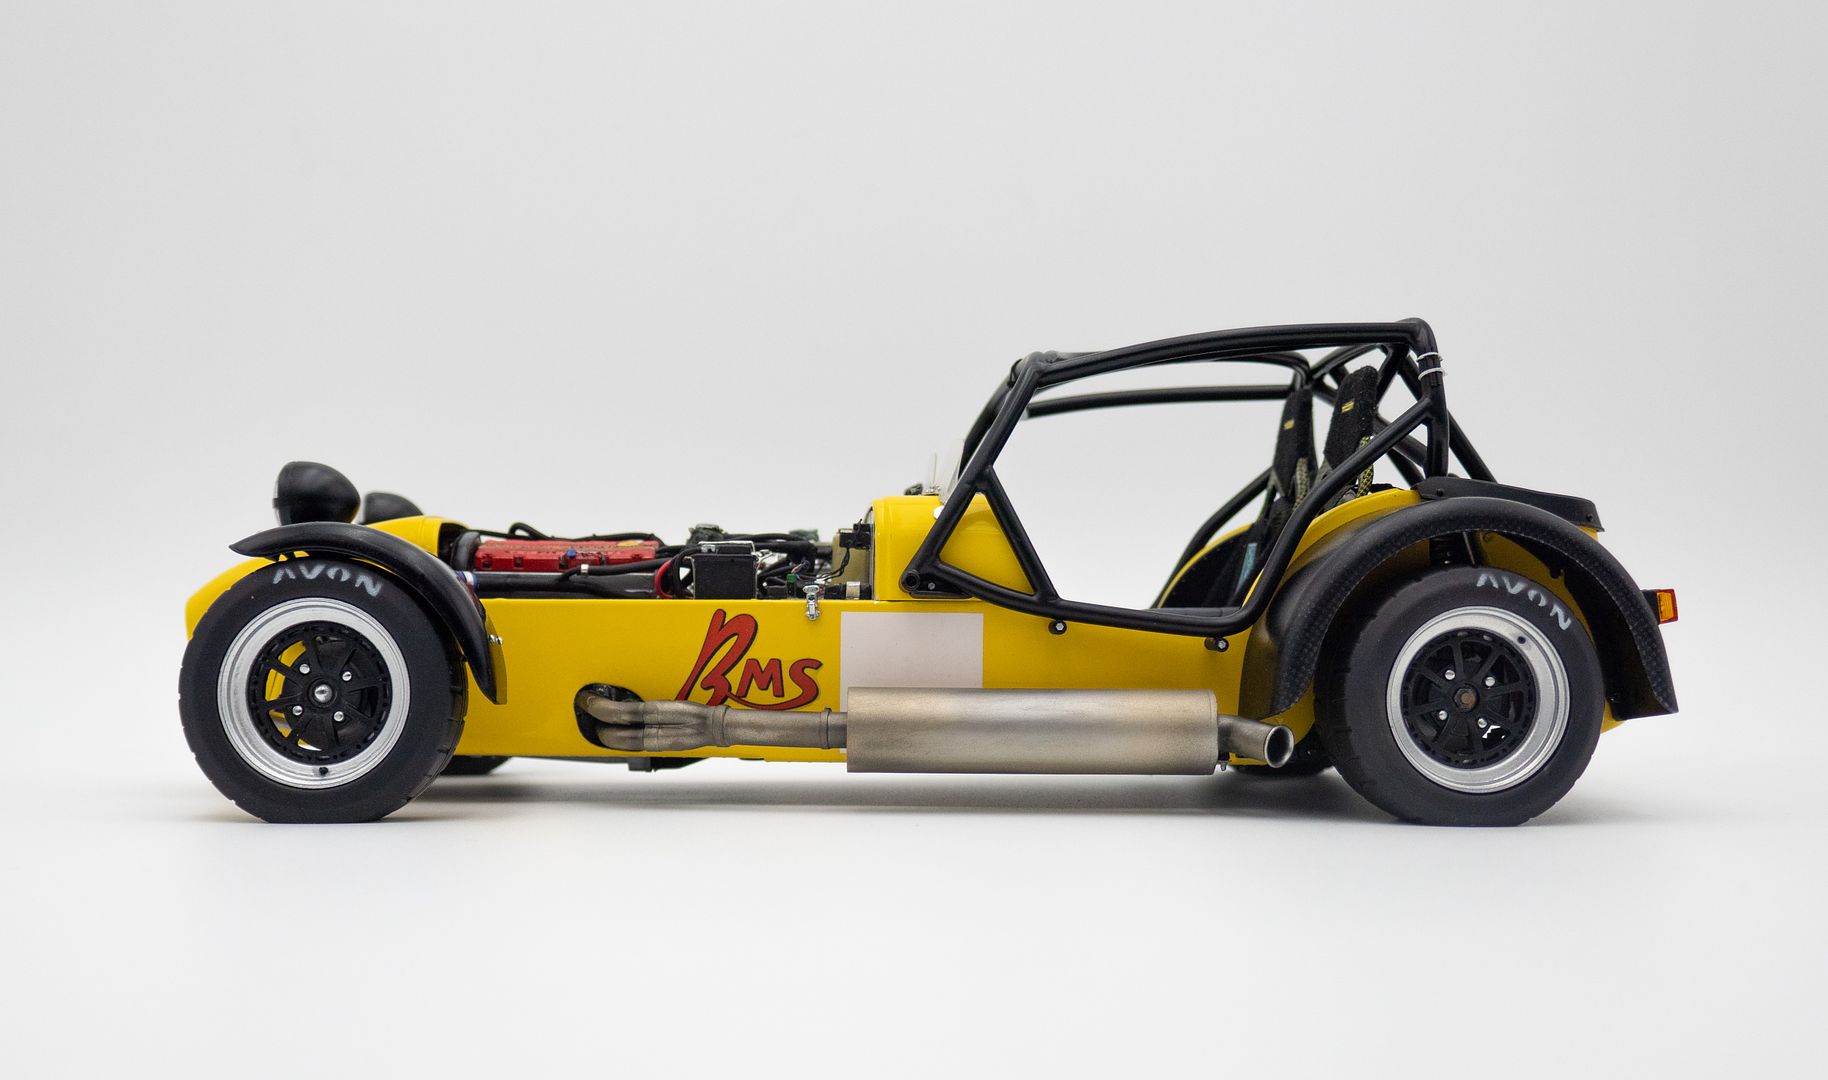
I am modelling these cars 'as-is' so the exhausts need to look like the 'used' ones on the real cars (see last post) - not all polished and shiny - although I would start at that point.
I'm winging all this, but it has worked so far!
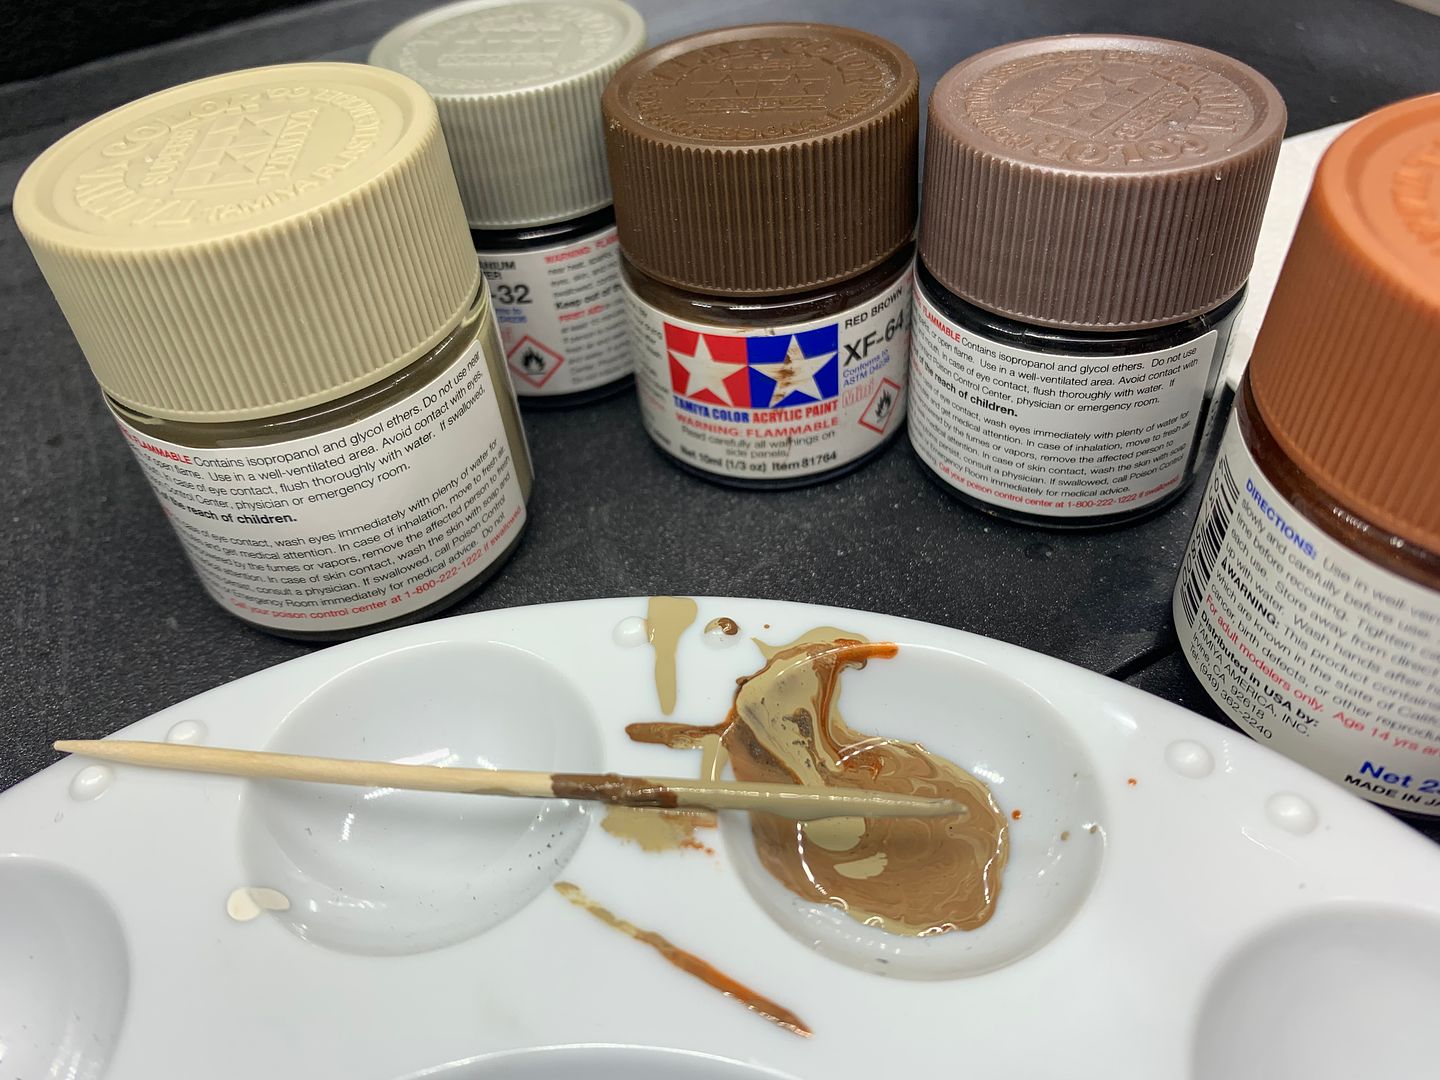
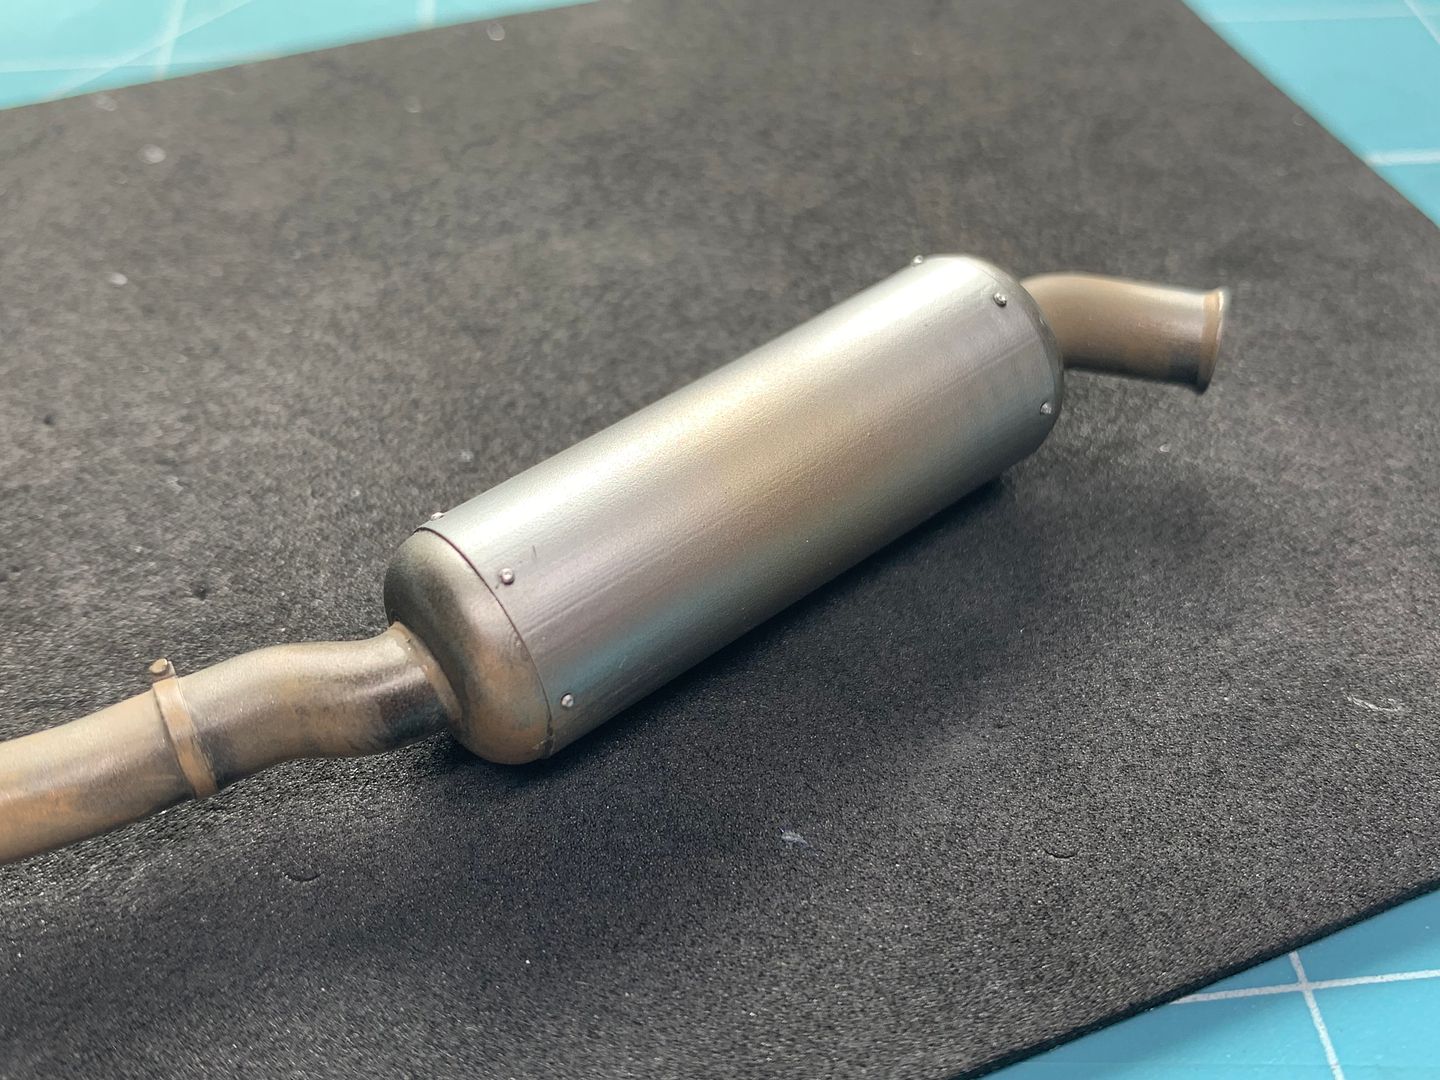
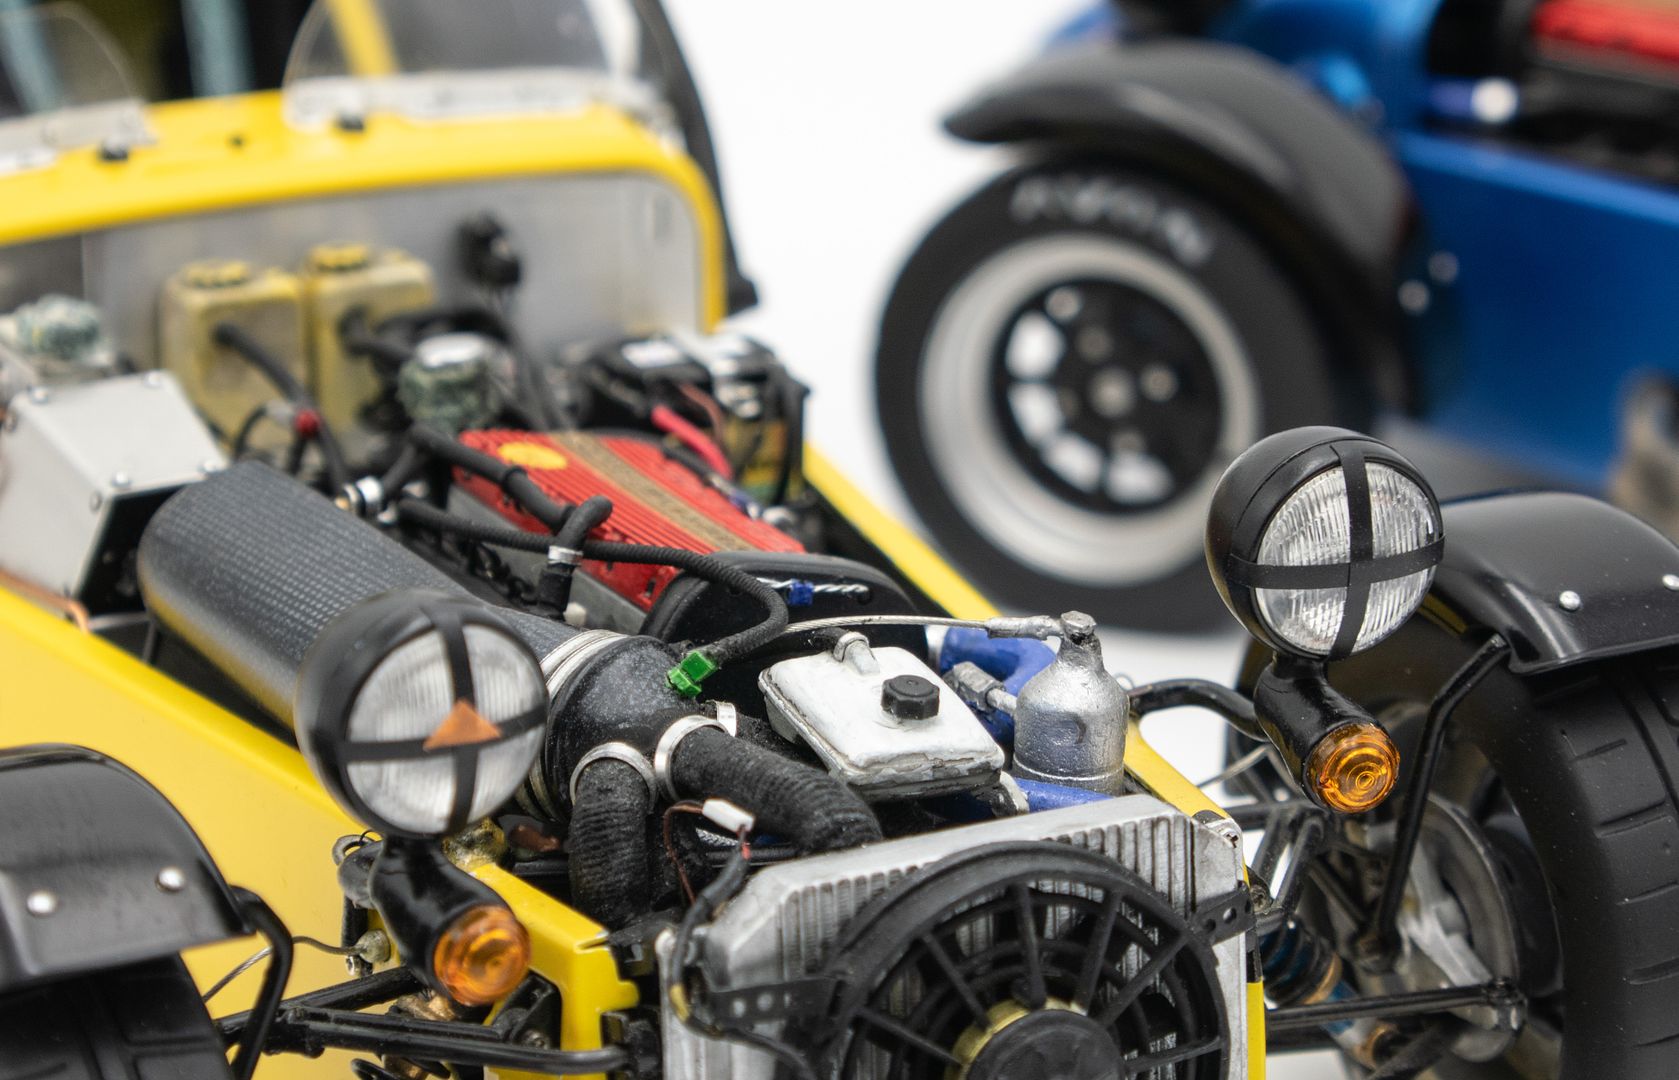
As I was going to use Alclad Chrome, I applied gloss black 'undercoat' - used to make the chrome shine - as it was, I ended up going over most of this, but it gave a suitable shiny 'under' surface - most of the pipes are oxidised and dirty. The cans are aluminium or titanium, so a different colour.
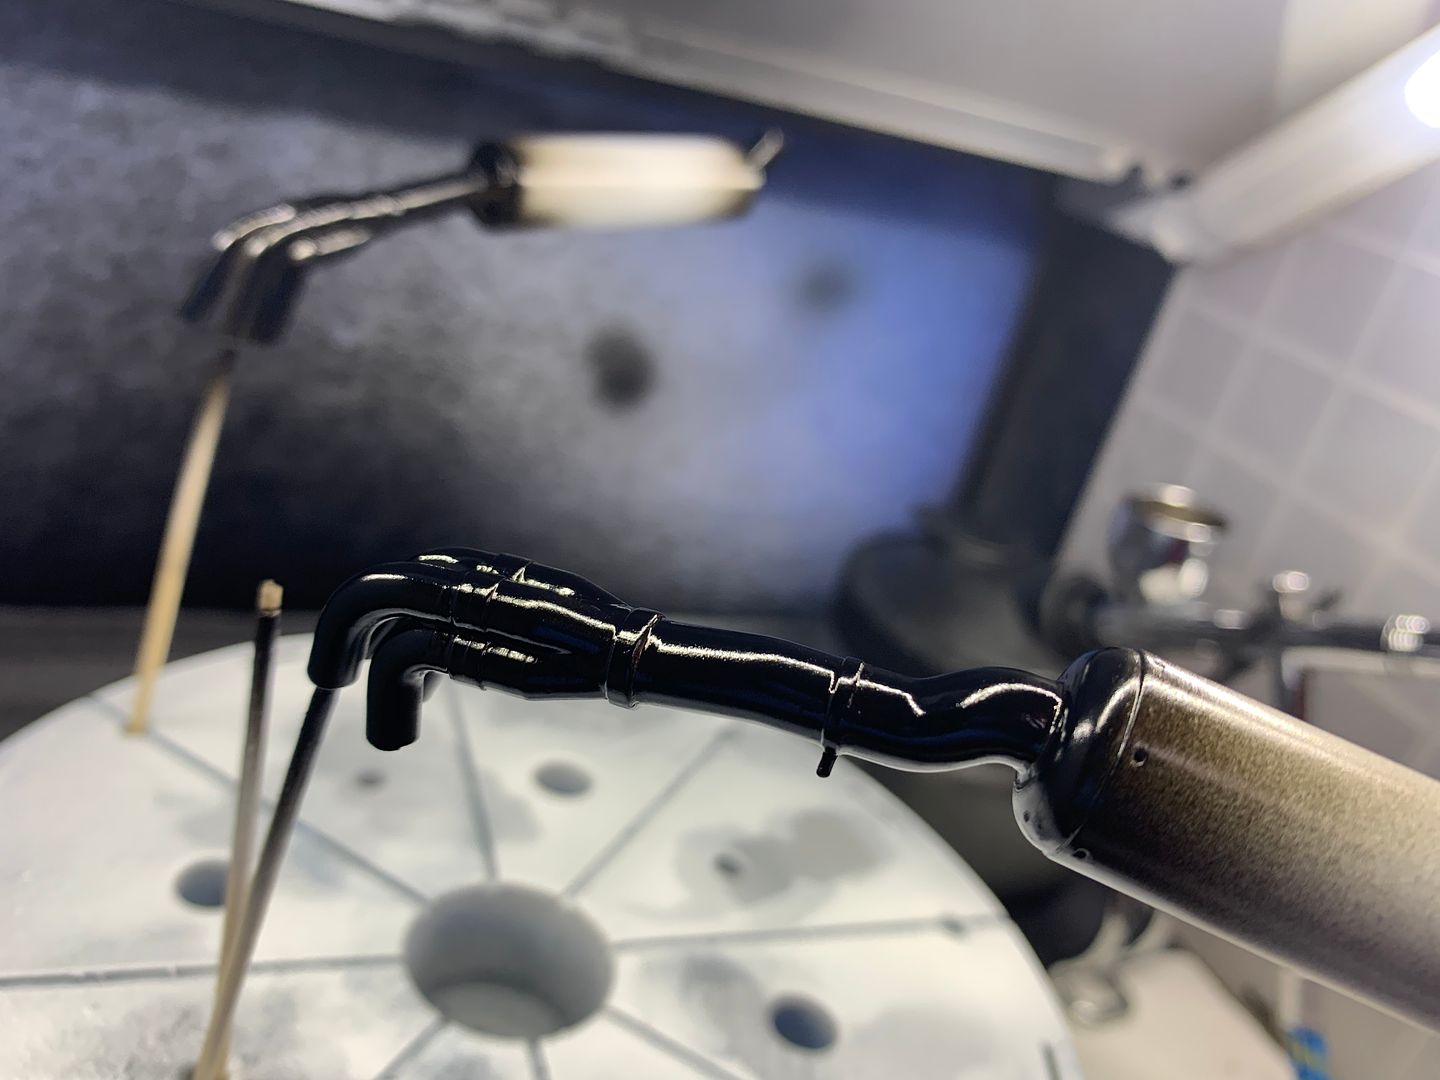
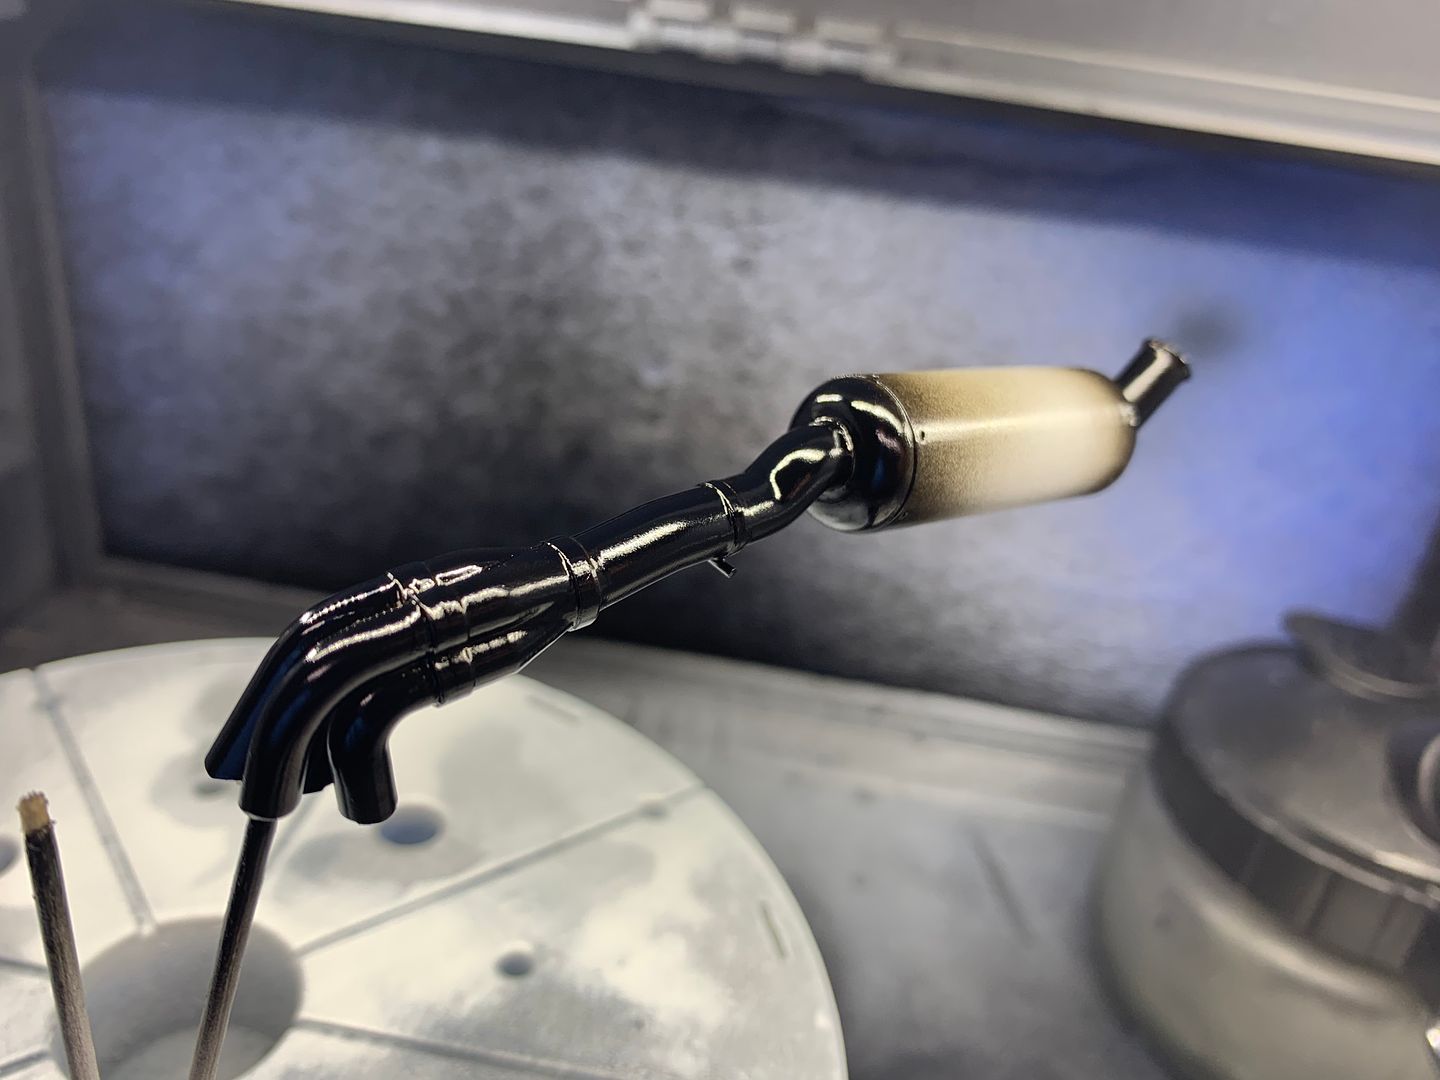
The I basically free-formed the build up of colour using Alclad Chrome, duraluminum, pale gold etc etc - I mixed a few together to try and get the correct tint, with the aim of using oils later...
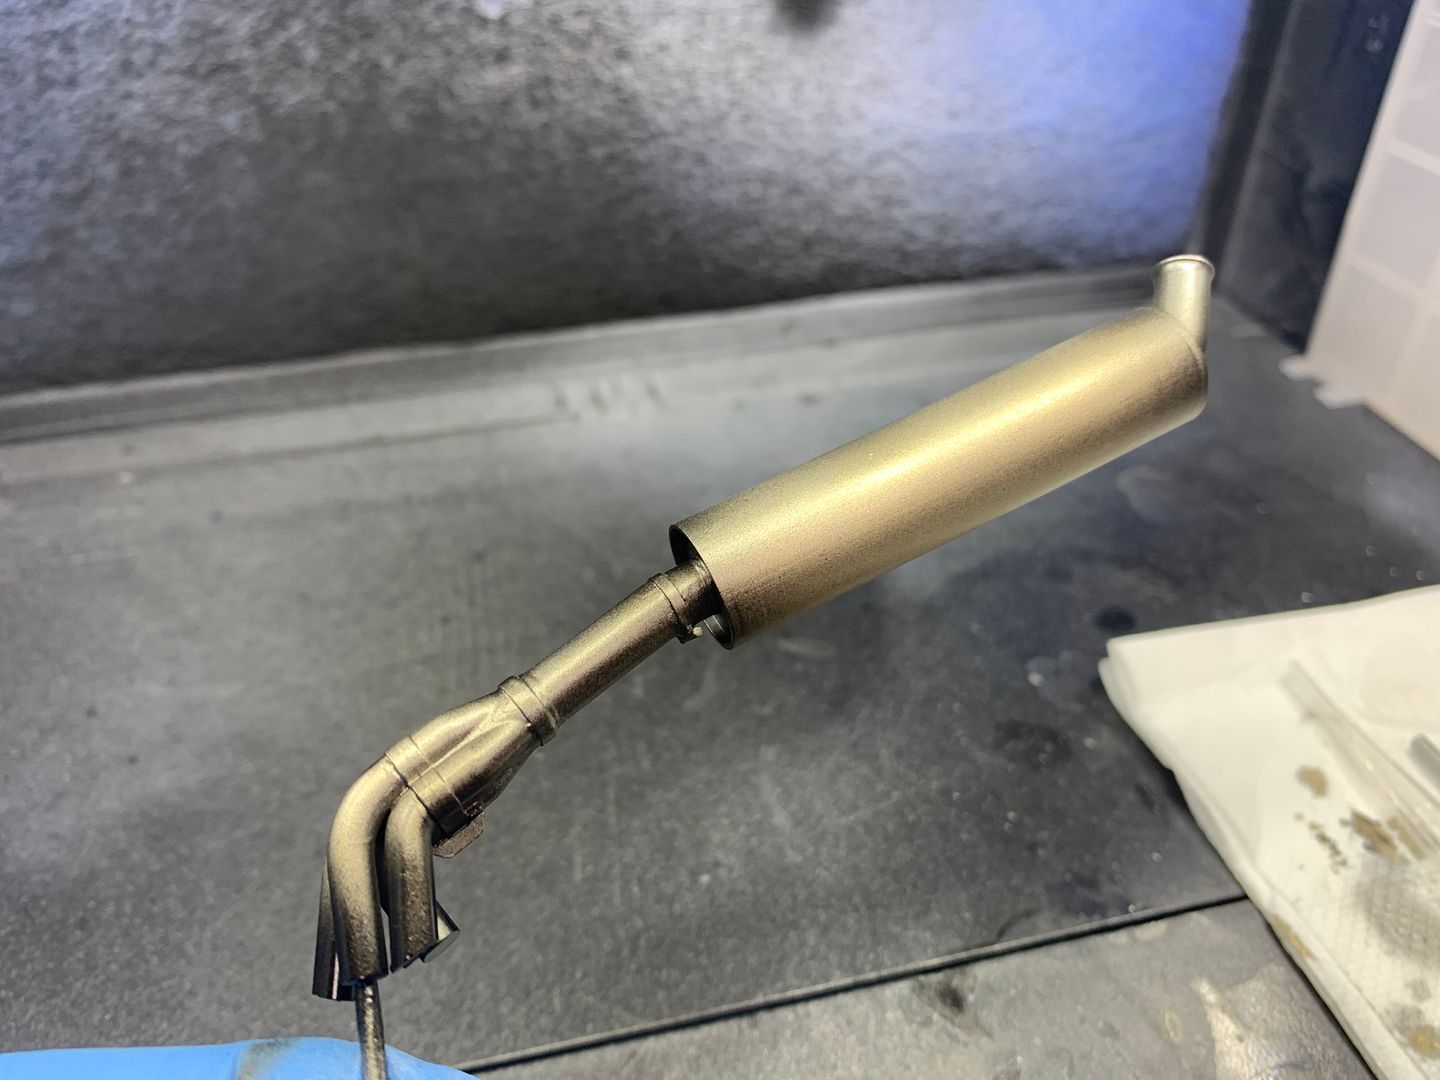
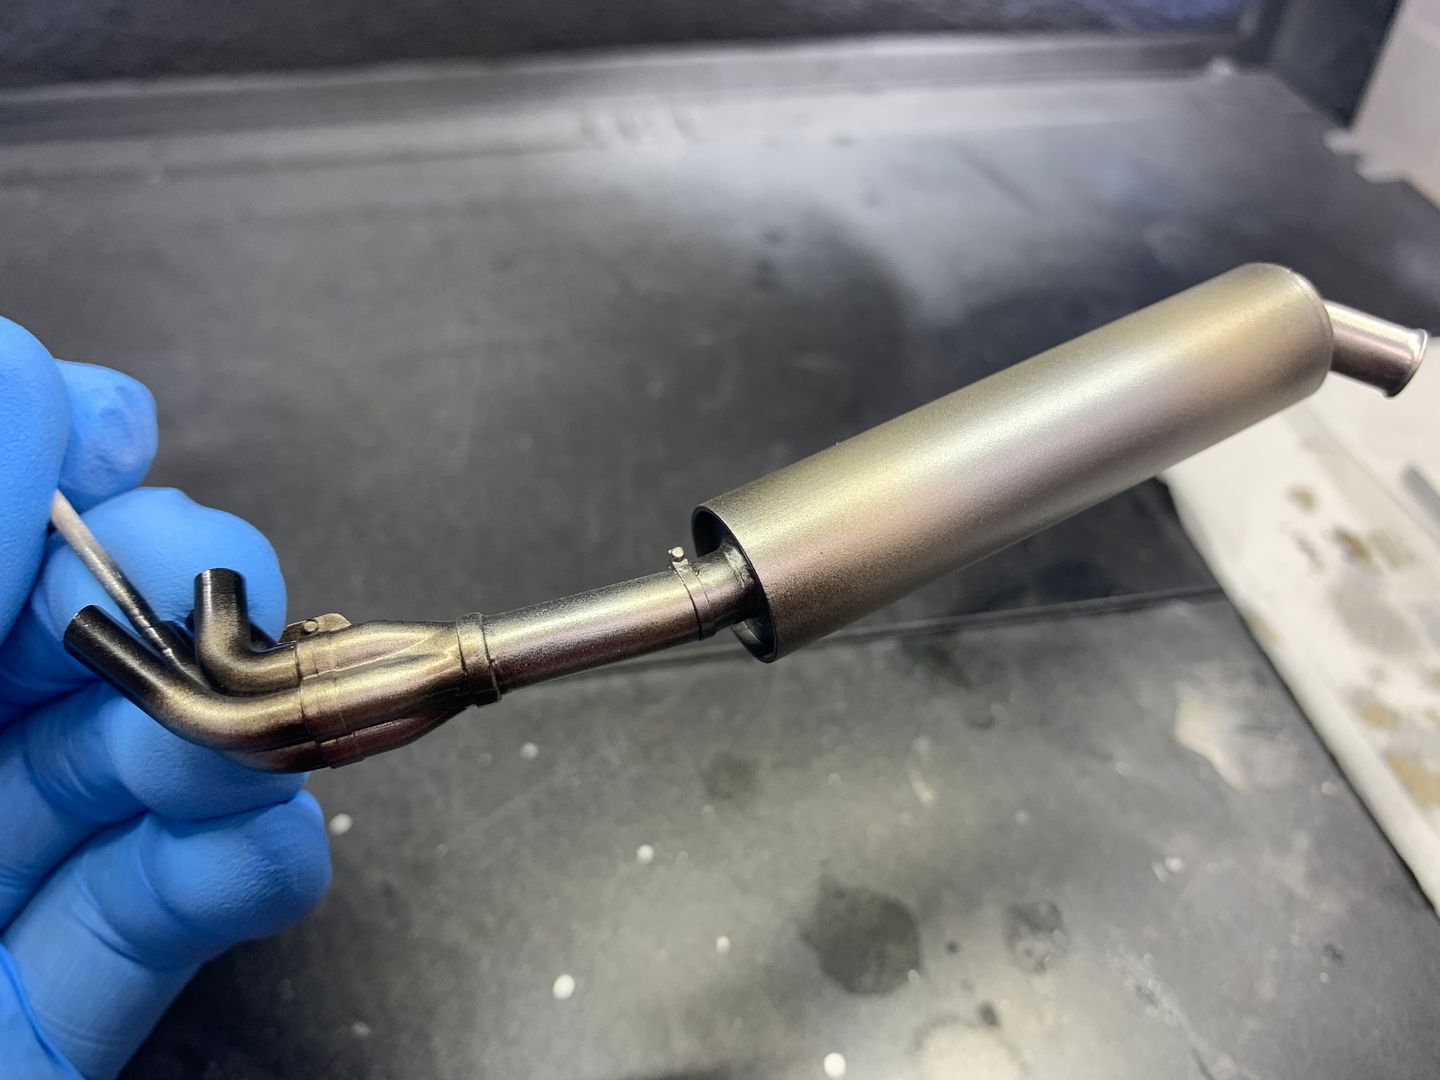
I then mixed up some tamiya acylics to airbrush, dry brush and stipple on, to represent the cruddy look of the real pipes...
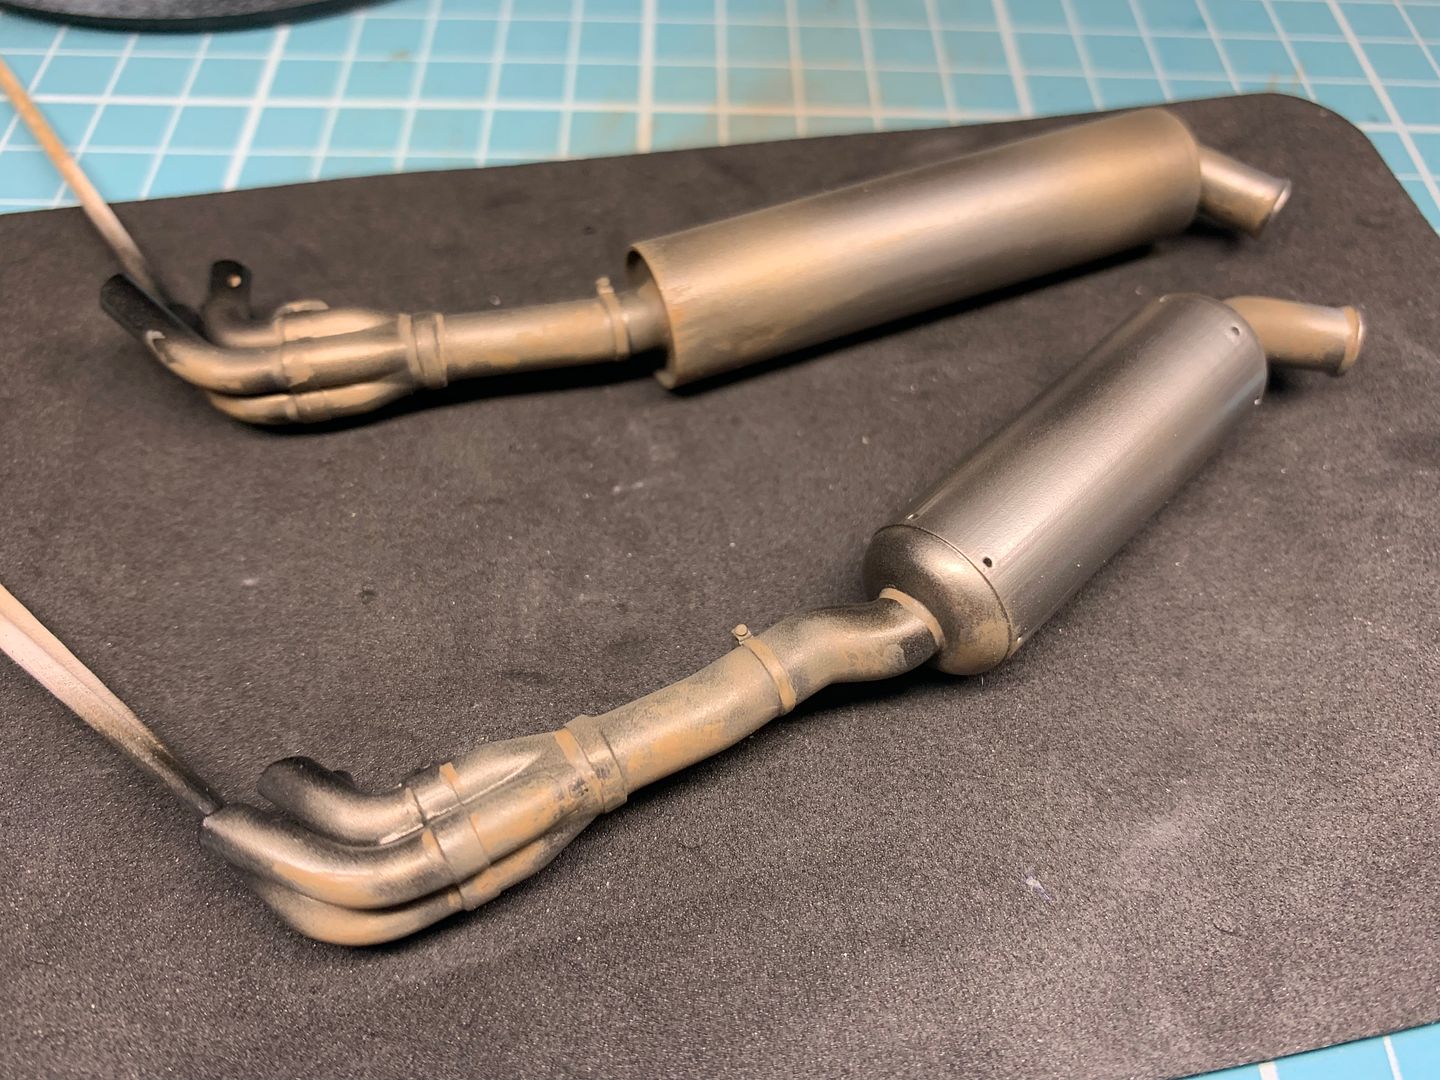
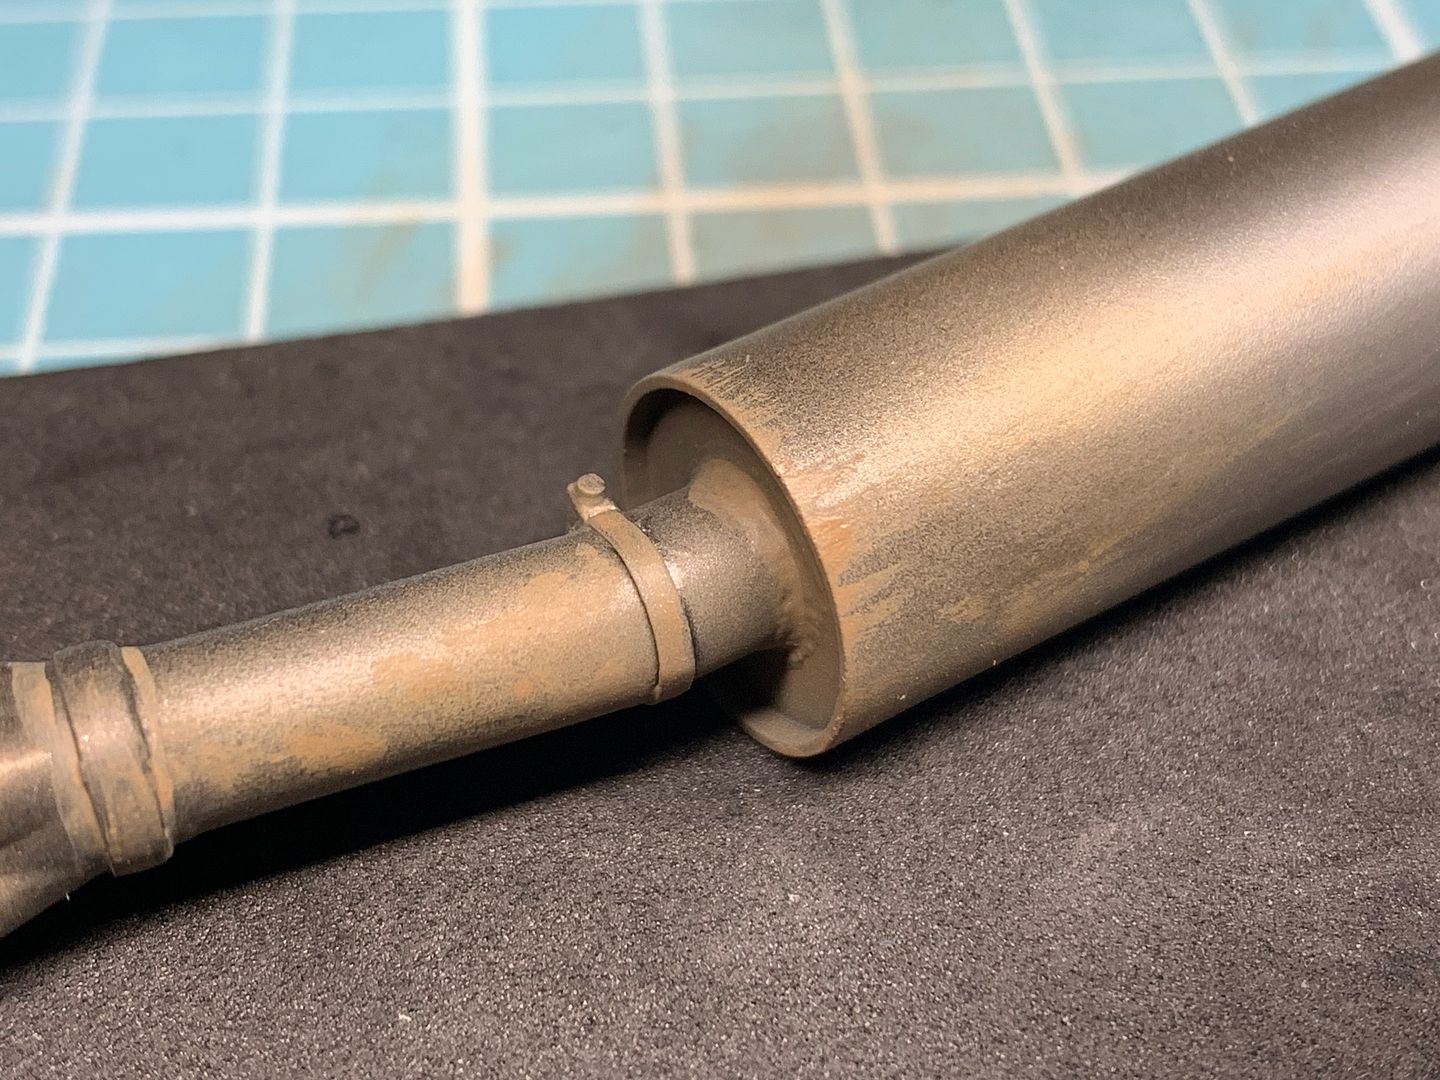
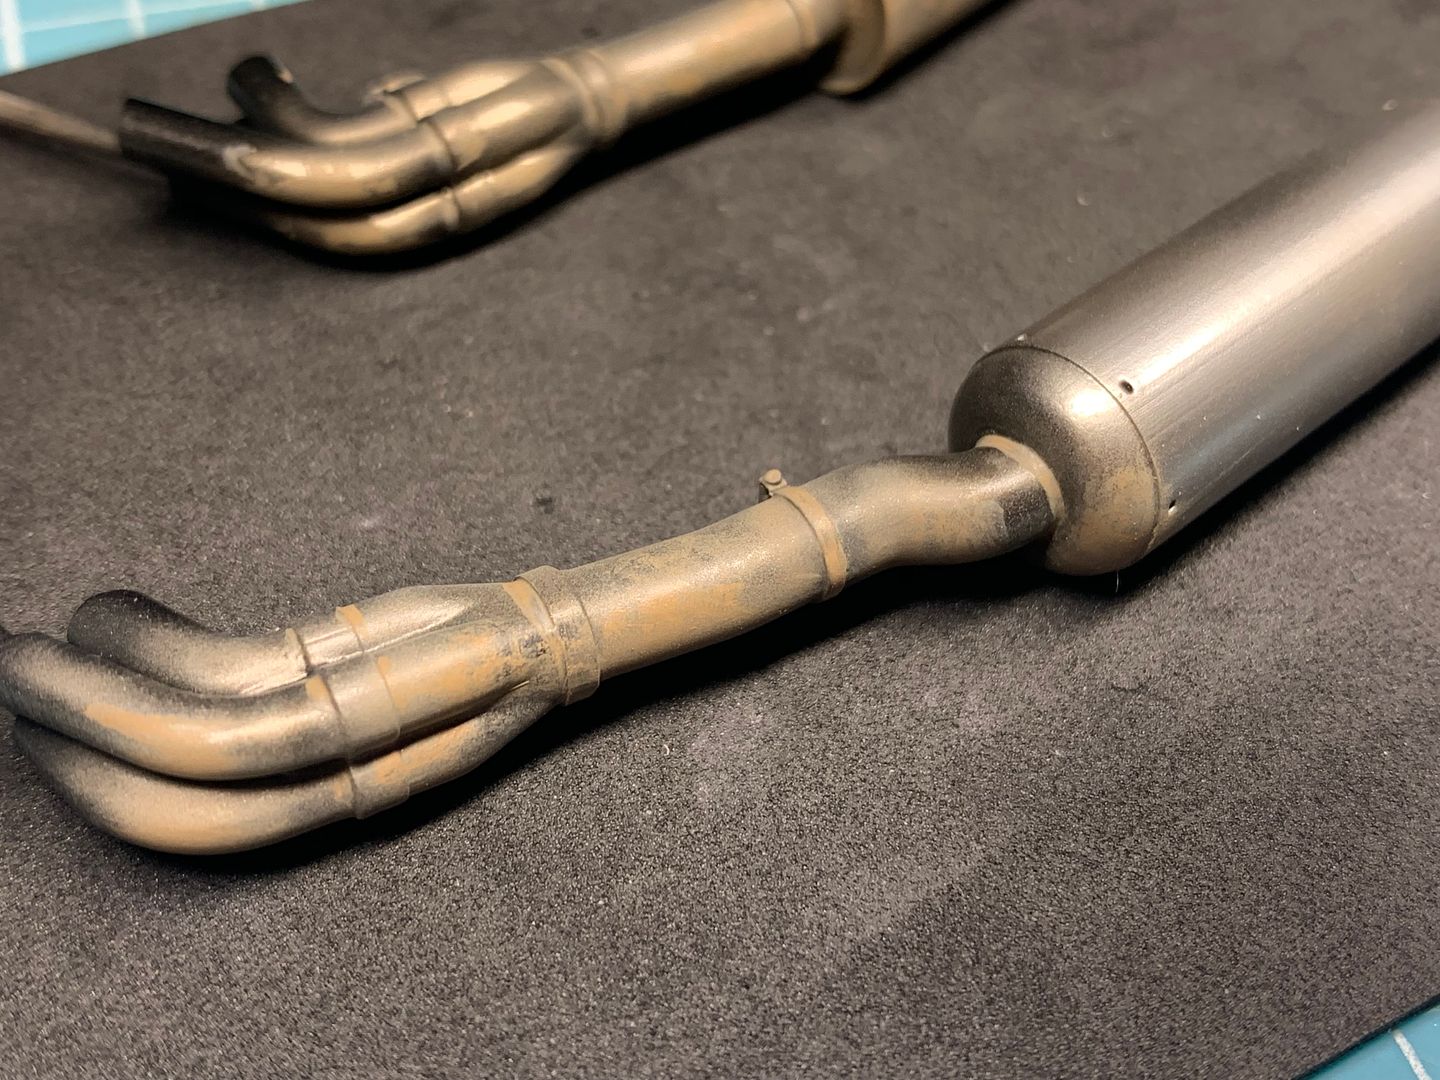
I still need to add some washes and highlights, and I want to try some of that graphite powder to get back some of the metallic look - but overall I am actually quite chuffed how these came out, considering I didn't 'practice' and made it up as I went along!!
Not fixed in place (have to make the mounts!!)....
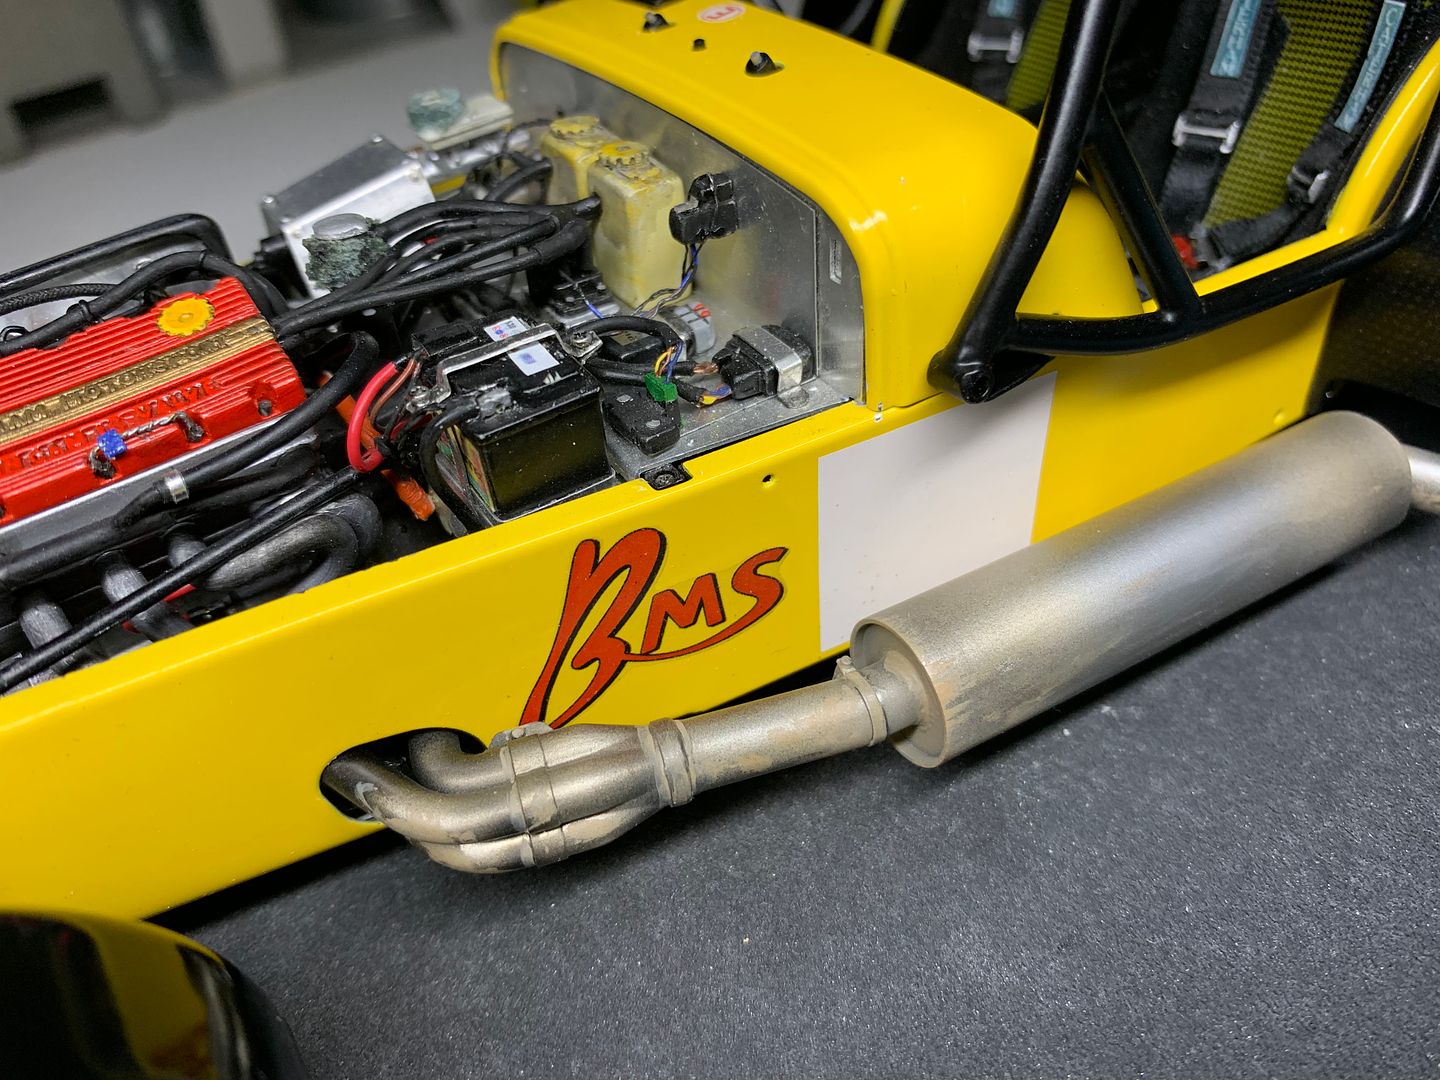
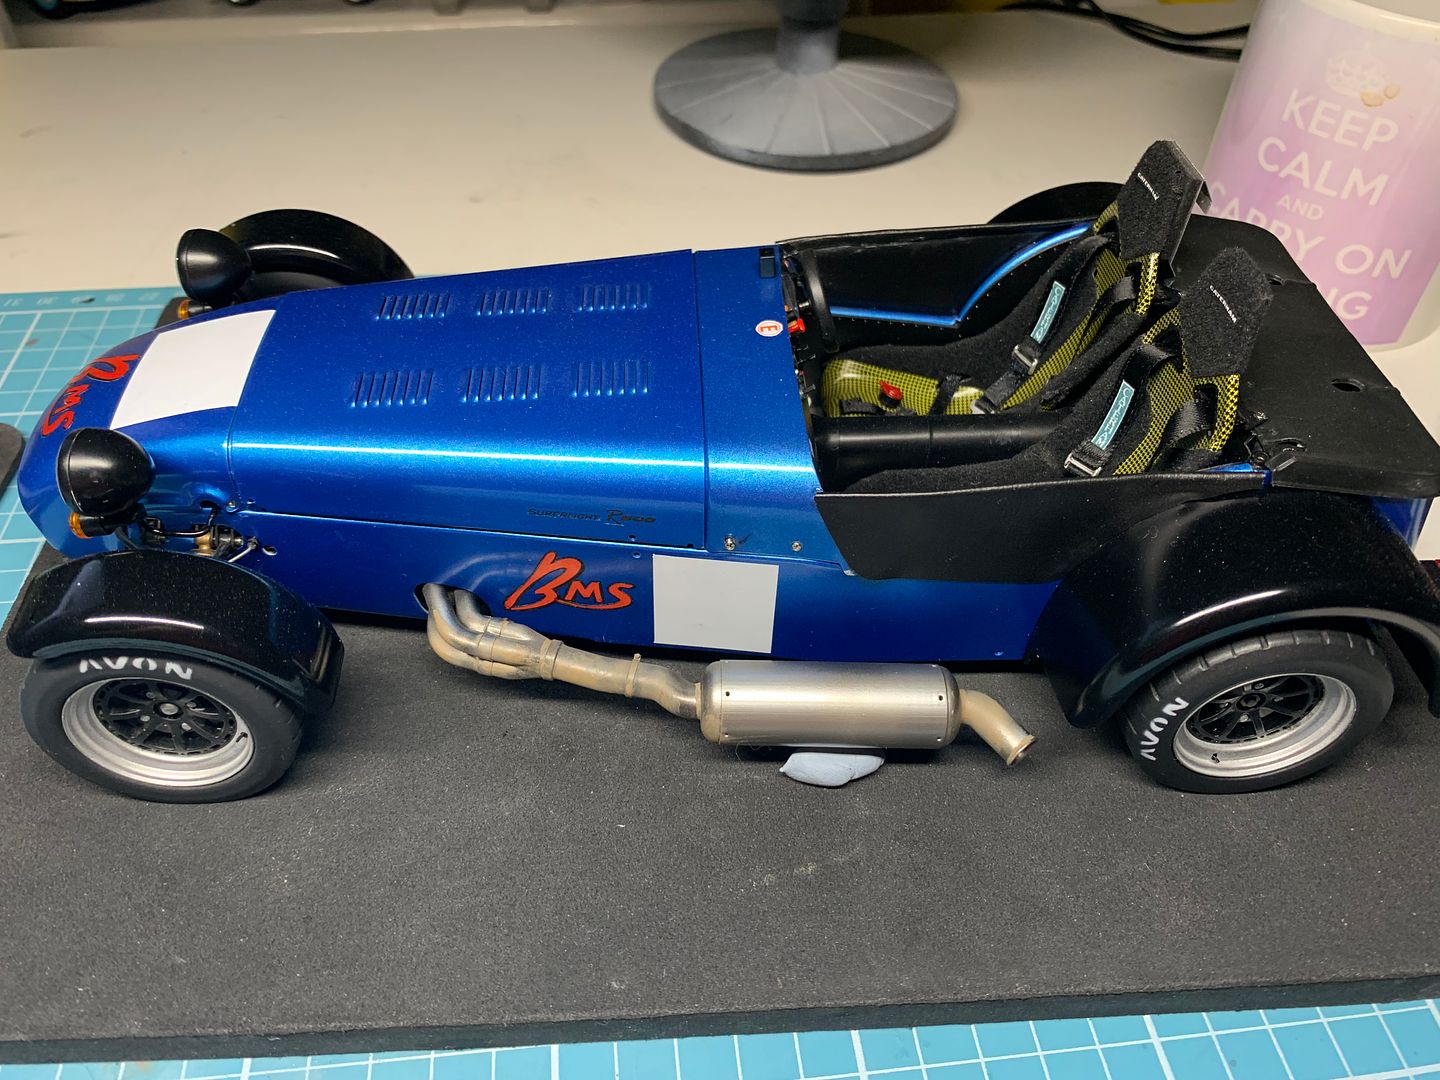
Not finished yet - add rivets and wash, more painting - but not bad so far!
I'm winging all this, but it has worked so far!
As I was going to use Alclad Chrome, I applied gloss black 'undercoat' - used to make the chrome shine - as it was, I ended up going over most of this, but it gave a suitable shiny 'under' surface - most of the pipes are oxidised and dirty. The cans are aluminium or titanium, so a different colour.
The I basically free-formed the build up of colour using Alclad Chrome, duraluminum, pale gold etc etc - I mixed a few together to try and get the correct tint, with the aim of using oils later...
I then mixed up some tamiya acylics to airbrush, dry brush and stipple on, to represent the cruddy look of the real pipes...
I still need to add some washes and highlights, and I want to try some of that graphite powder to get back some of the metallic look - but overall I am actually quite chuffed how these came out, considering I didn't 'practice' and made it up as I went along!!
Not fixed in place (have to make the mounts!!)....
Not finished yet - add rivets and wash, more painting - but not bad so far!
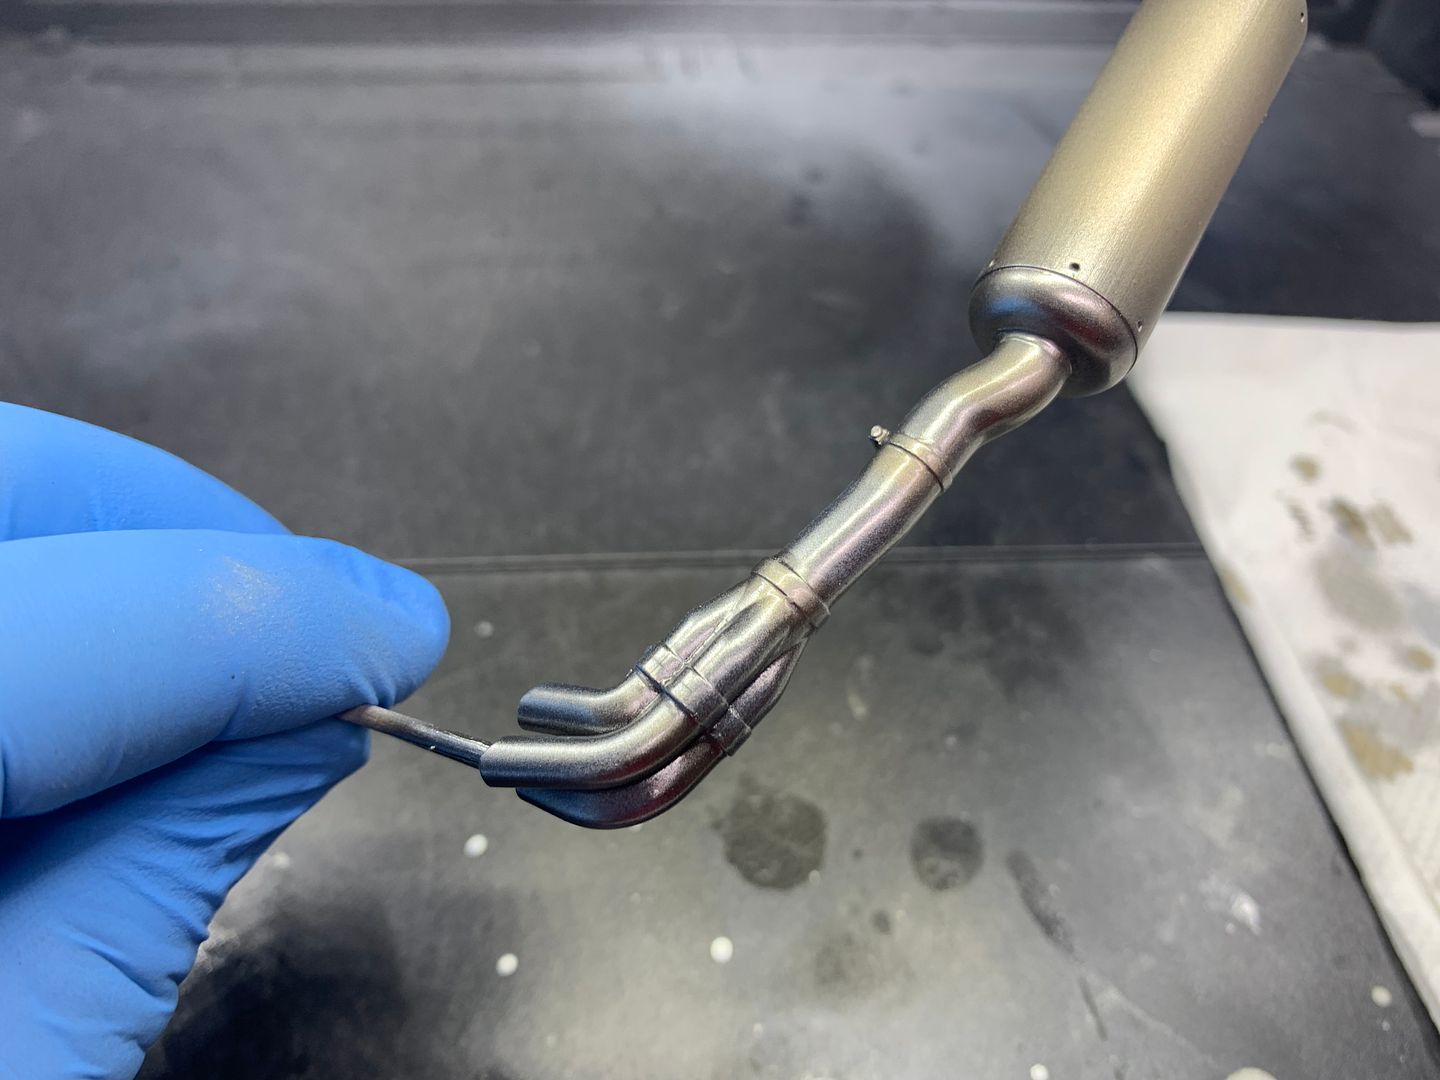
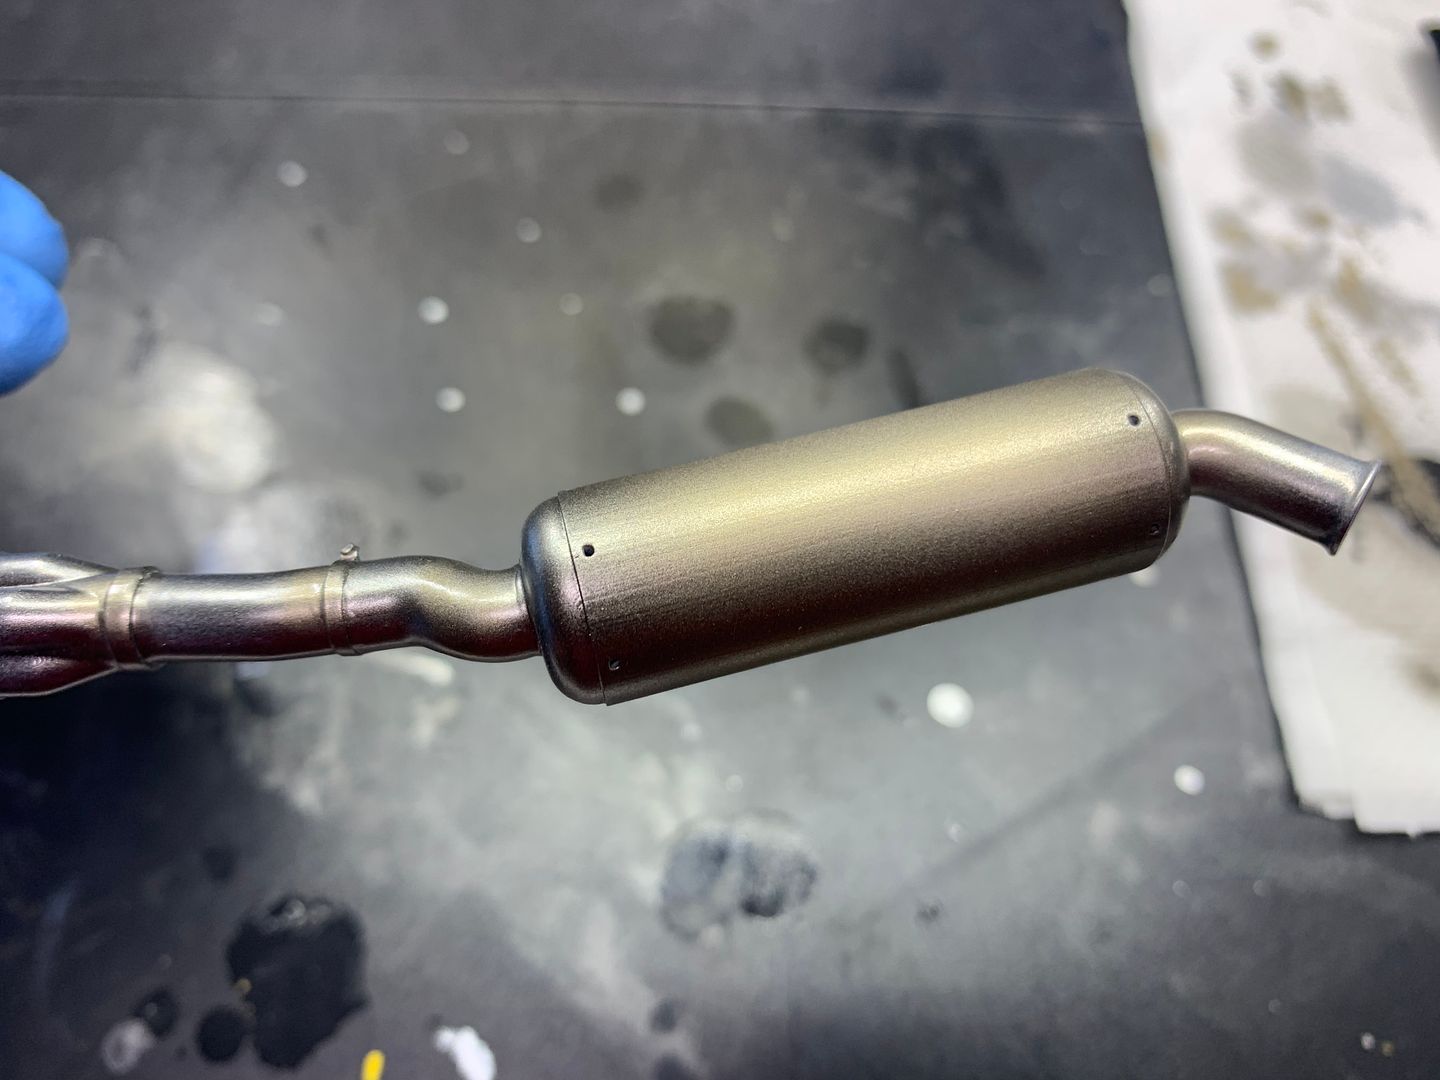
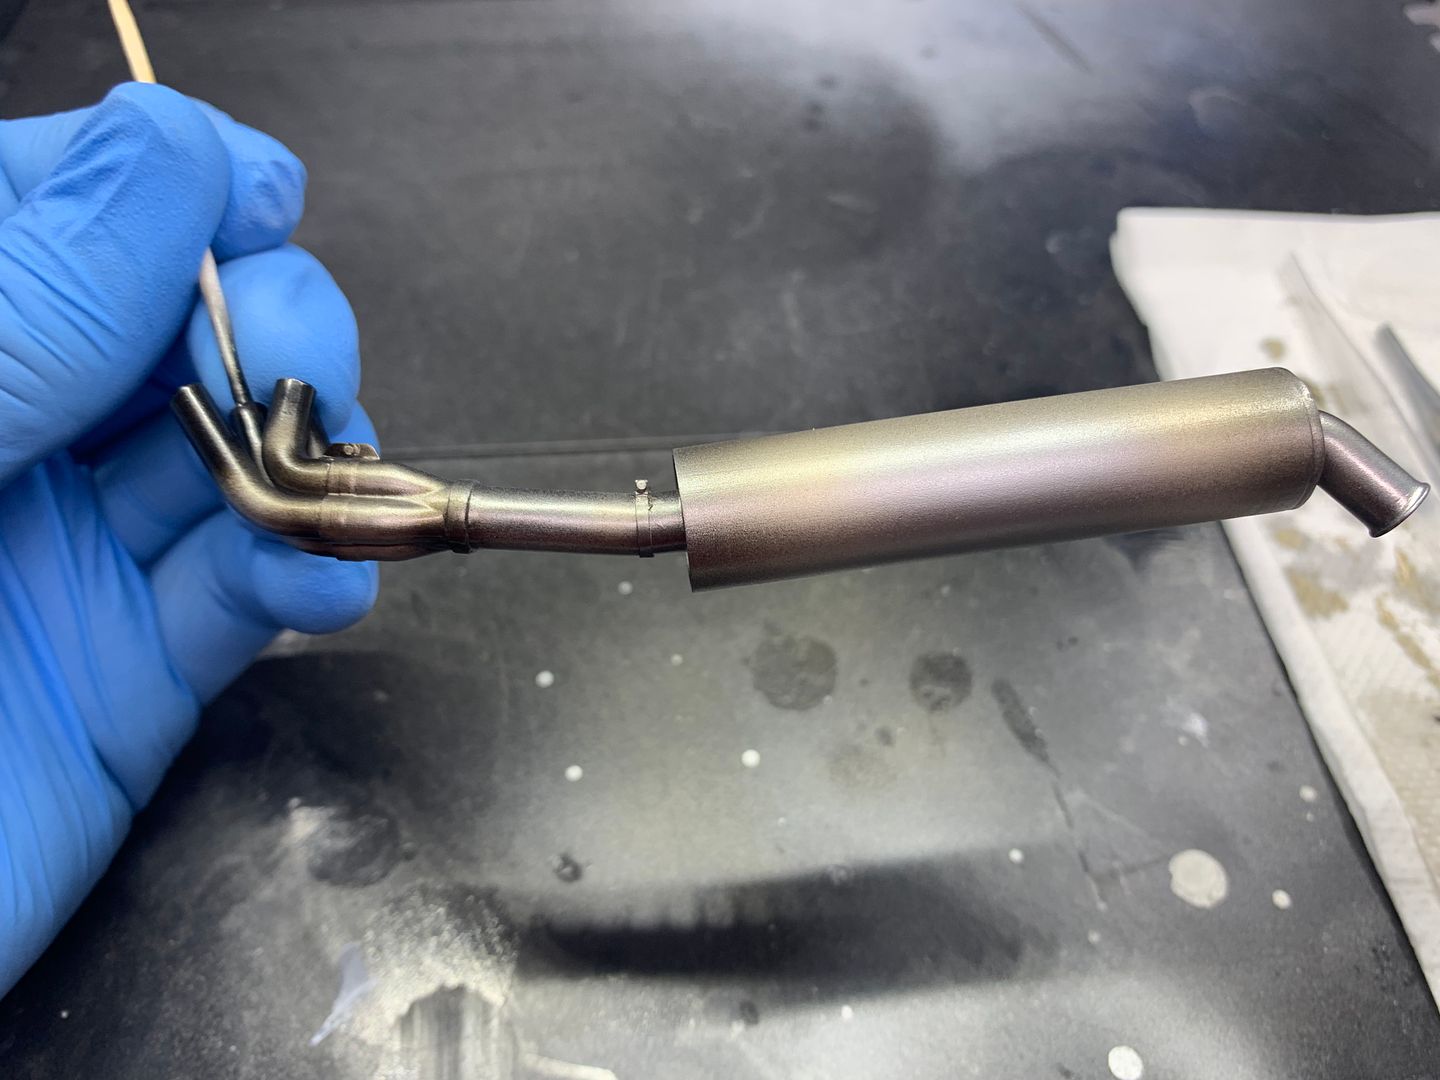
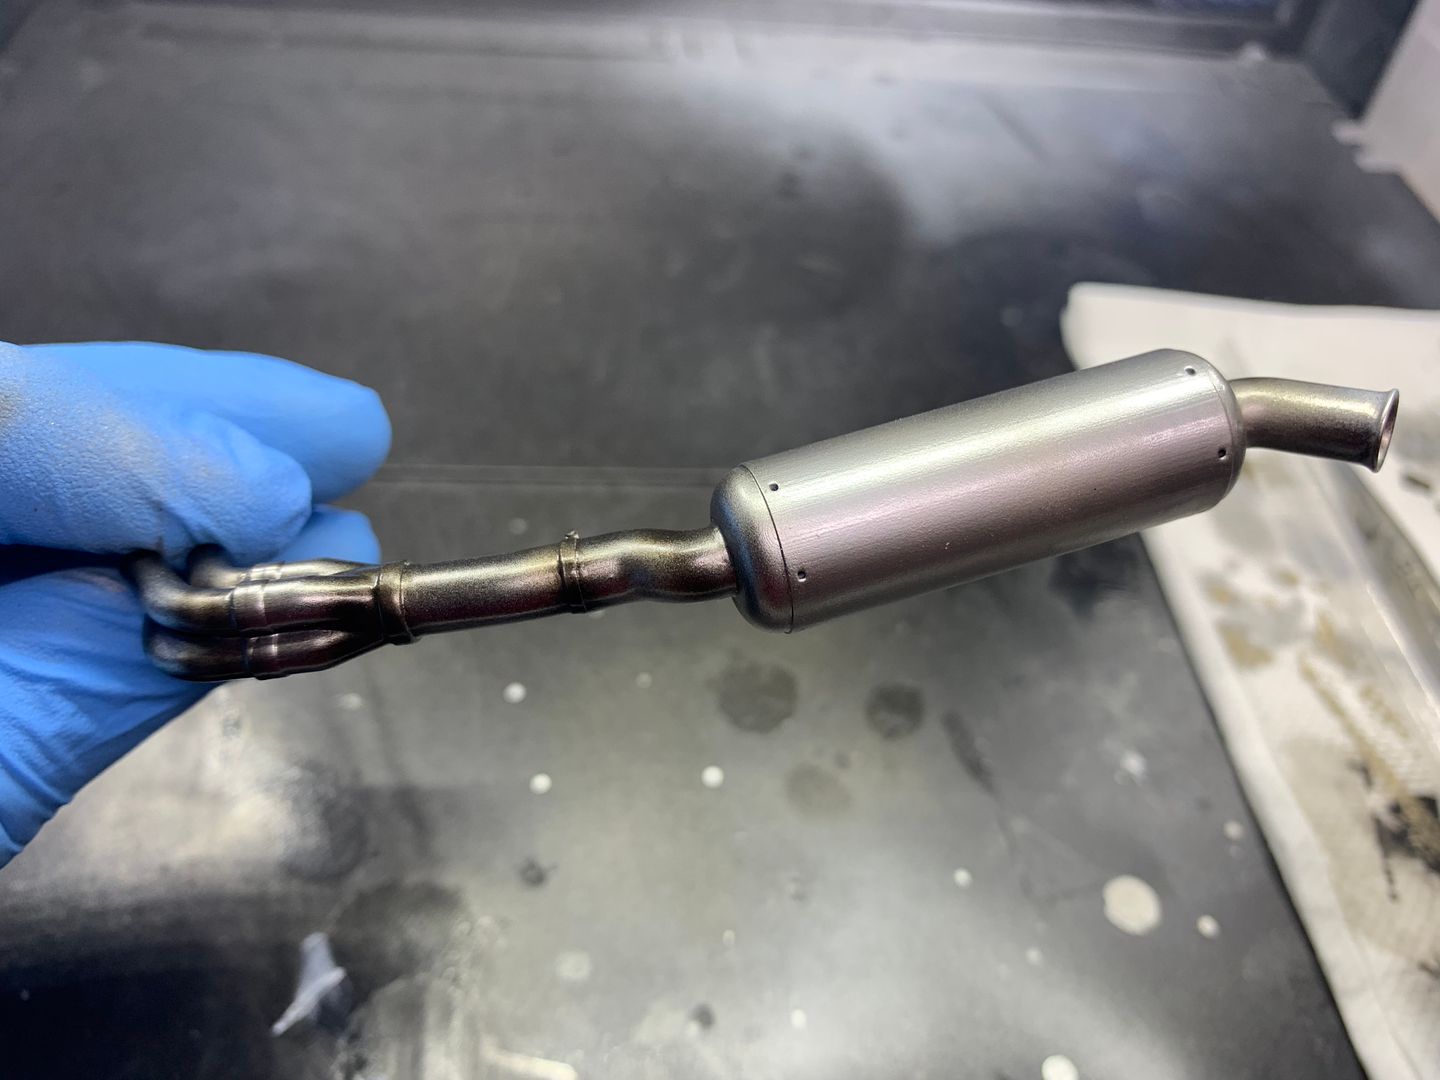
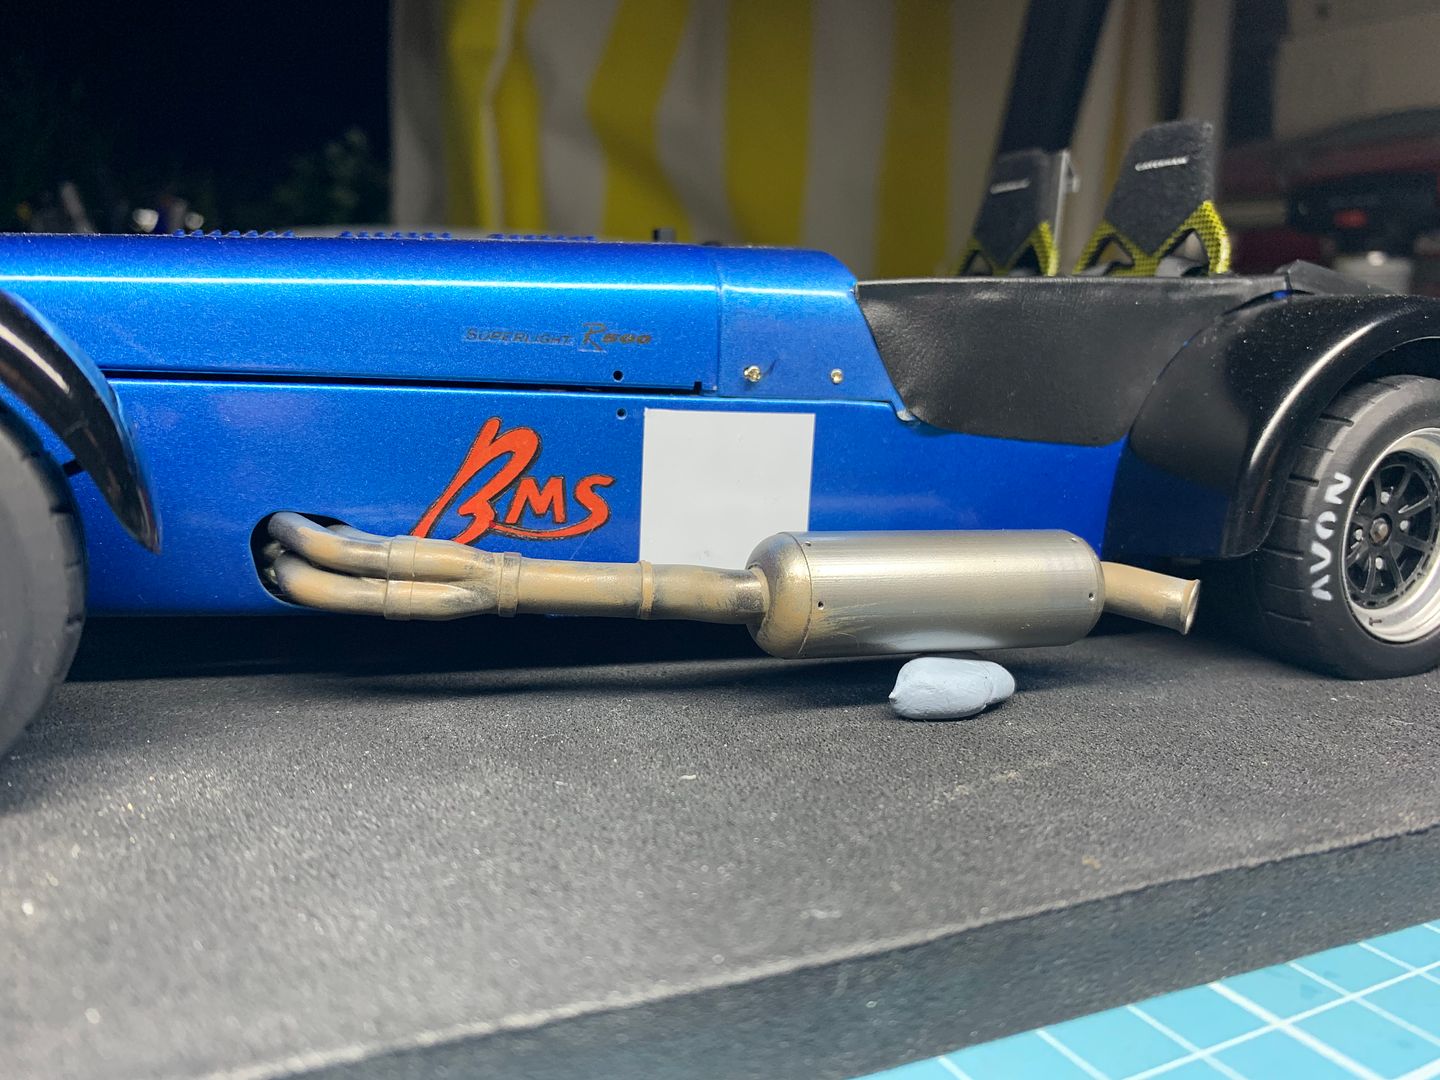
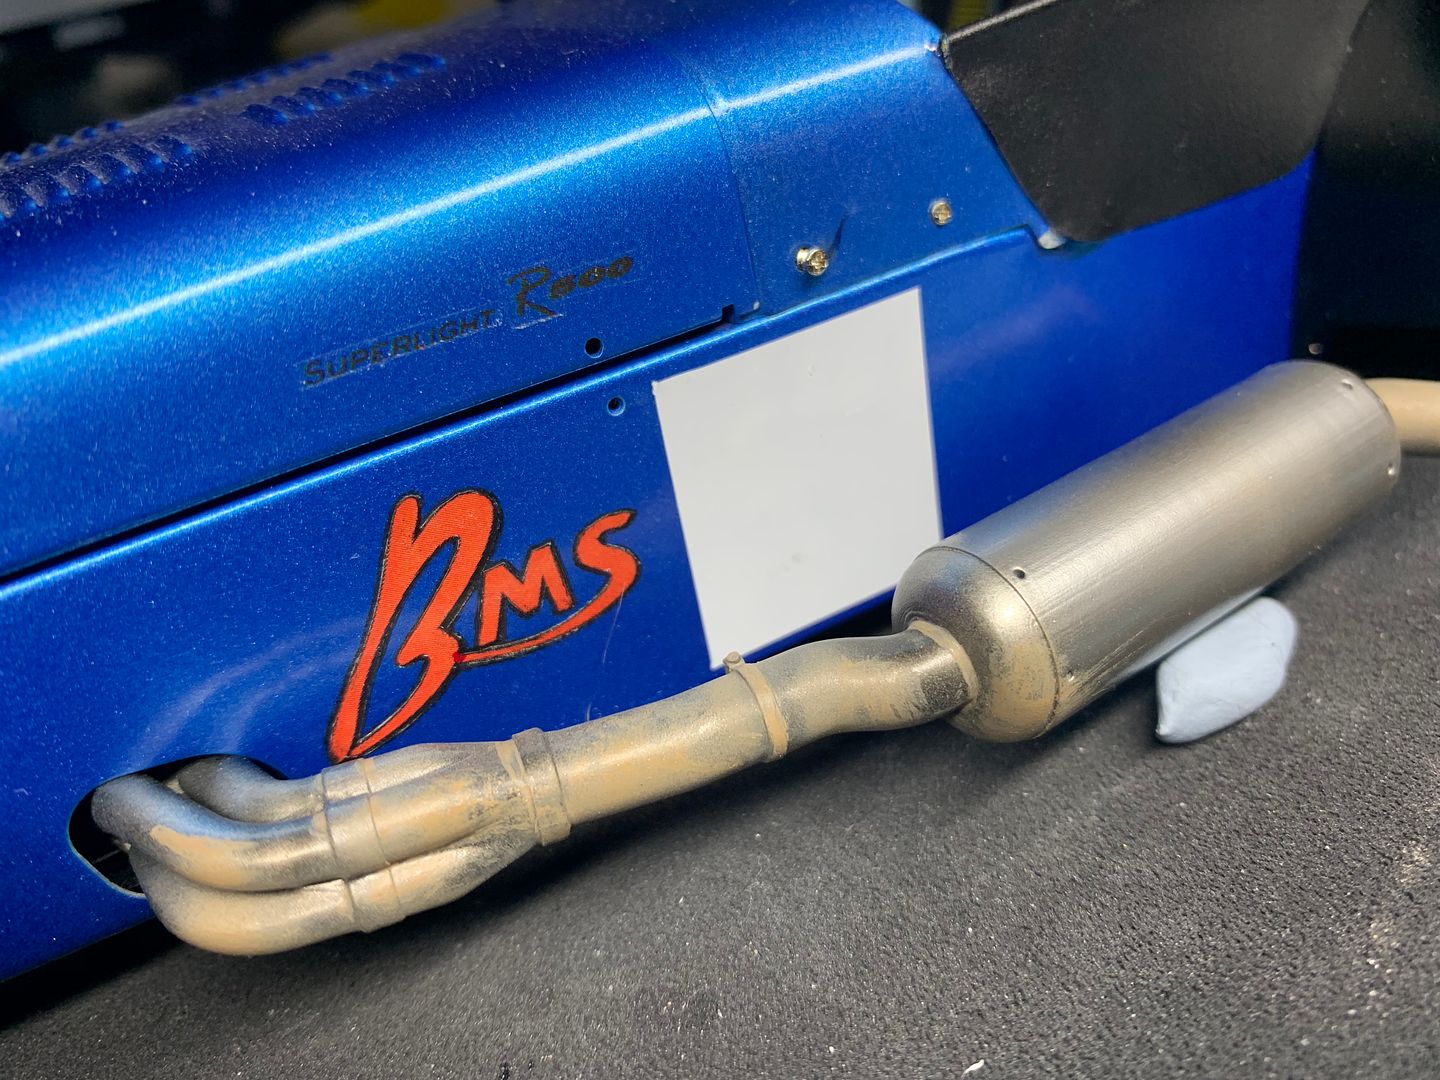
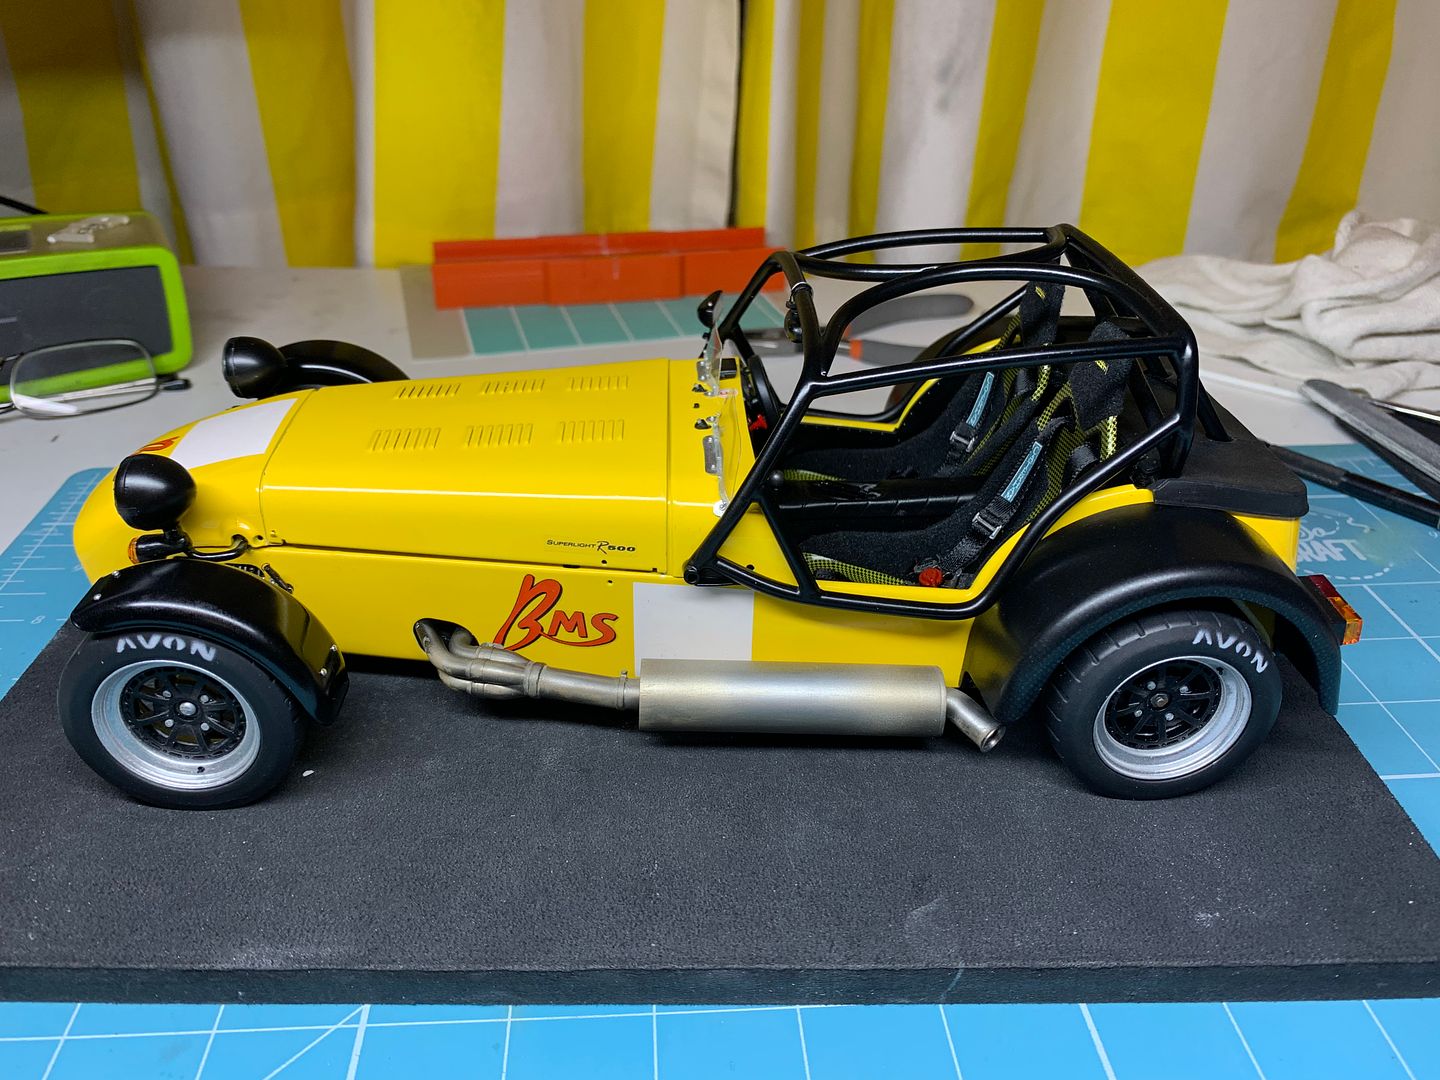
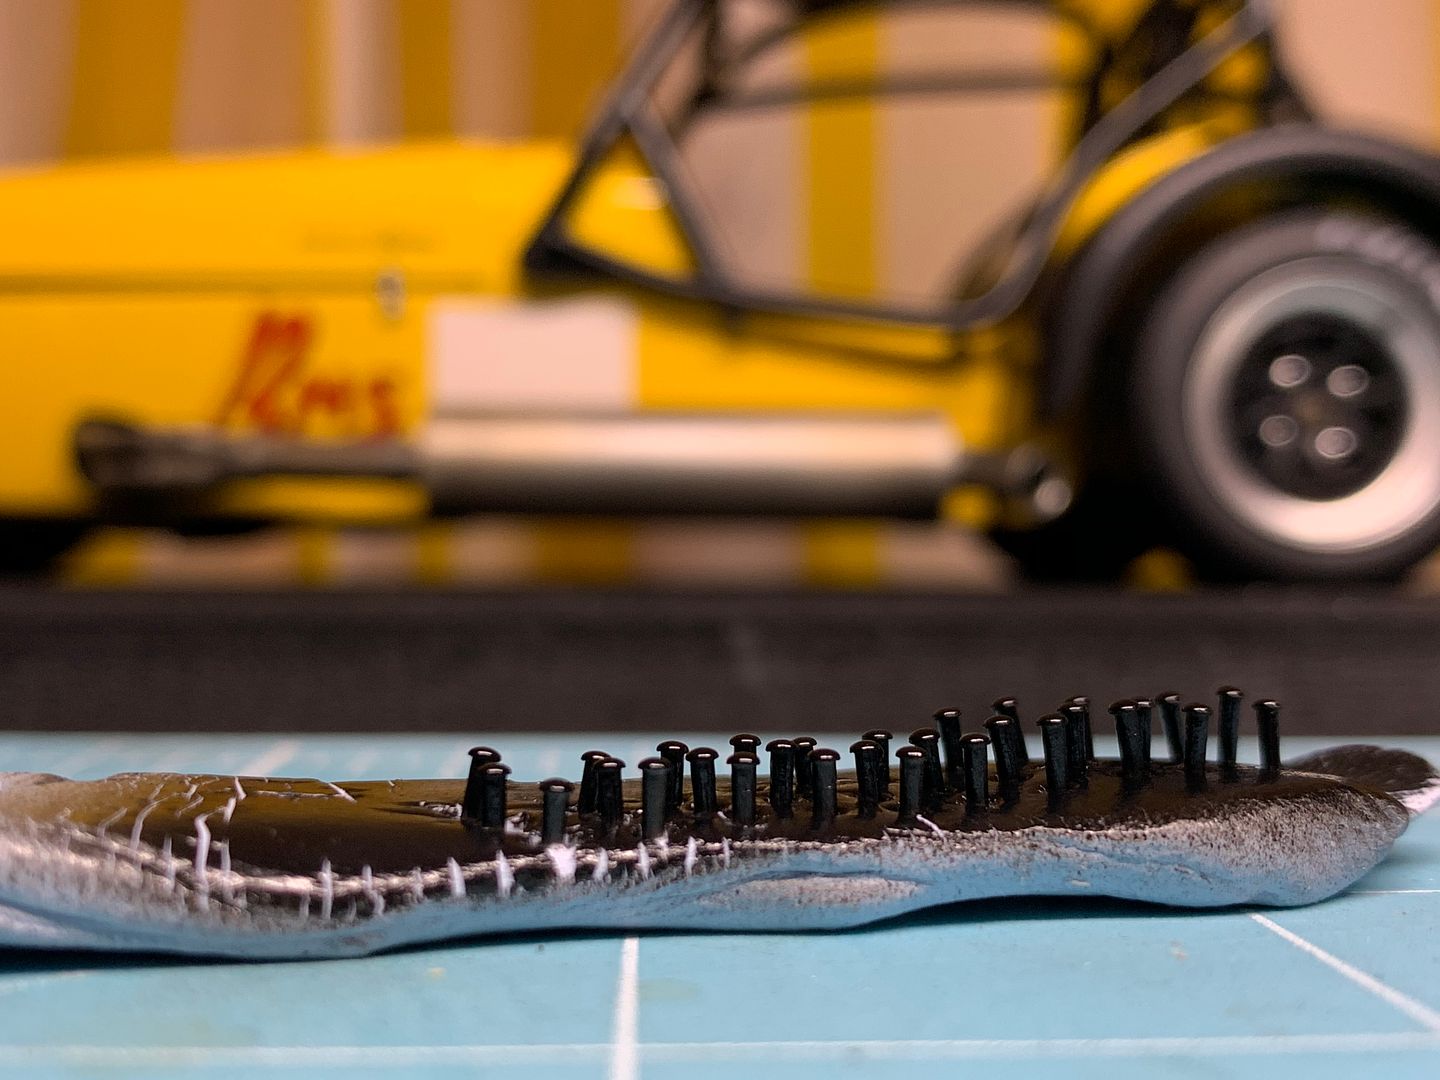
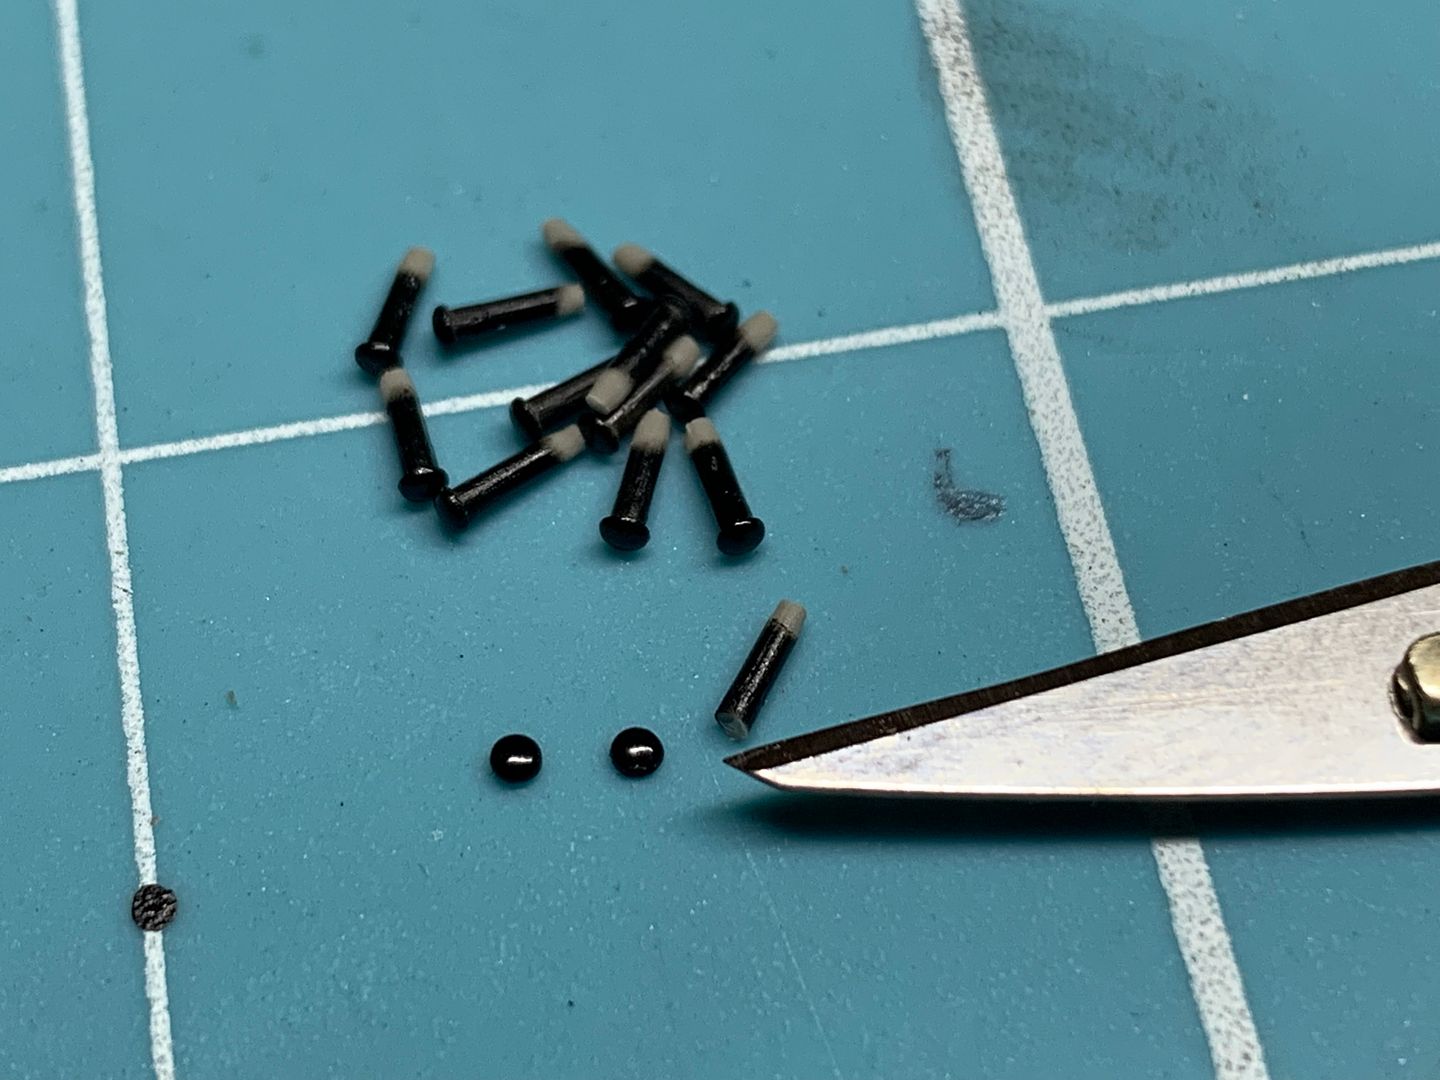
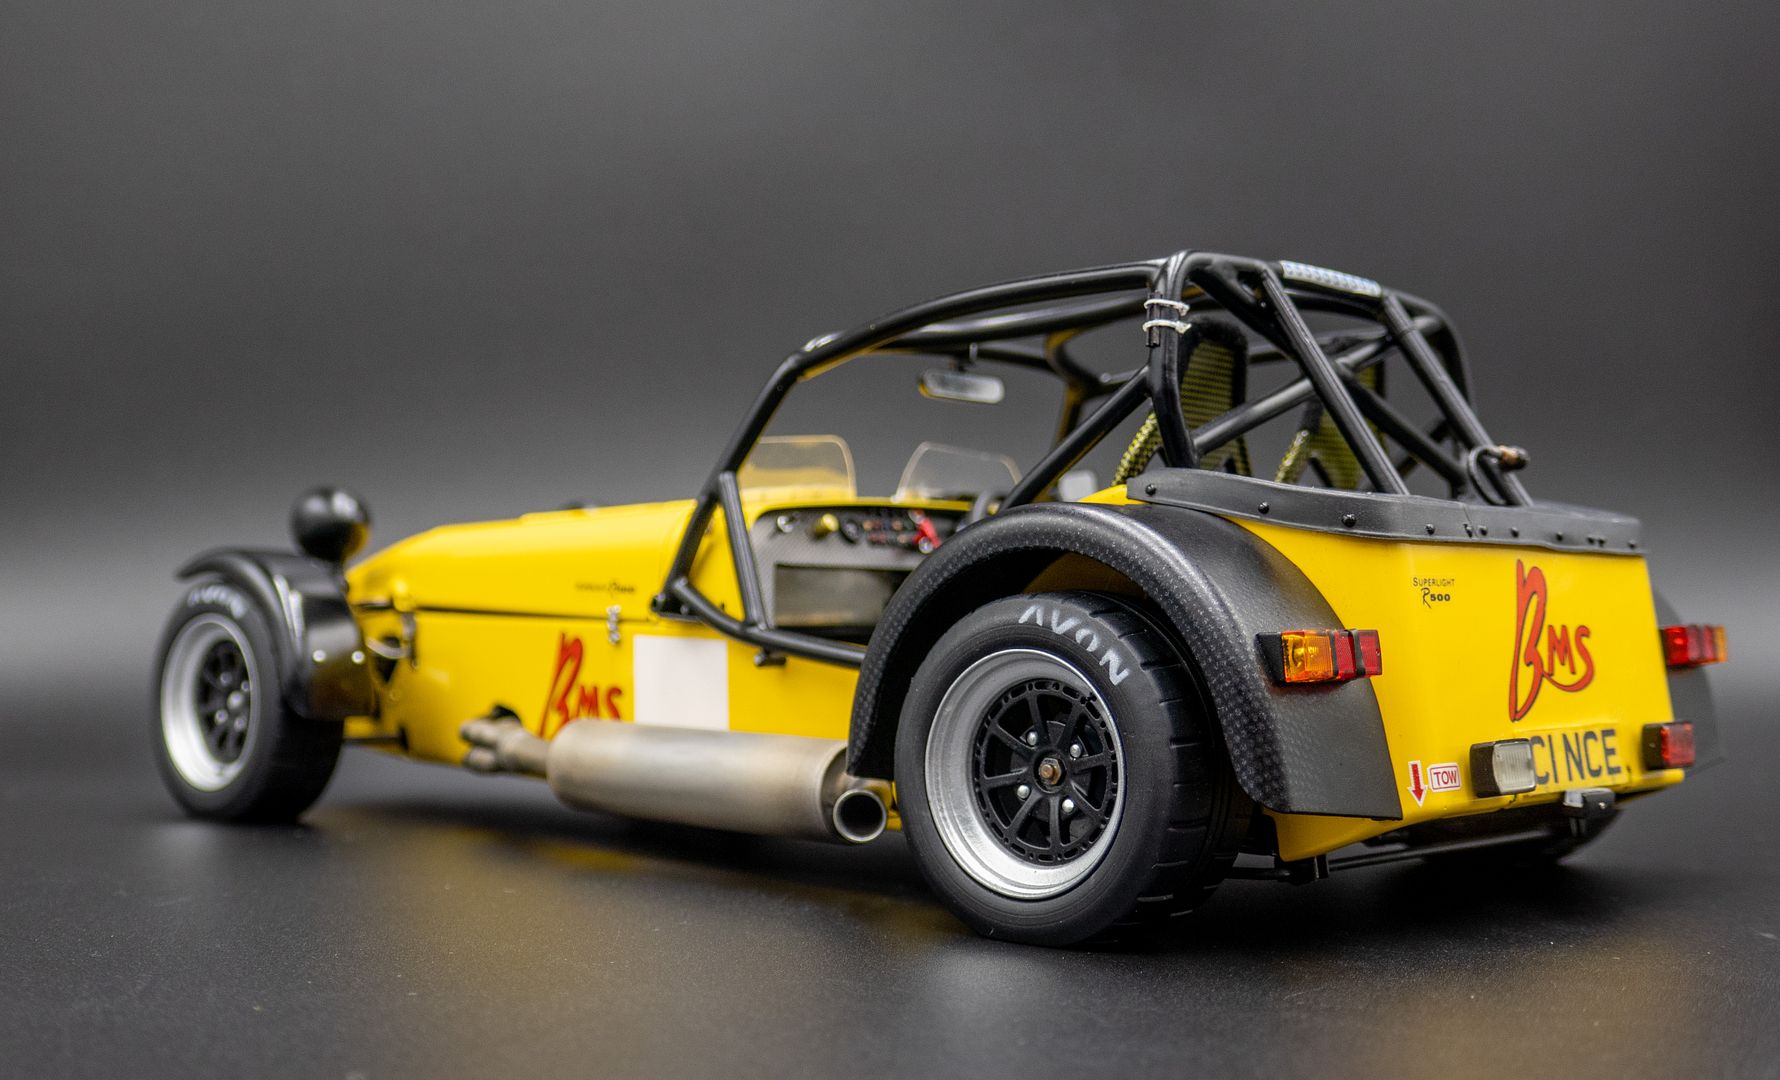
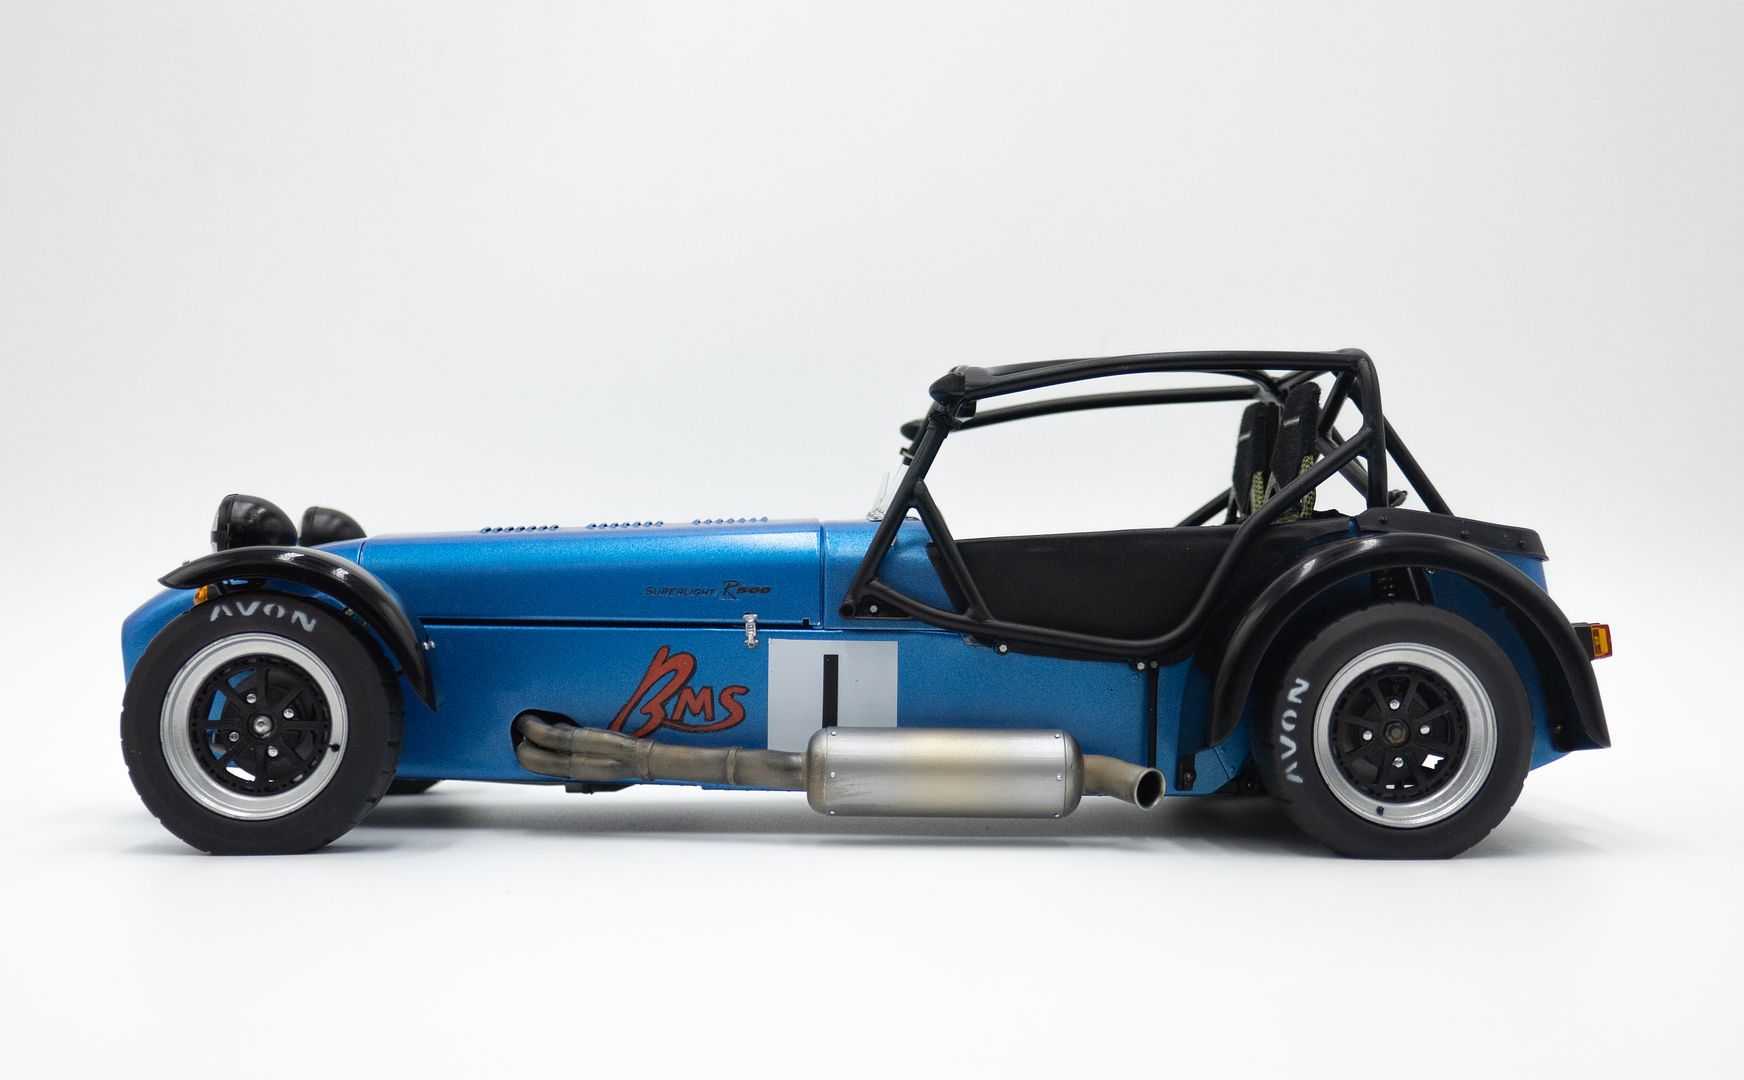
More exhaust details - added the rivets!
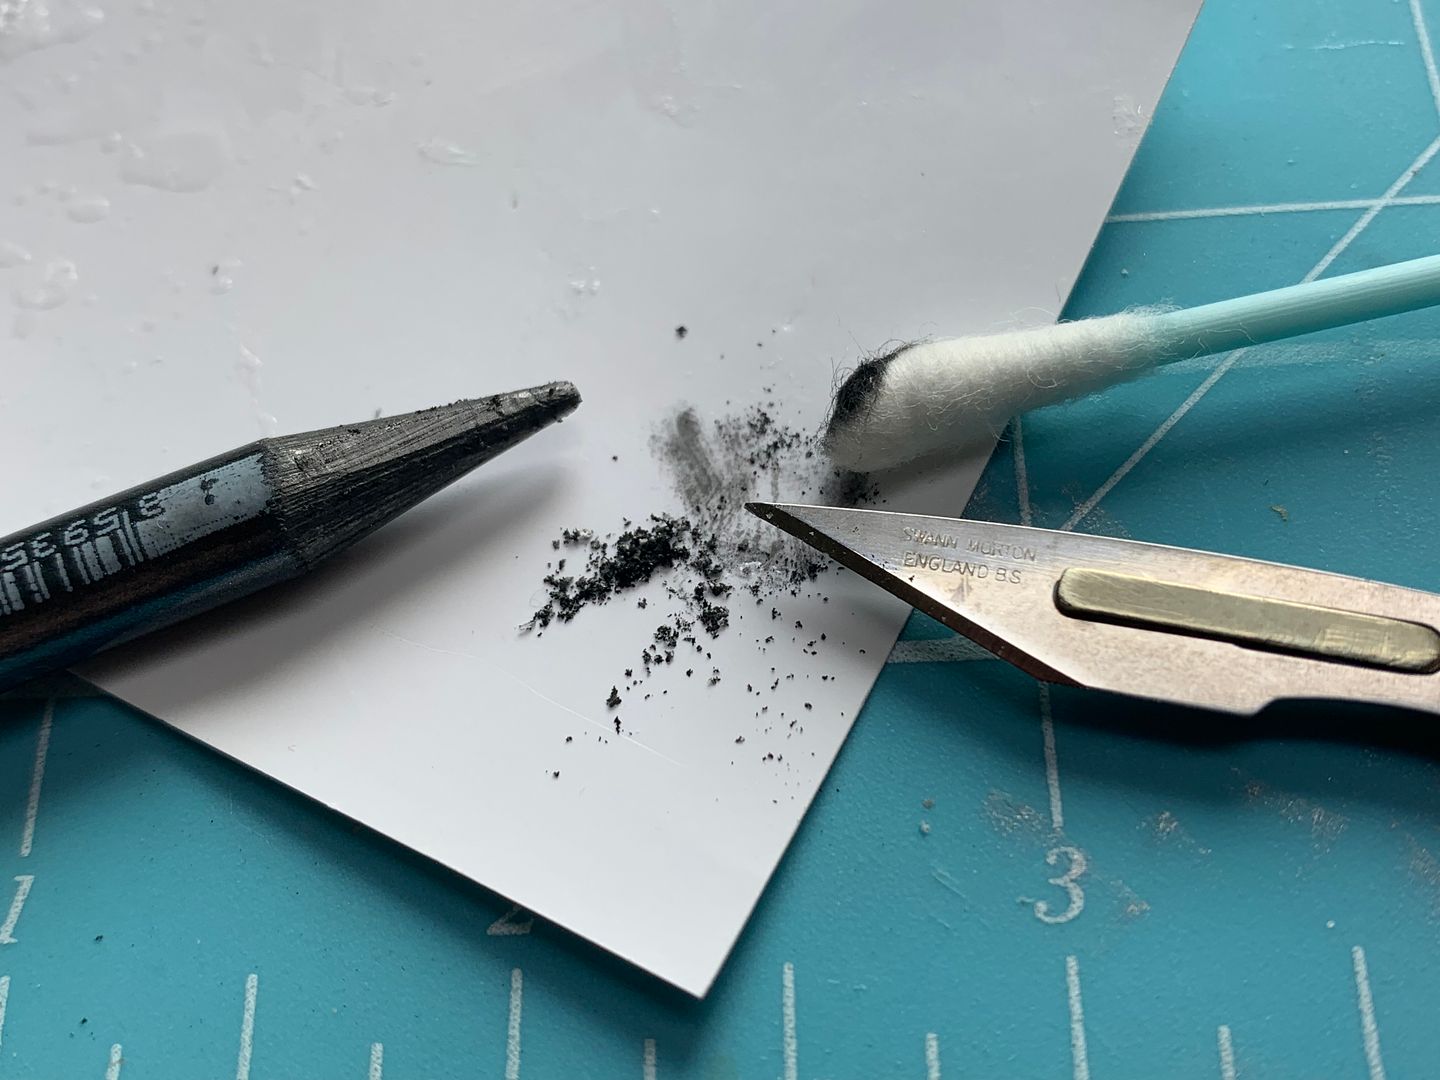
I used some graphite from a pencil to add back some of the metallic look in certain areas...
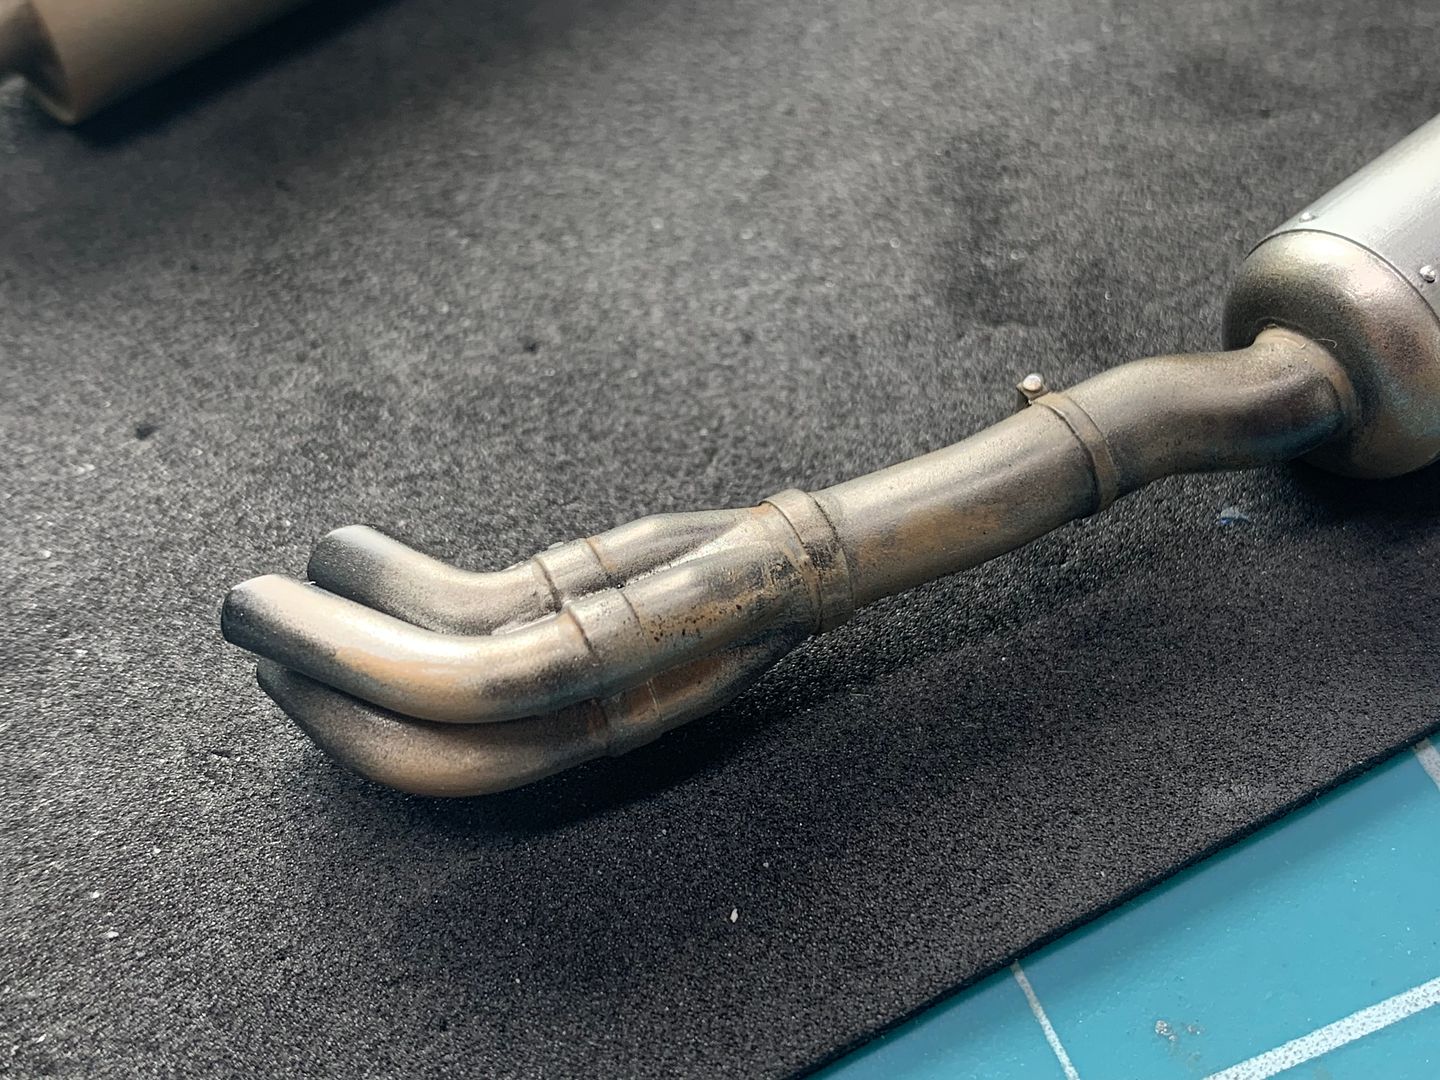
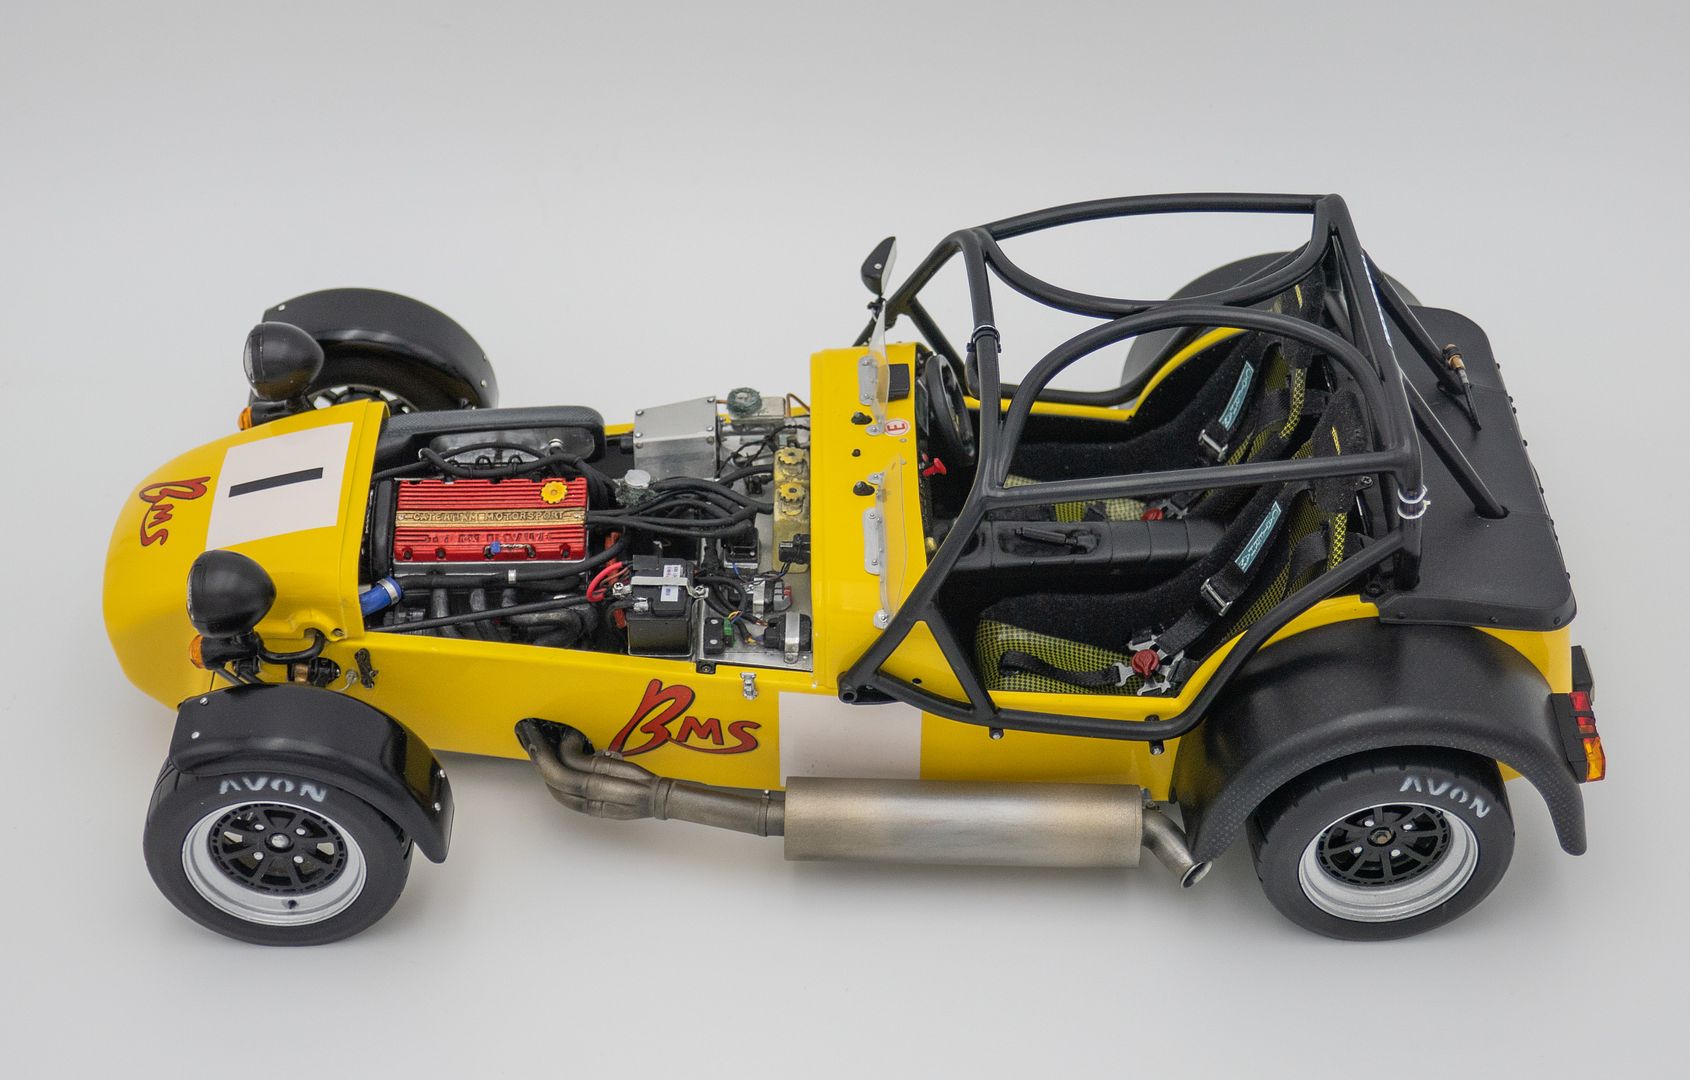
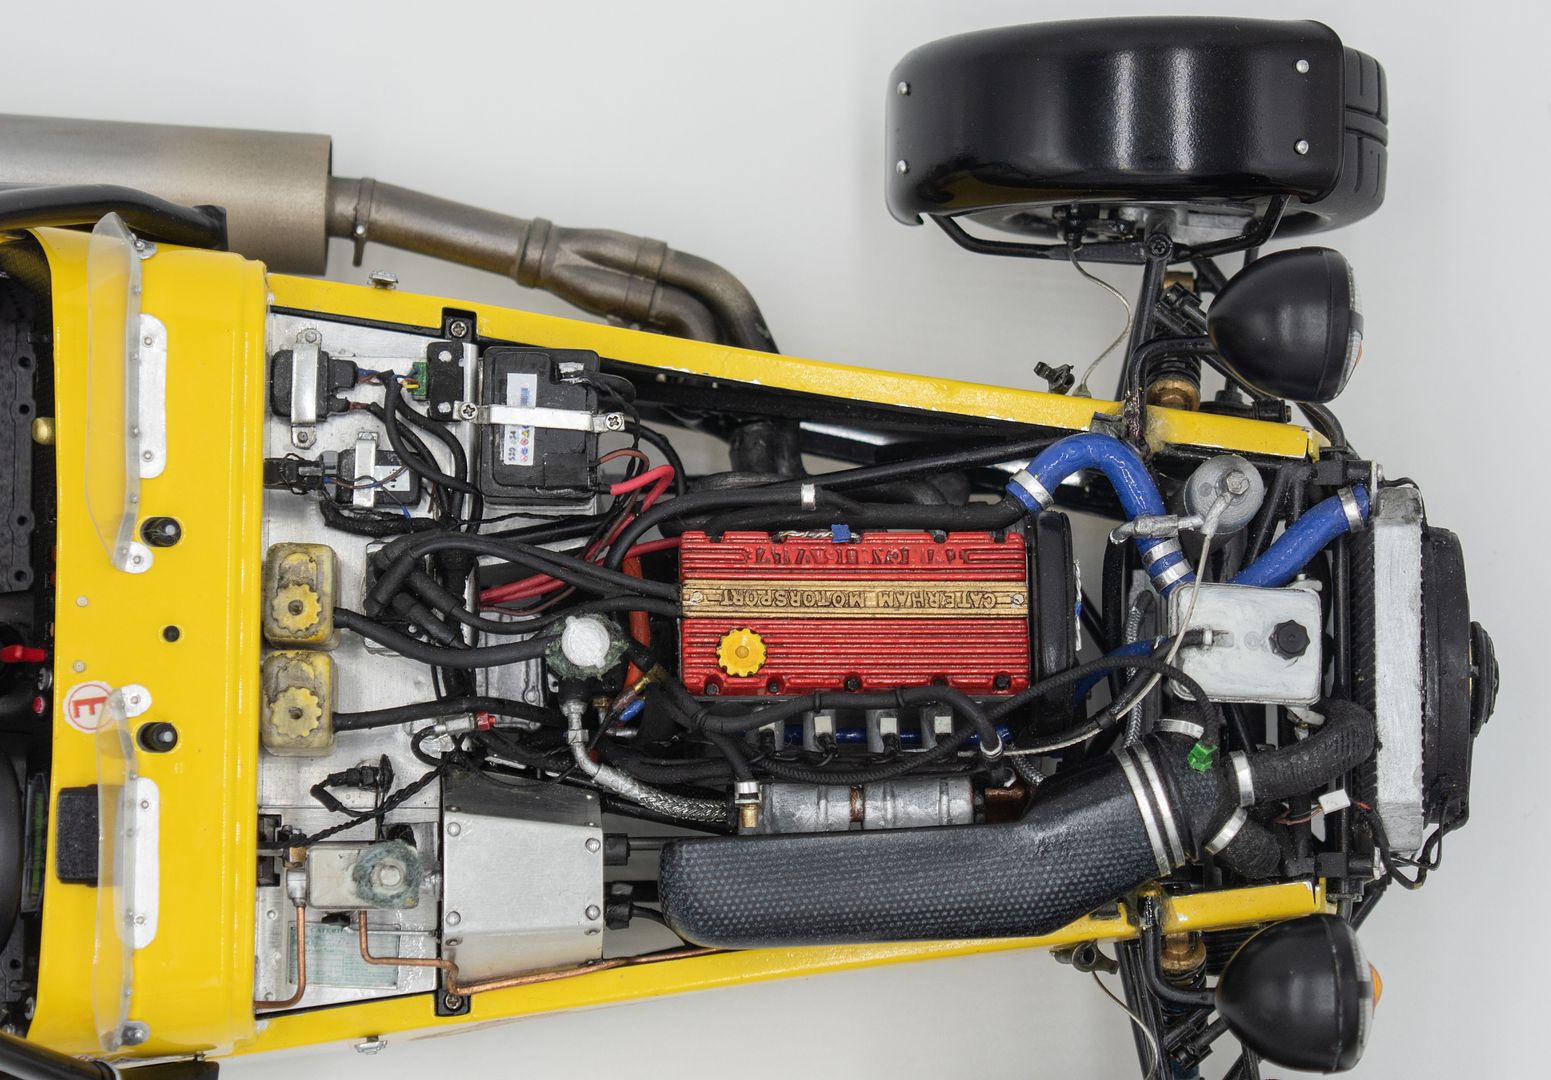
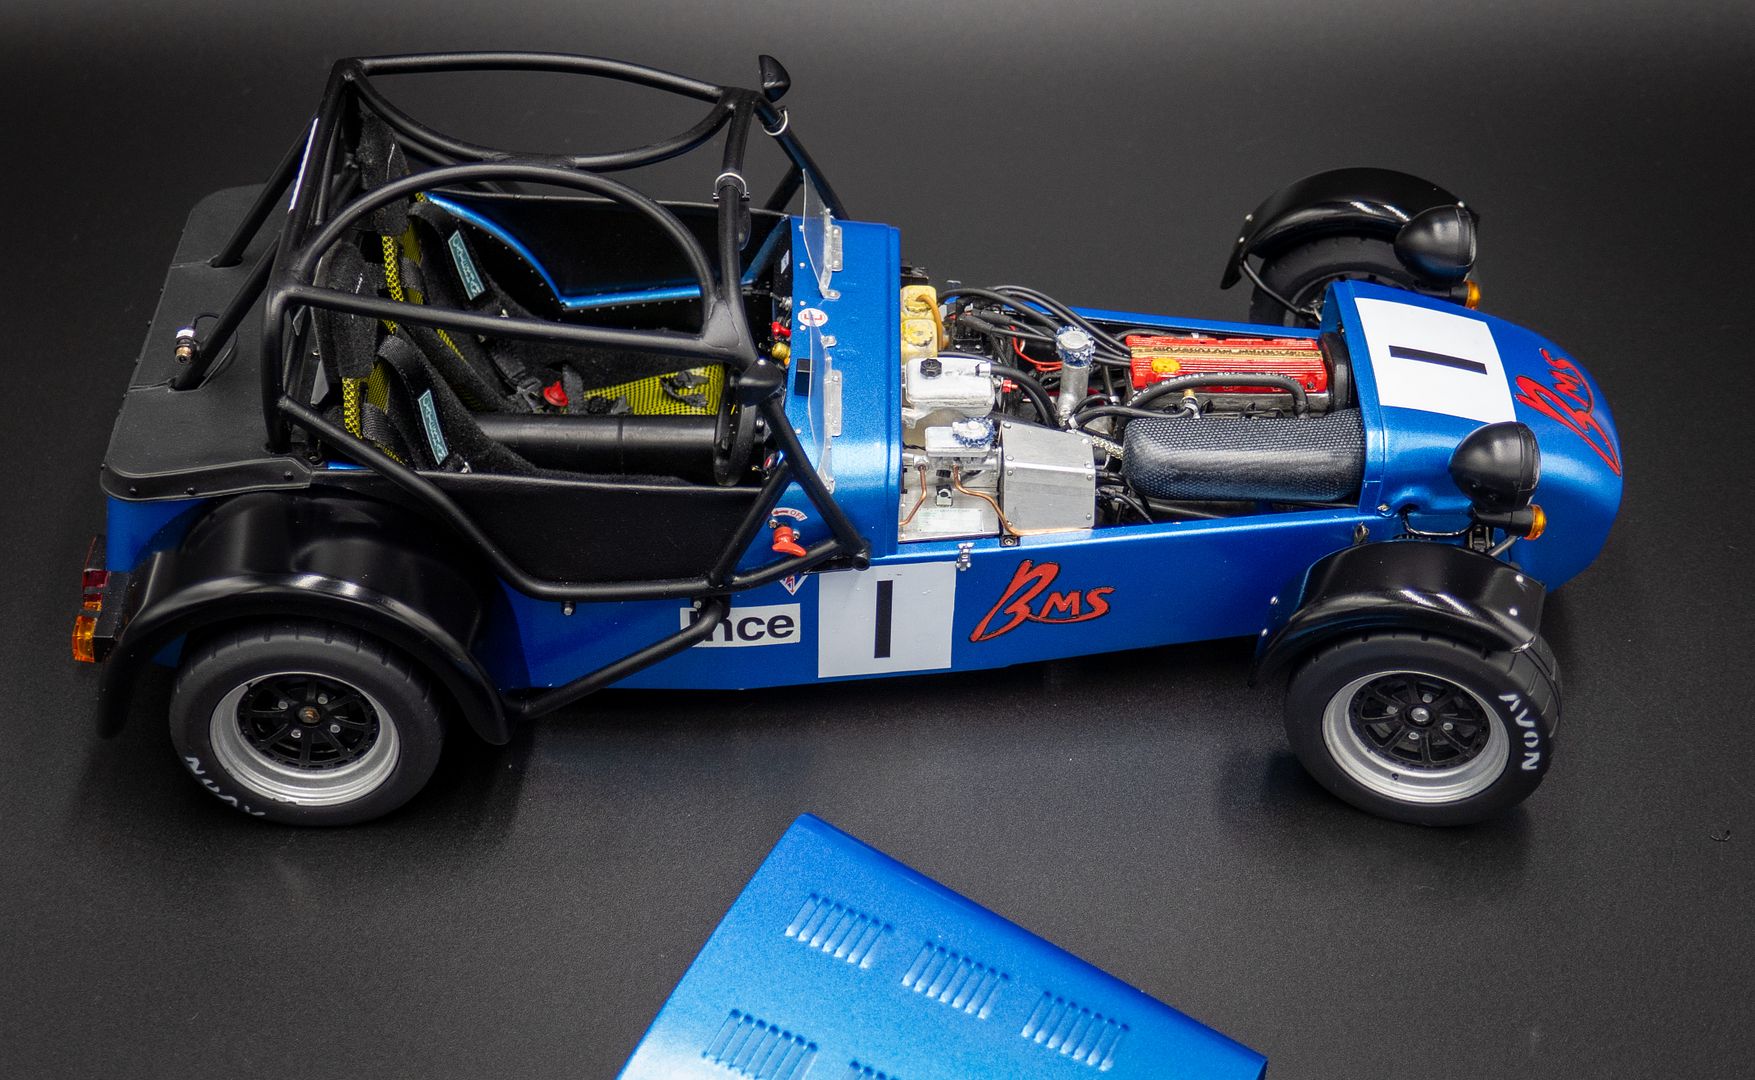
I glued the exhaust in at the front end (2-part epoxy this time) in the engine bay - rear exhaust mounts would come later...
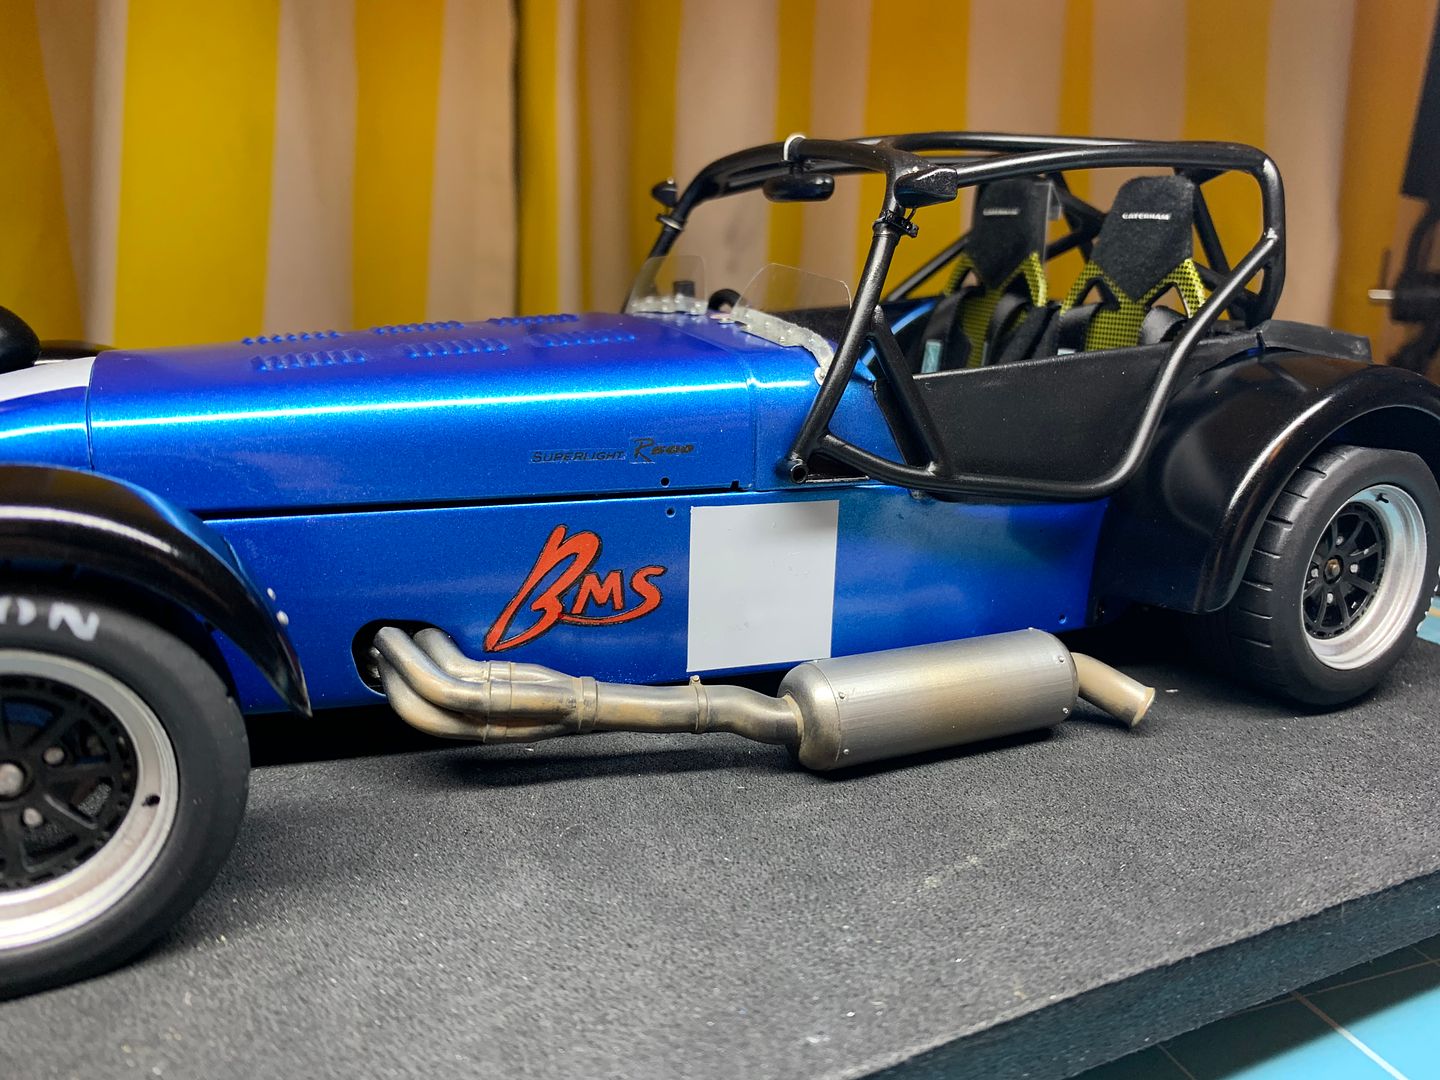
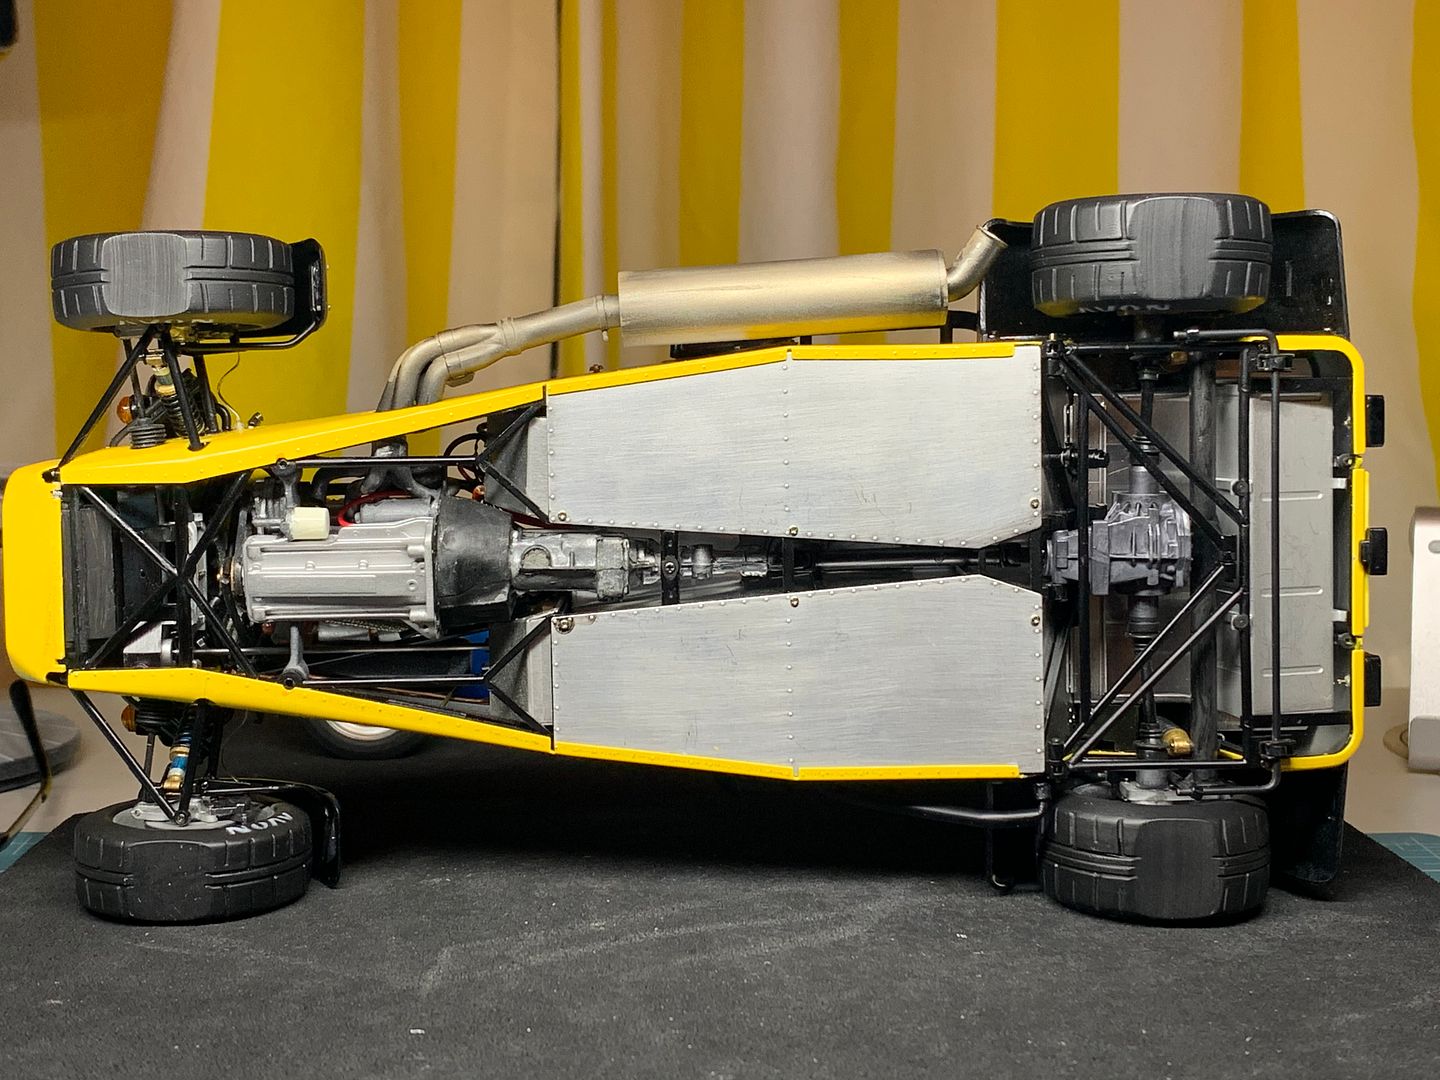

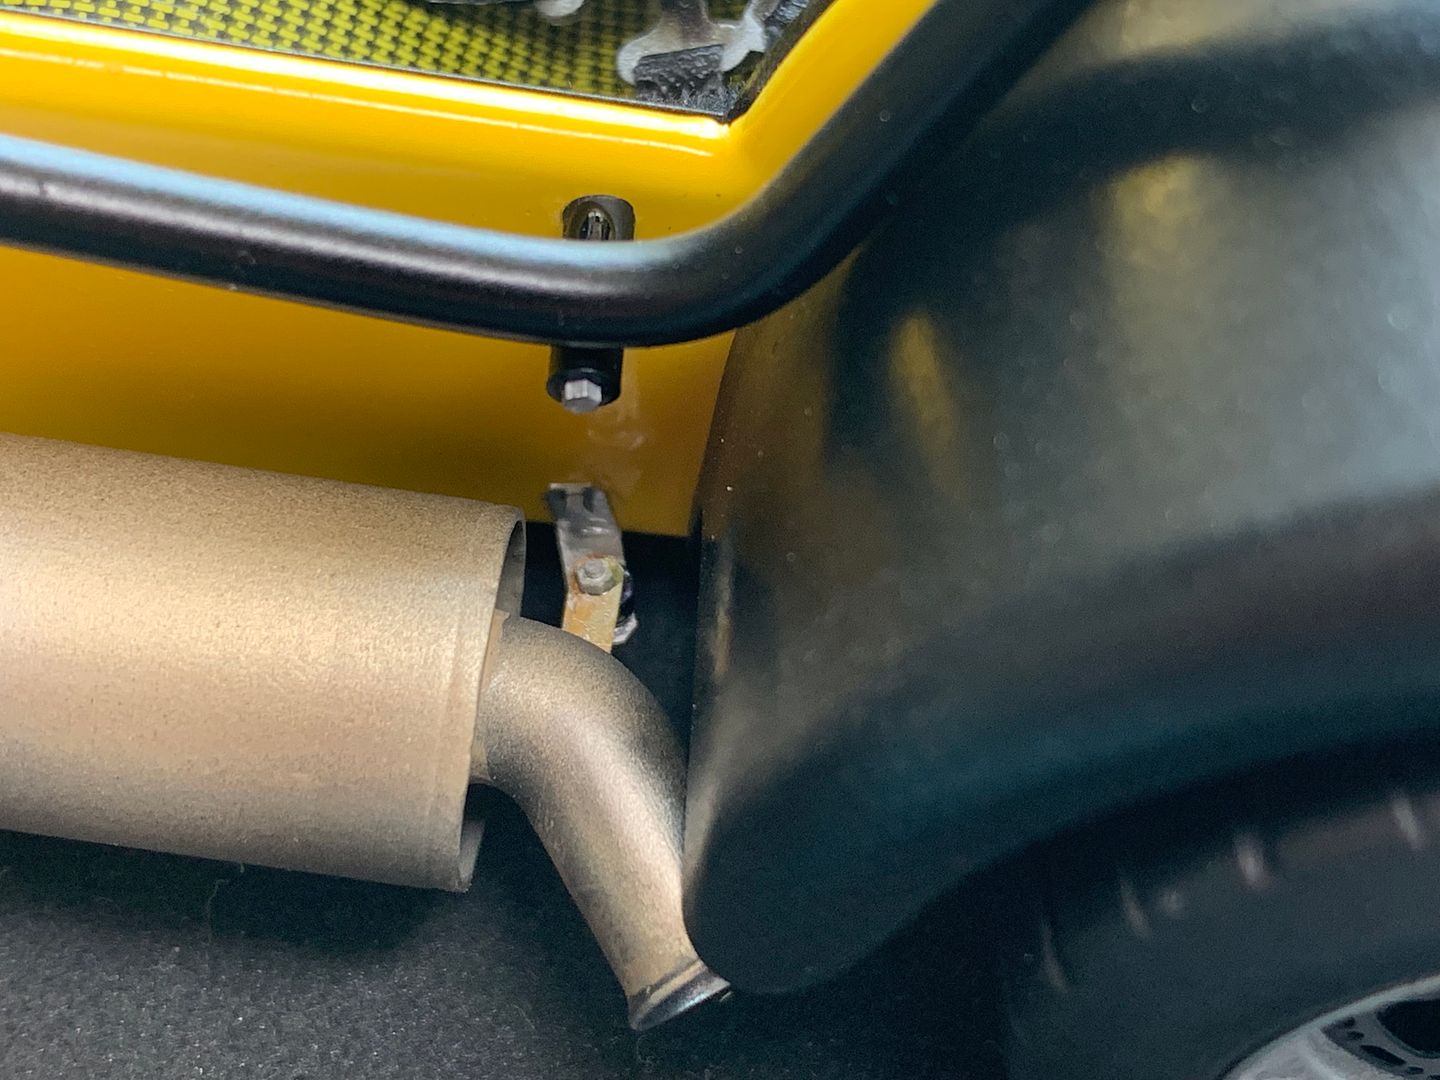
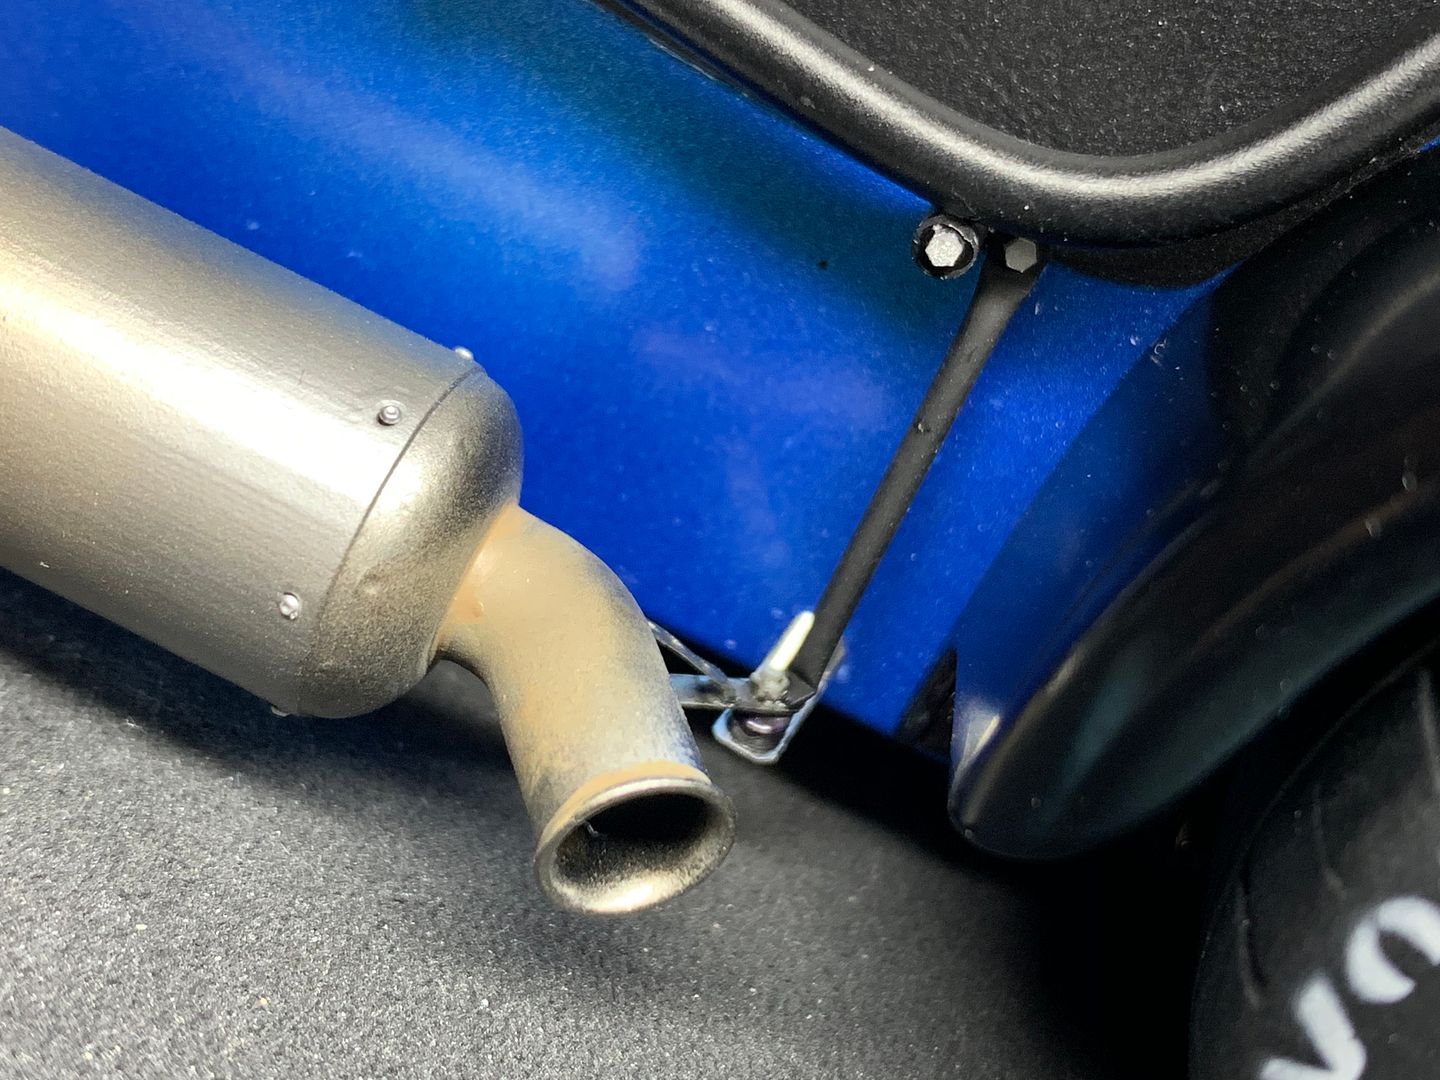
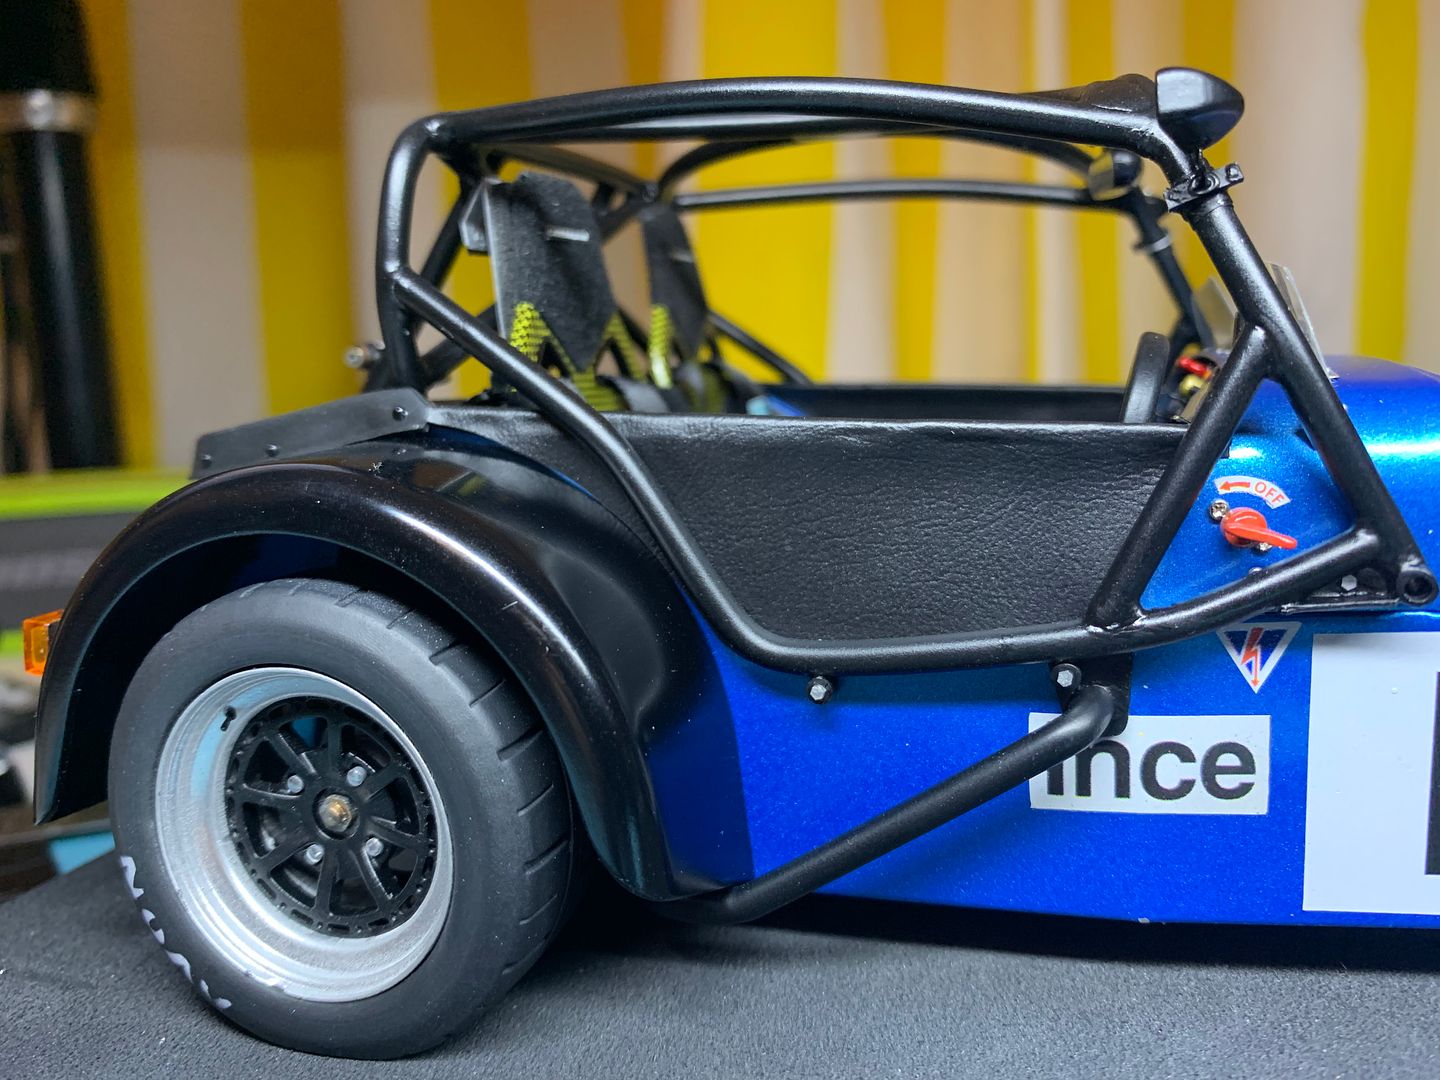
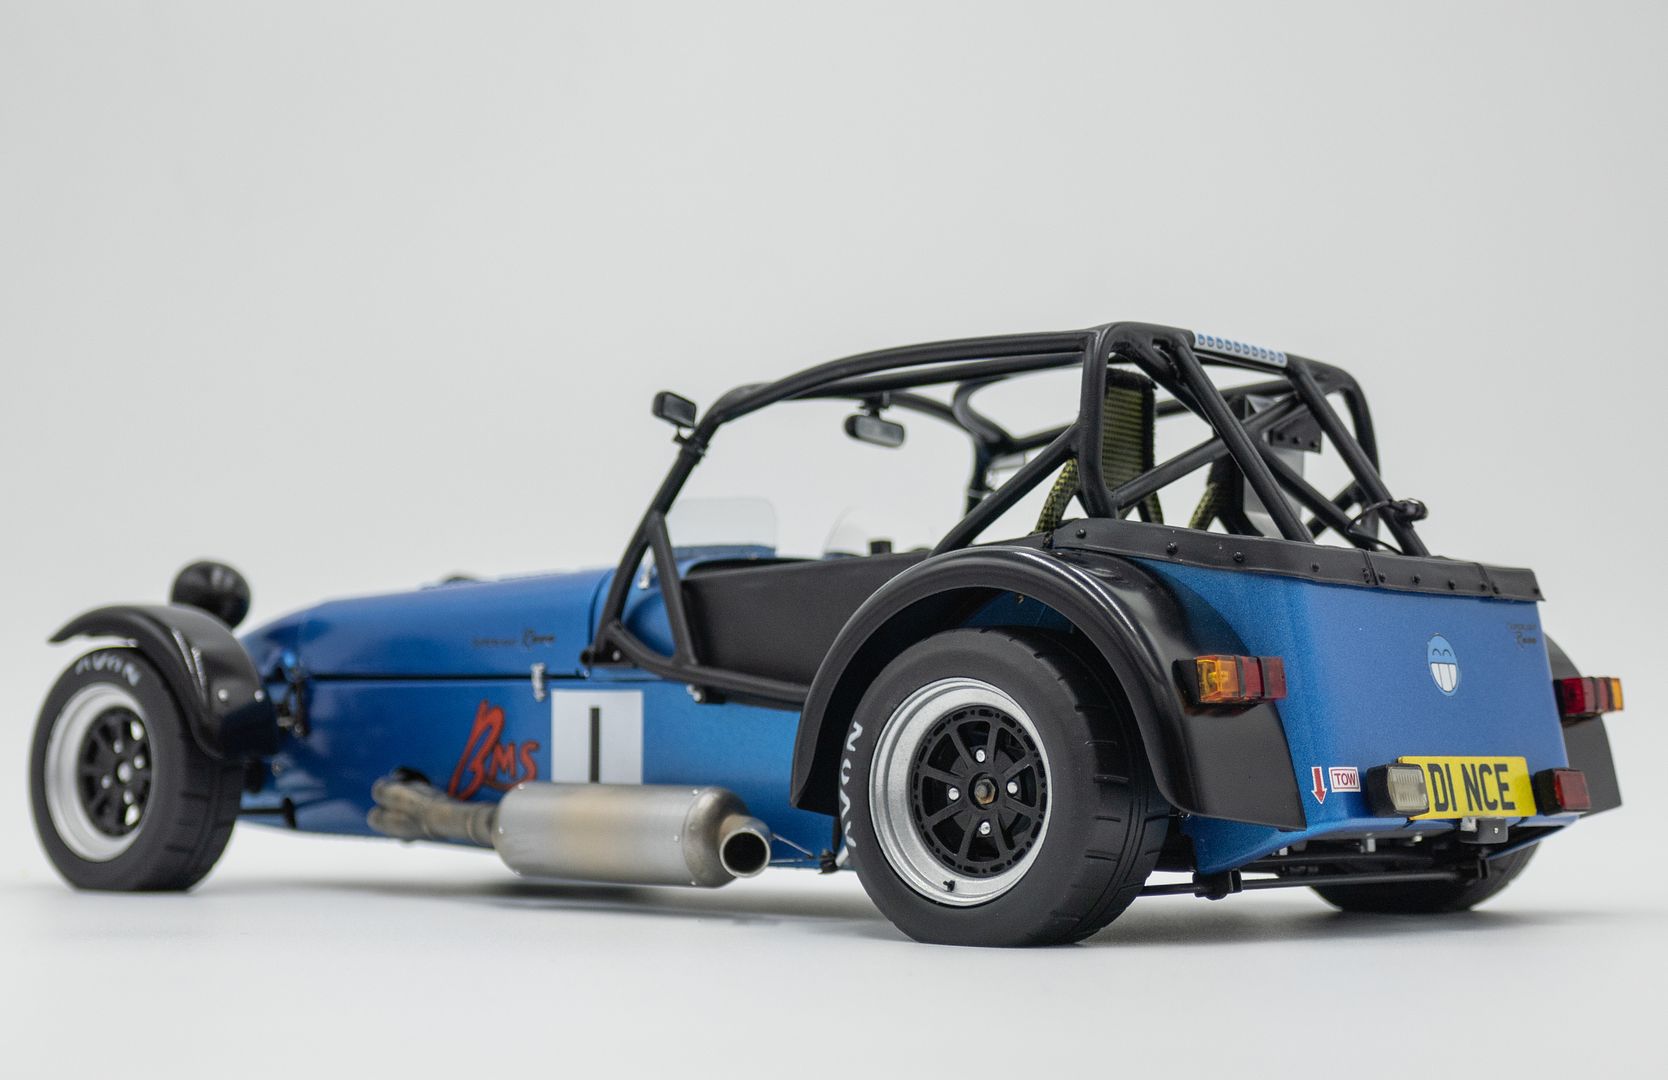
Of course the second, blue car had a different exhaust mount, with an extra strengthening hanger - it is common for the rear exhaust mount to snap as it hold such a long length of pipe and silencer...
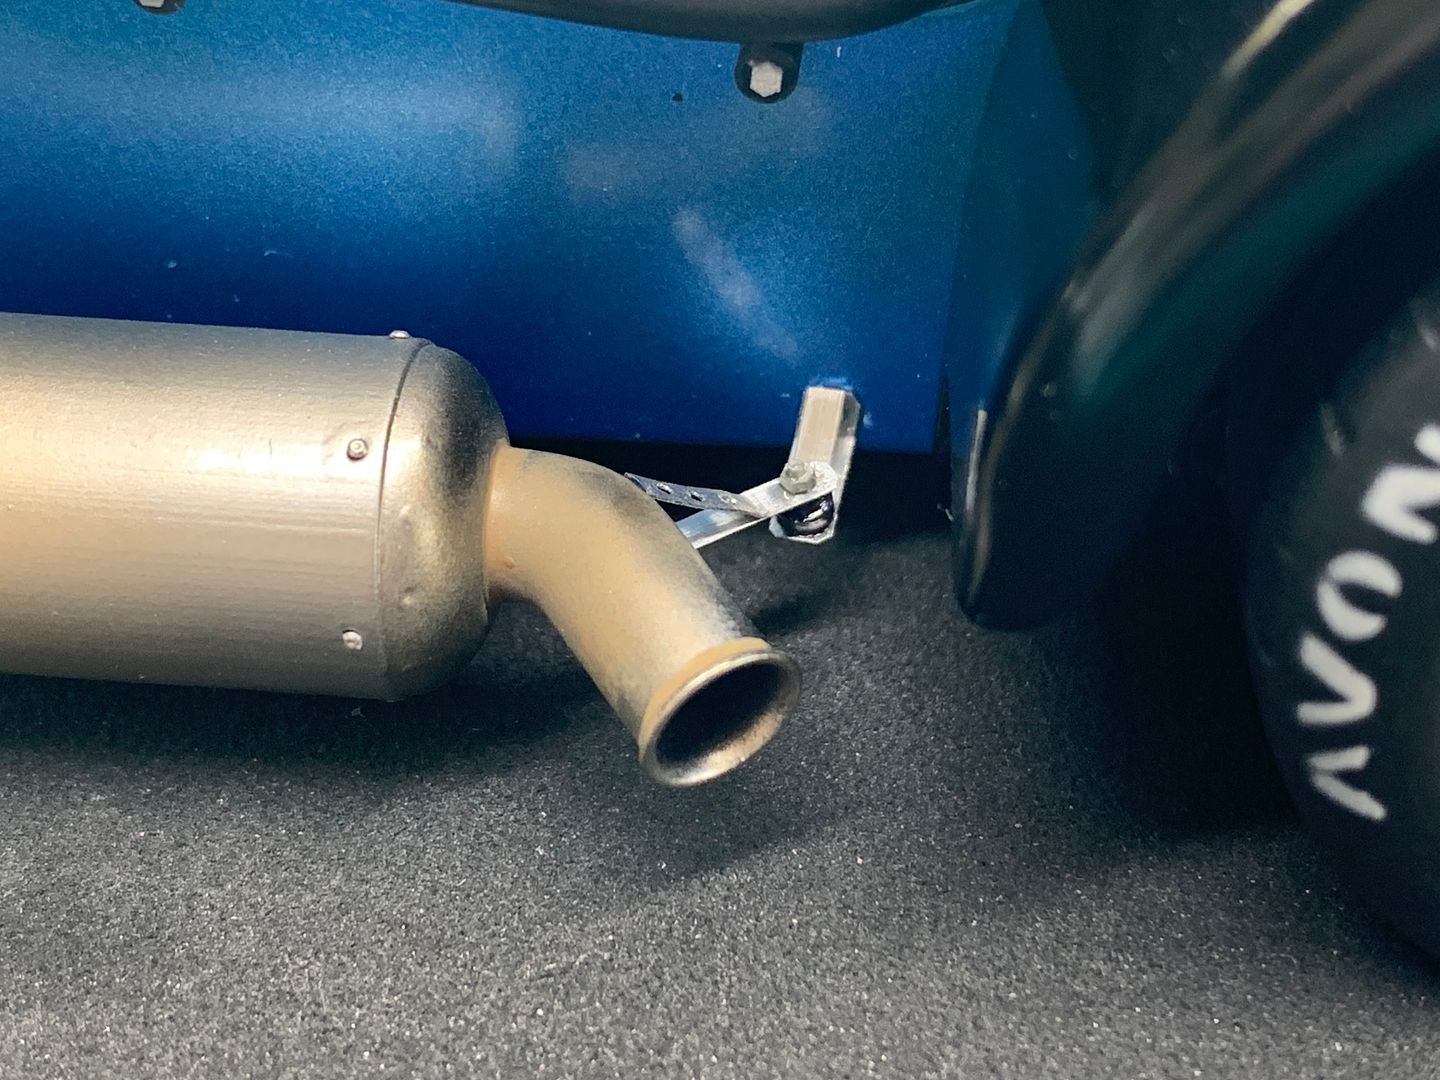
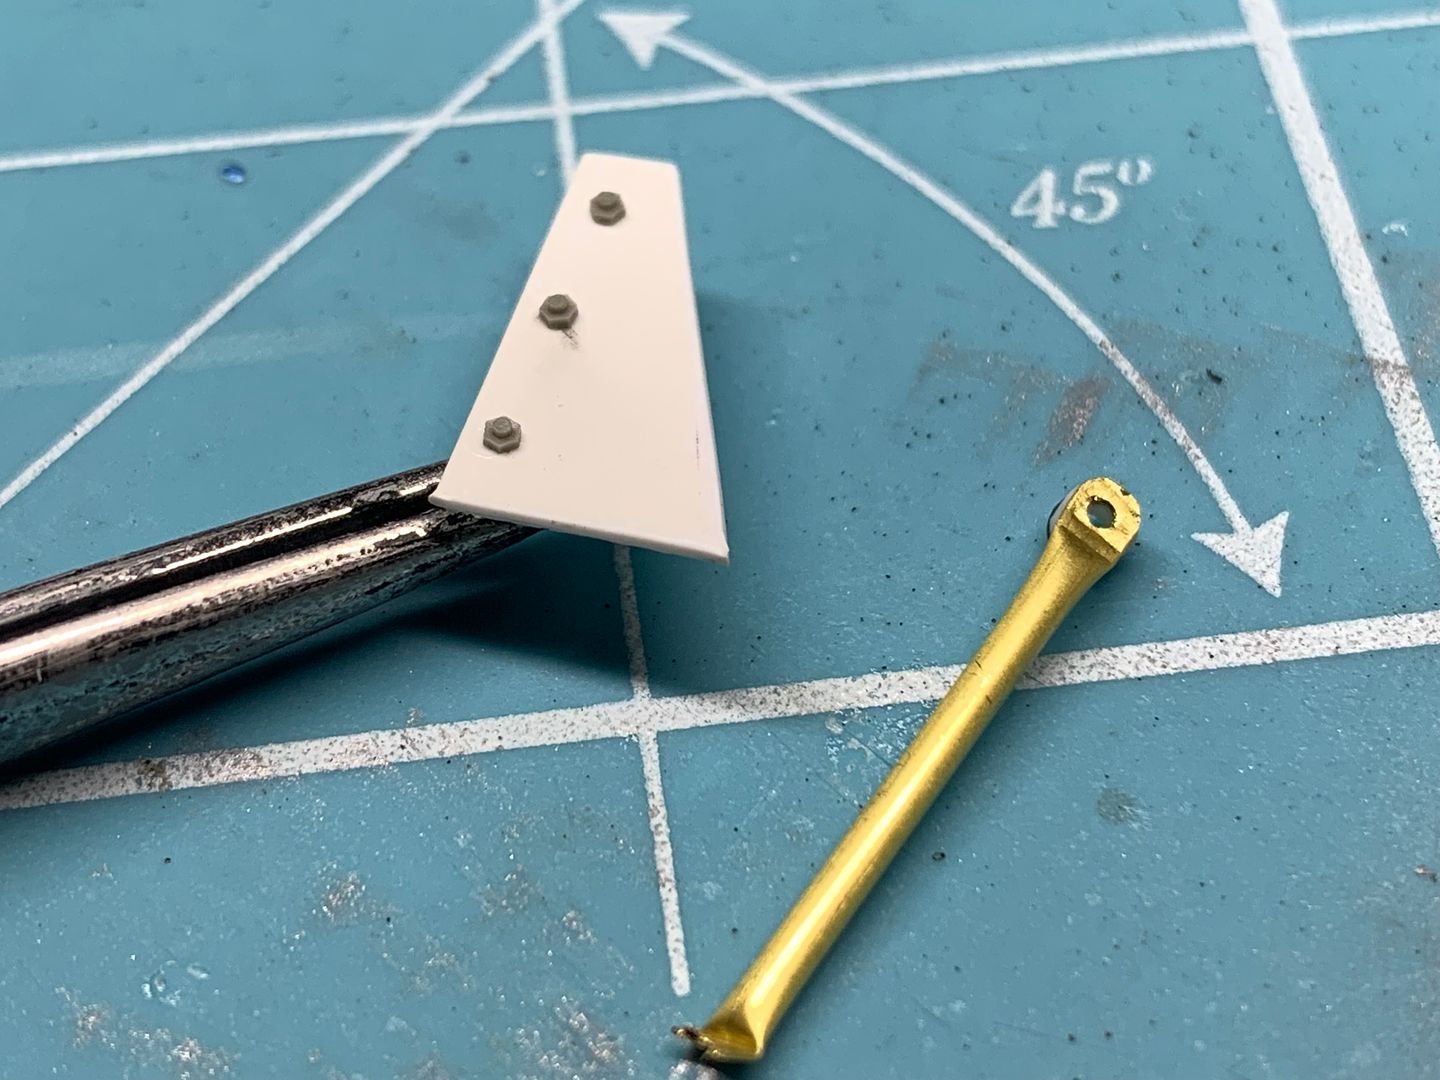
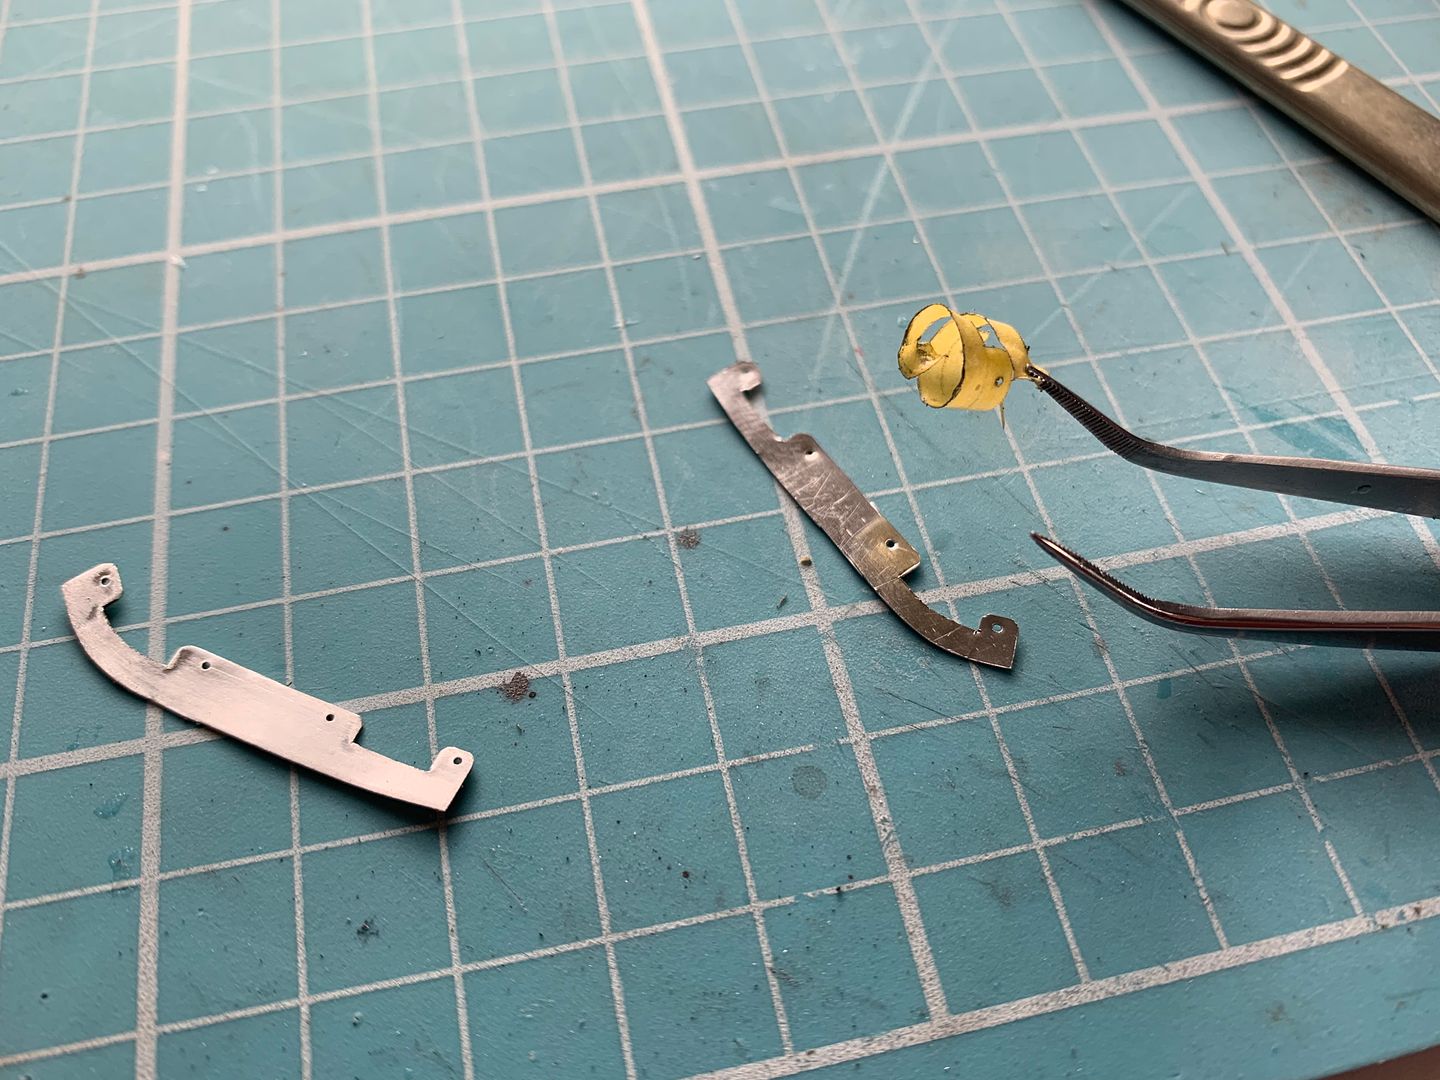
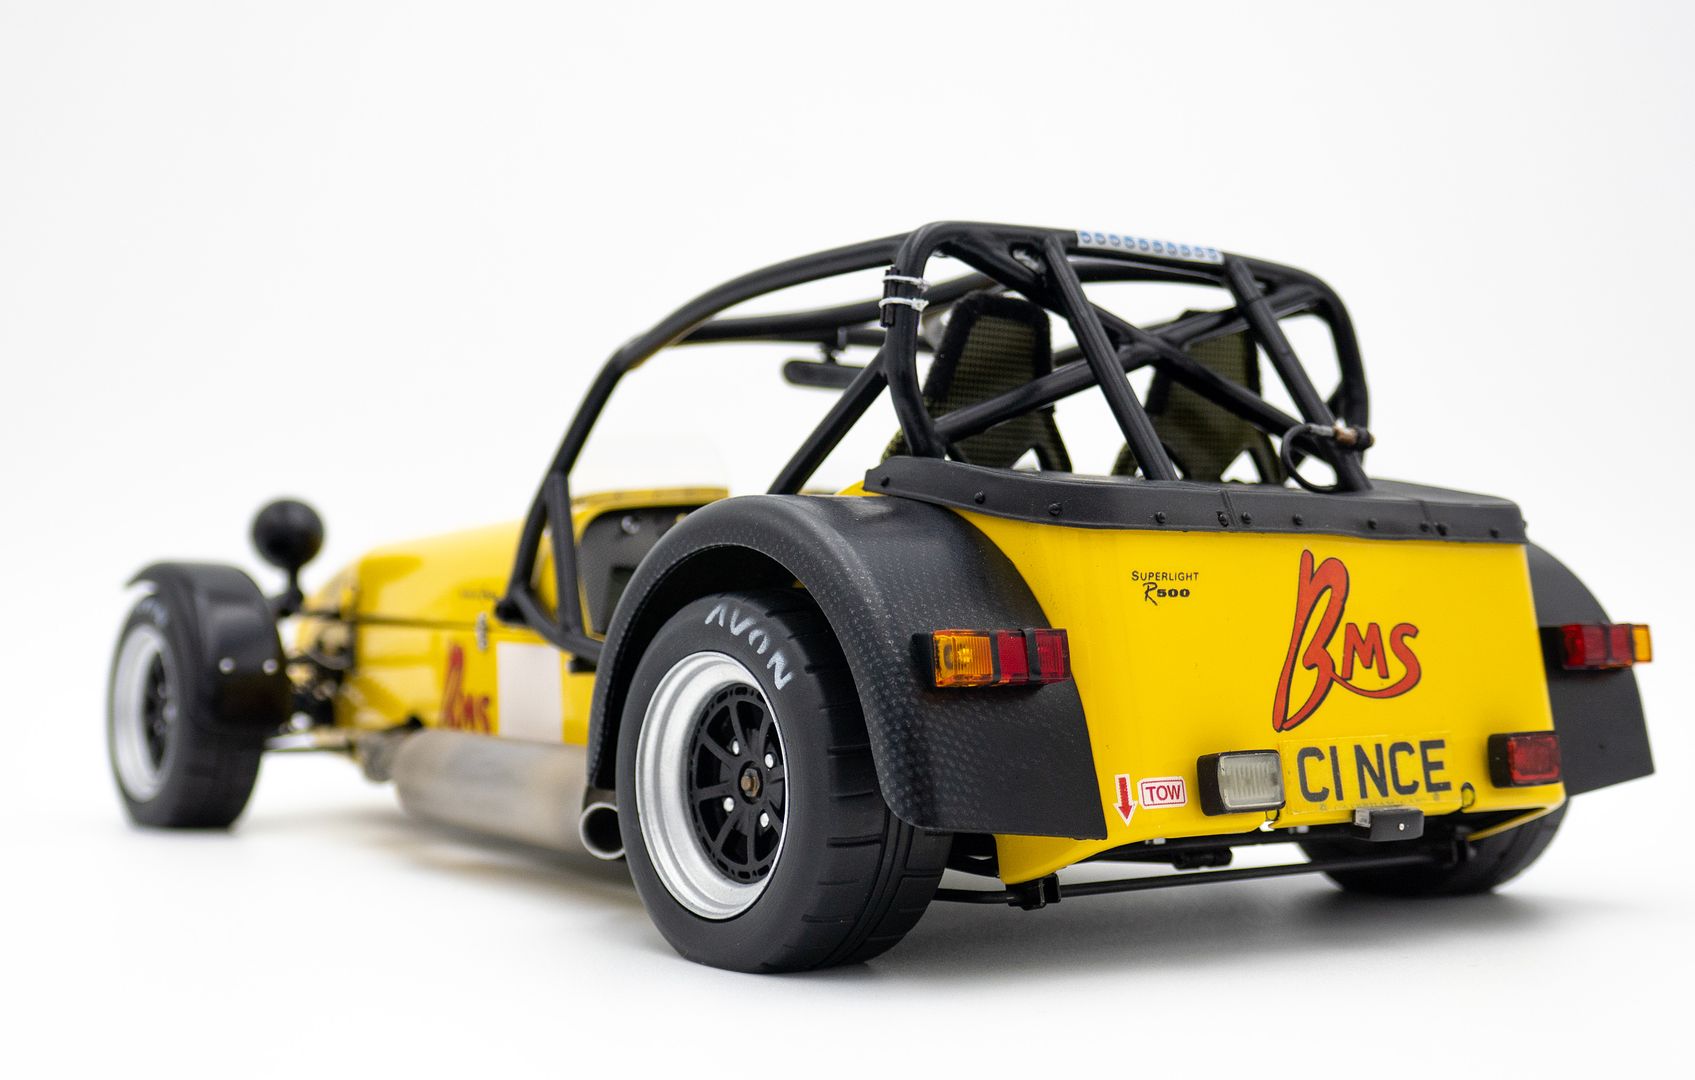
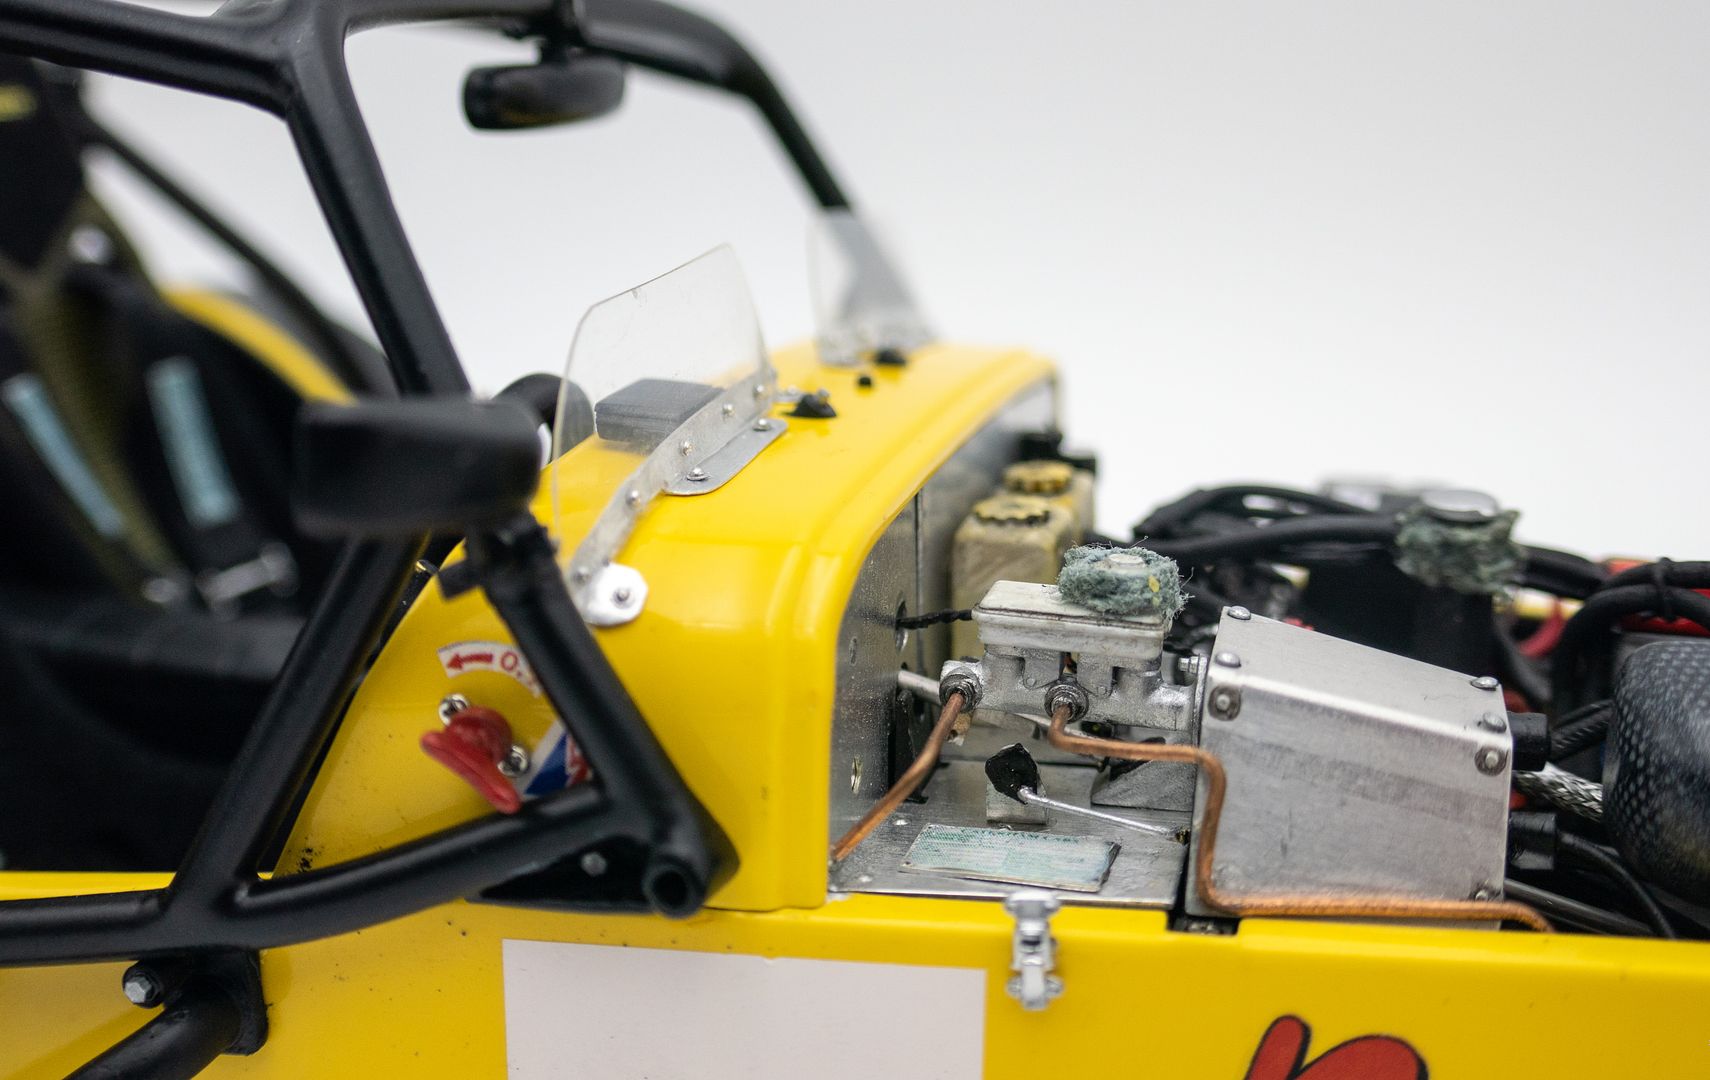
The white plate is for behind the drivers seat - brass pipe is exhaust support...
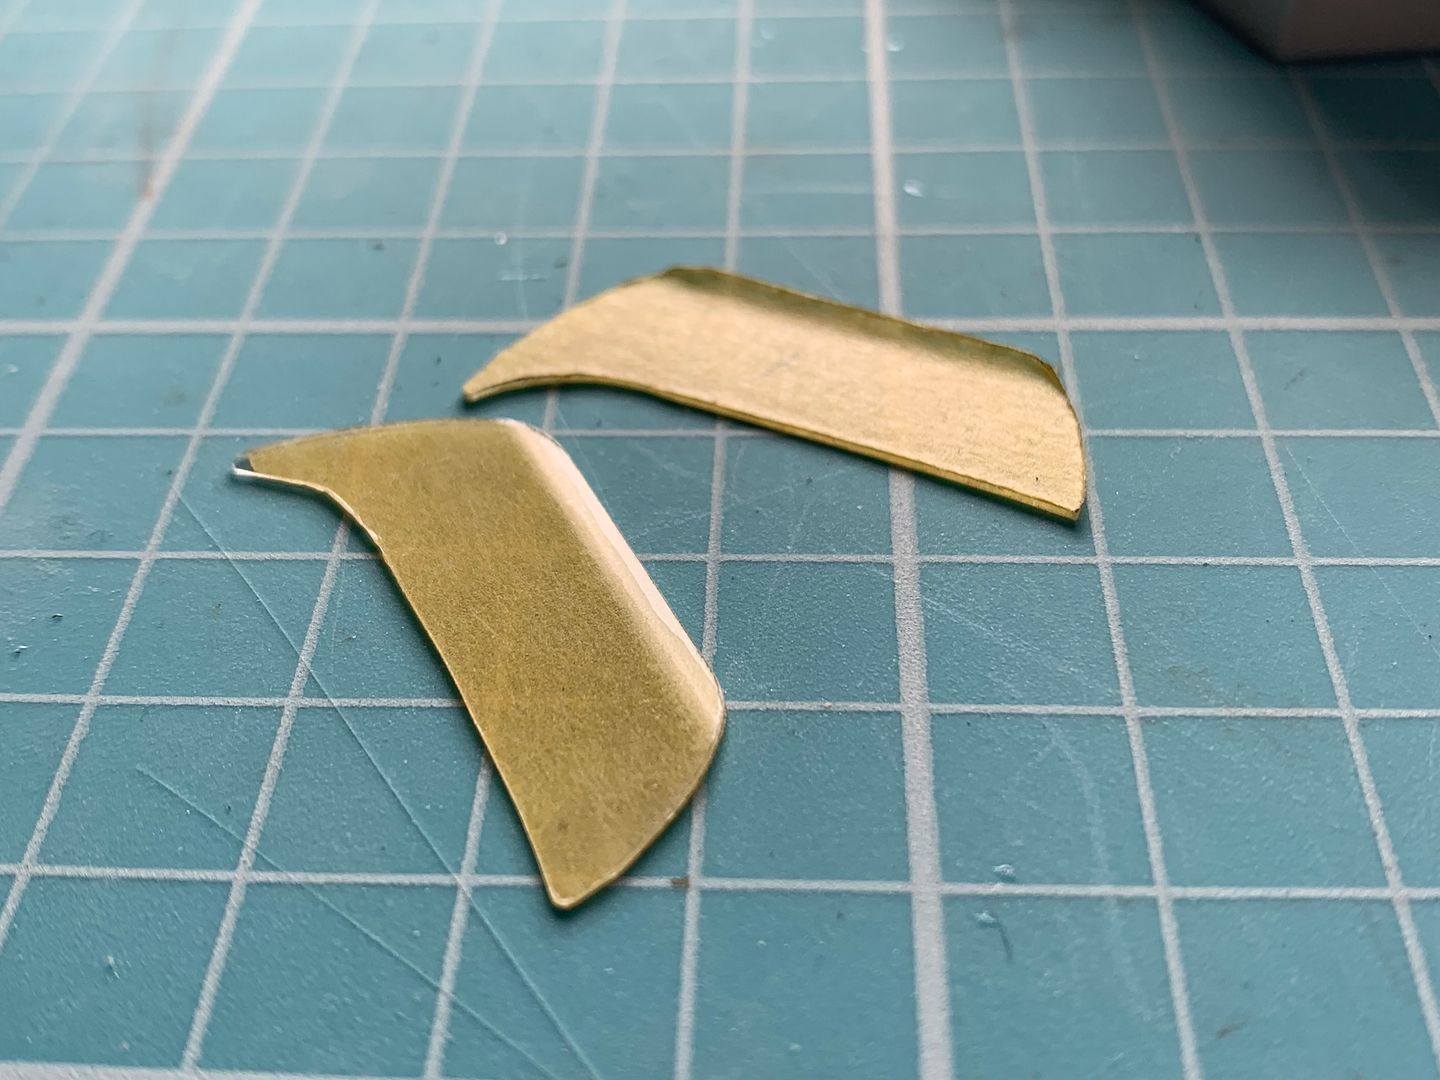
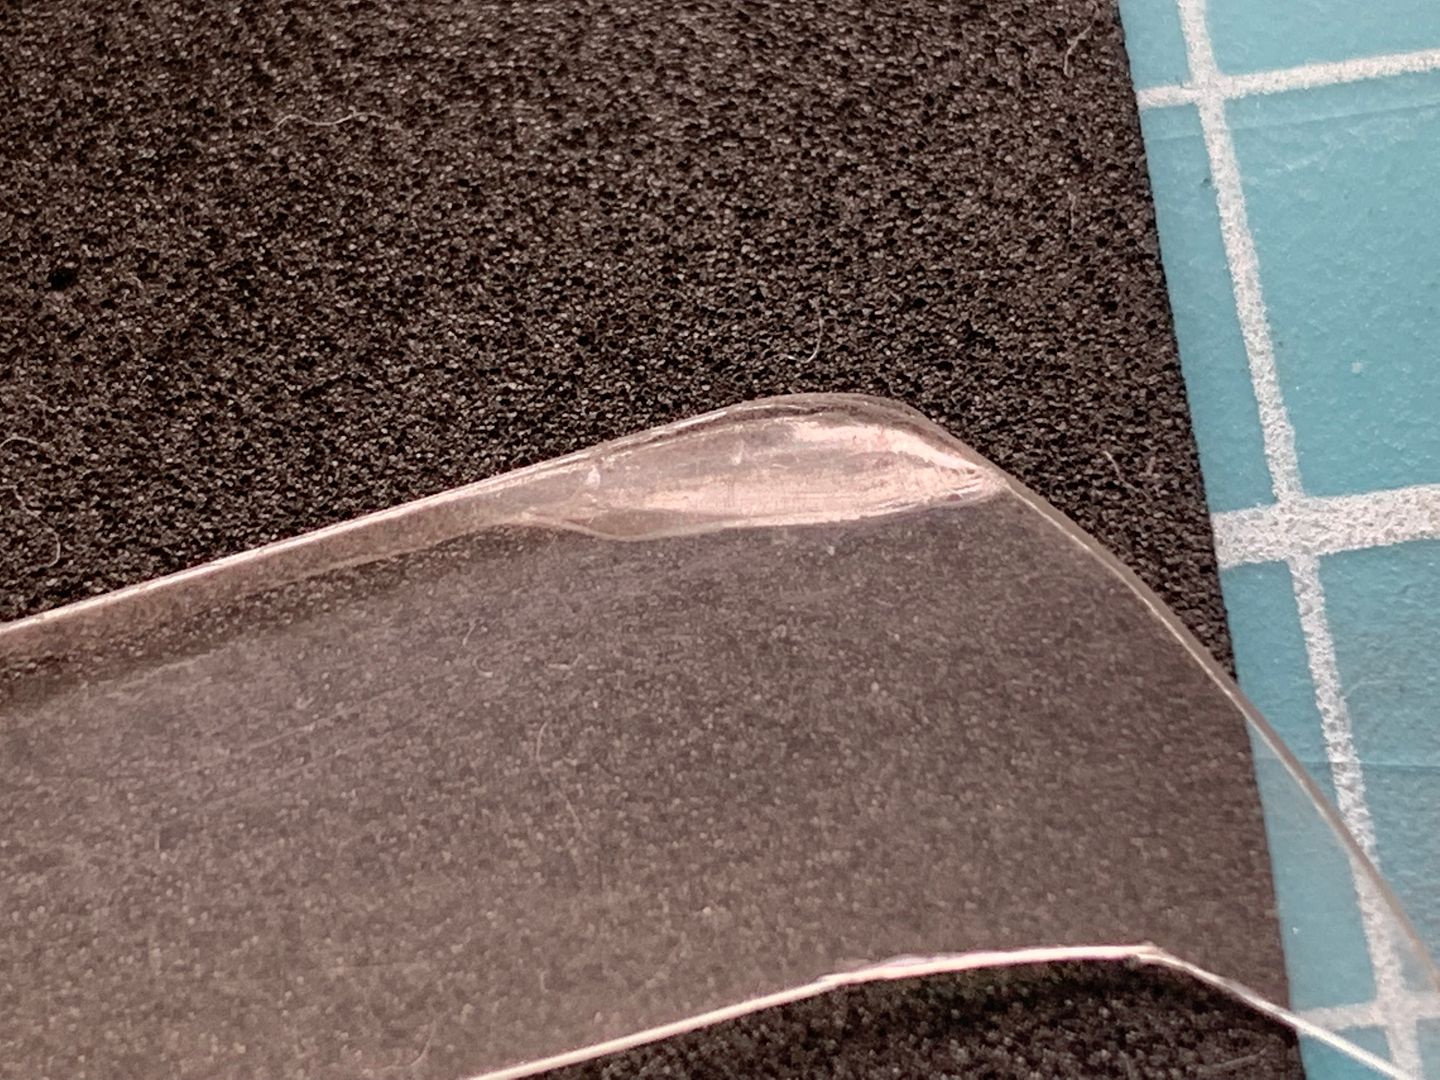
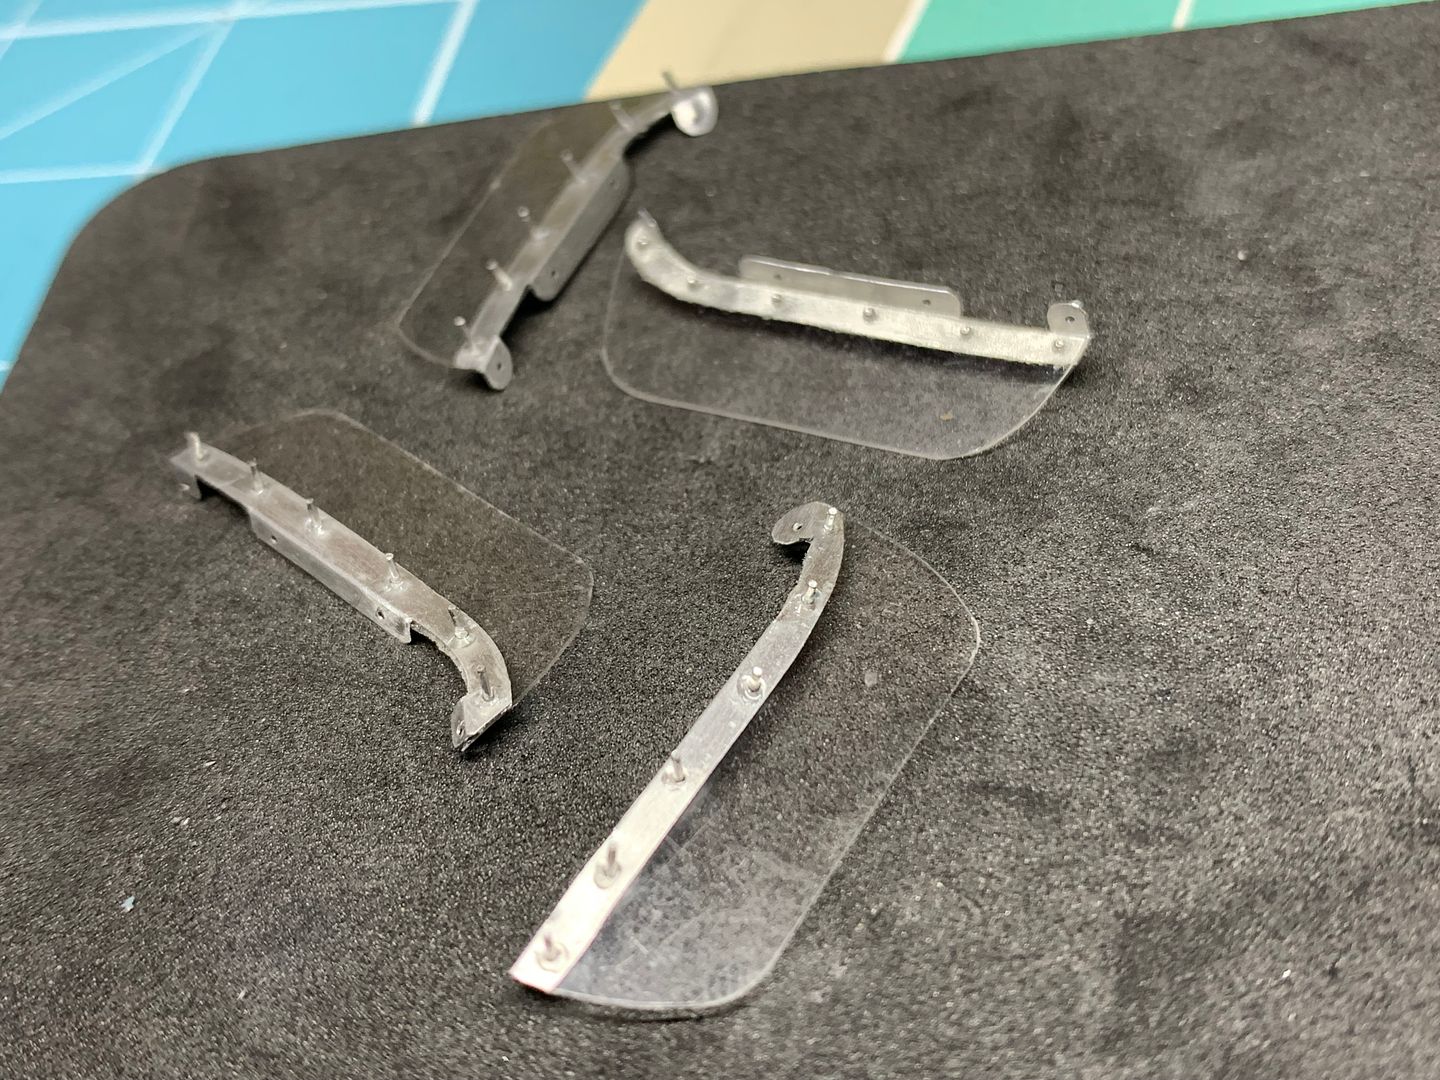
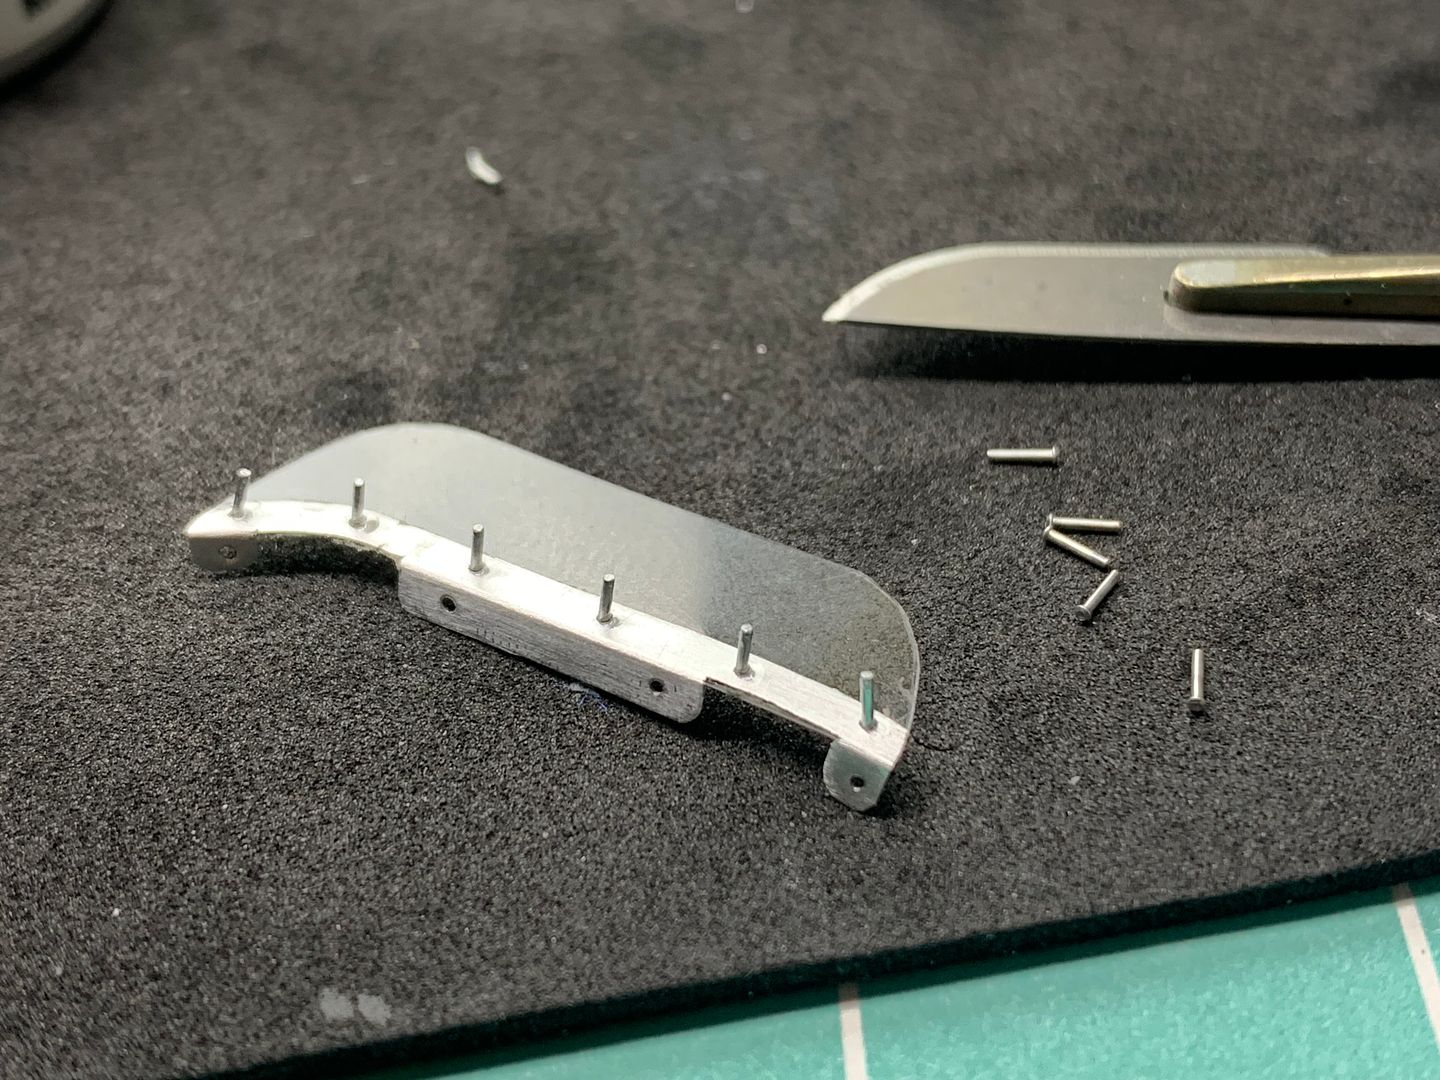
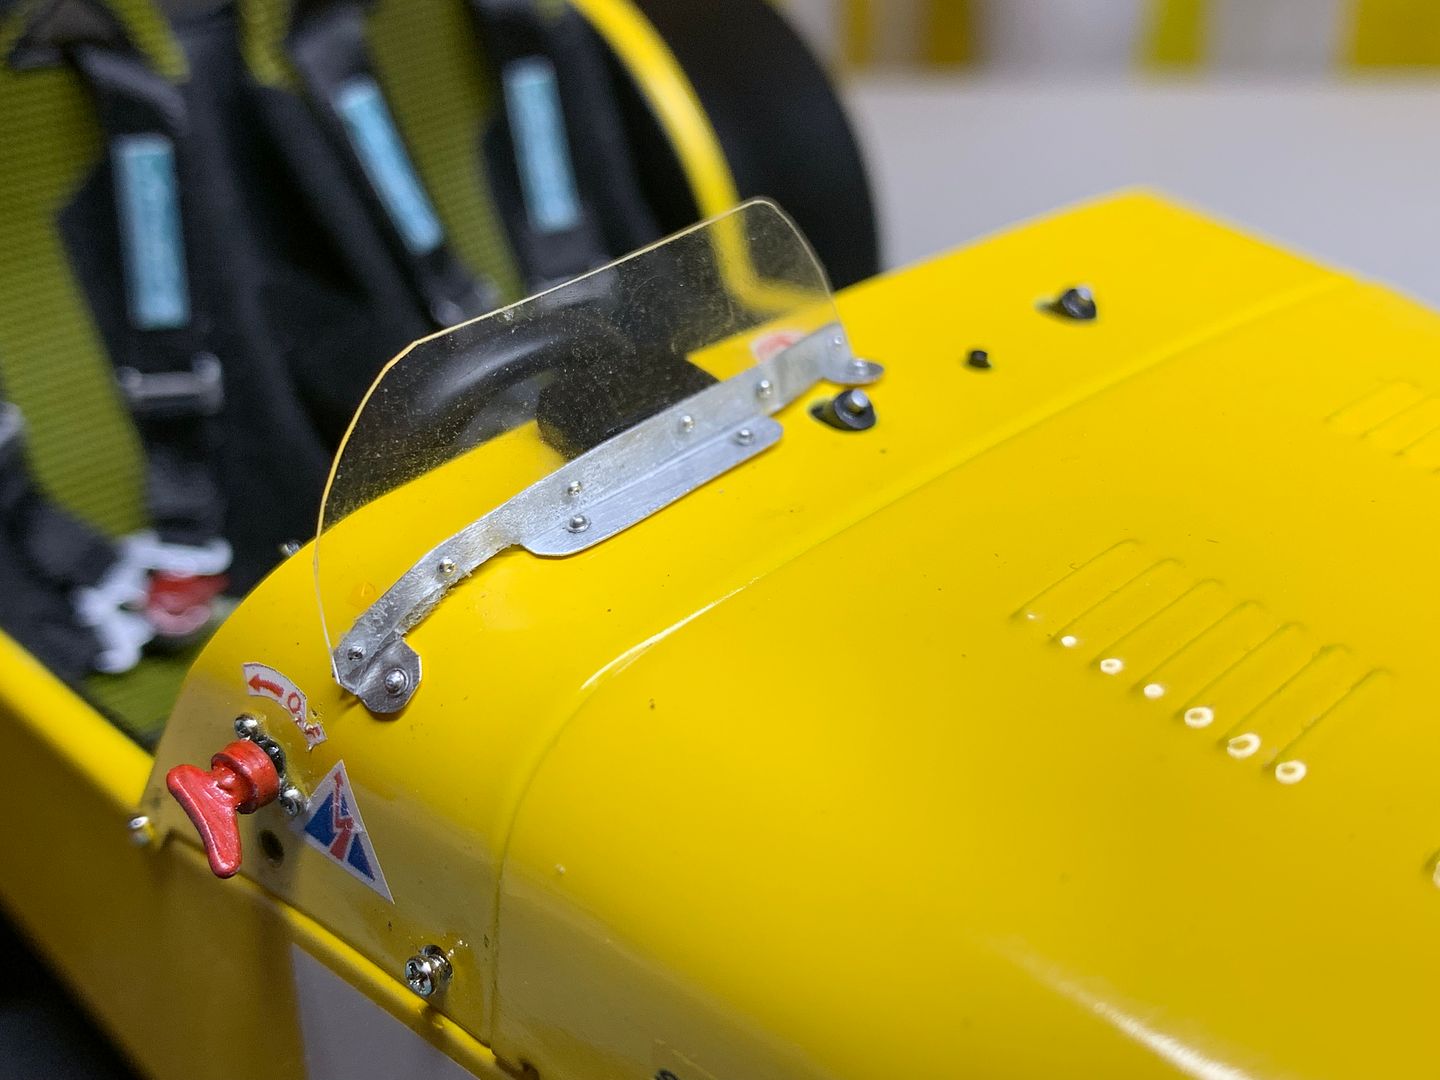
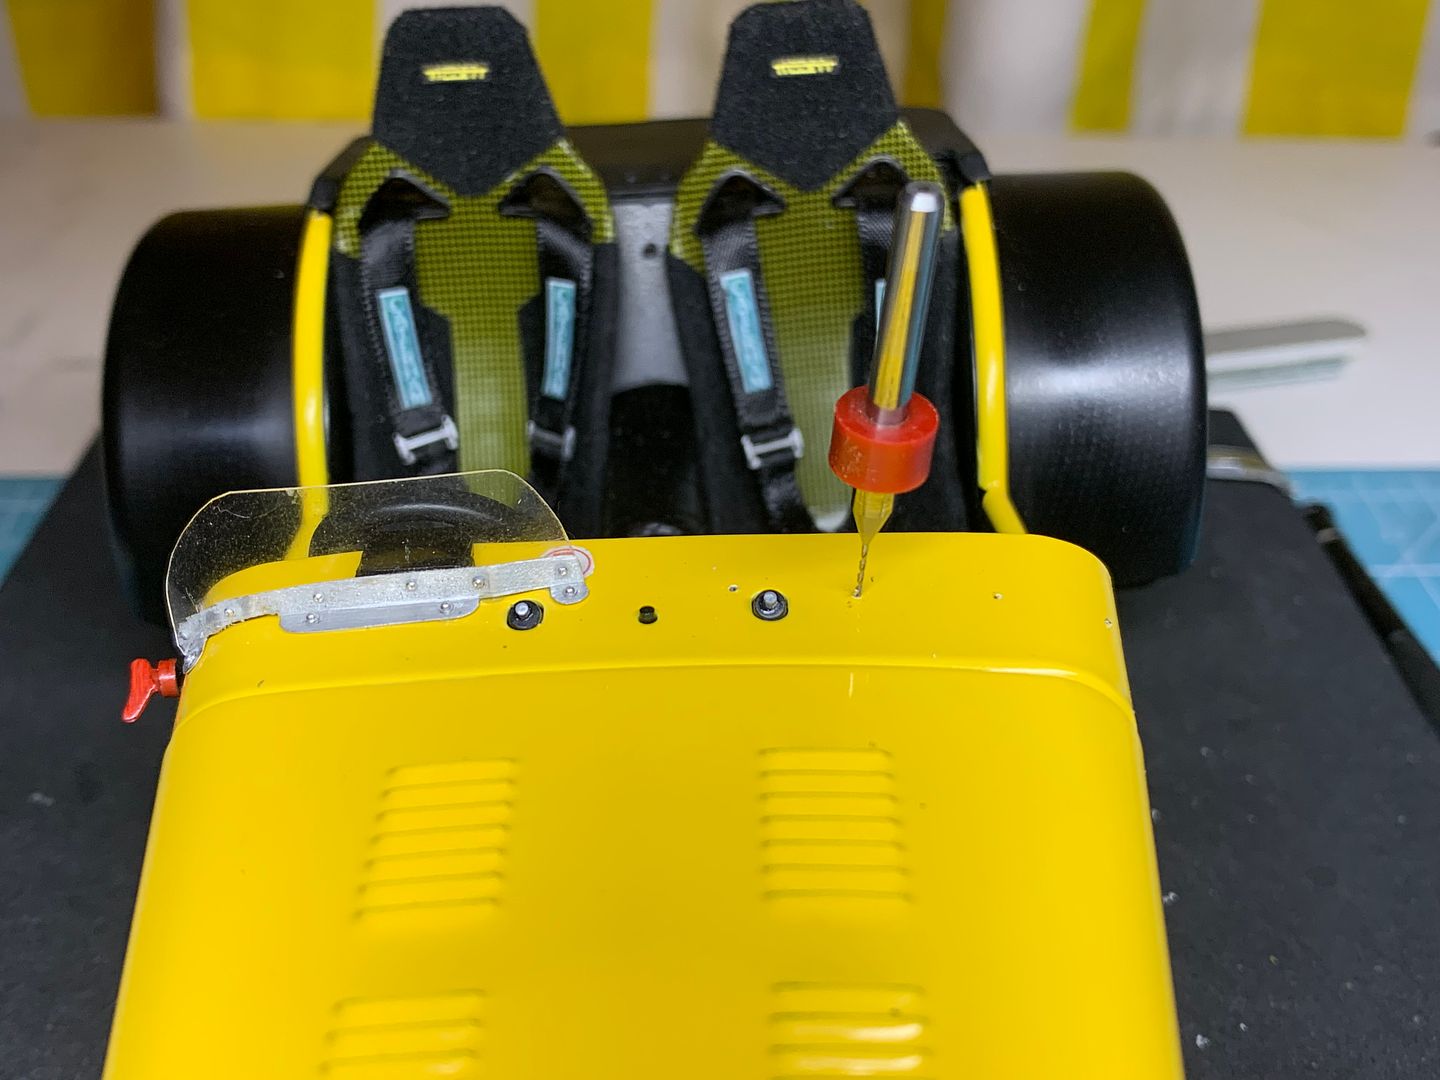
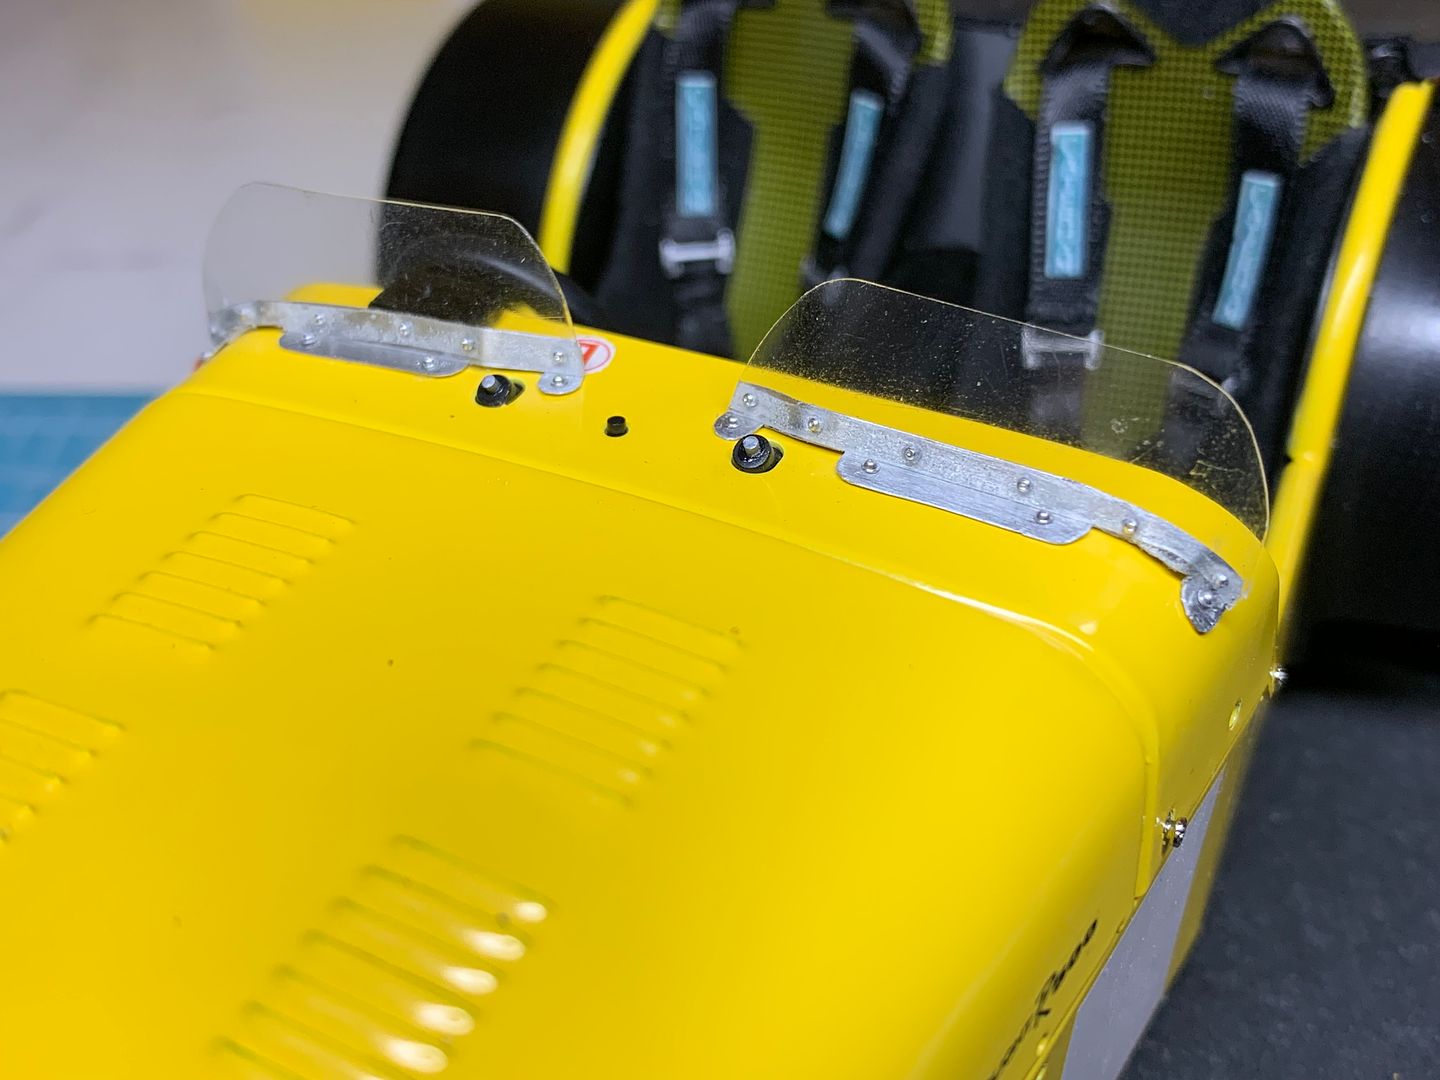
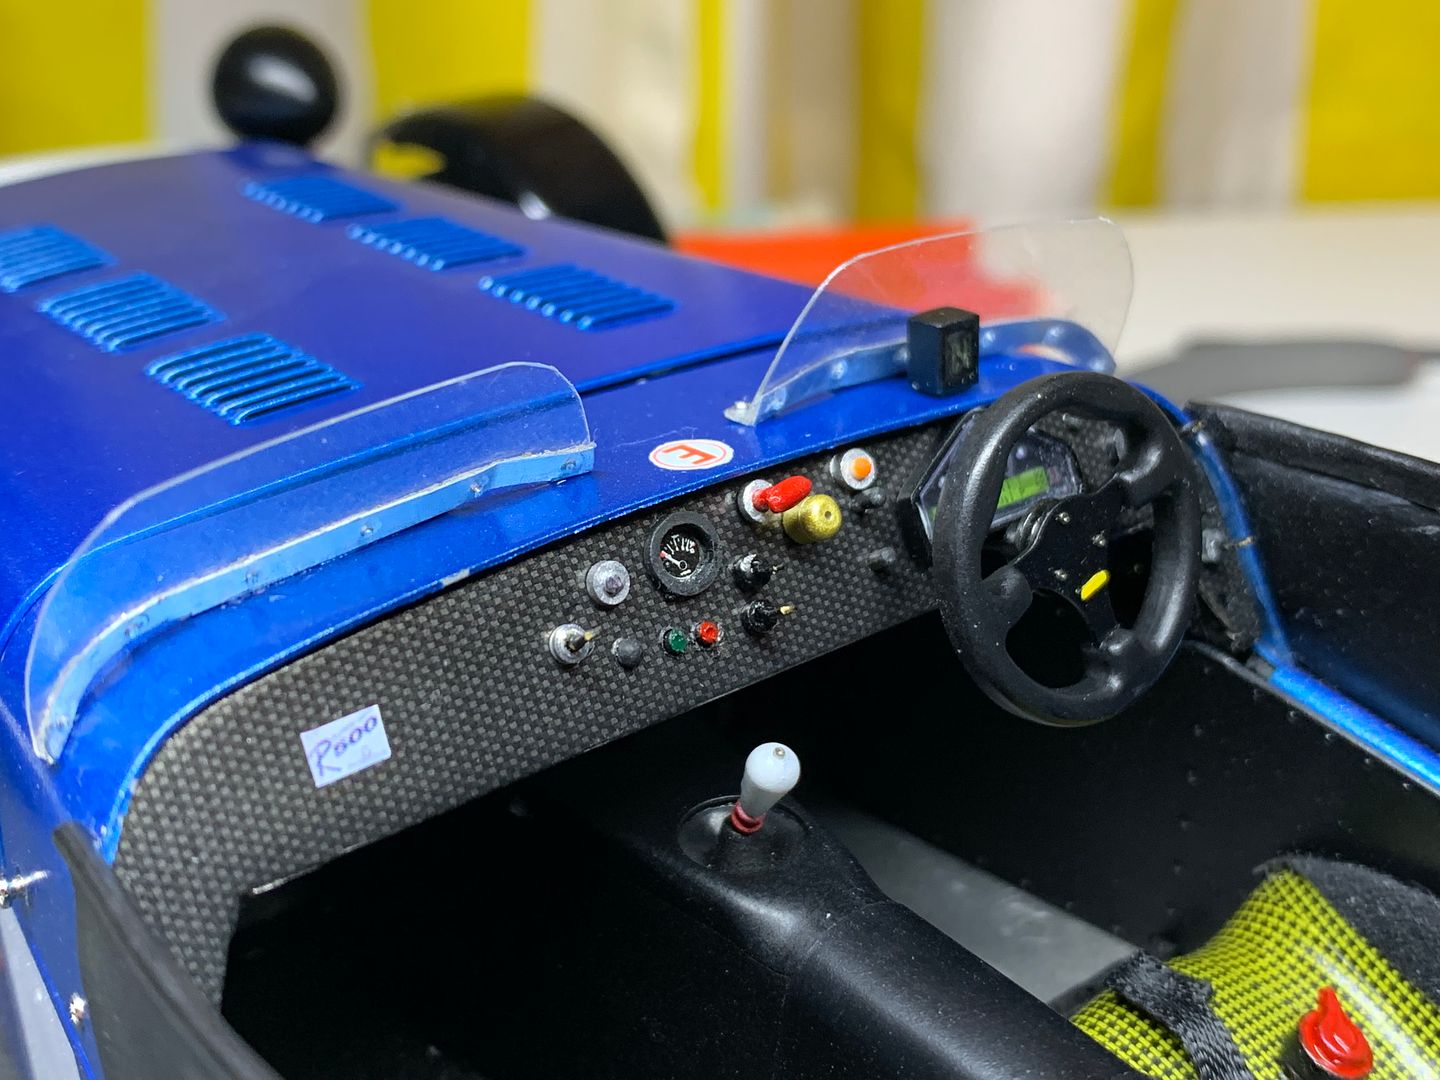
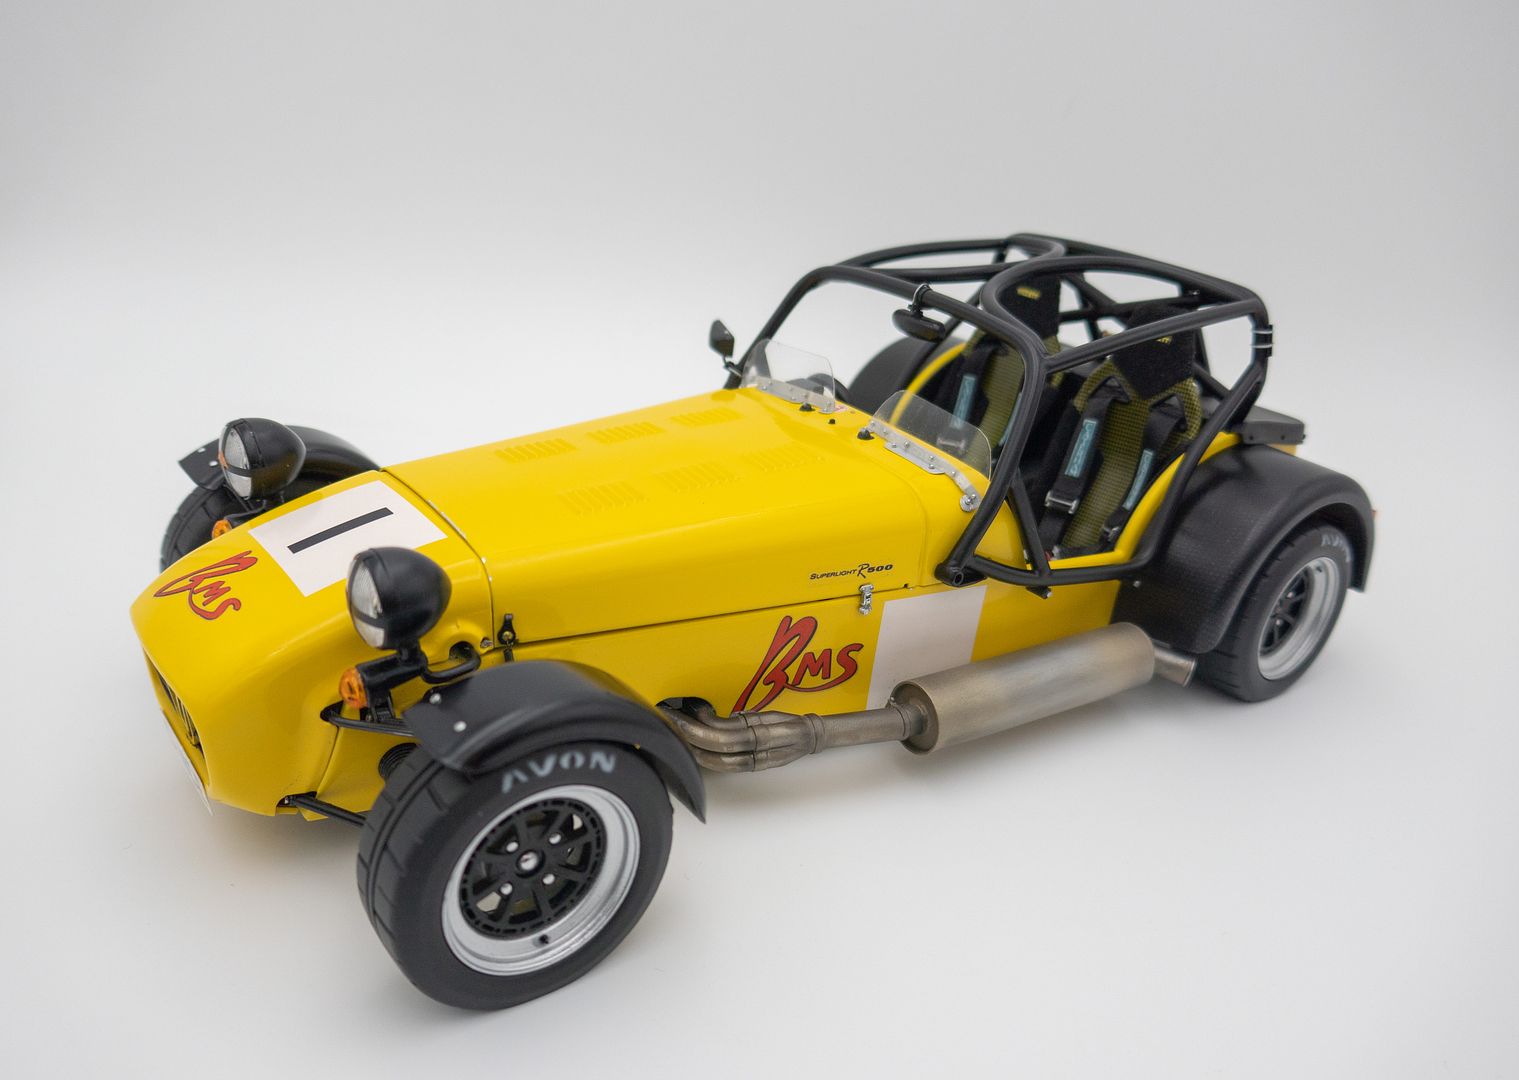
Next big job which I had put off was the 4 clear race screens. These are quite scrappy in real life - bent ali strip along the bottom, cut perspex screens. The only way to make these was exactly like the 'real' ones - so cut some acetate sheet, cut some ali sheet and rivet them together (glued) then rivet them to the cars...great!


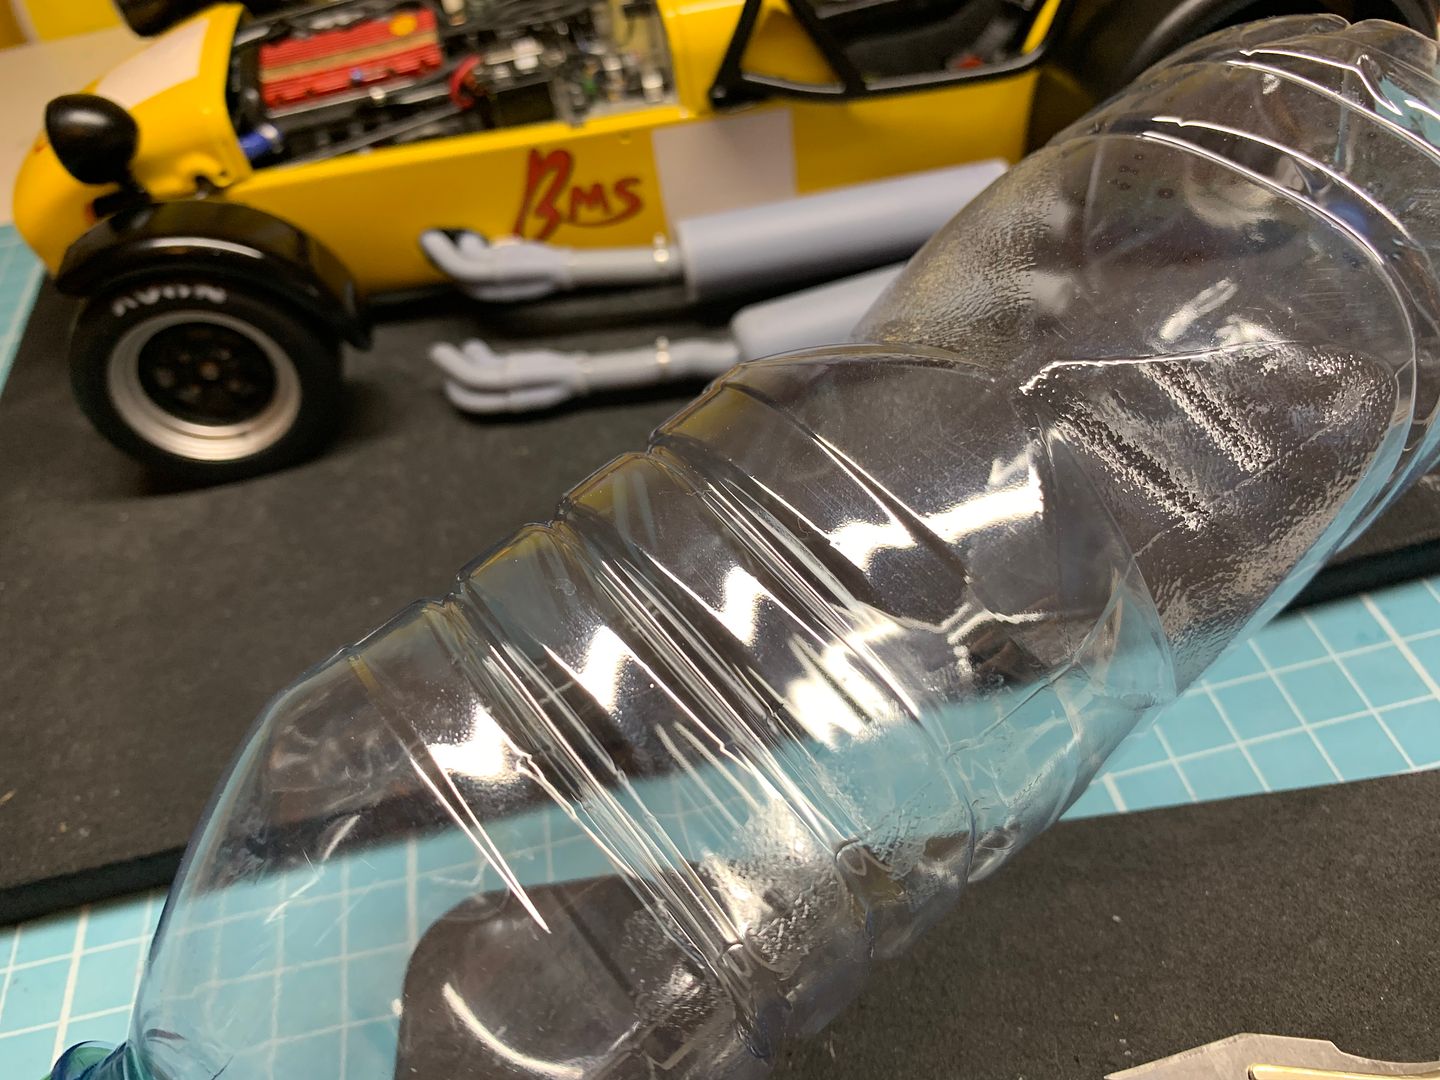
At this point I was trying to be clever with the clear screens - there is a very small lip at the top on the real cars - I figured I could make this by using a section cut from a water bottle - I reckon you could find any canopy, headlight cover or curved window 'somewhere' on some of these curvy bottles...anyway, I found my section - but when I came to cleaning up the edges I discovered that these bottles and laminated - 2 layers! Same thickness (as opposed to the graphic sleeve some use) - and these were separating - so I dumped that idea and went back to flat - the compound curve would have made bending the corners round much more difficult, so all ok...
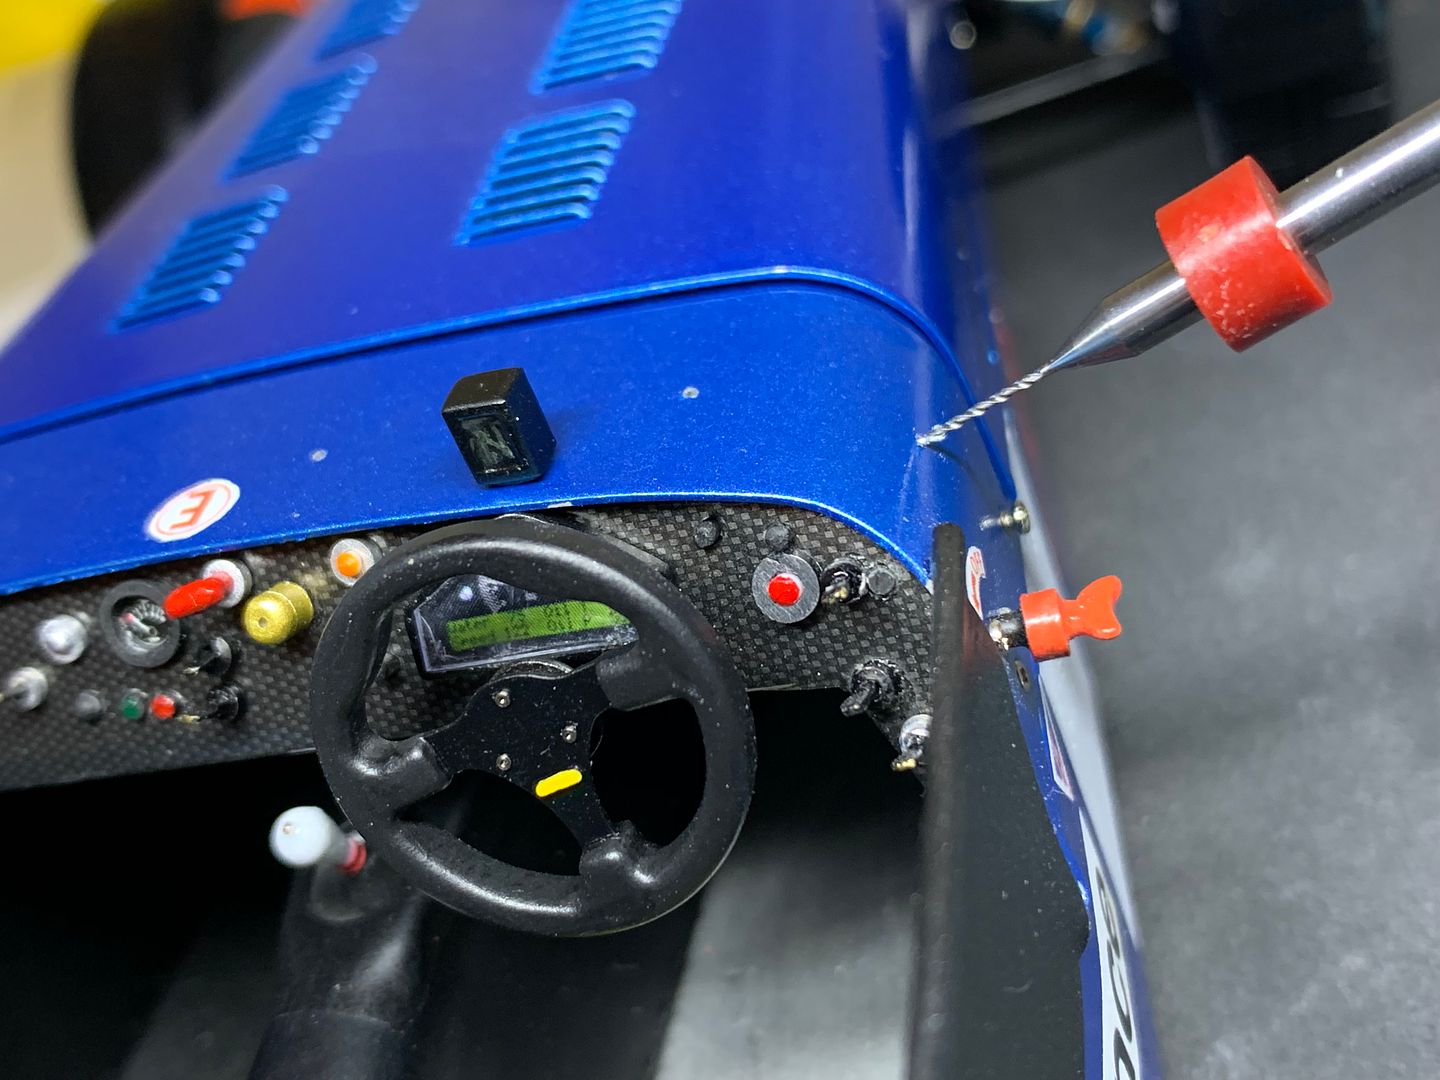
More rivets!
Scary bit - I painted these cars back in 2003 - no idea what auto paint colour I used, so no touch up later!!
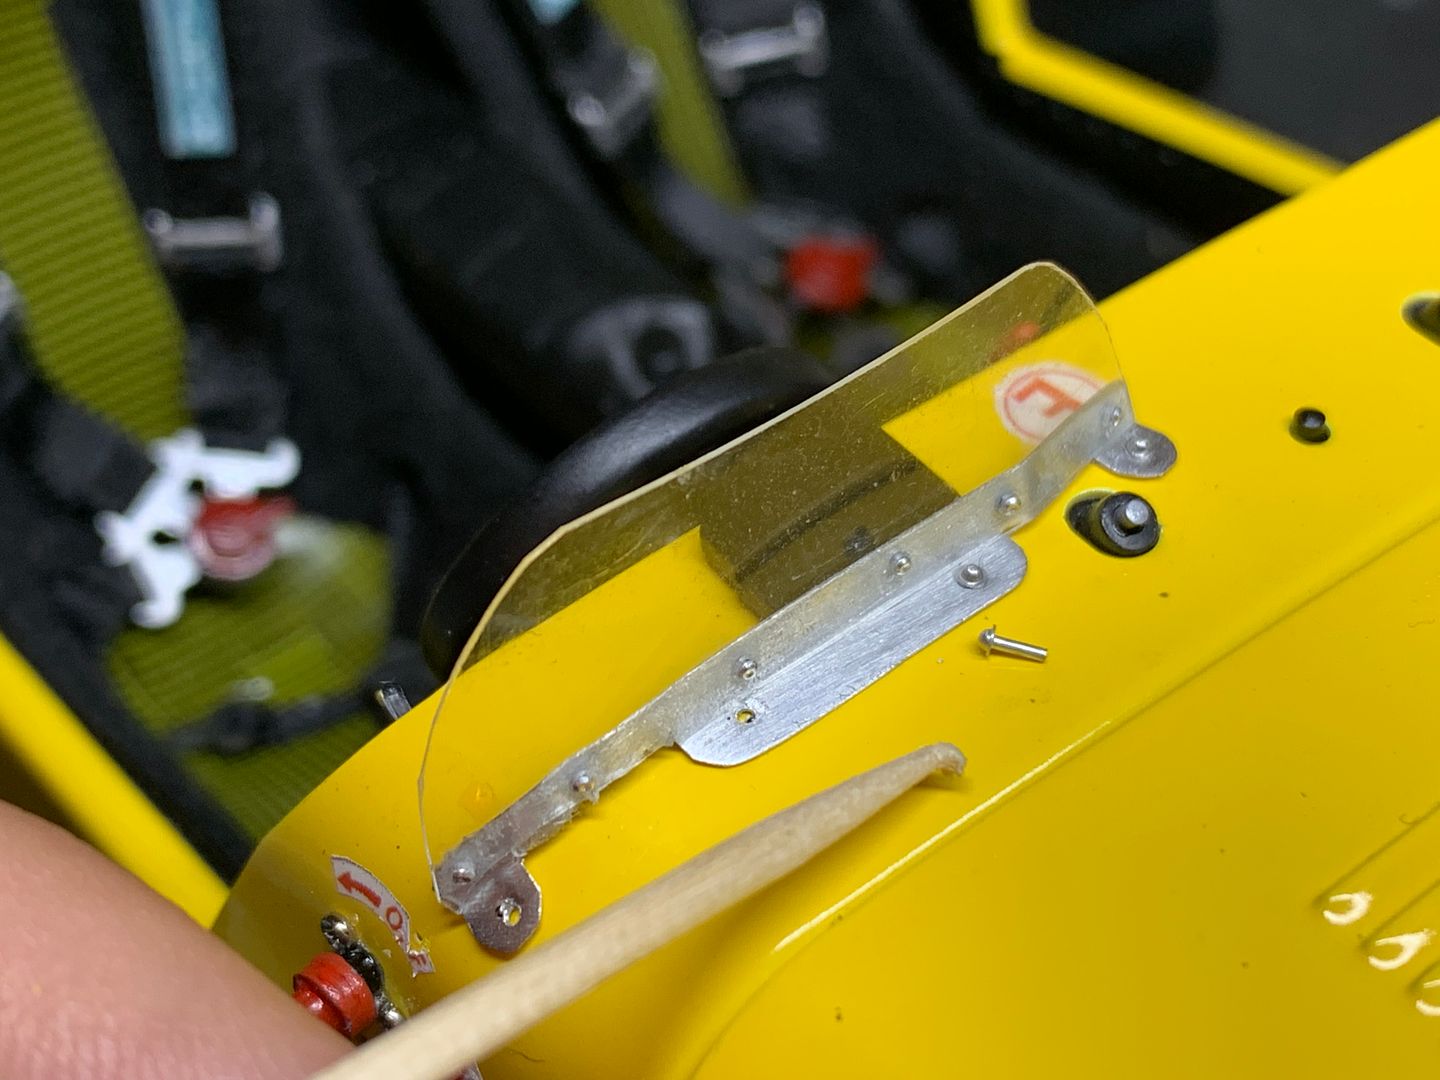
I glued them onto the car, but used rivets to provide a mechanical join as well...
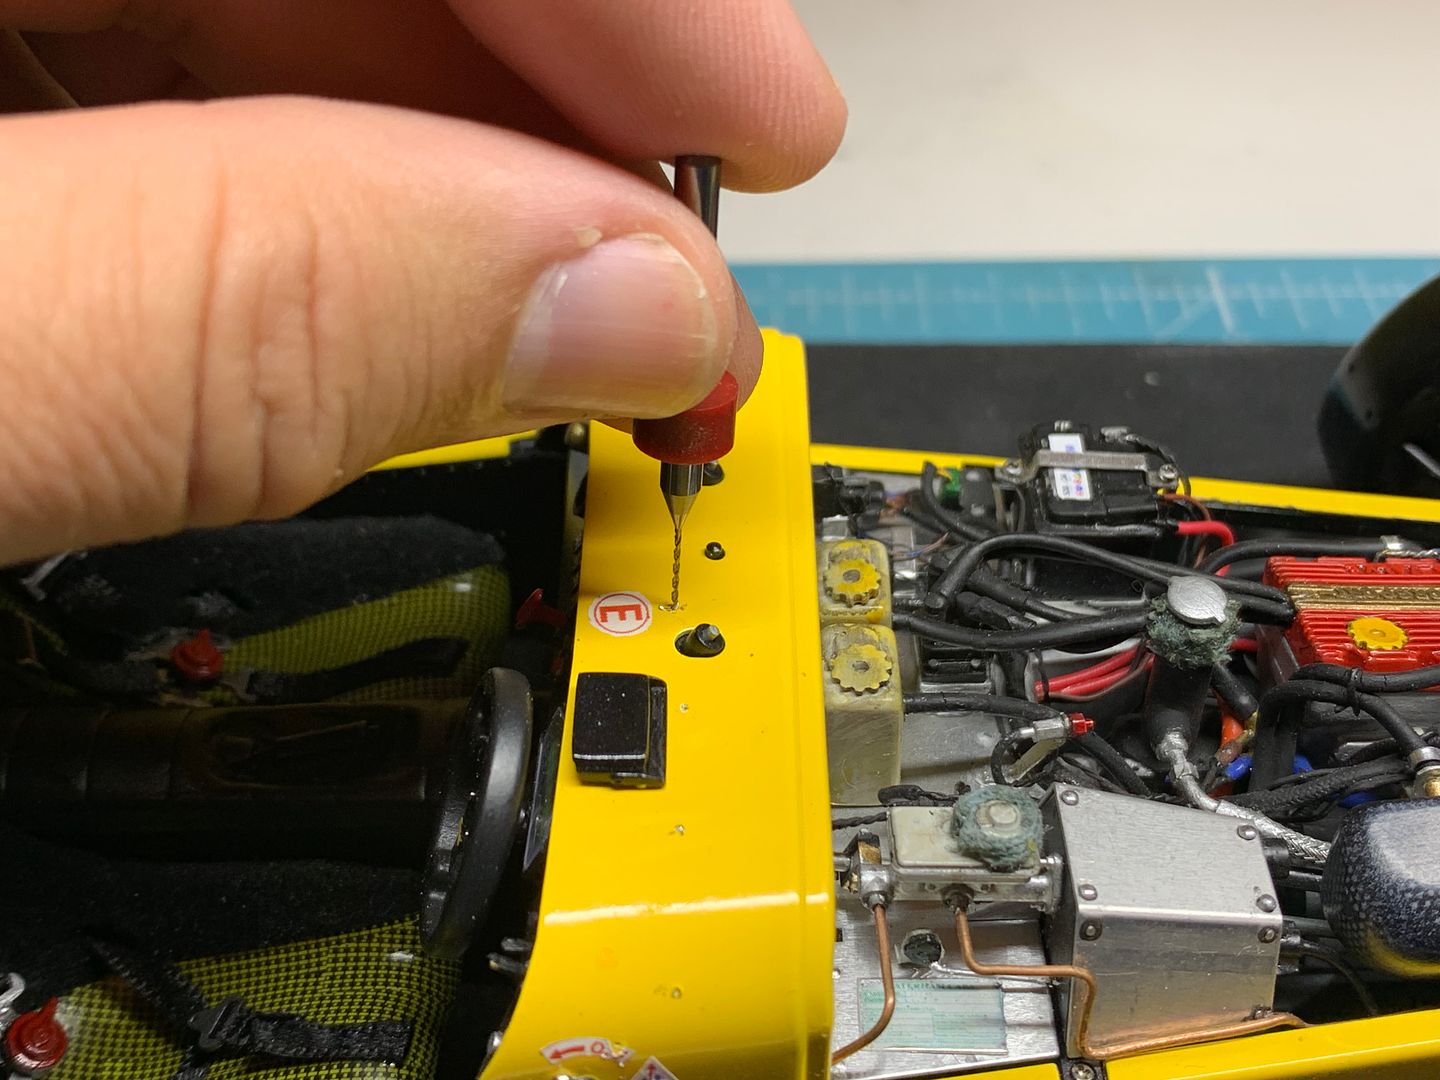
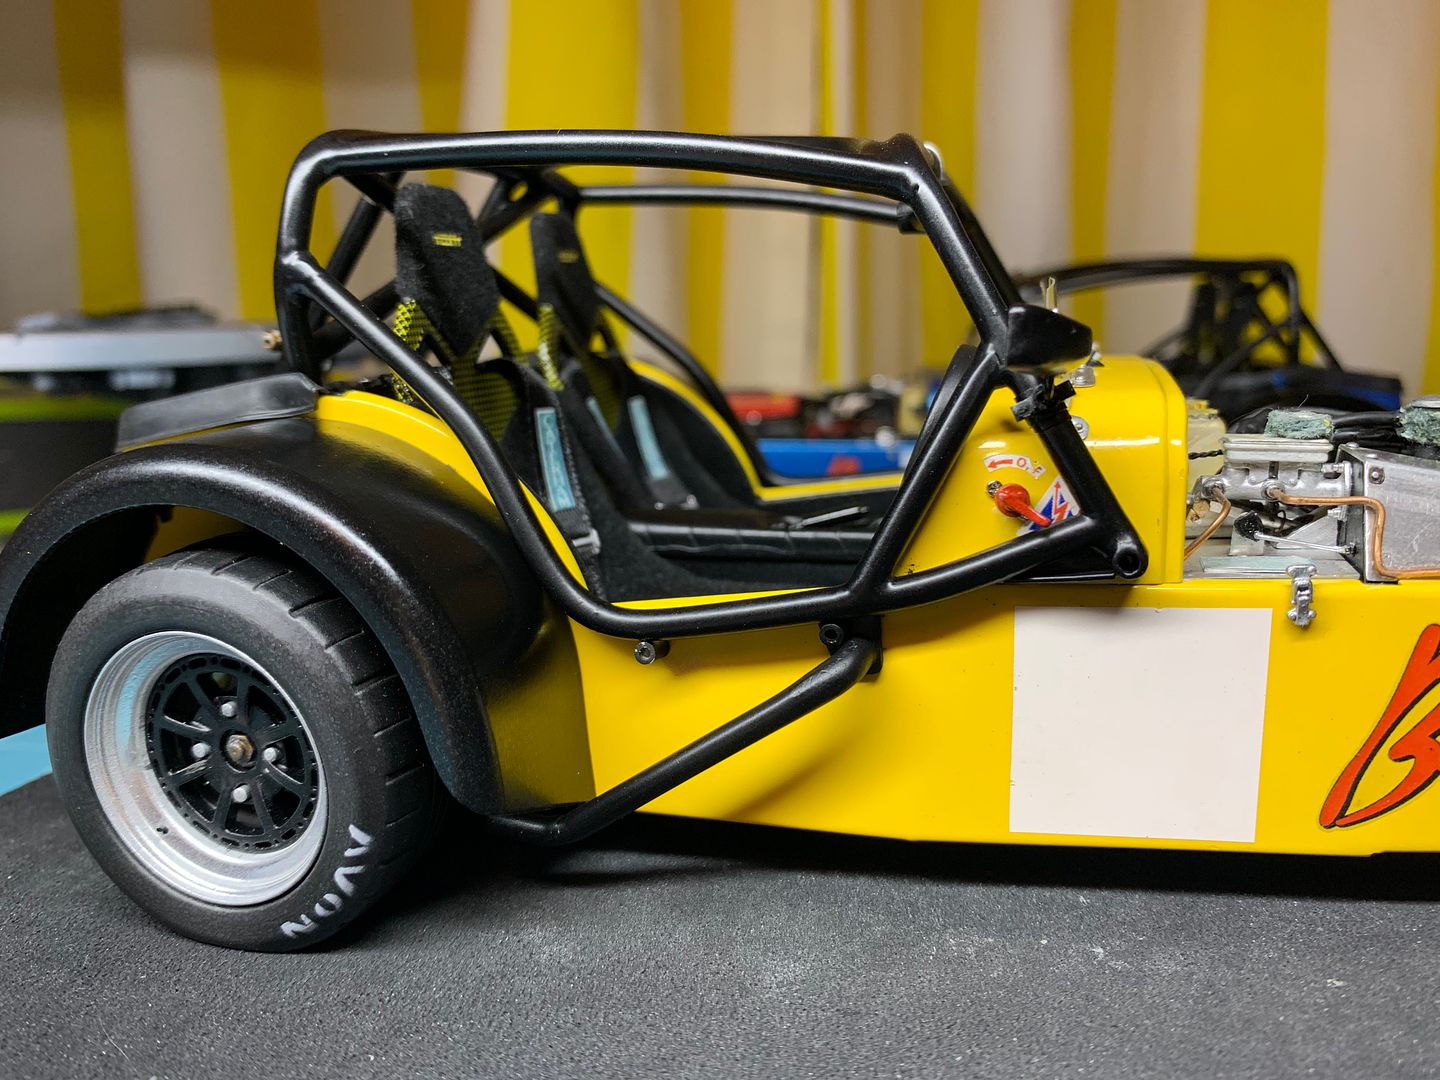
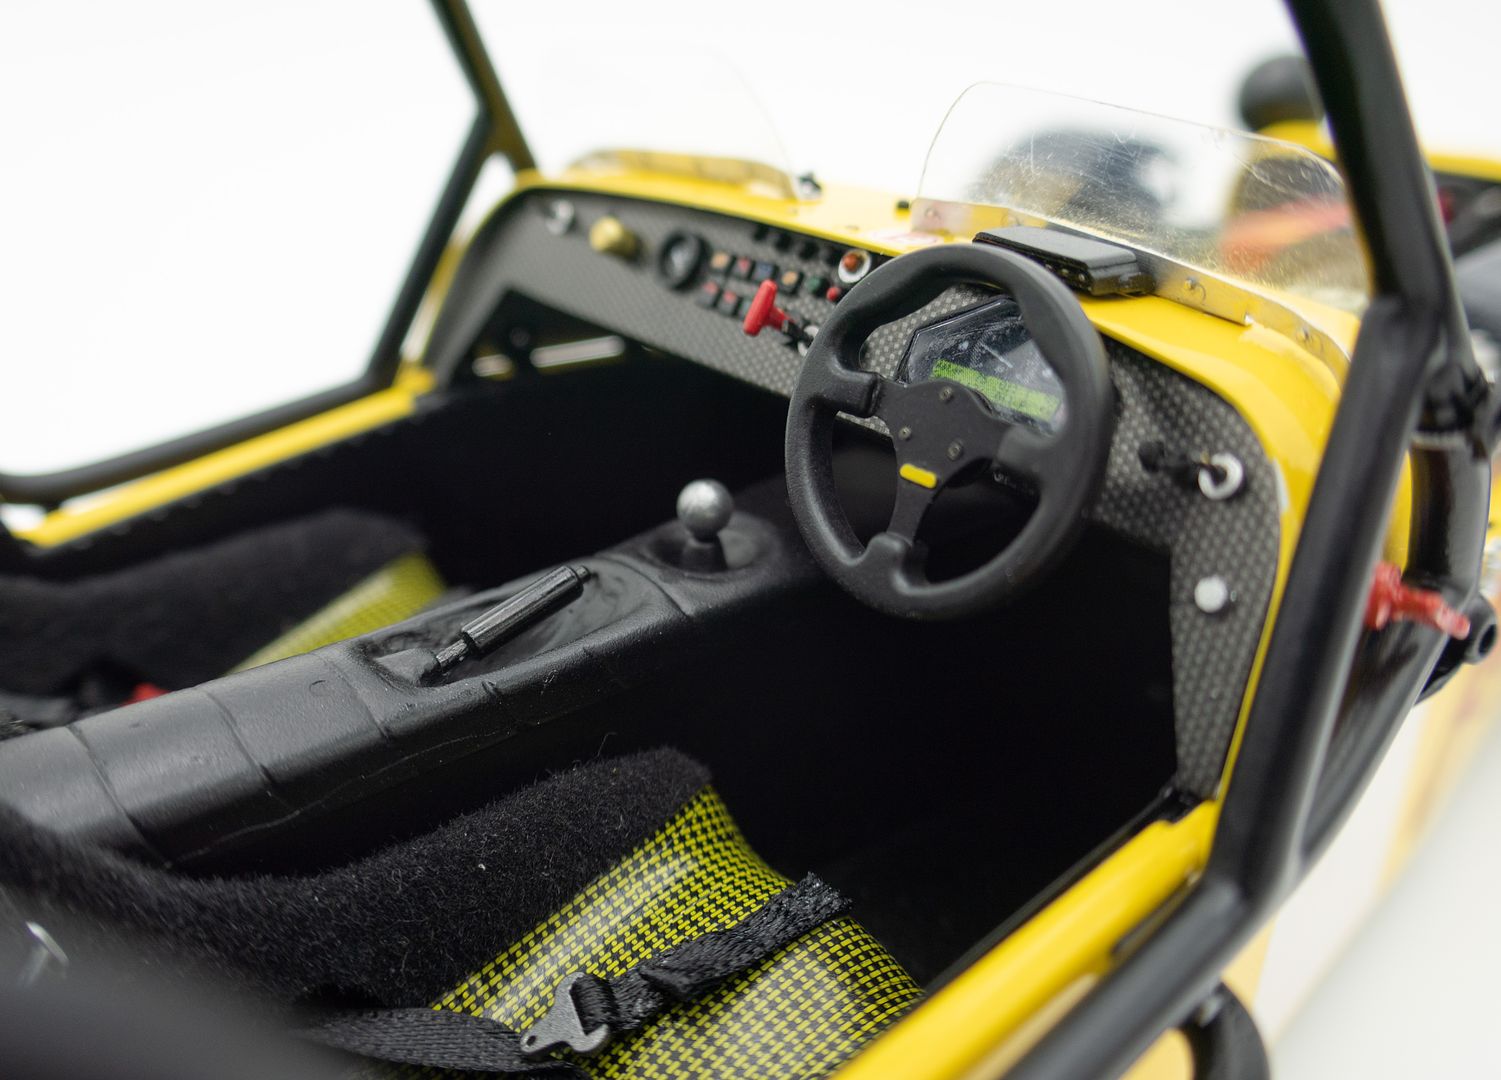
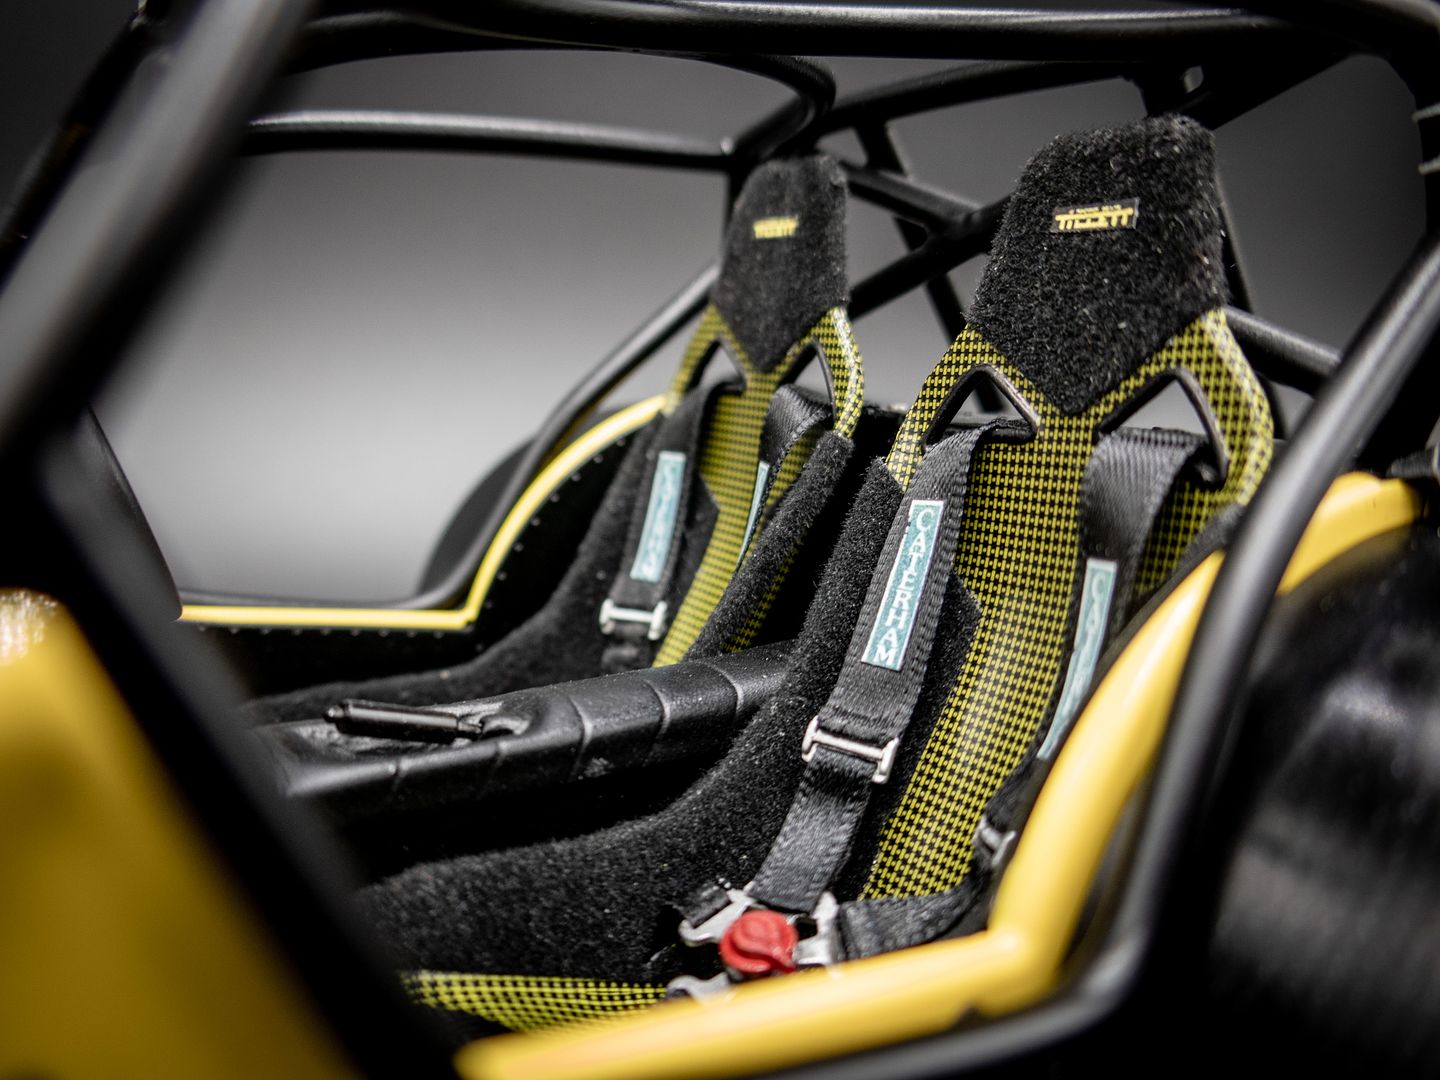
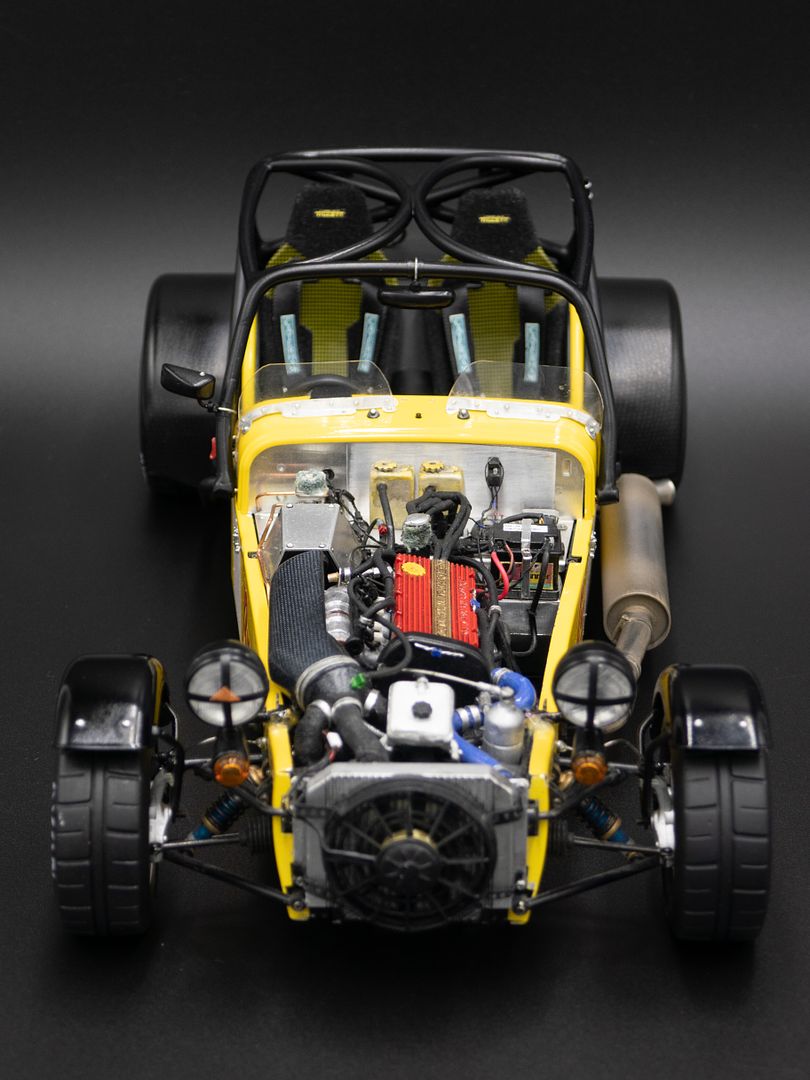
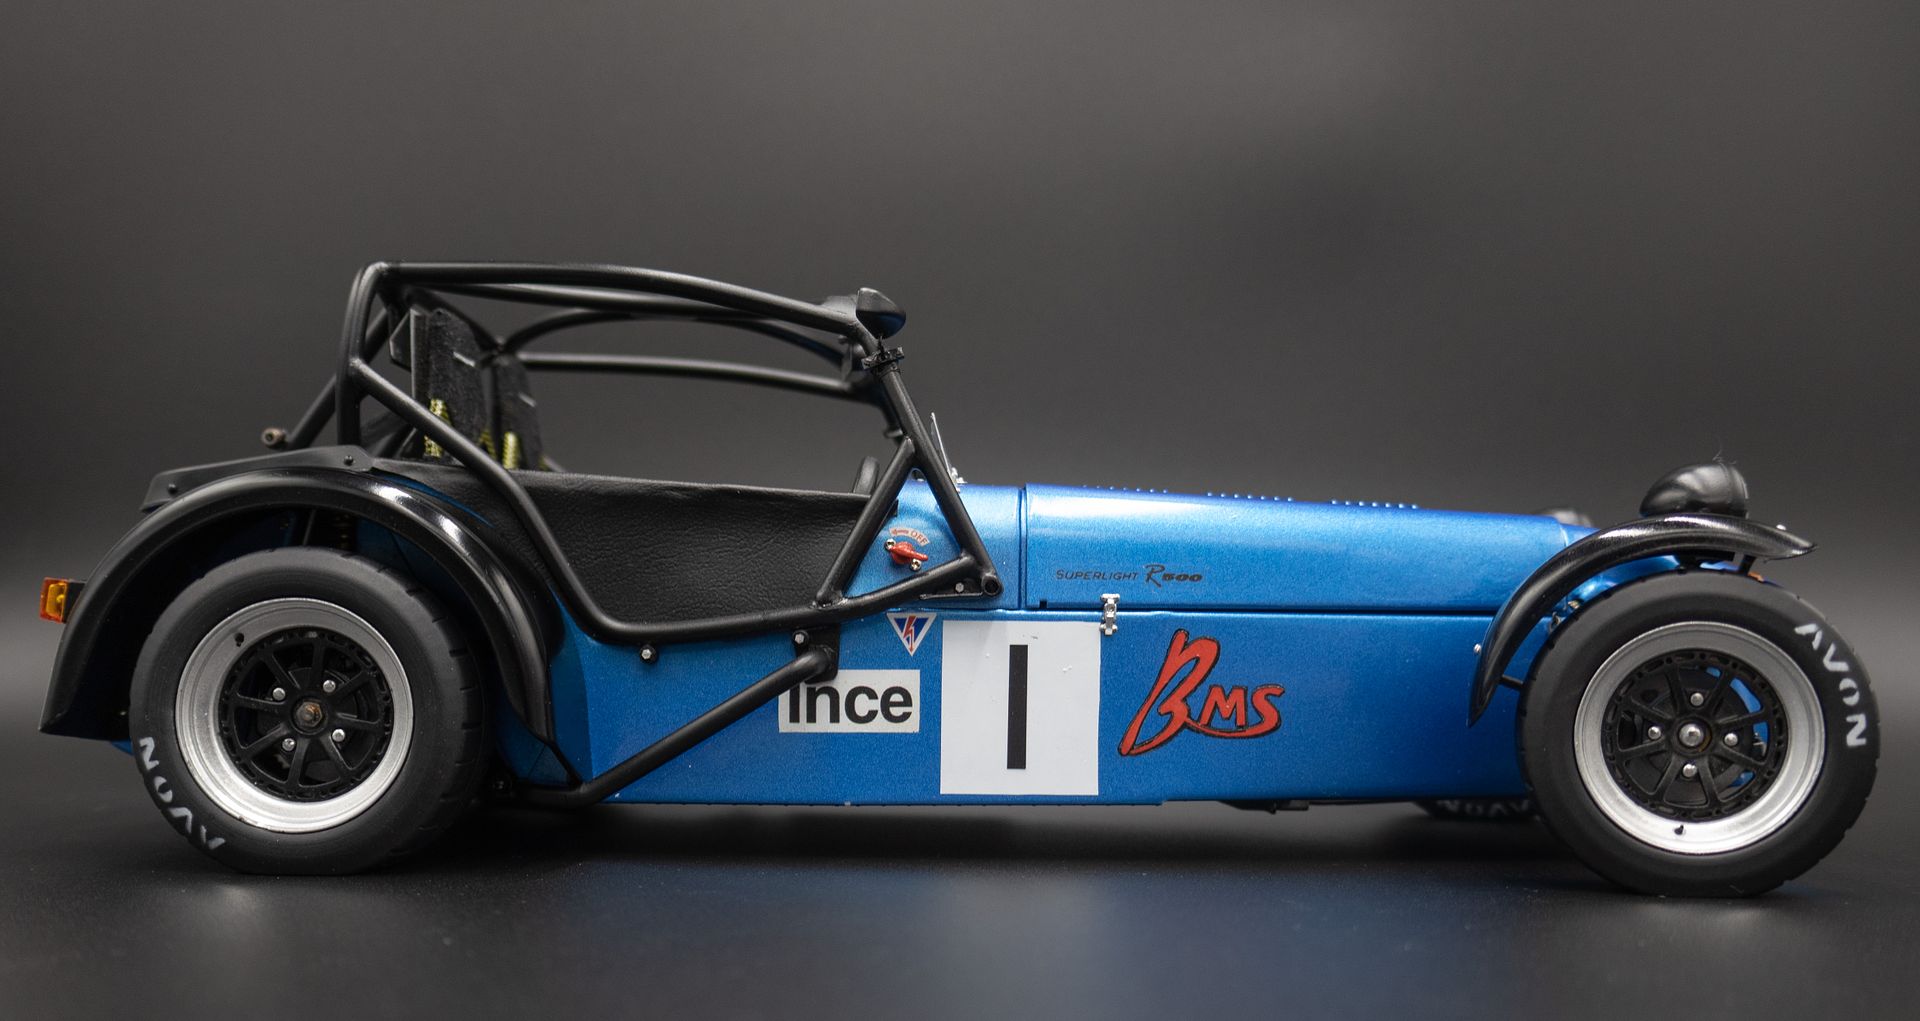
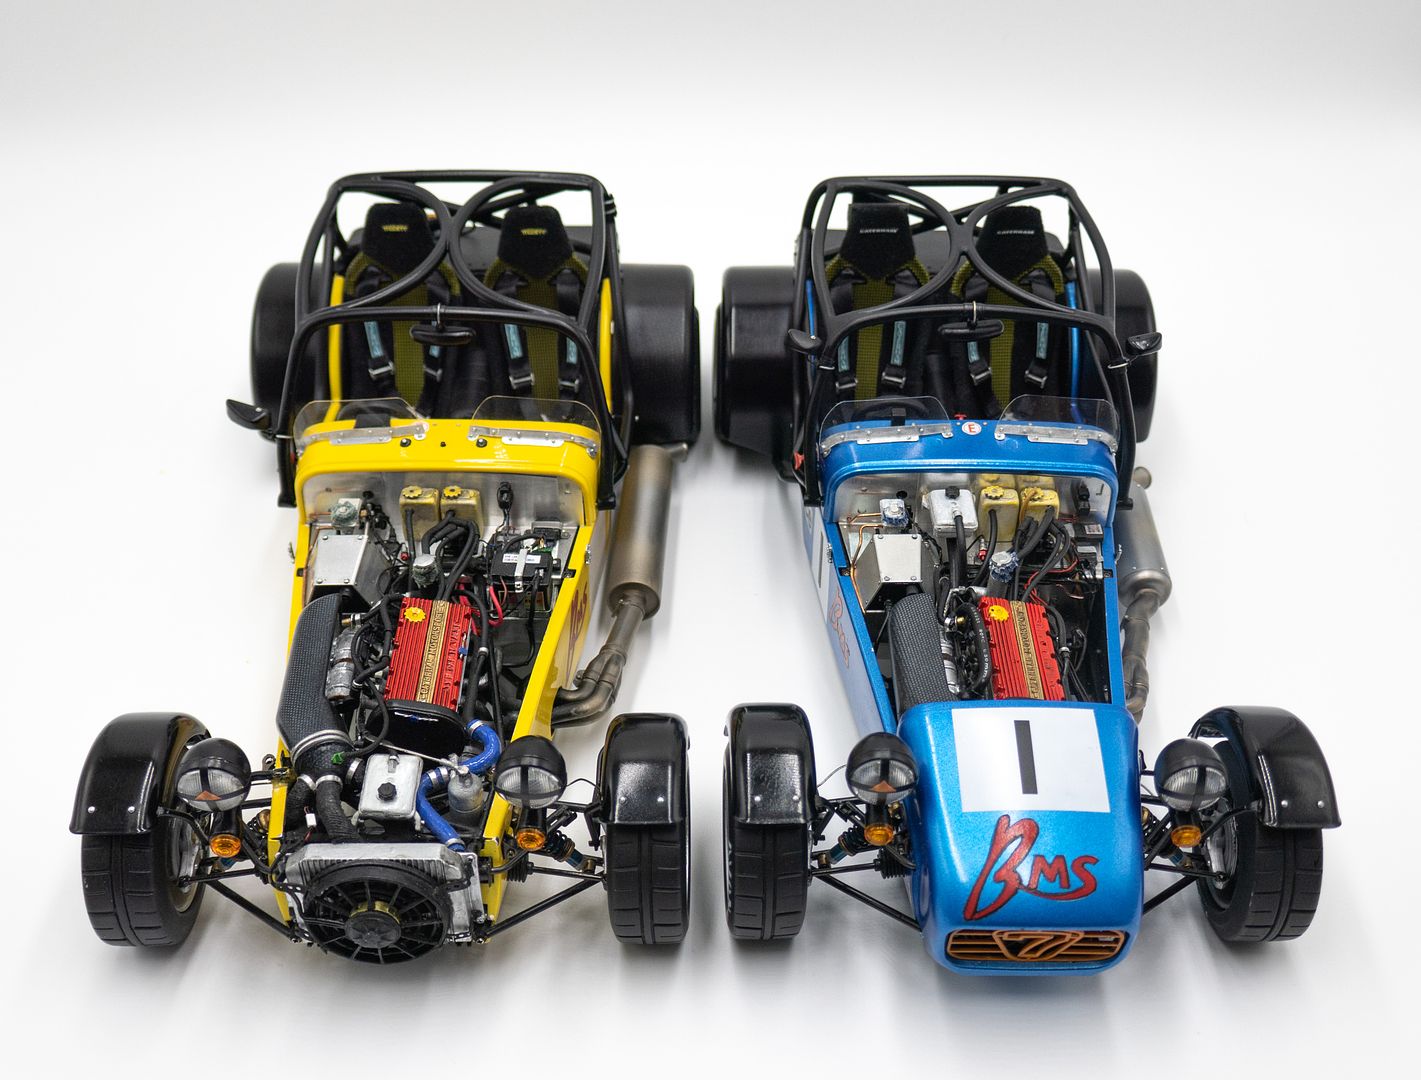
At this point with the seatbelts and screens done, I could finally glue the cages in place!
Another part of the cage that I had almost forgotten about was the drivers side-impact protection...
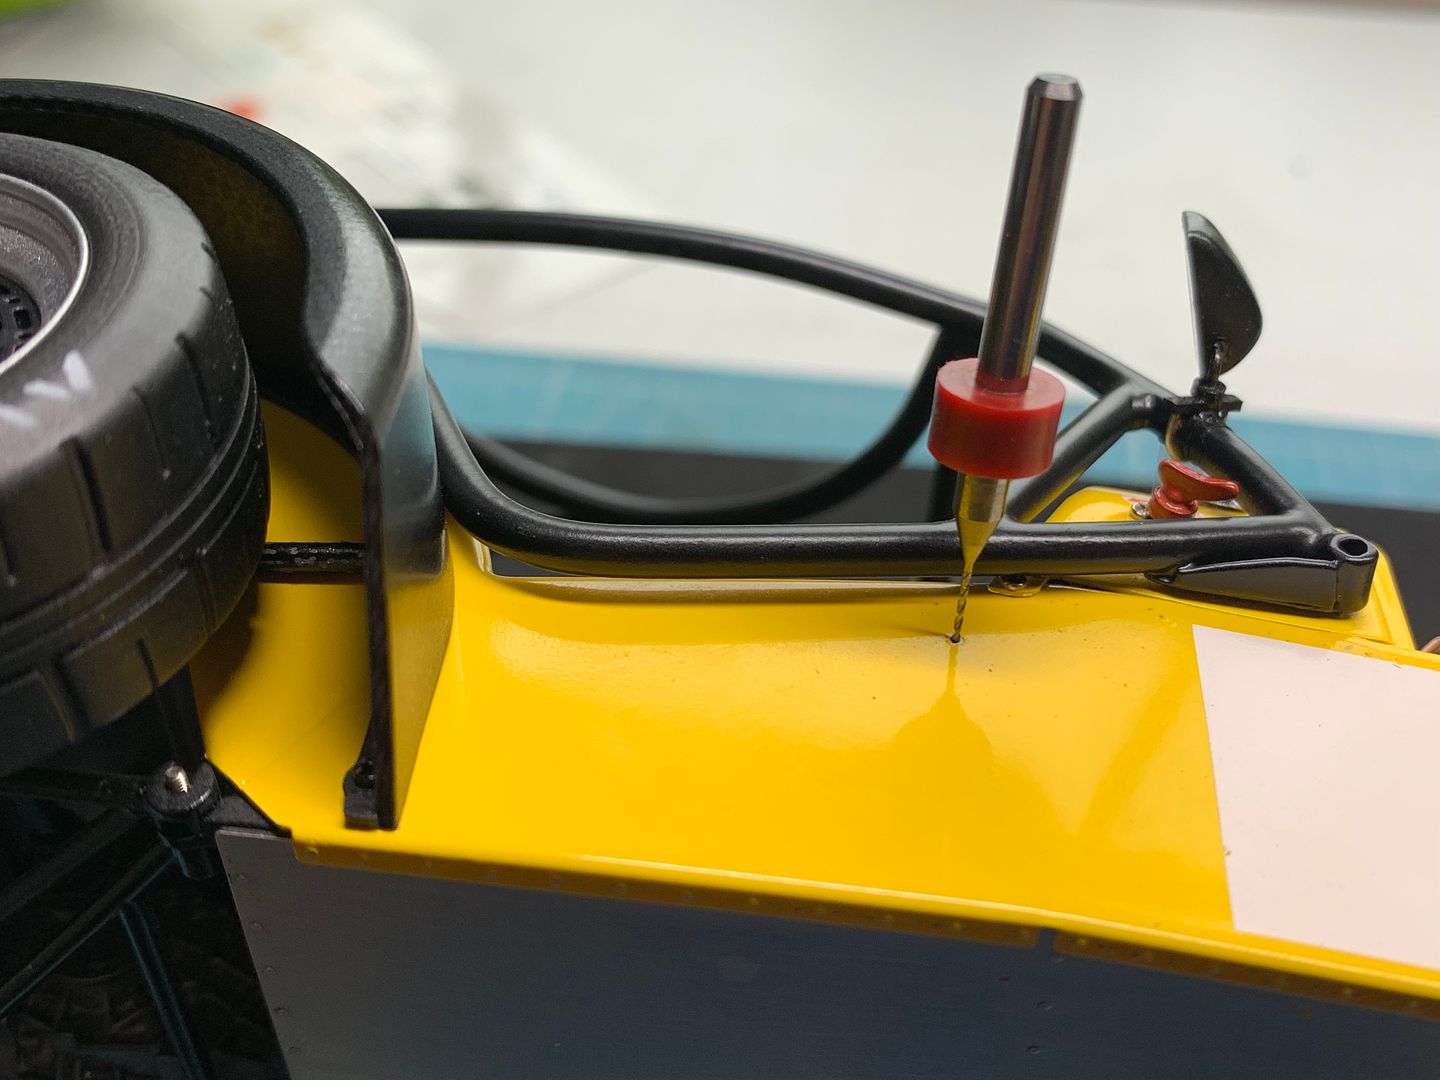
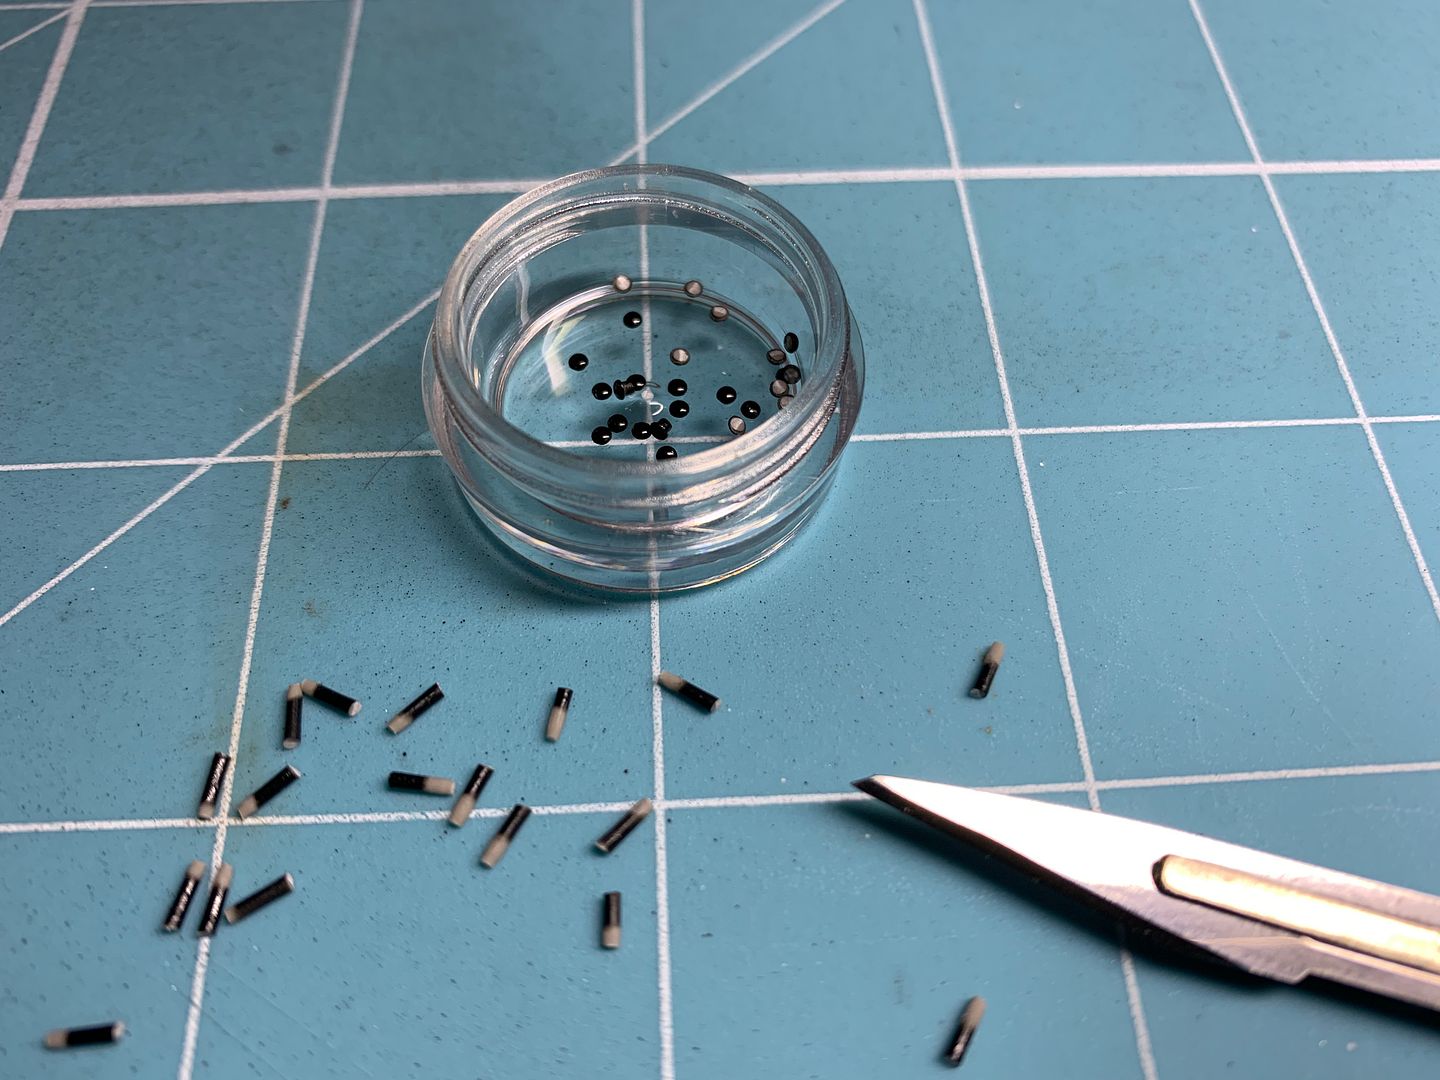
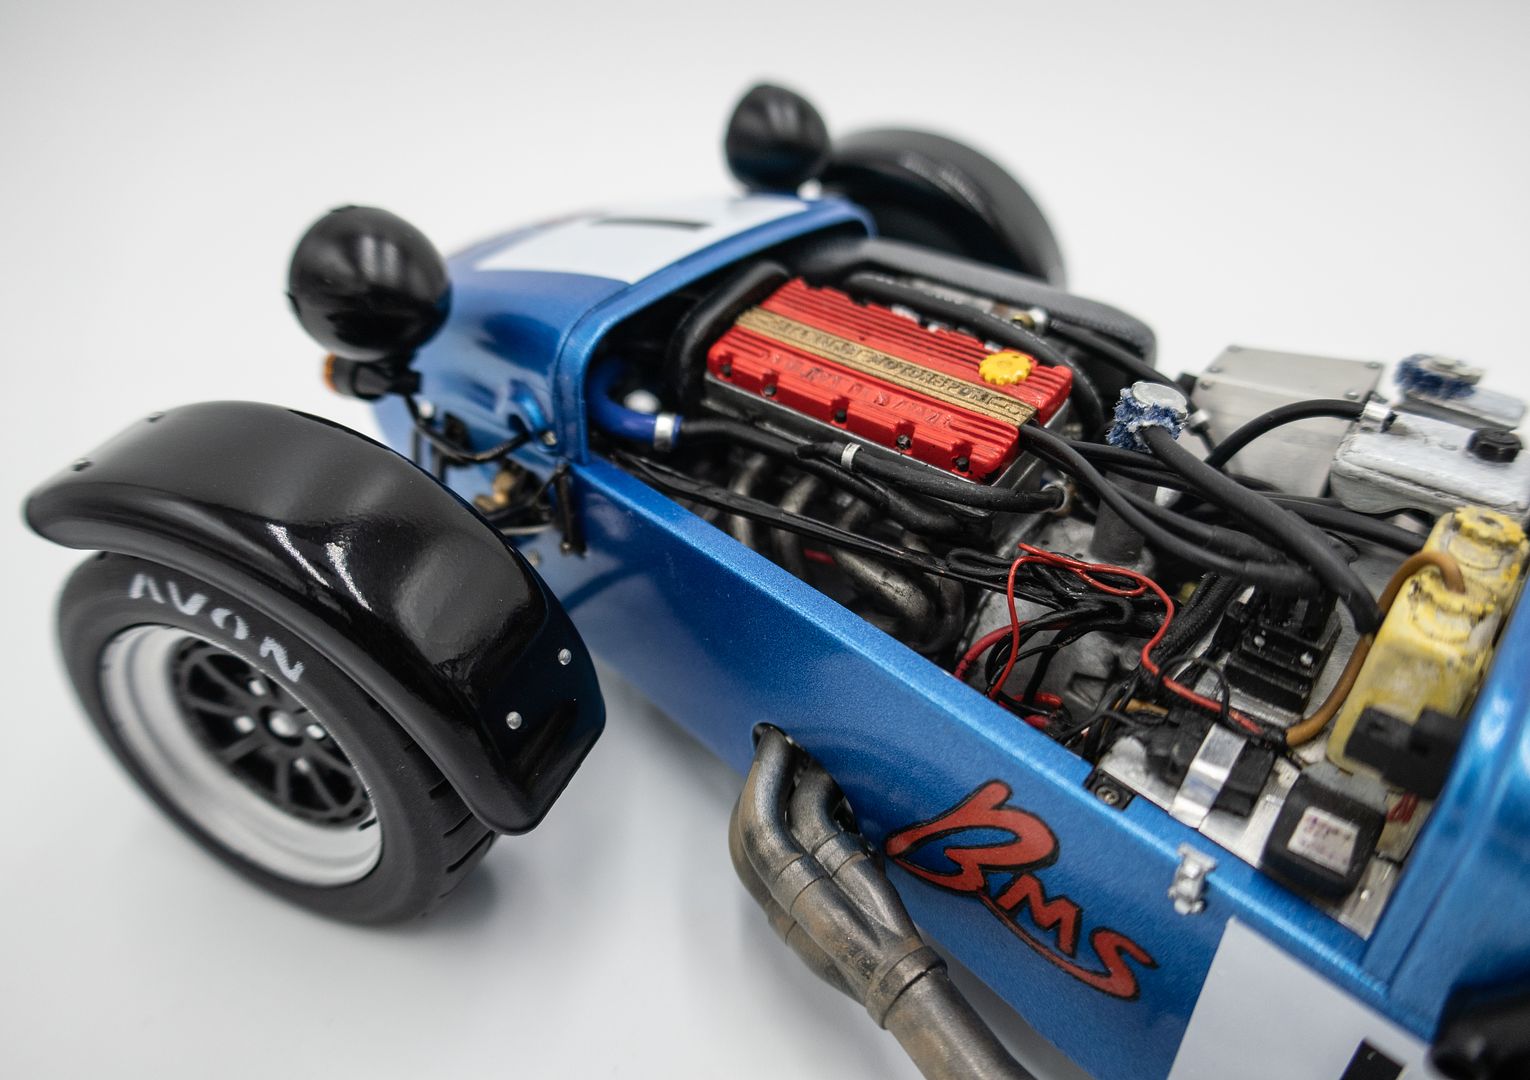
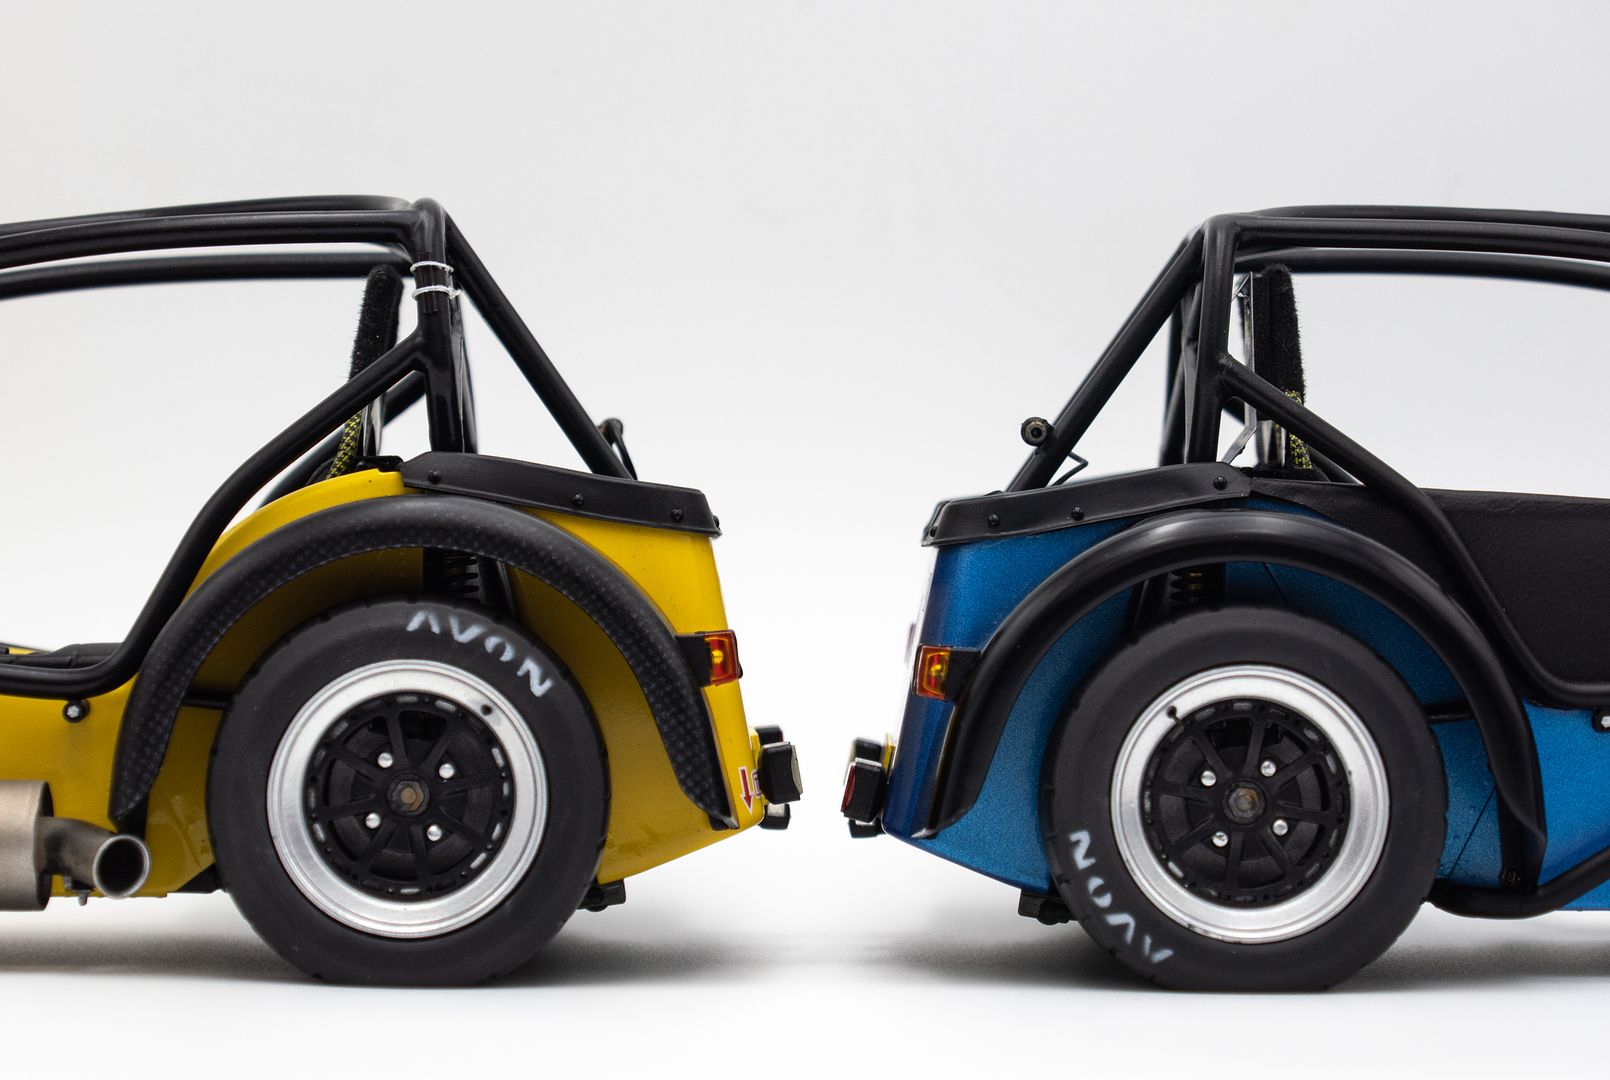
Getting close now - all these little tiny 'quick' details take waaaaay longer than you think they will take...starting with the 28 poppers to fit to the boot covers. I painted plastic rivets and then cut just the heads off to stick directly to the 'rubber' covers. Pins would have also worked, but more of a pain to cut and glue...

Some poppers on the scuttles...
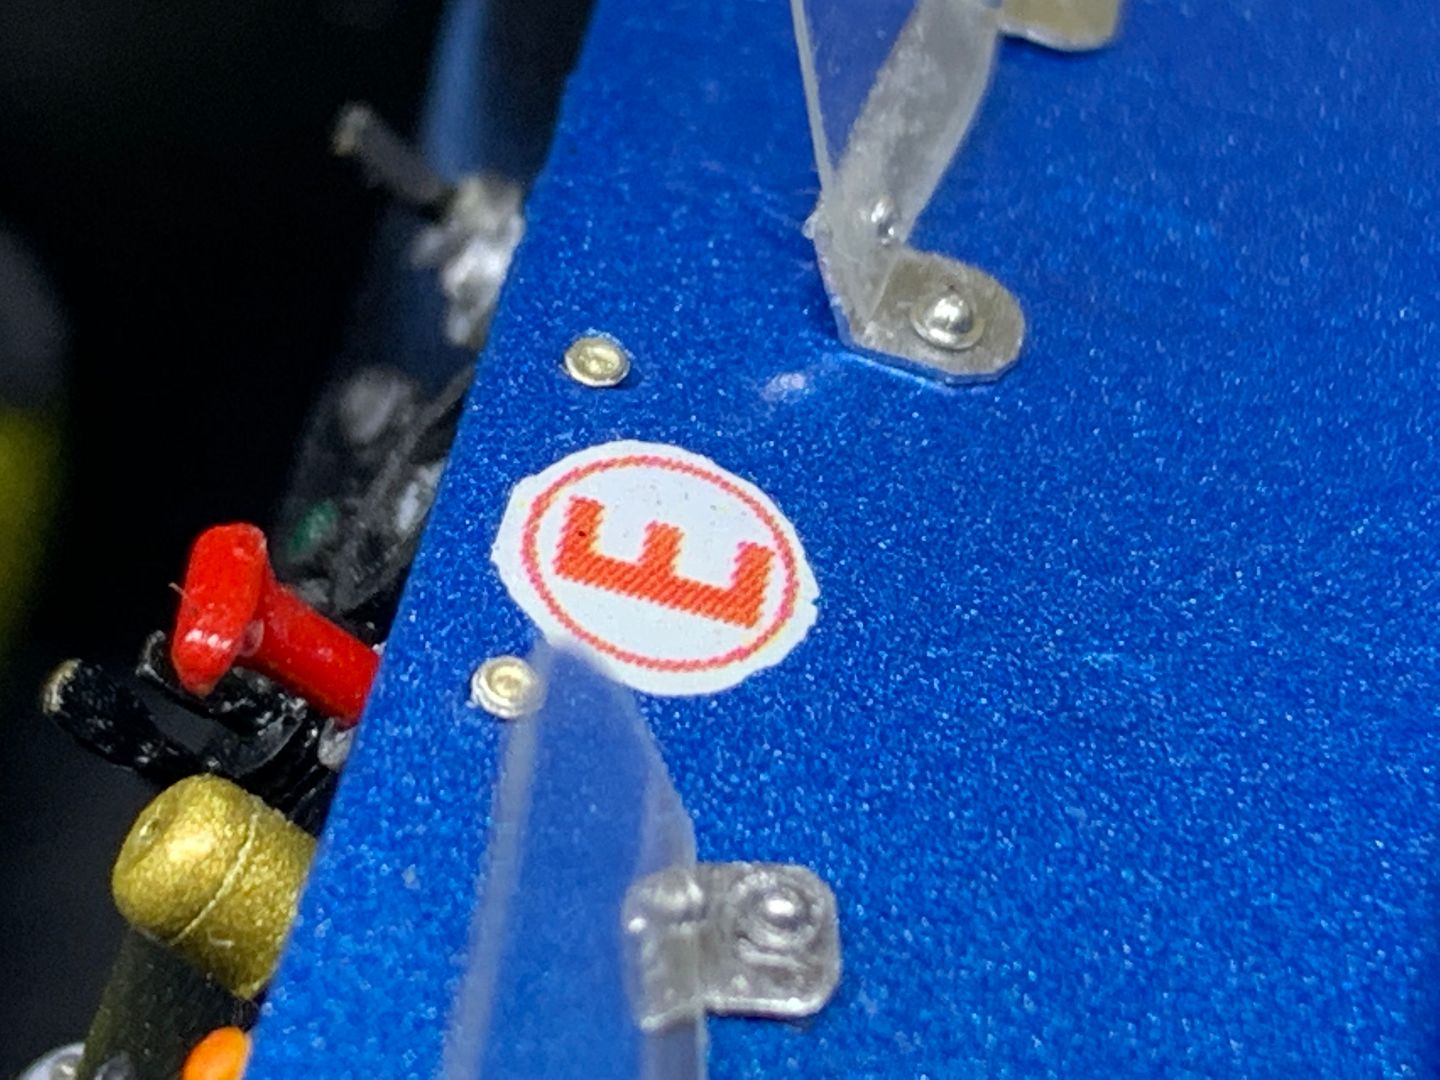
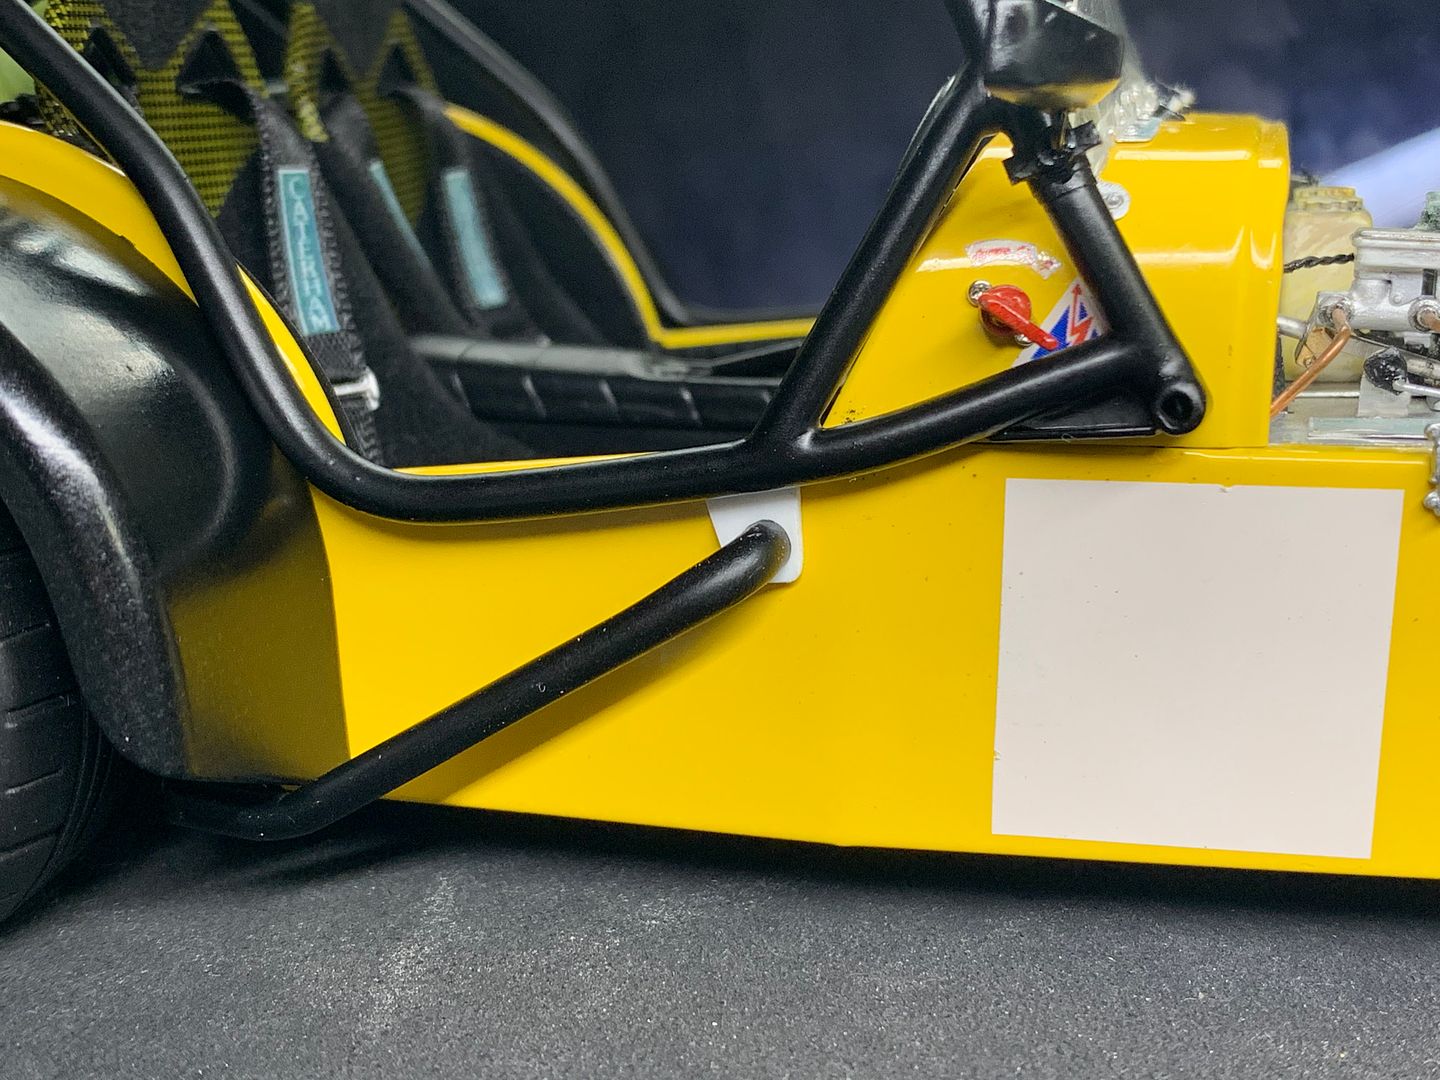
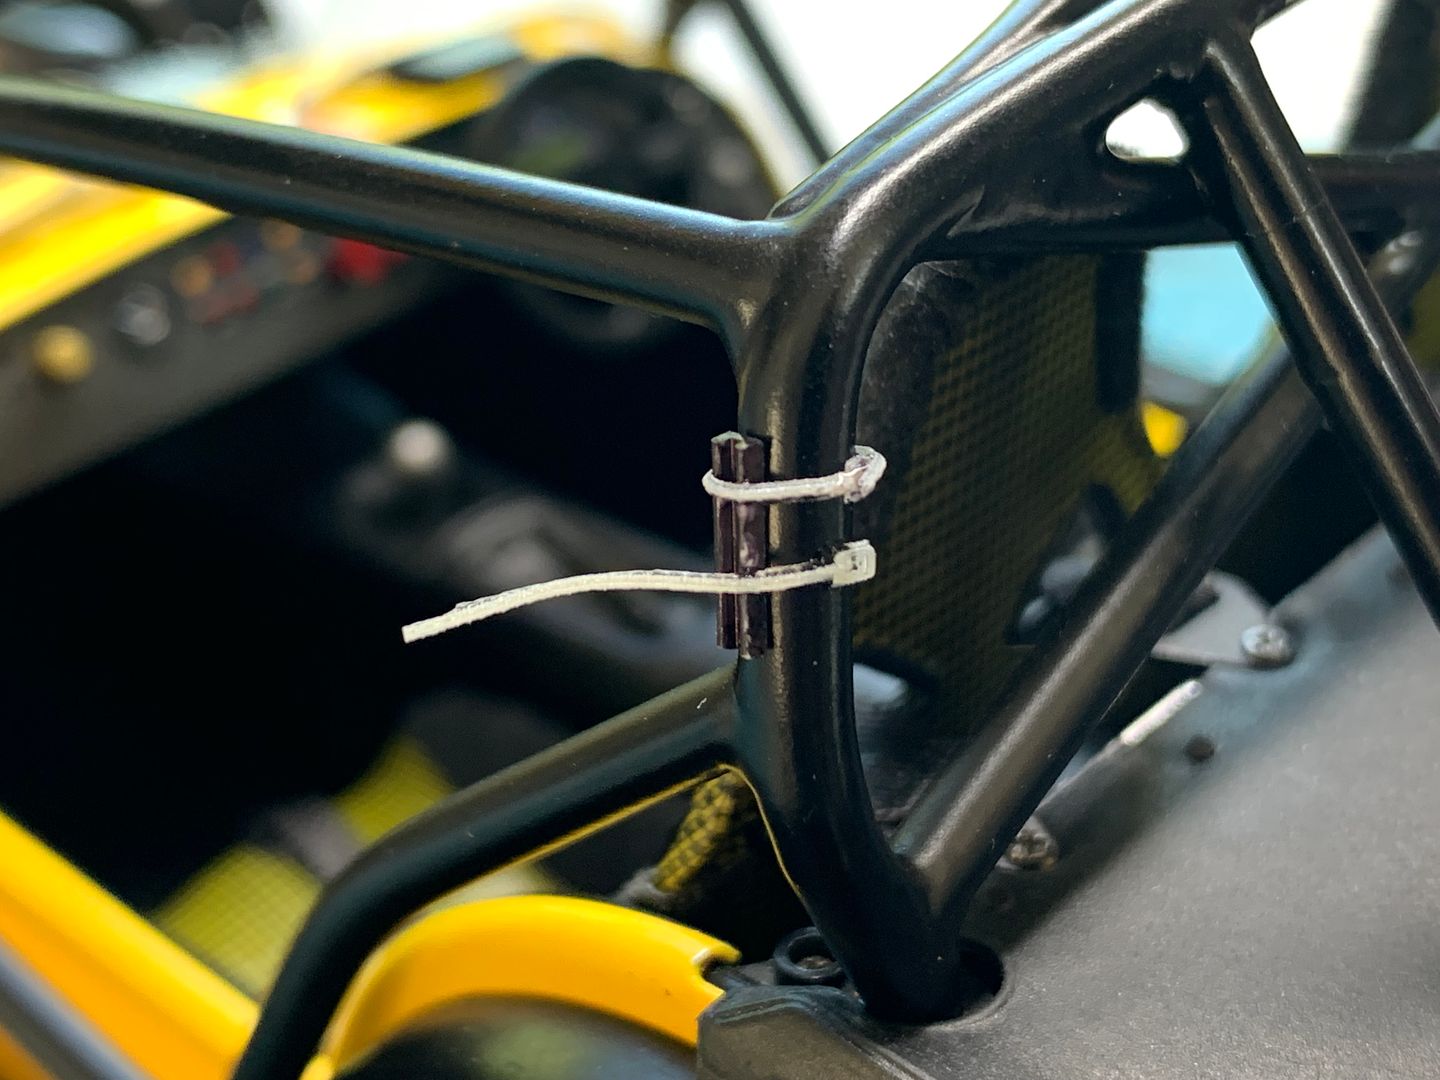
Noticed a small bracket on the yellow roll cage - so that had to go on, complete with cable ties!

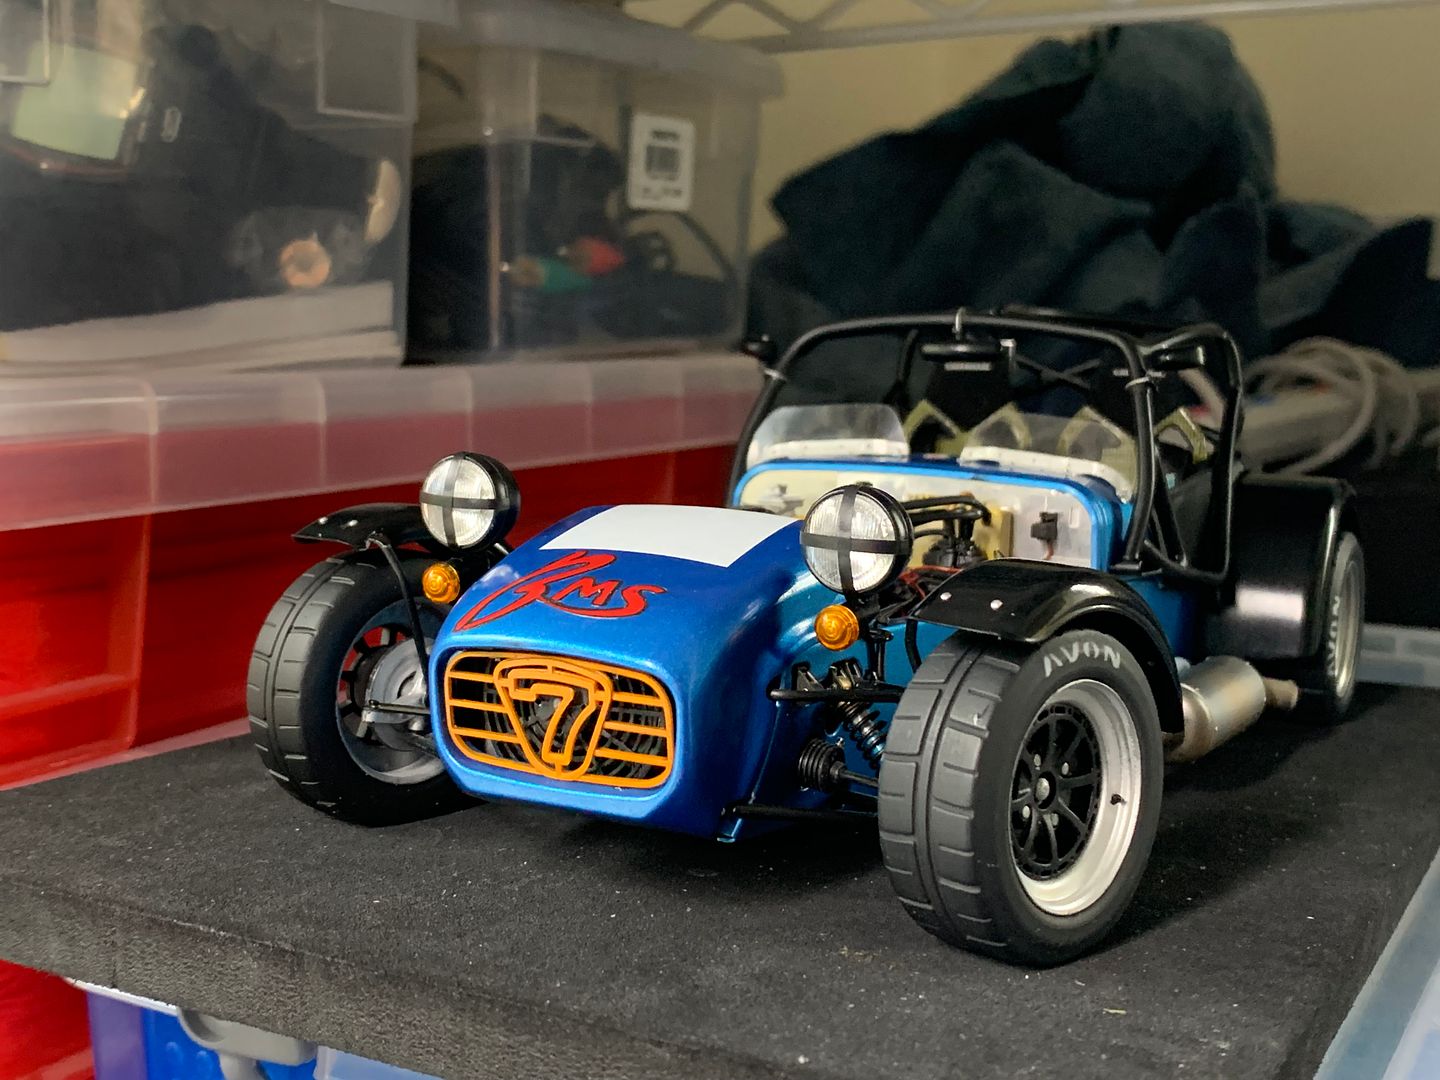
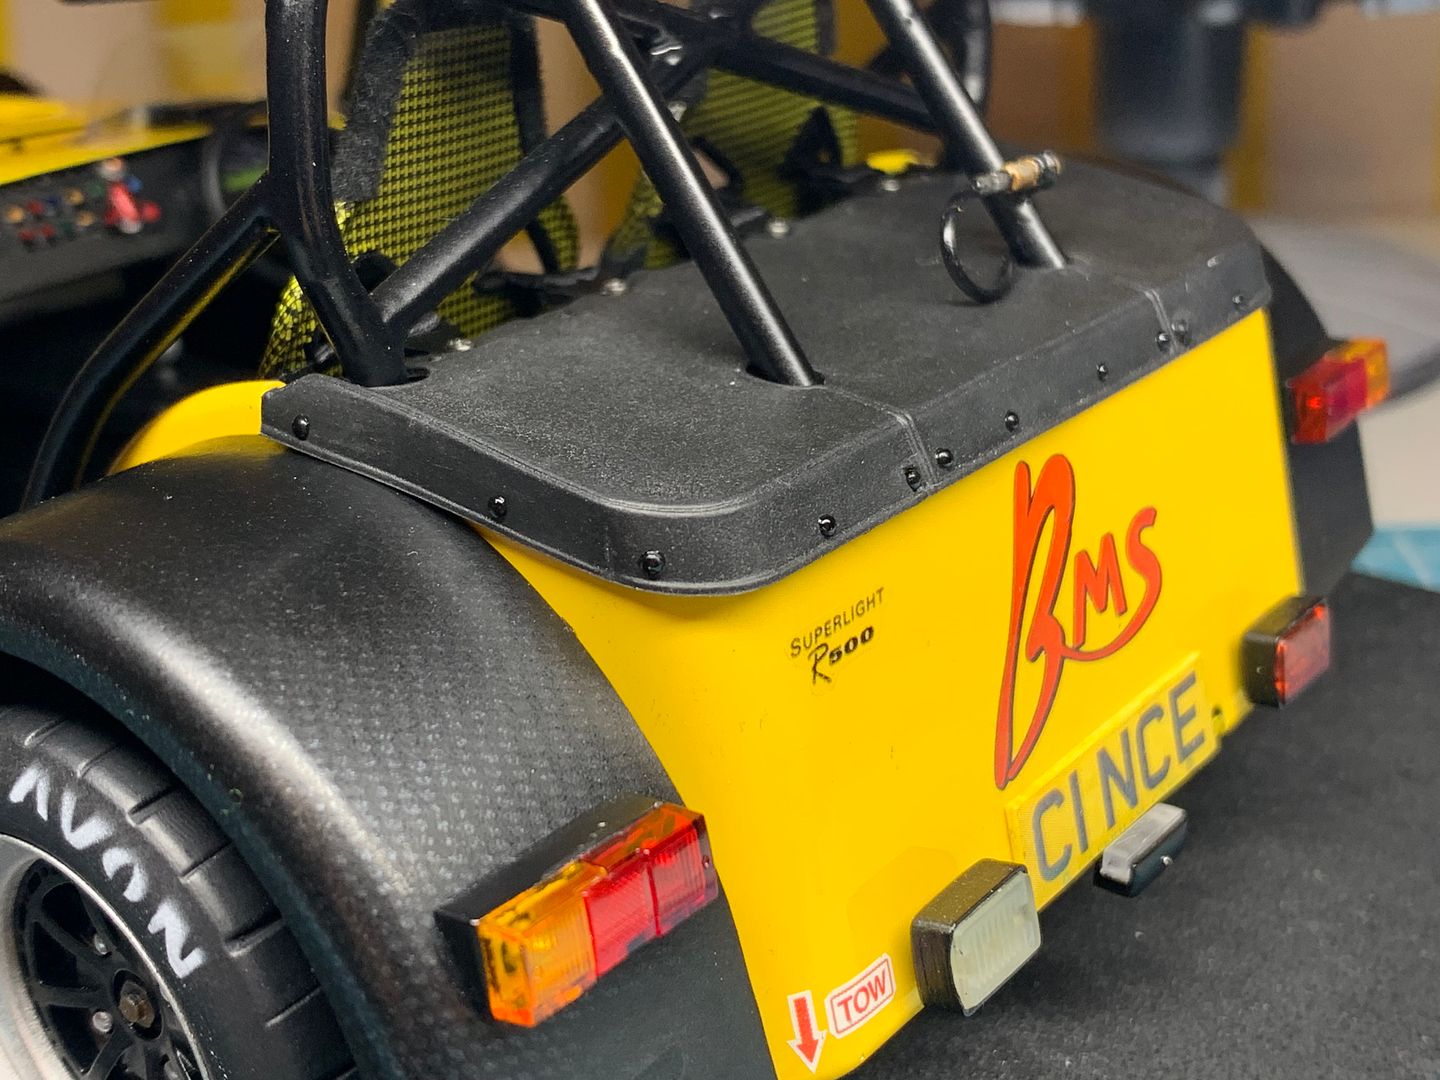
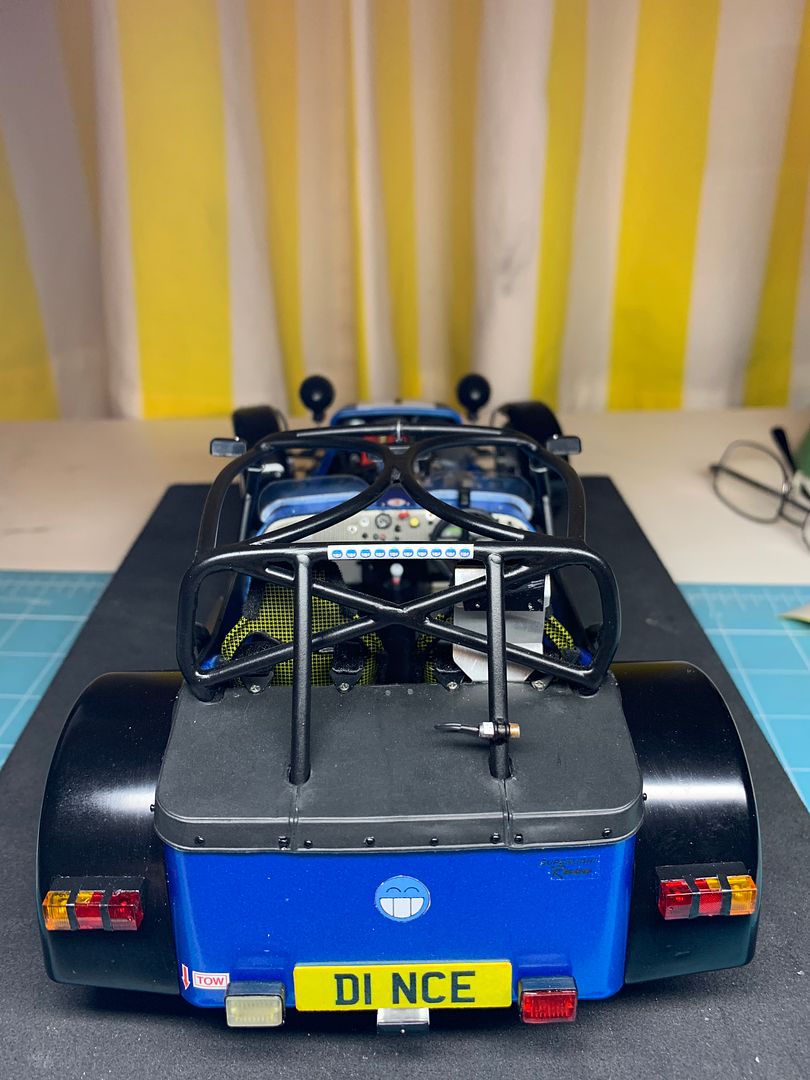
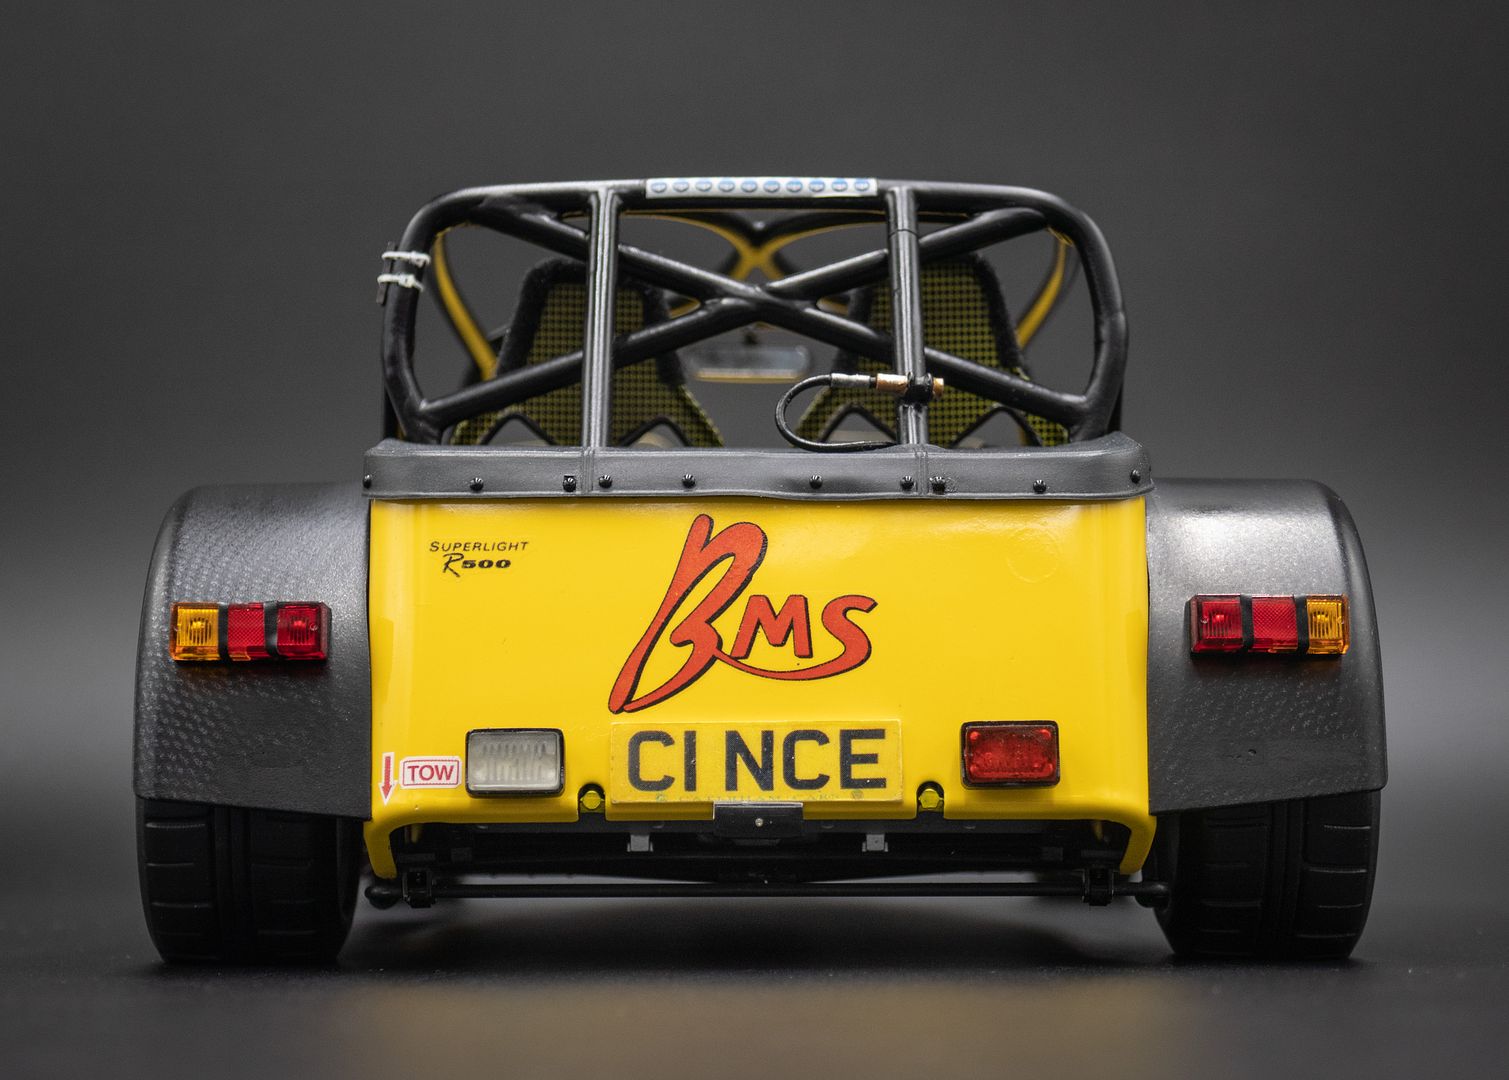
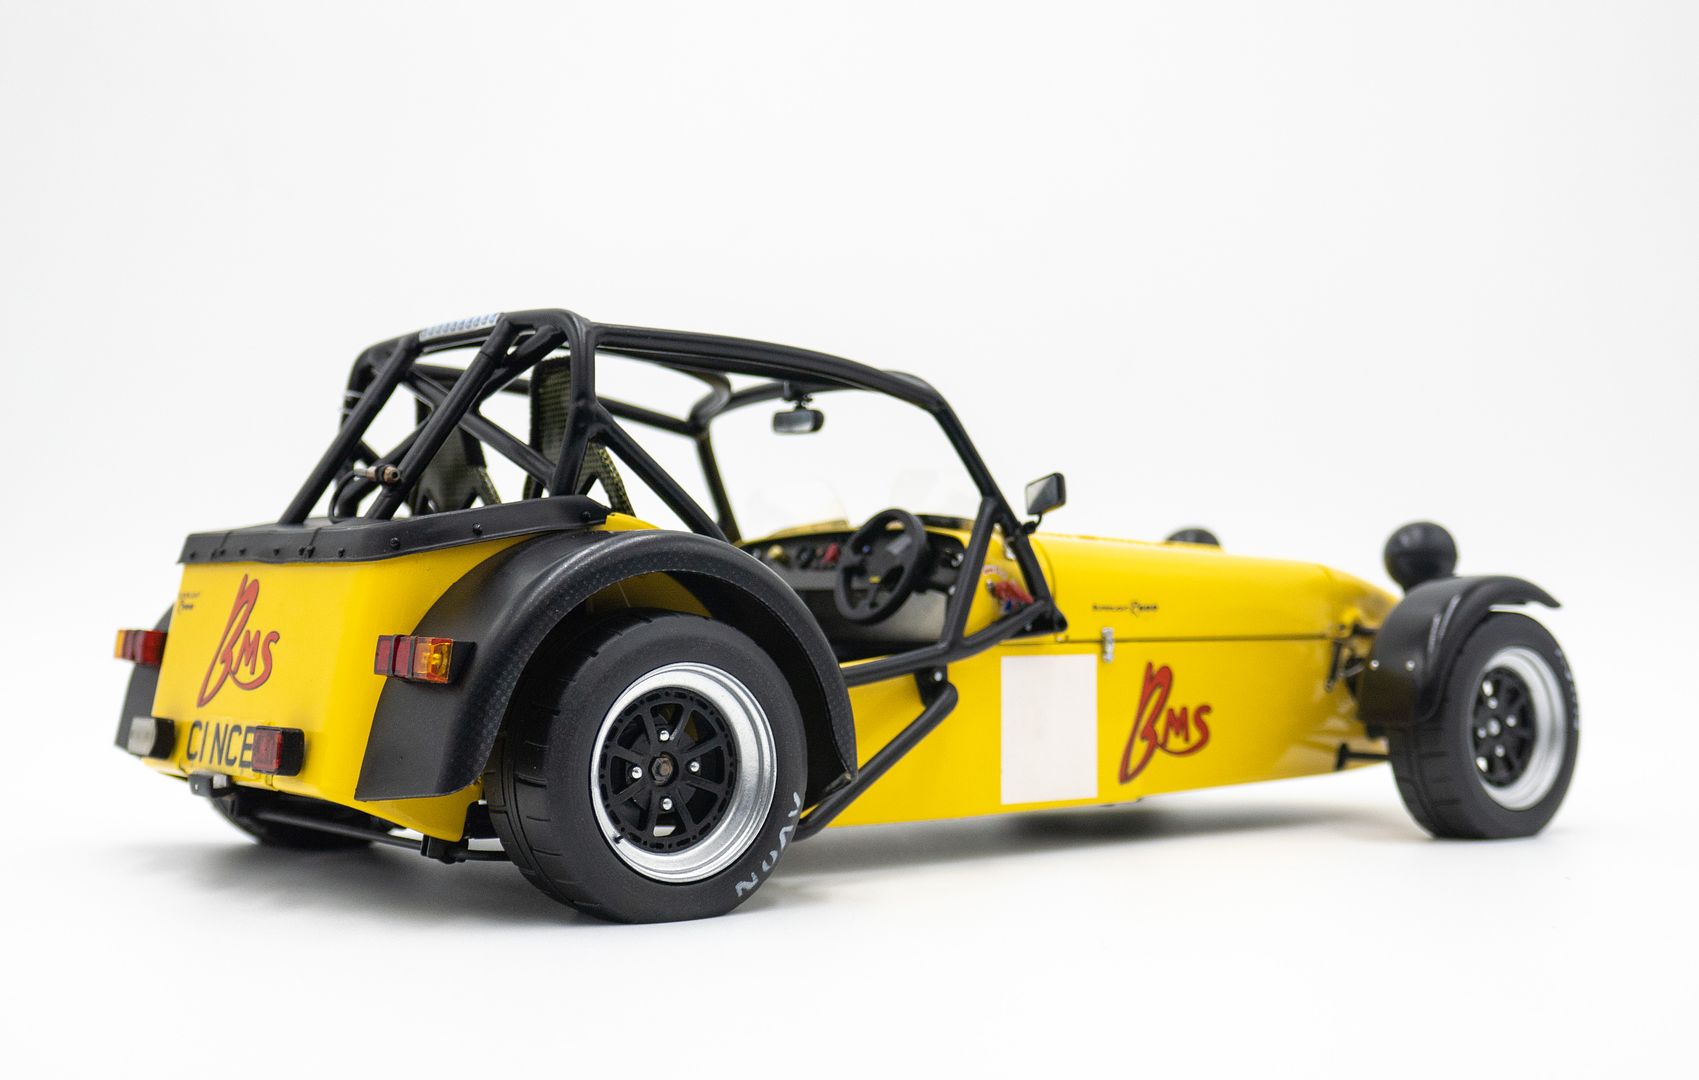
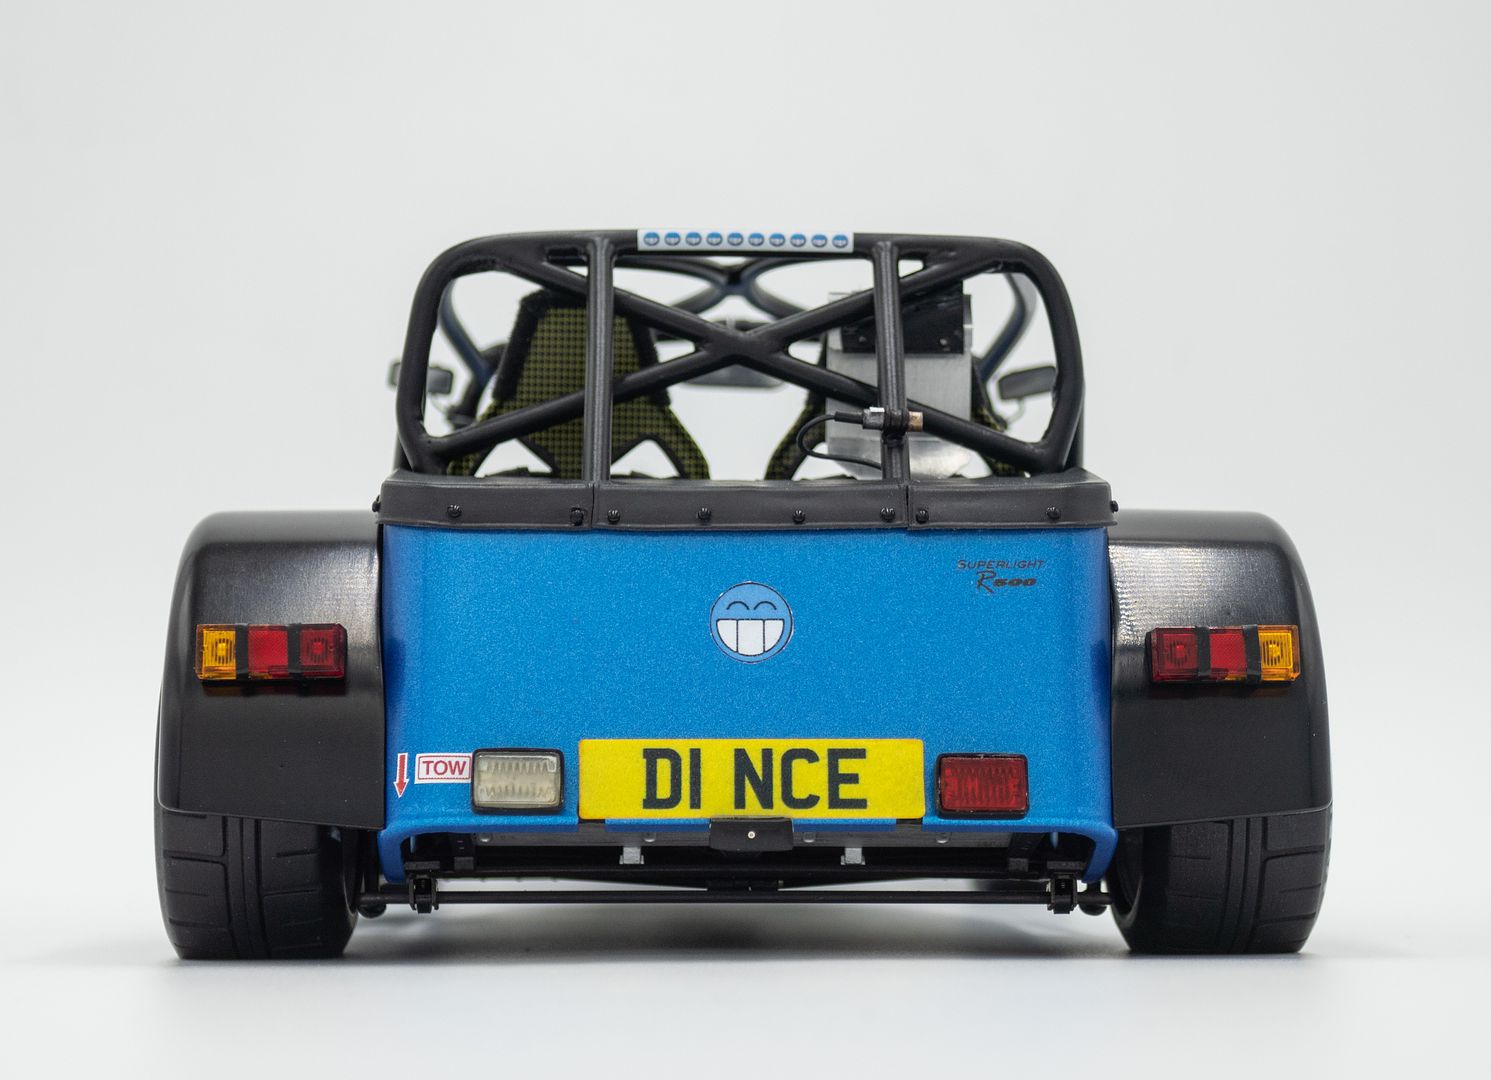
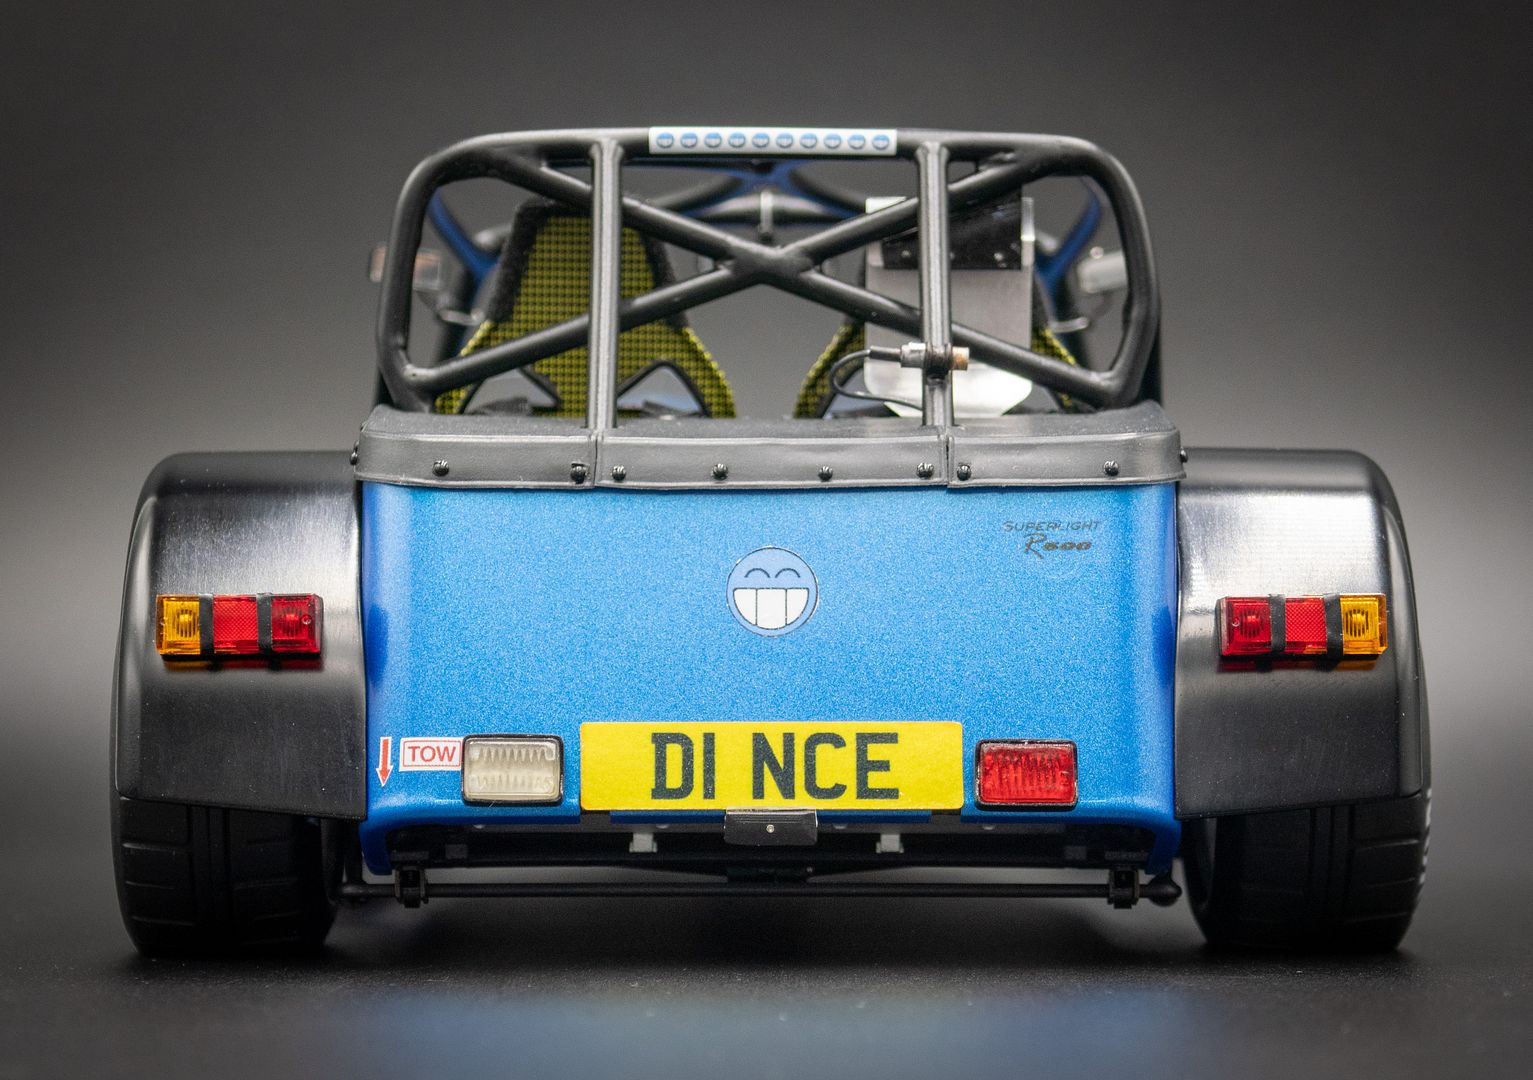
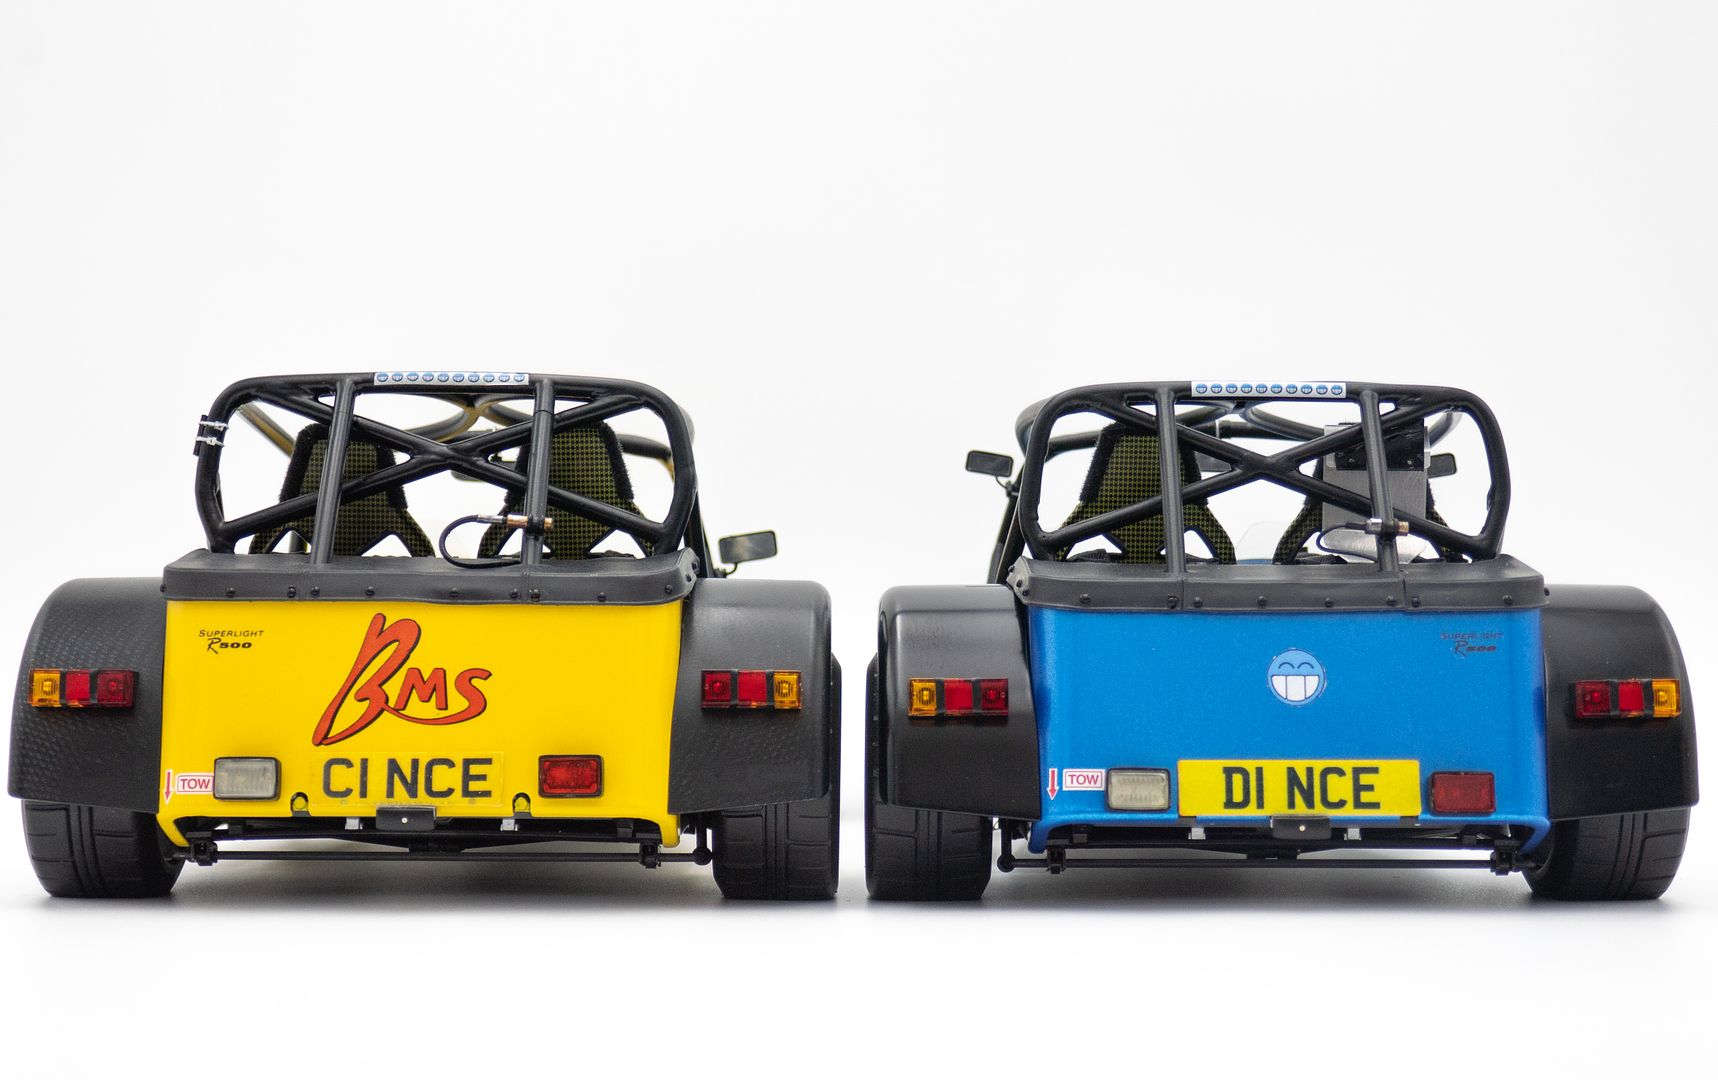
Rear number plate and light on the blue car...
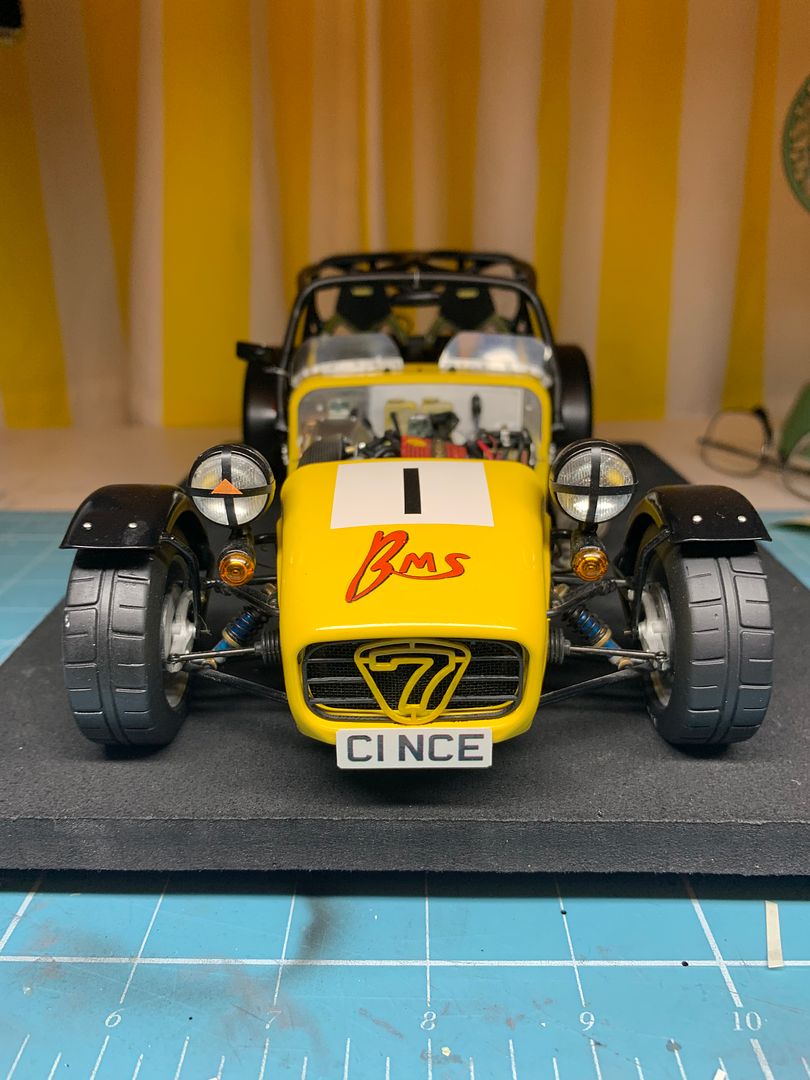
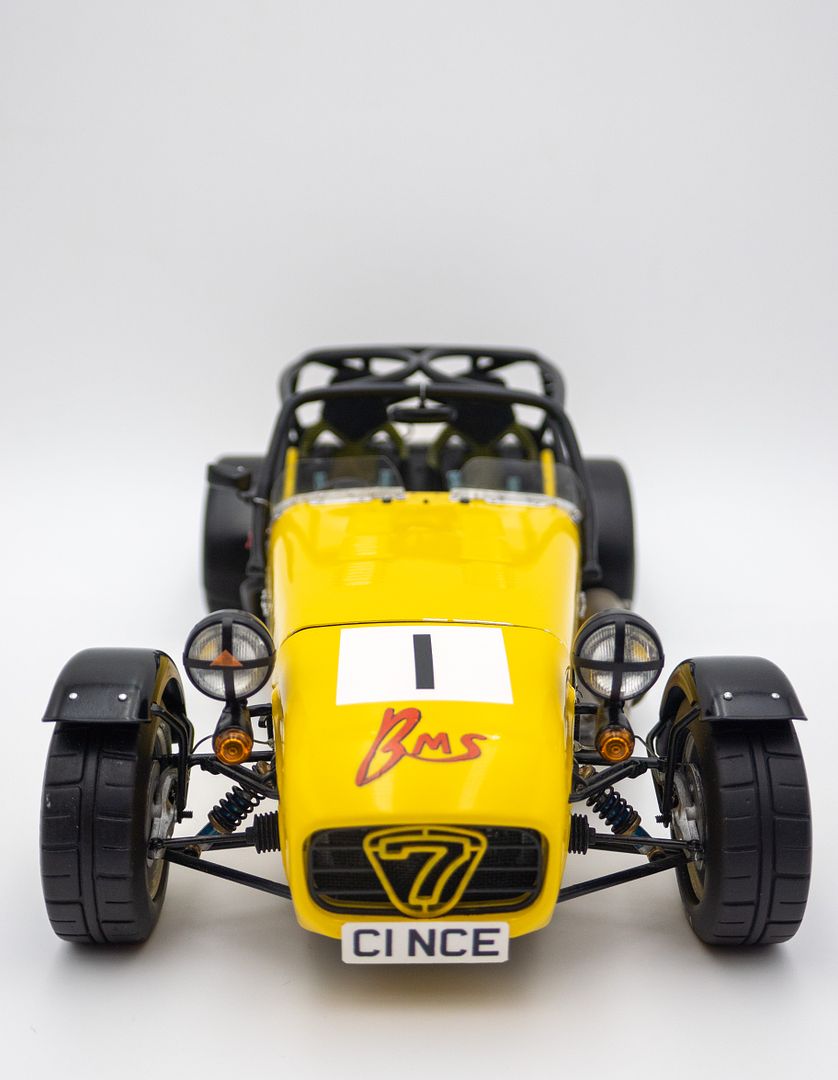
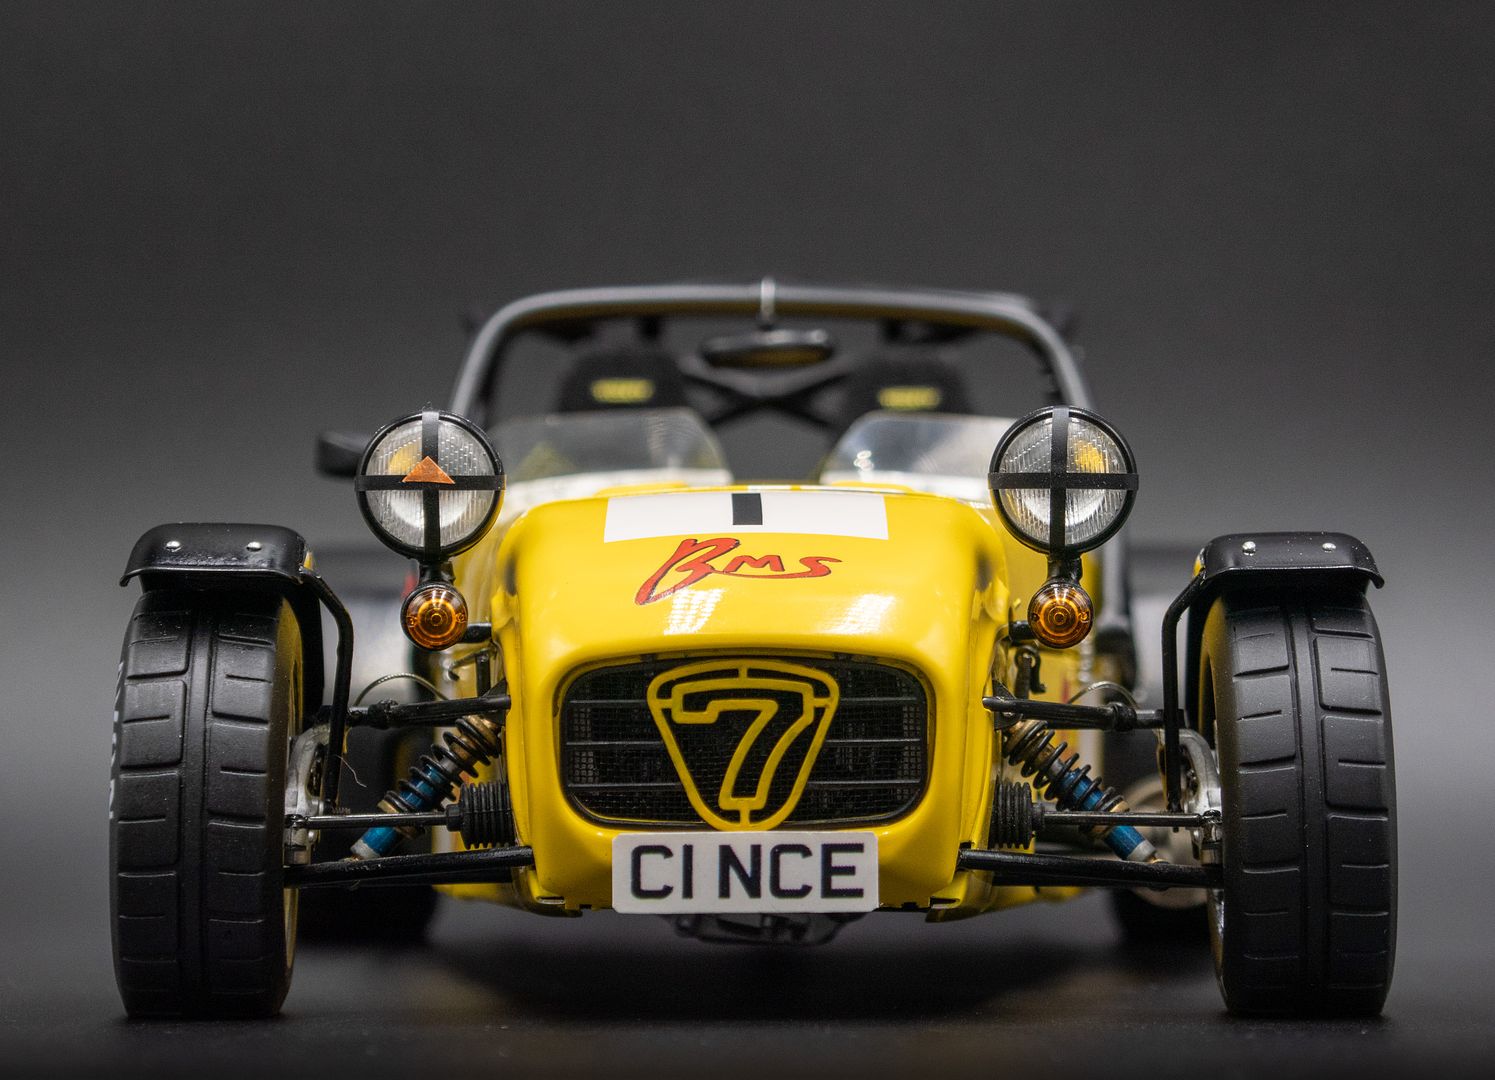
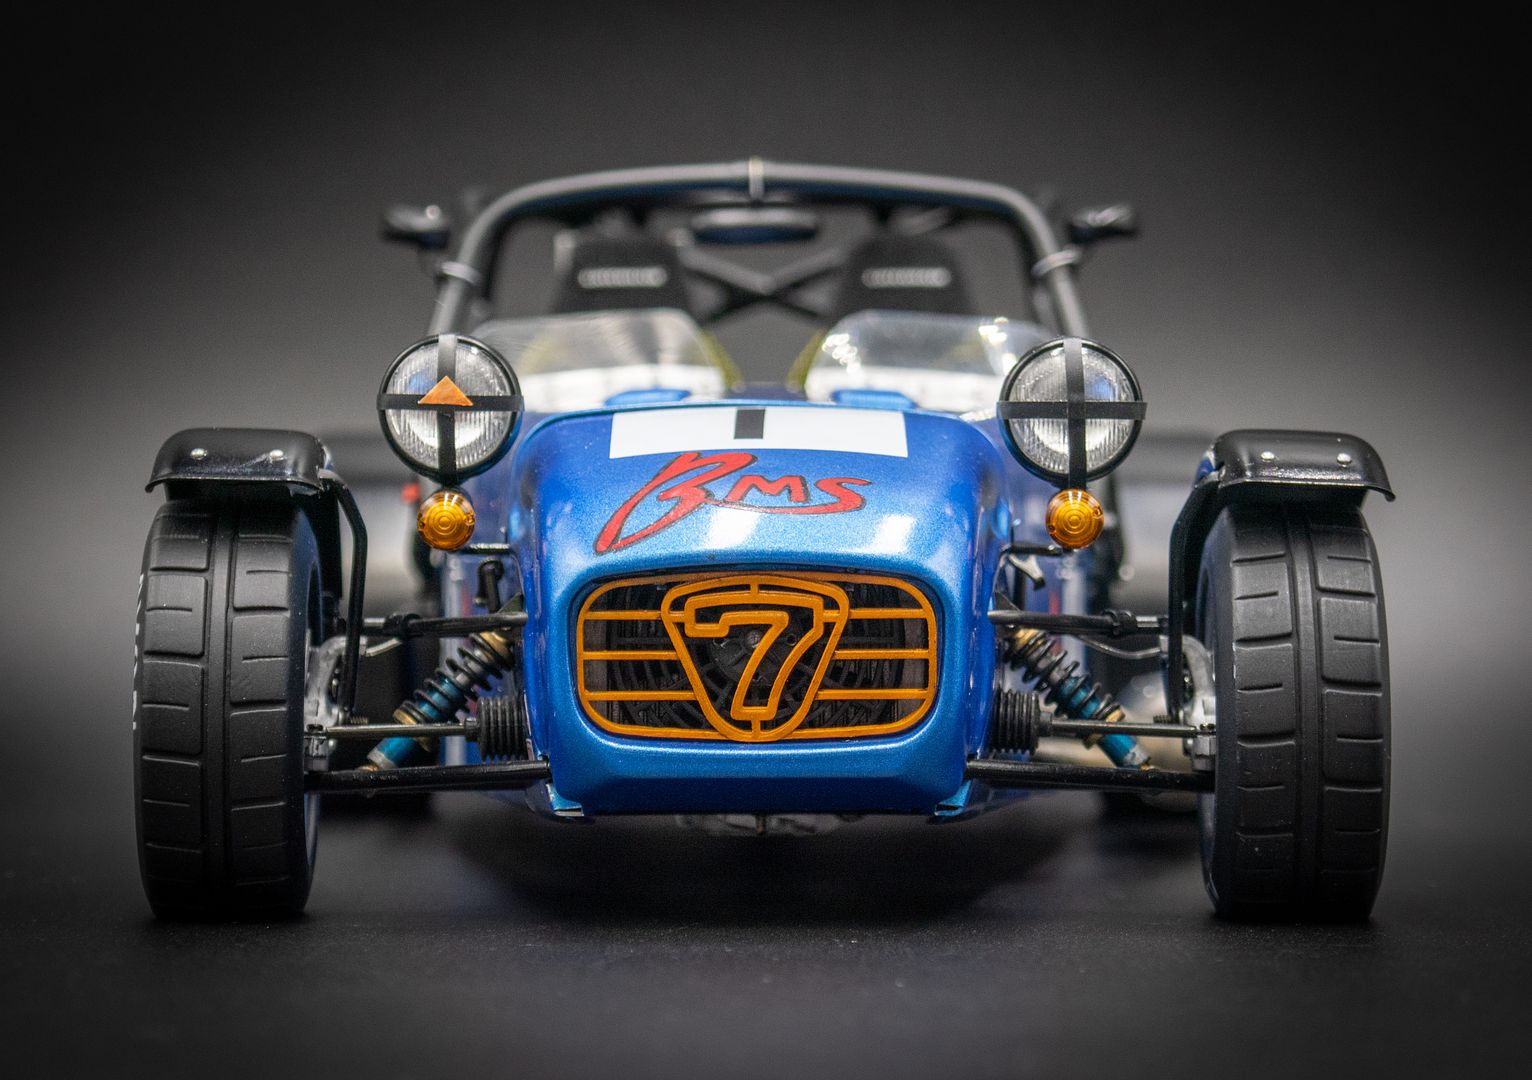
And front plate on the yellow...I had also added tape to the front and rear lights, as race cars tend to do...
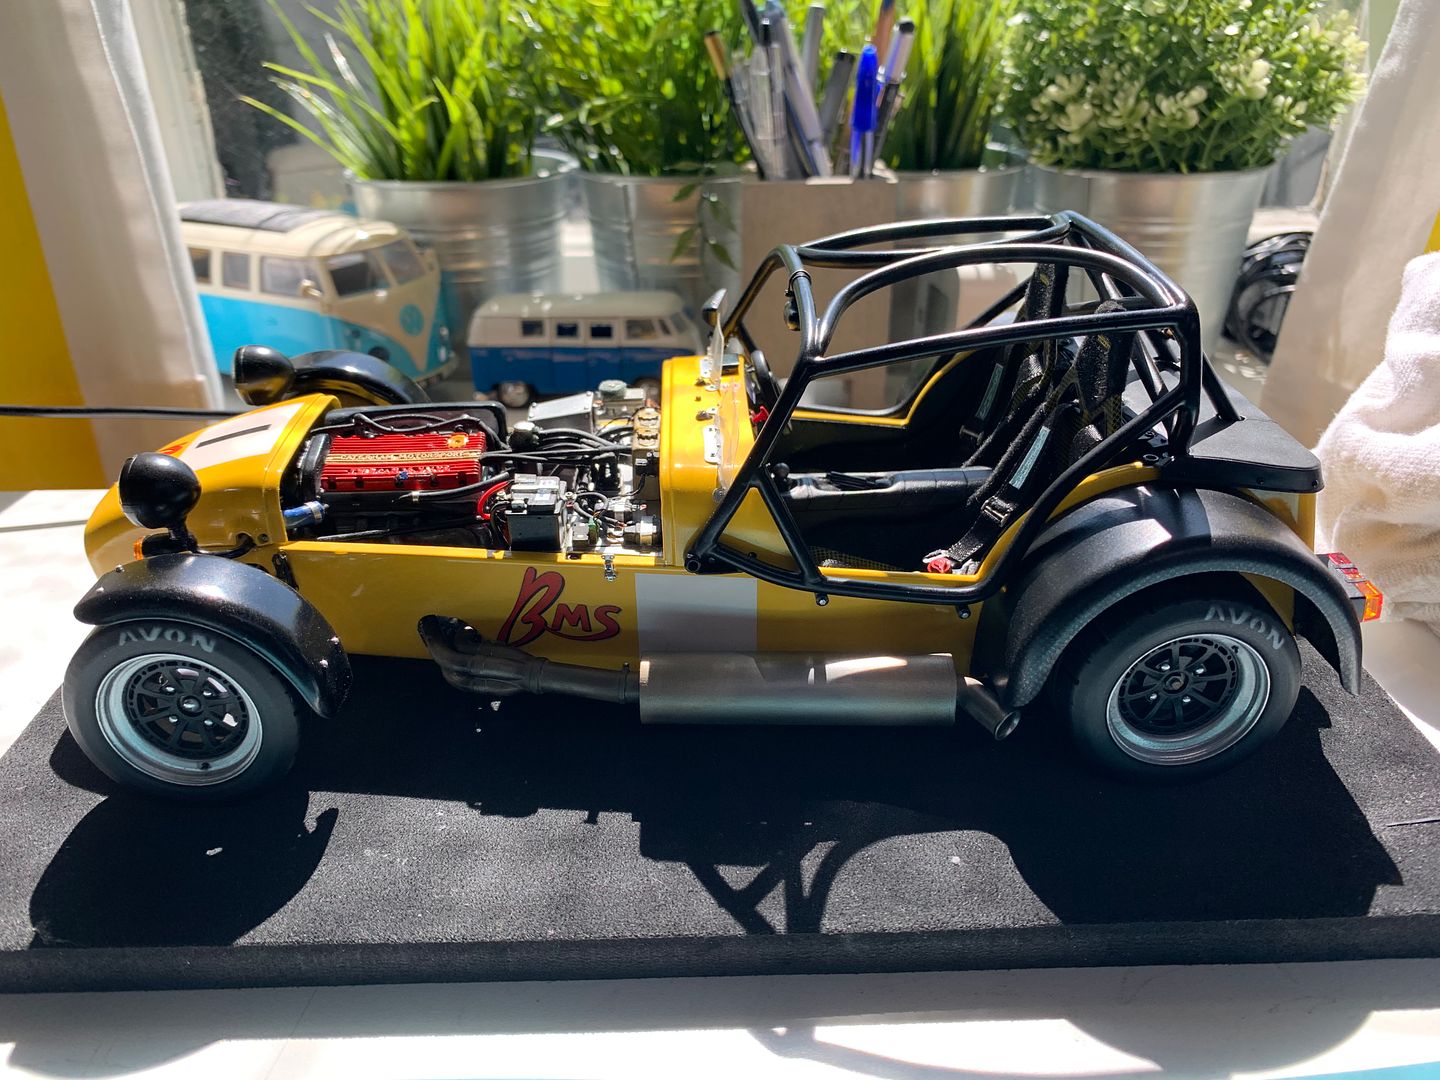
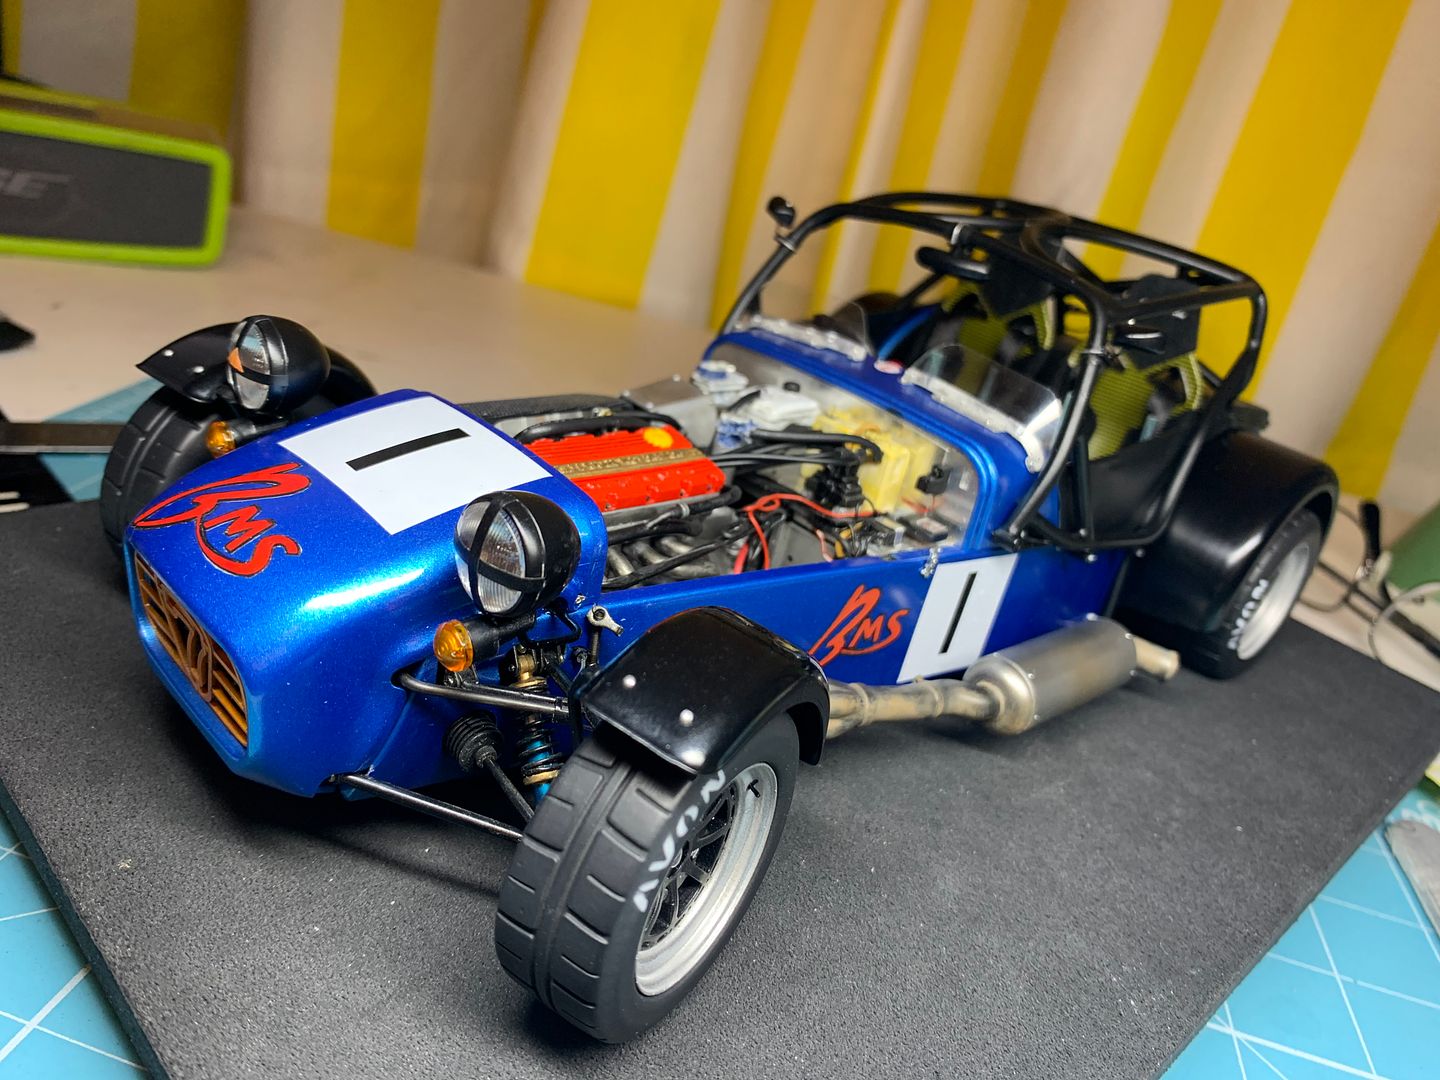
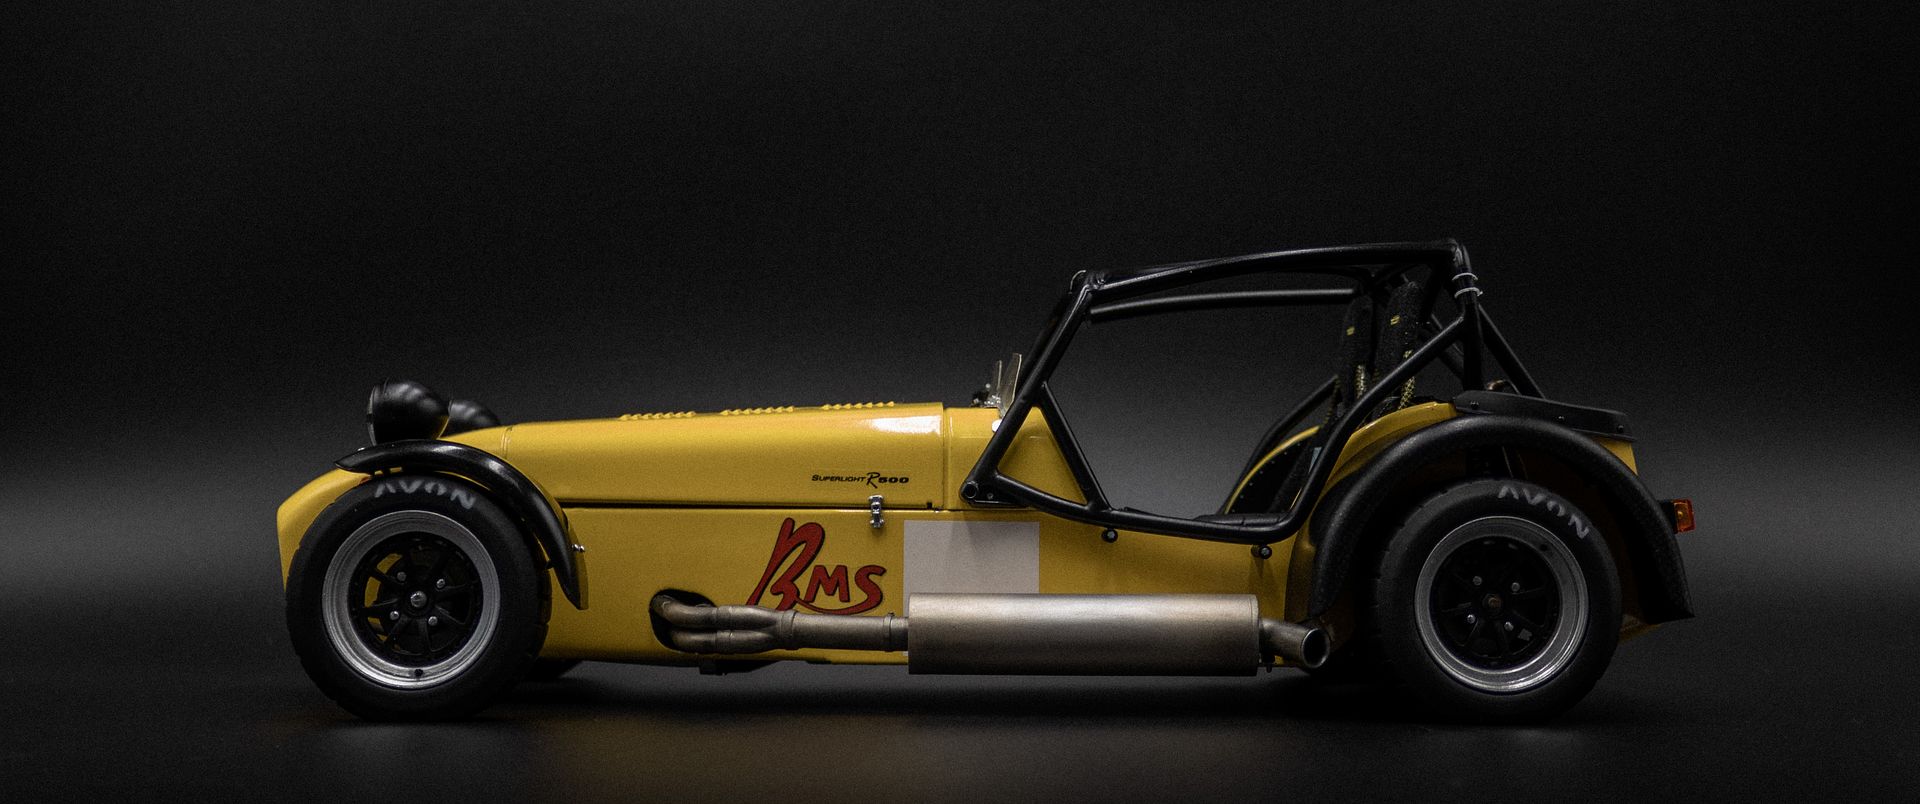
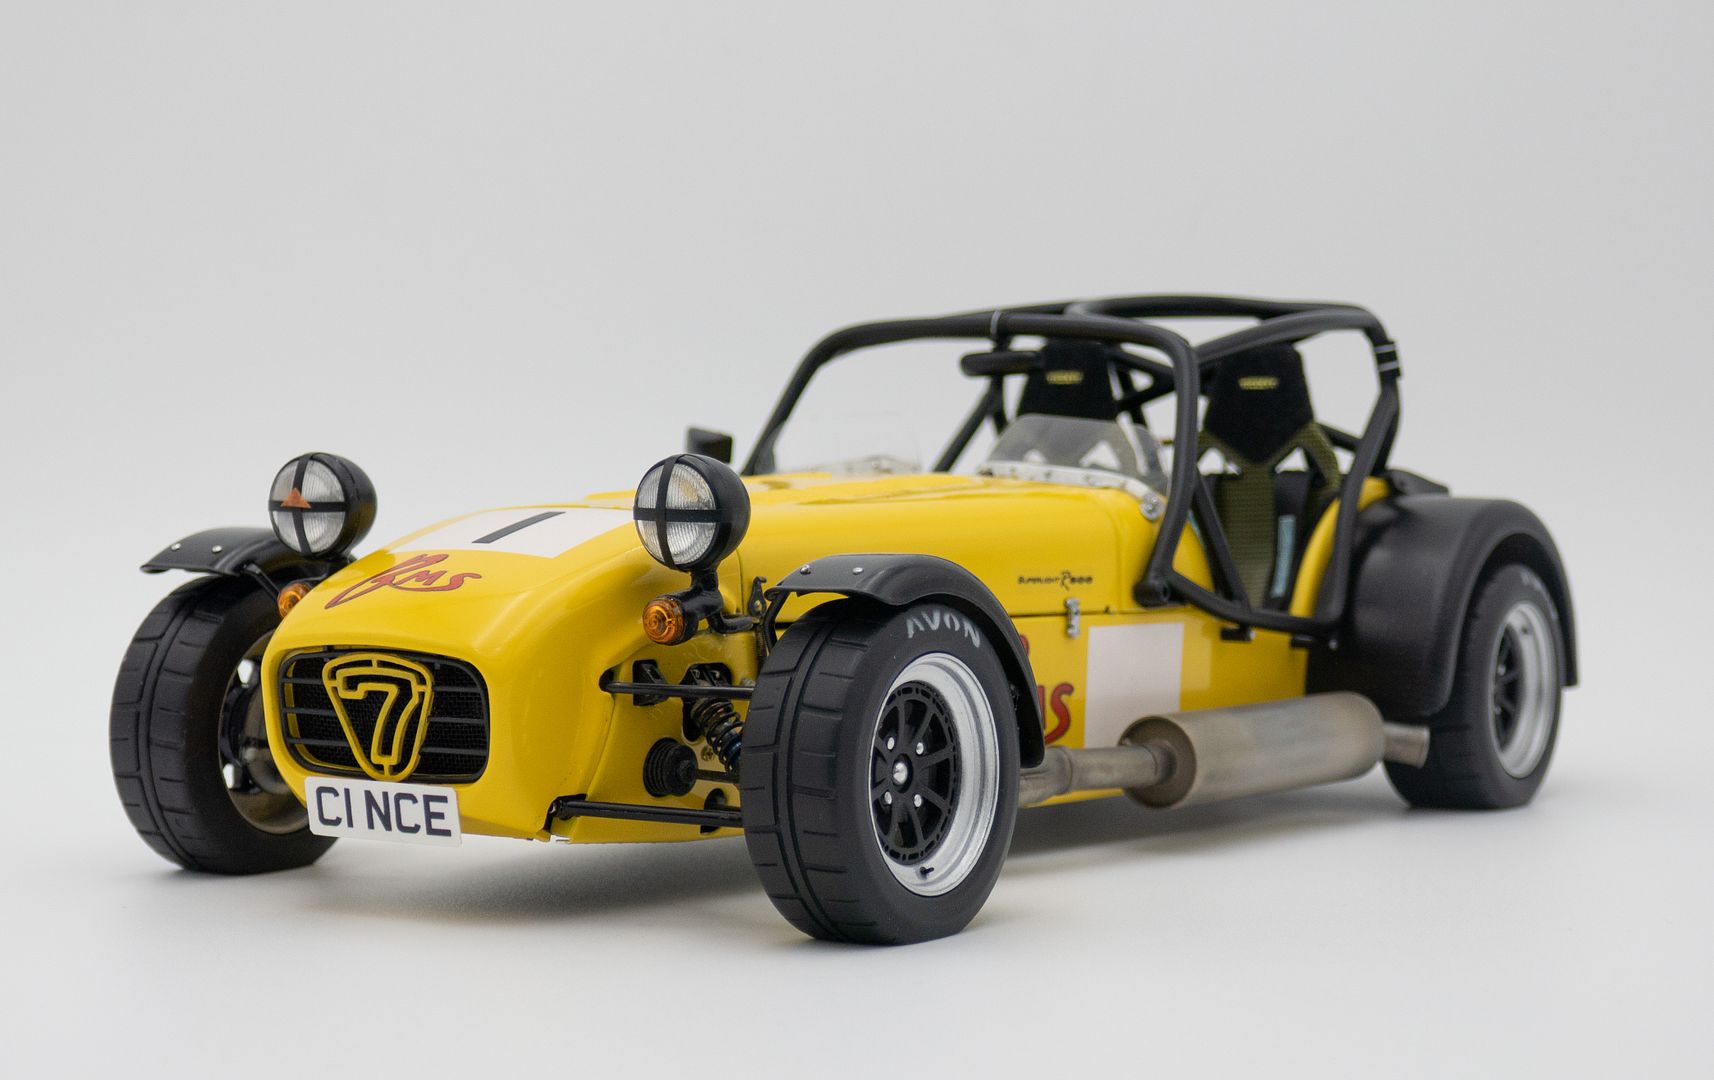
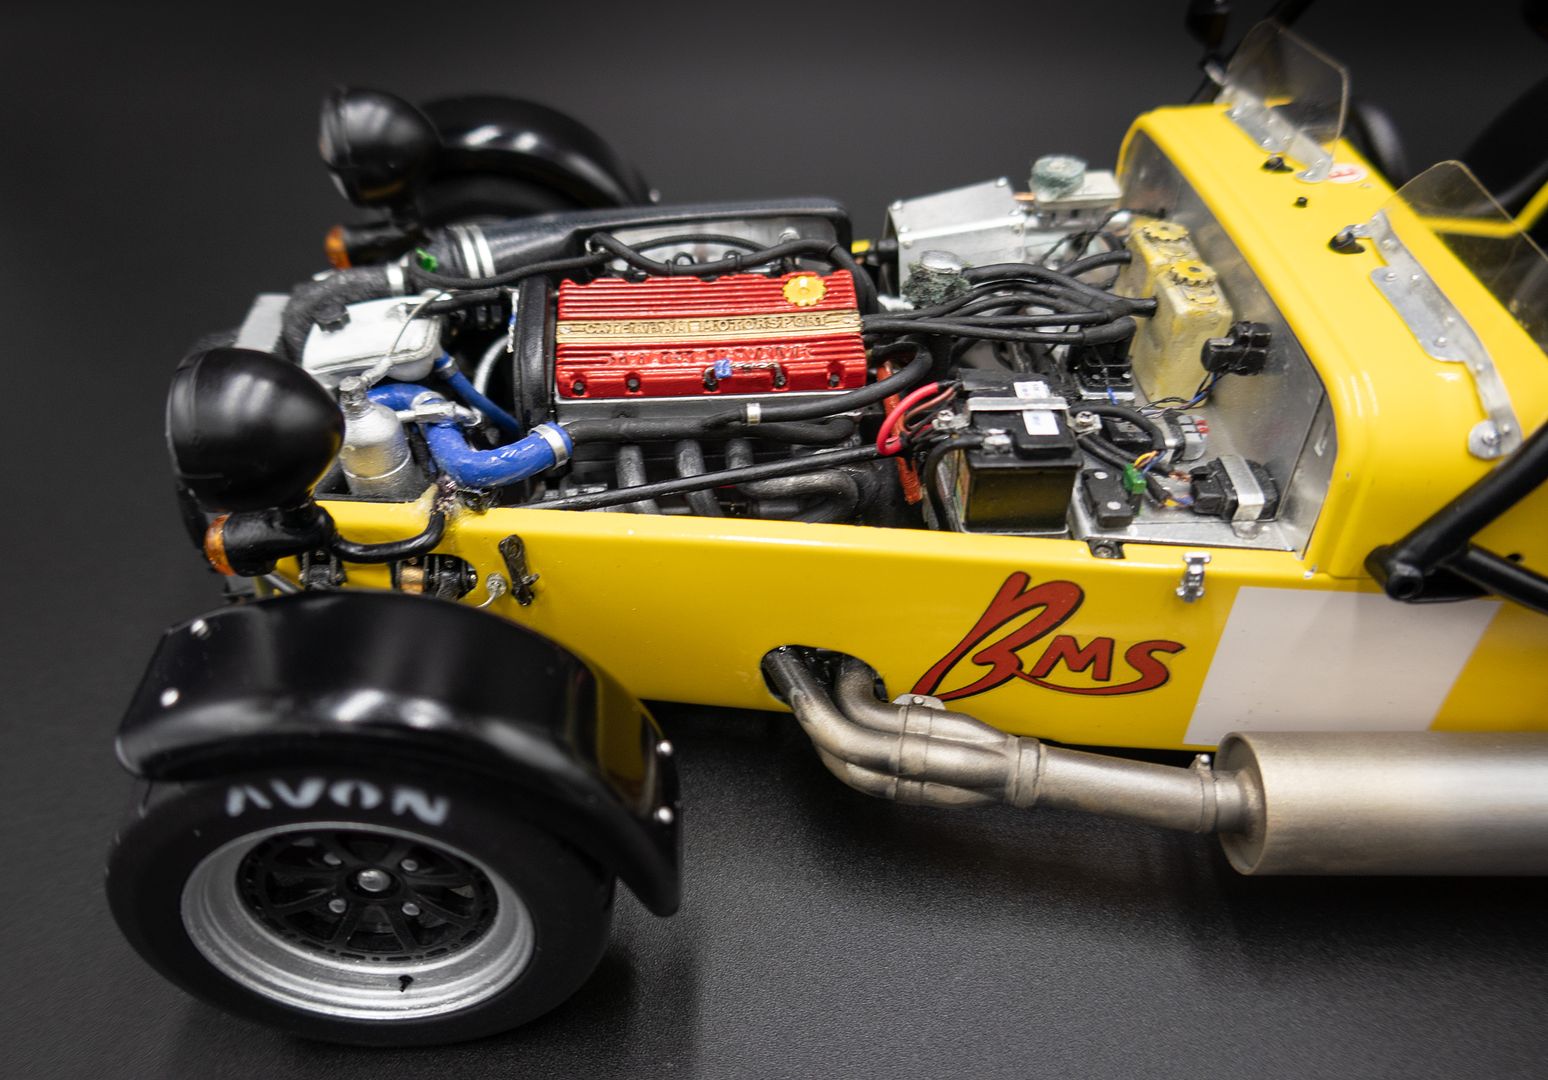
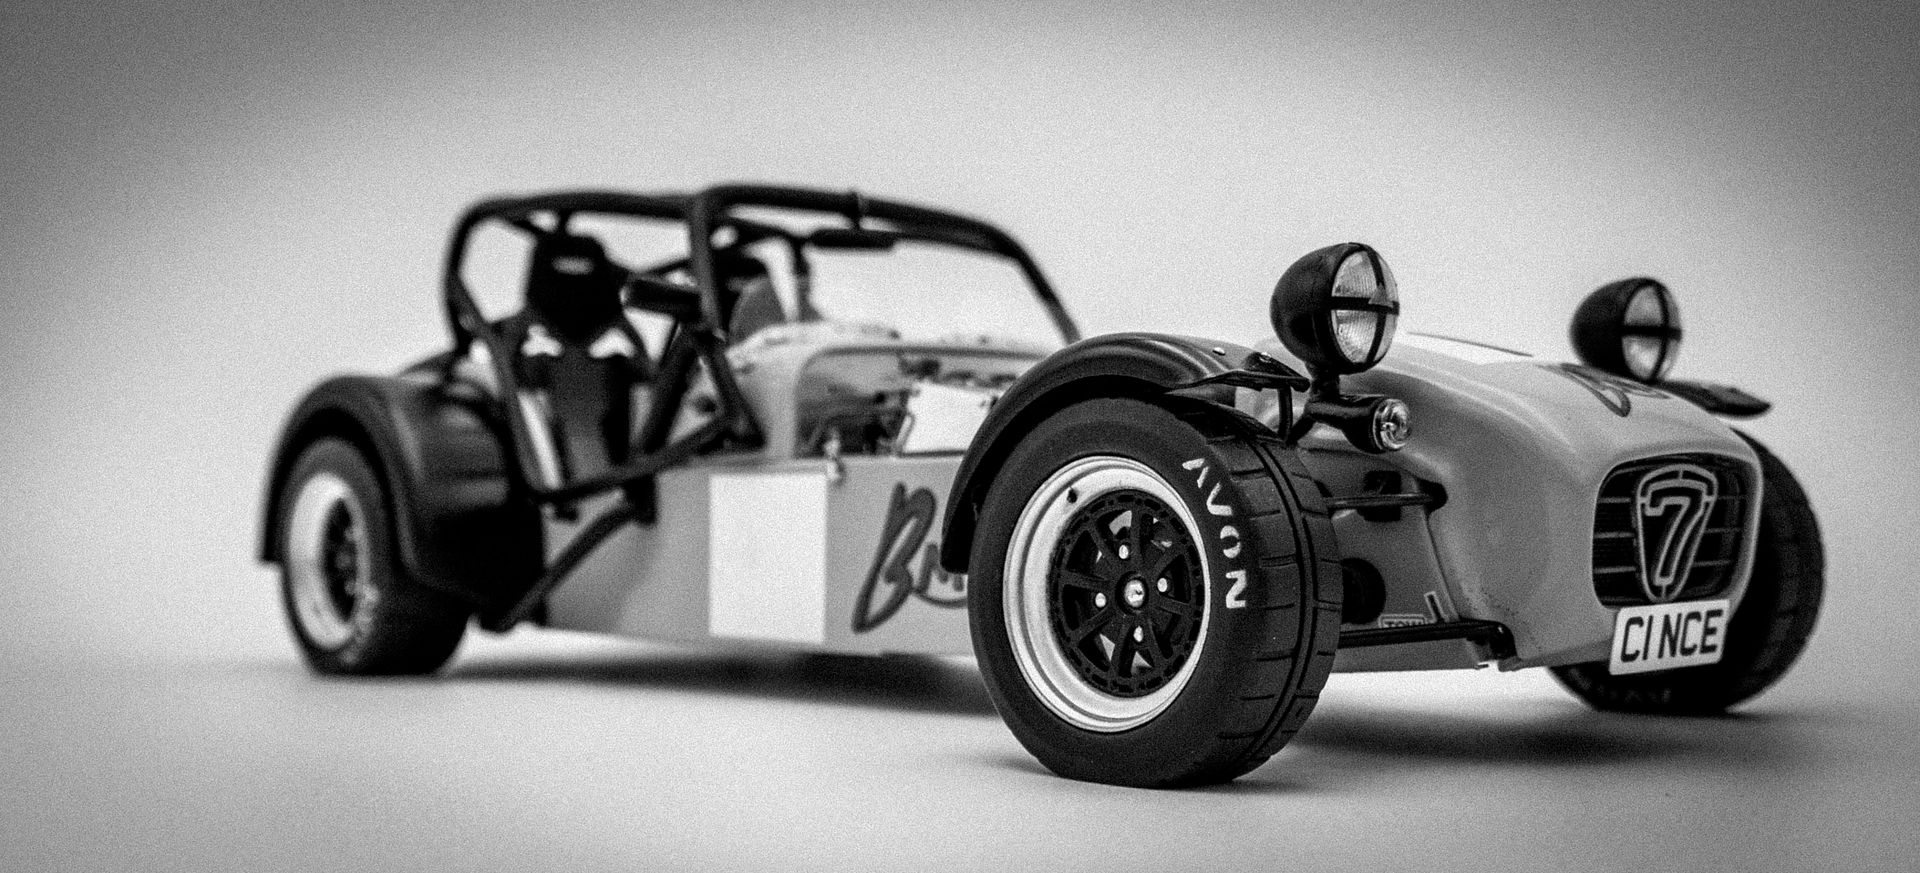
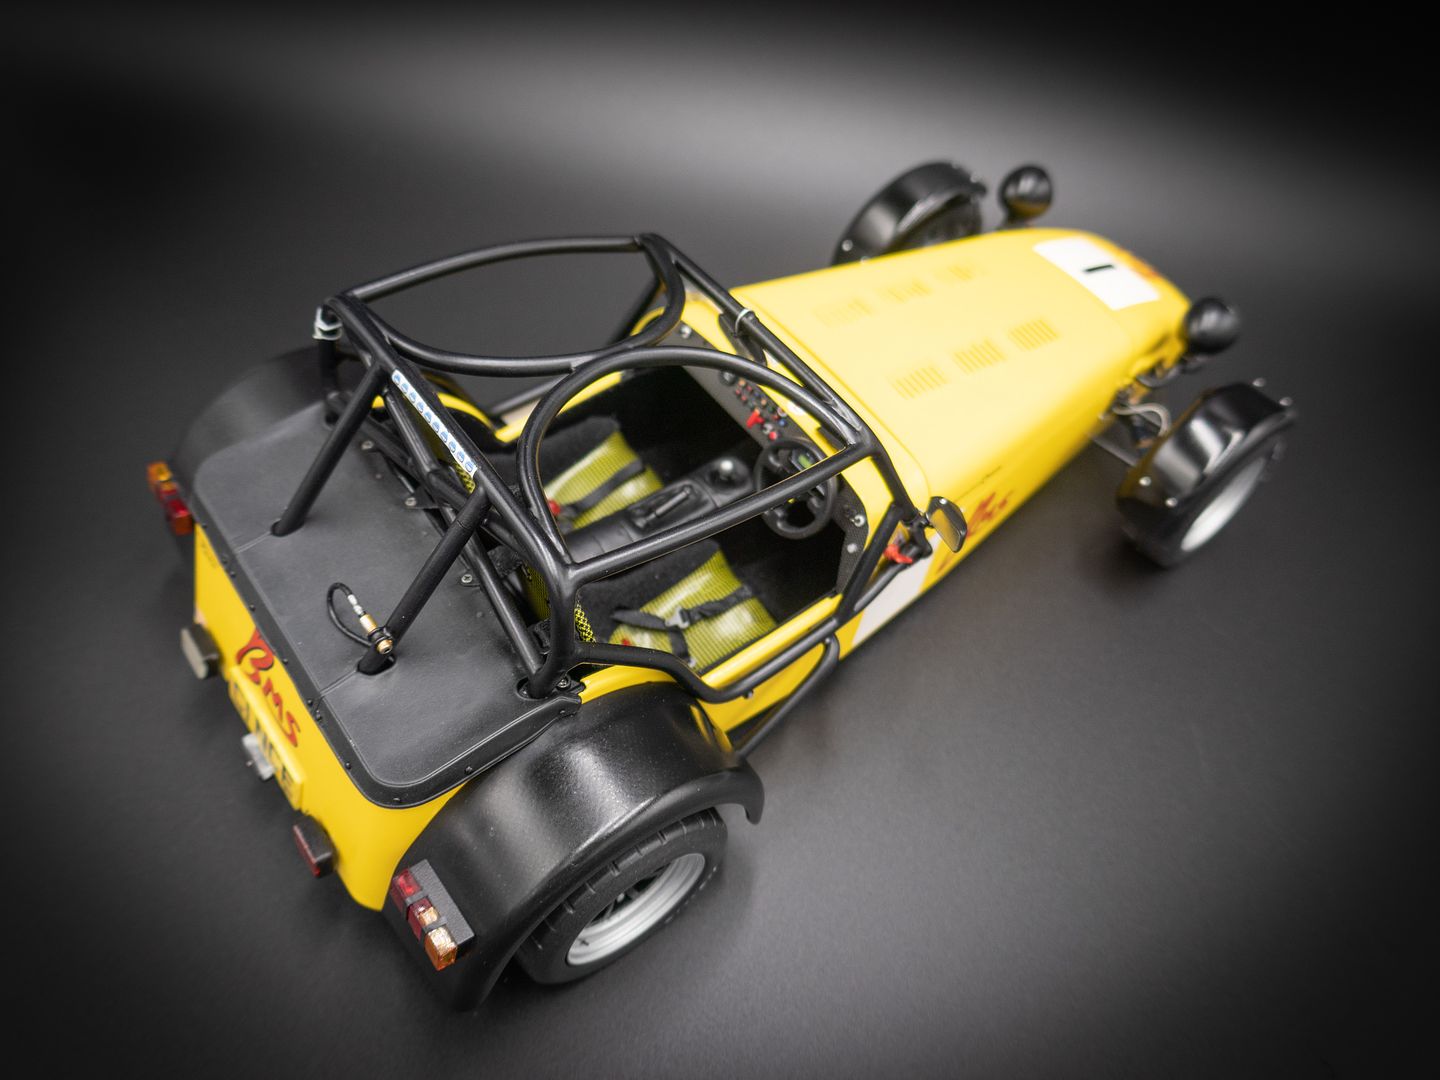
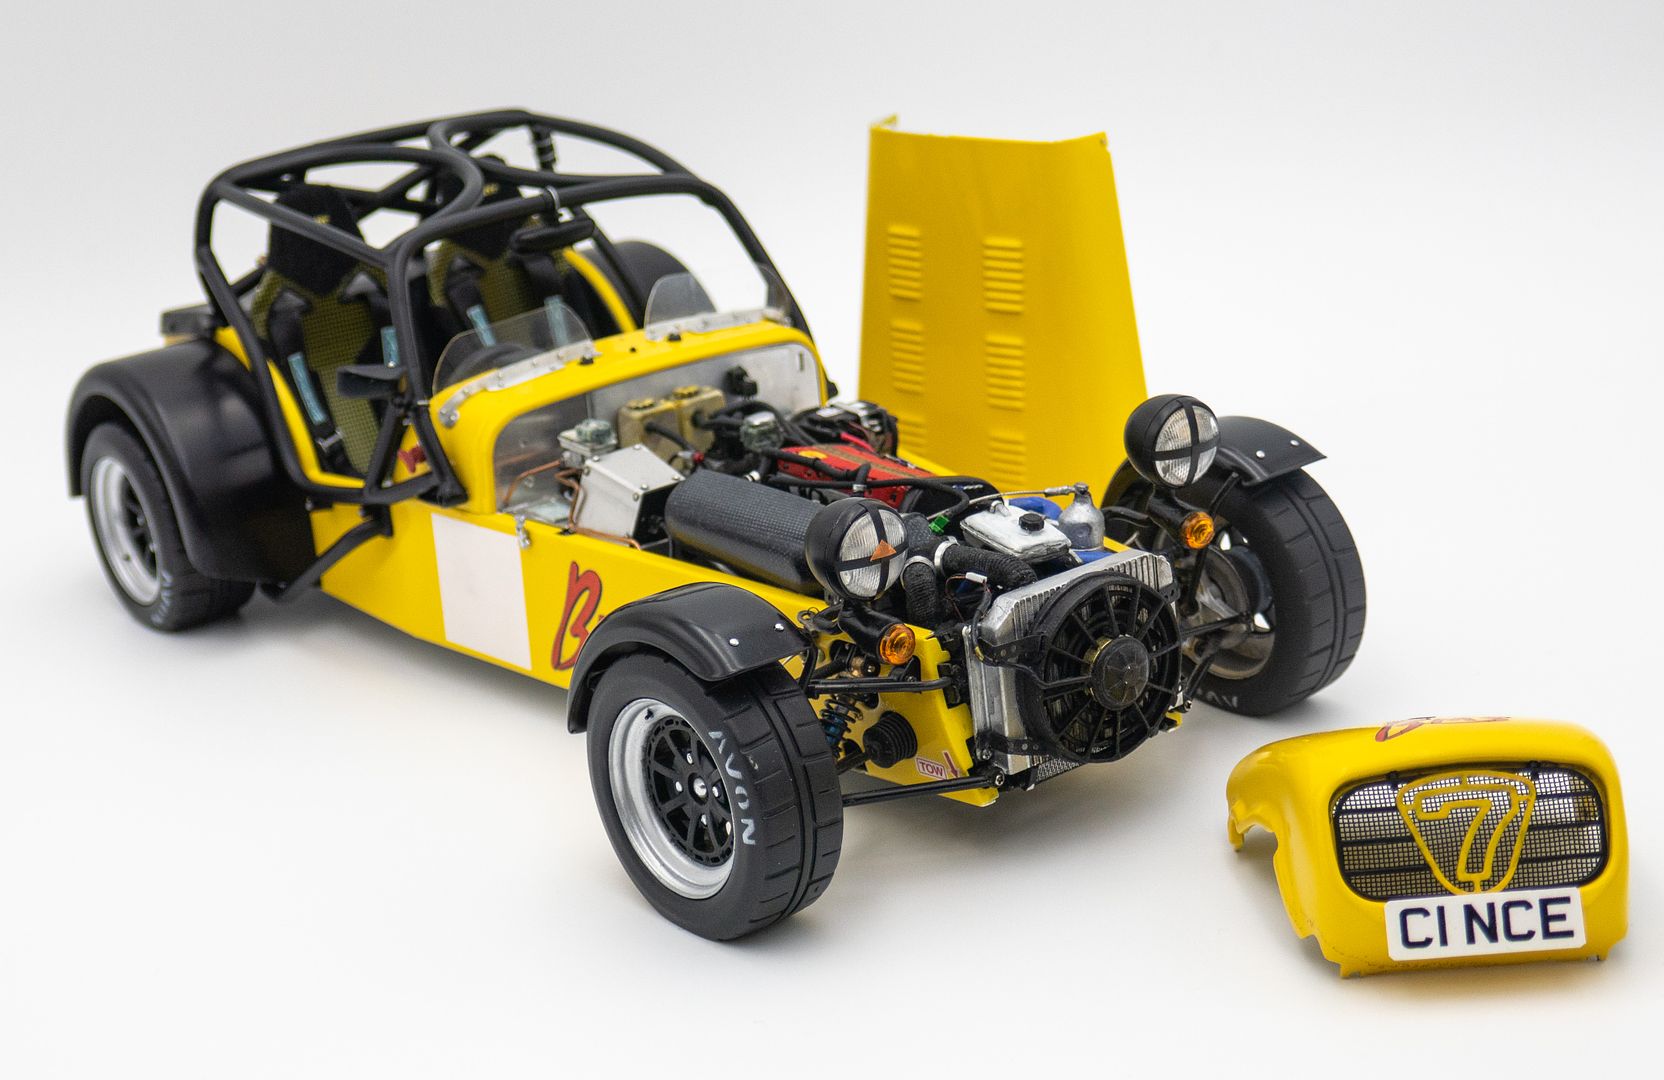
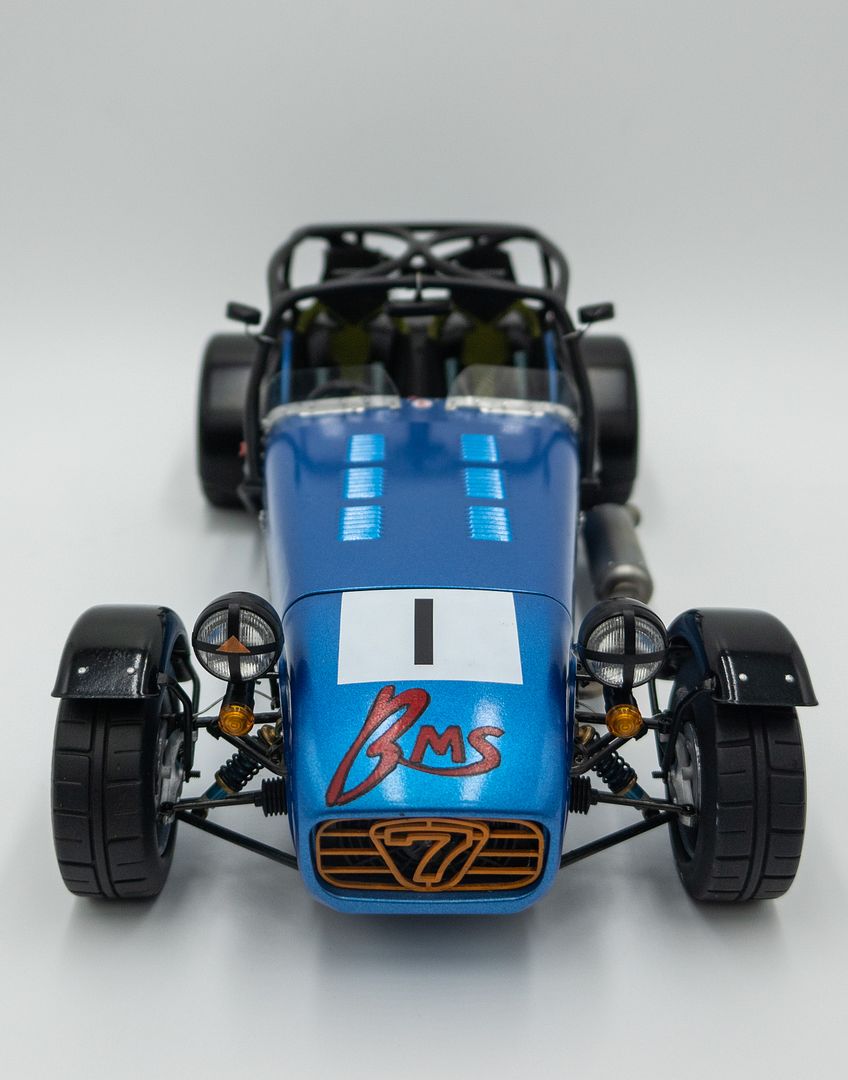
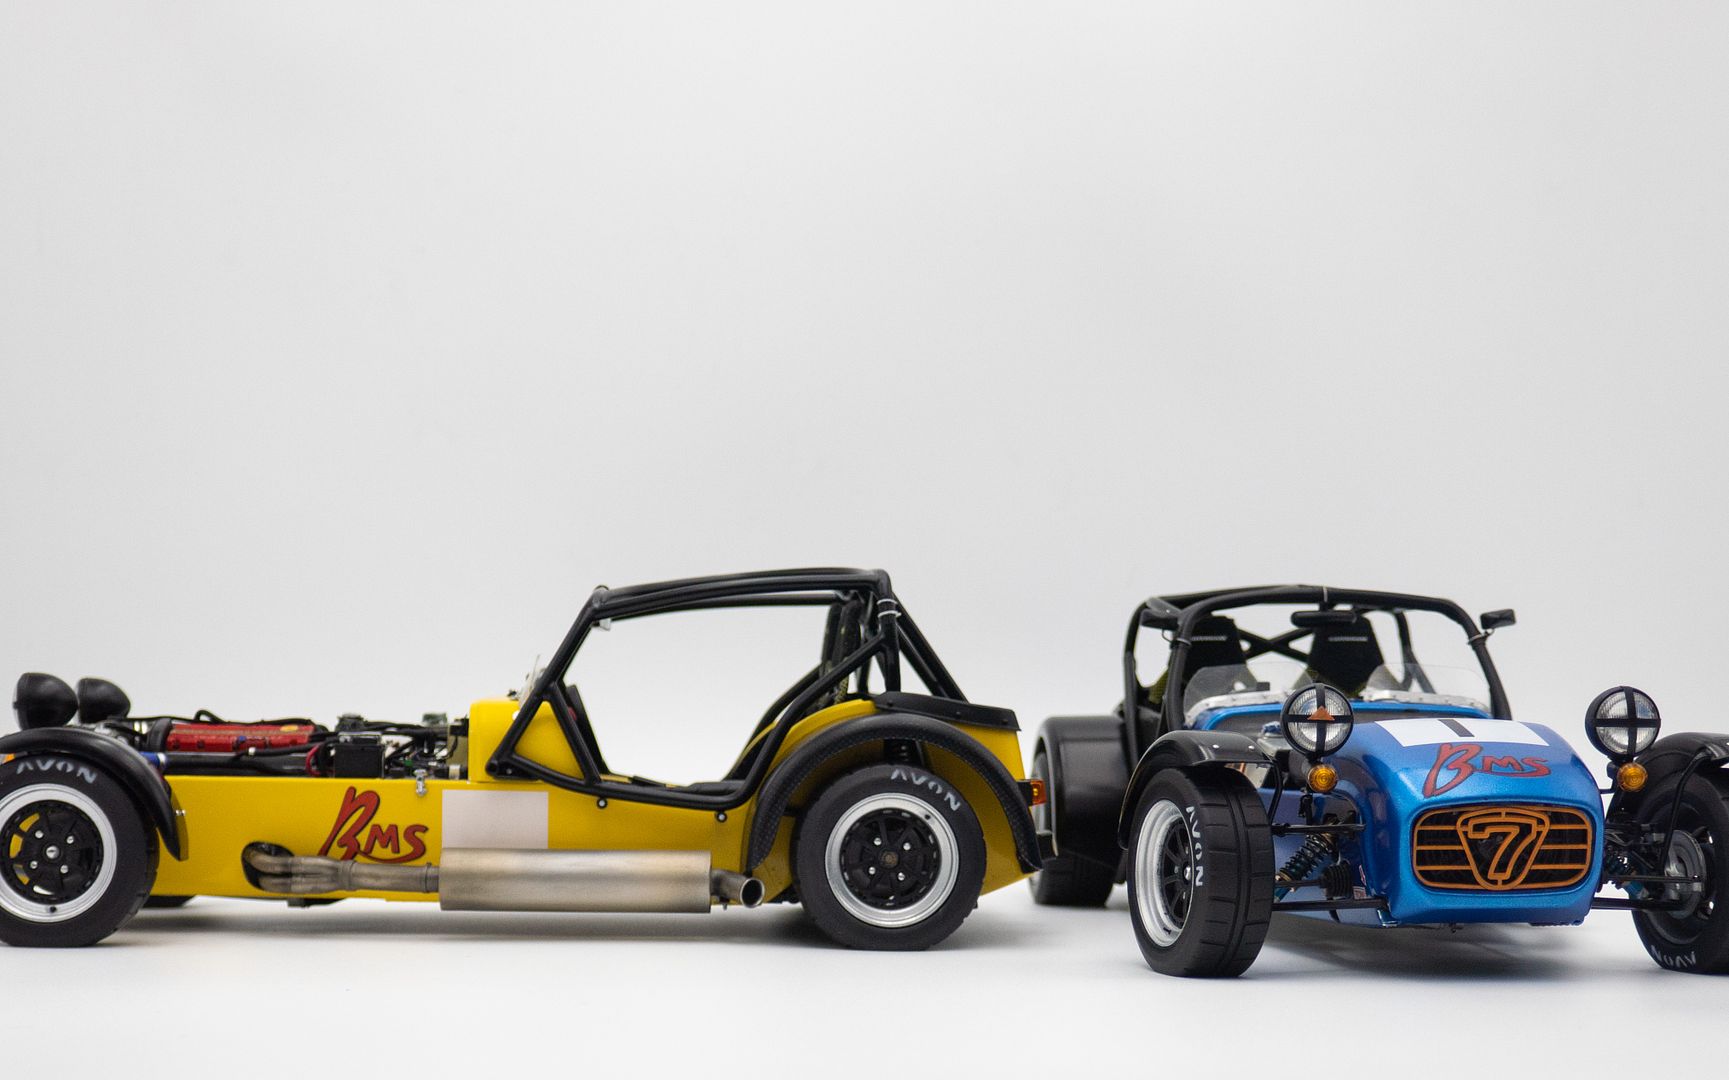
And.....FINISHED!!!!!! omg - only taken 17 years!!
I'll take some 'proper' finished pictures at the weekend - but well chuffed with the results.
I used some graphite from a pencil to add back some of the metallic look in certain areas...
I glued the exhaust in at the front end (2-part epoxy this time) in the engine bay - rear exhaust mounts would come later...
Of course the second, blue car had a different exhaust mount, with an extra strengthening hanger - it is common for the rear exhaust mount to snap as it hold such a long length of pipe and silencer...
The white plate is for behind the drivers seat - brass pipe is exhaust support...
Next big job which I had put off was the 4 clear race screens. These are quite scrappy in real life - bent ali strip along the bottom, cut perspex screens. The only way to make these was exactly like the 'real' ones - so cut some acetate sheet, cut some ali sheet and rivet them together (glued) then rivet them to the cars...great!
At this point I was trying to be clever with the clear screens - there is a very small lip at the top on the real cars - I figured I could make this by using a section cut from a water bottle - I reckon you could find any canopy, headlight cover or curved window 'somewhere' on some of these curvy bottles...anyway, I found my section - but when I came to cleaning up the edges I discovered that these bottles and laminated - 2 layers! Same thickness (as opposed to the graphic sleeve some use) - and these were separating - so I dumped that idea and went back to flat - the compound curve would have made bending the corners round much more difficult, so all ok...
More rivets!
Scary bit - I painted these cars back in 2003 - no idea what auto paint colour I used, so no touch up later!!
I glued them onto the car, but used rivets to provide a mechanical join as well...
At this point with the seatbelts and screens done, I could finally glue the cages in place!
Another part of the cage that I had almost forgotten about was the drivers side-impact protection...
Getting close now - all these little tiny 'quick' details take waaaaay longer than you think they will take...starting with the 28 poppers to fit to the boot covers. I painted plastic rivets and then cut just the heads off to stick directly to the 'rubber' covers. Pins would have also worked, but more of a pain to cut and glue...
Some poppers on the scuttles...
Noticed a small bracket on the yellow roll cage - so that had to go on, complete with cable ties!
Rear number plate and light on the blue car...
And front plate on the yellow...I had also added tape to the front and rear lights, as race cars tend to do...
And.....FINISHED!!!!!! omg - only taken 17 years!!
I'll take some 'proper' finished pictures at the weekend - but well chuffed with the results.


Gassing Station | Scale Models | Top of Page | What's New | My Stuff