1:250 HMV Steve Irwin
Discussion


Update time... Not got a huge amount done due to _real work_ ugh. Anyway.
This really fiddly laser cut stuff is at the limit of my ability. It's getting there, but is also fragile, and you do lose a little in detail where the laser is monochrome but the standard item may have some detail printing.
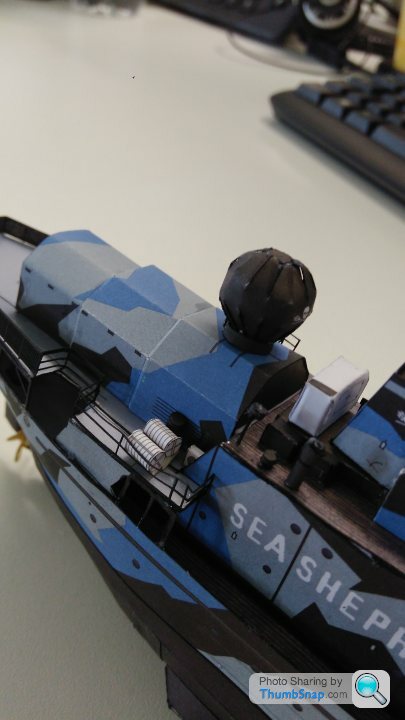
The radar dome was tricky - needs some black paint wicking into the joints to hide the white
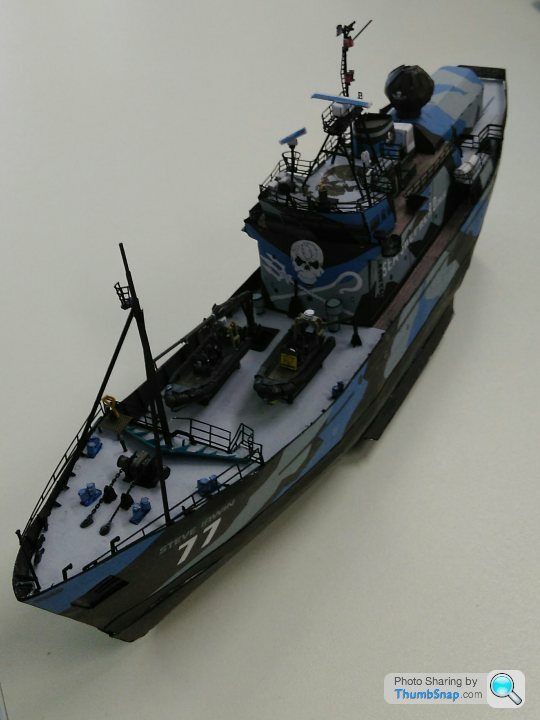
Only the rails to add to the top deck, and some minor shaping where the rails have taken a knock.

Lookin like a boat now.
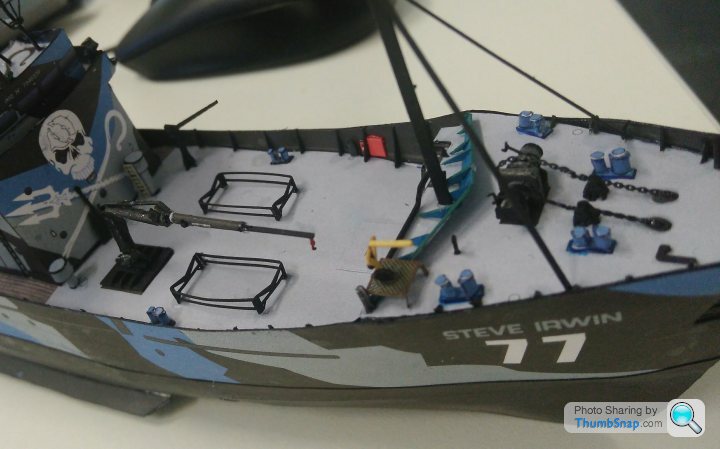
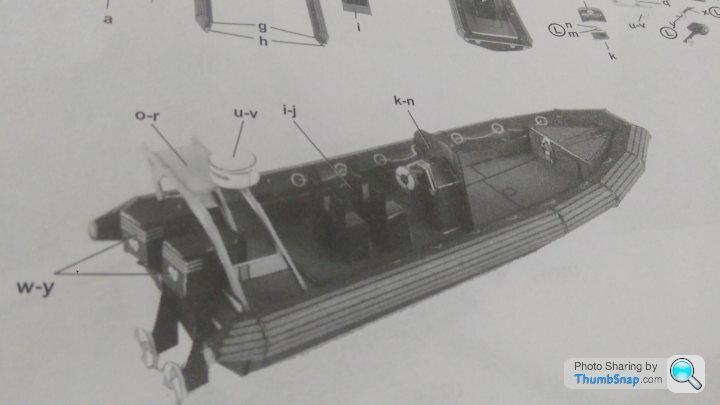
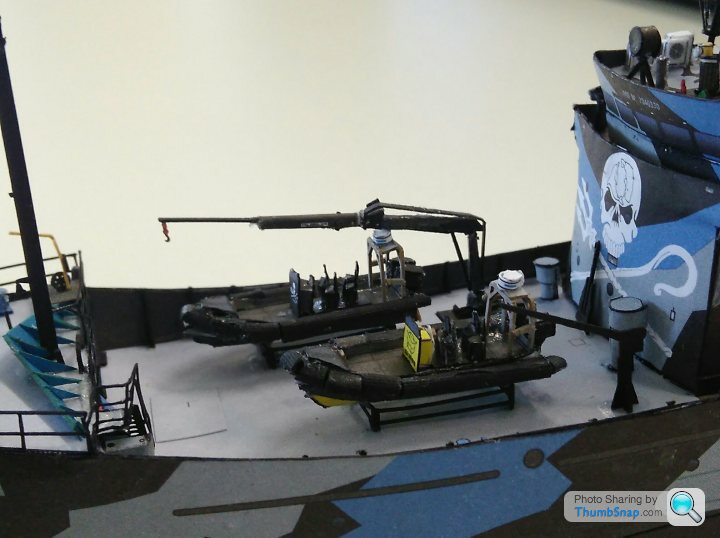
A couple of bits, some railings, a crane and two RIB boats to go.
This really fiddly laser cut stuff is at the limit of my ability. It's getting there, but is also fragile, and you do lose a little in detail where the laser is monochrome but the standard item may have some detail printing.
The radar dome was tricky - needs some black paint wicking into the joints to hide the white
Only the rails to add to the top deck, and some minor shaping where the rails have taken a knock.
Lookin like a boat now.
A couple of bits, some railings, a crane and two RIB boats to go.
Insane in the crane... Insane in the membrane..
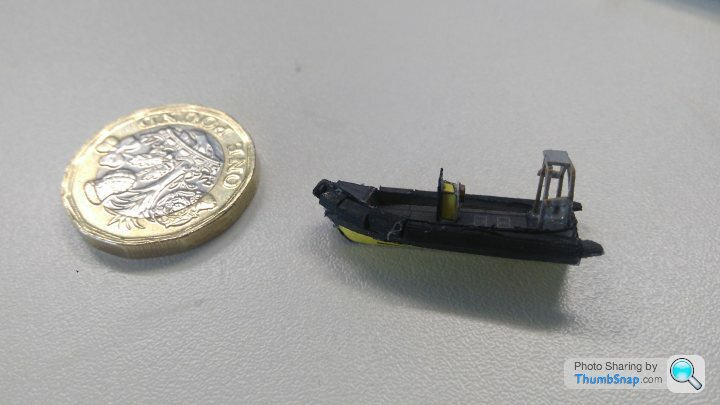
25 peices. Many many minutes.
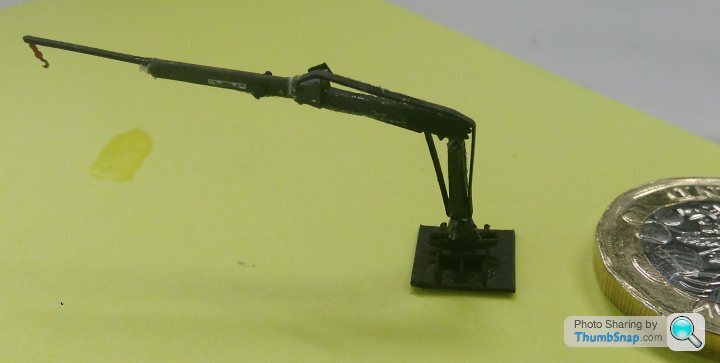
My head hurts. Tweezers, pins, and dots of glue very much the order of the day.
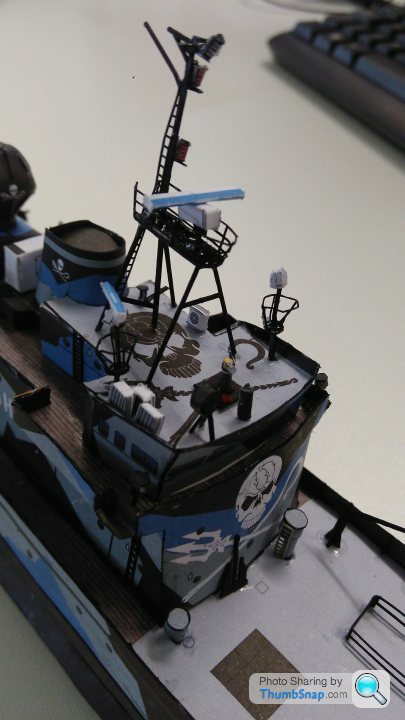
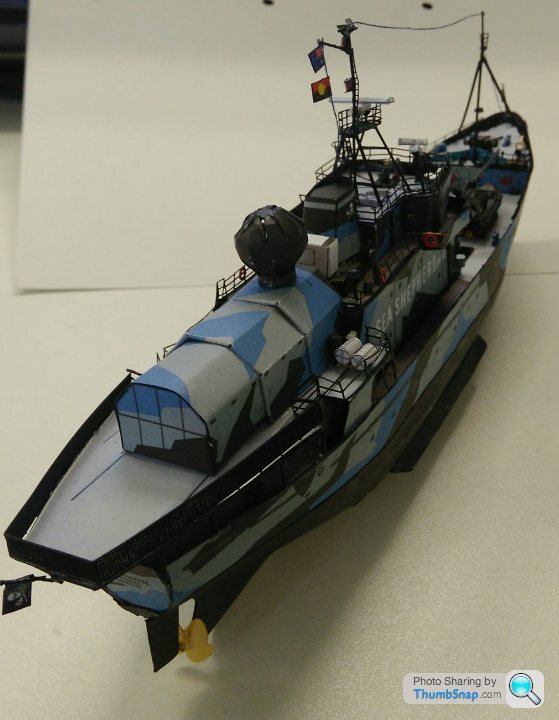
In place. (Again, phone camera struggles with this range, excuse it being slightly out of focus)
There are a few Greebles to be attached to the mast, but they can wait until last, along with railings.
Two RIBs to go, then I'm on the home straight.
25 peices. Many many minutes.
My head hurts. Tweezers, pins, and dots of glue very much the order of the day.
In place. (Again, phone camera struggles with this range, excuse it being slightly out of focus)
There are a few Greebles to be attached to the mast, but they can wait until last, along with railings.
Two RIBs to go, then I'm on the home straight.
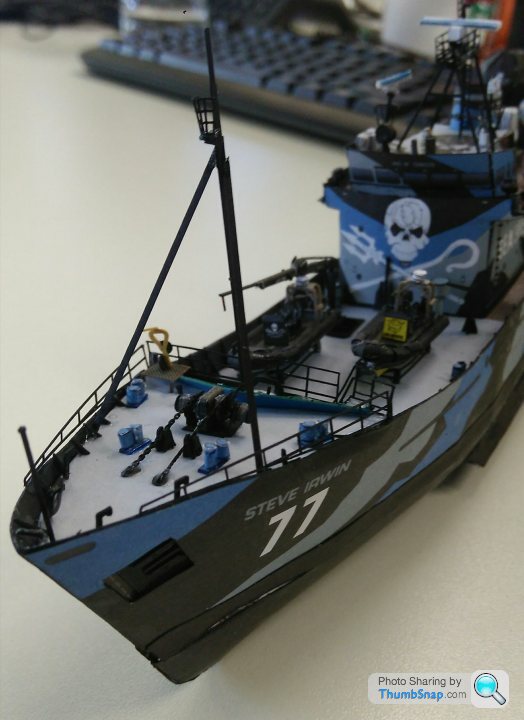

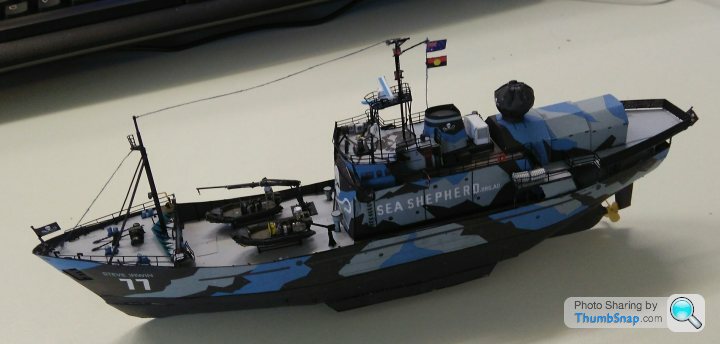
Nigh on complete.
A few ropes to be added, and one or two tiny detail parts, then a tidy up, straighten the railings and touch up a couple of white seams that are still visible.
Pretty happy with the result overall, will try and do a decent photoshoot with it in a couple of days, busy few weeks at work coming up.
This looks like a very pleasant way to spend an hour of my evenings, excuse the basic questions but my google-fu seems to be weak today.
Ive found the paper kits for sale on kartonmodellbau, are there any tools (sharp knife, cutting mat, steel rule etc.) that you would recommend, what glue do you use? Any tips for a beginner when it comes to laying down / build process?
All I need to do now is to keep it away from the cats
Ive found the paper kits for sale on kartonmodellbau, are there any tools (sharp knife, cutting mat, steel rule etc.) that you would recommend, what glue do you use? Any tips for a beginner when it comes to laying down / build process?
All I need to do now is to keep it away from the cats
I do find it really relaxing, especially after a rough day at work... Intend to buy from Amazon, free shipping with prime.
As for recommendations, you're pretty spot on. Cutting mat, sharp knife, steel rule. Something to score with is a must, and a selection of mini screwdrivers and needles/pins to wrap the tiny tubular bits round.
Glue wise, kids PVA works or me... And superglue for the smaller parts, it's trickier but i find you need that instant bite.
Make sure the initial ribbing is flat, no warps, or you're buggered. I tack it to something flat whilst I'm doing that section.
dr_gn said:
Looks great already, but the rigging will lift it further.
Are you going to get a case for it? I expect dusting these things would be a disaster...
Thanks. Rigging is now on, but I think I will change it. The masts are so fragile that I can't get the sag out of the thread without them flexing. I might try new bits, cut to length then impregnated with glue to stiffen before mounting.Are you going to get a case for it? I expect dusting these things would be a disaster...
Pics still from phone as She has tidied up the charger for my camera...

I think I'll be looking to get a cover of some form for it. The Von Der Tann I did previously is hanging from the little squirts ceiling at a 90° angle so he can see the detail but is collecting a little dust.
I use heat stretched sprue for rigging over large spans, or where it's attached to delicate masts etc.
In case you're not familiar with the technique:
https://www.youtube.com/watch?v=dtG09wlQ5W4
I usually cut it too long, attached it using PVA, then trim each end to length when set.
It's inherently more stiff, and so doesn't sag as much as cotton or whatever (nor do you get the wooly jumper effect of tiny fibres sticking up all over it). Even elasticated thread (EzLine) can bend card masts under very little stretch load.
Gassing Station | Scale Models | Top of Page | What's New | My Stuff