Airfix 1:72 Tiger Moth
Discussion


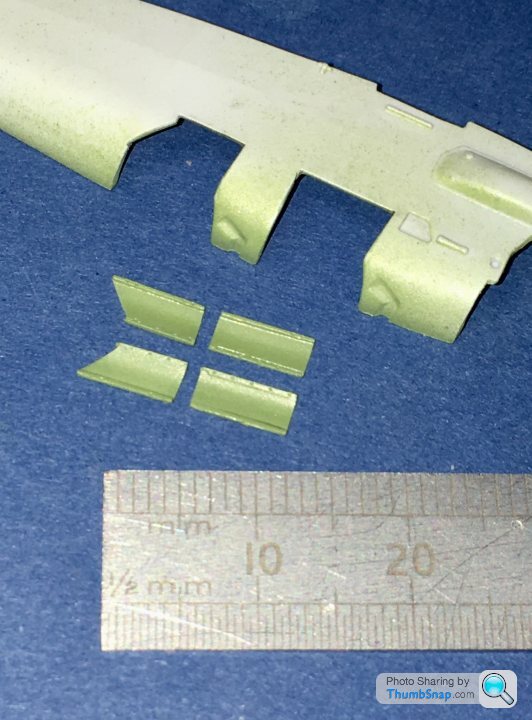
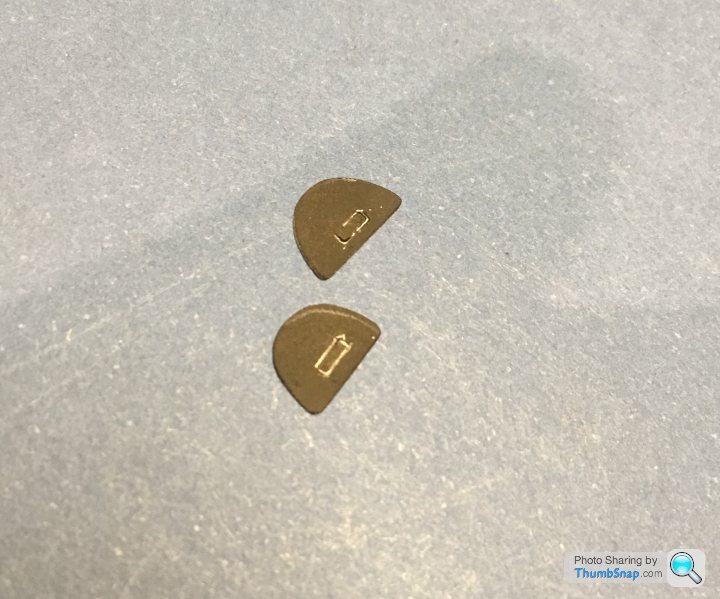
Some of the photo-etched levers and quadrants are seriously small on this one:
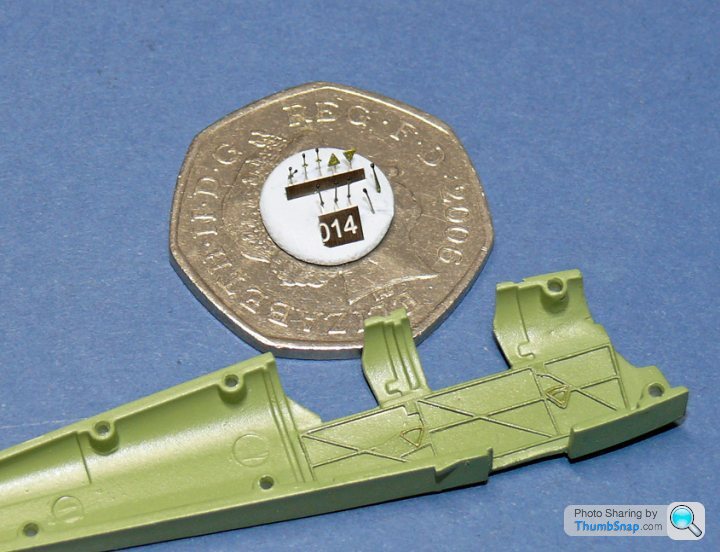
I blobbed some black paint on the ends to give the knobs some depth.
The fuselage frames and lever quadrants were secured using dilute PVA wicked into place with a paintbrush.
I also dusted some Tamiya light gunmetal powder onto them, which will hopefully show up slightly better with a matt coat.
I blobbed some black paint on the ends to give the knobs some depth.
The fuselage frames and lever quadrants were secured using dilute PVA wicked into place with a paintbrush.
I also dusted some Tamiya light gunmetal powder onto them, which will hopefully show up slightly better with a matt coat.
Some more parts fitted:
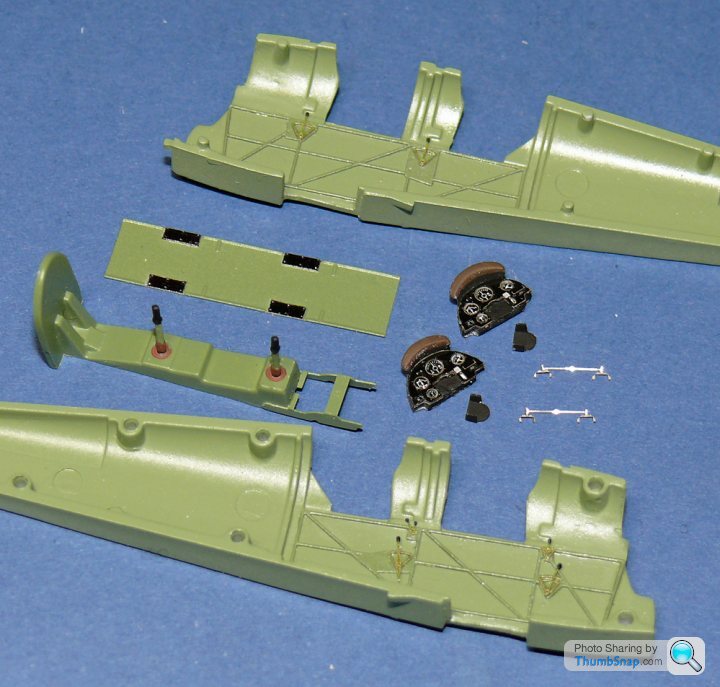
The rudder bars (below the instrument panels) are very fragile - I managed to break a couple while bending into shape. They're now pva'd back together.
I'll add some control rods to the levers, and a bit of cockpit wiring tomorrow if I get time. I think the longer levers on the port side of the cockpit should be parallel (like the stbd. side) - I assumed everything is linked front and back. That's what you get for follwing instructions...
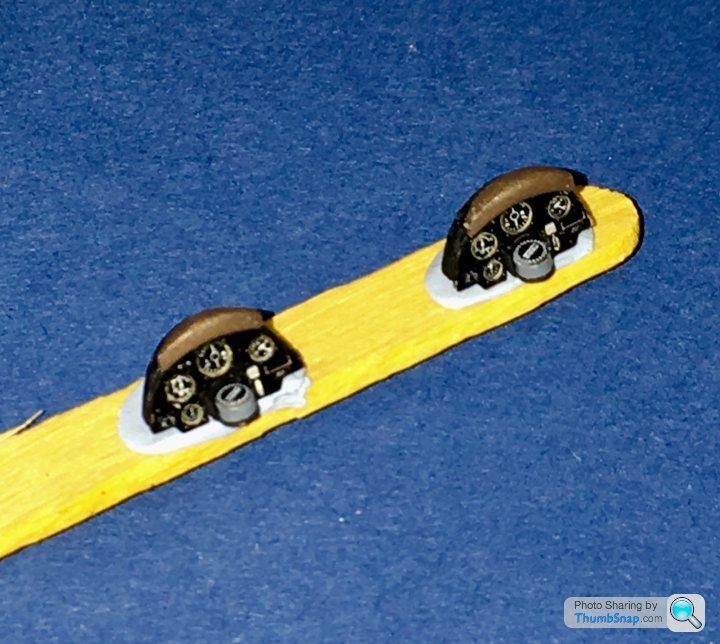
Did a bit more work on the cockpit tonight. Applied a dark wash to everything to give some depth to the detail:
A wash can often dry a bit grainy, so I lightly brush over with a slightly lighter shade of weathering powder to blend it in and it also highlights the raised bits. I’ve given the edges of the bulkhead plates a dusting of gunmetal to take the flatness off them too.
Finally, I’ve assembled and curved the photo etched cockpit doors. They’re now ready for the same weathering process as the cockpit:
The front ones should have angled front edges, but I doubt anyone will notice.
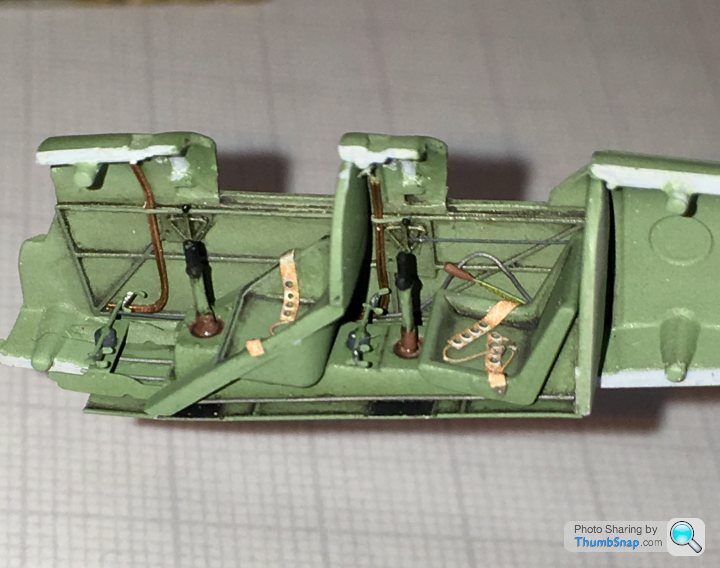
I’ve detailed the cockpit with control rods, pipes and cables made from copper and lead wire, and stretched sprue. Maybe not 100% complete (no two cockpits seem to be exactly the same), but at this scale, an impression of what’s there is often good enough:

Also added a map pocket (scrap photo-etch) to the back of the pilot’s seat, and rudder bars. Next job is to add the seat harnesses.
Also added a map pocket (scrap photo-etch) to the back of the pilot’s seat, and rudder bars. Next job is to add the seat harnesses.
Edited by dr_gn on Thursday 8th March 22:24
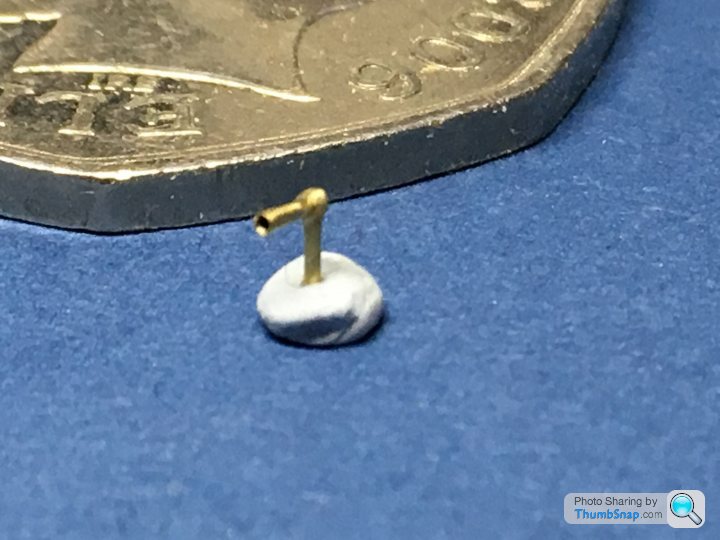
The instrument Venturi tubes on each side of the fuselage are represented by moulded-in lumps:

I made a more refined version by heating some brass tube and flaring the end with a pin:

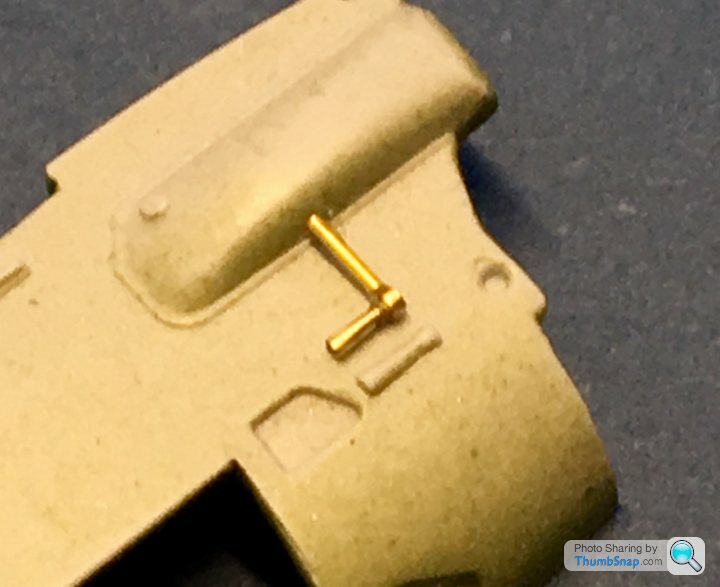
Then glued a straight piece to the end, along with a mounting spigot:
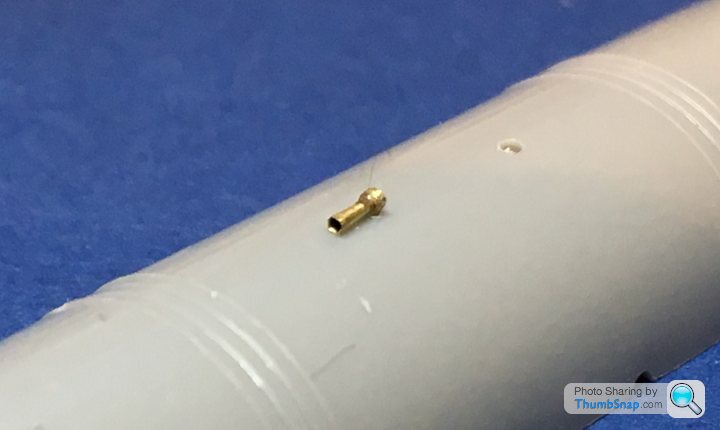
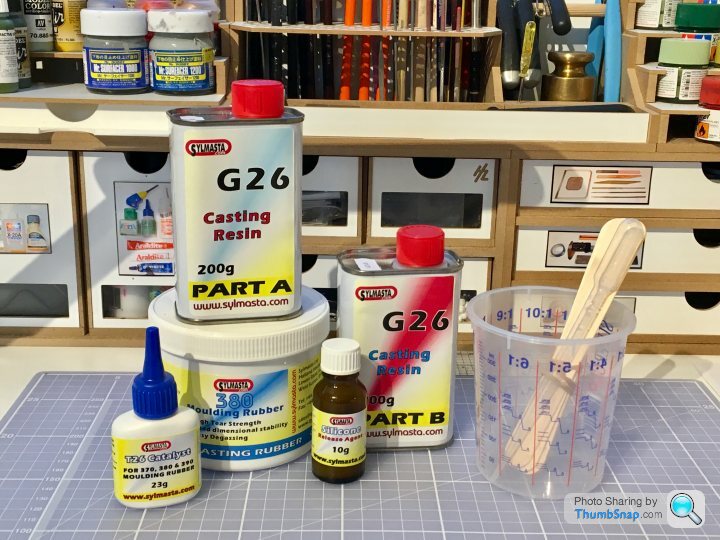
This will form a pattern for resin casting a pair. I’ve done a bit of resin casting before, but decided to treat myself to a new kit:
I made a more refined version by heating some brass tube and flaring the end with a pin:
Then glued a straight piece to the end, along with a mounting spigot:
This will form a pattern for resin casting a pair. I’ve done a bit of resin casting before, but decided to treat myself to a new kit:


dr_gn said:
The instrument Venturi tubes on each side of the fuselage are represented by moulded-in lumps: I made a more refined version by heating some brass tube and flaring the end with a pin: Then glued a straight piece to the end, along with a mounting spigot:
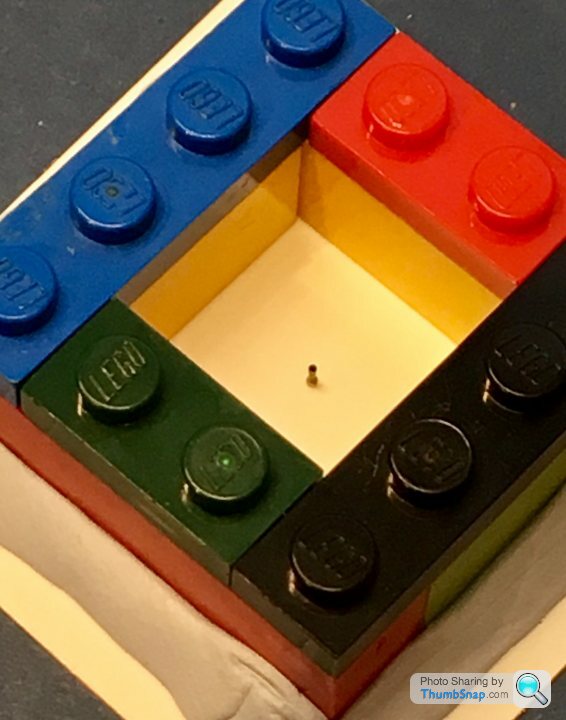
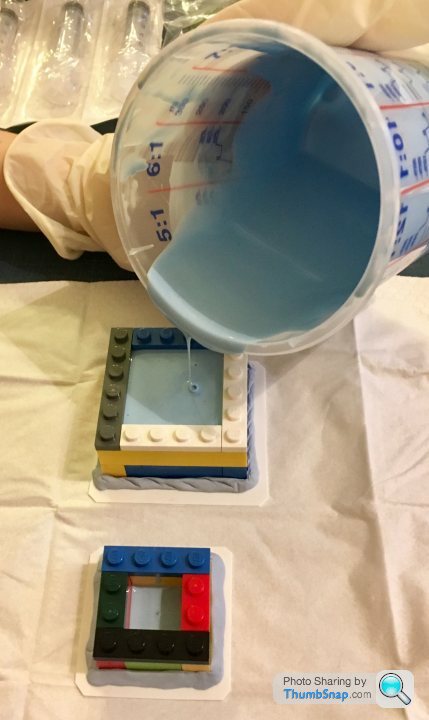
Why wouldn't you fit the brass one and paint that? The mould set, and the pattern pulled straight out:

I’ll wait until I’ve got some spare resin from my robot build, then try casting a few:
https://www.pistonheads.com/gassing/topic.asp?h=0&...
I’ll wait until I’ve got some spare resin from my robot build, then try casting a few:
https://www.pistonheads.com/gassing/topic.asp?h=0&...
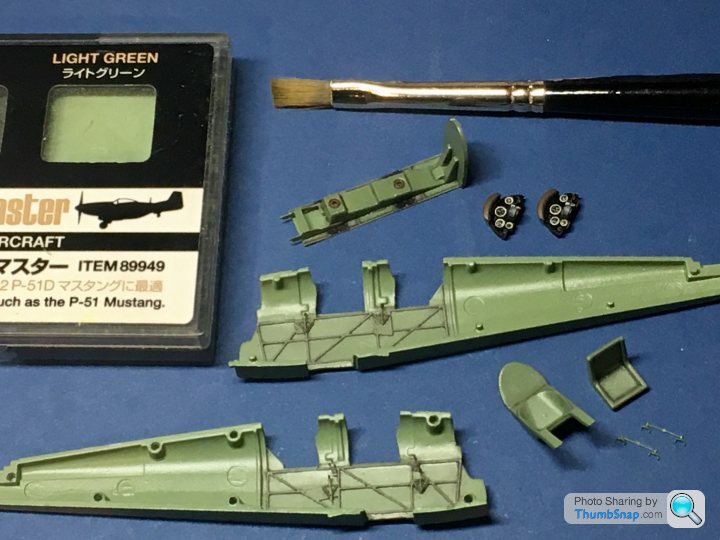
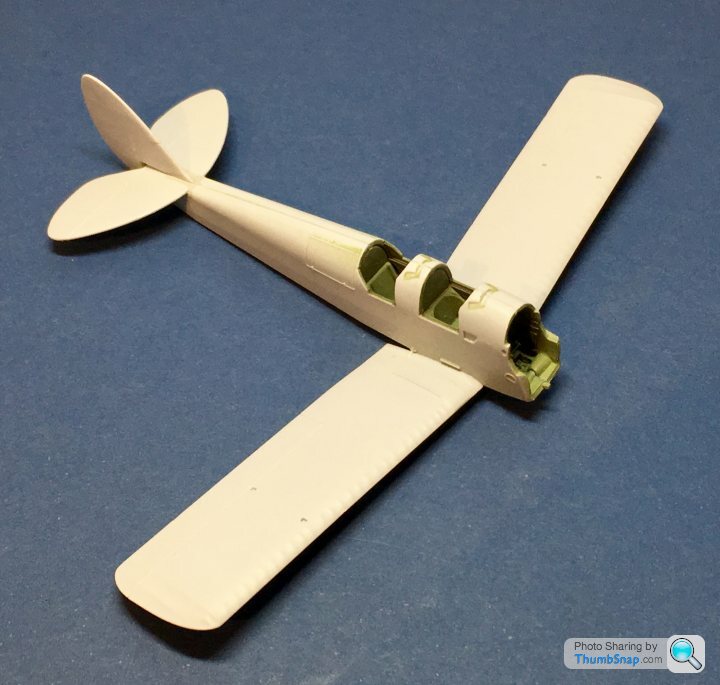
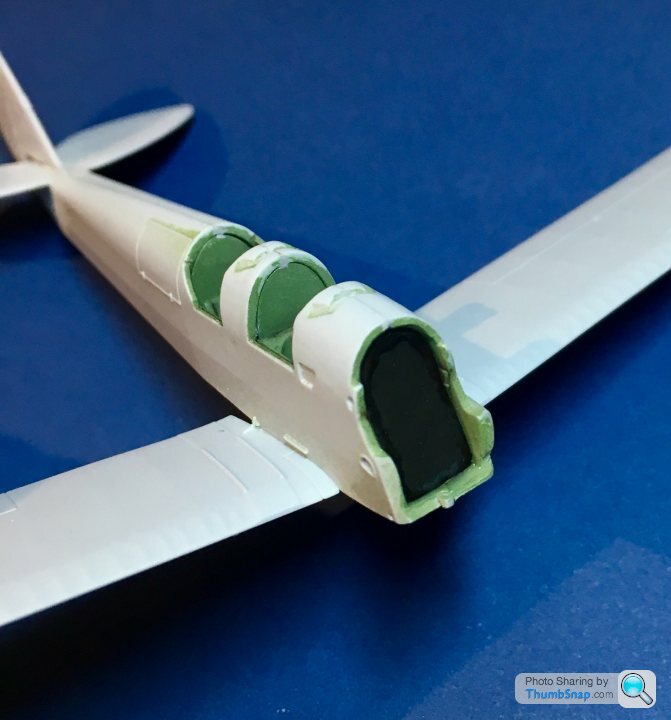
Drilled out the intakes in the cowl, and scraped off the over scale hinge lines. I’ll replace these with sprue in a more realistic scale, and in the correct position for the modified cowl alignment:

I managed to lose the separate cowl air scoop, so made a replacement out of a cut down Polikarpov gun fairing. I’ve also made a start on hollowing it out.
Finally, drilled out the exhaust pipe.
I managed to lose the separate cowl air scoop, so made a replacement out of a cut down Polikarpov gun fairing. I’ve also made a start on hollowing it out.
Finally, drilled out the exhaust pipe.
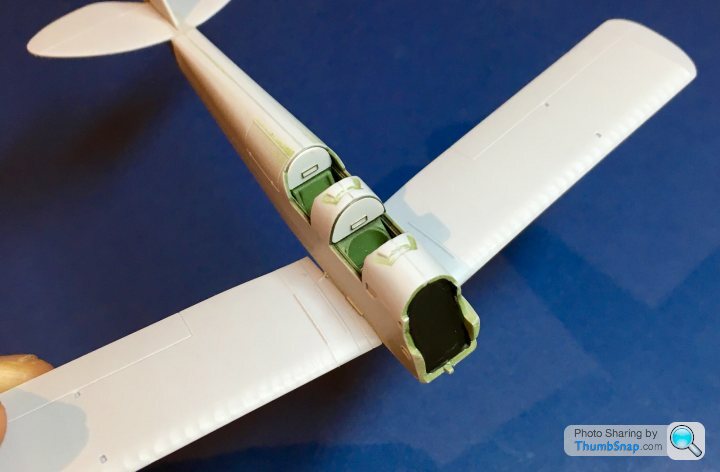
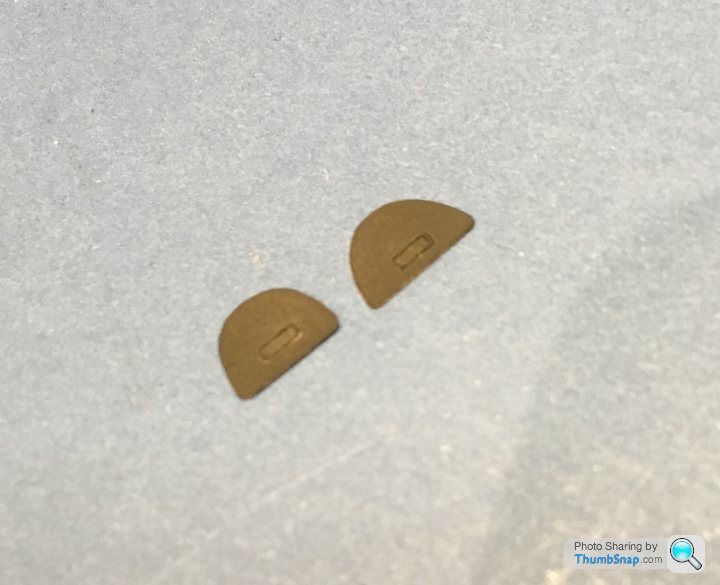
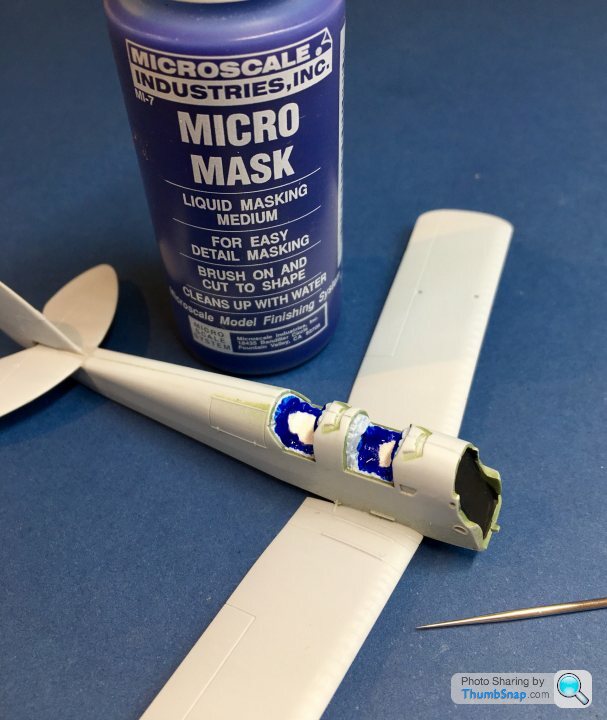
So the cockpit bulkheads: I noticed that some Tiger Moths have what appears to be a separate panel above the seats, with apertures for the harness. The surrounds for the apertures are provided in the photo-etch set. I made some plasticard panels and temporarily pva’d the surrounds in place. After spraying black, I removed the surrounds, and will now cut rectangular holes. I’ll then paint, re-attach the surrounds and fix them in place after main painting is complete. To finish them, I’ll use 0.2mm lead wire to form a representation of a trim beaded edge around each one, then fix the harness:
dr_gn said:
The mould set, and the pattern pulled straight out:
I’ll wait until I’ve got some spare resin from my robot build, then try casting a few:
https://www.pistonheads.com/gassing/topic.asp?h=0&...
Why aren't you just using the brass pattern on the model?I’ll wait until I’ve got some spare resin from my robot build, then try casting a few:
https://www.pistonheads.com/gassing/topic.asp?h=0&...
Gassing Station | Scale Models | Top of Page | What's New | My Stuff