Airfix 1:72 Tiger Moth
Discussion


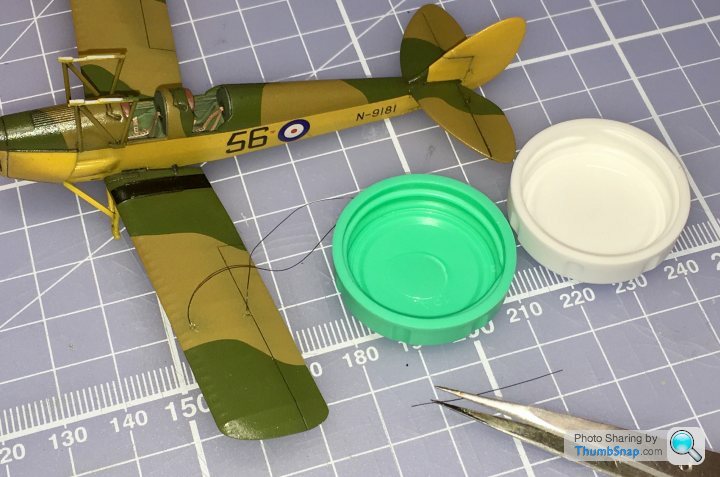
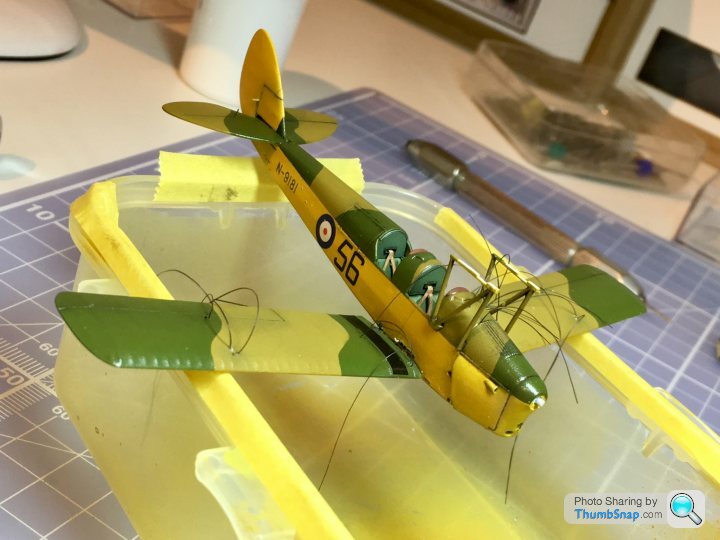
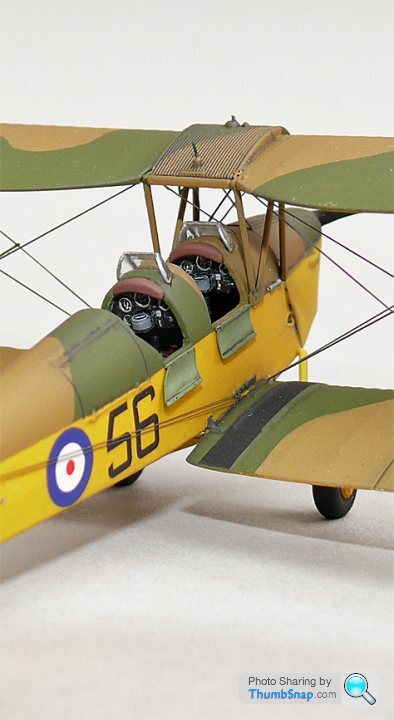
I figured that if I rigged the cabane first, without the upper wing fitted, it would simplify things (a bit). I also fully rigged the interplanes, with a bit of extra tension, before fitting the outer struts. I’ve had to separate the struts because the x braces clash with the plastic temporary jigs. Anyway, the individual struts snap into place quite nicely. I managed to unstick a cabane brace, and with no way of re-attaching it, I’ll have to replace with stretched sprue:

Old and new:
Old and new:
Yes, scale is 1:48.
I wasn't satisfied with the brush paintwork quality of the rudder so I decided to sand the humbrol stuff down and airbrush the colors on again.
I used acrylic paint, which turns out to give a very nasty effect of partially sticking only. Maybe I will have to primer first.
Don't worry, the photo is only after half-time sanding. I also took the scratches and everything out.
BTW: apologies hijacking your thread.
Edited by allegerita on Friday 6th April 22:57
allegerita said:
Yes, scale is 1:48.
I wasn't satisfied with the brush paintwork quality of the rudder so I decided to sand the humbrol stuff down and airbrush the colors on again.
I used acrylic paint, which turns out to give a very nasty effect of partially sticking only. Maybe I will have to primer first.
Don't worry, the photo is only after half-time sanding. I also took the scratches and everything out.
BTW: apologies hijacking your thread.
Edited by allegerita on Friday 6th April 22:57
AlexC1981 said:
I just pulled out my half built 1:72 De Havilland Vampire from the cupboard and I had forgotten just how small 1:72 scale aeroplanes are. Amazing attention to detail 
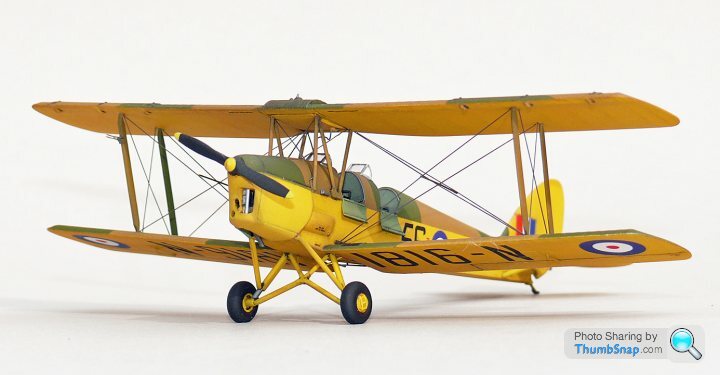
Sometimes all the extra detail adds up to something impressive, sometimes it just doesn’t hang together. This one looks ok, but not my best; yellow can be a tricky colour to get looking right, and often doesn’t cover well. With this one, some detail was filled by the paint, and the dark wash was a little harsh. It’s “ok”
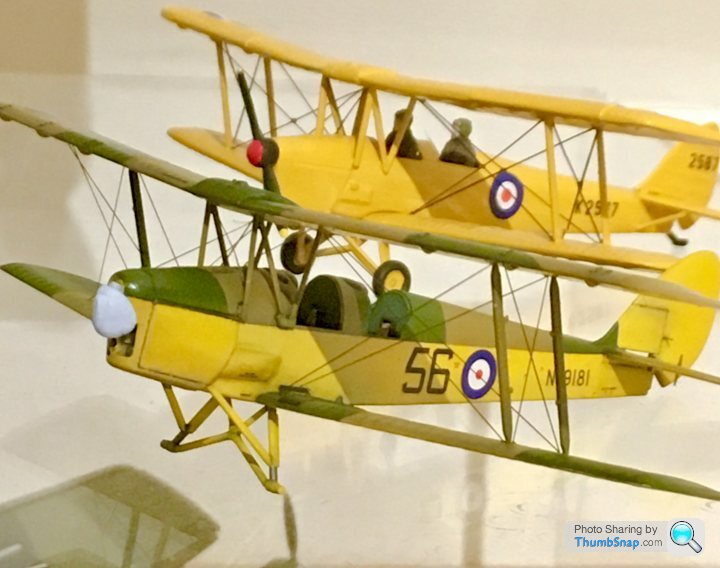
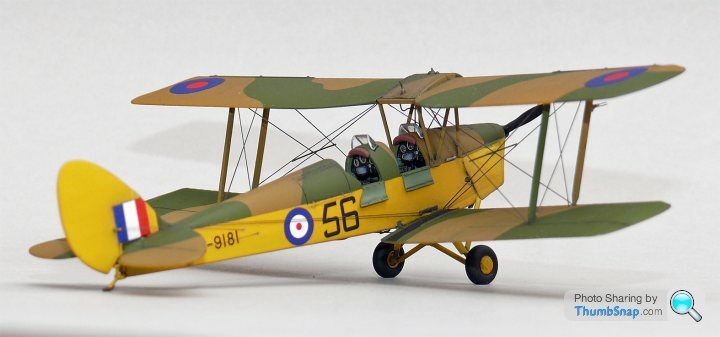
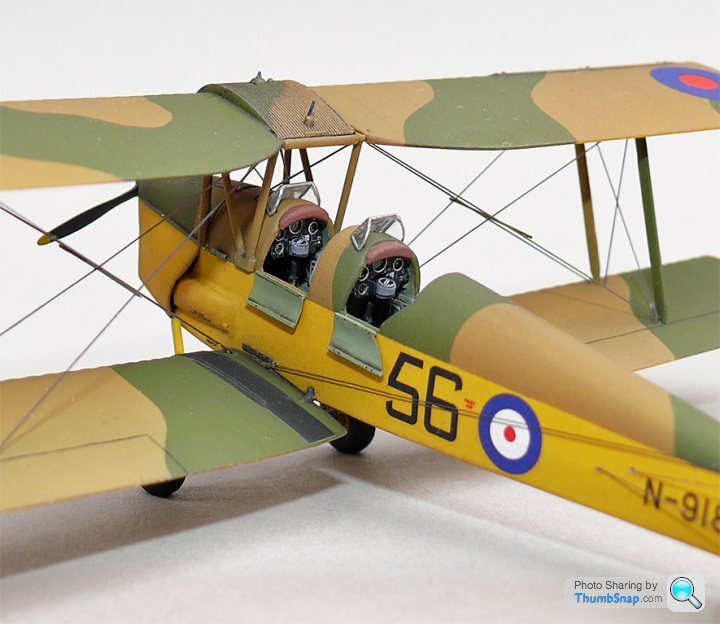
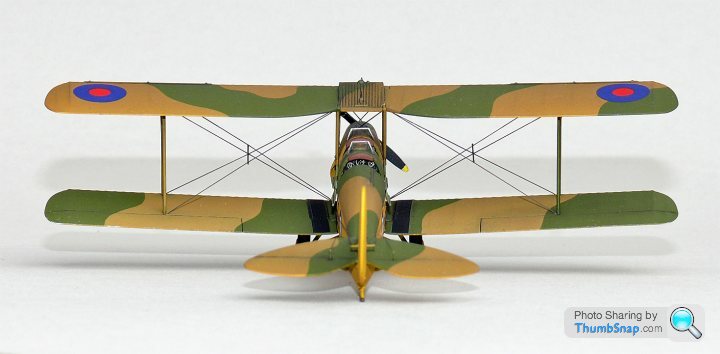
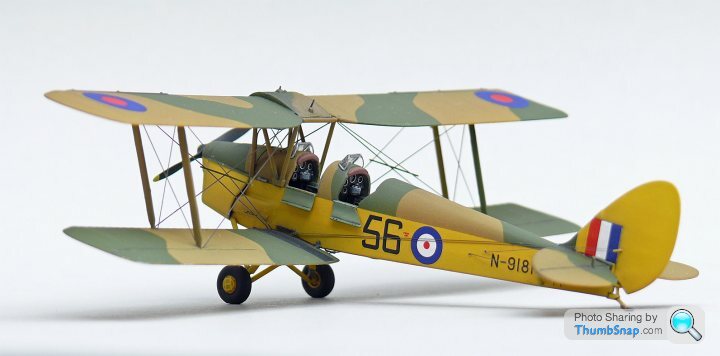
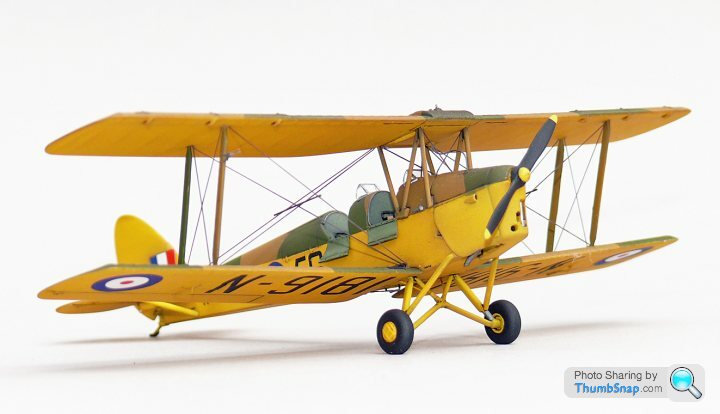
Here are the finished pics.
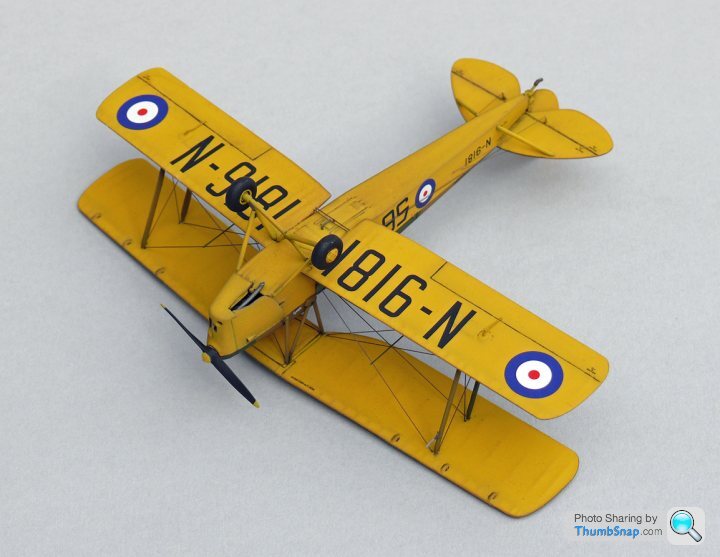
1:72 Airfix Tiger Moth N-9181, No.10 Elementary Reserve & Flying Training School, RAF Yatesbury, 1940.
Modifications / additions were:
Corrected nose angle
Nose vents drilled out
Photo-etch / scratchbuilt cockpit details
Cockpit rear bulkheads scratch built with plasticard and lead wire piping
Photo-etch cockpit doors
Engine front pushrod added
Ez-Line & stretched sprue rigging (standard) & control lines (fine)
Lead wire fuel pipe
Scratchbuilt fuel level indicator and vent.
Photo-etch aileron linkages
Scratch-built fuselage aileron and rudder mechanisms
Photo-etch rudder & elevator horns
Photo-etch undercarriage stays
Photo-etch pitot tubes
Resin cast fuselage venturis
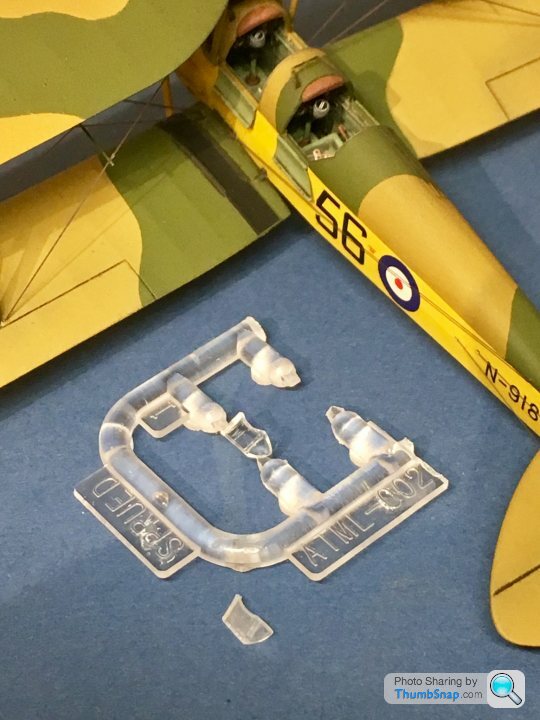
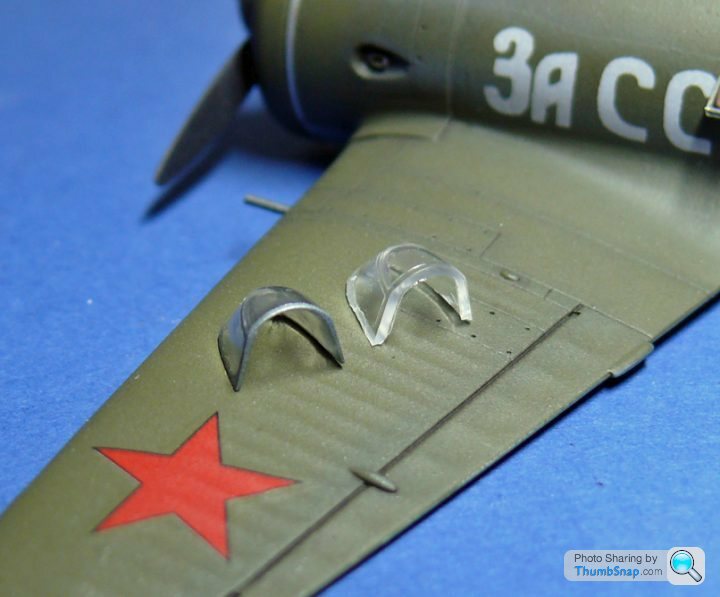
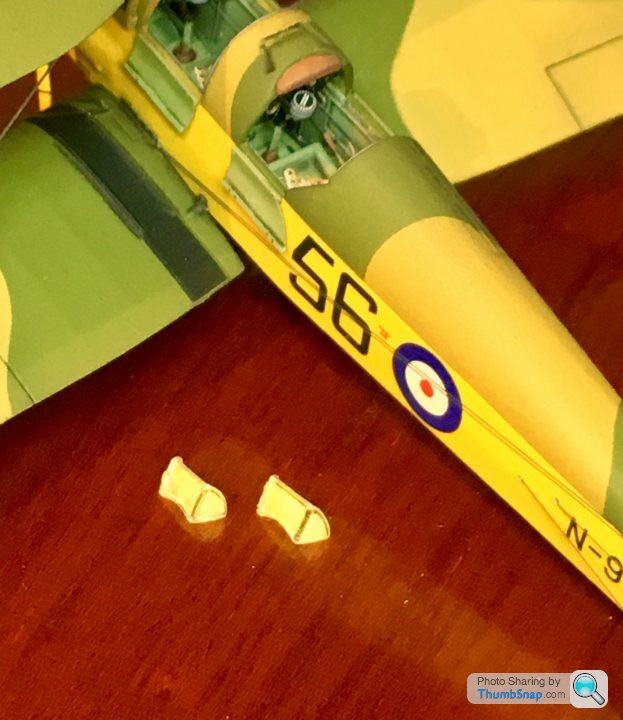
Thinned windscreens
Flatted tyres
Scratch built lower fuselage panels/stiffeners
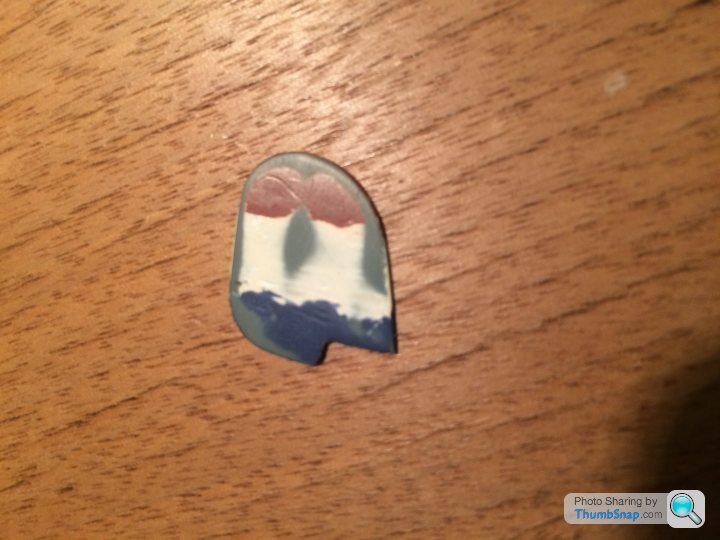
Fin flash decals
It turned out OK, but it was very tricky to build.


1:72 Airfix Tiger Moth N-9181, No.10 Elementary Reserve & Flying Training School, RAF Yatesbury, 1940.
Modifications / additions were:
Corrected nose angle
Nose vents drilled out
Photo-etch / scratchbuilt cockpit details
Cockpit rear bulkheads scratch built with plasticard and lead wire piping
Photo-etch cockpit doors
Engine front pushrod added
Ez-Line & stretched sprue rigging (standard) & control lines (fine)
Lead wire fuel pipe
Scratchbuilt fuel level indicator and vent.
Photo-etch aileron linkages
Scratch-built fuselage aileron and rudder mechanisms
Photo-etch rudder & elevator horns
Photo-etch undercarriage stays
Photo-etch pitot tubes
Resin cast fuselage venturis
Thinned windscreens
Flatted tyres
Scratch built lower fuselage panels/stiffeners
Fin flash decals
It turned out OK, but it was very tricky to build.
Edited by dr_gn on Saturday 21st April 13:32
tight5 said:
Lovely.
The rigging makes it for me.
Makes me wonder about the colour scheme, though.
Cammo and yellow ?
Do we wanna hide or be high vis ?
I think the camo may have been to hide the airfields rather than the aircraft. If the field had no concrete runways and no aeroplane shaped yellow things dotted about it would be hard to spot from the air.The rigging makes it for me.
Makes me wonder about the colour scheme, though.
Cammo and yellow ?
Do we wanna hide or be high vis ?
Gassing Station | Scale Models | Top of Page | What's New | My Stuff