Tamiya 1/12 Caterham BDR
Discussion


I heard my name mentioned...
It looks excellent, and I'm sure you'll be building some models after this one.
One small point about your photos in the sun. This applies mainly to finished models: I'm no professional photographer, but I think bright sun doesn't show models to the best effect - with harsh shadow. I usually wait for a bright, but overcast day and take finished pictures with a piece of A1 medium grey card as background. Put the camera on a tripod and use a 2 second self timer. Experiment with exposure (and sometimes even flash).
It always surprises me that people spend hours on a model, only to compromise on how they show it off. Be proud of your work and show it at its best!
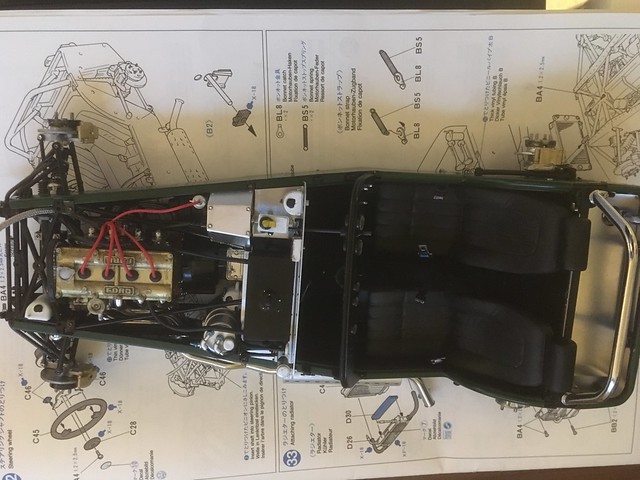
Progress so far - sorry Dr_gn but they'r just iphone pics to document my progress, I'll take some proper pictures when its complete.
 IMG_0312 by MBBlat, on Flickr
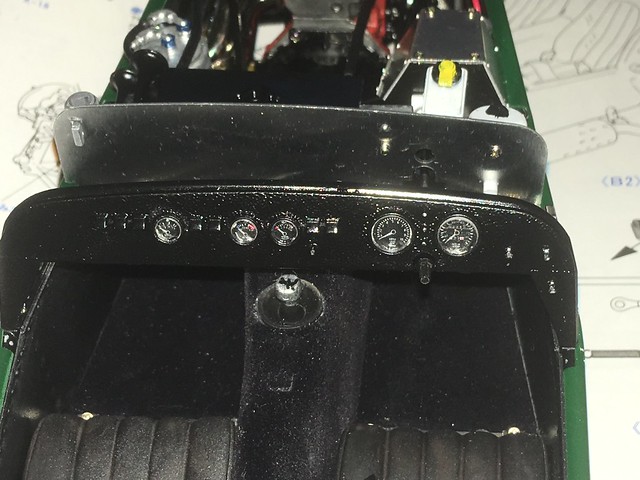
Dash
 IMG_0315 by MBBlat, on Flickr
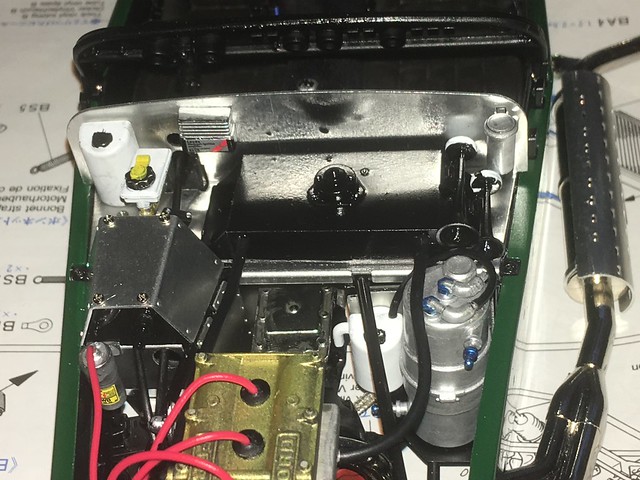
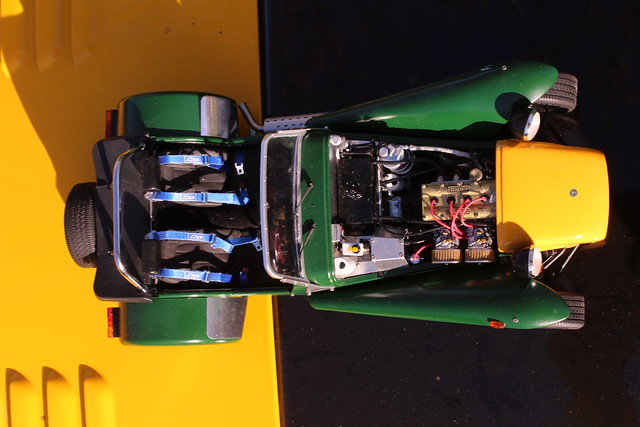
rear of engine bay
 IMG_0316 by MBBlat, on Flickr
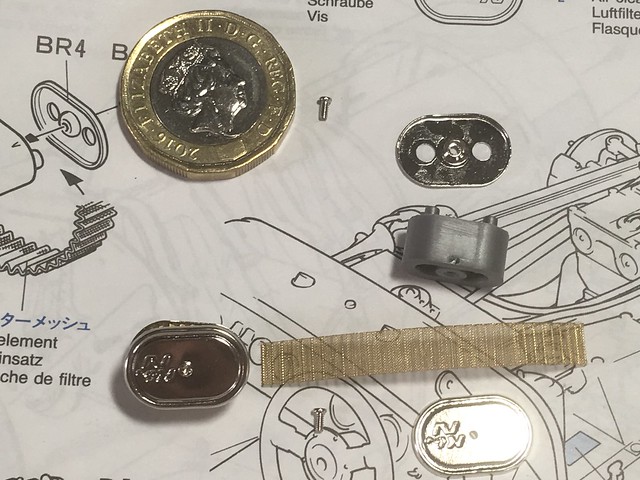
So far every thing except paint is as supplied by tamiya in the box. About the only things missing are the brake lines and wiring looms.
Next up is the radiator - instructions say black, seems wrong to me so will probably go alloy with a bit of a was in the fins to make the attached oil cooler stand out a bit.
IMG_0312 by MBBlat, on FlickrDash
IMG_0315 by MBBlat, on Flickrrear of engine bay
IMG_0316 by MBBlat, on FlickrSo far every thing except paint is as supplied by tamiya in the box. About the only things missing are the brake lines and wiring looms.
Next up is the radiator - instructions say black, seems wrong to me so will probably go alloy with a bit of a was in the fins to make the attached oil cooler stand out a bit.
Turn7 said:
Do you have a link for the kit please ?
From JDLAM https://www.jadlamracingmodels.com/tamiya-10204-ca...Other suppliers are available

MBBlat said:
Cheers.....but.....
How much??!?
How can a kit be that expensive ? Or am I way to far out of the loop on kit pricing these days ?
Turn7 said:
Cheers.....but.....
How much??!?
How can a kit be that expensive ? Or am I way to far out of the loop on kit pricing these days ?
Compared to Pocher https://www.wonderlandmodels.com/brands/pocher/ its almost a bargin How much??!?
How can a kit be that expensive ? Or am I way to far out of the loop on kit pricing these days ?
Remember this isn't just a plastic glue together kit - the exterior pannels are thin aluminium, suspension arms & de-dion tubes are metal, and its mostly assembled with absolutly tiny screws not glue.
Its not even the most expensive model Tamiya do - that would be their 1/16 tanks, even witout the bits that make them go https://www.jadlamracingmodels.com/tamiya-36212-u-...
Or fully RC https://www.jadlamracingmodels.com/tamiya-rc-56041... + radio + battery
On the other end of the scale, the pistonheads favorite MX-5 is £13 in 1:24 https://www.jadlamracingmodels.com/tamiya-24085-ma...
MBBlat said:
Compared to Pocher https://www.wonderlandmodels.com/brands/pocher/ its almost a bargin
Thats crazy money....MBBlat said:
Remember this isn't just a plastic glue together kit - the exterior pannels are thin aluminium, suspension arms & de-dion tubes are metal, and its mostly assembled with absolutly tiny screws not glue.
Ah, OK, I didnt realise that.....MBBlat said:
Turn7 said:
Cheers.....but.....
How much??!?
How can a kit be that expensive ? Or am I way to far out of the loop on kit pricing these days ?
Compared to Pocher https://www.wonderlandmodels.com/brands/pocher/ its almost a bargin How much??!?
How can a kit be that expensive ? Or am I way to far out of the loop on kit pricing these days ?
Remember this isn't just a plastic glue together kit - the exterior pannels are thin aluminium, suspension arms & de-dion tubes are metal, and its mostly assembled with absolutly tiny screws not glue.
Its not even the most expensive model Tamiya do - that would be their 1/16 tanks, even witout the bits that make them go https://www.jadlamracingmodels.com/tamiya-36212-u-...
Or fully RC https://www.jadlamracingmodels.com/tamiya-rc-56041... + radio + battery
http://www.rcarmory.com/kit_kingtiger.html#price
I make that, fully specced, £1900, shipping not included.

Turn7 said:
MBBlat said:
Compared to Pocher https://www.wonderlandmodels.com/brands/pocher/ its almost a bargin
Thats crazy money....MBBlat said:
Remember this isn't just a plastic glue together kit - the exterior pannels are thin aluminium, suspension arms & de-dion tubes are metal, and its mostly assembled with absolutly tiny screws not glue.
Ah, OK, I didnt realise that.....I'd love one of these Caterhams, I remember when they first came out in the late 90's and being blown away by the detail. They still hold their own now against more modern kits.
Turn7 said:
MBBlat said:
Cheers.....but.....How much??!?
How can a kit be that expensive ? Or am I way to far out of the loop on kit pricing these days ?
Finally finished
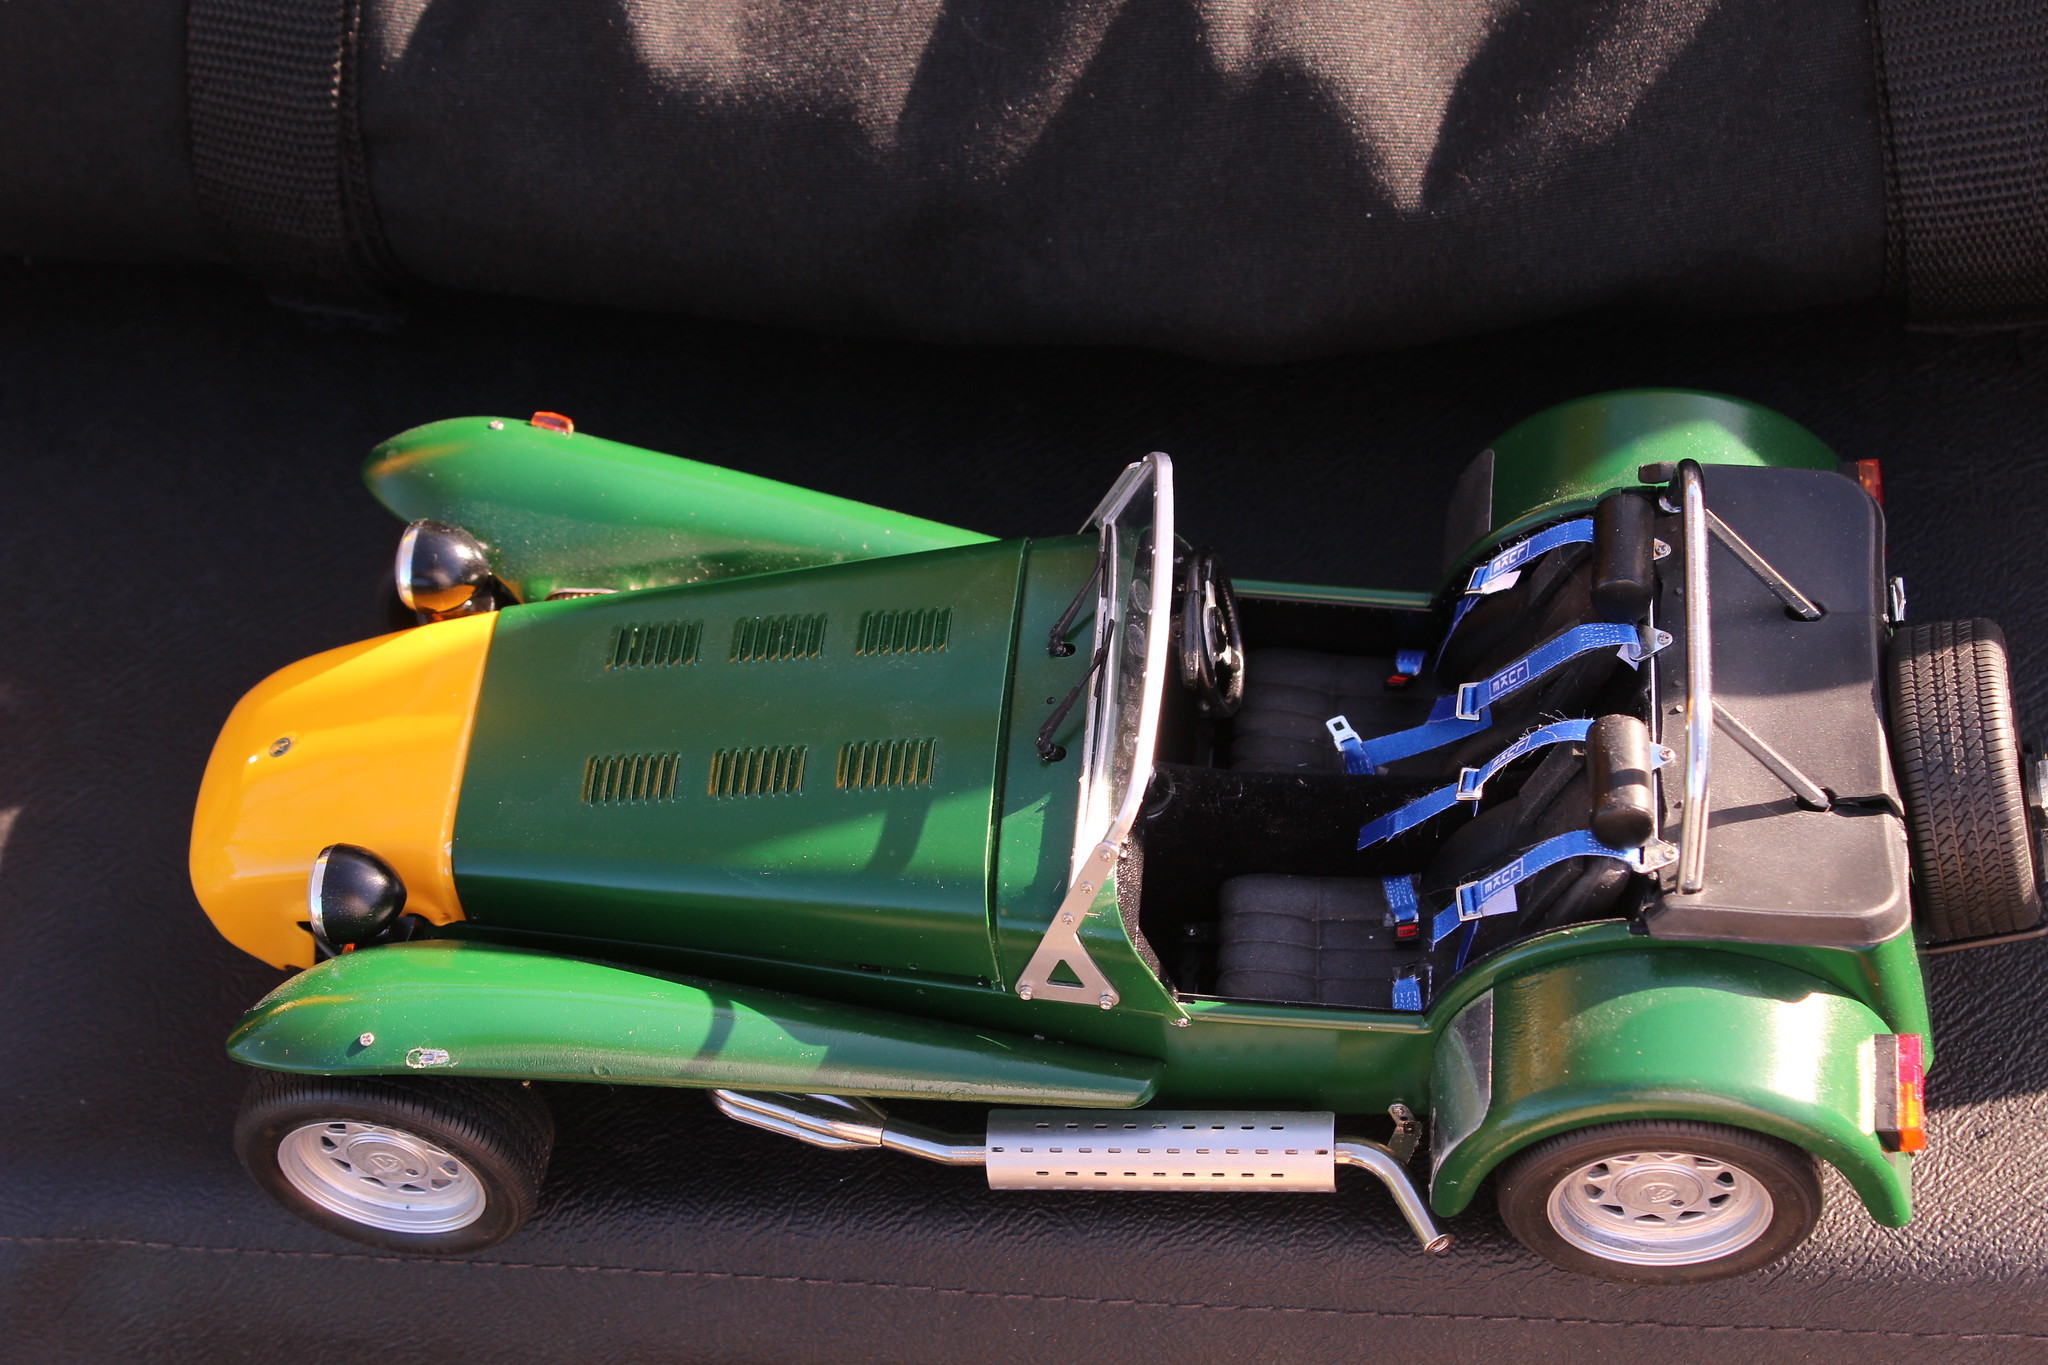 Mustang Caterham_18 by MBBlat, on Flickr
 Mustang Caterham_12 by MBBlat, on Flickr
Not happy with the seatbelts - they are self adhesive but with the least grabbing adhesive known, so can't get them to stay together, I may have to replace them with some aftermarket belts.
It also took me ages to get a reasonable finish on the nosecone, the paint I originally used ate into the plastic, so it had to be stripped, filled and sanded back.
Mustang Caterham_18 by MBBlat, on FlickrMustang Caterham_12 by MBBlat, on FlickrNot happy with the seatbelts - they are self adhesive but with the least grabbing adhesive known, so can't get them to stay together, I may have to replace them with some aftermarket belts.
It also took me ages to get a reasonable finish on the nosecone, the paint I originally used ate into the plastic, so it had to be stripped, filled and sanded back.
MBBlat said:
Finally finished
Mustang Caterham_18 by MBBlat, on Flickr
Mustang Caterham_12 by MBBlat, on Flickr
Not happy with the seatbelts - they are self adhesive but with the least grabbing adhesive known, so can't get them to stay together, I may have to replace them with some aftermarket belts.
It also took me ages to get a reasonable finish on the nosecone, the paint I originally used ate into the plastic, so it had to be stripped, filled and sanded back.
.Mustang Caterham_18 by MBBlat, on FlickrMustang Caterham_12 by MBBlat, on FlickrNot happy with the seatbelts - they are self adhesive but with the least grabbing adhesive known, so can't get them to stay together, I may have to replace them with some aftermarket belts.
It also took me ages to get a reasonable finish on the nosecone, the paint I originally used ate into the plastic, so it had to be stripped, filled and sanded back.
A tiny drop of CA or preferably Micro clear would sort the seat belts out from coming apart

One of the headlights is a bit loose and easily knocked askew, trouble is the bracket it attaches to is slightly broken, so I cant tighten it up properly.
I tried additional tape on the belts, without any luck, reluctant to try superglue as that would stiffen them too much, plus I'm likely to get it everywhere knowing my luck. I've got a set of after-market F1 straps to try, but only enough for one side, just have to finish a couple of other projects first.
I tried additional tape on the belts, without any luck, reluctant to try superglue as that would stiffen them too much, plus I'm likely to get it everywhere knowing my luck. I've got a set of after-market F1 straps to try, but only enough for one side, just have to finish a couple of other projects first.
It just occurred to me I never updated the original thread I created.
Thread is here:-
https://www.pistonheads.com/gassing/topic.asp?t=14...
I will add the other pictures to it.
Thread is here:-
https://www.pistonheads.com/gassing/topic.asp?t=14...
I will add the other pictures to it.
Gassing Station | Scale Models | Top of Page | What's New | My Stuff