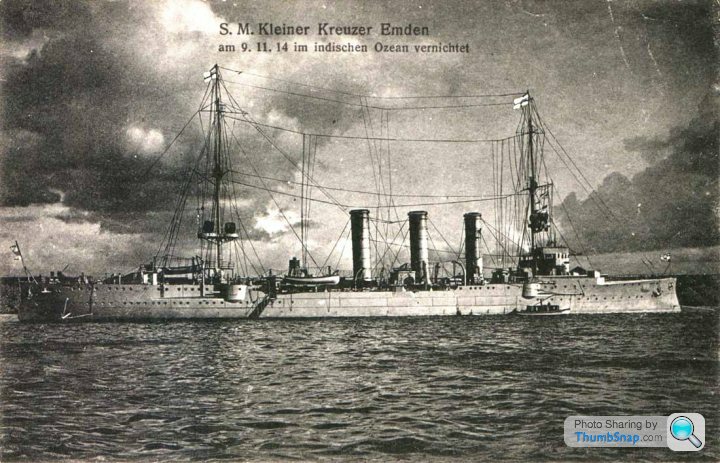
Paper Ship: SMS Emden (1910), 1:250
Discussion


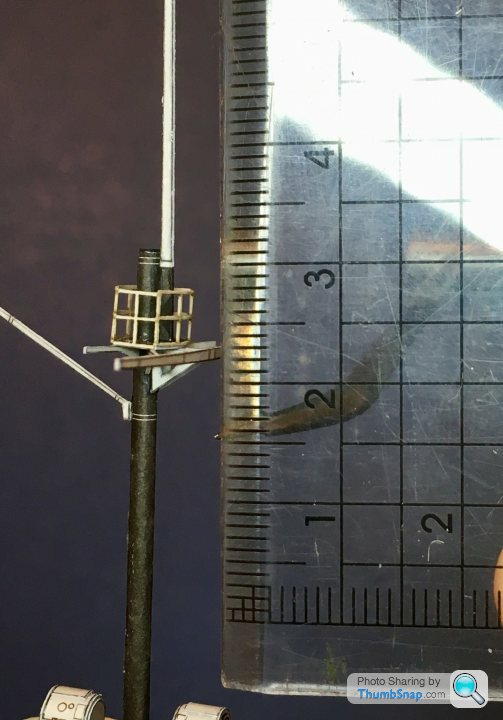
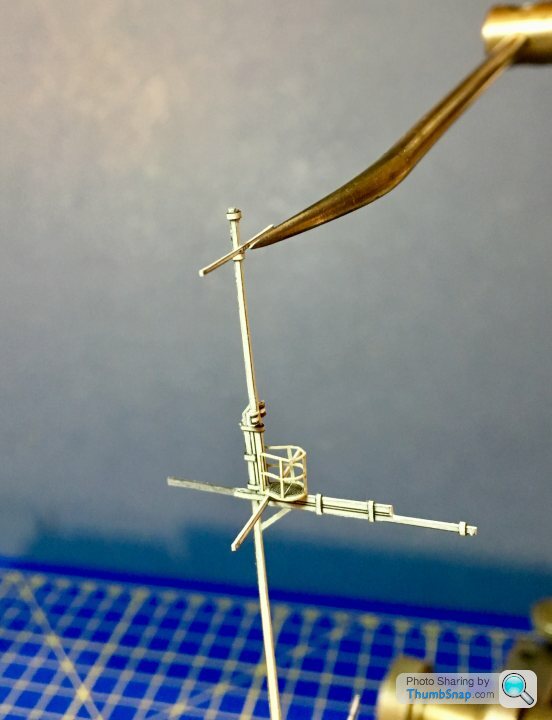
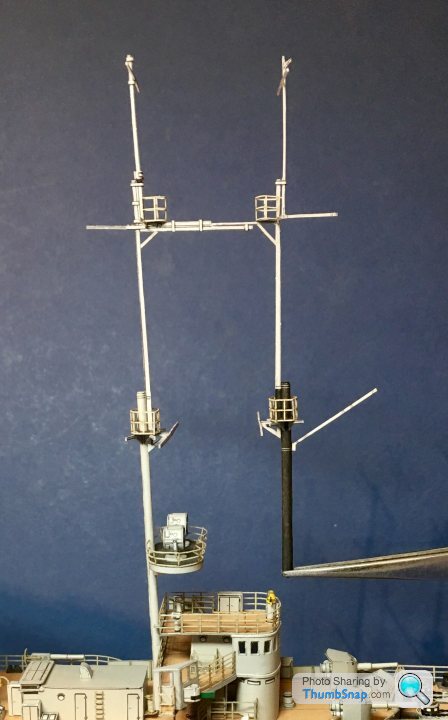
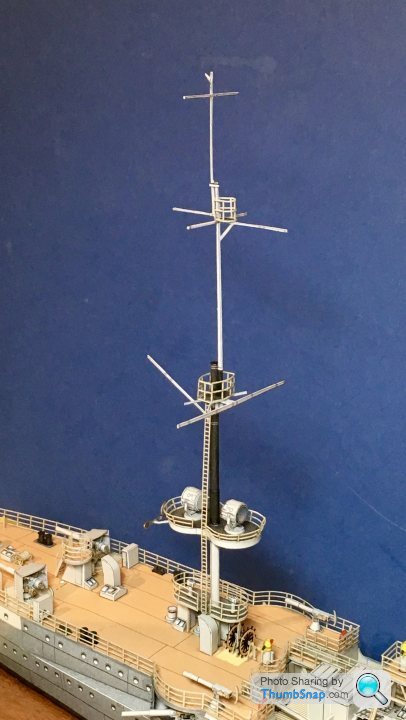
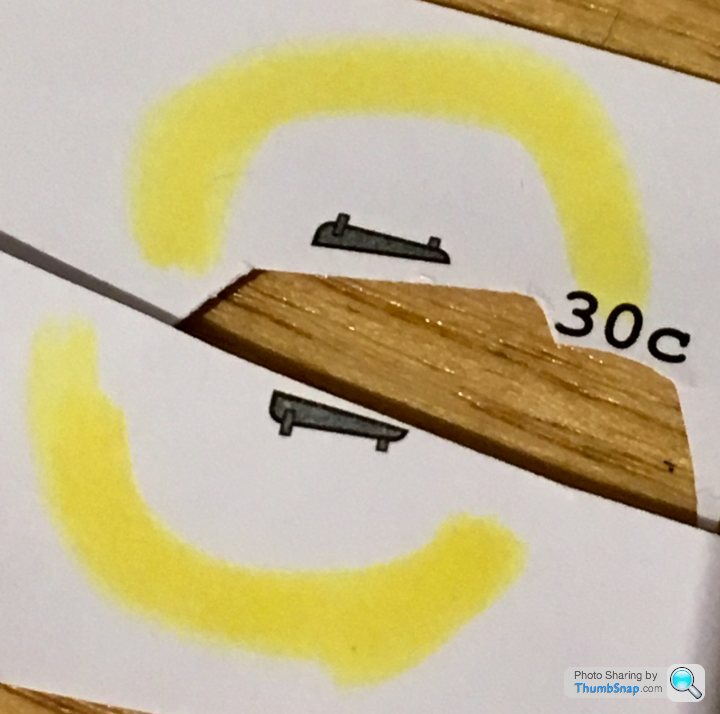
I think the masts might have been telescopic, to give clearance under bridges. Anyway, since pretty much all drawings and photographs I can find show the masts to be equal heights, I opted to change mine. Started by measuring the relative heights of three key points on the masts - the centres of the spars where the horizontal rigging fits:
Front location A:
Rear; difference 7mm high:
Front location B:
Rear; difference 6mm high:
Front position C:
Rear: difference 6mm high.
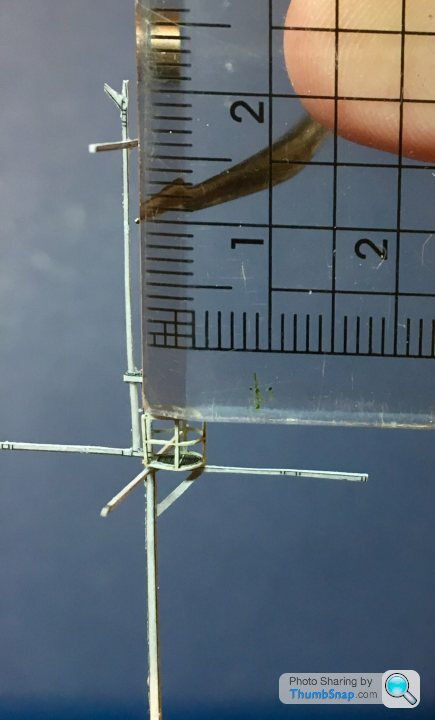
Average to remove from rear mast = 6.3mm. Snip:
Snip:
Confirmation the features line up:
Then wrap some paper around the joint, paint and fix:
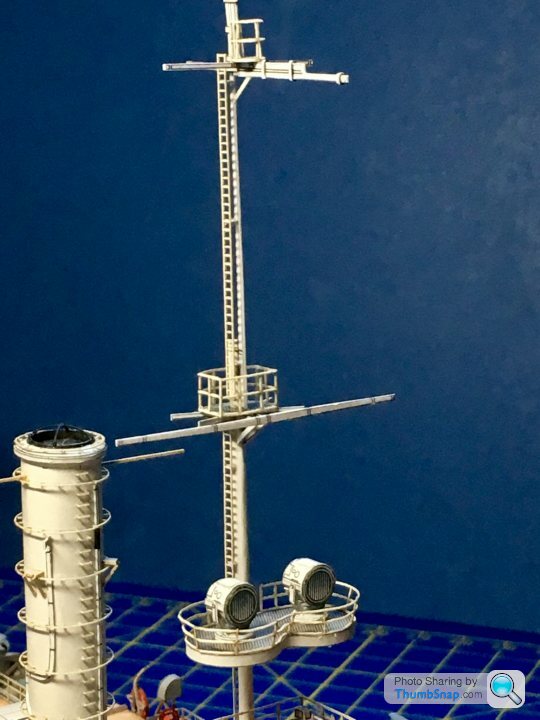
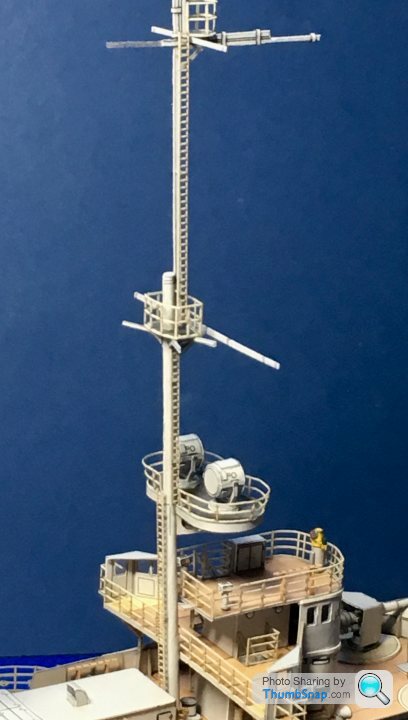
Not too bad, especially when the ladder is fitted, and at least the rigging will be parallel now:
Front location A:
Rear; difference 7mm high:
Front location B:
Rear; difference 6mm high:
Front position C:
Rear: difference 6mm high.
Average to remove from rear mast = 6.3mm. Snip:
Snip:
Confirmation the features line up:
Then wrap some paper around the joint, paint and fix:
Not too bad, especially when the ladder is fitted, and at least the rigging will be parallel now:

dr_gn said:
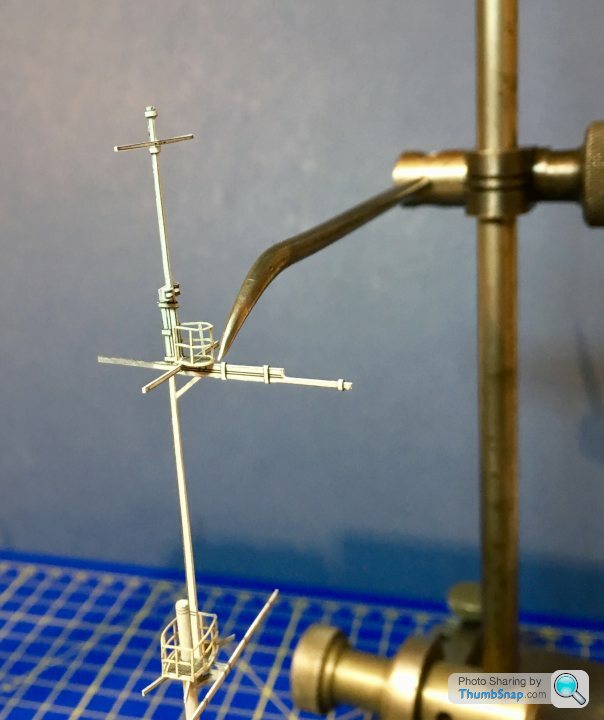
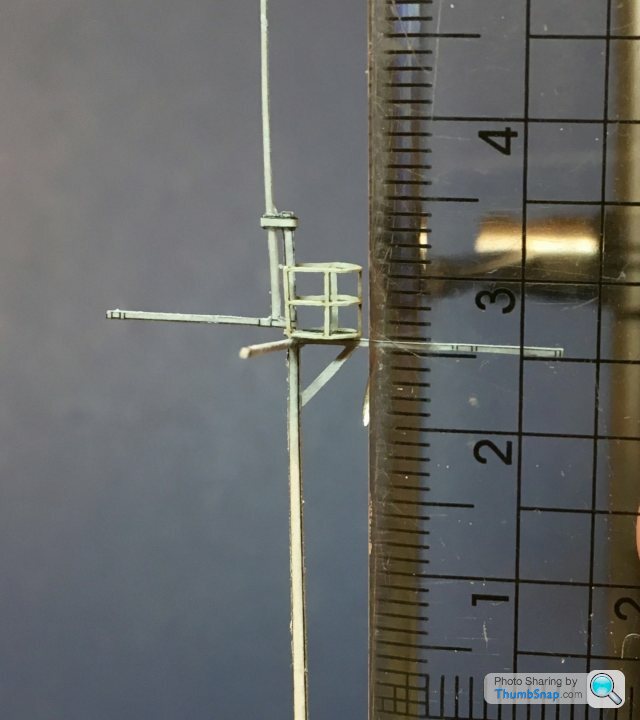
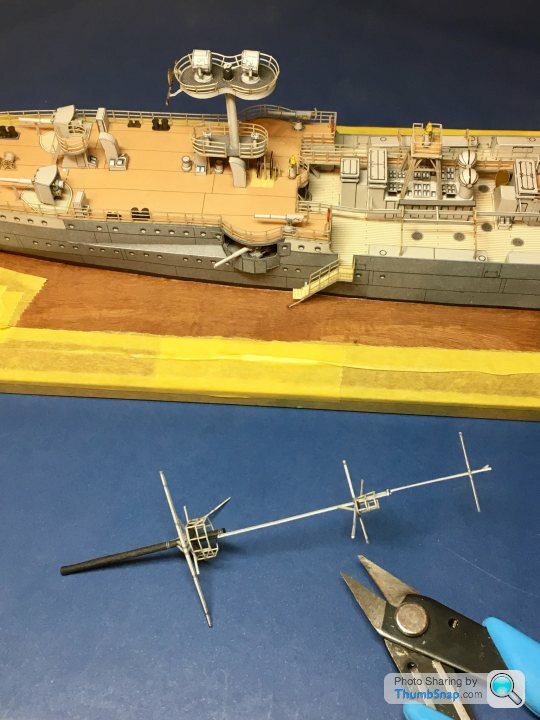
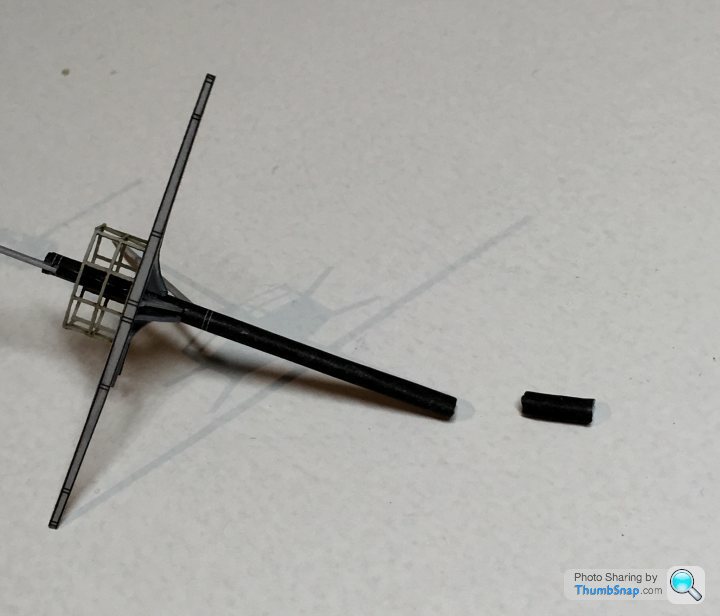
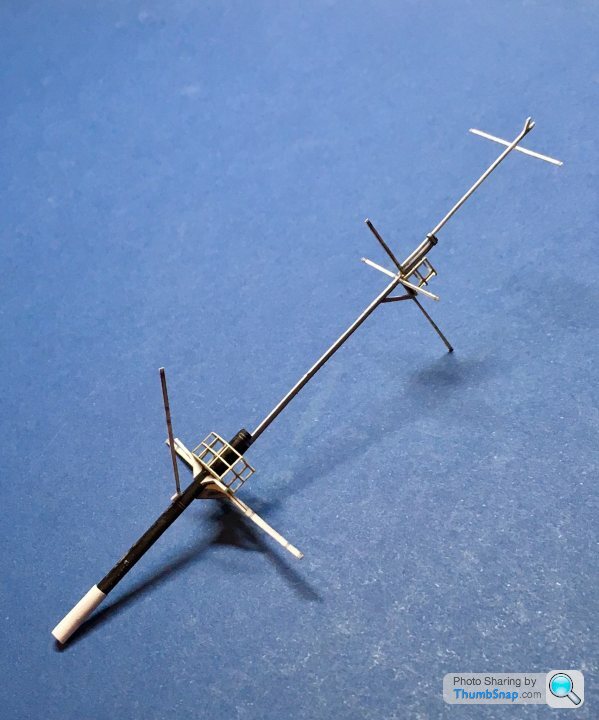
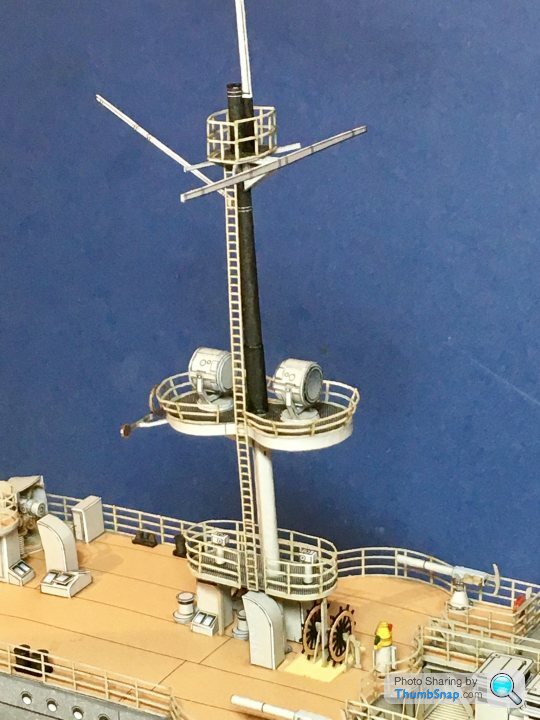
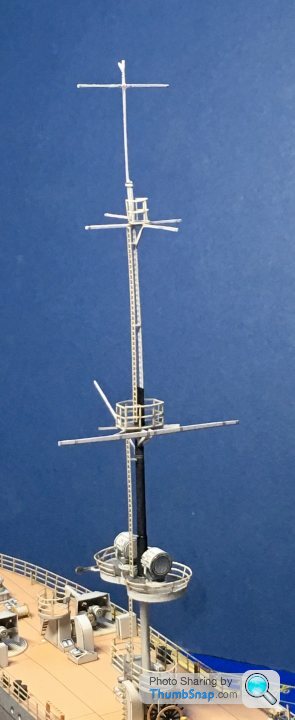
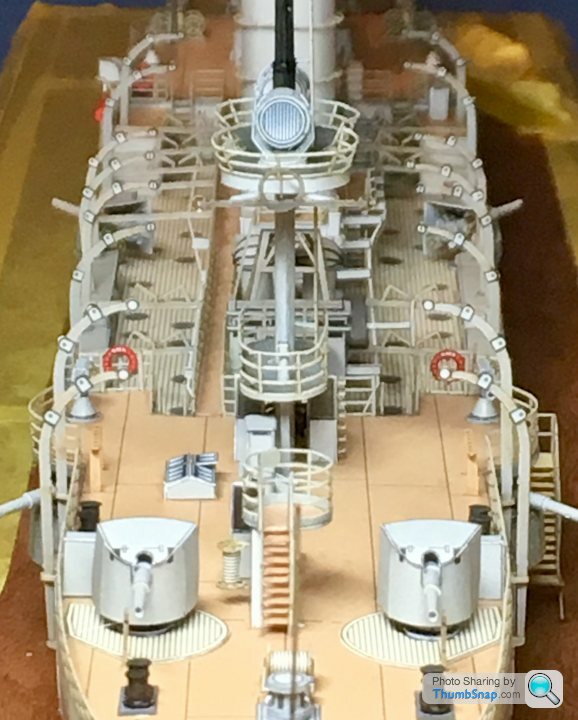
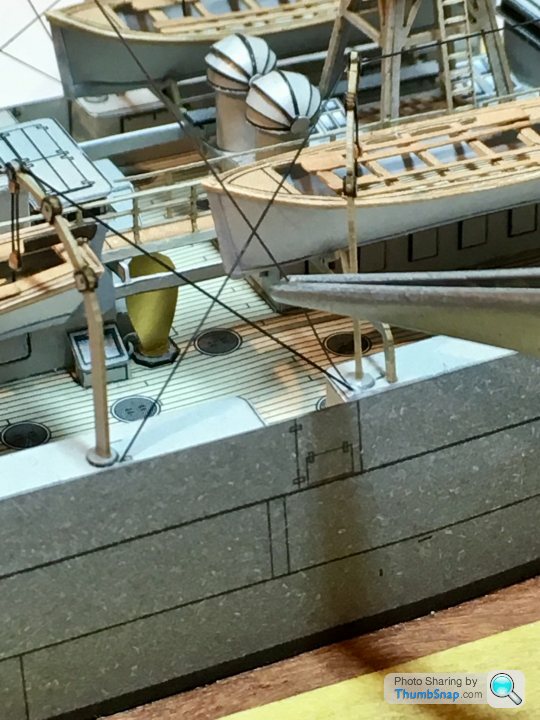
Re-jigged the rear mast ladders a bit, and fitted the front mast ladders. I opted to make some spacers for them so that they form a deeper section to the thin upper mast sections. It’s stiffened them quite a bit:
What colour are you going to paint it when it's finished  Truly excellent work sir.

Ha ha - ‘fraid this one has tested me to the limit, I can’t deal with details any smaller than the smallest laser-cut bits in here. And even then there are more than a few compromises in it. I’ve no idea if the mast ladders are right, Im just happy they look like they vaguely could be at this stage!
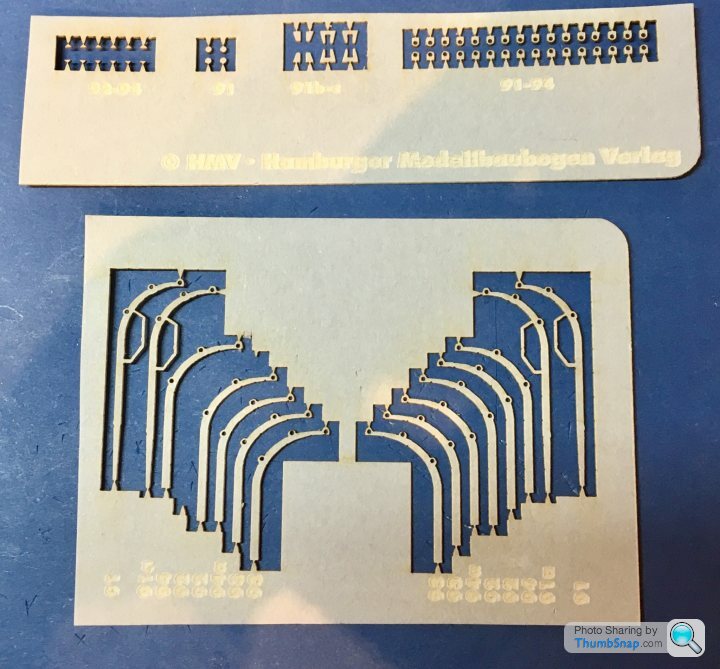
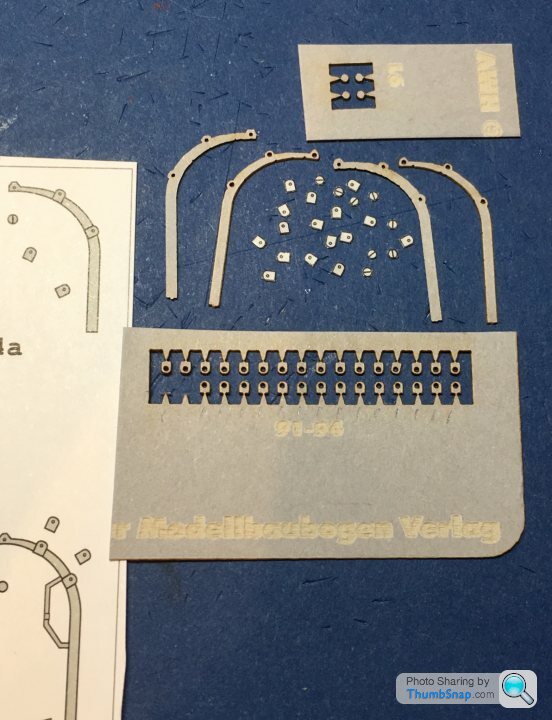
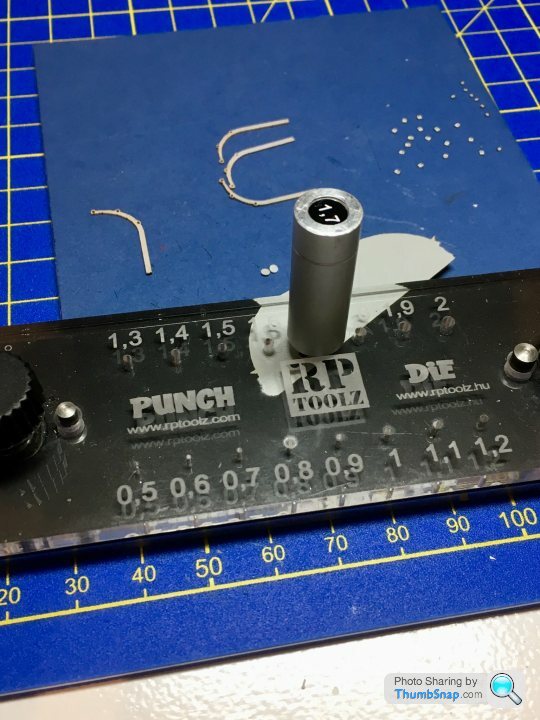
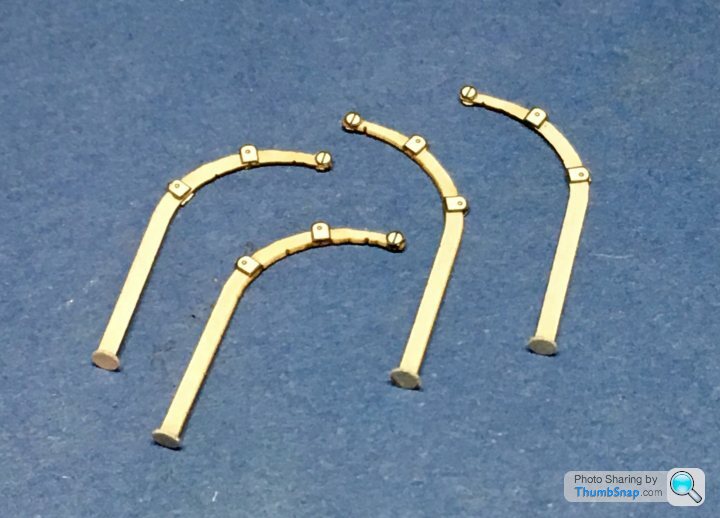
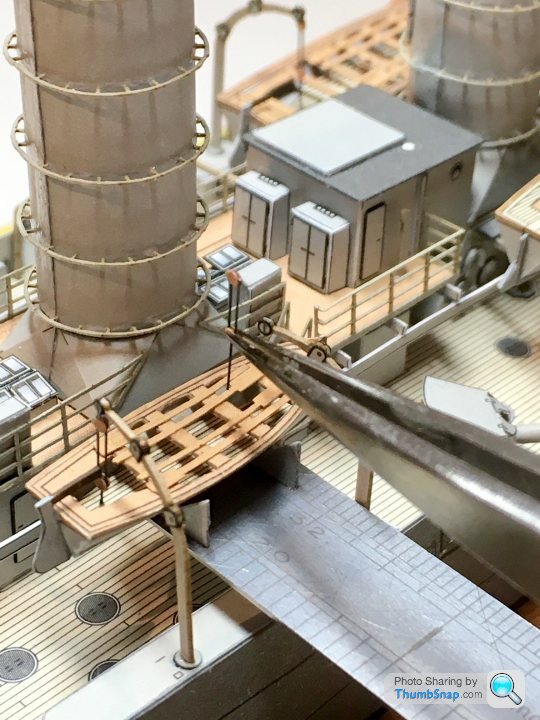
On to the davits. They are included in the laser-cut set, with some detail bits to stick on:
The add-ons looked a bit crude to my eyes, and they only attach to one side of each arm. I decided to cut out the much thinner paper versions of the eye doublers and end pulleys, paint the edges black and stick them on to both sides of each arm:
The now surplus eyelet doublers will make great padeyes for where my elastic rigging meets the deck.
Also punched some thin card feet for the davits which will hopefully make them easier to place:
Finished:
Only another 12 to go...


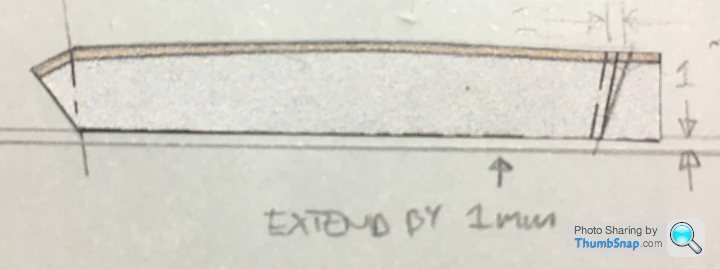
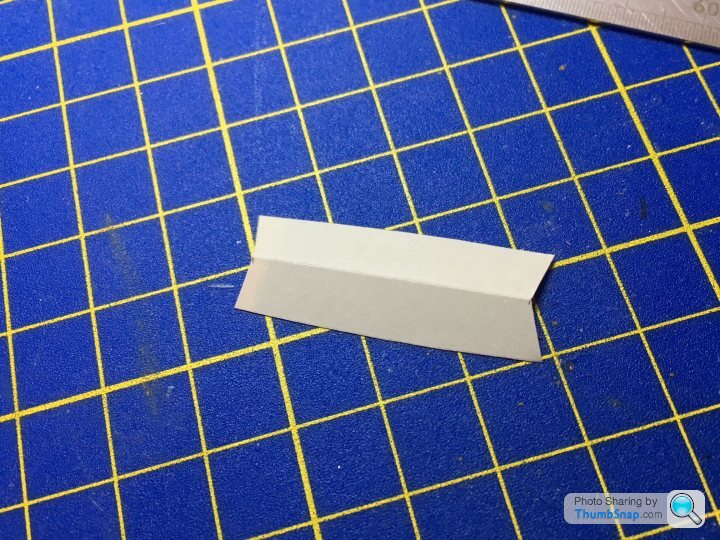
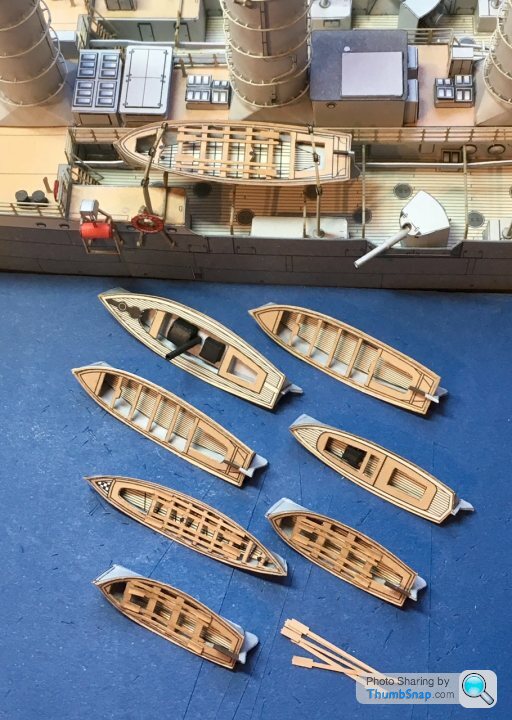
I ended up making the troublesome boat hulls from scratch. By trial and error, I added 1mm to the bottom of the hull sides, amended the length and angle of the bows and removed the stern triangles (to be fitted seperately):
Then drew around the remaining upper profile, folded along the keel and cut out from some spare grey card in the kit:
I then cut the individual sides out and assembled to the deck plates. I added the brown hull top edging from painted paper, and also made keel and bow finishers from painted paper, scored to form a "v" shape. They all look acceptable now, although there remain some annoying details such as no propellers on the motor launches:
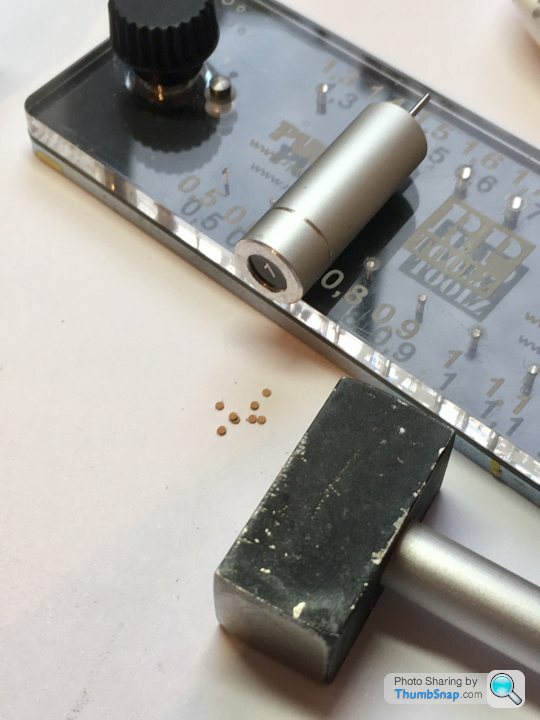
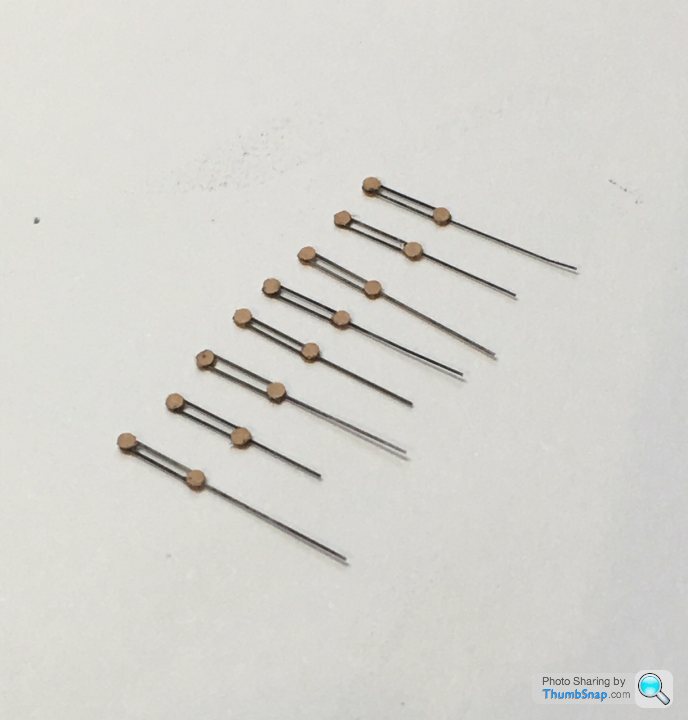
Made some davit pulleys from 1mm circles punched from scrap laser-cut card:
and added stretched sprue for the lines:
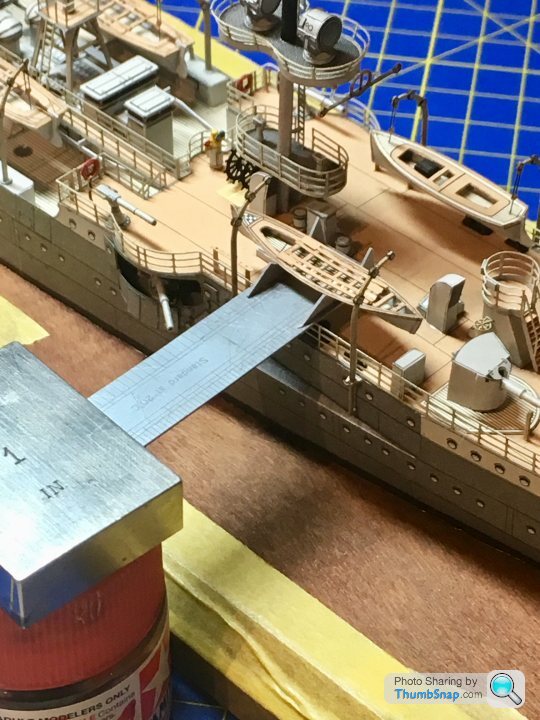
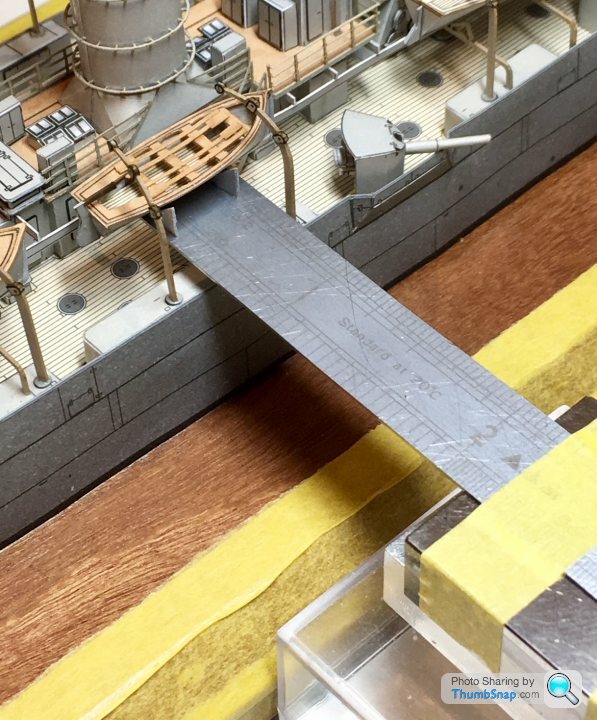
I opted to fit all the boats stowed, and since there are no supports for this option, I ended up making a makeshift height fixture out of a steel rule and some triangles of card:
(that one's shown back to front by mistake)
the davit pulley lines were then trimmed to suit and PVA'd in place:
Then drew around the remaining upper profile, folded along the keel and cut out from some spare grey card in the kit:
I then cut the individual sides out and assembled to the deck plates. I added the brown hull top edging from painted paper, and also made keel and bow finishers from painted paper, scored to form a "v" shape. They all look acceptable now, although there remain some annoying details such as no propellers on the motor launches:
Made some davit pulleys from 1mm circles punched from scrap laser-cut card:
and added stretched sprue for the lines:
I opted to fit all the boats stowed, and since there are no supports for this option, I ended up making a makeshift height fixture out of a steel rule and some triangles of card:
(that one's shown back to front by mistake)
the davit pulley lines were then trimmed to suit and PVA'd in place:
mcdjl said:
How has this not driven you insane? Or were you already? I would have given up long ago having made a mess of making the main hull about 1/4 as well as you have those launches.
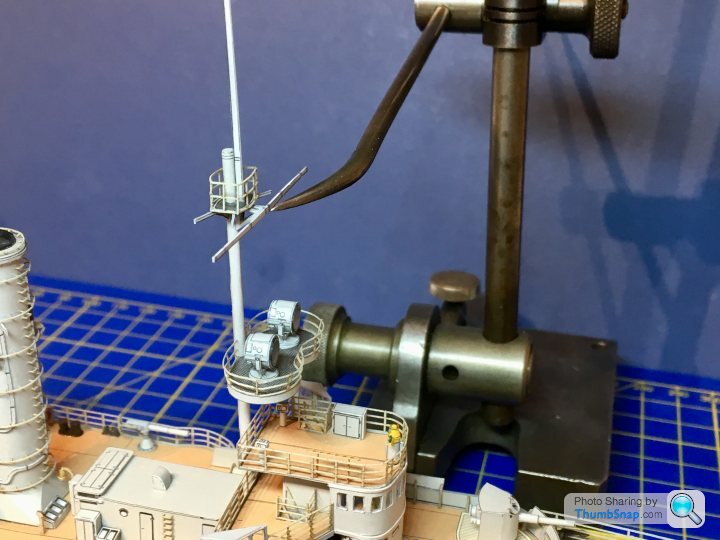
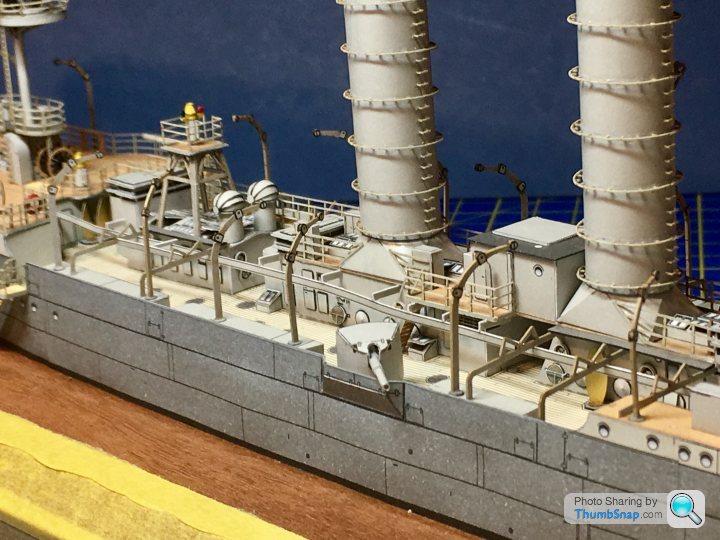
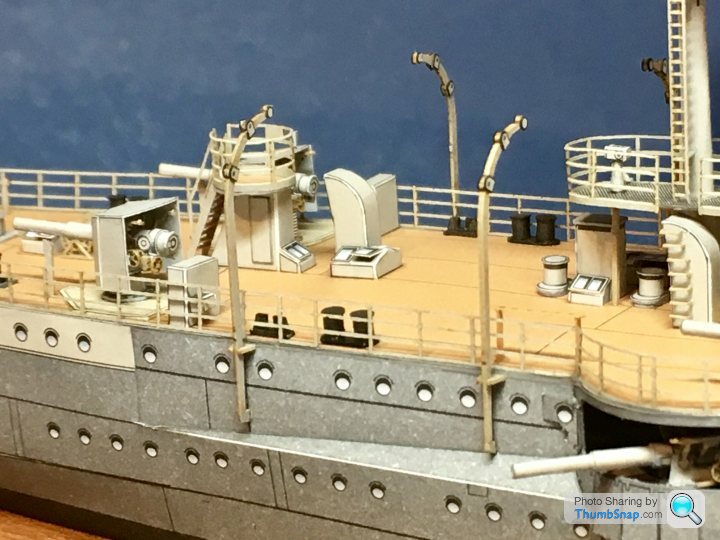
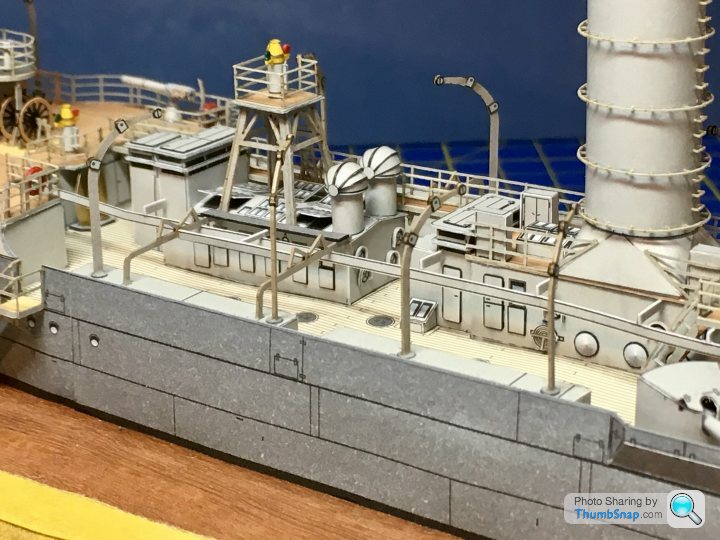
I keep having a break from it and coming back (as I do with most models). When it gets really frustrating there's no point pressing on - it's meant to be fun!Rigging at last. I’m using a combination of stretched sprue (for short runs and for those mast supports that contribute to stiffness), and elastic thread for the rest.
My technique for elastic thread involves cutting it about 2mm short, fixing one end, and then using tweezers in an adjustable stand to de-tension the other until it’s glue has set:
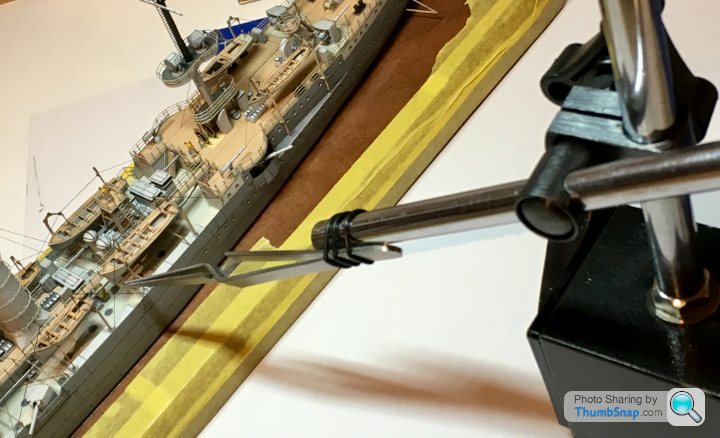
Most of the hull rigging is done, now for the masts...

My technique for elastic thread involves cutting it about 2mm short, fixing one end, and then using tweezers in an adjustable stand to de-tension the other until it’s glue has set:
Most of the hull rigging is done, now for the masts...
dr_gn said:

I’m assuming the tall masts were partly a left over from sailing ship design philosophy, and the standing rigging for them was necessary by default. I think getting a high vantage point for lookouts was maybe a reason along with all the things you mention. Did the later ships have shorter, stiffer masts, maybe partly made of steel?
I think the taller masts on ships of that era were also partly due to the need for effective signalling (flag signalling still very much in use at that point- wireless comms at sea was still in it's infancy during WW1, hence a lot of the communication issues experienced at Jutland), and also for mounting lookout and searchlight platforms.
I think you are right in that a lot of the rigging is essentially support for the masts. As the years went on and the lightweight lookout platforms made way for much heavier range-finding equipment up in the spotting tops, the lightweight masts tended to get replaced by heavier (often tri-pod) steel constructions, that would have had much more inherent stability/rigidity.
That said, there is still a surprising amount of rigging on those later ships- I've not yet bought myself to have a go at modelling it yet, my current 1/350 Dreadnought build will be my first go
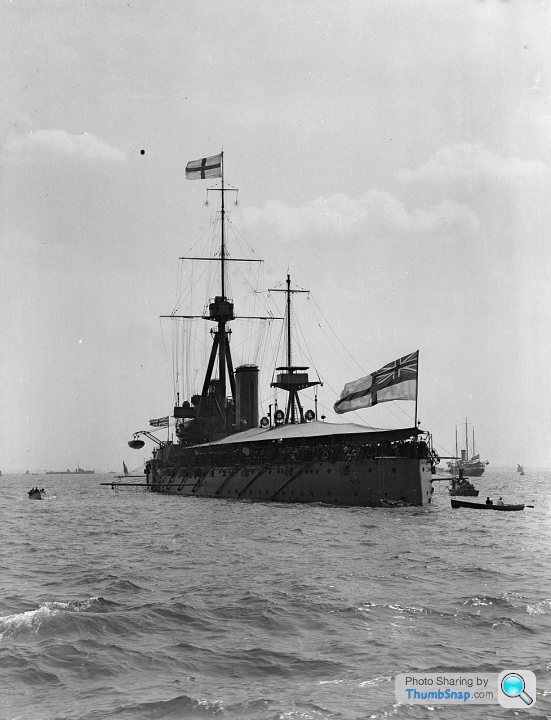
Edit to add: This picture of Dreadnought still shows a suprising amount of rigging- and this was the case even with the later dreadnought classes, although only the following Bellerophon, St Vincent, and Neptune classes retained the twin masts, it was dispensed with from the Colossus class onward (making an appearance again in QE & Revenge classes for mounting range-finders).
Superb work by the way, if I hadn't seen all of the progress pictures I'd never believe it was made of paper! [url]
[url]
I think you are right in that a lot of the rigging is essentially support for the masts. As the years went on and the lightweight lookout platforms made way for much heavier range-finding equipment up in the spotting tops, the lightweight masts tended to get replaced by heavier (often tri-pod) steel constructions, that would have had much more inherent stability/rigidity.
That said, there is still a surprising amount of rigging on those later ships- I've not yet bought myself to have a go at modelling it yet, my current 1/350 Dreadnought build will be my first go
Edit to add: This picture of Dreadnought still shows a suprising amount of rigging- and this was the case even with the later dreadnought classes, although only the following Bellerophon, St Vincent, and Neptune classes retained the twin masts, it was dispensed with from the Colossus class onward (making an appearance again in QE & Revenge classes for mounting range-finders).
Superb work by the way, if I hadn't seen all of the progress pictures I'd never believe it was made of paper!
[url]Edited by Squirrelofwoe on Saturday 19th January 10:17
I am staggered how you can make such a paper model so crisply and evenly.....I mean, I know it takes skill etc - but even so - amazing!
I'm quite tempted to give it a go, simply as a model I can do without having all my 'gear' around me - I'm moving/new job etc etc so can't really paint/spray etc....I know you have said before, but can you remind me your source for these kits? cheers!
I'm quite tempted to give it a go, simply as a model I can do without having all my 'gear' around me - I'm moving/new job etc etc so can't really paint/spray etc....I know you have said before, but can you remind me your source for these kits? cheers!
caterhamnut said:
I am staggered how you can make such a paper model so crisply and evenly.....I mean, I know it takes skill etc - but even so - amazing!
I'm quite tempted to give it a go, simply as a model I can do without having all my 'gear' around me - I'm moving/new job etc etc so can't really paint/spray etc....I know you have said before, but can you remind me your source for these kits? cheers!
I get mine from the Maritime Museum in Hamburg, but the full range is available here:I'm quite tempted to give it a go, simply as a model I can do without having all my 'gear' around me - I'm moving/new job etc etc so can't really paint/spray etc....I know you have said before, but can you remind me your source for these kits? cheers!
https://www.kartonmodellbau.de/epages/63481486.mob...
I’d go for the ones designed by Peter Brandt, rated “difficult” or “very difficult” - they’re the ones that usually have laser-cut sets available.
Gassing Station | Scale Models | Top of Page | What's New | My Stuff