ferrari 250 gto realising a dream
Discussion


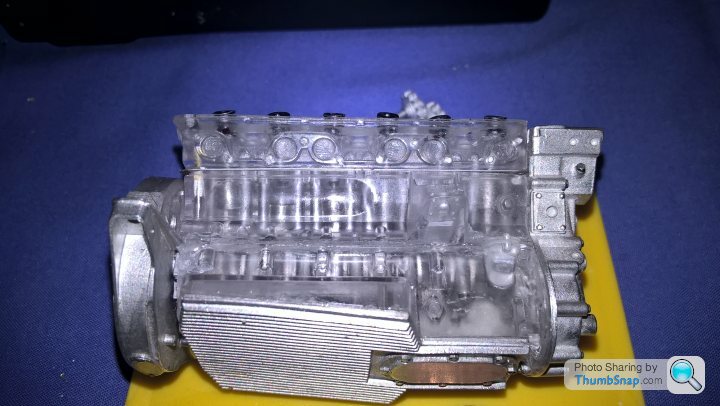
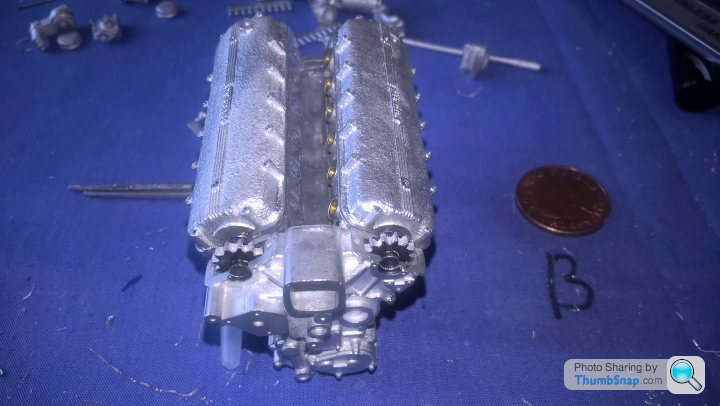
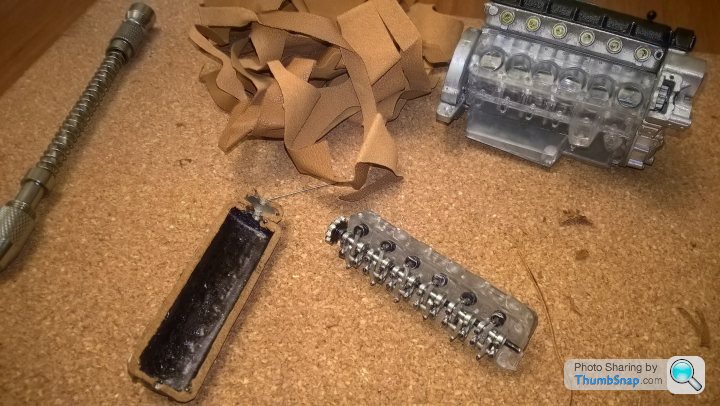
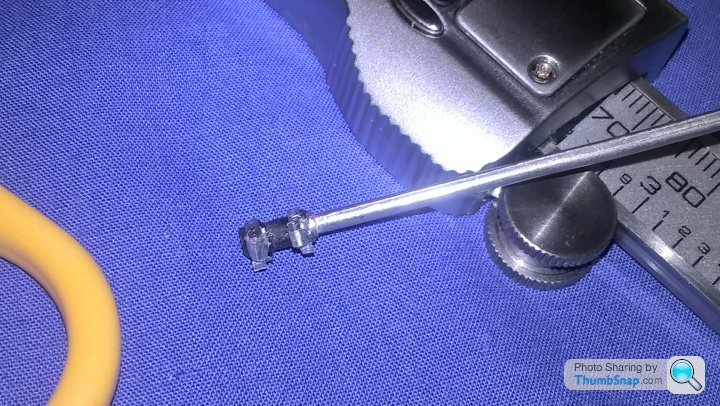
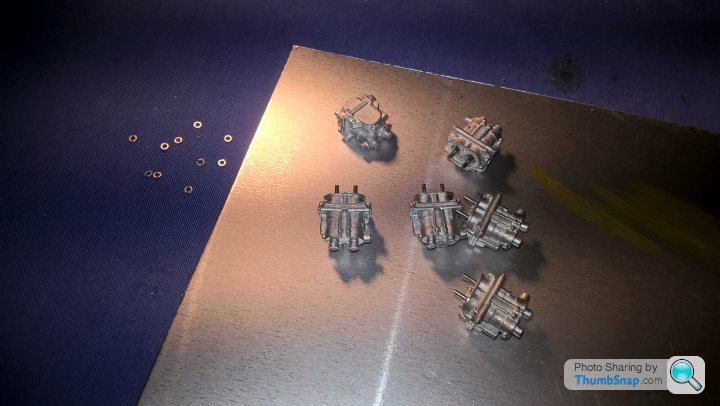
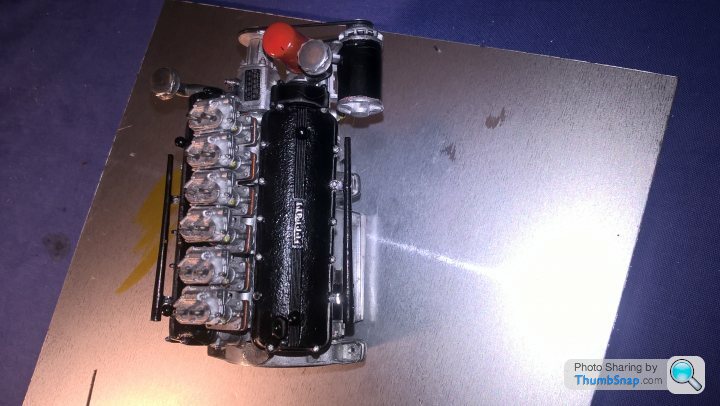
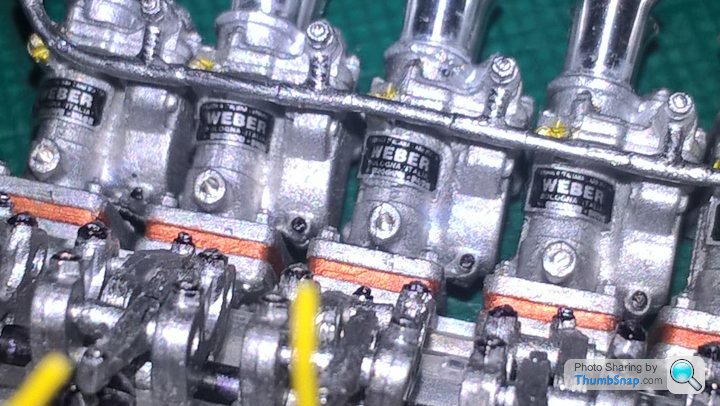
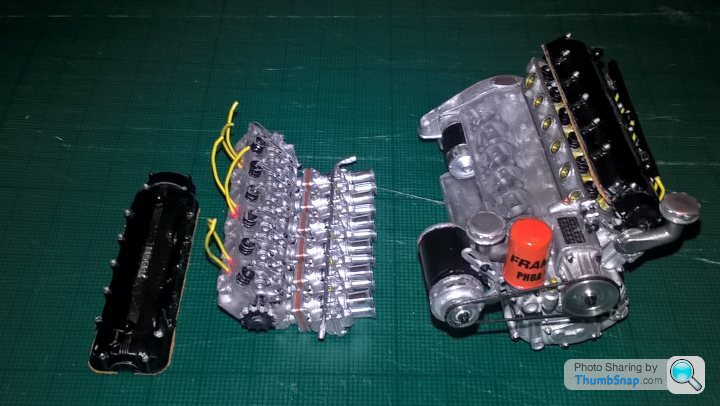
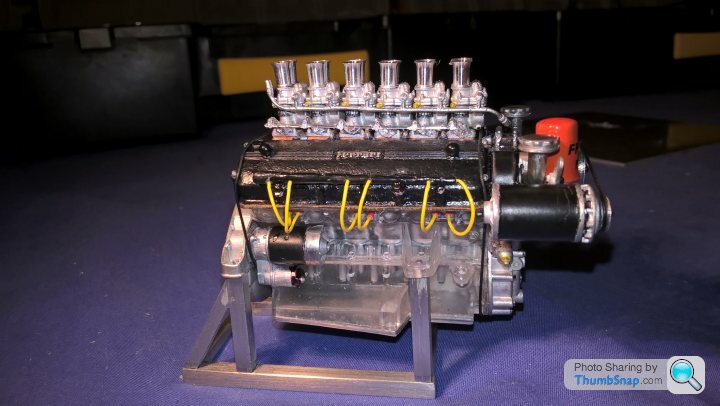
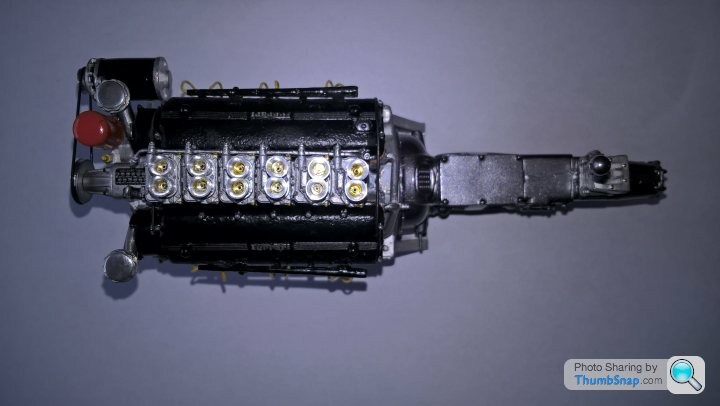
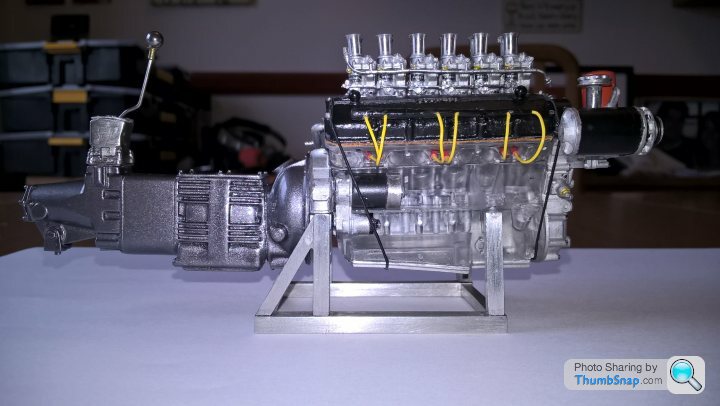
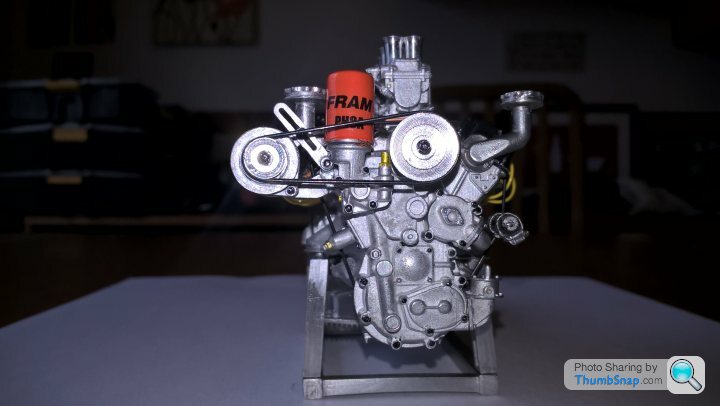
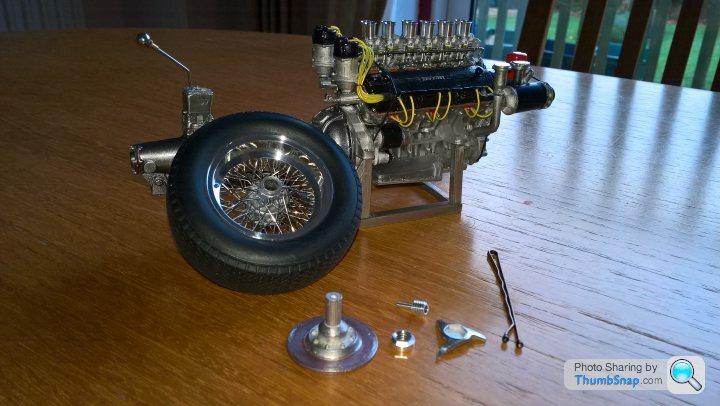
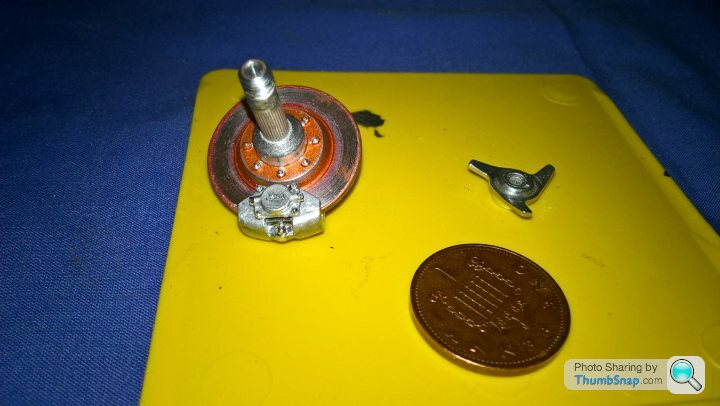
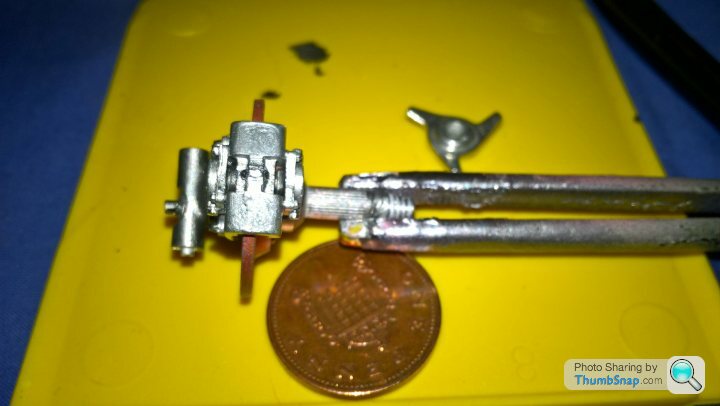
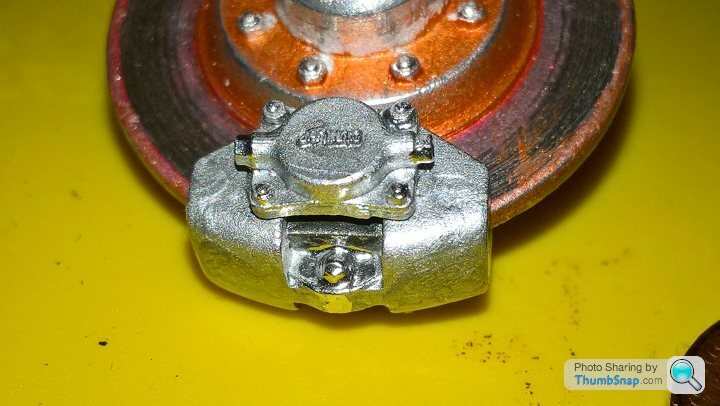
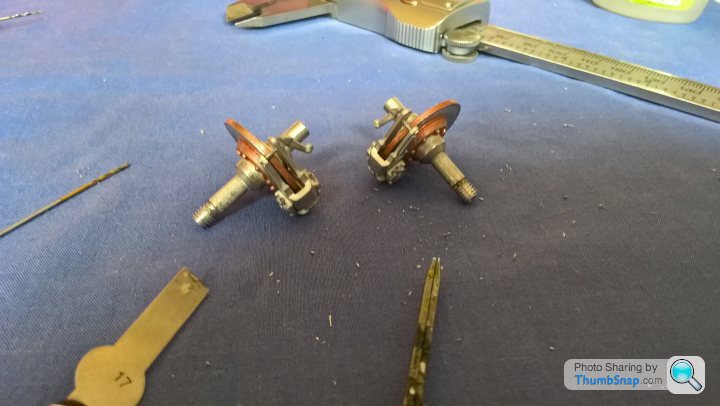
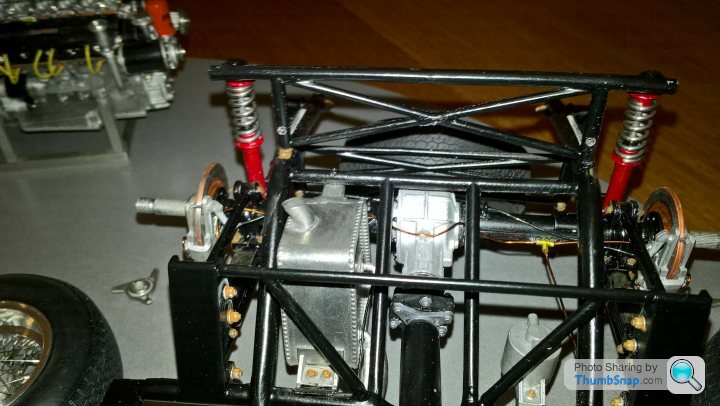
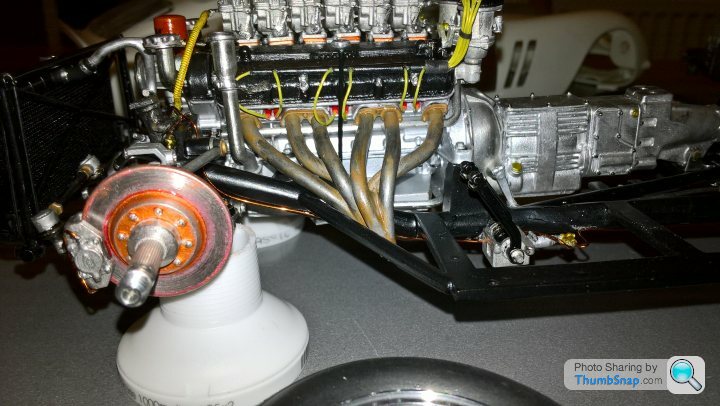
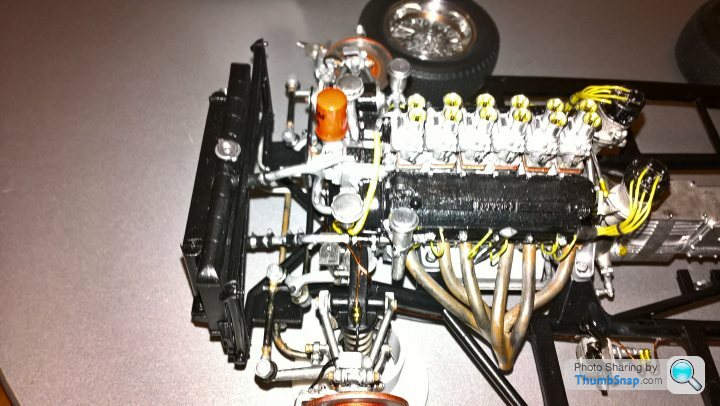
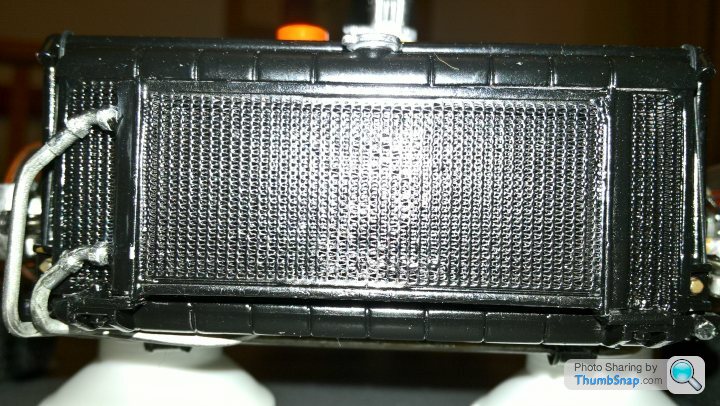
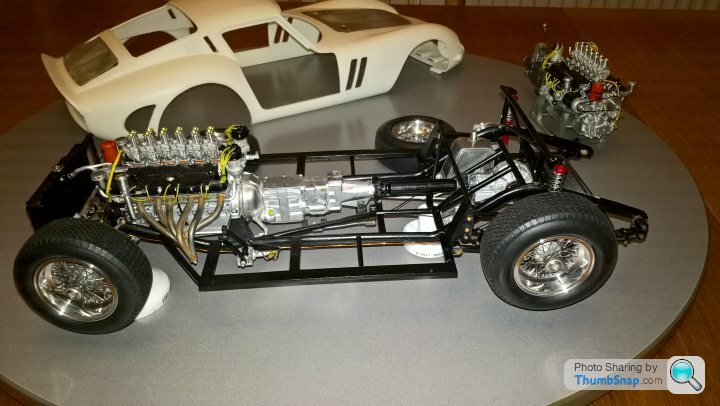
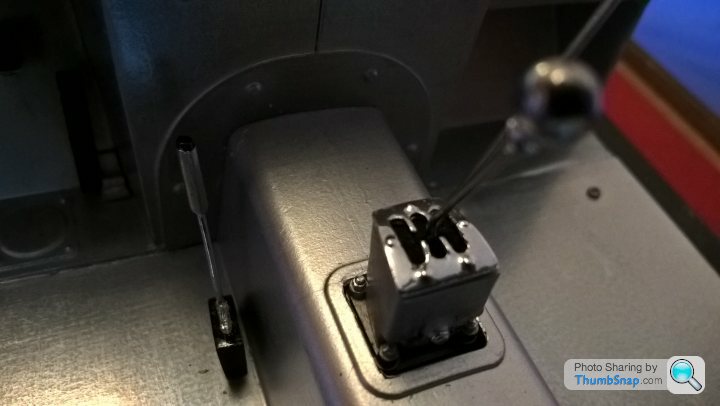
Heres a continuation of the standalone engine/gearbox build,it was a bit dissapionting that the gearbox didnt have any moving parts so i made my own gearstick so that it would work through the gate, also added rocker cover gaskets cut from leather and made my own jubilee clips using aluminium foil and watchmakers screws, hope you like the rest of the pictures and i will start the car build picture thread later at some point, thanks for looking.
 .
.  .
.  .
.  .
.  .
.  .
.  .
.  .
.  .
.  .
.  .
.  .
.  .
.  .
.  .
.
 .
.
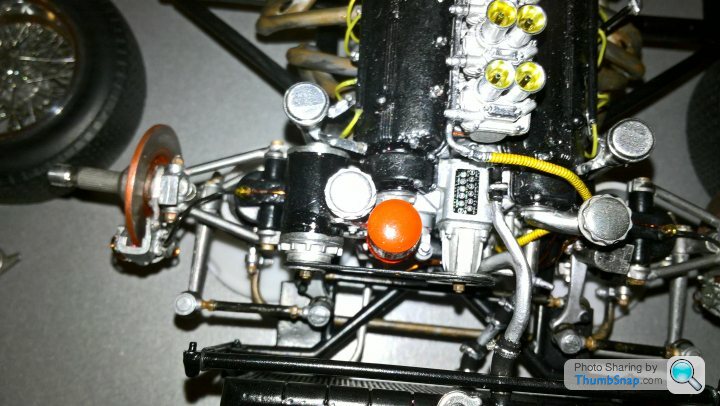
Finished in 2017, then i had to do it all over again for the car build. Im glad i did as mentioned previously a lot of detail would be lost in the car. This engine will sit next to the car when i ve finished,hopefully sooner than later. I have to say that i really enjoy this degree of building as i find i can get lost in time and empty my mind of the day to day demands on business. I recommend this to anyone who has either previously had a modelling hobby and would like to take it up again and some skill in assembly work. theres loads of articles, photos etc on line to use as a reference.
. . . . . . . . . . . . . . .. Finished in 2017, then i had to do it all over again for the car build. Im glad i did as mentioned previously a lot of detail would be lost in the car. This engine will sit next to the car when i ve finished,hopefully sooner than later. I have to say that i really enjoy this degree of building as i find i can get lost in time and empty my mind of the day to day demands on business. I recommend this to anyone who has either previously had a modelling hobby and would like to take it up again and some skill in assembly work. theres loads of articles, photos etc on line to use as a reference.
Hi! all, ive completed the engine build photos see the 2nd page.
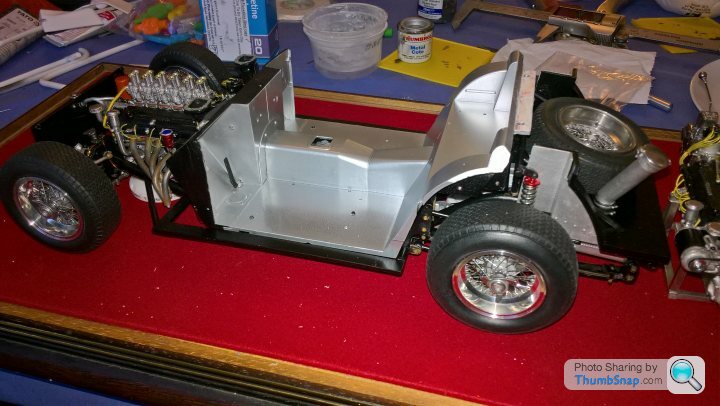
So heres the start of the car build thread, hope you like them, any comments positive or negative appreciated.
 .
.  .
.  .
.  .
.  .
.  .
.
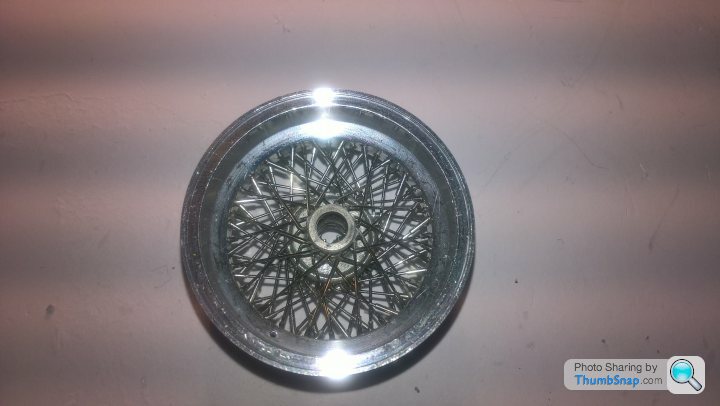
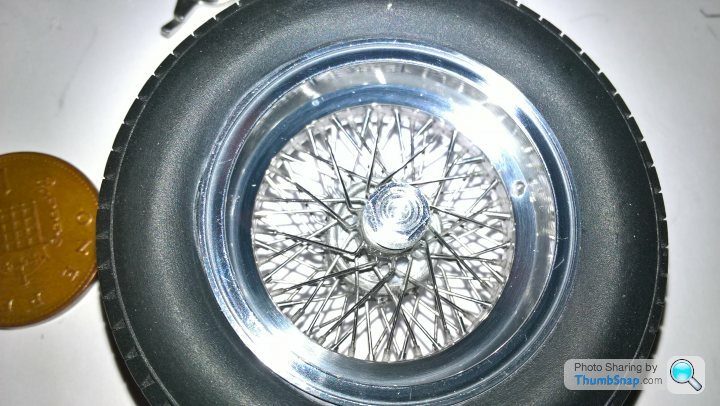
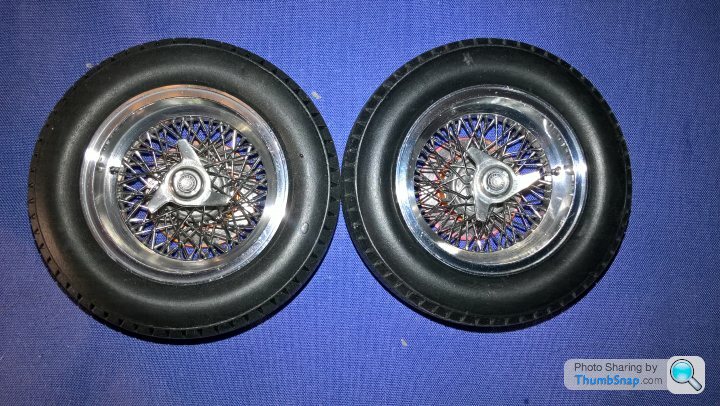
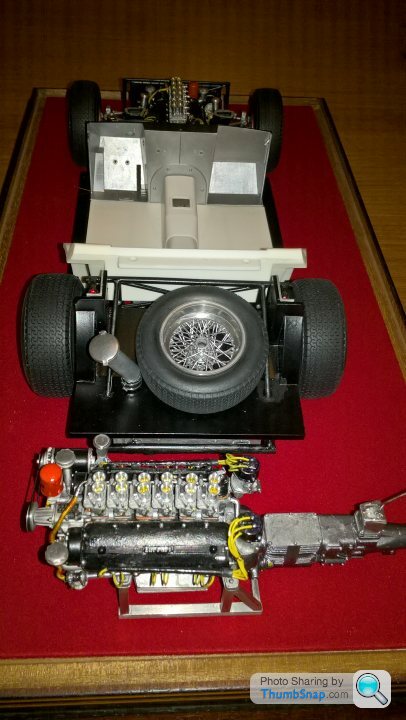
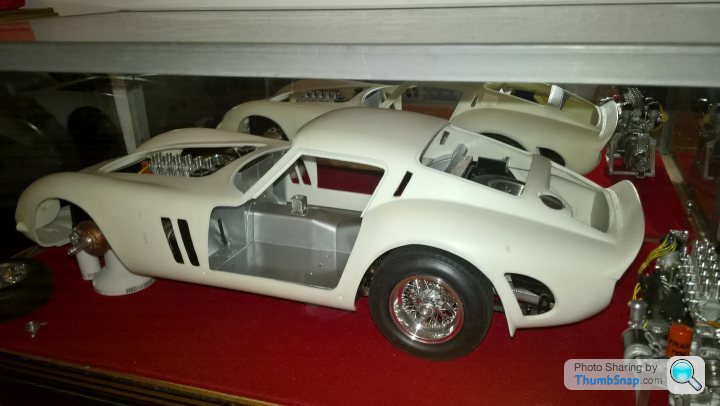
This did test my patience to do 4 wheels. 4 rows of 72 spokes and ferruls had to be cut and bent and inserted, glued into the hub and rim on a jig supplied with the kit + assembling the 5th spare wheel which was all white metal parts, at the end. Felt like i acheived something and put me in a positive frame of mind to proceed with the car build. Brakes coming up soon
So heres the start of the car build thread, hope you like them, any comments positive or negative appreciated.
. . . . . . This did test my patience to do 4 wheels. 4 rows of 72 spokes and ferruls had to be cut and bent and inserted, glued into the hub and rim on a jig supplied with the kit + assembling the 5th spare wheel which was all white metal parts, at the end. Felt like i acheived something and put me in a positive frame of mind to proceed with the car build. Brakes coming up soon
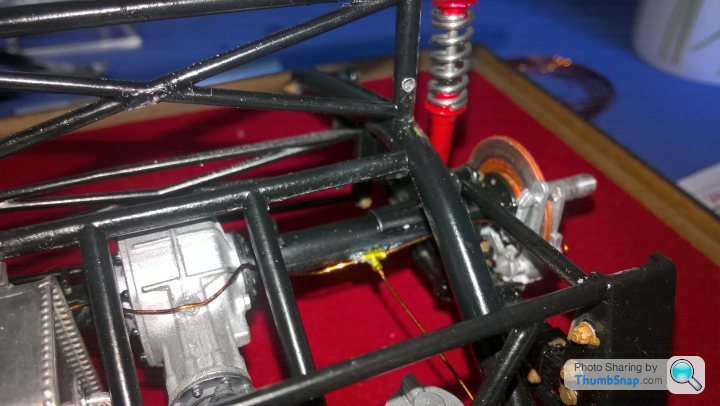
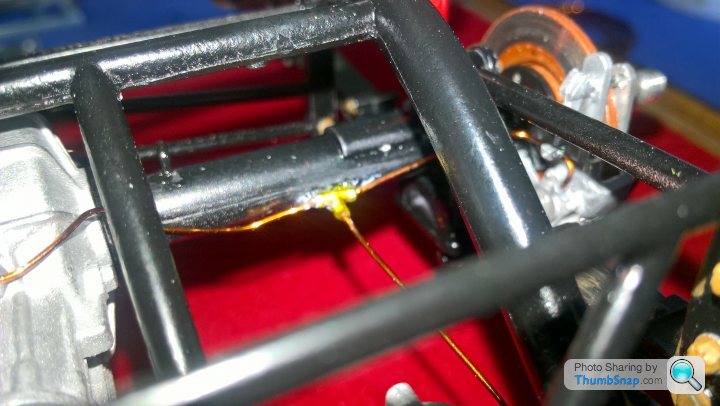
Here are some pictured of the disk brakes with a bity of patina. I had to drill out the uprights and insert brass rods instead as i new the white metal wouldnt stand up to the growing weight of the car 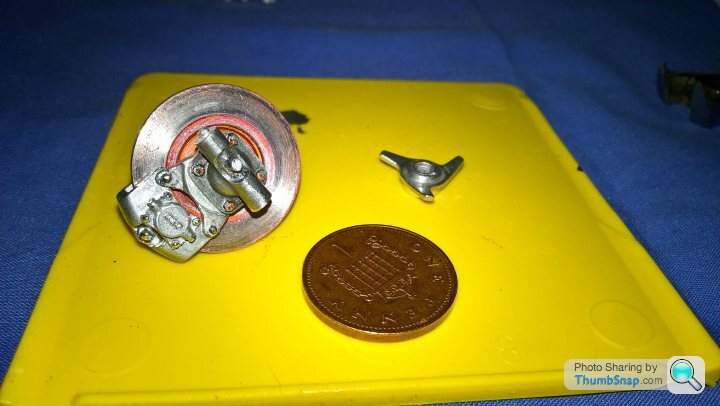 .
.  .
.  .
.  .
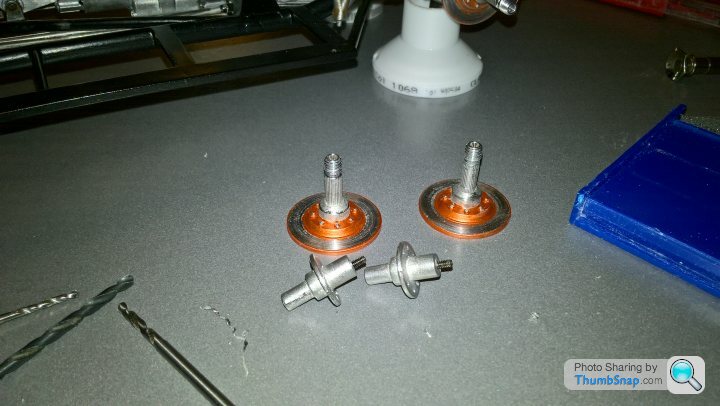
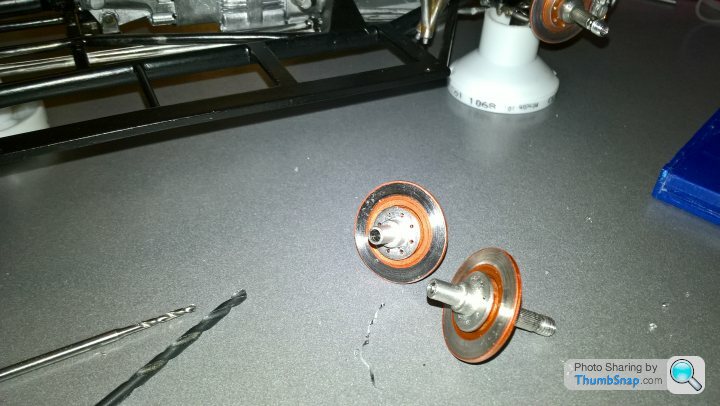
. 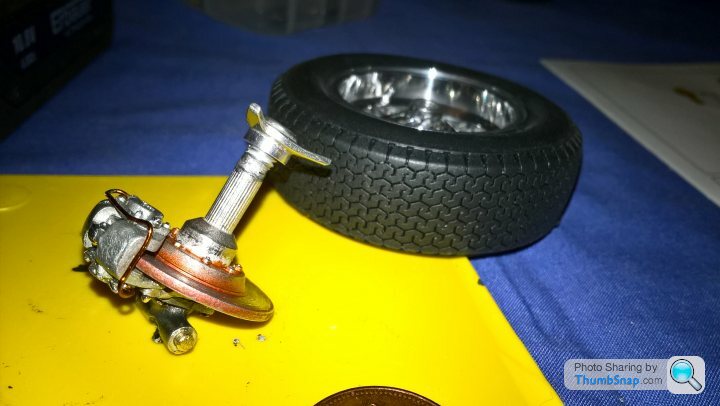 . I did a mod on the hubshafts as the instructions showed the wheels turning but not the disks on all corners which i thought that considering the detail so far deminished the operation of the wheels, Drilled out the stub shafts by hand 2mm drill and screwed the shaft to the disk allowing the disks to rotate.
 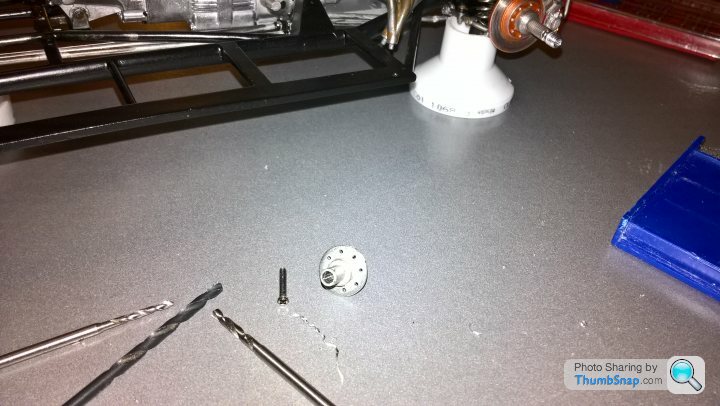 .
.  .
.  .
.  .
.  .
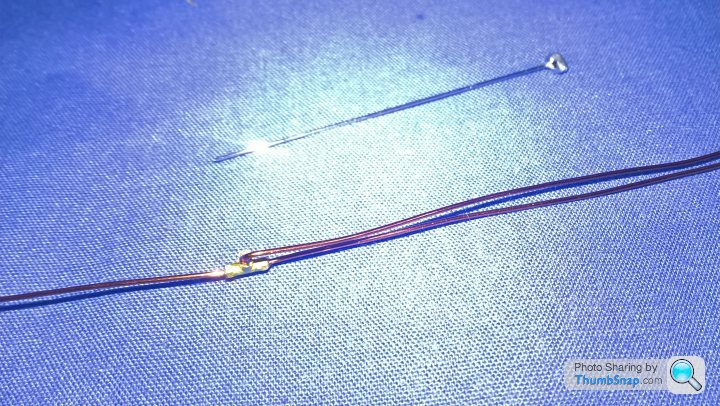
. 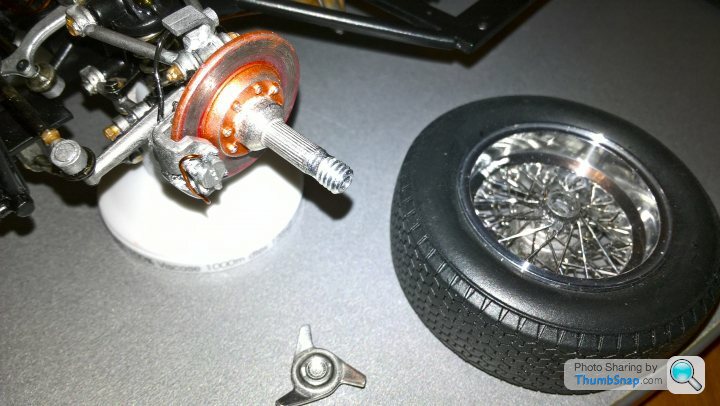 .Copper wire was used for brake pipes running to all calipers and black flexible wire used for the caliper flex pipe and handbrake cables .The disks were finally cleaned up of excess paint once fitted. Next lot of photos coming soon. Thanks for looking.
. . . . . I did a mod on the hubshafts as the instructions showed the wheels turning but not the disks on all corners which i thought that considering the detail so far deminished the operation of the wheels, Drilled out the stub shafts by hand 2mm drill and screwed the shaft to the disk allowing the disks to rotate. . . . . . .Copper wire was used for brake pipes running to all calipers and black flexible wire used for the caliper flex pipe and handbrake cables .The disks were finally cleaned up of excess paint once fitted. Next lot of photos coming soon. Thanks for looking.Zippee said:
Amazing skills - you must have the patience if a saint 
Thank you. I’ve been lucky that I got involved in engineering, love cars and have competed in racing events. I was going to get involved in building a racing Tvr chimera, but sold it to Neil Garner due work commitments, then almost got to building a gt40, now realising age isn’t on my side I decided to build models instead.im trying to get as much detail into this build as possible just for the fun and enjoyment of it. Cheersgenerationx said:
Beautiful work.
Thank you very much. Just hope I can do the bodywork justice, fingers crossed.im a few stages away from that and doing the interior, dissapointed there were no lap belts to make so I’ve made them. I’m leaving the interior naked (aluminium) as I’m finishing it as a race car. The next run of photos will just show a progression of the build. Thank you to you and all who have encouraged me to show this model off. 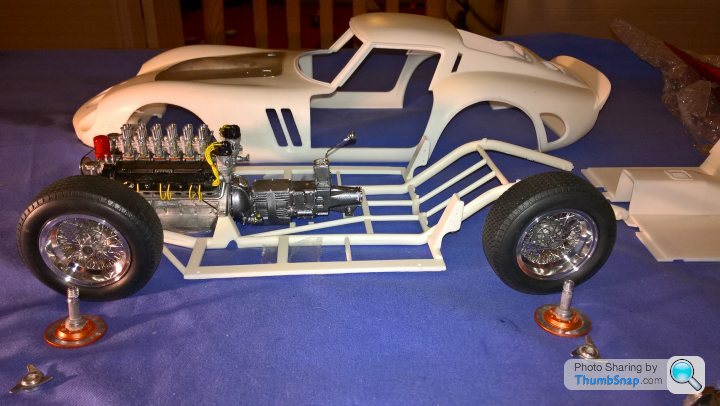
lufbramatt said:
Not sure how I've missed this one! Amazing work, can't wait to see more!
I've built a couple of Pocher kits but this is just another level and makes them look like toys.
Yes i agree, i built the Alfa Romeo, more than 10 years ago and was a bit dissapointed at costong over £300.00, probably because the model was to big and found the metal parts to be a bit tinny. On the upside i kept a lot of parts back and used the leather for rocker cover gaskets for the FerrariI've built a couple of Pocher kits but this is just another level and makes them look like toys.
Resolutionary said:
I see what you mean about it being sad that the engine detail will be hidden under the chassis eventually - phenomenal stuff. As echoed above, this must take some real patience and devotion, I'm impressed.
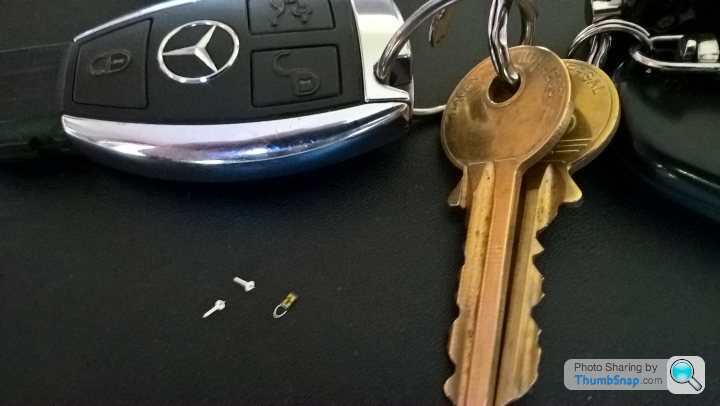
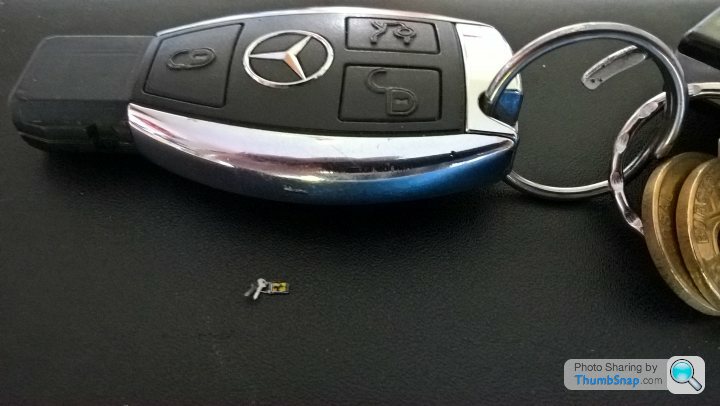
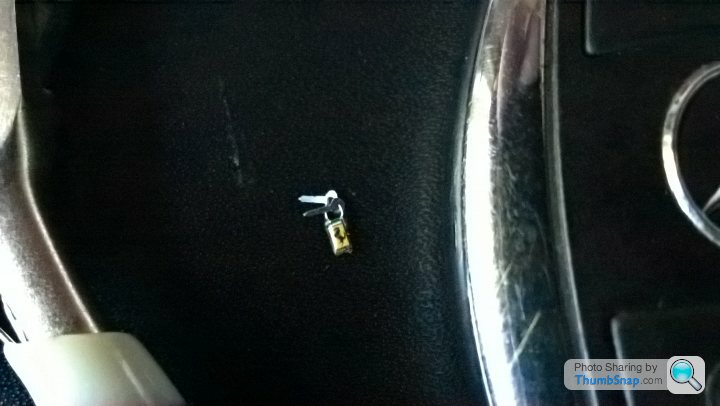
Thankyou for the encouraging comments, the detail is truly starting to dissapear but at least i know its all there and the photos have memorialised the build.Ive taken a break briefly, but i just had to do a little more.I decided to make up the ignition keys (two keys , a fob and the enamel badges that went on both sides). Didnt even know they were there till i looked at the photo etched sheet. A nice touch i thought.
 .
.  .
.  .
.Uploading some more mid week if time allows.
Cheers
Edited by henryk001 on Monday 6th August 17:56
NDA said:
I don't think my eyesight would be up to some of the smaller assemblies.... amazing.
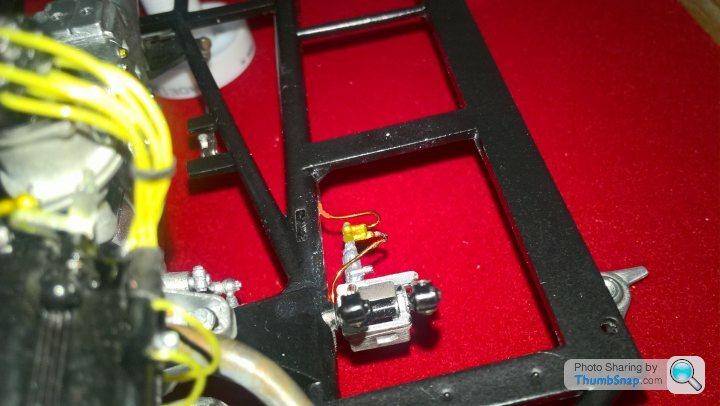
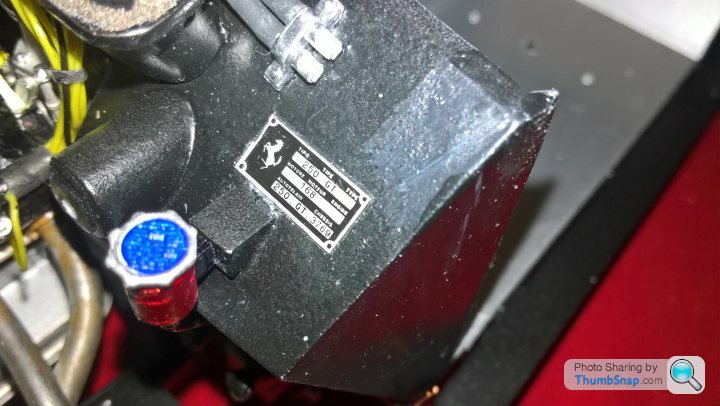
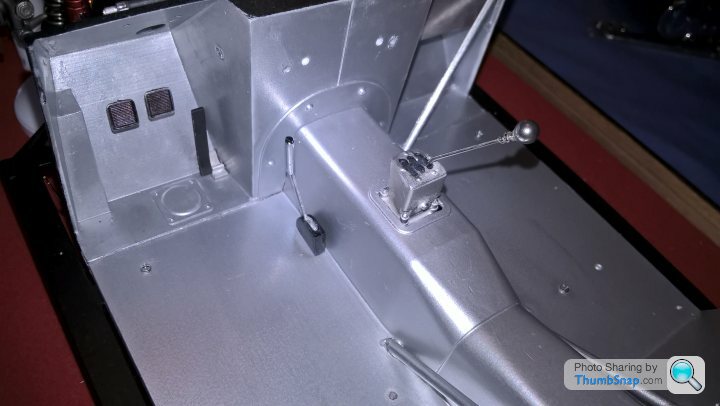
I know what you mean, even at x3 magnification my eyes run a bit after a couple of hours. Well the interior goes in now and theres a lot of test fitting , body on and off to check the fit.coolant pipes , coils and wiring, finishing off the clutch and brake pipes. Ferrari chassis plate is clear and crisp. 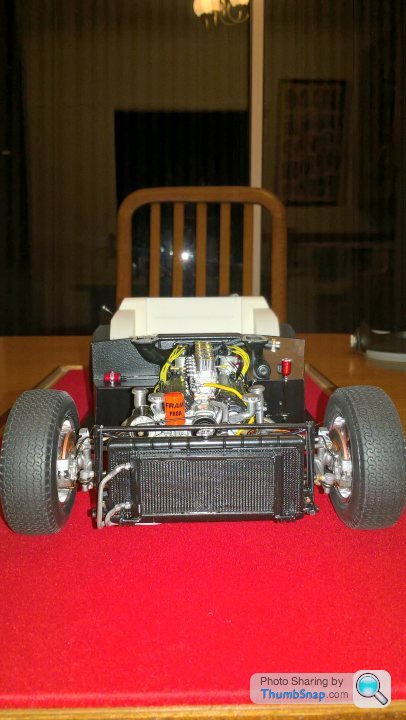 .
.  .
.  .
.  .
.  .
.  . Thanks for looking
Edited by henryk001 on Tuesday 14th August 00:41
Boxbrownie said:
Speechless........
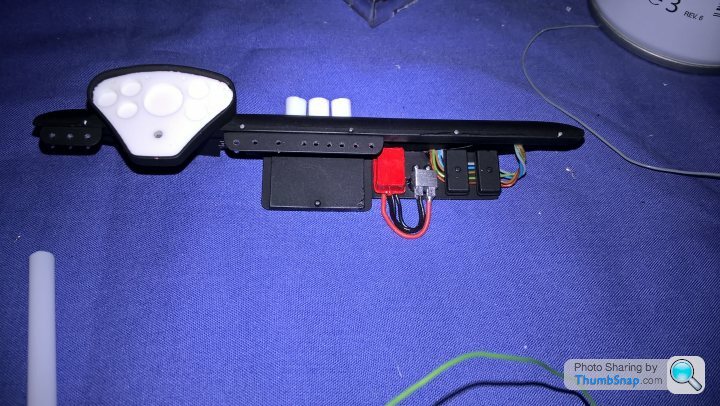
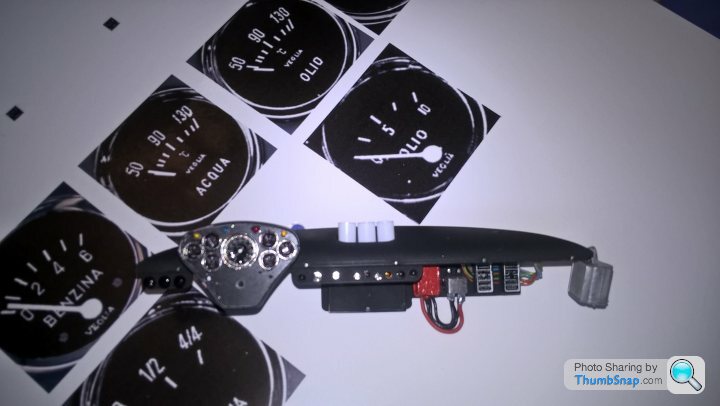
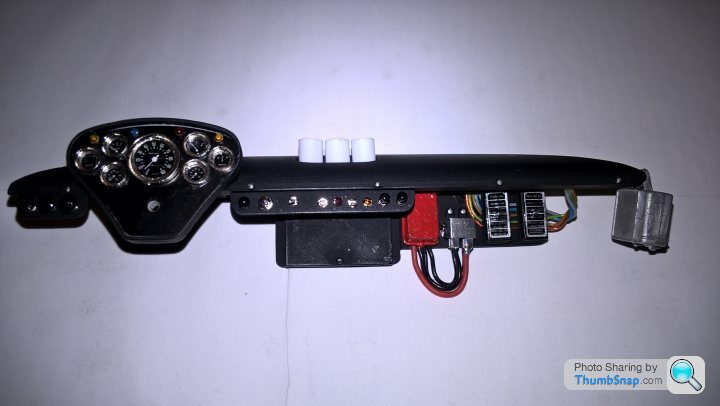
Wow! Thankyou. Its coming on now but as said before the detail is dissapearing. Heres the dashboard build. I managed to get the dash semi-black textured by stippling using a sponge after about 10 minutes of drying, warning lights were put on using clear and i decided to print my own decals after downloading them and shrinking them to size onto waterslide paper because i didnt like the fit of the ones supplied, although they were clear i found them to be a bit on the small side, so i took them off and fitted my own. I have to thank my wife for allowing me to steal her Basecoat and top coat she uses for her nails. sealed the decals perfectly and also alowed them to stay flexible. 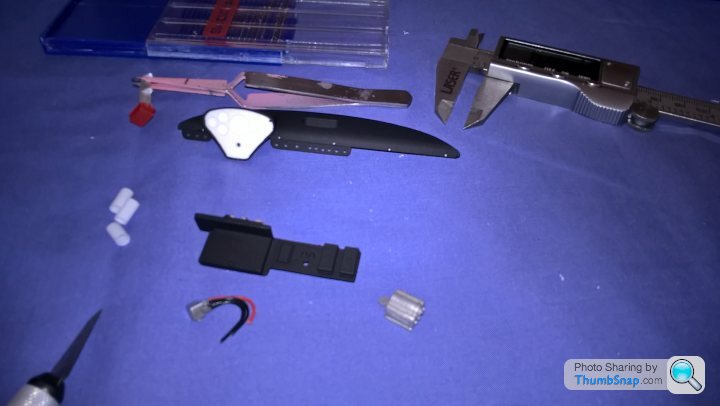 .
.  .
.  .
.  .
.  .
. 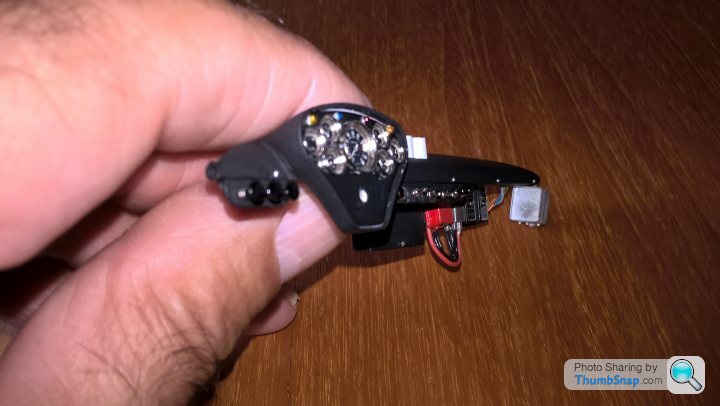 .
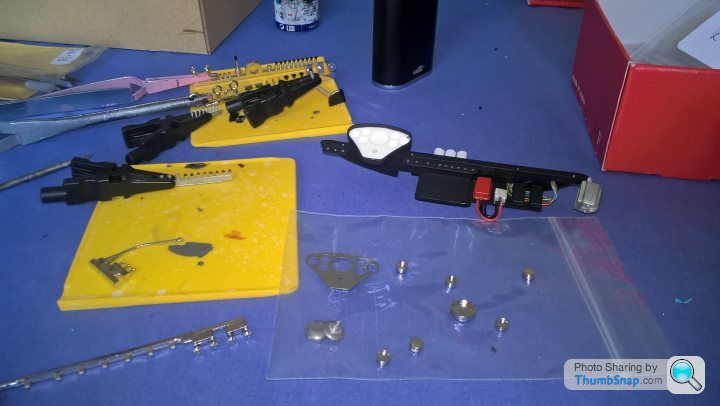
. Made the gear stick fitted the knob, chromed the gate plate and made it movable through the gates.Thankyou for the encouraging comments. More to follow.Finished dashboard. Seats and lapbelts next. Cheers.
 .
. 
Edited by henryk001 on Tuesday 14th August 00:43
Edited by henryk001 on Tuesday 14th August 00:47
Gassing Station | Scale Models | Top of Page | What's New | My Stuff