ferrari 250 gto realising a dream
Discussion


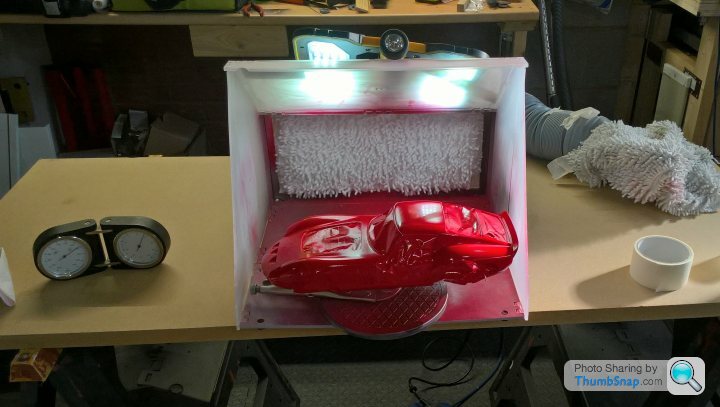
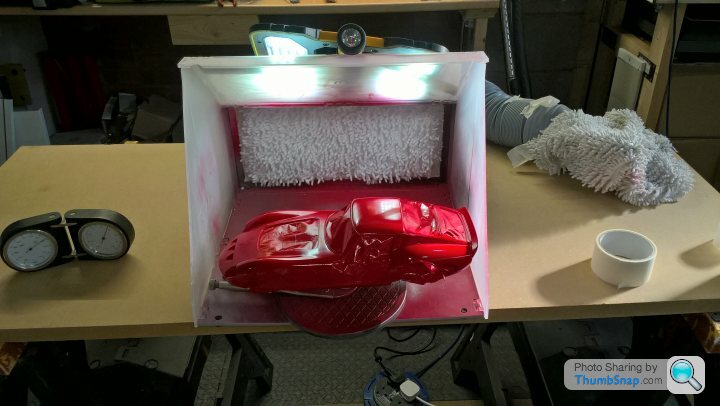
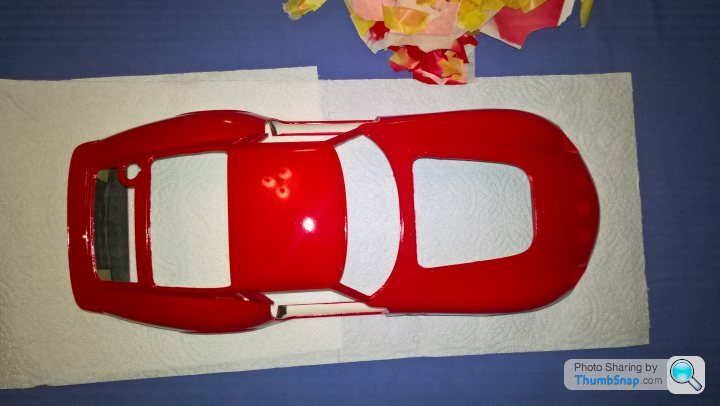
Hi! All. I let the paint dry for a 2-3 days and now ready to put the top coat on. Dehumidifying the garage and raising the temp to 18 degrees. Took around an hour but being patient as theres always a risk of laquer blooming in cold climates and spoiling the whole thing.
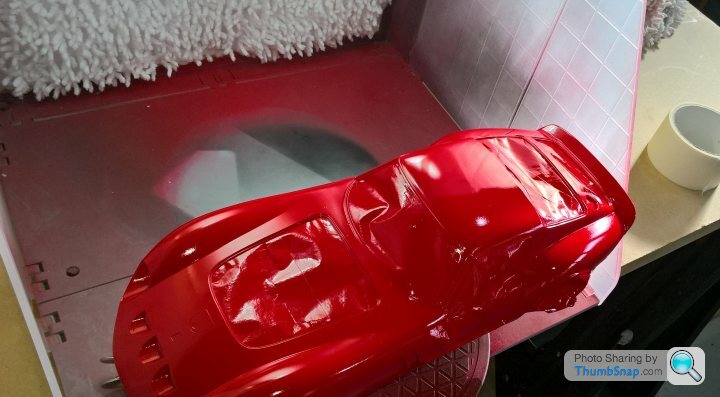
1st dry coat, just to get some on, sprayed all around edges first then over body.Waited about 10 minutes
 .
.
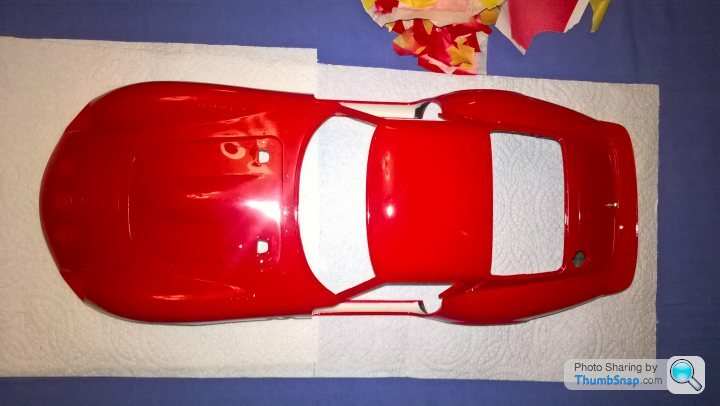
2nd wet coat, sorry about the phone photos you cant see much difference but it is there. Waited another 10 minutes
 .
.
3rd wet coat .
 .
.
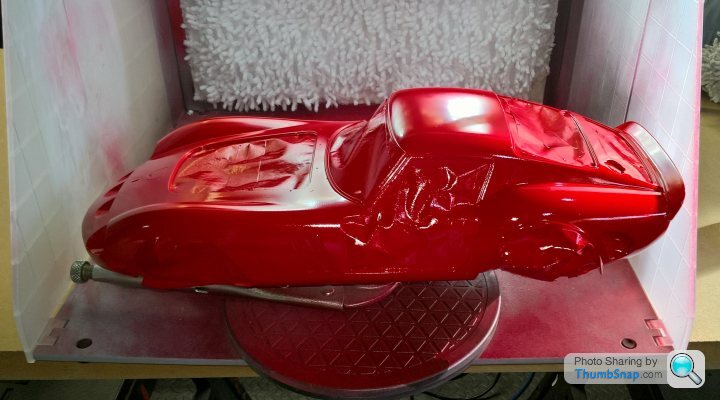
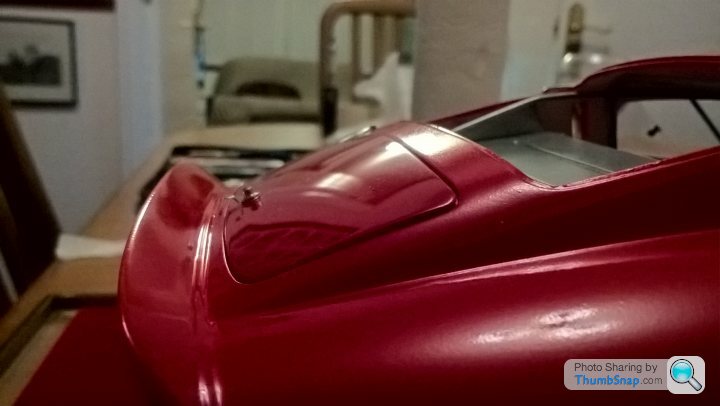
Finally waited approx 20 minutes then gave it a final slow wet coat.
 .
.
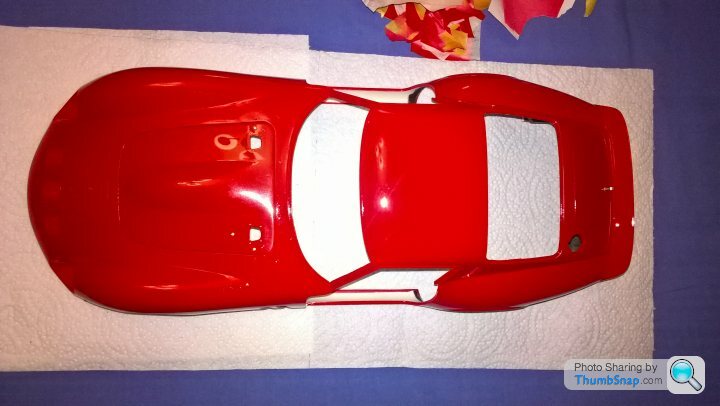
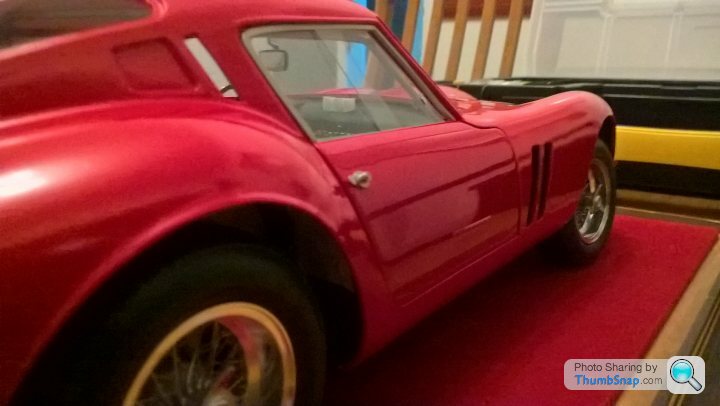
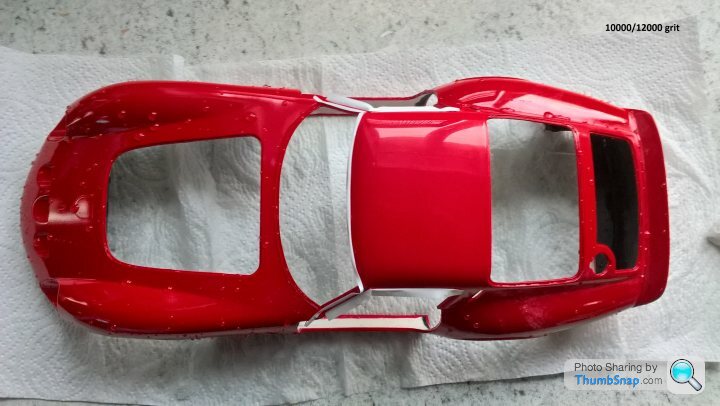
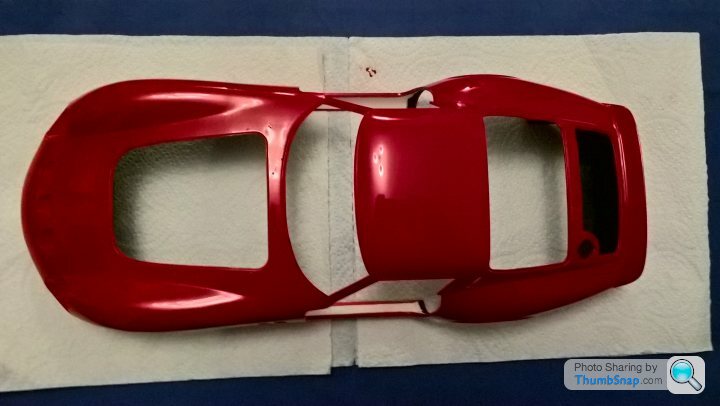
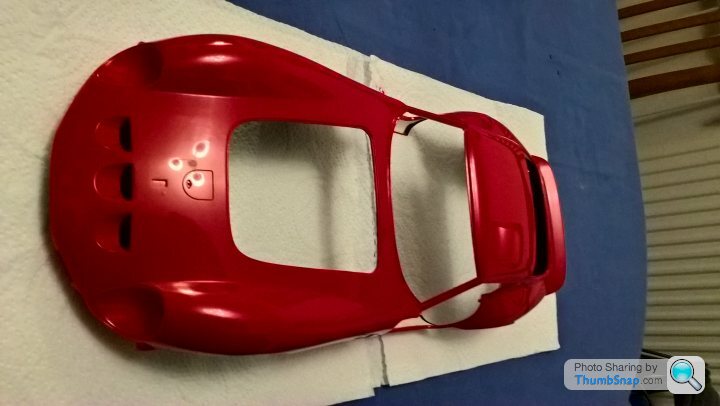
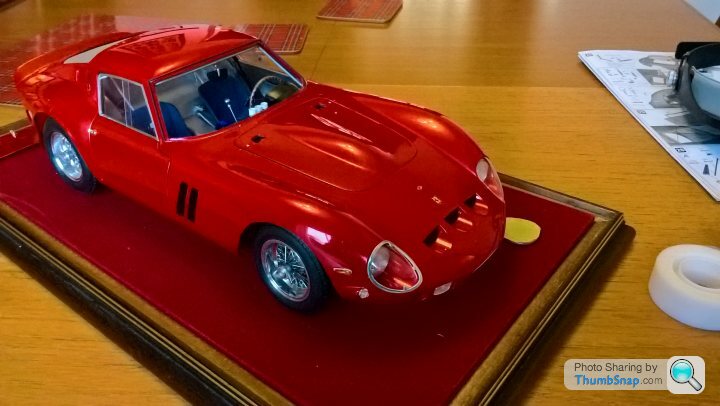
So job done, no runs, a couple of dust marks which will polish out. Left for a couple of days before laying on but not fixing the bonnet, boot,doors and frames to compare what ive polished to 12000 grit, to the painted body. Im pleased to see the already polished sections mentioned are slighly darker compared to the unfinished body, so by carefully rubbing down the rest of the body down to 12000 will come up the same as the rest.
If you look carfully and compare the reflection lines of the doors and bonnet, the lines are more sharper/defined than the reflection off the body lines.
 .
.
 .
.
 .
.
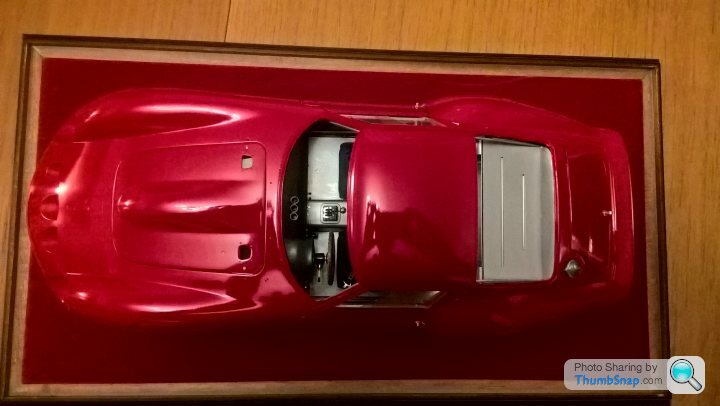
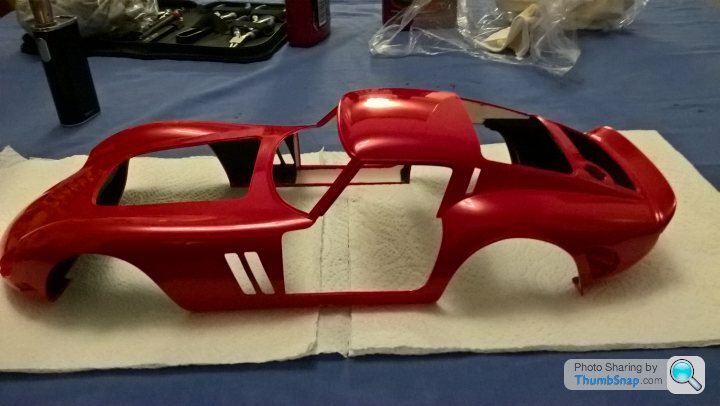
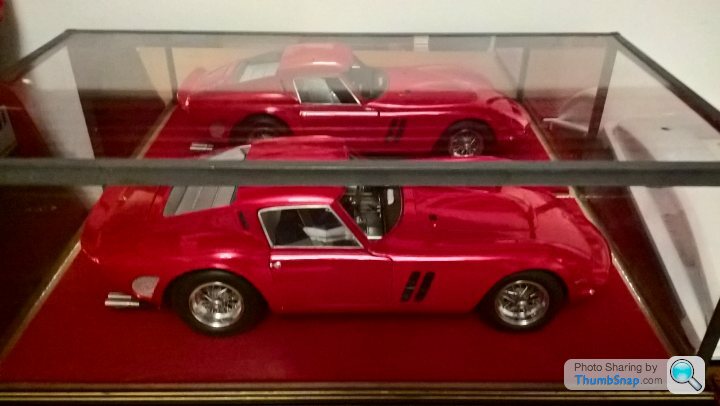
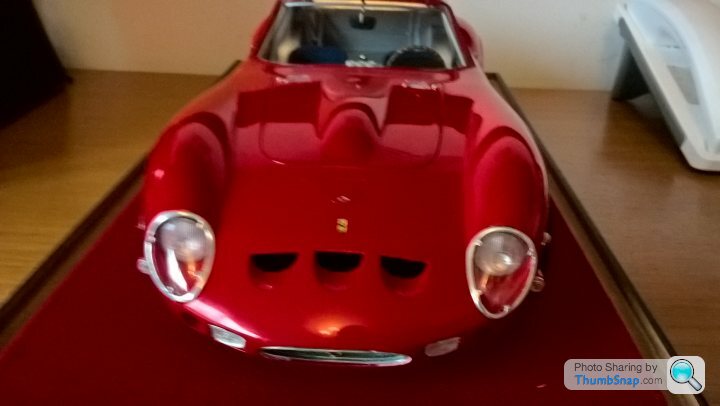
I layed the body onto the chassis, just to take a look. Happy so far.
 .
.
 .
.
 .
.
Next step is to finish the body off before adding on loads more parts to complete. Thanks for looking. Cheers
1st dry coat, just to get some on, sprayed all around edges first then over body.Waited about 10 minutes
. 2nd wet coat, sorry about the phone photos you cant see much difference but it is there. Waited another 10 minutes
.3rd wet coat .
. Finally waited approx 20 minutes then gave it a final slow wet coat.
. So job done, no runs, a couple of dust marks which will polish out. Left for a couple of days before laying on but not fixing the bonnet, boot,doors and frames to compare what ive polished to 12000 grit, to the painted body. Im pleased to see the already polished sections mentioned are slighly darker compared to the unfinished body, so by carefully rubbing down the rest of the body down to 12000 will come up the same as the rest.
If you look carfully and compare the reflection lines of the doors and bonnet, the lines are more sharper/defined than the reflection off the body lines.
. . .I layed the body onto the chassis, just to take a look. Happy so far.
. . . Next step is to finish the body off before adding on loads more parts to complete. Thanks for looking. Cheers
TR4man said:
I reckon you've put almost as much effort into that as they did building the real ones!
.and comments from RDMcG and NDA .Thankyou very much for your kind comments. I used to be involved with real cars, racing cars and Gearbox karts years ago,raced them as well but seeing my work being driven up the road at times were sometimes dissapointing as a feeling of achievement and even worse if they came back damaged. Years have gone by and i prefer to build something sitting at a table that i at the least own and enjoy albeit at a smaller scale, but i really do enjoy what im doing and at least i dont have to get on my knees, lie on my back,contort myself to undo a nut & bolt, cut myself, get arc eye or hit my thumb with a hammer.It was at the time all a necessary experience to gain skills im sure. I still experience these pitfalls in my day-job supporting the automation industry to pay for "the poor childrens fathers beer money fund" or PCFBMF ha! ha!.
Im yet to start the process on the body of rubbing down to 12000. Its going to take some time though.The doors,bonnet and boot were relatively flat surfaces, so didnt really take long to do. I will need to be carefull around any edges.
Will post at some point. Cheers for now
Hi!.Well i took the body off the chassis and since removed the bonnet, boot and door assemblies which were just taped on and put them away for later.
Heres some photos of my way of working on the body,s paintwork for comparrison.
Im sure there are other methods that you guys use, i prefer to finish everything by hand, as in the past experience using rotary tools
easily burnt the paintwork and i would have had to start all over again.The paintwork did look ok anyway but i wanted to get the surfaces glass smooth.
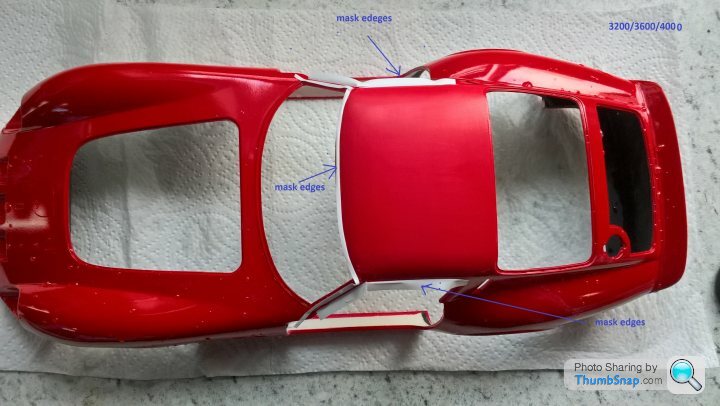
Today i just did the roof panel, masking off any sharp areas as these would easily rub through the laquer and the edges
were shining through anyway.
Running the tap slowly, continuosly and luke warm.
1st stage is the hardest amount of work using 3200 grit to start off, patience as well.Very light pressure, all the other grits to 12000 only took around 10 minutes each
 .
.
Starting to reflect light now
 .
.
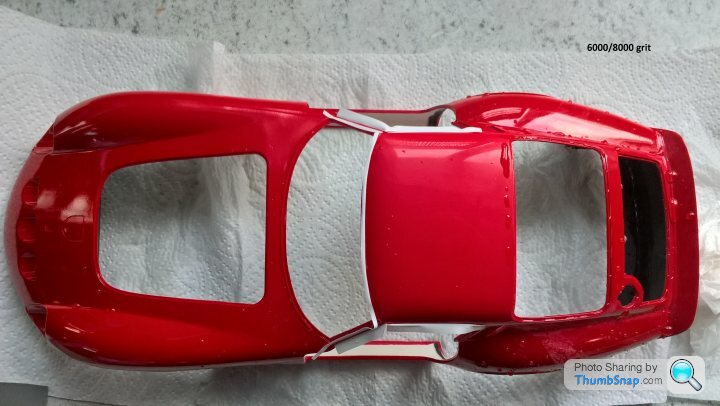
Visable reflection now, crisp and clean reflective lines
 .
.
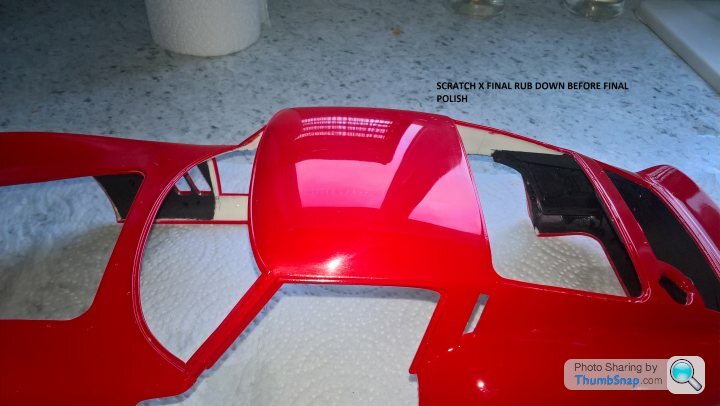
Final stage using Scratch X 2.0 compound (very wet creamy fine abrasive).
The Hue and shade of red is now the same as the other components ive already completed
 .
.
Took about 2 hours to do the roof, but most of the time taken was just being very carefull.
The only sharp edges left really are the wheel arches, so the remaining bodywork should be relatively easy to do.
Once completed the inside of the body needs touching up and the aluminium in the roof panel, and A pillars before final assembly.
The final waxing will be done when ive completed the rest of the body. Cheers for now
Heres some photos of my way of working on the body,s paintwork for comparrison.
Im sure there are other methods that you guys use, i prefer to finish everything by hand, as in the past experience using rotary tools
easily burnt the paintwork and i would have had to start all over again.The paintwork did look ok anyway but i wanted to get the surfaces glass smooth.
Today i just did the roof panel, masking off any sharp areas as these would easily rub through the laquer and the edges
were shining through anyway.
Running the tap slowly, continuosly and luke warm.
1st stage is the hardest amount of work using 3200 grit to start off, patience as well.Very light pressure, all the other grits to 12000 only took around 10 minutes each
. Starting to reflect light now
. Visable reflection now, crisp and clean reflective lines
. Final stage using Scratch X 2.0 compound (very wet creamy fine abrasive).
The Hue and shade of red is now the same as the other components ive already completed
. Took about 2 hours to do the roof, but most of the time taken was just being very carefull.
The only sharp edges left really are the wheel arches, so the remaining bodywork should be relatively easy to do.
Once completed the inside of the body needs touching up and the aluminium in the roof panel, and A pillars before final assembly.
The final waxing will be done when ive completed the rest of the body. Cheers for now
Edited by henryk001 on Sunday 25th November 23:13
NDA said:
It's going to be soooo good when it's finished. 
.I hope so NDA, theres so much more left to do i dont want to assume all is going to go well and drop my guard, so i think im concentrating much,much more on preventing making any mistakes, as its really the stage im at would show up a mistake like a sore thumb (if i do at least it will be red ha! ha!) . Cheers
Its been slow at the moment, taking my time evenings on the bodywork taking care not to go through the laquer.
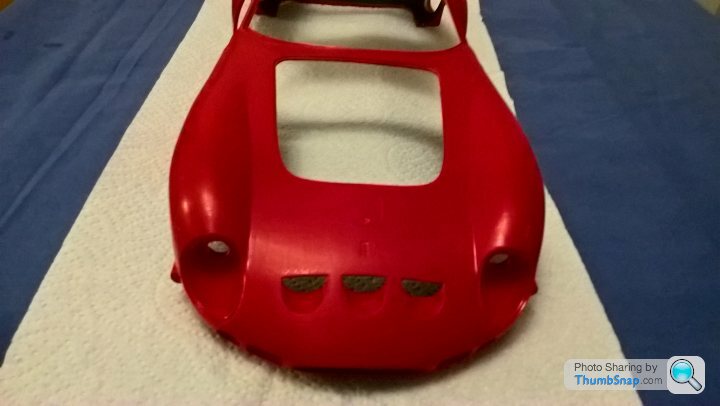
Anyway heres some pictures before and after starting at 3200/3600/4000/6000/8000 and finally 12000 , then some scratch x 2.0. Im not going to polish it until the rest of the parts are fitted, some painting of the rubber seals for the doors and windscreen rubber yet to do,inside roof and pillars in Aluminium, waxing at this stage will stop any gluing or painting i need to do.
BODY TAKEN DOWN TO 3200.
 .
.
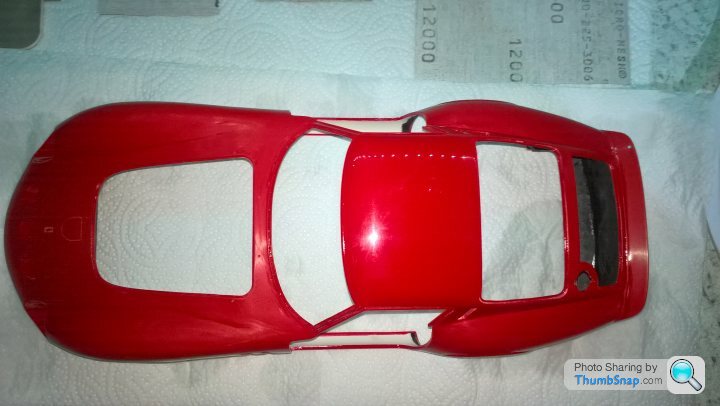
BODY AT 12000 BEFORE AS POLISH.
 .
.
 .
.
 .
.
 .
.
Sorry about the poor quality photos, im no David Bailey thats for sure.Anyway im pleased with the result, reflection lines are crisp and clean. I can now get on with the cars trim parts, windows,lights, wipers, leather etc, loads more parts to fit yet. Ive ordered the trumpeter GT40 + super detail parts to start next year,dont know when ill get it as its only available on a pre order basis,will go nicely with the 250 GTO. should be fun. More to come. Cheers
Anyway heres some pictures before and after starting at 3200/3600/4000/6000/8000 and finally 12000 , then some scratch x 2.0. Im not going to polish it until the rest of the parts are fitted, some painting of the rubber seals for the doors and windscreen rubber yet to do,inside roof and pillars in Aluminium, waxing at this stage will stop any gluing or painting i need to do.
BODY TAKEN DOWN TO 3200.
. BODY AT 12000 BEFORE AS POLISH.
....Sorry about the poor quality photos, im no David Bailey thats for sure.Anyway im pleased with the result, reflection lines are crisp and clean. I can now get on with the cars trim parts, windows,lights, wipers, leather etc, loads more parts to fit yet. Ive ordered the trumpeter GT40 + super detail parts to start next year,dont know when ill get it as its only available on a pre order basis,will go nicely with the 250 GTO. should be fun. More to come. Cheers
Edited by henryk001 on Friday 30th November 14:50
Edited by henryk001 on Friday 30th November 14:51
Hi! CanAm, yes im aware of the Inaccuracies, also there are comments on forums elswhere about the fit and finish of some parts including too much chrome, however its all i can find in 1/12th scale to build as a project to sit next to the ferrari im doing and i wouldnt realy be making the car to any degree of historical reference. I will only be interested in the build and as fine in detail that i can make it, pretty much to my personal choice in colour as if i owned a real one. Im also not sure if i will even be able to get it as it was a pre-order purchase on Grand prix models web-site. They may have even stopped making them, fingers crossed.
[quote=robemcdonald]First things first. Great build, truly inspirational stuff.
Second I have the trumpeter GT40 mk2 and have been build8ng it off and on for a little while.
It’s not in the same league as this kit, but it’s good for the money.
Thankyou very much for your encouraging comment. I hope i do manage to get one,if i do i think i will get rid of any toy like parts and make my own. The Deluxe super detail kit from KA models should take care of most fine detailing. Its over £100.00 but considering the amount of parts, id say will be worth it .If your going to get one be careful when ordering as there are 3 versions and differing prices, but the box is the same so you may think your getting a bargain paying £75.00 only to find the very nice seats are missing.
Heres a link to it if you havent already seen it.
https://hlj.com/1-12-scale-gt40-mk-ii-super-detail... .
I see your building skills are up there with the best of them, would be very interested to see how your GT40 build goes. Cheers
Edited by henryk001 on Saturday 1st December 12:13
Ive gone off, the stage by stage method of building as its starting to come closer to completion.
I want to let anyone know who builds this model of what i think solves a issue with the kit. Its nothing serious but i saved my self a awfull lot of time.I hope this thread helps anyone out.
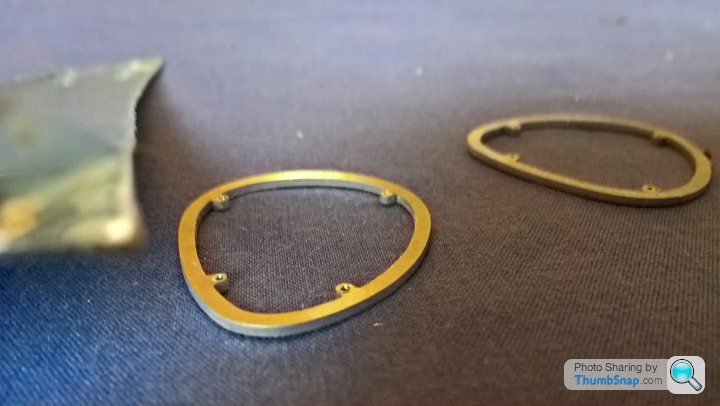
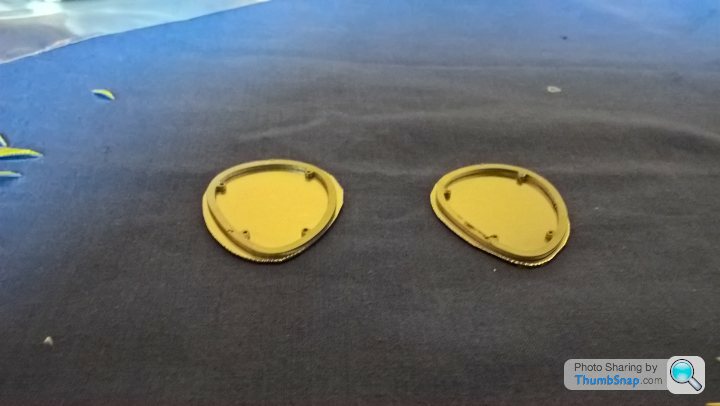
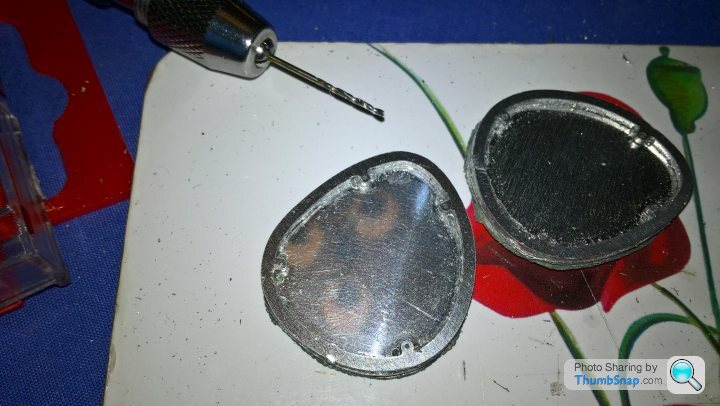
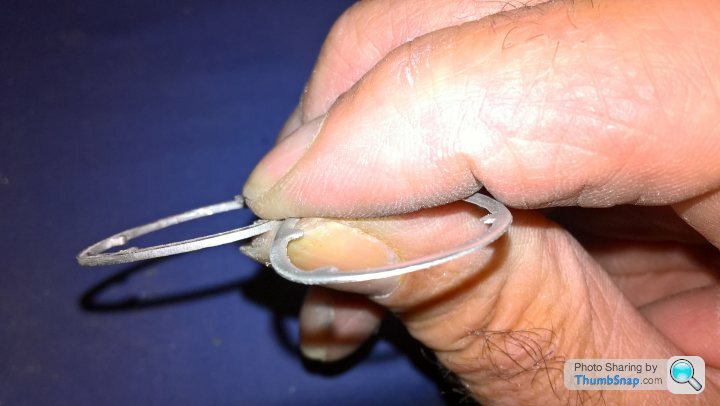
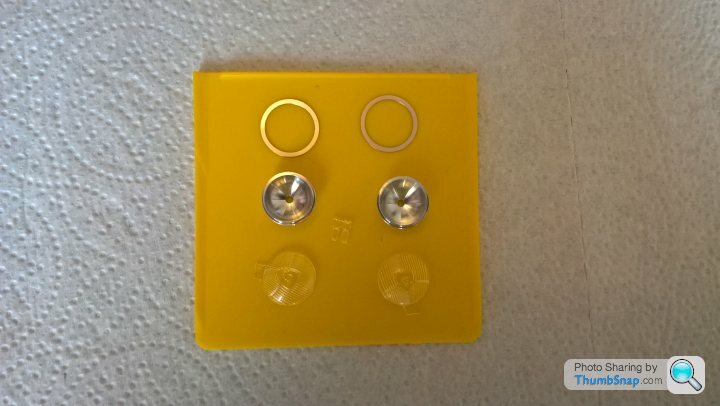
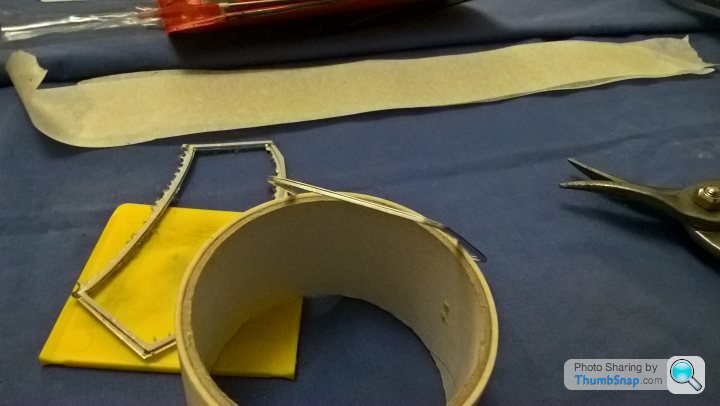
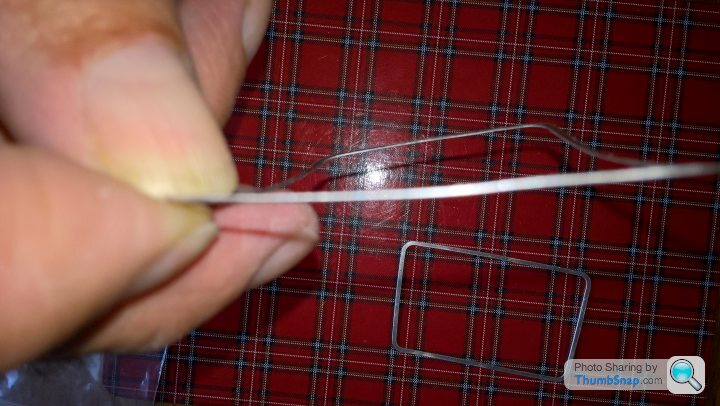
The beauty rings for the headlight covers, window frames are punched out of 1.2mm solid alluminium, so they have to be filed/dremeld into a radius and thin enough to look to scale, approx 0.4mm at its thickest.You can buy a thin template and solder onto it at extra expense.Not my cup of tea.The main reason to do this was if i made a mistake shaping the ones provided i would have had to order new ones at extra cost from MFH to try again. Heres my way to do it.
 .
.
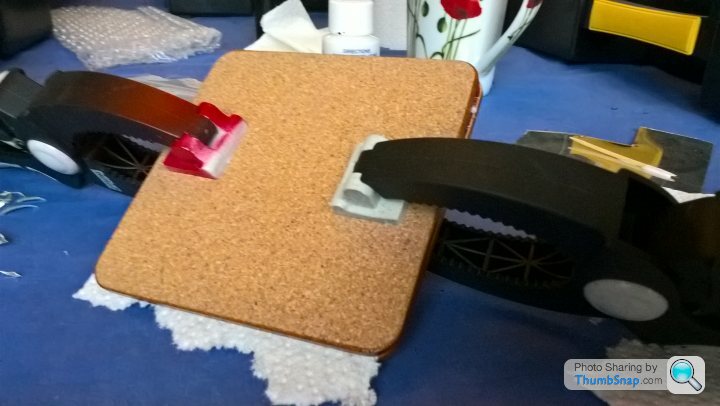
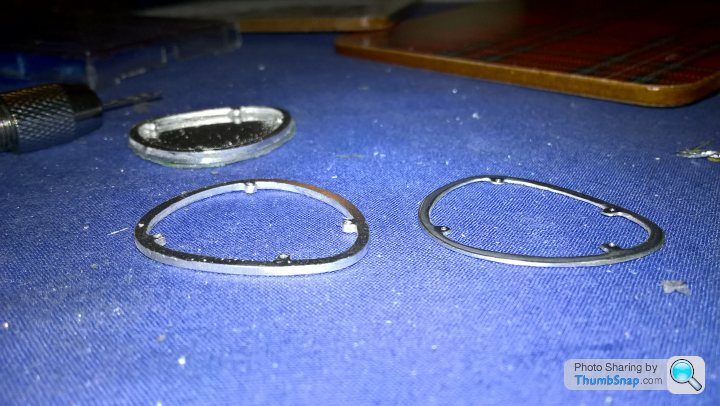
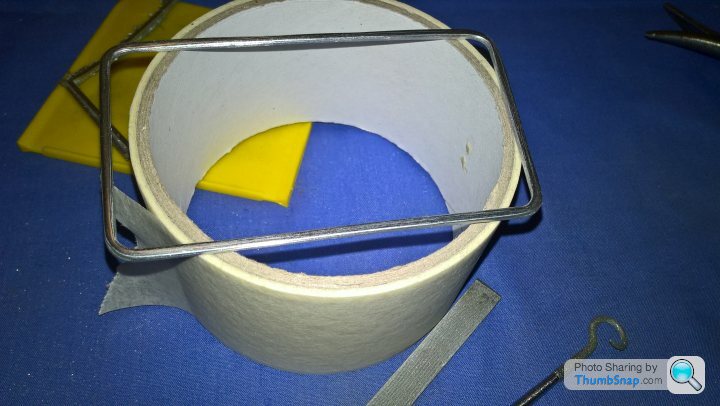
So i cut 0.5mm thick mirror finished ally and stuck it with watered dowm PVA onto the rings which are now acting as a template.Then clamped together
 .
.
 .
.
Trimmed of the excess and filed around the outside with jewellers file till i just touched the outside frame.
 .
.
 .
.
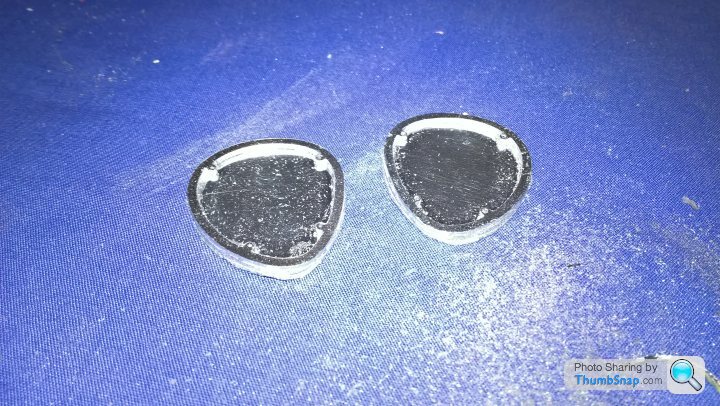
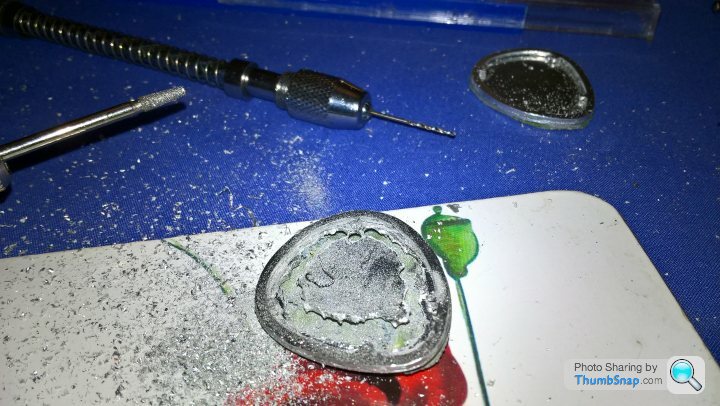
Drilled 0.5mm holes at the corner of the lugs to break into later, then drilled a row of 2mm holes around the inside,then broke through them with a dremel mill (doesnt take long).Carefull with your fingers.
 .
.
 .
.
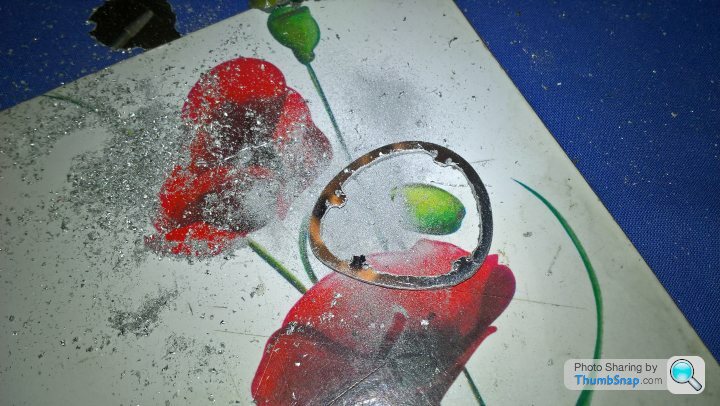
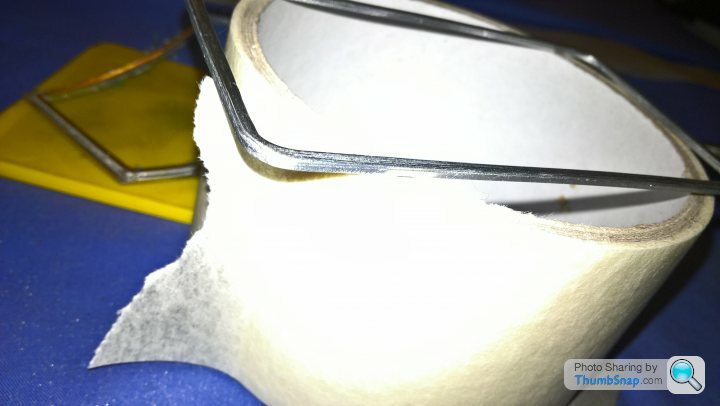
Finally cleaned up with a tapered to point dremal bit on the inside and draw filed around the outside,rough filed the radius edges, some rotary micro sanding wheels, and polishing pads finished the job.
 .
.
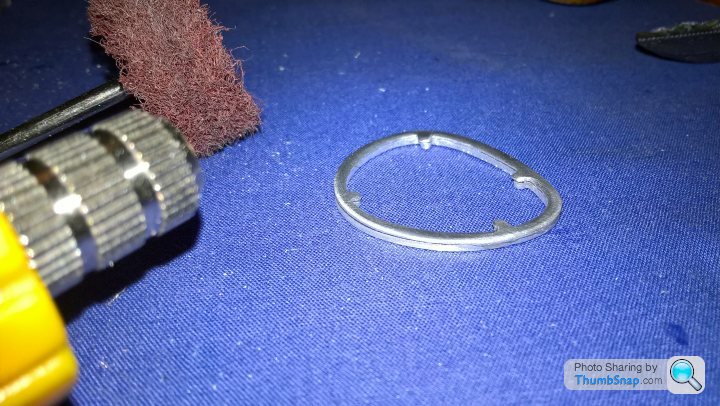
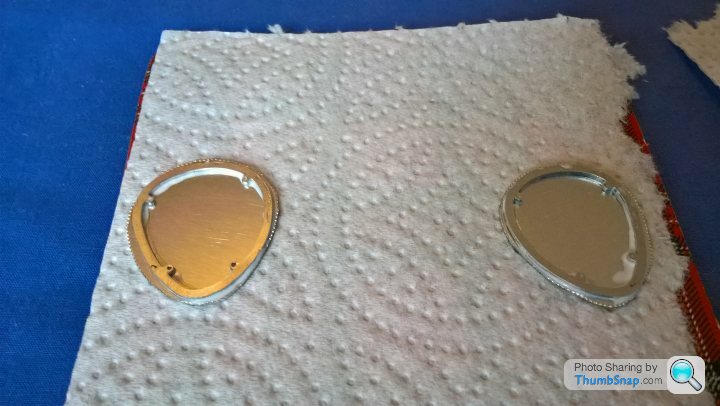
Some warm water softens the glue and free,s off my new thinner beauty ring, gives me back the template for another project in the future.
 .
.
 .
.
 .
.
Just needs forming around the headlight cover, at only 0.4mm at its thickest will be a easy job to do. Final fitting & Four rivets to go in.
Looks great and saved a lot of time. If this helps anyone or gives anyone a idea for a future projects then im happy. Cheers
I want to let anyone know who builds this model of what i think solves a issue with the kit. Its nothing serious but i saved my self a awfull lot of time.I hope this thread helps anyone out.
The beauty rings for the headlight covers, window frames are punched out of 1.2mm solid alluminium, so they have to be filed/dremeld into a radius and thin enough to look to scale, approx 0.4mm at its thickest.You can buy a thin template and solder onto it at extra expense.Not my cup of tea.The main reason to do this was if i made a mistake shaping the ones provided i would have had to order new ones at extra cost from MFH to try again. Heres my way to do it.
.So i cut 0.5mm thick mirror finished ally and stuck it with watered dowm PVA onto the rings which are now acting as a template.Then clamped together
..Trimmed of the excess and filed around the outside with jewellers file till i just touched the outside frame.
.. Drilled 0.5mm holes at the corner of the lugs to break into later, then drilled a row of 2mm holes around the inside,then broke through them with a dremel mill (doesnt take long).Carefull with your fingers.
. . Finally cleaned up with a tapered to point dremal bit on the inside and draw filed around the outside,rough filed the radius edges, some rotary micro sanding wheels, and polishing pads finished the job.
. Some warm water softens the glue and free,s off my new thinner beauty ring, gives me back the template for another project in the future.
... Just needs forming around the headlight cover, at only 0.4mm at its thickest will be a easy job to do. Final fitting & Four rivets to go in.
Looks great and saved a lot of time. If this helps anyone or gives anyone a idea for a future projects then im happy. Cheers
Edited by henryk001 on Thursday 6th December 20:44
Edited by henryk001 on Friday 7th December 13:35
Edited by henryk001 on Friday 7th December 13:39
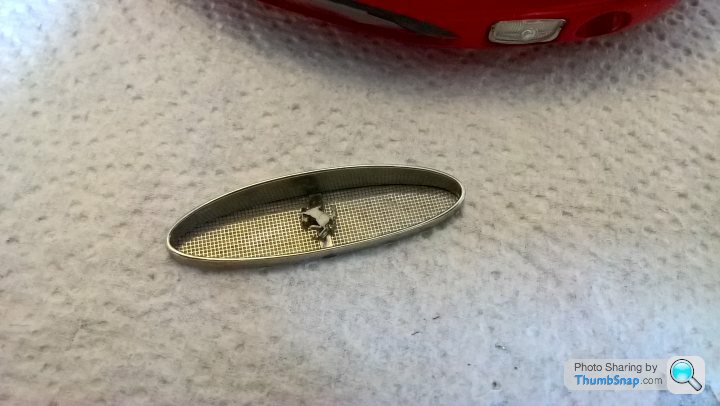
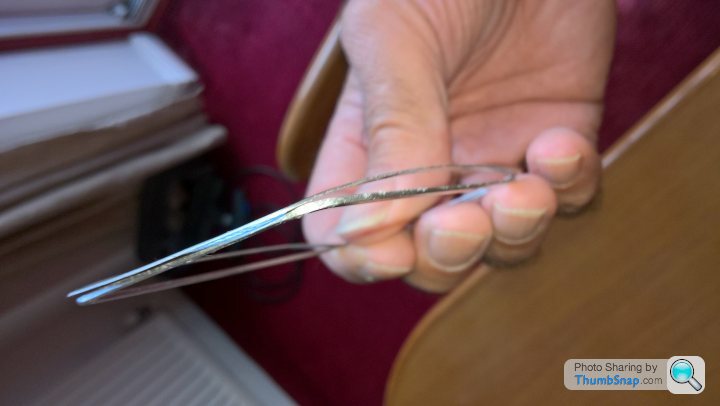
Hi. Yes the rings and windscreen frames are supplied pre made cut to size and shaped but not formed to scale on the radius( see previous photos), need finishing. An awful lot of metal removal So here’s the worry which I mentioned. If a mistake is made forming them then that’s it “san fairy Ann”. I used the parts supplied as a pattern to make my own out of thinner aluminium (half the thickness and more scalable), so if I did make a mistake shaping or bending , I could do another one. The one in the picture took about 2 hours and fits nicely over the lens cover , was easy to form and bend. I’m going to do the same with the windscreen and rear window as well. I trust this explains what I’ve done. Cheers
NDA said:
It does explain - thanks.
It's a huge amount of work and quite fascinating to watch the progress.
.It's a huge amount of work and quite fascinating to watch the progress.
Its really coming together now, cant stop staring at it. Will post more photos as and when.Sounds like you may like to get into this hobby. Tamiya 1/12th scale is a very good start,much lower in cost and very fine detail without any rework, mostly plastic,there are super detailing kits available to add to. Cheers
CanAm said:
With the price that MFH charge, I'd be very miffed at having to replace parts that could so easily ruin the whole appearance of the model.
.I would totally agree, if i was new to this hobby. Its definitely not for the faint hearted and needs a lot of thought and patience.
I prefer reworking and adding,using my own judgment and methodology. its "just my bag" . The big difference in comparison to others, is the MFH kits use a lot of white metal, nickel silver, machined metal parts, ally & stainless and loads of photo etched parts makes it all the more challenging for me.The price point is high compared to the all plastic kits, but considering the varying amount of materials supplied and development costs that would have had to be factored in, seems fair to me. Cheers for now
NDA said:
I'd like to, but I am not sure I'd have the patience. Also I am that bloke that tightens that bolt a quarter turn more than it needs - I lack the deft touch required to create something other than a total bodge.
.I totally understand, however I haven’t got the smallest hands in the world either.I used to work in the factory plant installation and maintenance dept when I was younger. So I would say if your as you say “unsure” tells me your thinking about it,why not give it a go. You can pm me if you need any advise. Cheers
Hi! There now that ive finished both light covers and rings im back to the stages of building, few words and more photos.
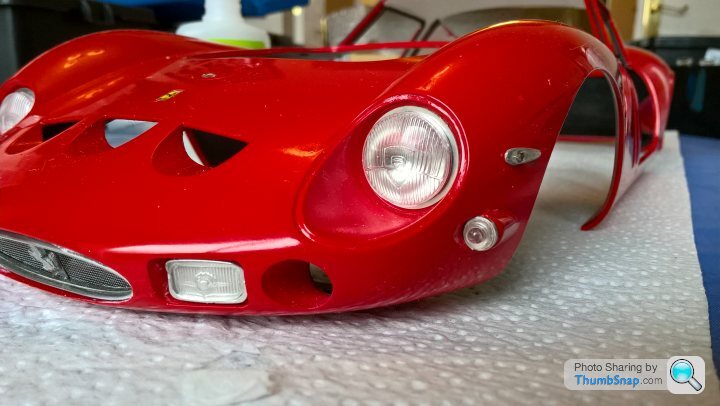
Head Lights
 .
.
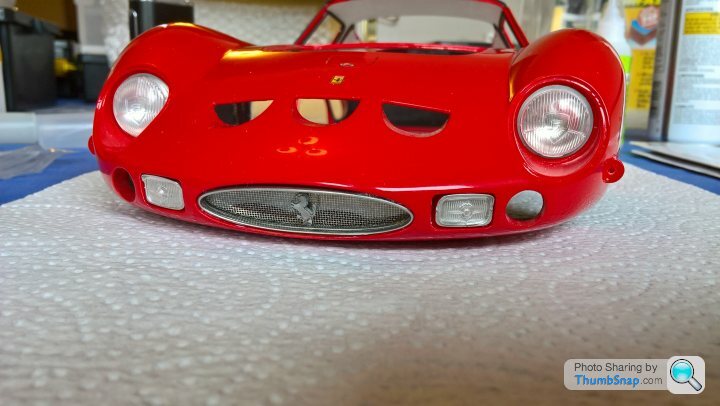
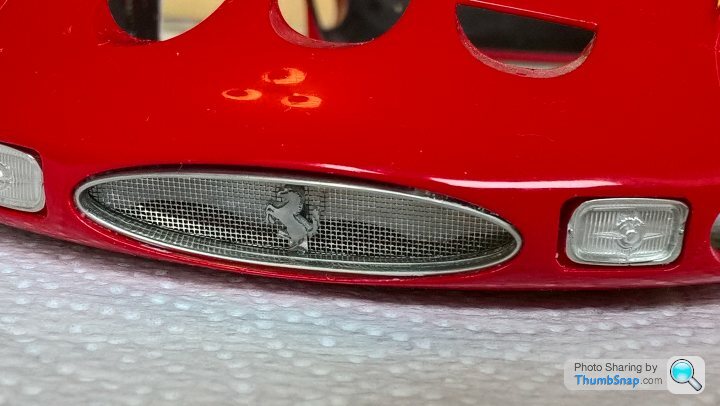
Grill made of 5 parts
 .
.
 .
.
 .
.
Side lights, fog and indicators.
 .
.
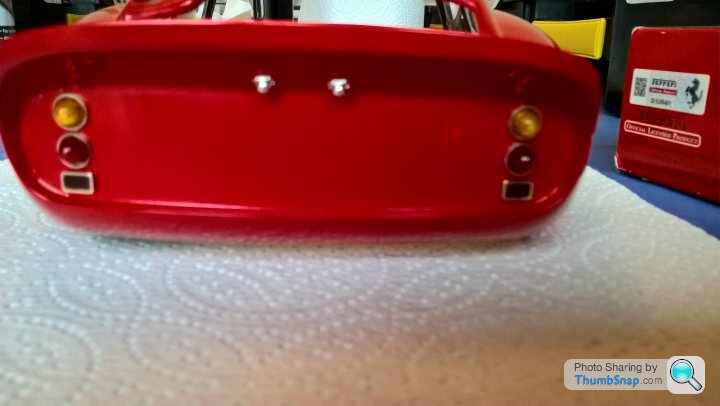
Rear lights, number plate lights.Lenses were painted with clear
 .
.
 .
.
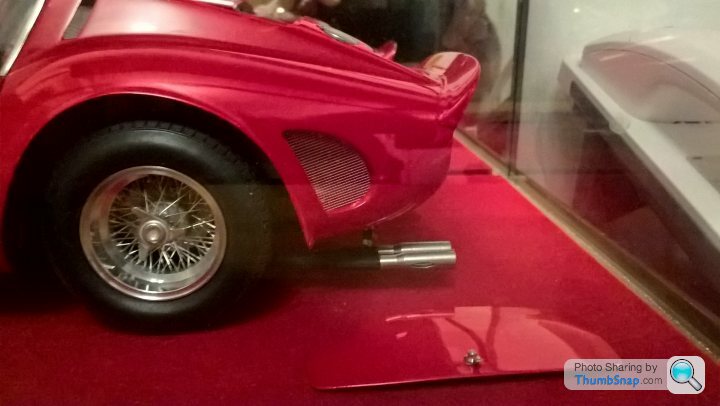
Mesh fitted to rear ducts and mesh fitted to front wing ducts and rear pillar air vents not standard
 .
.
All thats left are 1 light cover,bonnet bits and pieces, leather straps etc, windows and frames,wipers, ferrari logo on the wings and license plates, them im all done.
I will post the final outcome on a rotary table when ive finished.Thankyou to all for the encouraging comments,i really did greatly appreciate them, spurred me on a bit as well.
Merry Xmas and a Happier New year to all from us and the boyos

Head Lights
.Grill made of 5 parts
...Side lights, fog and indicators.
.Rear lights, number plate lights.Lenses were painted with clear
. .Mesh fitted to rear ducts and mesh fitted to front wing ducts and rear pillar air vents not standard
. All thats left are 1 light cover,bonnet bits and pieces, leather straps etc, windows and frames,wipers, ferrari logo on the wings and license plates, them im all done.
I will post the final outcome on a rotary table when ive finished.Thankyou to all for the encouraging comments,i really did greatly appreciate them, spurred me on a bit as well.
Merry Xmas and a Happier New year to all from us and the boyos
Edited by henryk001 on Thursday 13th December 17:58

NDA said:
Fab! Well done.
Some high def pictures with the bonnet open and interior would be very welcome when you have time.
Where are you going to have it in the house?
.Some high def pictures with the bonnet open and interior would be very welcome when you have time.
Where are you going to have it in the house?
I,ll do my best. I have a rotary table to put it on for some photos.
Its going up to my son when im finished, as its too much of a distraction and i want to go on to another project. It will be great to see it from time to time.
I think i will appreciate it better that way.Cheers
Happy New year. Well after all that booze,food and telly repeats, im back in the game.
Just a few photos of where shes at.
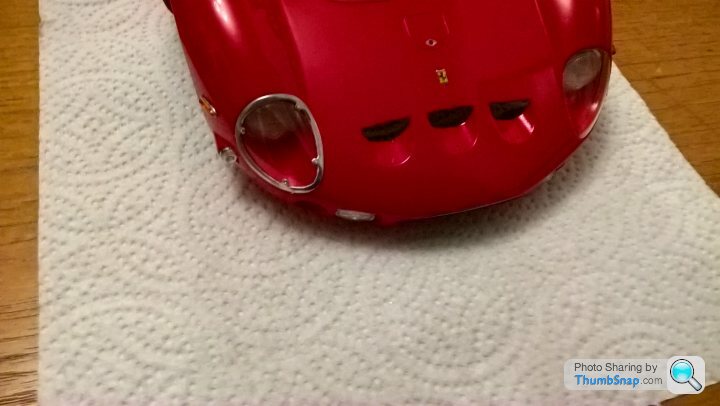
Headlight beauty rings finished, sorry bit fuzzy
 .
.
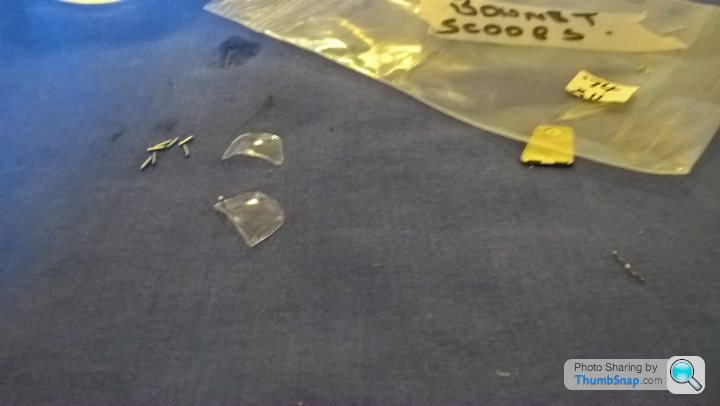
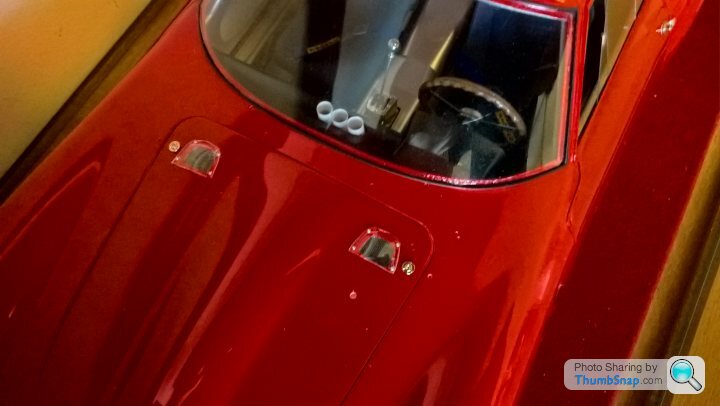
Windscreen Catch stops Bonnet vent grills covers and rivets (15 parts)Leather straps, buckles,rivets and window frame surround yet to do .
 .
.
 .
.
 .
.
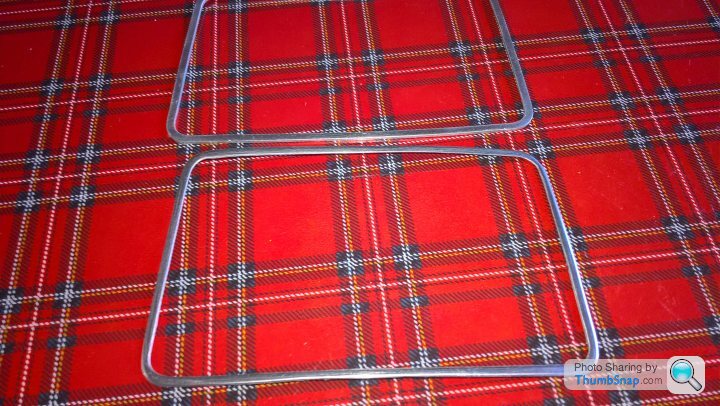
The windows frame surrounds im doing in the same method as the headlight rings
 .
.
 .
.
 .
.
 .
.
 .
.
 .
.
Front screen surround to do next.
Trumpeter GT40 arrived a couple of days ago for the next build project. Looking forward to building it using the super detail kit supplied by KA models.
Cheers for now.
Just a few photos of where shes at.
Headlight beauty rings finished, sorry bit fuzzy
. Windscreen Catch stops Bonnet vent grills covers and rivets (15 parts)Leather straps, buckles,rivets and window frame surround yet to do .
... The windows frame surrounds im doing in the same method as the headlight rings
......Front screen surround to do next.
Trumpeter GT40 arrived a couple of days ago for the next build project. Looking forward to building it using the super detail kit supplied by KA models.
Cheers for now.
Edited by henryk001 on Saturday 23 February 14:43
Hi! Been a while, really busy after the xmas holiday, mad to have time off only to go back and spend 3 weeks trying to catch up.
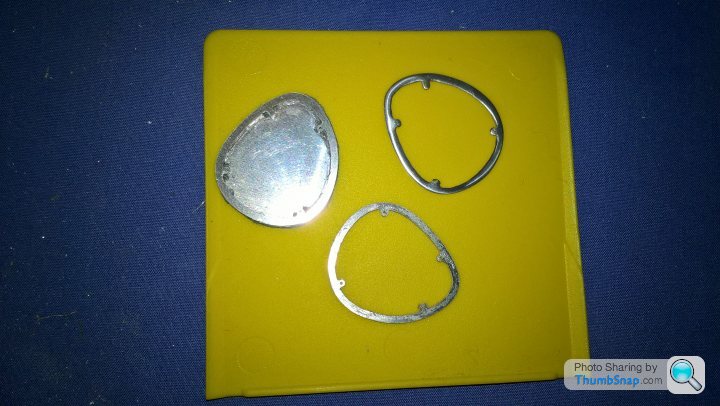
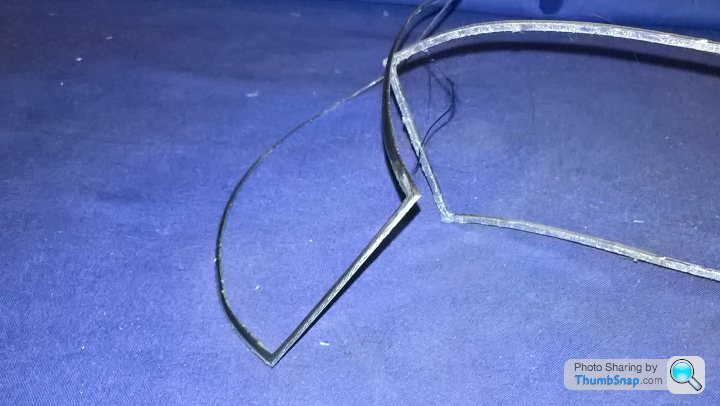
 My Failed 1st attempt at making the front screen surround in the same method as the rear one and headlight rings. Im so glad i used the provided frame as a jig instead, as i needed to scrap the 1st one and make another. Never mind.
 .
.
 .
.
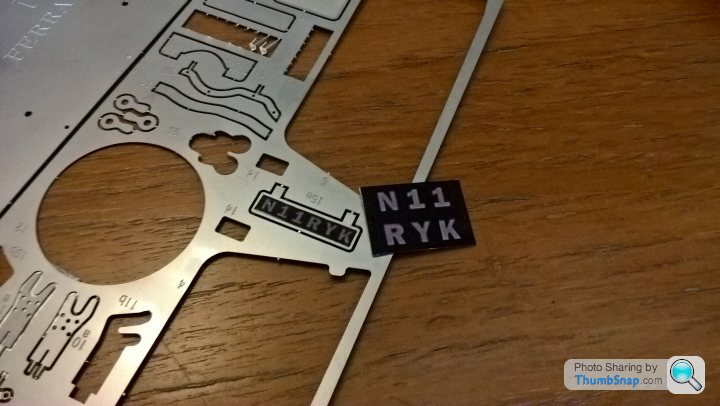
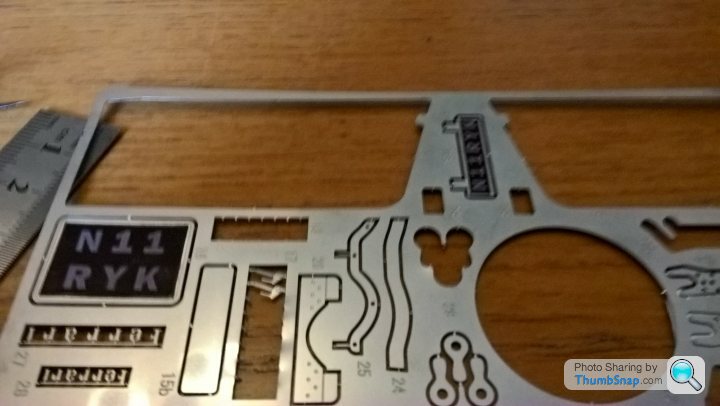
I decided to make my own vintage number plate decals in keeping with the era, finished of with my wifes, nail basecoat, dont tell
 .
.
 .
.
Its coming up to a year building this car,i need some snow now to lock me in so i can get on and finish the car.
Cheers for now
My Failed 1st attempt at making the front screen surround in the same method as the rear one and headlight rings. Im so glad i used the provided frame as a jig instead, as i needed to scrap the 1st one and make another. Never mind...I decided to make my own vintage number plate decals in keeping with the era, finished of with my wifes, nail basecoat, dont tell
..Its coming up to a year building this car,i need some snow now to lock me in so i can get on and finish the car.
Cheers for now
Gassing Station | Scale Models | Top of Page | What's New | My Stuff