Airfix 1/24 Spitfire Mk VB
Discussion


Right - for my 2nd military plane, I'm building this large scale kit for a friend. Pretty sure this was bought as part of a group buy via good 'ol Blatchat (7 Club)
I've not finished the Mossie yet, but need something new to get me back into it all....
From what I have read, these old big Airfix kits can be a bit hit and miss in terms of fit etc - certainly not quite the same as the new Tamiya stuff, that is for sure! But a lovely subject.
The kit had been very slightly started, with a few parts of the cockpit assembled and painted. I've undone this work, so I can paint again with new paint and so keep colour consistency.
It also means I can add a bit more detail - despite my plan to build totally OOB, I can't help myself.
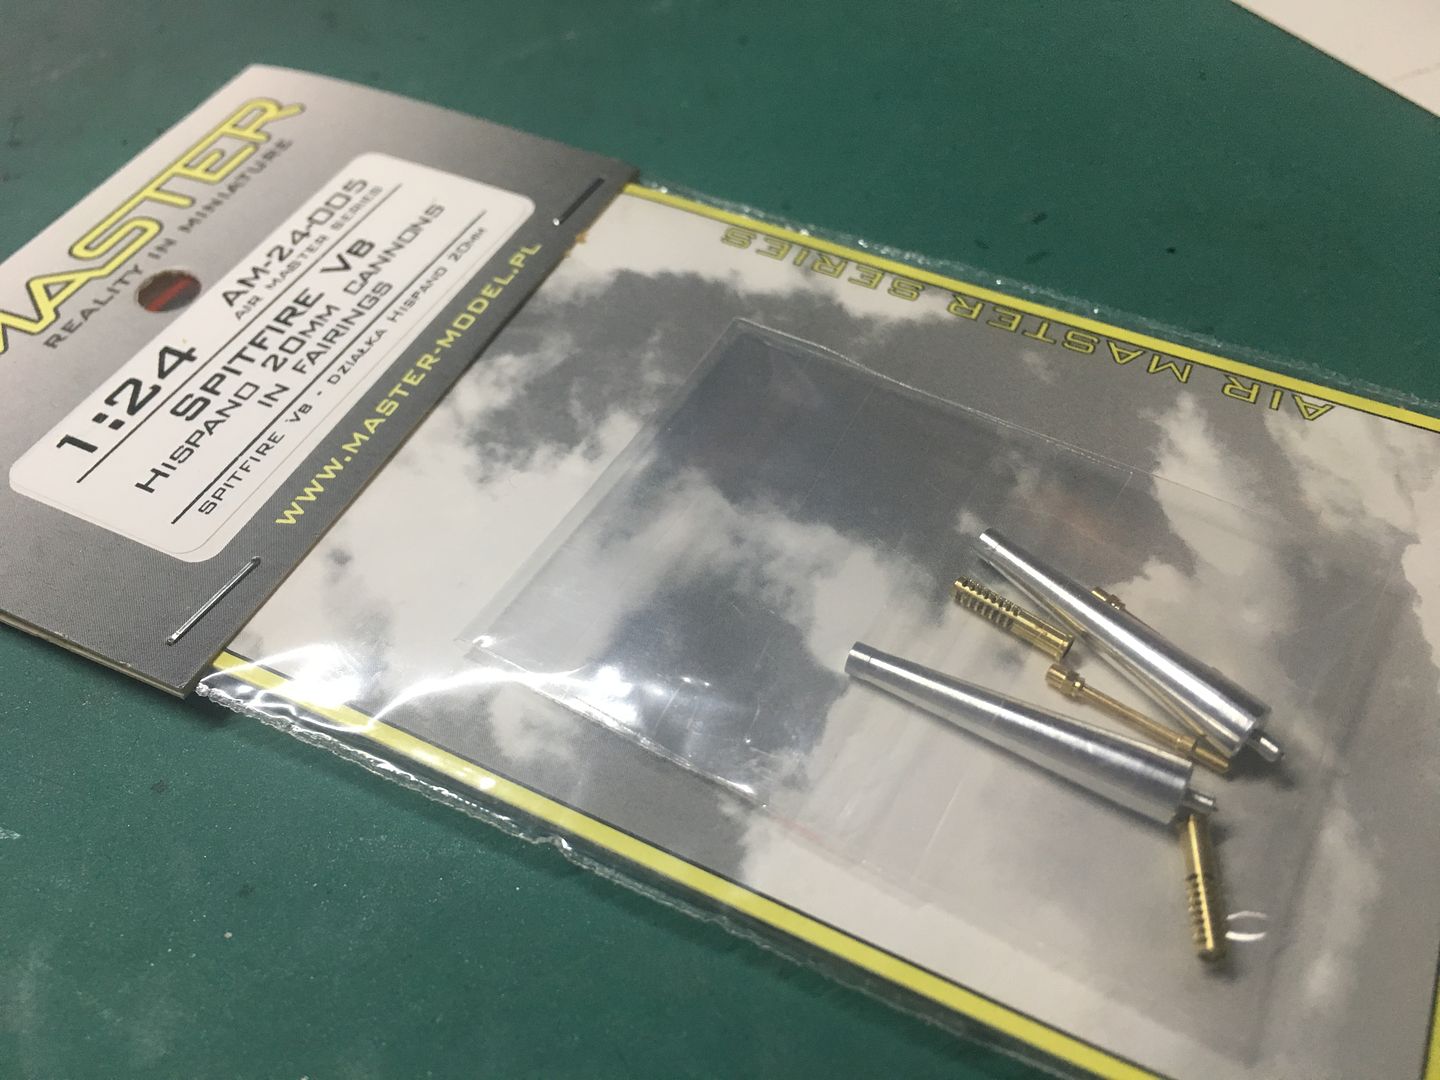
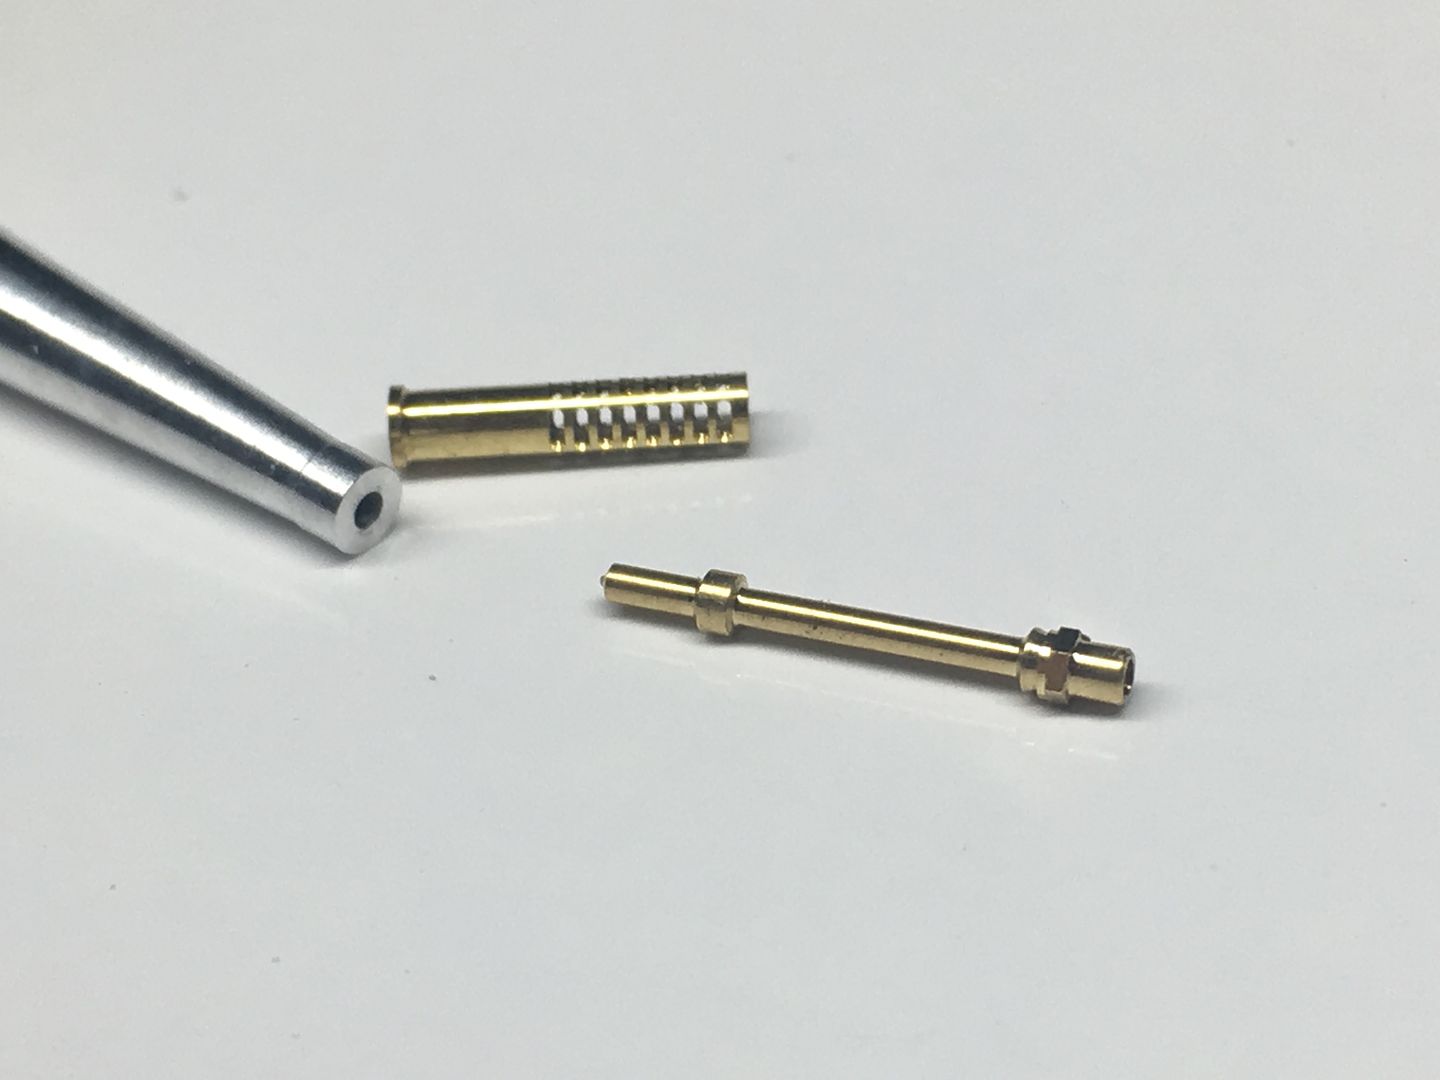
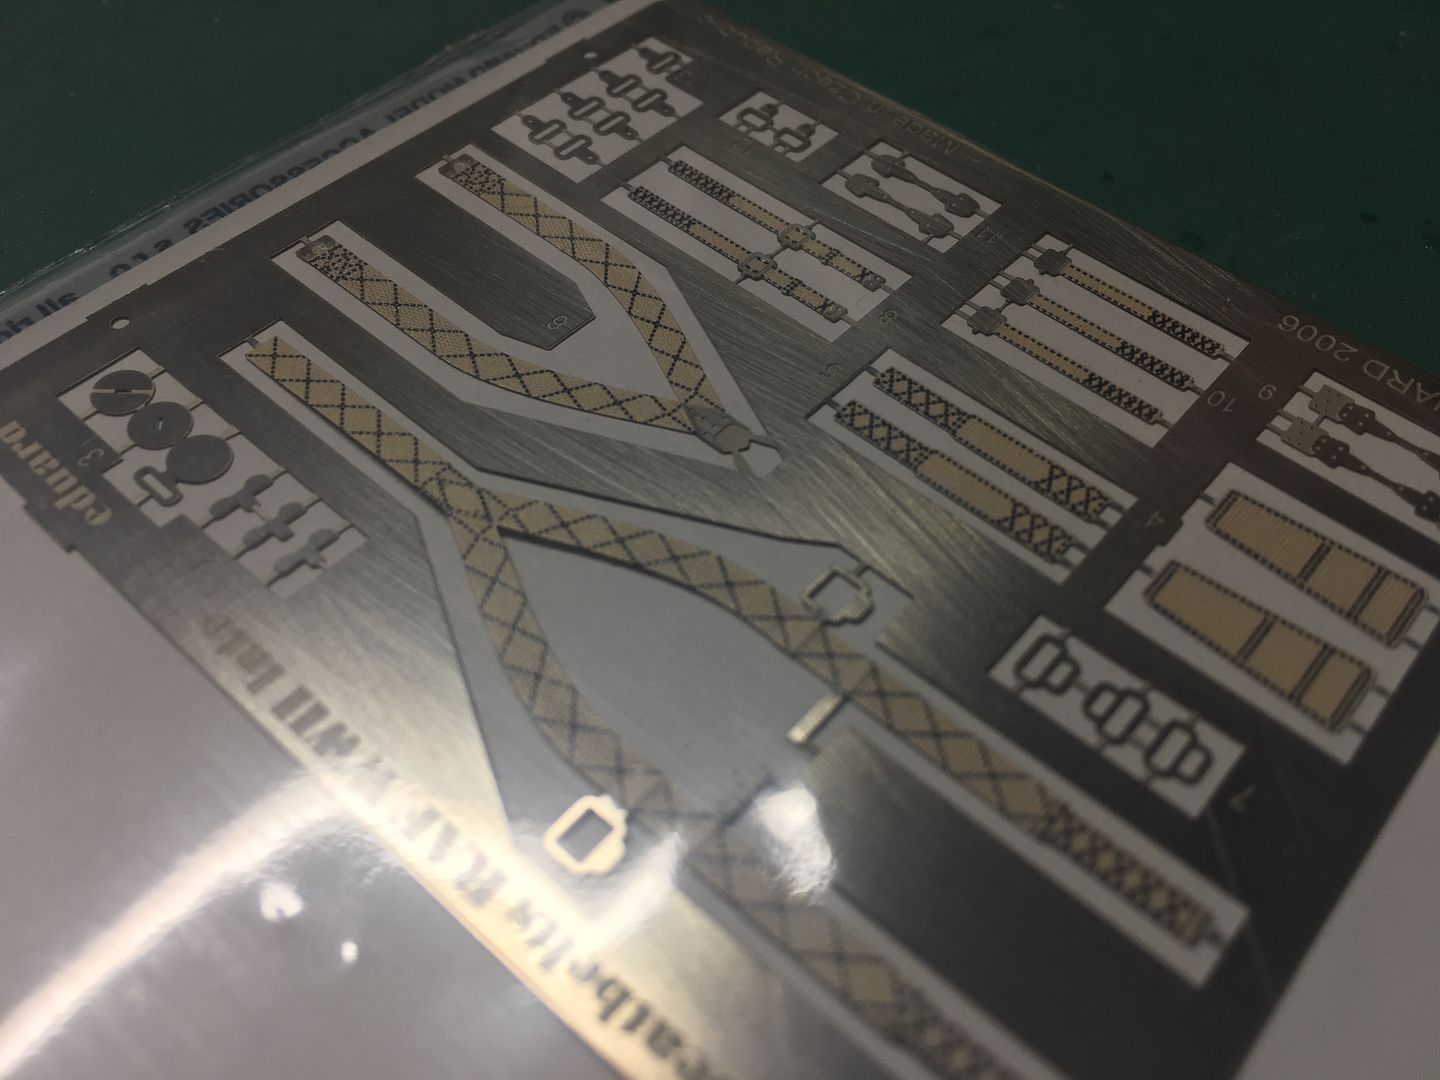
I've ordered the Eduard seatbelts, Master 20mm cannons and some masks for spraying the cockpit
I'm going to scratch build some cockpit internals - but not go mad - hopefully.
Researching forums on this subject, there are a huge number of opinions, variations etc etc - I'm going for a nice kit - if the radio headset is not correct for a particular month in the 40's, I'm ok with that
That said, I do want to get the big stuff accurate....
So here goes...
I've not finished the Mossie yet, but need something new to get me back into it all....
From what I have read, these old big Airfix kits can be a bit hit and miss in terms of fit etc - certainly not quite the same as the new Tamiya stuff, that is for sure! But a lovely subject.
The kit had been very slightly started, with a few parts of the cockpit assembled and painted. I've undone this work, so I can paint again with new paint and so keep colour consistency.
It also means I can add a bit more detail - despite my plan to build totally OOB, I can't help myself.
I've ordered the Eduard seatbelts, Master 20mm cannons and some masks for spraying the cockpit
I'm going to scratch build some cockpit internals - but not go mad - hopefully.
Researching forums on this subject, there are a huge number of opinions, variations etc etc - I'm going for a nice kit - if the radio headset is not correct for a particular month in the 40's, I'm ok with that
That said, I do want to get the big stuff accurate....
So here goes...
Good luck :-D
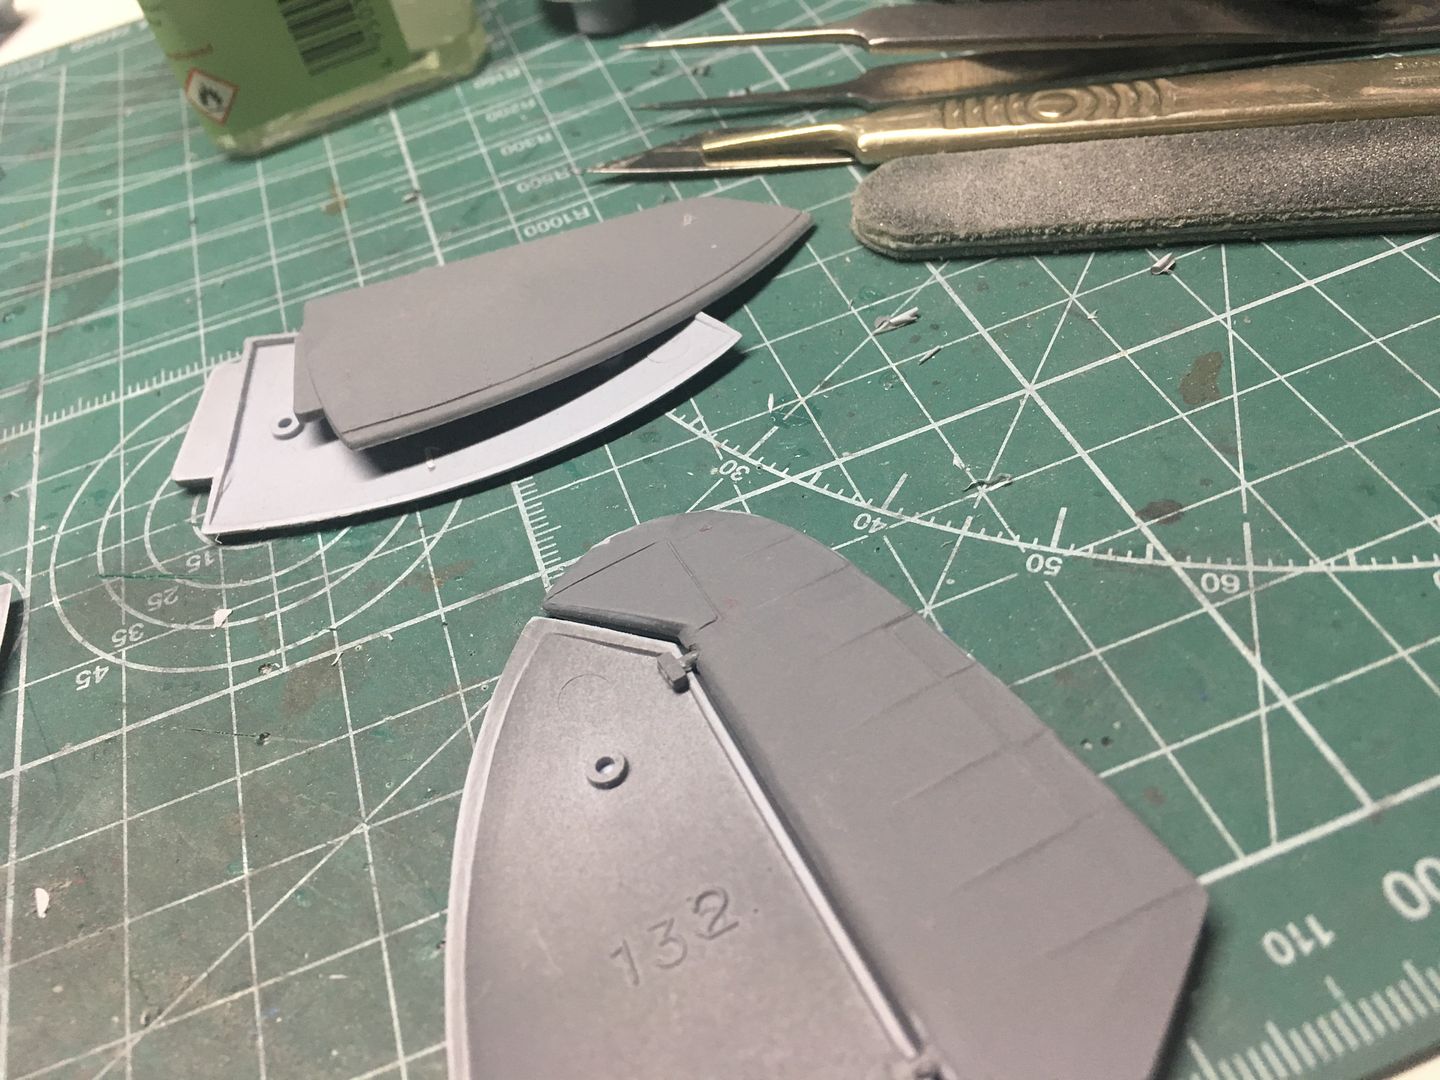
Biggest problem with these is the wing has no real internal supporting structure so it ends up being too flat when built up. It’s worth adding a spar made from aluminium angle or brass rod to get the correct 6 degrees of dihedral on each wing. Makes the finished model look so much more like a spitfire!
Biggest problem with these is the wing has no real internal supporting structure so it ends up being too flat when built up. It’s worth adding a spar made from aluminium angle or brass rod to get the correct 6 degrees of dihedral on each wing. Makes the finished model look so much more like a spitfire!
I've read about the wing-droop! I'll add some wire in there...
Mark wants 'wheels up' - this means I don't have to worry about some of the extra detail around the undercarriage, or even the engine - so I have at least a chance of making all the front panels fit...
Sadly, it also means I have to paint the pilot - something I have just started to do on the Mossie crew, and very much a new skill to learn....pilot will also hide some of the extra cockpit detail I was going to add - but that is not a bad thing - be good to actually finish this one!
So the first job was to dismantle the very small amount of assembly, just to make it easier to tweak. I didn't take many pictures at this point, but it was only really a little bit of cockpit area stuff. I primed over the green paint, just to make it easier to see what was going on...
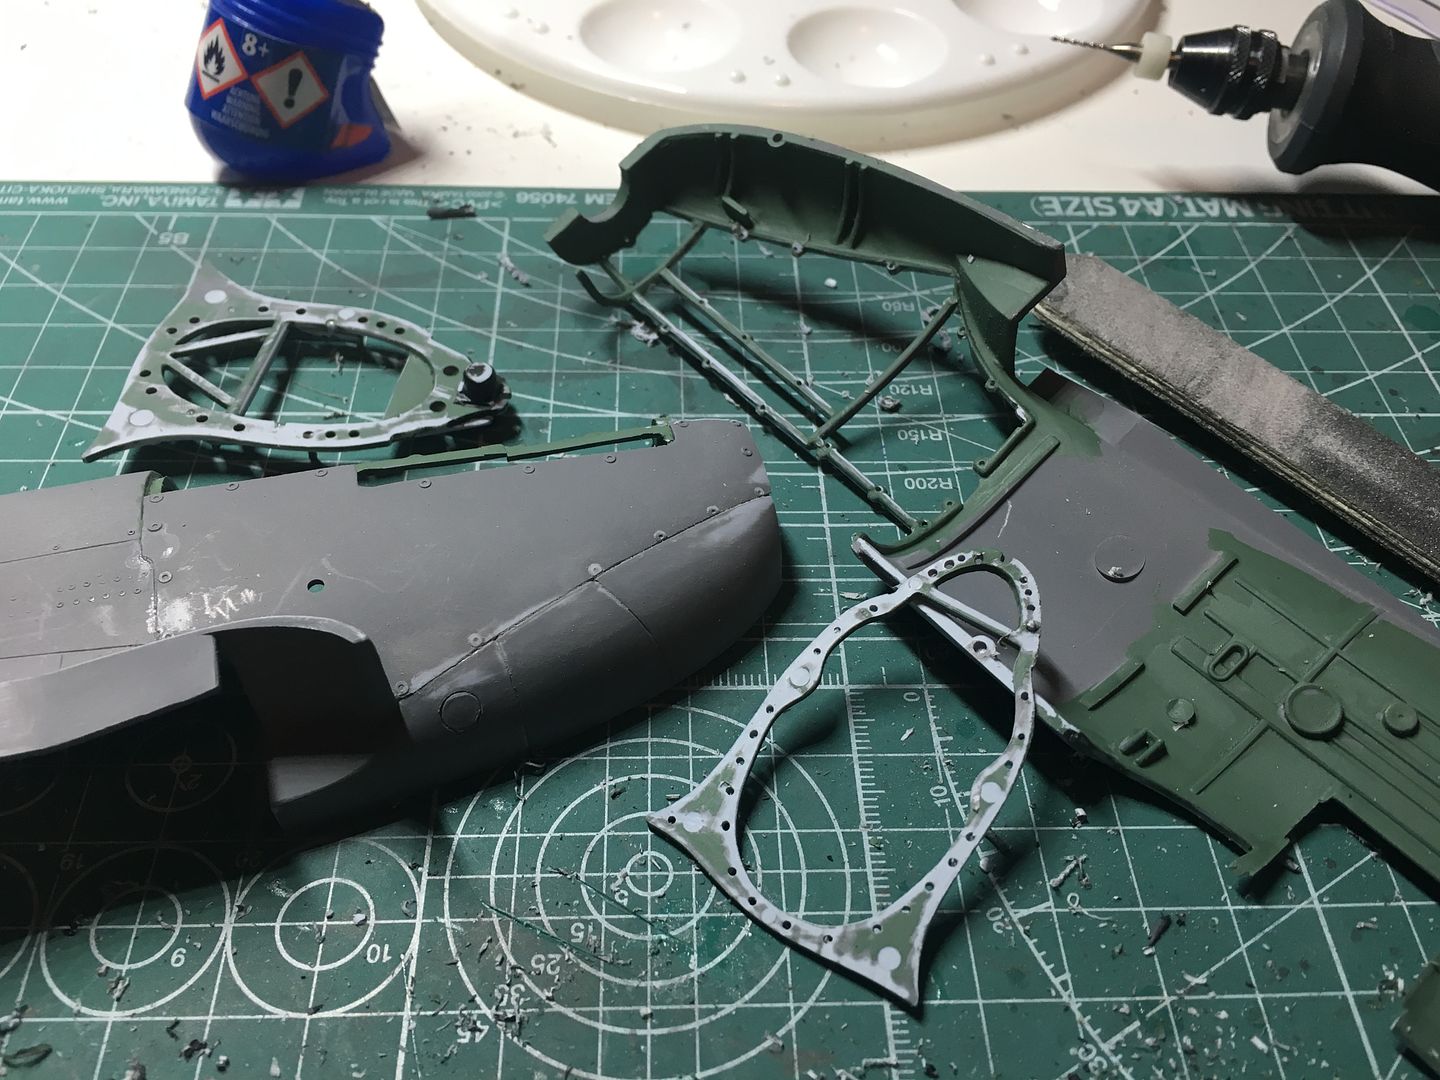
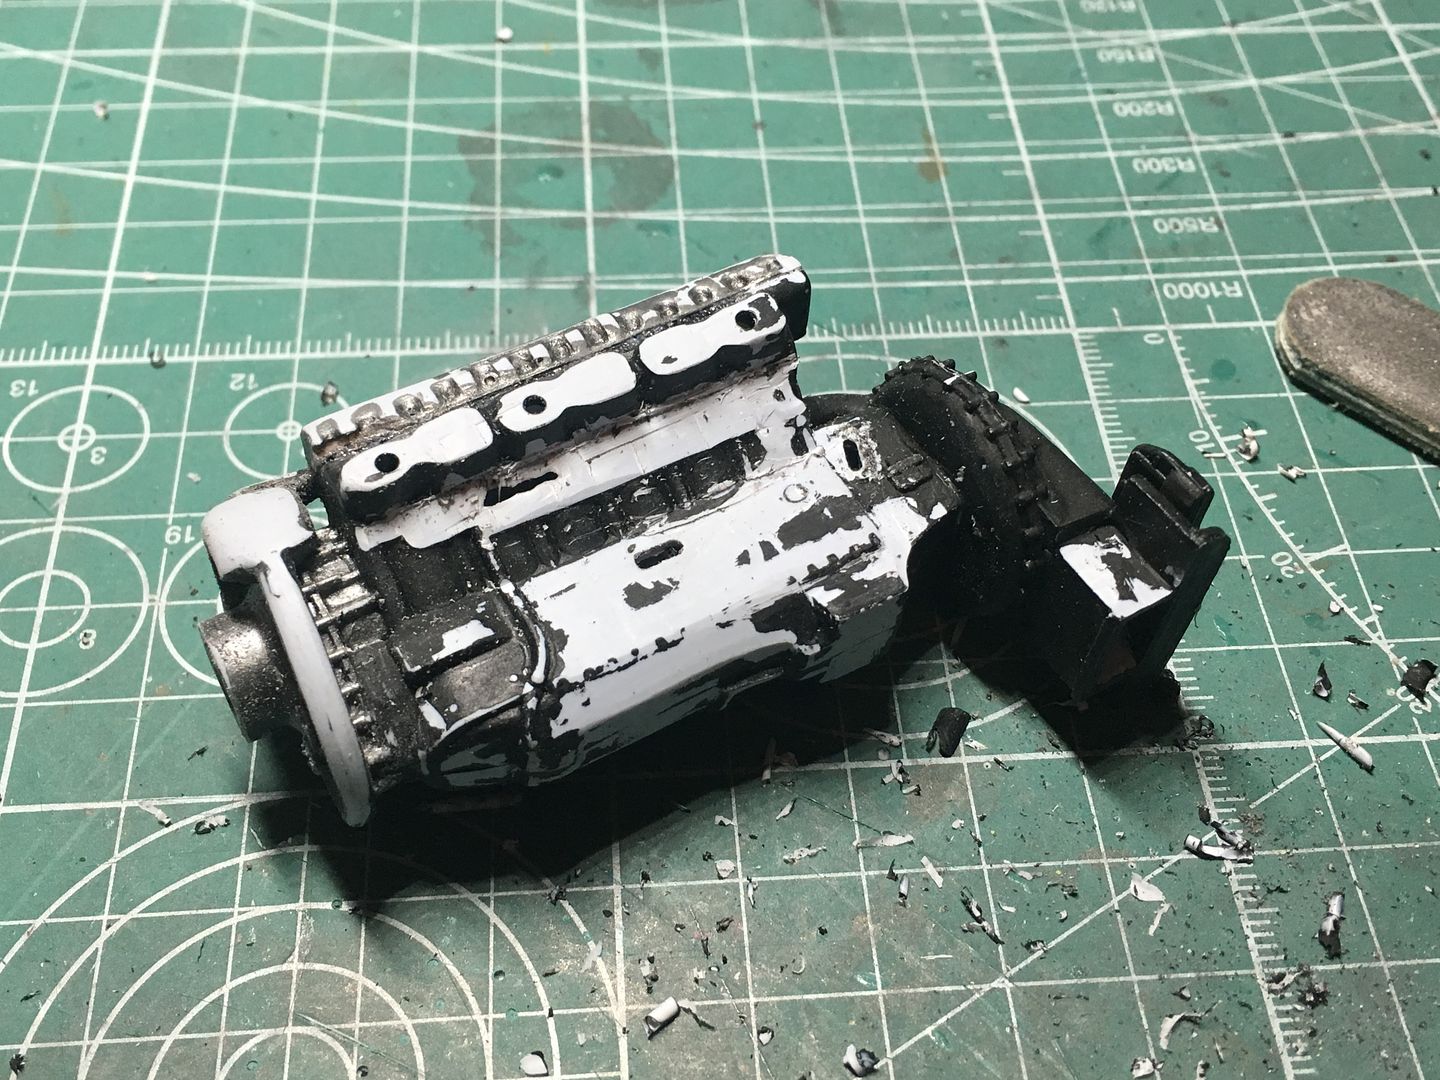
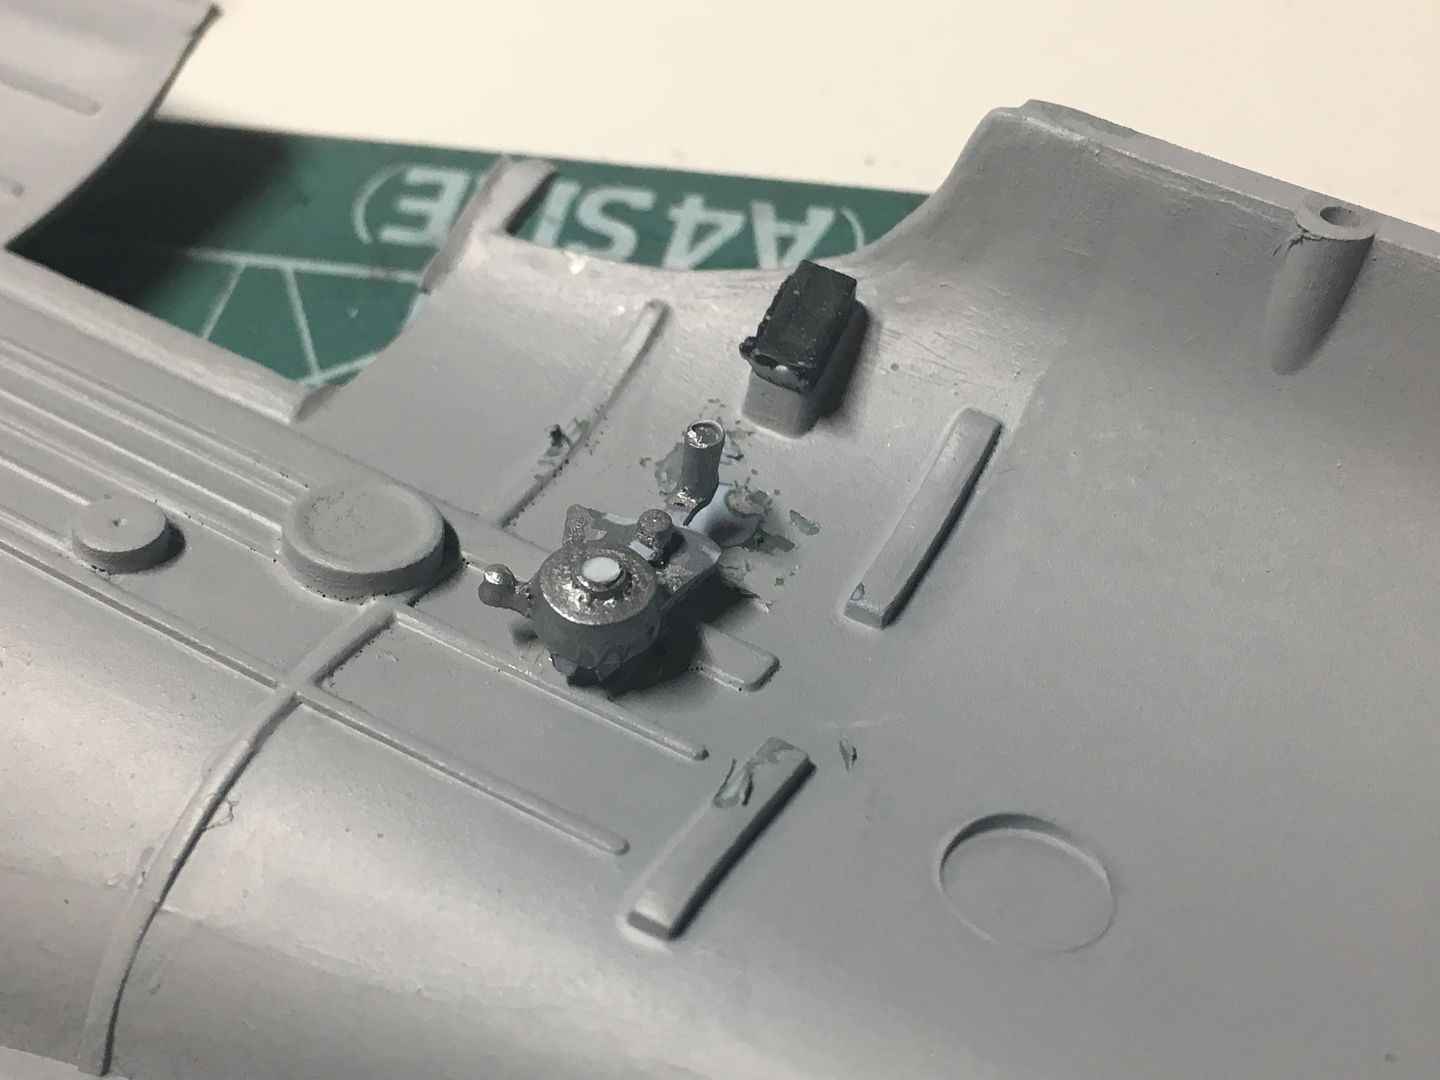
At this point I was going to work on the engine, so I had stripped this to work on as well - I was just going to show one side panel open - the panel fit is so bad, I was going to glue the other side shut! Now the plane is 'in flight' I can miss this step out...

I took the very small amount of 'detail' in the kit and improved it a little - as now much of it would be properly hidden I did not do too much of this - at this point!
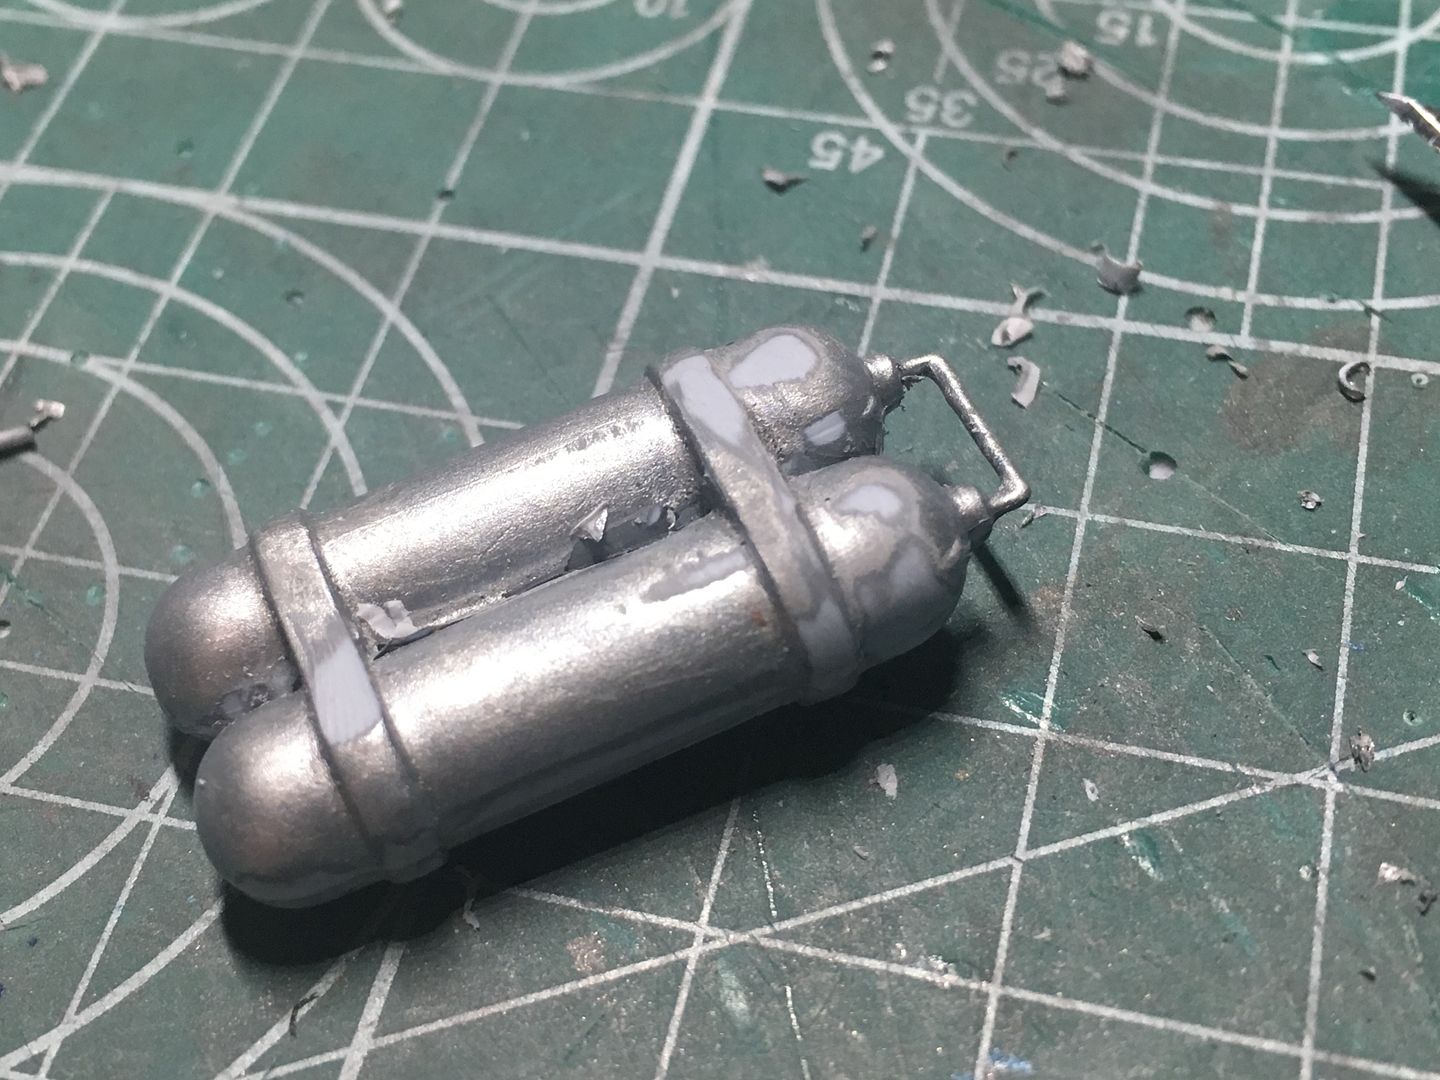
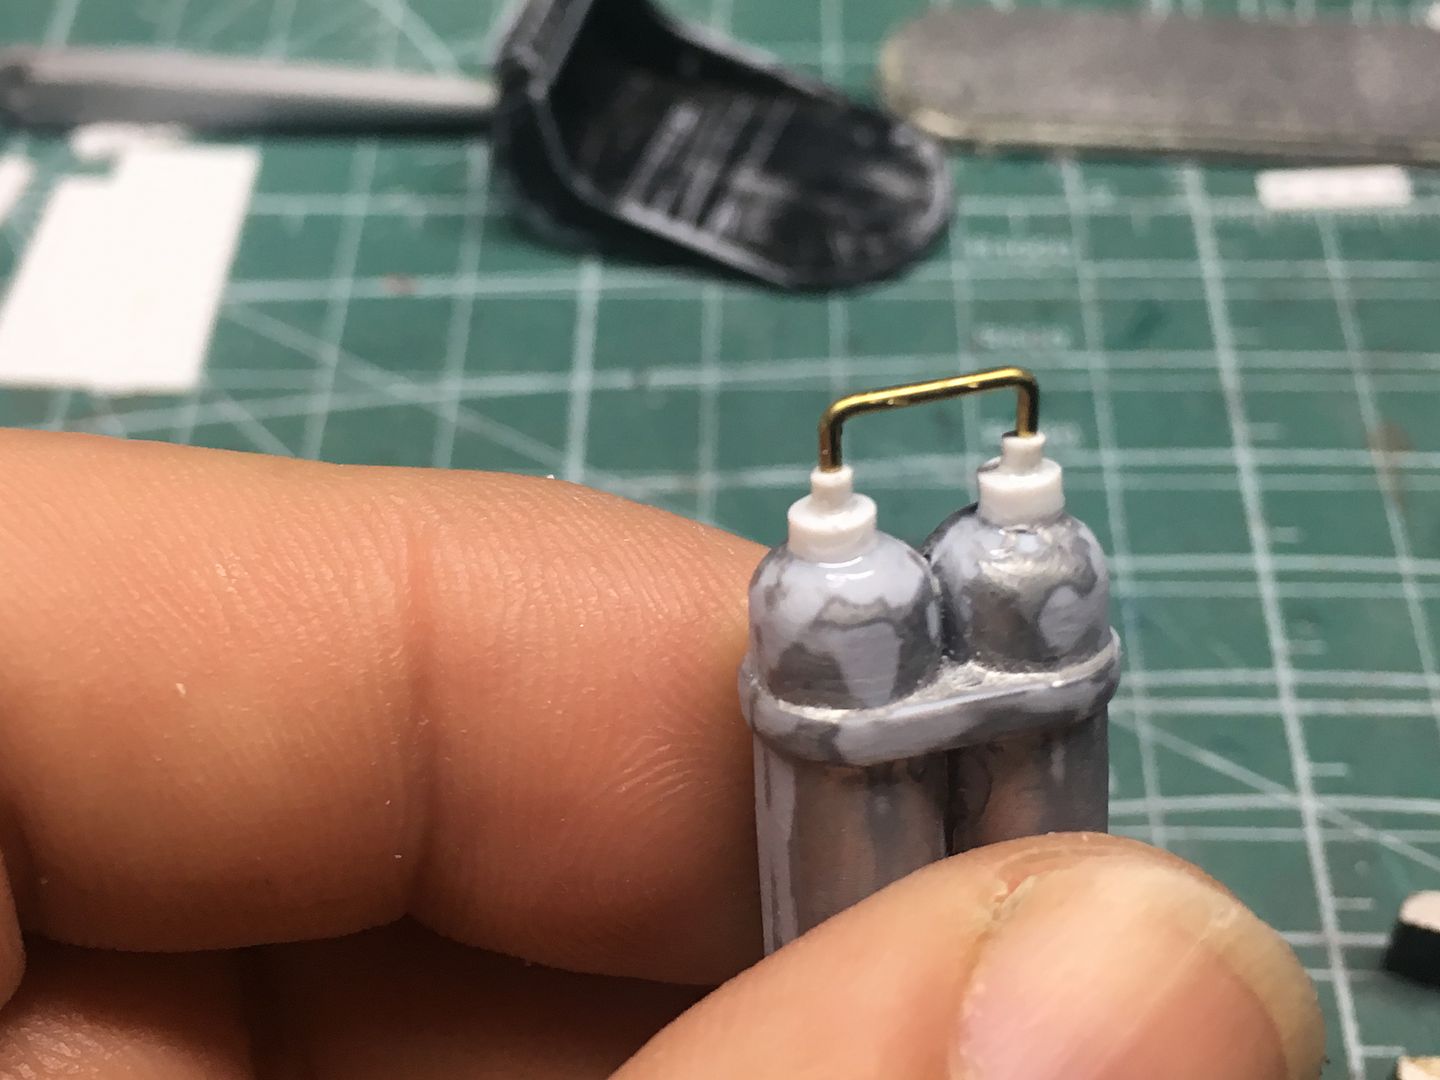
....I cut the end off and replaced with wire - if this had been visible (it wont be) I would have rebuilt in its entirety - but I want to actually finish this model!
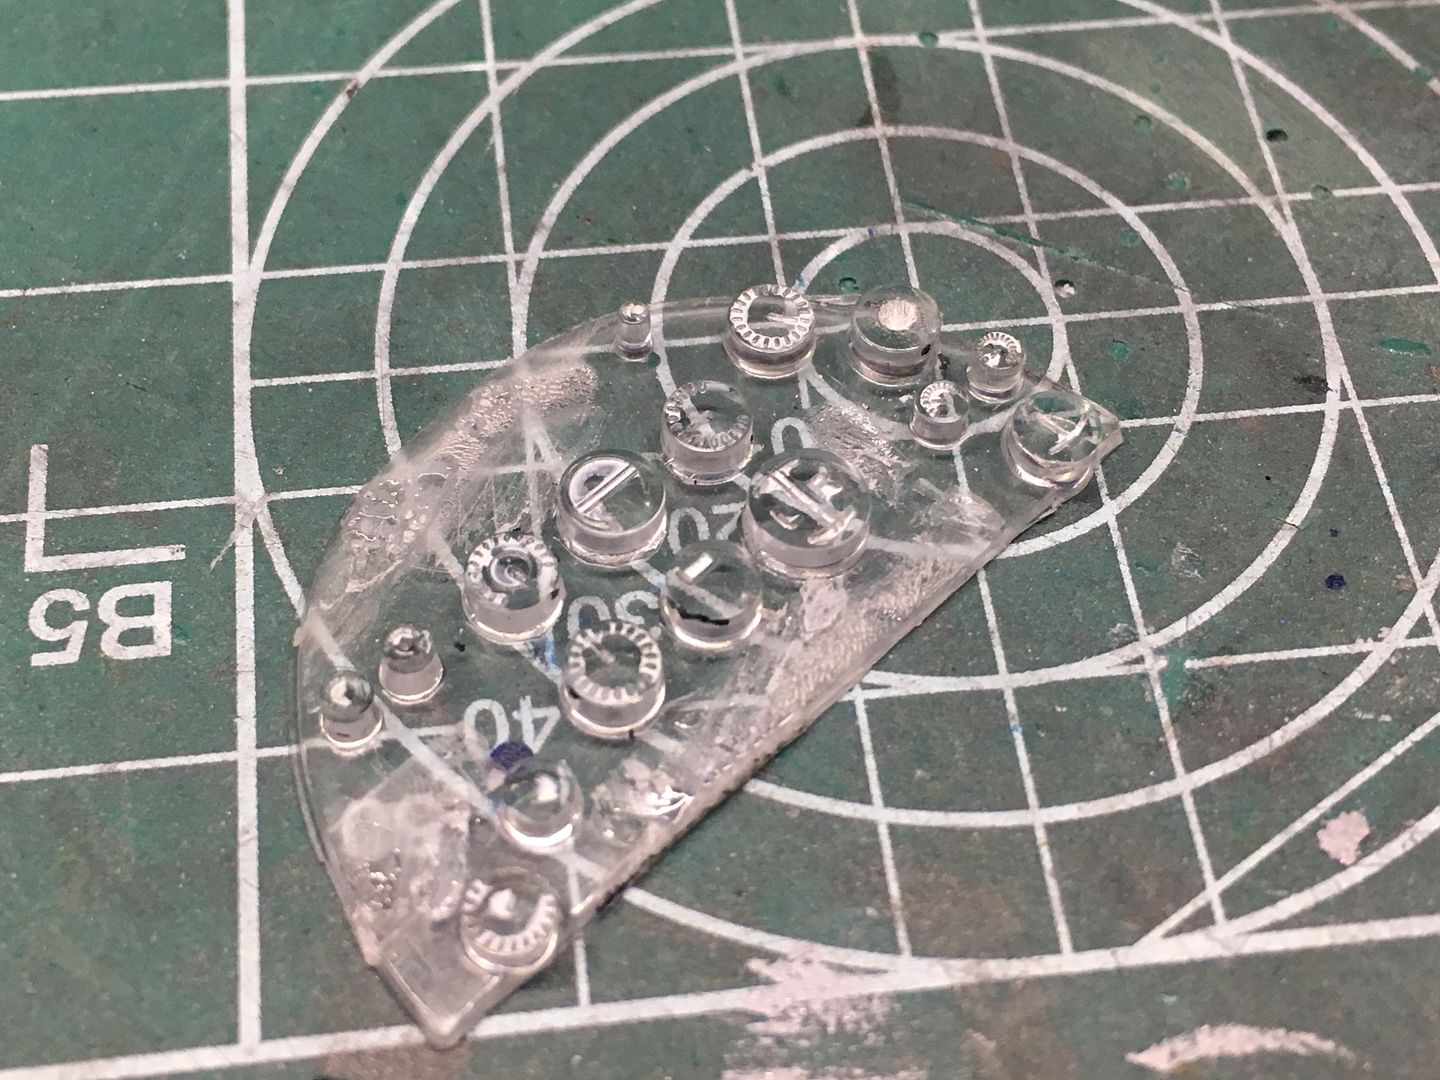
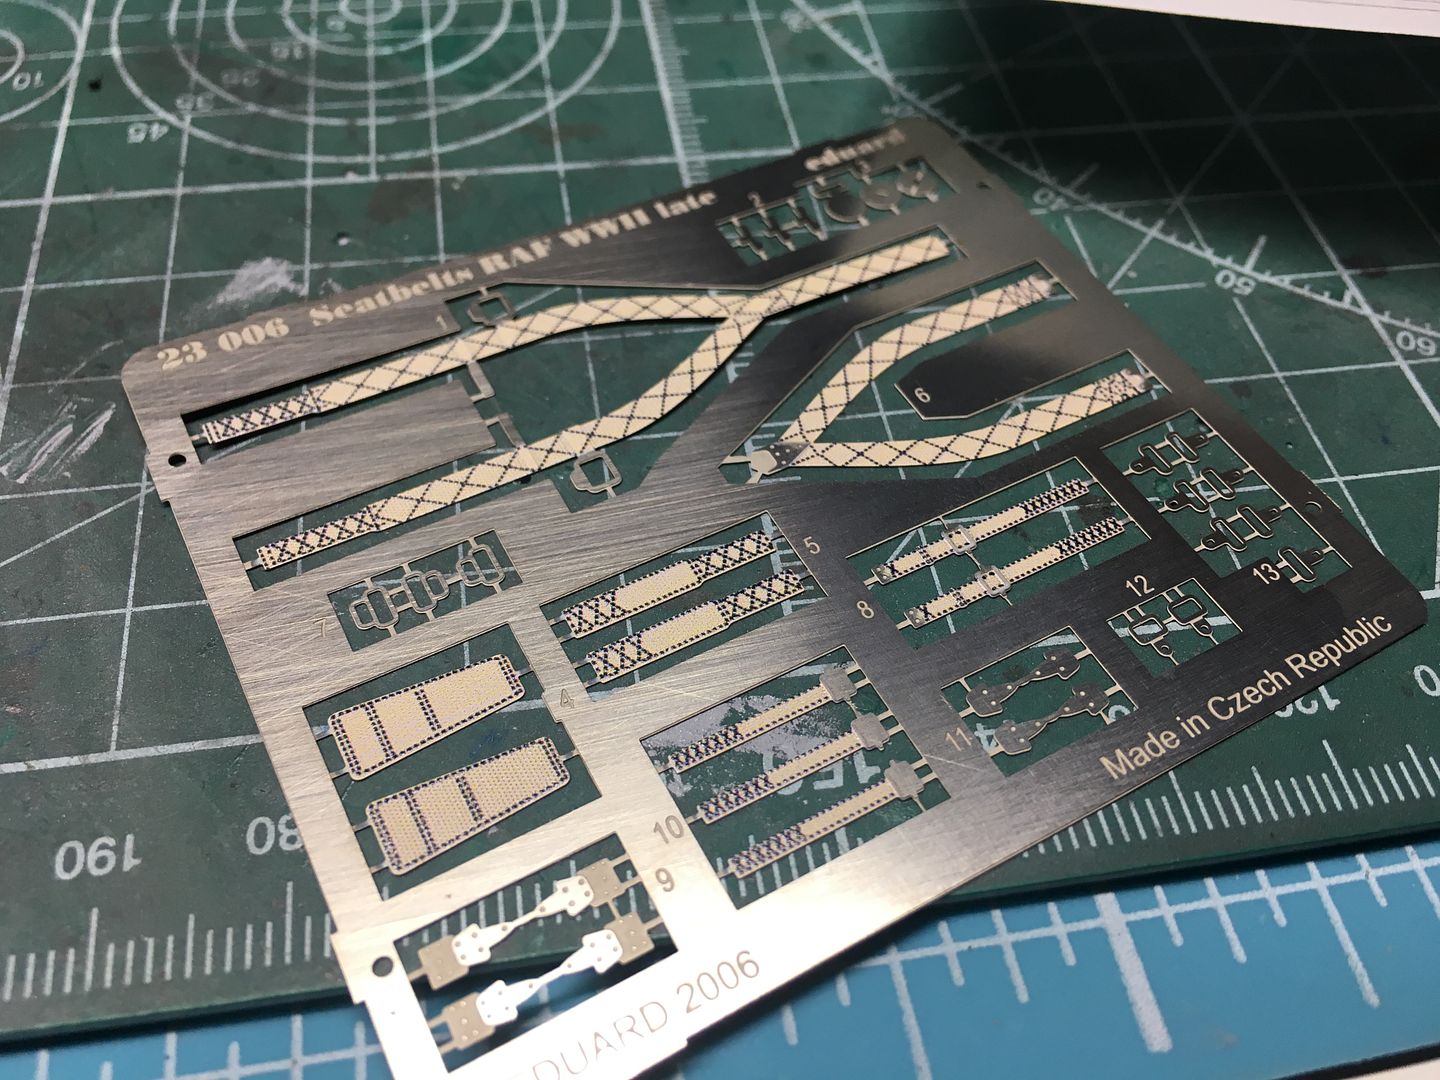
I had bought a few detail parts...cannons (nice) seatbelts (now not needed, or at least not all of the parts) and cockpit canopy masks...
I started to assemble the 'big' bits, knowing that the real work was going to be the filling, sanding and finishing - this is not a complicated kit to assemble in terms of part numbers of complexity...
Nothing glued here obviously...
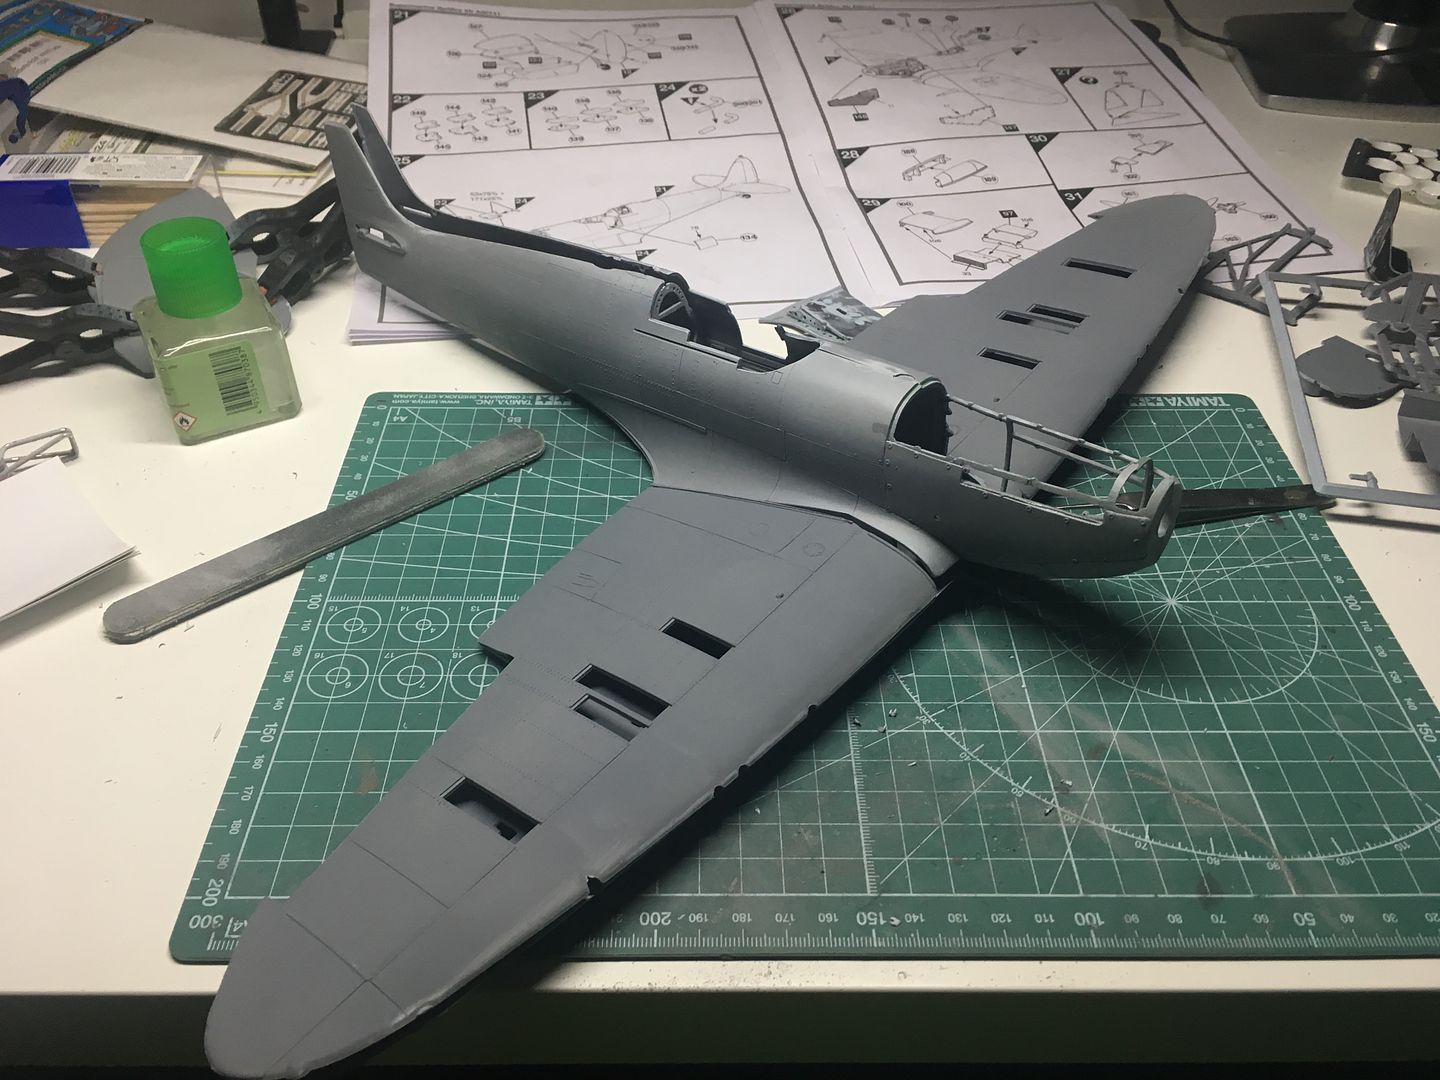
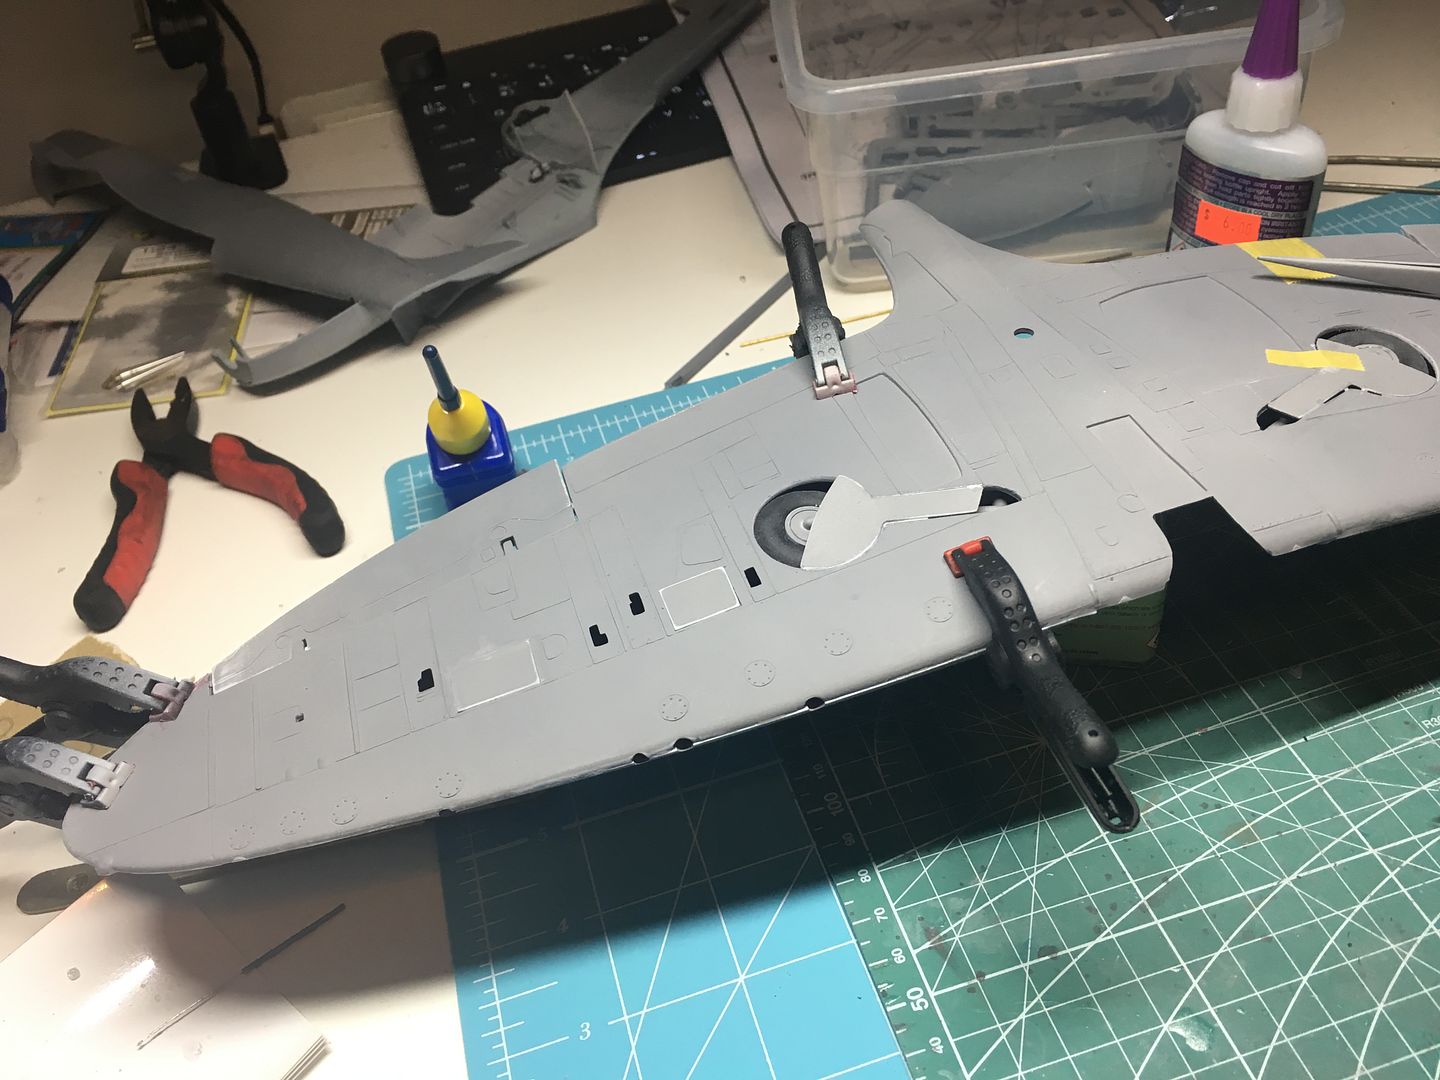
The wings have lots of panels to fit - used to show the guns inside the wing if required...they went in ok - with some fettling obviously...


In order to get the panels to fit over the engine, I had to cut away the back to thin them...

Could be fairly crude as unseen...
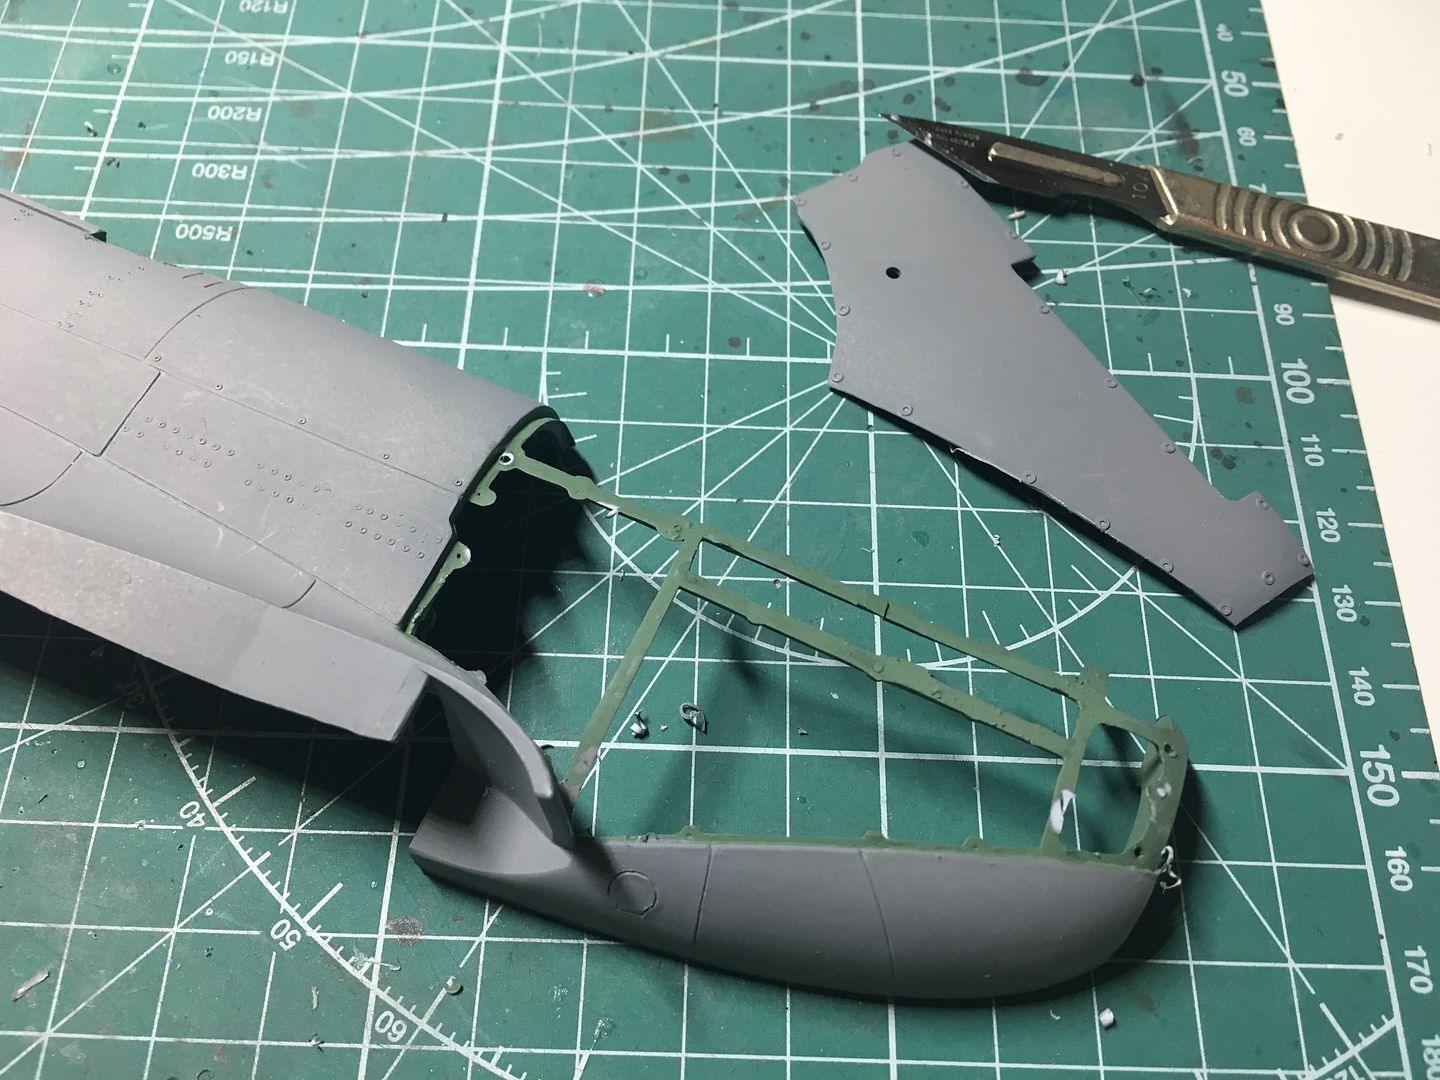
I glued a crossmember in the wing root to fix the oft-mentioned drooping wing, after joining the wing parts....

I had fixed the undercarrige in place - I'll fit the cover panels later....
That really was it for the big stuff - could now turn my attention to the cockpit area...
At this point I was going to work on the engine, so I had stripped this to work on as well - I was just going to show one side panel open - the panel fit is so bad, I was going to glue the other side shut! Now the plane is 'in flight' I can miss this step out...
I took the very small amount of 'detail' in the kit and improved it a little - as now much of it would be properly hidden I did not do too much of this - at this point!
....I cut the end off and replaced with wire - if this had been visible (it wont be) I would have rebuilt in its entirety - but I want to actually finish this model!
I had bought a few detail parts...cannons (nice) seatbelts (now not needed, or at least not all of the parts) and cockpit canopy masks...
I started to assemble the 'big' bits, knowing that the real work was going to be the filling, sanding and finishing - this is not a complicated kit to assemble in terms of part numbers of complexity...
Nothing glued here obviously...
The wings have lots of panels to fit - used to show the guns inside the wing if required...they went in ok - with some fettling obviously...
In order to get the panels to fit over the engine, I had to cut away the back to thin them...
Could be fairly crude as unseen...
I glued a crossmember in the wing root to fix the oft-mentioned drooping wing, after joining the wing parts....
I had fixed the undercarrige in place - I'll fit the cover panels later....
That really was it for the big stuff - could now turn my attention to the cockpit area...
CanAm said:
Caterhamnut loves deadlines, and the whistling noise they make as they go flying past. 
yeah - fair enough - but you know, life....Trying to change that now. Have the gear (still no idea) and tech is moving on so I can create some things...really want to get a 3D printer - but a resin one - so I can make some things like seats, wheels etc...
Anyway - onwards....
So after my first fleeting trip to Telford, I'm back and cracking on...I'd done the next bit on Thursday, but had not posted....
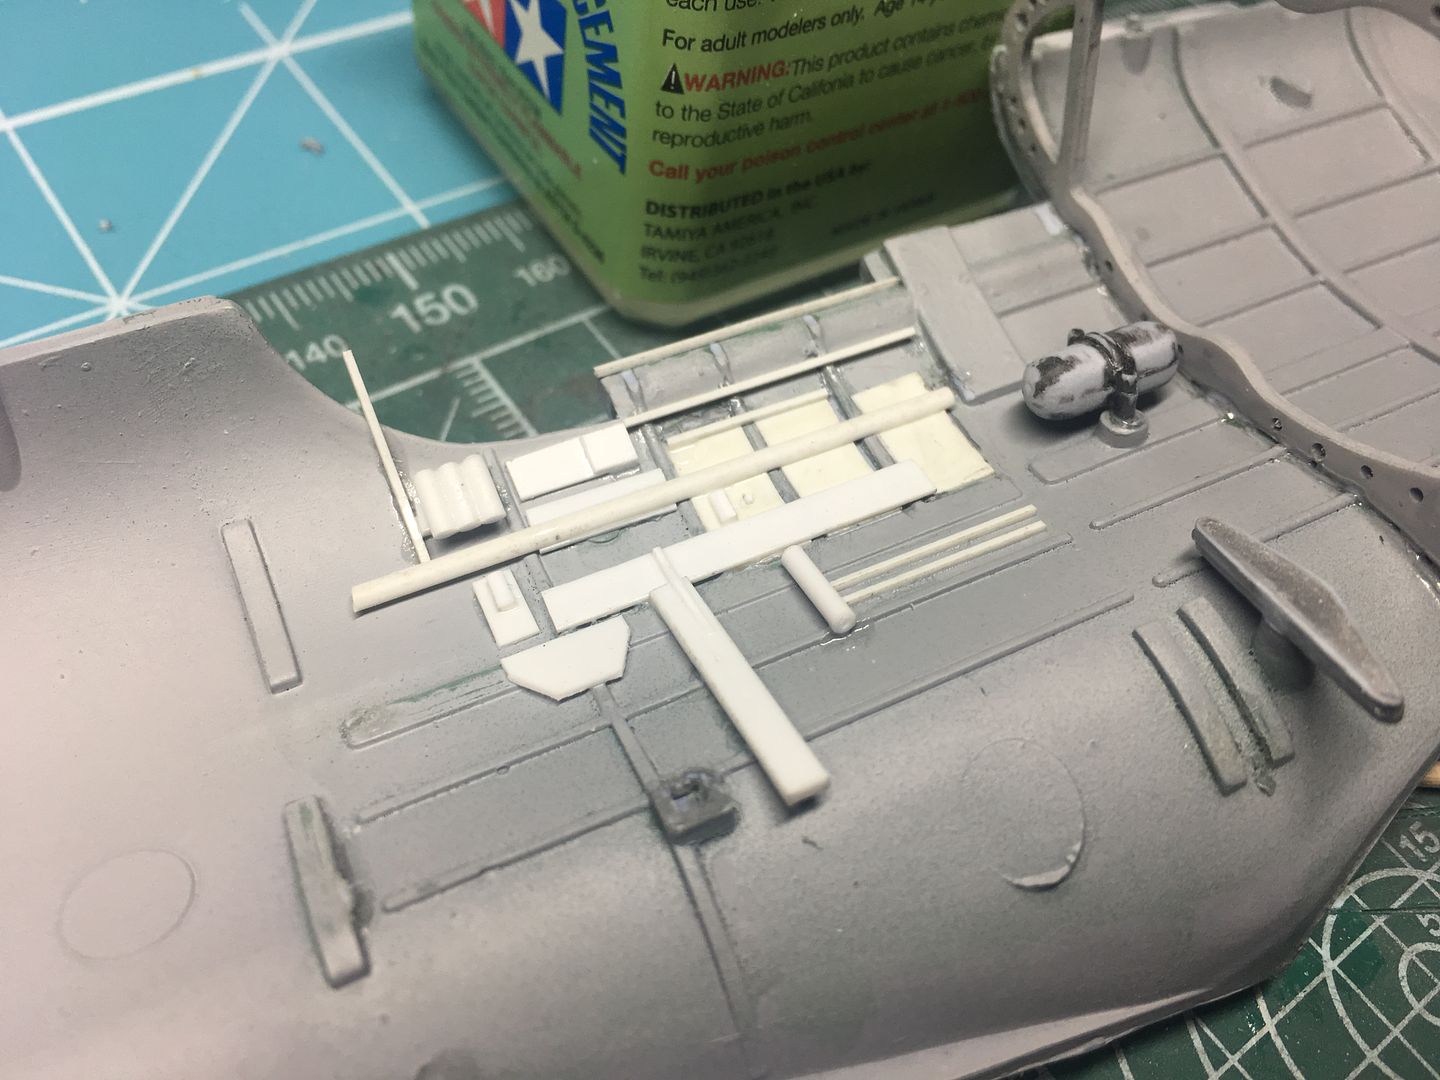
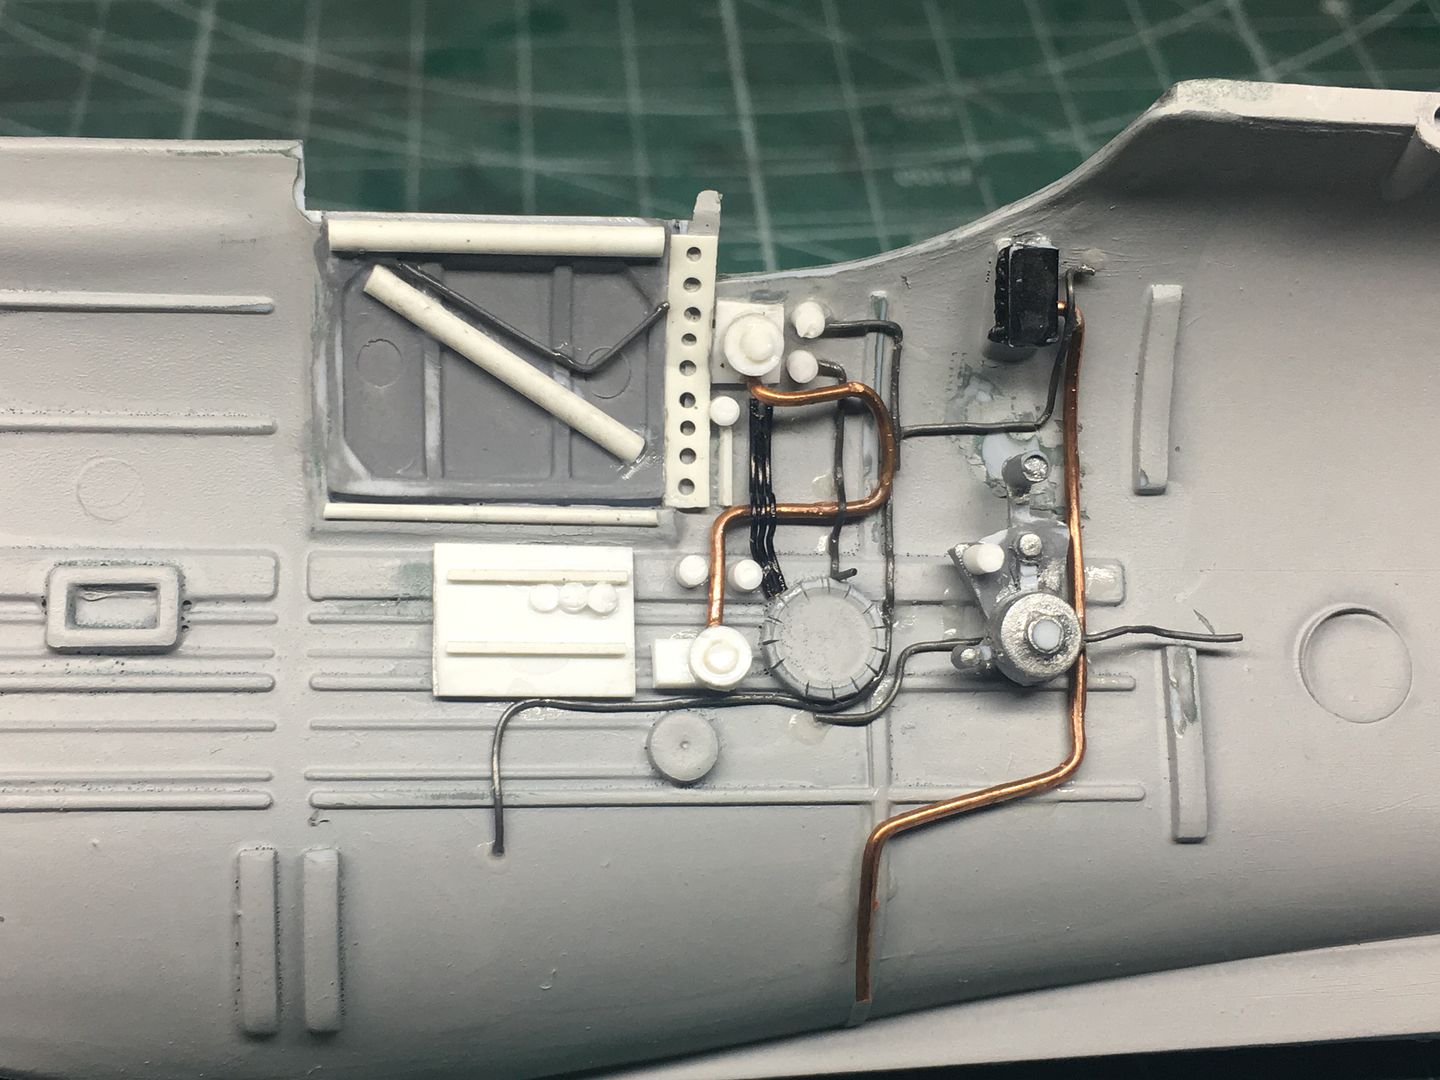
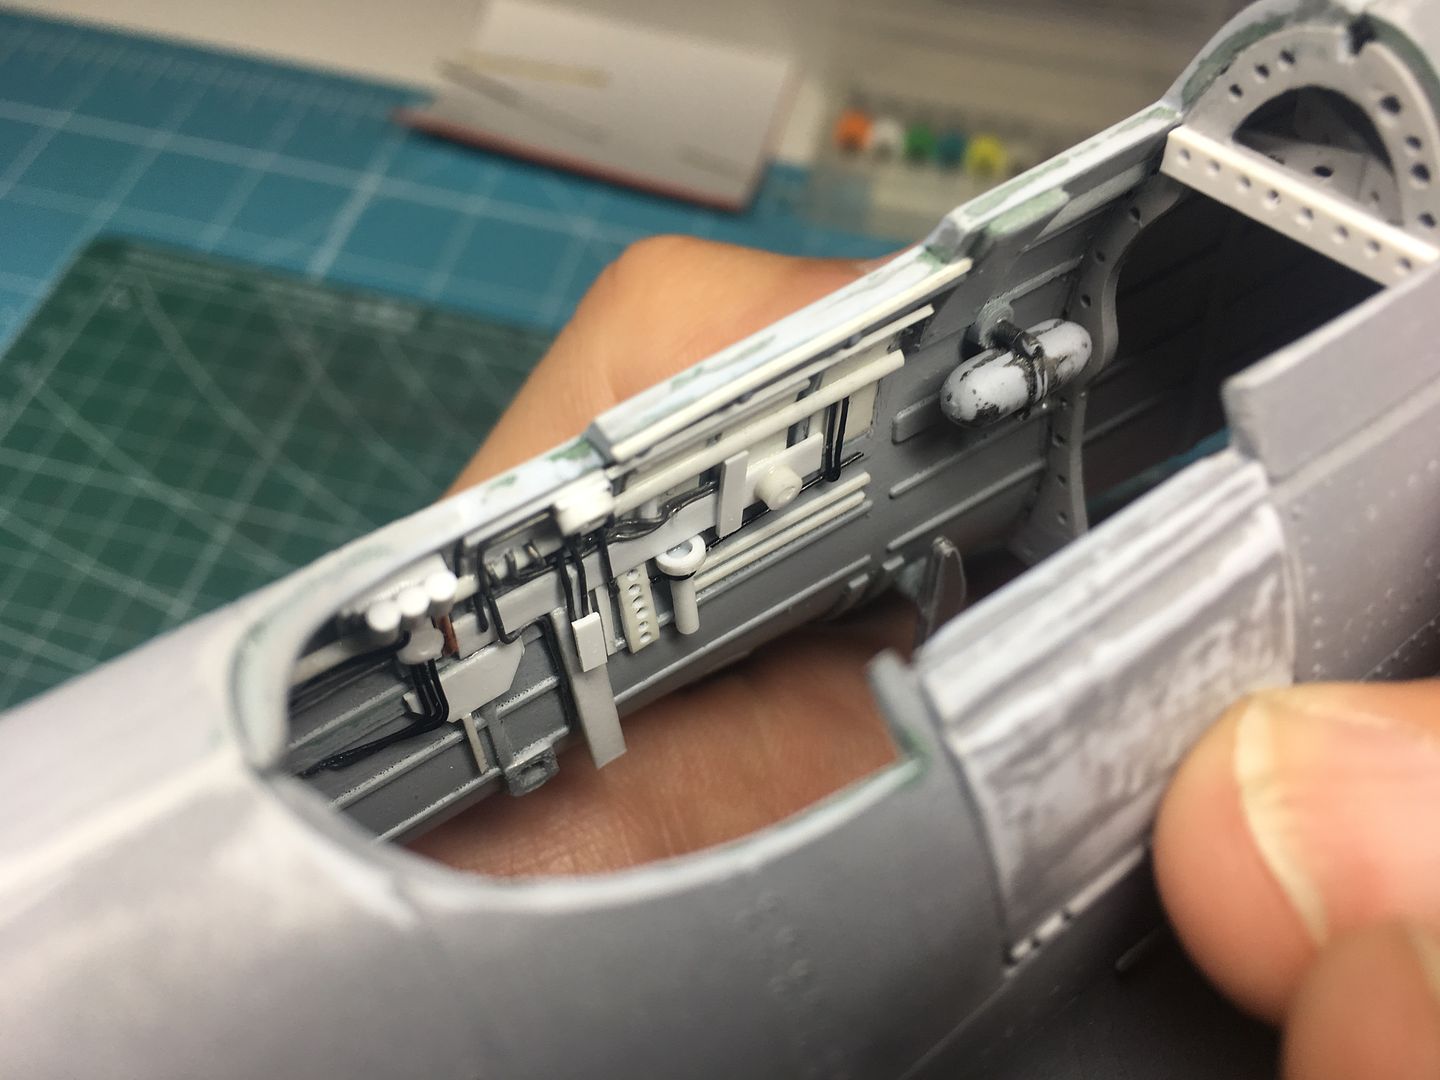
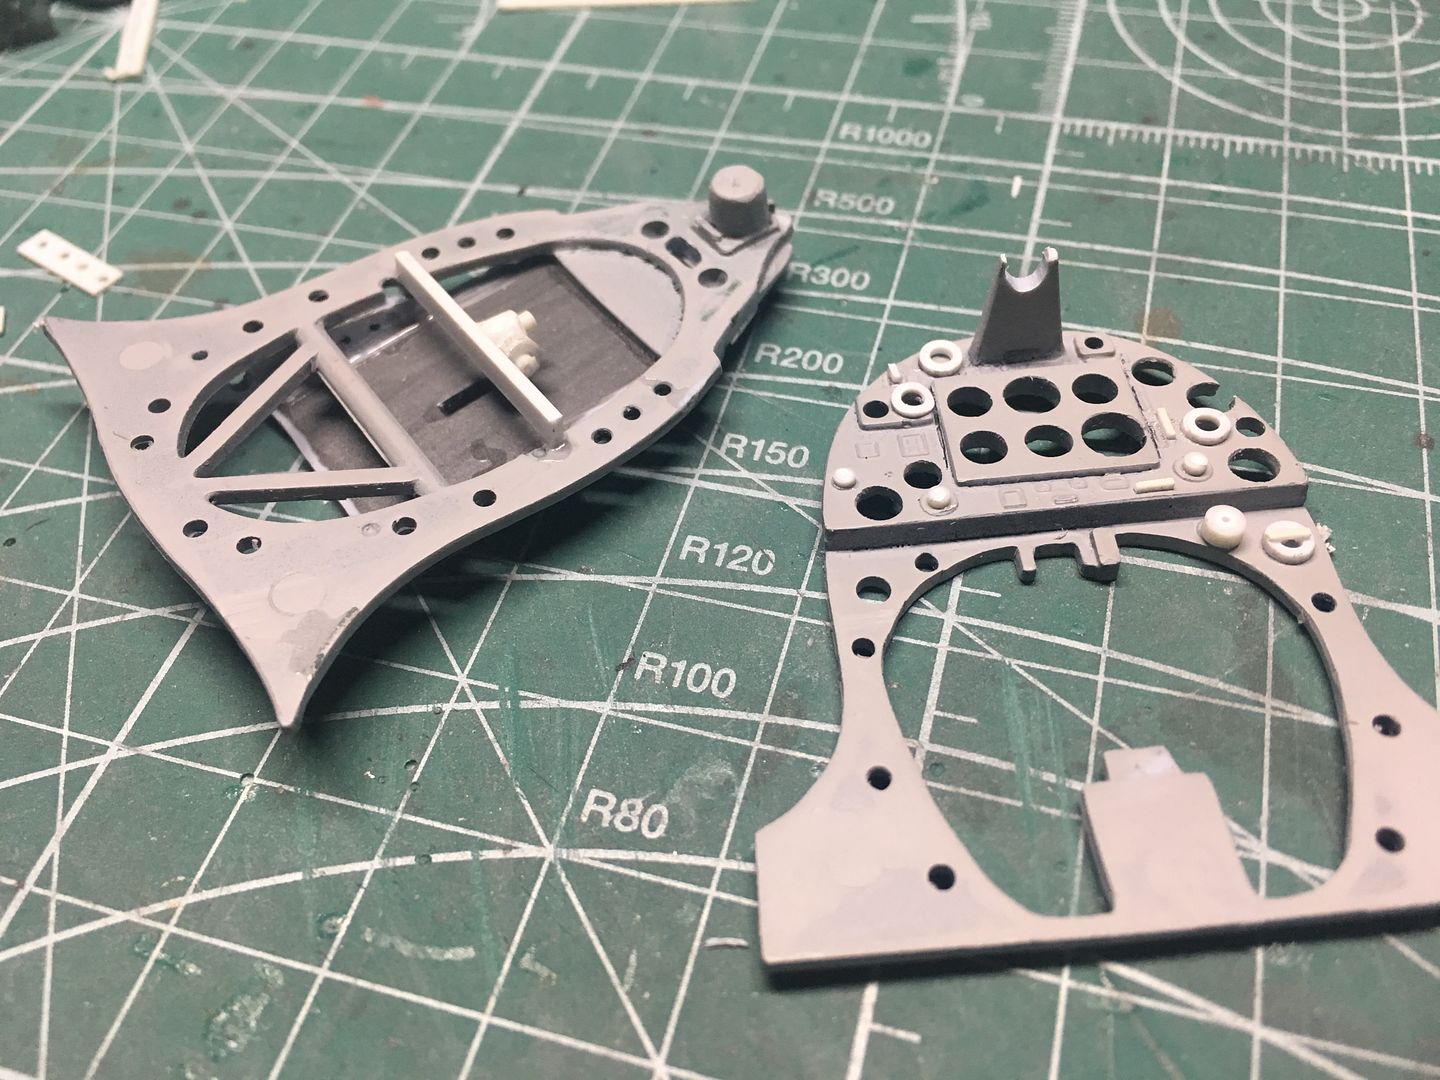
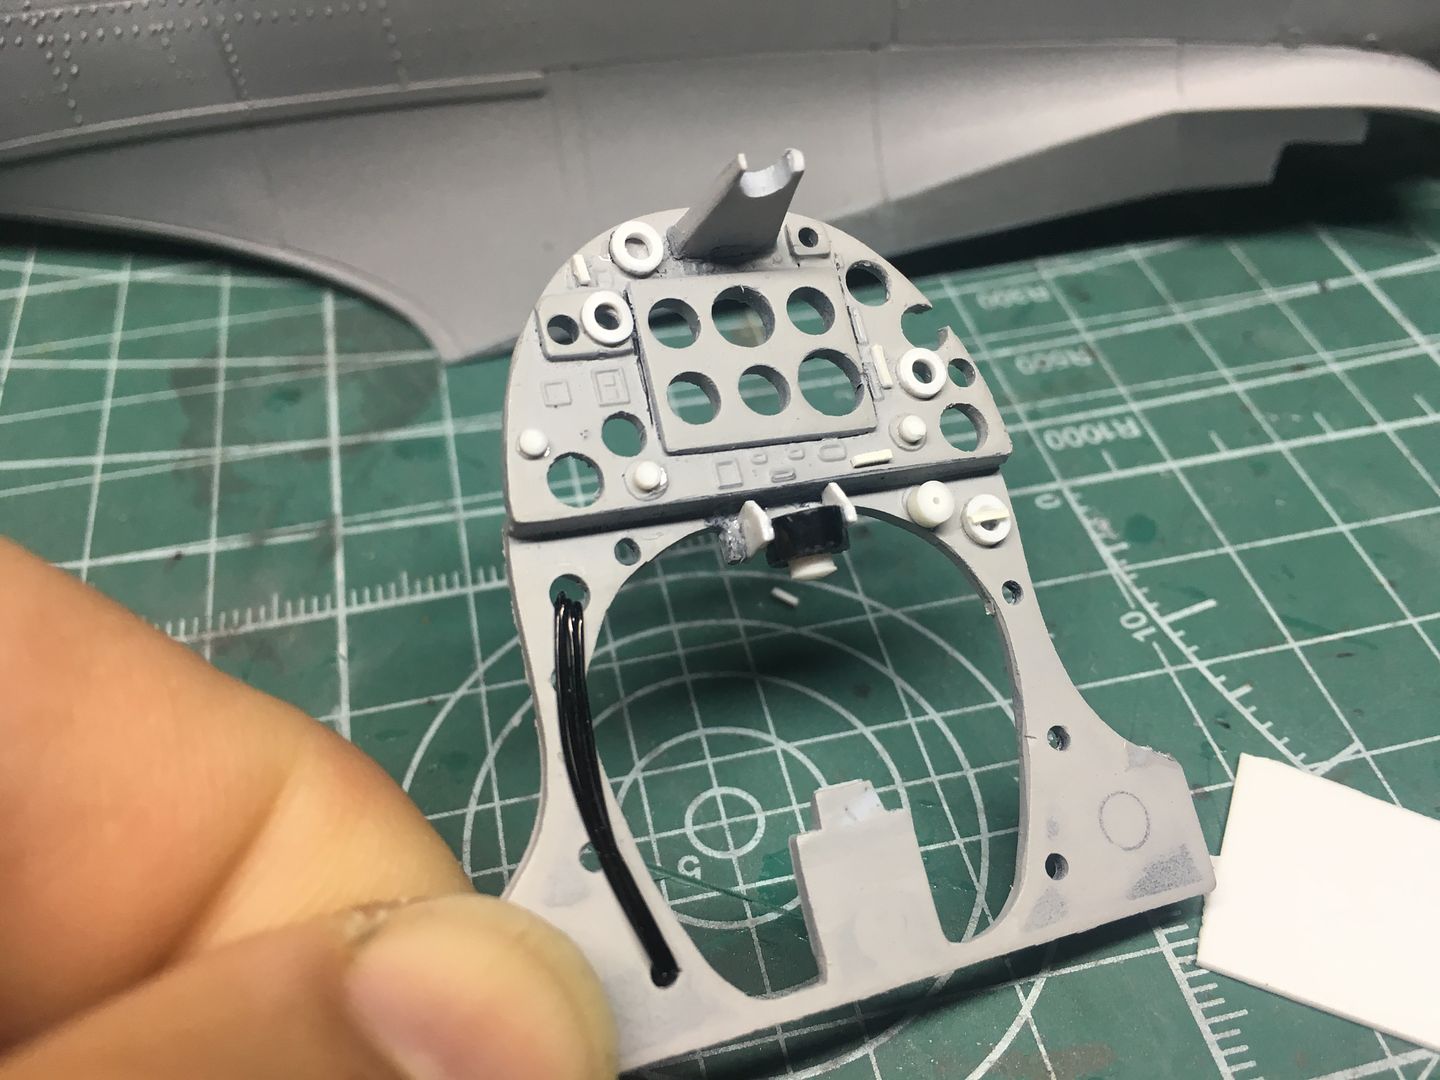
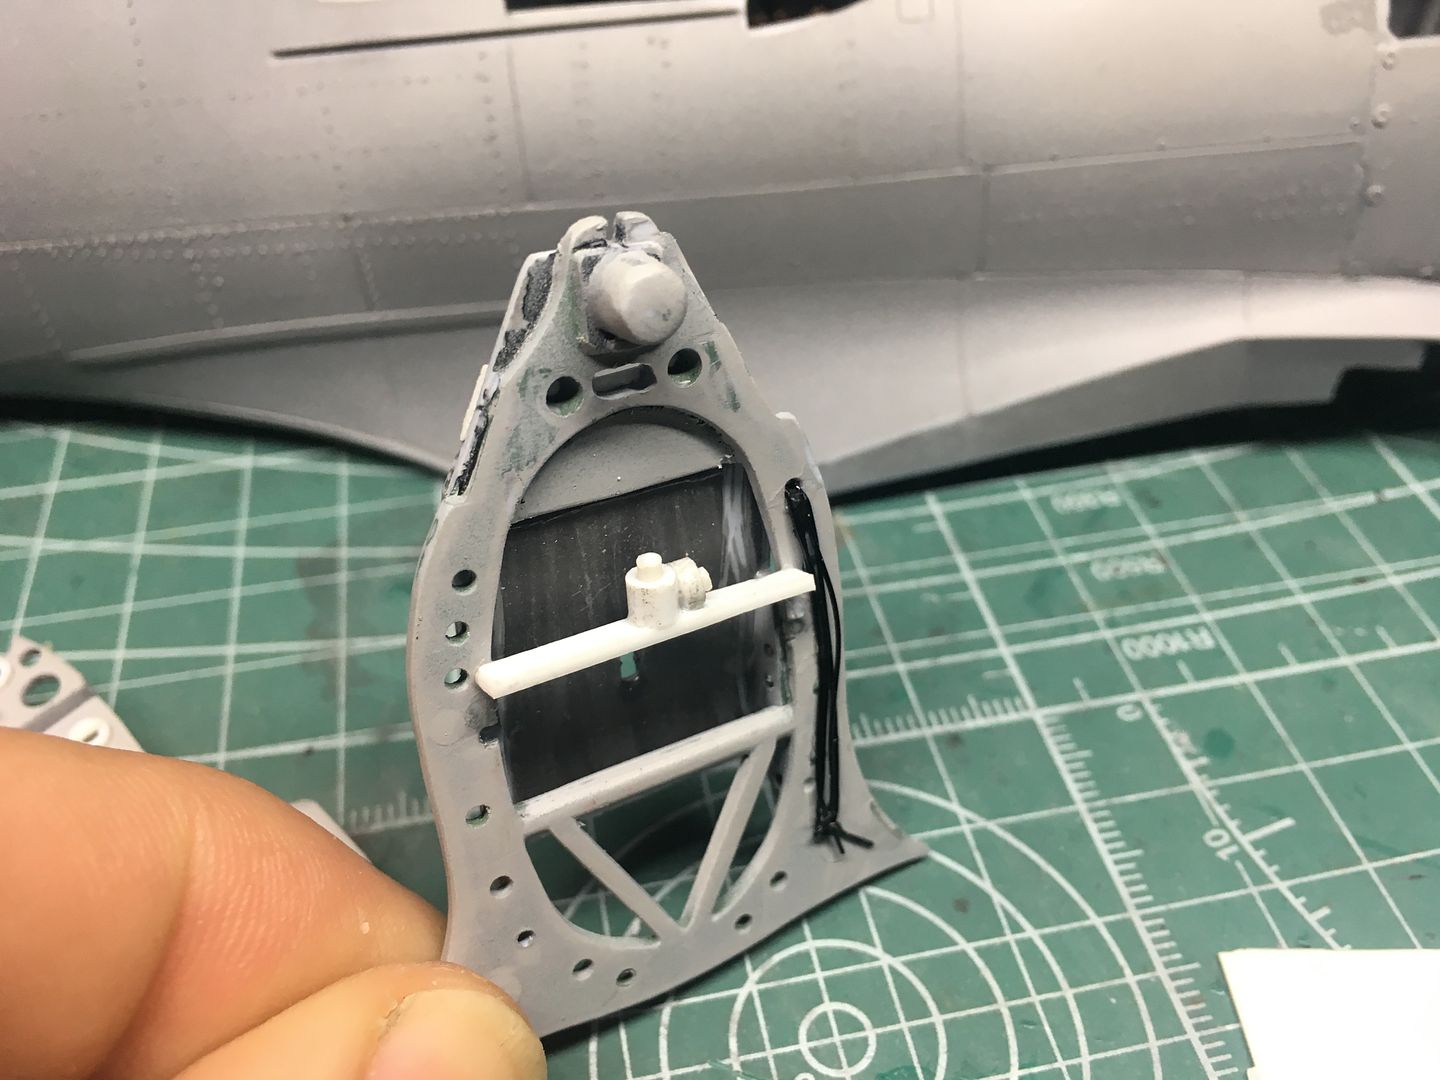
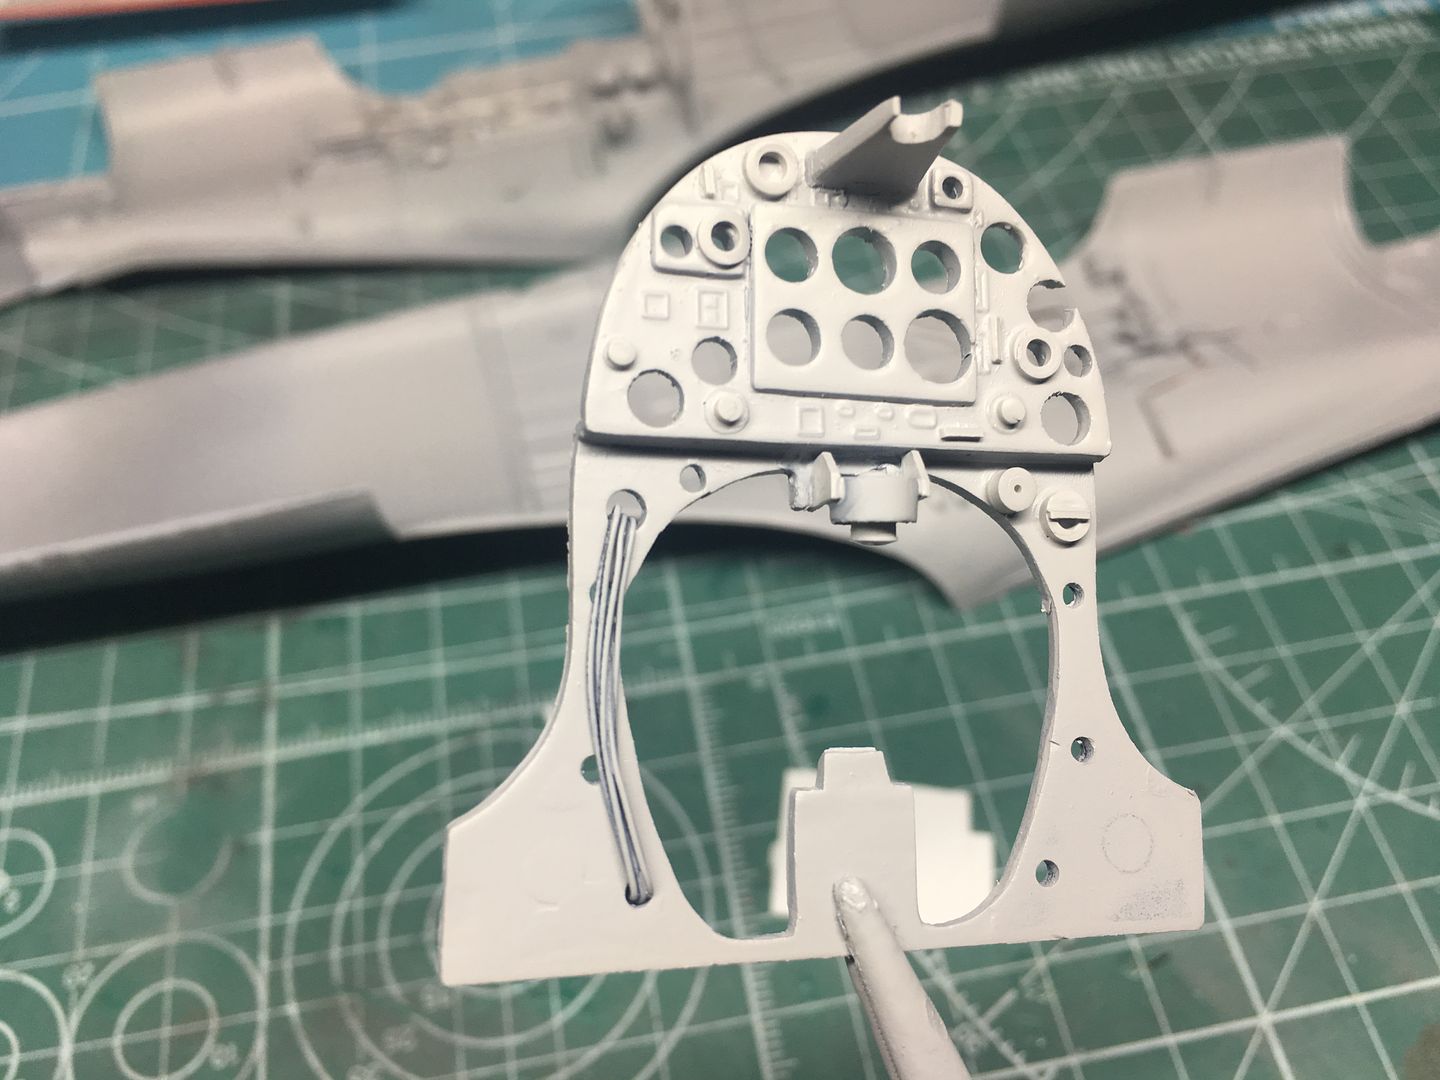
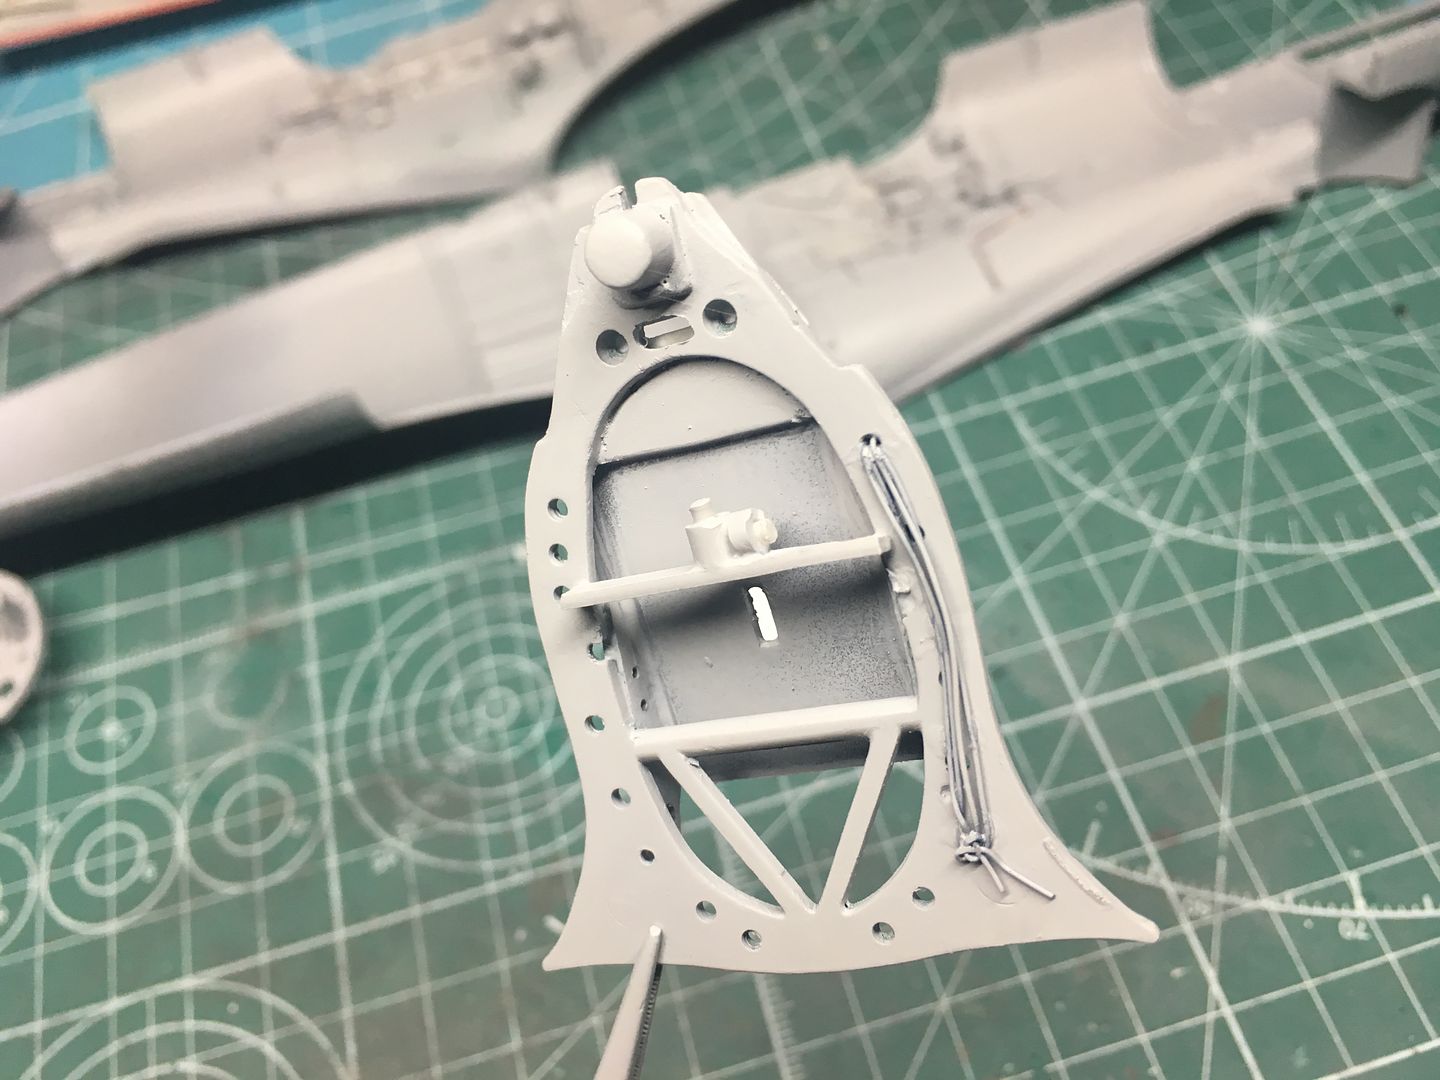
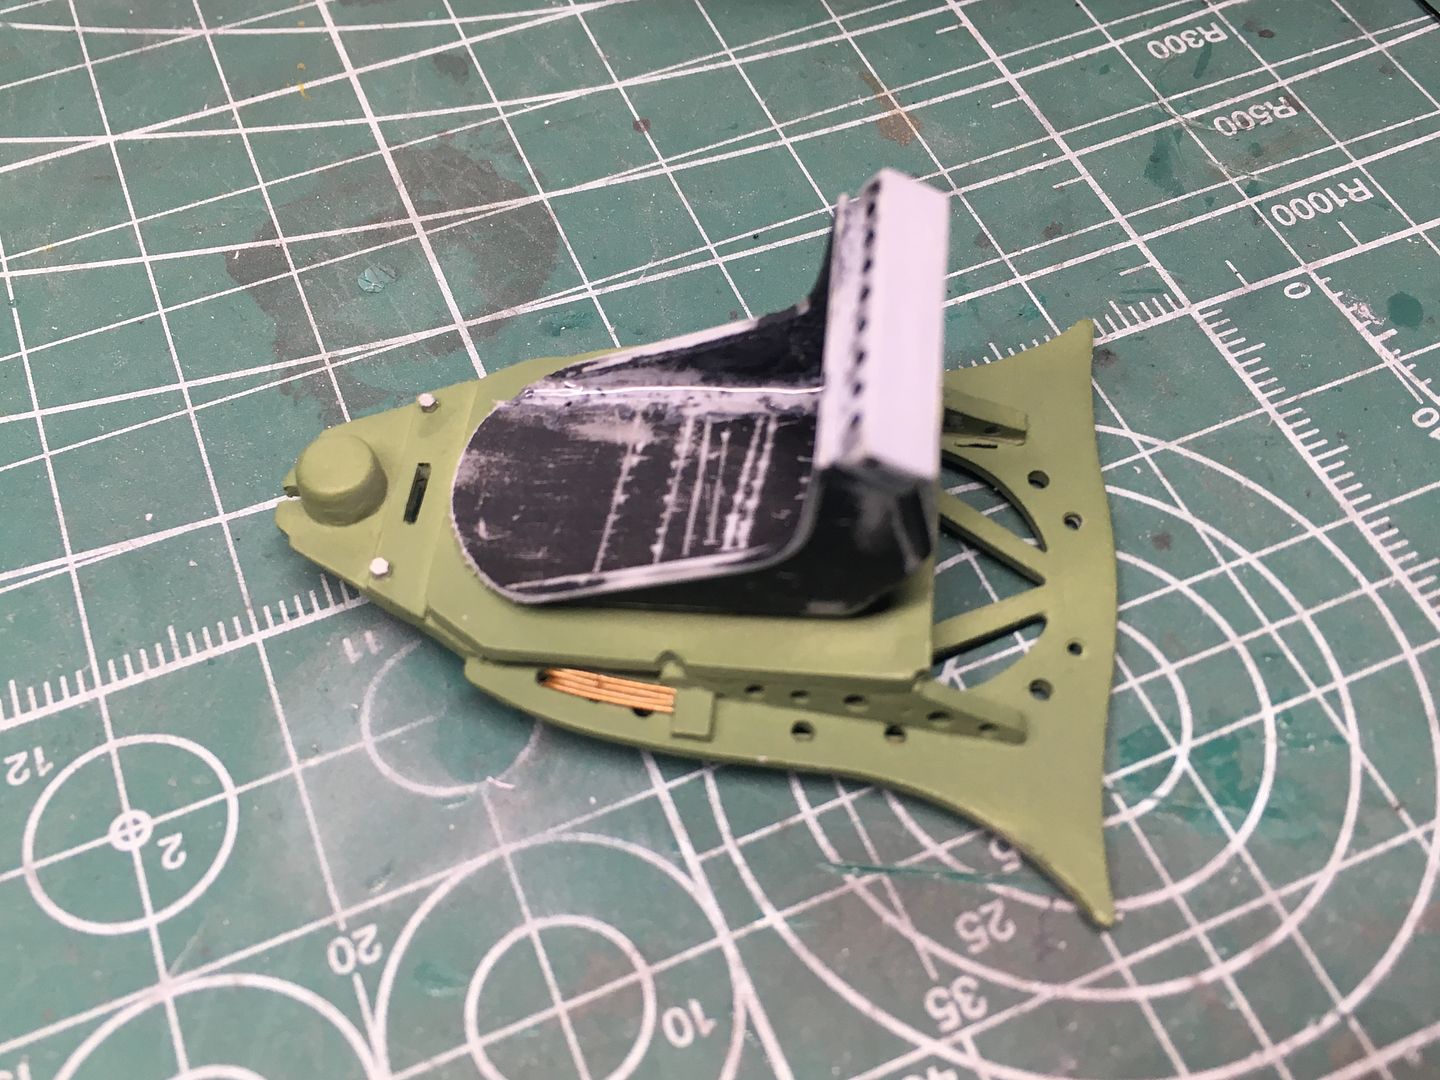
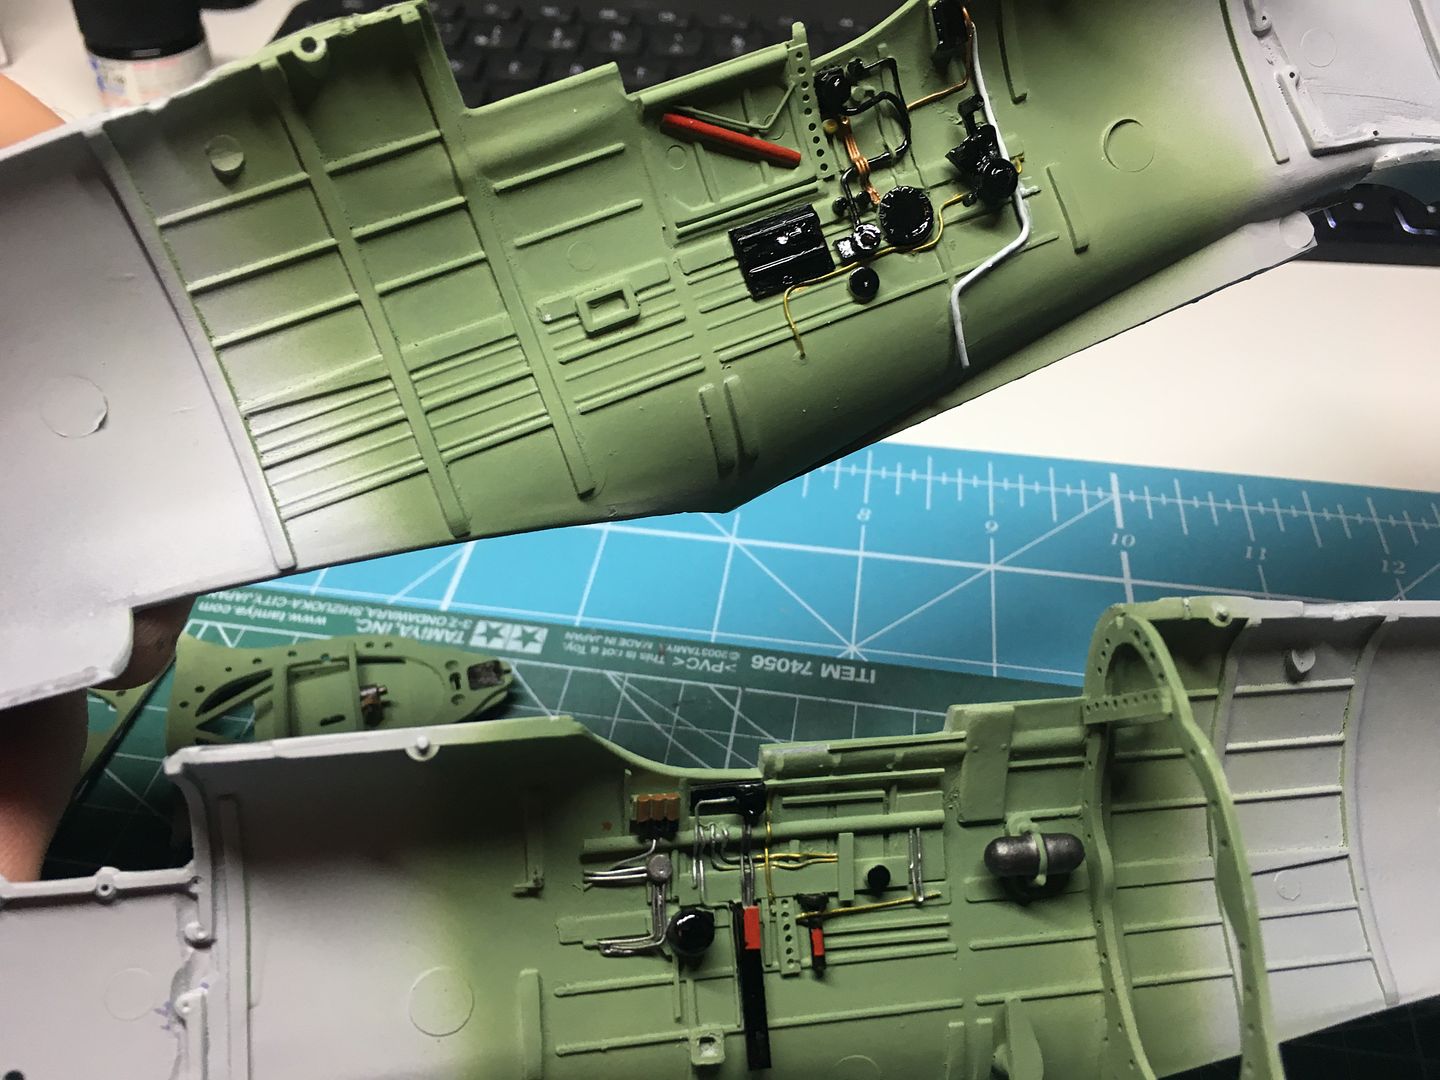
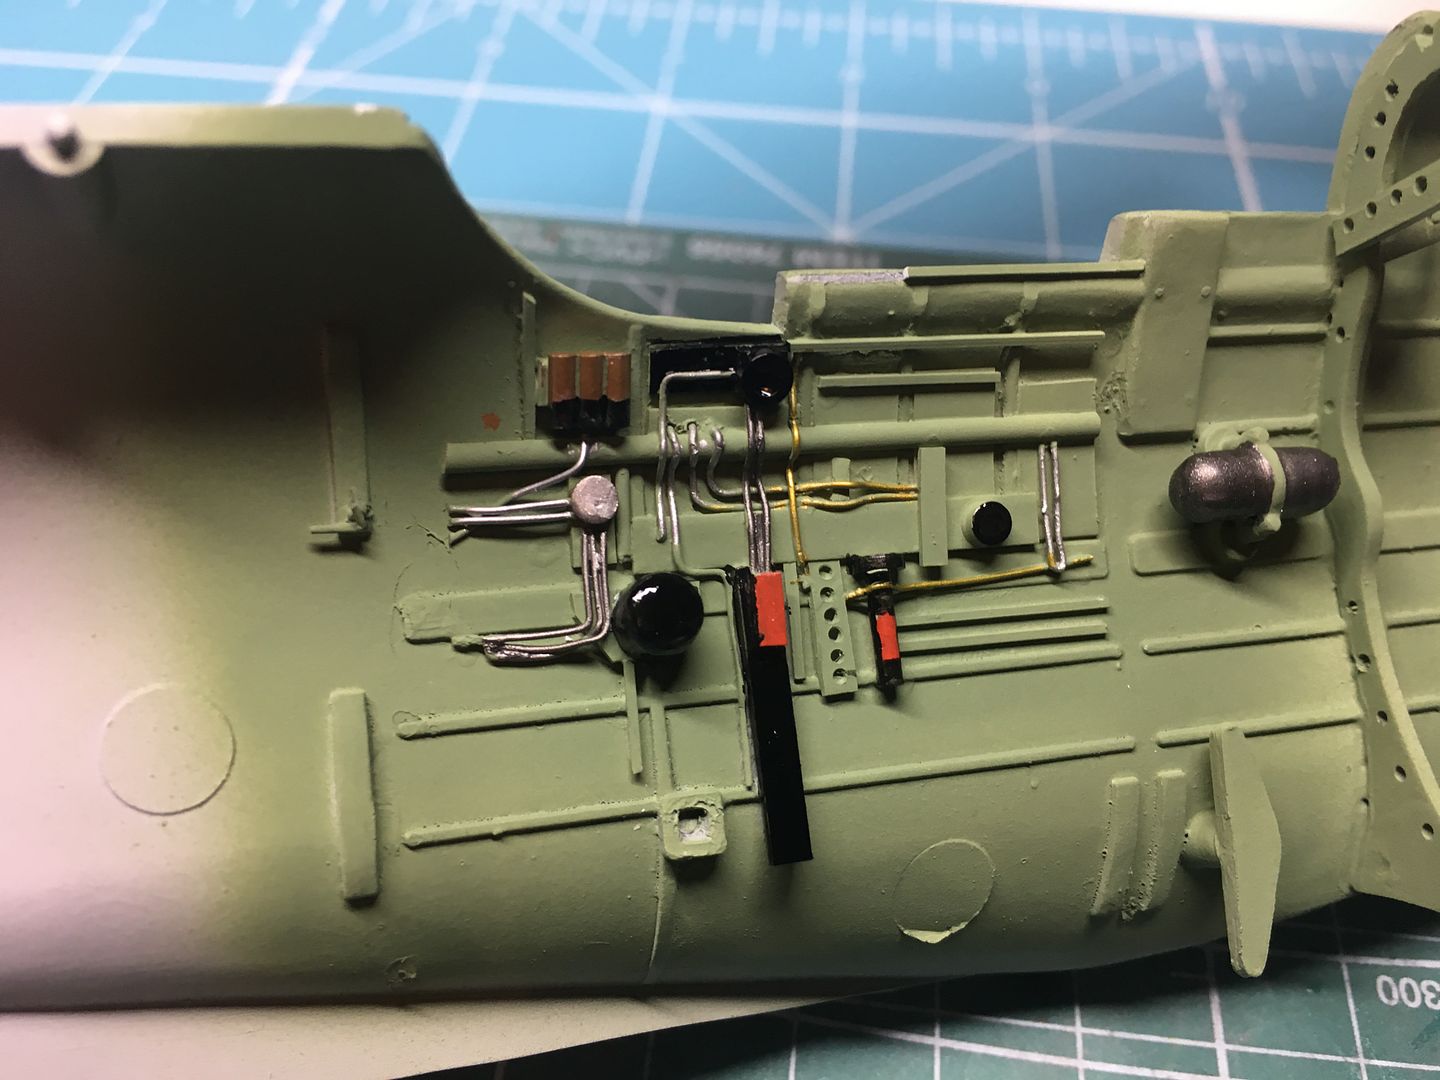
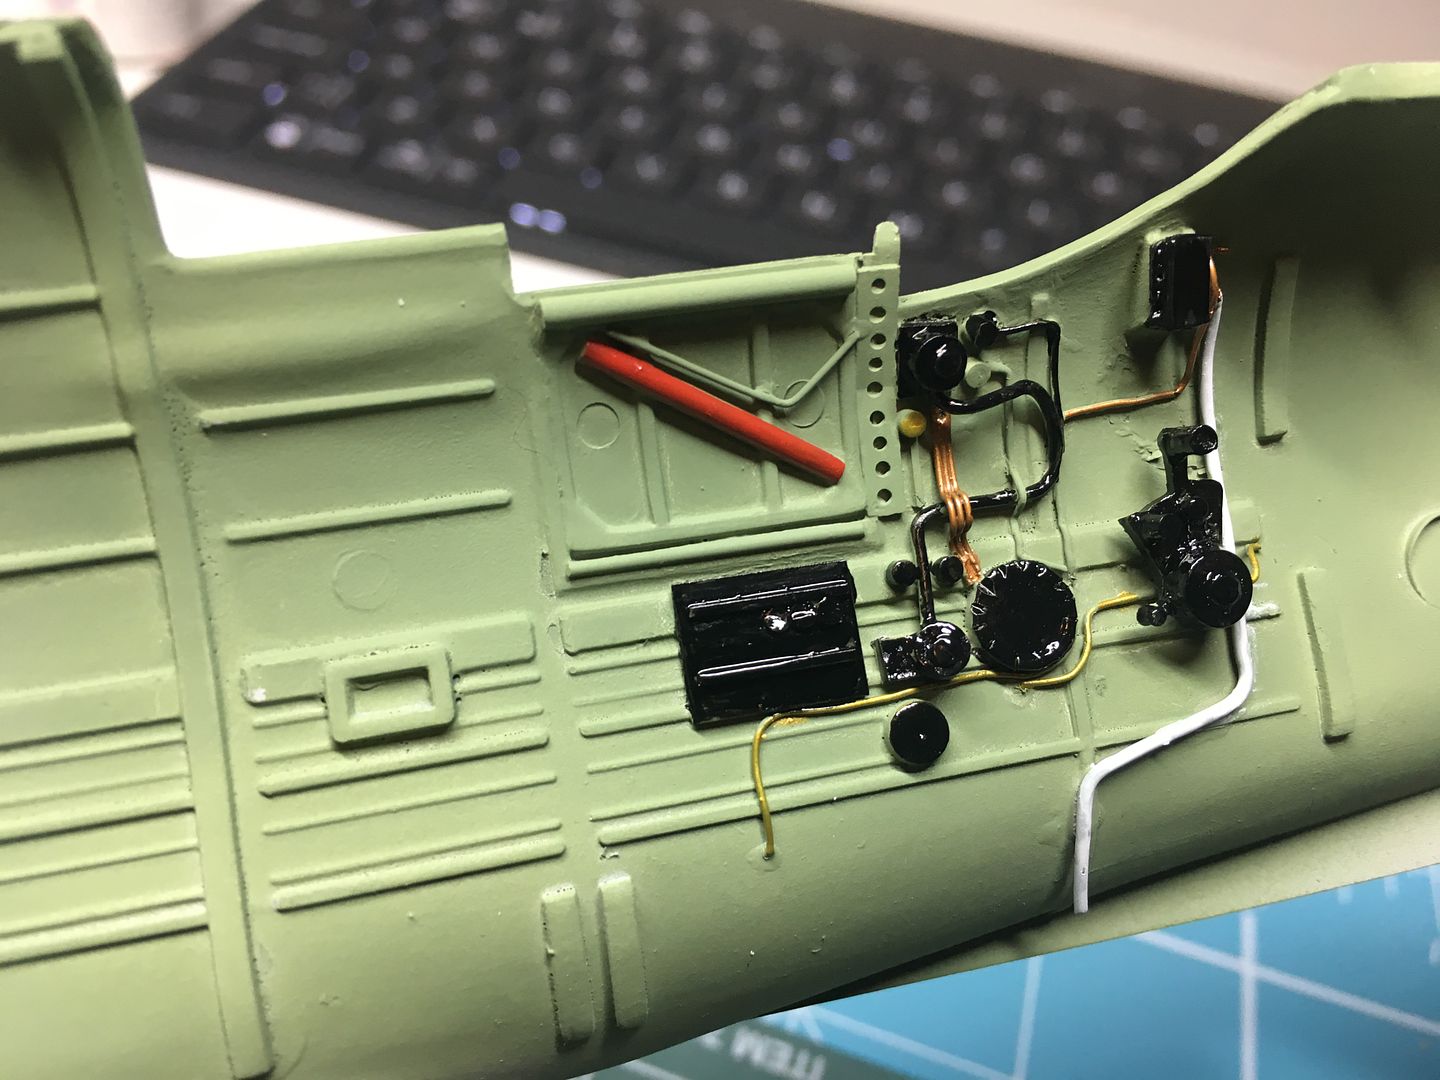
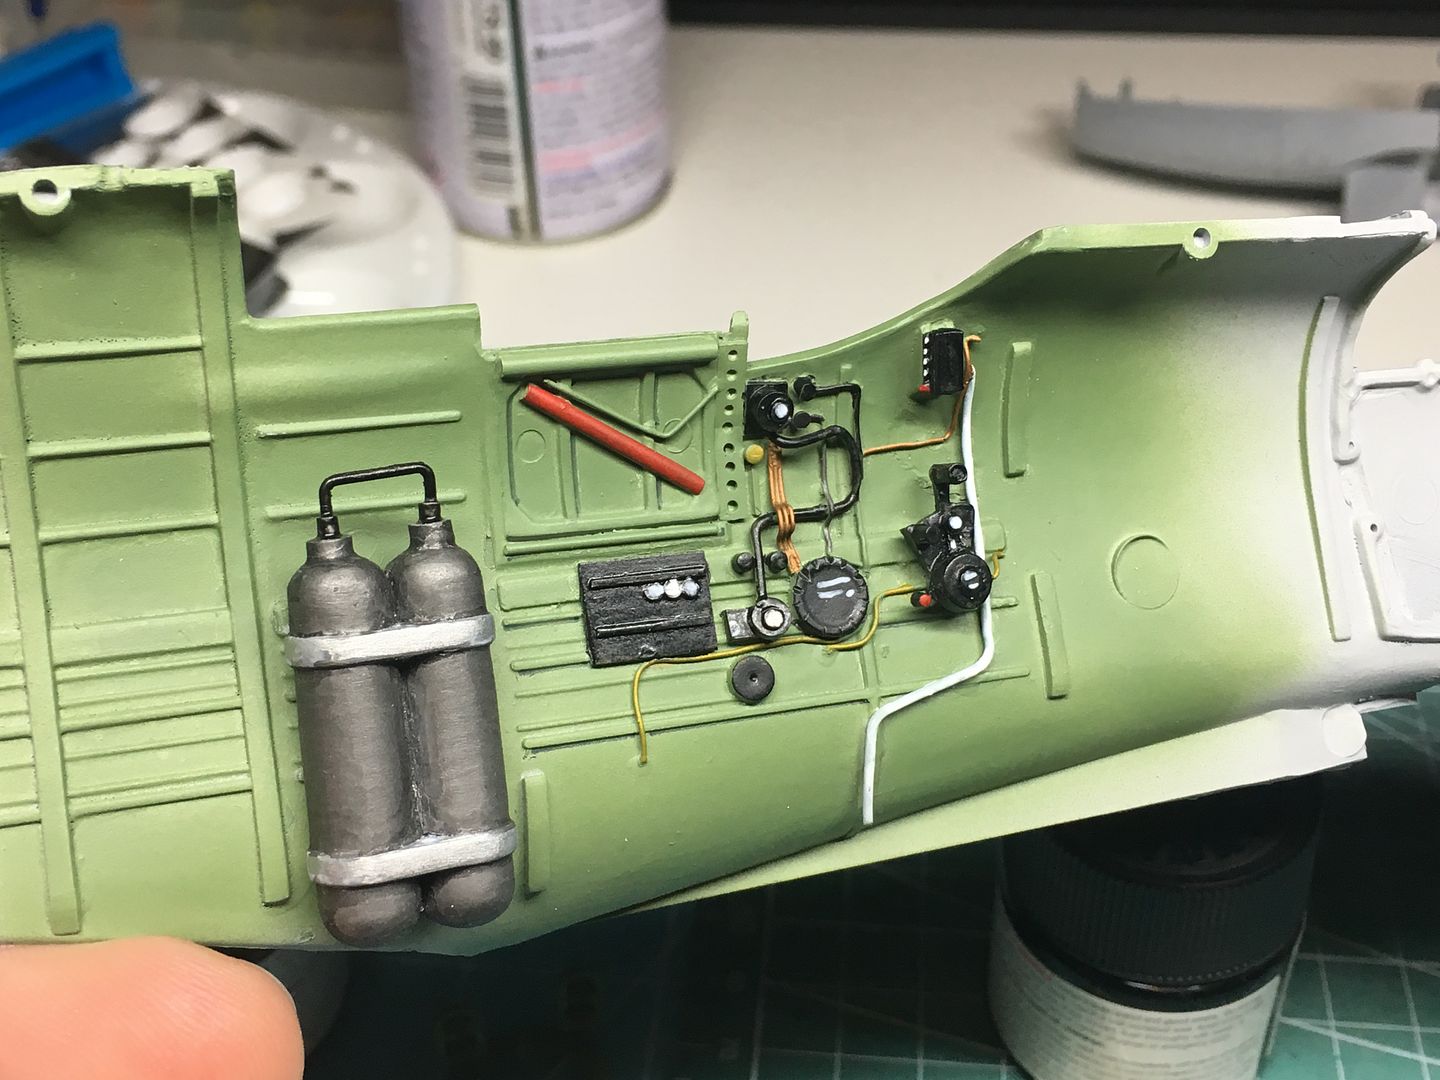
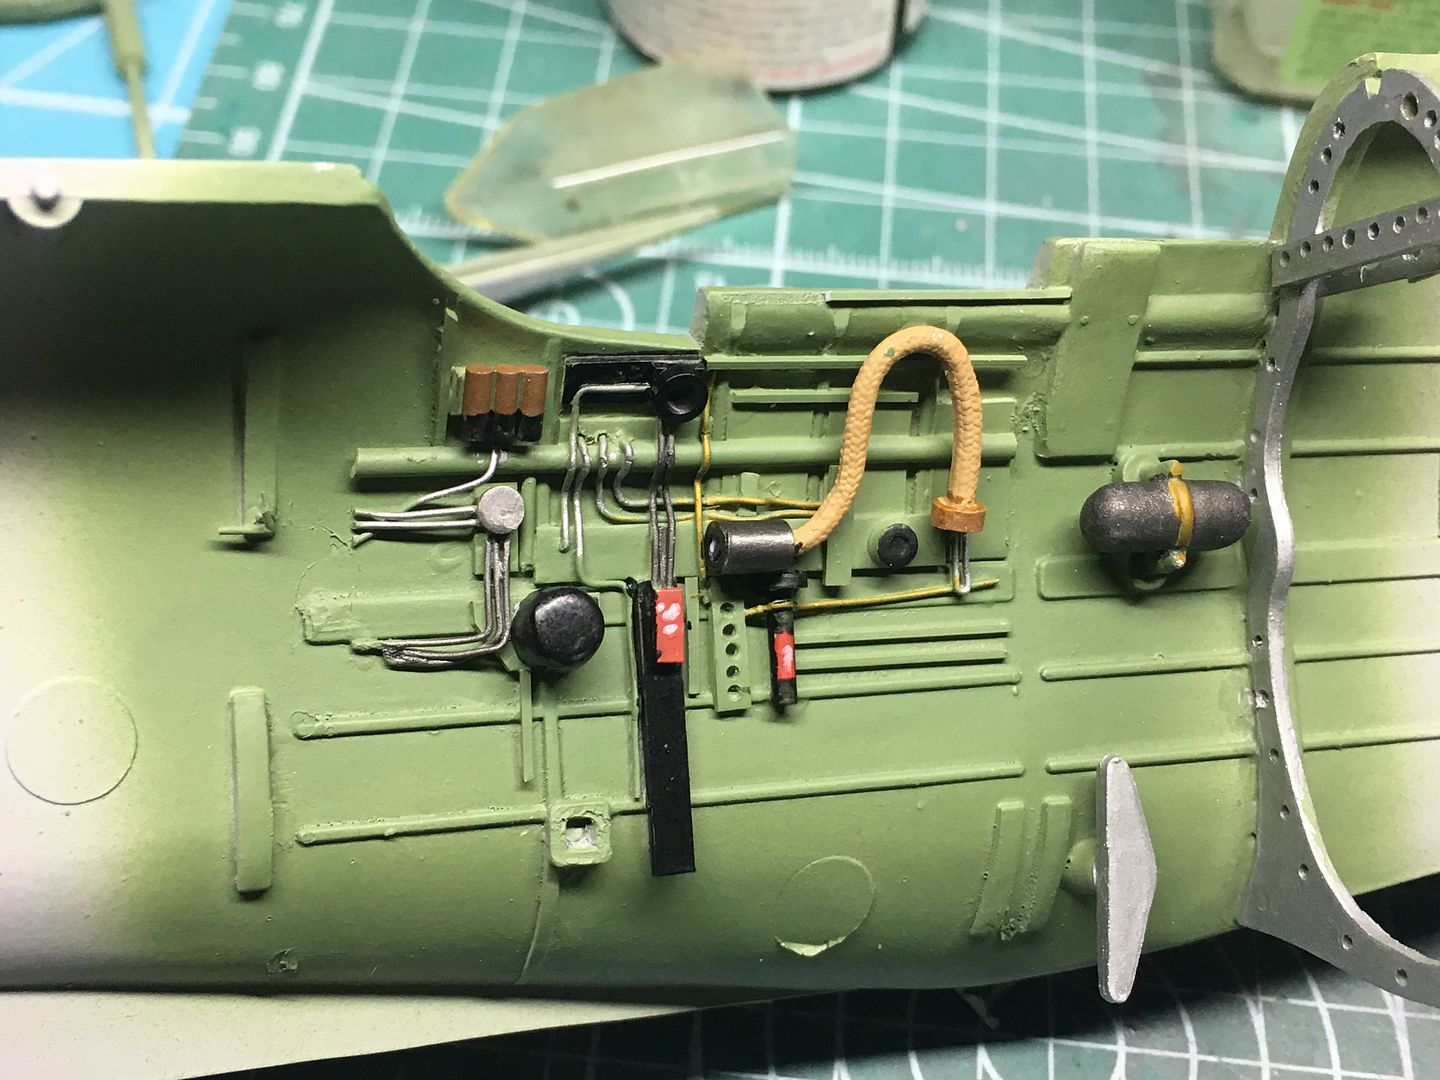
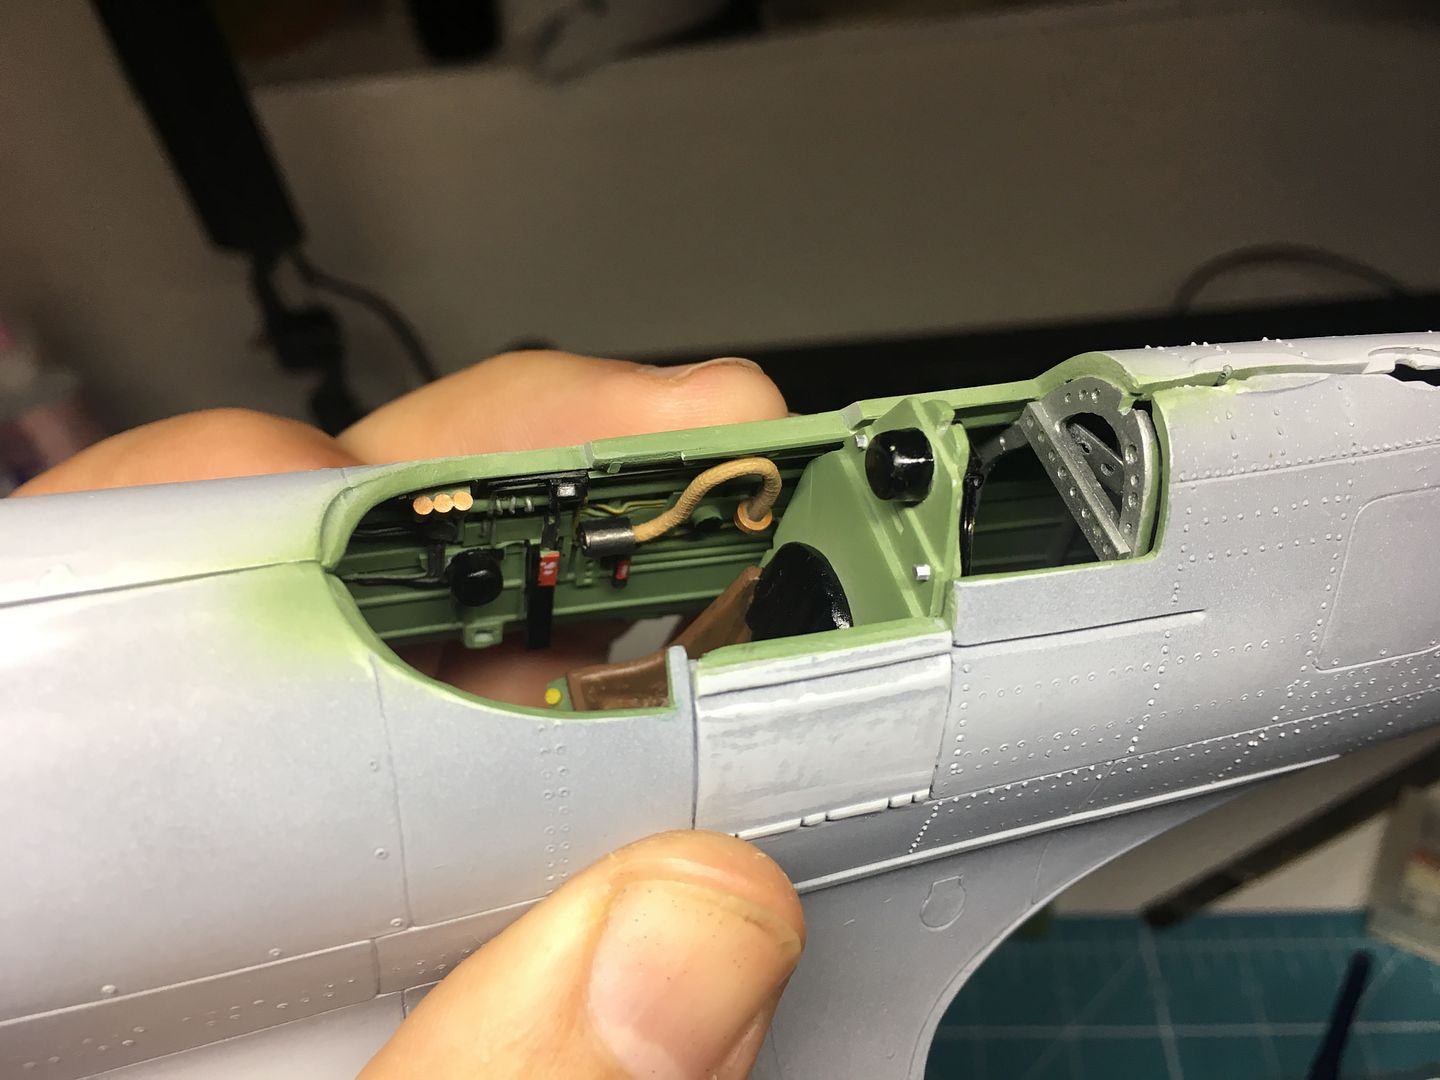
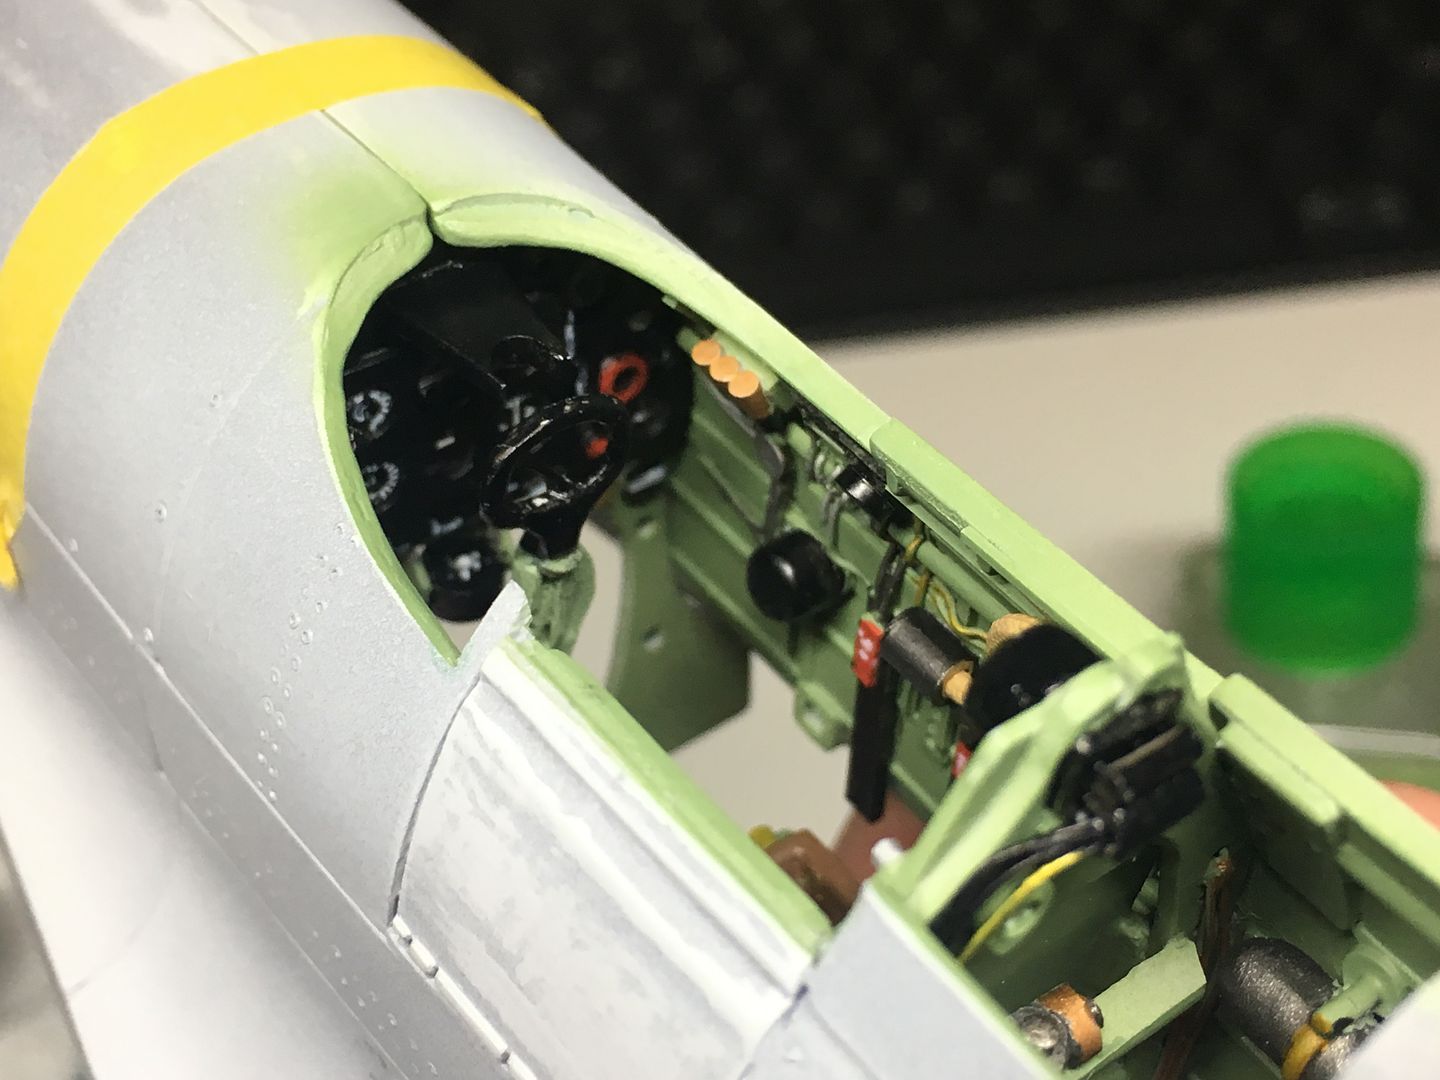
I was going to add some detail to the cockpit - only really what might be visible through the canopy - but the pilot hides almost everything anyway - still wanted to add details to the fuselage skins - I scratch built some bits to add to the - 5 - parts in the kit
Again - not going to perfect accuracy - just an idea of stuff going on....
Level of kit detail:
Started to add bits and bobs...


What you might actually be able to see!!

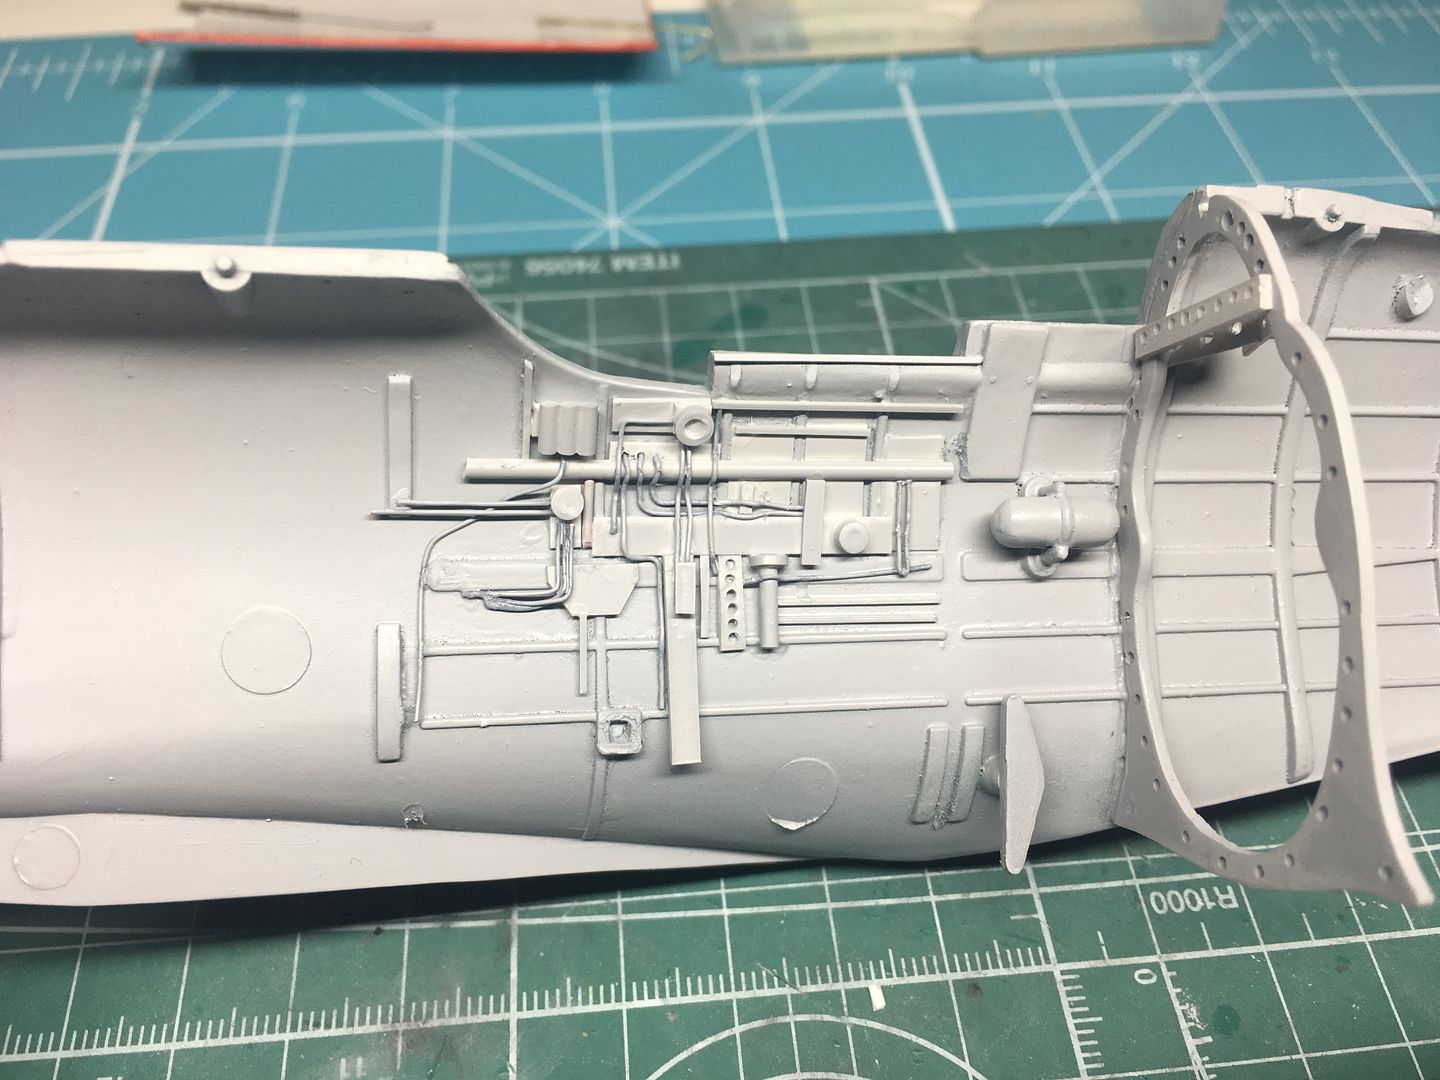
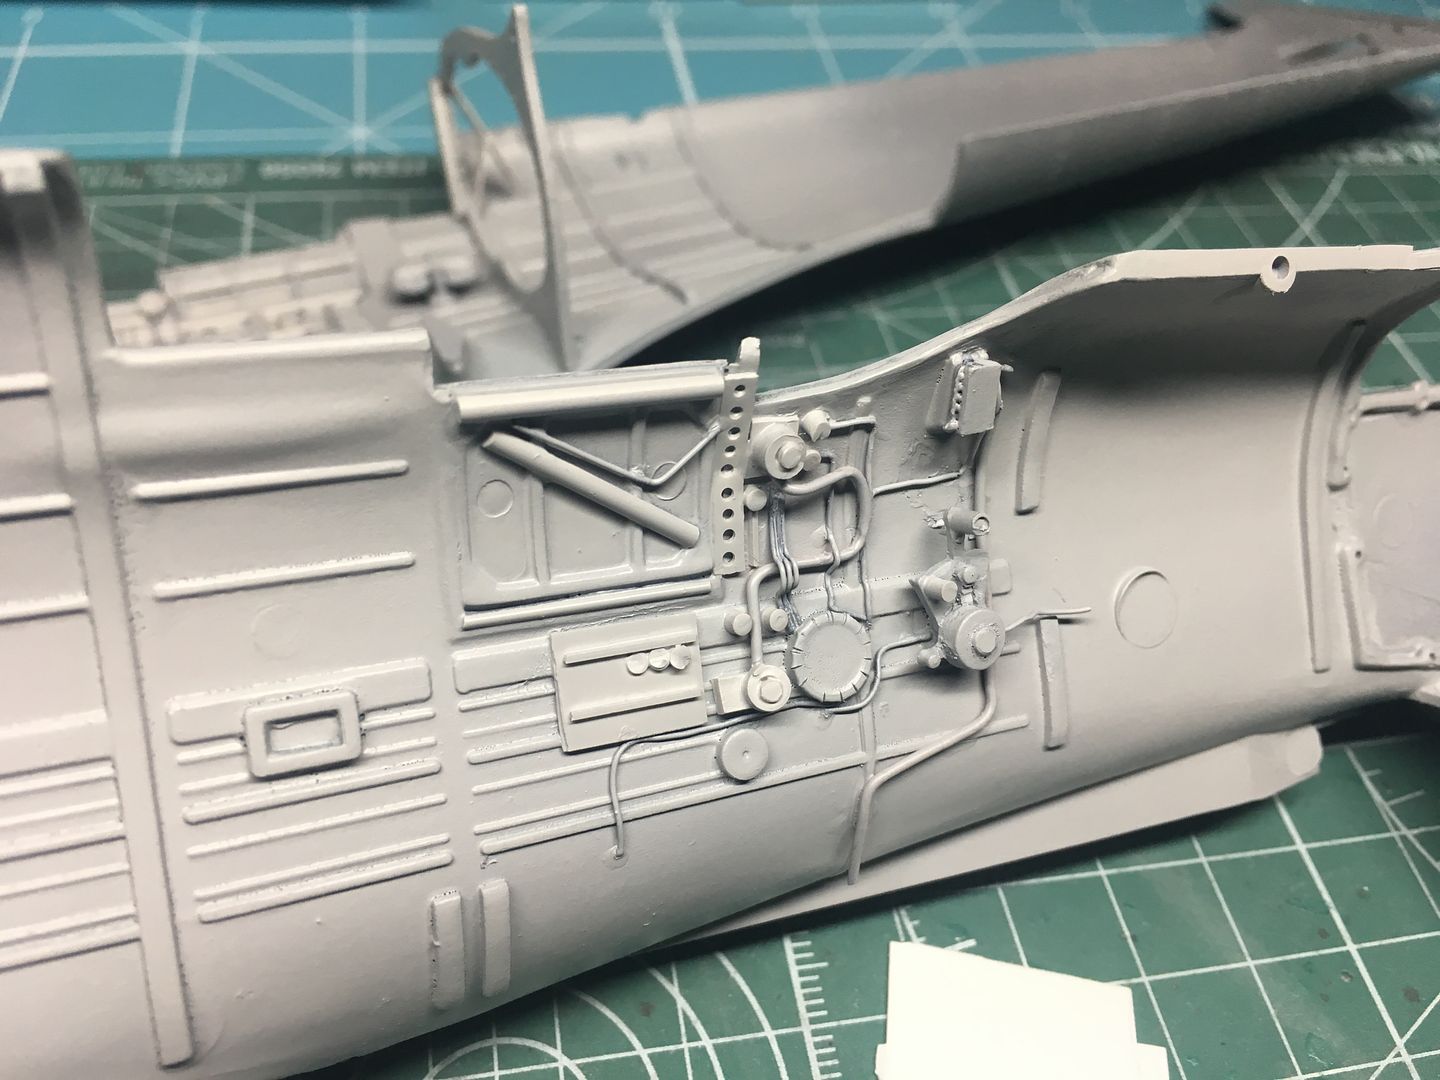

Also added detail to the bulkheads:
Lidl purchase!! £3 ish
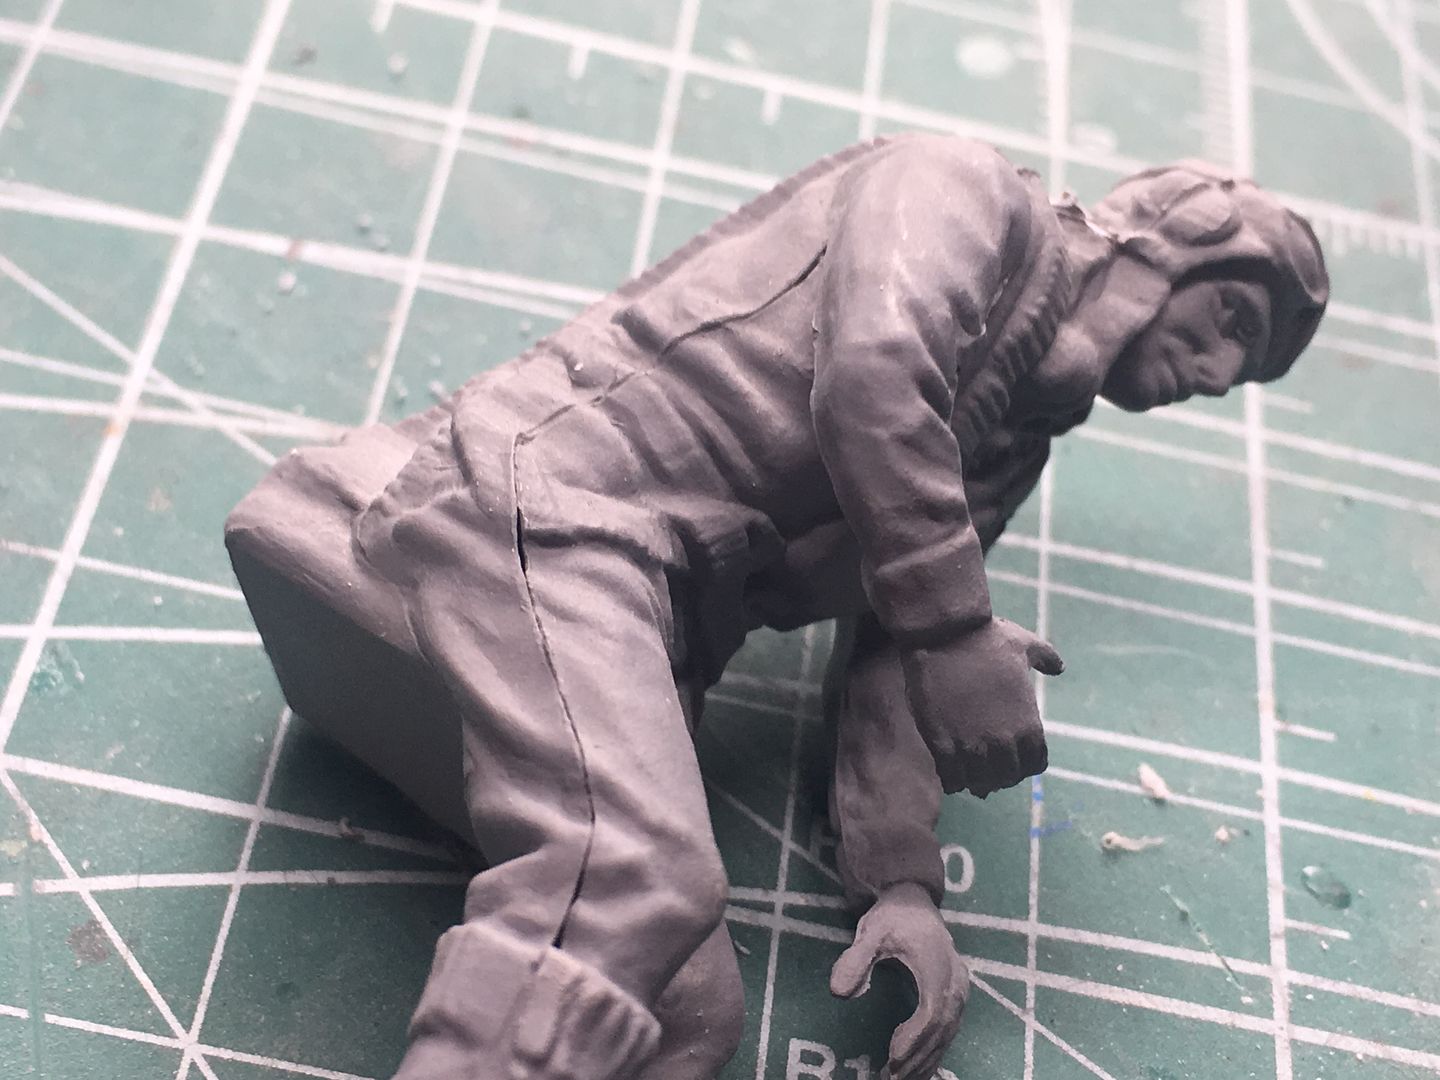
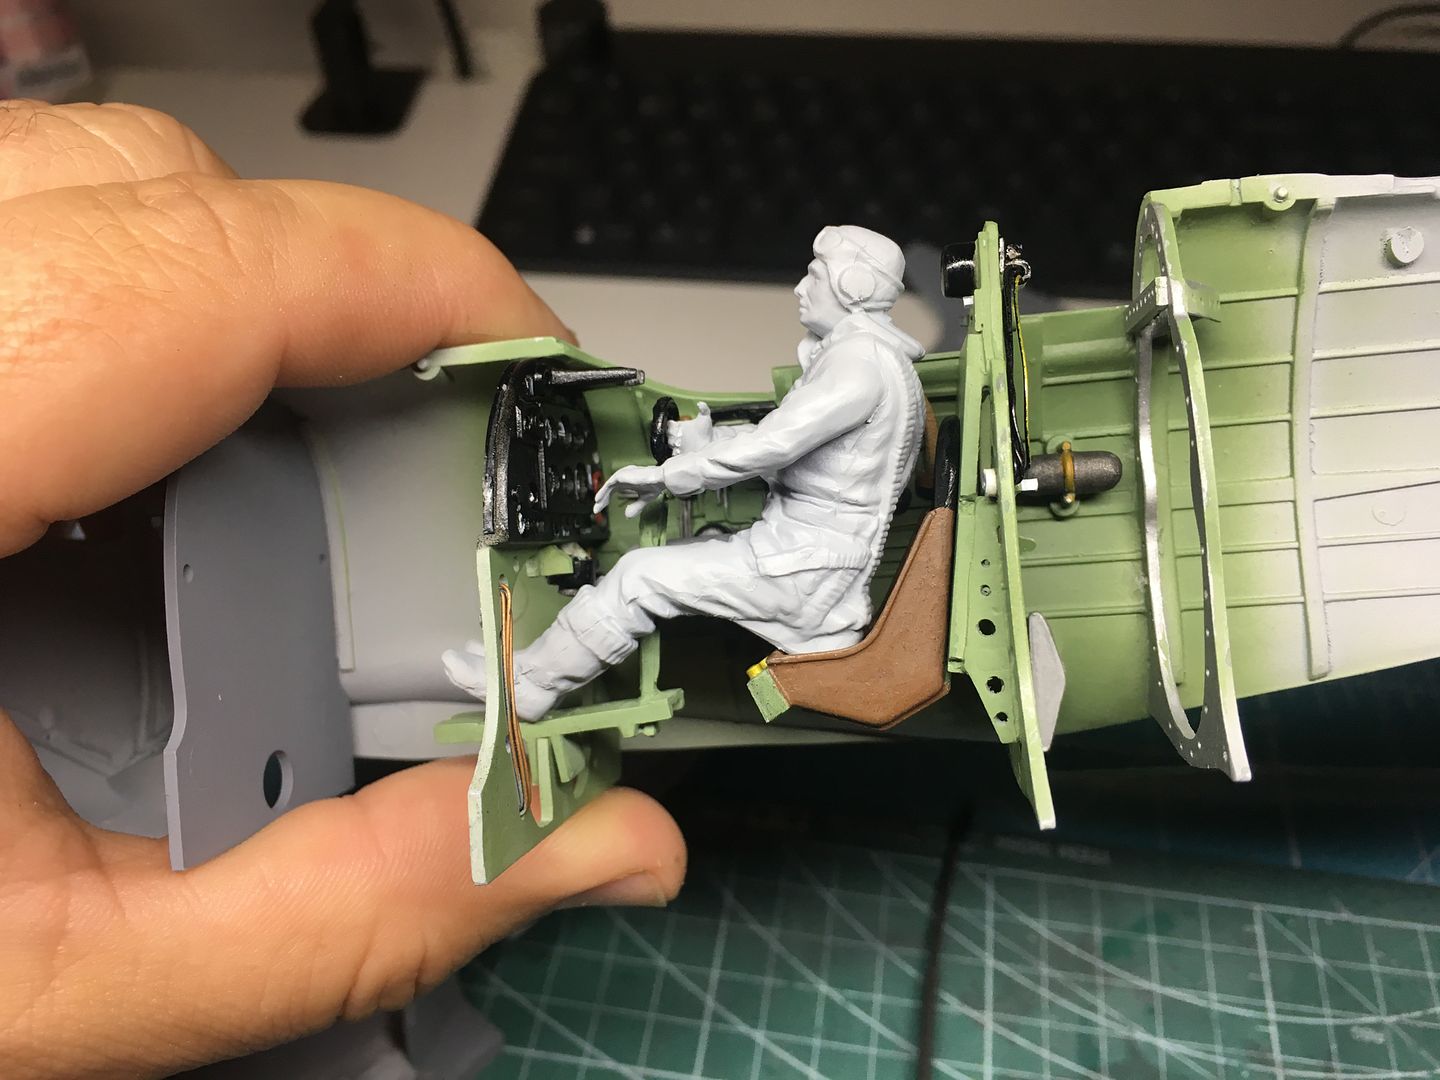
Also have to work on this chap - very much a beginner on figure painting, so this will be interesting - also working on the 1/32nd Mossie crew at the same time...
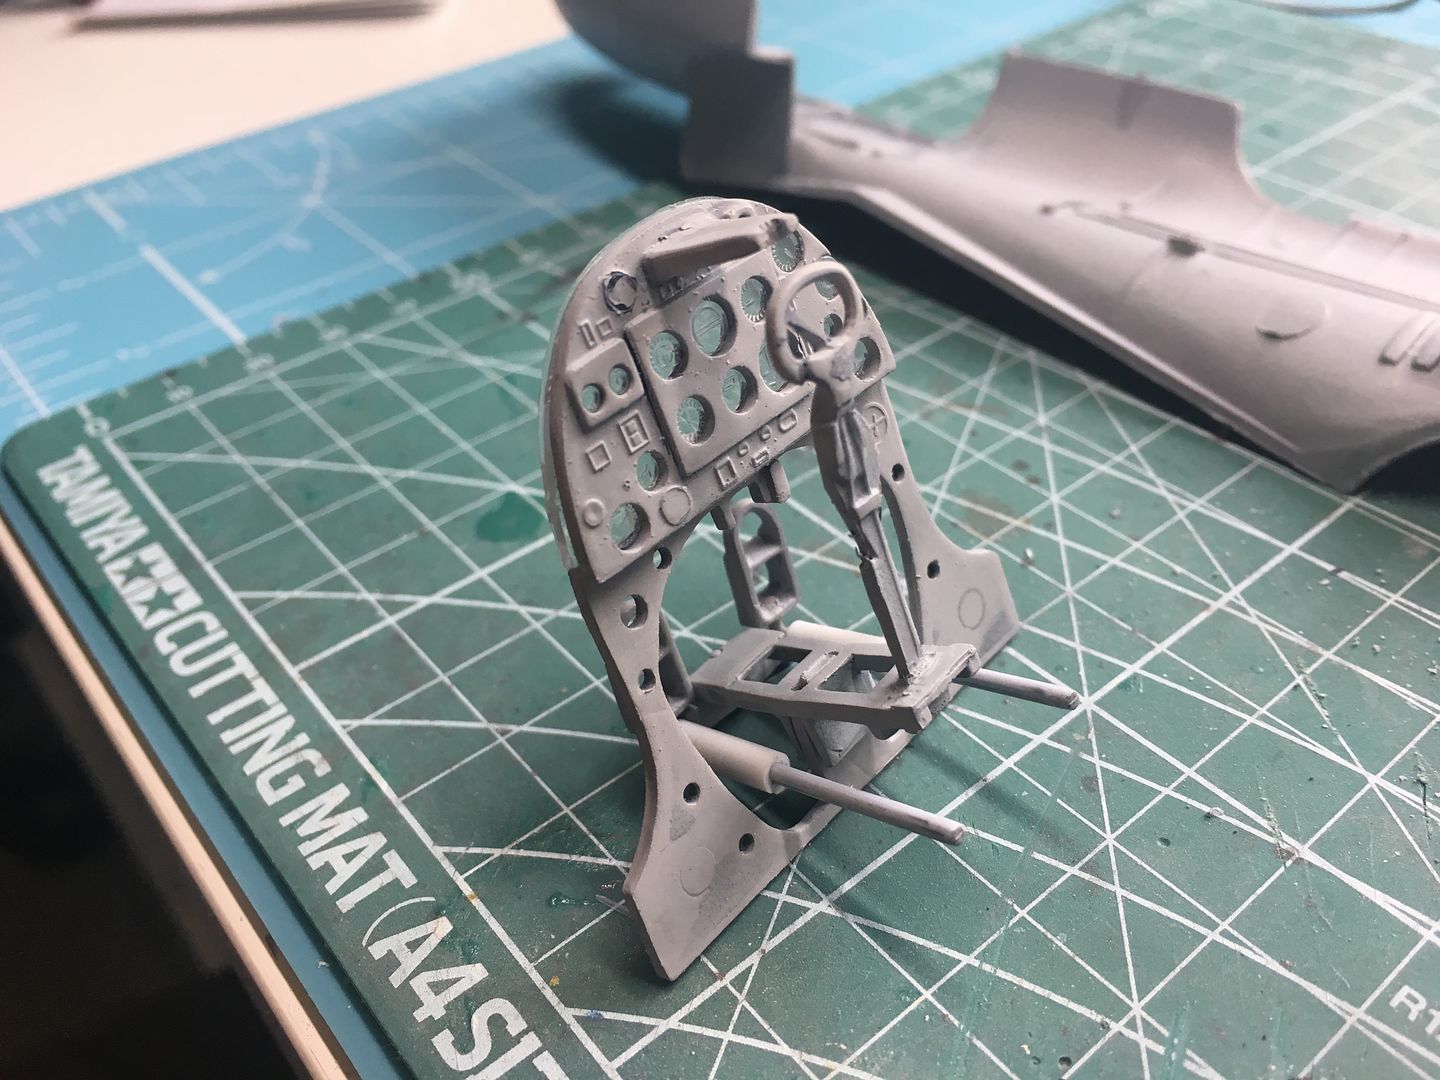
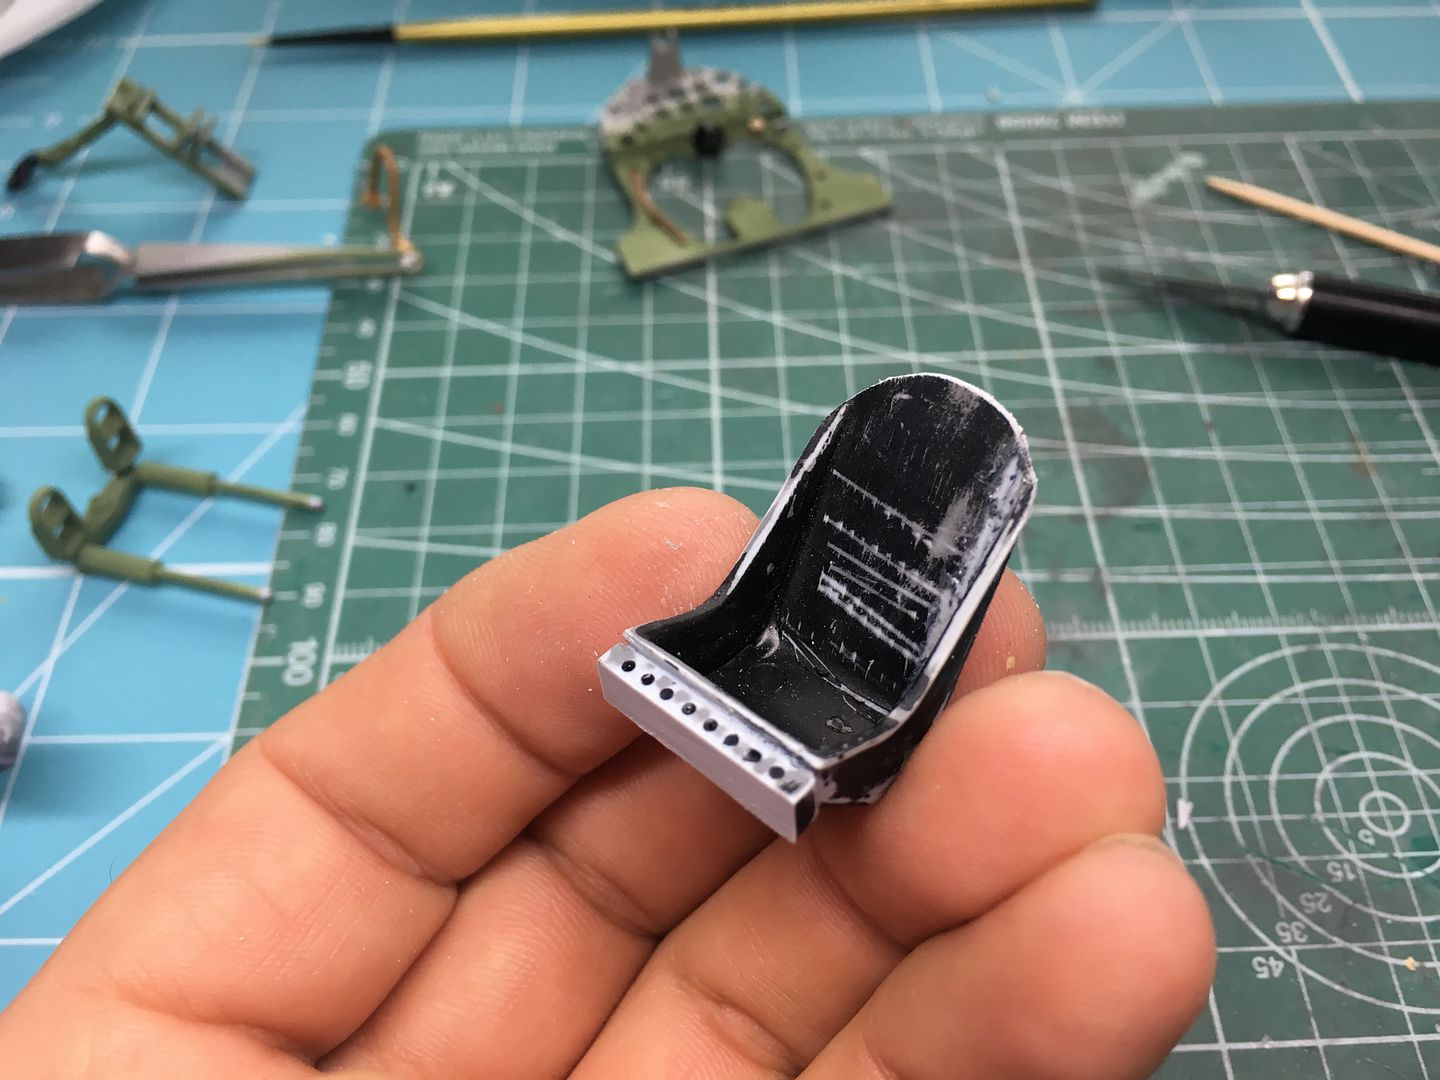
Info on another build suggests this seat is too large...

Certainly old Ginger is a bit small when in the seat - may require a re-build...
Right - time to get some colour on tonight (cockpit, that is)
I was going to add some detail to the cockpit - only really what might be visible through the canopy - but the pilot hides almost everything anyway - still wanted to add details to the fuselage skins - I scratch built some bits to add to the - 5 - parts in the kit
Again - not going to perfect accuracy - just an idea of stuff going on....
Level of kit detail:
Started to add bits and bobs...
What you might actually be able to see!!
Also added detail to the bulkheads:
Lidl purchase!! £3 ish
Also have to work on this chap - very much a beginner on figure painting, so this will be interesting - also working on the 1/32nd Mossie crew at the same time...
Info on another build suggests this seat is too large...
Certainly old Ginger is a bit small when in the seat - may require a re-build...
Right - time to get some colour on tonight (cockpit, that is)
Angus, not sure about your level of aircraft knowledge so apologies if I'm teaching you to suck eggs. The RAF fighter pilots parachute was actually his seat cushion as well and fitted into the metal frame. Airfix made the same mistake on the big Typhoon too, with the result that the pilot sat about 6 scale inches too low.
Alan (L7GB)
Alan (L7GB)
Hi Alan - yes, I have seen the parachute attached to the Pilot as a 'seat cushion' on the Mossie as well...this Airfix pilot also has the 'cushion' as well - I had seen on another build thread how the Airscale pilots seat is a much smaller size than the Airfix one, in all dimensions - as the pilot rattles around in the Airfix seat, I might fabricate the smaller size - assuming the scale is better of course....
All looking good - nice scratch building.
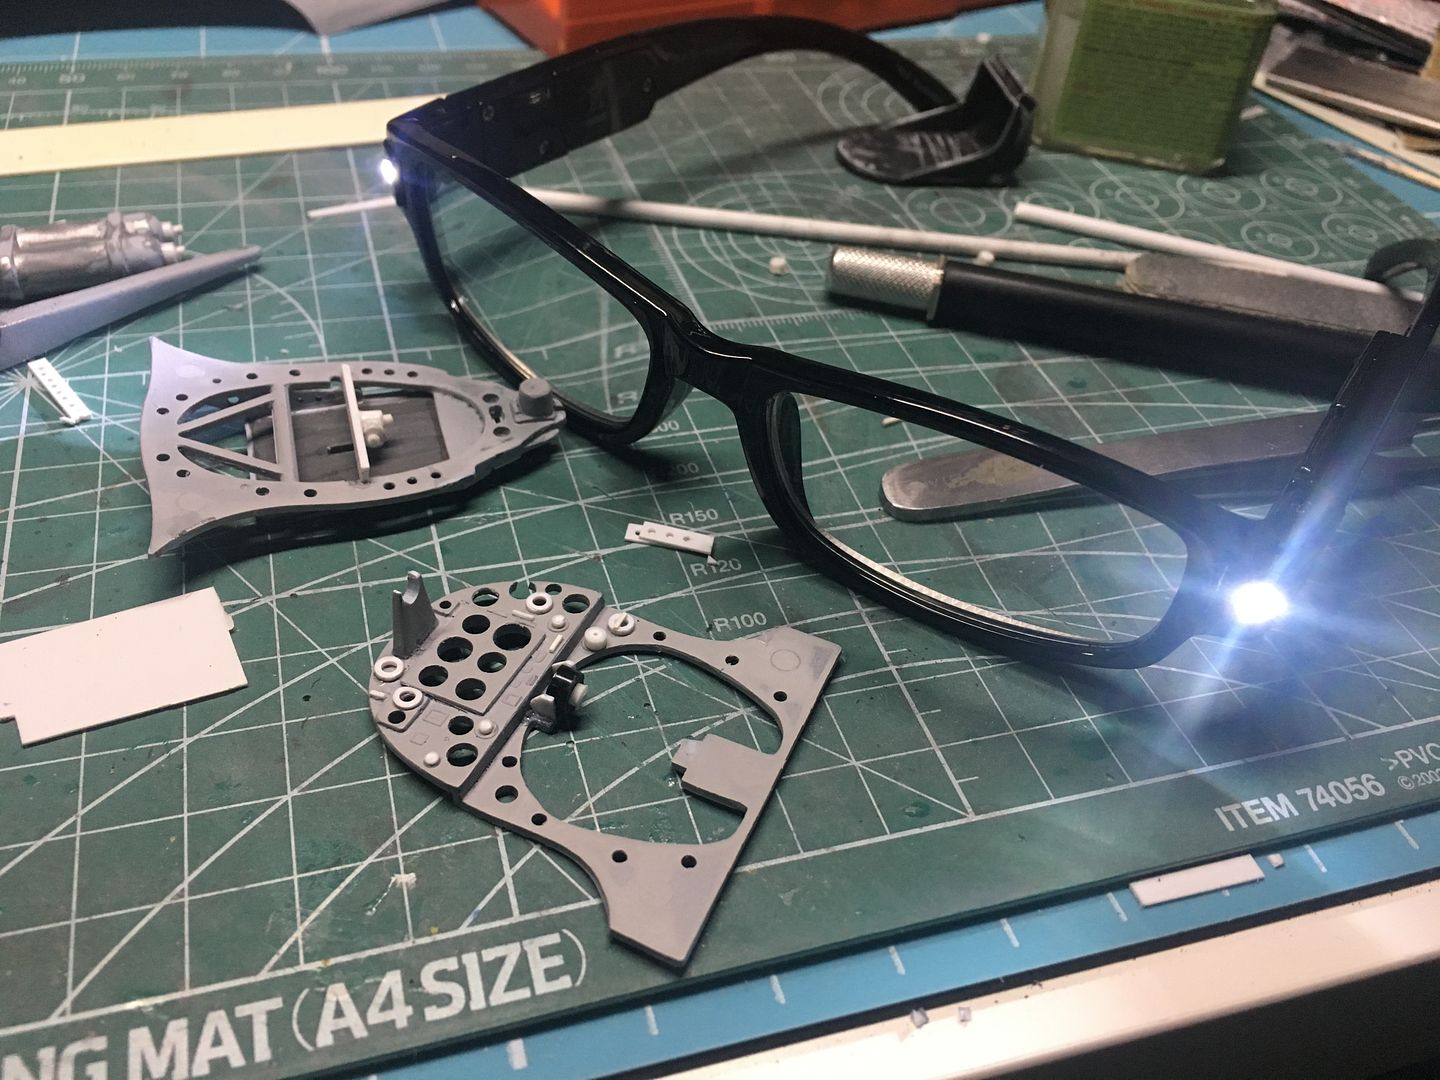
How are you getting on with the glasses? I got some too (3 dioptre), but the near point is too close for comfort when doing fine work, plus as soon as you look away to pick up a brush or whatever, everything is too de-focussed to work with. I was going to get some larger ones with interchangeable lenses on offer from Telford for £12.99, but they'd sold out by the time I went back.
I've tried an anglepoise type magnifier, but that was awkward to use. Still looking for something effective and practical for modelling.
I think some lenses held about 3" from the eyes, and small enough to look above/around when you want to pick something up would be ideal.
I know what you mean, I'm looking for some form of magnification too, using a jewellers loupe seems to be worse than an illuminated lens - I really need that stereo perception. There seems to be any number of visor type magnifiers on Ebay, not sure which to try!
https://www.ebay.co.uk/itm/Head-Magnifier-2LED-Lig...
https://www.ebay.co.uk/itm/Head-Mounted-Magnifier-...
At least 300 different items on Ebay, 419 on Amazon. Sometimes choice can be a bad thing. Having illumination isn't crucial, the built-in LEDs are always low in the green part of the spectrum, and cheap ones like these will be very blue. Not to mention heavy batteries. I did consider one of the new generation of USB microscopes, which do give good magnification, but I think stereo is pretty important.
Mantis microscopes are fantastic for stereo work on relatively large objects, but £1K is a bit outside budget.
Zad said:
I know what you mean, I'm looking for some form of magnification too, using a jewellers loupe seems to be worse than an illuminated lens - I really need that stereo perception. There seems to be any number of visor type magnifiers on Ebay, not sure which to try!
https://www.ebay.co.uk/itm/Head-Magnifier-2LED-Lig...
https://www.ebay.co.uk/itm/Head-Mounted-Magnifier-...
At least 300 different items on Ebay, 419 on Amazon. Sometimes choice can be a bad thing. Having illumination isn't crucial, the built-in LEDs are always low in the green part of the spectrum, and cheap ones like these will be very blue. Not to mention heavy batteries. I did consider one of the new generation of USB microscopes, which do give good magnification, but I think stereo is pretty important.
Mantis microscopes are fantastic for stereo work on relatively large objects, but £1K is a bit outside budget.
Go with genuine Opitvisor, had a pair x2.5 for several years and are still fine even though my bifocal prescription has changed due to age. https://www.ebay.co.uk/itm/Head-Magnifier-2LED-Lig...
https://www.ebay.co.uk/itm/Head-Mounted-Magnifier-...
At least 300 different items on Ebay, 419 on Amazon. Sometimes choice can be a bad thing. Having illumination isn't crucial, the built-in LEDs are always low in the green part of the spectrum, and cheap ones like these will be very blue. Not to mention heavy batteries. I did consider one of the new generation of USB microscopes, which do give good magnification, but I think stereo is pretty important.
Mantis microscopes are fantastic for stereo work on relatively large objects, but £1K is a bit outside budget.
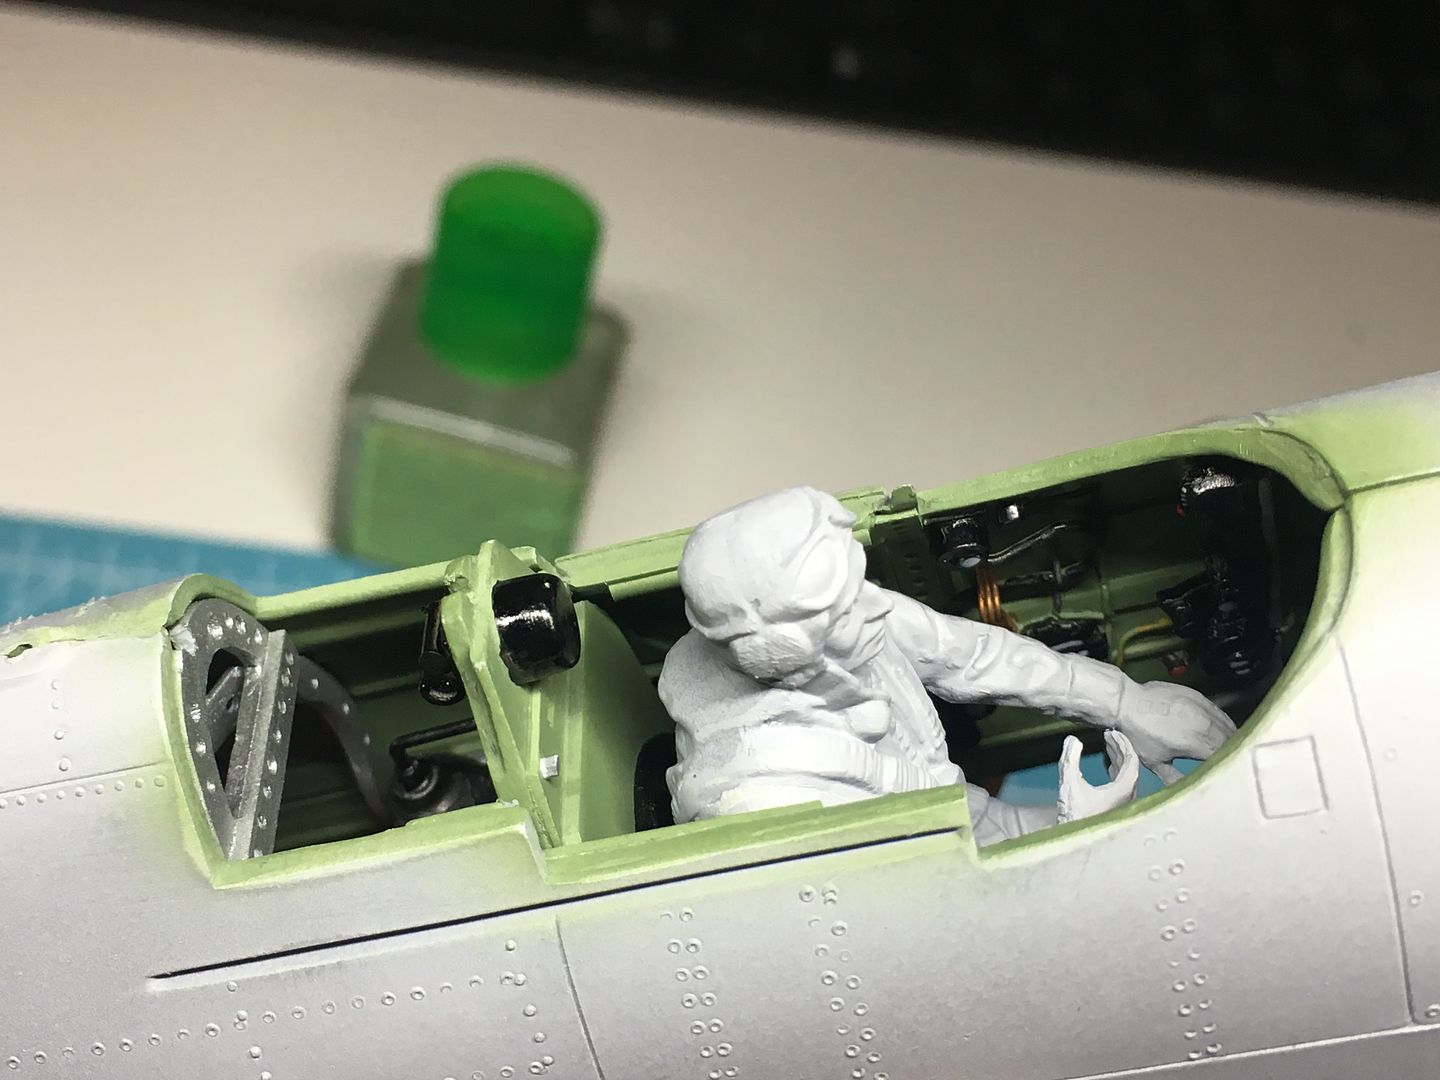
Right - shrank the chair!

Pretty crude - but as I said, won't be seen AT ALL - and i want to finish this model!

I've added a bit of 'padding' - (and obviously painted too early!)
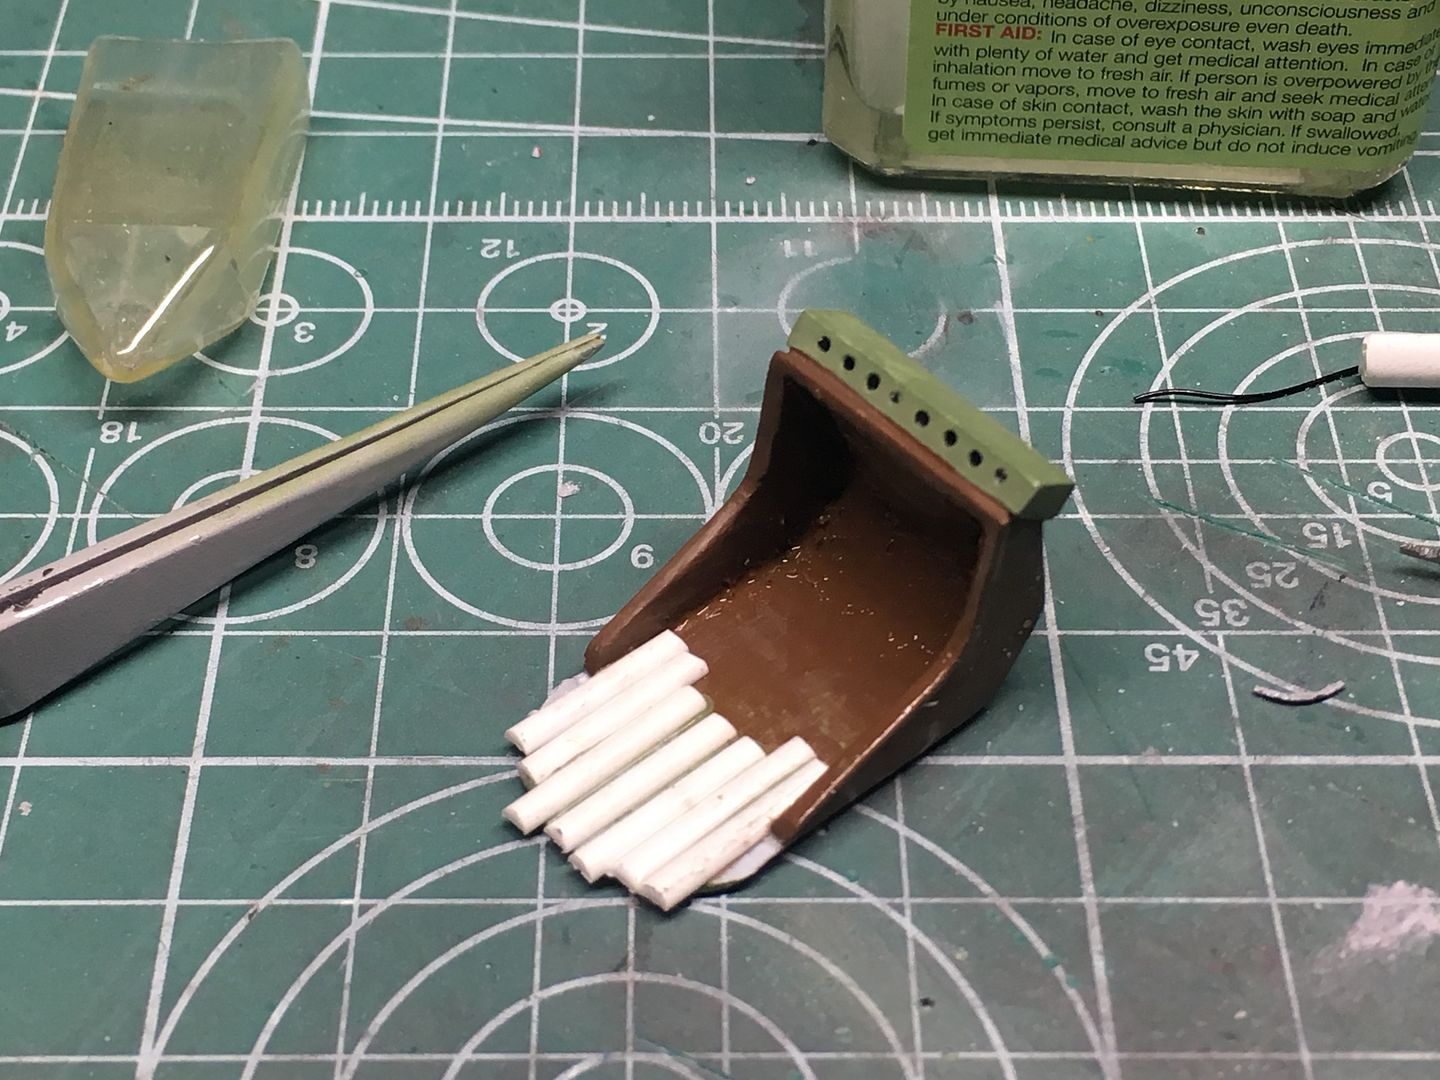
The filler inside is where the pilot part goes -
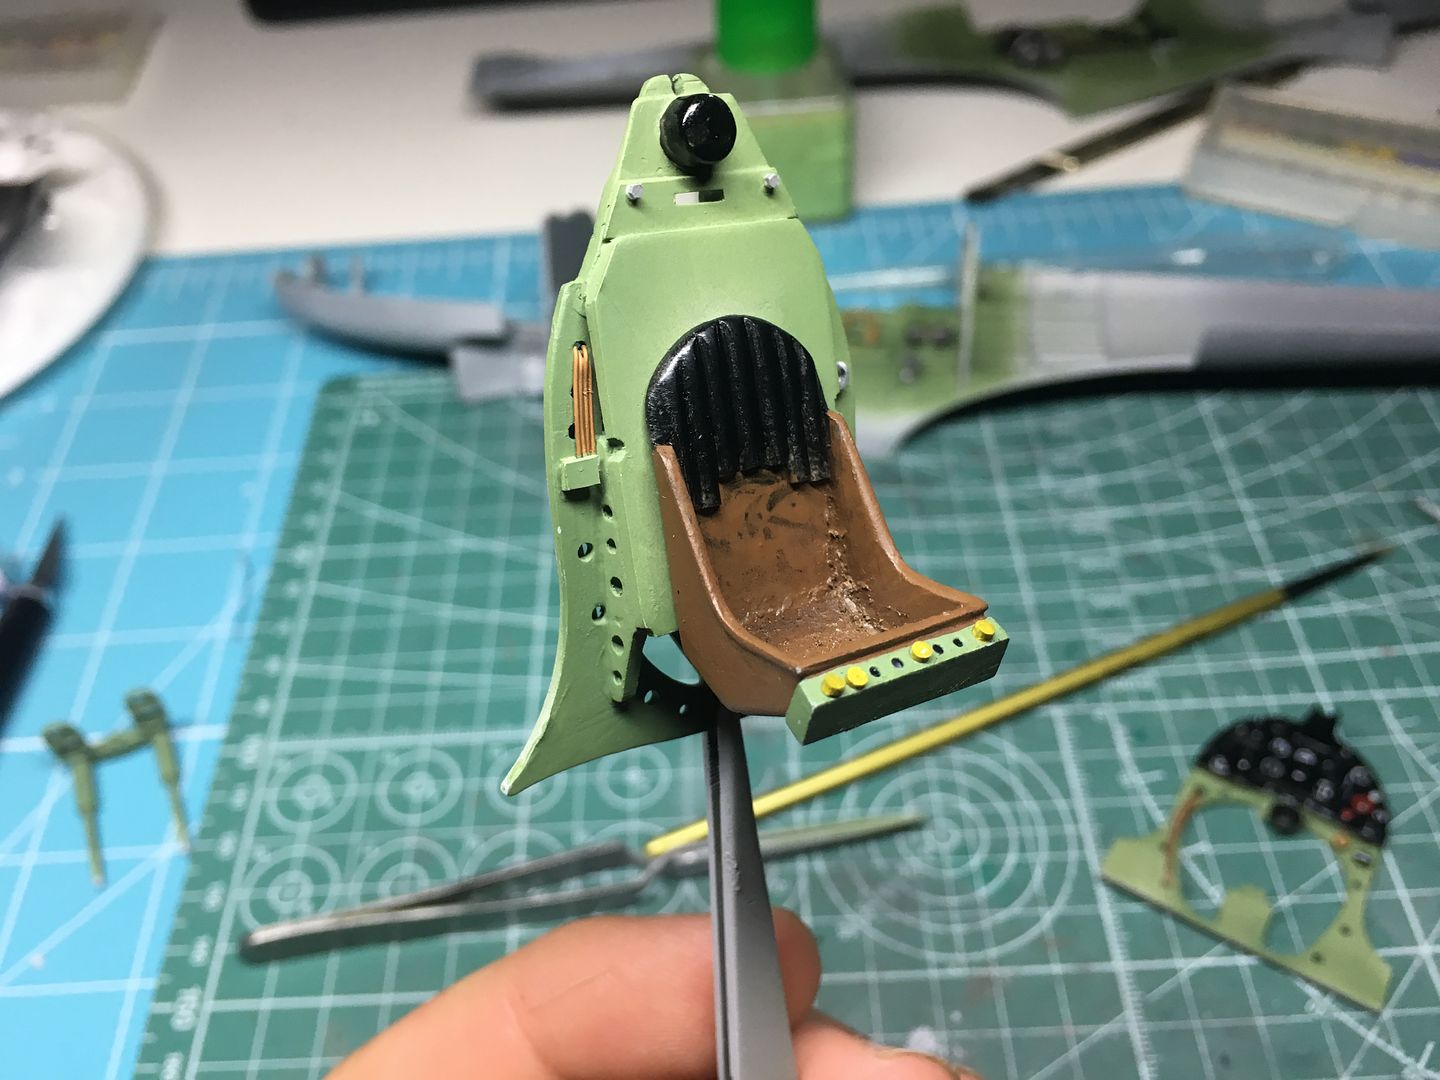
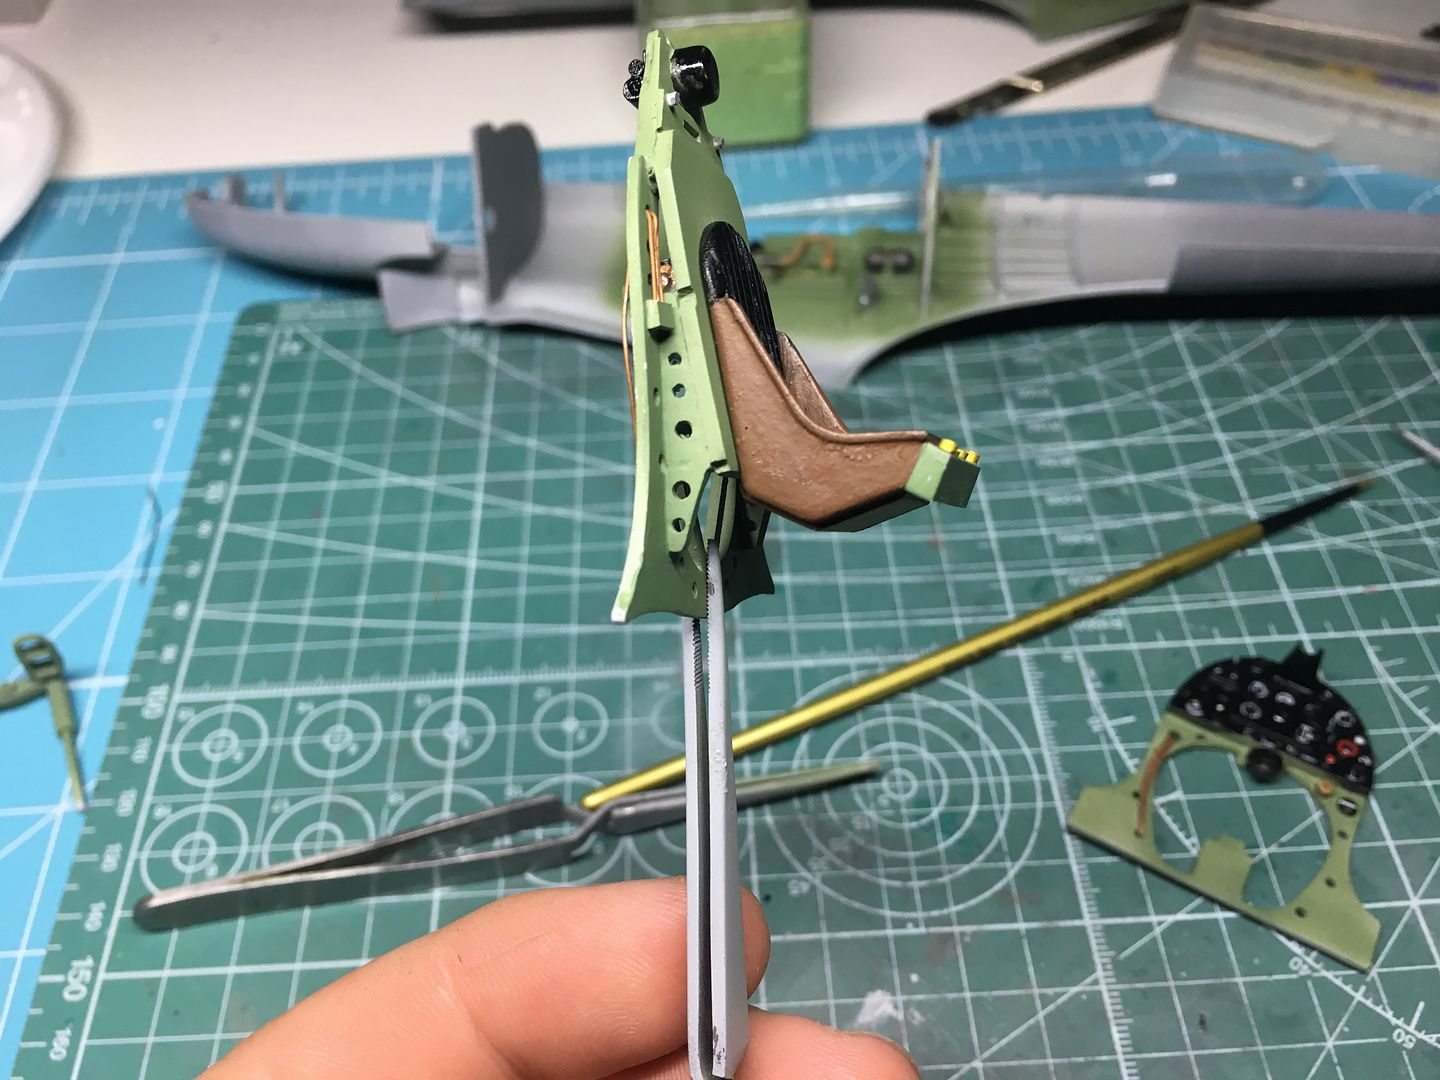
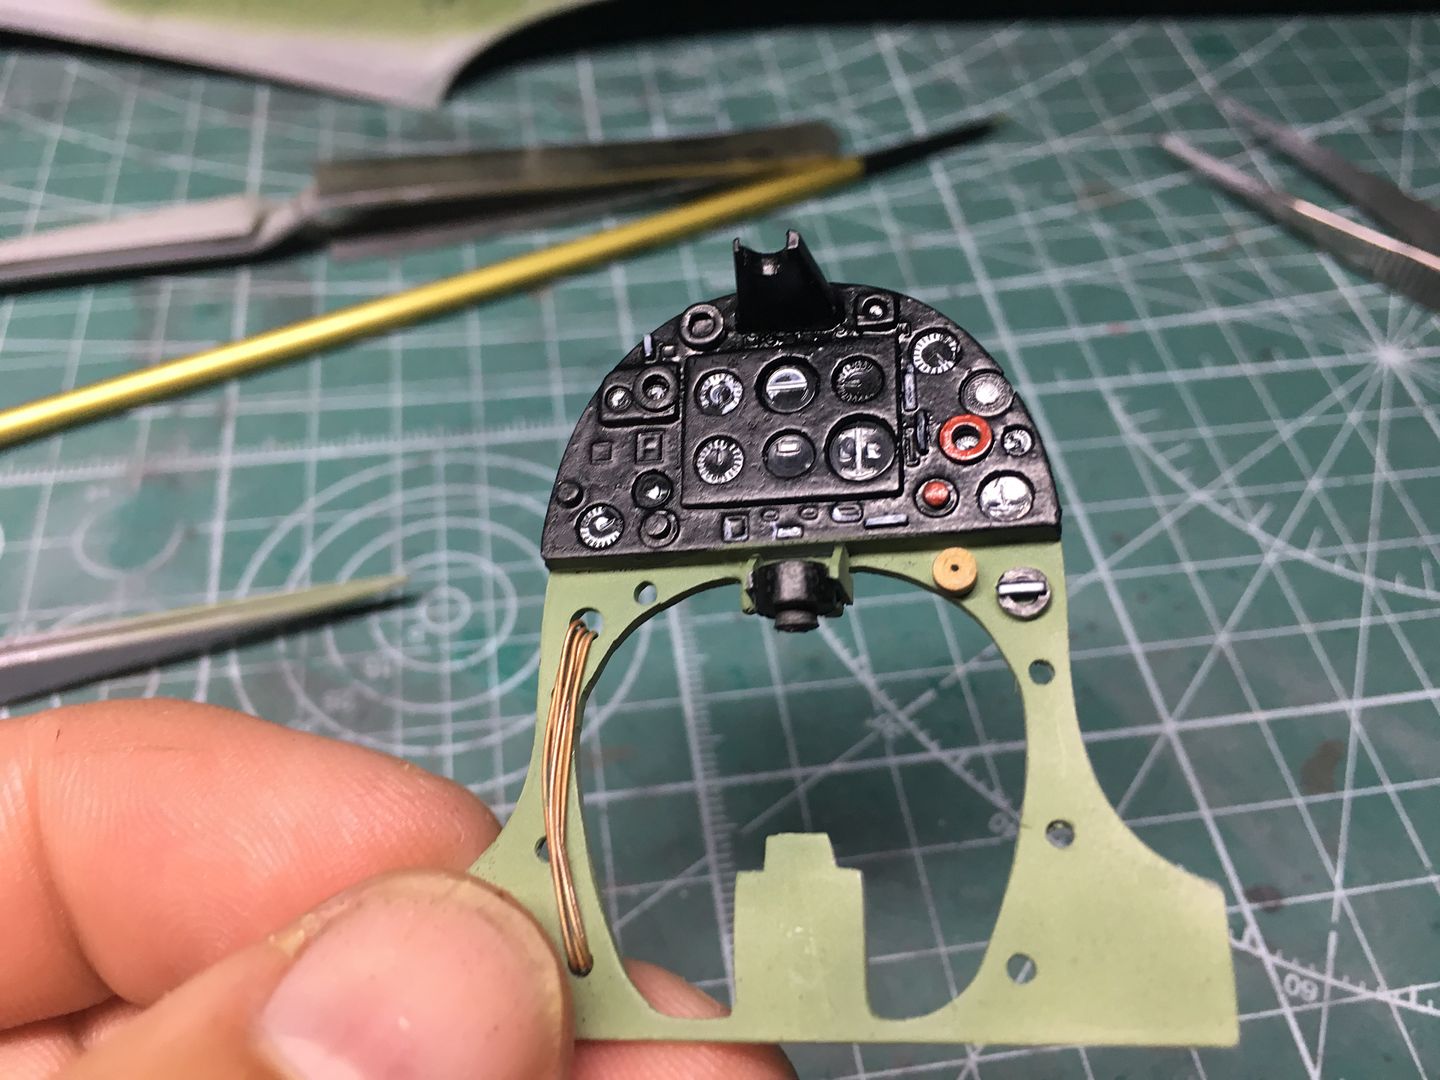
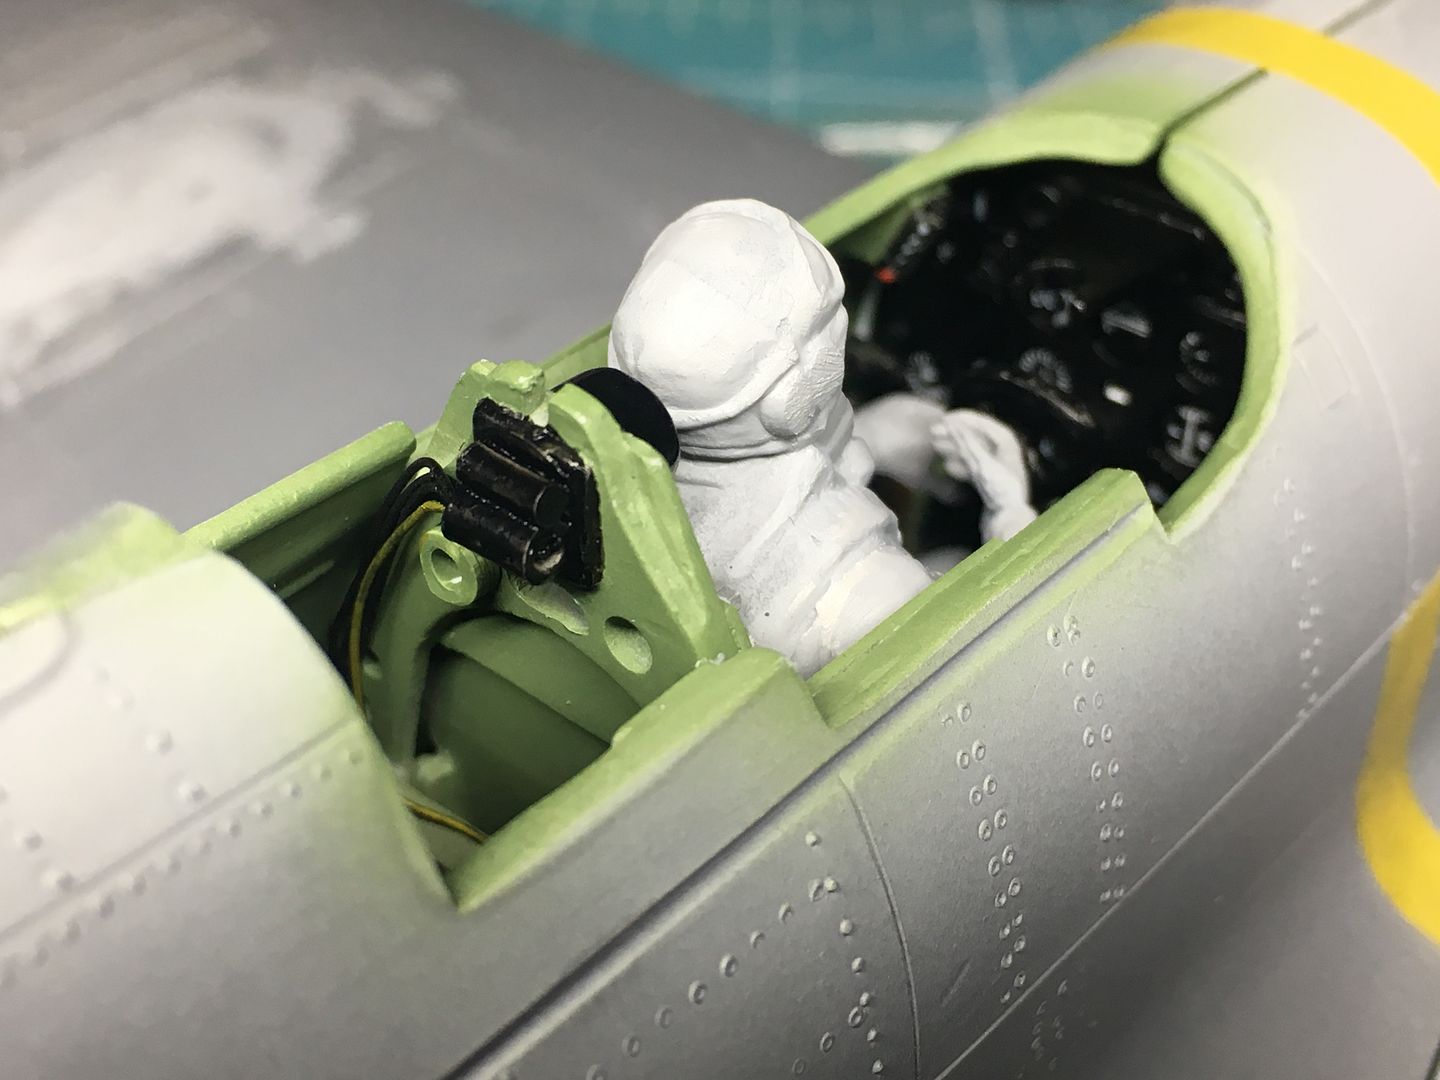
I painted my 'fake' cockpit details....

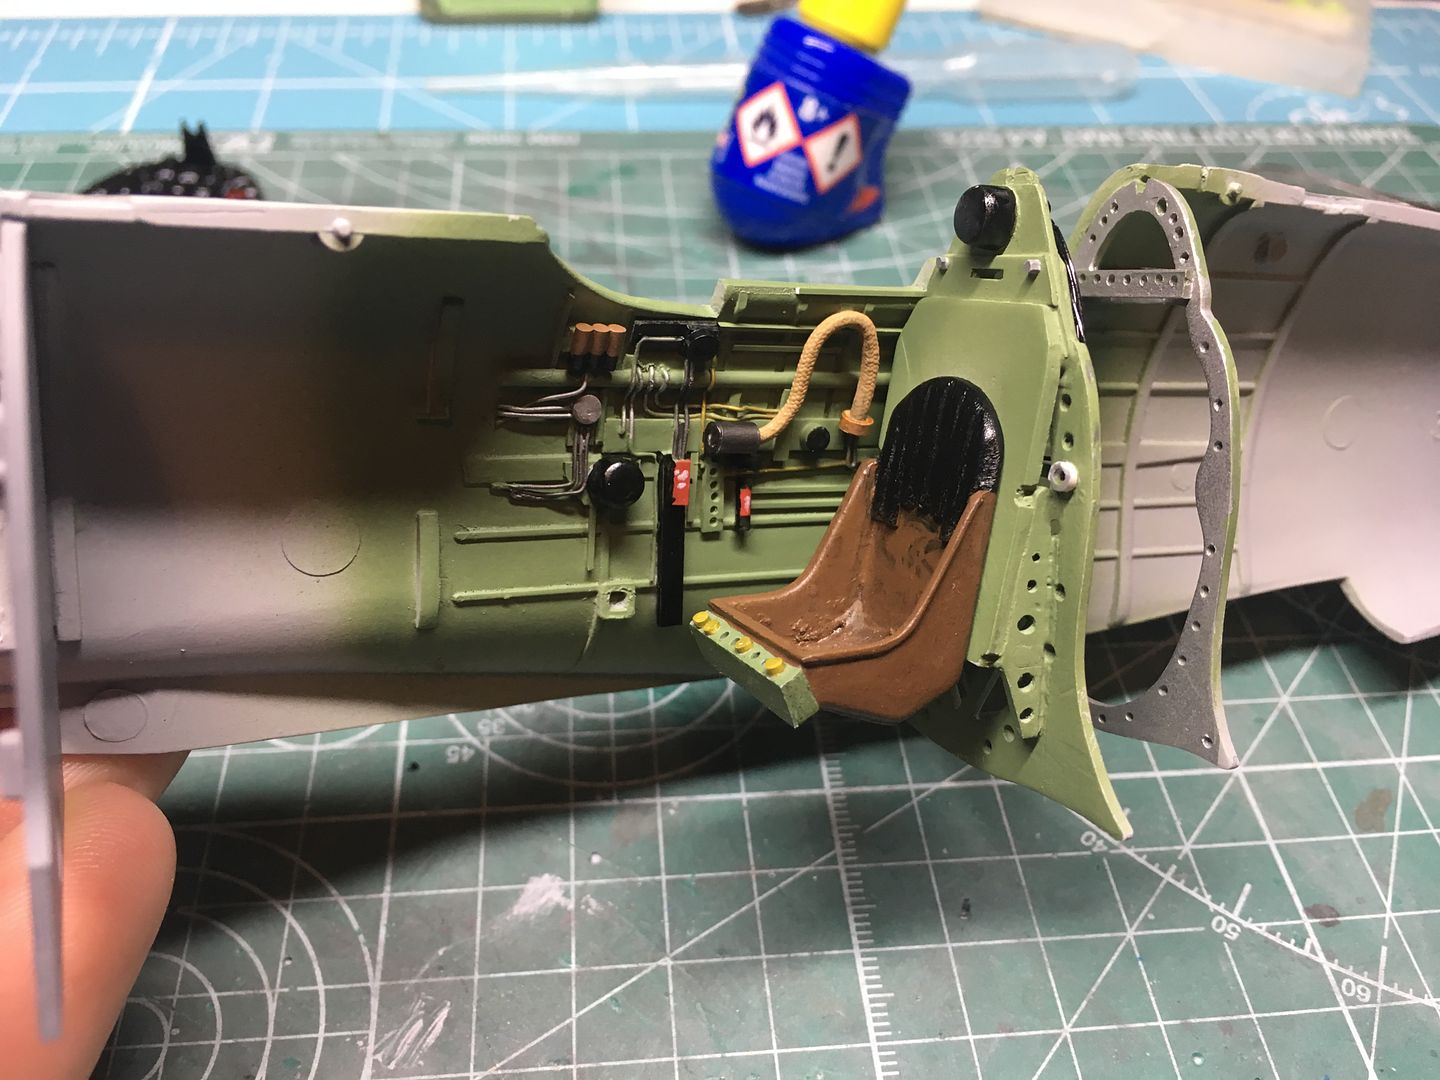
...and painted the instrument panel - I managed to get some white onto the clear parts, which have the dials cast in - when assembled with a black background, these actually look ok! (no decals)
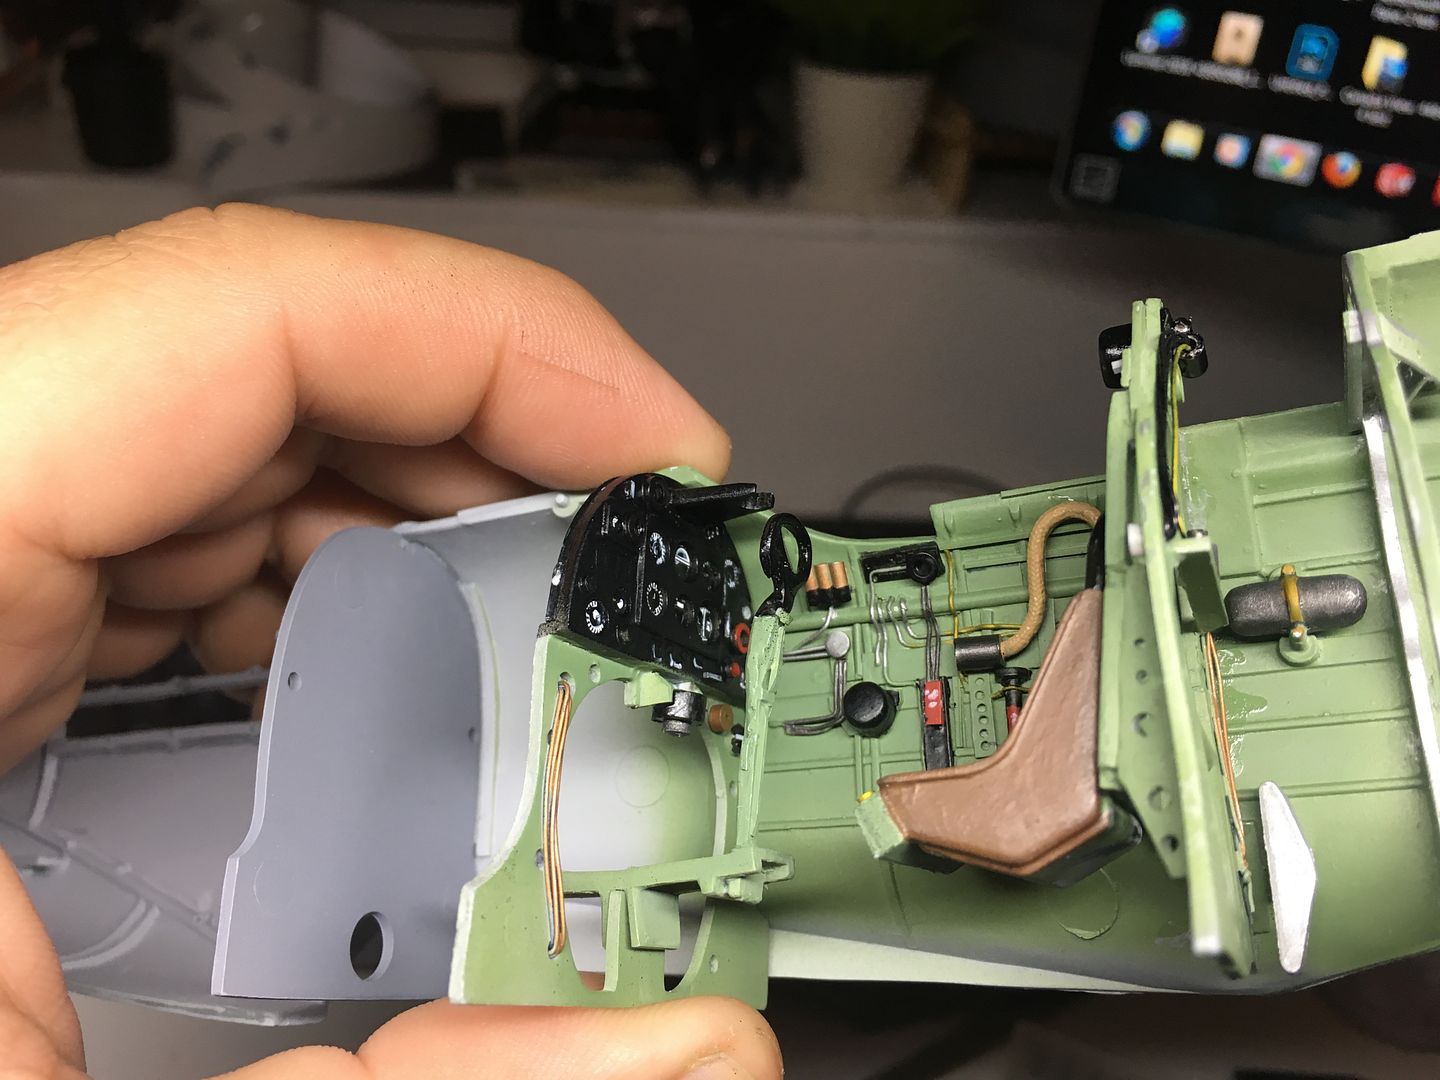
A test fit shows how little of any of this you will actually be able to see!!
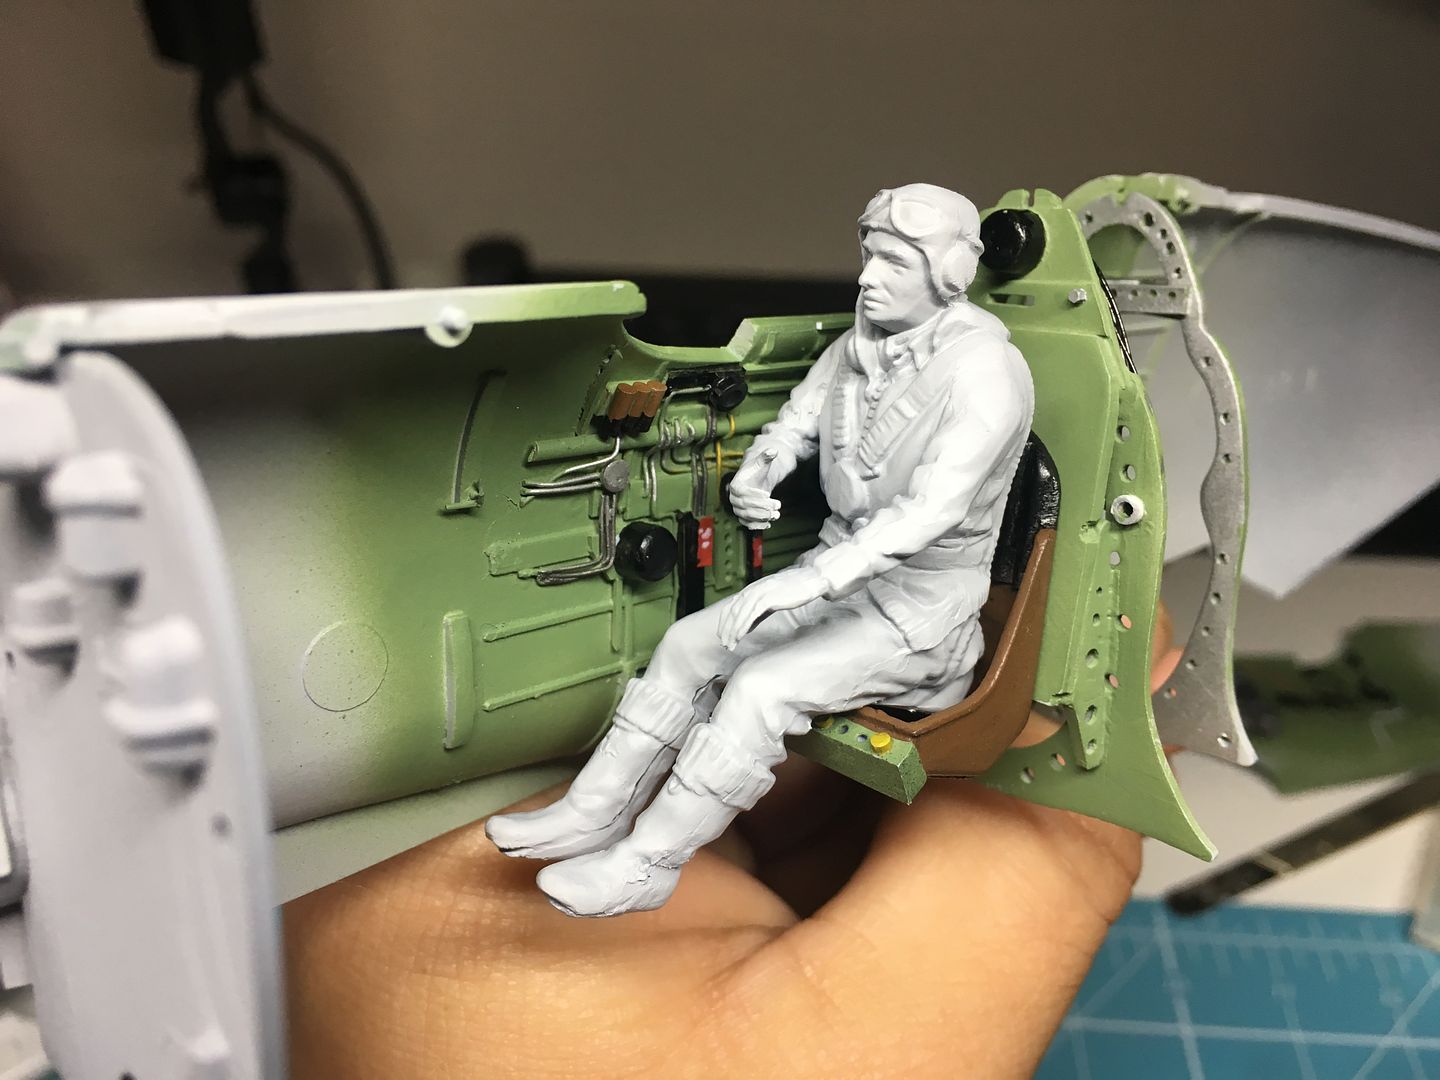
Especially with Ginger in position!
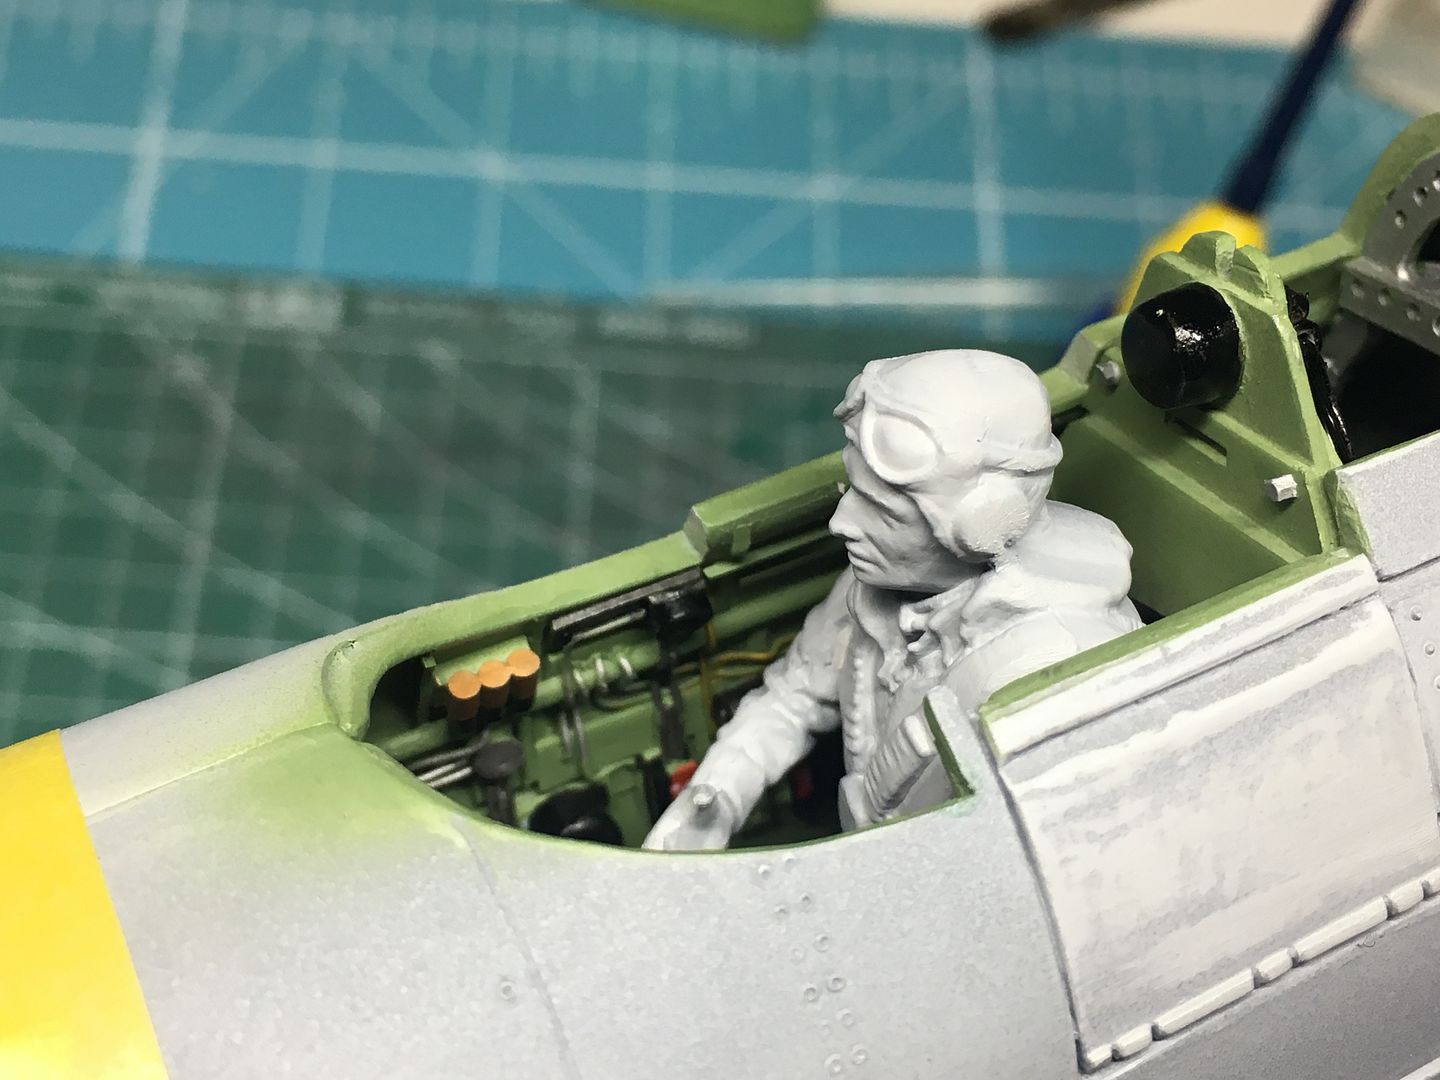
Going to have to cheat Gingers physical appearance a bit to make him hold everything properly...
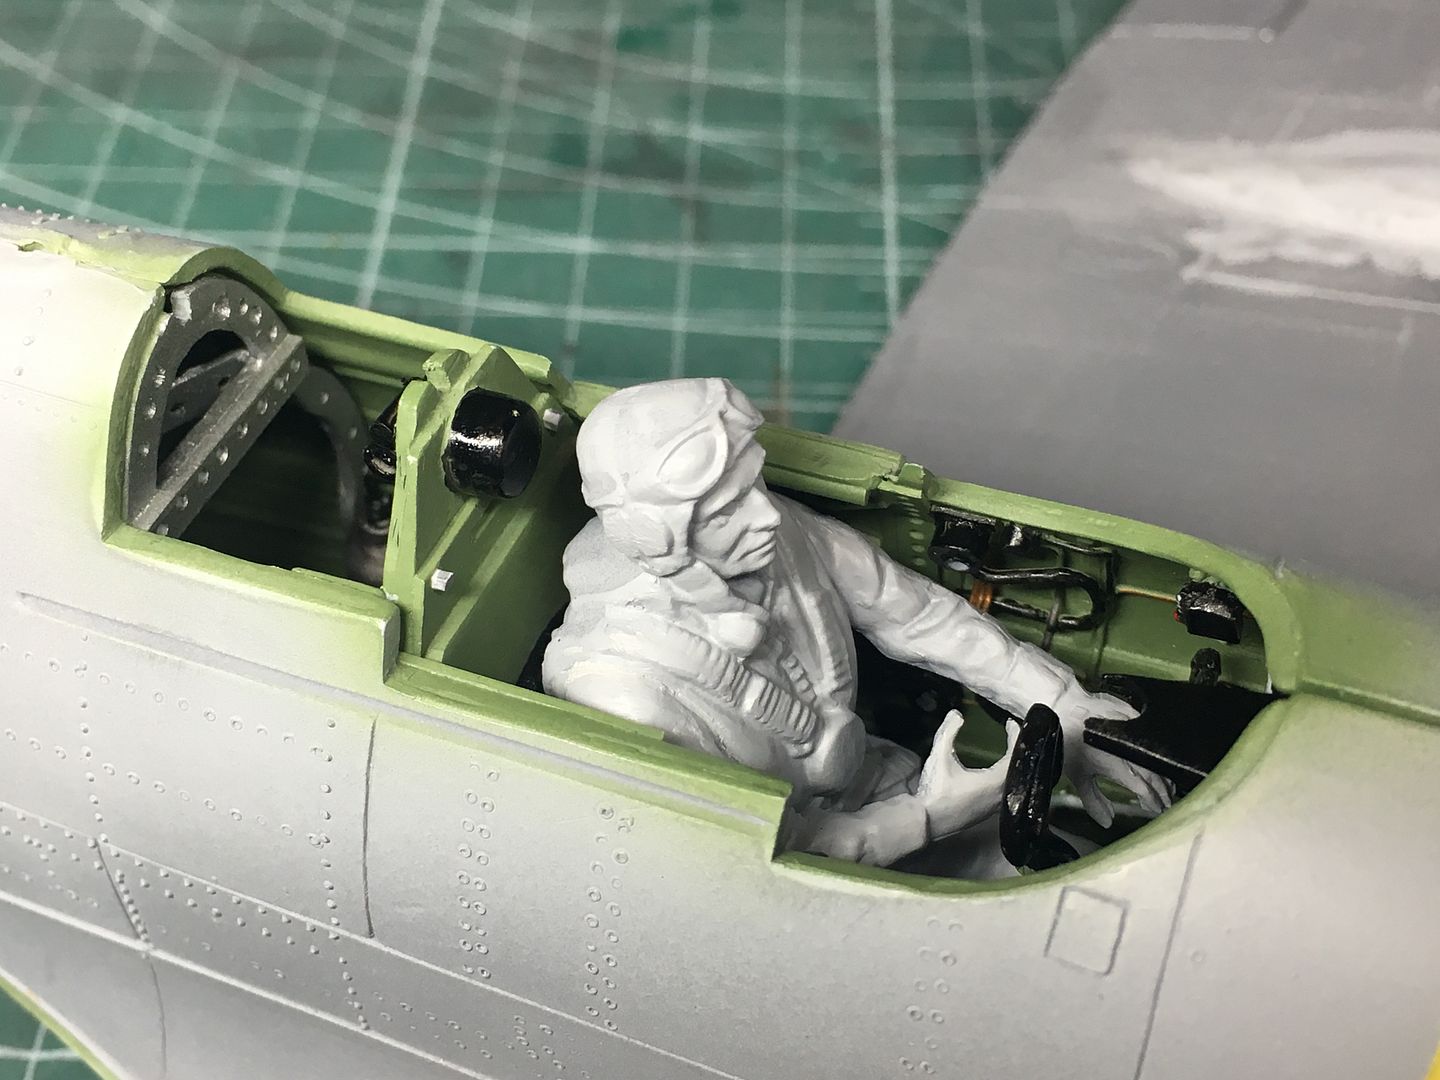
I've also started removing his molded-in harness so I can use the Eduard detail parts I bought - at least the top straps that thread through the bulkhead to attach behind the seat...

Pretty crude - but as I said, won't be seen AT ALL - and i want to finish this model!
I've added a bit of 'padding' - (and obviously painted too early!)
The filler inside is where the pilot part goes -
I painted my 'fake' cockpit details....
...and painted the instrument panel - I managed to get some white onto the clear parts, which have the dials cast in - when assembled with a black background, these actually look ok! (no decals)
A test fit shows how little of any of this you will actually be able to see!!
Especially with Ginger in position!
Going to have to cheat Gingers physical appearance a bit to make him hold everything properly...
I've also started removing his molded-in harness so I can use the Eduard detail parts I bought - at least the top straps that thread through the bulkhead to attach behind the seat...
It's amazing how old and grizzled a 27 year old could look in 1942.
In actual fact, the pilot of RF-D was usually this chap -
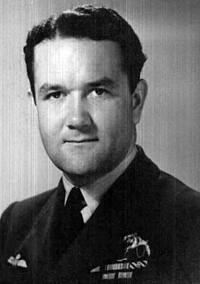
His story is very interesting and rather mysterious - especially how he met his end.
https://en.wikipedia.org/wiki/Jan_Zumbach
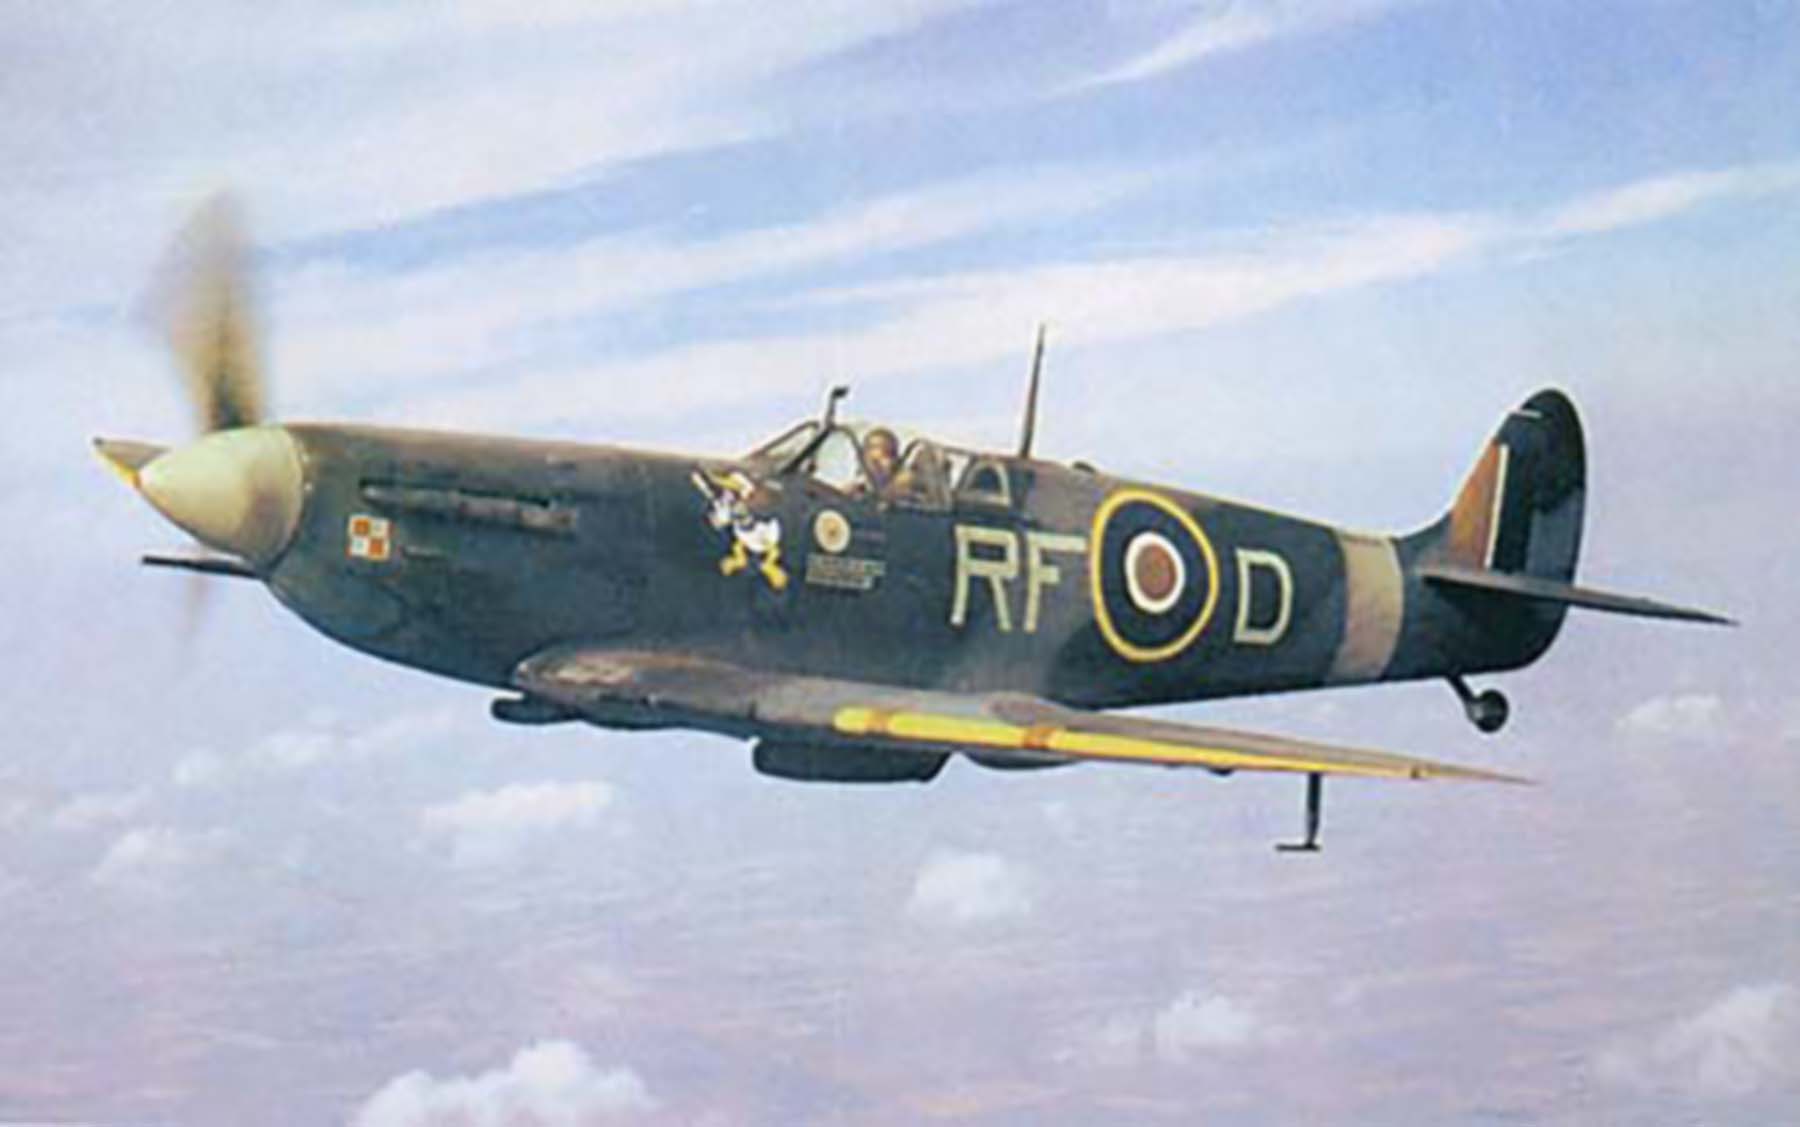
RF-D is a popular choice for kit and decal manufacturers because there is a series of excellent World War 2 period colour pictures of this specific aircraft -
In actual fact, the pilot of RF-D was usually this chap -
His story is very interesting and rather mysterious - especially how he met his end.
https://en.wikipedia.org/wiki/Jan_Zumbach
RF-D is a popular choice for kit and decal manufacturers because there is a series of excellent World War 2 period colour pictures of this specific aircraft -

Gassing Station | Scale Models | Top of Page | What's New | My Stuff