Airfix 1:72 Spitfire Mk 1a
Discussion


tight5 said:
dr_gn said:
tight5 said:
robemcdonald said:
I don’t use Halfords find it’s too easy to go heavy due to it being a larger nozzle. I tend to use Tamiya rattle cans or sometimes the Vallejo polyurethane stuff (although I find it really hard to clean out of the airbrush afterwards)
Why use a rattle can when you have an airbrush ?
I have used Tamiya primer too and it is an excellent product. If the model is a bit more refined, I would tend to use it - if I have it.
Ayahuasca said:
That looks great.
I am not happy with the paint on mine - it seems to dry very gritty, not at all smooth. Any ideas for how to prevent that?
Cheers.I am not happy with the paint on mine - it seems to dry very gritty, not at all smooth. Any ideas for how to prevent that?
I painted mine using an airbrush and that really helps, but I appreciate that is an relatively expensive option. Painting with brushes is never going to get quite the same finish but the quality of the paint used will make a huge difference. Taking time to prepare the surface with some light sanding after a good coat of primer will make a big difference as well.
Regarding paints, I gave up on Humbrol almost straight away as I couldn't get a consistent finish. Tamiya acrylics are miles better and thinned 1:1 with their X-20A thinner will give excellent results even using a brush. Vallejo paints have a great colour range but I have found them more tricky to work with.
Cheers.
I have discovered that a lot of the paint crappiness was down to the paintbrush supplied with the kit. A decent larger flat brush gets a much better finish.
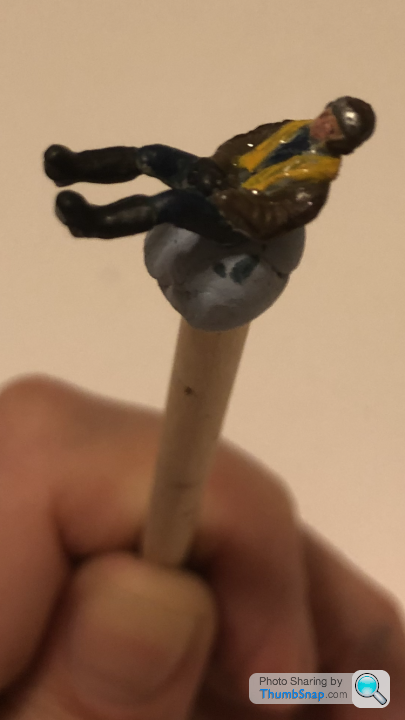
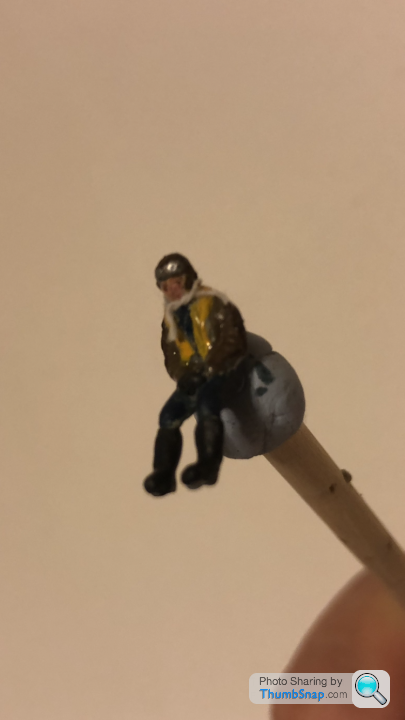
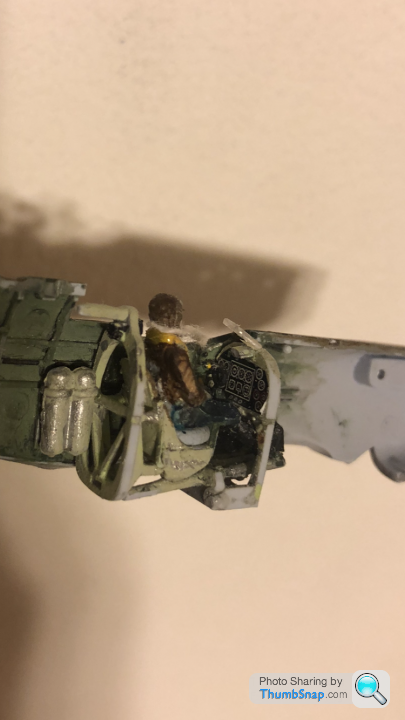
Like others have realised that the pilot does not fit. Loathe to Baderise him, so have moved the rudder pedals forward instead.
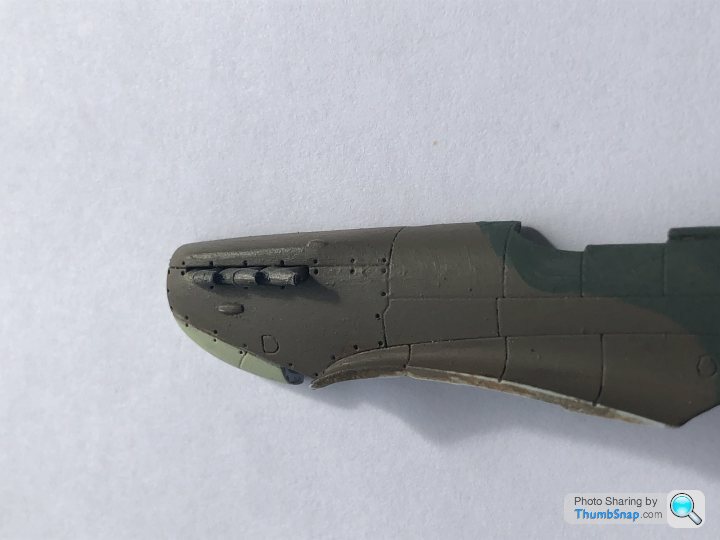
Little spots of black paint on the ends of the exhaust stubs give the illusion - from a distance - of hollow tubes.
I have discovered that a lot of the paint crappiness was down to the paintbrush supplied with the kit. A decent larger flat brush gets a much better finish.
Like others have realised that the pilot does not fit. Loathe to Baderise him, so have moved the rudder pedals forward instead.
Little spots of black paint on the ends of the exhaust stubs give the illusion - from a distance - of hollow tubes.
Edited by Ayahuasca on Wednesday 23 January 20:37

Ayahuasca said:
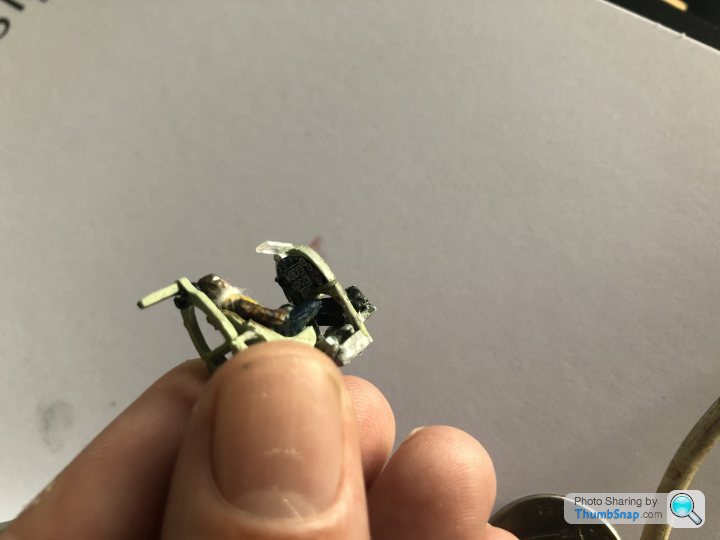
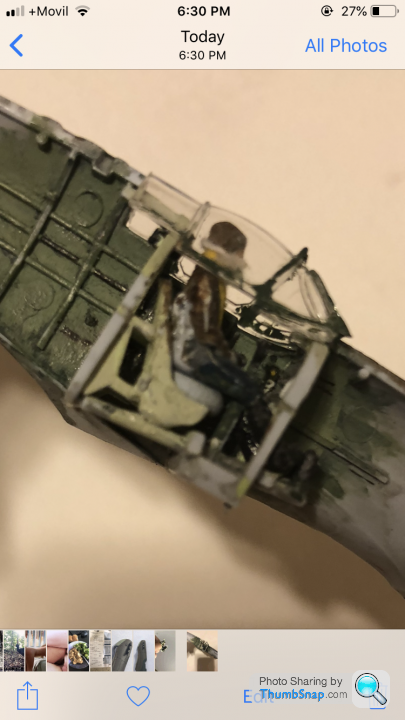
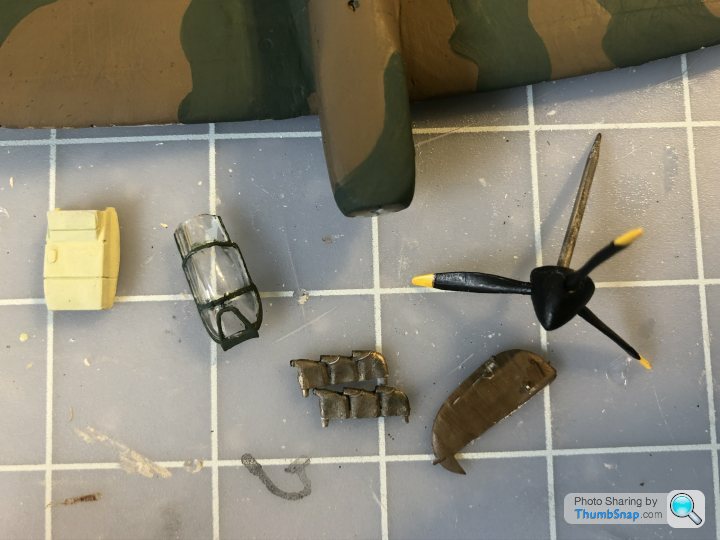
Cockpit. Bit of spue to represent the gunsight. Not happy with the pilot’s position - he is too low down in his seat. I noticed this with some of the other builds pictured too. Real Spit pilots sat a lot higher. Still.
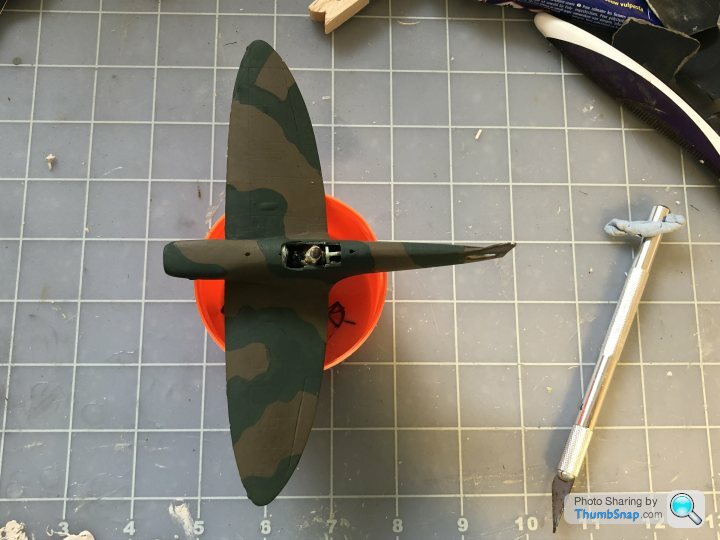
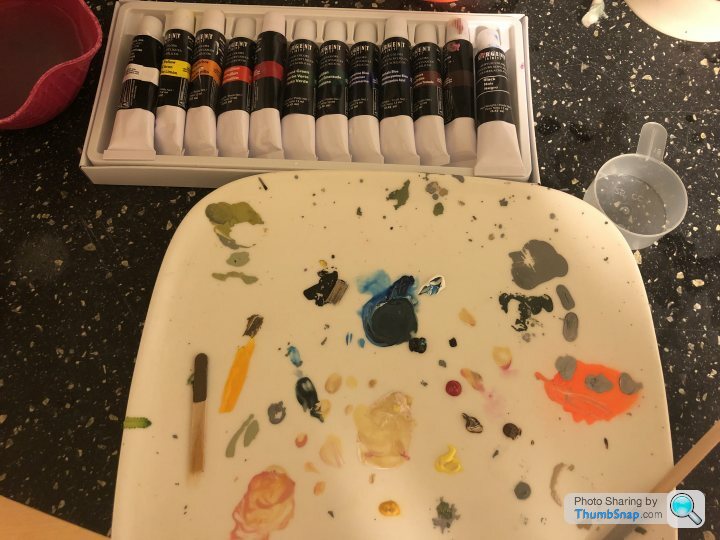
Beginning to look a bit like a Spitfire. A bit of filler and sanding needed on the engine coweling, behind the cockpit and the wing roots. Covered the whole thing in brown then sanded a bit to get worst brush marks out, then on went the green. The prop shaft snapped off so using a long steel shaft - which has the advantage that I don’t need to fit the prop until later, and it will still spin. Never used filler or sandpaper on a model before. Never used varnishes either so will see how that goes.
dr_gn said:
How come you left off the tail planes and rudder? It’s best to fix them and deal with any gaps before painting.
Yep, I suspect you are right. Left them off to faciltate painting the fuselage. Need all the room I can get to sand brush marks off. Actually that is half lie - the rudder actually dropped off during manhandling!Ayahuasca said:
dr_gn said:
How come you left off the tail planes and rudder? It’s best to fix them and deal with any gaps before painting.
Yep, I suspect you are right. Left them off to faciltate painting the fuselage. Need all the room I can get to sand brush marks off. Actually that is half lie - the rudder actually dropped off during manhandling!Yeah, sanding brush marks off, you are entering a vicious circle.
Next time just add some proper thinners to your paint, that would be the cheapest way to improve the paint a bit.
Then if you want better still go with a better brush and then paints if you like.
If you plan on doing lots more models, these will all be investments and will improve your models over time.
Before long you'll be looking at an airbrush lol
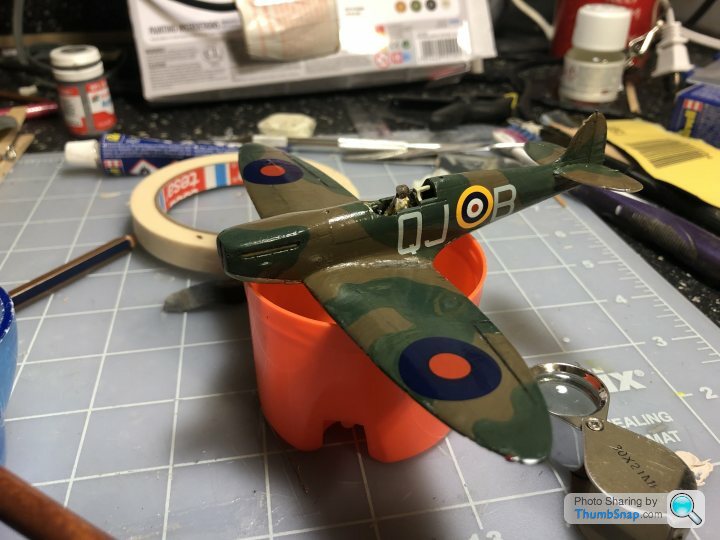
Quite like the gloss look! Everyone suggesting Vallejo paints and airbrushes etc - yes but I am building this in darkest Central America and the nearest model shop is thousands of miles away. Gotta make do with what I have. Don’t have any decal solution but I read that its principle ingredient is white vinagar so used that. Not sure it worked. Next task: see if masking tape coloured with felt tip will work as the gun covers.
Gassing Station | Scale Models | Top of Page | What's New | My Stuff