The thread where we can talk about painting figures
Discussion


Well (a couple of) you asked for it.
So I’ll lay out a step by painful step guide as to how I paint my figures.
My method is quick and easy enough that anyone can do it. It won’t stand up against the artisans, but is good enough to add a bit of life to a build.
When it’s done. I’m happy to give (and take) advice on any projects you have and feel free to add your own “builds”
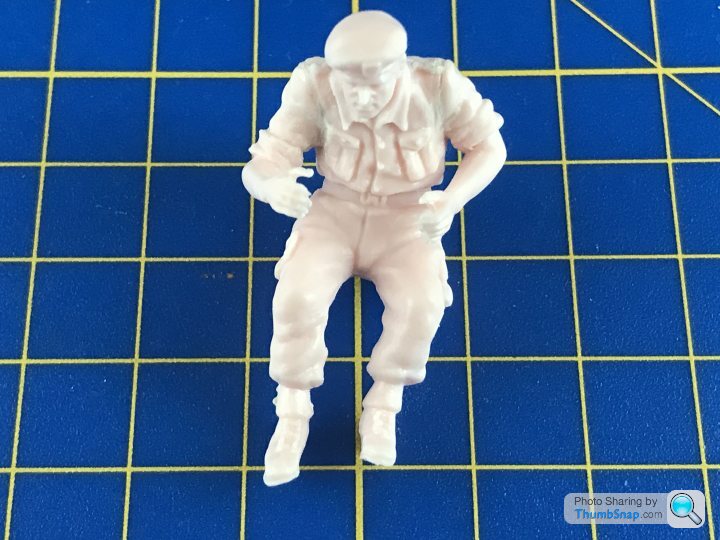
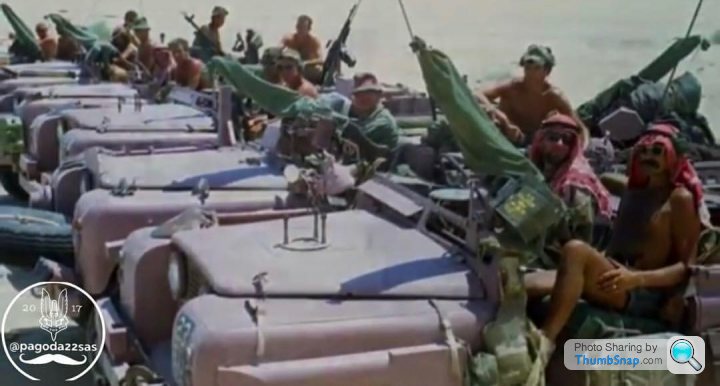
For the demonstration I have liberated an old kit from my stash.

As you might expect the first step is removing the parts from the sprue.
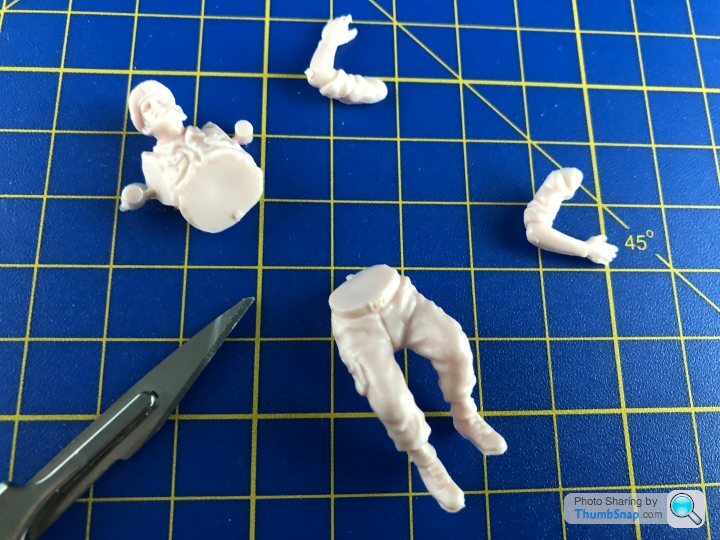
I hadn’t really looked in the box before and was actually pleasantly surprised by how nice the mouldings still are. Some clean up is going to be required. I use a #11 blade.
More later....
So I’ll lay out a step by painful step guide as to how I paint my figures.
My method is quick and easy enough that anyone can do it. It won’t stand up against the artisans, but is good enough to add a bit of life to a build.
When it’s done. I’m happy to give (and take) advice on any projects you have and feel free to add your own “builds”
For the demonstration I have liberated an old kit from my stash.
As you might expect the first step is removing the parts from the sprue.
I hadn’t really looked in the box before and was actually pleasantly surprised by how nice the mouldings still are. Some clean up is going to be required. I use a #11 blade.
More later....
Edited by robemcdonald on Wednesday 27th February 20:11
Don’t panic! We can rebuild him.
Step 2. Clean him up a bit. I used 1000 grit Tamiya sanding sponge in addition to the #11 blade.
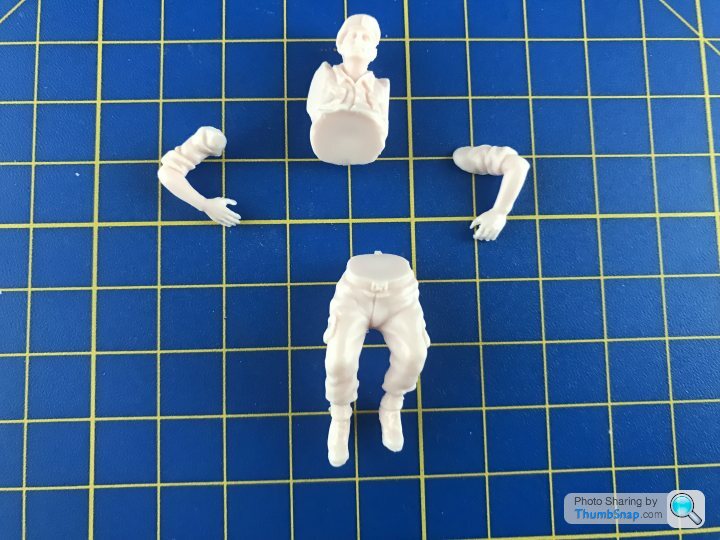
Step 3. Assembly using the normal Tamiya fine liquid poly.
Step 4. A little filler was required.
Step 5. I put a pit of the cement over the filler to smooth it out a bit. My filler is solvent based so it works. I know some are water based, so you’d use water...
Step 6. Prime. I used the MIG one shot. I like this as you can actually clean it out of the airbrush unlike the Vallejo stuff.
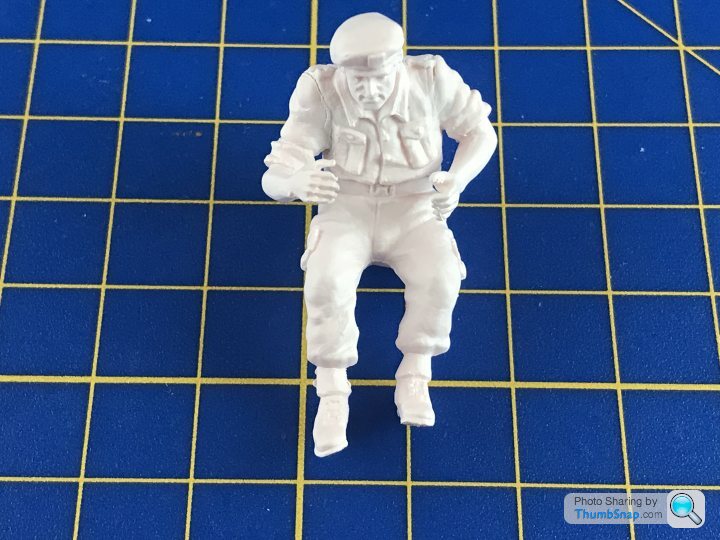
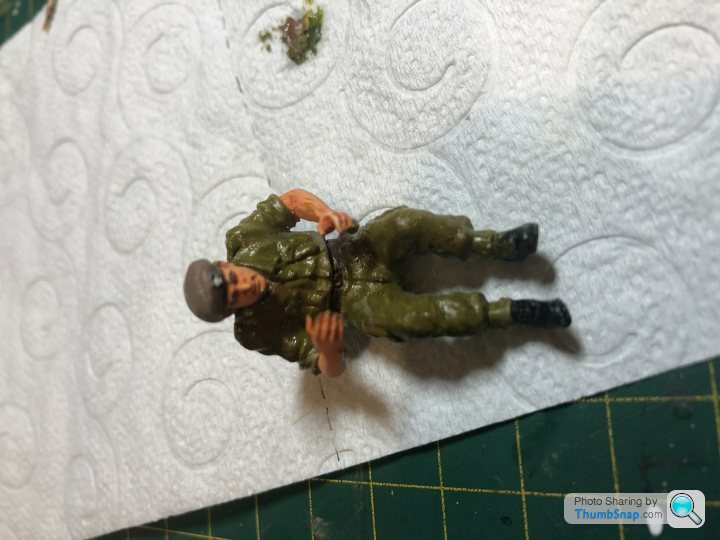
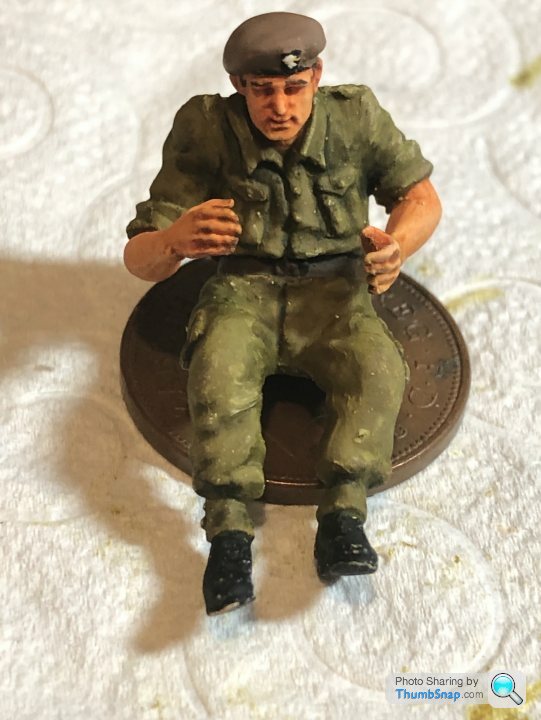
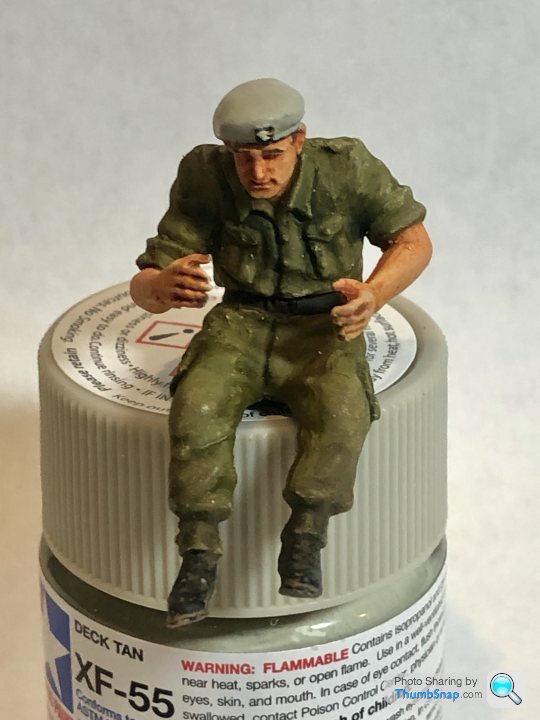
Step 7. I painted the whole figure XF-15 flat flesh. I know it’s over kill, but I wanted a nice opaque coat. And,when applying several light coats it’s easier to paint the whole thing.

Tomorrow it will be uniform colours.
If you have any questions or comments let me know. Happy for criticism too, but wait until he is finished before you let me have it.
Step 2. Clean him up a bit. I used 1000 grit Tamiya sanding sponge in addition to the #11 blade.
Step 3. Assembly using the normal Tamiya fine liquid poly.
Step 4. A little filler was required.
Step 5. I put a pit of the cement over the filler to smooth it out a bit. My filler is solvent based so it works. I know some are water based, so you’d use water...
Step 6. Prime. I used the MIG one shot. I like this as you can actually clean it out of the airbrush unlike the Vallejo stuff.
Step 7. I painted the whole figure XF-15 flat flesh. I know it’s over kill, but I wanted a nice opaque coat. And,when applying several light coats it’s easier to paint the whole thing.
Tomorrow it will be uniform colours.
If you have any questions or comments let me know. Happy for criticism too, but wait until he is finished before you let me have it.
I forgot to say why I painted the flesh colour first. Basically it’s because it’s the colour you want to have the thinnest and flattest coat of, so it makes sense to apply it with the airbrush. I use acrylic paints for the base colours and these can actually dry out during application if you aren’t careful. I want my figures to have a smooth complexion.
If you look at the figure I completely brush painted below you’ll see what I mean.

If you look at the figure I completely brush painted below you’ll see what I mean.
I’ve not been feeling too well this week, so for the most part modelling has been a bit slow. (Quick get the violins out)
Anyway I forced myself to do half an hour on Sargent Clarke yesterday evening.
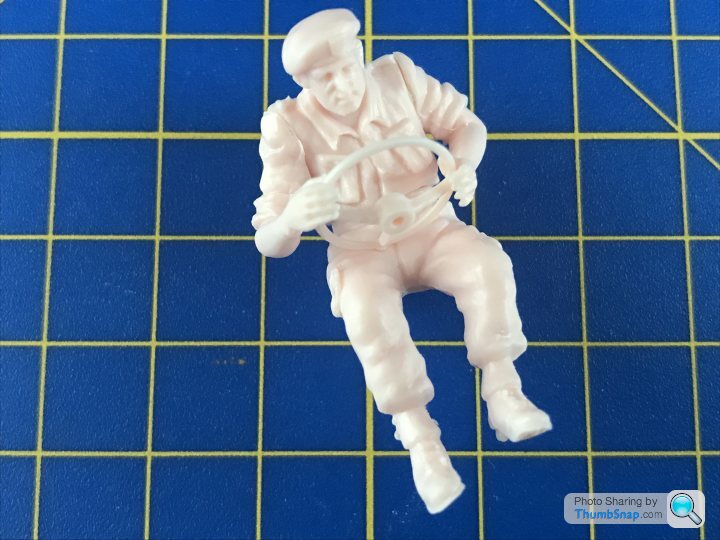
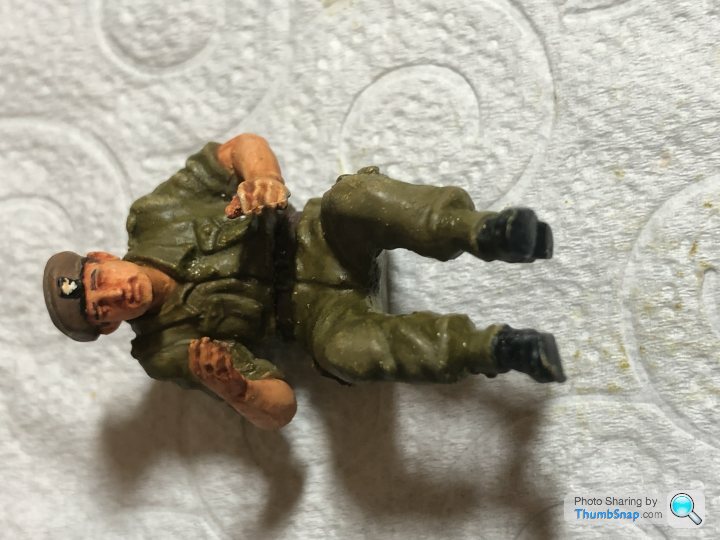
Basic uniform colours using Tamiya acrylics
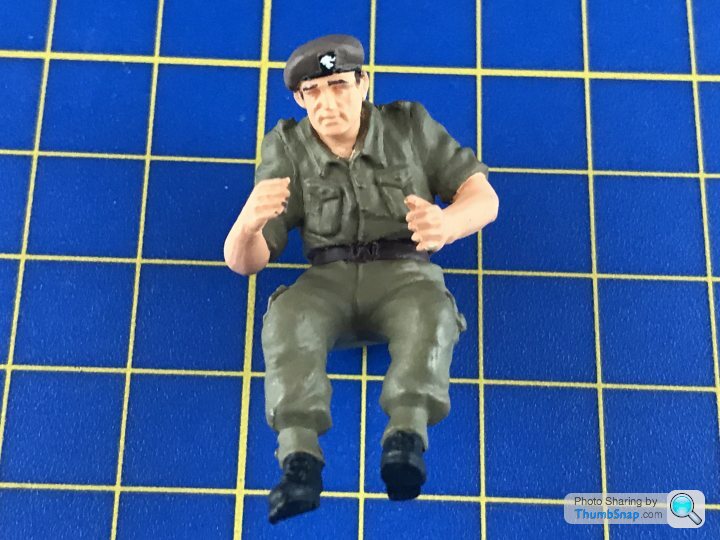
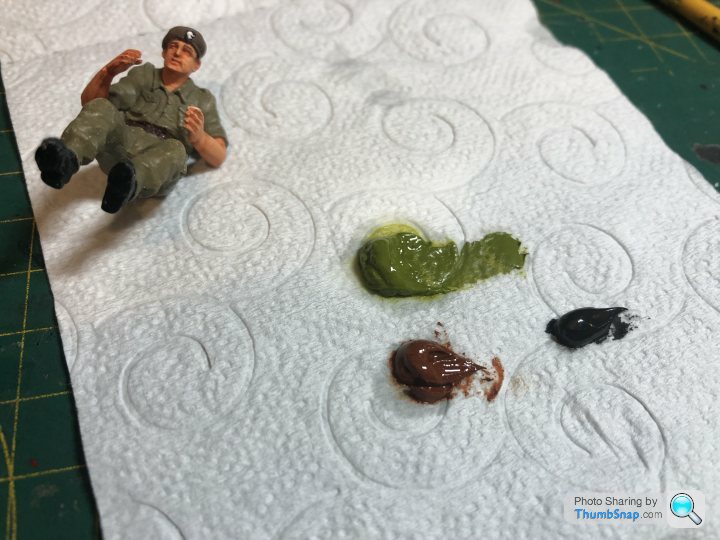
Then I applied an oil wash to the skin areas. The oil paint is thinned with lighter fluid. It drys almost instantly and adding a little more fluid on a brush reactivates it.

It’s a bit of a rinse and repeat process; brush in lighter fluid, apply to figure, wipe excess off brush on paper towel and start again. Keep going until you get the effect as you want it.
When you’re happy with that move on to the uniform. I mixed up a slightly darker shade to the acrylic base.
And then applied it all over the uniform area.
And again it’s the same process of thinning the coat down with lighter fluid and removing the excess wash.
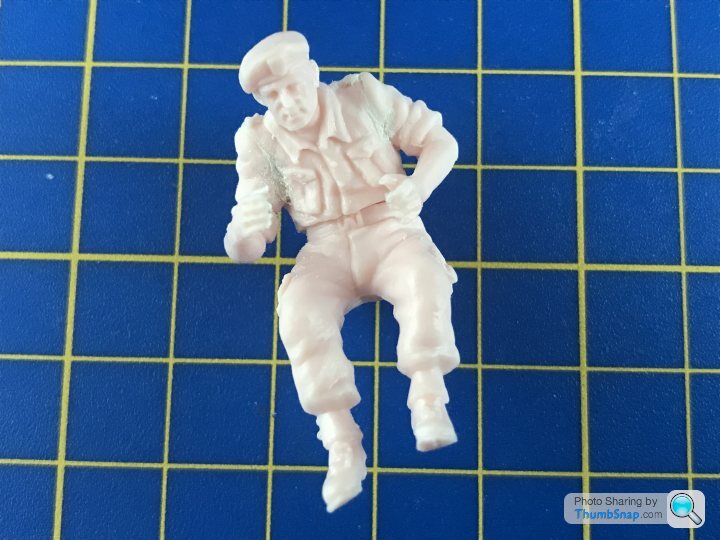
Next I use some white oil and highlight the high areas (only the smallest amount is needed)
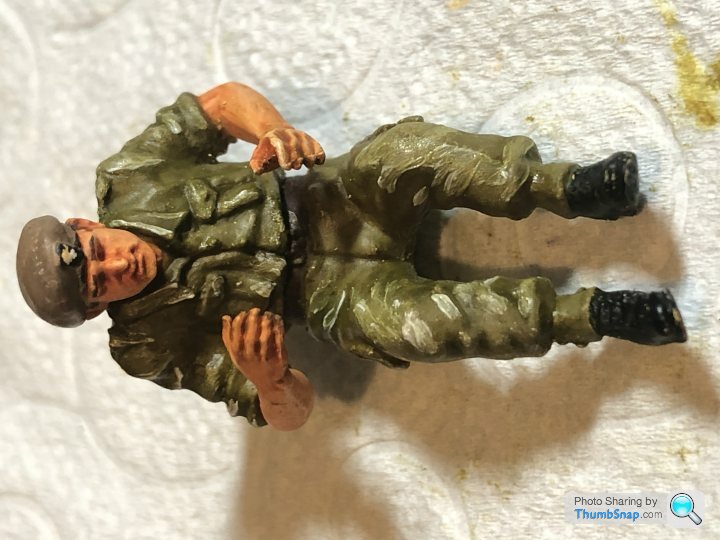
I think you probably can guess what you do next...
Same thing with a tiny amount of black for shadows.
And once you’ve washed most of the oil away with lighter fluid to get the severity of look you want.
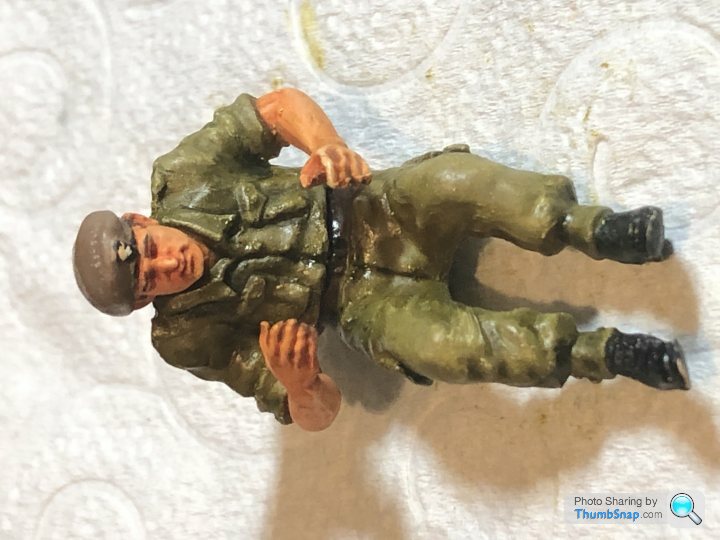
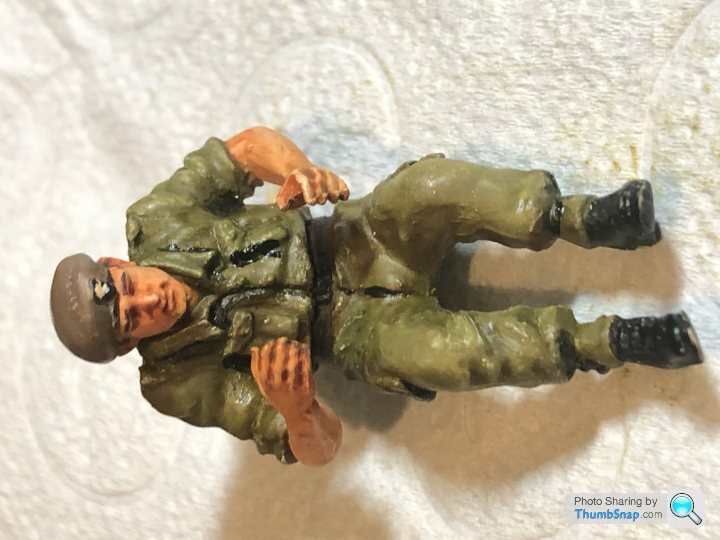
You can seal everything in with a flat clear coat.
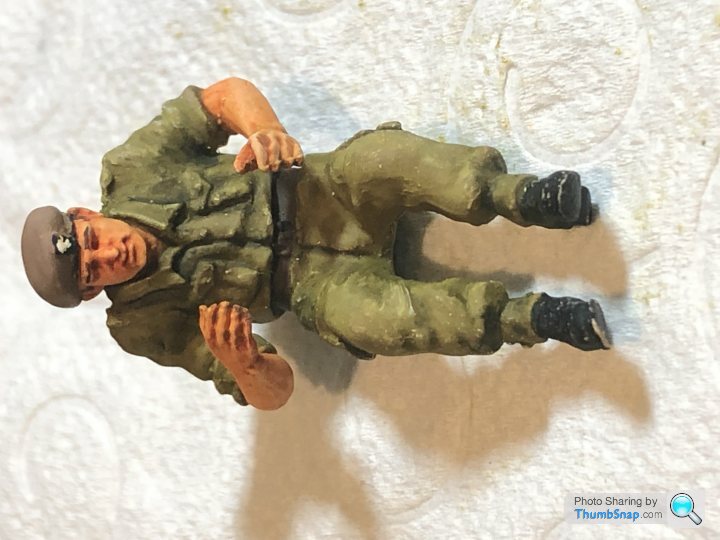
That’s pretty much it. It took around 45 minutes from start to finish. There are a few finishing touches I will add later today.
Anyway I forced myself to do half an hour on Sargent Clarke yesterday evening.
Basic uniform colours using Tamiya acrylics
Then I applied an oil wash to the skin areas. The oil paint is thinned with lighter fluid. It drys almost instantly and adding a little more fluid on a brush reactivates it.
It’s a bit of a rinse and repeat process; brush in lighter fluid, apply to figure, wipe excess off brush on paper towel and start again. Keep going until you get the effect as you want it.
When you’re happy with that move on to the uniform. I mixed up a slightly darker shade to the acrylic base.
And then applied it all over the uniform area.
And again it’s the same process of thinning the coat down with lighter fluid and removing the excess wash.
Next I use some white oil and highlight the high areas (only the smallest amount is needed)
I think you probably can guess what you do next...
Same thing with a tiny amount of black for shadows.
And once you’ve washed most of the oil away with lighter fluid to get the severity of look you want.
You can seal everything in with a flat clear coat.
That’s pretty much it. It took around 45 minutes from start to finish. There are a few finishing touches I will add later today.

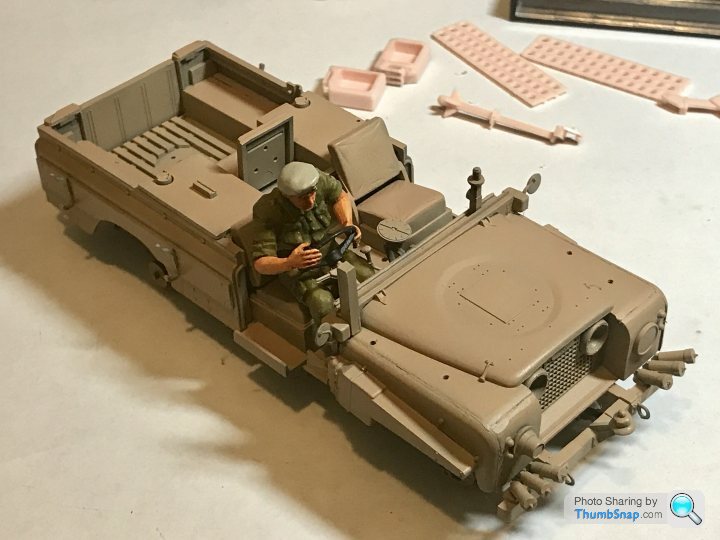
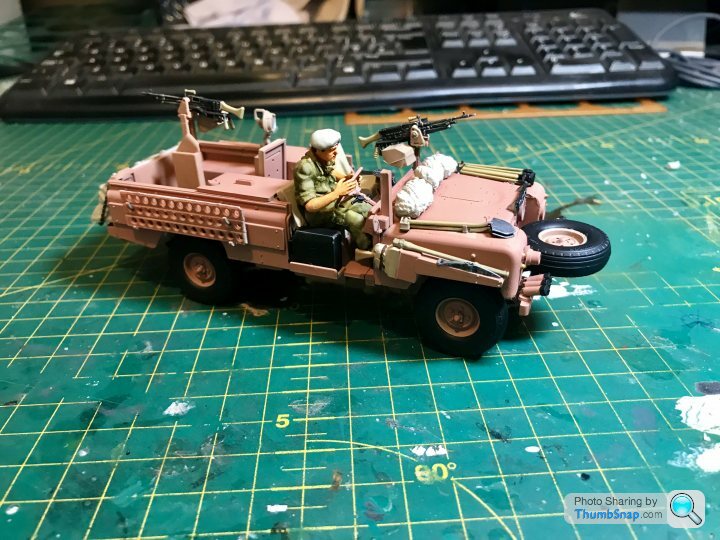
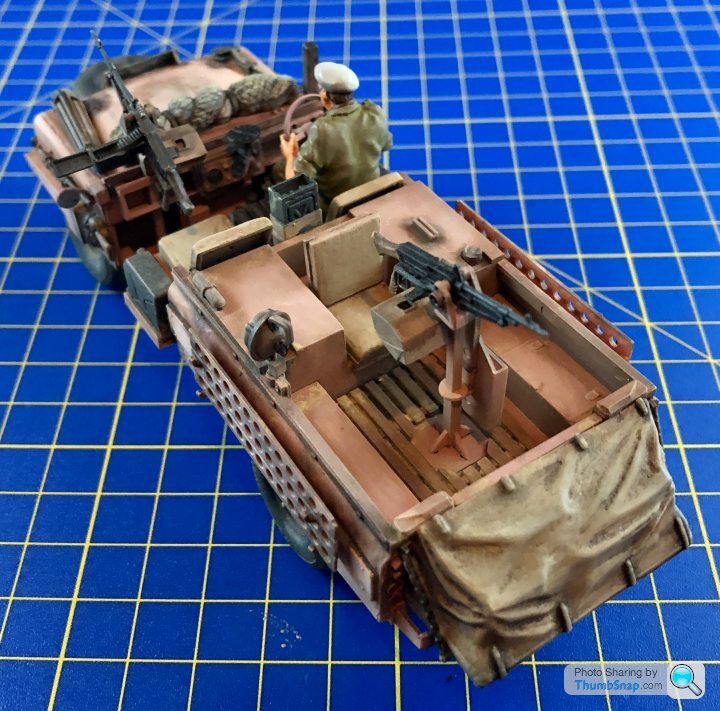
Turns out extracolour desert pink isn’t really that pink.
I mixed up my own version.
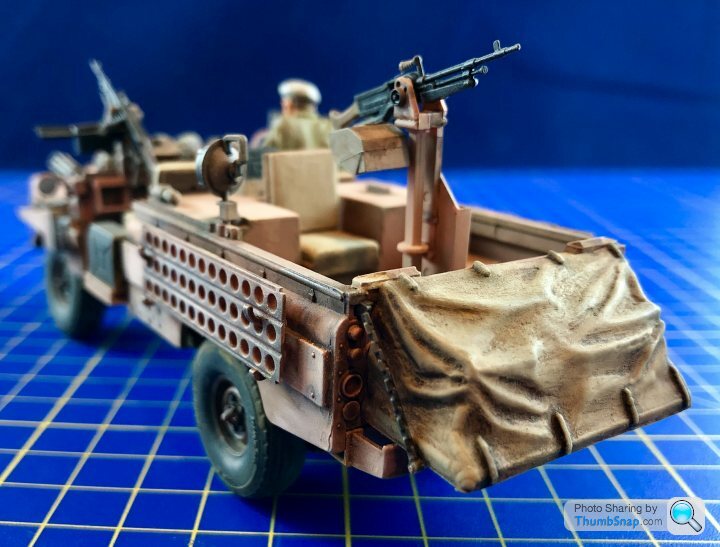
Painted some of the details and the wooden bed in the back.

Wheels and tyres are painted too. I’m going to chuck it together and weather the hell out of it.
The only problem is I haven’t got anywhere to put it when it’s done...
I mixed up my own version.
Painted some of the details and the wooden bed in the back.
Wheels and tyres are painted too. I’m going to chuck it together and weather the hell out of it.
The only problem is I haven’t got anywhere to put it when it’s done...
Thanks for the comments.
For the flesh colour I use Tamiya XF15 Flat Flesh as the base and burnt sienna oil paint for the wash.
I made a little bit of progress tonight, but I am retiring early due to what I am reliably informed is “man flu”
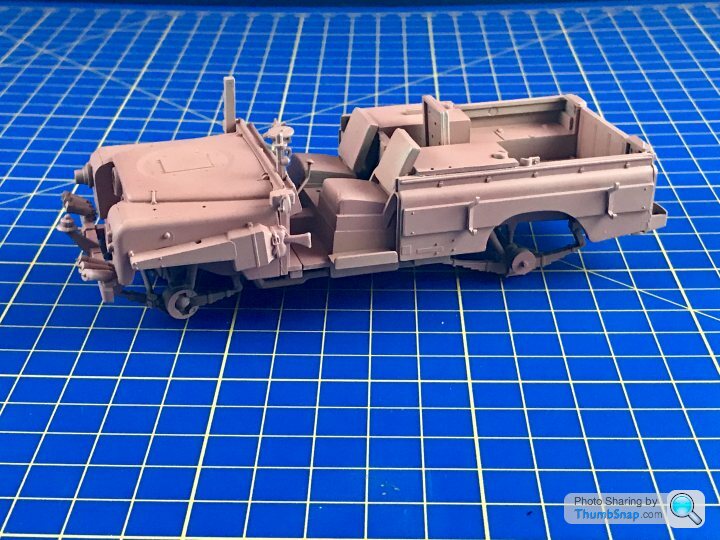
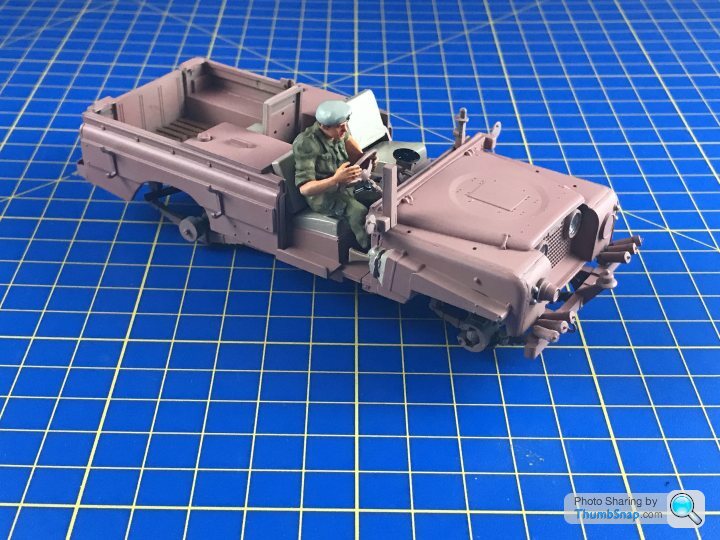
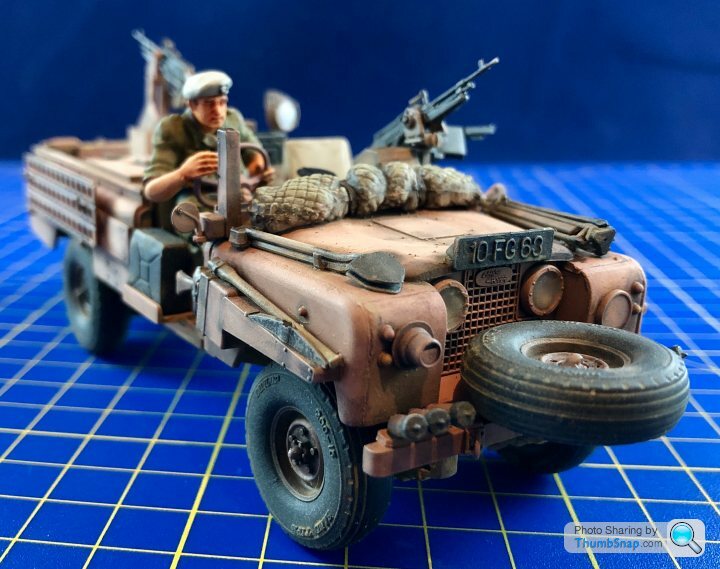
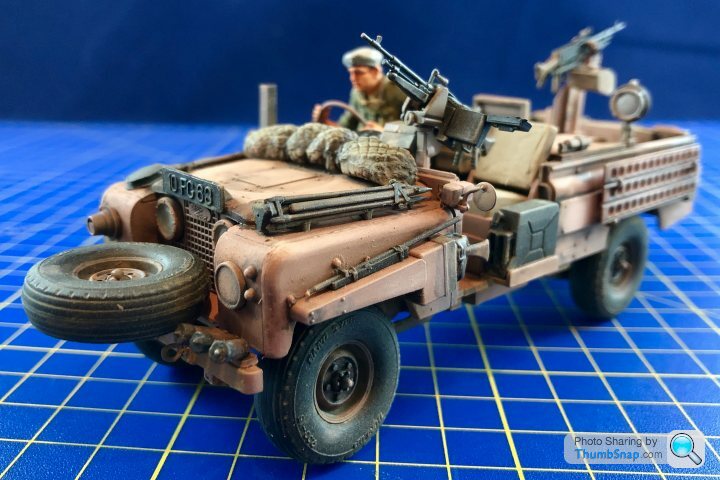
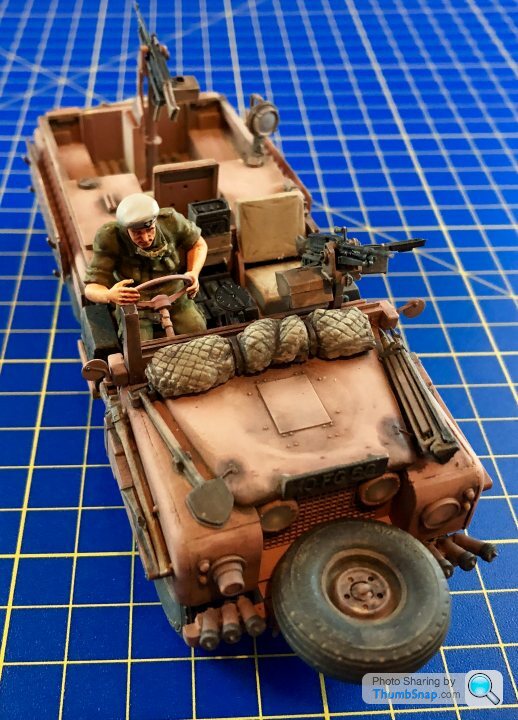
Anyway. For an old kit it’s still pretty nice. One obvious development between this kits initial release and the modern age is the inclusion (or lack of) clear parts. Marker lights and indicators are just moulded onto the body. The headlights do have lenses, but they are the same pink styrene as the rest of the kit.
I painted all the lights with my Molotow chrome marker. For the markers and indicators I used Tamiya clear colours. For the headlights I filled the bowls with canopy cement. It should eventually dry clear.
I also gave Nobby a set of goggles. Again these were plain cut out the lenses and once again used canopy cement to give me clear glass.

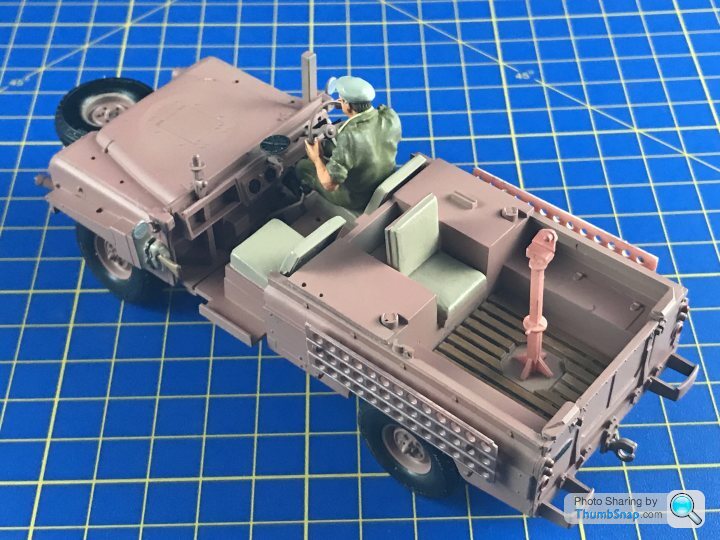
I’ve started painting remaining tools, stowage and armaments on the sprues. I’ll let them dry overnight and fit them in the morning.
For the flesh colour I use Tamiya XF15 Flat Flesh as the base and burnt sienna oil paint for the wash.
I made a little bit of progress tonight, but I am retiring early due to what I am reliably informed is “man flu”
Anyway. For an old kit it’s still pretty nice. One obvious development between this kits initial release and the modern age is the inclusion (or lack of) clear parts. Marker lights and indicators are just moulded onto the body. The headlights do have lenses, but they are the same pink styrene as the rest of the kit.
I painted all the lights with my Molotow chrome marker. For the markers and indicators I used Tamiya clear colours. For the headlights I filled the bowls with canopy cement. It should eventually dry clear.
I also gave Nobby a set of goggles. Again these were plain cut out the lenses and once again used canopy cement to give me clear glass.
I’ve started painting remaining tools, stowage and armaments on the sprues. I’ll let them dry overnight and fit them in the morning.

Gassing Station | Scale Models | Top of Page | What's New | My Stuff