FORD GT40 MKII 1/12TH TRUMPETER
Discussion


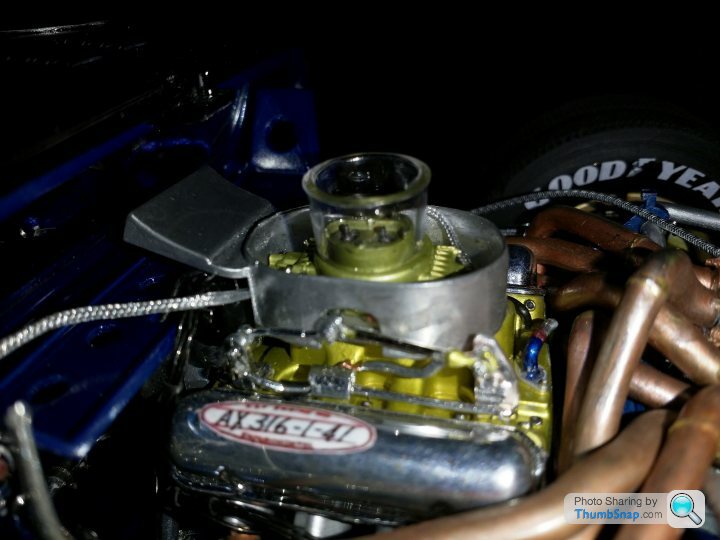
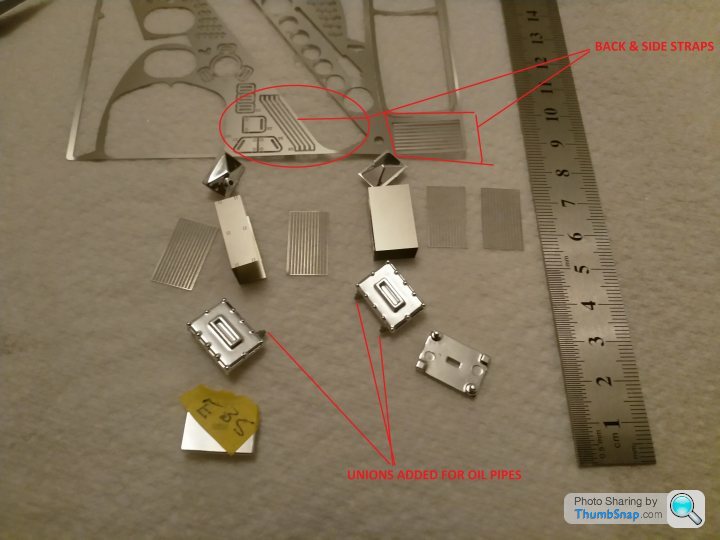
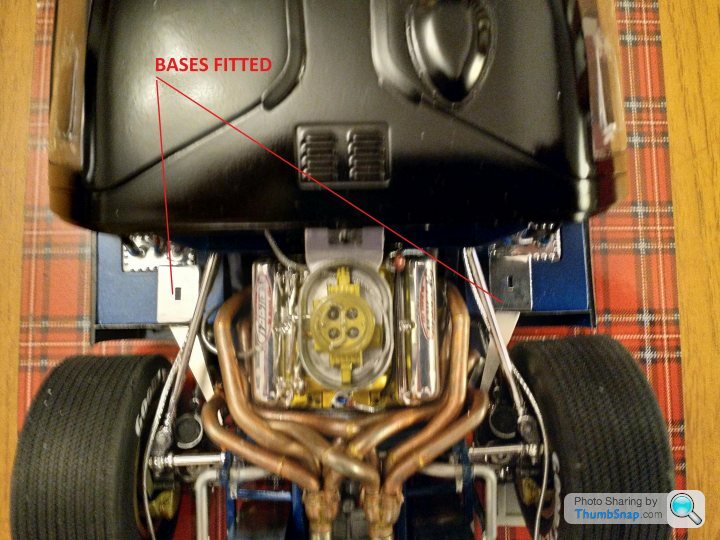
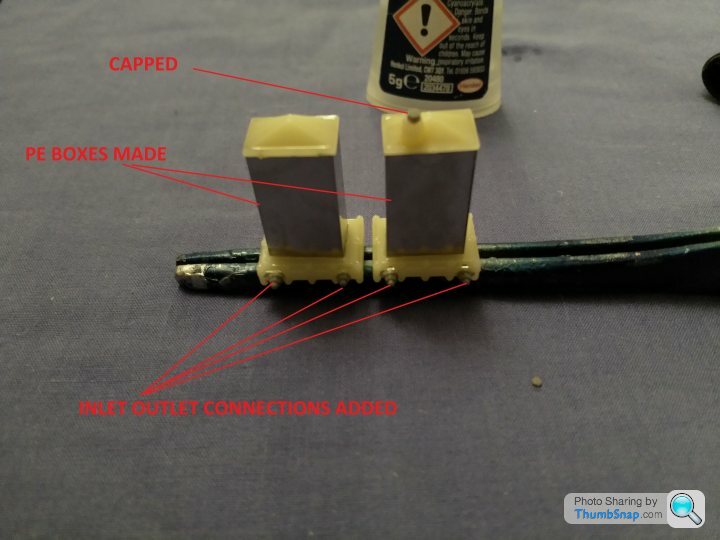
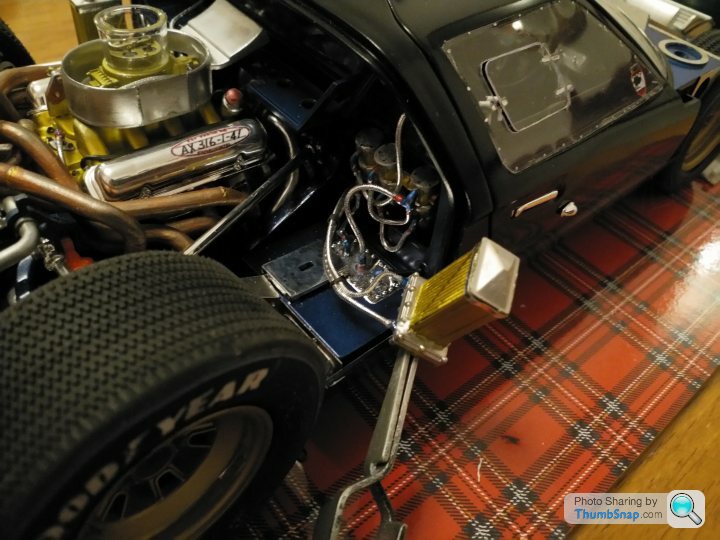
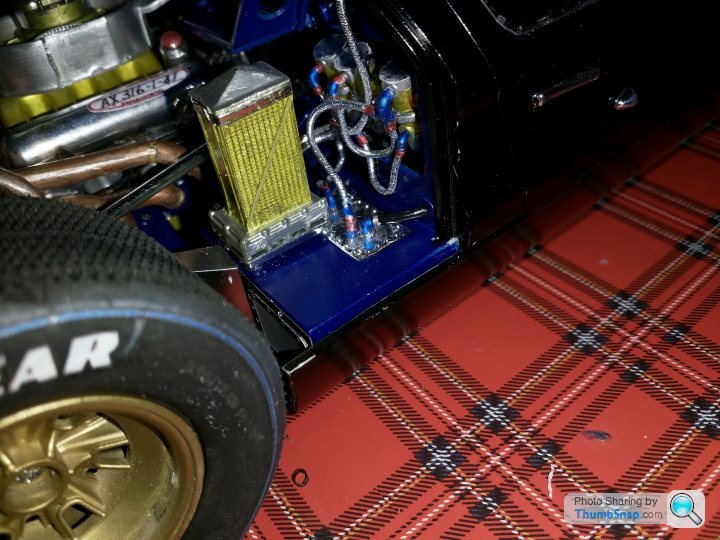
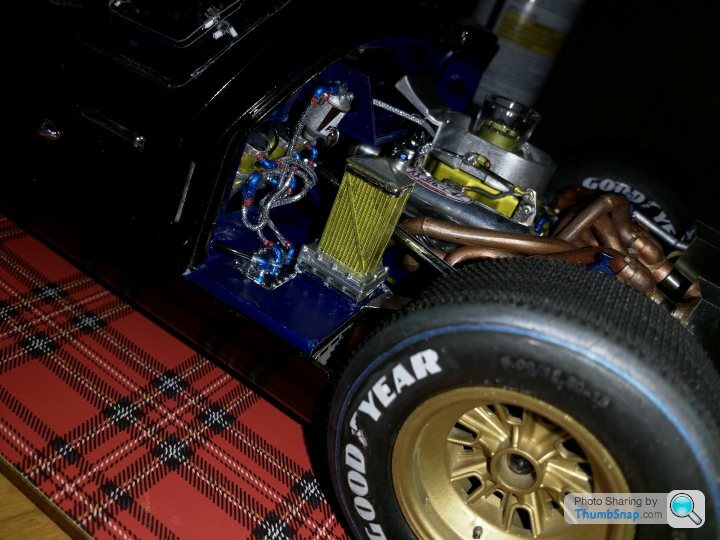
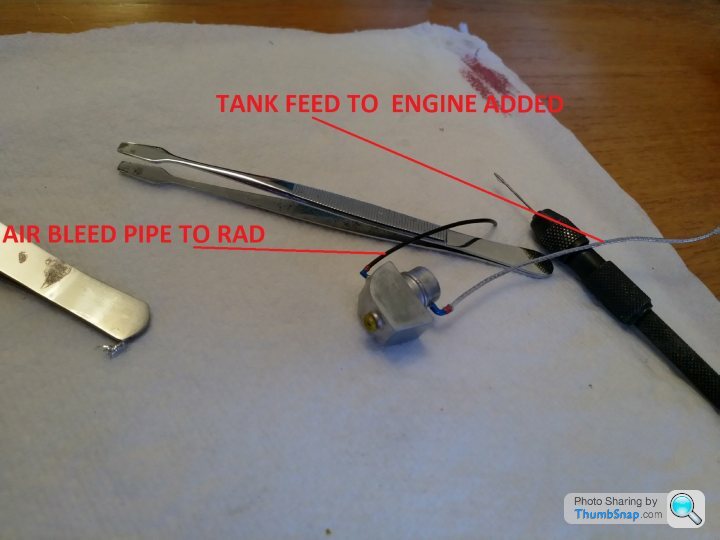
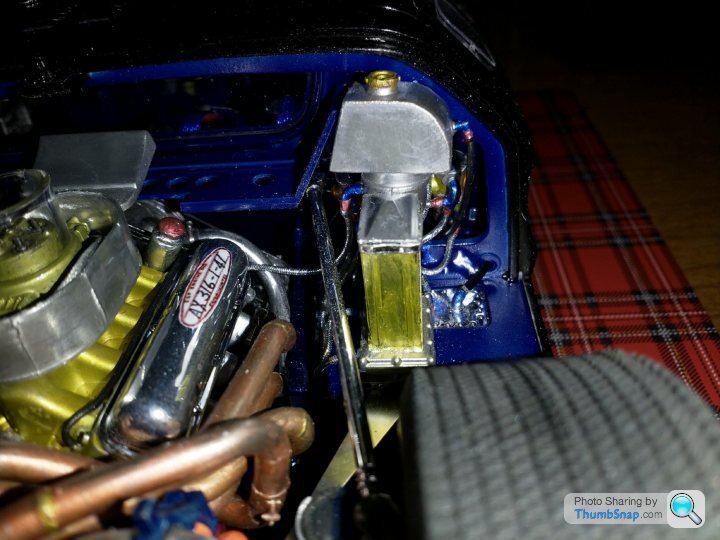
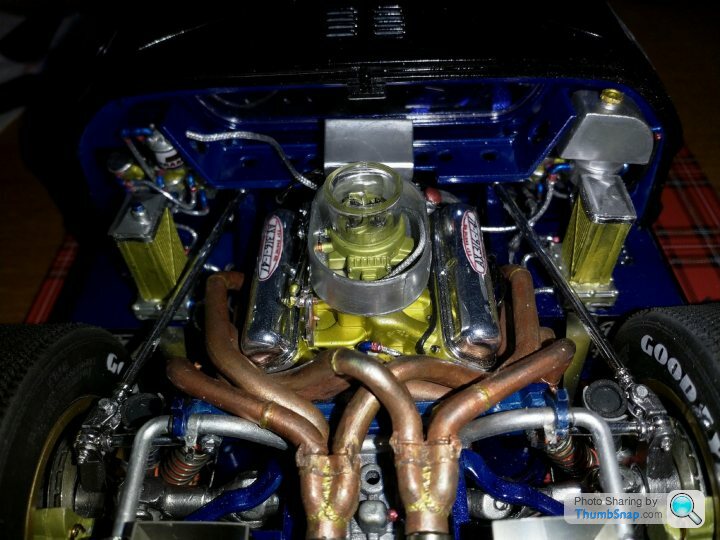
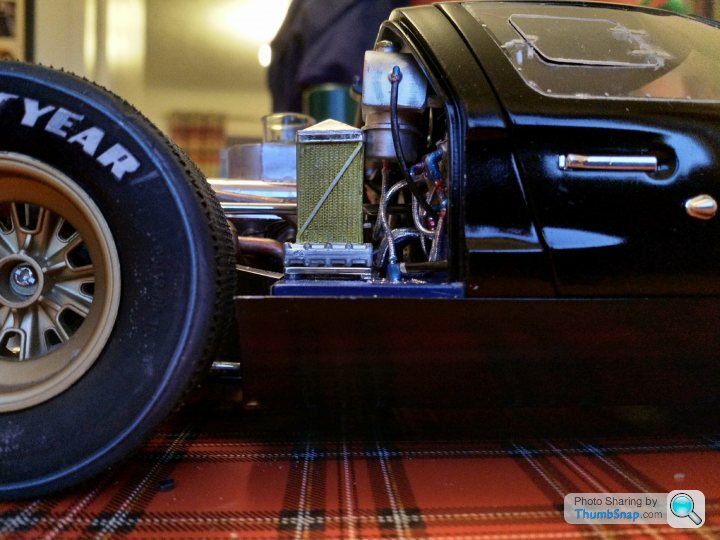
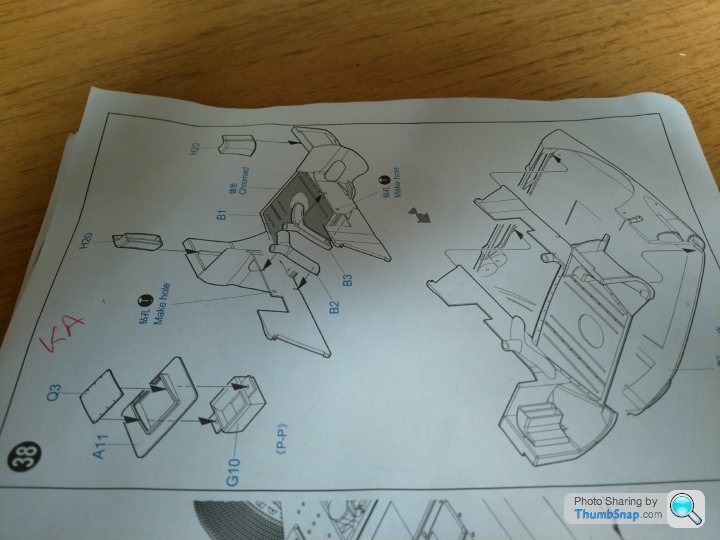
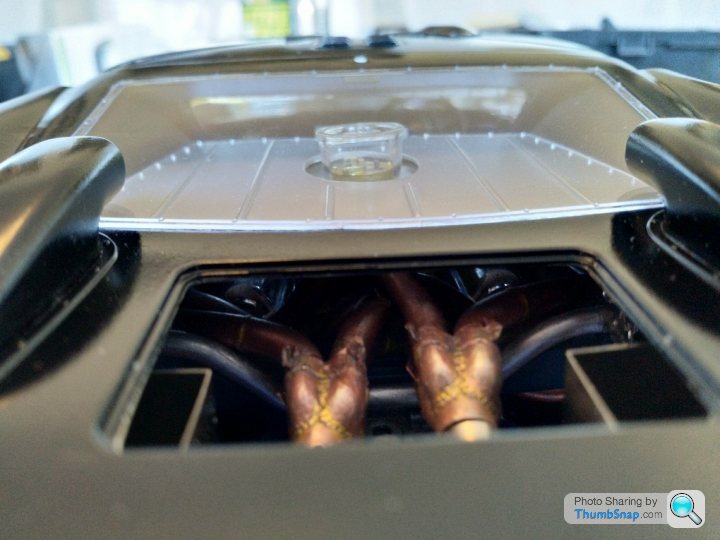
Other side completed, also the throttle linkages and now making up the oil coolers. Using the bases and tops from the kit and leaving the chrome on but using the KA PE parts to build up the radiator cores. Ive also added unions to the bases to be able to run inlet and outlet oil pipes.Also need to touch up the carbs before i go any further
Some photos.
 .
.
 .
.
 .
.
 .
.
Cheers
Some photos.
....Cheers
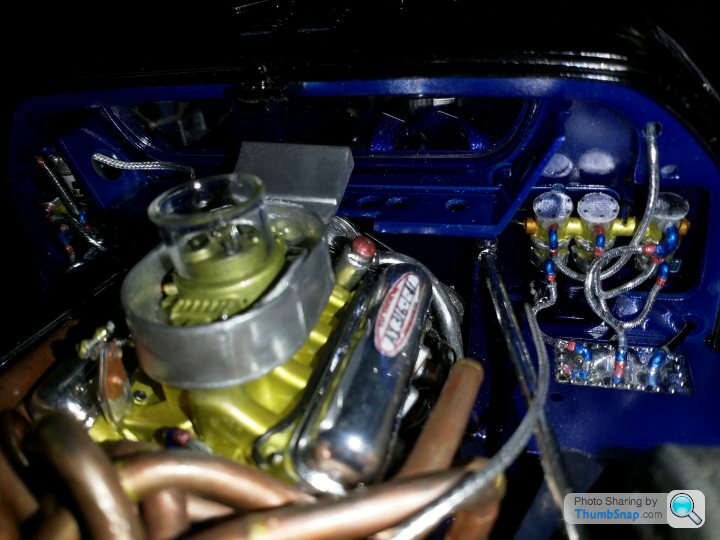
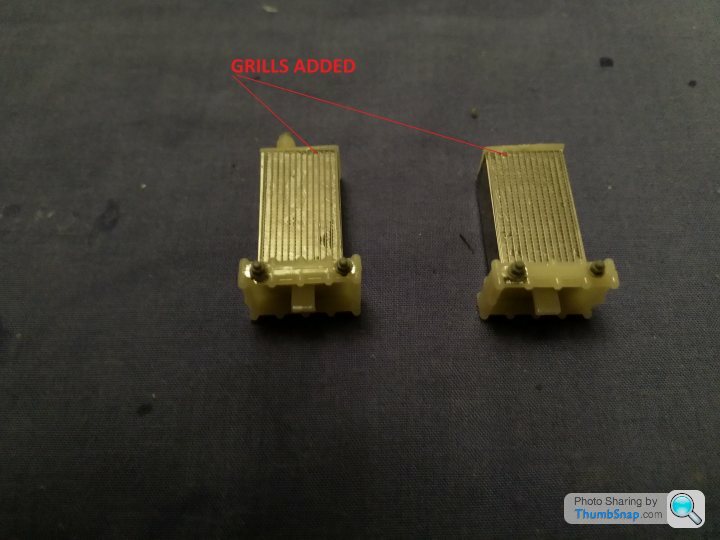
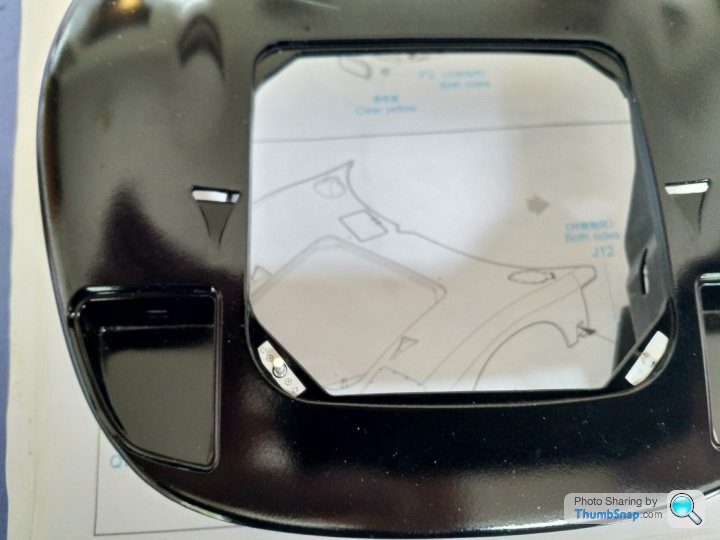
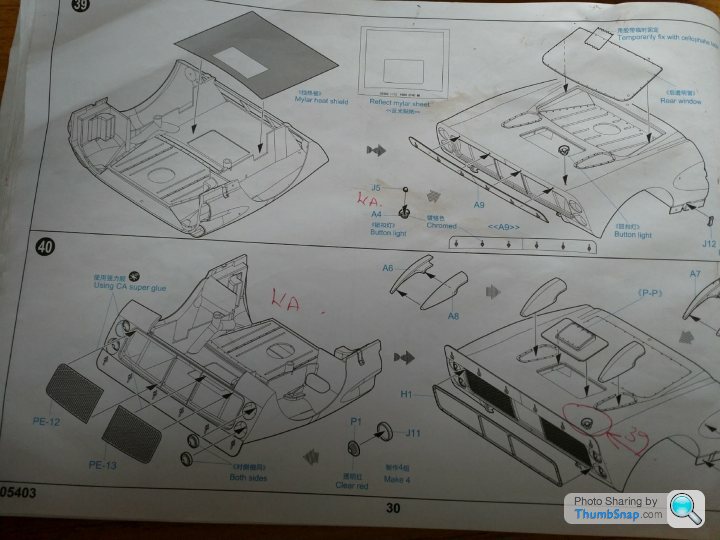
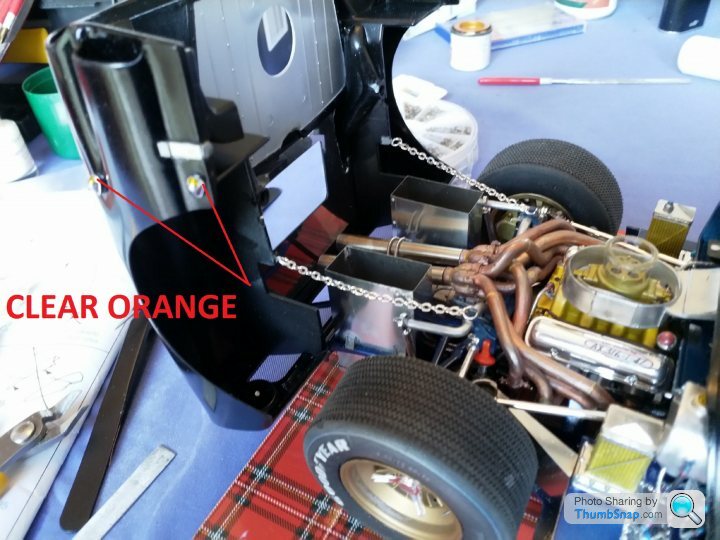
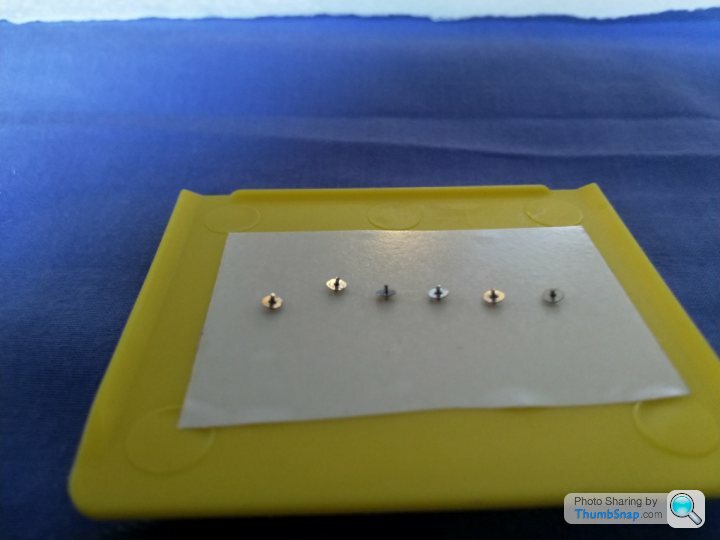
I changed my mind on the chrome bits for the oil coolers, the only part left chromed is the base plates.Capped off hole with a hex plug for one lid as its not correct, added unions to the base and blued, for the inlet /outlet lines from the oil filter to the coolers to tank made earlier. Anodised/plating look for the radiators, aluminium tops and base. Using the KA detail there are 25 parts in total.I redrilled the position for the oil cooler bases as the bases according to RK,s web site showed a overlap of the fuel tank access plates.
 .
.
 .
.
 .
.
 .
.
 .
.
 .
.
 .
.
 .
.
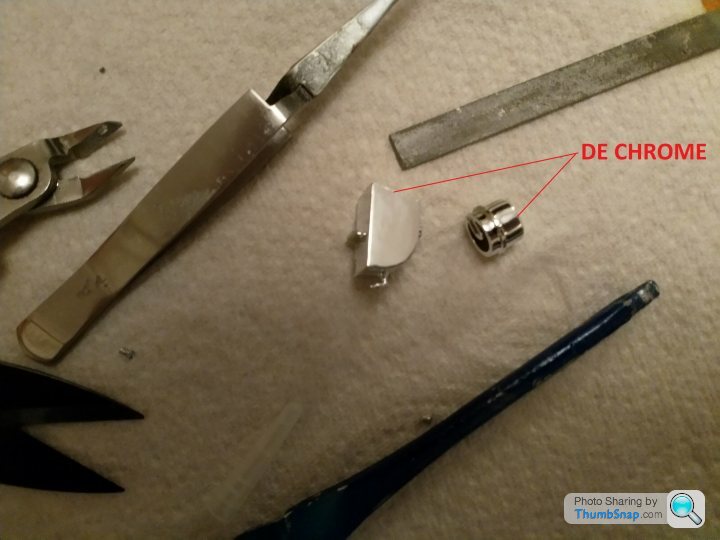
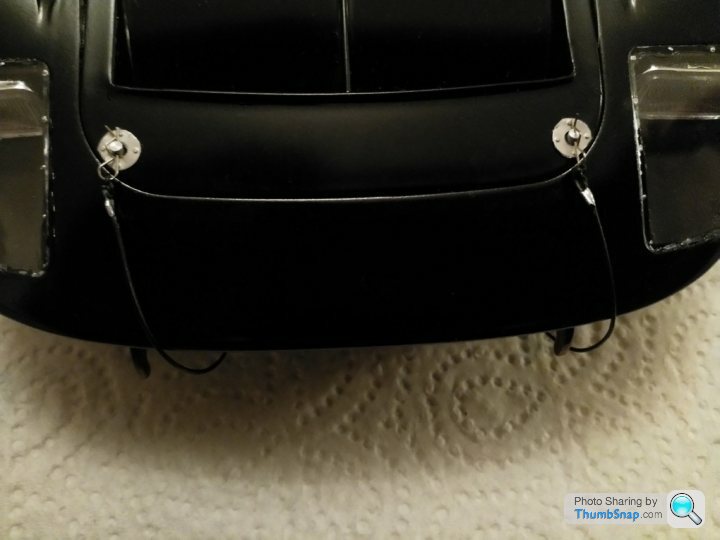
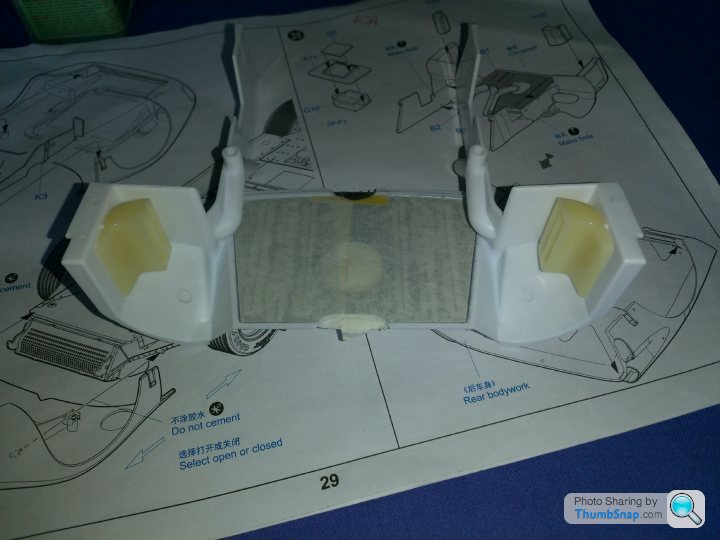
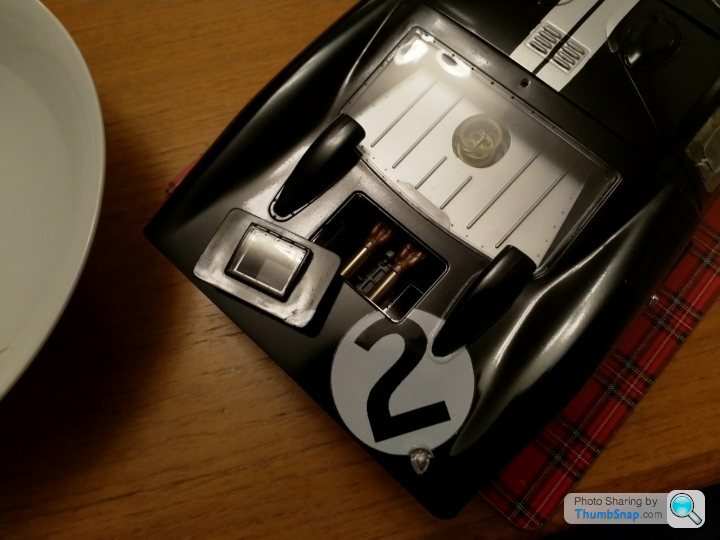
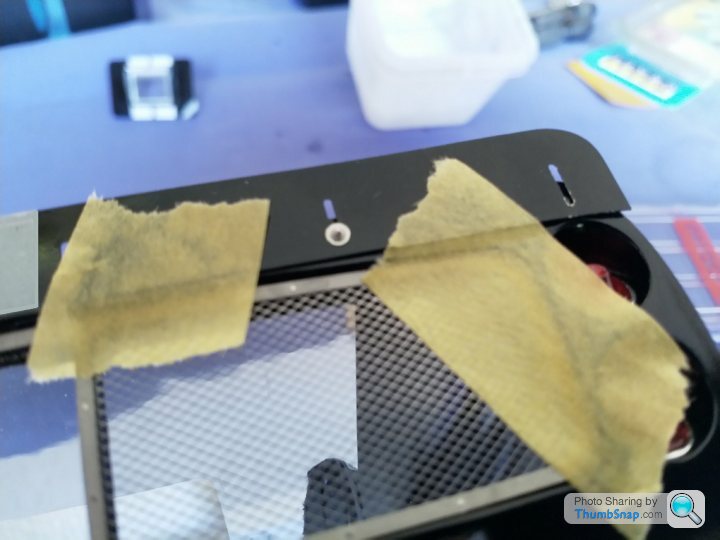
Onto the final part before going onto the front and rear bodywork.Dechroming the water tank, adding weld lines finishing of with aluiminium rub.Ive never taken off so much chrome in a kit before, but worth doing as far as i see.
 .
.
Cheers.
........Onto the final part before going onto the front and rear bodywork.Dechroming the water tank, adding weld lines finishing of with aluiminium rub.Ive never taken off so much chrome in a kit before, but worth doing as far as i see.
.Cheers.


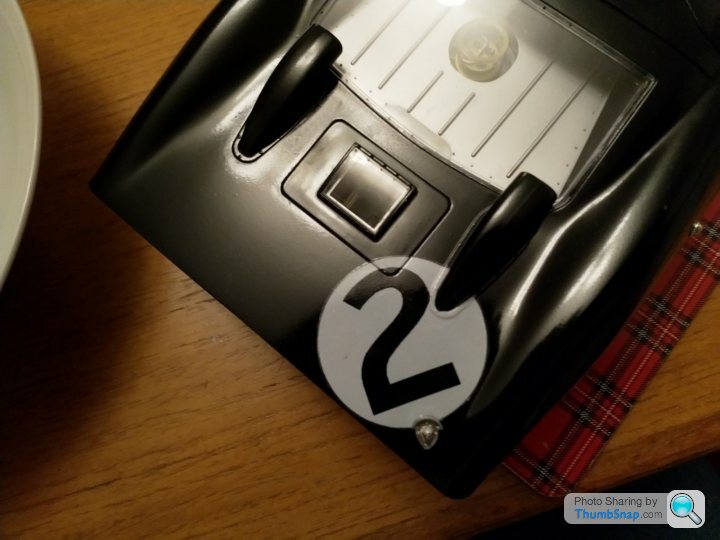
Final part finished Coolant tank, before going onto the bodywork, which is going to take up some time.
 .
.
 .
.
 .
.
 .
.
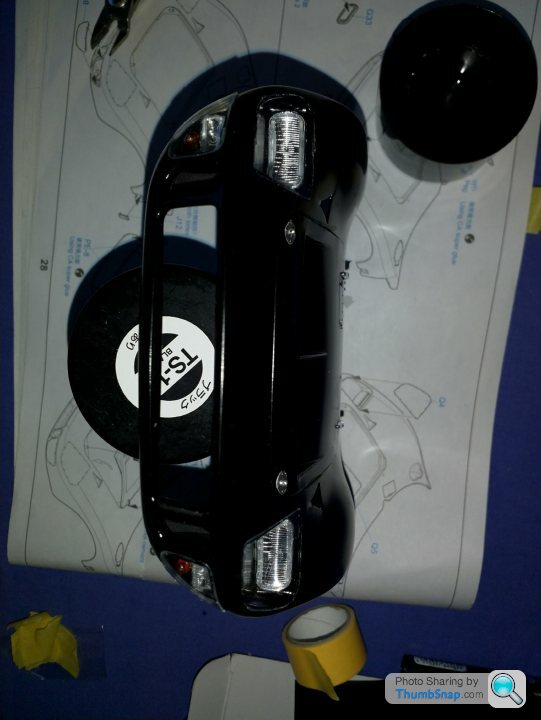
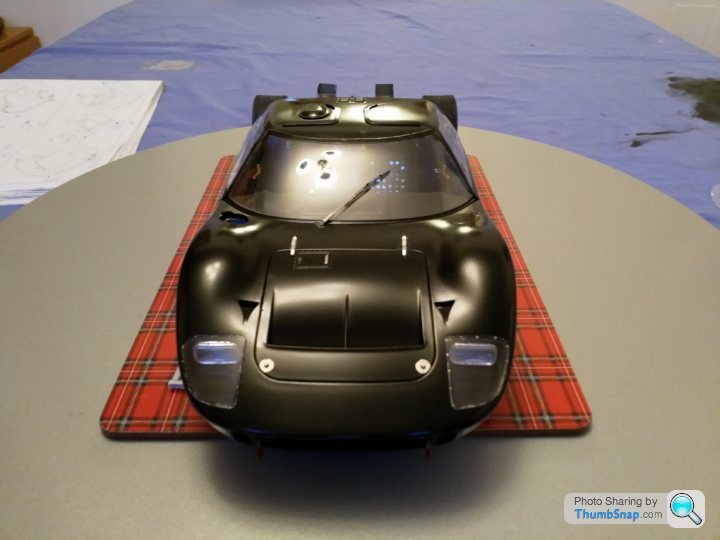
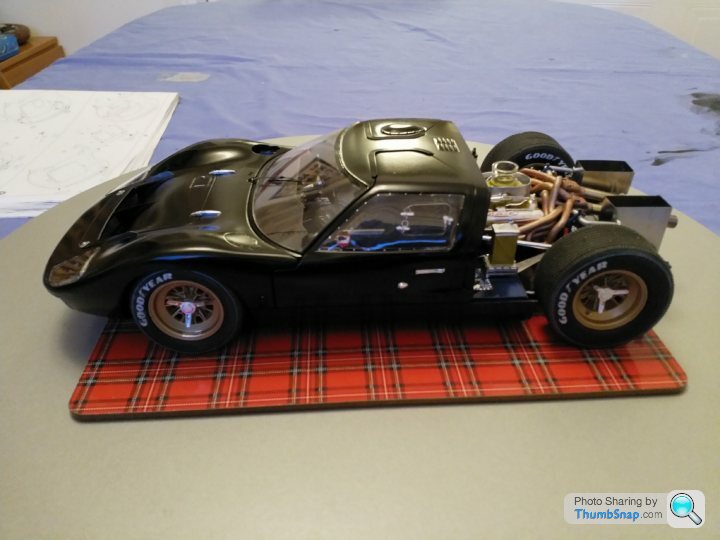
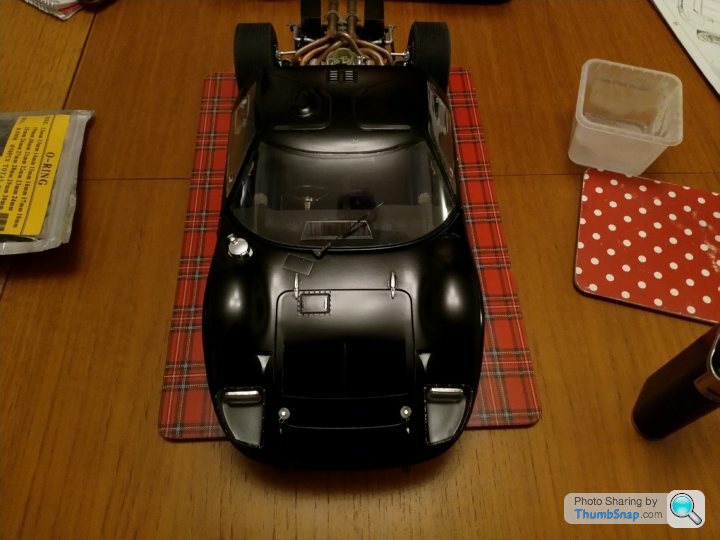
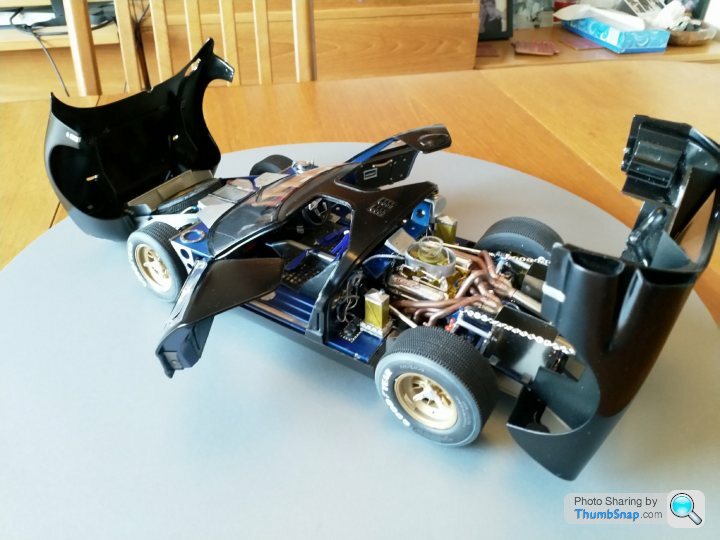
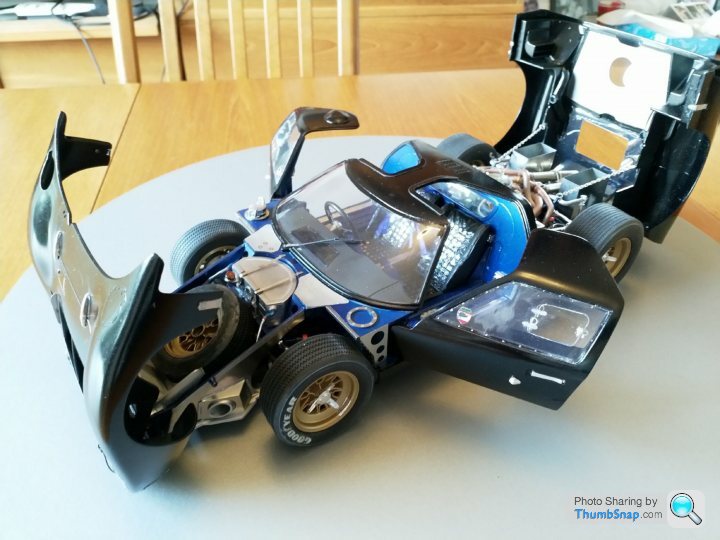
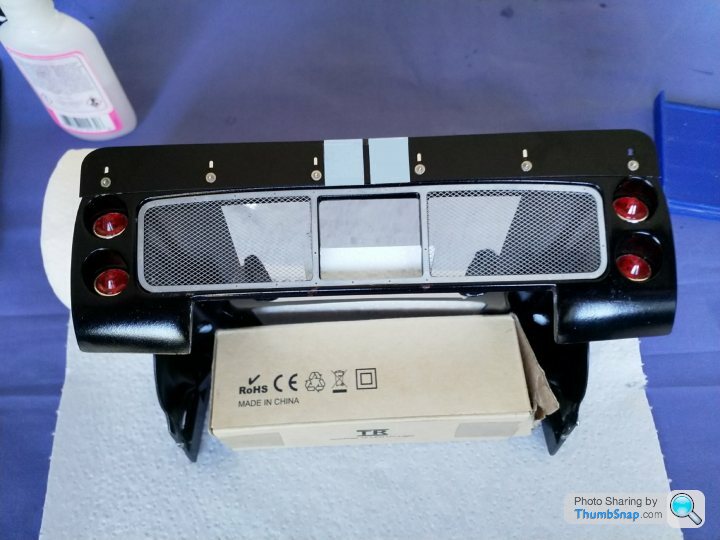
All done. Now onto the body which has many parts, parts that need correcting/adjusting and a lot of photo etched to complete.
Going to take some time.
Thanks to everyone looking so far and commenting and thankyou Can Am for pointing me in the right direction. Ive enjoyed it all very much.
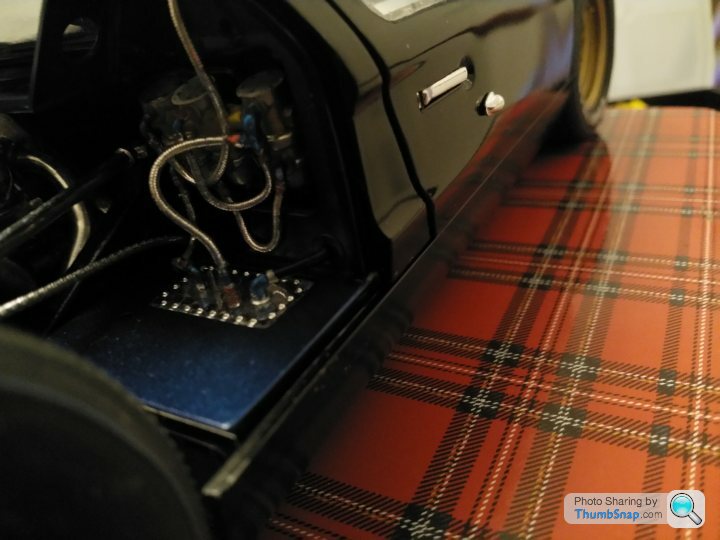
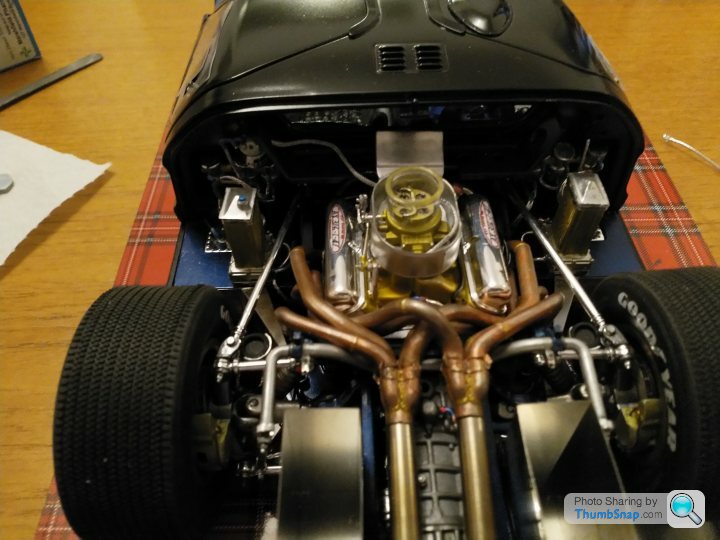
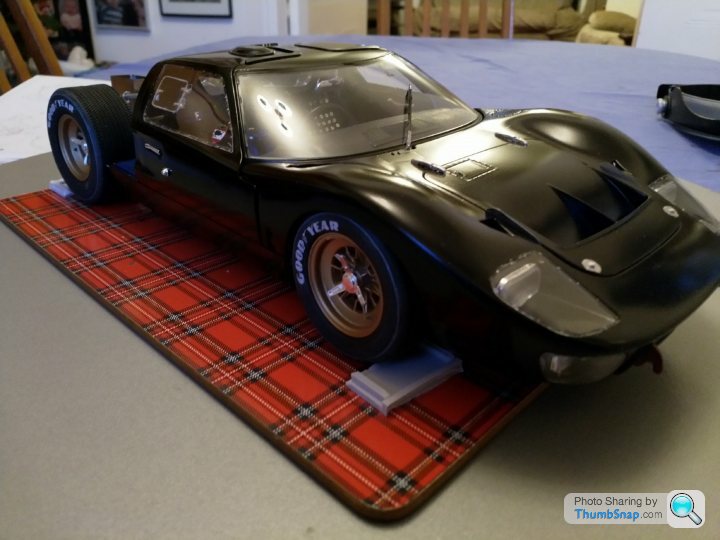
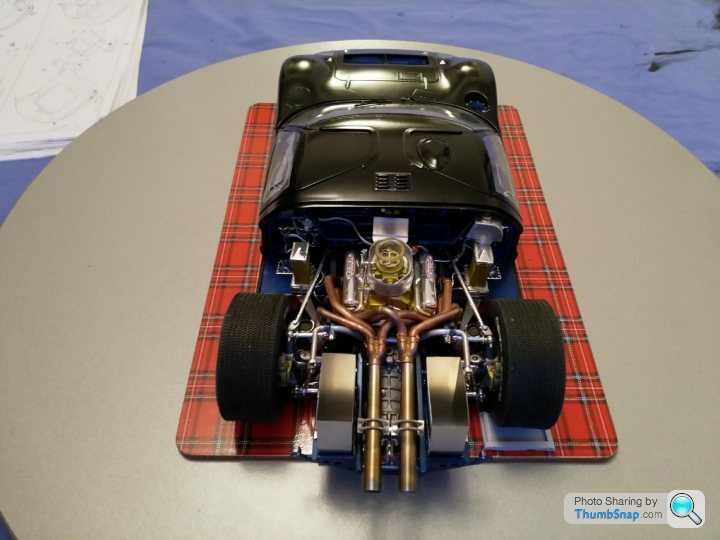
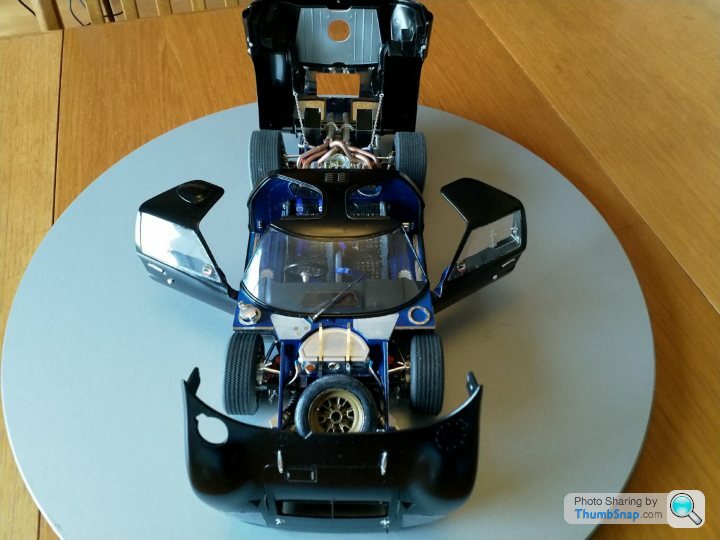
Reaping the rewards to be able to look at most of the small details of this build.Nice thing is the two clam shells expose a lot of the interior details.
Hope i can finish it to a acceptable standard.
Cheers
....All done. Now onto the body which has many parts, parts that need correcting/adjusting and a lot of photo etched to complete.
Going to take some time.
Thanks to everyone looking so far and commenting and thankyou Can Am for pointing me in the right direction. Ive enjoyed it all very much.
Reaping the rewards to be able to look at most of the small details of this build.Nice thing is the two clam shells expose a lot of the interior details.
Hope i can finish it to a acceptable standard.
Cheers
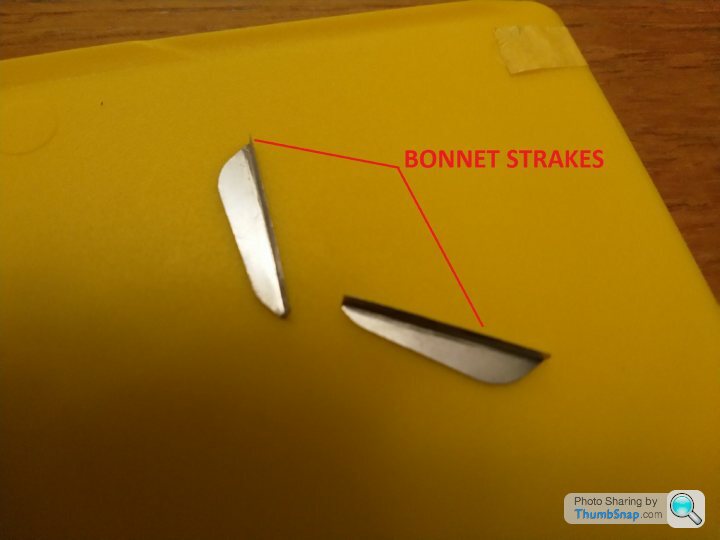
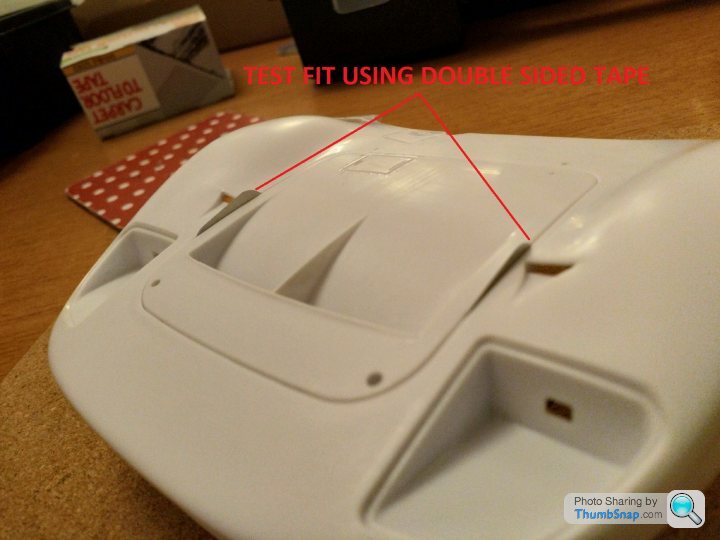
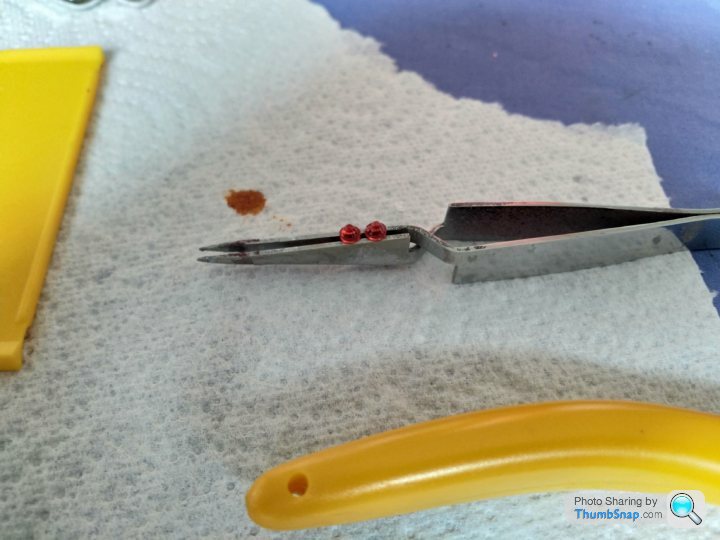
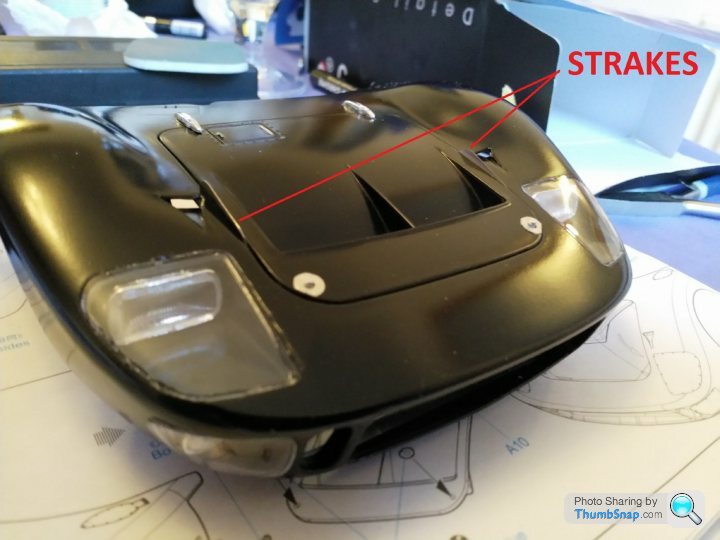
Did these last night.
On the origonal winning car as outlined by CanAm, there are 2 alluminium air strakes, stuck out of the bonnet that were rivited to the front Clam.
Made mine out of 0.15mm shim stock from my works toolbox.
Some photos.
 .
.
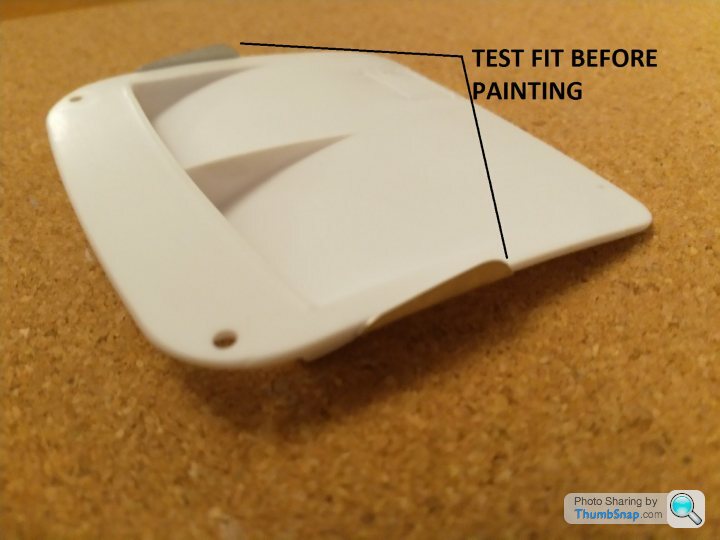
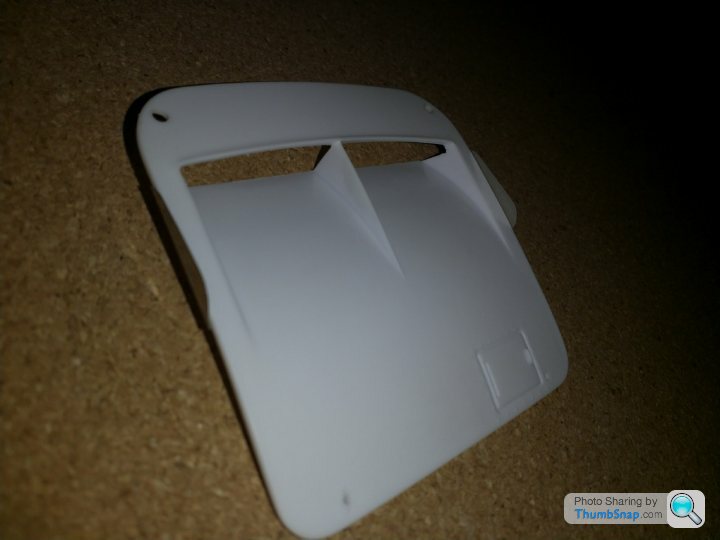
After preparing the front panel and clam for paint,trial fitting the strakes using double sided sticky tape before spraying.
 .
.
 .
.
 .
.
Should look nice against the black paint when finished.
Cheers Its Friday.
On the origonal winning car as outlined by CanAm, there are 2 alluminium air strakes, stuck out of the bonnet that were rivited to the front Clam.
Made mine out of 0.15mm shim stock from my works toolbox.
Some photos.
.After preparing the front panel and clam for paint,trial fitting the strakes using double sided sticky tape before spraying.
...Should look nice against the black paint when finished.
Cheers
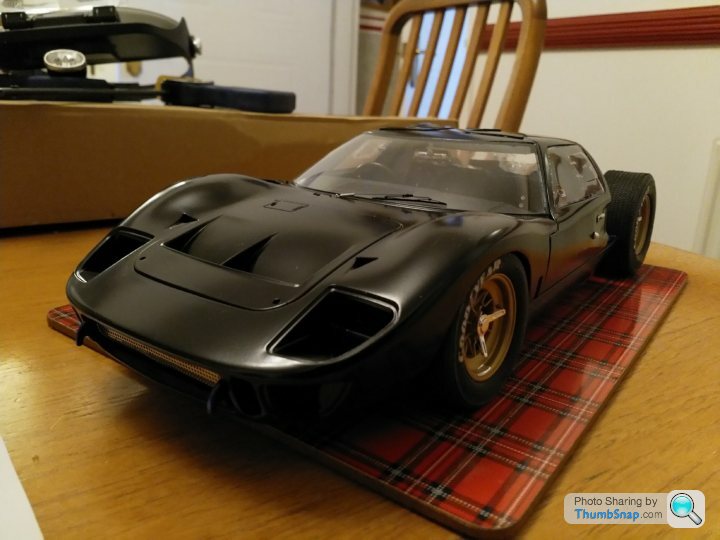
Its Friday.Hi , Painting same as previous bodywork, looks quite dull but will polish up nicely. I dont want to put a super laquer finish on as ive read that the paintwork quality on these cars wernt a high priority in the day,adding parts to the front clam, finishing of the underbody parts later with criss cross glass fibre effect with a fine flat nylon basting brush.
 .
.
Bonnet pins from kit and brackets from KA PE.
 .
.
 .
.
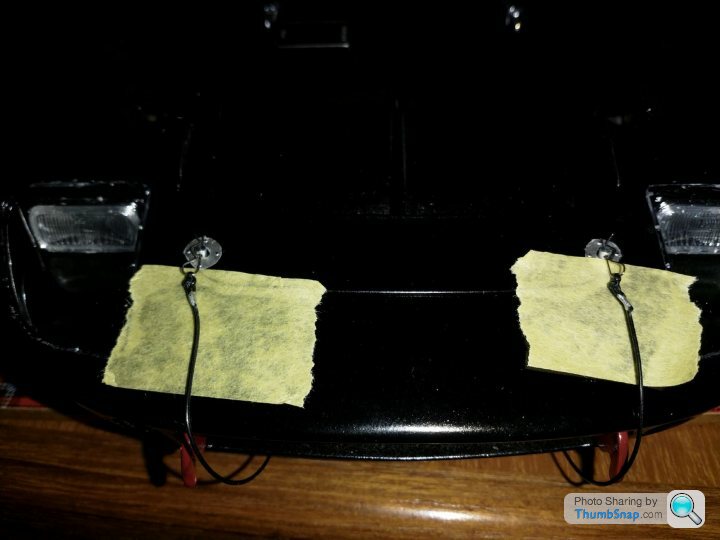
The indicator lights were Red clear so i had to add Chrome this time instead of taking it off as ive done before. Then painted orange clear over for the lenses. Fitted headlights and fog lights.Left the chrome on these as well. Im not totally no-chrome biased
 .
.
 .
.
 .
.
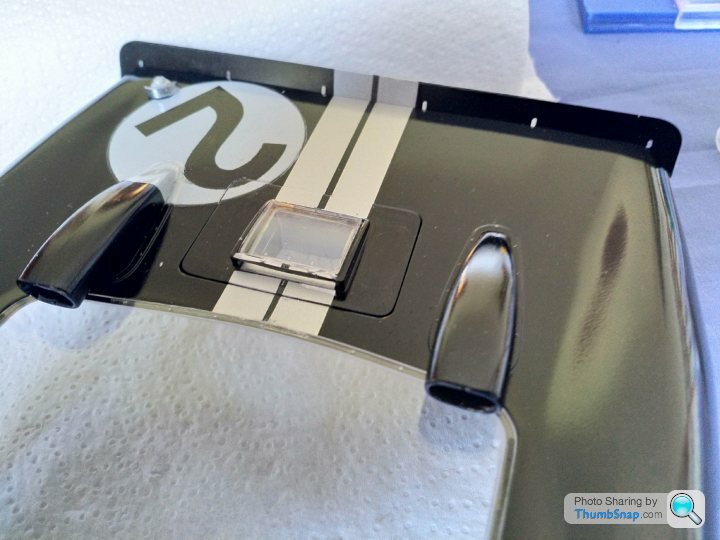
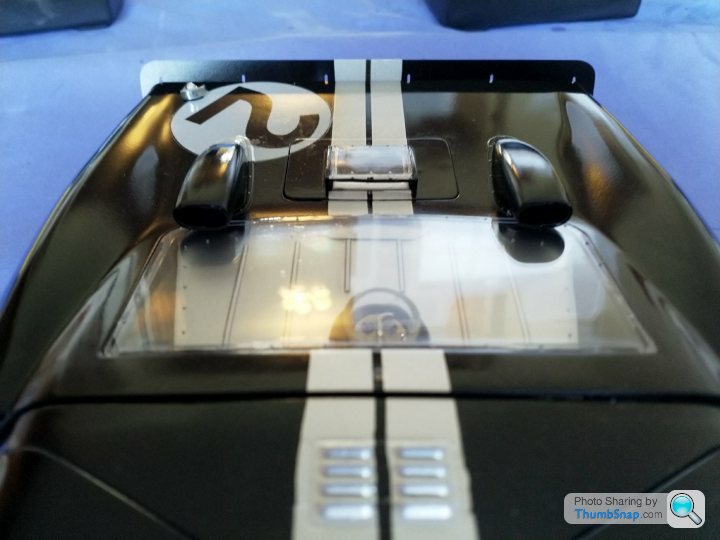
Strakes added, hindges,bonnet pin covers and light covers
 .
.
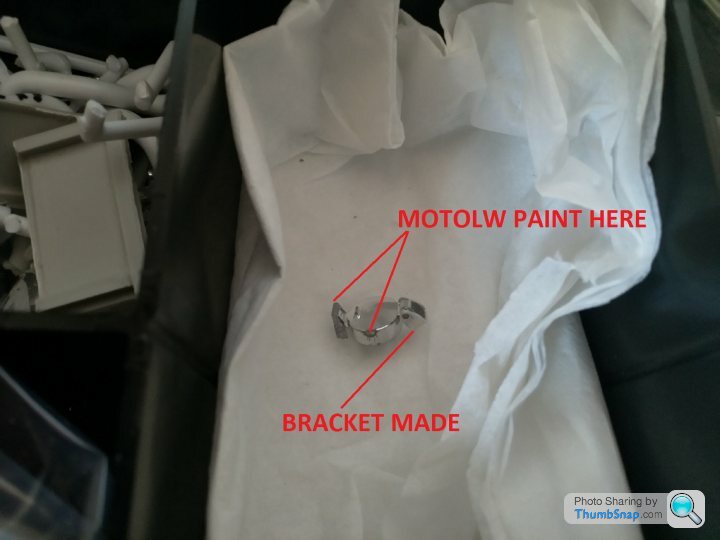
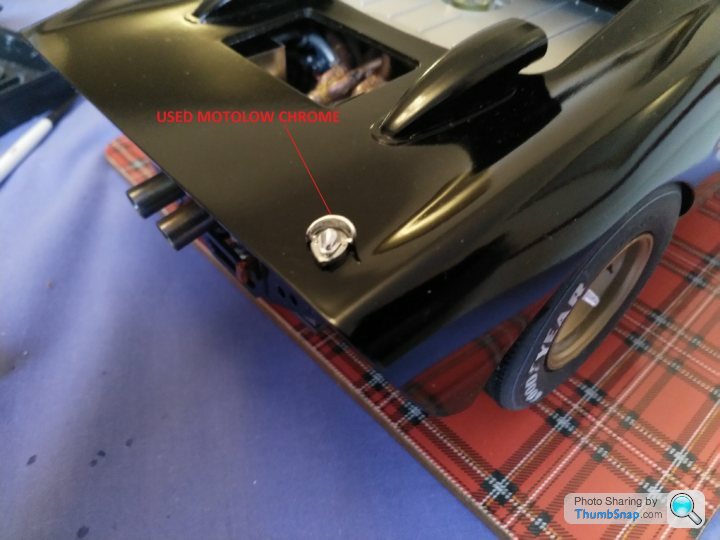
Light cover rivets chromed with 1mm nib Motolow pen
 .
.
Showing spare wheel from Bestbalsa kits, Good year logo and straps yet to finish
 .
.
 .
.
 .
.
 .
.
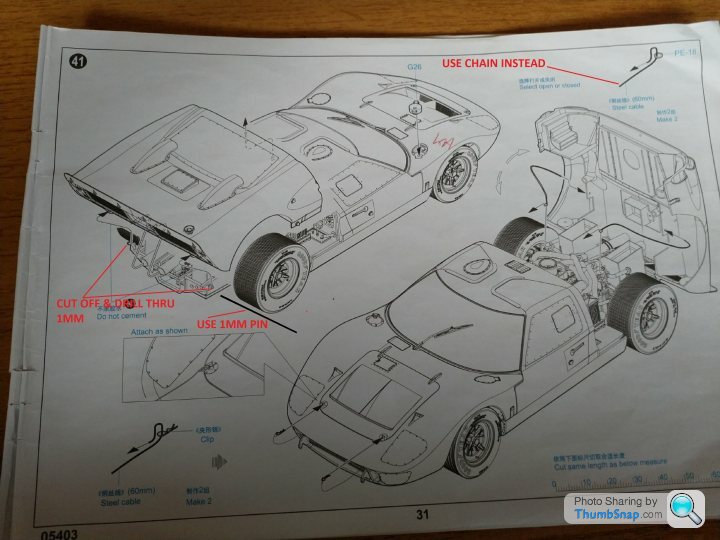
Its going quite quickly now, onto the rear clam, ordered silver chain to hold the rear clam in a upright position, some more refining to do, painting and finally decals before a polish.
Cheers
.Bonnet pins from kit and brackets from KA PE.
..The indicator lights were Red clear so i had to add Chrome this time instead of taking it off as ive done before. Then painted orange clear over for the lenses. Fitted headlights and fog lights.Left the chrome on these as well. Im not totally no-chrome biased
...Strakes added, hindges,bonnet pin covers and light covers
.Light cover rivets chromed with 1mm nib Motolow pen
.Showing spare wheel from Bestbalsa kits, Good year logo and straps yet to finish
....Its going quite quickly now, onto the rear clam, ordered silver chain to hold the rear clam in a upright position, some more refining to do, painting and finally decals before a polish.
Cheers
Rain stopped play today, too much humidity and i couldnt use my garage.
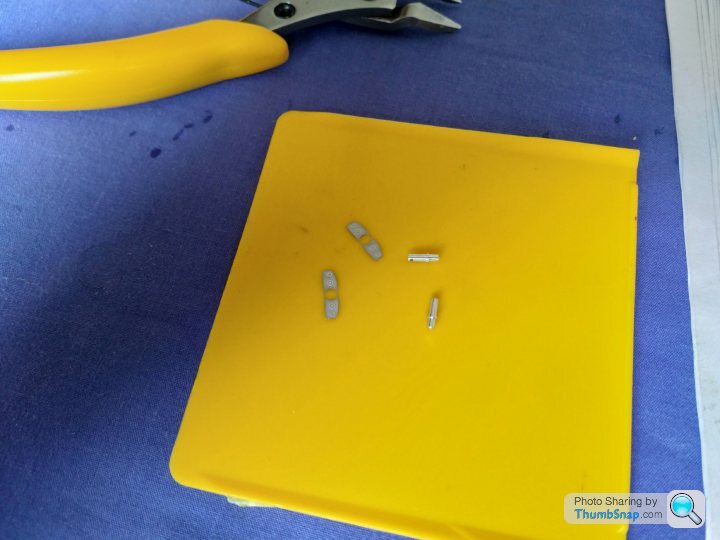
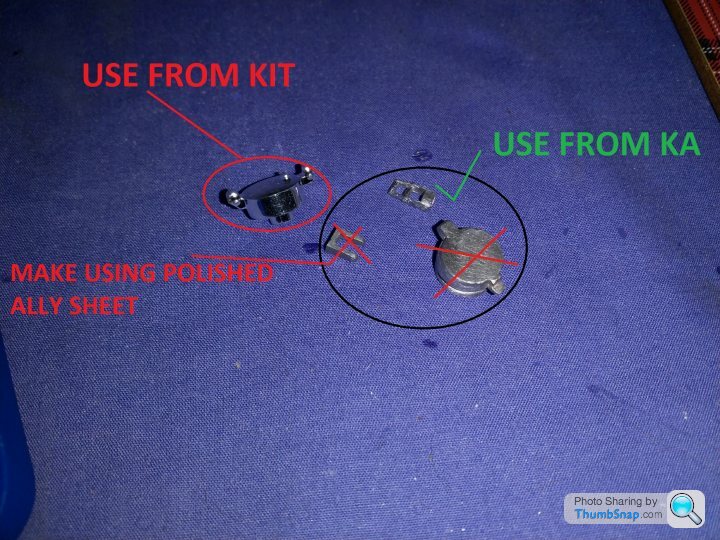
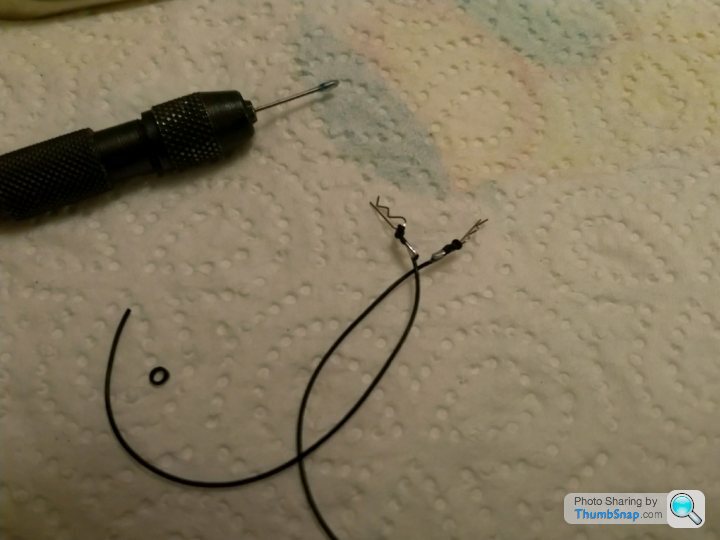
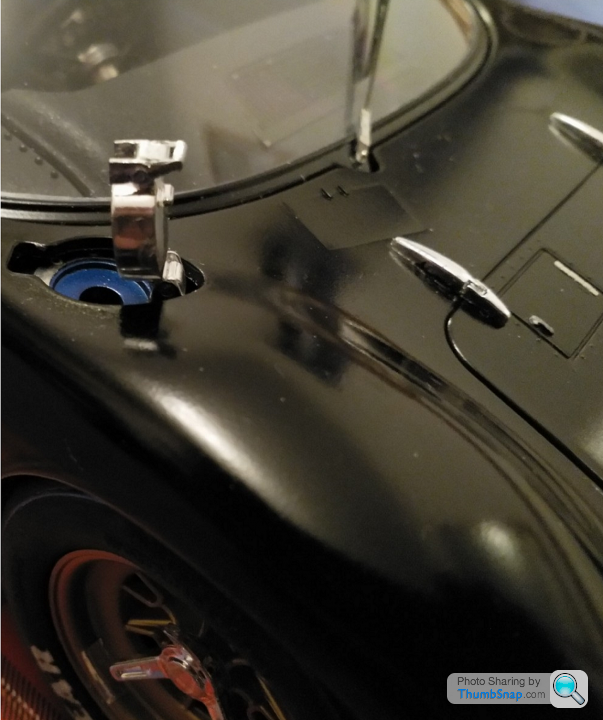
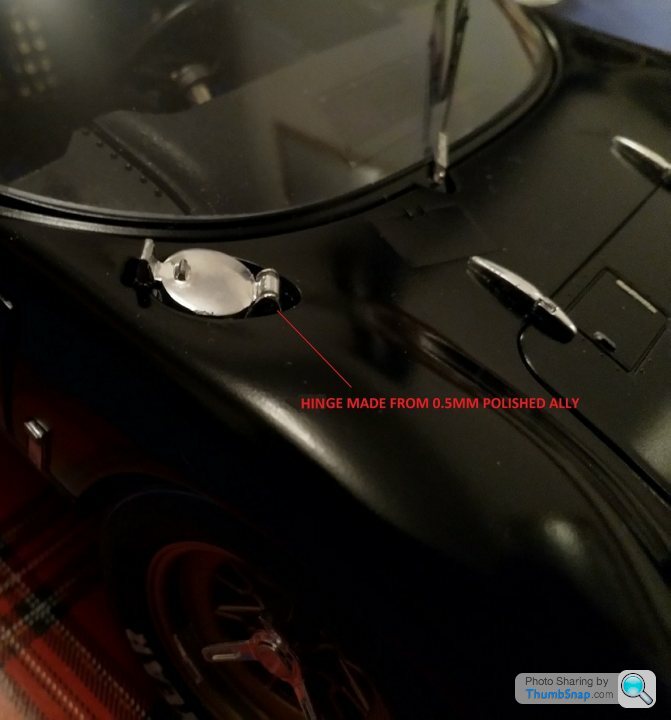
So i did the fuel cap. Used the chrome kit part, the opening KA clip part and made my own fixing bracket to allow it to open/close.
Did the bonnet post retaining clips and cables made using watchmakers o-rings as well.
Some pics.
 .
.
 .
.
 .
.
 .
.
 .
.
 .
.
 .
.
 .
.
Thanks for looking. Cheers
So i did the fuel cap. Used the chrome kit part, the opening KA clip part and made my own fixing bracket to allow it to open/close.
Did the bonnet post retaining clips and cables made using watchmakers o-rings as well.
Some pics.
........Thanks for looking. Cheers
NDA said:
How much further to go?
Looking great and almost ready to drive.
.Looking great and almost ready to drive.
Thanks NDA.
Not much left to do,rear clam which needs a lot of adjustment, hindge pins are 1mm and very weak,cant suport the weight, so ive cut them off and inserted a steel pin which works a treat, silver chain to use instead of wire for the clam restraint.Priming, paint a few PE parts, decals and a polish. Couple of months i guess.
Heres where im at .
 .
. .
. .
. .
.Some Pe parts to do.
 .
. .
.Thanks for looking. Cheers
NDA said:
I had the full size similar version of this car - a 2005 Ford GT. The geometry of the rear clam shell hinges and the adjustment to get proper shut lines was quite complex... I know because when mine left the factory it wasn't quite right and needed a lot of fiddling to get it right... not by me!
.Very nice indeed to have owned a desirable modern day versaion of the GT40.Hoping my Mars Red SL55 AMG F1 becomes desirable before i pass it on in the future.
Looks like i have the same issues albeit at 1/12th scale. Cheers
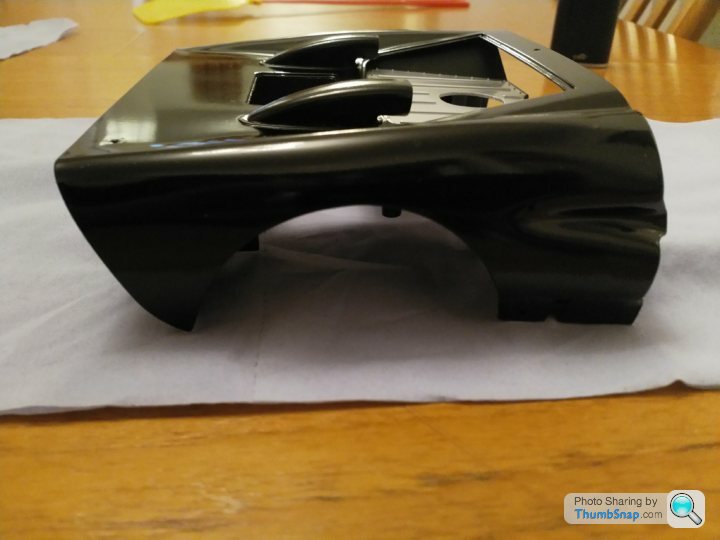
The rear Clam profile isnt good , ive had to do a lot of tweaking and adjusting to make it fit before i put anything else on. Got it to what i see as acceptable but ive got to remake the clam clasps to actually pull down and hold in a nice position as its still sitting up slightly.
INNER ASSEMBLY, MASKED THEN PAINTED AND HELD BY BEING CLIPPED IN
 .
.
CLAM
 .
.
 .
.
 .
.
 .
.
CHEERS
INNER ASSEMBLY, MASKED THEN PAINTED AND HELD BY BEING CLIPPED IN
.CLAM
....CHEERS
Feeling a bit ropy today, dodgy dining i think.Wifes let me off on chores so i can can chillax.
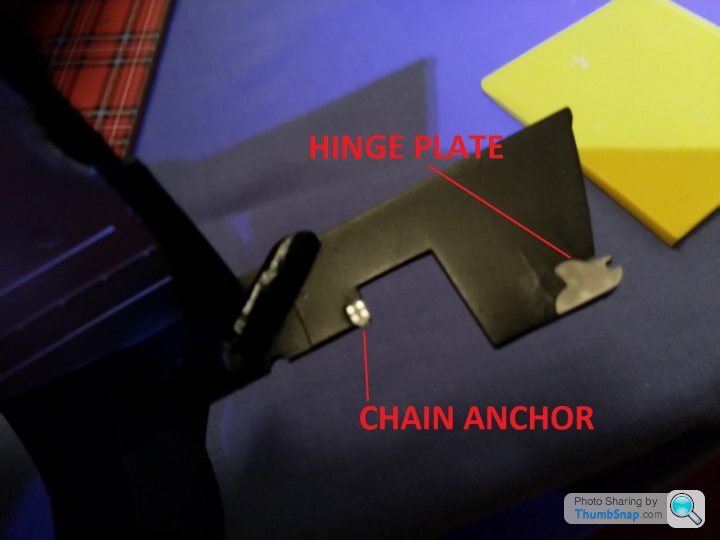
Fuel cap finished off to open.Rear clam light chromed, tilt and chain brackets done this week.
Then onto the nightmare.


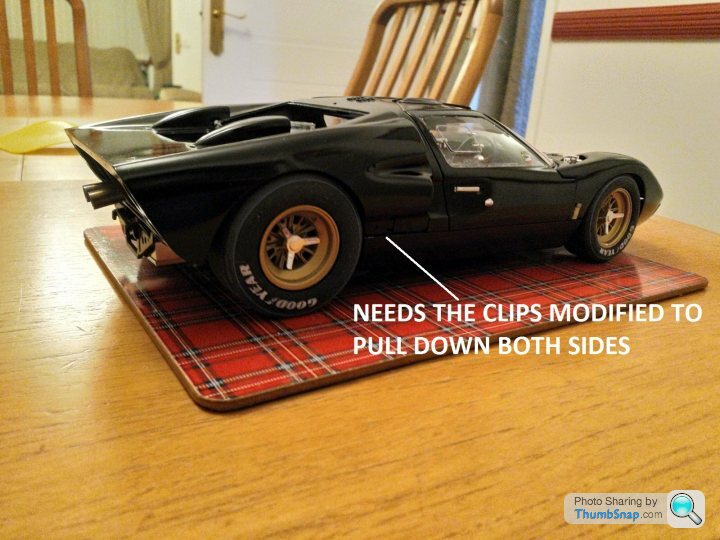
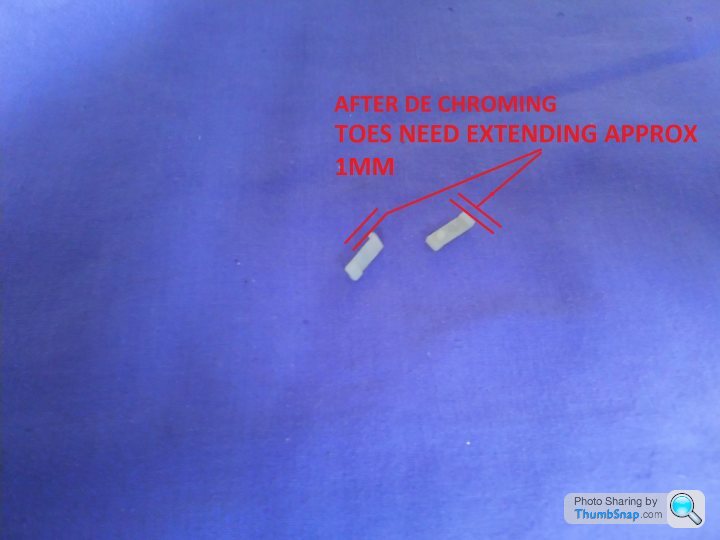
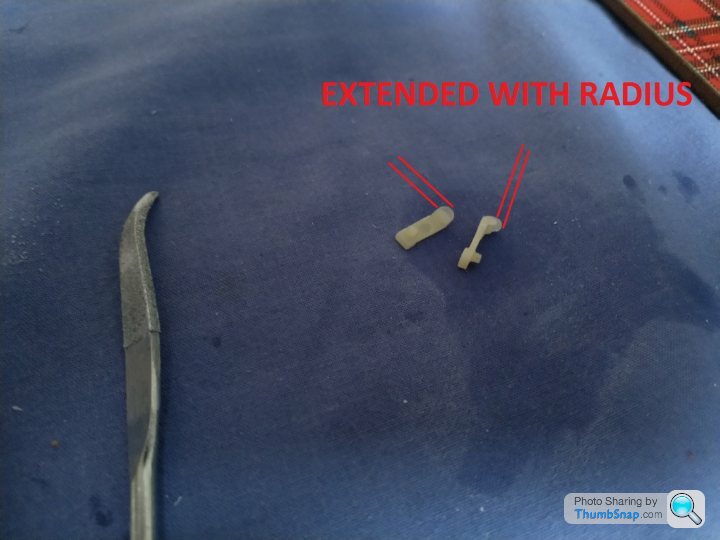
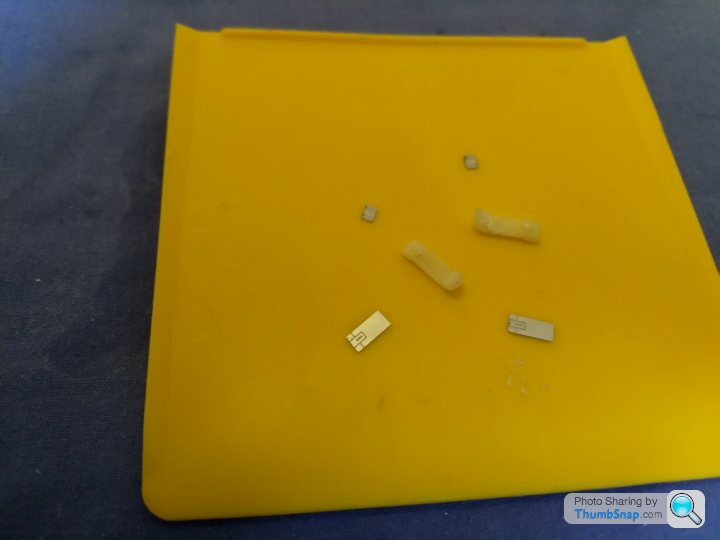
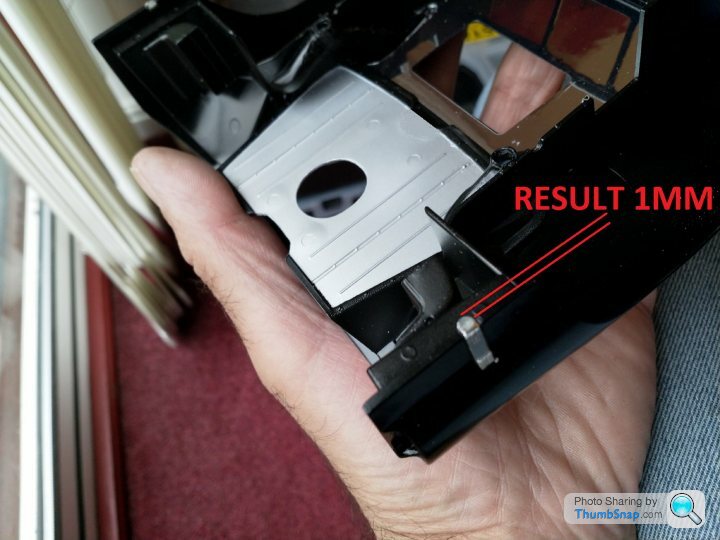
Im pretty sure now why this kit was removed from sale. The worst up till now was approx 3mm toe out on the front steerring.
The rear clam was such a poor fit that when closed it would sit up approx 2mm, even with a load of fettling.
I looked at other web builds of this kit and was seeing the same.I wouldnt or couldnt want to display a finished model in this condition.
 So ive spent pretty much the rest of the evenings this week modifying the catches so they actually work by them clipping into recesses i made into the chassis.
Marked out, drilled and dremelled. Finally got it to fit.Photos a bit dusty but will clean up ok.
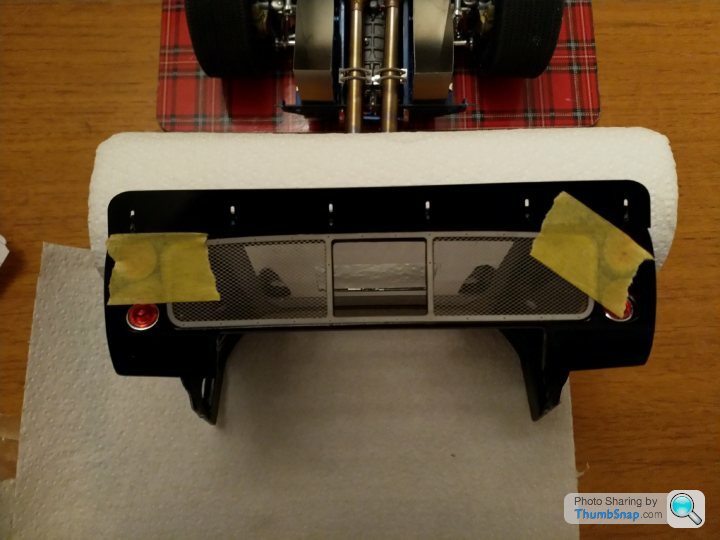
CAP & LIGHT.
Too small to make the spring catch work, so its glued on instead.
 .
.
 .
.
 .
.
TILT & CHAIN BRACKETS
 .
.
 .
.
CLAM MODIFIED
 .
.
 .
.
 .
.
 .
.
 .
.
 .
.
 .
.
 .
.
 .
.
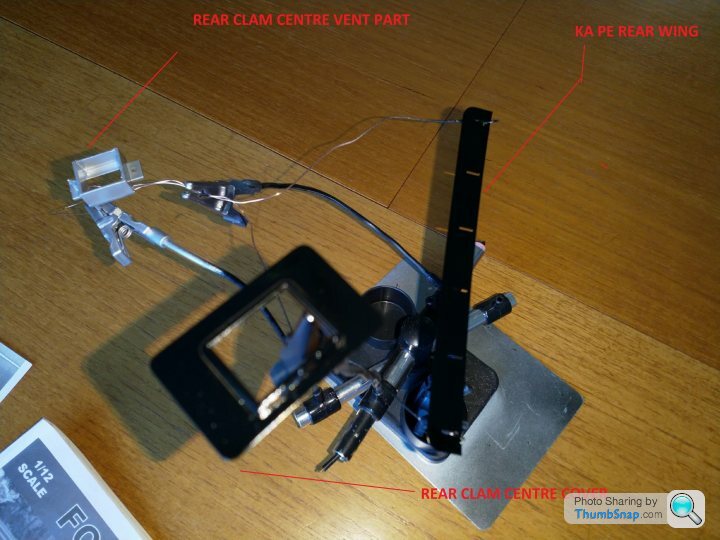
Now able to get on and add the rest of the parts, PE Spoiler, PE grills, lights,Clam centre cowl and window,rear windscreen,Clam chains and finally decals which im concearned are quite old and may not take.
Cheers
Fuel cap finished off to open.Rear clam light chromed, tilt and chain brackets done this week.
Then onto the nightmare.
Im pretty sure now why this kit was removed from sale. The worst up till now was approx 3mm toe out on the front steerring.
The rear clam was such a poor fit that when closed it would sit up approx 2mm, even with a load of fettling.
I looked at other web builds of this kit and was seeing the same.I wouldnt or couldnt want to display a finished model in this condition.
So ive spent pretty much the rest of the evenings this week modifying the catches so they actually work by them clipping into recesses i made into the chassis.Marked out, drilled and dremelled. Finally got it to fit.Photos a bit dusty but will clean up ok.
CAP & LIGHT.
Too small to make the spring catch work, so its glued on instead.
...TILT & CHAIN BRACKETS
..CLAM MODIFIED
.........Now able to get on and add the rest of the parts, PE Spoiler, PE grills, lights,Clam centre cowl and window,rear windscreen,Clam chains and finally decals which im concearned are quite old and may not take.
Cheers
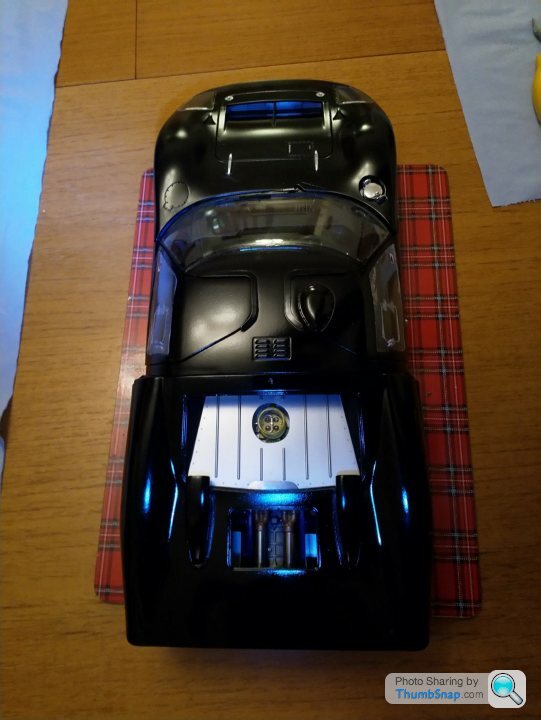
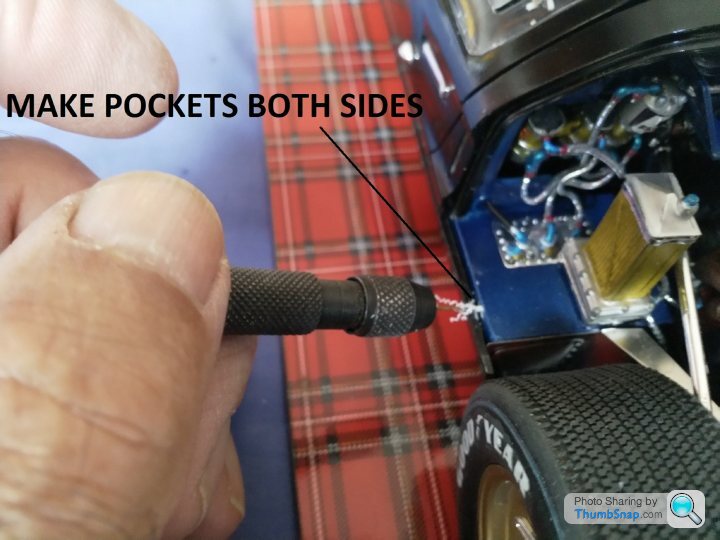
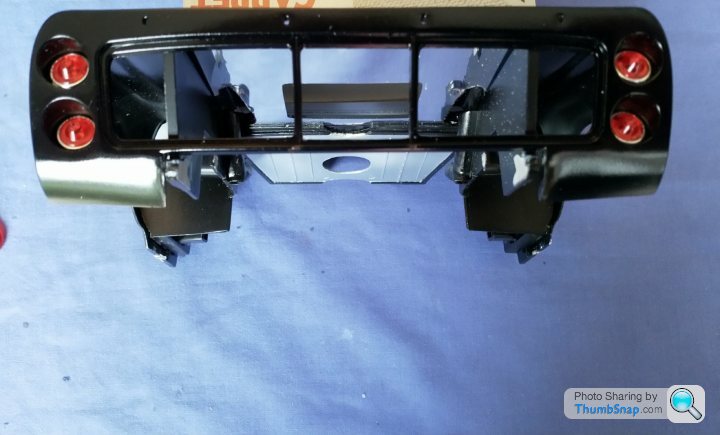
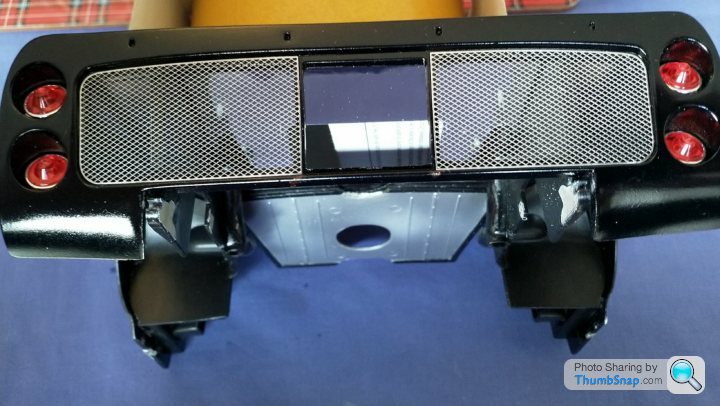
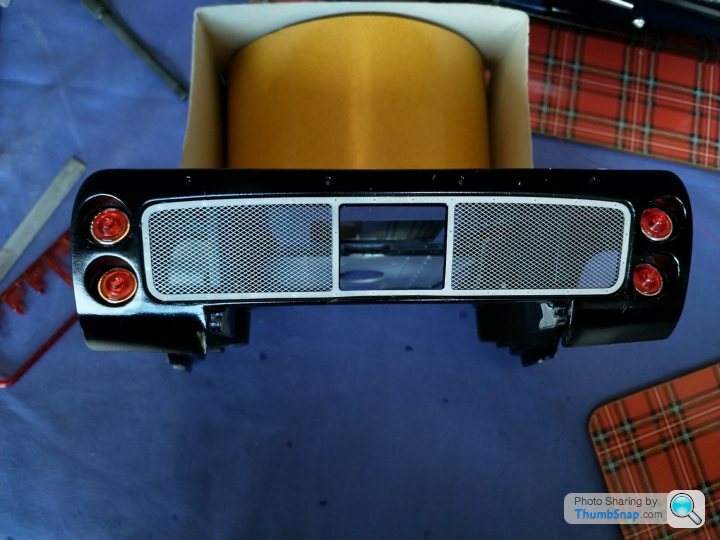
A couple of evenings spent adding detail;s to the rear Clam.
Lights.
 .
.
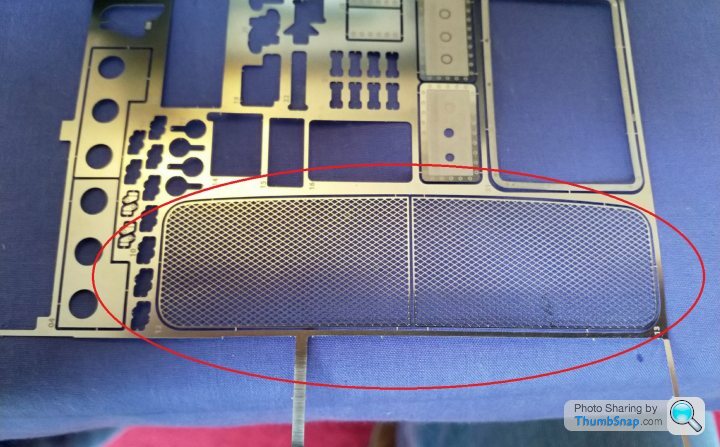
Grills next using KA models PE detail instead of kit. Much finer.
 .
.
 .
.
 .
.
 .
.
 .
.
Used silver jewellry chain and links instead of wire, may be period incorrect but i have seen them on some GT 40,s?
 .
.
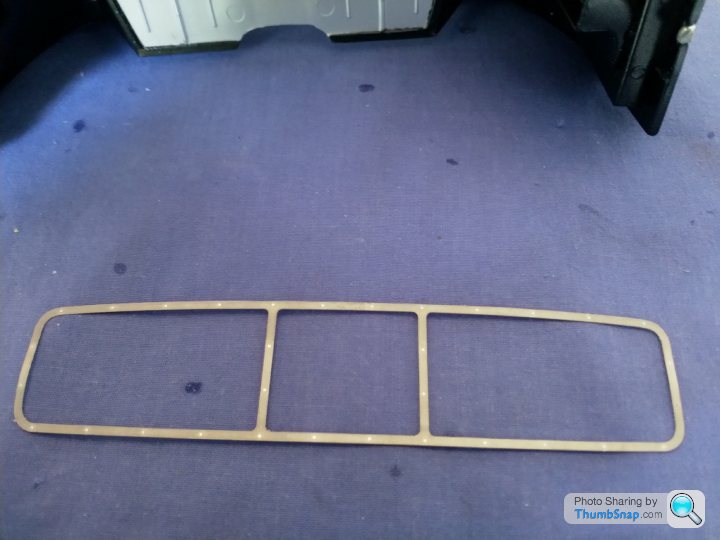
Rear windscreen needs chrome on the raised rivet heads to finish.
 .
.
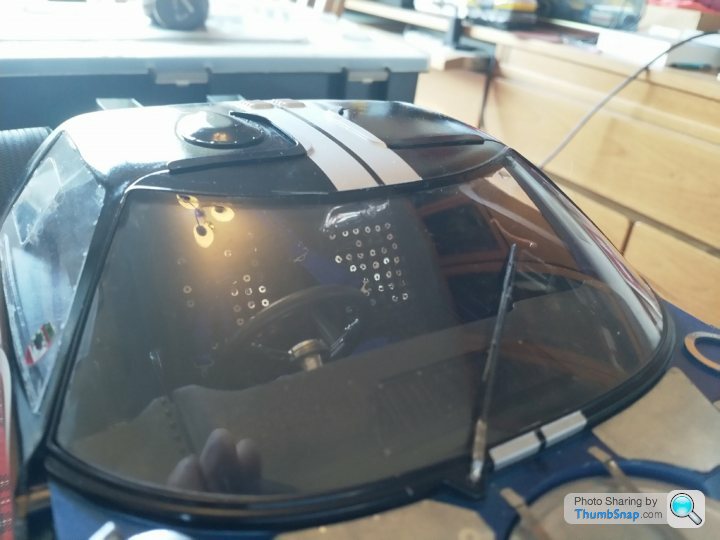
Fitted the side lights on the Clam. Orange lenses cleared, doors and top Clam number light in clear white.Clam centre cowl to do, rear spoiler.Some tidying up to do then onto the decals.
 .
.
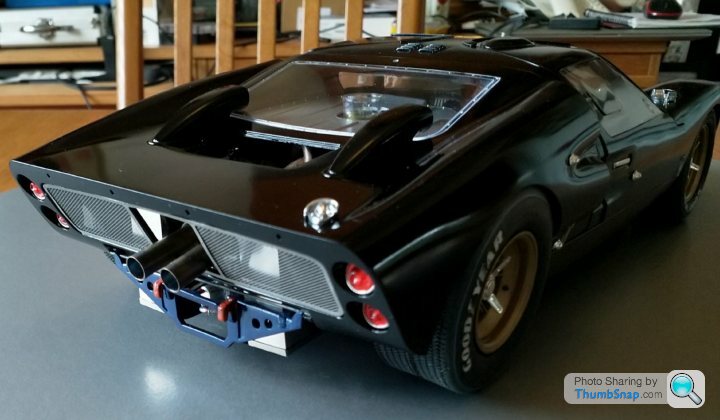
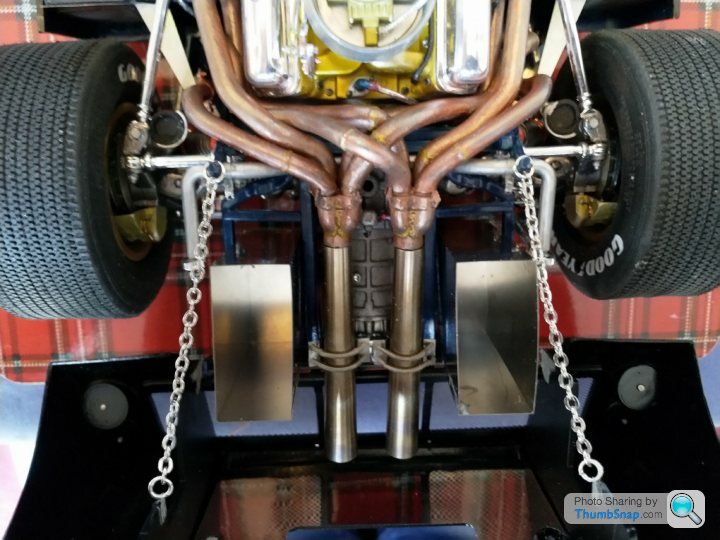
Some alround photos.
 .
.
 .
.
 .
.
 .
.
 .
.
Cheers
Lights.
.Grills next using KA models PE detail instead of kit. Much finer.
.....Used silver jewellry chain and links instead of wire, may be period incorrect but i have seen them on some GT 40,s?
.Rear windscreen needs chrome on the raised rivet heads to finish.
.Fitted the side lights on the Clam. Orange lenses cleared, doors and top Clam number light in clear white.Clam centre cowl to do, rear spoiler.Some tidying up to do then onto the decals.
.Some alround photos.
.....Cheers
Edited by henryk001 on Wednesday 21st August 16:14
Did some bits and pieces over the last week, especially today.I can see the finish line now.
Thanks to CanAm, ive been able to get this as correct as is possible. Im sure theres some mistakes (I call it evocation) along the way.
Fern.
 .
.
The 3 remaining parts painted, rear wing, centre rear clam cover and cowl.
 .
.
 .
.
Decals next, concearned they would be too old and either fall apart or not even come away, but theyve come on ok.
I cleaned the surface first with zeiss lens cleaner on a lens cloth, then micro set1, and micro sol 2.
 .
.
 .
.
 .
.
 .
.
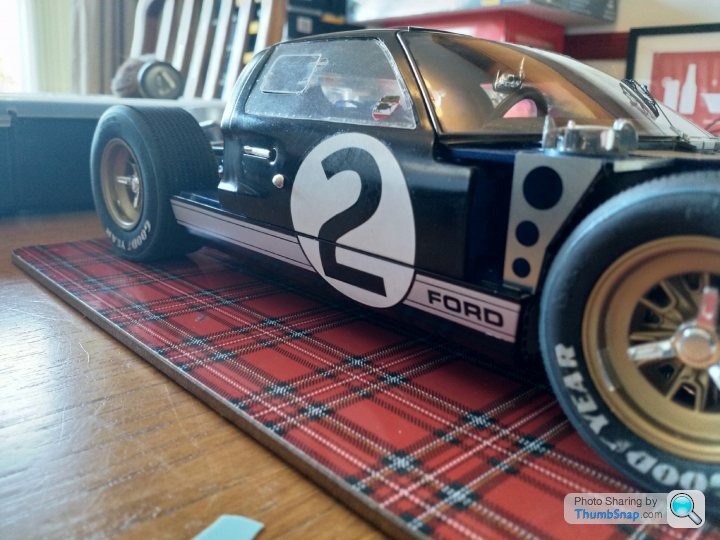
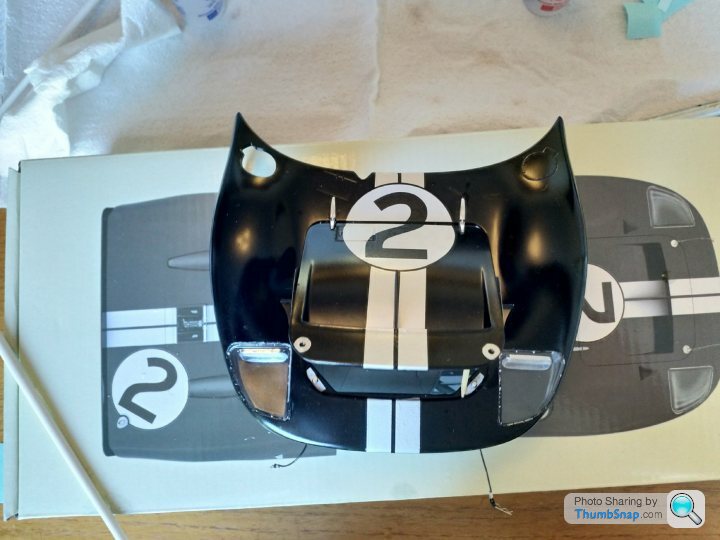
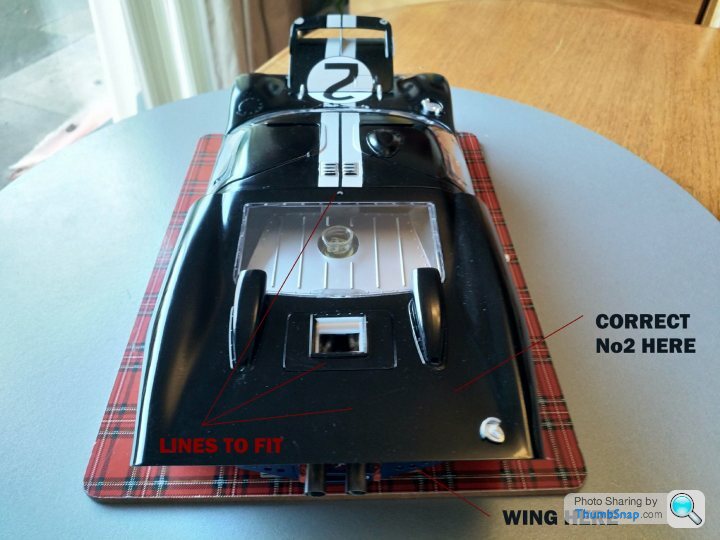
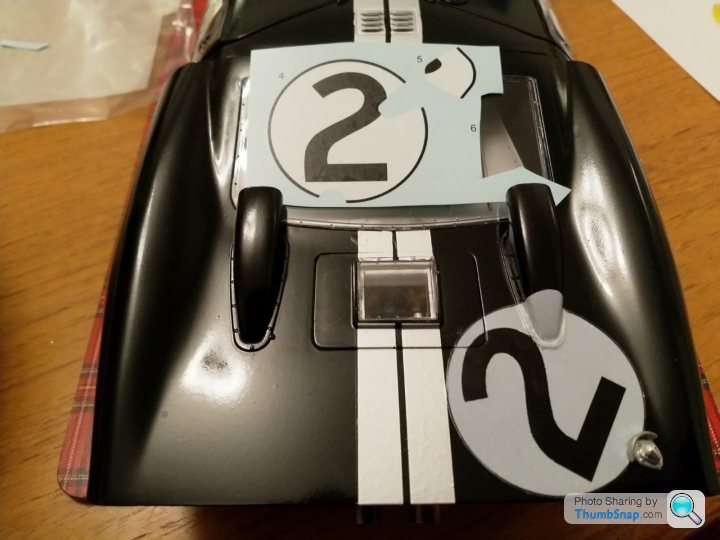
Now the decal set is wrong, in that No2 on the rear would show being formed over the air intake which is historically incorrect.
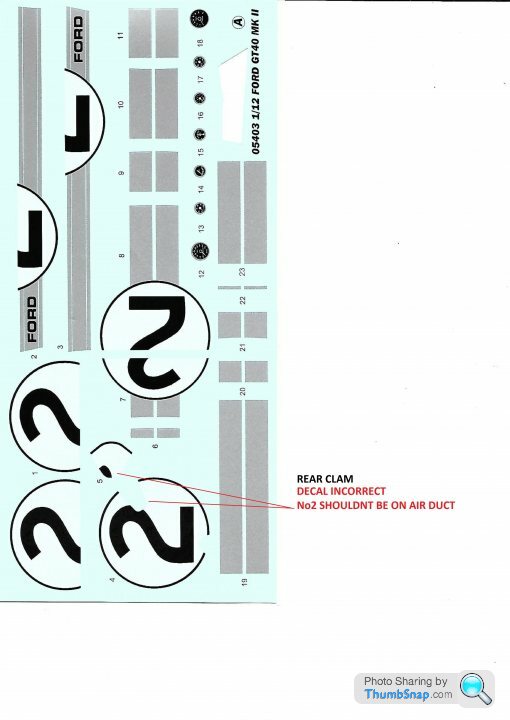
Scanned the set and remade as good as i can get it to,printed onto paper, cut out to see if its now correct, just waiting for some waterslide to print onto.
 .
.
Just a couple of lines to do. Glass for the cowl. Rear wing to fit using KA rivet bolts and washers,tyre decals for the spare tyre, a tidying up , cleanup and thats my lot.
I will put some finished photos on soon.
Cheers
Thanks to CanAm, ive been able to get this as correct as is possible. Im sure theres some mistakes (I call it evocation) along the way.
Fern.
.The 3 remaining parts painted, rear wing, centre rear clam cover and cowl.
..Decals next, concearned they would be too old and either fall apart or not even come away, but theyve come on ok.
I cleaned the surface first with zeiss lens cleaner on a lens cloth, then micro set1, and micro sol 2.
....Now the decal set is wrong, in that No2 on the rear would show being formed over the air intake which is historically incorrect.
Scanned the set and remade as good as i can get it to,printed onto paper, cut out to see if its now correct, just waiting for some waterslide to print onto.
.Just a couple of lines to do. Glass for the cowl. Rear wing to fit using KA rivet bolts and washers,tyre decals for the spare tyre, a tidying up , cleanup and thats my lot.
I will put some finished photos on soon.
Cheers
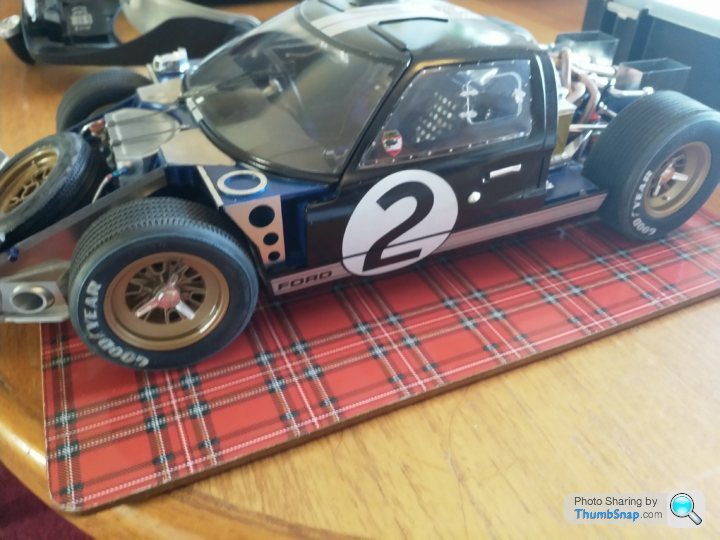
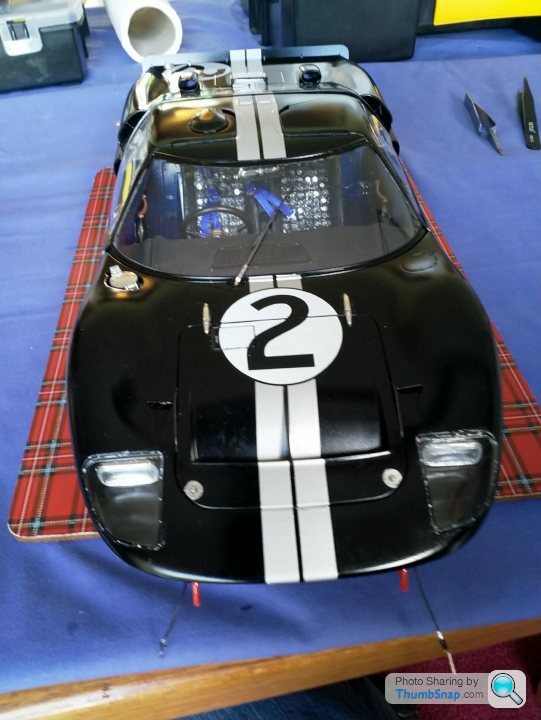
After numerous attempts finally made the correct decals for the number 2 for the rear clam.
 .
.
 .
.
 .
.
 .
.
Here you can see the big difference between the kit number and one i made up.
 .
.
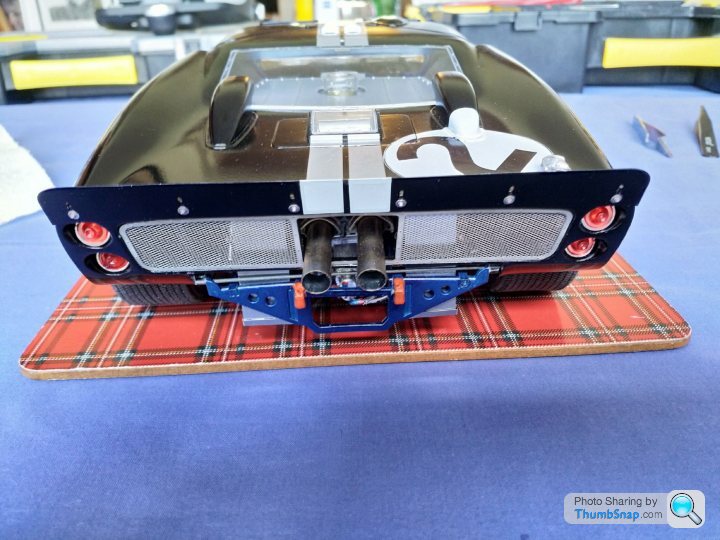
The last part was the photo etched wing, also there are no stripe decals for it in the kit so i had to make them up
Also supplied with the KA detail set were the bolts, hex and washers x6. The clam only has 4 holes for the plastic part i havent used
so i had to drill 6 holes 0.7mm and used the wing as a jig.
 .
.
 .
.
 .
.
 .
.
 .
.
 .
.
 .
.
 .
.
 .
.
 .
.
Will post some finished photos later.
Well thats it apart from a clean,bit of polish. Ive reached my quota on display models now. One almost finished Lotus MK3 and 1 unbuilt Ferrari 126 C2
in my stable.
Im off to make sure the grandson doesnt get caught up in gaming. Ive purchased and modified a 1/10th scale FTX Carnage RC car.
Its a bit of a monster, jumps really well after i corner weighted it. With adult supervision should get him going on it and have some real fun.
Thankyou to all who have read my thread and everyone that has commented. Thankyou CanAm for all your help with the historic info.
Cheers
....Here you can see the big difference between the kit number and one i made up.
.The last part was the photo etched wing, also there are no stripe decals for it in the kit so i had to make them up
Also supplied with the KA detail set were the bolts, hex and washers x6. The clam only has 4 holes for the plastic part i havent used
so i had to drill 6 holes 0.7mm and used the wing as a jig.
..........Will post some finished photos later.
Well thats it apart from a clean,bit of polish. Ive reached my quota on display models now. One almost finished Lotus MK3 and 1 unbuilt Ferrari 126 C2
in my stable.
Im off to make sure the grandson doesnt get caught up in gaming. Ive purchased and modified a 1/10th scale FTX Carnage RC car.
Its a bit of a monster, jumps really well after i corner weighted it. With adult supervision should get him going on it and have some real fun.
Thankyou to all who have read my thread and everyone that has commented. Thankyou CanAm for all your help with the historic info.
Cheers
Edited by henryk001 on Sunday 1st September 16:03
Edited by henryk001 on Sunday 1st September 16:04
Gassing Station | Scale Models | Top of Page | What's New | My Stuff