1:72 Airfix Bristol Bulldog
Discussion


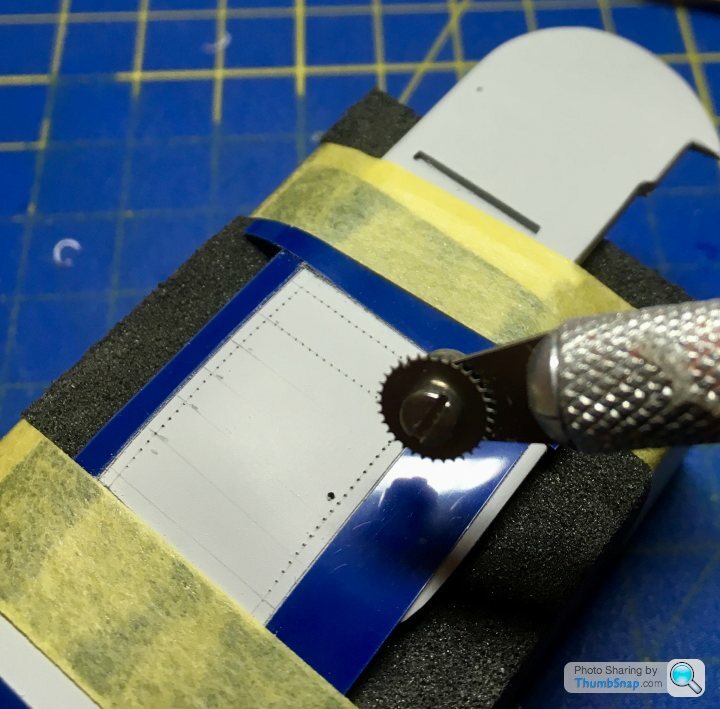
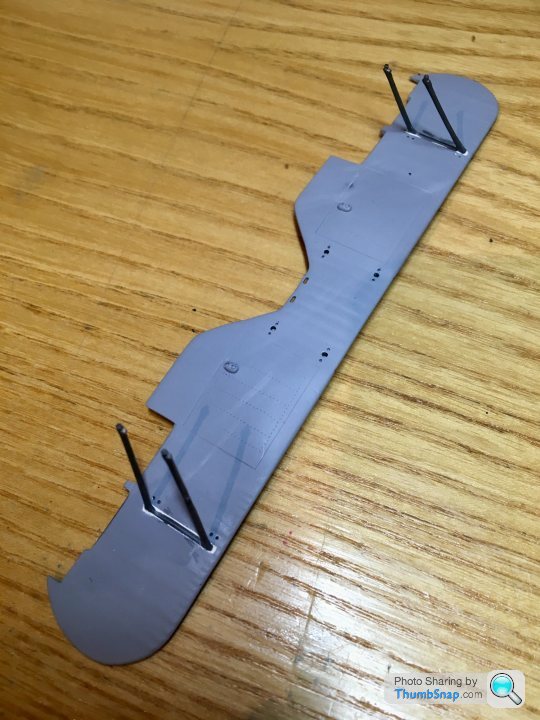
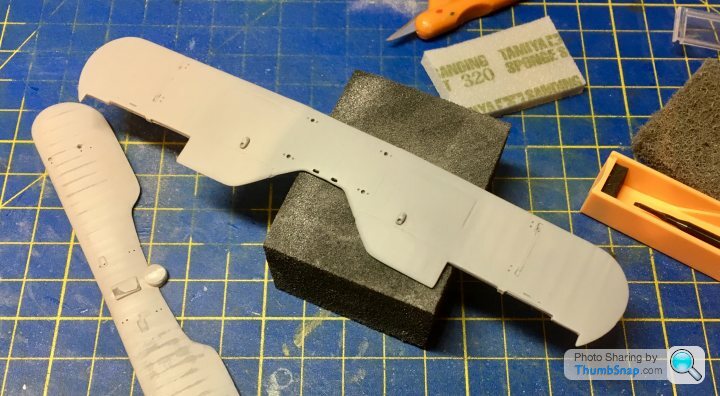
Re-riveted and scribed the upper wing fuel tanks:
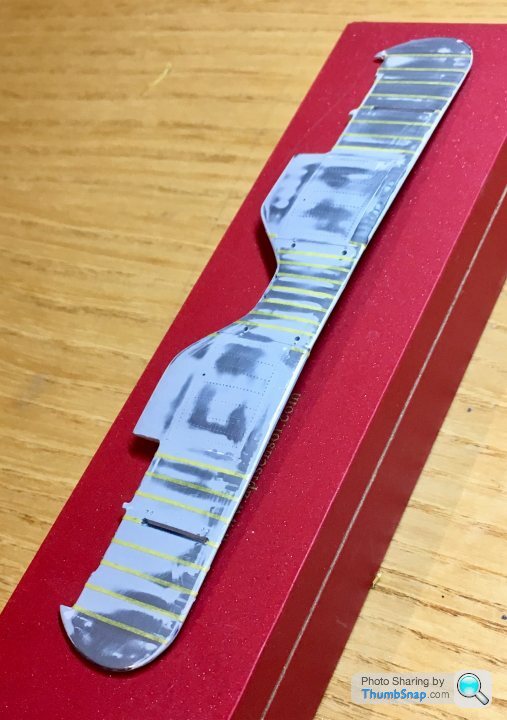
Couldn’t face skinning the wing undersides, so I’m giving another technique a try; representing the wing rib cap protrusions with 0.6 mm Kabuki tape. I’ve sealed it with Klear, and will give it a couple of coats of primer when it’s all in place:
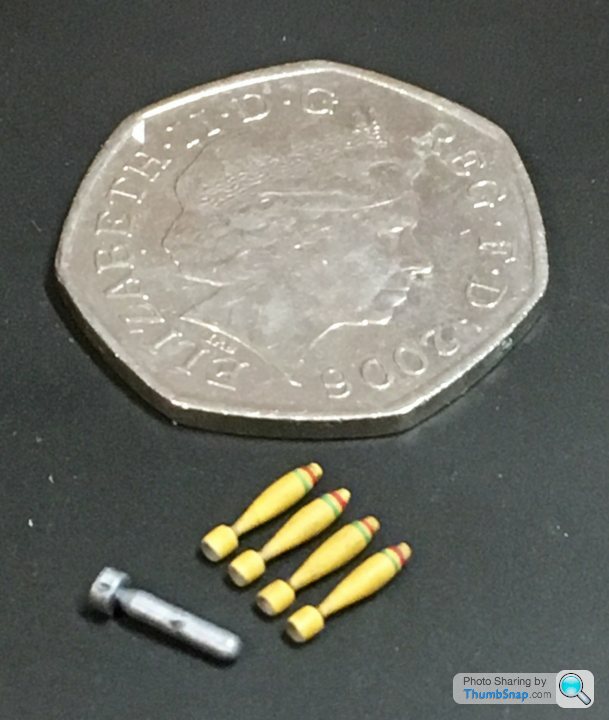
The printed 20lb bombs turned out OK for a first attempt, but I think a bit more optimisation of the settings is needed. I painted them just to get a benchmark. Way better than the originals even as they are:
Couldn’t face skinning the wing undersides, so I’m giving another technique a try; representing the wing rib cap protrusions with 0.6 mm Kabuki tape. I’ve sealed it with Klear, and will give it a couple of coats of primer when it’s all in place:
The printed 20lb bombs turned out OK for a first attempt, but I think a bit more optimisation of the settings is needed. I painted them just to get a benchmark. Way better than the originals even as they are:

Neonblau said:
What tool is that you're using in the wing picture? That looks really useful for a couple of projects I have in mind.
It's an RB riveting tool, in a standard blade holder:http://www.radubstore.com/index.php?main_page=inde...
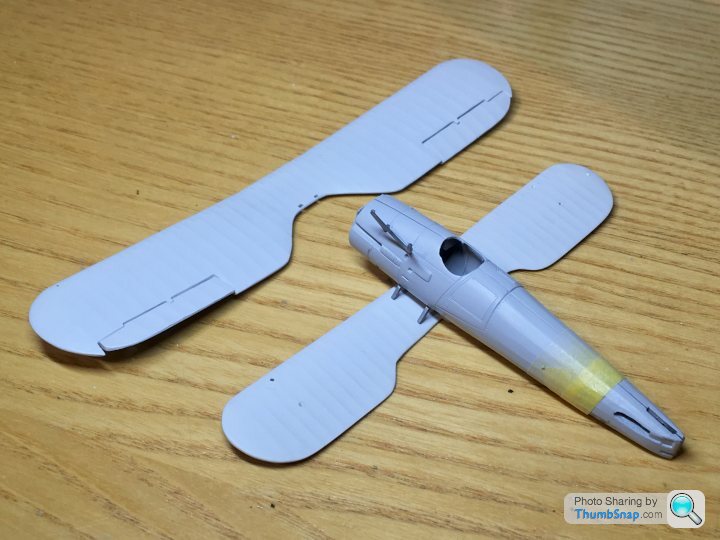
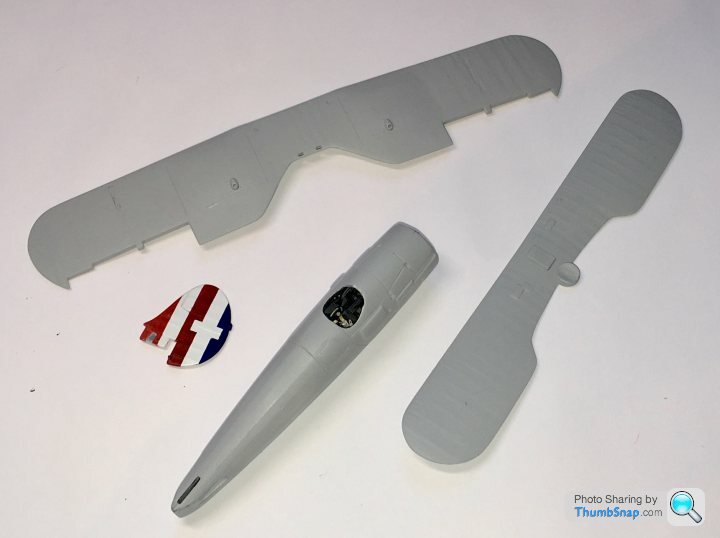
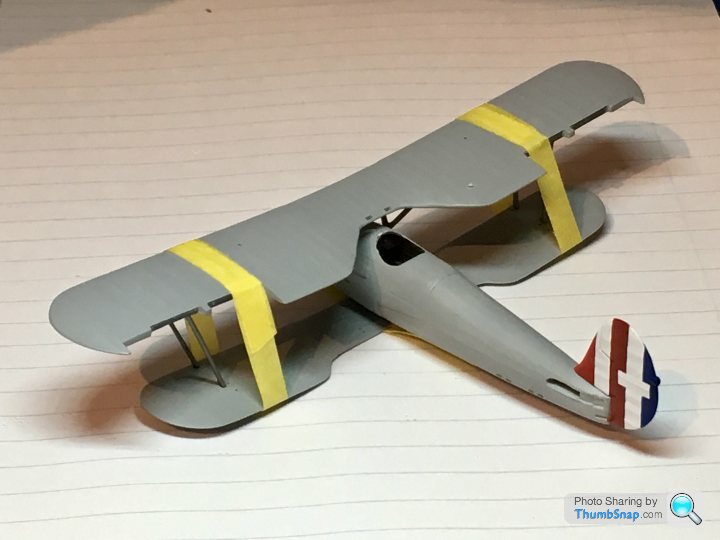
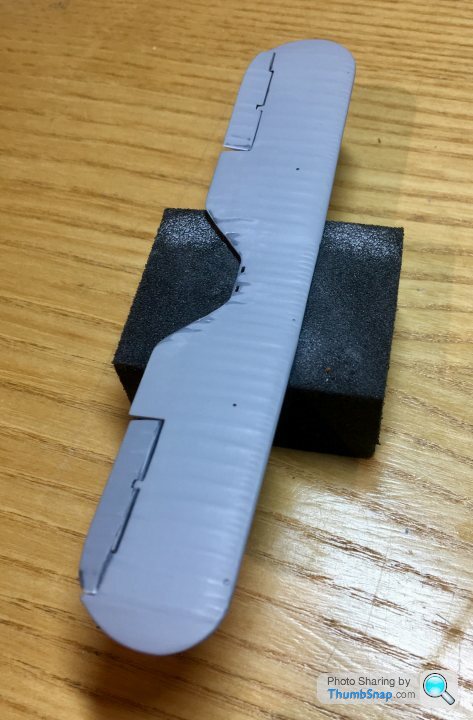
Got a bit bogged down with all my current projects being a pain in the arse. To get to this stage has taken wayyy longer than it should; the wing skinning didn’t work out, because there was no neat way of doing the underside of the upper wing and retaining the fuel tanks. Also disappointed to find no decals are included for the fin flashes, so required masking and painting. First time I got the stripes the wrong width, second time I got the read and blue mixed up. Sigh....
It’s going to one of those where the result doesn’t justify the effort, but there we go.
It’s going to one of those where the result doesn’t justify the effort, but there we go.

eccles said:
dr_gn said:
wolfracesonic said:
dr_gn said:
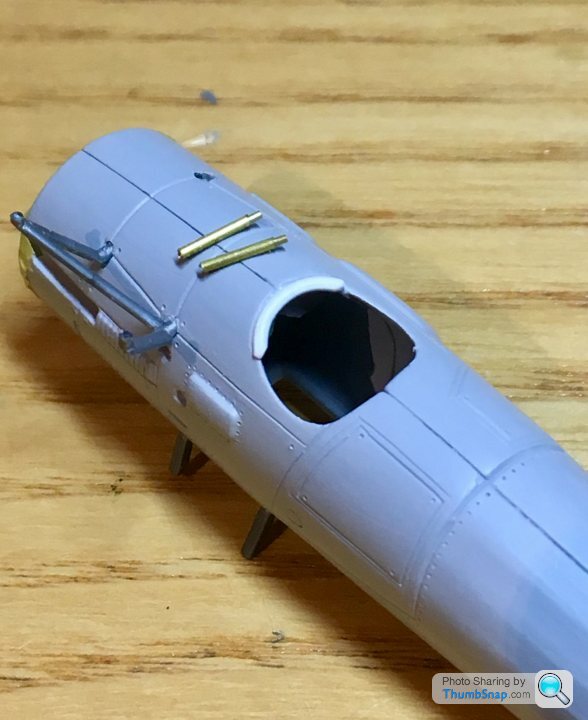
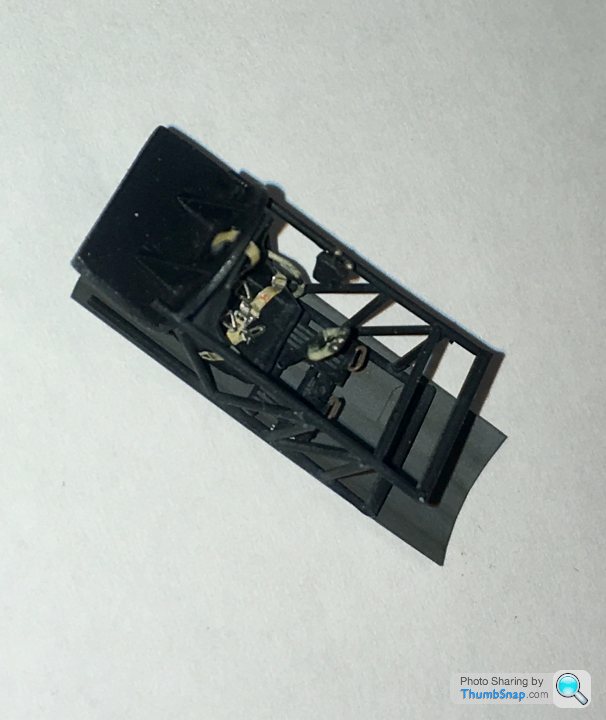
I’ll have to remember to pose the control column correctly:
.
I was going to pick you up on that if you forgot;).

Going by your previous builds I expect you already know the scale deflection and stick position!

Modeller’s license - my favourite phrase.
eccles said:
dr_gn said:
eccles said:
dr_gn said:
wolfracesonic said:
dr_gn said:
I’ll have to remember to pose the control column correctly:
.
I was going to pick you up on that if you forgot;).
Going by your previous builds I expect you already know the scale deflection and stick position!
Modeller’s license - my favourite phrase.
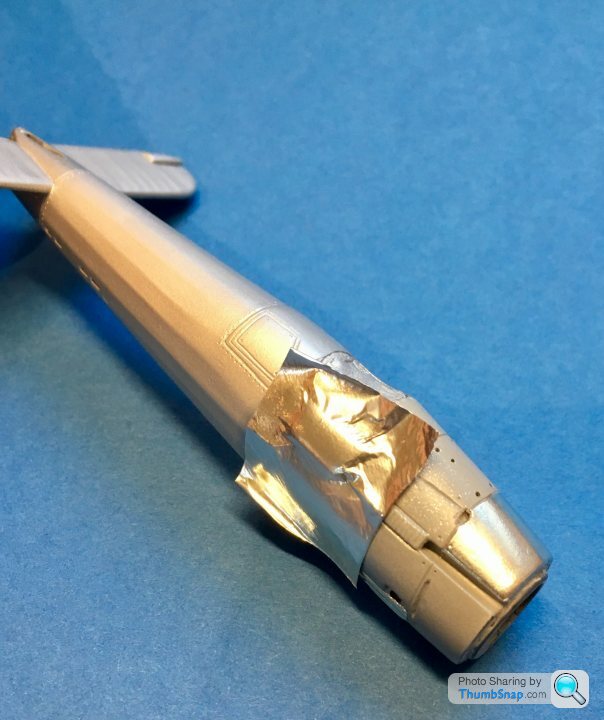
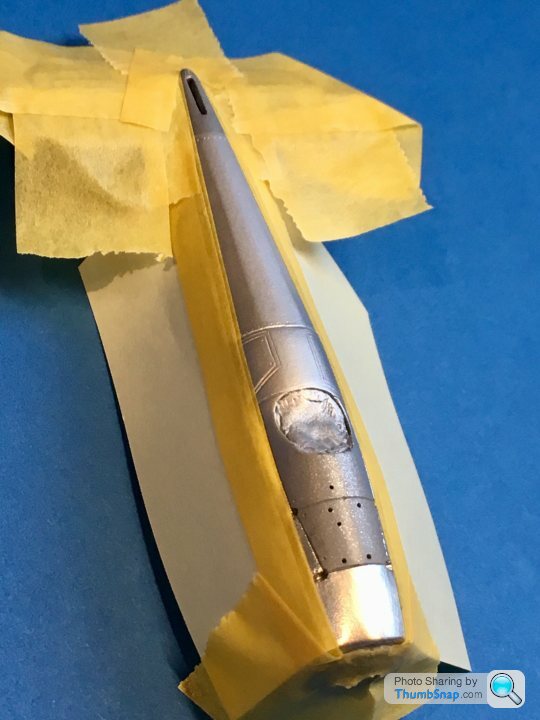
Happy new year, I'm looking forward to the rest of this build and your future ones.Anyway, new year, new technique to try - Bare Metal Foiled the polished forward fuselage:
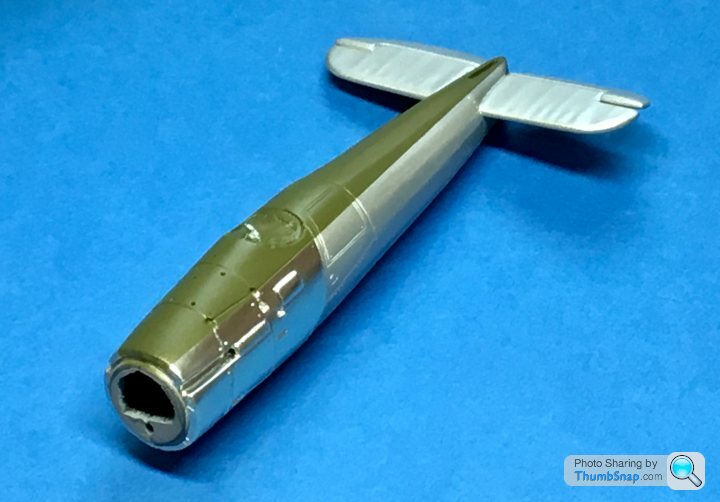
Masked and painted the green upper surfaces:
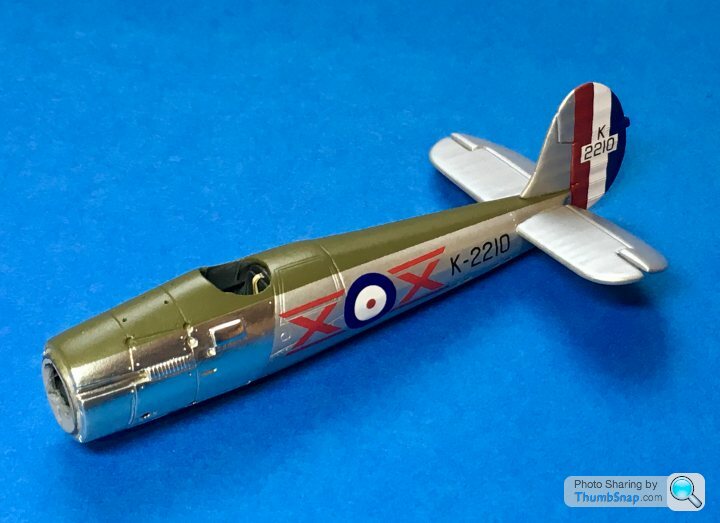
And put the decals on:
Still needs a dark wash, which may or may not work on the foil.
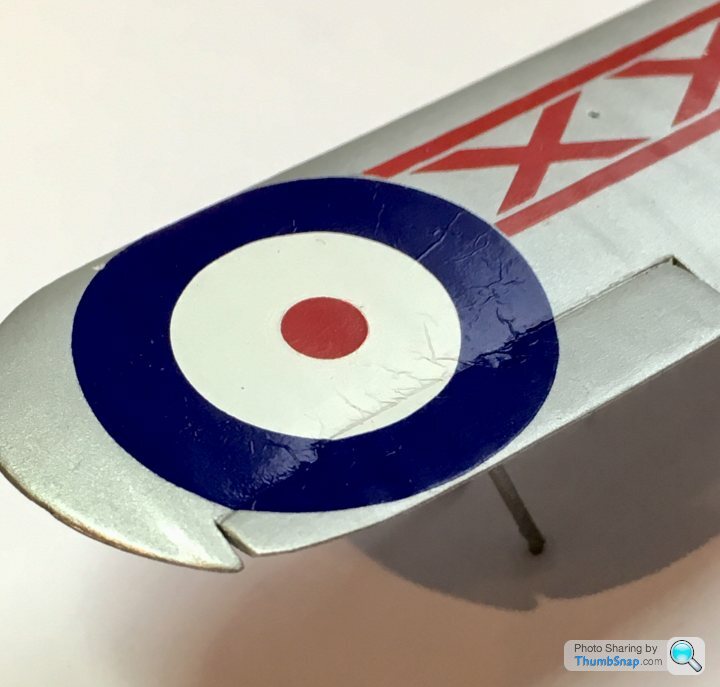
Don’t normally have much problem with decals, but these aftermarket ones didn’t like Micro Sol, and the wrinkling didn’t disappear. So I suppose I’ll have to strip the wing. Again.
allegerita said:
How do you attach the bare metal foil? I tried with kitchen aluminium foil and several glues on one of my paint mules but none were thin enough to not to leave any traces.I am using Allclad now but I still want to apply the foil technique.
It's very easy:https://www.bare-metal.com/how-to-use-bare-metal-f...
It's self-adhesive, but in a weird way; it's sticks, but you can peel it off again. High-tack masking tape will lift it.
I applied it using some paper tortillons for large areas,
https://en.wikipedia.org/wiki/Tortillon
and a cocktail stick to work it into panel lines. Cut oversize, and trim to size when in place with a new #11 blade.
I've tried all sorts of metal paints over the years, but none looked anything like real polished aluminium.
Gary29 said:
dr_gn said:
How do you go about painting such fine lines on an item like that? I'm talking about the red and green stripes? I could never achieve that.They’re scrap anyway because I’ve got some better resolution ones now. That’s if I can ever get the wings looking right.
allegerita said:
dr_gn said:
It's very easy:
https://www.bare-metal.com/how-to-use-bare-metal-f...
It's self-adhesive, but in a weird way; it's sticks, but you can peel it off again. High-tack masking tape will lift it.
I applied it using some paper tortillons for large areas,
https://en.wikipedia.org/wiki/Tortillon
and a cocktail stick to work it into panel lines. Cut oversize, and trim to size when in place with a new #11 blade.
I've tried all sorts of metal paints over the years, but none looked anything like real polished aluminium.
Perfect, thanks. I found the stuff for sale in the Netherlands so I'll order some sheets.https://www.bare-metal.com/how-to-use-bare-metal-f...
It's self-adhesive, but in a weird way; it's sticks, but you can peel it off again. High-tack masking tape will lift it.
I applied it using some paper tortillons for large areas,
https://en.wikipedia.org/wiki/Tortillon
and a cocktail stick to work it into panel lines. Cut oversize, and trim to size when in place with a new #11 blade.
I've tried all sorts of metal paints over the years, but none looked anything like real polished aluminium.
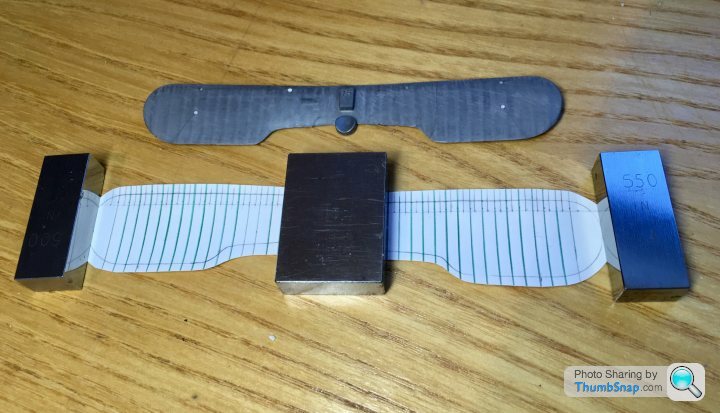
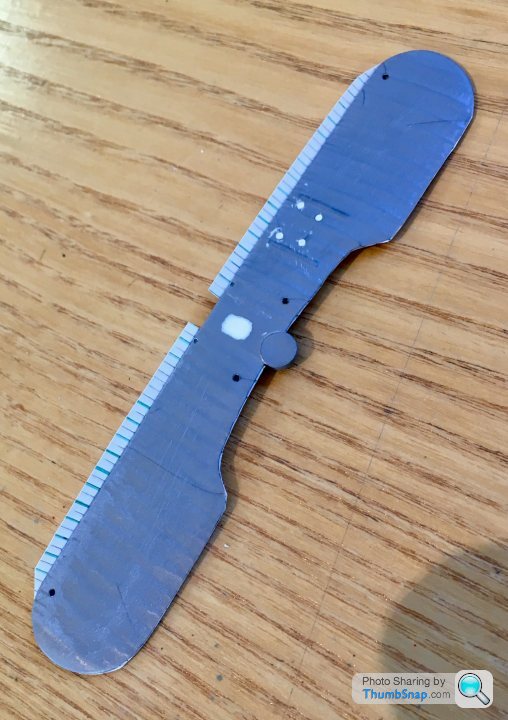
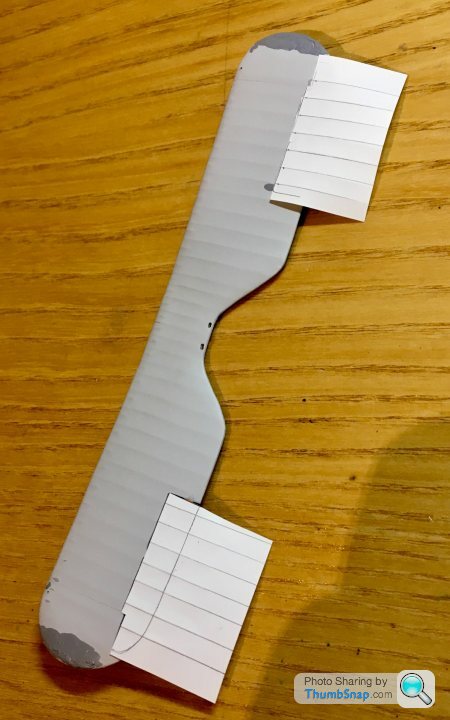
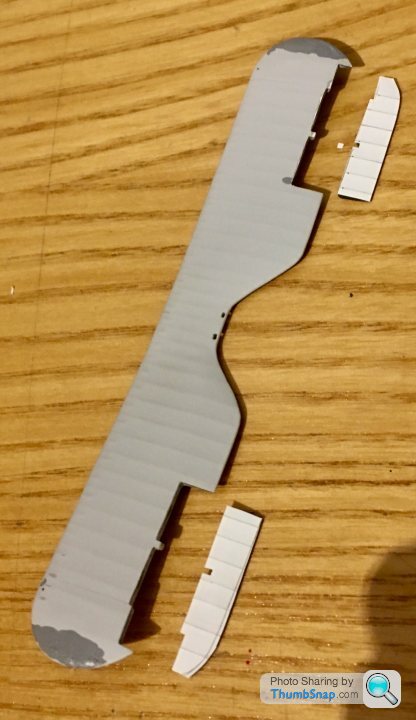
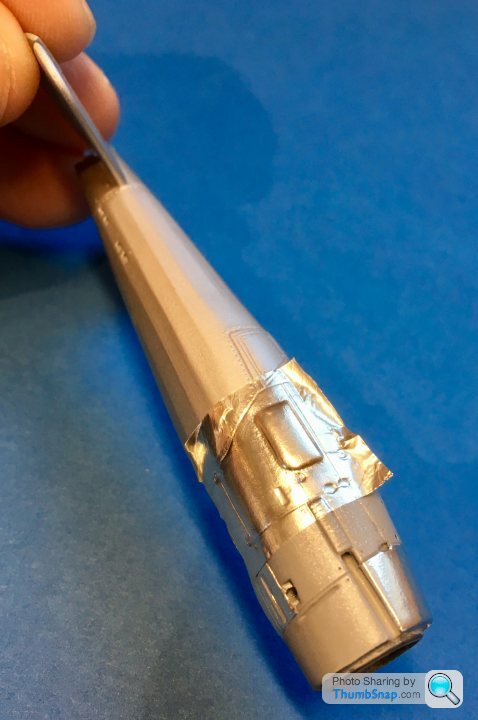
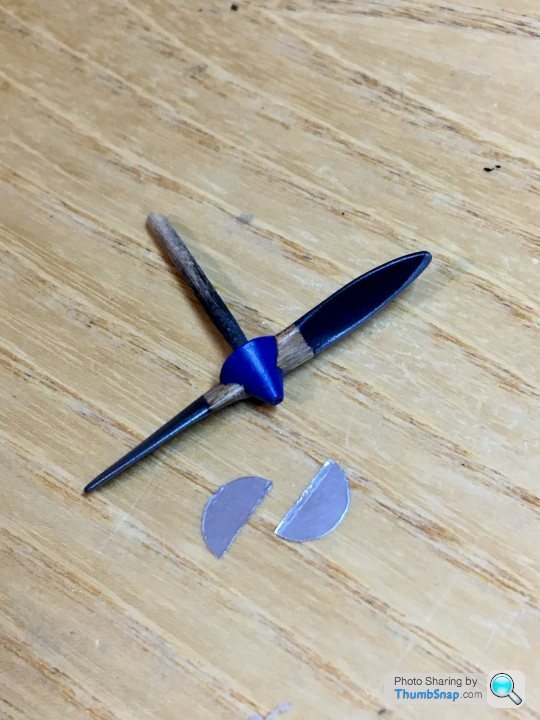
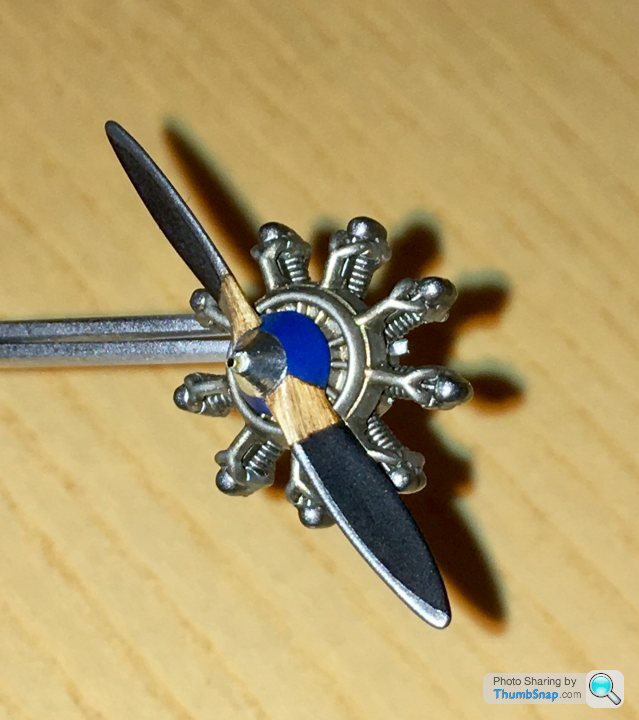
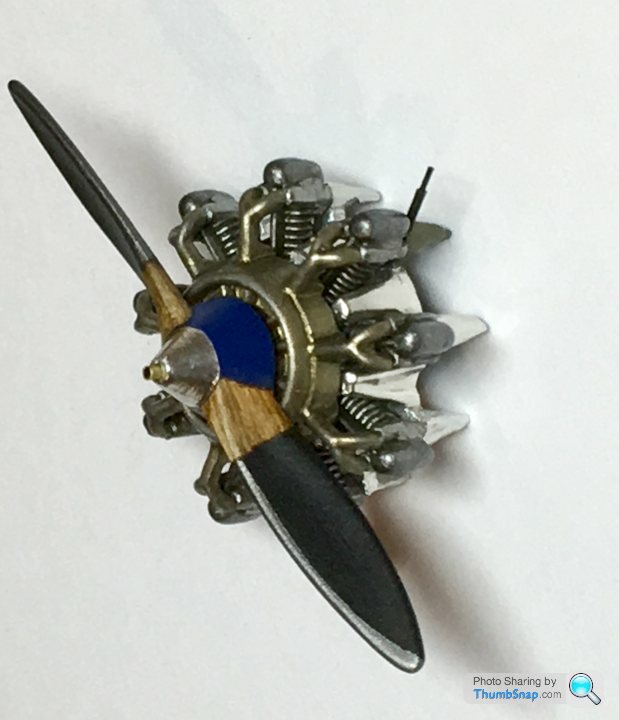
Benn working on the propeller - the real thing was partially painted wood, with protective metal on the edges, and a polished aluminium and blue painted spinner. I’d already drilled the original out and made a started dog from brass tube. Then the wood - Tamiya white primer streaked with burnt umber oil paint. The black blades and edging was a simple masking job. Not so the aluminium spinner. It had to match the forward fuselage, so Bare Metal Foil again. Found an online calculator for the developed shape:
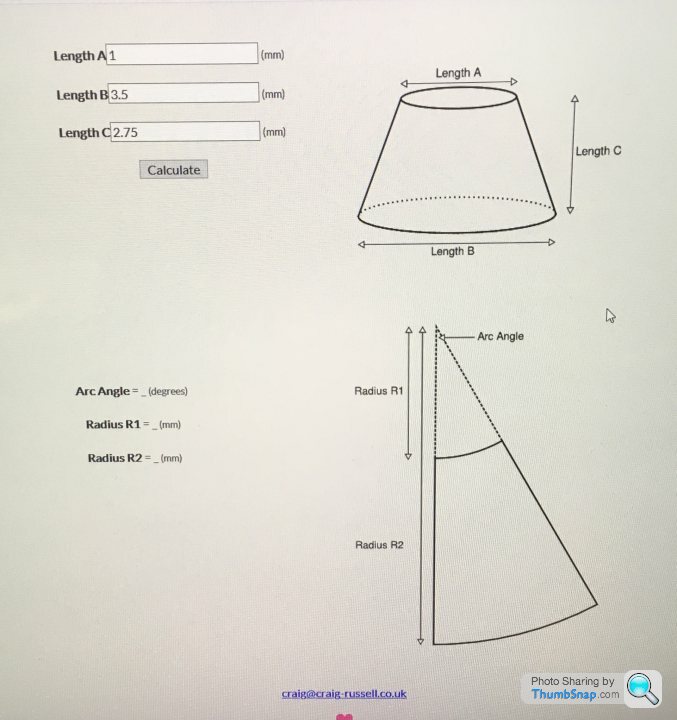
Once I’d got the critical large circle diameter I freestyled the rest:
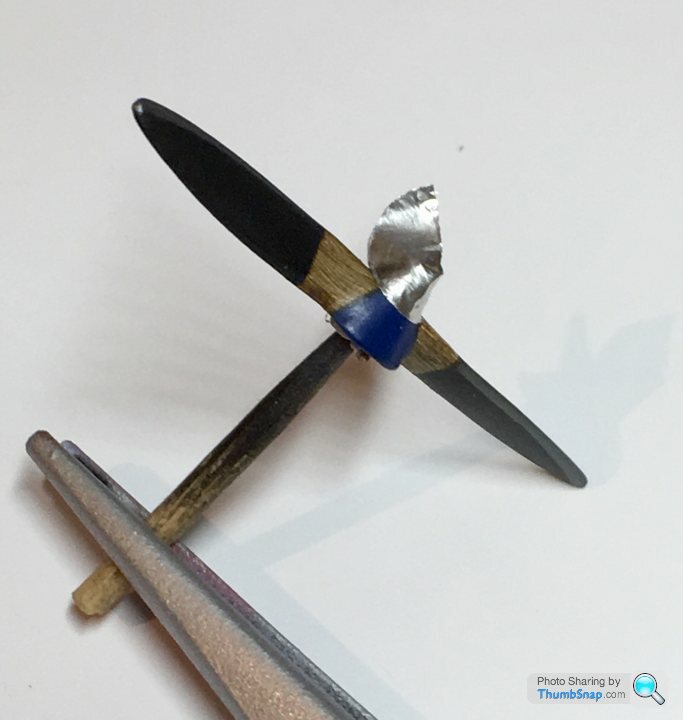
Despite reservations it went on fine:
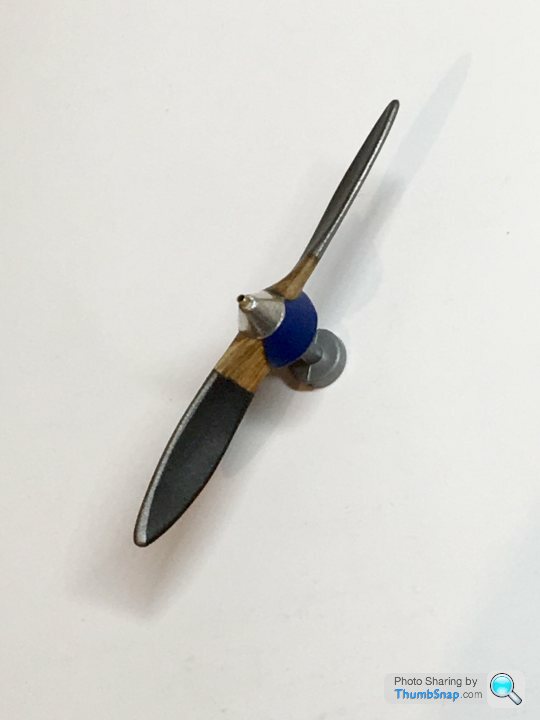
Couldn’t resist assembling it to the engine:
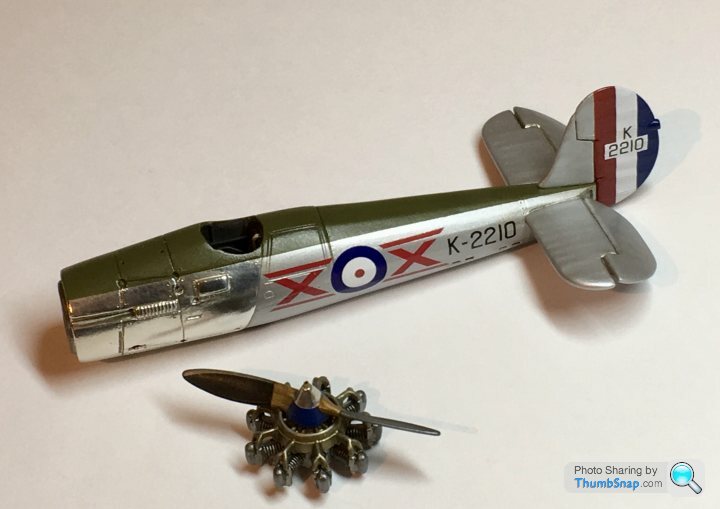
Next up for BMF is the engine fairing, which isn’t going to be easy...
Once I’d got the critical large circle diameter I freestyled the rest:
Despite reservations it went on fine:
Couldn’t resist assembling it to the engine:
Next up for BMF is the engine fairing, which isn’t going to be easy...
AshVX220 said:
I was hoping to find a "dropped jaw" smiley but these will have to do....

and

Thanks very much. Very pleased with how the completed bits look, but a major screw-up is the wing.and
With heavy heart, I stripped it back with caustic soda/brake fluid. This removed the top coats, but not the Tamiya primer. It also partially melted the struts, so I set-to and drilled/chiselled the slots clear:
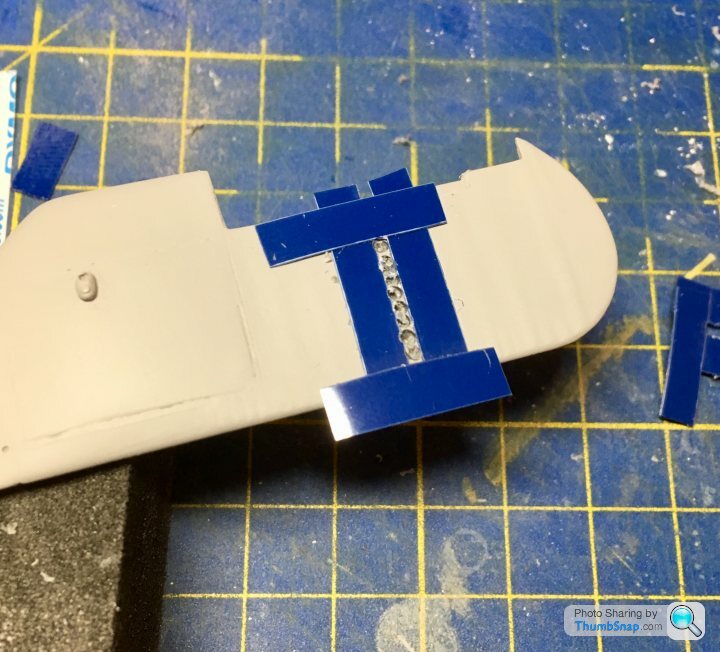
Since the quest for the perfect model filler continues, I thought I’d try Tamiya putty on this particular screw-up:
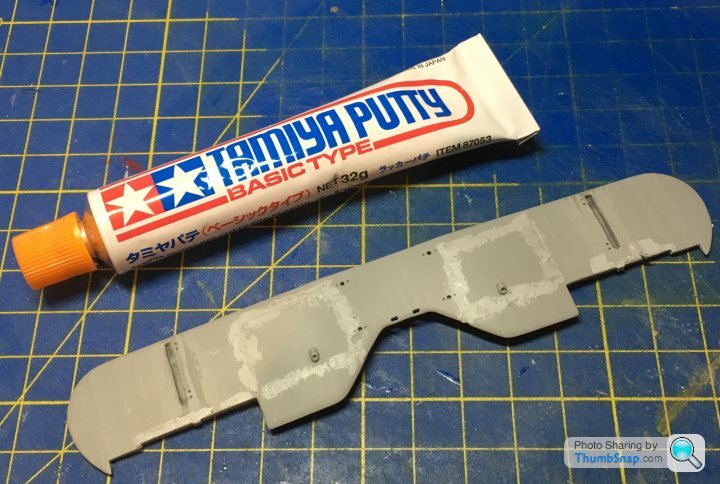
So we’ll see how that goes.
Gassing Station | Scale Models | Top of Page | What's New | My Stuff