1:72 Airfix Bristol Bulldog
Discussion


After the skinning experiment, I ended using some parts (upper wing) from a second kit - this one was a later version picked up on EBay, in a blister pack rather than a bag.
I was looking at the duplicate parts, and noticed they were much worse quality. The propeller for example has a badly mis-shapen spinner, the oil cooler is poorly defined and the generator is a short-shot:

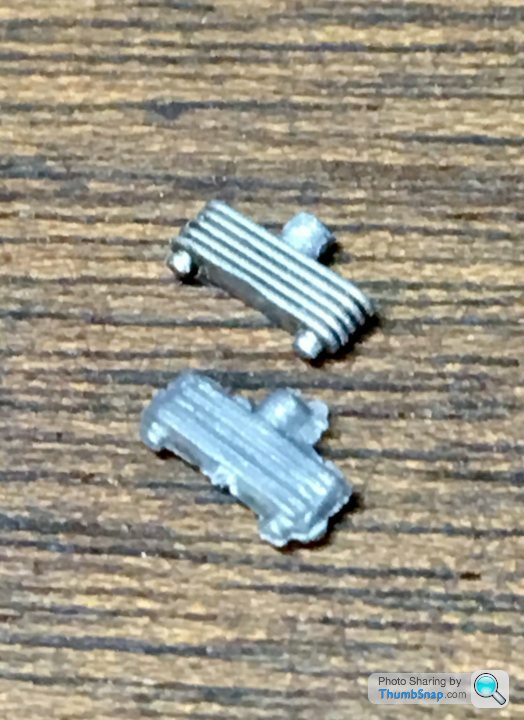

I’m surprised that the mould saw such rapid wear (if that’s what the issue is). I wonder if the Airfix re-release this year has had the moulds upgraded? Worth considering if anyone is considering getting one.
I was looking at the duplicate parts, and noticed they were much worse quality. The propeller for example has a badly mis-shapen spinner, the oil cooler is poorly defined and the generator is a short-shot:
I’m surprised that the mould saw such rapid wear (if that’s what the issue is). I wonder if the Airfix re-release this year has had the moulds upgraded? Worth considering if anyone is considering getting one.
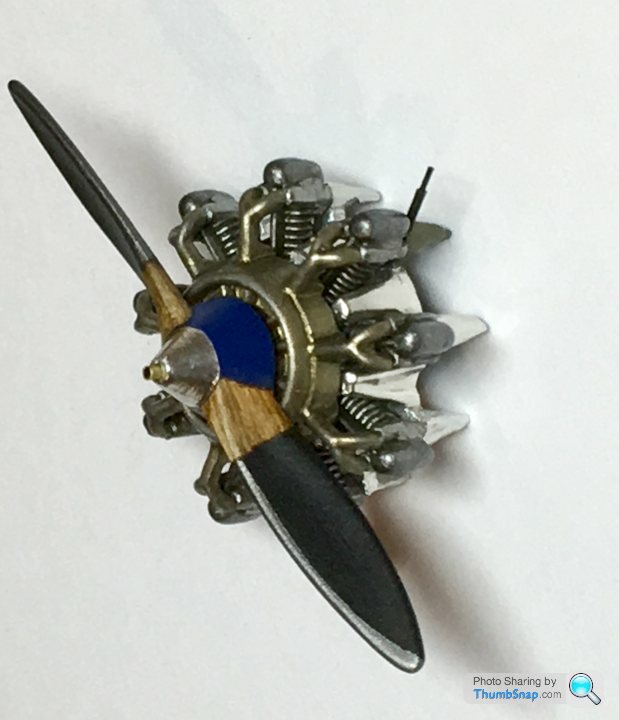
Working on refining a few details: As already mentioned, the propeller powered electrical generator needed a more realistic propeller:
So I made one out of plastic card, which was carved to approximately the right shape with a scalpel. Also made a brass shaft, spinner and spacer, and added a wire out of the back:

Once the prop was painted with oils, and everything asssembled, it looks a lot better (and it spins!):

Also made a more refined pitot head from brass tube:

Oh well, back to the never ending wing fettling.
So I made one out of plastic card, which was carved to approximately the right shape with a scalpel. Also made a brass shaft, spinner and spacer, and added a wire out of the back:
Once the prop was painted with oils, and everything asssembled, it looks a lot better (and it spins!):
Also made a more refined pitot head from brass tube:
Oh well, back to the never ending wing fettling.
robemcdonald said:
I’ve been enjoying the updates on this one.
I have to say the level of quality on the modified and scratch built elements is amazing.
I’m working on a kit bash / scratch built project for my clubs January competition and have struggled to fabricate elements an order of magnitude larger than your generator without anywhere near the finesse.
Top quality work sir.
Thanks for that. I'm finding that modelling with magnified glasses is making things a lot easier. Not ideal, but I guess nobody can stop eyesight deterioration!I have to say the level of quality on the modified and scratch built elements is amazing.
I’m working on a kit bash / scratch built project for my clubs January competition and have struggled to fabricate elements an order of magnitude larger than your generator without anywhere near the finesse.
Top quality work sir.
I've not seen any of your builds here for a long time, it's sometimes good to see build threads rather than just completed models.
robemcdonald said:
dr_gn said:
robemcdonald said:
I’ve been enjoying the updates on this one.
I have to say the level of quality on the modified and scratch built elements is amazing.
I’m working on a kit bash / scratch built project for my clubs January competition and have struggled to fabricate elements an order of magnitude larger than your generator without anywhere near the finesse.
Top quality work sir.
Thanks for that. I'm finding that modelling with magnified glasses is making things a lot easier. Not ideal, but I guess nobody can stop eyesight deterioration!I have to say the level of quality on the modified and scratch built elements is amazing.
I’m working on a kit bash / scratch built project for my clubs January competition and have struggled to fabricate elements an order of magnitude larger than your generator without anywhere near the finesse.
Top quality work sir.
I've not seen any of your builds here for a long time, it's sometimes good to see build threads rather than just completed models.
Also there are so many great builders on here I’m not sure what I could add. I mean I can barely tell the difference between a scalpel and a motorcycle.
That said. I have the new p38 to build, so may do one for that.
Keep up the excellent work.
Scratch-built a new bore sight to replace the rather chunky original:

Added an Eduard generic ring sight to go with the bead sight on the engine fairing. Also fitted the Yahu instrument panel, crash pad and cabane struts:

Still needs a windscreen.
I’ve seen some archive images with silver trim on the wheel centres, which I liked. Stuck the wheels on a drill shank in the lathe and brush painted them:

The wings are back in stripper for the umpteenth time. It’s now either them or me. A line’s been crossed, it’s a battle of wills. It’s not about experience or whatever anymore it’s about monkeys and typewriters; repeat until it’s randomly right. It’s war:

Added an Eduard generic ring sight to go with the bead sight on the engine fairing. Also fitted the Yahu instrument panel, crash pad and cabane struts:
Still needs a windscreen.
I’ve seen some archive images with silver trim on the wheel centres, which I liked. Stuck the wheels on a drill shank in the lathe and brush painted them:
The wings are back in stripper for the umpteenth time. It’s now either them or me. A line’s been crossed, it’s a battle of wills. It’s not about experience or whatever anymore it’s about monkeys and typewriters; repeat until it’s randomly right. It’s war:
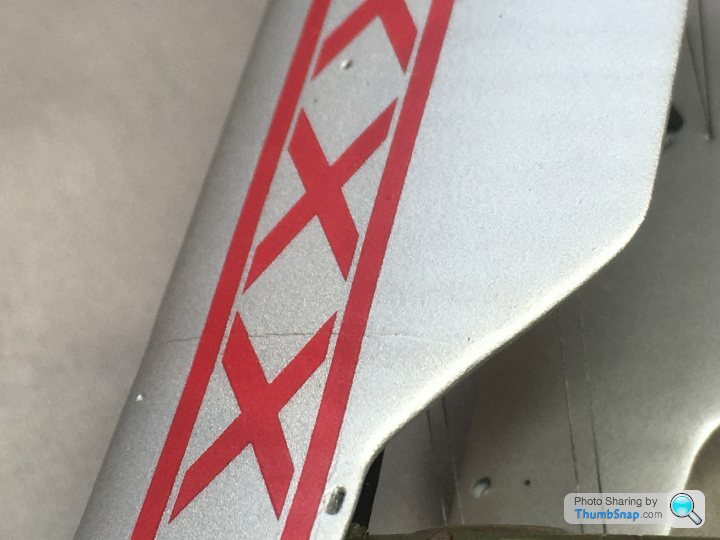
So, predictably, after flatting, re-scribing and re-painting the wing, the new decals wrinkled. Again.


This time I’d used MicroSet instead of Klear as an undercoat, but whatever.
So Im stripping the wing. Again. Next time I’ll airbrush the roundels with circular masks and be done with it. The diamond band has never been an issue.
So unless someone has a spare RAFDec wing band they want to sell, it’s a another set of decals. They are limited edition, and the manufacturer no longer has spares (I did ask):

Or I just don’t bother and move on to the next one. It’s not funny anymore!
This time I’d used MicroSet instead of Klear as an undercoat, but whatever.
So Im stripping the wing. Again. Next time I’ll airbrush the roundels with circular masks and be done with it. The diamond band has never been an issue.
So unless someone has a spare RAFDec wing band they want to sell, it’s a another set of decals. They are limited edition, and the manufacturer no longer has spares (I did ask):
Or I just don’t bother and move on to the next one. It’s not funny anymore!

The test wing sees yet more action:


That was suspiciously easy...
Couple of lessons learned for the real thing:
1) cover up the pin hole in the centre of the white mask - the red decal isn’t opaque.
2) stop the white background spray before the roundel edge well within the blue outer circle to stop ghosting.
That was suspiciously easy...
Couple of lessons learned for the real thing:
1) cover up the pin hole in the centre of the white mask - the red decal isn’t opaque.
2) stop the white background spray before the roundel edge well within the blue outer circle to stop ghosting.
Perseverant said:
Beautiful work! It took me back a bit to my teens when I was quite a keen modeller. I had a Bulldog in1/48 scale made, think by a company called "Inpact". I also had their Hawker Hart. The same firm also made a range of early aircraft like Bleriot - I had a Martin-Handaside. I rigged them with thin fishing line and covered the Bulldog and Hart with chewing gum silver paper rubbed on the appropriate sections. The scored plastic technique is very like the way I made wings for a Hansa-Brandenburg "Star Strutter" (WW1 Austro Hungarian fighter plane) .
Thanks! This one is fighting all the way.Not heard of Inpact, if you look on Scalemates, apparently it was a re-box of an older Merit kit. The Bleriot etc seem to have been made by Inpact, and released in conjunction with the film “Those magnificent men in their flying machines”.
Silver wings do a 1:32 Bulldog, in fact I downloaded their instructions and used them to detail this Airfix kit.
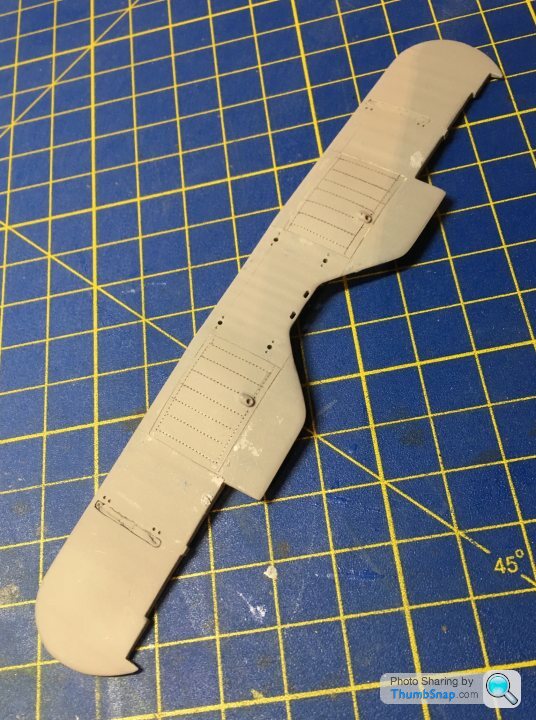
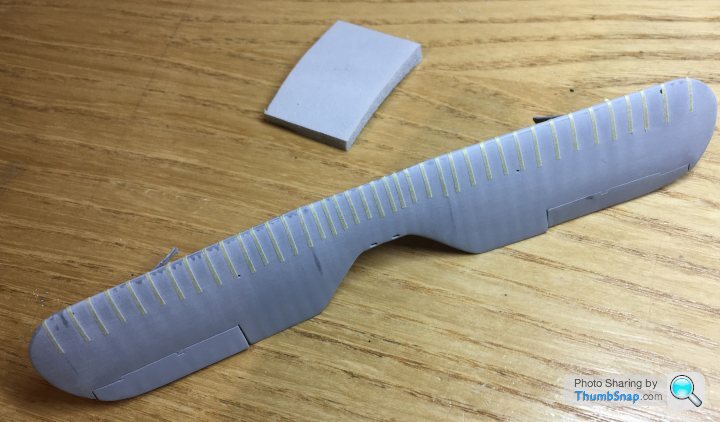
Surprised the wing assembly can take this much abuse...painted it for the sixth or seventh time last night, only to find a bit of dust right in the middle. Removing it screwed it, so into the thinners again, washed dried and flatted. By this time the rib betail in the leading edge was barely visible. I cut some 0.5mm tape and put it along the edge, then sanded it with Tamiya sponge. Put some subtle waviness back:
Also made an acetate windscreen to replace the massive original version:

Wing is now painted and Kleared pretty well, so the next job on this one is to paint the roundels and put the band decal on tomorrow. If that doesn’t work, it’s going in the bin. Not prepared to compromise on the most visible bit of the model, and I’m sure not buying a fourth set of decals.
Also made an acetate windscreen to replace the massive original version:
Wing is now painted and Kleared pretty well, so the next job on this one is to paint the roundels and put the band decal on tomorrow. If that doesn’t work, it’s going in the bin. Not prepared to compromise on the most visible bit of the model, and I’m sure not buying a fourth set of decals.
Last chance method; home made roundel masks + decals.

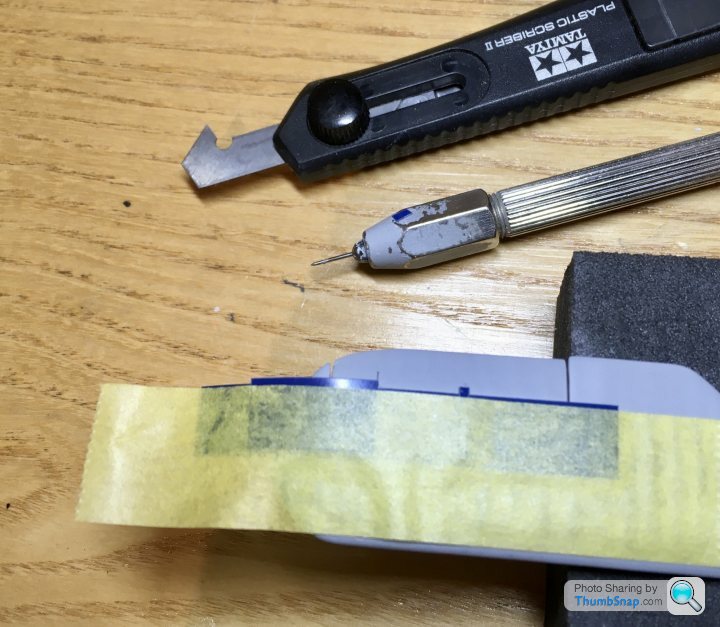
FWIW, this is what I did:
Cut the circles from masking film. The decals were slightly too large for the wing, so I corrected the diameter:

Then stick the circles to the wing, ensuring they’re as symmetrical as they can be, relative to the features on the wing:
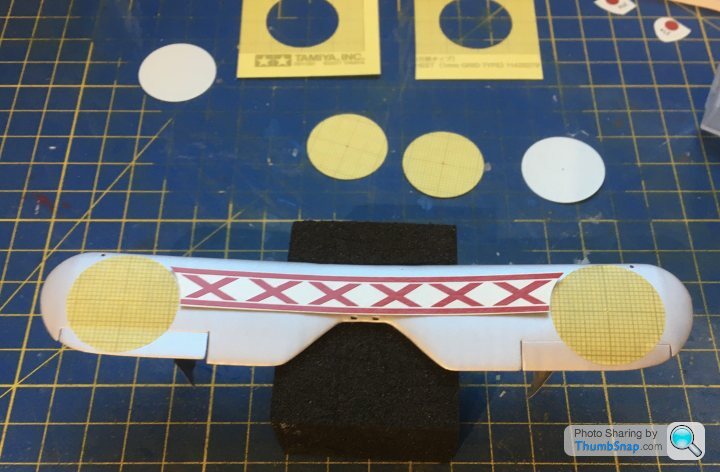
Substitute the circles with the outer masks:
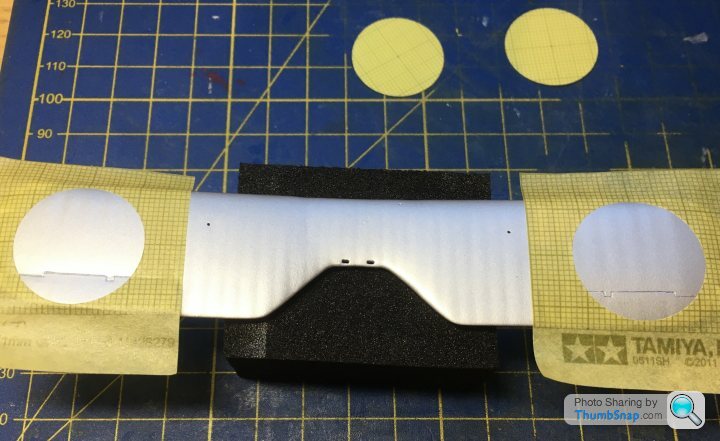
Add Blu-Tack around the edges to avoid white edges:
Spray Tamiya white primer, Vallejo off white, and Klear:

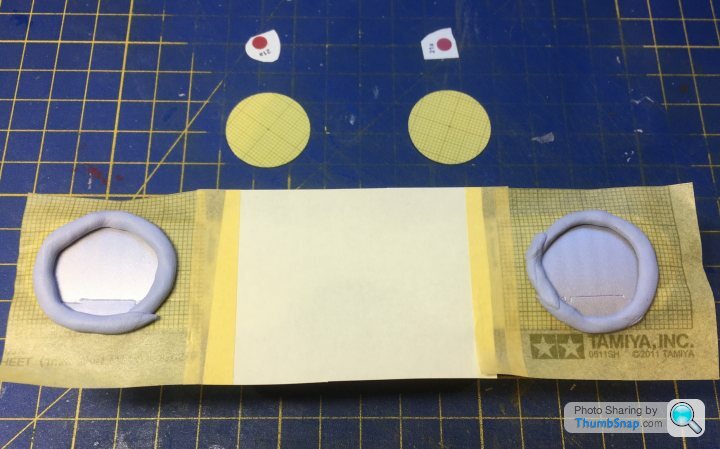
Place the inner (white area) masks using the annular rings as guides:

Then spray Tamiya dark blue, remove masks:

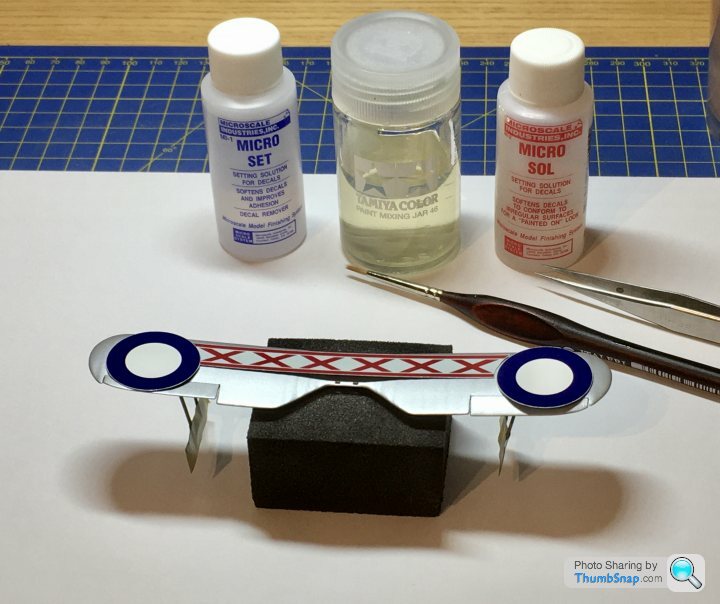
Fiinally, add red centres and diamond band, (and pray it doesn’t wrinkle), then coat everything with Klear:

Currently setting in the airing cupboard. It’s by far the best result so far, so assuming it stays good...onward at last.
FWIW, this is what I did:
Cut the circles from masking film. The decals were slightly too large for the wing, so I corrected the diameter:
Then stick the circles to the wing, ensuring they’re as symmetrical as they can be, relative to the features on the wing:
Substitute the circles with the outer masks:
Add Blu-Tack around the edges to avoid white edges:
Spray Tamiya white primer, Vallejo off white, and Klear:
Place the inner (white area) masks using the annular rings as guides:
Then spray Tamiya dark blue, remove masks:
Fiinally, add red centres and diamond band, (and pray it doesn’t wrinkle), then coat everything with Klear:
Currently setting in the airing cupboard. It’s by far the best result so far, so assuming it stays good...onward at last.
Fitted the lower wing in place - got to start with one fixed reference I suppose:

The upper wing drops in place, but is slightly skewed, so I’ll have to figure out how to cure that somehow. The upper wing is what it is, but that’s as good as I can get it. Painted the fuel tanks a darker silver, put the stencils on and varnished it:


Also BMF’d the undercarriage leg spring fairings:
Next job is to fettle the location points for the upper wing without damaging anything...
The upper wing drops in place, but is slightly skewed, so I’ll have to figure out how to cure that somehow. The upper wing is what it is, but that’s as good as I can get it. Painted the fuel tanks a darker silver, put the stencils on and varnished it:
Also BMF’d the undercarriage leg spring fairings:
Next job is to fettle the location points for the upper wing without damaging anything...
So I got the top wing on, after much fiddling and fettling (as usual). It’s very slightly out of alignment, but ok. Of course, a crack re-appeared along the joint line:
It’s actually on a break line on the real aircraft, so I’ll have to find a method of turning it into an extremely fine panel line. Tried a strip of black decal (too obvious), silver painted masking tape (would also need red decals in the appropriate places, and looks clunky). Current idea is to use super fine elastic rigging looped around the whole wing and fixed with Klear...
Anyway, the elastic rigging is done - used the drilled lower wing method, which I’ve never used before. As expected it greatly simplifies one thing (the rigging), at the expense of greatly complicating the painting of the lower wing.

So after filling and flatting the rigging holes (predictably not very well), it’s now painted and awaiting the thankfully extensive decals:


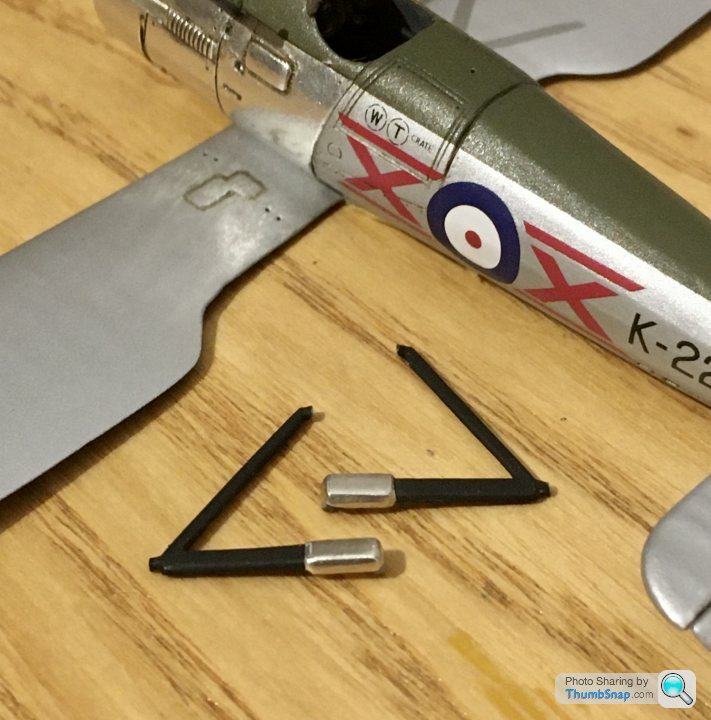
In the meantime I made some better rudder horns out of flattened and filed brass tube:
It’s actually on a break line on the real aircraft, so I’ll have to find a method of turning it into an extremely fine panel line. Tried a strip of black decal (too obvious), silver painted masking tape (would also need red decals in the appropriate places, and looks clunky). Current idea is to use super fine elastic rigging looped around the whole wing and fixed with Klear...
Anyway, the elastic rigging is done - used the drilled lower wing method, which I’ve never used before. As expected it greatly simplifies one thing (the rigging), at the expense of greatly complicating the painting of the lower wing.
So after filling and flatting the rigging holes (predictably not very well), it’s now painted and awaiting the thankfully extensive decals:
In the meantime I made some better rudder horns out of flattened and filed brass tube:
The lower wings been stripped and re-painted twice since this morning (decal disaster and temperamental paint). The combination of silver paint (main issue - it’s a nightmare) and a rigged biplane was not a great choice. Drilling through the lower wing and repairing the holes was a really daft idea. So close to finishing it, yet I can feel something’s going to push this one towards the bin. At least I’ve got another two sets of decals before I run out.
Edited by dr_gn on Saturday 25th January 20:58
Finally got the decals on without something going wrong. Jeez.
Also added a circular disc to represent the oil cooler vent. I’ve seen one image with what looks like a ventral lamp under there too, but can’t find a definitive reference.
ETA note the deliberate stencil mistake. Wouldn’t be the same to finish a stage without a correction to make.
Also added a circular disc to represent the oil cooler vent. I’ve seen one image with what looks like a ventral lamp under there too, but can’t find a definitive reference.
ETA note the deliberate stencil mistake. Wouldn’t be the same to finish a stage without a correction to make.
Edited by dr_gn on Saturday 25th January 22:55
Equus said:
Skii said:
He's a bit good isn't he 
And this is one that's teetering on the edge of the bin? 
 ked.
ked.For some odd reason, a crack appeared in the upper wing. I’ve tried to cover it by making it into an assembly break line (which would have been ok), but it looked gash:

So I’ve tried to scrape it out and dissolve some sprue into it:

But obviously it means re-painting....and yet another decal:

I very much doubt the wing can take another flat and re-paint, and it’s now fitted and rigged, making any repair 10x more difficult.
I think I’ll end up stripping the wings off and retaining the fuselage and engine etc for another life. Shame really, since I must have spent dozens of hours on it, and most of it looks very good (and I’m quite critical of my own work).
Gassing Station | Scale Models | Top of Page | What's New | My Stuff