1/8 Ghostbusters Ecto-1 Partwork
Discussion


dudleybloke said:
Are you leaving the seat back the way it is or will you glue and fill to remove the screws?
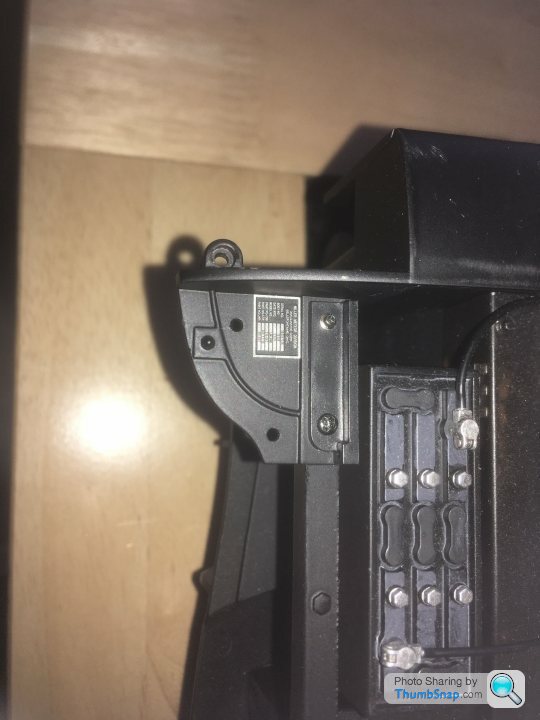
Going to wait to see how visible they are once the interior is together. There is a half height bulkhead immediately behind the seats, so wont be seen from the back, and on the real thing the seat-backs are behind the door jam. So as long as I don't fold the seats forwards the screws will be pretty much invisible once complete. The advantage of a screw assembly is that if I change my mind later it will be simple to remove the seats and fill in the screw holes.I might have to do something about the underside of the jump seat though, the screws are fairly visible when its folded up.
Adam Savage seems to be building this too...
youtube link
It's a beast of a model, enjoying both builds!
youtube link
It's a beast of a model, enjoying both builds!


Quick comparison for size with the Lego Ecto

I’ve since added a carpet to the front and got some upgrades to the dash. Next 2 stages have arrived which make a start to the rear interior, but they need a bit of improvement first, and I need to clear a couple of other projects off the workbench first.
I’ve since added a carpet to the front and got some upgrades to the dash. Next 2 stages have arrived which make a start to the rear interior, but they need a bit of improvement first, and I need to clear a couple of other projects off the workbench first.
I know its been a while, but had to get the mojo up for some major scratchbuilding.
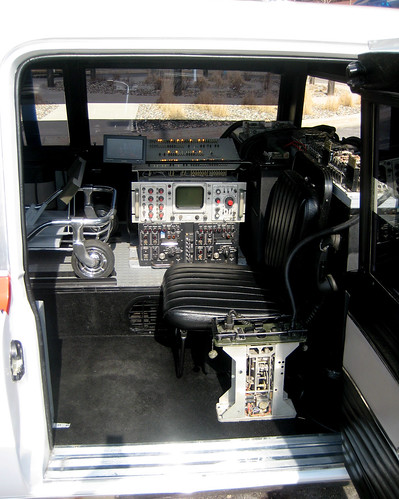
The supplied part for the top of the interior bulkhead was just a crude bit of moulded plastic, all in silver, as can be seen at the 6 min mark of this https://youtu.be/MnE_hh4ZBw8
The real thing is a bank of relays and wiring https://www.gbfans.com/forum/viewtopic.php?t=17266
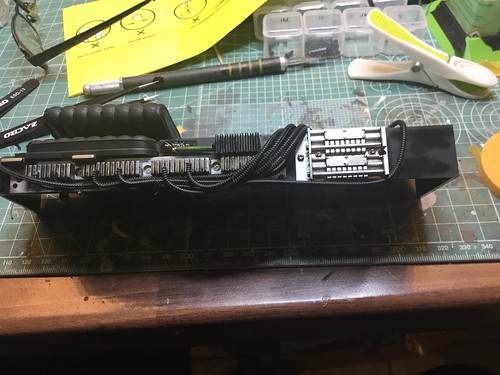
Step one - I gut off the crude moulding for the solenoid and replaced with a bit of plastic tube, also added in the circular wire conduit with a much shorter bit of tube, and repainted. As scratch built a switch panel, which is probably a bit undersize - anyone know of a source of 1/8 scale toggle switches?
 IMG_1995 by MBBlat, on Flickr
I then ignored the instructions for the placement of the conduits and put them in a more realistic position, secured with superglue & scale cable ties.
 IMG_0080(1) by MBBlat, on Flickr
 IMG_0081(1) by MBBlat, on Flickr
Got some after-market carpet & the grill for the rear seat-well on order, then its the oscilloscope & associated panels, which Eaglemoss have made to look almost totally unlike the real thing.
The supplied part for the top of the interior bulkhead was just a crude bit of moulded plastic, all in silver, as can be seen at the 6 min mark of this https://youtu.be/MnE_hh4ZBw8
The real thing is a bank of relays and wiring https://www.gbfans.com/forum/viewtopic.php?t=17266
Step one - I gut off the crude moulding for the solenoid and replaced with a bit of plastic tube, also added in the circular wire conduit with a much shorter bit of tube, and repainted. As scratch built a switch panel, which is probably a bit undersize - anyone know of a source of 1/8 scale toggle switches?
IMG_1995 by MBBlat, on FlickrI then ignored the instructions for the placement of the conduits and put them in a more realistic position, secured with superglue & scale cable ties.
IMG_0080(1) by MBBlat, on FlickrIMG_0081(1) by MBBlat, on FlickrGot some after-market carpet & the grill for the rear seat-well on order, then its the oscilloscope & associated panels, which Eaglemoss have made to look almost totally unlike the real thing.
MBBlat said:
As scratch built a switch panel, which is probably a bit undersize - anyone know of a source of 1/8 scale toggle switches?
I’m not sure about 1/8 but 1/10 is a popular scale for RC and there is a wealth of detail bits available for those.I found some on Shapeways - search 1/10 toggle. You might be able to scale them up.
Alternatively I googled and found some 1/12 ones on Spotmodel.com (no idea what they are like) possibly too small though.
About time I did an update, been waiting for some deliveries before I could continue. After-market carpeting and trim for the rear.
 IMG_2008 by MBBlat, on Flickr
This also included a PE grill that is missing from the model. I cut away the bulkhead behind the grill, will put some random pipes and wires behind when I install it onto the chassis.
 IMG_2011 by MBBlat, on Flickr
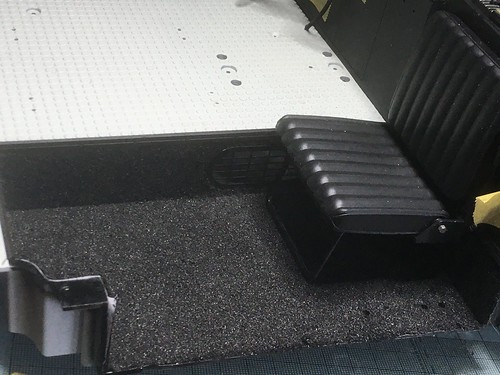
Also got some seat-back covers and attached the front and rear floor plates
 IMG_2012 by MBBlat, on Flickr
Very disappointed with the quality of the interior pieces, Tamiya quality moulding this is not. In fact Tamiya RC models from the 70's are better quality.
This is the oscilloscope and radio after some detailed painting:
 IMG_2014 by MBBlat, on Flickr
Unfortunately the whole rear interior is of this (lack of) quality, and basically needs whole sale replacement. To that end I've brought, Pistonheads man maths in action, a 3D printer, and downloaded some 3d Files. Properly scaled analogue/digital simulation board compared to the Eaglemoss one:
 IMG_2010 by MBBlat, on Flickr
Honeywell 600, which was totally missing
 IMG_2015 by MBBlat, on Flickr
IMG_2008 by MBBlat, on FlickrThis also included a PE grill that is missing from the model. I cut away the bulkhead behind the grill, will put some random pipes and wires behind when I install it onto the chassis.
IMG_2011 by MBBlat, on FlickrAlso got some seat-back covers and attached the front and rear floor plates
IMG_2012 by MBBlat, on FlickrVery disappointed with the quality of the interior pieces, Tamiya quality moulding this is not. In fact Tamiya RC models from the 70's are better quality.
This is the oscilloscope and radio after some detailed painting:
IMG_2014 by MBBlat, on FlickrUnfortunately the whole rear interior is of this (lack of) quality, and basically needs whole sale replacement. To that end I've brought, Pistonheads man maths in action, a 3D printer, and downloaded some 3d Files. Properly scaled analogue/digital simulation board compared to the Eaglemoss one:
IMG_2010 by MBBlat, on FlickrHoneywell 600, which was totally missing
IMG_2015 by MBBlat, on FlickrThe radio after a bit of detail painting and weathering:
 IMG_2016 by Mark Benger, on Flickr
Added some greeblies to the power supply and painted it the correct colour. The UHF signal distributor panels are stock, why the rest of the interior couldn't be to this standard I don't know.
 IMG_2019 by MBBlat, on Flickr
 IMG_2021 by MBBlat, on Flickr
 IMG_2022 by MBBlat, on Flickr
 IMG_2023 by MBBlat, on Flickr
Electronics are in & working, the siren is awful. Also got the inner body frame - this is massive and heavy. Need to sort out another photo hosting site though, since I refuse to pay the inflated Flickr pro prices & my storage is full. Anyone got any suggestions?
IMG_2016 by Mark Benger, on FlickrAdded some greeblies to the power supply and painted it the correct colour. The UHF signal distributor panels are stock, why the rest of the interior couldn't be to this standard I don't know.
IMG_2019 by MBBlat, on FlickrIMG_2021 by MBBlat, on FlickrIMG_2022 by MBBlat, on FlickrIMG_2023 by MBBlat, on FlickrElectronics are in & working, the siren is awful. Also got the inner body frame - this is massive and heavy. Need to sort out another photo hosting site though, since I refuse to pay the inflated Flickr pro prices & my storage is full. Anyone got any suggestions?


CDP said:
I've often wondered about these partworks as they strike me as very expensive. Having said that with the effort you are putting in you will get something fantastic out of it.
I wonder how many people make it to the end of the series?
I'm paying 3 monthly, so just over £40 a month. So slightly cheaper than my previous Lego Addiction I wonder how many people make it to the end of the series?
 . I don't smoke, only drink lightly and have no kids, all of which would be more expensive. Cutting down on Lego purchases has also helped.
The scale bolts were a fairly cheap upgrade, and I had most of the paint & weathering products already.
Raided the spares box for some bits, there is a cut down Sherman front sprocket on the power supply box.
Spent a bit more on the carpet sets. I've also got a power mod so that it can run off mains power on order.
1/8 kits of anything are also rare outside of the Partworks.
MBBlat said:
CDP said:
I've often wondered about these partworks as they strike me as very expensive. Having said that with the effort you are putting in you will get something fantastic out of it.
I wonder how many people make it to the end of the series?
I'm paying 3 monthly, so just over £40 a month. So slightly cheaper than my previous Lego Addiction I wonder how many people make it to the end of the series?
. I don't smoke, only drink lightly and have no kids, all of which would be more expensive. Cutting down on Lego purchases has also helped.The scale bolts were a fairly cheap upgrade, and I had most of the paint & weathering products already.
Raided the spares box for some bits, there is a cut down Sherman front sprocket on the power supply box.
Spent a bit more on the carpet sets. I've also got a power mod so that it can run off mains power on order.
1/8 kits of anything are also rare outside of the Partworks.
Gassing Station | Scale Models | Top of Page | What's New | My Stuff