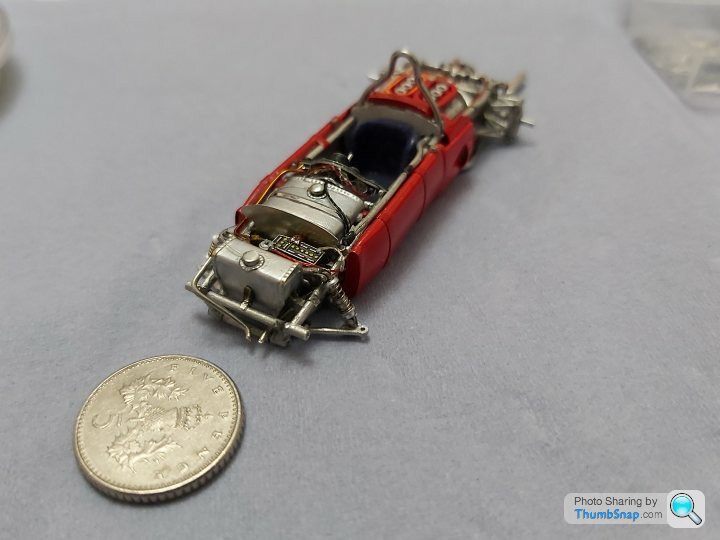
1961 FERRARI 156 SHARKNOSE 1/43
Discussion


dr_gn said:
Very nice. Was it a kit someone else built, or is it a diecast model?
Its a diecast,ive never heard of before. I have no idea how old this is,other than the damage i have to fix.The paintwork and the rest is as new (as was advertised).Only had to use the anti static brush to get a few dust particles off.Interested if anyone knows of these models.
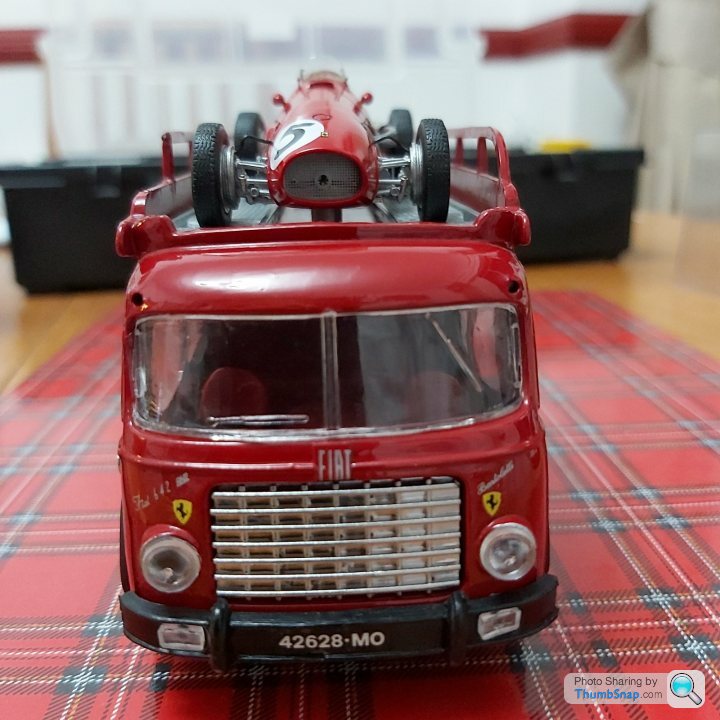
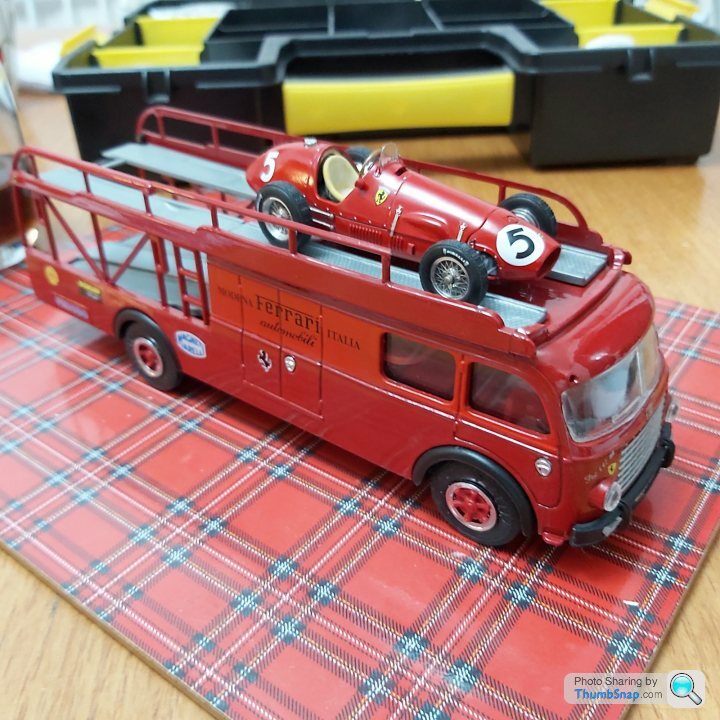
Ive put my Ferrari 500 on that i built a while back looks ok to me. Need to get on and finish the sharknose then perhaps think about what the 3rd car could be to go on the transporter.
 .
. .
. .
.henryk001 said:
dr_gn said:
Very nice. Was it a kit someone else built, or is it a diecast model?
Its a diecast,ive never heard of before. I have no idea how old this is,other than the damage i have to fix.The paintwork and the rest is as new (as was advertised).Only had to use the anti static brush to get a few dust particles off.Interested if anyone knows of these models.
Ive put my Ferrari 500 on that i built a while back looks ok to me. Need to get on and finish the sharknose then perhaps think about what the 3rd car could be to go on the transporter.
...
Evangelion said:
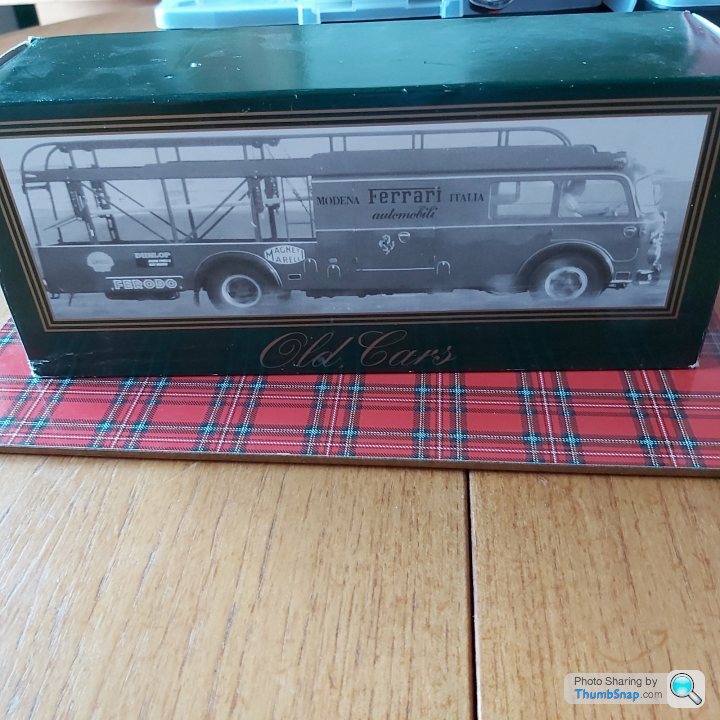
I believe Old Cars was the same company as Idea 3, and they made several racing transporters back in the 80s.
I have the Conrad Mercedes high speed transporter from about the same period. Goes nicely with the 196 streamliner.
I found this on the web for anyone who may be interested in transporters.I have the Conrad Mercedes high speed transporter from about the same period. Goes nicely with the 196 streamliner.
http://www.graham-ruckert.com.au/Imports%20Pages/O...
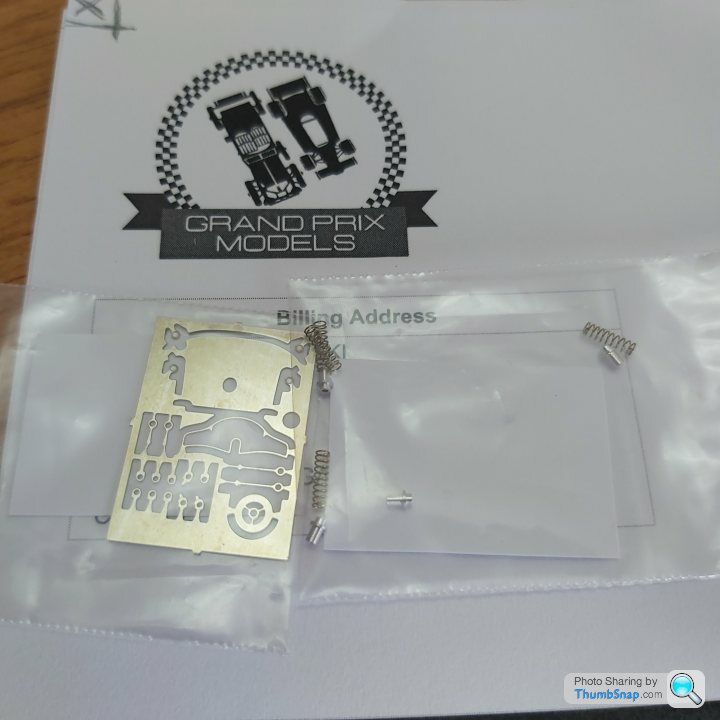
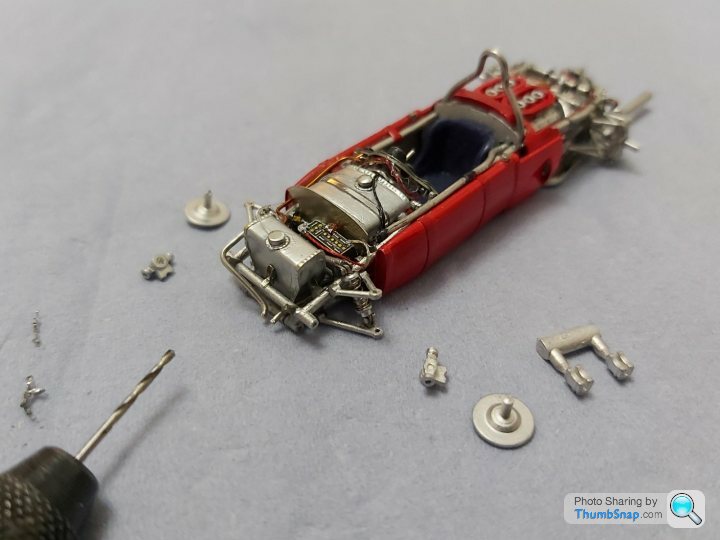
Going back a bit i lost the shock assembly, pinged off into the house somewhere forever lost. Contacted Grand Prix Models beginning of July who sold me the tameo kit asking for help.This company is superb at dealing with its customers.Other companies ive dealt with in the past should take a leaf out of their book.Should be the definition of great customer service. Many thanks to Mark and Tameo for looking after its customers. My go-to company from now on.Came in the post today with more than i needed so i now have 5 chances to build 2 more shocks. Thankyou, thankyou
henryk001 said:
Going back a bit i lost the shock assembly, pinged off into the house somewhere forever lost. Contacted Grand Prix Models beginning of July who sold me the tameo kit asking for help.This company is superb at dealing with its customers.Other companies ive dealt with in the past should take a leaf out of their book.Should be the definition of great customer service. Many thanks to Mark and Tameo for looking after its customers. My go-to company from now on.Came in the post today with more than i needed so i now have 5 chances to build 2 more shocks. Thankyou, thankyou
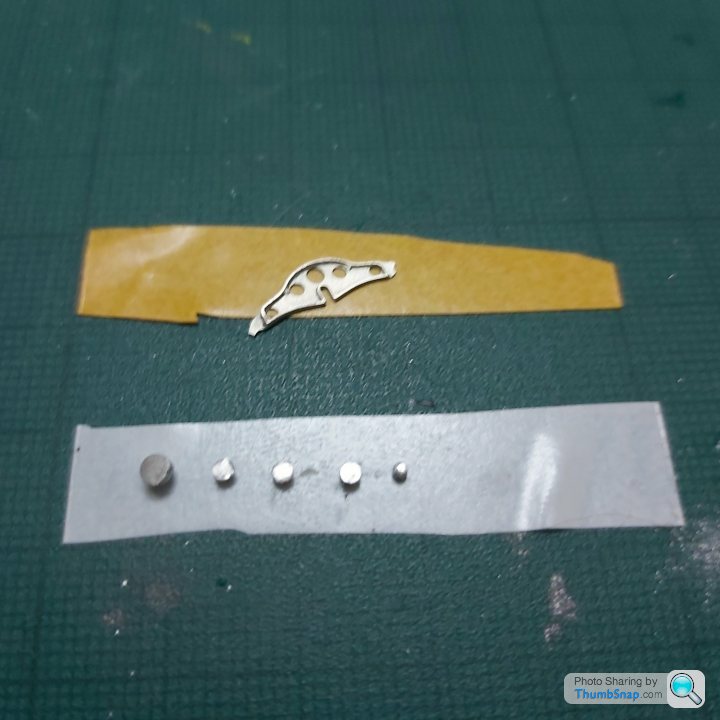
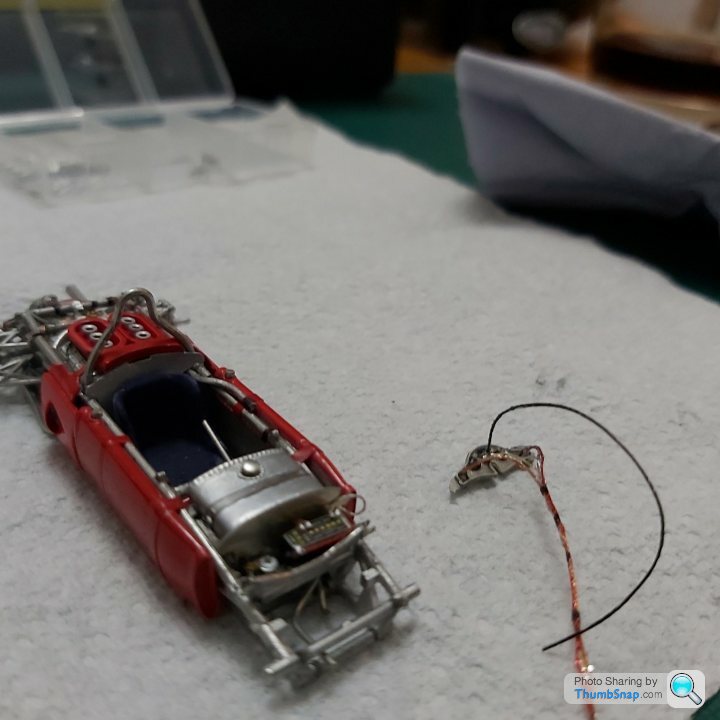
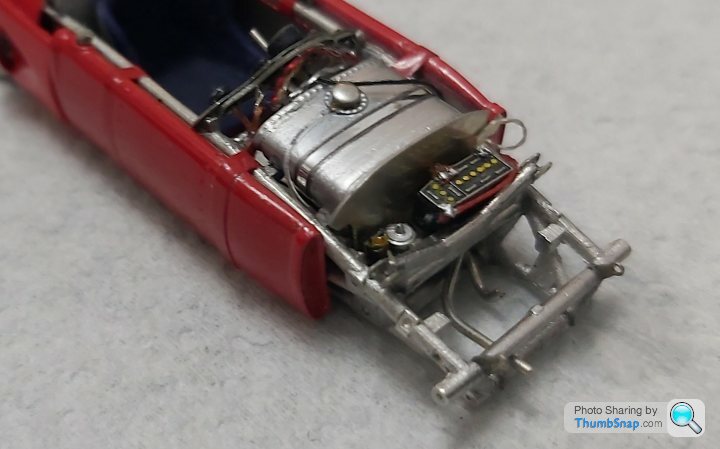
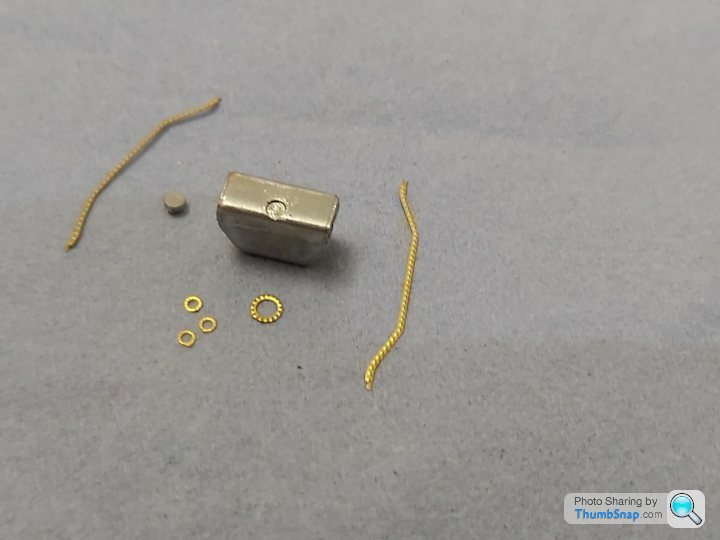
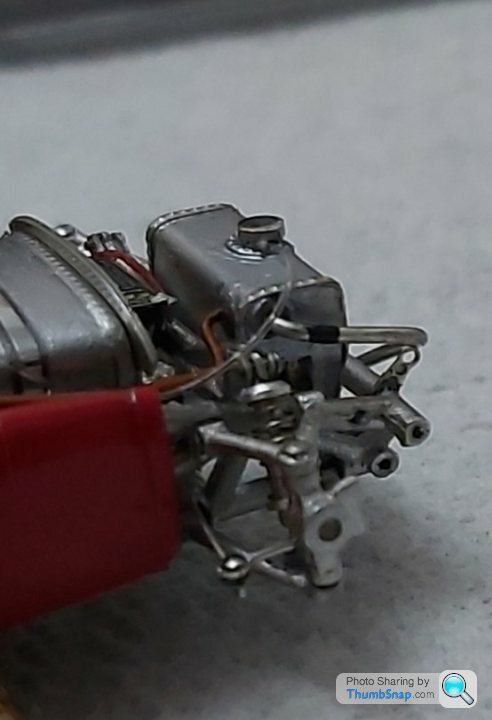
Out of interest - did they charge you?Level 41 dashboard has a lot of parts for such a small kit, even to the point of adding binnacle clamps.After a bit of web searching found that the wiring was mostly braided. A copper wire for temp and a black wire for rev counter. Decided to depict some wiring using 0.25 metallic thread.May not be accurate but at least its something to show when the cover is removed "Thankyou to my wifes stash of embroidery equipment".Clear coated the threads to stop them from fraying. The decals were nice including the left ignition button.
 .
.
 .
.
 .
.
 .
.
 .
.
Wiring added and black decal tape i made to keep the loom together.
 .
.
 .
.
 .
.
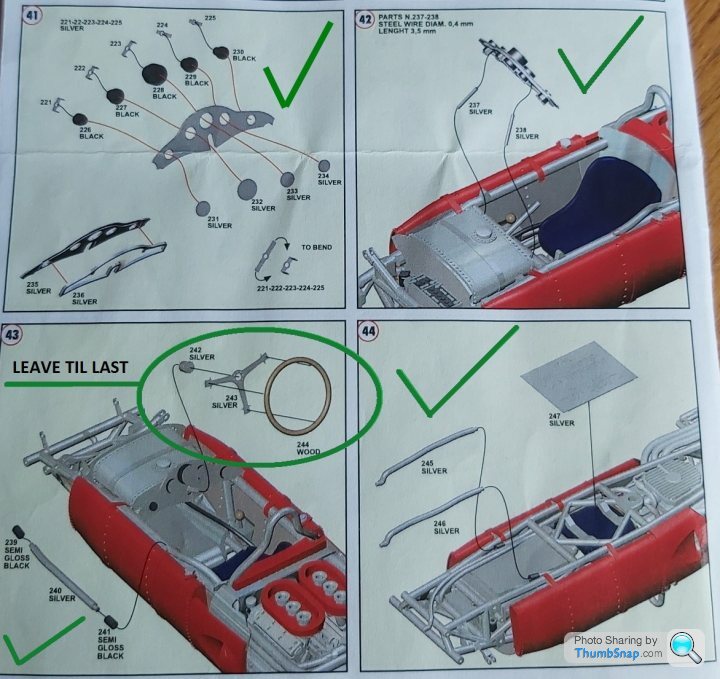
 .
.
 .
.
 .
.
Onto 42.Just need to add the two support wires & fit it now
.....Wiring added and black decal tape i made to keep the loom together.
......Onto 42.Just need to add the two support wires & fit it now
Edited by henryk001 on Sunday 9th August 21:51
Thanks to 2 sMoKiN bArReLs & Generationx.
Decided to skip fitting the steering wheel until the end as theres a risk of bending or damaging it whilst working on the front end top and bottom.
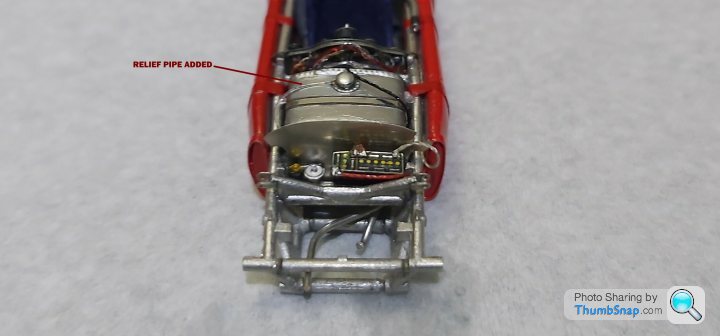
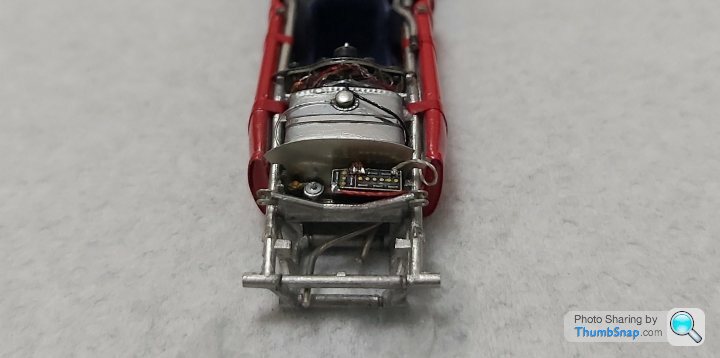
Fitted a relief pipe to tank with transparent acrylic thread and fitted the dash. Im happy with the result looking at it by eye.Noticed that the yellow battery caps have bled so will need to clean that up at some point.
 .
.
 .
.
 .
.
 .
.
 .
.
Onwards
Decided to skip fitting the steering wheel until the end as theres a risk of bending or damaging it whilst working on the front end top and bottom.
Fitted a relief pipe to tank with transparent acrylic thread and fitted the dash. Im happy with the result looking at it by eye.Noticed that the yellow battery caps have bled so will need to clean that up at some point.
.....Onwards

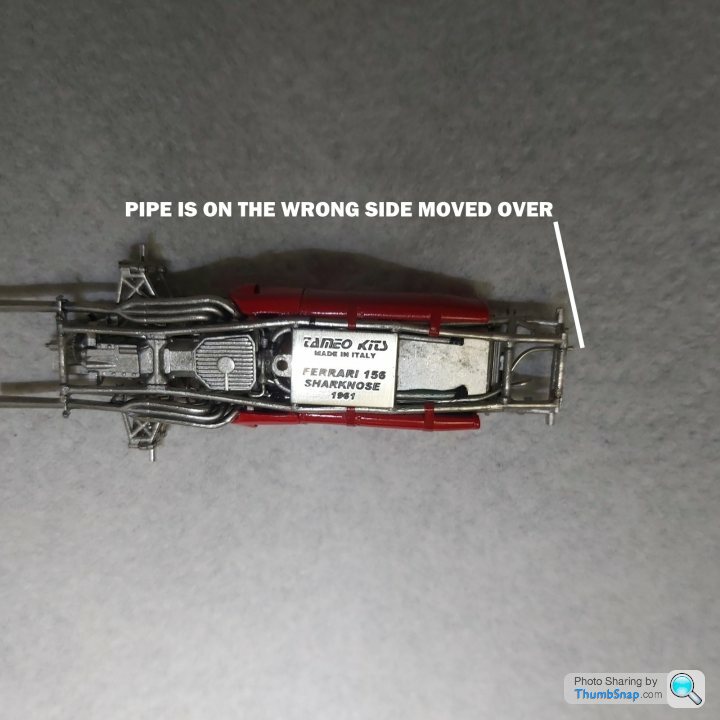
Thought i dropped the ball on this. I ran a pipe from the engine to the front of the chassis earlier on in the build as per the instructions but later found it was on the wrong side.Thought it was me but looked into it further and saw it was the instructions that caused it to be wrong. The 0.7mm wire was soft enough to bend it back over to the other side of the chassis.
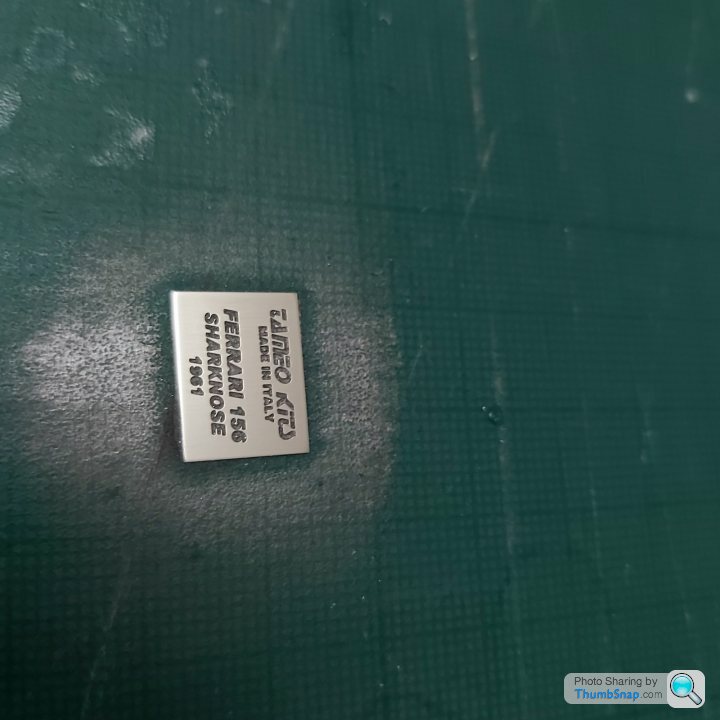
Painted the inlay on the legend plate, then polished down to 12000.
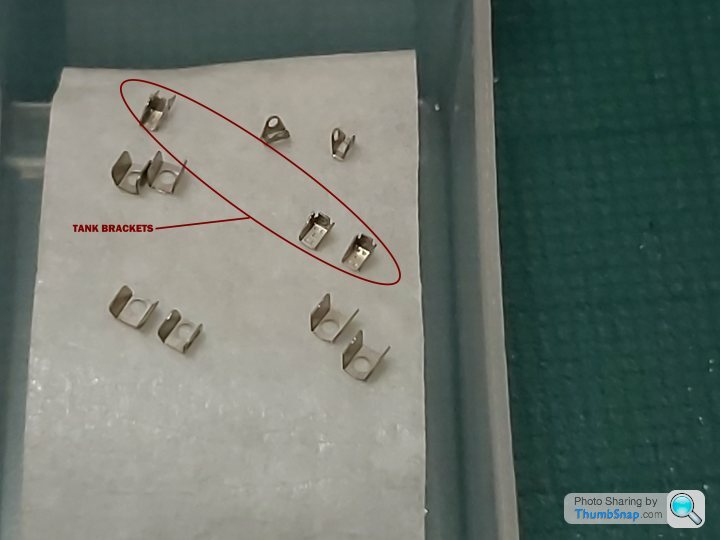
Onto the tank (runing a extra copper line for the temp sensor) front suspention adding brake pipes and the last radiator+pipes to then go onto the final stages of bodywork,steering wheel and decals.
 .
.
 .
.
 .
.
 .
.
Indication of work to do once the tank is in.
 .
.
Painted the inlay on the legend plate, then polished down to 12000.
Onto the tank (runing a extra copper line for the temp sensor) front suspention adding brake pipes and the last radiator+pipes to then go onto the final stages of bodywork,steering wheel and decals.
....Indication of work to do once the tank is in.
. .
. .
. .
. .
. .
. .
.2 sMoKiN bArReLs said:
You must have the steadiest hands & sharpest eye sight!
Awesome work.
Thankyou. A gin keeps it steady and a large magfnifier helps. Just realised after fitting the last tank, how torturously hot it must have been to drive these cars for any length of time. All the heat being blasted from the radiator onto the front bulkhead and the pipes running along the floor, also the pipe that runs along the top of the chassis. I take my hat off to those drivers of that era.Awesome work.
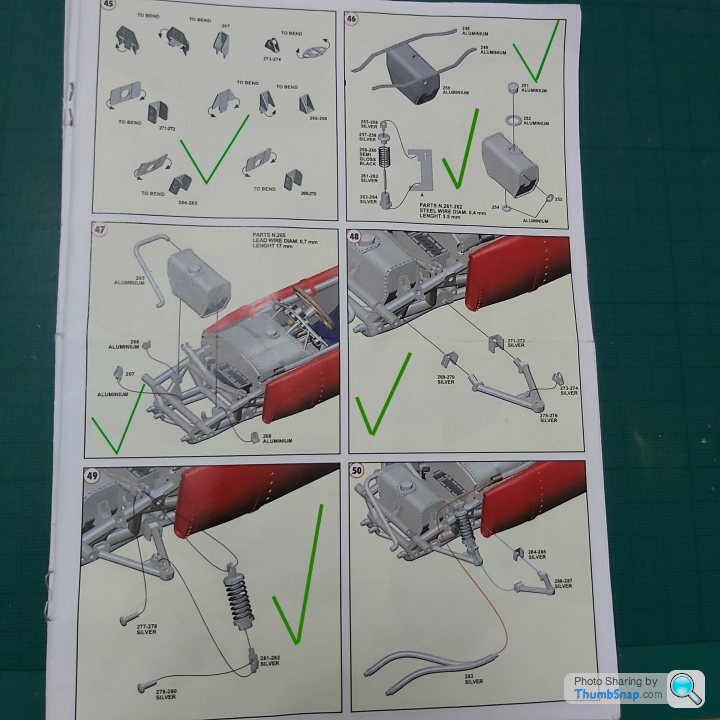
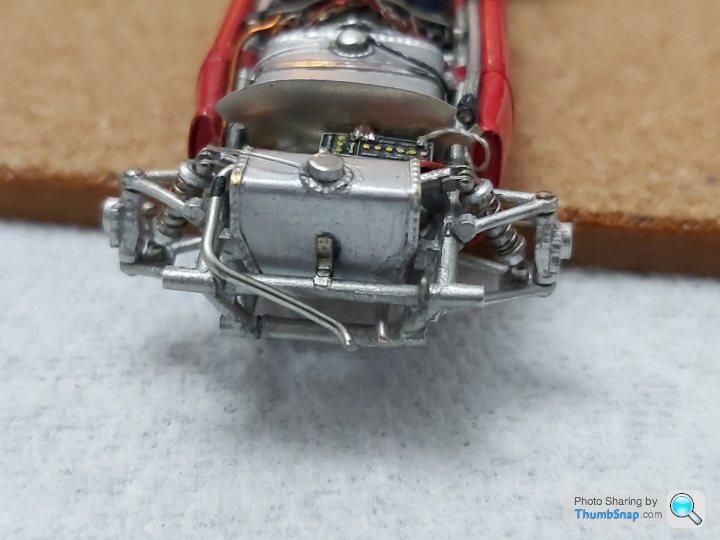
Made up the front shocks same method used as for the rears on stage 20, fronts in the instructions from stage 46, then finished off the lower wishbones on 48 & 49. Almost as many parts as if it were the real thing. Getting close now and test fitted the body just incase.
 .
.
 .
.
 .
.
 .
.
 .
.
Checking the fit.

.....Checking the fit.
Troubleatmill said:
What is really sad is that, unless you know what you are looking at, all the amazing hard work will never be seen...
Luckily, this model allows for removal of the nose canopy and rear cowl to expose most of what ive worked on over and above the standard instructions.Its the main reason why im concentrating on detail of this complex tiny kit.
Im making a couple of A-stands from 0.4mm stainless steel wire to place the bodywork on when displayed also when complete,its going on the transporter, which needs a bit of TLC and correction together with the ferrari 500. Cheers
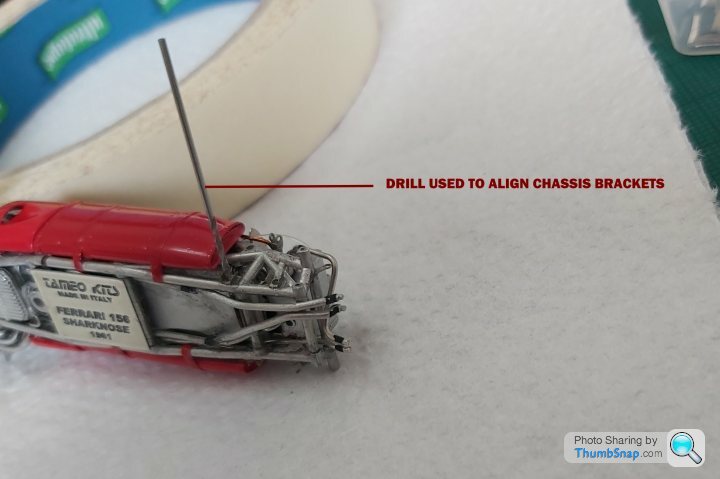
Decided to take off the 2 coolant pipes on the left and fit later when the radiater is on as they kept breaking off, also on level 50 left the top pipes till later too.Finished off the front suspension 50, 51 & 52.Drilled out all the holes on the upright etc.Fitted the disks and scored them as well,the stubs need to be painted gunmetal.Front brake pipes to add,placed the wheels on to have a look and will be leaving them loose.Starting to see "the light at the end of the tunnel"
 .
.
 .
.
 .
.
 .
.
 .
.
 .
.
 .
.
 .
.
Cheers for now
........Cheers for now
Gassing Station | Scale Models | Top of Page | What's New | My Stuff