1961 FERRARI 156 SHARKNOSE 1/43
Discussion


dr_gn said:
Good progress again...
I keep looking at the 1:43 156/85 my Dad got me for the Christmas after going to Silverstone for F1 stuff in 1985. I built it the best I could, but...it's not great. Always had a soft spot for the car ever since. This thread has pushed me to investigate further; turns out Tameo are now on their third iteraton of that kit. I'm sorely tempted, but I just can't justify it at £90. Also a Western Kits 1:43 Tyrrell P34 prototype my Dad built soon after its release in 1975. It's pretty crude, falling to pieces and completely the wrong blue, but how I'd love to build another...and there's one on EBay.
Anyway as you were - the more I see of your great work with these Ferraris, the more I want to have a go. too much WIP though.
..I keep looking at the 1:43 156/85 my Dad got me for the Christmas after going to Silverstone for F1 stuff in 1985. I built it the best I could, but...it's not great. Always had a soft spot for the car ever since. This thread has pushed me to investigate further; turns out Tameo are now on their third iteraton of that kit. I'm sorely tempted, but I just can't justify it at £90. Also a Western Kits 1:43 Tyrrell P34 prototype my Dad built soon after its release in 1975. It's pretty crude, falling to pieces and completely the wrong blue, but how I'd love to build another...and there's one on EBay.
Anyway as you were - the more I see of your great work with these Ferraris, the more I want to have a go. too much WIP though.
All it needs is some research,time and a lot of patience of which you have prooved your more than capable of. You know you want to


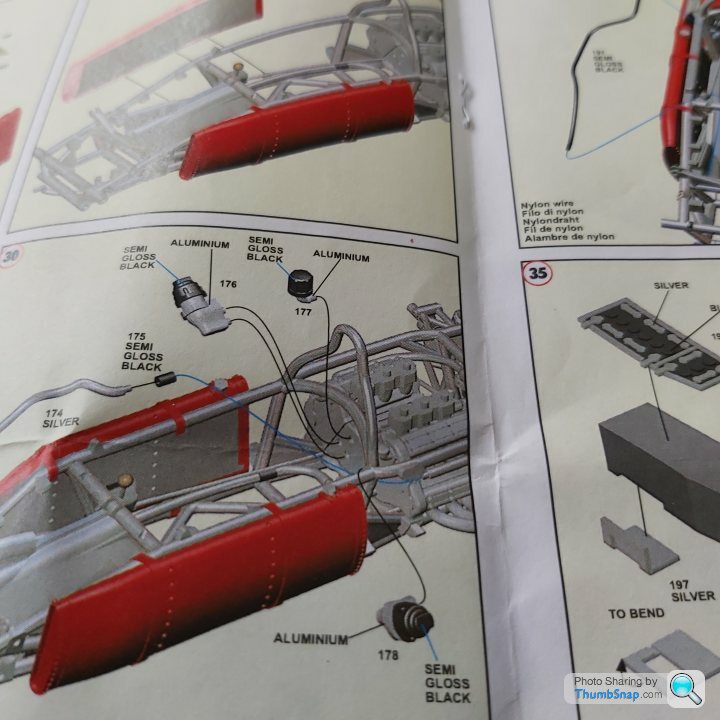
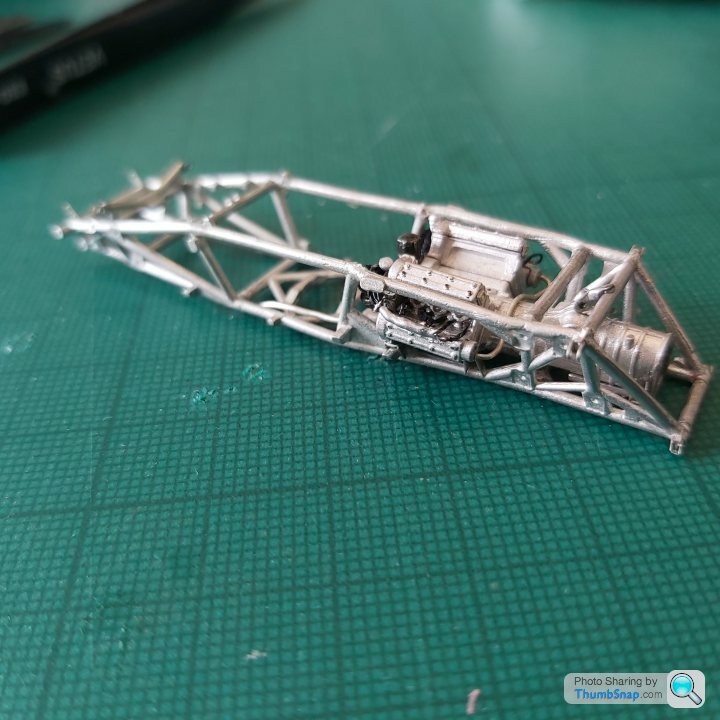
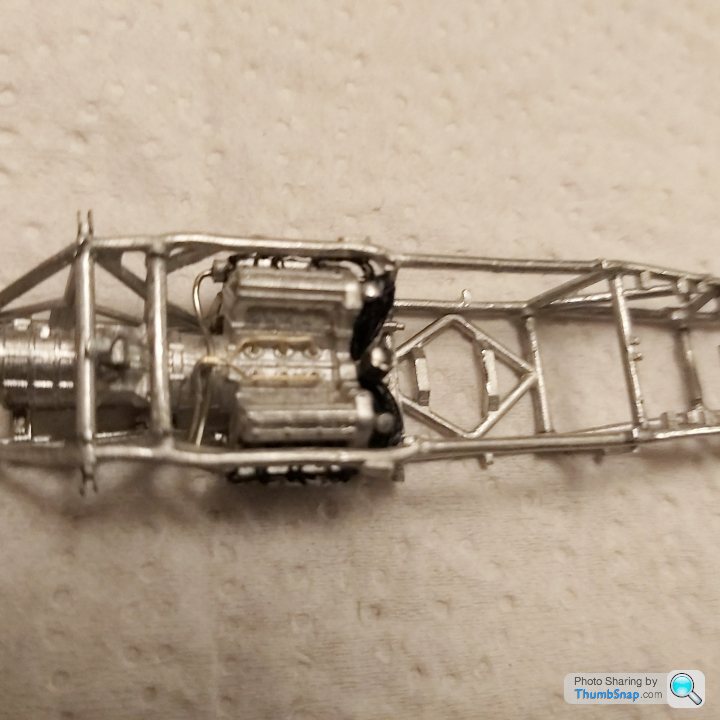
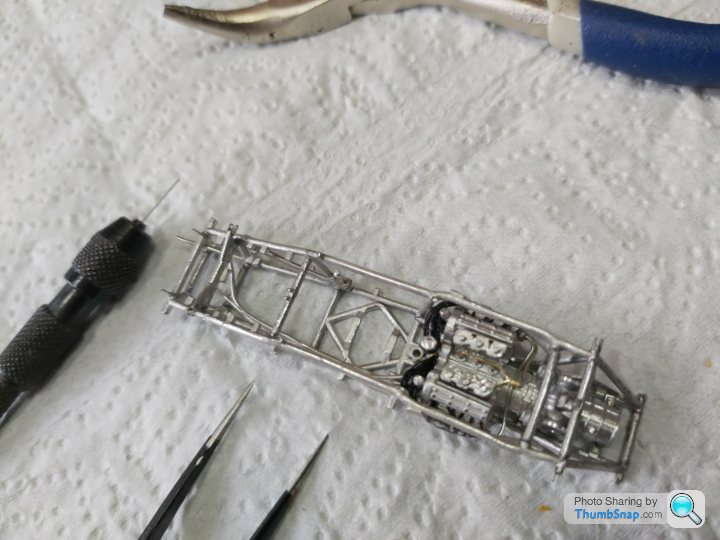
Fast forward to level 30 to make up the distributors with additional wiring whilst the chassis is still quite naked.If i dont put these additional details on it will bug me.
Then back to finish of to end of level 11.Fit home made gearbox mount,pipe, water pump and nut. Its starting to get a bit fiddly now.
 .
.
 .
.
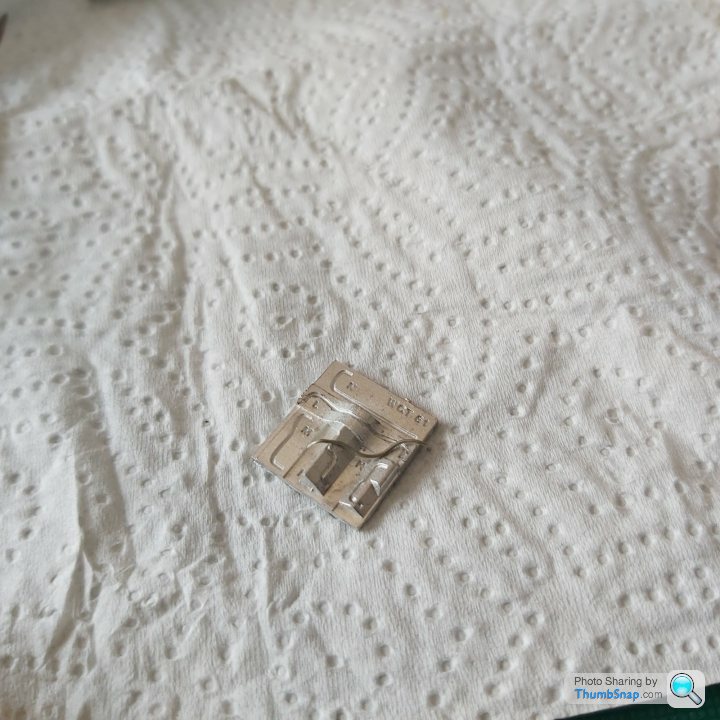
OIL PIPE JIG
 .
.
 .
.
 .
.
Just need to fit the distributors, connect the ignition wires up and finally run a bead of crystal clear to represent the lead tube that would fit on top of the rocker cover and paint it alluminium.
Then onto 12 onwards. Cheers
Then back to finish of to end of level 11.Fit home made gearbox mount,pipe, water pump and nut. Its starting to get a bit fiddly now.
..OIL PIPE JIG
...Just need to fit the distributors, connect the ignition wires up and finally run a bead of crystal clear to represent the lead tube that would fit on top of the rocker cover and paint it alluminium.
Then onto 12 onwards. Cheers

henryk001 said:
Evangelion said:
My God.
If anyone wonders why i no longer build kits ... this is why.
Interesting. Please elaborateIf anyone wonders why i no longer build kits ... this is why.
(When I was building these things for a living, I would deliberately quote high prices for single-seaters, to put people off.)
Evangelion said:
henryk001 said:
Evangelion said:
My God.
If anyone wonders why i no longer build kits ... this is why.
Interesting. Please elaborateIf anyone wonders why i no longer build kits ... this is why.
(When I was building these things for a living, I would deliberately quote high prices for single-seaters, to put people off.)
I see you built models for a living,are there any on the "show us your models" section
2 sMoKiN bArReLs & Matt Cup.
Thankyou for your comment, much appreciated.
Ooops i see there was a red angry smilie on here, sorry i thought i was clicking on the thumbs up icon which is right next to it
Thankyou for your comment, much appreciated
.Ooops i see there was a red angry smilie on here, sorry i thought i was clicking on the thumbs up icon which is right next to it
Edited by henryk001 on Friday 12th June 14:09
Edited by henryk001 on Friday 12th June 14:10
Edited by henryk001 on Friday 12th June 14:11
henryk001 said:
... I see you built models for a living,are there any on the "show us your models" section
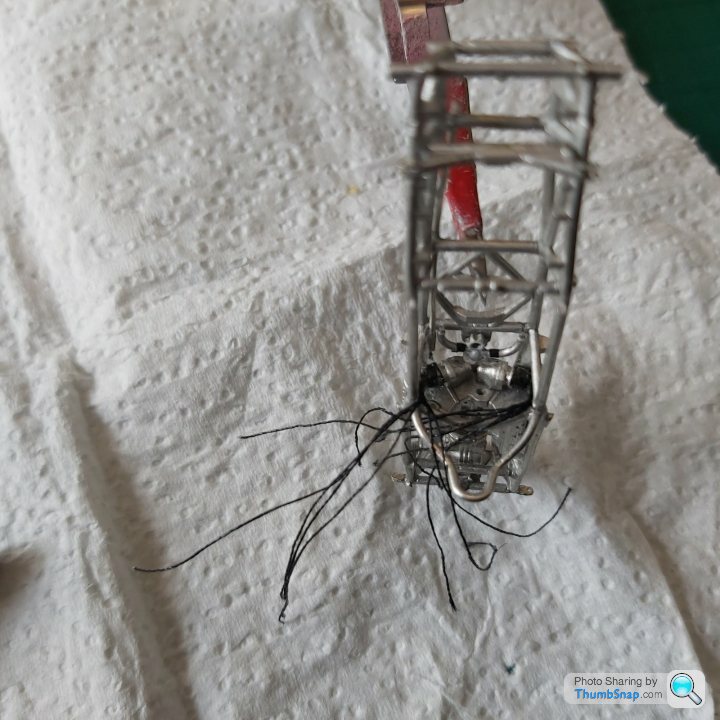
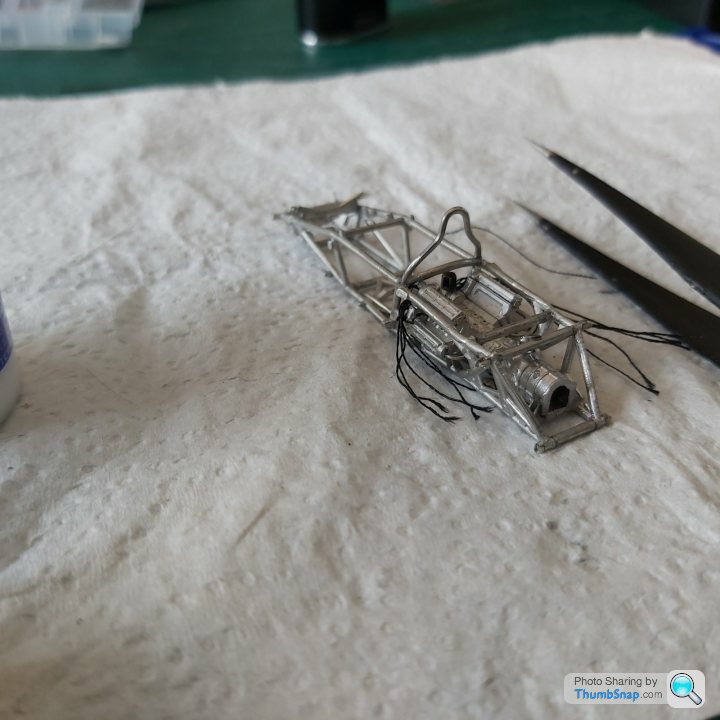
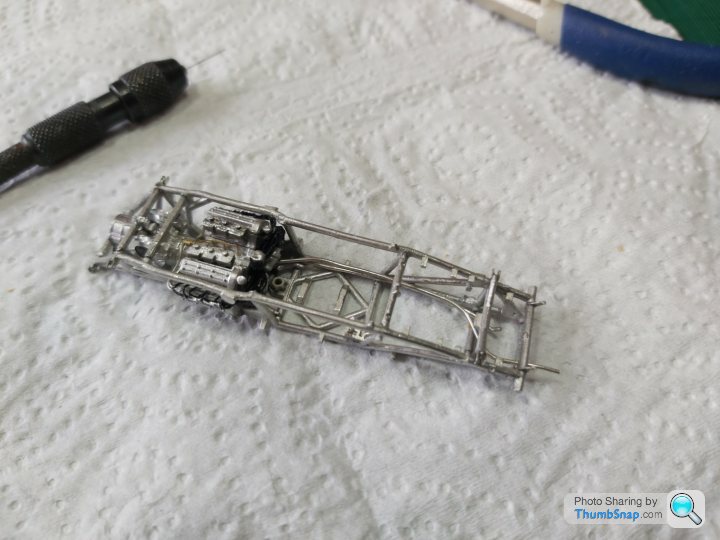
I did photograph nearly everything I built, but it was all on 35mm film in those days, so although I have a huge collection of prints, very few of them have been scanned. I'll try to find those that have and post them.Right or wrong, decided to add the wiring to this kit as i feel it would be better to have it than not.
Took ages to sort out and plan to do.
Decided to take the rollbar off at the end as its getting in the way. I can put it back on later.
Used Micro crystal klear to coat the strands of silk thread to help the threads from fraying when cut.
Fitted the distributors, oil filter and oil filler spouts + PE glands.Then seperated the strands and transferred across.
Once cut to length and connected up, ran a bead of Crystal clear along the wires glued to the rocker cover as i cant make a tapered wiring harness that small.It will have to do.
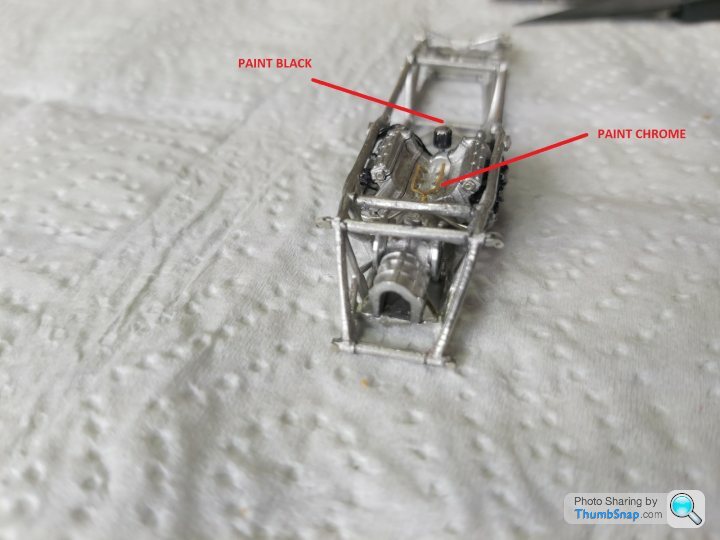
Painting them alluminium (prefference was to leave it all black), but that wouldnt be historically correct,some touching up later should be ok.
 .
.
 .
.
 .
.
 .
.
 .
.
 .
.
 .
.
 .
.
 .
.
Finish off level 12 and onto 13. Cheers
Took ages to sort out and plan to do.
Decided to take the rollbar off at the end as its getting in the way. I can put it back on later.
Used Micro crystal klear to coat the strands of silk thread to help the threads from fraying when cut.
Fitted the distributors, oil filter and oil filler spouts + PE glands.Then seperated the strands and transferred across.
Once cut to length and connected up, ran a bead of Crystal clear along the wires glued to the rocker cover as i cant make a tapered wiring harness that small.It will have to do.
Painting them alluminium (prefference was to leave it all black), but that wouldnt be historically correct,some touching up later should be ok.
.........Finish off level 12 and onto 13. Cheers
2 sMoKiN bArReLs said:
This is fantastic work! Really enjoying it (and am somewhat envious speaking as a ham fisted twerp  )
)
Thankyou for your encouraging & kind comments. I must say that at 1/43rd scale and only my 2nd build at this scale, i too am feeling very ham fisted. Its taking a age just to do one thing.The amount of times ive dropped a part or its pinged off somwhere and oh the expletives ive used is more and more prevelent. Am i still enjoying this?. Well yes so far)First of all, apologies if anyone reading this thread for the poor photos,really hard to get a good focus on these small parts.
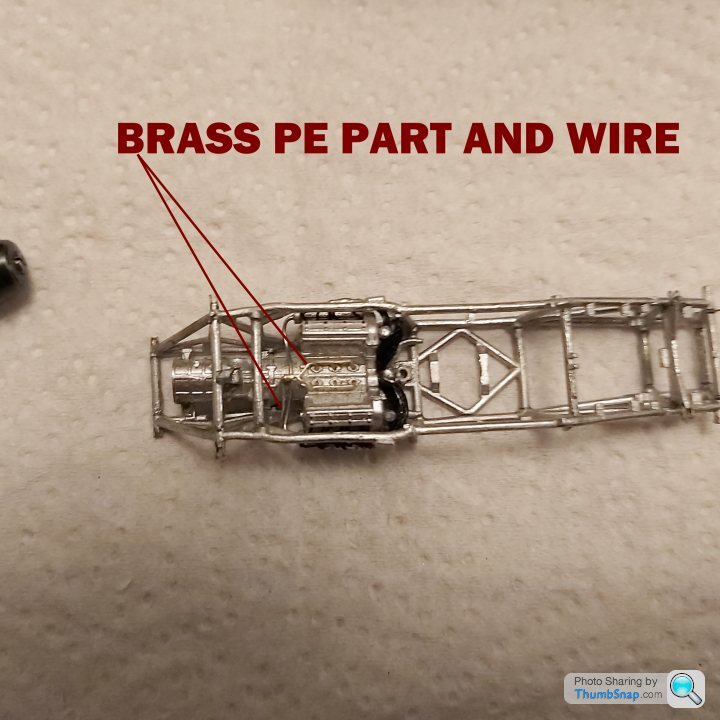
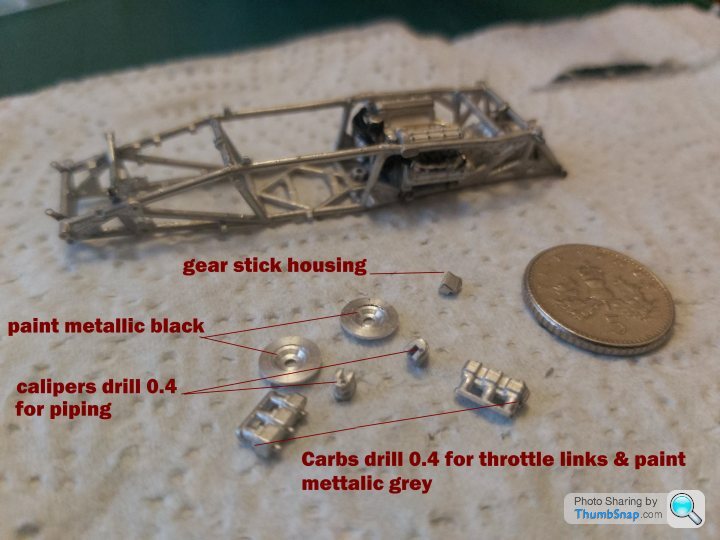
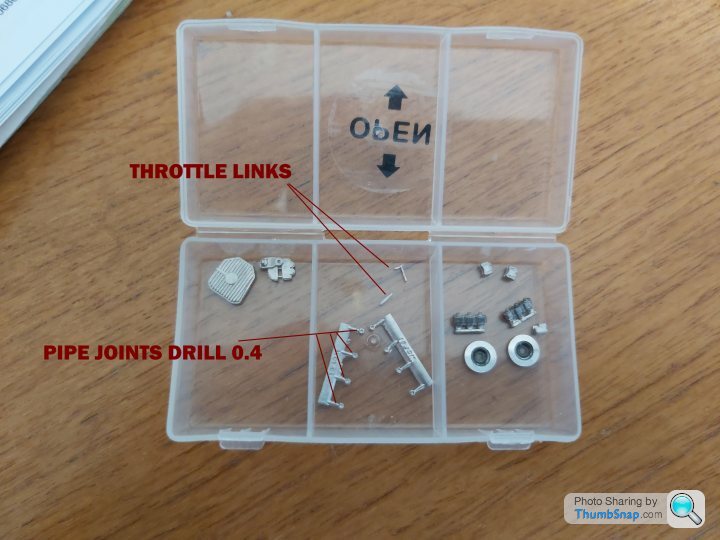
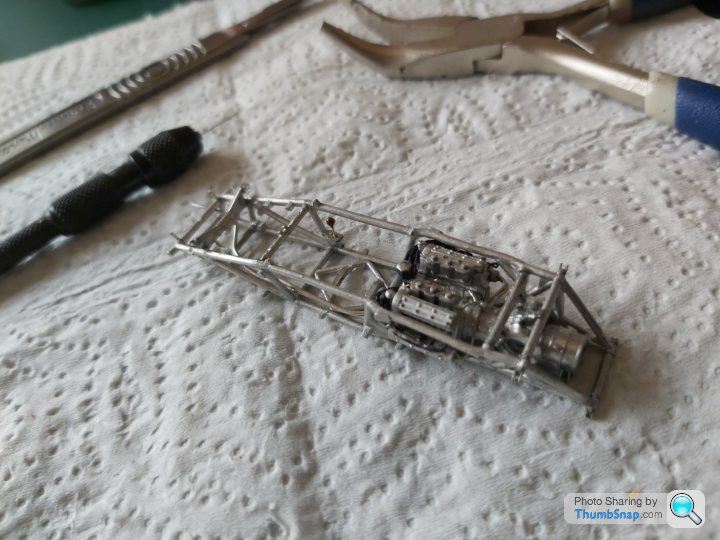
Level 13 to 14 prep for the bits i need to fit.2 rear turned alluminium disks, brake calipers(which all 4 looked the same) but when i meaured the difference between the thickness fronts 0.48mm & rear 0.38 disks could have stumped me if i assumed they where the same. Not in the instructions decided to drill the calipers 0.4 for copper wire brake lines and drilled 0.4 ends of carbs for throttle linkages and throttle cable im adding.
 .
.
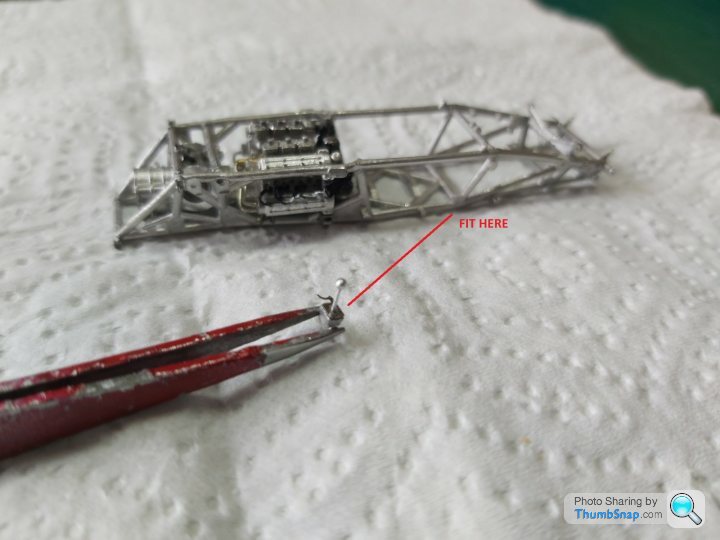
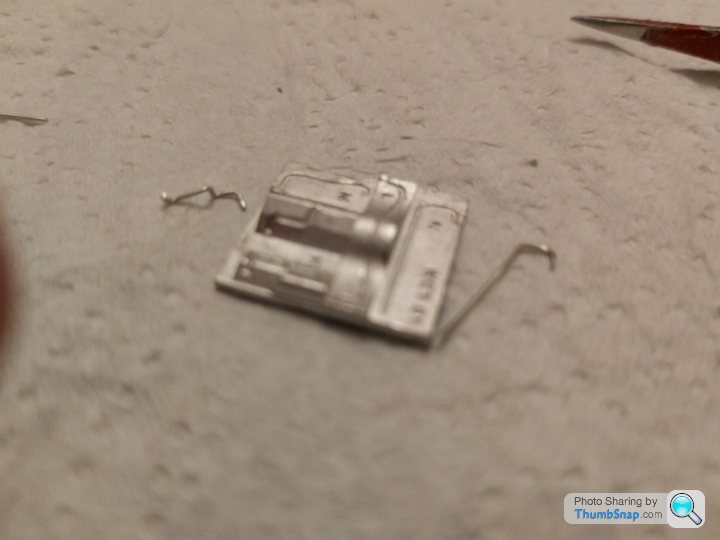
Taking ages to do just one thing, the central oil distribution pipe (Brass PE) and 0.5mm wire to top cam rocker took ages, just picking the pe up with tweezers distorted it coupled with 6 pronges to manipulate to go into the holes was a task in itself, but i got there in the end.
 .
.
 .
.
 .
.
 .
.
Seems to be dragginbg on a bit,realising im going to have to jump back and forth on a few levels EG not fit the tanks,panels and roll bar till the end otherwise holding the model whilst building will surely damage the paint.Would have got on a bit quicker if the scale was up to 1/24th or 1/12th.
Cheers for now
Level 13 to 14 prep for the bits i need to fit.2 rear turned alluminium disks, brake calipers(which all 4 looked the same) but when i meaured the difference between the thickness fronts 0.48mm & rear 0.38 disks could have stumped me if i assumed they where the same. Not in the instructions decided to drill the calipers 0.4 for copper wire brake lines and drilled 0.4 ends of carbs for throttle linkages and throttle cable im adding.
.Taking ages to do just one thing, the central oil distribution pipe (Brass PE) and 0.5mm wire to top cam rocker took ages, just picking the pe up with tweezers distorted it coupled with 6 pronges to manipulate to go into the holes was a task in itself, but i got there in the end.
....Seems to be dragginbg on a bit,realising im going to have to jump back and forth on a few levels EG not fit the tanks,panels and roll bar till the end otherwise holding the model whilst building will surely damage the paint.Would have got on a bit quicker if the scale was up to 1/24th or 1/12th.
Cheers for now
Finished levels 13-14.
 .
.
Noticed the kit is looking too silver grey, so decided to chrome up central distribution pipe as its hard to see some of the tiny details.Also some retouching as i go along.
 .
.
Rear brake disks and calipers fitted.
 .
.
Gearstick, PE gate and carbs.
 .
.
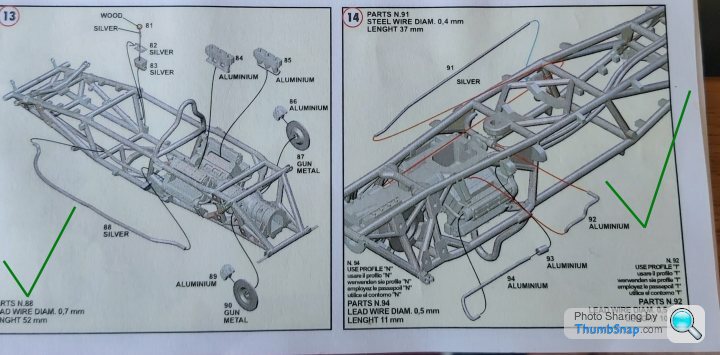
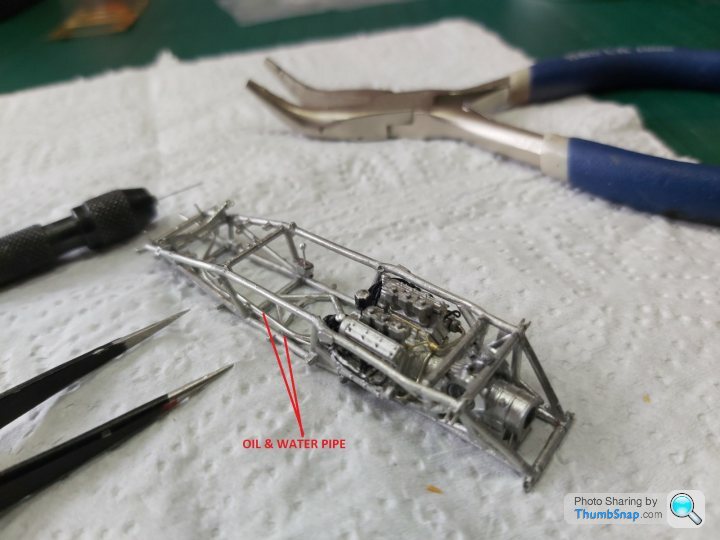
Oil & water pipes cut and bent to shape
 .
.
 .
.
 .
.
 .
.
More bending for pipes.
 .
.
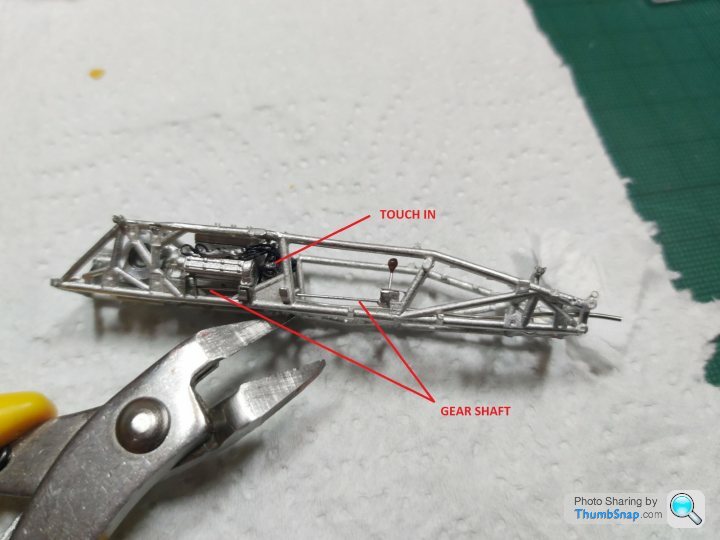
Nickel silver Gearshaft.
 .
.
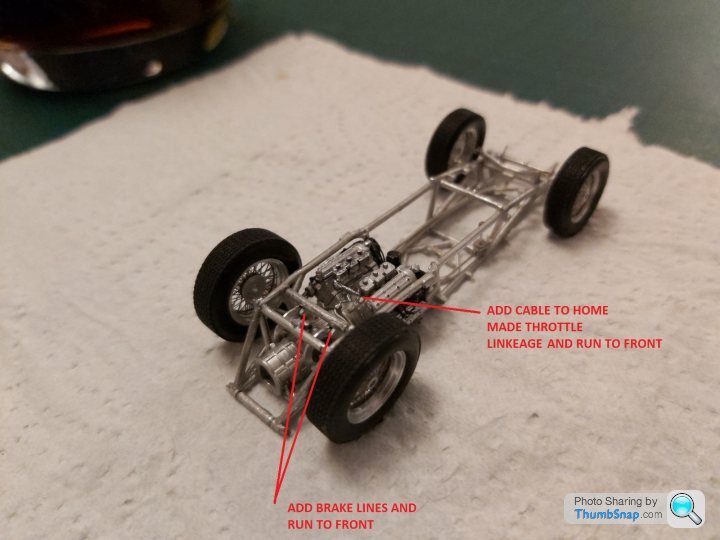
Throttle cable and brake lines to add (to drag this build out) before going onto levels15-20.Just placed the wheels around the chassis to visualise the progress.
.Noticed the kit is looking too silver grey, so decided to chrome up central distribution pipe as its hard to see some of the tiny details.Also some retouching as i go along.
.Rear brake disks and calipers fitted.
.Gearstick, PE gate and carbs.
.Oil & water pipes cut and bent to shape
....More bending for pipes.
.Nickel silver Gearshaft.
.Throttle cable and brake lines to add (to drag this build out) before going onto levels15-20.Just placed the wheels around the chassis to visualise the progress.
Gassing Station | Scale Models | Top of Page | What's New | My Stuff