1961 FERRARI 156 SHARKNOSE 1/43
Discussion


Thanks to 2 sMoKiN bArReLs & Generationx.
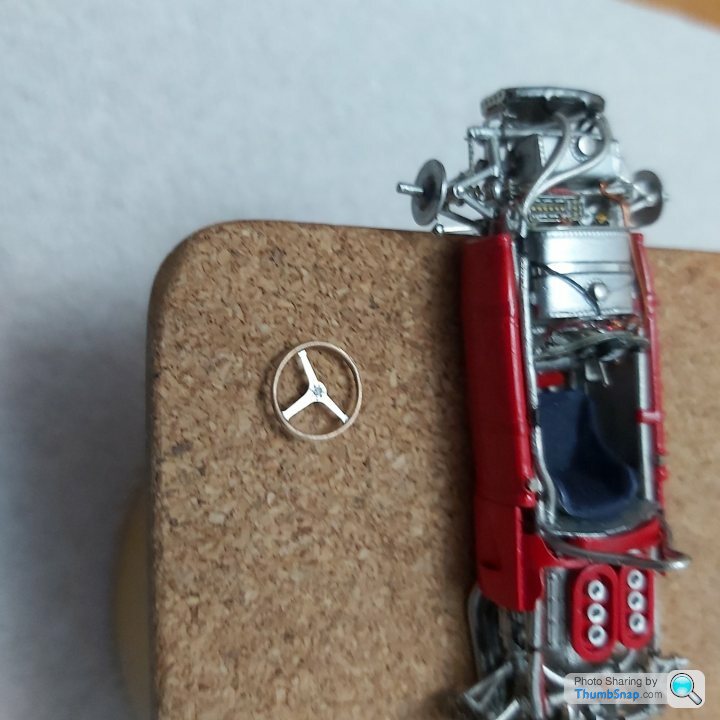
Decided to skip fitting the steering wheel until the end as theres a risk of bending or damaging it whilst working on the front end top and bottom.
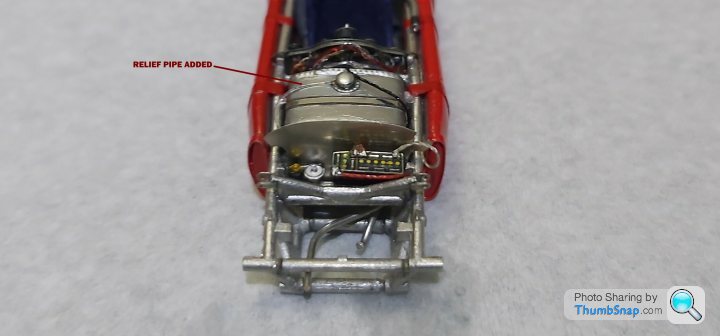
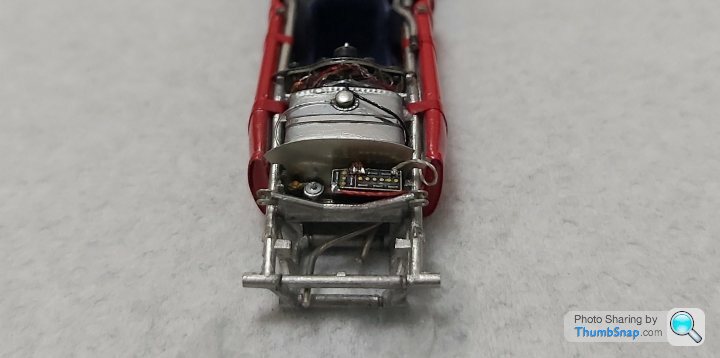
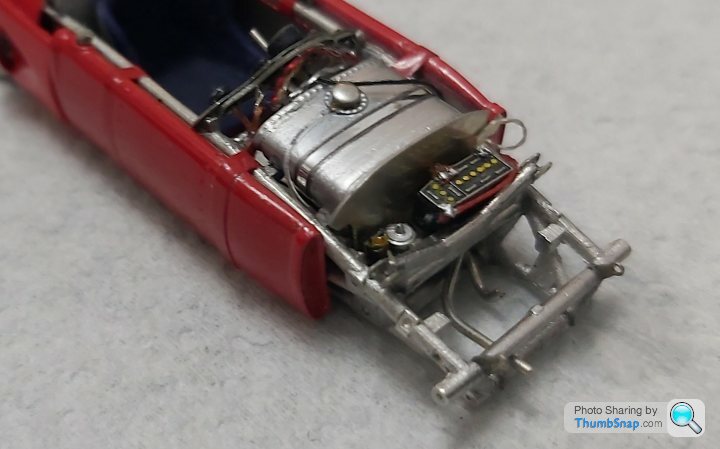
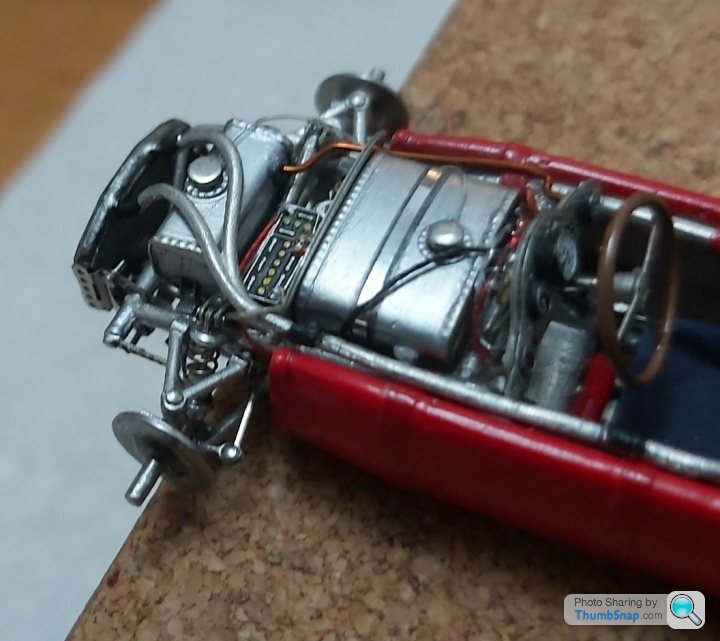
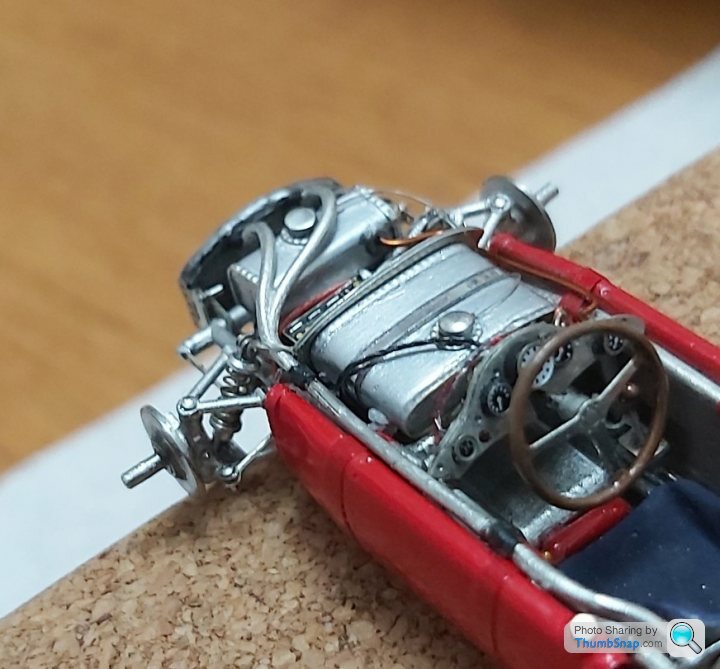
Fitted a relief pipe to tank with transparent acrylic thread and fitted the dash. Im happy with the result looking at it by eye.Noticed that the yellow battery caps have bled so will need to clean that up at some point.
 .
.
 .
.
 .
.
 .
.
 .
.
Onwards
Decided to skip fitting the steering wheel until the end as theres a risk of bending or damaging it whilst working on the front end top and bottom.
Fitted a relief pipe to tank with transparent acrylic thread and fitted the dash. Im happy with the result looking at it by eye.Noticed that the yellow battery caps have bled so will need to clean that up at some point.
.....Onwards
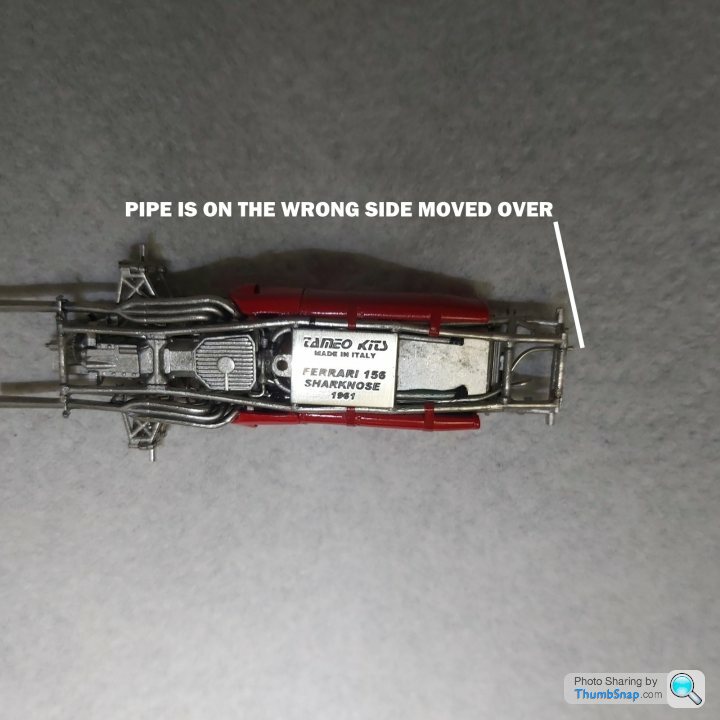
Thought i dropped the ball on this. I ran a pipe from the engine to the front of the chassis earlier on in the build as per the instructions but later found it was on the wrong side.Thought it was me but looked into it further and saw it was the instructions that caused it to be wrong. The 0.7mm wire was soft enough to bend it back over to the other side of the chassis.
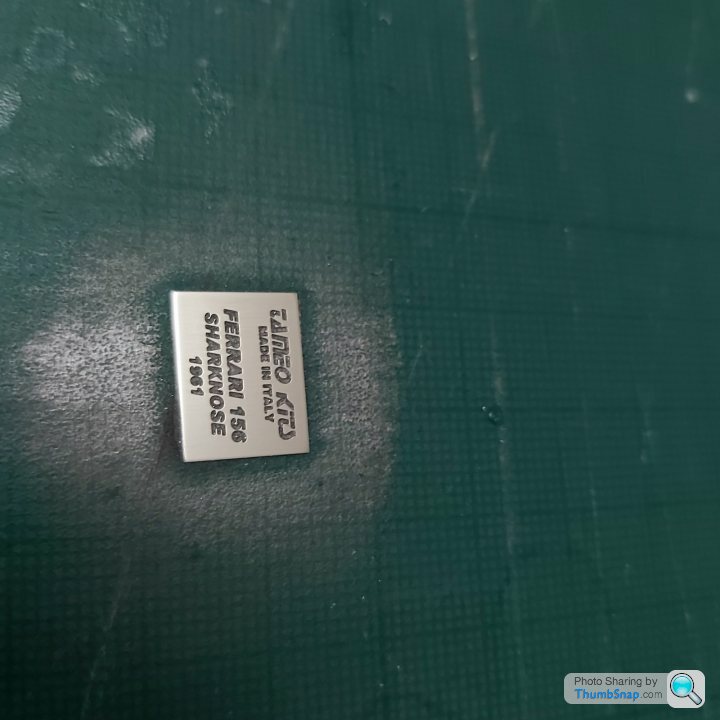
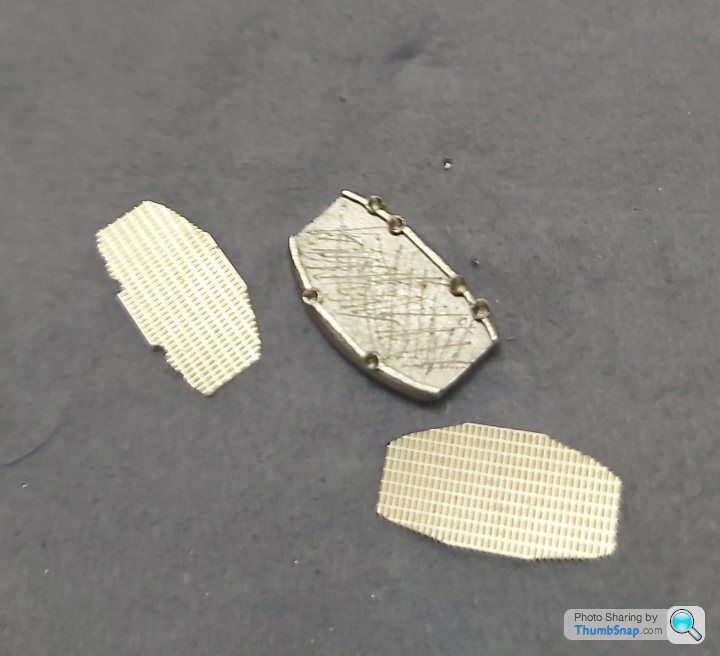
Painted the inlay on the legend plate, then polished down to 12000.
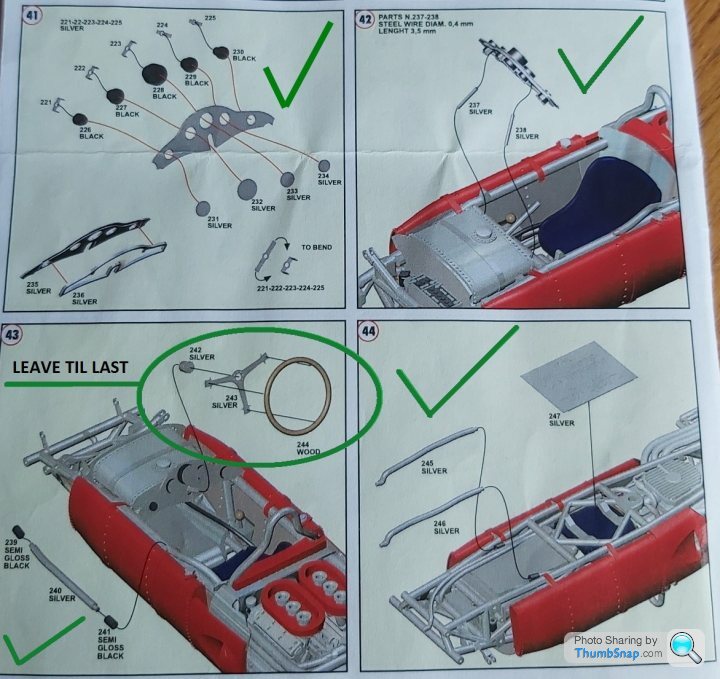
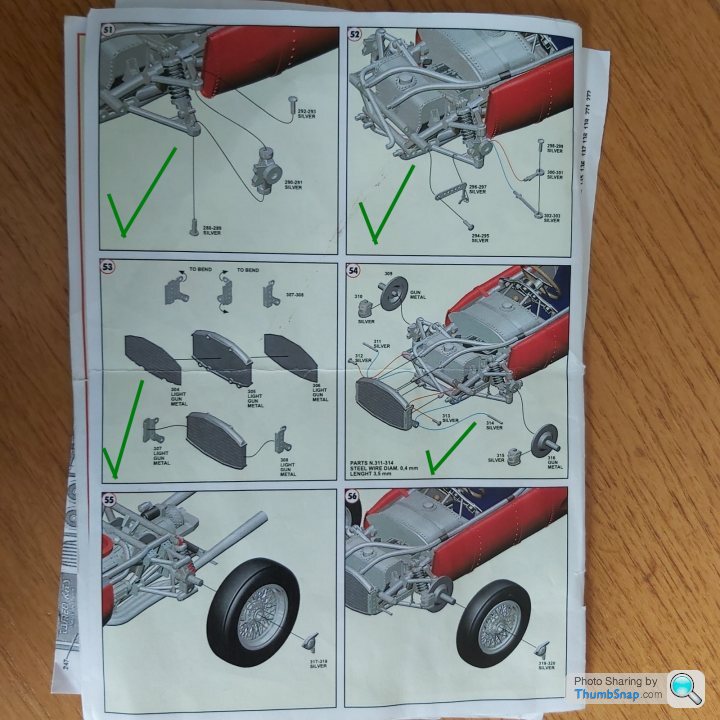
Onto the tank (runing a extra copper line for the temp sensor) front suspention adding brake pipes and the last radiator+pipes to then go onto the final stages of bodywork,steering wheel and decals.
 .
.
 .
.
 .
.
 .
.
Indication of work to do once the tank is in.
 .
.
Painted the inlay on the legend plate, then polished down to 12000.
Onto the tank (runing a extra copper line for the temp sensor) front suspention adding brake pipes and the last radiator+pipes to then go onto the final stages of bodywork,steering wheel and decals.
....Indication of work to do once the tank is in.
. .
. .
. .
. .
. .
. .
.2 sMoKiN bArReLs said:
You must have the steadiest hands & sharpest eye sight!
Awesome work.
Thankyou. A gin keeps it steady and a large magfnifier helps. Just realised after fitting the last tank, how torturously hot it must have been to drive these cars for any length of time. All the heat being blasted from the radiator onto the front bulkhead and the pipes running along the floor, also the pipe that runs along the top of the chassis. I take my hat off to those drivers of that era.Awesome work.
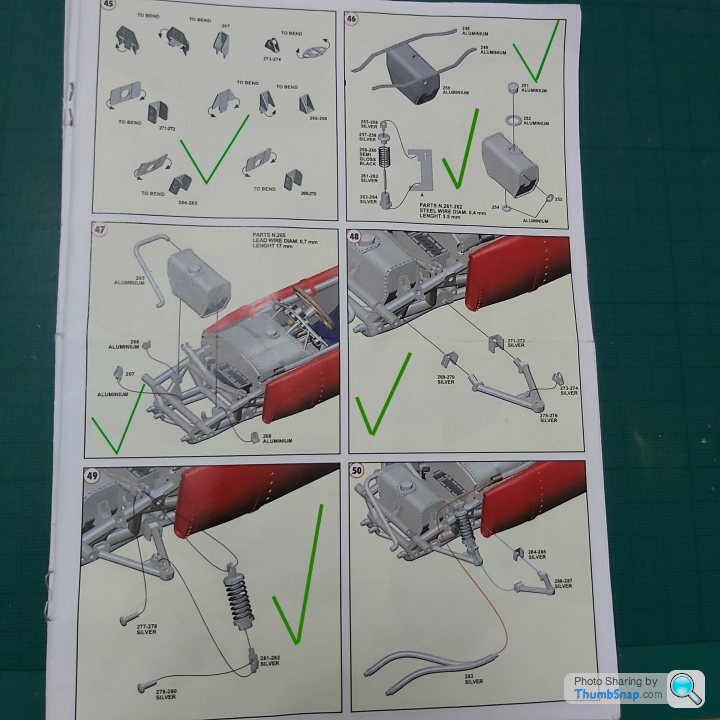
Made up the front shocks same method used as for the rears on stage 20, fronts in the instructions from stage 46, then finished off the lower wishbones on 48 & 49. Almost as many parts as if it were the real thing. Getting close now and test fitted the body just incase.
 .
.
 .
.
 .
.
 .
.
 .
.
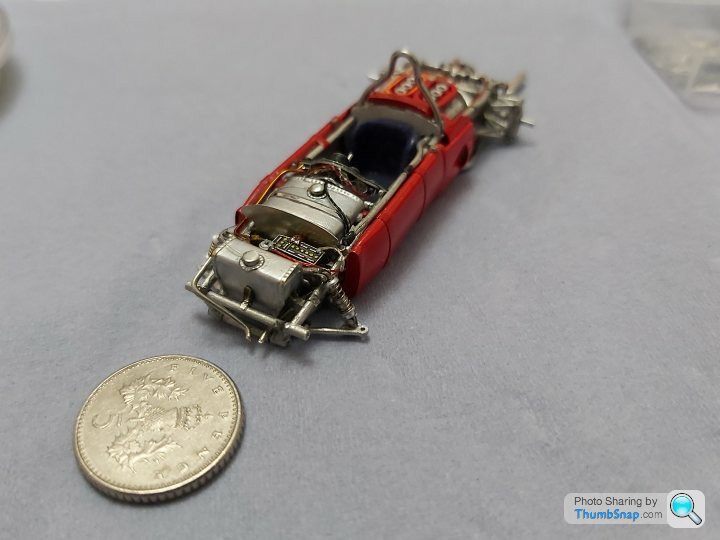
Checking the fit.

.....Checking the fit.
Troubleatmill said:
What is really sad is that, unless you know what you are looking at, all the amazing hard work will never be seen...
Luckily, this model allows for removal of the nose canopy and rear cowl to expose most of what ive worked on over and above the standard instructions.Its the main reason why im concentrating on detail of this complex tiny kit.
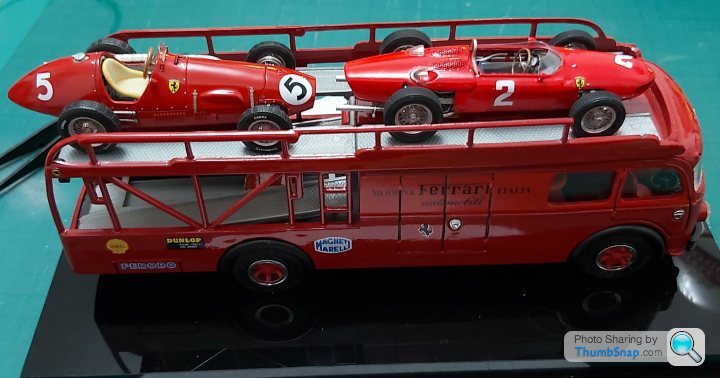
Im making a couple of A-stands from 0.4mm stainless steel wire to place the bodywork on when displayed also when complete,its going on the transporter, which needs a bit of TLC and correction together with the ferrari 500. Cheers
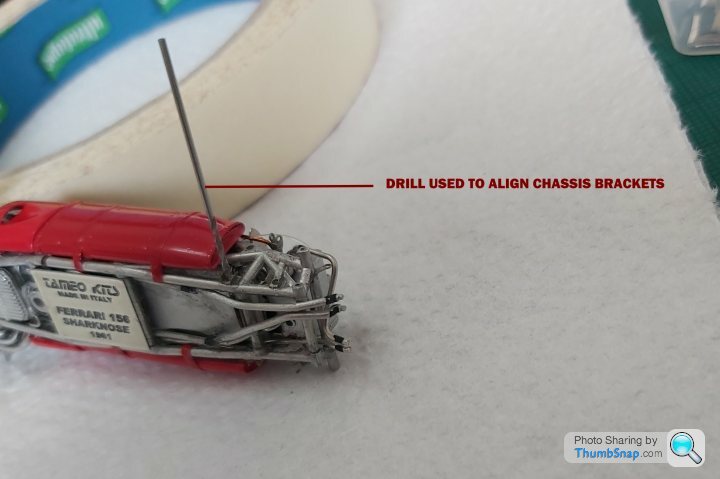
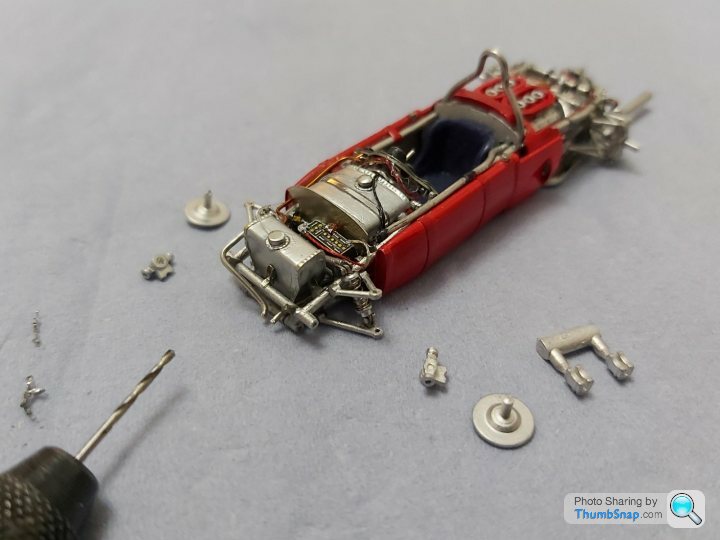
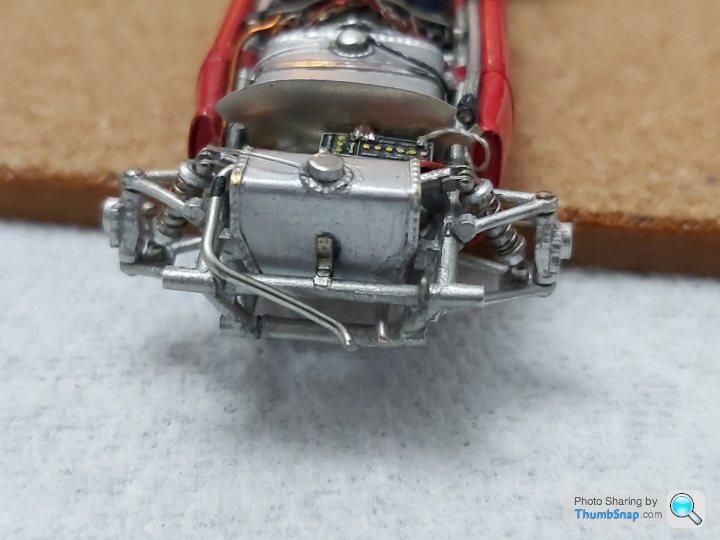
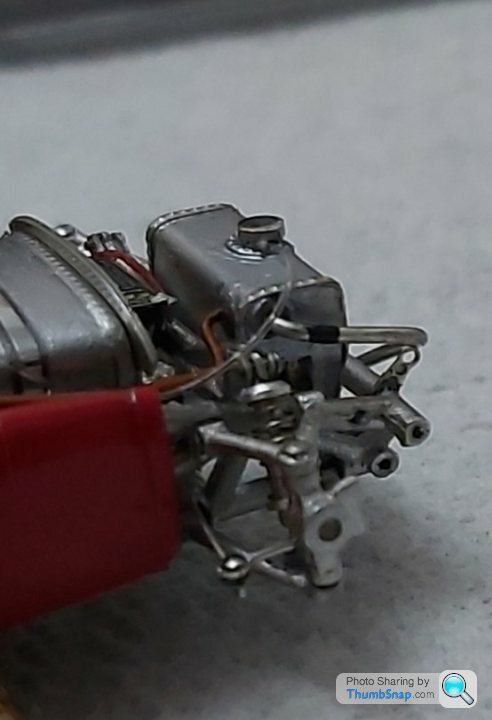
Decided to take off the 2 coolant pipes on the left and fit later when the radiater is on as they kept breaking off, also on level 50 left the top pipes till later too.Finished off the front suspension 50, 51 & 52.Drilled out all the holes on the upright etc.Fitted the disks and scored them as well,the stubs need to be painted gunmetal.Front brake pipes to add,placed the wheels on to have a look and will be leaving them loose.Starting to see "the light at the end of the tunnel"
 .
.
 .
.
 .
.
 .
.
 .
.
 .
.
 .
.
 .
.
Cheers for now
........Cheers for now
Dinoboy said:
Jewel of a thing.
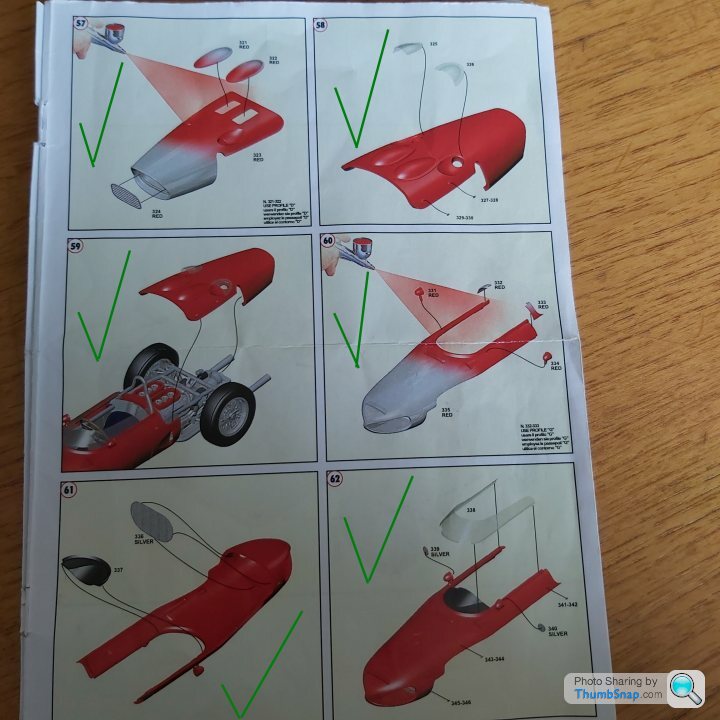
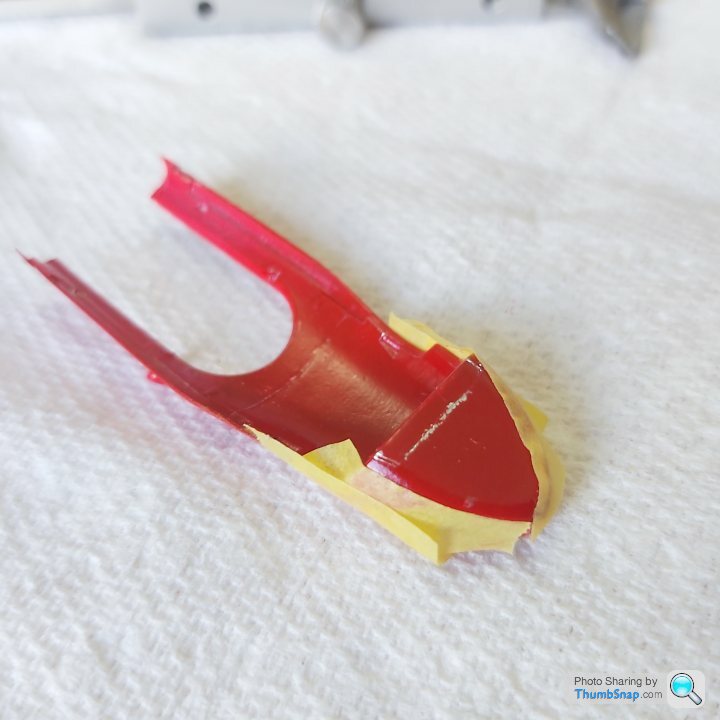
Thankyou for your encouraging comment, Its starting to look like a car now, but found a grave error in the design of the kit. I assumed the front canopy would just need cleaning up as the previous kits castings were very good. I think its a mistake in production in that they didnt take into account of the thickness of the radiator (approx 2mm). So now the canopy wont fit into its place because the underside of the cowl fouls against the radiator. Ive already painted it so now hopefully i can fettle off the required amount without damaging the paintworkGot as far as doing the radiator level 53 & 54 finished but need to mount the calipers which will have brake pipes added.Stepped back to fit the steering wheel, which needs some paint removal from the spokes.Need to make a major adjustment as previously mentioned on the front nose cone which doesnt fit in place now.
PICS.
 .
.
 .
.
 .
.
 .
.
 .
.
 .
.
PICS.
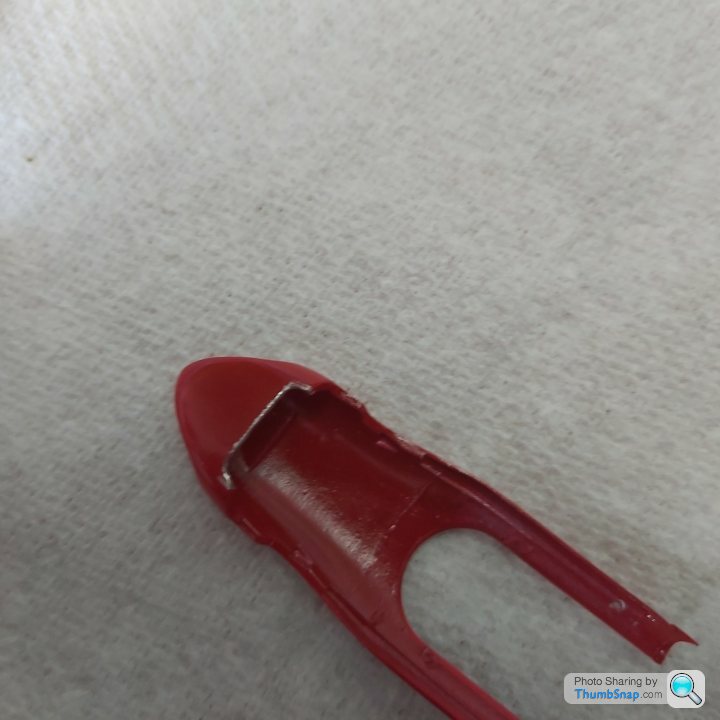
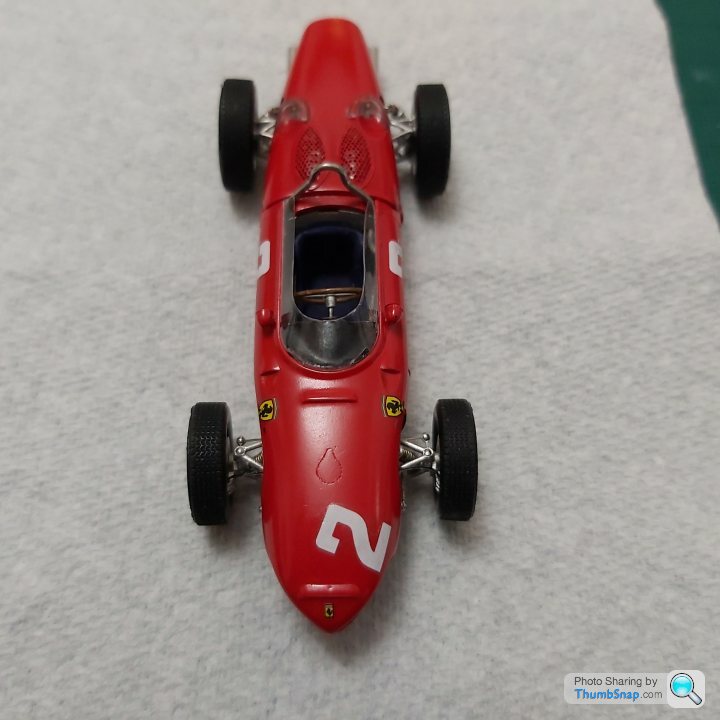
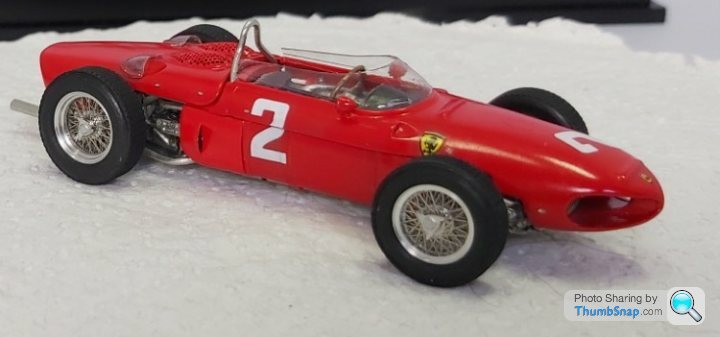
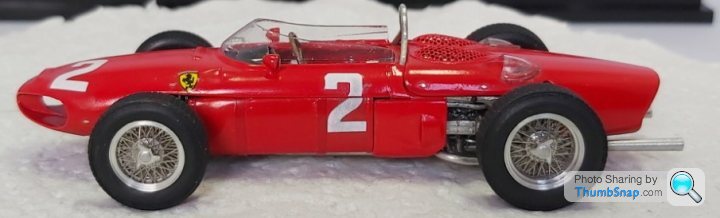
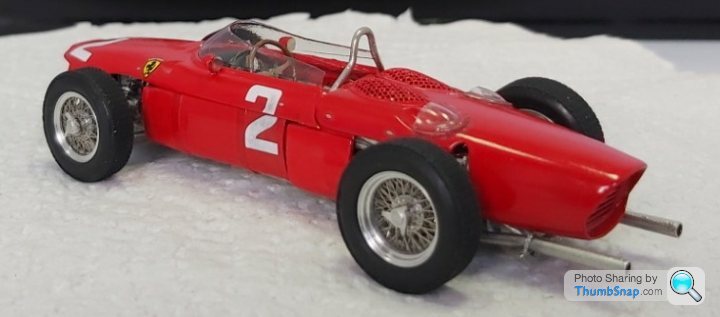
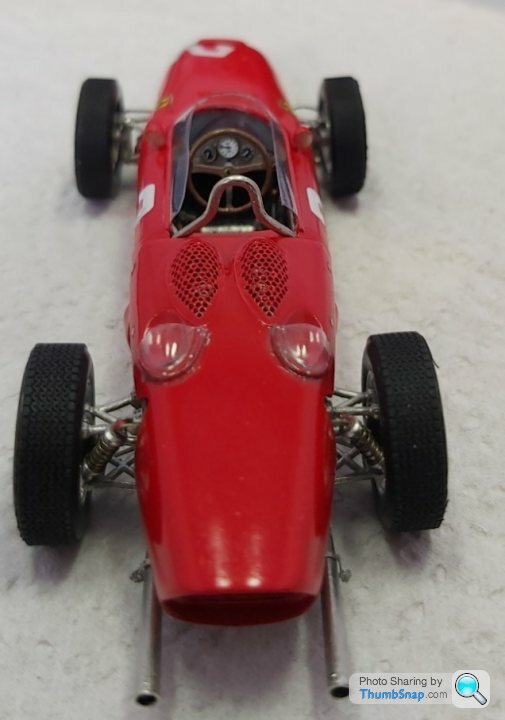
......Ground away the excess on the nosecone and other than a bit of cleanup etc,also the clear visor needs doing again fortunayely they supply 2 of each. 99% finished the build. The car is sitting quite nicely along with the Ferrari 500 and the transporter i have to repair, which has a broken toprail,mirrors missing and chrome striping along its length. Also the windscreen needs finishing off. A very nice kit if you have the time and the pocket money. Fab detail parts as standard right down to the dzuz fasteners. Thanks to evryone commenting and watching. A big thakyou to Grandprix models for the bits i lost. I will do a run of photos of the three vehicles together on the "show us your model page".
Final pics.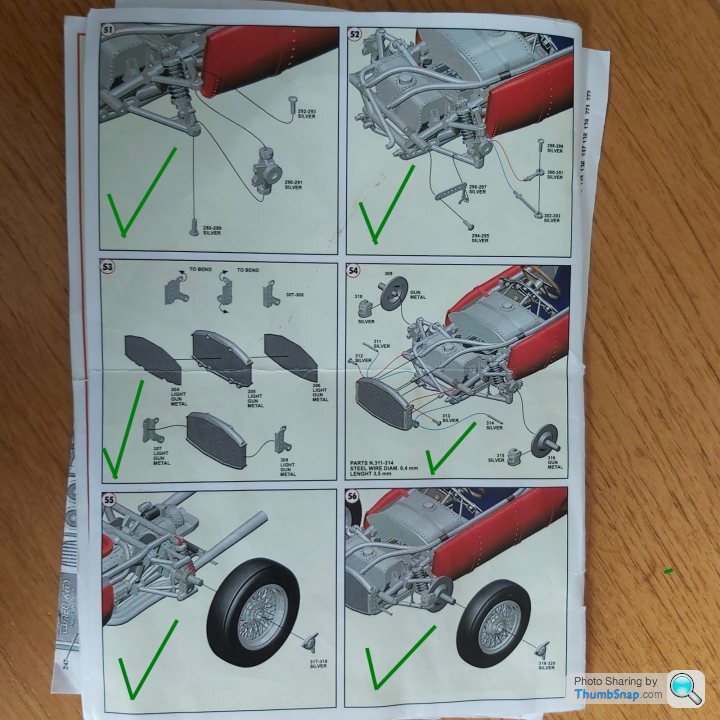 .
.
 .
.
 .
.
 .
.
Nosecone now meets the rear cowl.
 .
.
.
Wheels set.
 .
.
Compled.
 .
.
 .
.
 .
.
 .
.
 .
.
 .
.
 .
.
 .
.
Thats it for some time now until i get the dredded fever to do something else. Cheers
Final pics.
....Nosecone now meets the rear cowl.
..Wheels set.
.Compled.
........Thats it for some time now until i get the dredded fever to do something else. Cheers
Gassing Station | Scale Models | Top of Page | What's New | My Stuff