Tameo 1:43 Ferrari 156/85
Discussion


dr_gn said:
Yes, it all seems to go together pretty well. The only real issue I'm seeing is the photo-etched suspension arms. It's almost like the metal is a sandwich, and the exposed edges all have a fairly prominent recess along them. It's odd. Would be a real pain to fill them too. Is any of your photo-etch like that?
.Have you got a photo for me to take a look at?
Actually i can see from your photos the recesses you describe.My kit doesnt have photo etch for suspension parts, mine are white metal castings.
Im just thinking that at this scale, priming and painting might naturally fill the recesses and might result in the surfaces as a oval blade as per the real thing?.
Im just thinking that at this scale, priming and painting might naturally fill the recesses and might result in the surfaces as a oval blade as per the real thing?.
henryk001 said:
Actually i can see from your photos the recesses you describe.My kit doesnt have photo etch for suspension parts, mine are white metal castings.
Im just thinking that at this scale, priming and painting might naturally fill the recesses and might result in the surfaces as a oval blade as per the real thing?.
I think Mr.Surfacer might be the best way. I’ll see what they look like in satin black first.Im just thinking that at this scale, priming and painting might naturally fill the recesses and might result in the surfaces as a oval blade as per the real thing?.
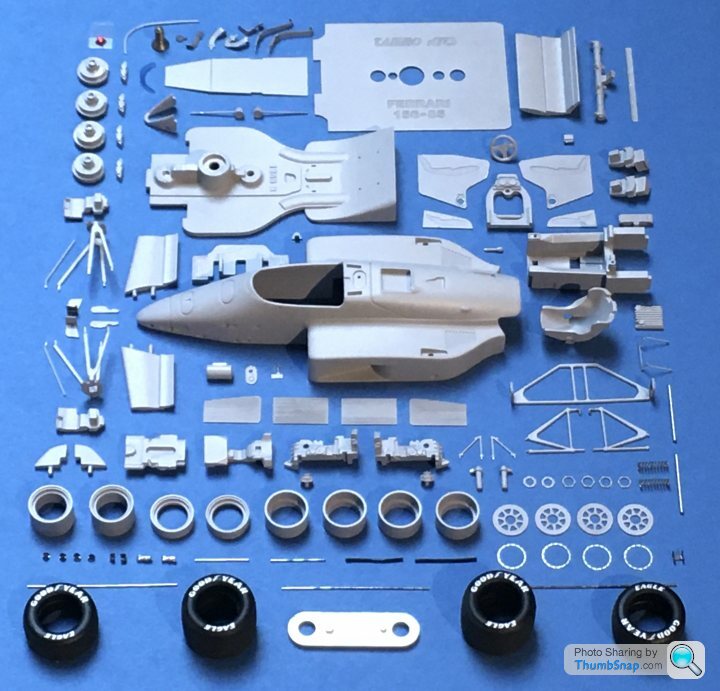
Stripped the primer off the wheels and spun them up in the lathe to polish the rims. I gave the centres a coat of Vallejo Air gold, and satin varnish. Couldn’t resist dry assembling them into the tyres:
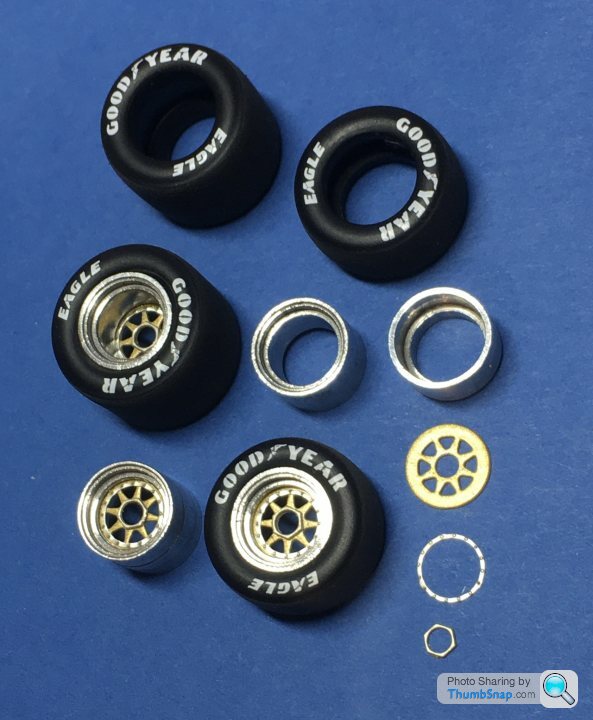
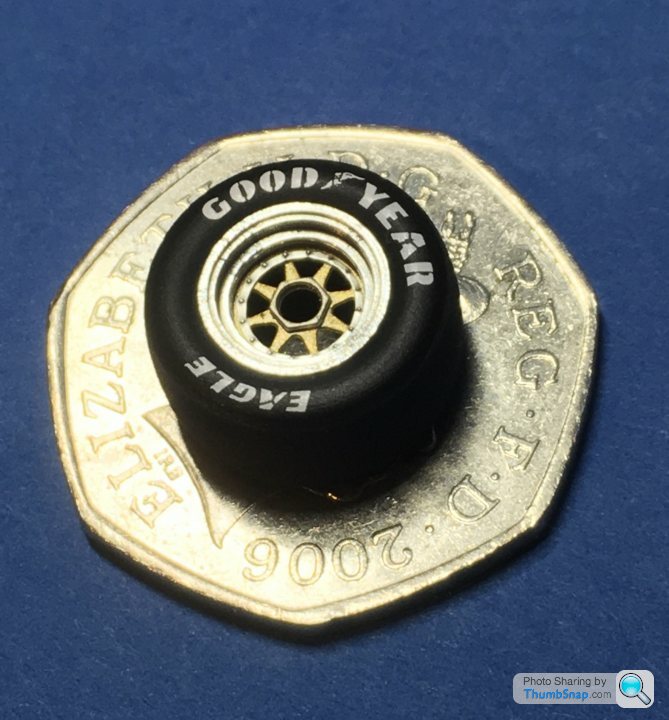
I think I’ll not bother with glue, then if they ever need polishing again I can just press them out if the tyres and they’ll fall to bits.
I think I’ll not bother with glue, then if they ever need polishing again I can just press them out if the tyres and they’ll fall to bits.
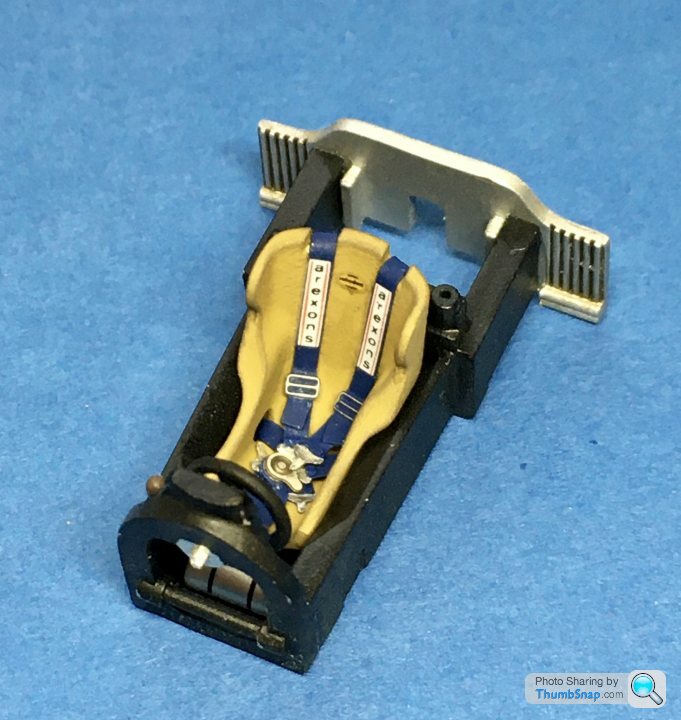
Most of the individual parts are now painted, decalled and clear coated pretty much to the finishes specified in the instructions. I used a dark wash and weathering powers on the gearbox casings and some other bits. The diffuser has a 3-piece decal to represent Kevlar. That was something I didn’t remember seeing, but a look at my photos confirmed it was correct. I used some old Pheon 1:32 SE.5a decals cut into thin strips to represent the black edging pieces, rather than risk masking and spraying. I used Vallejo Dark Stone with Tamiya mud weathering powder to represent the suede seat and head rest:
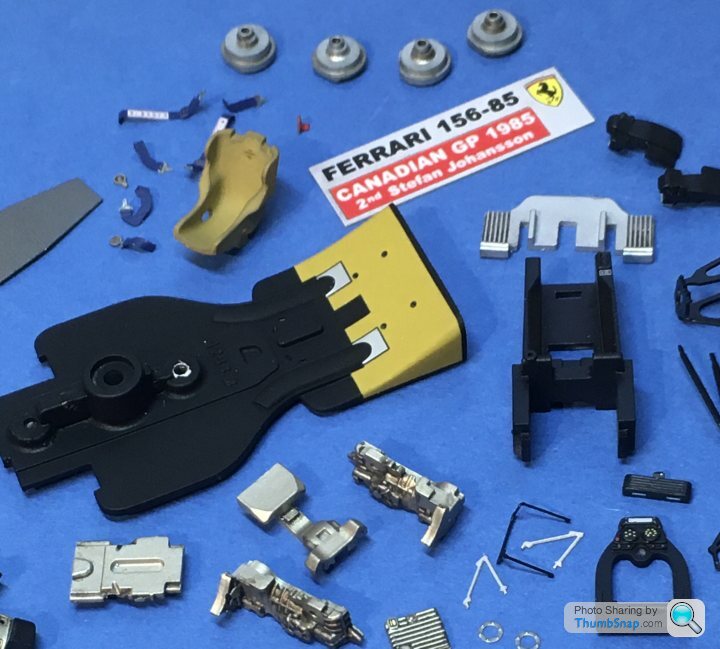
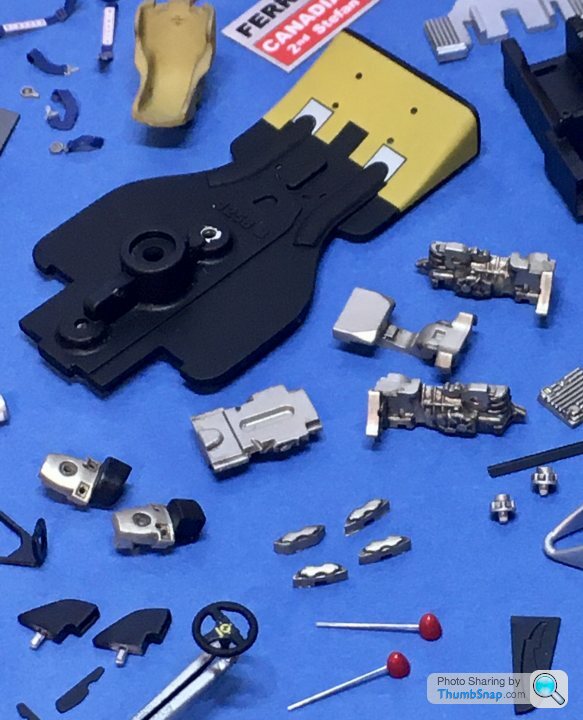
There were two tiny decals that weren’t shown in the instructions; a small one that looked like a Magneti Marelli logo, which I put on the ECU, and a silver Ferrari data plate, which I put in the appropriate place just behind the gear lever gate surround.
A nice touch is the embossed photo-etched name plate, onto which a couple of decals are placed, and the main lettering blocked in with black and polished back.
Now to assemble a few things, and no doubt have to touch-in the inevitable paint chips that seem to go with the territory of a metal kit.
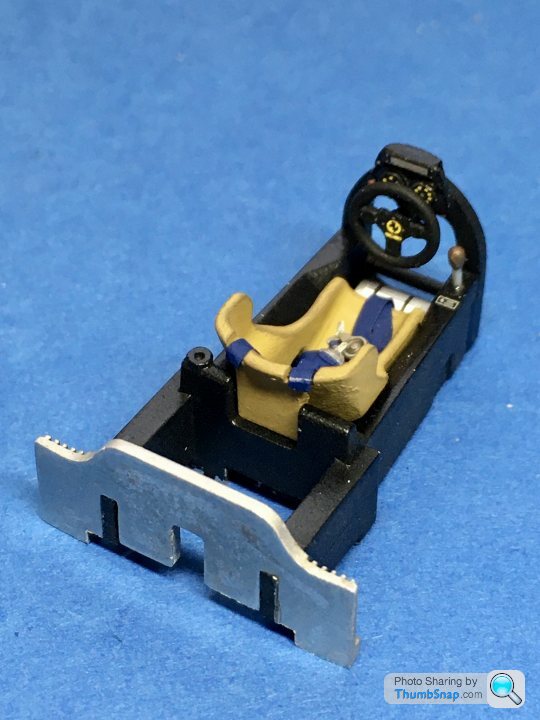
Assembled the harness to the seat with PVA, and the seat, fire extinguisher and gear lever to the cockpit tub assembly:
...and it didn’t take long for the first of what will be dozens of paint chips to appear during test assembly:
Probably the worst part of building a metal kit is weak paint adhesion.
...and it didn’t take long for the first of what will be dozens of paint chips to appear during test assembly:
Probably the worst part of building a metal kit is weak paint adhesion.
...and it didn’t take long for the first of what will be dozens of paint chips to appear during test assembly:
Probably the worst part of building a metal kit is weak paint adhesion.
[/quote].
Comes with the territory im afraid. Happens to me too. I have got around it by using the thinest embriodery needle and running a drop line along the damage has so far given me invisible repairs, but you have to be quick if the paint dries before you finish it will show up.
I practised quite a lot before i got it right.Watchibg Kirsten on the repair shop doing her broken vases gave me some clues.Im sure you have a succesfull method of your own. Anyway its all looking very nice.
I always give the parts a good clean with wire wool, until they have a bright shine. If you look closely, you will see that the 'shine' is composed of really tiny scratches. Because they are so small, they won't show once the paint is on, but will give it something to hold on to.
There is also a school of thought that says the first coat of paint should be applied before the last coat of primer is fully dry.
There is also a school of thought that says the first coat of paint should be applied before the last coat of primer is fully dry.
I abraded all the cast parts with a fibreglass pencil - the body with fine wet & dry before priming. All the chips are straight to metal - the primer lifts. Strangely, I had to remove the paint from the rear wing end plates and I had to use abrasive pads - no way it was coming off any other way.
Started the polishing process using cotton buds and cloth with Tamiya Finish compound.
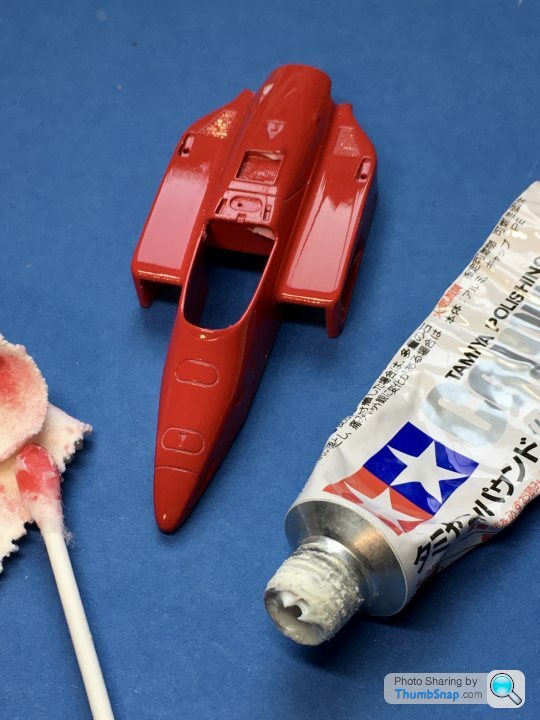
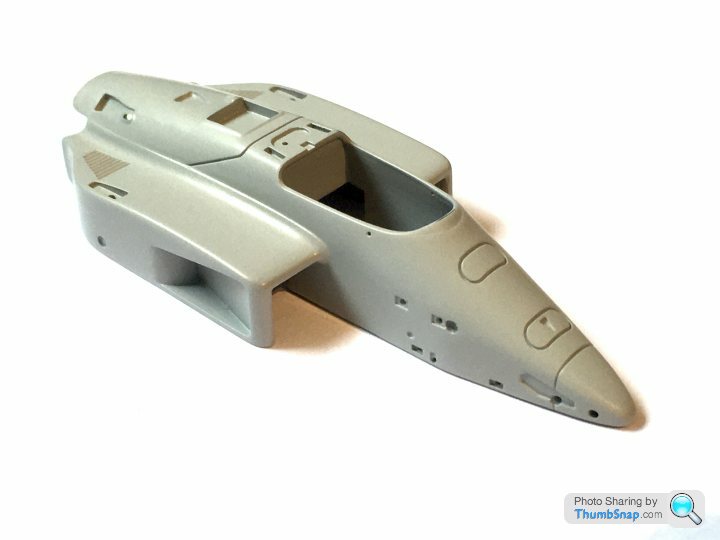
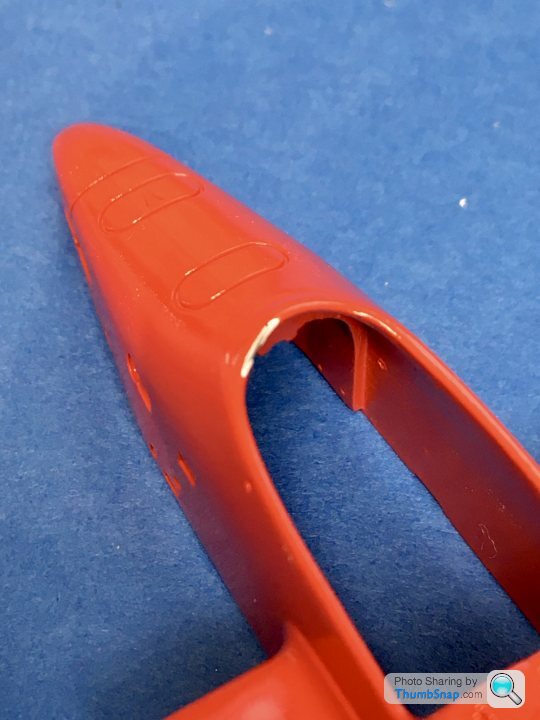
It was looking good, but then, entirely predictably, I rubbed through to primer on an edge:
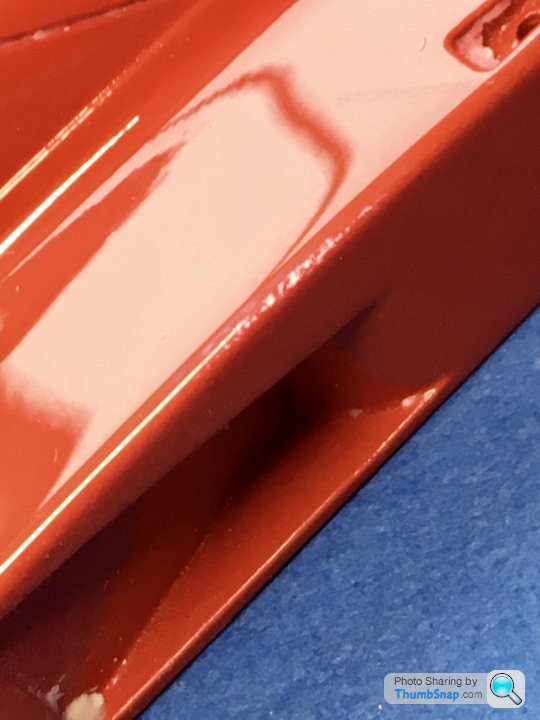
So I’ve had to re-coat it. I’m expecting this to happen several times. Not even sure it’s worth polishing at this stage, I’ll be clearcoating after decals, so that will need polishing too. I just want a fairly flat surface for the decals at this stage.
Anyway, I’ve assembled the transmission and rear suspension. The oil cooler had a decal with temp tell-tale stickers on it. Unfortunately they were slightly mis-aligned in the print, so I sanded them off and locally re-sprayed black. I’ll cut some more stickers out of a random blue decal and position them myself.
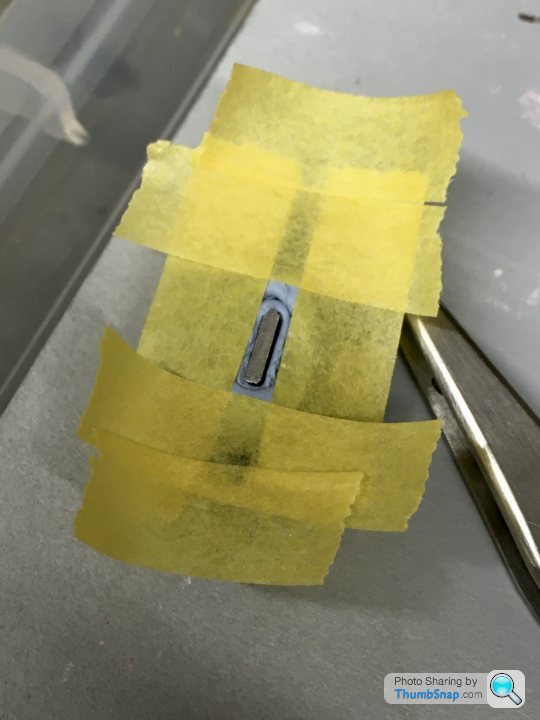
I should have accepted that they weren’t going to look right before I fitted it, but again I often tell myself something won’t be too noticeable, but then it really is...
It was looking good, but then, entirely predictably, I rubbed through to primer on an edge:
So I’ve had to re-coat it. I’m expecting this to happen several times. Not even sure it’s worth polishing at this stage, I’ll be clearcoating after decals, so that will need polishing too. I just want a fairly flat surface for the decals at this stage.
Anyway, I’ve assembled the transmission and rear suspension. The oil cooler had a decal with temp tell-tale stickers on it. Unfortunately they were slightly mis-aligned in the print, so I sanded them off and locally re-sprayed black. I’ll cut some more stickers out of a random blue decal and position them myself.
I should have accepted that they weren’t going to look right before I fitted it, but again I often tell myself something won’t be too noticeable, but then it really is...
dr_gn said:
Started the polishing process using cotton buds and cloth with Tamiya Finish compound.
It was looking good, but then, entirely predictably, I rubbed through to primer on an edge:
So I’ve had to re-coat it. I’m expecting this to happen several times. Not even sure it’s worth polishing at this stage, I’ll be clearcoating after decals, so that will need polishing too. I just want a fairly flat surface for the decals at this stage.
Anyway, I’ve assembled the transmission and rear suspension. The oil cooler had a decal with temp tell-tale stickers on it. Unfortunately they were slightly mis-aligned in the print, so I sanded them off and locally re-sprayed black. I’ll cut some more stickers out of a random blue decal and position them myself.
I should have accepted that they weren’t going to look right before I fitted it, but again I often tell myself something won’t be too noticeable, but then it really is...
Just a thought. I found on my previous Ferrari build that too much polishing at this scale tended to make my model look toylike, so i preferred to leave it with top coat and laquer as i cut through the paint as well and had to spray it all over again.It was looking good, but then, entirely predictably, I rubbed through to primer on an edge:
So I’ve had to re-coat it. I’m expecting this to happen several times. Not even sure it’s worth polishing at this stage, I’ll be clearcoating after decals, so that will need polishing too. I just want a fairly flat surface for the decals at this stage.
Anyway, I’ve assembled the transmission and rear suspension. The oil cooler had a decal with temp tell-tale stickers on it. Unfortunately they were slightly mis-aligned in the print, so I sanded them off and locally re-sprayed black. I’ll cut some more stickers out of a random blue decal and position them myself.
I should have accepted that they weren’t going to look right before I fitted it, but again I often tell myself something won’t be too noticeable, but then it really is...
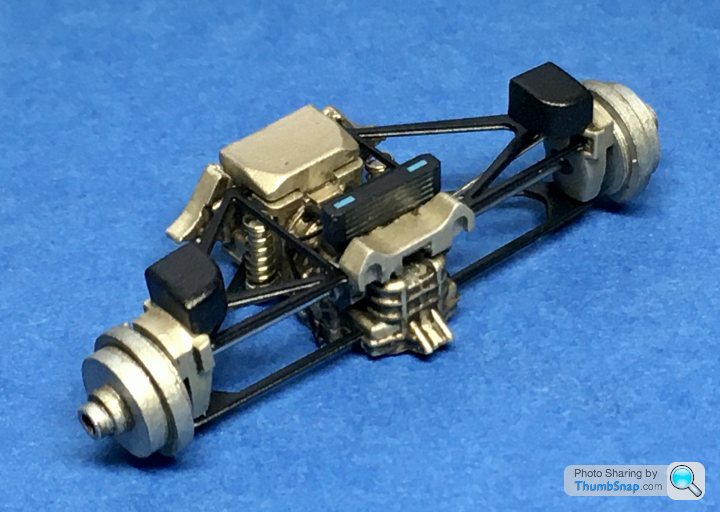
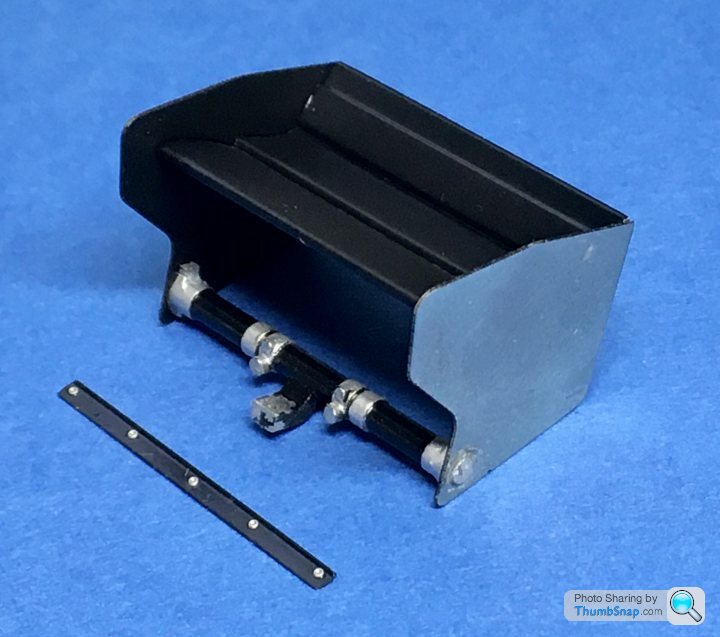
So while the body is drying again, I’ve finished the transmission and rear suspension. The oil cooler correction worked well enough:

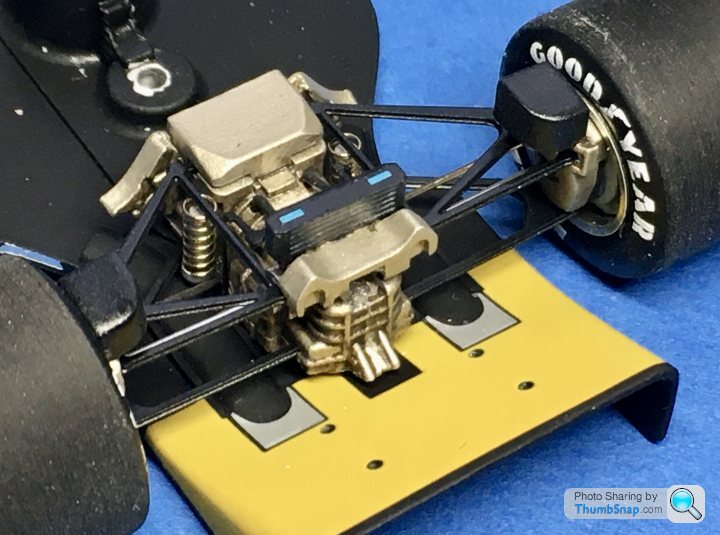
Here it is test fitted to the rear floor. About half of the assembly is covered by the rear bodywork, but most of it is still visible if you look carefully enough. I put the wheels in place just to check alignment - it looks ok:
Front wing end plates fitted:
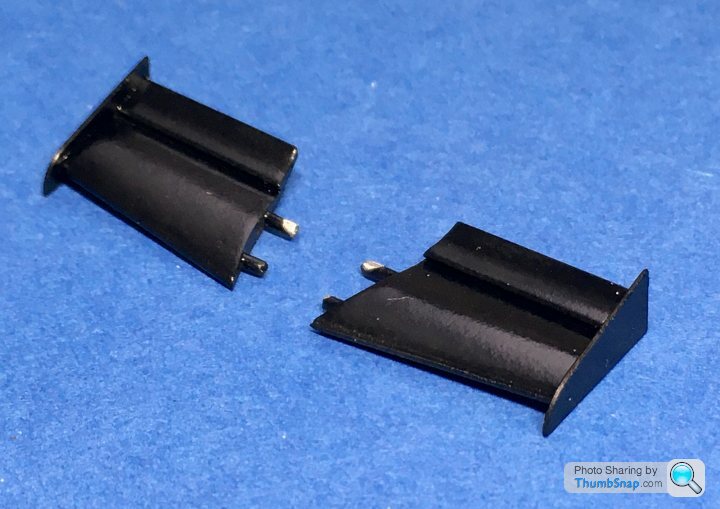
And the rear wing:
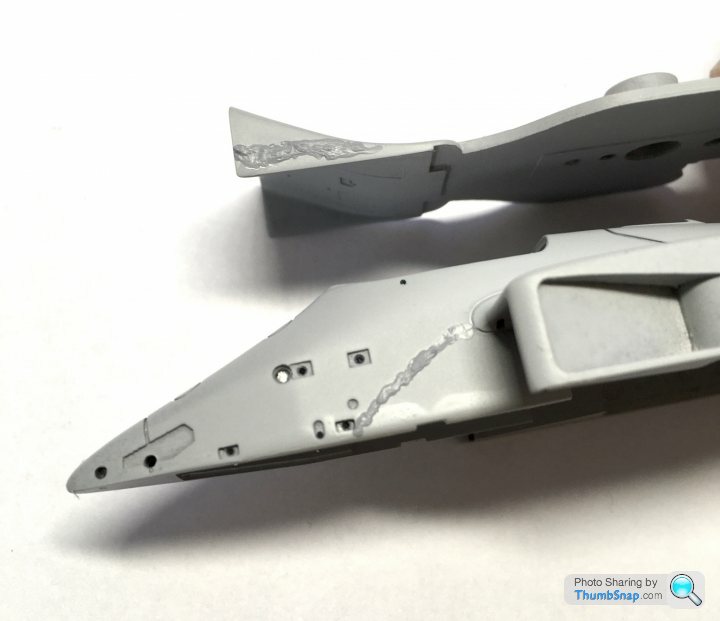
The wing beam ends protrude through the end plates, so they need filling and flatting before painting, hence the bare metal. I’ve added some 0.6mm p/e rivers to the Gurney flap; the raised dimples proved too difficult to scrape the paint off:
Here it is test fitted to the rear floor. About half of the assembly is covered by the rear bodywork, but most of it is still visible if you look carefully enough. I put the wheels in place just to check alignment - it looks ok:
Front wing end plates fitted:
And the rear wing:
The wing beam ends protrude through the end plates, so they need filling and flatting before painting, hence the bare metal. I’ve added some 0.6mm p/e rivers to the Gurney flap; the raised dimples proved too difficult to scrape the paint off:
Edited by dr_gn on Saturday 18th July 17:01
Had a bit of an issue with the fluorescent strips on the front wings. For some reason the right side decal cracked into 3 pieces. You get two sets of decals in the kit, and both were the same:
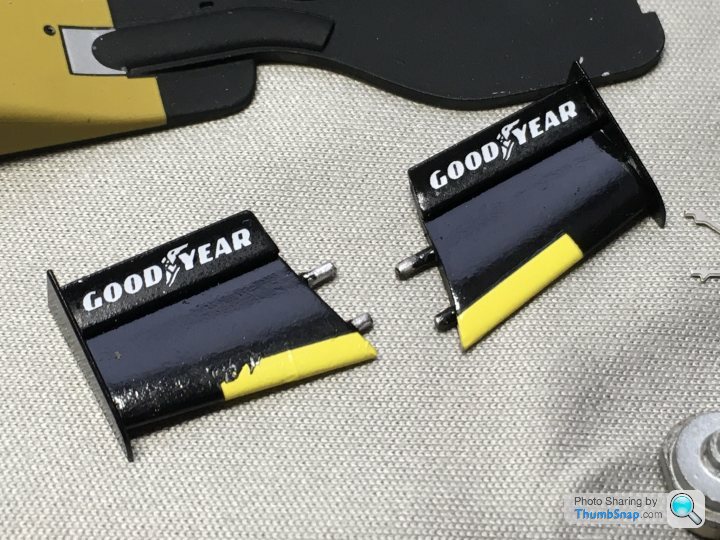
I’ve messaged Tameo and I think they’re sending me another set.
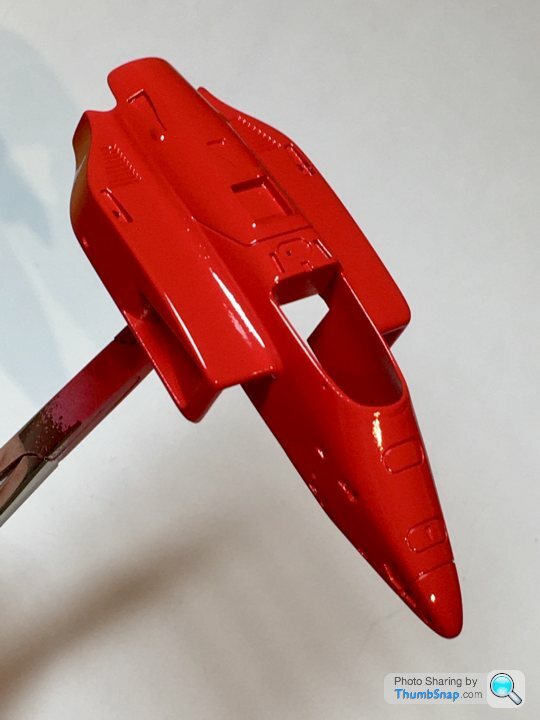
Then on to the body. I made a small holder so I don’t have to touch it, and I’ve taken to putting parts on a cloth to try and avoid chips:
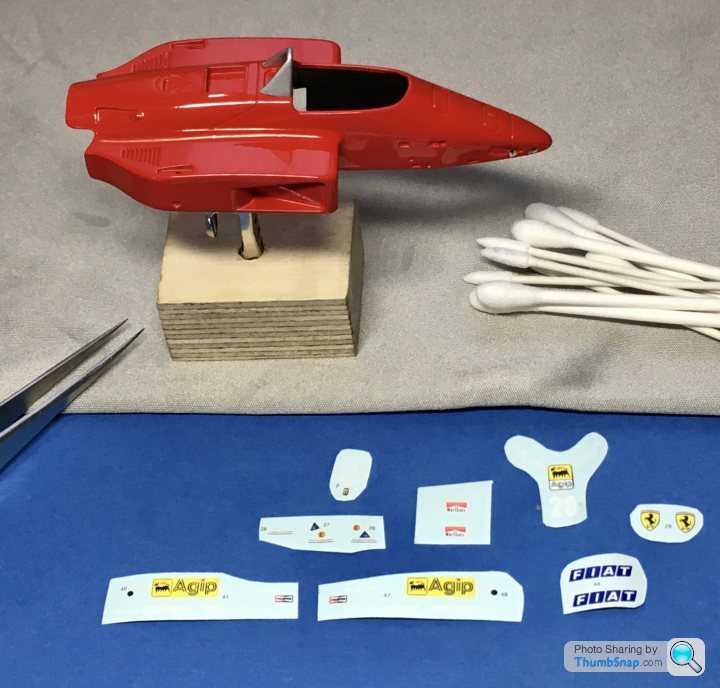
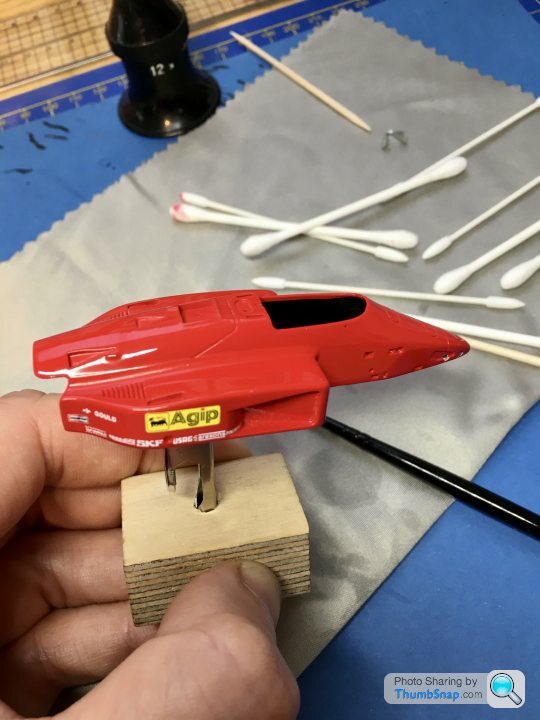
There’s something really satisfying about putting the yellow and white decals on a Ferrari F1 car. They instantly transform it into the real thing. It’s a bit like applying decals to a Spitfire model - it just comes to life.
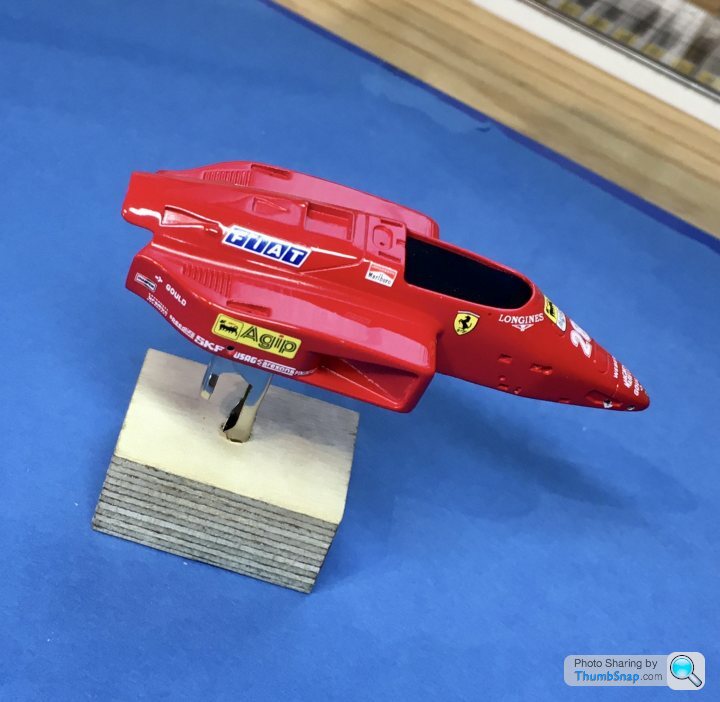
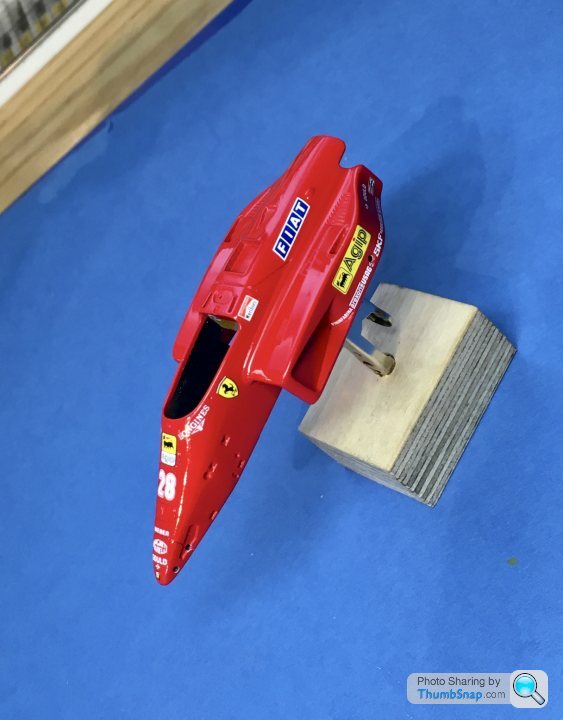
I like that the sidepod and nose decal arrays are printed on one backing film, so they’re all perfectly aligned relative to each other. Once they’re set I‘ll give them a couple of coats of Tamiya gloss clear.
I’ve messaged Tameo and I think they’re sending me another set.
Then on to the body. I made a small holder so I don’t have to touch it, and I’ve taken to putting parts on a cloth to try and avoid chips:
There’s something really satisfying about putting the yellow and white decals on a Ferrari F1 car. They instantly transform it into the real thing. It’s a bit like applying decals to a Spitfire model - it just comes to life.
I like that the sidepod and nose decal arrays are printed on one backing film, so they’re all perfectly aligned relative to each other. Once they’re set I‘ll give them a couple of coats of Tamiya gloss clear.
Gassing Station | Scale Models | Top of Page | What's New | My Stuff