Tameo 1:43 Ferrari 156/85
Discussion


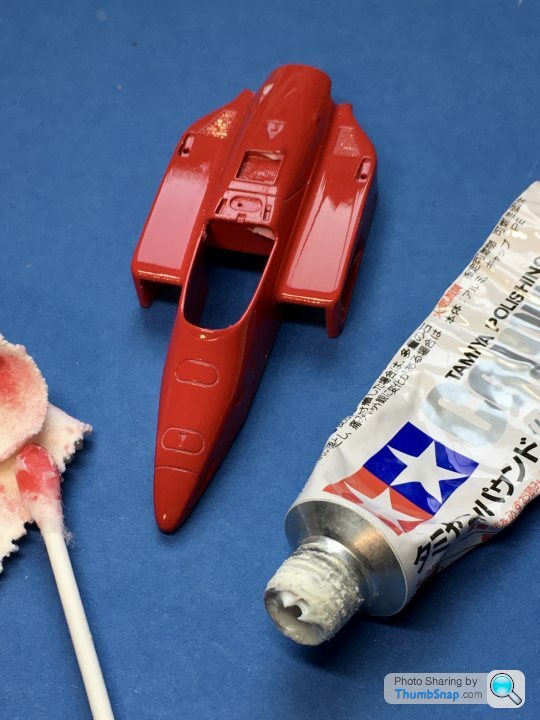
I abraded all the cast parts with a fibreglass pencil - the body with fine wet & dry before priming. All the chips are straight to metal - the primer lifts. Strangely, I had to remove the paint from the rear wing end plates and I had to use abrasive pads - no way it was coming off any other way.
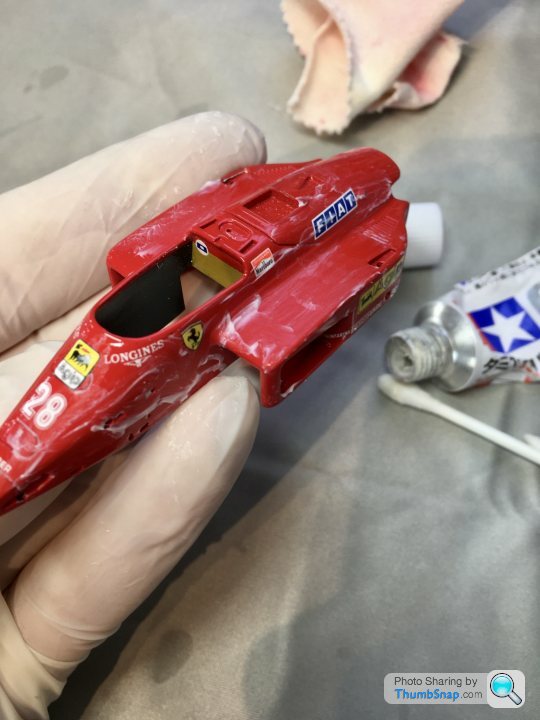
Started the polishing process using cotton buds and cloth with Tamiya Finish compound.
It was looking good, but then, entirely predictably, I rubbed through to primer on an edge:
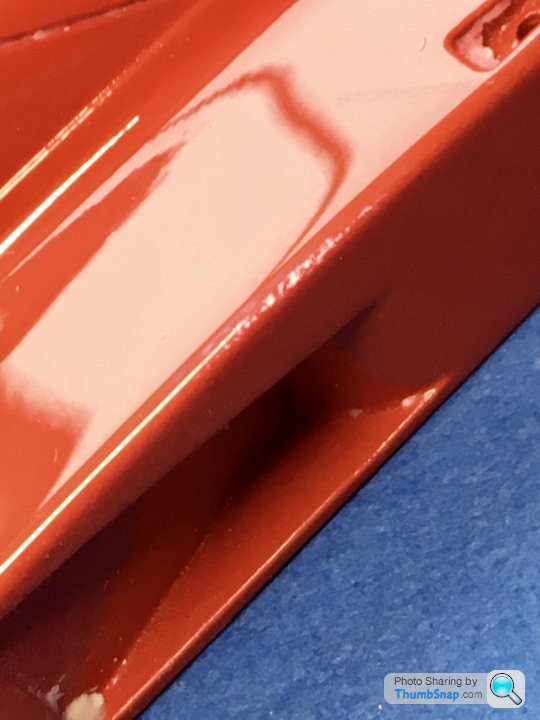
So I’ve had to re-coat it. I’m expecting this to happen several times. Not even sure it’s worth polishing at this stage, I’ll be clearcoating after decals, so that will need polishing too. I just want a fairly flat surface for the decals at this stage.
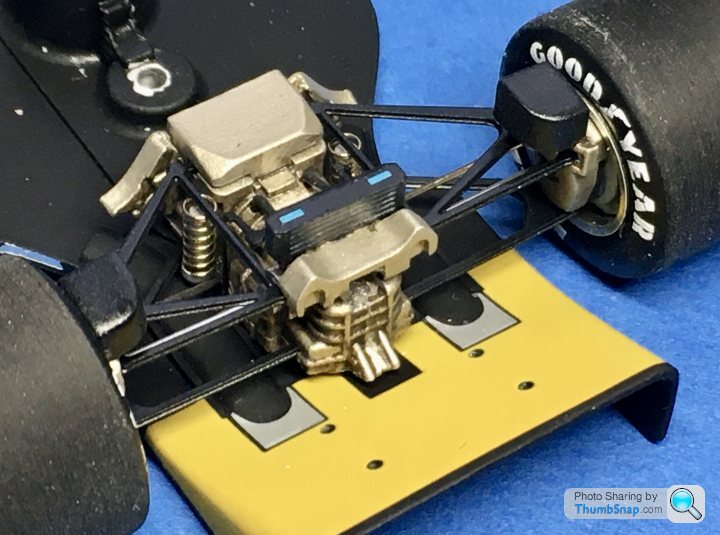
Anyway, I’ve assembled the transmission and rear suspension. The oil cooler had a decal with temp tell-tale stickers on it. Unfortunately they were slightly mis-aligned in the print, so I sanded them off and locally re-sprayed black. I’ll cut some more stickers out of a random blue decal and position them myself.
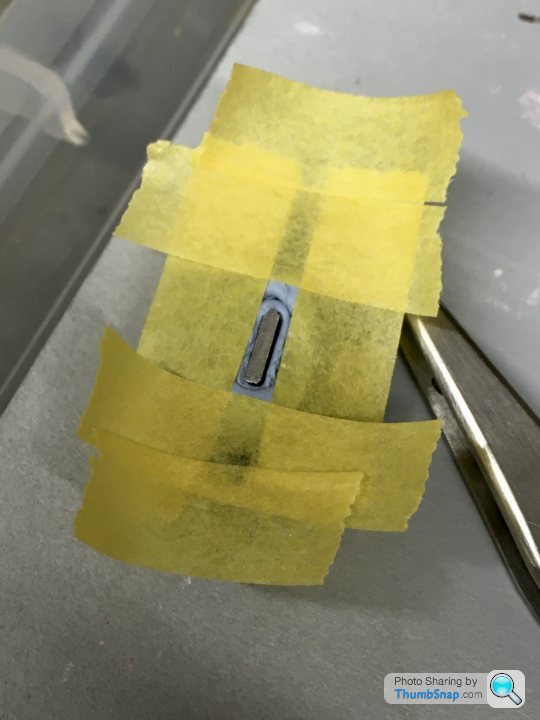
I should have accepted that they weren’t going to look right before I fitted it, but again I often tell myself something won’t be too noticeable, but then it really is...
It was looking good, but then, entirely predictably, I rubbed through to primer on an edge:
So I’ve had to re-coat it. I’m expecting this to happen several times. Not even sure it’s worth polishing at this stage, I’ll be clearcoating after decals, so that will need polishing too. I just want a fairly flat surface for the decals at this stage.
Anyway, I’ve assembled the transmission and rear suspension. The oil cooler had a decal with temp tell-tale stickers on it. Unfortunately they were slightly mis-aligned in the print, so I sanded them off and locally re-sprayed black. I’ll cut some more stickers out of a random blue decal and position them myself.
I should have accepted that they weren’t going to look right before I fitted it, but again I often tell myself something won’t be too noticeable, but then it really is...
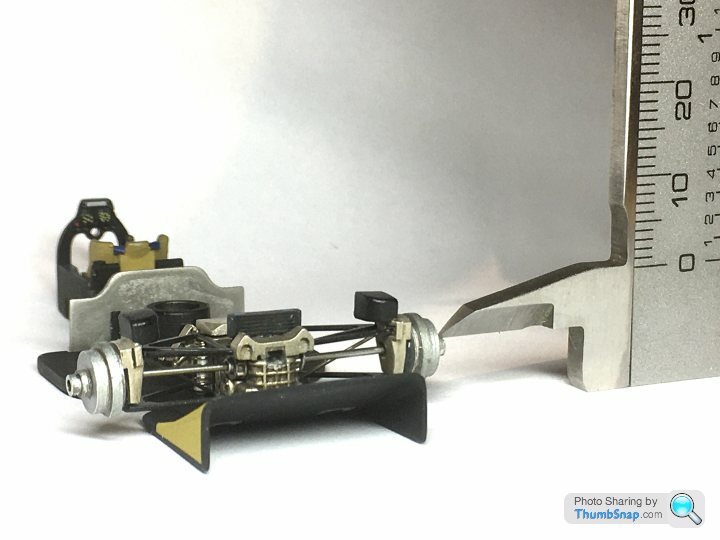
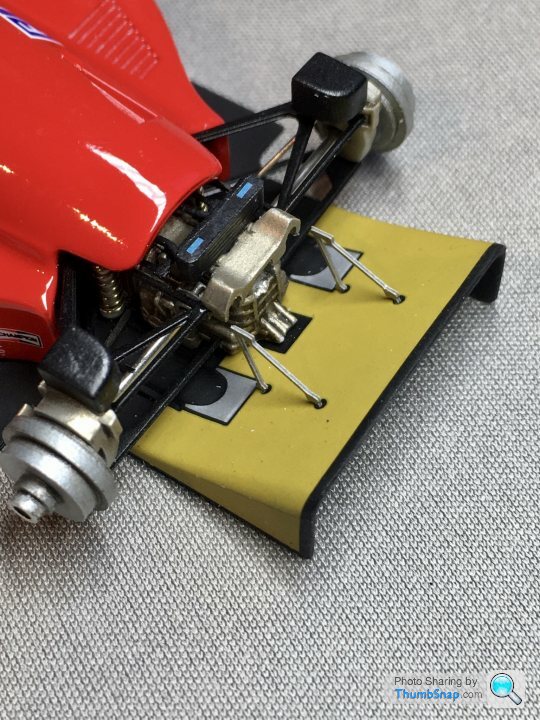
So while the body is drying again, I’ve finished the transmission and rear suspension. The oil cooler correction worked well enough:
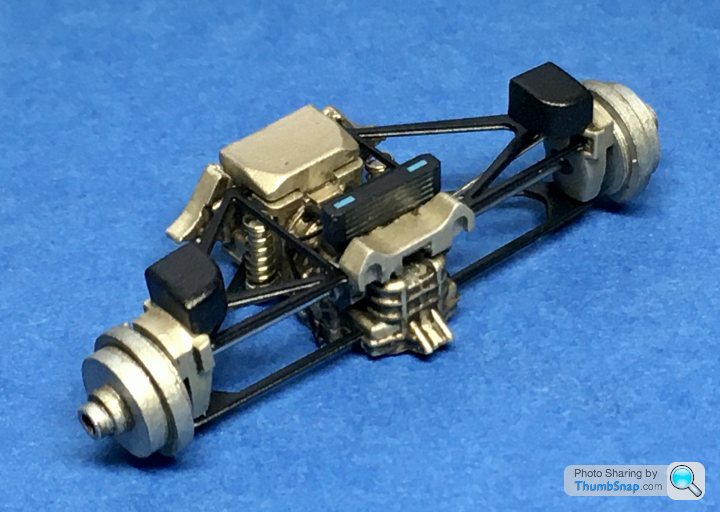

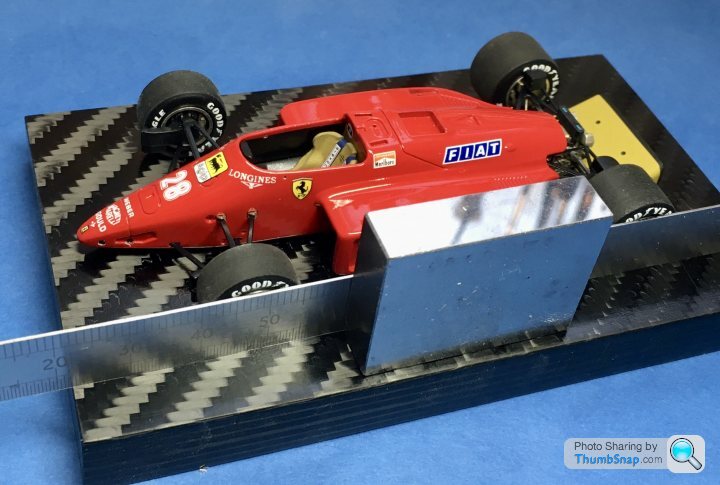
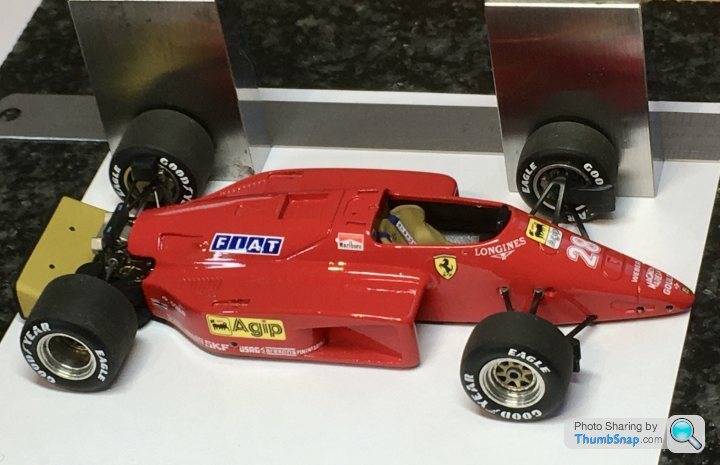
Here it is test fitted to the rear floor. About half of the assembly is covered by the rear bodywork, but most of it is still visible if you look carefully enough. I put the wheels in place just to check alignment - it looks ok:
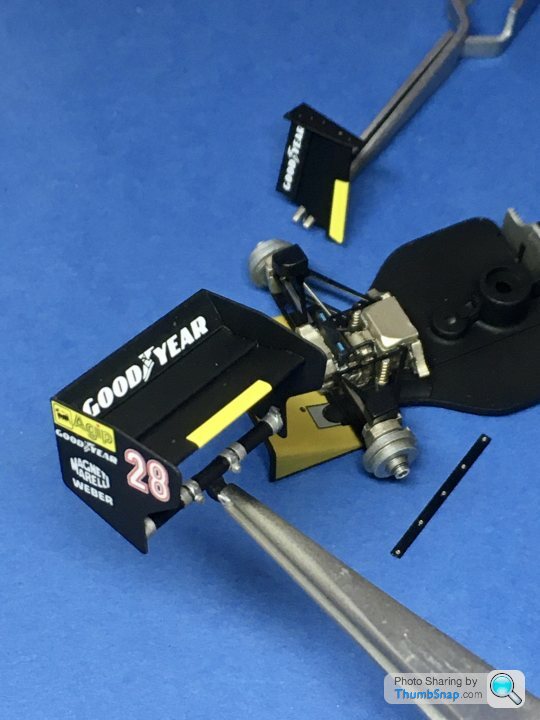
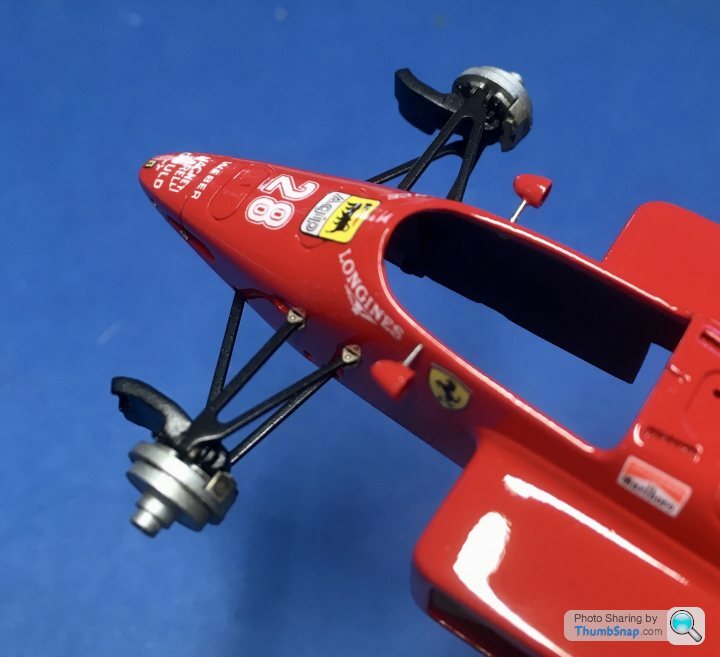
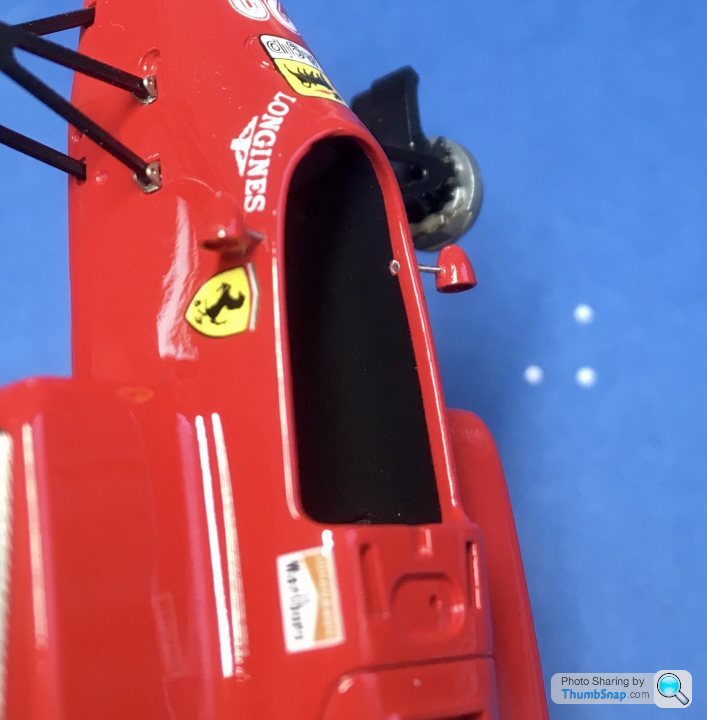
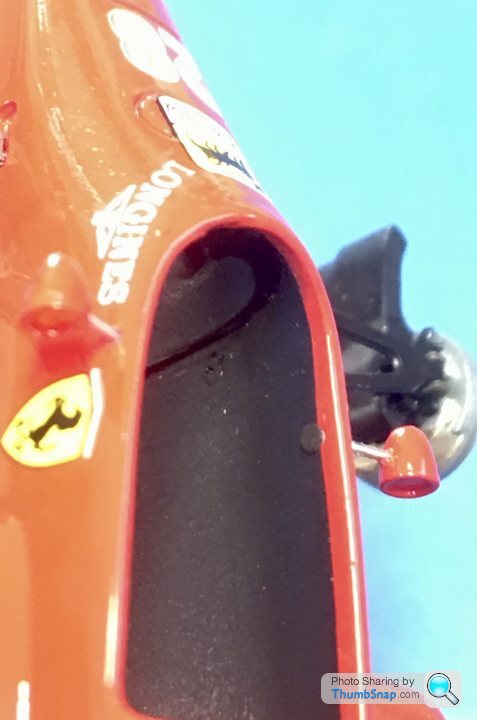
Front wing end plates fitted:
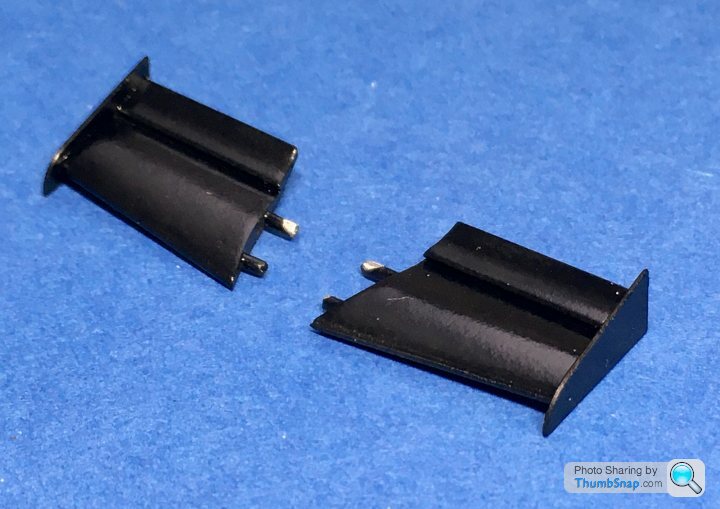
And the rear wing:
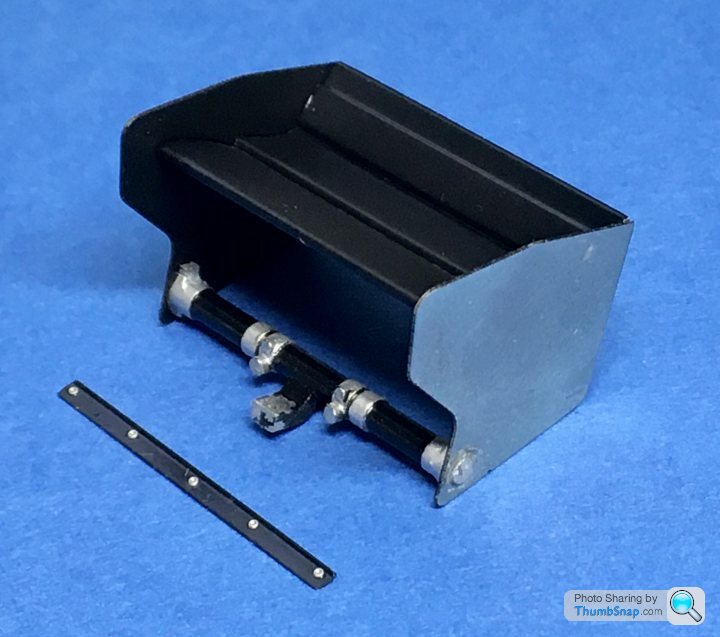
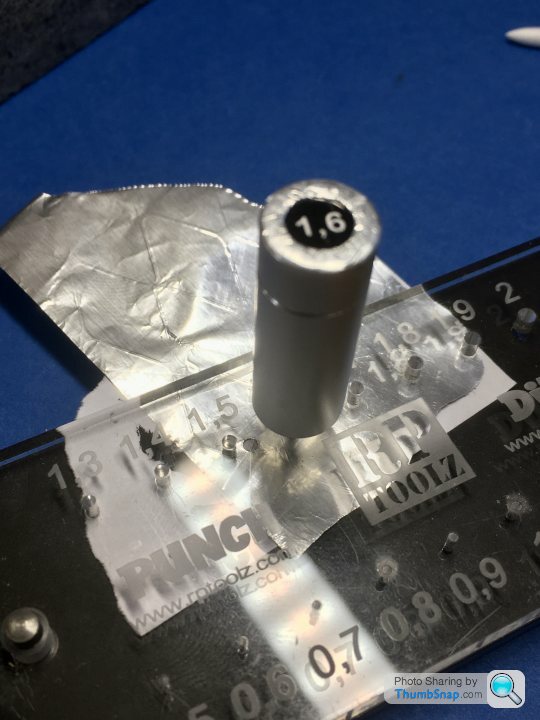
The wing beam ends protrude through the end plates, so they need filling and flatting before painting, hence the bare metal. I’ve added some 0.6mm p/e rivers to the Gurney flap; the raised dimples proved too difficult to scrape the paint off:
Here it is test fitted to the rear floor. About half of the assembly is covered by the rear bodywork, but most of it is still visible if you look carefully enough. I put the wheels in place just to check alignment - it looks ok:
Front wing end plates fitted:
And the rear wing:
The wing beam ends protrude through the end plates, so they need filling and flatting before painting, hence the bare metal. I’ve added some 0.6mm p/e rivers to the Gurney flap; the raised dimples proved too difficult to scrape the paint off:
Edited by dr_gn on Saturday 18th July 17:01
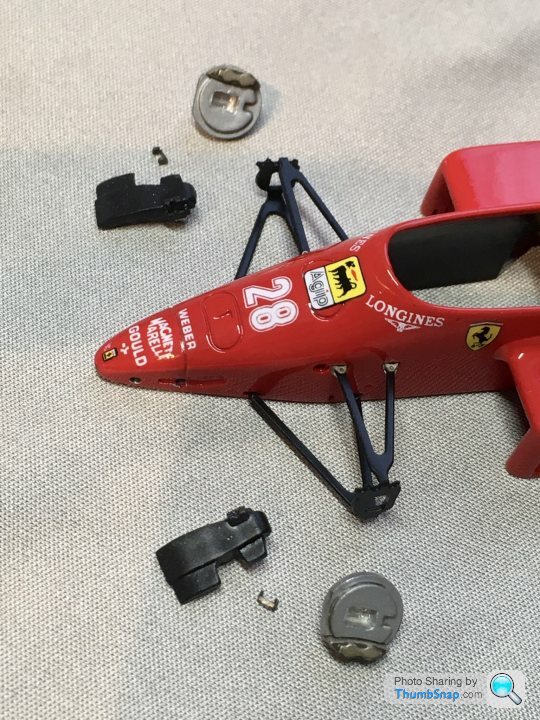
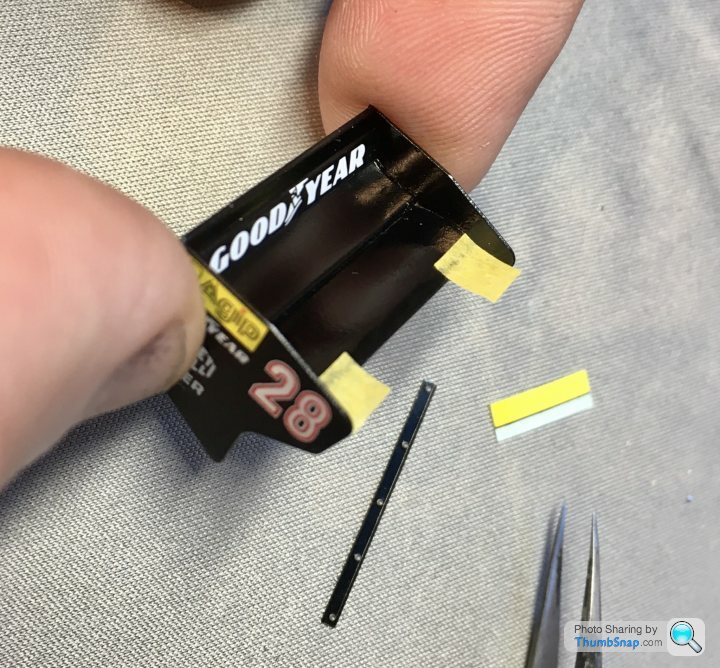
Had a bit of an issue with the fluorescent strips on the front wings. For some reason the right side decal cracked into 3 pieces. You get two sets of decals in the kit, and both were the same:
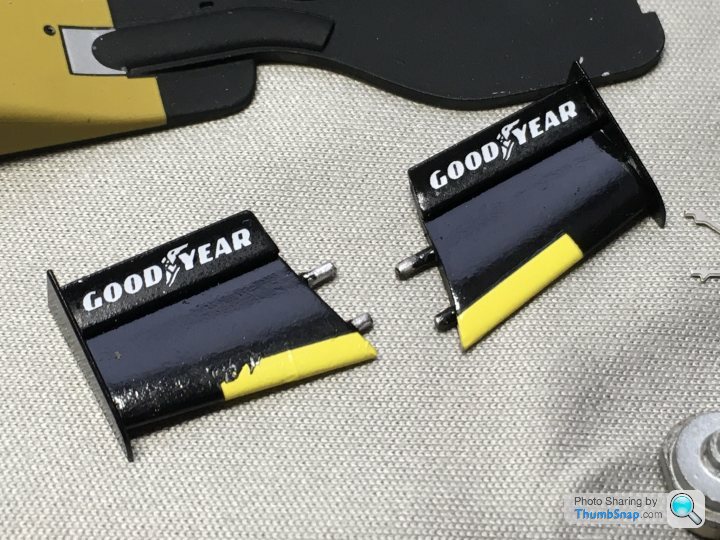
I’ve messaged Tameo and I think they’re sending me another set.
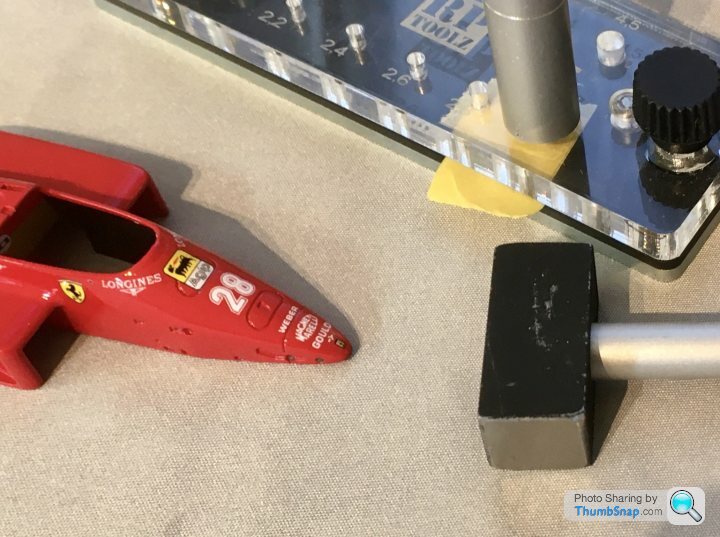
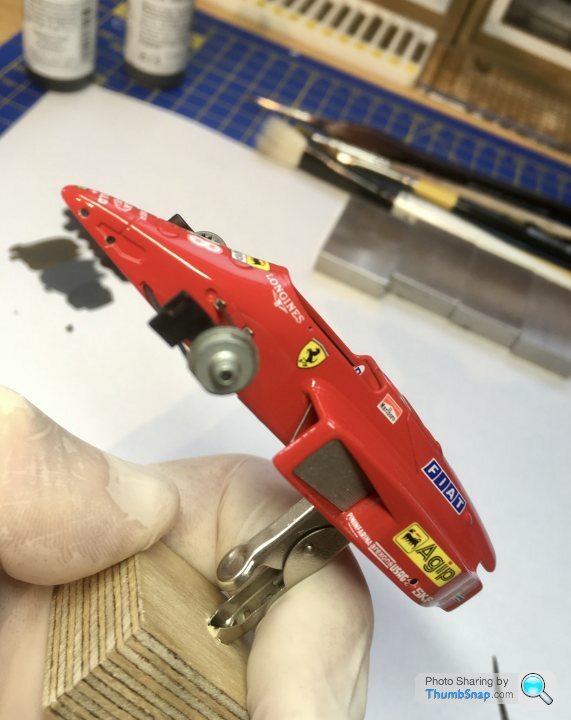
Then on to the body. I made a small holder so I don’t have to touch it, and I’ve taken to putting parts on a cloth to try and avoid chips:
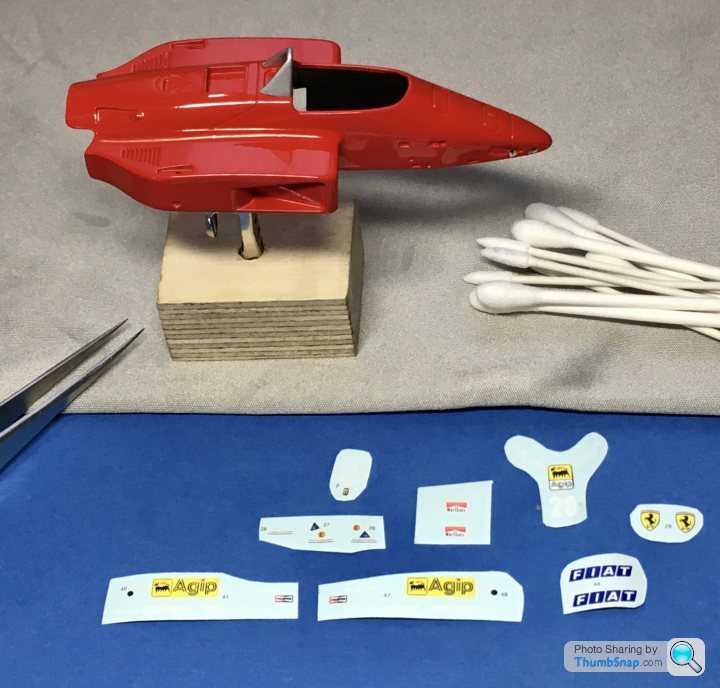
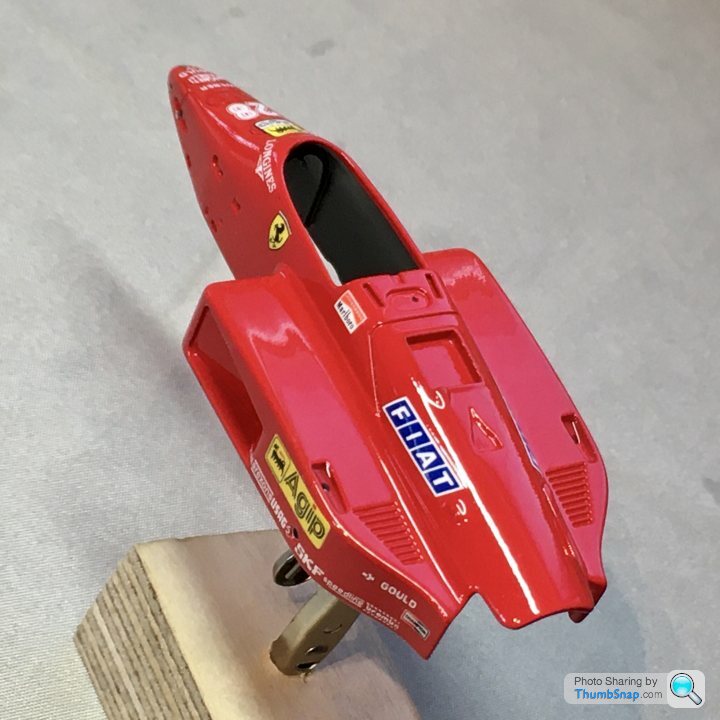
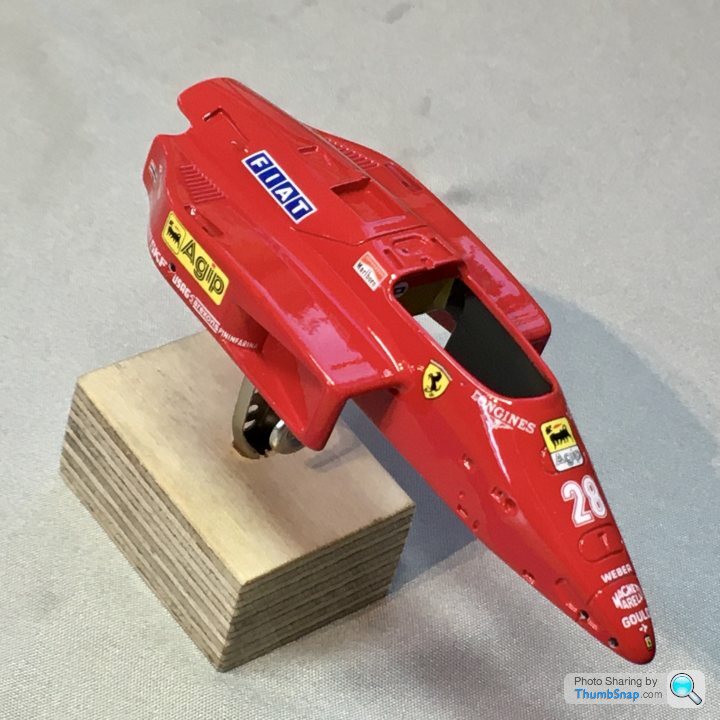
There’s something really satisfying about putting the yellow and white decals on a Ferrari F1 car. They instantly transform it into the real thing. It’s a bit like applying decals to a Spitfire model - it just comes to life.
I like that the sidepod and nose decal arrays are printed on one backing film, so they’re all perfectly aligned relative to each other. Once they’re set I‘ll give them a couple of coats of Tamiya gloss clear.
I’ve messaged Tameo and I think they’re sending me another set.
Then on to the body. I made a small holder so I don’t have to touch it, and I’ve taken to putting parts on a cloth to try and avoid chips:
There’s something really satisfying about putting the yellow and white decals on a Ferrari F1 car. They instantly transform it into the real thing. It’s a bit like applying decals to a Spitfire model - it just comes to life.
I like that the sidepod and nose decal arrays are printed on one backing film, so they’re all perfectly aligned relative to each other. Once they’re set I‘ll give them a couple of coats of Tamiya gloss clear.
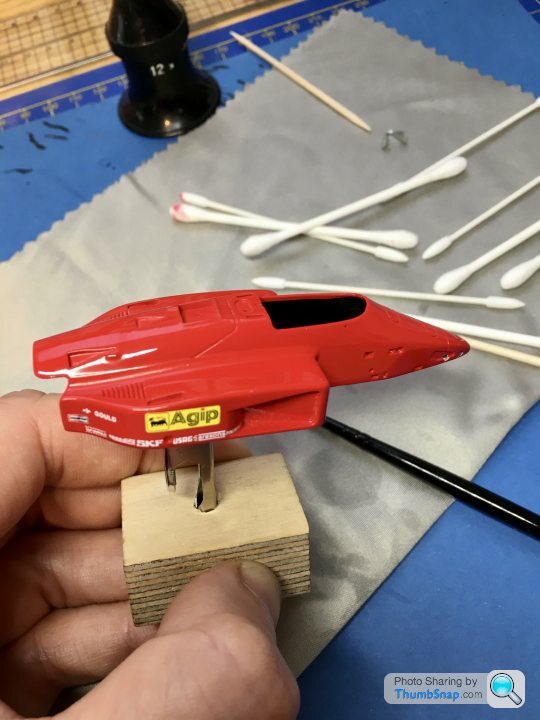
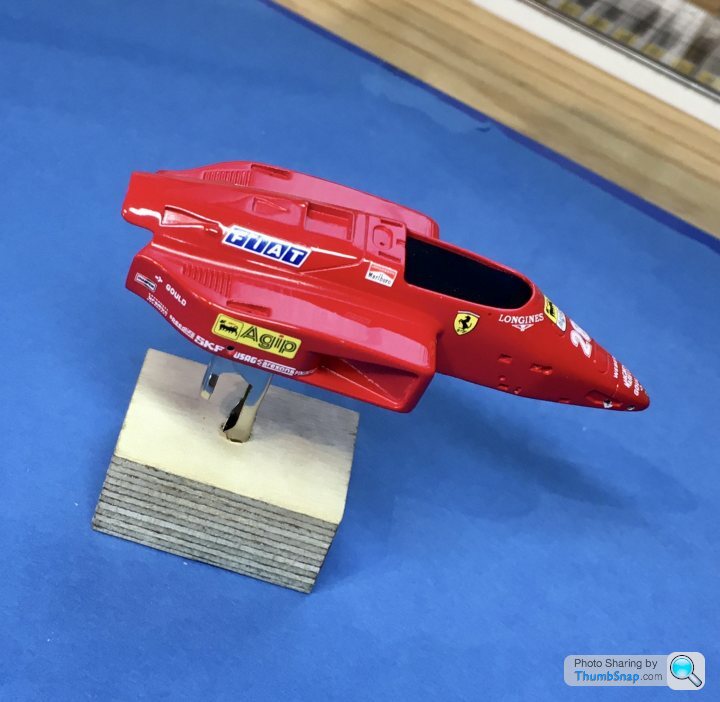
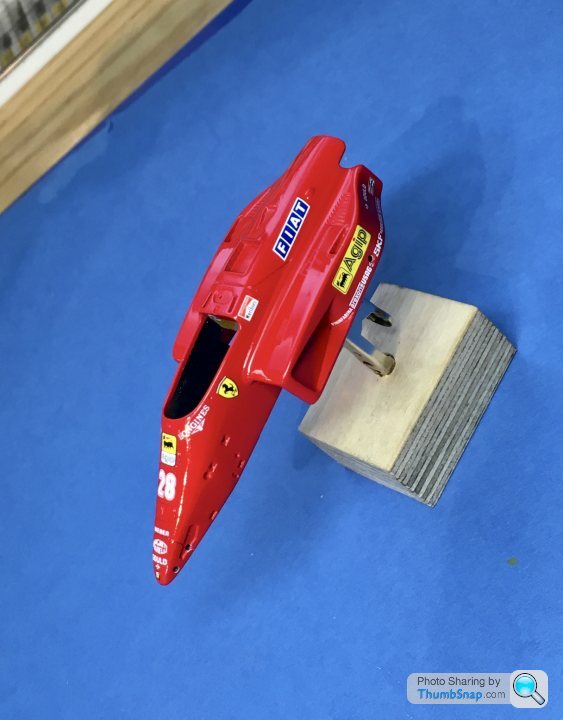
So I applied some Tamiya Gloss, and flatted it back. Then polishing compound:
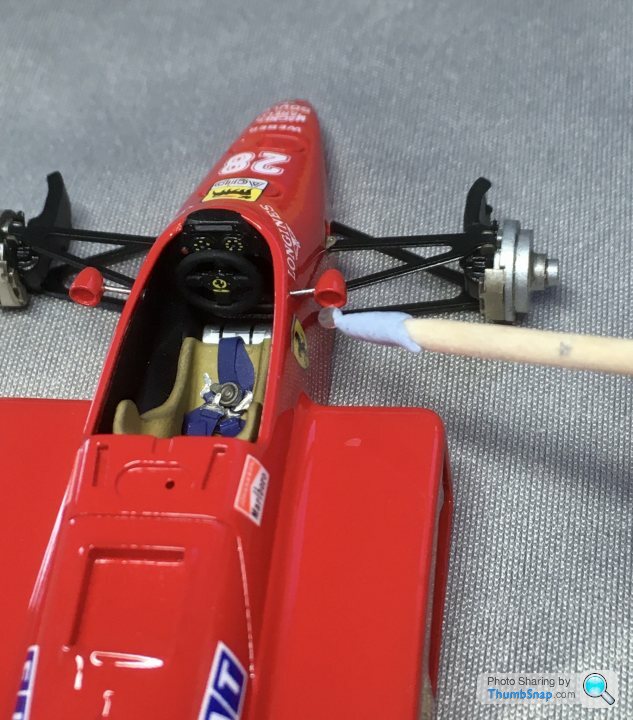
Next job is to clean out the suspension mount holes (no doubt introducing more paint chips!), and then after test fitting, spray the cockpit sides matt. Then a final wax polish.
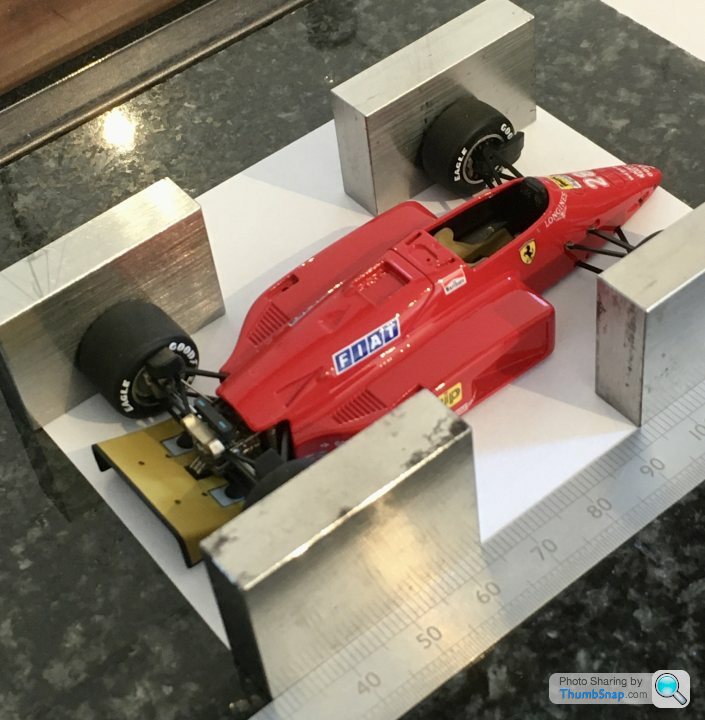
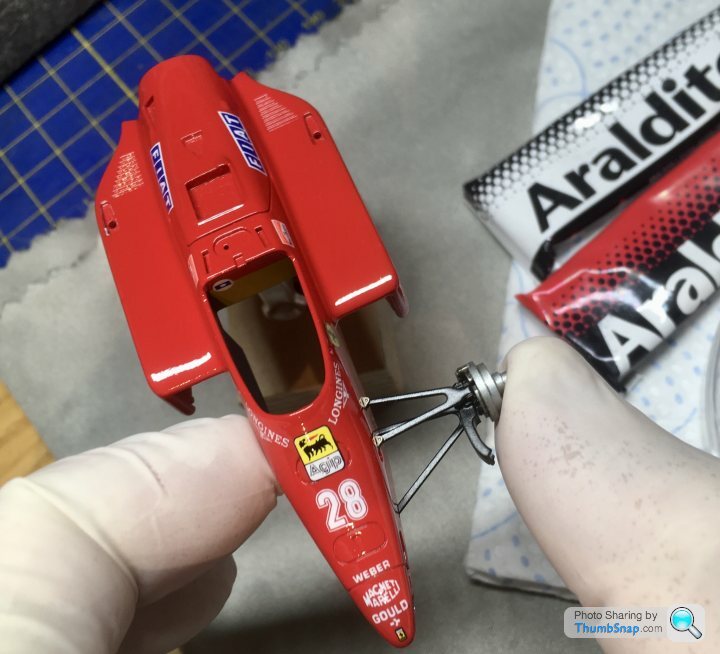
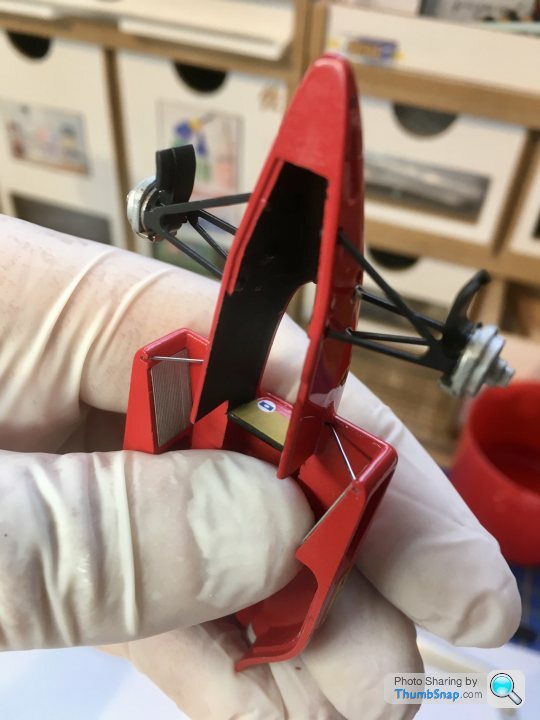
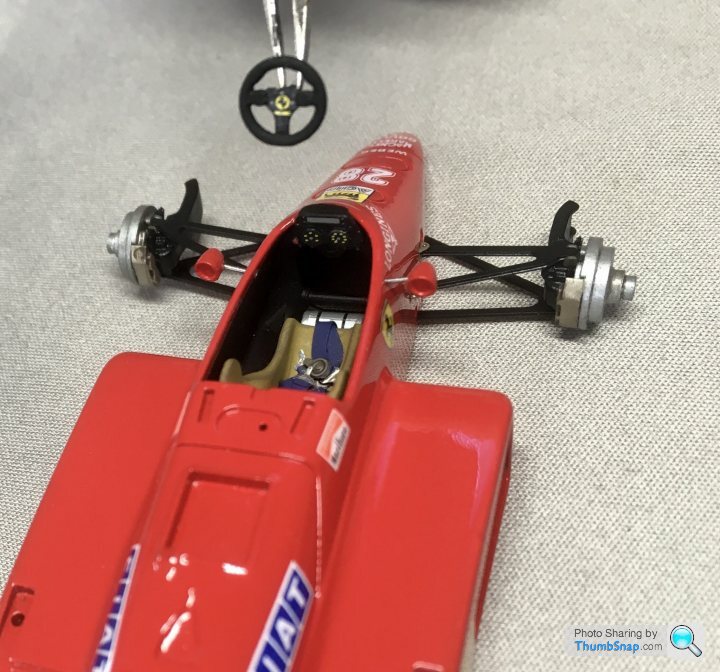
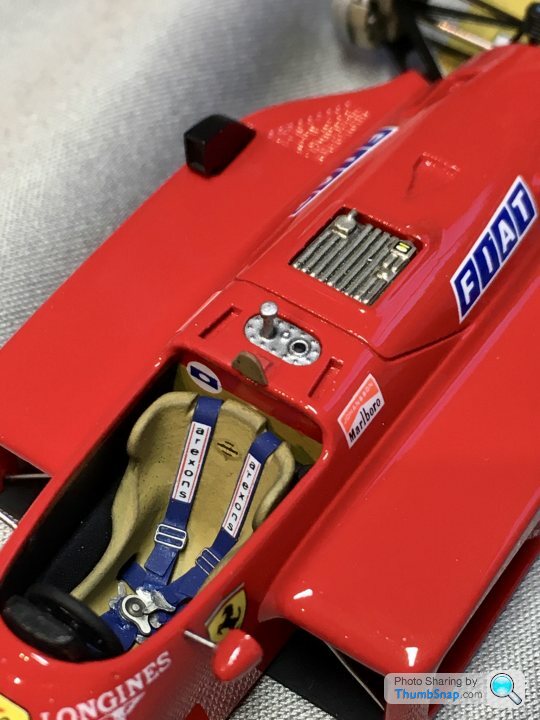
Fitted the rear suspension and cockpit:
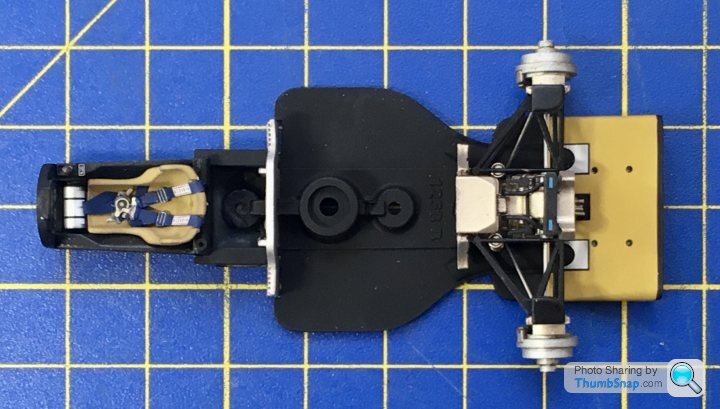
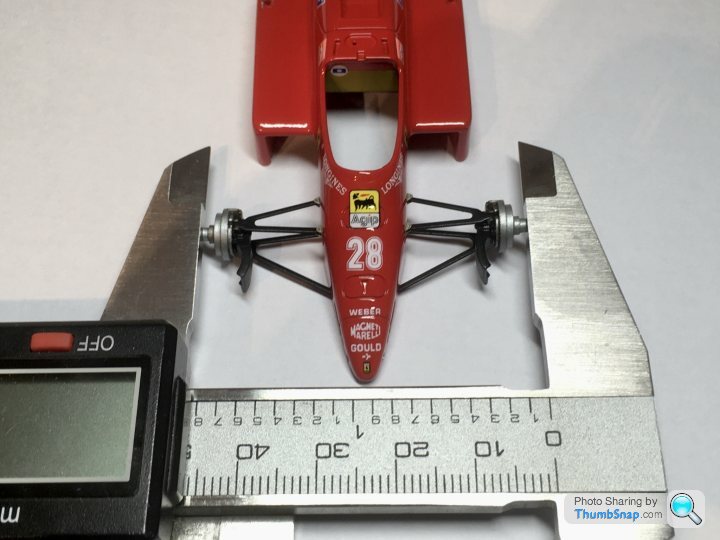
Making sure the axle height was about right:
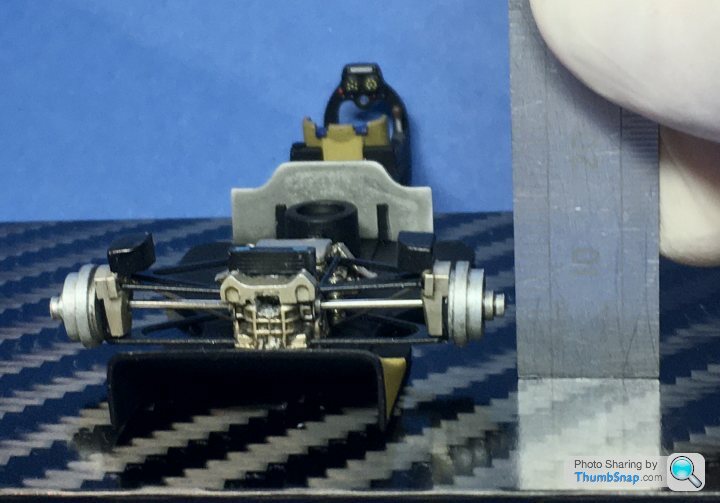
I had to partially dismantle the transmission casing because I noticed a step in it, which would have put the rear wing beam out of position.
Next job is to clean out the suspension mount holes (no doubt introducing more paint chips!), and then after test fitting, spray the cockpit sides matt. Then a final wax polish.
Fitted the rear suspension and cockpit:
Making sure the axle height was about right:
I had to partially dismantle the transmission casing because I noticed a step in it, which would have put the rear wing beam out of position.
These are good, for anyone thinkig of having a go:
https://www.tameokits.com/en/cat-tutorial/how-to-a...
https://www.tameokits.com/en/cat-tutorial/how-to-a...


Evangelion said:
In the old days they were decals, and sometimes weren't included in the kit so you had to supply your own. Luckily people like GPM used to sell sheets of them.
I'll need some 1:43 decals for the P34, I hope they're available, and if they are I hope they'll fit the ancient Western Kits mouldings.CanAm said:
dr_gn said:
CanAm said:
I hope you're not going to tell us that you hand-painted the lettering on those tyres! 
No - they were pre-printed.I grew up in the day when manufacturer's tyre markings were more discreet, if not invisible. I prefer the look on Henryk's 156, though yours are of course historically correct.
And as for Historic Racers with a huge AVON on the sidewalls....


Test fitted the wheels again This morning, and the front right was about 2mm out. No idea how or why that could be remotely possible.
Anyway, body finally fitted, along with mirrors, mirror glass (kitchen foil discs), mirror hole covers (paper discs), mirror shadow plates, cockpit floor, steering wheel, turbo intakes, ECU, radiators and intake stays.

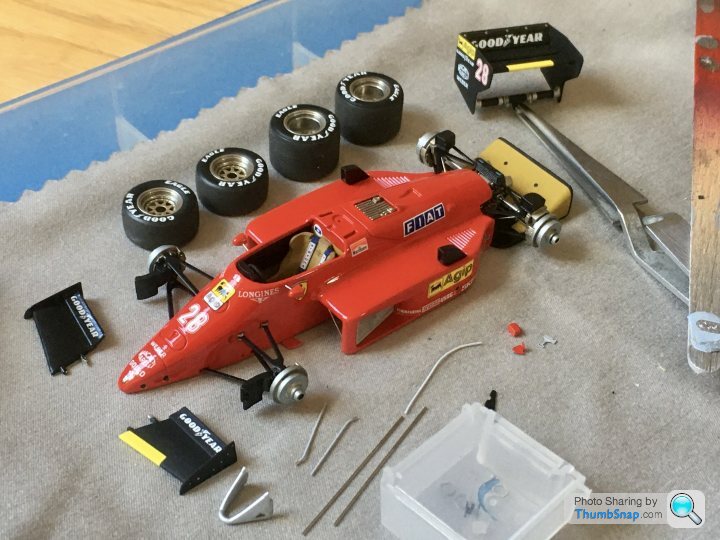
Anyway, body finally fitted, along with mirrors, mirror glass (kitchen foil discs), mirror hole covers (paper discs), mirror shadow plates, cockpit floor, steering wheel, turbo intakes, ECU, radiators and intake stays.

Gassing Station | Scale Models | Top of Page | What's New | My Stuff