Surtees Ferrari 158 tameo wct kit
Discussion


Thankyou very much for all your kind and encouraging comments Davettf2,Dinoboy,dr_gn and s111dpc and anyone else interested in this car.
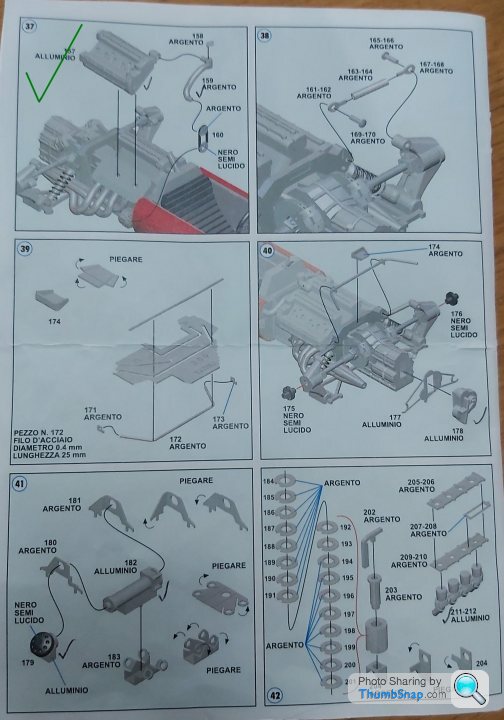
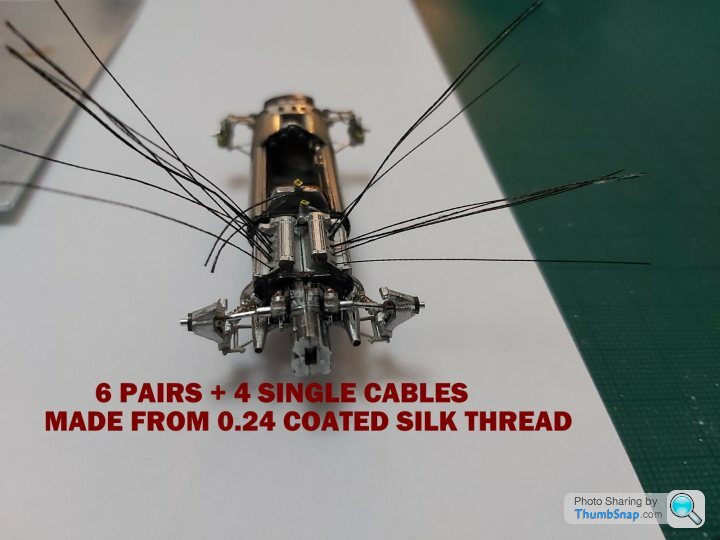
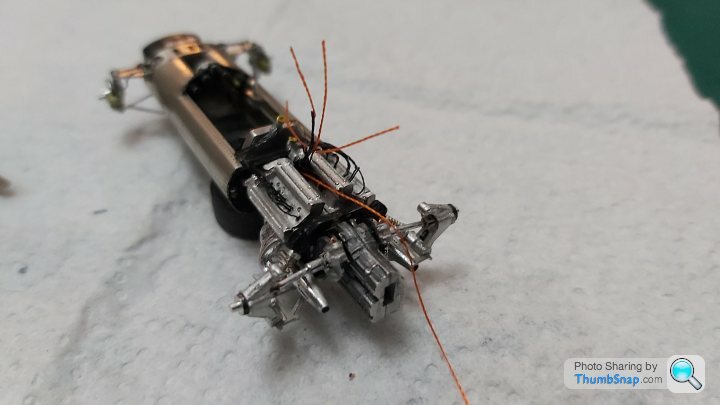
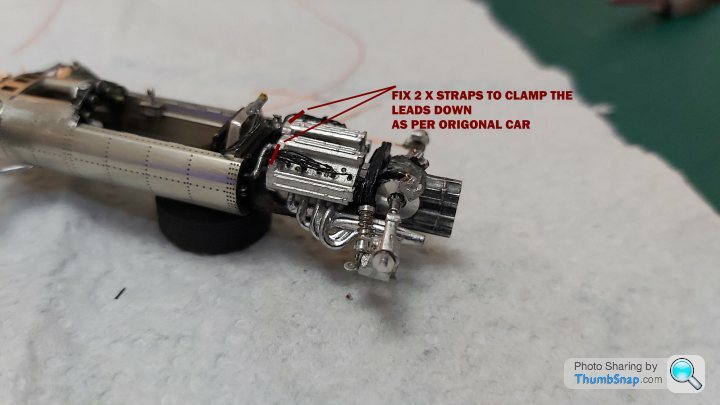
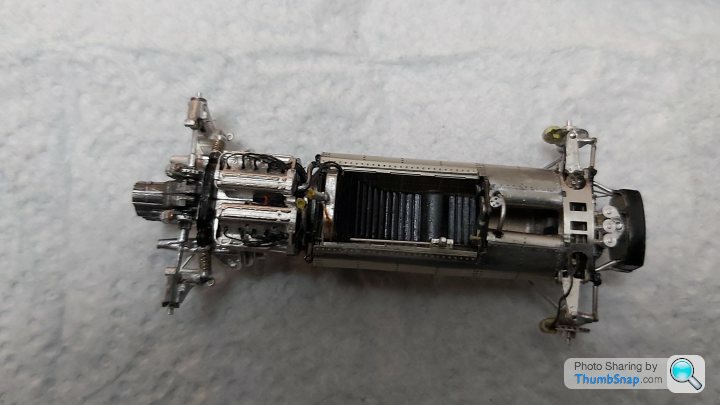
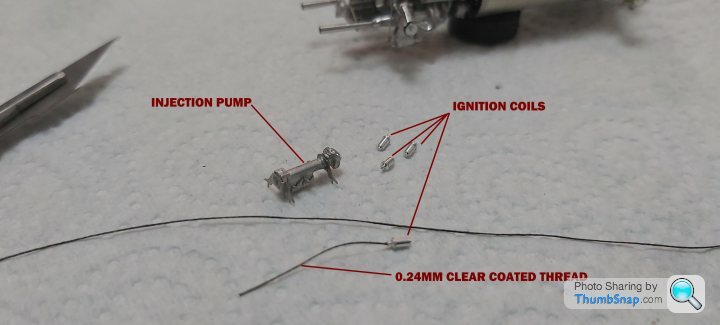
Going off piste a bit now ive finished level 37.A bit of sowing will be required for the sparkplug leads with 16 x 0.24 thread coated with crystal clear.
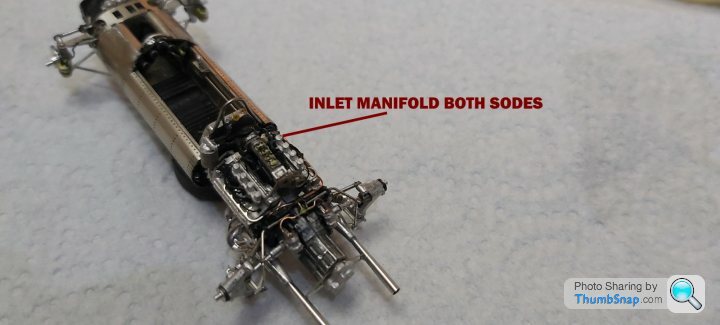
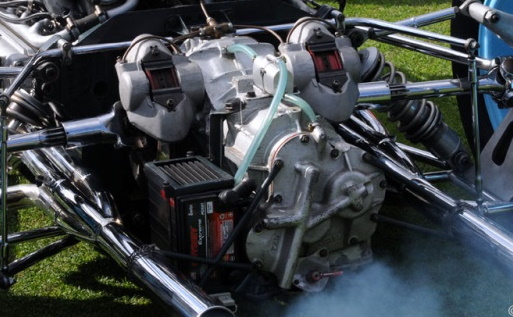
Looking at photographs of this V8 engine i couldnt at first make out why it looked like there were 3 pairs of leads and one on each end, realising later on from another photo it was just the way the leads ran. So it was either twin leads or twin spark.Will be gluing some yellow thread so i can see where im going, glue on each one as a fish on the ends to pull them through
 .
.
 .
.
Here goes
Going off piste a bit now ive finished level 37.A bit of sowing will be required for the sparkplug leads with 16 x 0.24 thread coated with crystal clear.
Looking at photographs of this V8 engine i couldnt at first make out why it looked like there were 3 pairs of leads and one on each end, realising later on from another photo it was just the way the leads ran. So it was either twin leads or twin spark.Will be gluing some yellow thread so i can see where im going, glue on each one as a fish on the ends to pull them through
..Here goes
Eric Mc said:
Incredible work.
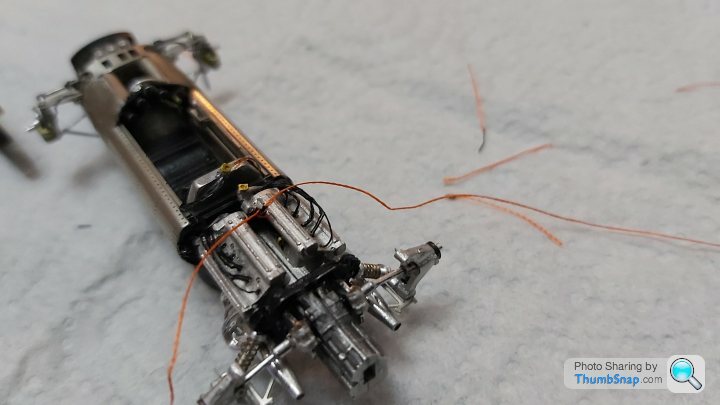
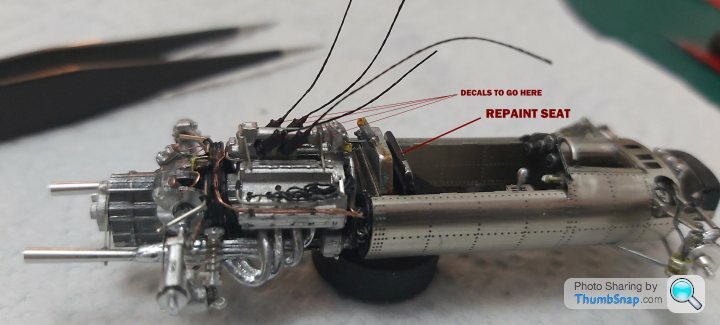
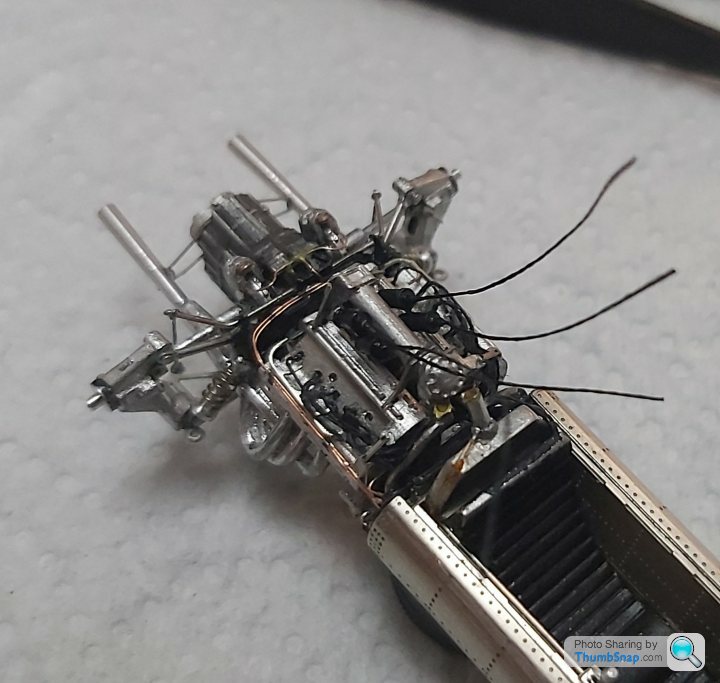
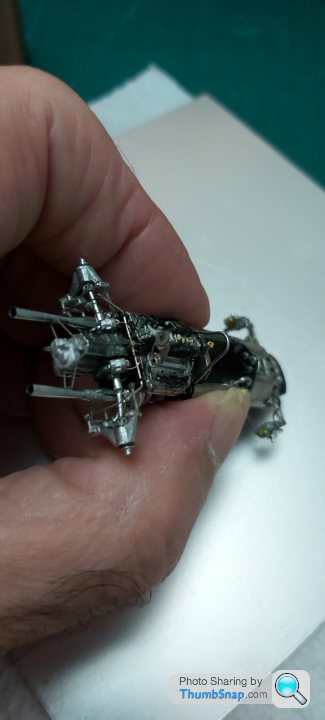
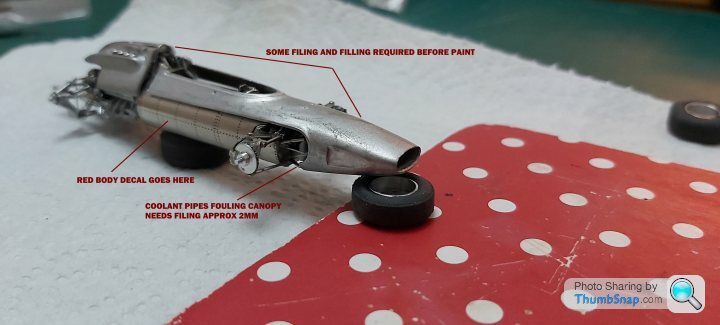
Thanks very much Eric.Theres still a chance it could all go pi-tong. Im not sure the red decal option is going to work to cover the side body which im going to have to try before the trailing arms go on and a worry that the top and rear canopy which have to be painted will match the decal. If it doesnt work im going to have to do a lot of micro masking and if that doesnt work its going to end up being unpainted all silver. Fingers crossedAfter a couple of attempts ive managed to sow the leads as extra detail representing the spark plugs.Had to join a bright colour thread onto the black so i could see where the ends were going around and through to the middle of the crankcase. Also the retaining straps will need to be made to go across the cam covers as per the origonal car and tidy it all up later after the coolant rails have been fixed.
 .
.
 .
.
 .
.
 .
.
 .
.
 .
.
 .
.
 .
.
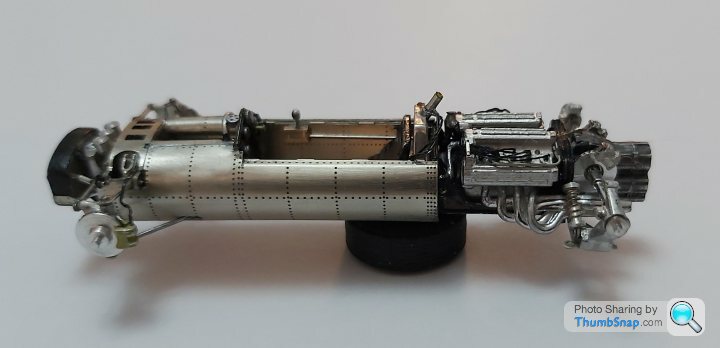
Some brake pipes next then onto level 38 onwards
........Some brake pipes next then onto level 38 onwards
RDMcG said:
What exceptional work. Hats off to you!.
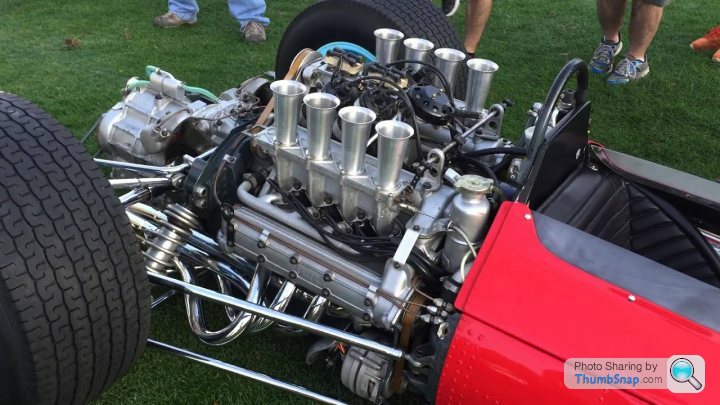
Thankyou RDMcG. Seems a bit ridiculous to go this far but enjoying the challange albeit a small one.Enjoying looking at the overall stages as i go along.Using origonal car photos to gain detailed information to add some details.
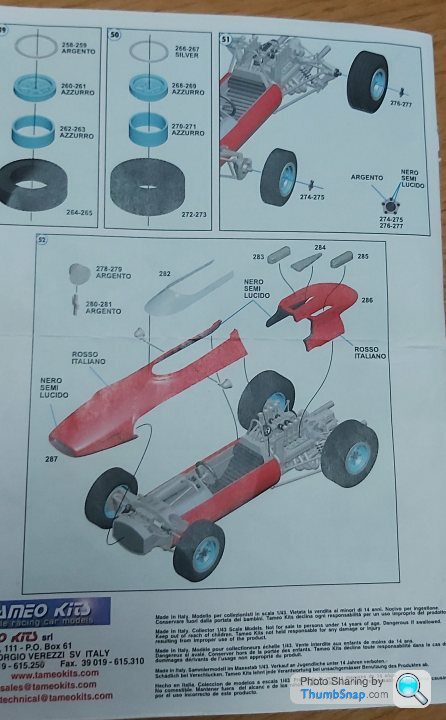
Origonal
 .
. .
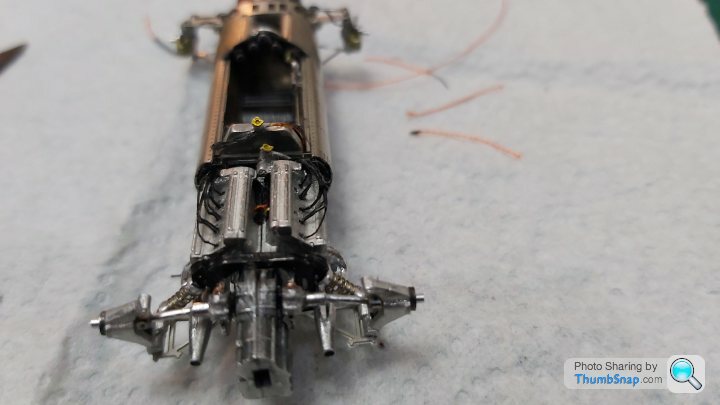
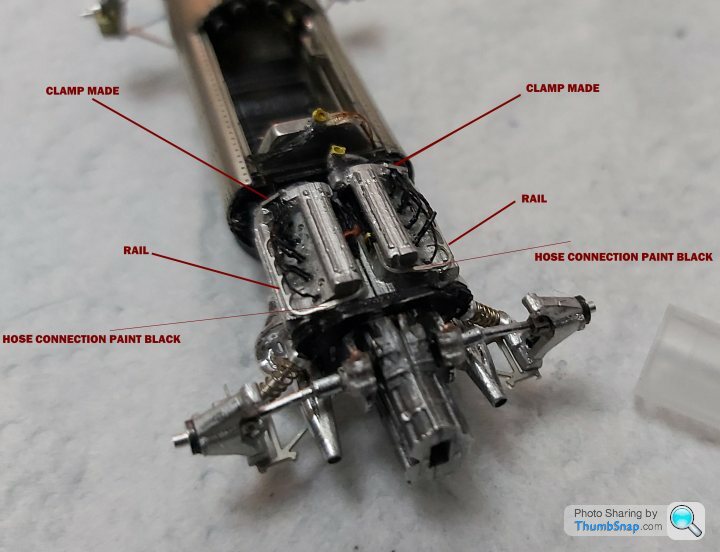
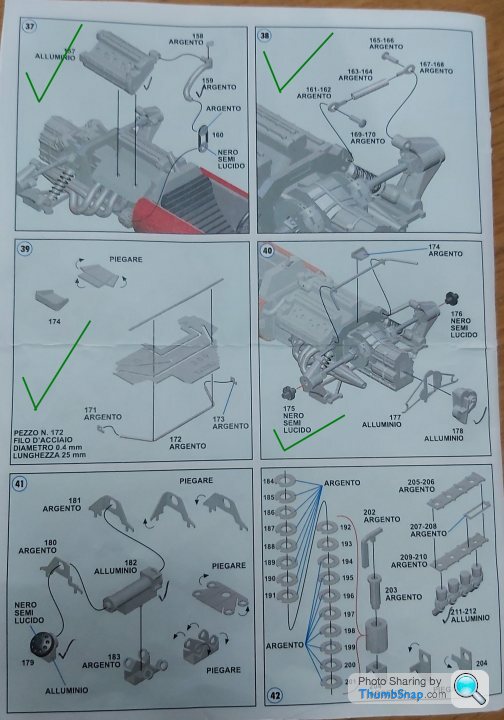
.Lead clamps and rails added.
 .
. .
. .
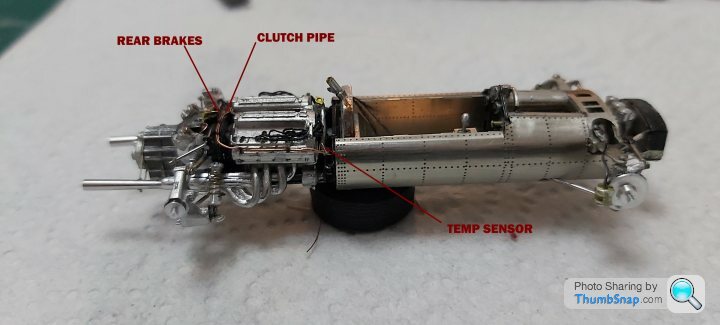
.Adding brake and clutch pipes before going on with the next levels.
Cheers.
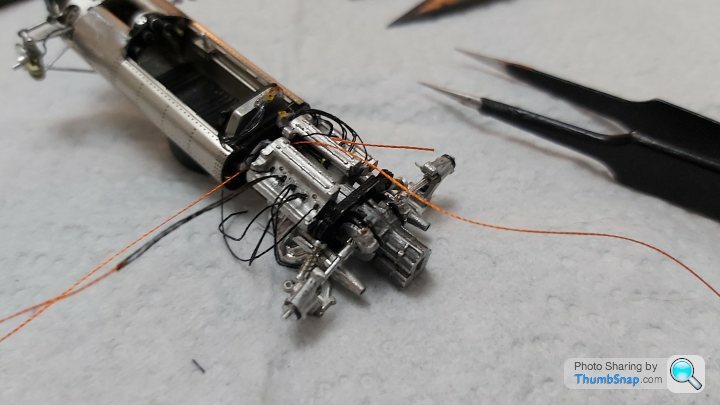
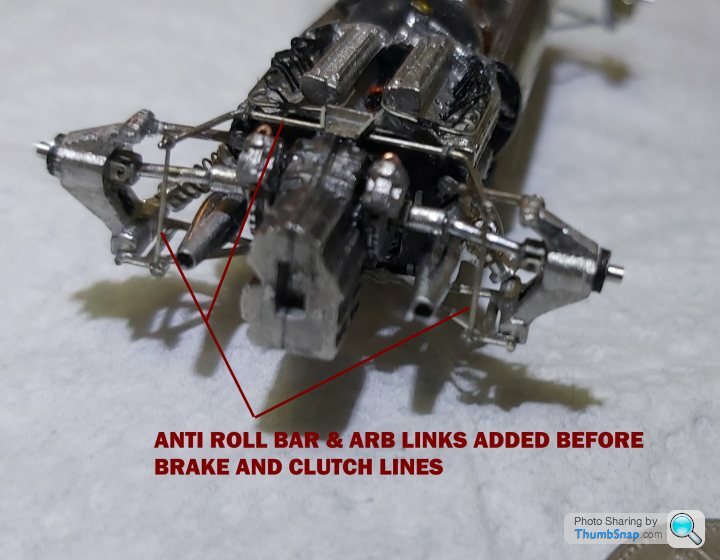
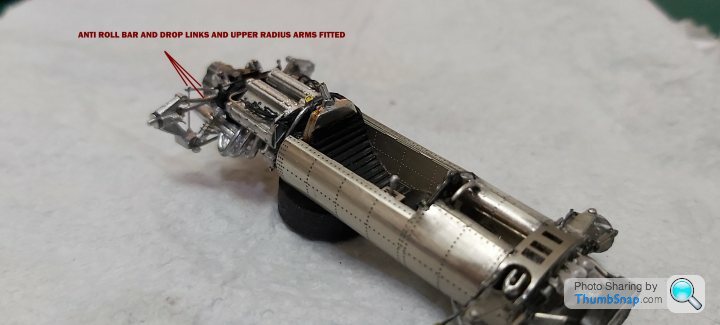
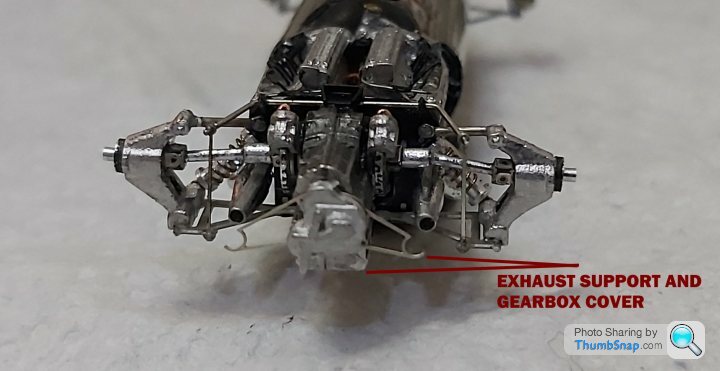
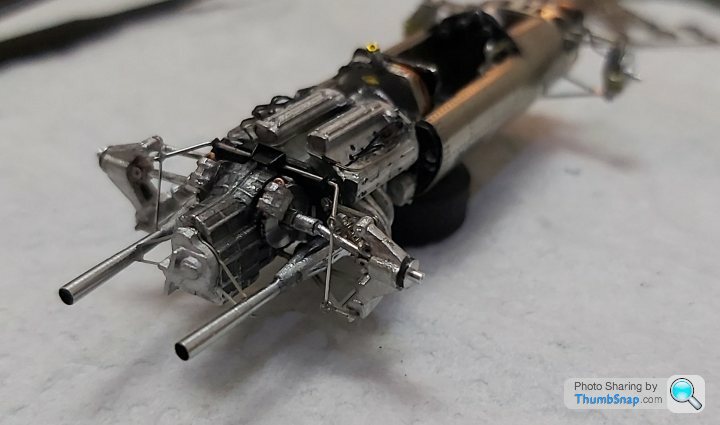
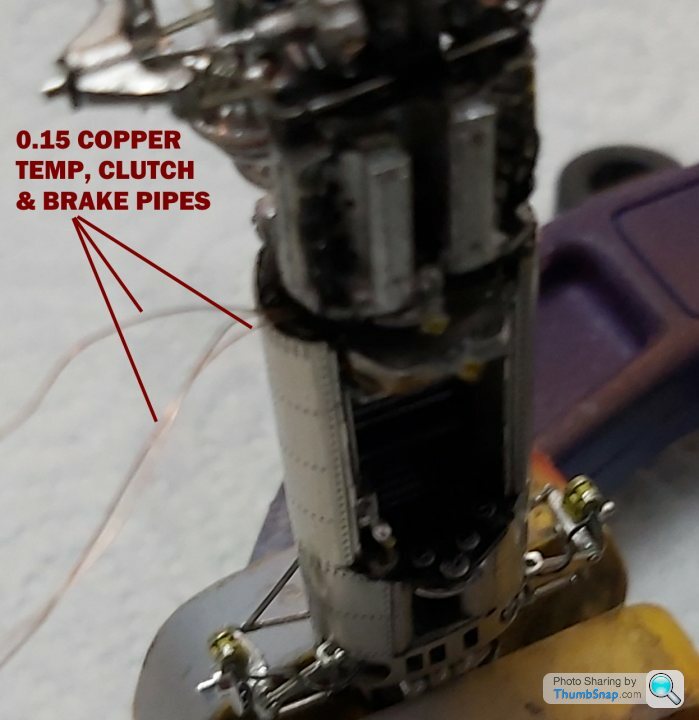
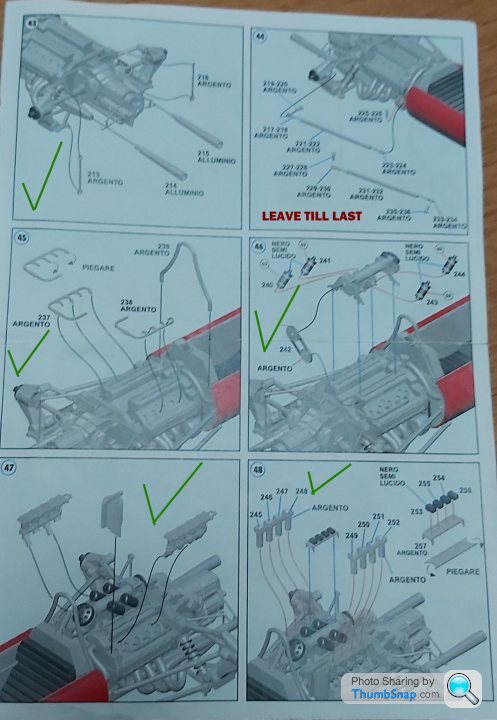
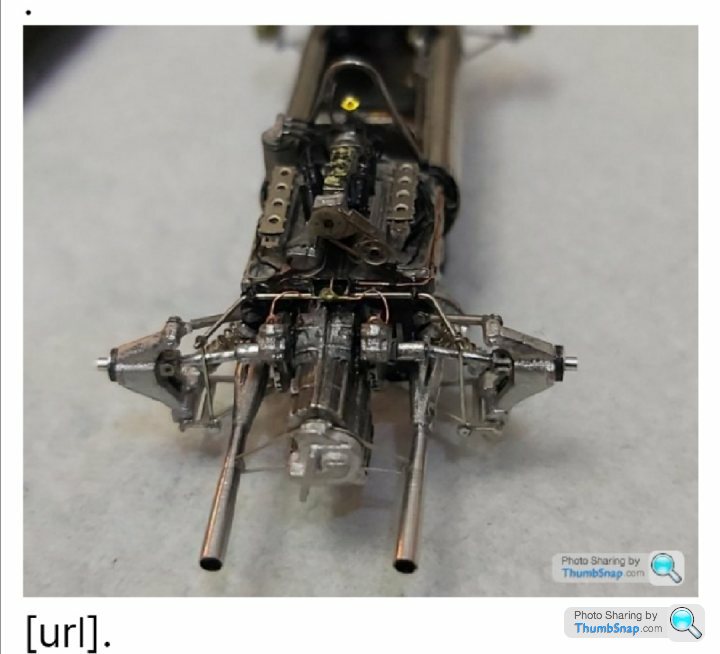
Realising before i can mount the brake pipes i need to finish off the rear suspension otherwise i wouldnt be able to fit the 0.4mm rear anti roll bar.So ive completed level 38,39,40 and jumped to 43 to mount the exhaust pipes and ARB drop links. Then made up the 0.15mm copper wires to run the temp sensor to the front of the engine, clutch and rear brakes as per the photo of the real car i posted back previously.
 .
.
 .
.
 .
.
 .
.
 .
.
 .
.
 .
.
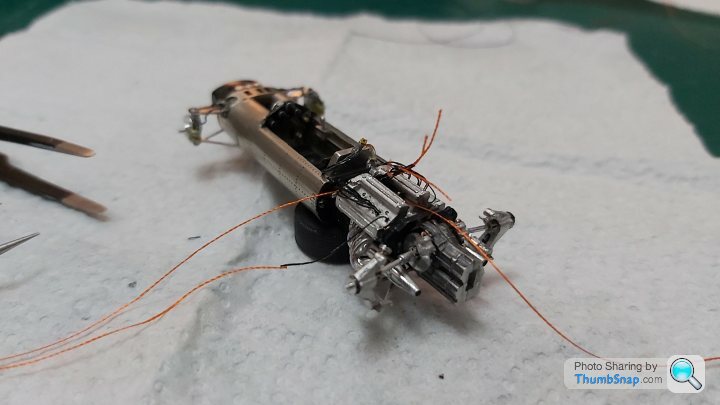
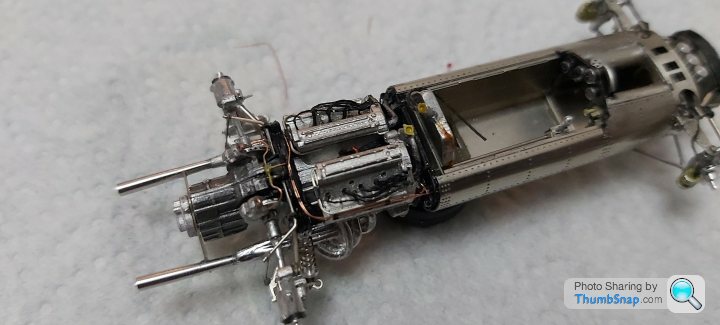
Now for the copper wires.
 .
.
 .
.
 .
.
Repaint the gearbox then onwards. Im leaving the rear trailing arms off till the end so i can handle the model without having to fit the body colour decals .
So the steering, trailing arms, body decals which by instruction should have already been completed are postponed.
.......Now for the copper wires.
...Repaint the gearbox then onwards. Im leaving the rear trailing arms off till the end so i can handle the model without having to fit the body colour decals .
So the steering, trailing arms, body decals which by instruction should have already been completed are postponed.
davettf2 said:
This is blowing me away! I struggle with 0.5mm wire on Gunze kits, but 0.15mm, and so neatly routed. Hats off to you, and I need more practice.
Cheers for sharing this
Dave
Hi! Dave.Thankyou for your very nice comments comments. Ive looked at the Gunze kits over time and like them. The only thing that holds me back from buying one is theres no engine detail on them which puts me off buying one.Cheers for sharing this
Dave
As far as i have seen they tend to concentrate on the running gear and chassis, unless you know of any more out there i havent seen. I do like the look Lotus.
williamp said:
Stunning. I cannot comprehend how you can make something so small, so well. Its a skill I will never posess, and I am amazed!
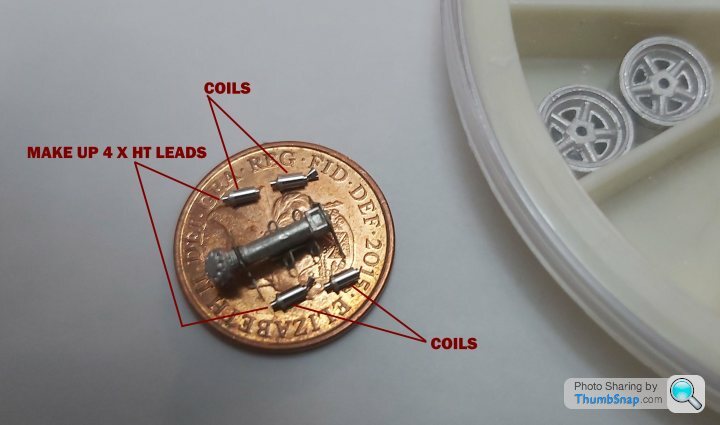
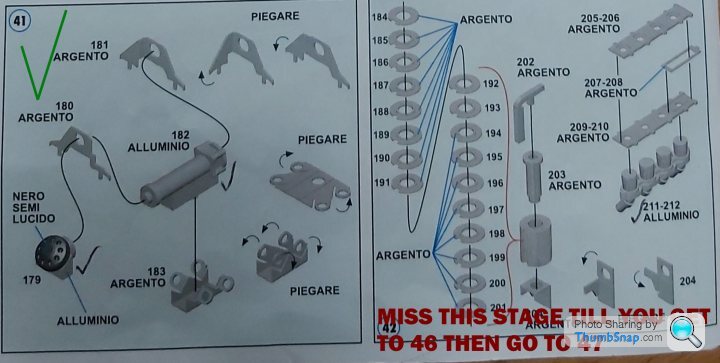
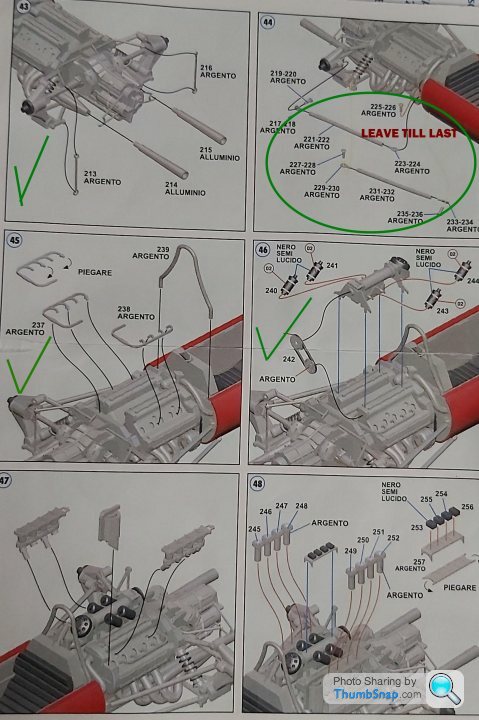
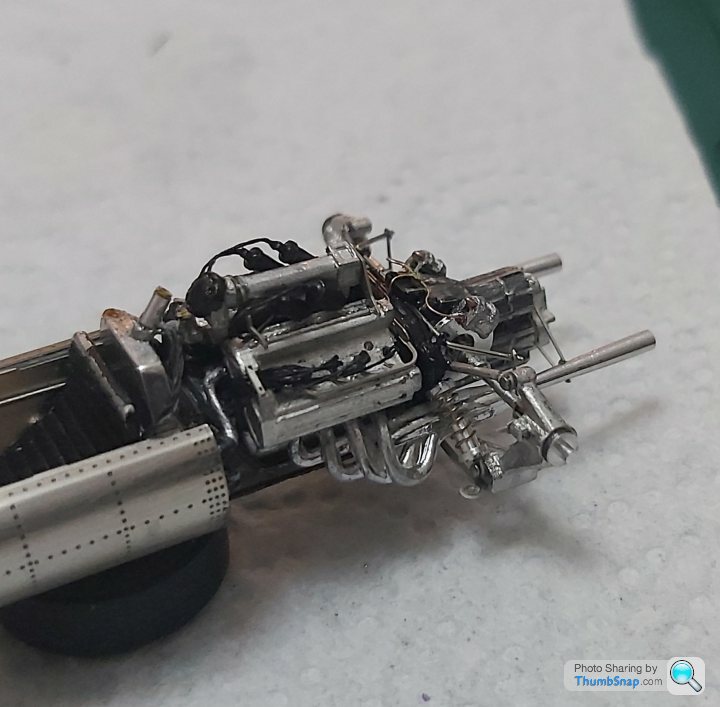
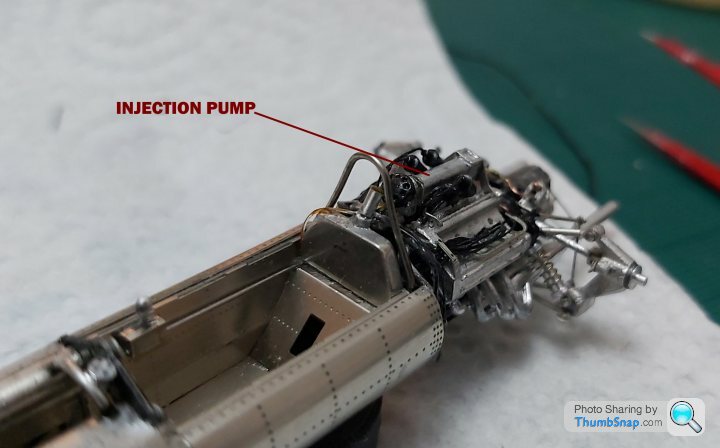
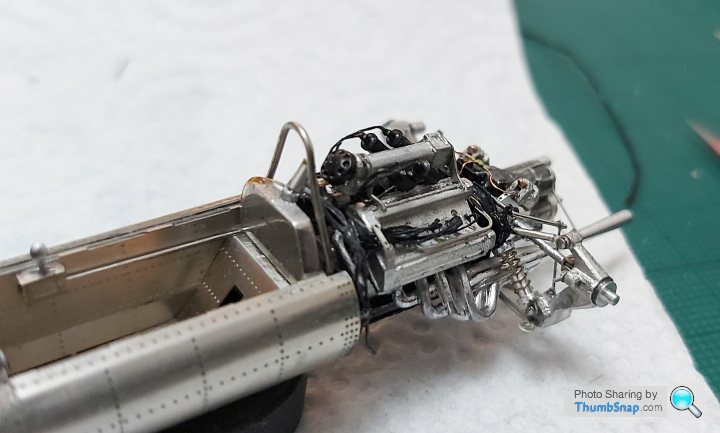
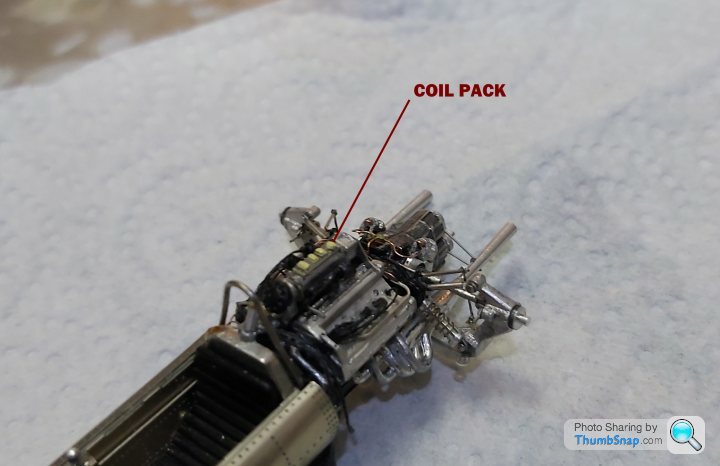
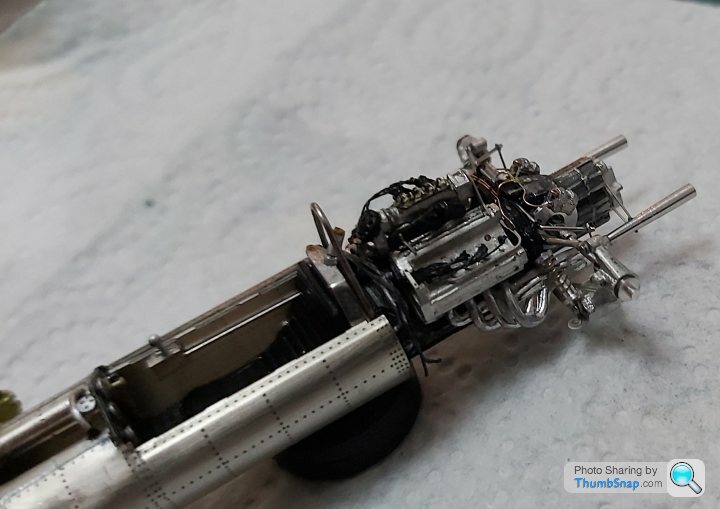
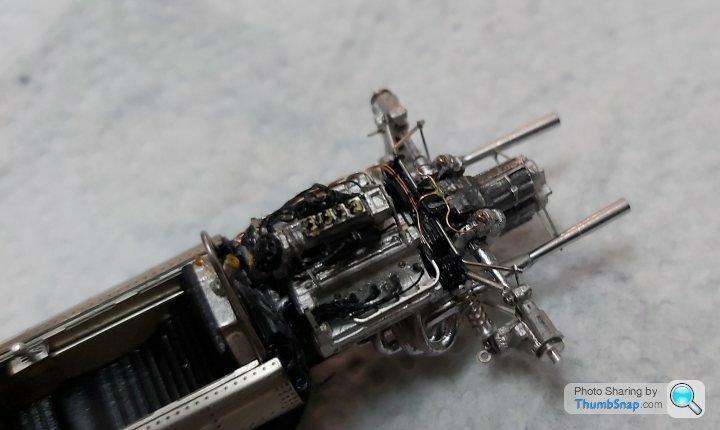
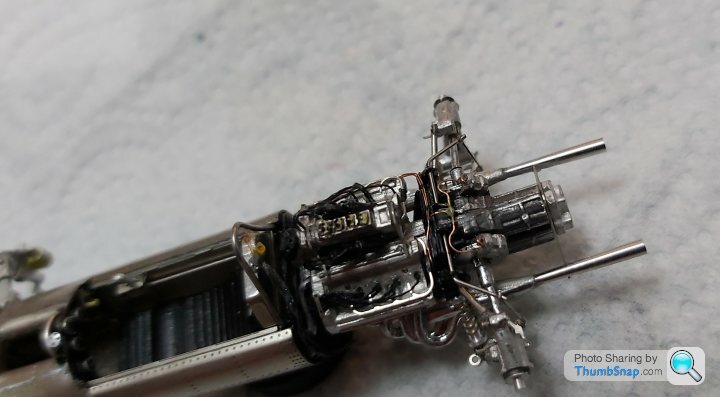
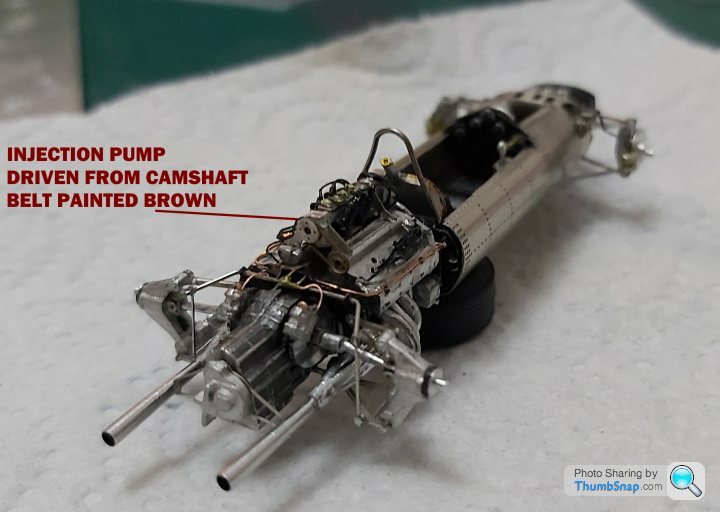
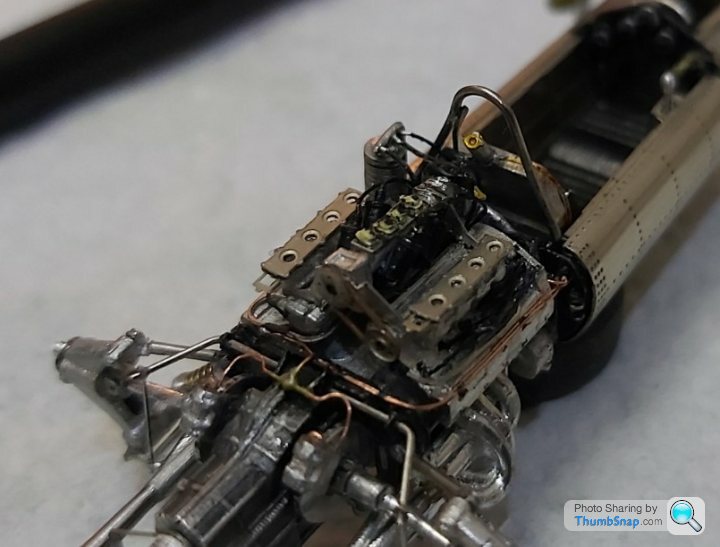
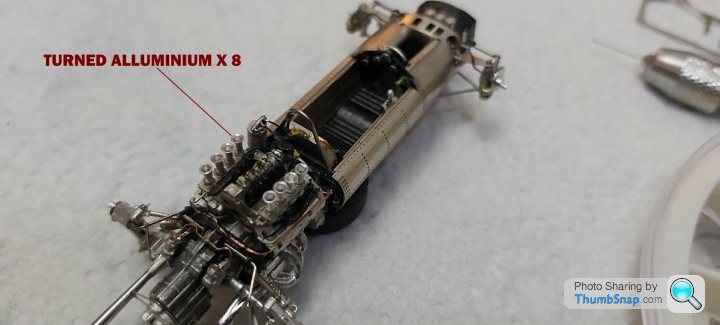
Hi! Will.Thankyou. I take my time and plan how to go about it all.At this scale its not something you can rush. The wires took about 4 hours from planning to get them on then on to completion,it did take several attempts though with quite a few choice words.Onto 41 Bosch direct injection, pump driven by toothed belt + 4 coils and then later at level 48 to mount the Twin-plug, Marelli coil-ignition 2 distributors.
HT leads to go on using black coated thread. Attempting to use 8 Strands of black hair for the 2 distributor wires will hopefully look to scale.Ive never seen what seems to be a wierd way of using a fuel and ignition delivery system?
 .
.
 .
.
HT leads to go on using black coated thread. Attempting to use 8 Strands of black hair for the 2 distributor wires will hopefully look to scale.Ive never seen what seems to be a wierd way of using a fuel and ignition delivery system?
..Edited by henryk001 on Friday 15th January 11:08
davettf2 said:
Hi Henry, I agree on the engine detail where the cars are concerned, i'm into the bike side where the detail is better, but not perfect.
Its certainly got me interested, theres some nice sangyo hi-tech bikes on show on the interweb. Maybey a new project is looming on the horizon.Thanks for pointing them out i didnt know they existed
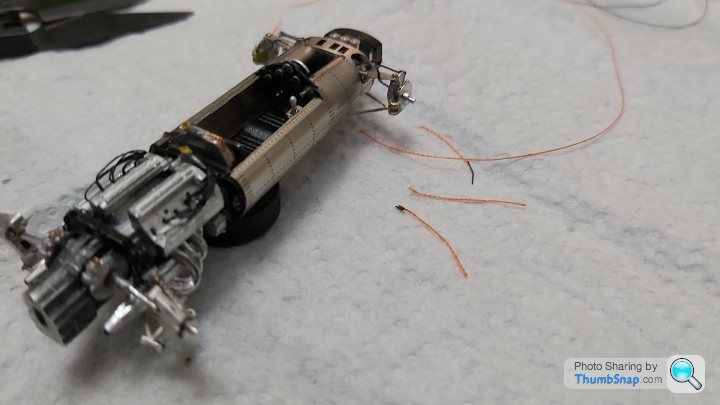
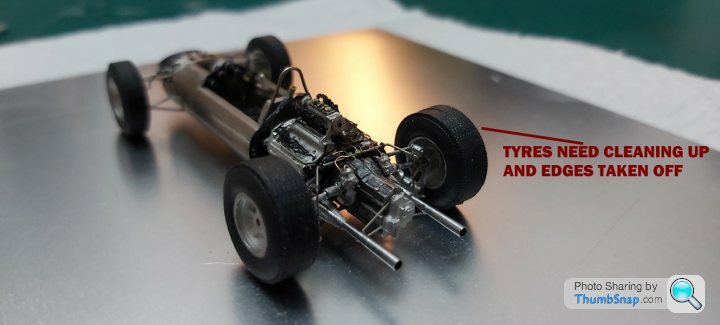
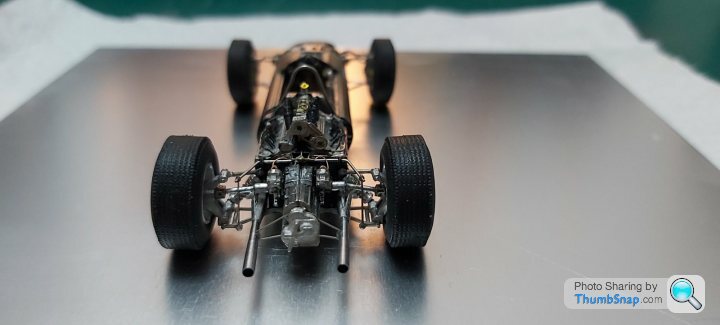
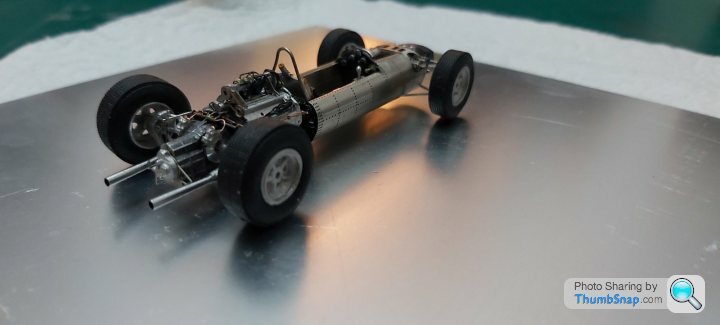
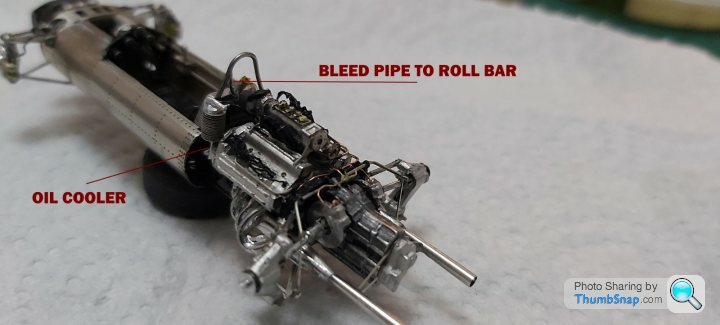
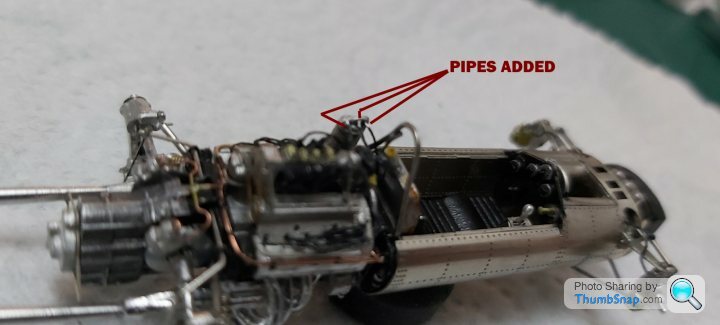
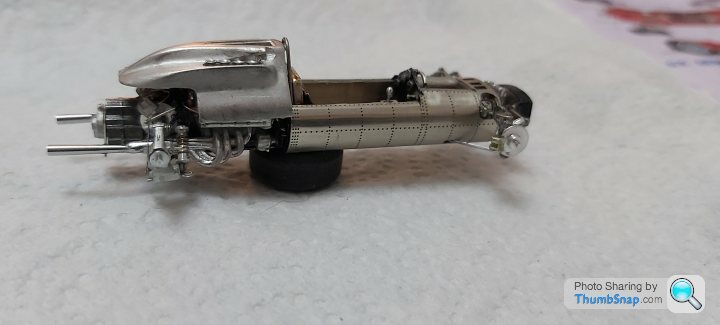
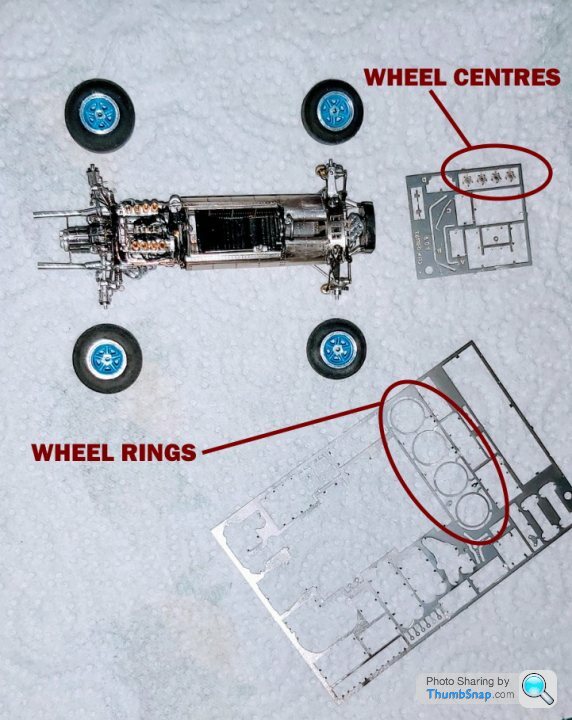
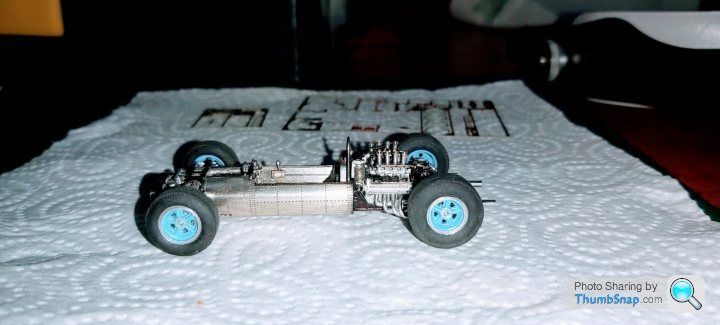
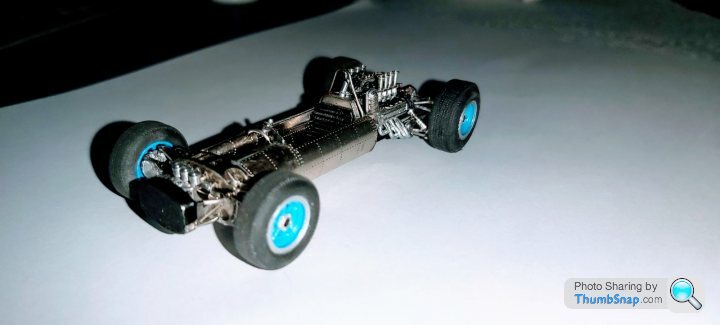
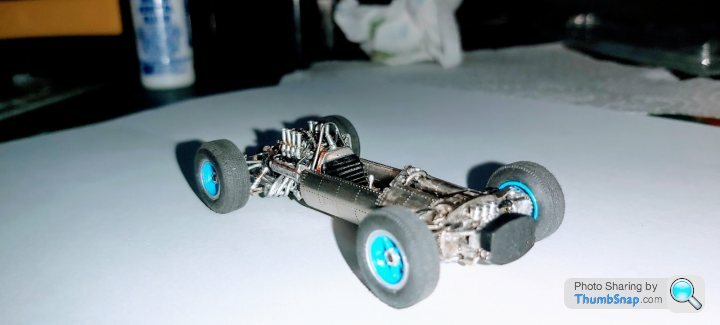
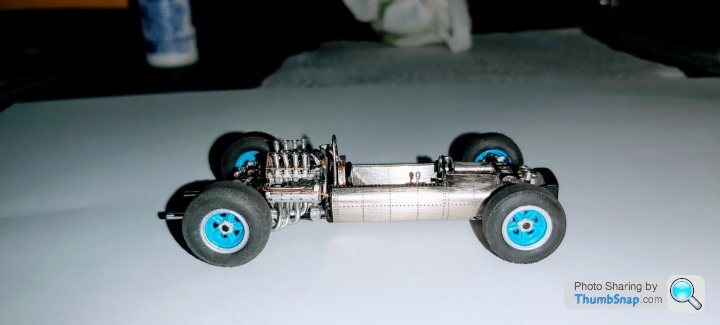
A week of evenings spent.Placed the wheels on to check the model out. A few mistakes made to sort out but going along quite nicely now, quite a few photos showing the issues ive dealt and am dealing with.Added more pipework for the oil cooler.
 .
.
 .
.
 .
.
 .
.
 .
.
Ooops
 .
.
Onwards
 .
.
 .
.
 .
.
 .
.
 .
.
 .
.
 .
.
 .
.
 .
.
 .
.
 .
.
 [url].
 |https://thumbsnap.com/RAo4PLRn[/url].
 .
.
 .
.
 .
.
 .
.
 .
.
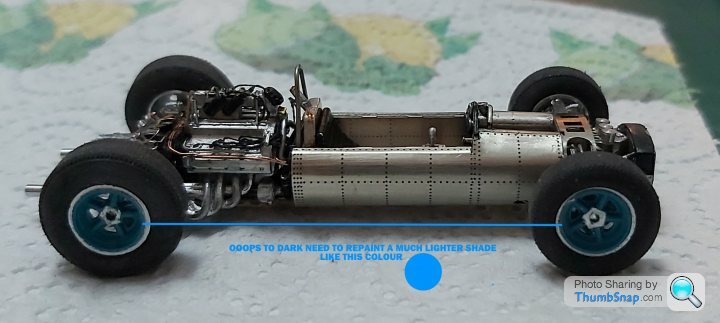
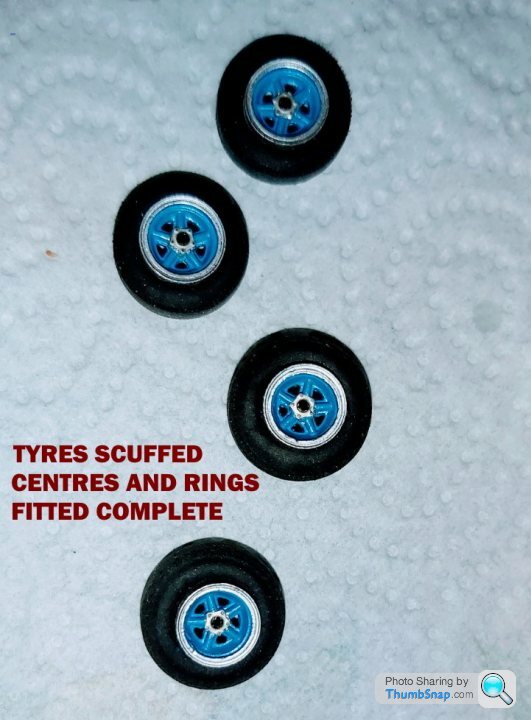
A bit more left to do.Getting towards the finish line. Steering, trailing arms, paint wheels correct light blue, some wiring in cockpit
 .
.
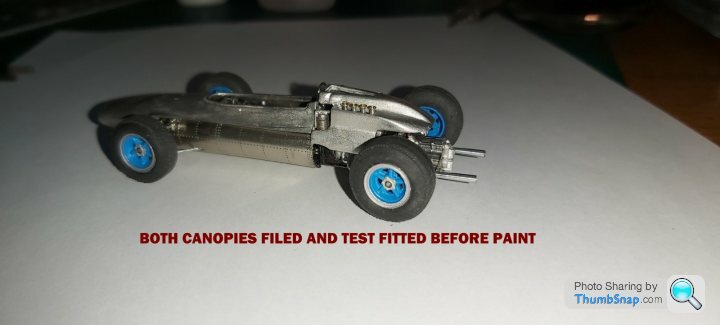
Biggest or should i say small worry is will the body decal match with the Tamiya paint?.
.....Ooops
.Onwards
...........[url].|https://thumbsnap.com/RAo4PLRn[/url]......A bit more left to do.Getting towards the finish line. Steering, trailing arms, paint wheels correct light blue, some wiring in cockpit
.Biggest or should i say small worry is will the body decal match with the Tamiya paint?.

Dinoboy said:
Absolute jewel of a thing.
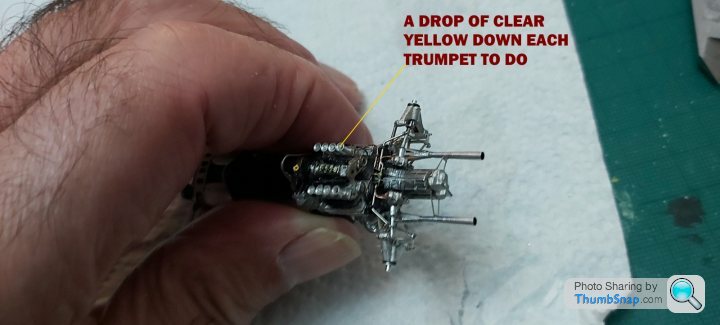
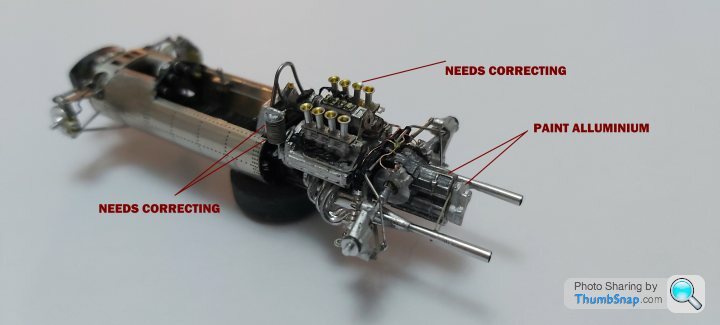
Thankyou very much Dinoboy.Theres a couple of mistakes i need to correct, one of the trumpets isnt square and some repainting to do on the radiatorand brake calipers. Trouble is that at this scale any painting paint has to be thin but rubs off easily.
4Q said:
Thanks Henry. I didn’t think I was into this sort of thing but after following a couple of your threads now it appears that I am, thank you and great work.
Hi! 4Q. Glad to read that the build threads are encouraging enough for you to maybey take up the mantle. So have you got a ongoing project or looking to start one?.What i would like to say to you and anyone else thinking about taking up building Tameo kits are:
Are these 1/43 kits from Tameo WCT worth the expense? YES, very high quality with some white metal filing and adjusting required.
Do they effectivly pass time in these unusual times? YES, i can spends days even weeks just doing one level.Feeds the grey matter and stop me watching telly repeats.
Is it really worth going the extra and adding detail? YES, as long as the bodywork can be removed to expose the work.
Do you need patience? YES Loads of it. I would say Its not for the faint hearted or anyone with a short temper. I walk away from anything that presents a problem, boil the kettle take in a coffee or have a drop of the harder stuff, rethink then get back to it usually sorts things out.
Whats the final thoughts once completed?. I do take great pleasure seeing them in the cabinet and knowing theres a awfull lot going on inside these small models.
Thankyou for looking at my build threads.
Edited by henryk001 on Sunday 24th January 00:21
dr_gn said:
Good progress - soon be ready for paint. I don’t envy you having to match the decals, in terms of both colour and reflectivity. Presumably you’ll be clear coating all the red bits to address the latter?
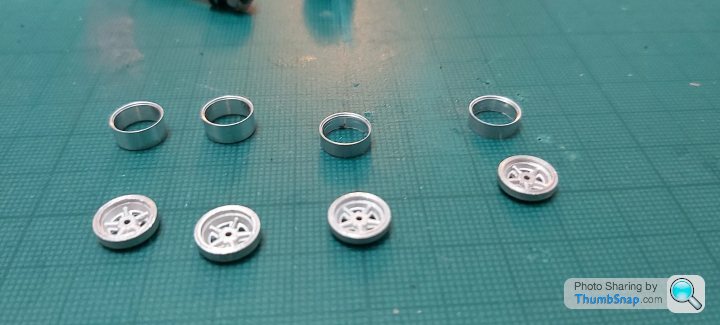
Re the wheels - I can’t tell from the photos whether you painted the silver outer rims or not. On the 156/85 I initially painted the rims (and the roll hoop). They looked painted though, and I wanted a polished look. I found that Autosol on a cotton bud will polish bare white metal to a very realistic finish. I spun the wheels in the lathe for this, but an electric drill also works. A final polish with car wax protects it.
Just a thought.
Im trying the decal option 1st as ive never seen this method before to cover a large(small) area. the 2nd option is spraying another white decal provided in the kit to match the Tamiya Red and then cut to shape, then lastely if that doesnt work just painting the body.This could all go wrong?.Re the wheels - I can’t tell from the photos whether you painted the silver outer rims or not. On the 156/85 I initially painted the rims (and the roll hoop). They looked painted though, and I wanted a polished look. I found that Autosol on a cotton bud will polish bare white metal to a very realistic finish. I spun the wheels in the lathe for this, but an electric drill also works. A final polish with car wax protects it.
Just a thought.
The wheels outer rims were painted with Motolow metallic paint pen after gluing the outer rims on, which didnt look very good because the wheel is white metal cast and the rims are steel Photo etch, so still wouldnt match up if i polished them.The photos were taken with flash so its showing up quite harsh. They do look ok by eye though.
gruffgriff said:
Properly mind-bending HenryK. Top level jewellery, thanks so much for sharing your odysseys!
Apologies if you've stated earlier but can you please share your glue choices? My modelling is much cruder in comparison; I use runny and normal cyano, sometimes with activator, clear varnish, araldite etc but can't get my head around using so little of any of those so as not to be obvious but still hold parts in place that the tiny assemblies can be handled....UV glue?
I pray to the decal gods to oversee body applications but as you say it looks incredible in the metal as a fall-back solution. Best of luck
Hi! gruffgriff.Apologies if you've stated earlier but can you please share your glue choices? My modelling is much cruder in comparison; I use runny and normal cyano, sometimes with activator, clear varnish, araldite etc but can't get my head around using so little of any of those so as not to be obvious but still hold parts in place that the tiny assemblies can be handled....UV glue?
I pray to the decal gods to oversee body applications but as you say it looks incredible in the metal as a fall-back solution. Best of luck
White metal is quite hard to bond, i score the surfaces criss cross with a scalpel and key any photo etch with a fine emery stick, helps the bonding.
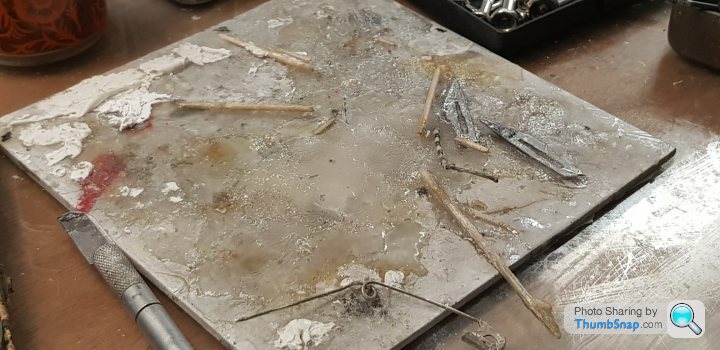
I use Zap CA super glue, bit pricey from the Axxzon. Zap Pink bottle is very thin and will capilerate. Mostly use Zap medium green bottle, seems stronger and cures in about 5 secs .
Zap thick yellow bottle for parts im not sure will be in the right place at the right time cures in about 10-20 secs. Also gap fills well with activator.
My method is to place just a droplet enough to do a couple of parts at any time onto a piece of plastic or ally sheet and use the drill shank 0.25 to 0.5mm depending on size of part.Gather a small drop to apply to surface.
I make sure i wipe the drill shank every time with a piece of kitchen towel before the next application as the CA starts to build up on the shank into a blob and you then get too much.
Ive made my glues last over a year by wiping the nozzle quickly with kitchen towel before putting the top on and rotating it a few times which stops the top bonding to the bottle.
These kits have to be handled carefully as CA doesnt like impact,2-3 layers of kitchen roll acts as a damper if you drop the model.Concidering the final outcome is to display and admire only. its sufficient.
Oh and either Kristal clear or PVA to do tiny parts not requiring any load, can be diluted to suit the application.
I dont like araldite as its time consuming and wastefull.Tried UV but doesnt work with me.
The other two cars ive built over the past year or two placed onto the transporter are doing fine in the cabinet.
Trust this helps and thankyou very much for your really nice comments.
Edited by henryk001 on Monday 25th January 11:53
Thankyou very much Davettf2,CanAm, Jacobyte and anyone else having a read.
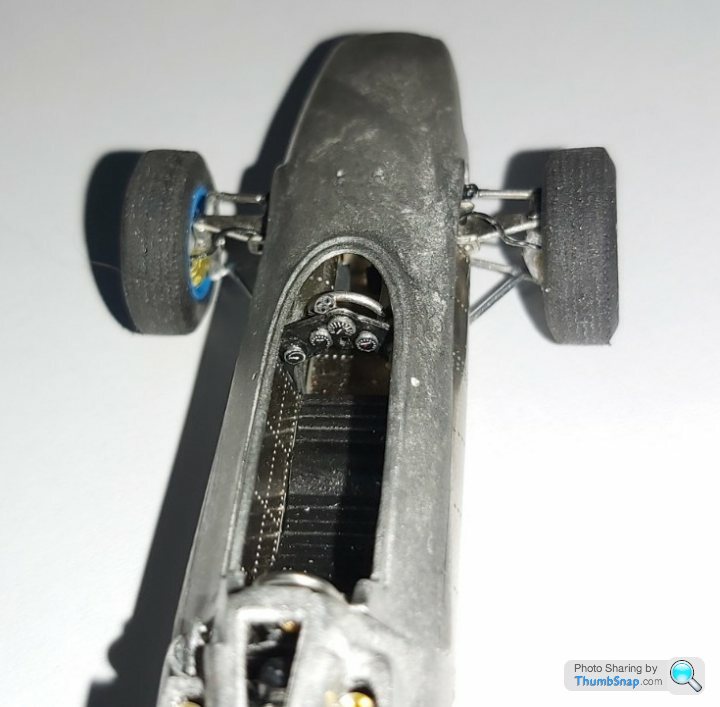
Noticed something in a photo, on top of the gearbox theres a breather box or mechanism with a leak of pipe on the real car so im going to have to make it as it would still be visable once the rear cowl goes on. Both cowls are removable which is the main reason why ive added details to this already complex little kit.
 .
.
Noticed something in a photo, on top of the gearbox theres a breather box or mechanism with a leak of pipe on the real car so im going to have to make it as it would still be visable once the rear cowl goes on. Both cowls are removable which is the main reason why ive added details to this already complex little kit.
.
Gassing Station | Scale Models | Top of Page | What's New | My Stuff