Surtees Ferrari 158 tameo wct kit
Discussion


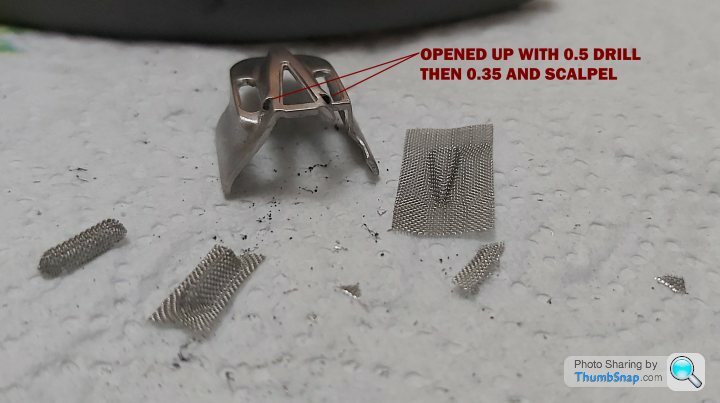
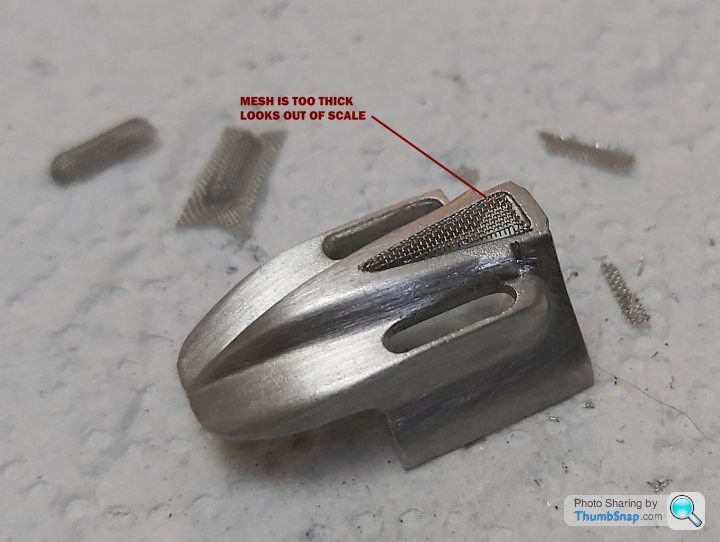
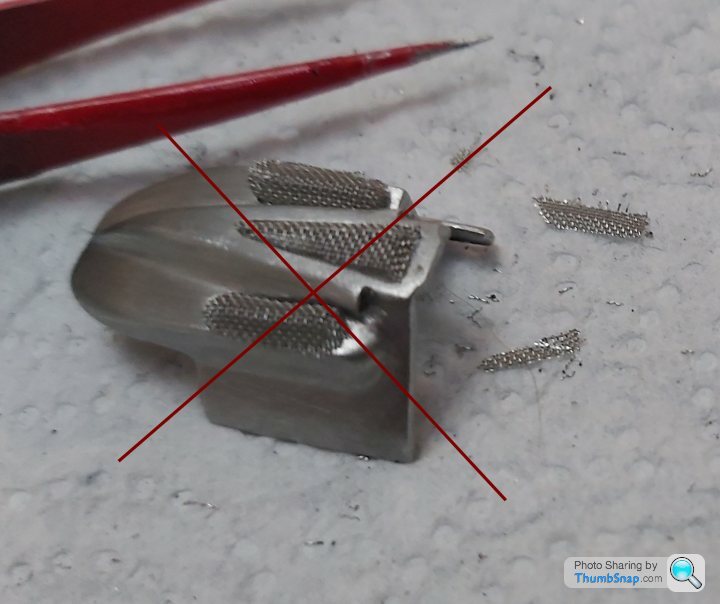
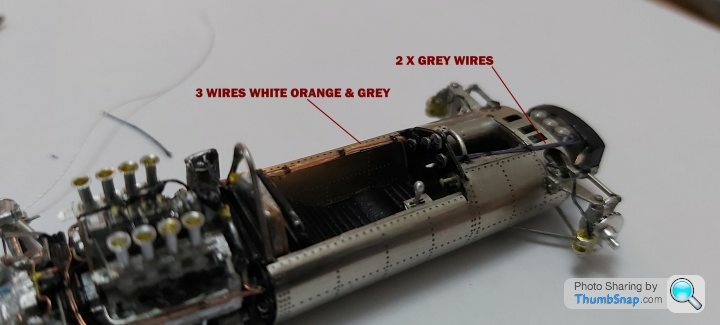
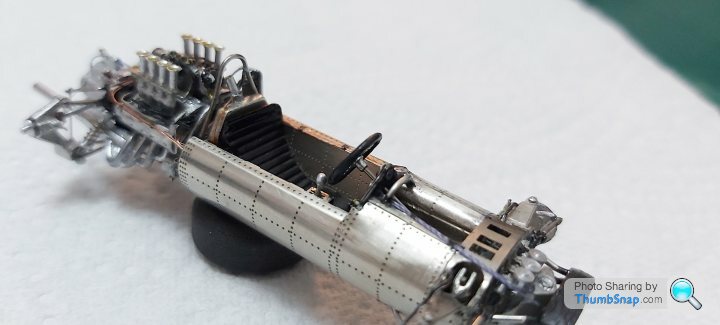
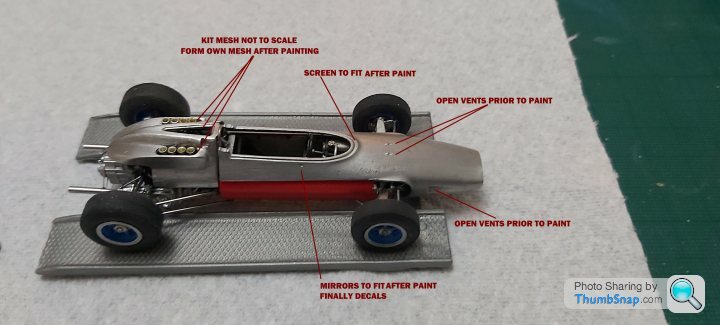
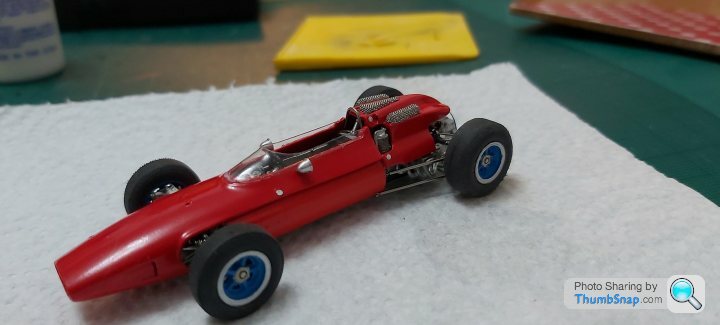
Drilled out the two small air vents. Before i can get the rear cowl to fit, prep and paint it, found the grill mesh too thick to use. It looks totally out of scale and by the time ive made the slots big enough for the cowl to go over the trumpets its going to look really odd. Wife comes to the rescue.
"How about this love".Some silver mesh ribbon. OK ill give it a go. So i did a practice run and am really happy it will work."Thankyou baby".
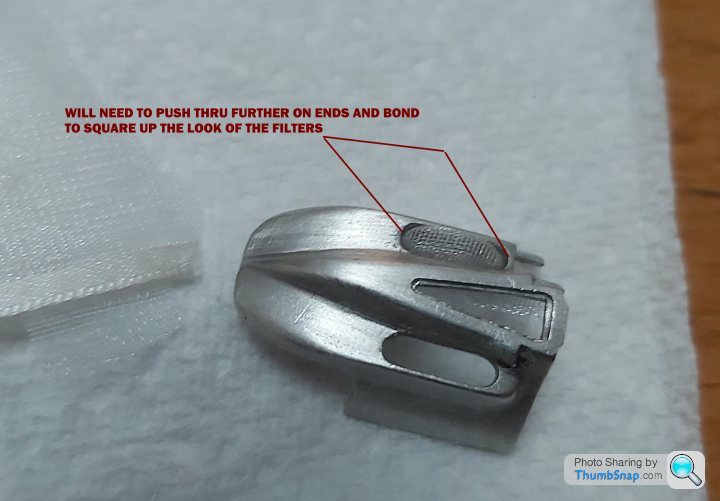
I need to make sure that once on it looks oblong in shape.Now i can get the cowl to fit and start painting.
 .
.
 .
.
SHOKER
 .
.
TRY THIS
 .
.
 .
.
 .
.
"How about this love".Some silver mesh ribbon. OK ill give it a go. So i did a practice run and am really happy it will work."Thankyou baby".
I need to make sure that once on it looks oblong in shape.Now i can get the cowl to fit and start painting.
..SHOKER
.TRY THIS
...
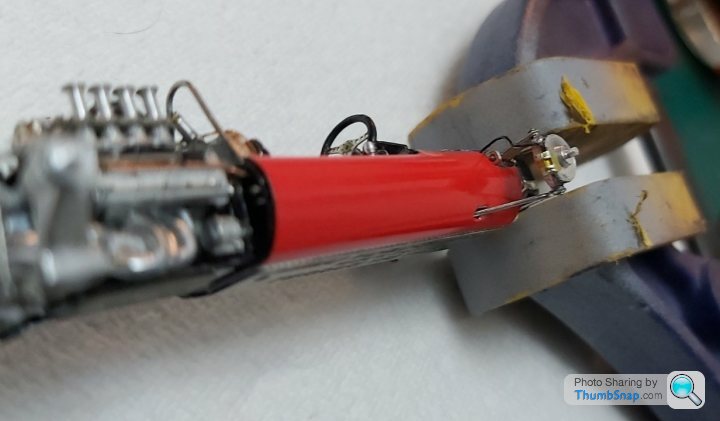
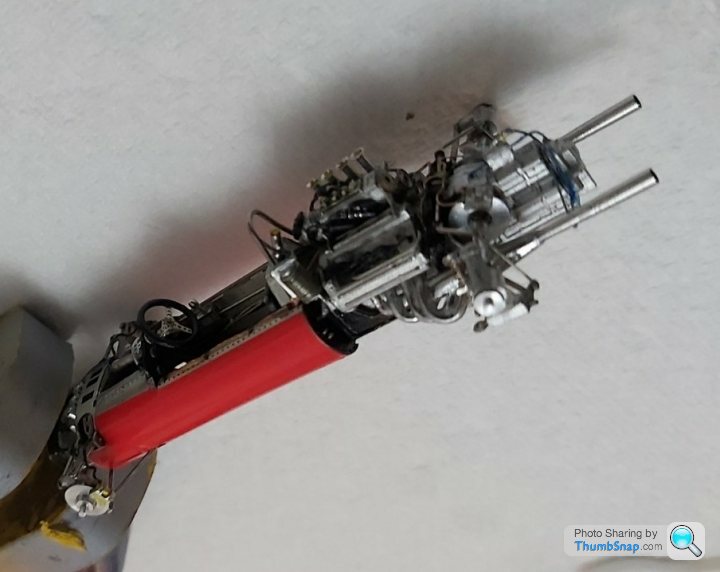
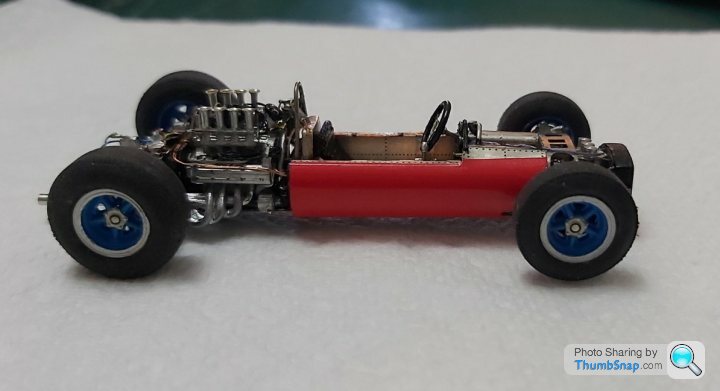
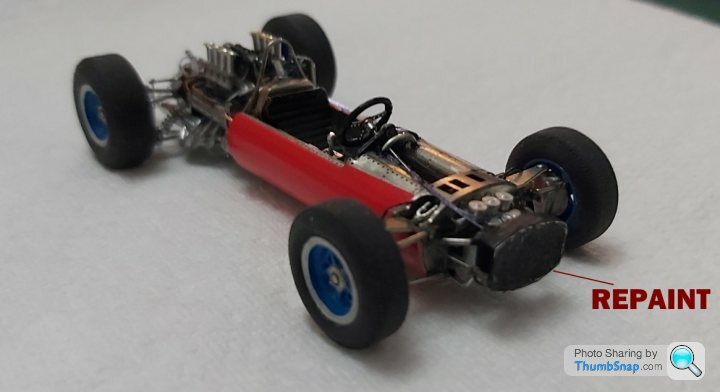
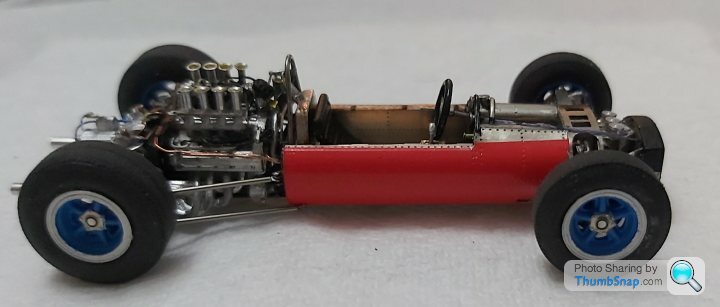
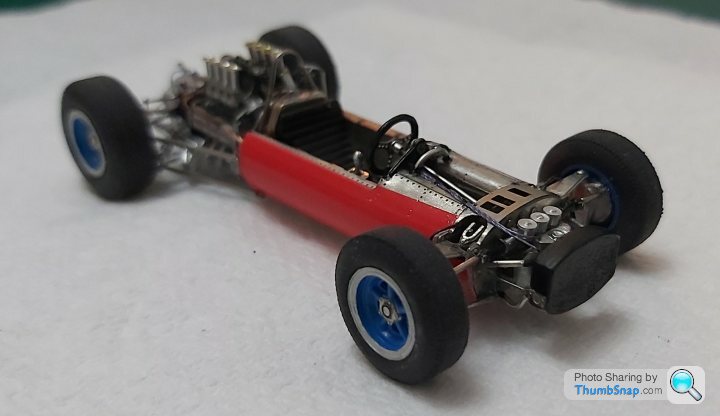
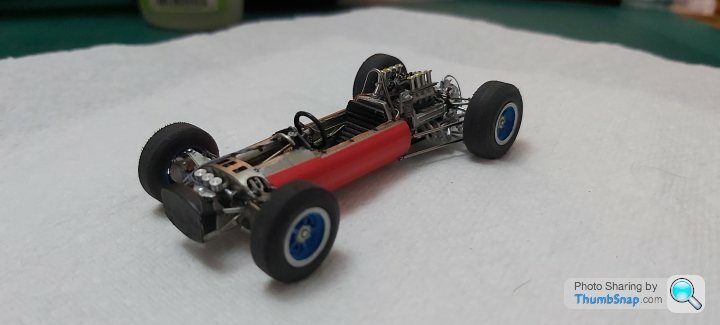
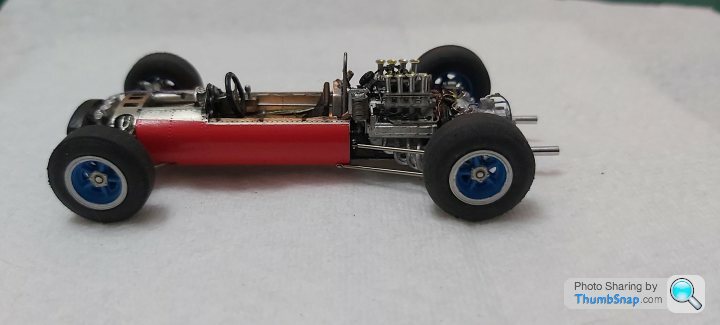
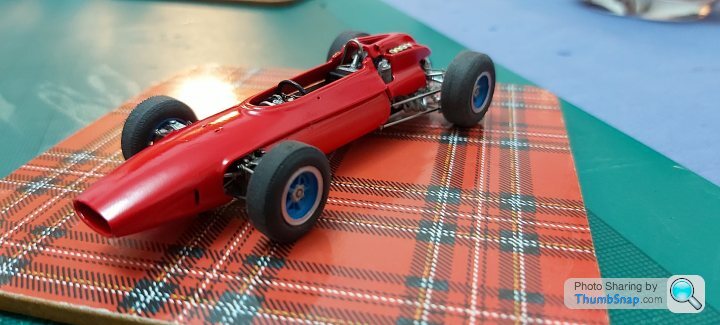
1st attempt at using a decal as bodywork colour instead of painting. Its one of three options, the 2nd is to spray a decal sheet and cut it out and finally
painting. It looks ok to me and was quite easy as there wernt any complex shapes to go on. Used Micro sol as its a 2 dimentional shape. The radiator lost some paint so will have to do that again and one intake stack fell off,realighnment of a couple of intake tubes to do easy enough to fix.Will be interesting to see the results after painting the cowls.
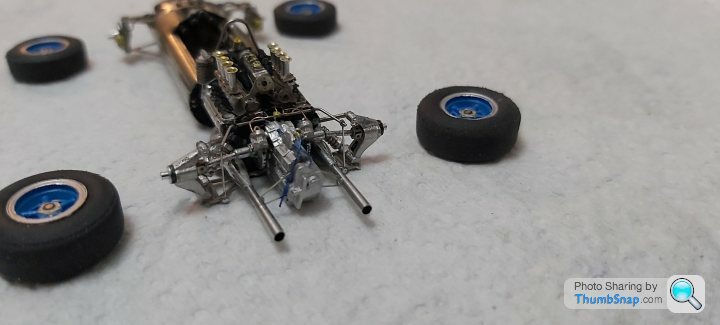
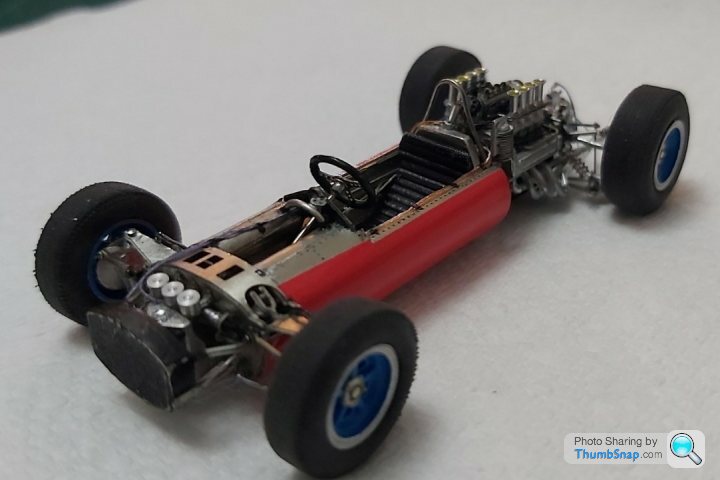
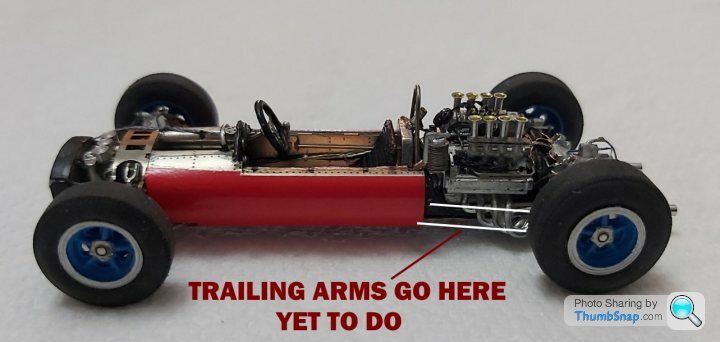
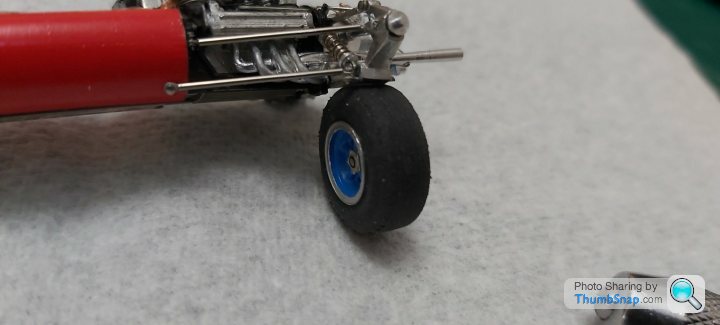
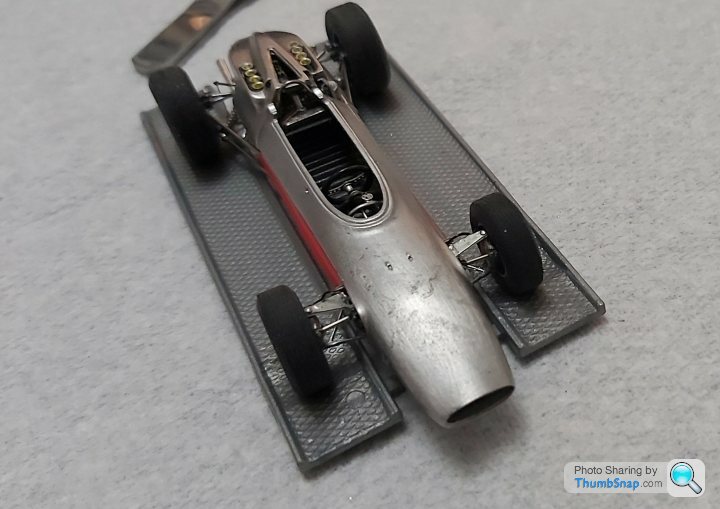
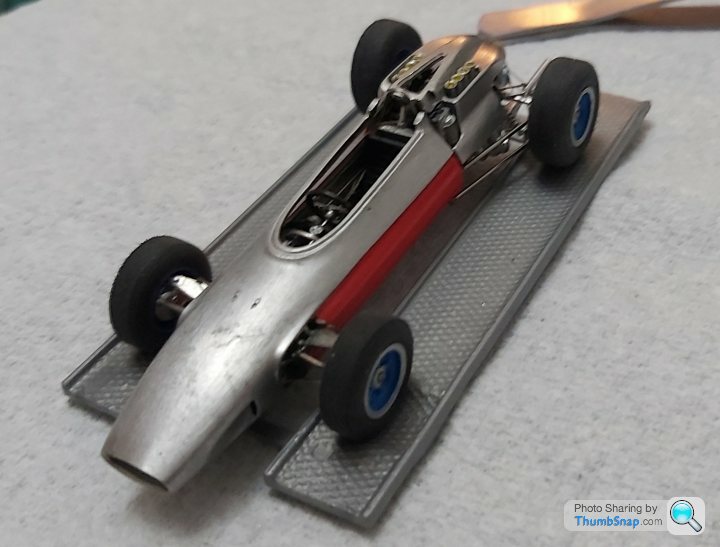
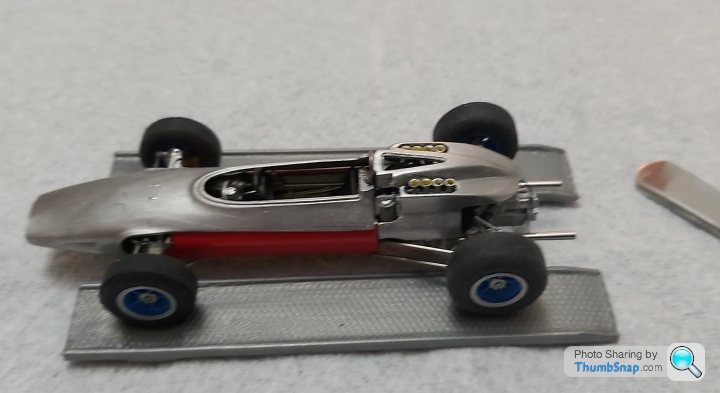
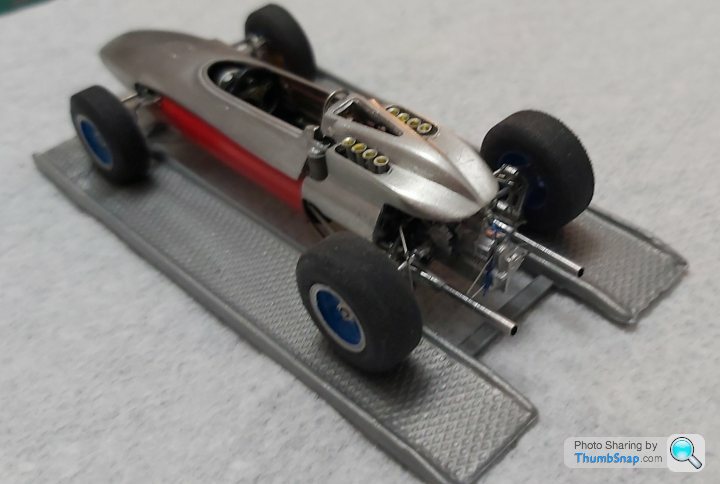
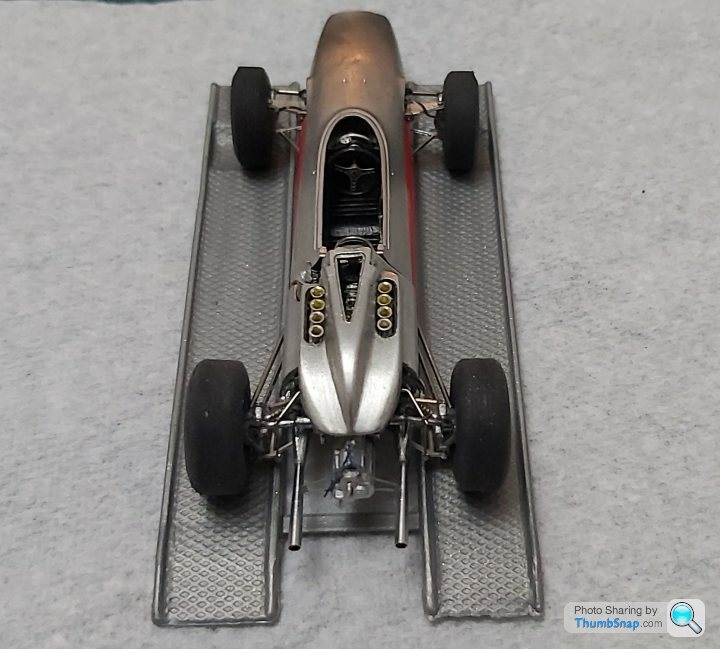
Some photos with the wheels on.
 .
.
 .
.
 .
.
 .
.
 .
.
 .
.
 .
.
 .
.
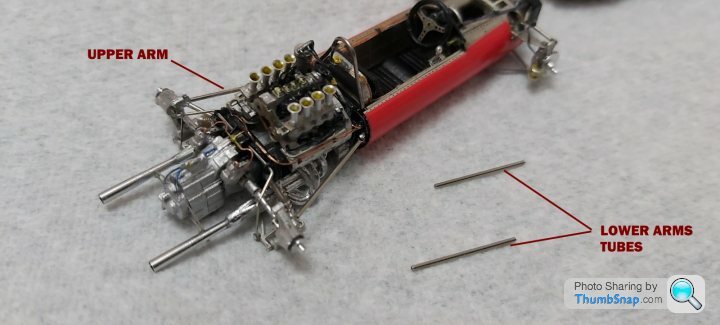
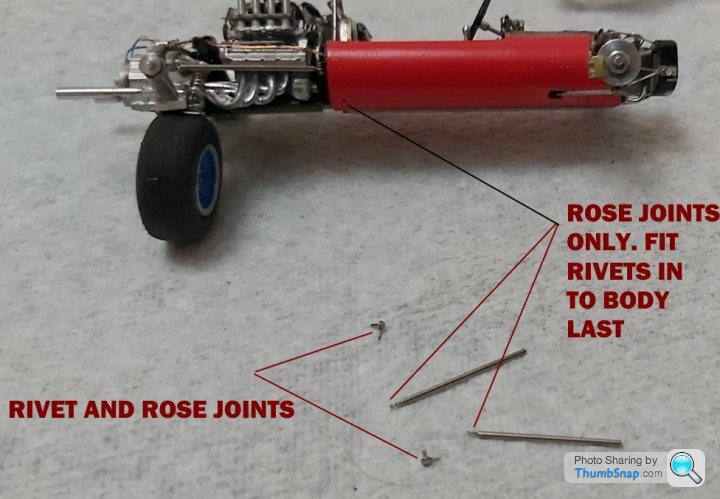
Rear trailing arms next.
painting. It looks ok to me and was quite easy as there wernt any complex shapes to go on. Used Micro sol as its a 2 dimentional shape. The radiator lost some paint so will have to do that again and one intake stack fell off,realighnment of a couple of intake tubes to do easy enough to fix.Will be interesting to see the results after painting the cowls.
Some photos with the wheels on.
........Rear trailing arms next.
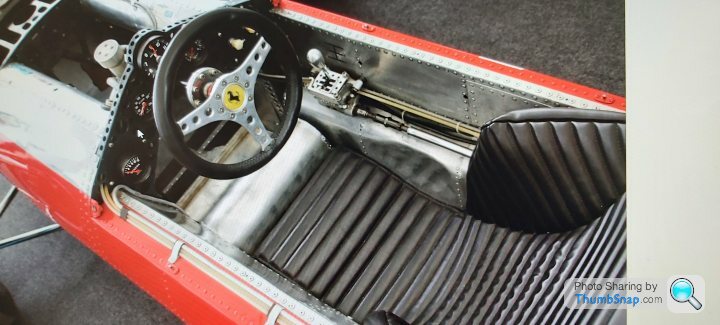
dr_gn said:
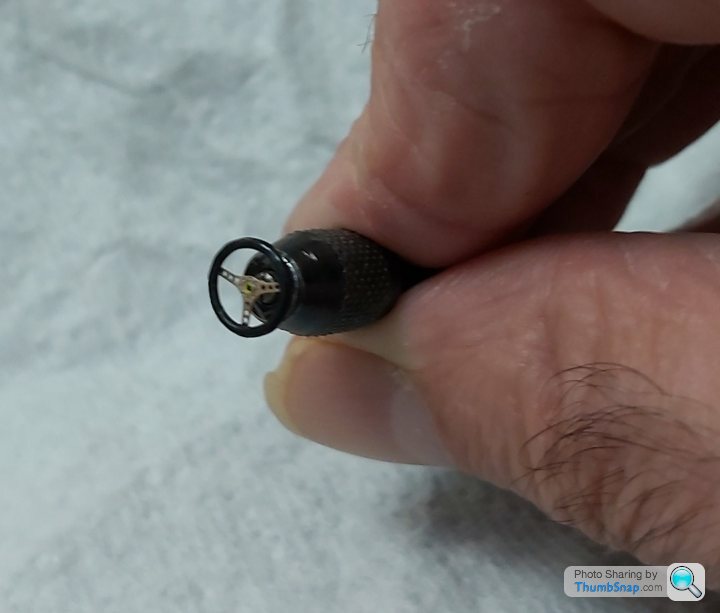
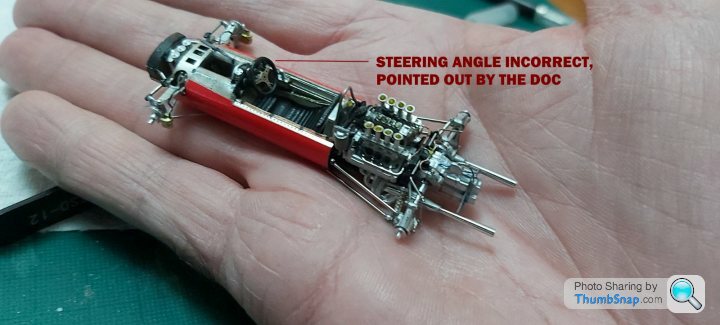
Just thought it seems to be pointed upwards too much, in other words like a go-kart steering wheel.
It was my thoughts as well but the cowl added on top does make it look correct to the instructions.I cant put the cowl on at the moment to check for fear of marking the decals. If it needs correcting later on, shouldnt be a problem.Thanks for the comment, all helps.henryk001 said:
dr_gn said:
Just thought it seems to be pointed upwards too much, in other words like a go-kart steering wheel.
It was my thoughts as well but the cowl added on top does make it look correct to the instructions.I cant put the cowl on at the moment to check for fear of marking the decals. If it needs correcting later on, shouldnt be a problem.Thanks for the comment, all helps.So ive removed it and now going to cut it to approx 15mm which would site it correctly, bit by bit until it fits and looks correct.
Once again thankyou.
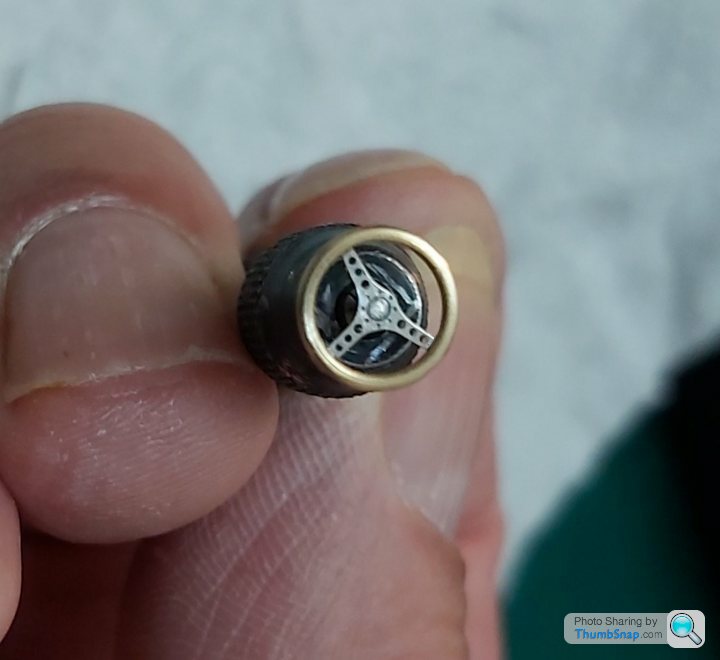
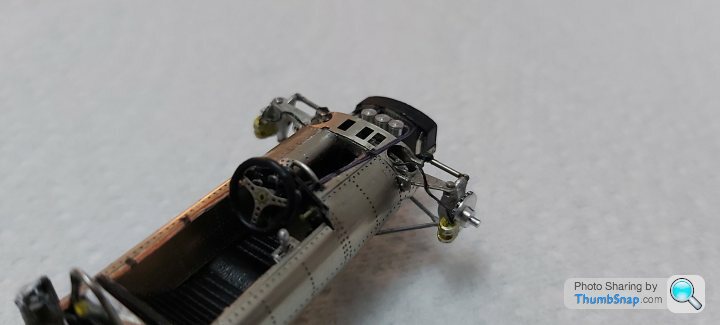
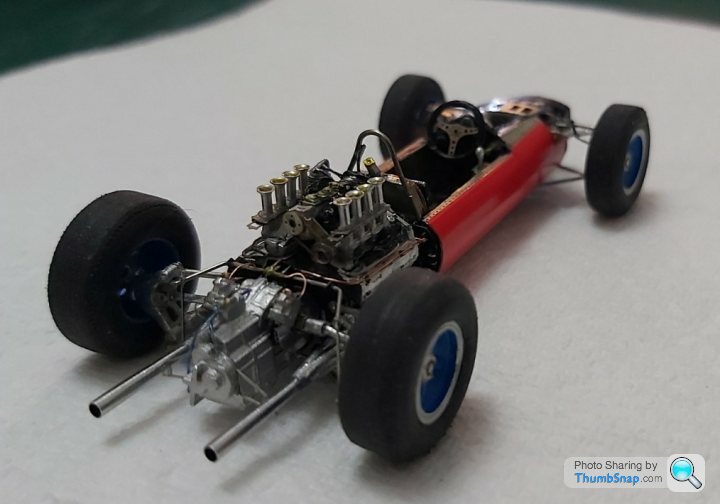
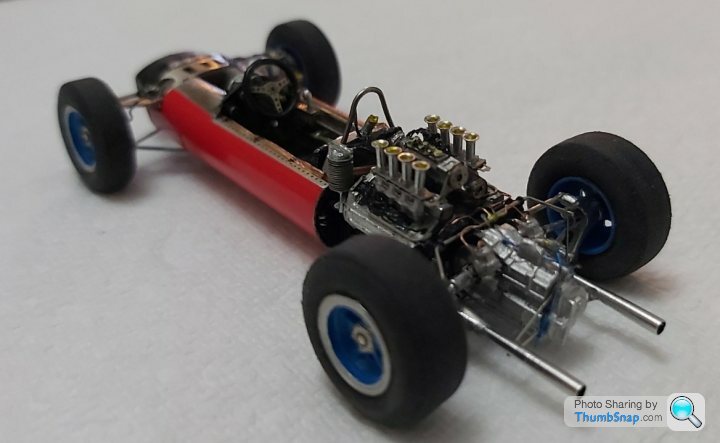
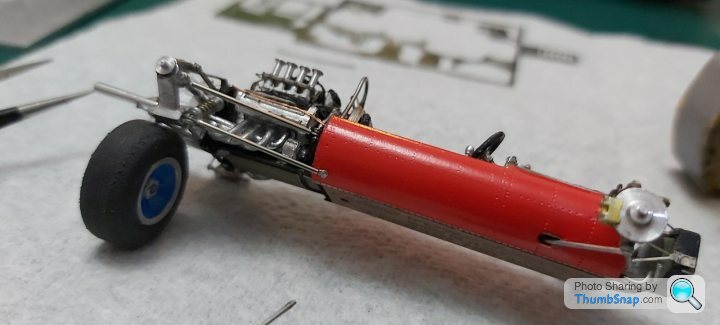
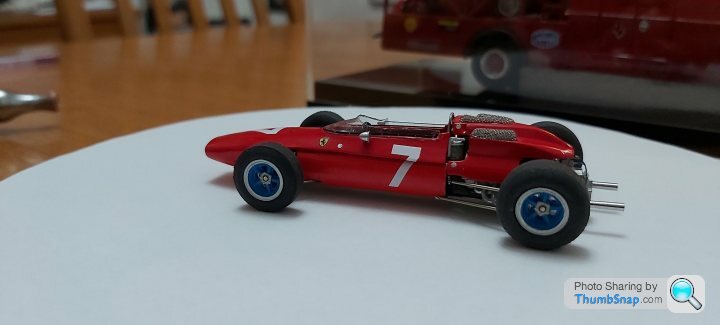
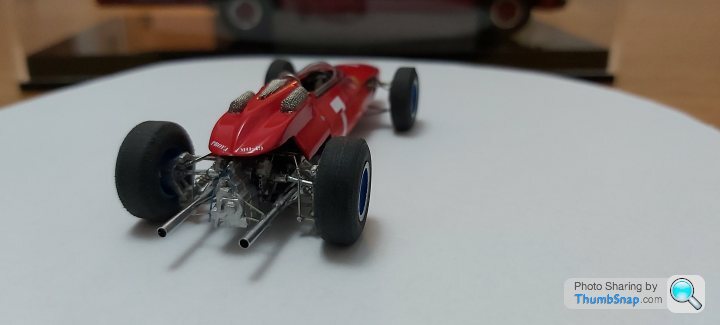
Trailing arms completed, quite difficult as i had to make sure the lengths of the tiny tubes assembled with rose joints were correct and the process of getting it right 1st time without getting into a mess with the glue or damaging the body decals.The decals have dried and are now showing the rivet lines.
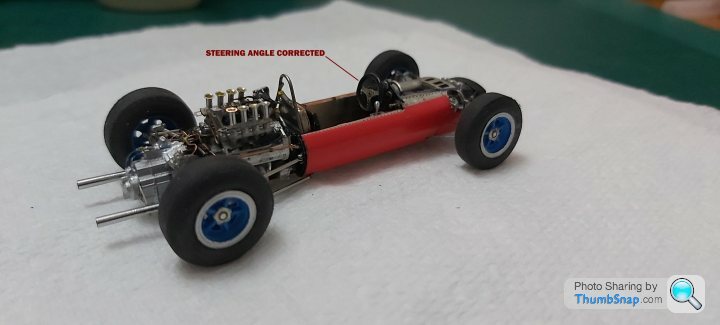
Thanks to the Doc for pointing out a mistake i made on the steering which i have since corrected. The cars nearing the finish line, just the bodywork and decals left.I may do the wheel rim edges in Motolow chrome at a later date.
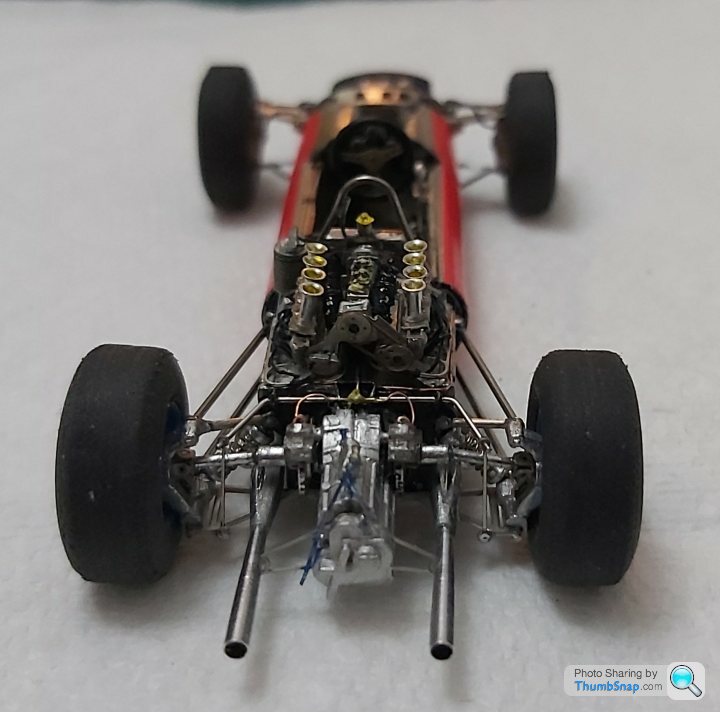
Some photos.
 .
.
 .
.
 .
.
 .
.
 .
.
 .
.
 .
.
 .
.
 .
.
 .
.
 .
.
Thankyou for looking and all the comments made on this thread. Will post the completed car when i get a chance to paint the cowls, weather permitting.
Thanks to the Doc for pointing out a mistake i made on the steering which i have since corrected. The cars nearing the finish line, just the bodywork and decals left.I may do the wheel rim edges in Motolow chrome at a later date.
Some photos.
...........Thankyou for looking and all the comments made on this thread. Will post the completed car when i get a chance to paint the cowls, weather permitting.
RDMcG said:
It's a fascinating thread and the thanks are all to you for sharing this project. Absolutely superb.
Thankyou RDMcG. I was looking at the ferrari build i built a while ago and realised you sent some detail photos of a real 250 GTO to help with the build. So thankyou. These model builds have been a great distraction from watching telly repeats and the situation were all in. gruffgriff said:
Ah now, the decalling worked! Awesome! Must give great confidence on the finishing straight!
Thanks gruffgriff. Im not going to laquer the decal for fear of having a reaction. I am going to use microscale liquid decal film instead should be good enoughto protect it and give it a glossier coat.

smifffymoto said:
I am so ham fisted I could have inhaled most of those tiny pieces but I fear my patience level wouldn’t even get me close to that dilemma.
Good work,the level of dedication to “real life” is commendable.
Thankyou smifffymoto. I can say that theres been quite a few times ive had issues making and fitting parts in a hamfisted manner and issues where static electricity has sent a part flying off into the room, never to be seen again Good work,the level of dedication to “real life” is commendable.
Quite a bit of fettling, thinning the rear cowl from the inside to allow the edges of the rear and front to line up and some more body prep/filling to do. Waiting for humidity do drop off to paint. Probably wont wait long enough and end up warming the parts and paint and do it indoors.Now that the wheels are on, semi bonded with PVA to allow removal if or when required, i have added the car to the ferrari collection and placed in the cabinet until needed to finish off.
Some pics.
 .
.
 .
.
 .
.
 .
.
 .
.
 .
.
 .
.
Some pics.
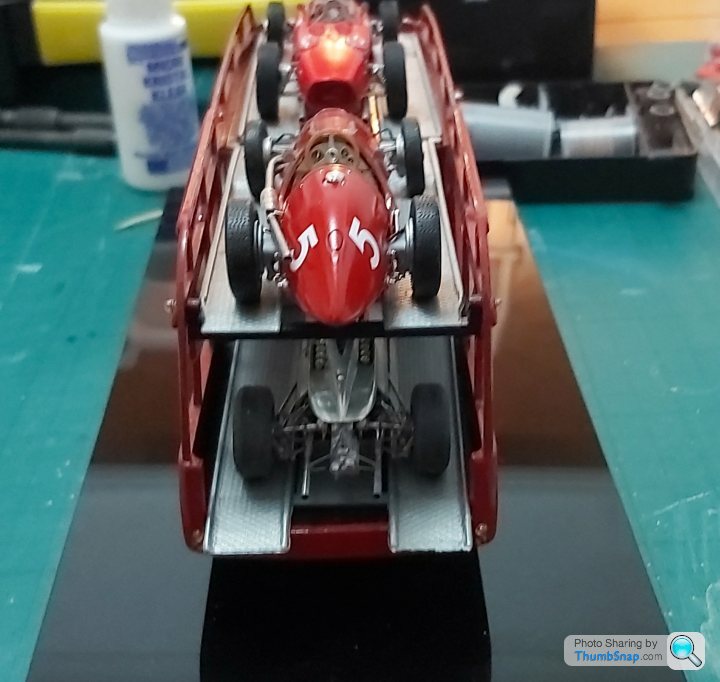
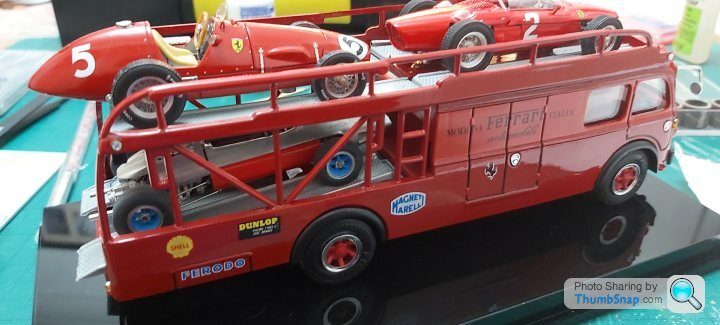
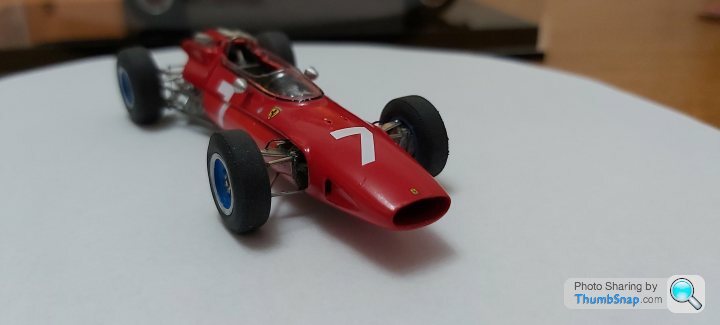
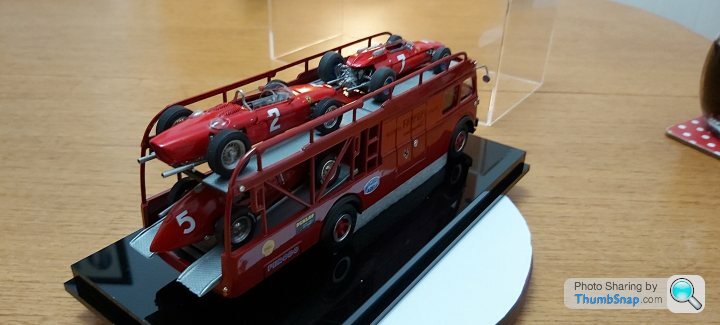
.......Well its been almost a year for me of getting down to the grind, so many things have happened to take me away from building scale modelcars other than a commision to build a 1/43 porsche 356 speedster. Ive been reading the forums regularly but havent commented on all the lovely work produced on this forum because i felt a bit like i was "out of the club" as i wasnt contributing or doing any models.So ive finished the Ferrari 158 model and the 3 cars look complete now . I have a Bugatti type 35, a couple of maserrati birdcages and a BRM yet to start so hopefully will start to contribute to the forum.
As promised all beit a bit late some photos of the 158. All the best to everyone for 2022.
 .
.
 .
.
 .
.
 .
.
 .
.
 .
.
 .
.
 .
.
As promised all beit a bit late some photos of the 158. All the best to everyone for 2022.
........Gassing Station | Scale Models | Top of Page | What's New | My Stuff