Surtees Ferrari 158 tameo wct kit
Discussion


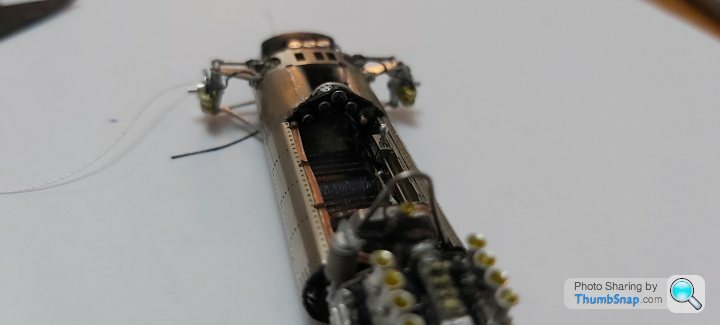
Good progress - soon be ready for paint. I don’t envy you having to match the decals, in terms of both colour and reflectivity. Presumably you’ll be clear coating all the red bits to address the latter?
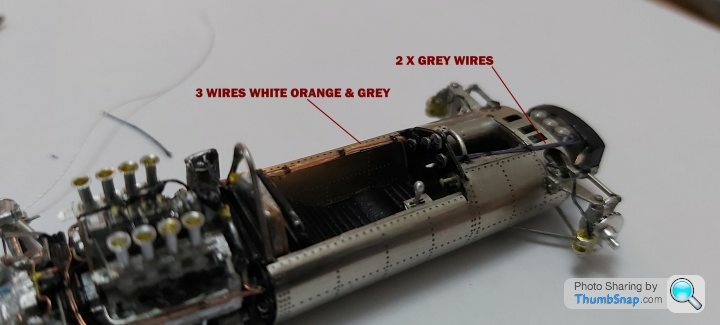
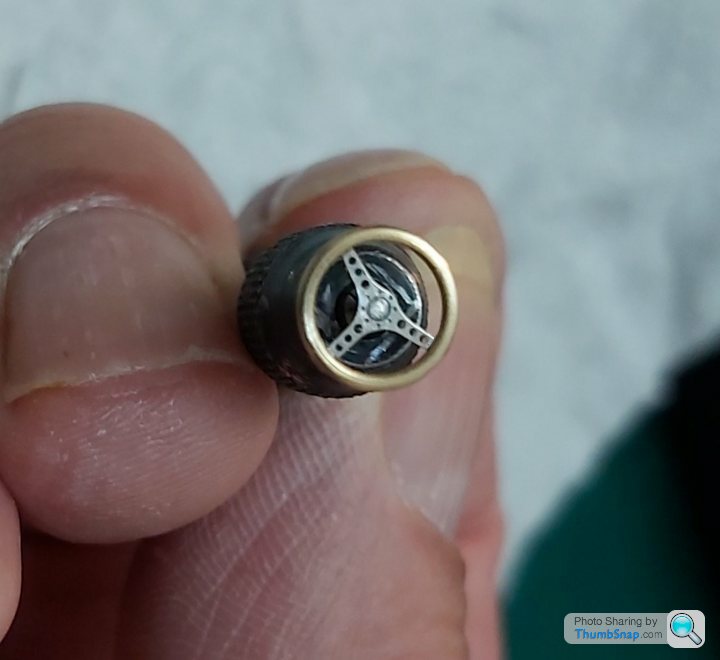
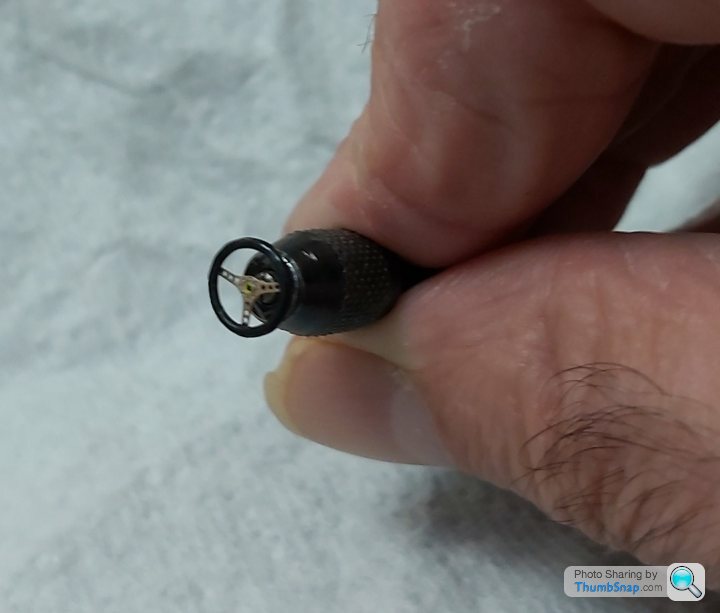
Re the wheels - I can’t tell from the photos whether you painted the silver outer rims or not. On the 156/85 I initially painted the rims (and the roll hoop). They looked painted though, and I wanted a polished look. I found that Autosol on a cotton bud will polish bare white metal to a very realistic finish. I spun the wheels in the lathe for this, but an electric drill also works. A final polish with car wax protects it.
Just a thought.
dr_gn said:
Good progress - soon be ready for paint. I don’t envy you having to match the decals, in terms of both colour and reflectivity. Presumably you’ll be clear coating all the red bits to address the latter?
Re the wheels - I can’t tell from the photos whether you painted the silver outer rims or not. On the 156/85 I initially painted the rims (and the roll hoop). They looked painted though, and I wanted a polished look. I found that Autosol on a cotton bud will polish bare white metal to a very realistic finish. I spun the wheels in the lathe for this, but an electric drill also works. A final polish with car wax protects it.
Just a thought.
Im trying the decal option 1st as ive never seen this method before to cover a large(small) area. the 2nd option is spraying another white decal provided in the kit to match the Tamiya Red and then cut to shape, then lastely if that doesnt work just painting the body.This could all go wrong?.Re the wheels - I can’t tell from the photos whether you painted the silver outer rims or not. On the 156/85 I initially painted the rims (and the roll hoop). They looked painted though, and I wanted a polished look. I found that Autosol on a cotton bud will polish bare white metal to a very realistic finish. I spun the wheels in the lathe for this, but an electric drill also works. A final polish with car wax protects it.
Just a thought.
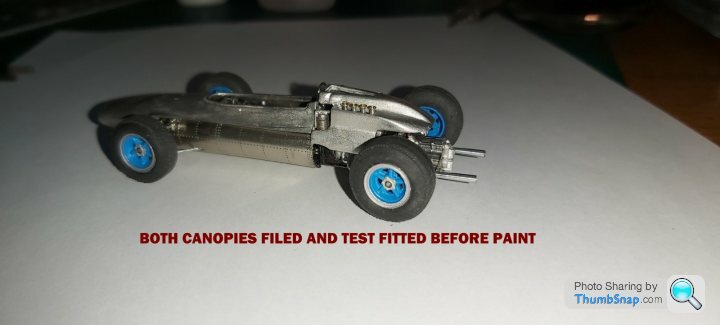
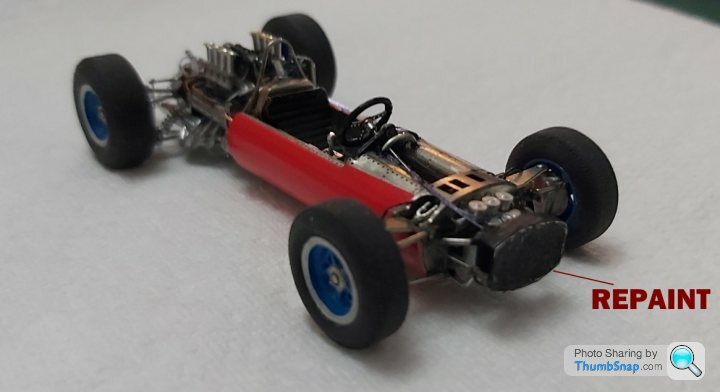
The wheels outer rims were painted with Motolow metallic paint pen after gluing the outer rims on, which didnt look very good because the wheel is white metal cast and the rims are steel Photo etch, so still wouldnt match up if i polished them.The photos were taken with flash so its showing up quite harsh. They do look ok by eye though.
Properly mind-bending HenryK. Top level jewellery, thanks so much for sharing your odysseys!
Apologies if you've stated earlier but can you please share your glue choices? My modelling is much cruder in comparison; I use runny and normal cyano, sometimes with activator, clear varnish, araldite etc but can't get my head around using so little of any of those so as not to be obvious but still hold parts in place that the tiny assemblies can be handled....UV glue?
I pray to the decal gods to oversee body applications but as you say it looks incredible in the metal as a fall-back solution. Best of luck
gruffgriff said:
Properly mind-bending HenryK. Top level jewellery, thanks so much for sharing your odysseys!
Apologies if you've stated earlier but can you please share your glue choices? My modelling is much cruder in comparison; I use runny and normal cyano, sometimes with activator, clear varnish, araldite etc but can't get my head around using so little of any of those so as not to be obvious but still hold parts in place that the tiny assemblies can be handled....UV glue?
I pray to the decal gods to oversee body applications but as you say it looks incredible in the metal as a fall-back solution. Best of luck
Hi! gruffgriff.Apologies if you've stated earlier but can you please share your glue choices? My modelling is much cruder in comparison; I use runny and normal cyano, sometimes with activator, clear varnish, araldite etc but can't get my head around using so little of any of those so as not to be obvious but still hold parts in place that the tiny assemblies can be handled....UV glue?
I pray to the decal gods to oversee body applications but as you say it looks incredible in the metal as a fall-back solution. Best of luck
White metal is quite hard to bond, i score the surfaces criss cross with a scalpel and key any photo etch with a fine emery stick, helps the bonding.
I use Zap CA super glue, bit pricey from the Axxzon. Zap Pink bottle is very thin and will capilerate. Mostly use Zap medium green bottle, seems stronger and cures in about 5 secs .
Zap thick yellow bottle for parts im not sure will be in the right place at the right time cures in about 10-20 secs. Also gap fills well with activator.
My method is to place just a droplet enough to do a couple of parts at any time onto a piece of plastic or ally sheet and use the drill shank 0.25 to 0.5mm depending on size of part.Gather a small drop to apply to surface.
I make sure i wipe the drill shank every time with a piece of kitchen towel before the next application as the CA starts to build up on the shank into a blob and you then get too much.
Ive made my glues last over a year by wiping the nozzle quickly with kitchen towel before putting the top on and rotating it a few times which stops the top bonding to the bottle.
These kits have to be handled carefully as CA doesnt like impact,2-3 layers of kitchen roll acts as a damper if you drop the model.Concidering the final outcome is to display and admire only. its sufficient.
Oh and either Kristal clear or PVA to do tiny parts not requiring any load, can be diluted to suit the application.
I dont like araldite as its time consuming and wastefull.Tried UV but doesnt work with me.
The other two cars ive built over the past year or two placed onto the transporter are doing fine in the cabinet.
Trust this helps and thankyou very much for your really nice comments.
Edited by henryk001 on Monday 25th January 11:53

Thankyou very much Davettf2,CanAm, Jacobyte and anyone else having a read.
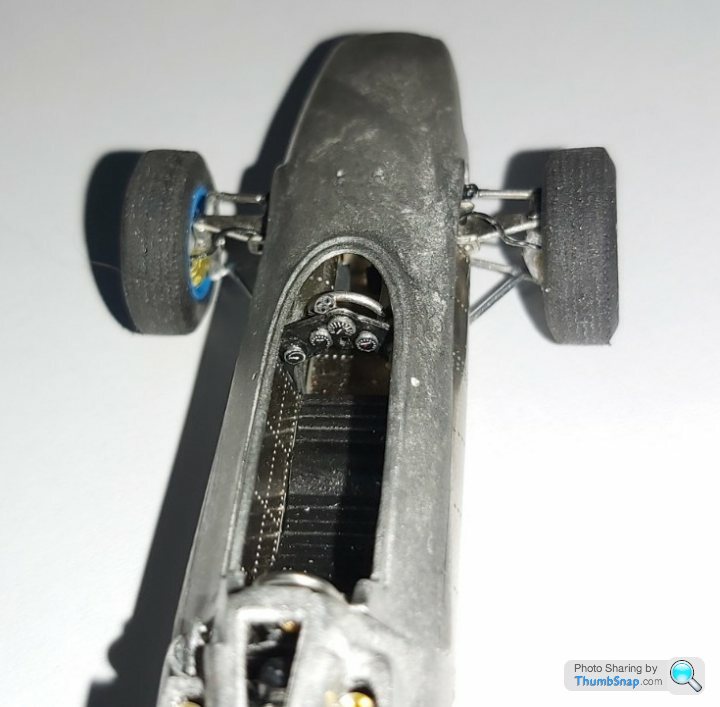
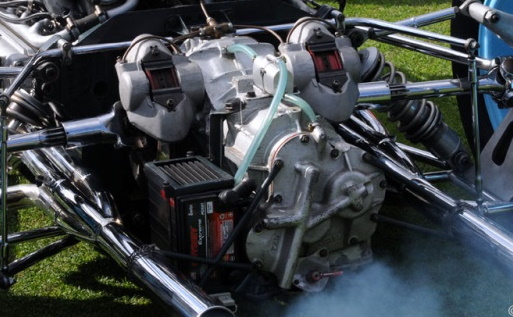
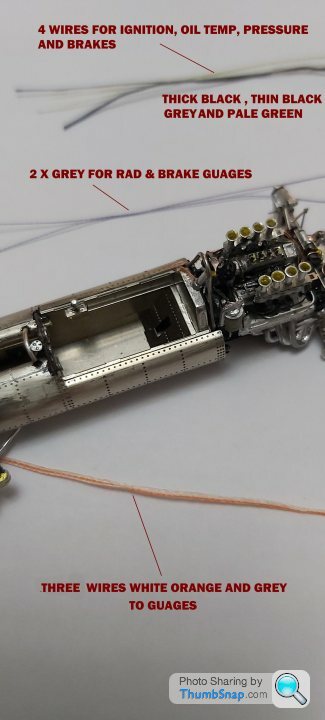
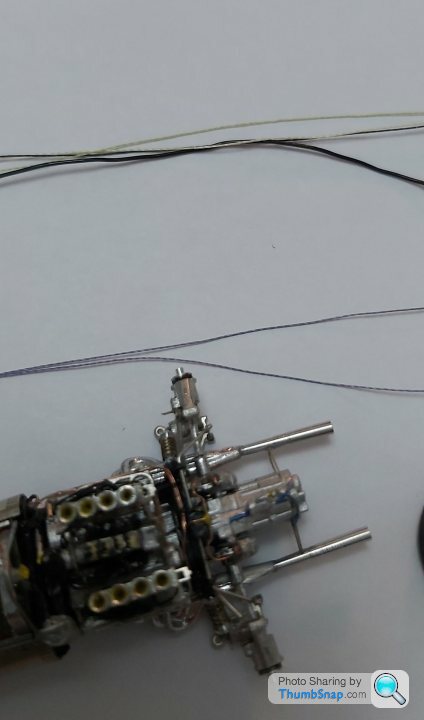
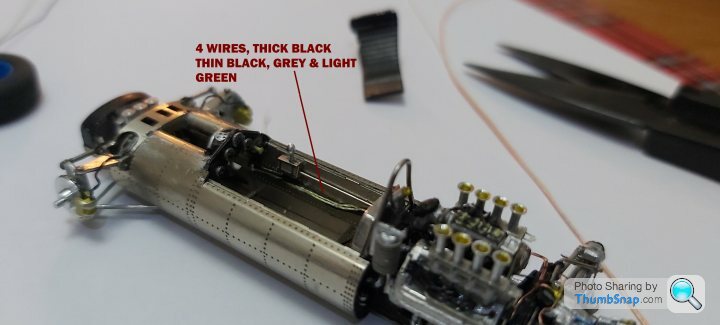
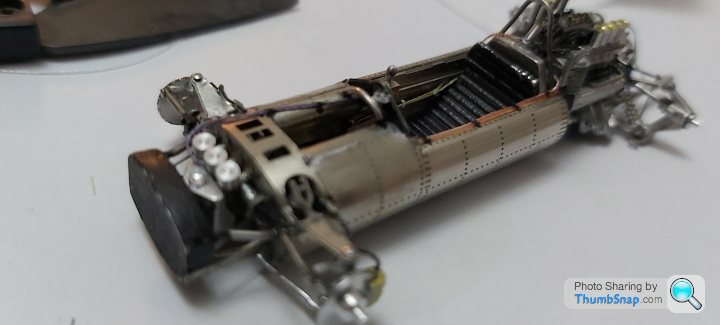
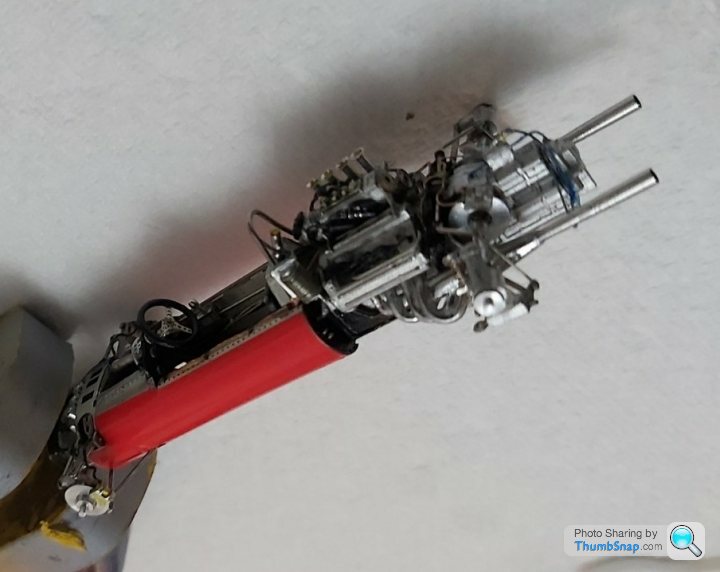
Noticed something in a photo, on top of the gearbox theres a breather box or mechanism with a leak of pipe on the real car so im going to have to make it as it would still be visable once the rear cowl goes on. Both cowls are removable which is the main reason why ive added details to this already complex little kit.
 .
.
Noticed something in a photo, on top of the gearbox theres a breather box or mechanism with a leak of pipe on the real car so im going to have to make it as it would still be visable once the rear cowl goes on. Both cowls are removable which is the main reason why ive added details to this already complex little kit.
.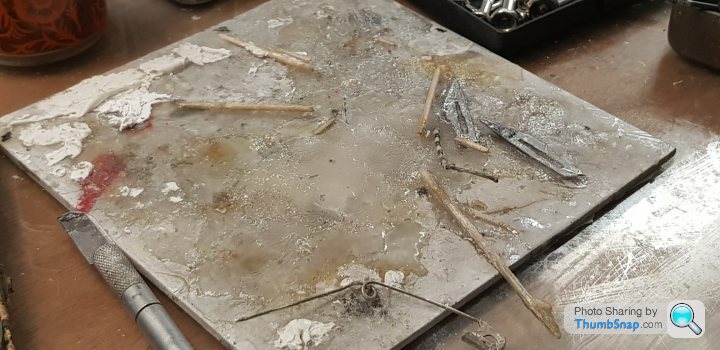
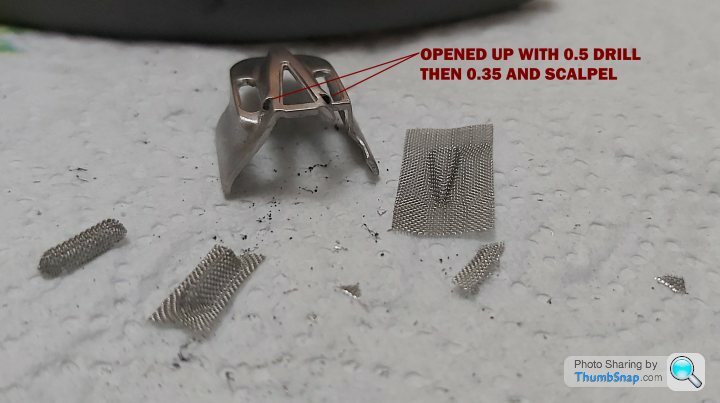
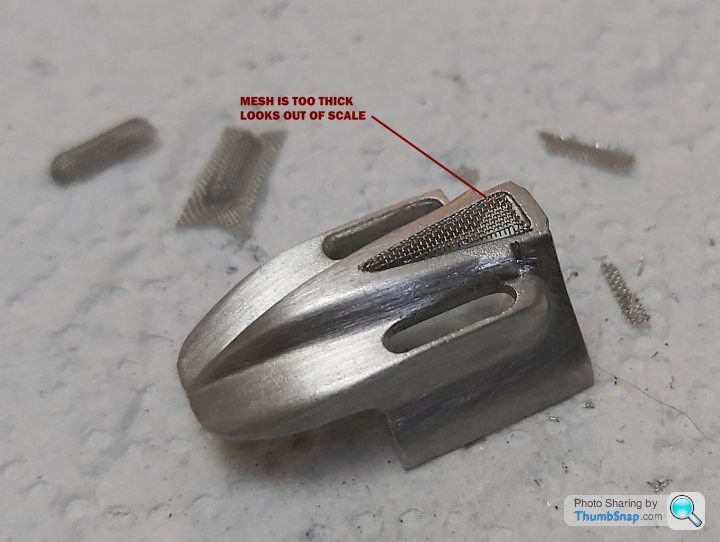
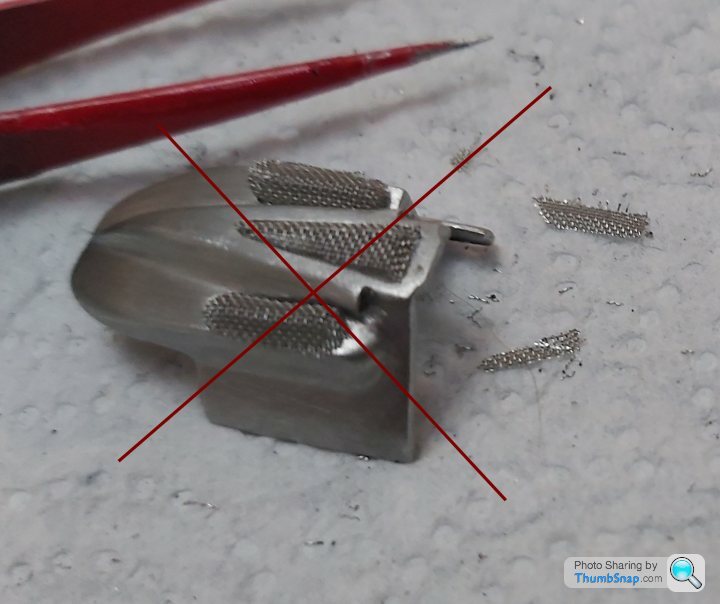
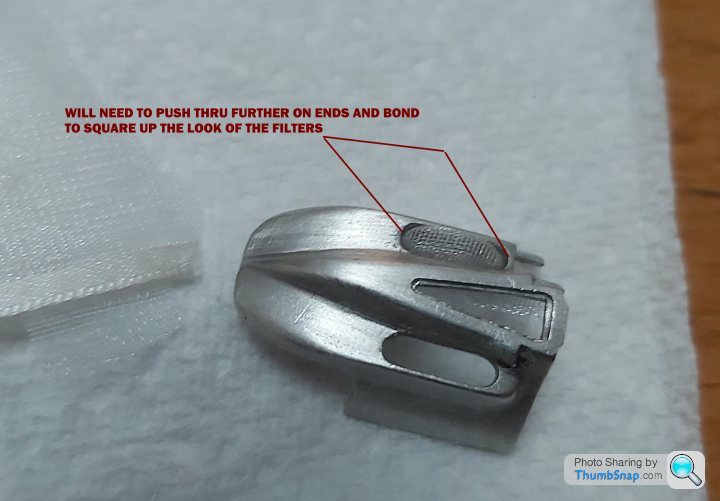
Drilled out the two small air vents. Before i can get the rear cowl to fit, prep and paint it, found the grill mesh too thick to use. It looks totally out of scale and by the time ive made the slots big enough for the cowl to go over the trumpets its going to look really odd. Wife comes to the rescue.
"How about this love".Some silver mesh ribbon. OK ill give it a go. So i did a practice run and am really happy it will work."Thankyou baby".
I need to make sure that once on it looks oblong in shape.Now i can get the cowl to fit and start painting.
 .
.
 .
.
SHOKER
 .
.
TRY THIS
 .
.
 .
.
 .
.
"How about this love".Some silver mesh ribbon. OK ill give it a go. So i did a practice run and am really happy it will work."Thankyou baby".
I need to make sure that once on it looks oblong in shape.Now i can get the cowl to fit and start painting.
..SHOKER
.TRY THIS
...
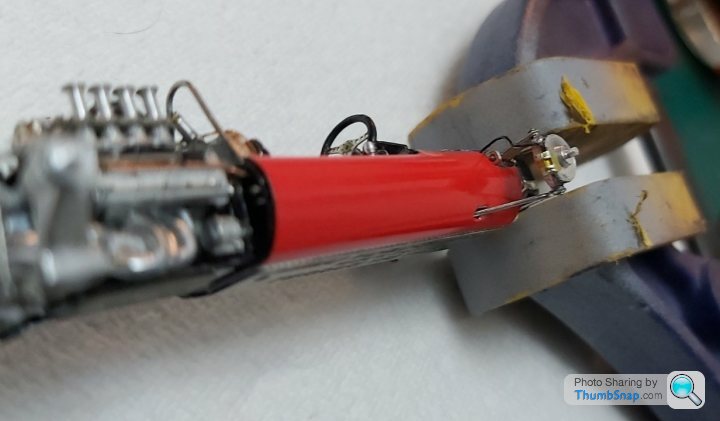
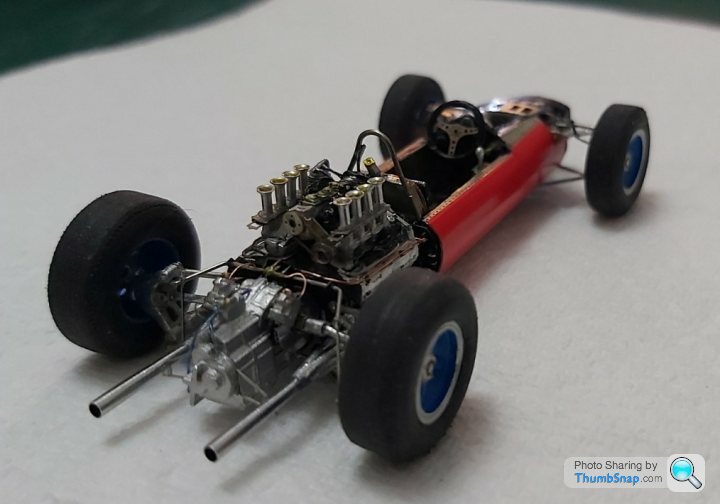
1st attempt at using a decal as bodywork colour instead of painting. Its one of three options, the 2nd is to spray a decal sheet and cut it out and finally
painting. It looks ok to me and was quite easy as there wernt any complex shapes to go on. Used Micro sol as its a 2 dimentional shape. The radiator lost some paint so will have to do that again and one intake stack fell off,realighnment of a couple of intake tubes to do easy enough to fix.Will be interesting to see the results after painting the cowls.
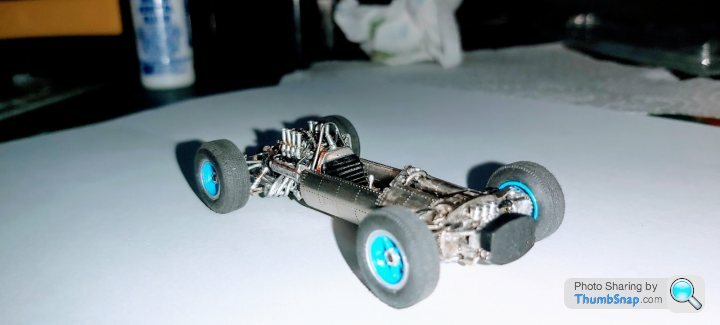
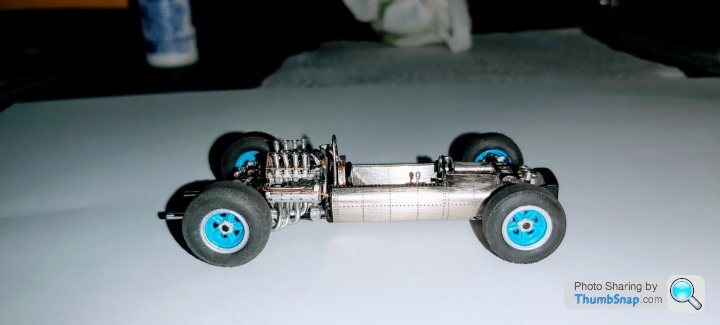
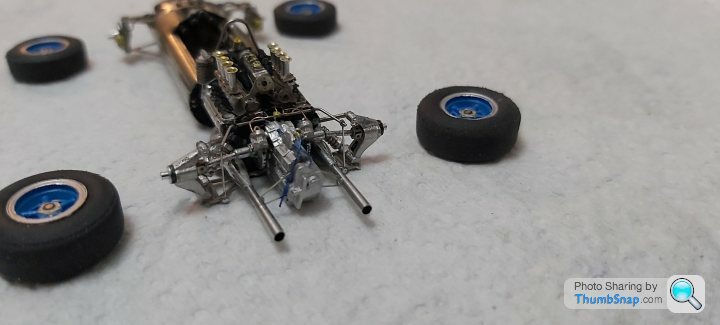
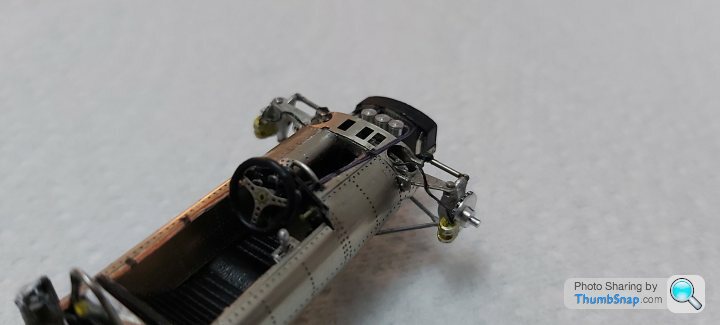
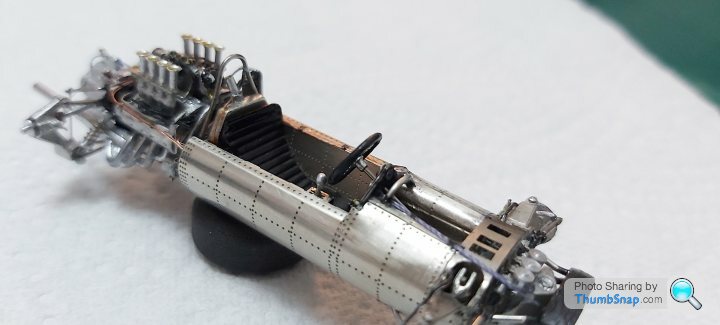
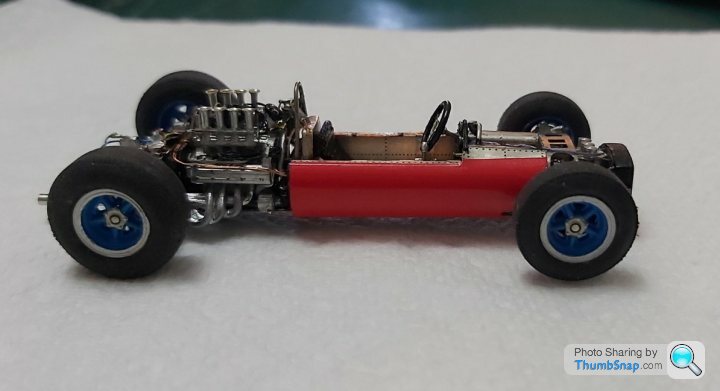
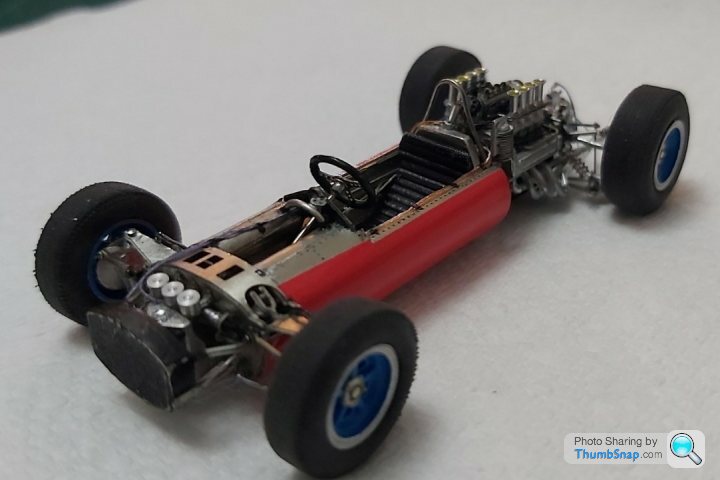
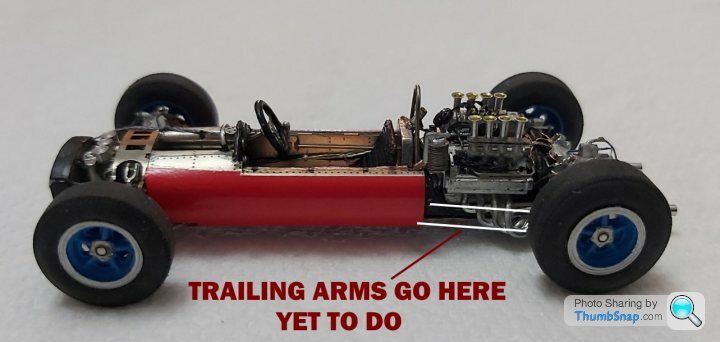
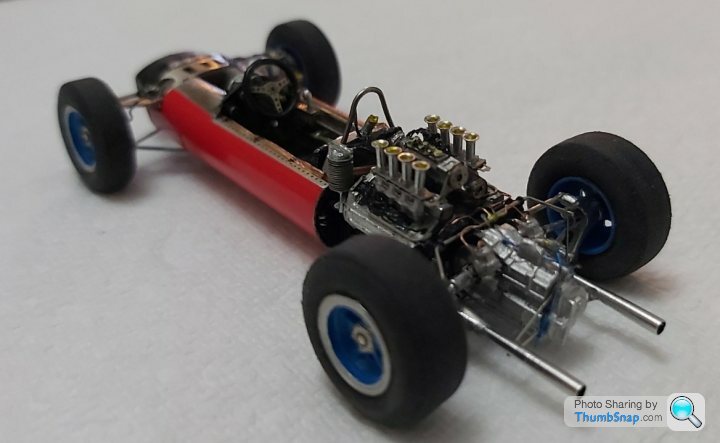
Some photos with the wheels on.
 .
.
 .
.
 .
.
 .
.
 .
.
 .
.
 .
.
 .
.
Rear trailing arms next.
painting. It looks ok to me and was quite easy as there wernt any complex shapes to go on. Used Micro sol as its a 2 dimentional shape. The radiator lost some paint so will have to do that again and one intake stack fell off,realighnment of a couple of intake tubes to do easy enough to fix.Will be interesting to see the results after painting the cowls.
Some photos with the wheels on.
........Rear trailing arms next.
Gassing Station | Scale Models | Top of Page | What's New | My Stuff