Airfix 1:72 Vulcan B.2
Discussion


shalmaneser said:
dr_gn said:
So exactly a year after winning this thing, I was at Scale Model World today, and so were Airfix. I showed them the pictures of some of the faults, and to be fair they seemed genuinely surprised. Both people (including I believe the designer) immediately said that it was clear that something had gone wrong somewhere. I think the conclusion was that perhaps an early batch might have gone out with some incorrect moulding settings (or whatever - anyway it wasn’t representative of what they consider to be acceptable quality).
Having had some experience with plastic injection moulding I would say it was indicative of an underfilled cavity. The sort of thing you would see early in a production run IMO.pingu393 said:
dr_gn said:
... the Airfix name is on the box no matter who actually moulded it and let it go out of the door...
Exactly. No excuse can avoid this simple fact.They should have offered you another voucher, at least.
Although these threads are a great advert for your skill, they are also a great advert for the model manufacturers.
mac96 said:
Thanks OP for posting the E Type; I would never have considered Airfix as a source of 1: 43 models suitable for an O Gauge railway but I have just bought one, and I have also found your wheel supplier.
I don't claim to be an expert on E Types, but it just looks right. Now need to consider what colour it is to be!

No problem! I'm currently loking for some turned metal spinners to replace the resin ones on the wheels.I don't claim to be an expert on E Types, but it just looks right. Now need to consider what colour it is to be!
I'm hoping that there will be a load of detail kits available for this. I can see a few of them on my shelf in various states of detail.
pingu393 said:
dr_gn said:
mac96 said:
Thanks OP for posting the E Type; I would never have considered Airfix as a source of 1: 43 models suitable for an O Gauge railway but I have just bought one, and I have also found your wheel supplier.
I don't claim to be an expert on E Types, but it just looks right. Now need to consider what colour it is to be!
No problem! I'm currently loking for some turned metal spinners to replace the resin ones on the wheels.I don't claim to be an expert on E Types, but it just looks right. Now need to consider what colour it is to be!
I'm hoping that there will be a load of detail kits available for this. I can see a few of them on my shelf in various states of detail.
 .
.pingu393 said:
dr_gn said:
On my Christmas list - I’ve done the CAD already for the Blue Steel trolley. Question is: £200 or £750?
I built my own PRUSA. It was great, but broke and the replacement part needed an upgrade that cost more than a new cheap printer, so I went for the cheap printer. Big mistake. Buy cheap, buy twice. I never bought twice, and now I don't have a printer, but I do have loads of PLA and ABS.It's also quite good fun building the PRUSA.
If I were going for broke, I'd get one of the ones that uses a bath of "filament". They are about £2000, but their finish is flawless, as they aren't layers stuck together, they produce a solid. You also need a curer and cleaner.
https://www.prusa3d.com/
Either way, FDM is pretty much useless for small scale models. I’m looking at a resin printer from Elegoo or Anycubic MSLA or DLP types. Big difference in price (at least last time I looked) for a small (but annoyingly tempting) increase in resolution.
pingu393 said:
dr_gn said:
I built a Prusa i3Mk2s a few years ago - it’s worked pretty much flawlessly since then. Just needed a thermocouple replacing last year. The big advantage of that printer is the automatic bed level compensation feature.
Either way, FDM is pretty much useless for small scale models. I’m looking at a resin printer from Elegoo or Anycubic MSLA or DLP types. Big difference in price (at least last time I looked) for a small (but annoyingly tempting) increase in resolution.
I also built a Mk2, but the pinda probe was ripped out of the frame when a print went wrong. The only way to replace it was to do the Mk3 upgrade.Either way, FDM is pretty much useless for small scale models. I’m looking at a resin printer from Elegoo or Anycubic MSLA or DLP types. Big difference in price (at least last time I looked) for a small (but annoyingly tempting) increase in resolution.
I was going to offer you my printer, but the i3Mk2 is better than mine. I may just take it to the local charity shop, as it's cluttering up the garage.
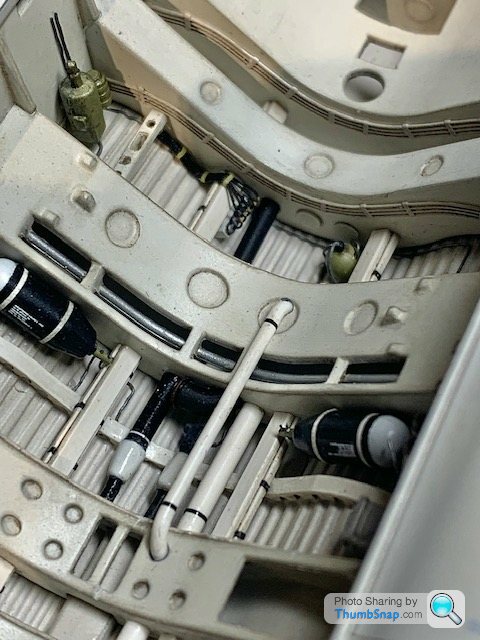
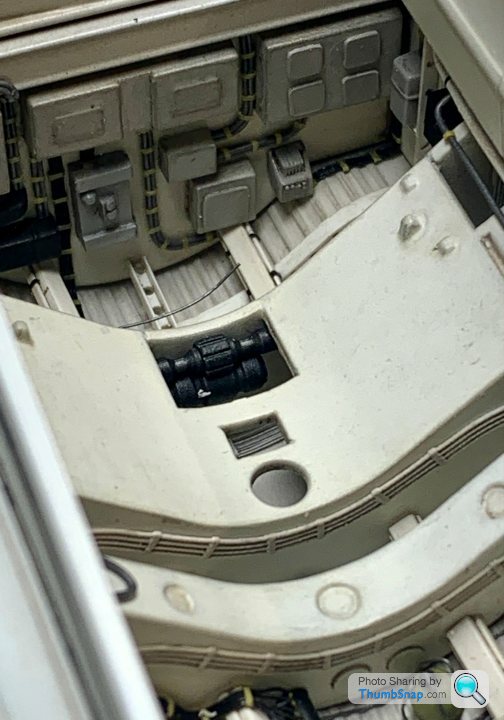
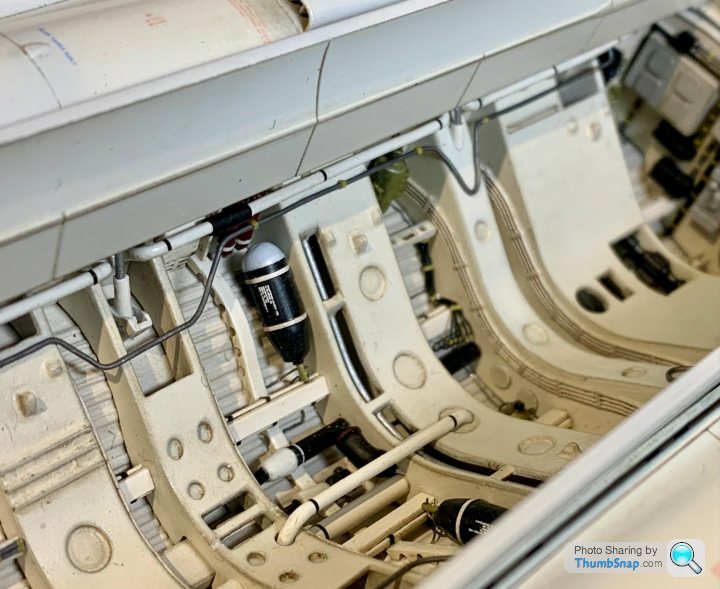
Quick progress report. Not sure why I embarked on this, but having seen the Vulcan bomb-bays at Duxford and Cosford, this one seemed very bare:

So I thought I'd add some details. I should have done it before assembly I guess, but I dont know, it's delayed the completion of the model and will be invisible anyway.
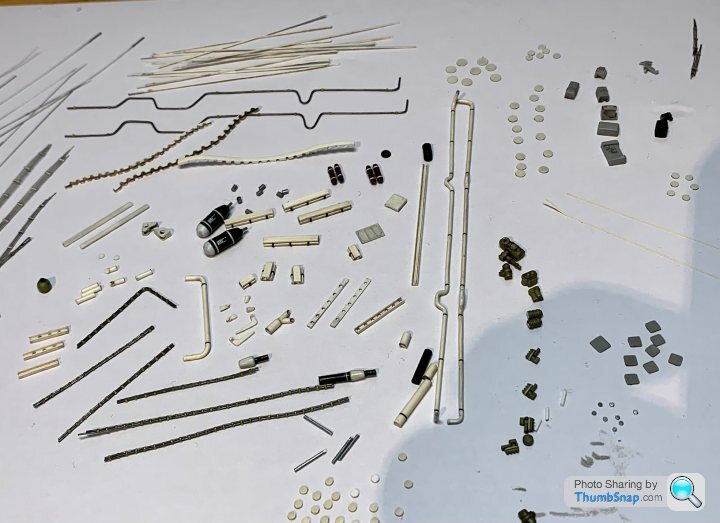
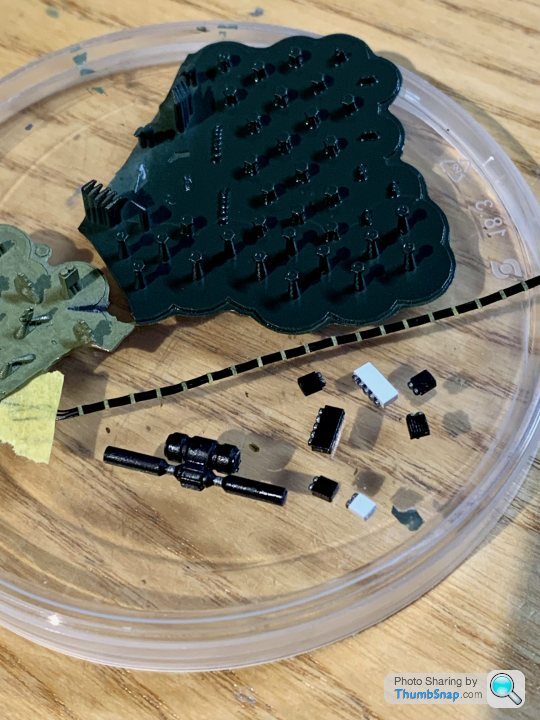
I raided the spares box to find things that could look vaguely like hydraulic fittings, accumulators and electrical boxes. I cobbled them together with lead wire and ended up with this lot. Some of the larger features are realistic, some not so much, but I wanted to give a semi-realistic impression of the huge complexity of this volume:
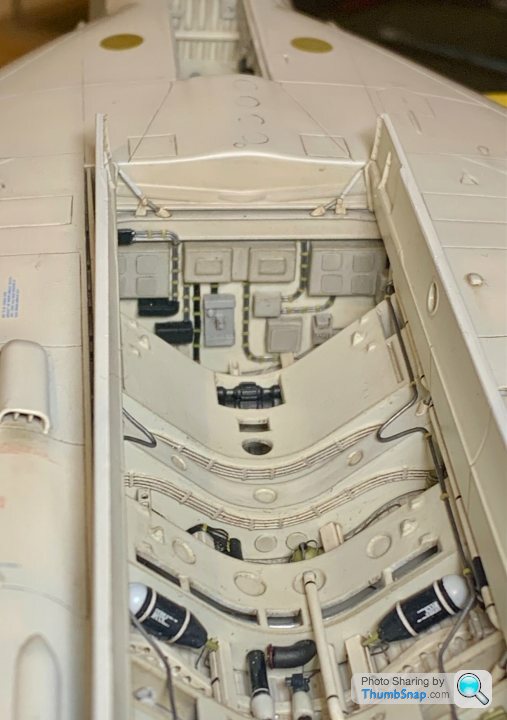
I also 3D-printed some hydraulic and electrical lines to fit on the faces of the spar arches:
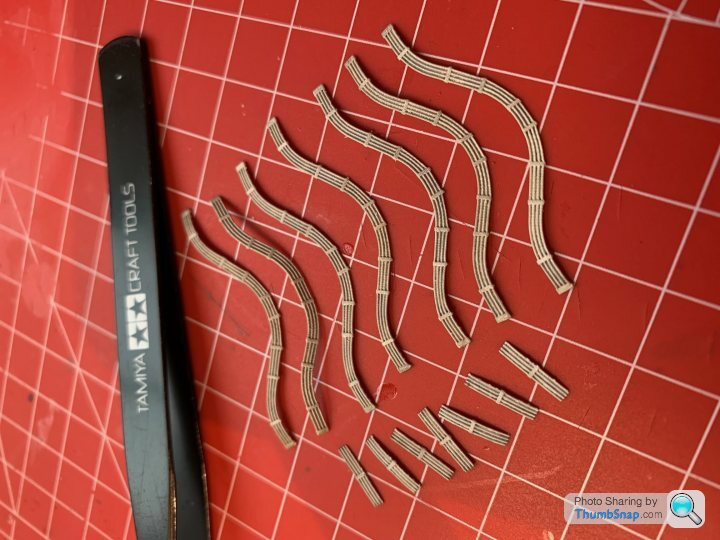
And some stiffeners for the rear, with some crude lightening hole detail:
Currently piecing this lot together into the bomb-bay, trying not to damage the paint on top!


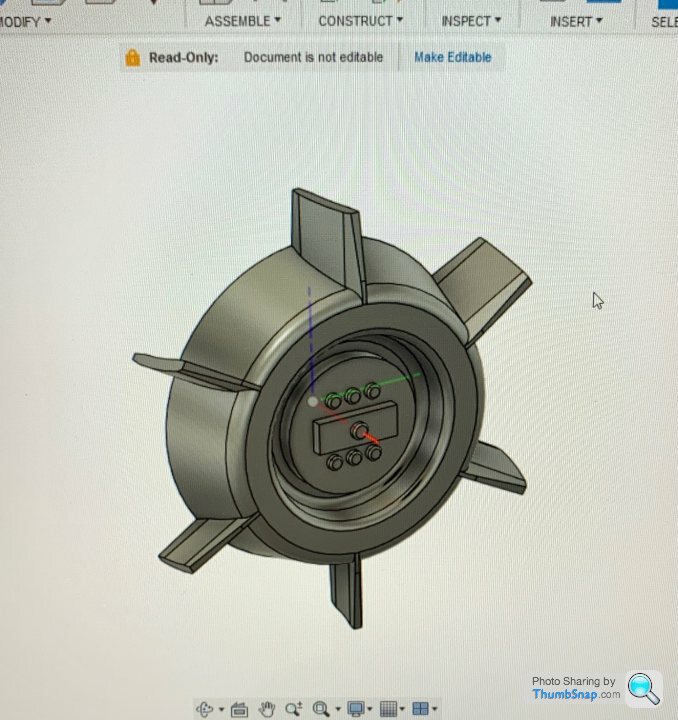
I also CADded up some debris shields for the main undercarriage bogies:
Still need some finishing, but look OK.
Cheers!
So I thought I'd add some details. I should have done it before assembly I guess, but I dont know, it's delayed the completion of the model and will be invisible anyway.
I raided the spares box to find things that could look vaguely like hydraulic fittings, accumulators and electrical boxes. I cobbled them together with lead wire and ended up with this lot. Some of the larger features are realistic, some not so much, but I wanted to give a semi-realistic impression of the huge complexity of this volume:
I also 3D-printed some hydraulic and electrical lines to fit on the faces of the spar arches:
And some stiffeners for the rear, with some crude lightening hole detail:
Currently piecing this lot together into the bomb-bay, trying not to damage the paint on top!
I also CADded up some debris shields for the main undercarriage bogies:
Still need some finishing, but look OK.
Cheers!
RacingPete said:
What attention to detail... and perseverance - thanks for sharing the latest update - does look good.
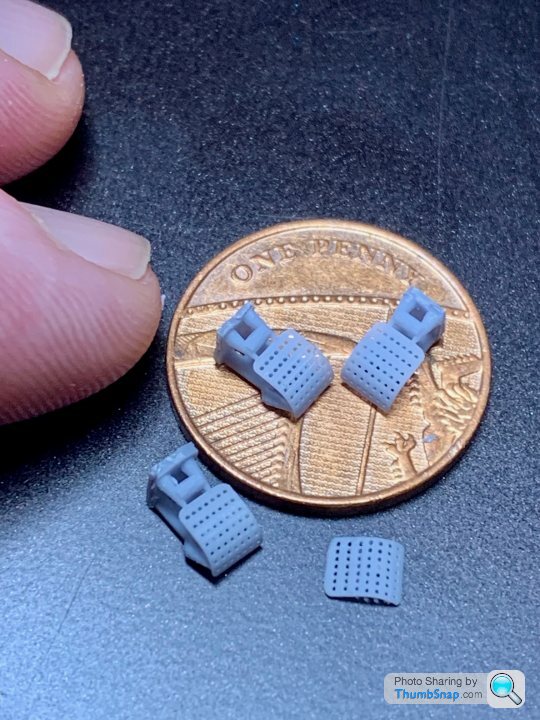
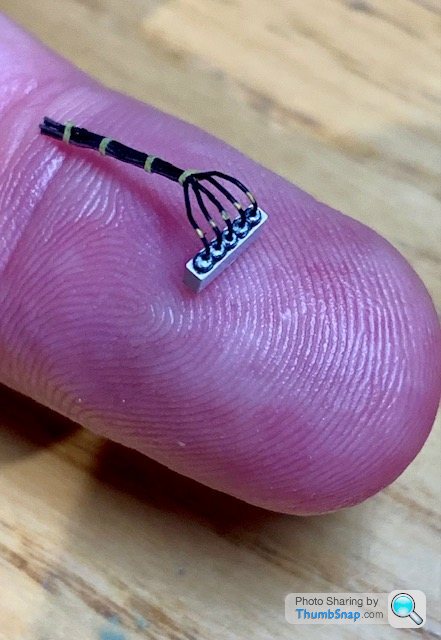
Thanks Pete!A few more detail parts under way: CADed up some bomb fuse turbines that someone on the V-Bomber FB page posted images of:
Getting to the point where the details are 100ths of a mm, and the printer won't quite pick them up.
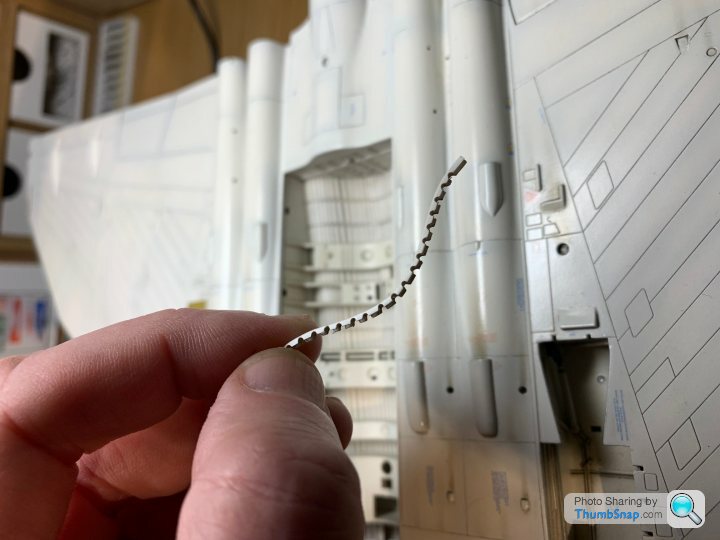
Also some electrical boxes, hydraulic manifolds, a gearbox type thing (not sure what it is, but fits inside one of the forward spars). Also made some black electrical harness, with thin masking tape for the binding:
And made this distinctive stiffener to go on the stbd. side of the bomb-bay:

gruffgriff said:
Great! Welcome back!
Now, parked on a mirror won't cut it, suspended from the ceiling a bit my-first-plane-model...how does one display this great underside work without resorting to a dug-in and flipped landing mishap diorama?!
Mounted vertically on four Perspex rods up the engines perhaps.Now, parked on a mirror won't cut it, suspended from the ceiling a bit my-first-plane-model...how does one display this great underside work without resorting to a dug-in and flipped landing mishap diorama?!
Then again when it’s in the loft along with the Lancaster it’ll all be irrelevant

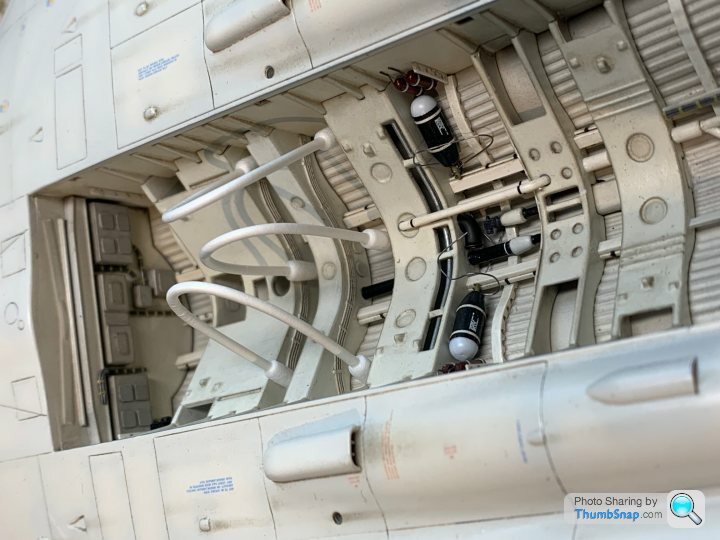
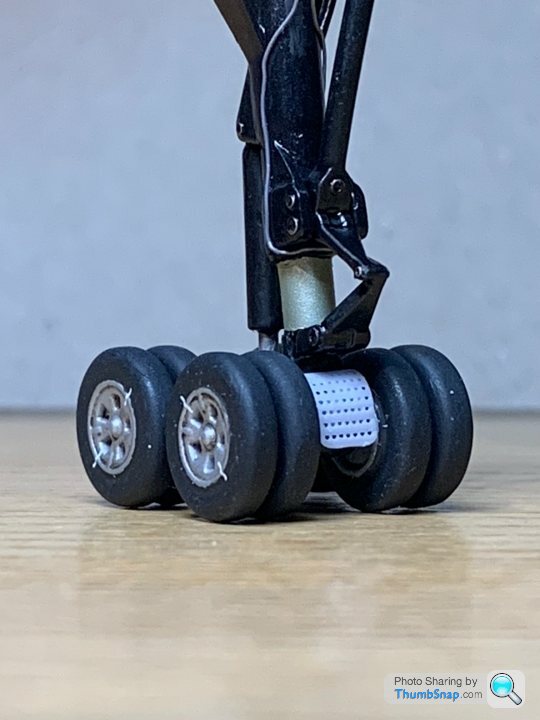
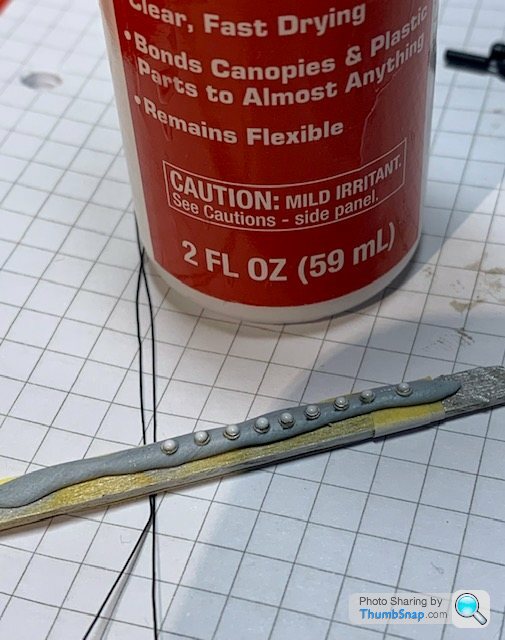
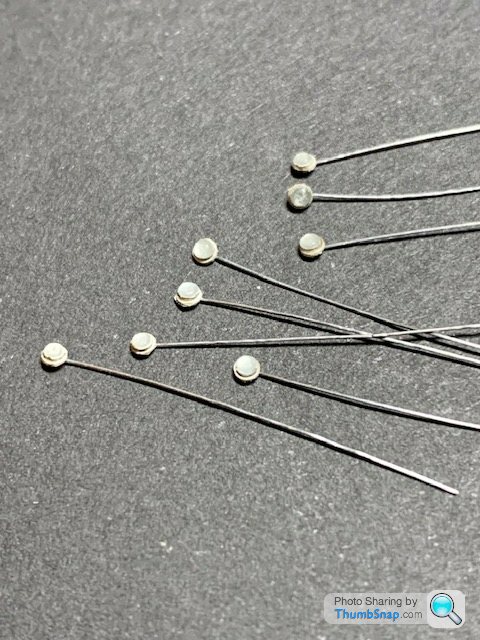
Continuing with adding some obvious details Airfix have missed - this time the hydraulic separators that fit behind the main gear legs. 3D printed with brass level indicator rods:
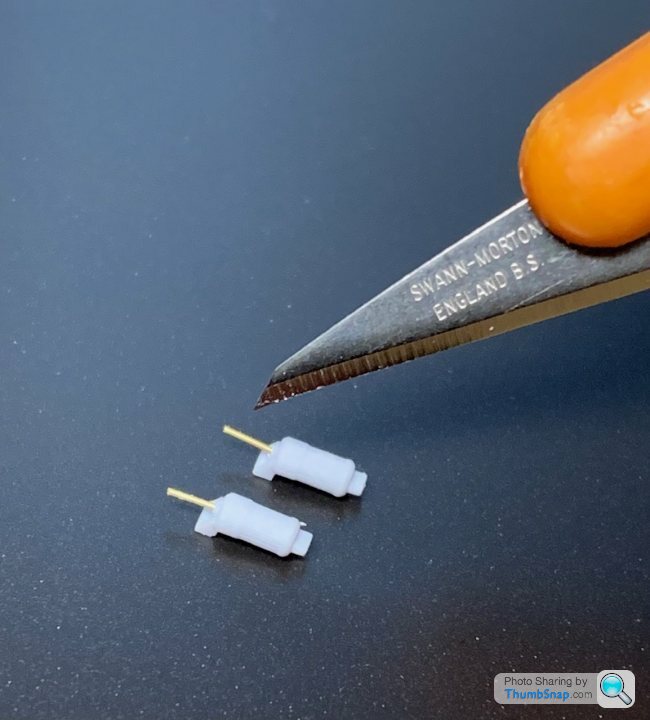
A bit big, maybe need scaling by x.95, but I think they'll do. Better than nothing there at all. Heres one Blu-tacked in place:
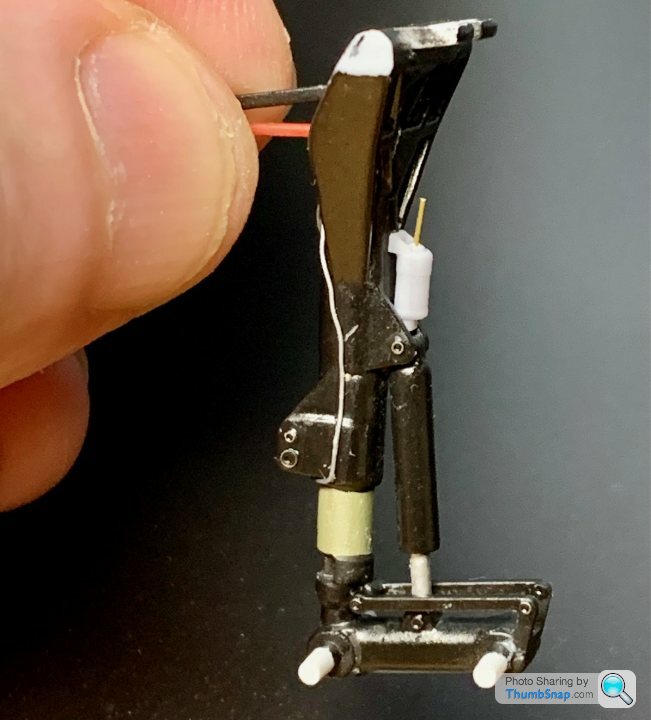
The brake lines still need their routing neatening-up and painting black.
A bit big, maybe need scaling by x.95, but I think they'll do. Better than nothing there at all. Heres one Blu-tacked in place:
The brake lines still need their routing neatening-up and painting black.
Few more bits:
Air brake motors and gearbox 3D printed and fitted into the front arch (not that you can see much of it with the bombs fitted, but it's there:
And scratch-built the parts for the bomb-door actuators. Most of them are cut-down to glue onto flat surfaces, which is something I could have addressed if I'd opted to detail the bomb-bay earlier. Still, they are better than nothing:
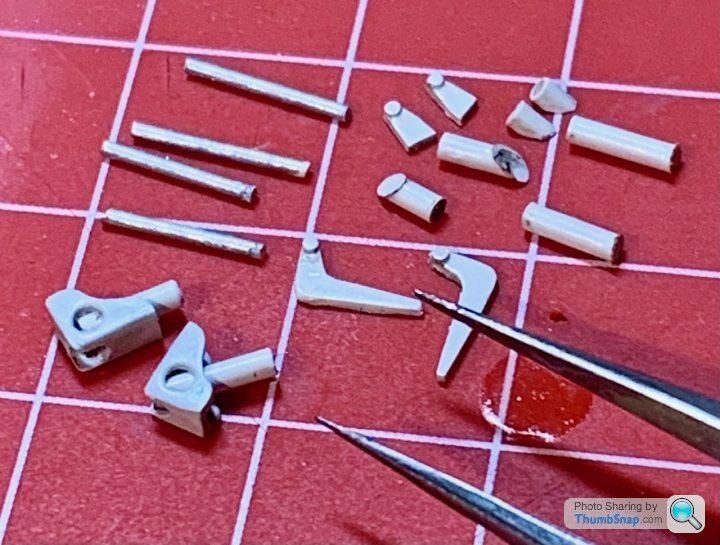
Here are the two mid door actuators fitted:
I'll let these set, then do the front levers and actuators tomorrow.
Air brake motors and gearbox 3D printed and fitted into the front arch (not that you can see much of it with the bombs fitted, but it's there:
And scratch-built the parts for the bomb-door actuators. Most of them are cut-down to glue onto flat surfaces, which is something I could have addressed if I'd opted to detail the bomb-bay earlier. Still, they are better than nothing:
Here are the two mid door actuators fitted:
I'll let these set, then do the front levers and actuators tomorrow.
Yertis said:
Amazing modelling. When I look at your work I don't know whether to feel inspired or demoralised 
To be fair I’m the demoralised one with modelling at the moment. Currently building three Airfix kits, and all of them require tedious work and re-work to bring them up to even 1990’s standards.

molineux1980 said:
Regbuser said:
I genuinely burst out laughing at my desk with that comment and photo, great work. :-)And huge kudos to Dr on the Vulcan, kept me entertained for half hour on a paticularly dull shift.
Can't wait to see it finished
Blackpuddin said:
Amazing thread, thank you. A propos of nothing but one of the older members of my golf club was a Vulcan pilot, sadly he died a few days ago.
No worries. Yep, these guys are getting fewer ad fewer. The family and I went to stay on Skomer Island last July for a couple of nights. It's a small island off the Pembrokeshire coast, uninhabited apart from some ecology researchers, a few visitors (if you're lucky enough to get booked in in time) and tens of thousands of seabirds and rabbits. One of the other overnight guests was an elderly gentleman - in his 90's; turned out he used to be a navigator on Valiant bombers (and one of the researchers was an ex RAF Puma pilot).Assembled the scratch-built forward bomb door mechanisms, and got them test-fitted. The struts still need attaching permanently, and weathering to match the rest:
In reality the actuators and levers are munted behind a cross-member, but this was modelled solid, so it'll have to do.
Still quite a bit to add to the lower panel of the front bulkhead.
In reality the actuators and levers are munted behind a cross-member, but this was modelled solid, so it'll have to do.
Still quite a bit to add to the lower panel of the front bulkhead.
Gassing Station | Scale Models | Top of Page | What's New | My Stuff