Airfix 1:72 Vulcan B.2
Discussion


RacingPete said:
anonymous said:
[redacted]
Just to say, as an RAF child who grew up a couple of doors down from Martin Withers at Finningley, I am enjoying the anecdotes alongside the build. 
IJWS15 said:
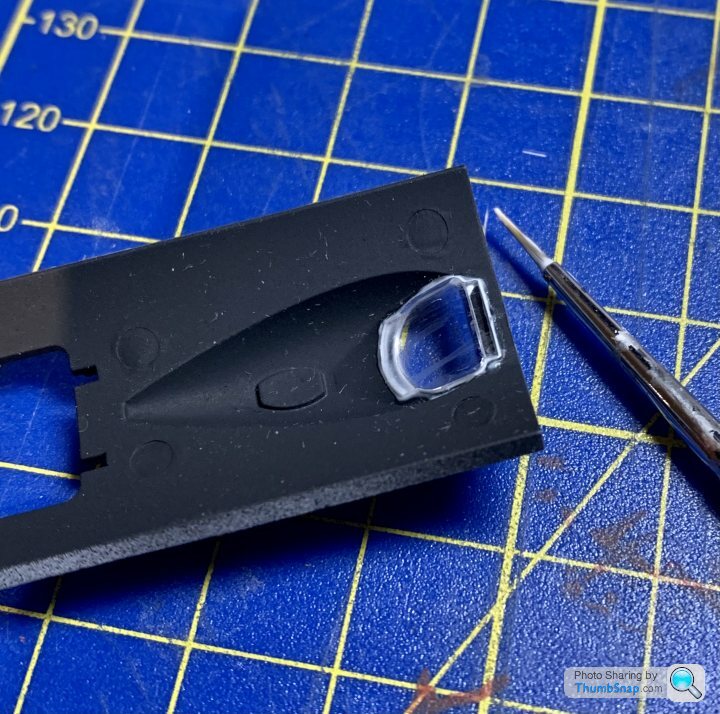
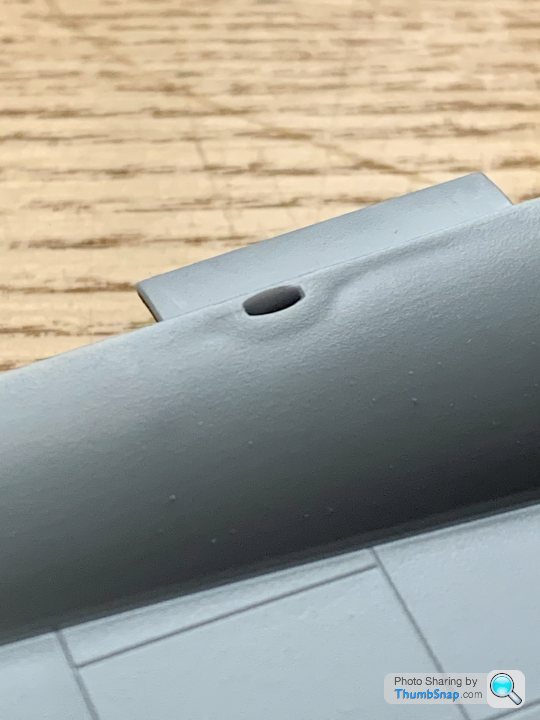
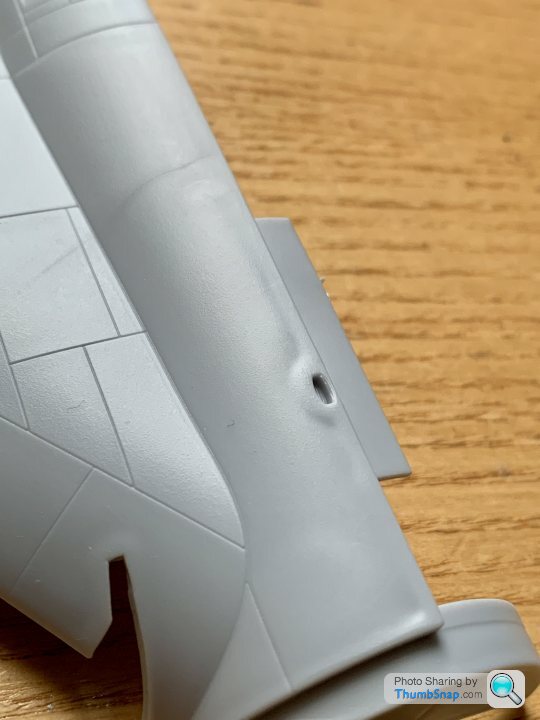
Thanks for those. Shows (as assumed) that the shoulder features on the wings were hollow, so I’ve drilled the fronts out:

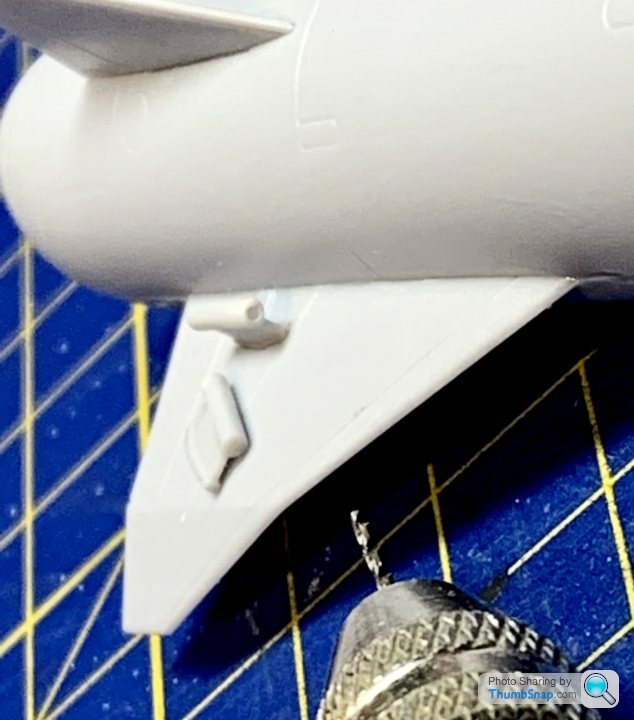
Not sure if the backs were also hollow, like some kind of Venturi, or whether they’re intakes. I’d assume they should be through-drilled, otherwise the rear would be streamlined?
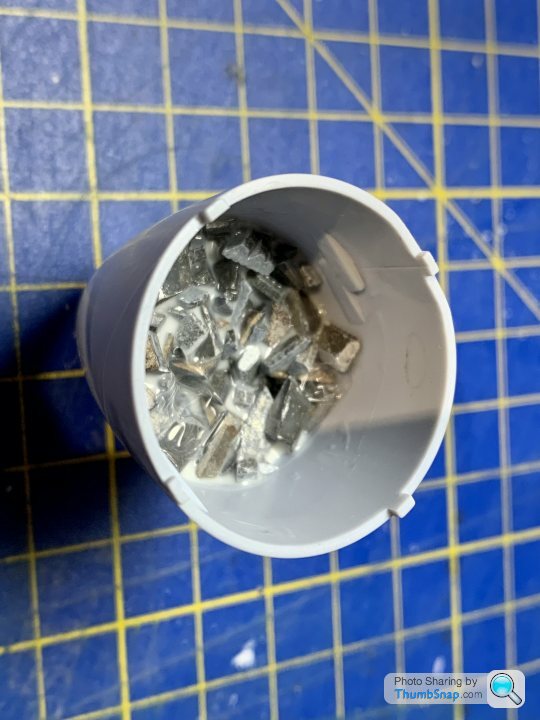
Instructions call for 40g of ballast in the nose, so I’ve cut some lead strip up:

and PVA’d it into the nose pod:
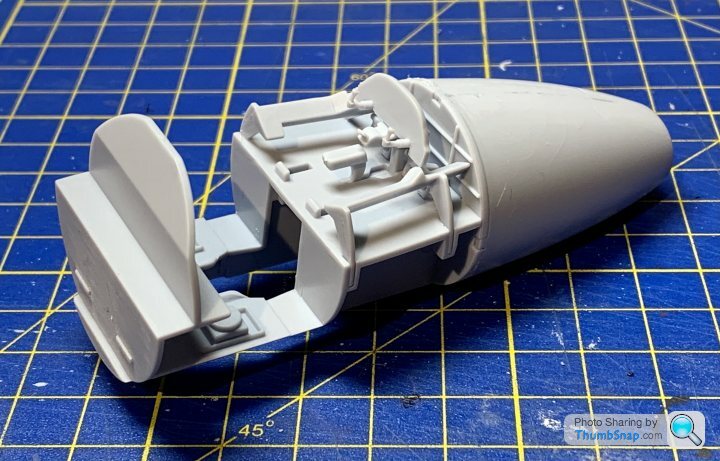
I rarely say ‘not worth doing’ regarding models, but in this case it’s not worth painting all the cockpit components separately, then putting them together in order to give some shade variation, so I went ahead and assembled the cockpit structure:

The seats, fire extinguishers and ladder parts are a bit different because they need detail painting, so I’ll fit them later with PVA.
Then fitted the ballast pod:
Also sprayed the u/c and bomb bays with Tamiya white primer:

It’s showed a few gaps up that I need to fill, but apart from that, they’ll be getting a coat of Vallejo Off-White, detail painting and weathering.
Also made some sanding sponges for the intakes:
Time will tell how much work they will need. The airbrush is hors de combat at the moment, so I’m a bit stuck for doing and detail work until a seal kit arrives next week.
and PVA’d it into the nose pod:
I rarely say ‘not worth doing’ regarding models, but in this case it’s not worth painting all the cockpit components separately, then putting them together in order to give some shade variation, so I went ahead and assembled the cockpit structure:
The seats, fire extinguishers and ladder parts are a bit different because they need detail painting, so I’ll fit them later with PVA.
Then fitted the ballast pod:
Also sprayed the u/c and bomb bays with Tamiya white primer:
It’s showed a few gaps up that I need to fill, but apart from that, they’ll be getting a coat of Vallejo Off-White, detail painting and weathering.
Also made some sanding sponges for the intakes:
Time will tell how much work they will need. The airbrush is hors de combat at the moment, so I’m a bit stuck for doing and detail work until a seal kit arrives next week.
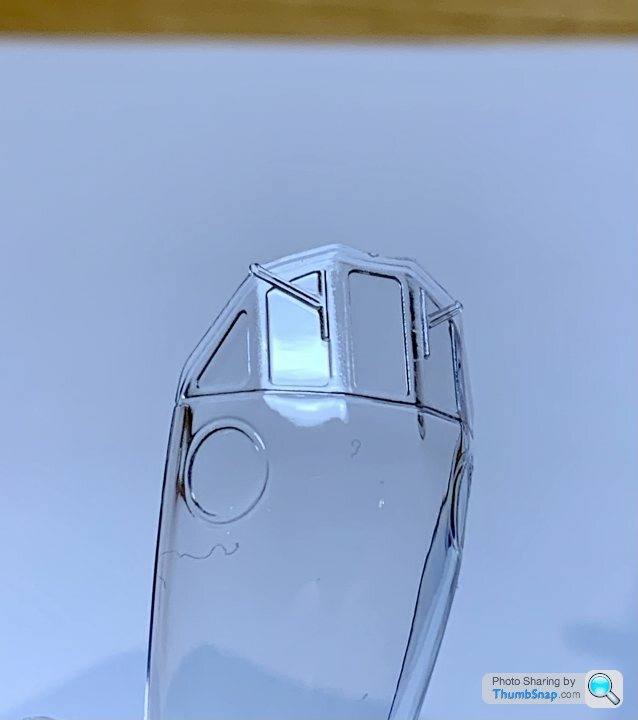
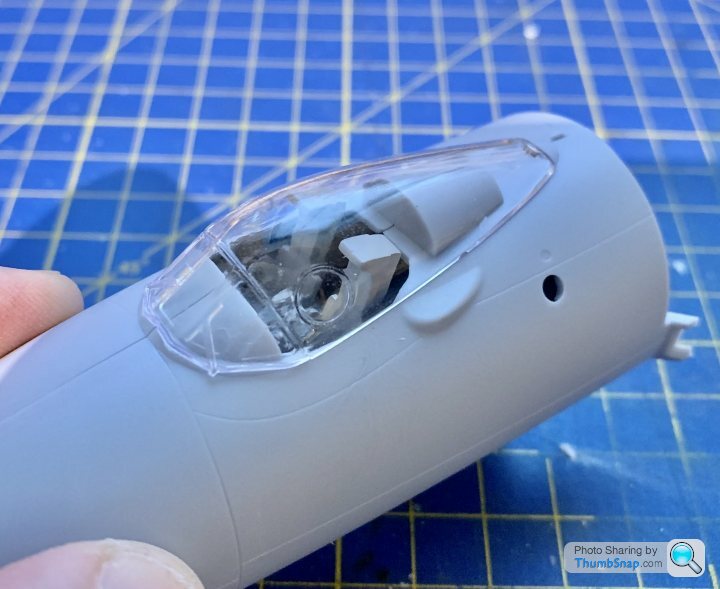
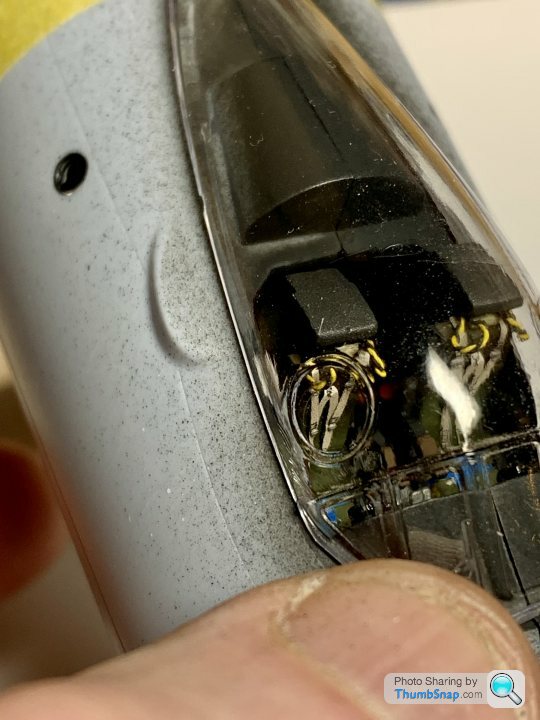
Airfix sent me a new canopy; this one seems spot-on:
So I gave it a coat of Klear to shiny it up a bit:
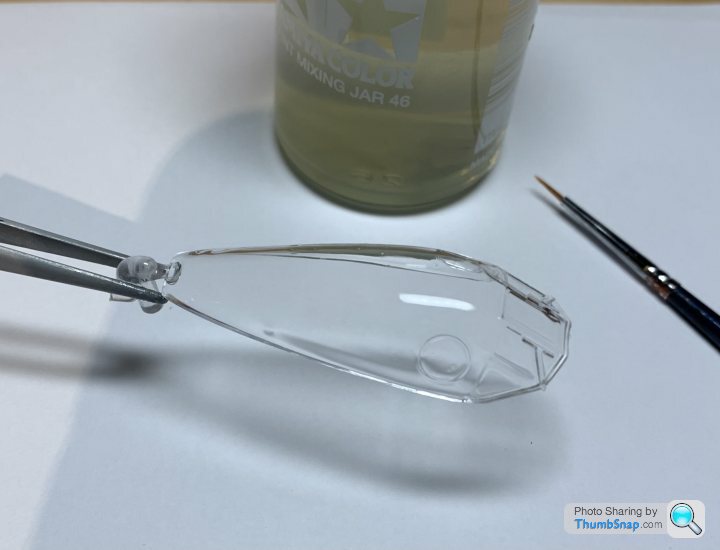
I guess fully detailed front and rear cockpits could be worthwhile if the fairing was separated from the windscreens. It would have to be displayed as ‘maintenance’, but of course the fairing could be put back in place as and when. Anyway, not for this one.
Made a start on painting the wheel wells and bomb bay in “off-white”:
I sliced off the small domes, which I think (hope) are lights. I’ll dot some silver on the remaining pads, followed by canopy PVA to form the transparent domes.
So I gave it a coat of Klear to shiny it up a bit:
I guess fully detailed front and rear cockpits could be worthwhile if the fairing was separated from the windscreens. It would have to be displayed as ‘maintenance’, but of course the fairing could be put back in place as and when. Anyway, not for this one.
Made a start on painting the wheel wells and bomb bay in “off-white”:
I sliced off the small domes, which I think (hope) are lights. I’ll dot some silver on the remaining pads, followed by canopy PVA to form the transparent domes.
Made a bit more progress with this one.Test fitting the seats showed that their sockets were either too tight, or the spigots too long, so I shortened them:

A test fit showed that the canopy still wouldn’t fit, even with the seats fully located. Swapping the seats round seemed to solve it - I assumed they were identical rather than handed:
Then on to the cockpit structure. I know from experience that airbrushing things with lots of nooks and crannies gives ‘dead spots’ where the spray can’t get to, so I brush painted those areas:

Then sprayed tyre black, and got on with detail painting the other stuff:
Then applied the instrument decals. Not sure why they’re usually bright white circles and lines - they never look like real instrument panels:

Anyway a few coats of Tamiya Smoke reduced the contrast a bit:
Then on to fitting the rear cockpit portholes. They come with small tags that makes location easy:
And the bomb sighting window:
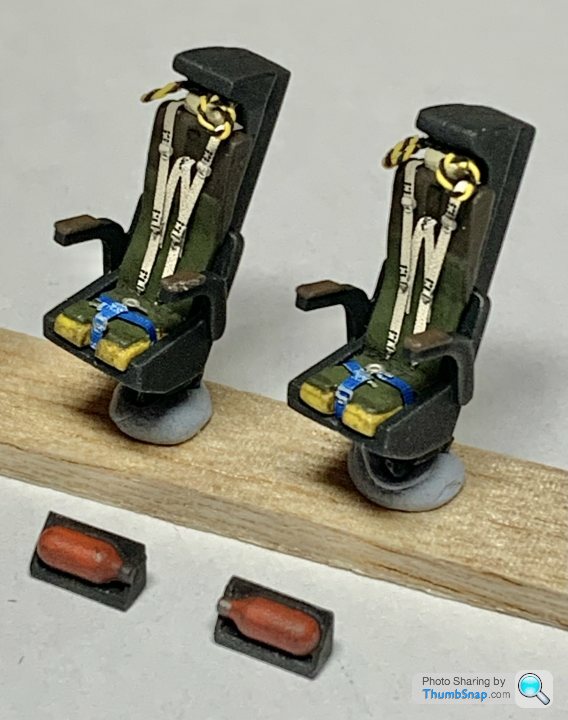
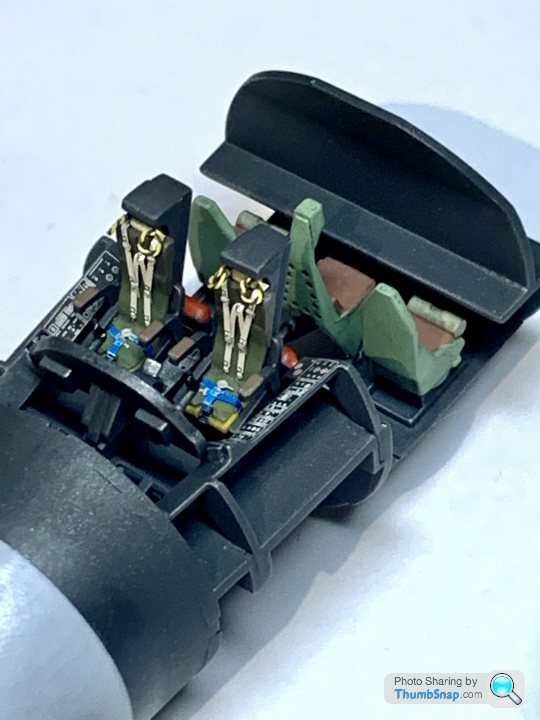
On to the pilot’s seats, after detail painting, I fitted the harnesses with PVA:
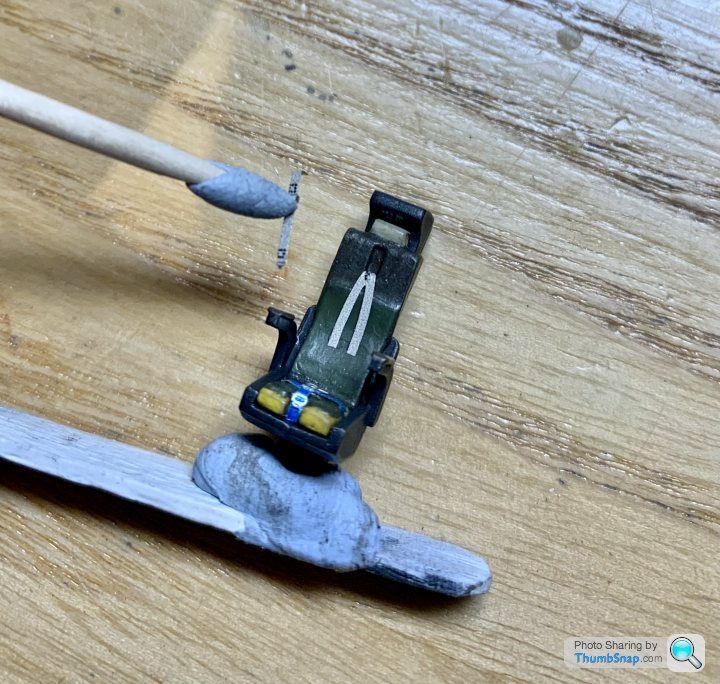
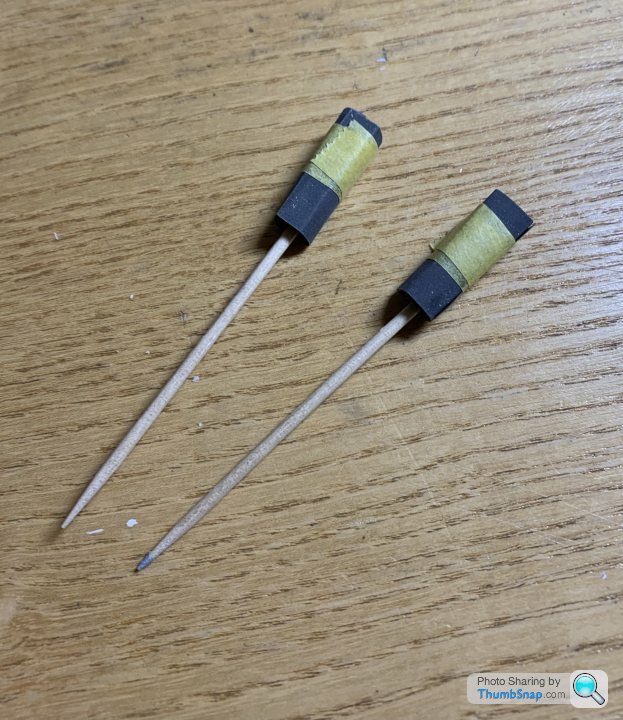
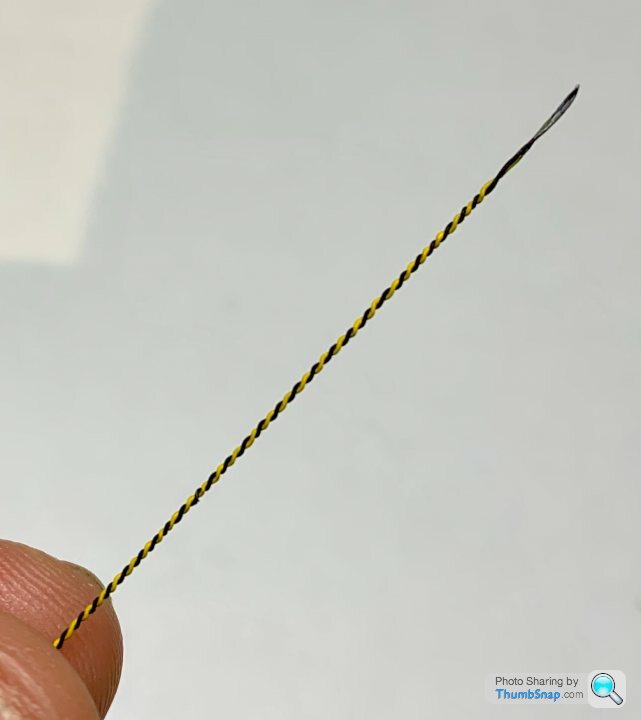
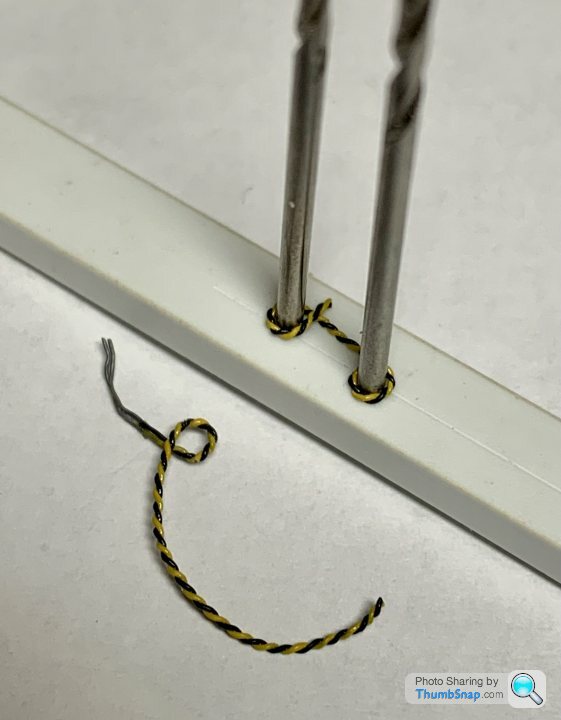
I noticed the ejection handle loops were missing, so just for something to try, made some out of painted 0.2mm lead wire:

Twisted together:
And formed to shape using a simple jig:

OK so they’re out of scale and a bit sketchy, but they were never going to be photo-etch standard, and they’re barely visible…
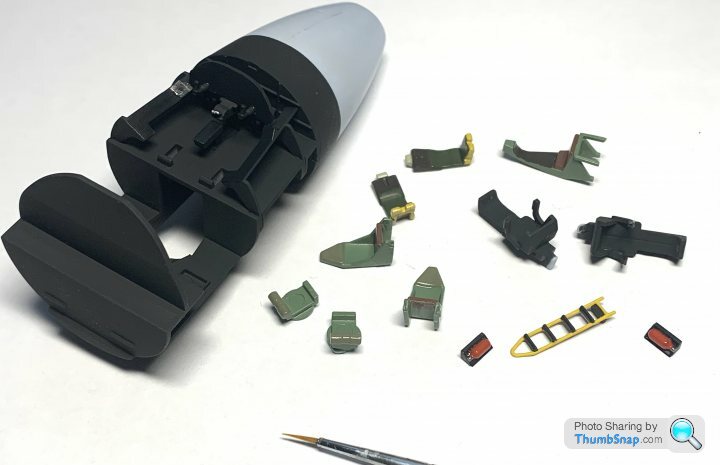
So here are the assembled ejector seats and fire extinguishers:
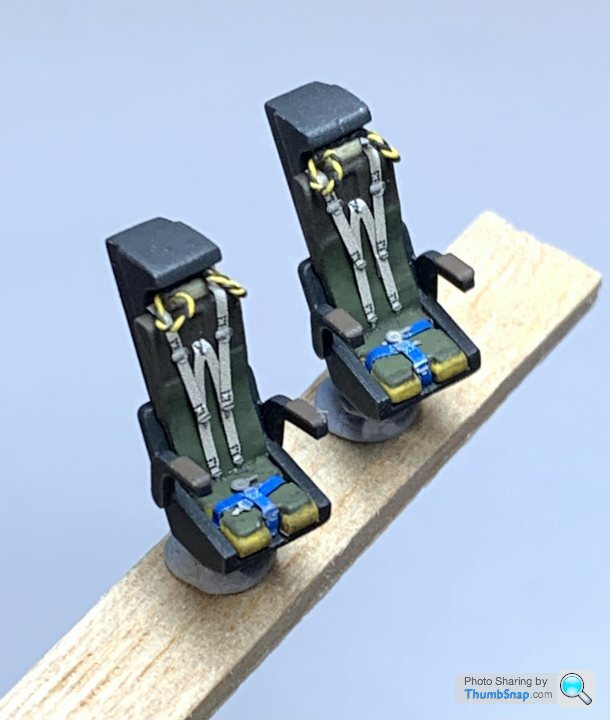
And with the other cockpit furniture completed:

Ready for assembly:
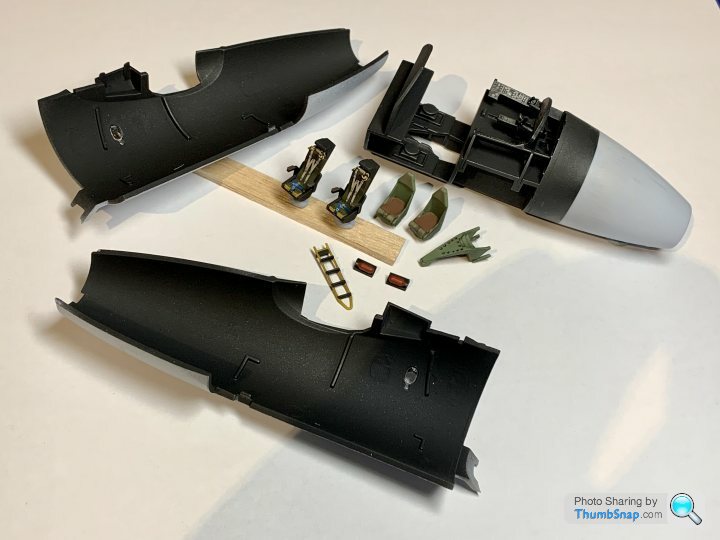
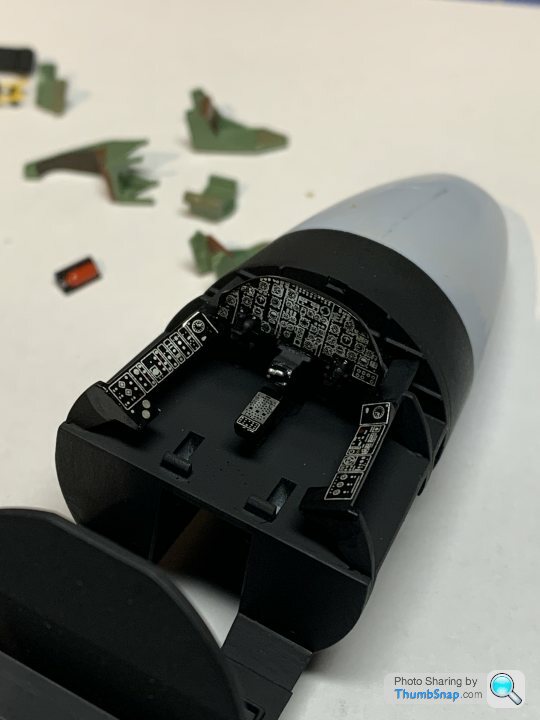
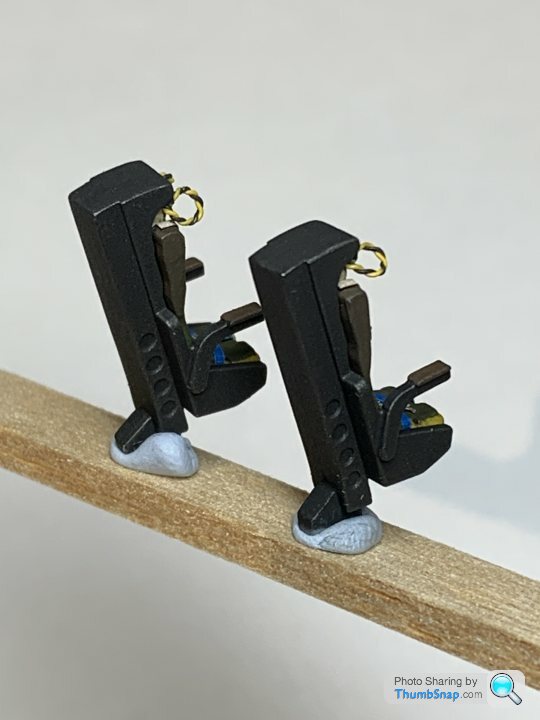
Cockpit inner pod finished:

In place in the forward fuselage halves:

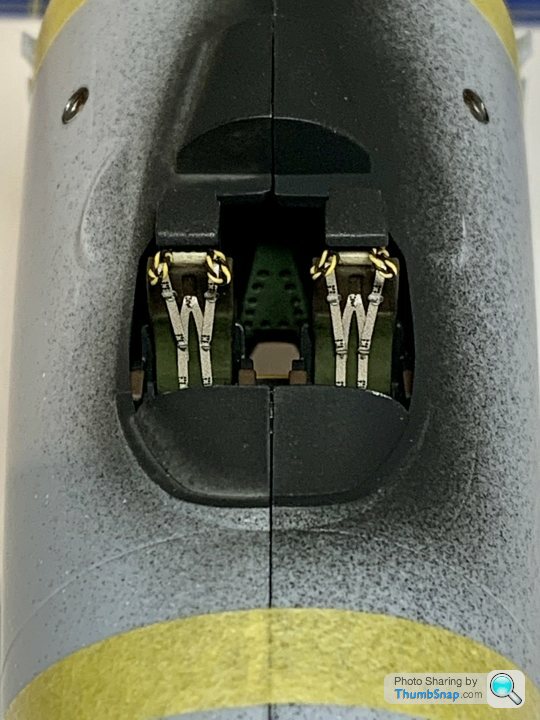
I’m glad at least some of the seat detail will be visible…if you look hard enough:
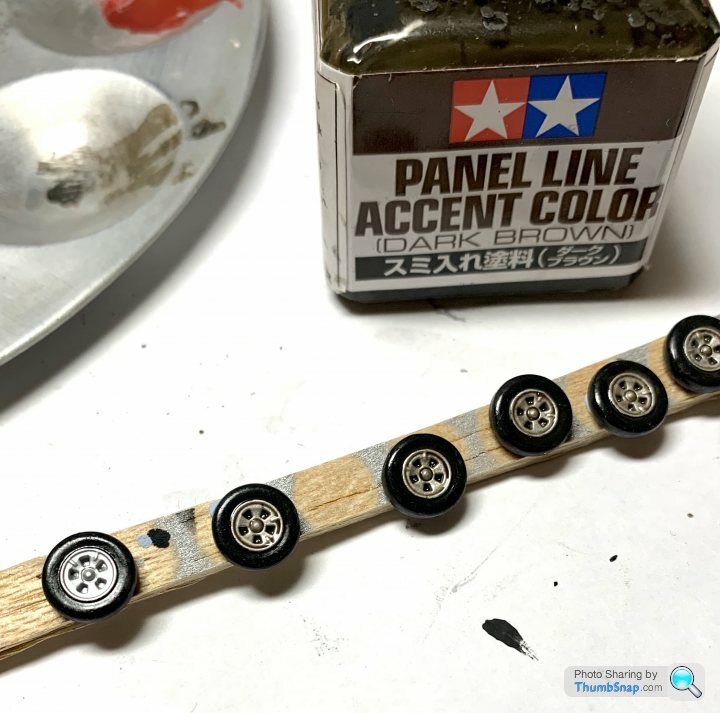
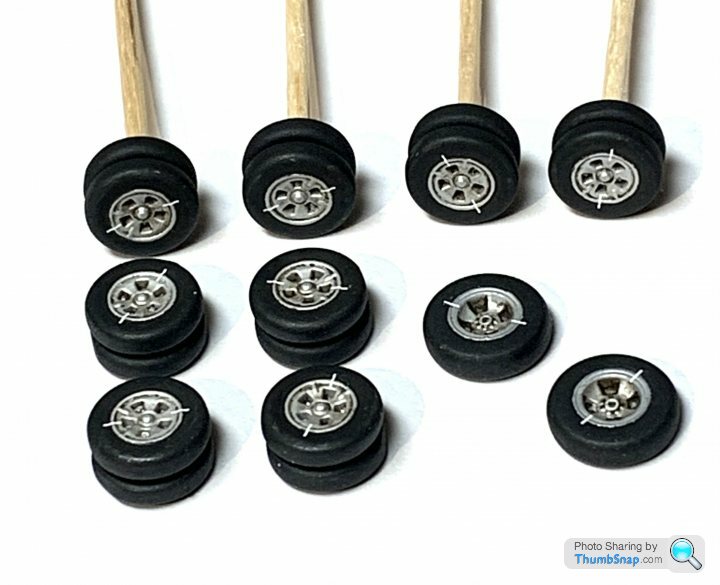
Then on to the wheels. I sprayed the hubs aluminium, Kleared them, then used my usual technique of gradually building up very thin black paint, capillaried around the hub grooves:
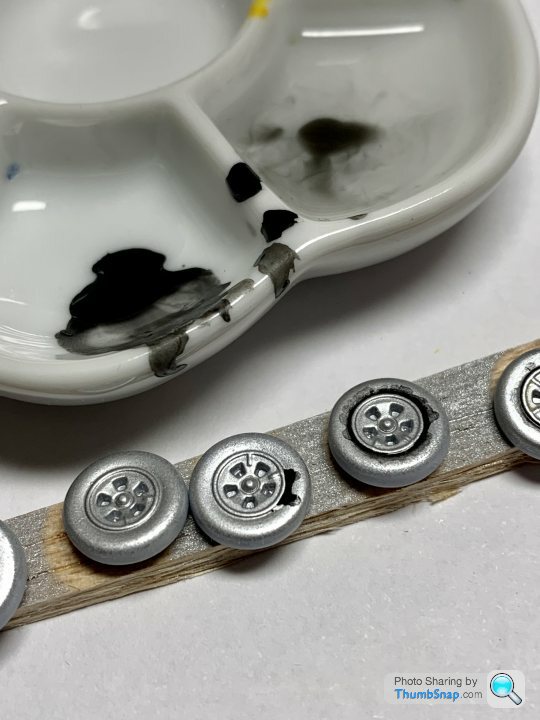
It’s then a simple matter of hand painting up to the defined edge, which is far enough away from the aluminium to avoid the risk of smudges. That’s for tomorrow though.
A test fit showed that the canopy still wouldn’t fit, even with the seats fully located. Swapping the seats round seemed to solve it - I assumed they were identical rather than handed:
Then on to the cockpit structure. I know from experience that airbrushing things with lots of nooks and crannies gives ‘dead spots’ where the spray can’t get to, so I brush painted those areas:
Then sprayed tyre black, and got on with detail painting the other stuff:
Then applied the instrument decals. Not sure why they’re usually bright white circles and lines - they never look like real instrument panels:
Anyway a few coats of Tamiya Smoke reduced the contrast a bit:
Then on to fitting the rear cockpit portholes. They come with small tags that makes location easy:
And the bomb sighting window:
On to the pilot’s seats, after detail painting, I fitted the harnesses with PVA:
I noticed the ejection handle loops were missing, so just for something to try, made some out of painted 0.2mm lead wire:
Twisted together:
And formed to shape using a simple jig:
OK so they’re out of scale and a bit sketchy, but they were never going to be photo-etch standard, and they’re barely visible…
So here are the assembled ejector seats and fire extinguishers:
And with the other cockpit furniture completed:
Ready for assembly:
Cockpit inner pod finished:
In place in the forward fuselage halves:
I’m glad at least some of the seat detail will be visible…if you look hard enough:
Then on to the wheels. I sprayed the hubs aluminium, Kleared them, then used my usual technique of gradually building up very thin black paint, capillaried around the hub grooves:
It’s then a simple matter of hand painting up to the defined edge, which is far enough away from the aluminium to avoid the risk of smudges. That’s for tomorrow though.
StonedRollin said:
You've said that this won't be to your usual attention to detail but still absolutely different class and thanks for taking the time and effort to share. It's a joy to see the updates.
Thanks very much.I’ll still be paying attention to construction/finishing detail as much as any other model, but I won’t be adding anything to the base kit, apart from some simple things like the seat harnesses and perhaps the odd drilled-out pipe and undercarriage brake line (in other words, stuff that would still class it as a “standard kit” in an an IPMS competition).
Luckily it’s a fairly featureless airframe in real life, and most of the small stuff like antennae and some pretty small undercarriage details are already provided in the kit.
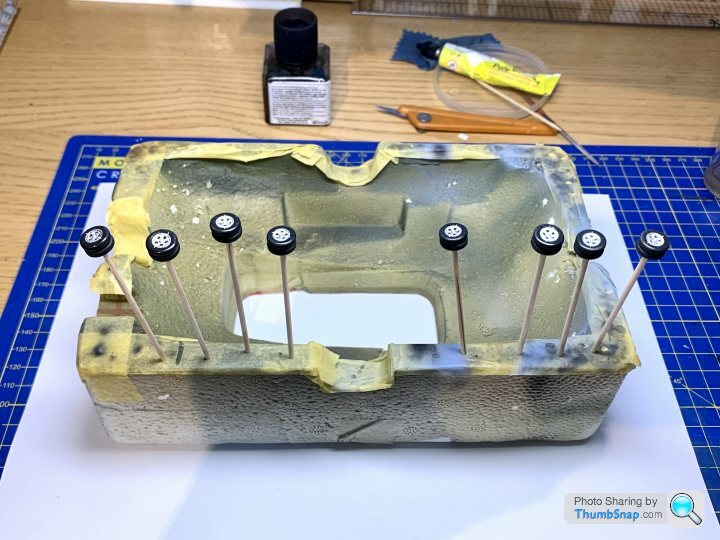
Continued with the 16 main wheels - added a dark wash:
Tyre slippage marks are included in the decals, maybe a bit long, but a nice touch:

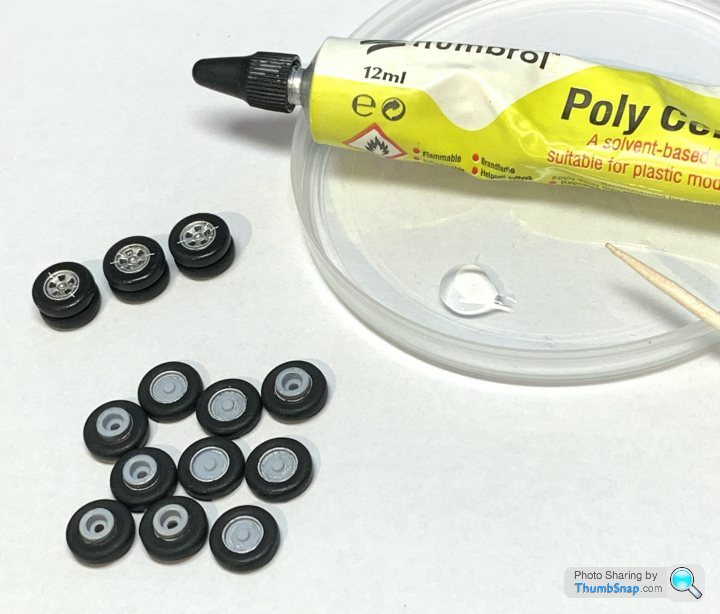
Glued the pairs together:
Then a final coat of Matt:
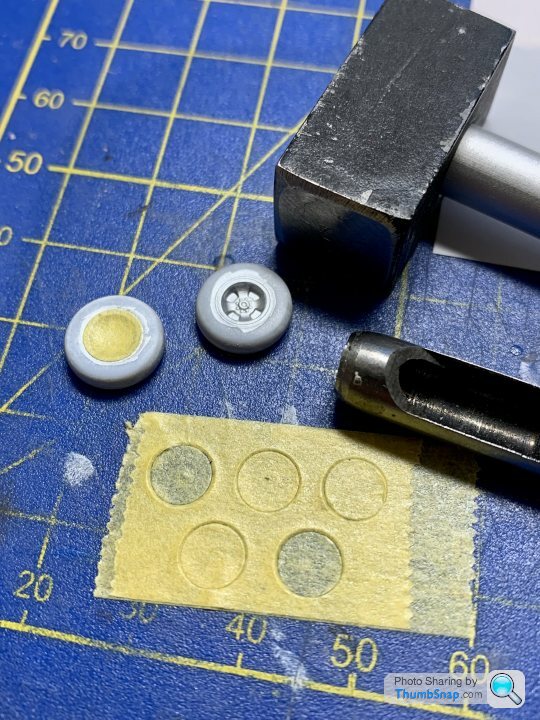
The engraved detail on the wheels is a bit soft, and I needed to mask the nose wheels, because there wasn’t enough of a groove to wick the tyre black into. Luckily one of my hole punches was just the right diameter:
All done:
Tyre slippage marks are included in the decals, maybe a bit long, but a nice touch:
Glued the pairs together:
Then a final coat of Matt:
The engraved detail on the wheels is a bit soft, and I needed to mask the nose wheels, because there wasn’t enough of a groove to wick the tyre black into. Luckily one of my hole punches was just the right diameter:
All done:
Made a start on filling the 1000 lb bomb seams. They’re not too bad, but a bead of Mr.Surfacer will get them perfect.
The airframe upper and lower halves must be the biggest individual kit parts I’ve ever seen, possibly with the exception of an old Revell Cutty Sark hull.
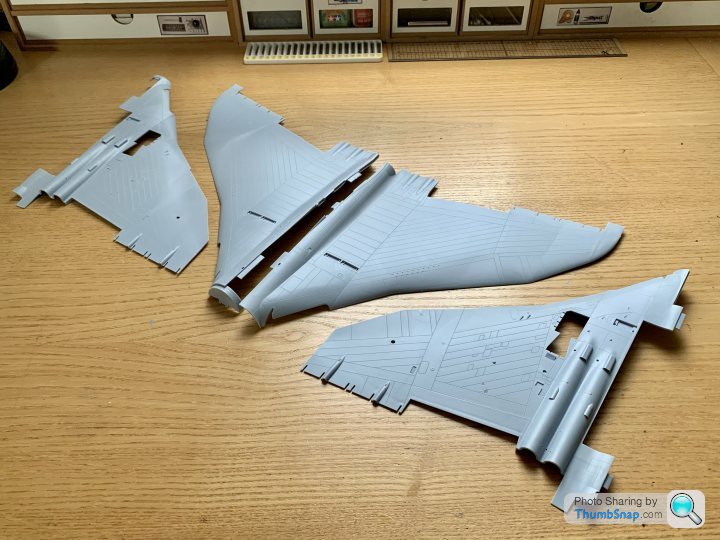
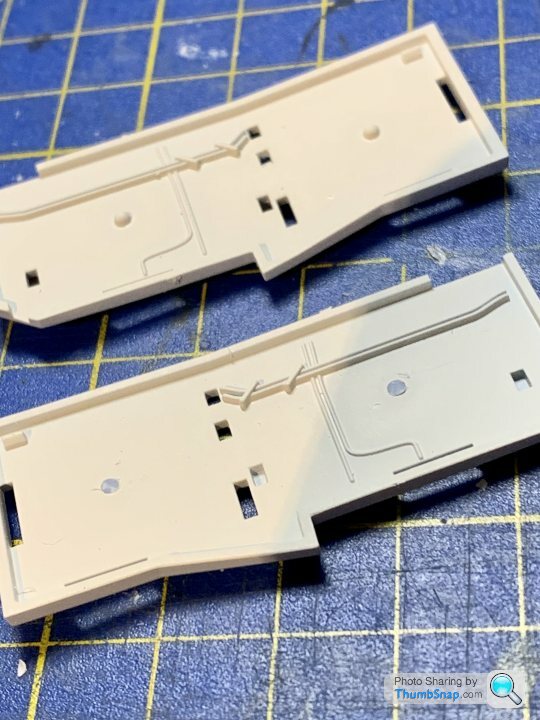
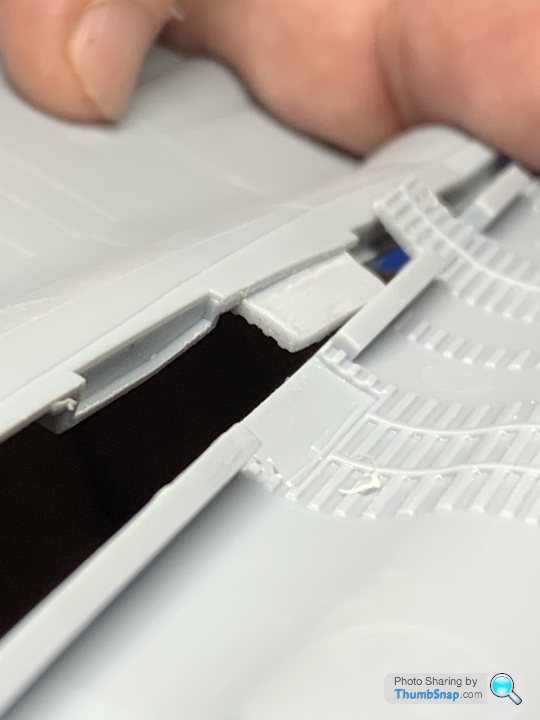
I was hoping this one would go together fairly quickly, but a closer look at the main airframe pieces revealed some significant sink marks that need dealing with:
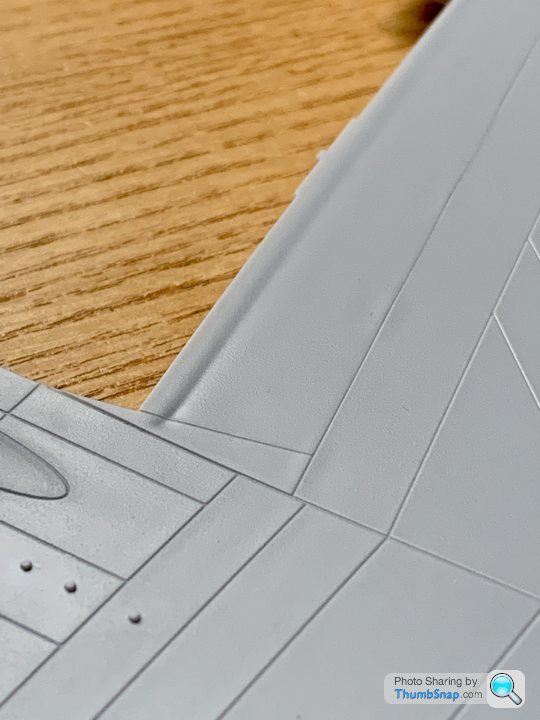

The airframe halves locate with tabs and pockets, some of which are in the vicinity of the bomb-bay roof detail. After trial fitting, it became clear that a lot of work is going to be needed to get these to fit neatly. It seems like the pockets are much too shallow for the thickness of the tabs:
The airframe upper and lower halves must be the biggest individual kit parts I’ve ever seen, possibly with the exception of an old Revell Cutty Sark hull.
I was hoping this one would go together fairly quickly, but a closer look at the main airframe pieces revealed some significant sink marks that need dealing with:
The airframe halves locate with tabs and pockets, some of which are in the vicinity of the bomb-bay roof detail. After trial fitting, it became clear that a lot of work is going to be needed to get these to fit neatly. It seems like the pockets are much too shallow for the thickness of the tabs:


I wasn’t too happy with the bomb bay/spar assembly weathering, so I’ve stripped it back to bare plastic and will have another go.
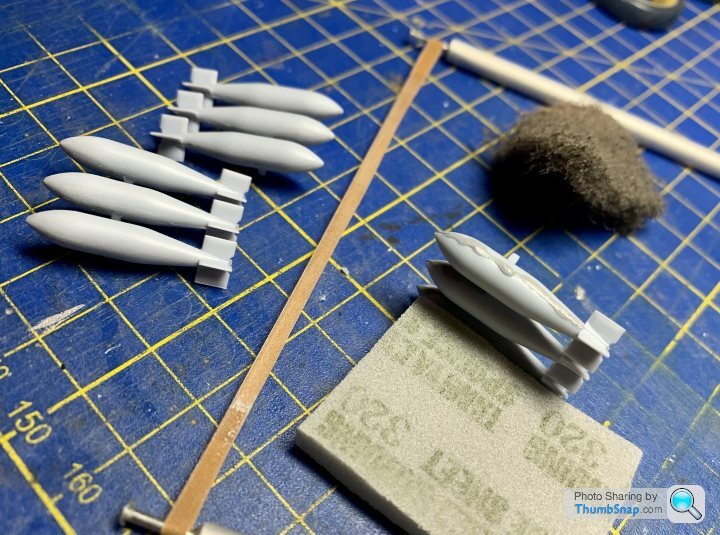
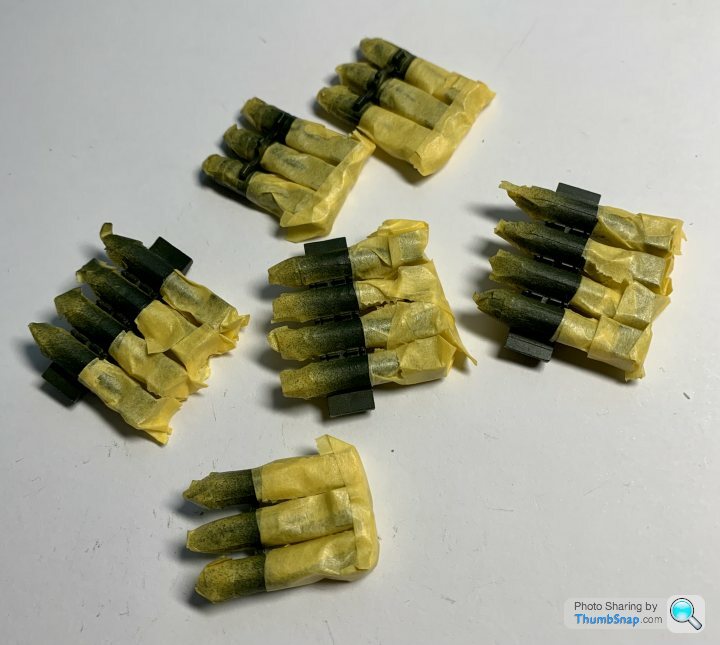
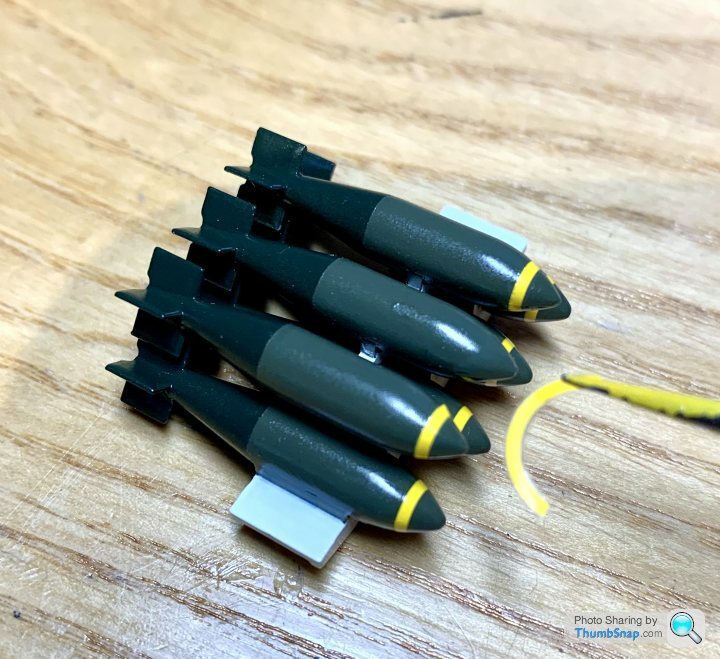
Also today, painted the 1000lb bombs in two-tone green, one for the bomb, one for the tail cone and fins:
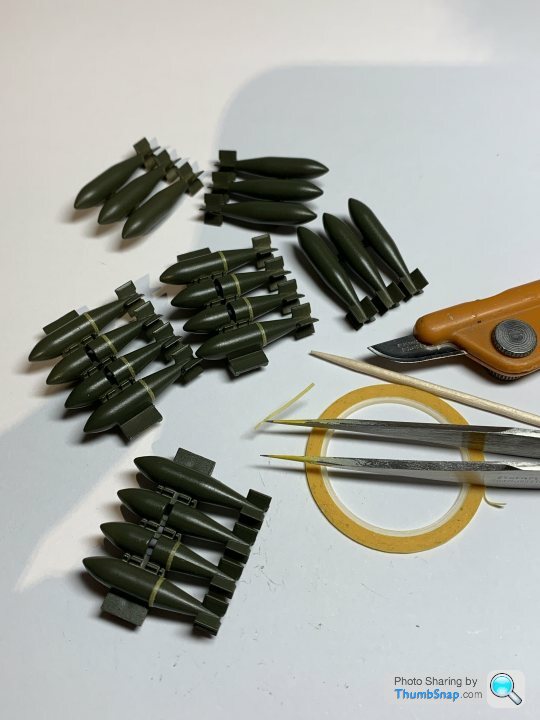
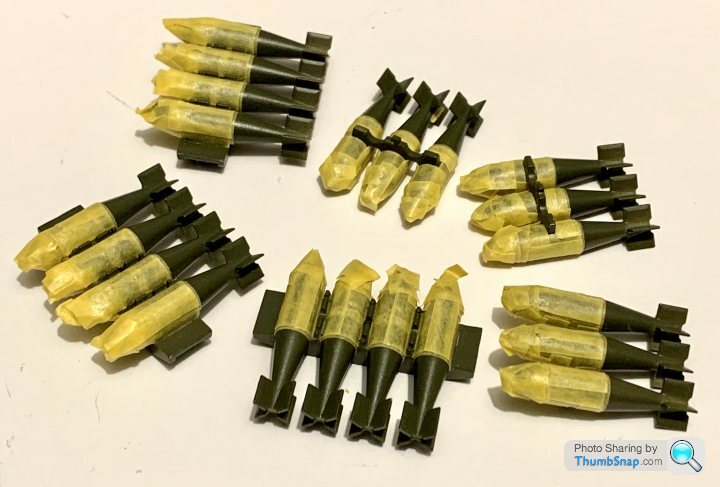
Took a lot of tedious masking, and the off-white structures are still to be done. I hope I’ve not used the same green on both parts…
Also today, painted the 1000lb bombs in two-tone green, one for the bomb, one for the tail cone and fins:
Took a lot of tedious masking, and the off-white structures are still to be done. I hope I’ve not used the same green on both parts…


Thanks, yes they are water slide decals. They overlapped at the ends by a few mm, so it took some coaxing with the scalpel, tweezers and a cocktail stick to get them to overlap perfectly. It would have been nice if they were printed to the exact length, because - in theory - if you then get the ends to butt up to each other, that would have automatically placed them at the right distance behind the nose.
wolfracesonic said:
I watched ‘Thunderball’ on Saturday night and thought of this thread; you’re ejection handle loops are very accurate!
Ha ha - we watched it too on Saturday night! I got the dvd because for some reason as an 8 or 9 year old, my son was obsessed with it. I thought we’d watch it one more time, just for the Vulcan bits. The skyhook scene at the end is pretty cool too.That was a good 1:1 mock-up they made for the sea bed scenes (apart from the bomb-bay door, as mentioned previously on here).
Trevatanus said:
dr_gn said:
I wasn’t too happy with the bomb bay/spar assembly weathering, so I’ve stripped it back to bare plastic and will have another go.
Also today, painted the 1000lb bombs in two-tone green, one for the bomb, one for the tail cone and fins:
Took a lot of tedious masking, and the off-white structures are still to be done. I hope I’ve not used the same green on both parts…
I Initially looked at this post and wondered what you had circled next to the tweezers Also today, painted the 1000lb bombs in two-tone green, one for the bomb, one for the tail cone and fins:
Took a lot of tedious masking, and the off-white structures are still to be done. I hope I’ve not used the same green on both parts…

Edited by dr_gn on Tuesday 21st December 11:25
Newarch said:
This is amazing, especially the level of work required even for quite small parts of the set. I must get an airbrush and have a go with some of my modest kit hoard (if you can call three or four kits a hoard).
I think the best advice would be to build a few models and hand paint everything. Vallejo model colour brushes nicely, especially if you apply it in slightly thinned coats with a good quality brush.Airbrushing can give a better finish, and you can get good effects like mottling and pre-shading, so long as everything is adjusted properly and the paint thinned etc etc. The downsides are that it’s a pretty big outlay for a good setup (airbrush, compressor, extraction, mask etc), it’s a new skill to learn, time consuming because of the masking usually required, and you can very easily end up frustrated. Of course if you’re after the best possible result, then go ahead.
I’ve always thought this guy’s videos are inspirational for hand painting and using basic modelling tools:
https://m.youtube.com/watch?v=oGZ4XKwBHVY
It would be good to do a “group build” where the rules are hand painting only, and no aftermarket details allowed (and a time limit!). Like the above really. I don’t think anyone could argue that his finished model doesn’t look incredibly good, never mind considering the fairly basic tools and materials he uses?

Newarch said:
dr_gn said:
I think the best advice would be to build a few models and hand paint everything. Vallejo model colour brushes nicely, especially if you apply it in slightly thinned coats with a good quality brush.
Airbrushing can give a better finish, and you can get good effects like mottling and pre-shading, so long as everything is adjusted properly and the paint thinned etc etc. The downsides are that it’s a pretty big outlay for a good setup (airbrush, compressor, extraction, mask etc), it’s a new skill to learn, time consuming because of the masking usually required, and you can very easily end up frustrated. Of course if you’re after the best possible result, then go ahead.
I’ve always thought this guy’s videos are inspirational for hand painting and using basic modelling tools:
https://m.youtube.com/watch?v=oGZ4XKwBHVY
It would be good to do a “group build” where the rules are hand painting only, and no aftermarket details allowed (and a time limit!). Like the above really. I don’t think anyone could argue that his finished model doesn’t look incredibly good, never mind considering the fairly basic tools and materials he uses?
I am pretty handy at brush painting models and figures, and use a few styles depending on the look I am going for. It was the professional airbrush finish I was interested in, although I accept this would take practice and patience to make it worthwhile.Airbrushing can give a better finish, and you can get good effects like mottling and pre-shading, so long as everything is adjusted properly and the paint thinned etc etc. The downsides are that it’s a pretty big outlay for a good setup (airbrush, compressor, extraction, mask etc), it’s a new skill to learn, time consuming because of the masking usually required, and you can very easily end up frustrated. Of course if you’re after the best possible result, then go ahead.
I’ve always thought this guy’s videos are inspirational for hand painting and using basic modelling tools:
https://m.youtube.com/watch?v=oGZ4XKwBHVY
It would be good to do a “group build” where the rules are hand painting only, and no aftermarket details allowed (and a time limit!). Like the above really. I don’t think anyone could argue that his finished model doesn’t look incredibly good, never mind considering the fairly basic tools and materials he uses?
On the subject of kit, can you use a general purpose compressor or do you need a proper airbrush compressor? I have some experience of spray painting vehicles but never used an airbrush before.
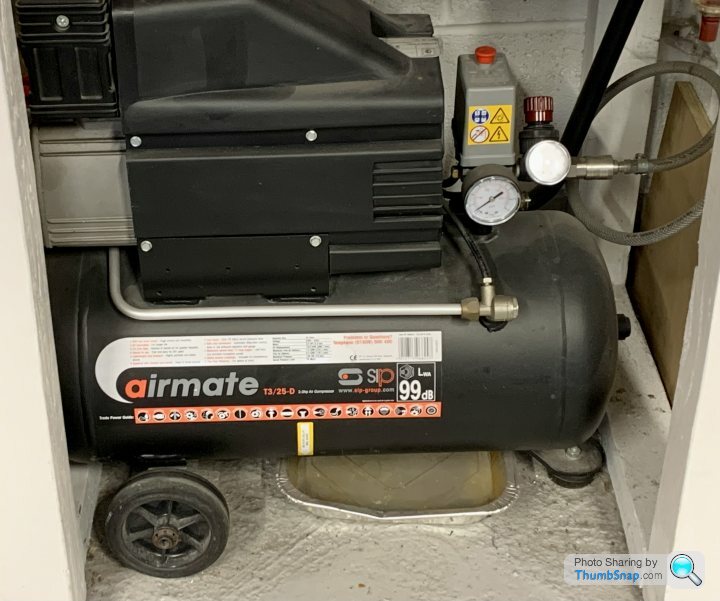
I use a garage compressor:
With a small regulator:
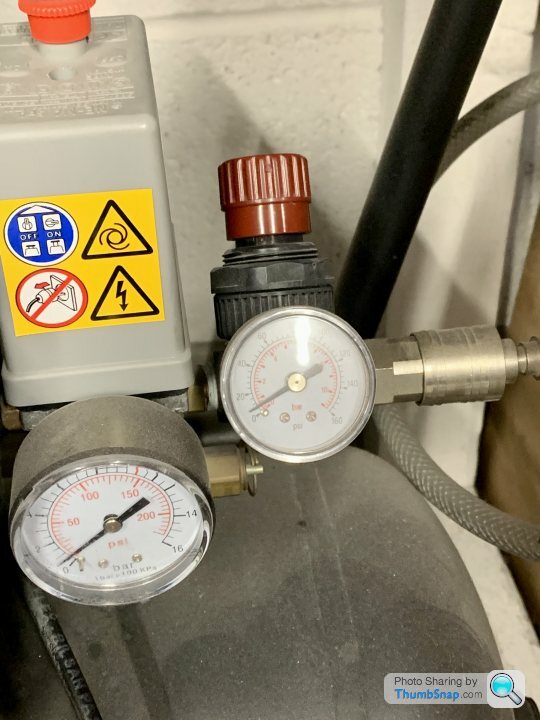
And small filter:
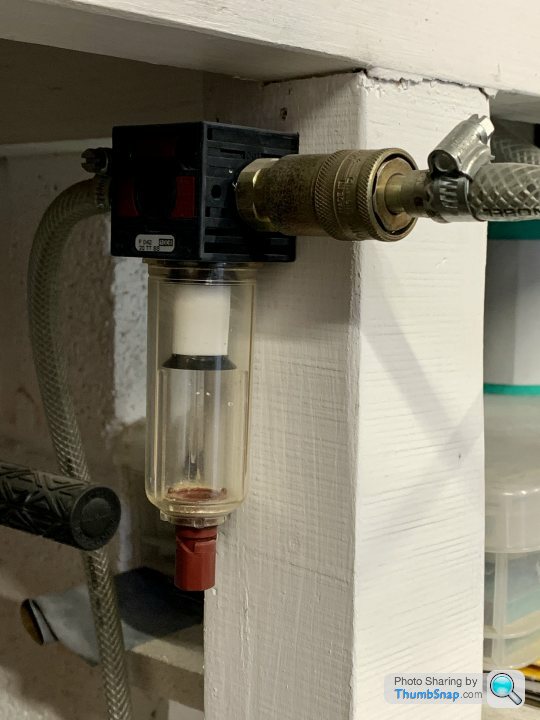
Piped to the bench to a quick-release adapter:
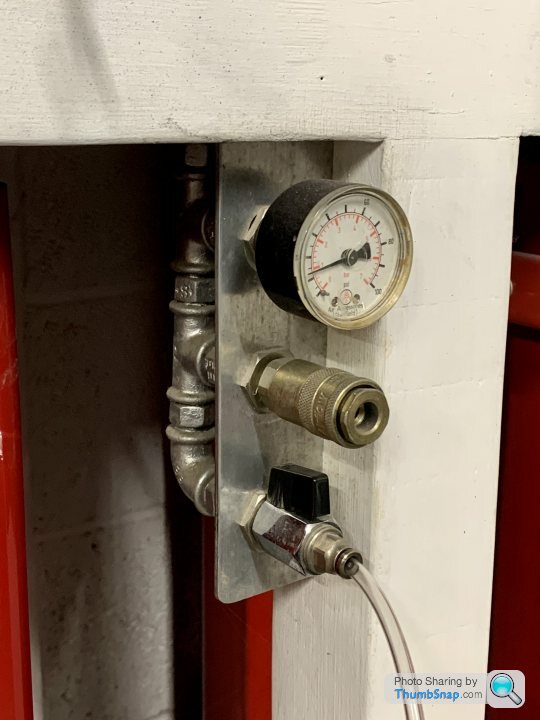
I also modified the airbrush, replacing the valve body with one which allows you to regulate the flow by turning a barrel on the input.
I always advise getting a quality airbrush, and be done with it, but others will disagree and advise getting a cheap Amazon special. If you already have a compressor etc, I would definitely go for a ‘name’ brand. It’s not like they’re thousands of pounds. End of the day the choice is yours.
Newarch said:
dr_gn said:
Apologies, for some reason I got the impression you were a beginner.
No apologies required. I can paint, but have minimal (adult) experience of model kits so your threads and advice are most useful, not to mention highly interesting.Thanks for the pictures of your set up, my compressor is about the same size. I might get an airbrush for Christmas.
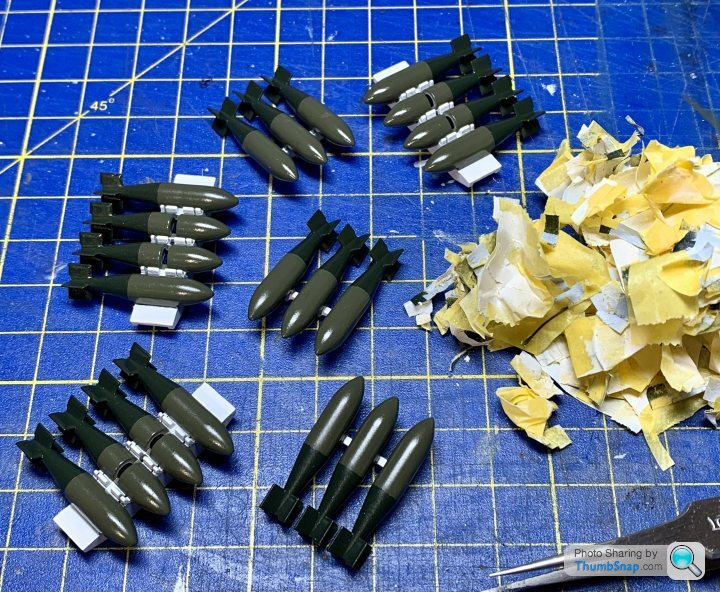
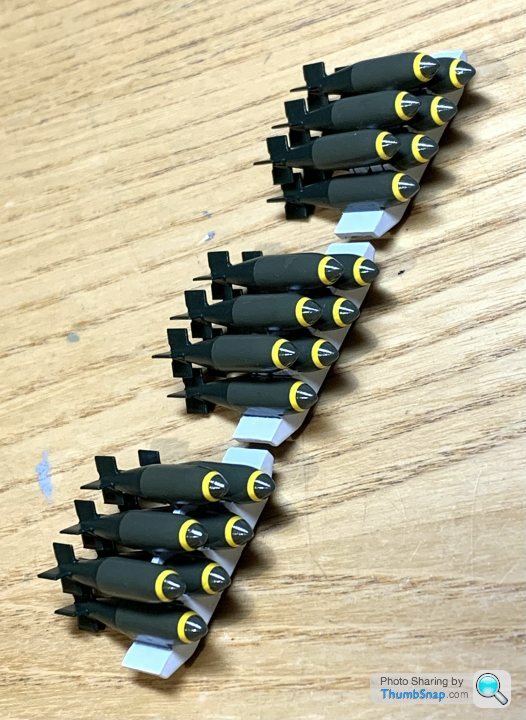
PVA’d the bombs together, after a coat of Matt:

And painted/washed the compressor/turbine faces:

The moulded-in wheel well and bomb-bay detail responded well to a dark wash and some weathering powders. I picked the boxes out with light grey, and the bottles with black. The actuator rods were painted chrome:

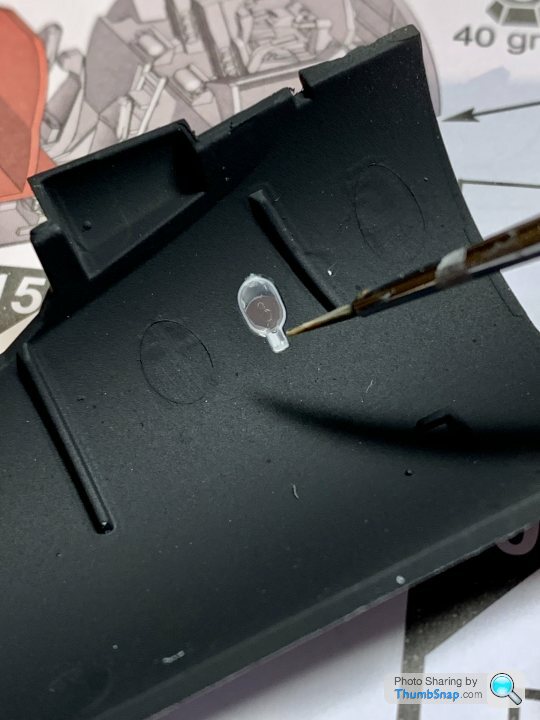
I dotted some chrome onto the wheel well lamps:

Followed by some PVA to represent the lenses:

It’ll set transparent, so I might give another light coat of Matt to give a frosted effect.
The large off-white areas are a pain because they show every random fibre and dust speck, which then gets highlighted even more with the weathering. At least it’s not too visible when complete. I might even strip the nearest one because it looks like half the carpet somehow got stuck to it.
And painted/washed the compressor/turbine faces:
The moulded-in wheel well and bomb-bay detail responded well to a dark wash and some weathering powders. I picked the boxes out with light grey, and the bottles with black. The actuator rods were painted chrome:
I dotted some chrome onto the wheel well lamps:
Followed by some PVA to represent the lenses:
It’ll set transparent, so I might give another light coat of Matt to give a frosted effect.
The large off-white areas are a pain because they show every random fibre and dust speck, which then gets highlighted even more with the weathering. At least it’s not too visible when complete. I might even strip the nearest one because it looks like half the carpet somehow got stuck to it.
Gassing Station | Scale Models | Top of Page | What's New | My Stuff