Airfix 1:72 Vulcan B.2
Discussion


RacingPete said:
Nothing really to add here apart from showing my support for such valiant effort and resilience on this build. I know I speak for a lot here that we really appreciate the effort and constant posting to keep us up to date.
Thanks RP - it’s not a big effort to post progress, and it’s good to be able to look back on a build when it’s finished. These threads sometimes also remind me of a particular colour or weathering sequence, if I’ve had a break and go back to something.
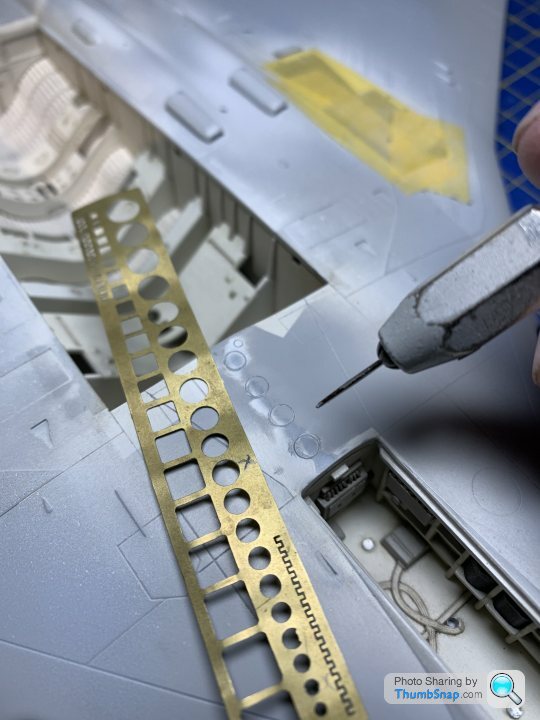
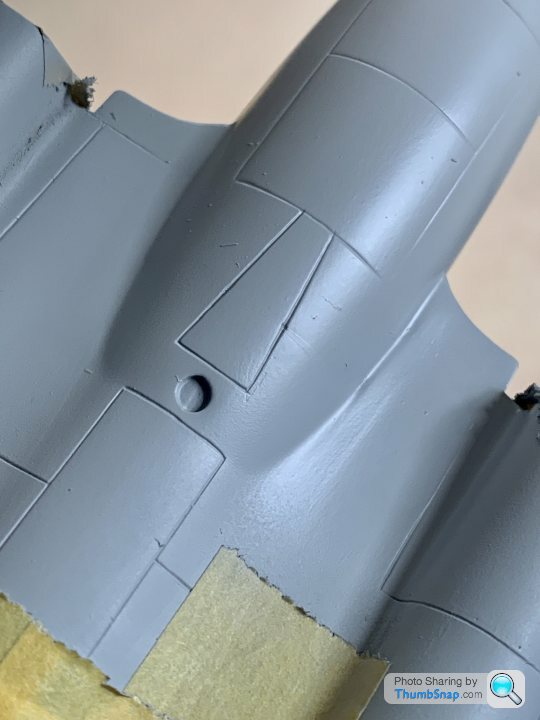
Reinstated some of the circular panel lines after the extensive amount of flatting required forward of the bomb bay:
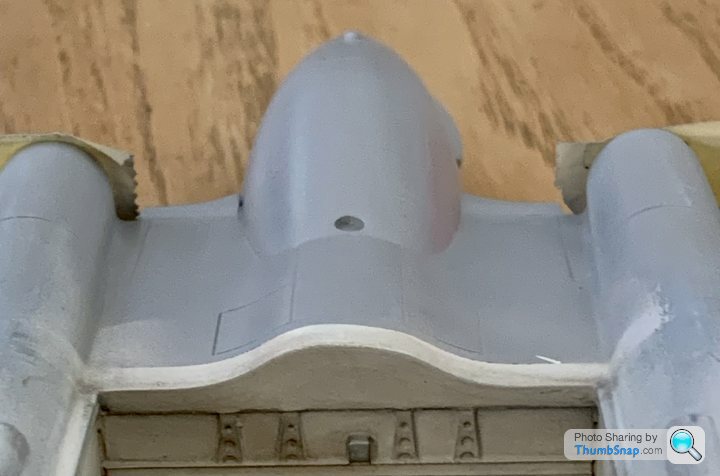
This view of the rear of the bomb bay fuselage asymmetry gives an impression of how much the fuselage is distorted in this area:
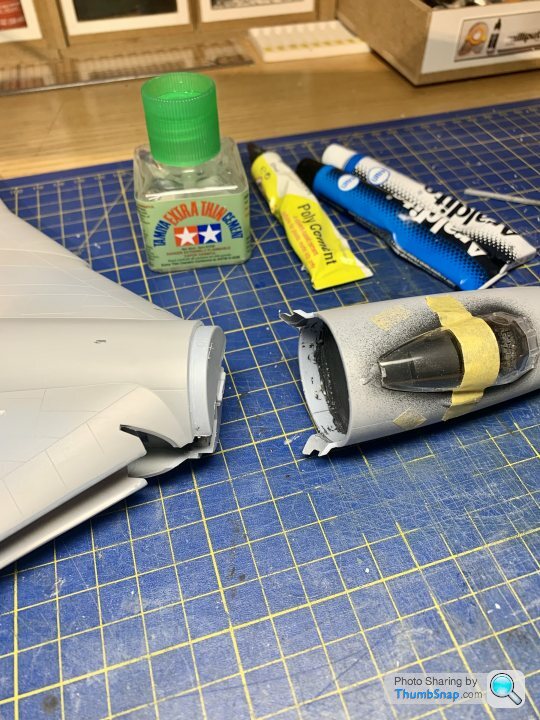
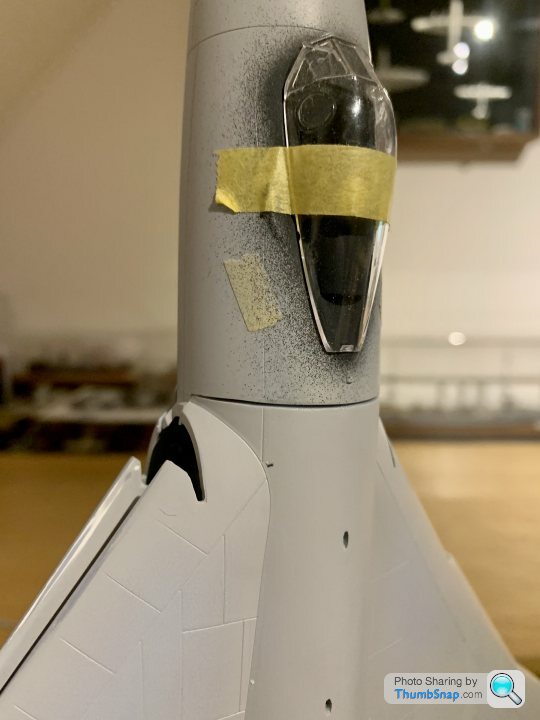
With trepidation, attention turned to fitting the forward fuselage pod. I used a variety of adhesives, mainly due to the hit-and-miss fit to the main airframe, and the weight of the ballast in the nose:
Initial impressions of the fit:
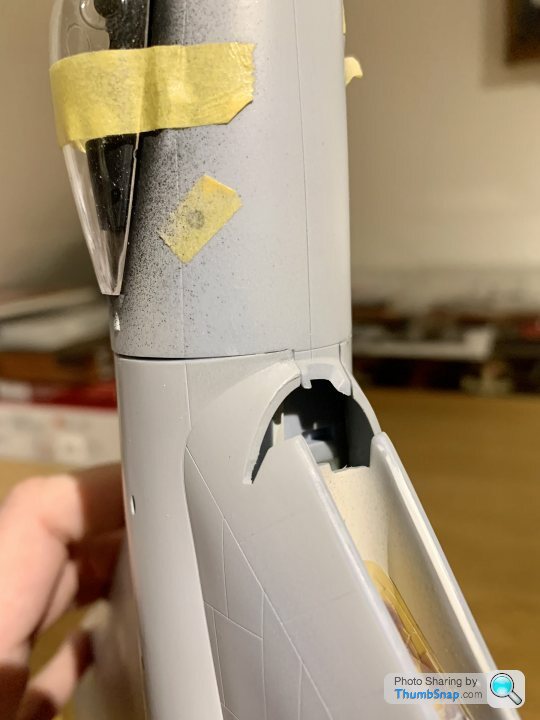
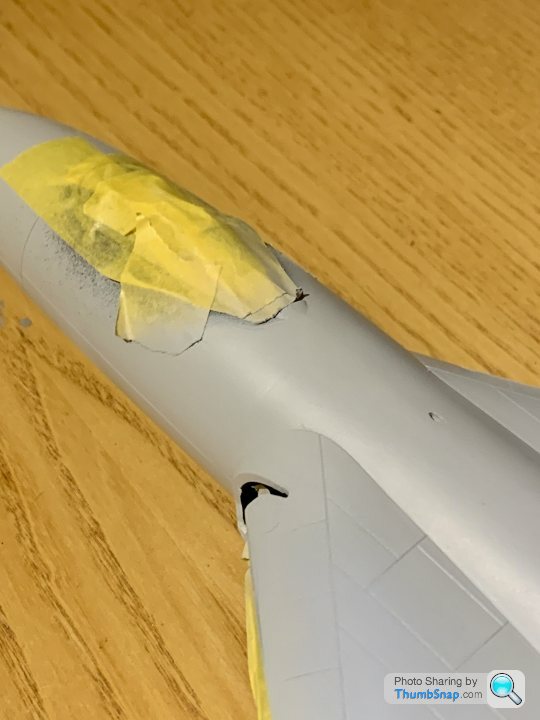
Sighting with a rule indicated a distinct kink to the left, confirmed by looking at the intake pocket detail, which was mis-matched by about 1mm inwards. I’ve had to correct this by inserting packing shims to bring those details into true:
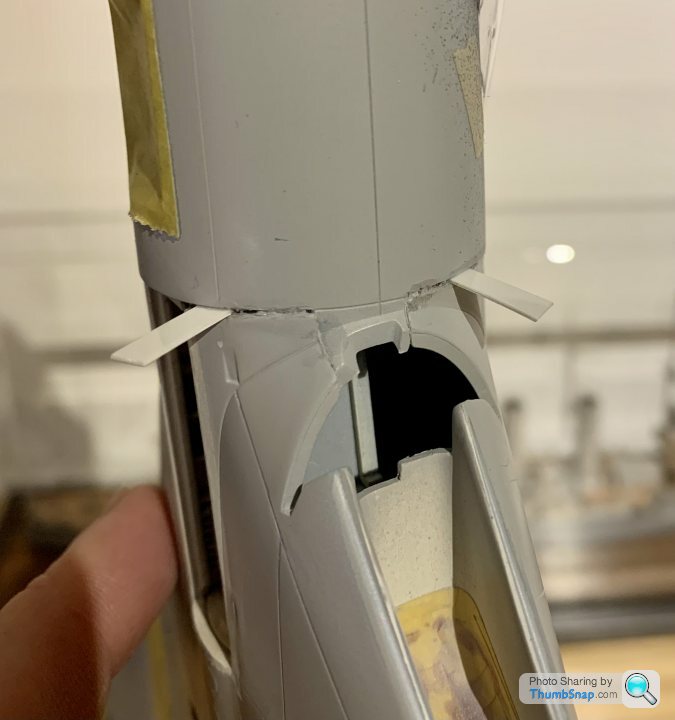
This is the resulting shimmed joint, which brings the nose tip in line with the centreline of the main airframe:
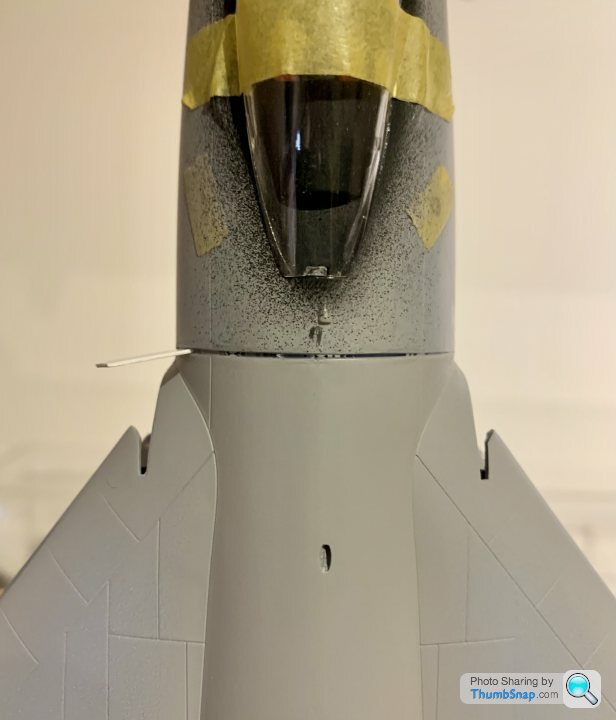
Obviously a huge amount of work awaits to get this filled, profiled, and re-scribed.
It looks as if, as previously alluded to, the port side of the main airframe is about a millimetre shorter overall than the stbd. side. I didn’t measure anything before assembly, but a 1mm shim does appear to ‘correct’ (if that term can be applied to this abortion of a job) the issue.
This view of the rear of the bomb bay fuselage asymmetry gives an impression of how much the fuselage is distorted in this area:
With trepidation, attention turned to fitting the forward fuselage pod. I used a variety of adhesives, mainly due to the hit-and-miss fit to the main airframe, and the weight of the ballast in the nose:
Initial impressions of the fit:
Sighting with a rule indicated a distinct kink to the left, confirmed by looking at the intake pocket detail, which was mis-matched by about 1mm inwards. I’ve had to correct this by inserting packing shims to bring those details into true:
This is the resulting shimmed joint, which brings the nose tip in line with the centreline of the main airframe:
Obviously a huge amount of work awaits to get this filled, profiled, and re-scribed.
It looks as if, as previously alluded to, the port side of the main airframe is about a millimetre shorter overall than the stbd. side. I didn’t measure anything before assembly, but a 1mm shim does appear to ‘correct’ (if that term can be applied to this abortion of a job) the issue.
Hard-Drive said:
Been lurking on this for a while now. That's really rubbish, looks no better than cheap Airfix stuff I used to build when I were a lad. Keep going, looking forward to seeing it!
One of my neighbours was a very accurate modeler when I was a kid, so he only had 1960s and 1970s models to work with. I never appreciated how much skill he had until I saw this.pingu393 said:
Hard-Drive said:
Been lurking on this for a while now. That's really rubbish, looks no better than cheap Airfix stuff I used to build when I were a lad. Keep going, looking forward to seeing it!
One of my neighbours was a very accurate modeler when I was a kid, so he only had 1960s and 1970s models to work with. I never appreciated how much skill he had until I saw this.The inconsistency in new-tool Airfix models is puzzling; their 1:72 Gladiator is one of the nicest kits I've ever built, and pretty much fell together on its own. Their 1:72 Bf.109-E4 also had the potential to be a great kit, but mine at least was spoiled by moulding issues on the fuselage, and IIRC strangely misplaced tail plane strut location holes.
dr_gn said:
pingu393 said:
Hard-Drive said:
Been lurking on this for a while now. That's really rubbish, looks no better than cheap Airfix stuff I used to build when I were a lad. Keep going, looking forward to seeing it!
One of my neighbours was a very accurate modeler when I was a kid, so he only had 1960s and 1970s models to work with. I never appreciated how much skill he had until I saw this.The inconsistency in new-tool Airfix models is puzzling; their 1:72 Gladiator is one of the nicest kits I've ever built, and pretty much fell together on its own. Their 1:72 Bf.109-E4 also had the potential to be a great kit, but mine at least was spoiled by moulding issues on the fuselage, and IIRC strangely misplaced tail plane strut location holes.
I think modern model cement is much faster acting and more permanent than the stuff was in the 1970s. There is no way I could have built it then, as the wing struts would have collapsed before the upper wing was attached. It also helps that it is not a tube nozzle droplet, but more like a syringe needle.
Flatted the Milliput back today, and had to sand quite a bit of plastic back on the port fuselage side. Obviously it’s removed the panel lines, which will need re-scribing eventually:
Luckily it seems to have blended well, and it’s not obvious where the mis-matched surfaces start and finish.
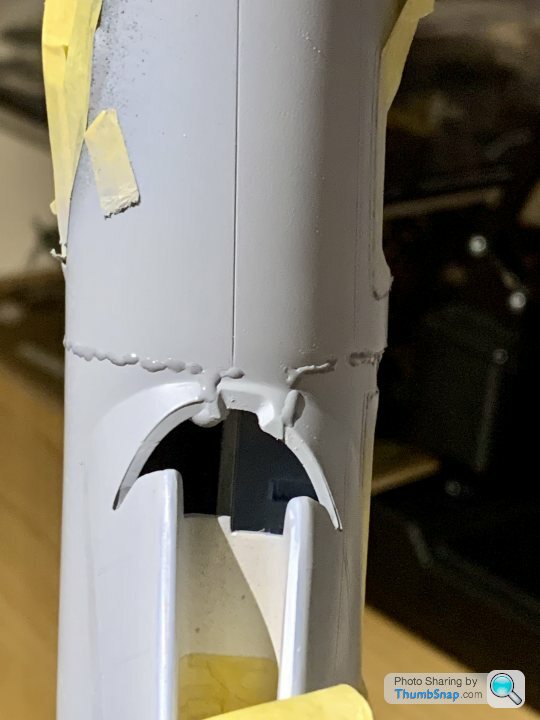
A guide coat of grey primer revealed some dimples:
Which I’ve treated with surfacer:
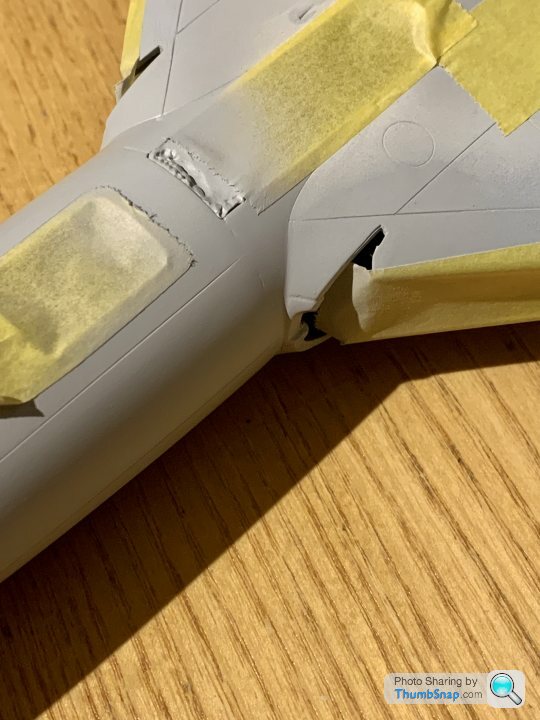
The splitter plate fit is par for the course for this thing, but at least the overall profile seems a pretty good match. A lot of filling will be required, but hopefully not much plastic sculpting will be needed:
Says a lot about this kit that I’m quite happy/relieved about how good the fit of those two parts is.
Luckily it seems to have blended well, and it’s not obvious where the mis-matched surfaces start and finish.
A guide coat of grey primer revealed some dimples:
Which I’ve treated with surfacer:
The splitter plate fit is par for the course for this thing, but at least the overall profile seems a pretty good match. A lot of filling will be required, but hopefully not much plastic sculpting will be needed:
Says a lot about this kit that I’m quite happy/relieved about how good the fit of those two parts is.
pingu393 said:
A question about your scribing technique -
Your scribed lines look to be the same depth along the scribe line. Do you use something like a router that controls the depth, or is it down to skill and feel?
Short answer is that I just scribe the lines by whatever means, and hope for the best. It’s very difficult to judge how they match until the new lines and the adjacent existing ones are covered with primer. Airfix seem to have relatively deep/wide panel lines (compared with say Tamiya or Eduard), so it’s not so much of an issue to deepen the new ones if necessary.Your scribed lines look to be the same depth along the scribe line. Do you use something like a router that controls the depth, or is it down to skill and feel?
Scribing is a pain in the arse, and if you get it wrong it can ruin an otherwise nice model. Matching the ends of two blended-out lines can be a major pain - nothing worse than slightly mid-matched lines. Also, scribing filler is a problem because it can crumble rather than cut. There are ways around that, for example by scribing the wet filler with a scalpel blade, or using a razor saw. I usually use a Tamiya panel line scriber which is good for all depths and widths, depending on how much pressure you apply. It also cuts the line, rather than tearing it (which is what can happen if you use a needle for example).
Lots of ways to do it, but once you’ve screwed up a re-scribing job, it can be very difficult to correct - as I said, most dry filler crumbles, and also whatever tool you use can get deflected back into the line you’ve tried to fill. It’s also very easy to make the new lines too deep, or worse, make them crooked, which will kill a small scale model. It’s sometimes better to draw panel lines on a finished model with pencil, depending on where they are.
dr_gn said:
pingu393 said:
A question about your scribing technique -
Your scribed lines look to be the same depth along the scribe line. Do you use something like a router that controls the depth, or is it down to skill and feel?
Short answer is that I just scribe the lines by whatever means, and hope for the best. It’s very difficult to judge how they match until the new lines and the adjacent existing ones are covered with primer. Airfix seem to have relatively deep/wide panel lines (compared with say Tamiya or Eduard), so it’s not so much of an issue to deepen the new ones if necessary.Your scribed lines look to be the same depth along the scribe line. Do you use something like a router that controls the depth, or is it down to skill and feel?
Scribing is a pain in the arse, and if you get it wrong it can ruin an otherwise nice model. Matching the ends of two blended-out lines can be a major pain - nothing worse than slightly mid-matched lines. Also, scribing filler is a problem because it can crumble rather than cut. There are ways around that, for example by scribing the wet filler with a scalpel blade, or using a razor saw. I usually use a Tamiya panel line scriber which is good for all depths and widths, depending on how much pressure you apply. It also cuts the line, rather than tearing it (which is what can happen if you use a needle for example).
Lots of ways to do it, but once you’ve screwed up a re-scribing job, it can be very difficult to correct - as I said, most dry filler crumbles, and also whatever tool you use can get deflected back into the line you’ve tried to fill. It’s also very easy to make the new lines too deep, or worse, make them crooked, which will kill a small scale model. It’s sometimes better to draw panel lines on a finished model with pencil, depending on where they are.
 .
.pingu393 said:
dr_gn said:
pingu393 said:
A question about your scribing technique -
Your scribed lines look to be the same depth along the scribe line. Do you use something like a router that controls the depth, or is it down to skill and feel?
Short answer is that I just scribe the lines by whatever means, and hope for the best. It’s very difficult to judge how they match until the new lines and the adjacent existing ones are covered with primer. Airfix seem to have relatively deep/wide panel lines (compared with say Tamiya or Eduard), so it’s not so much of an issue to deepen the new ones if necessary.Your scribed lines look to be the same depth along the scribe line. Do you use something like a router that controls the depth, or is it down to skill and feel?
Scribing is a pain in the arse, and if you get it wrong it can ruin an otherwise nice model. Matching the ends of two blended-out lines can be a major pain - nothing worse than slightly mid-matched lines. Also, scribing filler is a problem because it can crumble rather than cut. There are ways around that, for example by scribing the wet filler with a scalpel blade, or using a razor saw. I usually use a Tamiya panel line scriber which is good for all depths and widths, depending on how much pressure you apply. It also cuts the line, rather than tearing it (which is what can happen if you use a needle for example).
Lots of ways to do it, but once you’ve screwed up a re-scribing job, it can be very difficult to correct - as I said, most dry filler crumbles, and also whatever tool you use can get deflected back into the line you’ve tried to fill. It’s also very easy to make the new lines too deep, or worse, make them crooked, which will kill a small scale model. It’s sometimes better to draw panel lines on a finished model with pencil, depending on where they are.
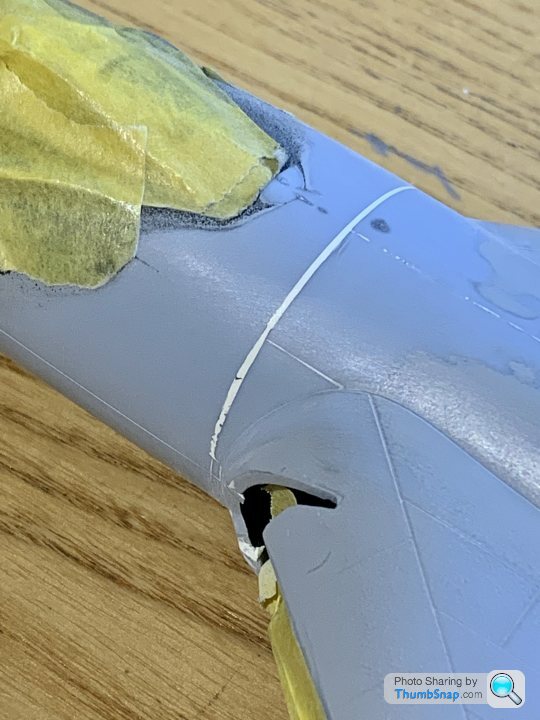
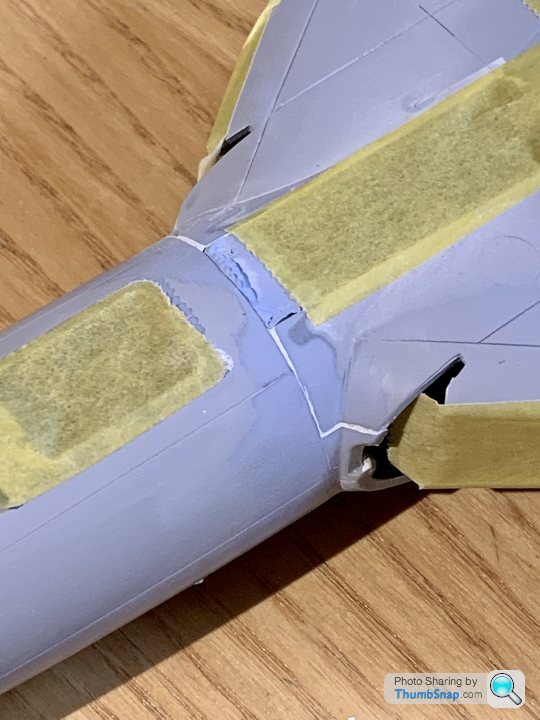
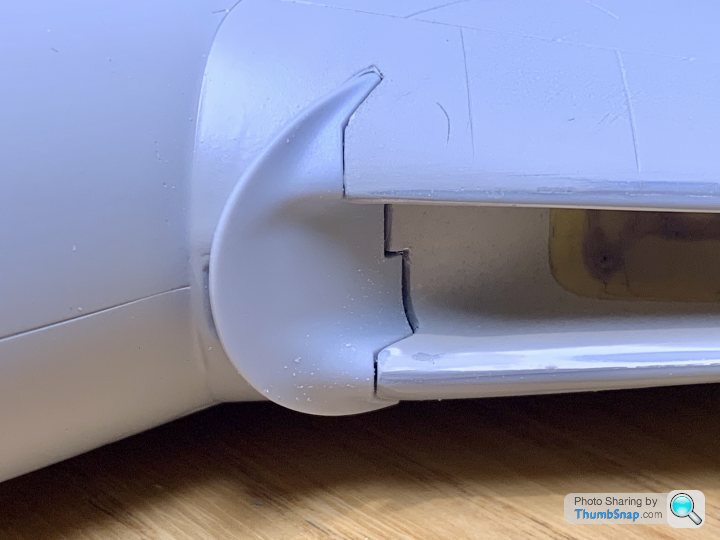
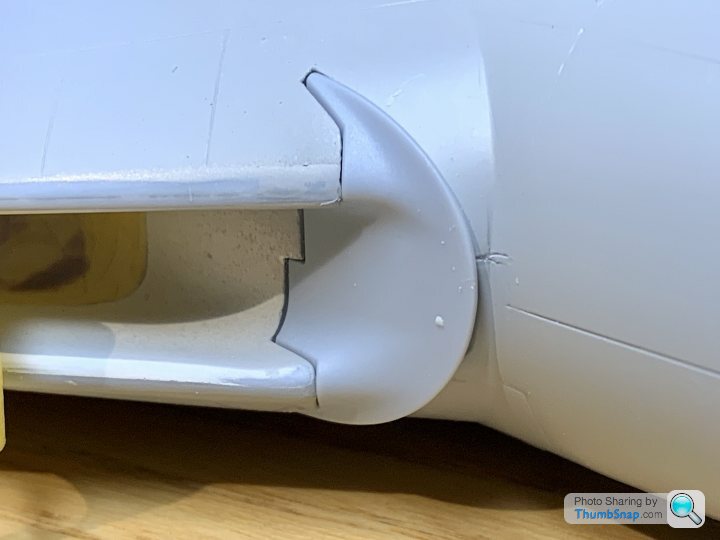
.This is a good example of how re-scribing can go wrong:
The angled line crosses a join line, and was re-scribed with a Tamiya scribing tool. Where the joint is, the tool has dug in to the filler, and made a bulge in the line. Multiple light passes to try and blend it has then made the line wide in the middle. This issue has been exacerbated by the appalling fit of the two parts, which required a lot of filler.
Also, you can see the discontinuity where the join line is between the fuselage pod and trailing edge fillet. The join abuts a moulded-in fillet radius feature, but there is no fillet beyond the joint line, because it’s an assembly line. This means filleting the missing detail with filler, and trying to get a neat blend in a very difficult to access place
These are typical issues, and there are multiple examples all over this model, most of which have had at least two attempts to correct. It just makes leaving it until another day far more attractive, which is why it’s dragging on so long.
Gassing Station | Scale Models | Top of Page | What's New | My Stuff