Christmas Group Build?
Discussion


dr_gn said:
gruffgriff said:
Lovely diversity here, great idea of yours dr_gn. Thanks.
Will post in a bit, found some hidden rust in my DUKW....
No problem. Didn’t go quite as expected for me, but it’s nice to see quite a few models getting started. I called at my Mum’s yesterday, and completely by chance she had daytime BBC news on TV. To my amazement, there was a feature on Airfix, and how modelling had really taken off again during lockdown. They featured the Spitfire that Robemcdonald is building. Made in England apparently. They showed a bloke checking the sprues against a template. Had to chuckle at that.Will post in a bit, found some hidden rust in my DUKW....
So for the first time, I’ve enjoyed some progress tonight. After midnight, everyone else in bed - concentrating on detail painting:
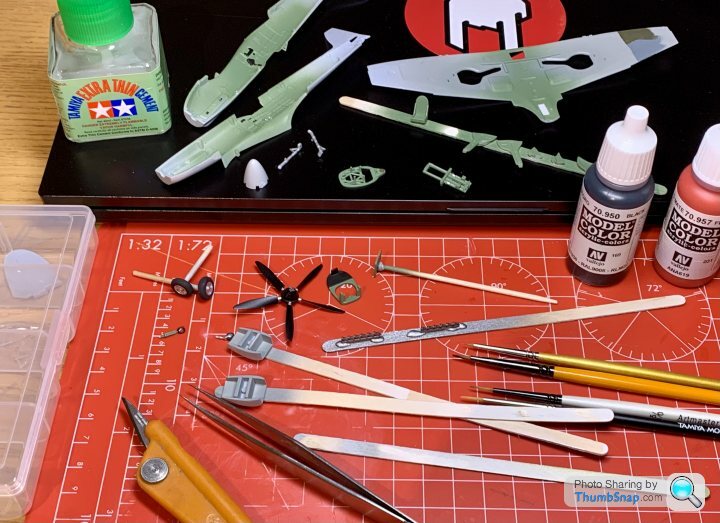
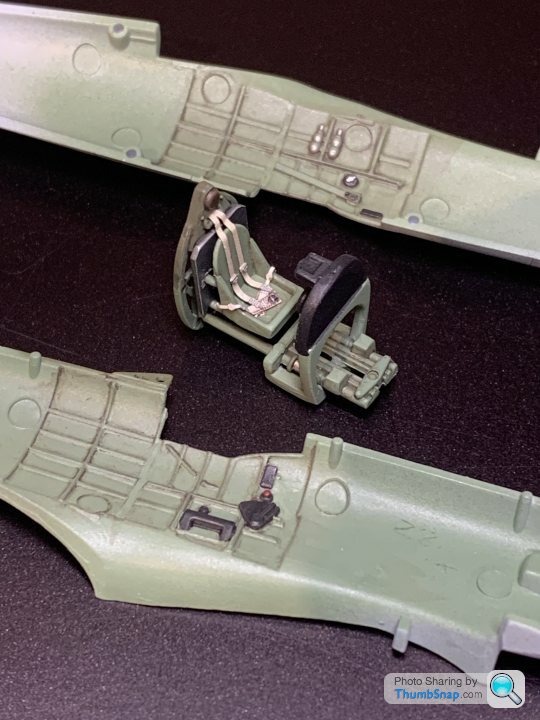
Ended up making a control column out of some scrap plastic from the spares box, and a photo-etched rivet. The Q.C. Bloke must have missed that one:

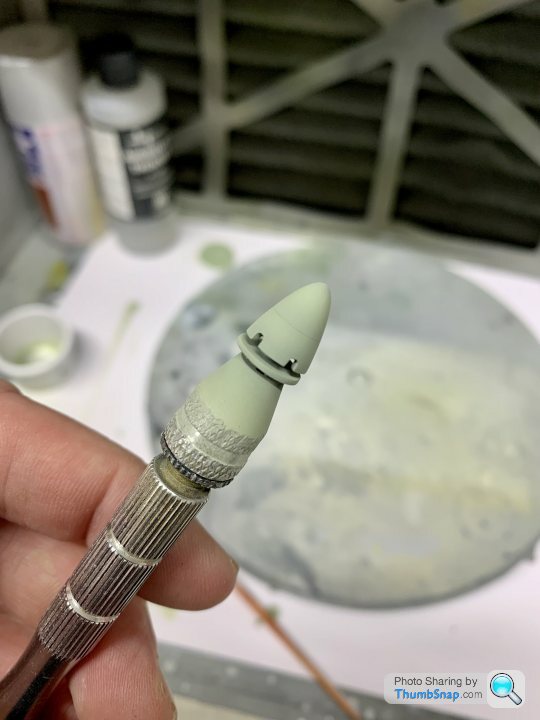
Also did a bit of a check on colours. The underside colour XF-83 looked way too dark until side-by-side with the upper Ocean Grey and Dark Green:

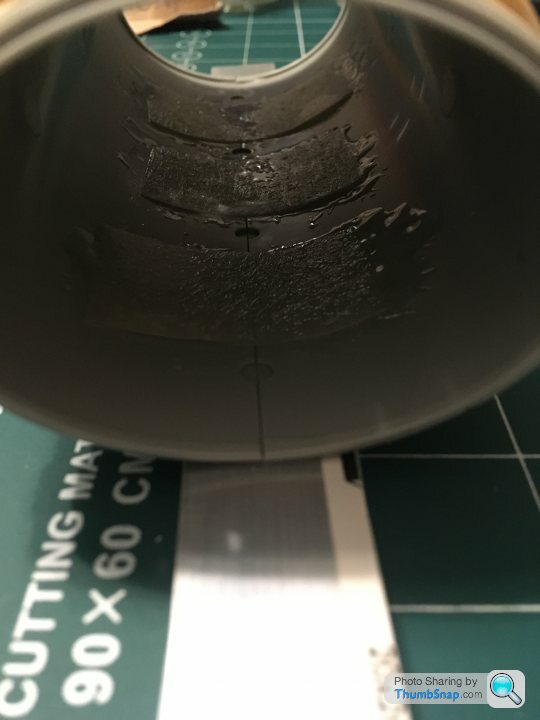
I can only hope Airfix send me a decent windscreen, otherwise it’s all for nowt.


Rtig said:
dr_gn said:
gruffgriff said:
Lovely diversity here, great idea of yours dr_gn. Thanks.
Will post in a bit, found some hidden rust in my DUKW....
No problem. Didn’t go quite as expected for me, but it’s nice to see quite a few models getting started. I called at my Mum’s yesterday, and completely by chance she had daytime BBC news on TV. To my amazement, there was a feature on Airfix, and how modelling had really taken off again during lockdown. They featured the Spitfire that Robemcdonald is building. Made in England apparently. They showed a bloke checking the sprues against a template. Had to chuckle at that.Will post in a bit, found some hidden rust in my DUKW....
So for the first time, I’ve enjoyed some progress tonight. After midnight, everyone else in bed - concentrating on detail painting:
Ended up making a control column out of some scrap plastic from the spares box, and a photo-etched rivet. The Q.C. Bloke must have missed that one:
Also did a bit of a check on colours. The underside colour XF-83 looked way too dark until side-by-side with the upper Ocean Grey and Dark Green:
I can only hope Airfix send me a decent windscreen, otherwise it’s all for nowt.

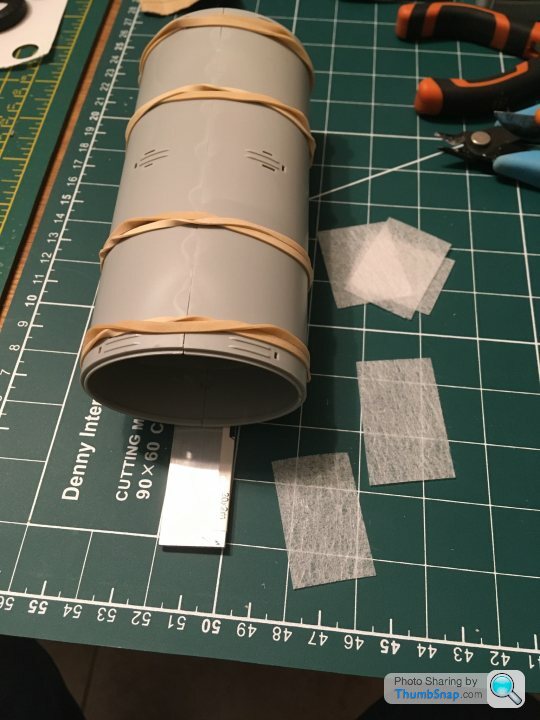
My solution to aligning the tank sides , glueing one side at a time . Rubber bands holding aluminium strip to get two edges of tank in straight line and then laying up small patches of glass fibre tissue with two part epoxy glue. Had to leave gaps as will be drilling holes in tank for valve/ tank filling caps.
Whirlwind 'chopper' build - I'm calling this one just about finished.
Good things :
I've learnt important lessons about temperatures and spray-painting.
Modern Airfix decals are excellent.
If approached as a quick and dirty build - then can be lots of fun.
Bad things:
It fits where it touches.
The transparencies seem to be for a different kit.
Nostalgia isn't as good as it used to be.
Almost every component is wrong and would need some extensive rework to correct.
The transparencies are just badly shaped and needed extensive work to make them fit (they are still bad!). Used white glue to fix them in place, and it's doing a lot of heavy lifting to fill the gaps.

I sprayed the white which went on OK, left it overnight to dry, then really struggled to get the green down. I worked in the very cold conservatory and the temperature really changed how the paint sprayed. It came out 'lumpy', blocked the spray gun and was just a pain. I finally got an OK finish, but my masking seems to have lifted slightly in the cold/damp air overnight. leaving a lot of clean up of the white.

I cleaned up the white (mostly by handpainting over the mess), then prepared some of the smaller components prior to decalling. You can see how simplified almost every component is - look at the rotor hub! To bring this kit up to standard would require lots of aftermarket.

The decals went down very well with some MIG decal softener/fixer. I tidied up some of the paint around the front transparency which lifted when I took off the masking.

All assembled (i've just noticed that there is some detail painting around the undercarriage required and around the nose vents, and it would likely benefit a little weathering to hide some of the mess )
)


Good things :
I've learnt important lessons about temperatures and spray-painting.
Modern Airfix decals are excellent.
If approached as a quick and dirty build - then can be lots of fun.
Bad things:
It fits where it touches.
The transparencies seem to be for a different kit.
Nostalgia isn't as good as it used to be.
Almost every component is wrong and would need some extensive rework to correct.
The transparencies are just badly shaped and needed extensive work to make them fit (they are still bad!). Used white glue to fix them in place, and it's doing a lot of heavy lifting to fill the gaps.
I sprayed the white which went on OK, left it overnight to dry, then really struggled to get the green down. I worked in the very cold conservatory and the temperature really changed how the paint sprayed. It came out 'lumpy', blocked the spray gun and was just a pain. I finally got an OK finish, but my masking seems to have lifted slightly in the cold/damp air overnight. leaving a lot of clean up of the white.
I cleaned up the white (mostly by handpainting over the mess), then prepared some of the smaller components prior to decalling. You can see how simplified almost every component is - look at the rotor hub! To bring this kit up to standard would require lots of aftermarket.
The decals went down very well with some MIG decal softener/fixer. I tidied up some of the paint around the front transparency which lifted when I took off the masking.
All assembled (i've just noticed that there is some detail painting around the undercarriage required and around the nose vents, and it would likely benefit a little weathering to hide some of the mess
)tangerine_sedge said:
Whirlwind 'chopper' build - I'm calling this one just about finished.
Good things :
I've learnt important lessons about temperatures and spray-painting.
Modern Airfix decals are excellent.
If approached as a quick and dirty build - then can be lots of fun.
Bad things:
It fits where it touches.
The transparencies seem to be for a different kit.
Nostalgia isn't as good as it used to be.
Almost every component is wrong and would need some extensive rework to correct.
The transparencies are just badly shaped and needed extensive work to make them fit (they are still bad!). Used white glue to fix them in place, and it's doing a lot of heavy lifting to fill the gaps.
I sprayed the white which went on OK, left it overnight to dry, then really struggled to get the green down. I worked in the very cold conservatory and the temperature really changed how the paint sprayed. It came out 'lumpy', blocked the spray gun and was just a pain. I finally got an OK finish, but my masking seems to have lifted slightly in the cold/damp air overnight. leaving a lot of clean up of the white.
I cleaned up the white (mostly by handpainting over the mess), then prepared some of the smaller components prior to decalling. You can see how simplified almost every component is - look at the rotor hub! To bring this kit up to standard would require lots of aftermarket.
The decals went down very well with some MIG decal softener/fixer. I tidied up some of the paint around the front transparency which lifted when I took off the masking.
All assembled (i've just noticed that there is some detail painting around the undercarriage required and around the nose vents, and it would likely benefit a little weathering to hide some of the mess)
Pretty good for such an old kit.Good things :
I've learnt important lessons about temperatures and spray-painting.
Modern Airfix decals are excellent.
If approached as a quick and dirty build - then can be lots of fun.
Bad things:
It fits where it touches.
The transparencies seem to be for a different kit.
Nostalgia isn't as good as it used to be.
Almost every component is wrong and would need some extensive rework to correct.
The transparencies are just badly shaped and needed extensive work to make them fit (they are still bad!). Used white glue to fix them in place, and it's doing a lot of heavy lifting to fill the gaps.
I sprayed the white which went on OK, left it overnight to dry, then really struggled to get the green down. I worked in the very cold conservatory and the temperature really changed how the paint sprayed. It came out 'lumpy', blocked the spray gun and was just a pain. I finally got an OK finish, but my masking seems to have lifted slightly in the cold/damp air overnight. leaving a lot of clean up of the white.
I cleaned up the white (mostly by handpainting over the mess), then prepared some of the smaller components prior to decalling. You can see how simplified almost every component is - look at the rotor hub! To bring this kit up to standard would require lots of aftermarket.
The decals went down very well with some MIG decal softener/fixer. I tidied up some of the paint around the front transparency which lifted when I took off the masking.
All assembled (i've just noticed that there is some detail painting around the undercarriage required and around the nose vents, and it would likely benefit a little weathering to hide some of the mess
)Re. the rotor head, you could easily thin the upper and lower plates, and add some drilled holes and / or some bits of sprue to add some detail. It doesn't even have to be accurate, just the suggestion that there's 'something' there.
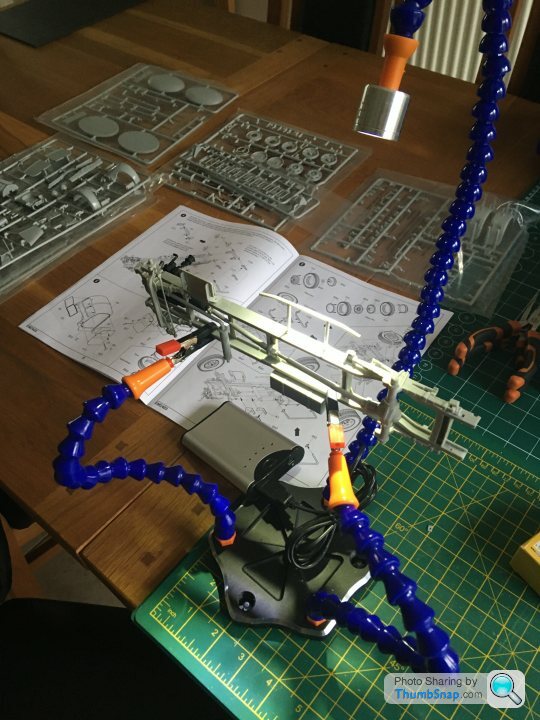
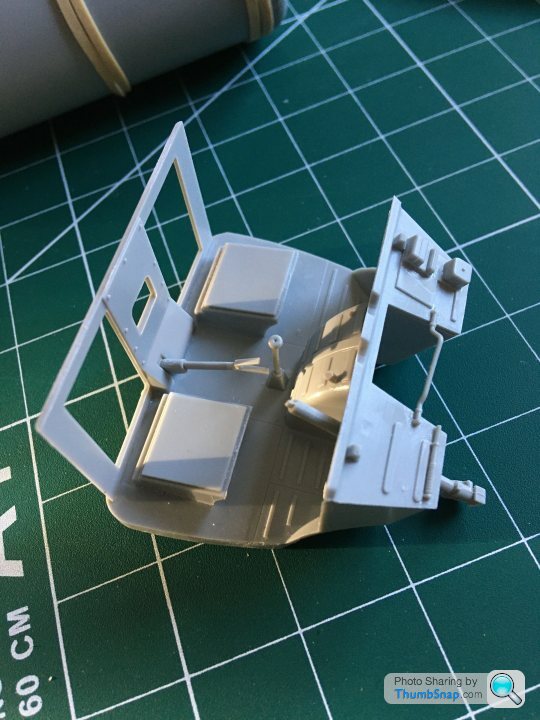
Cockpit is nearly ready to fit, only addition was the Eduard belts, and the home-made control column to replace the missing kit item:

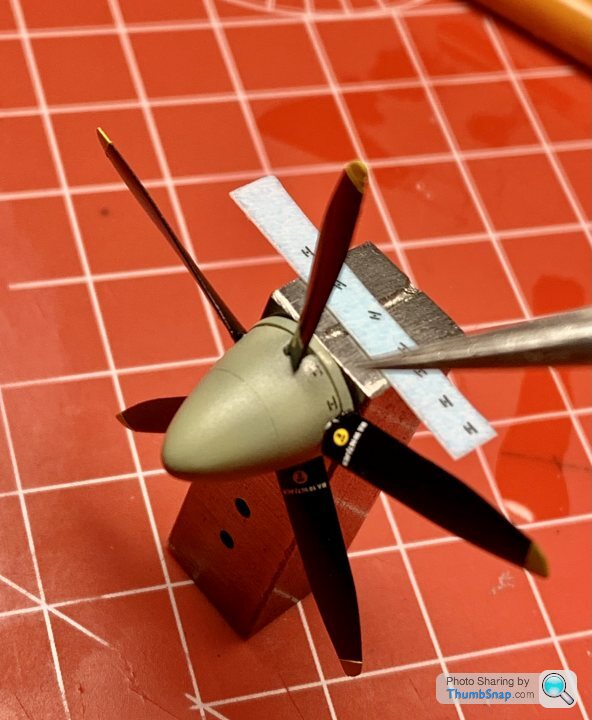
Also finished the propeller assembly:
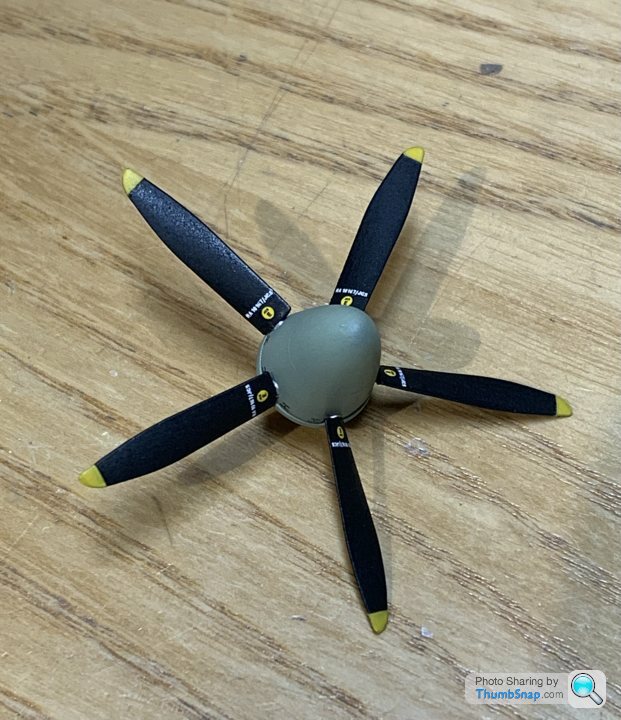
I modified it with a brass spindle in the cut-down original retainer so that I can fit it last, and it will spin:
I hope Airfix send the replacement windscreen soon.
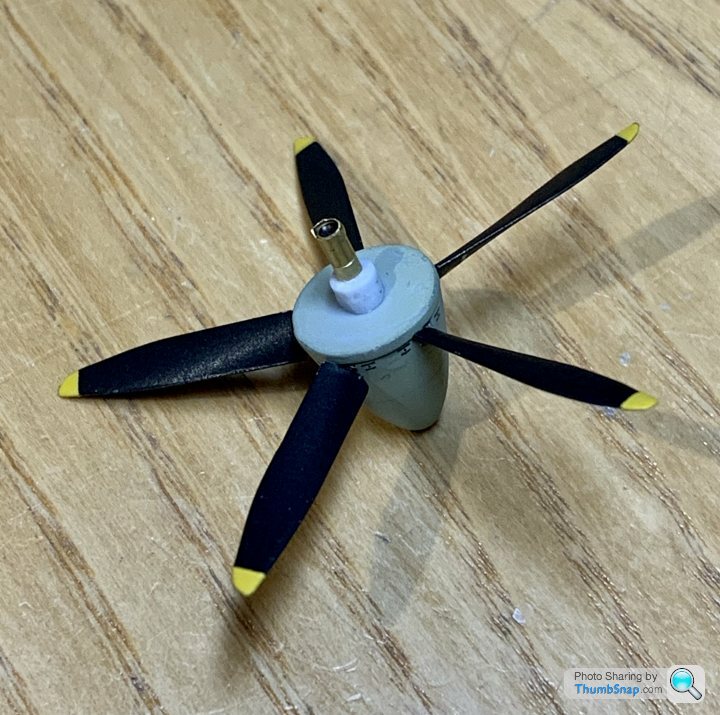
Also finished the propeller assembly:
I modified it with a brass spindle in the cut-down original retainer so that I can fit it last, and it will spin:
I hope Airfix send the replacement windscreen soon.
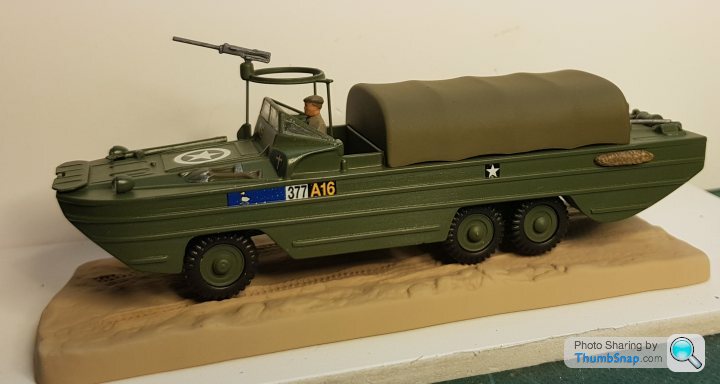
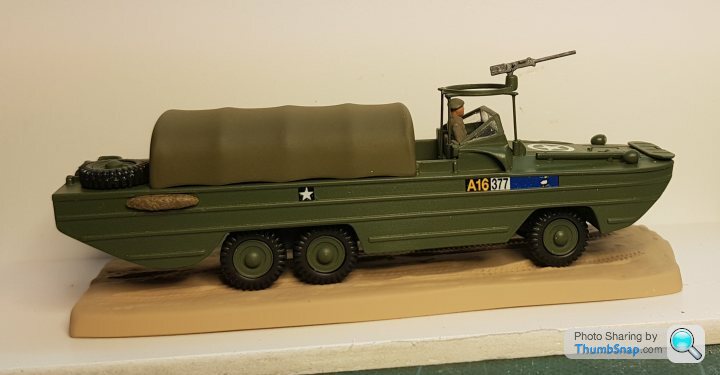
Despite looking pretty much the same as it did in previous pics, a fair few washes built up and the driest of dry brushings sees it finally done:
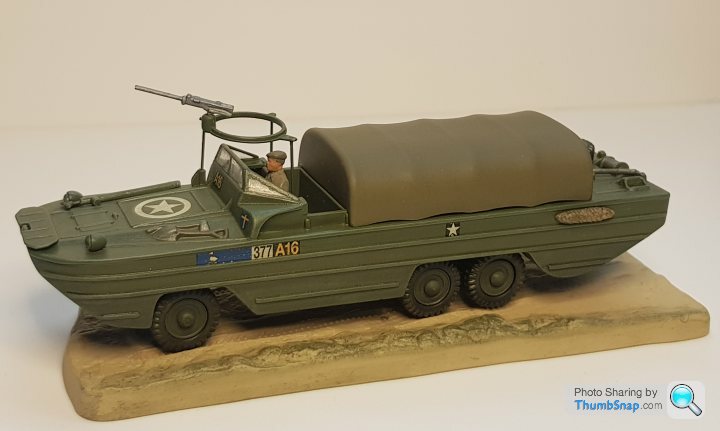
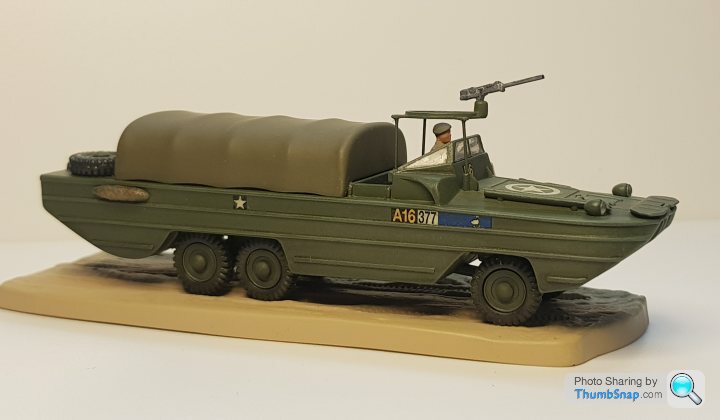
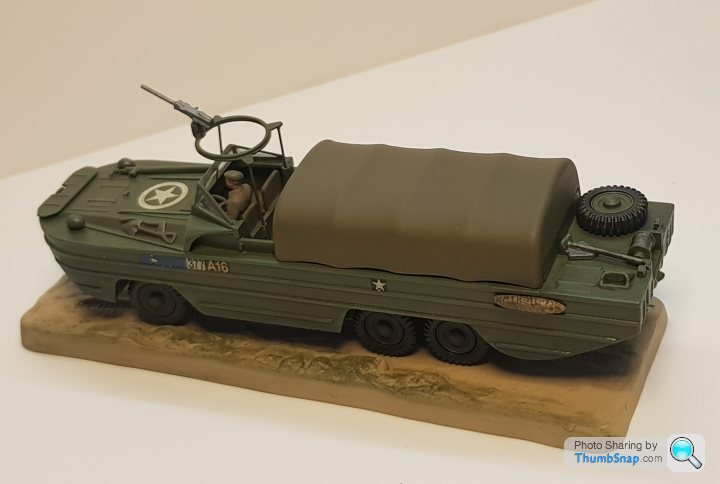
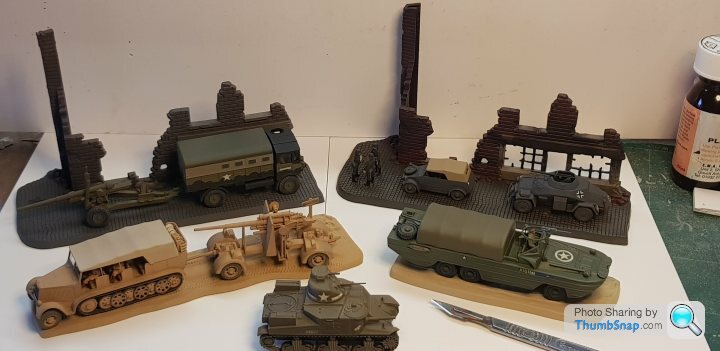
It can run and play with it's vintage Airfix friends now:
I was pleasantly surprised how well it built with just a bit of flash removal over the usual general part prep needed. A big win was finding the clear light lens that pinged-off the tweezers and in to the distance, twice!
It can run and play with it's vintage Airfix friends now:
I was pleasantly surprised how well it built with just a bit of flash removal over the usual general part prep needed. A big win was finding the clear light lens that pinged-off the tweezers and in to the distance, twice!
Gassing Station | Scale Models | Top of Page | What's New | My Stuff