Airfix 1:72 Spitfire Mk.I
Discussion


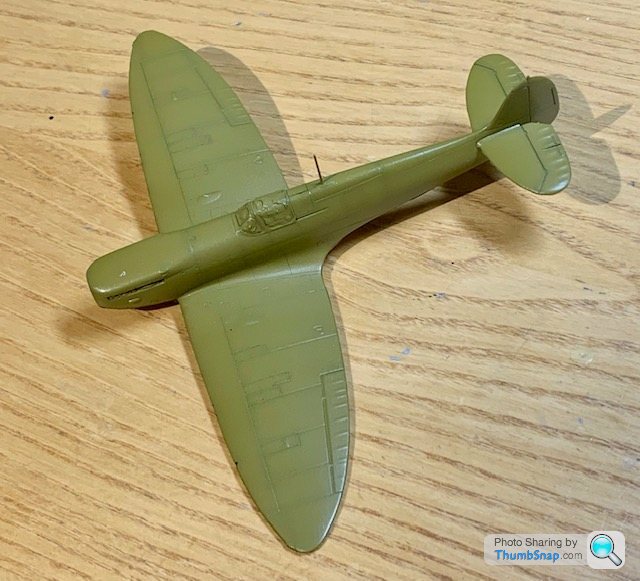
Already posted on another Spitfire model thread but build quality on some spitfires was pretty bad, panel gaps etc galore. They were banged out by the thousands and didn’t need to have a long service life. We are probably a bit misled as the survivors have been lovingly restored/ rebuilt
.
.
wisbech said:
Already posted on another Spitfire model thread but build quality on some spitfires was pretty bad, panel gaps etc galore. They were banged out by the thousands and didn’t need to have a long service life. We are probably a bit misled as the survivors have been lovingly restored/ rebuilt
.
Thanks, yes I realise that they may have looked a bit agricultural after a few weeks, but at 1:72 it's sometimes difficult to get the balance between true scale and what you think you should see..
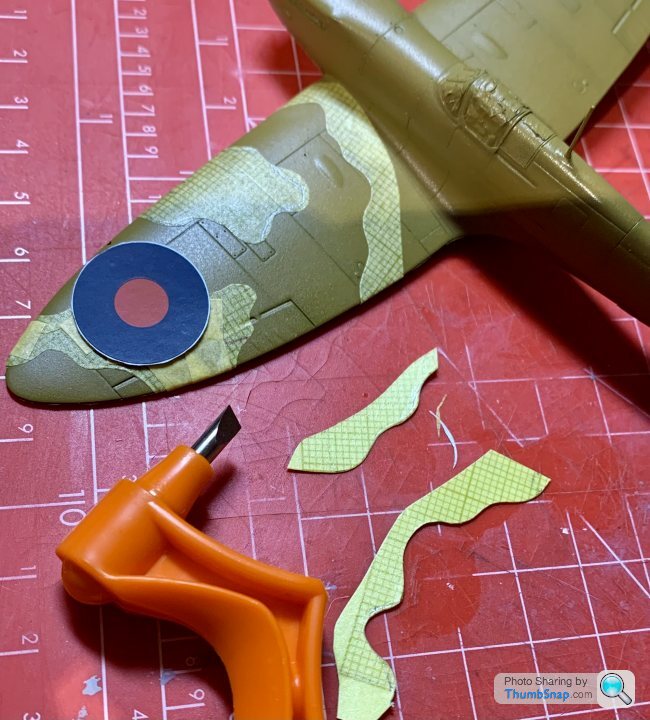
The the old issue. Decals. The Airfix ones have a lot of carrier film, perfect for silvering issues. I've also heard thay can be tempremental:
To reduce the chances of silvering, and also to stagger the codes so they fitted better to the rear fuselage upper/lower paint demarcations, I cut them up as close to the printed parts as I could. The applied them using a dot of Klear under, and Microset over.
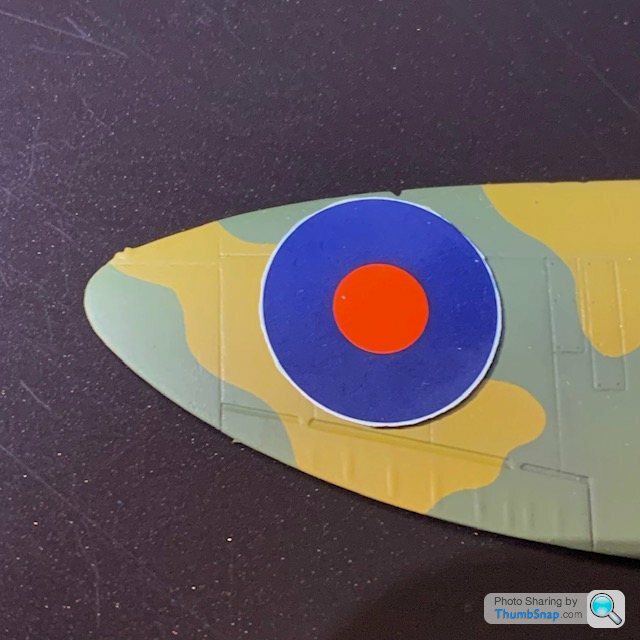
Once dry, this was the result on some of them:
Of course, the Microset had done it's job, making clean removal impossible:

So, yet another model that's going to need hours and hours more work - if indeed it's even possible to get back to the paint finish I want.
I've never seen an effect like that using Klear and Microsol. No idea what happened. I'll try to flat the damaged paint back and re-do it, but I find acrylics are very soft and difficult to correct. If I wasn't demoralised enough with modelling before this, I certainly am now...
To reduce the chances of silvering, and also to stagger the codes so they fitted better to the rear fuselage upper/lower paint demarcations, I cut them up as close to the printed parts as I could. The applied them using a dot of Klear under, and Microset over.
Once dry, this was the result on some of them:
Of course, the Microset had done it's job, making clean removal impossible:
So, yet another model that's going to need hours and hours more work - if indeed it's even possible to get back to the paint finish I want.
I've never seen an effect like that using Klear and Microsol. No idea what happened. I'll try to flat the damaged paint back and re-do it, but I find acrylics are very soft and difficult to correct. If I wasn't demoralised enough with modelling before this, I certainly am now...
I've tried to correct the paint, but it's clear that there's just no way it will be right.
So unfortunately this will join the only other model I've given up on since 2008 - in the bin with the other Airfix Spitfire Mk.1a. There's no way I'm going through all the panel line filling again with another one. Seems you really can't polish a turd.
So unfortunately this will join the only other model I've given up on since 2008 - in the bin with the other Airfix Spitfire Mk.1a. There's no way I'm going through all the panel line filling again with another one. Seems you really can't polish a turd.
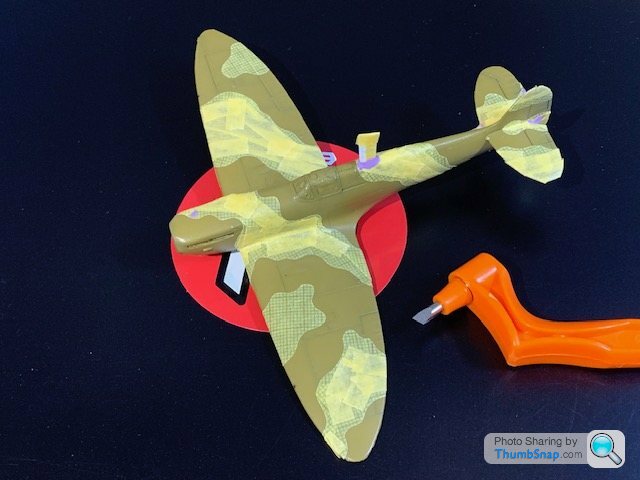
So to directly contradict my previous post, I did get another Spitfire. I found the oldest one I could on EBay in the hope of the mouldings being a better starting point than the previous one. That hope lasted until opening the box:
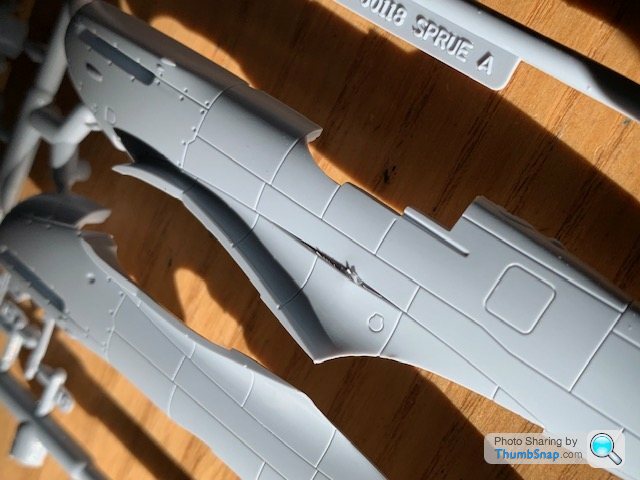
Good old Airfix.
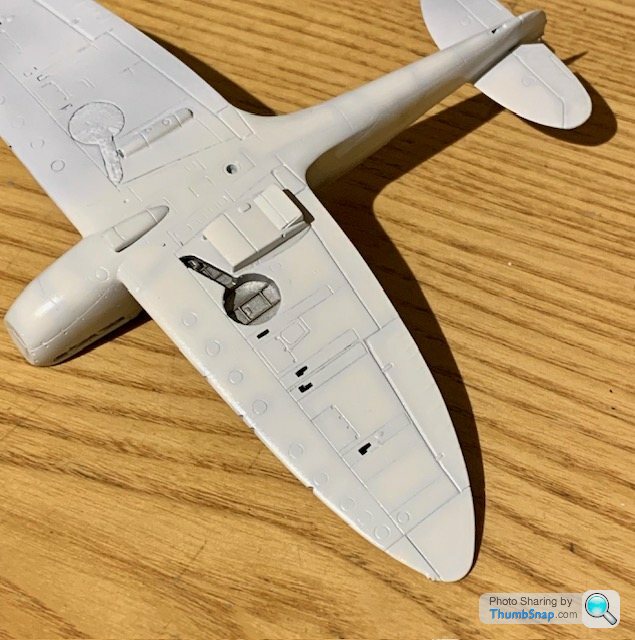
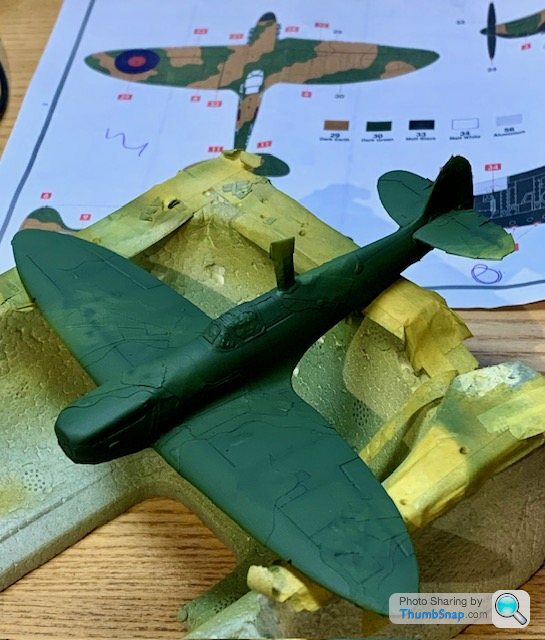
Anyway, I also got some more decals from a forum, and I've gone through the same process of filling the panel lines as before. I've used the original interior, which I managed to salvage:
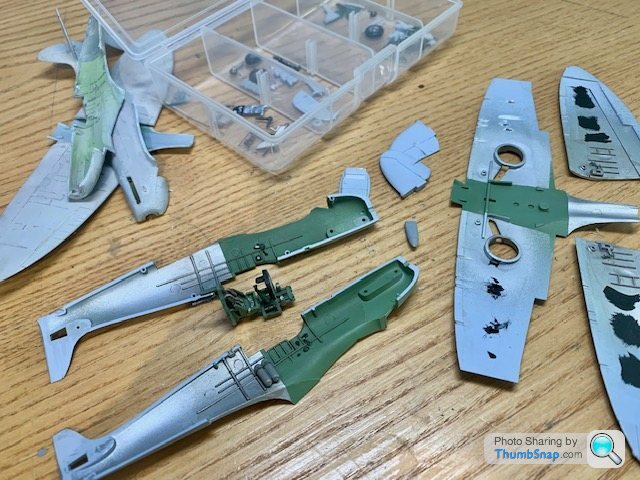
I'm now in the process of re-scribing the detail lost on assembly (if anything, the fit with this one was worse than the last):

Four months on from the last disaster, I'm not convinced this one will be any better, but got to at least try.
Good old Airfix.
Anyway, I also got some more decals from a forum, and I've gone through the same process of filling the panel lines as before. I've used the original interior, which I managed to salvage:
I'm now in the process of re-scribing the detail lost on assembly (if anything, the fit with this one was worse than the last):
Four months on from the last disaster, I'm not convinced this one will be any better, but got to at least try.
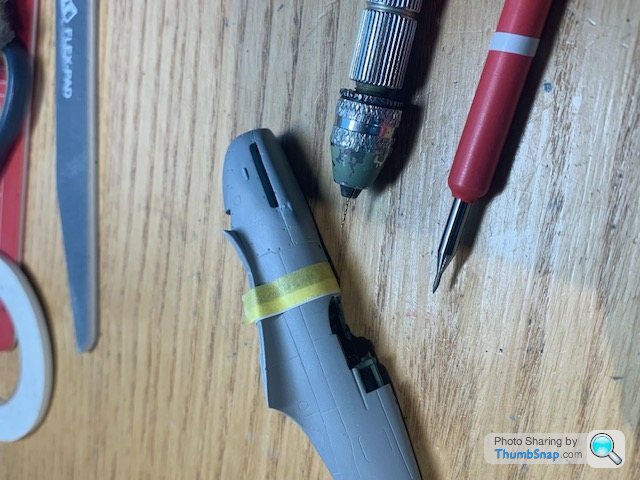
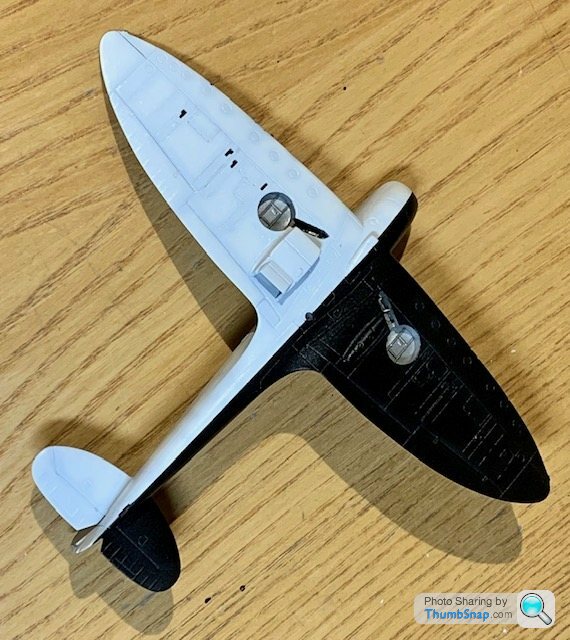
Slow but sure progress now on the re-scribing. I've had to recreate the small oblong bumps from Tamiya Pla-paper though (as I did on the last version). They got lost when refining the wing fillet joints:
Looking at the above, it shows just how mch more work I've got to do to get the bullet-hole cowling fasteners to be consistent. Pffff.
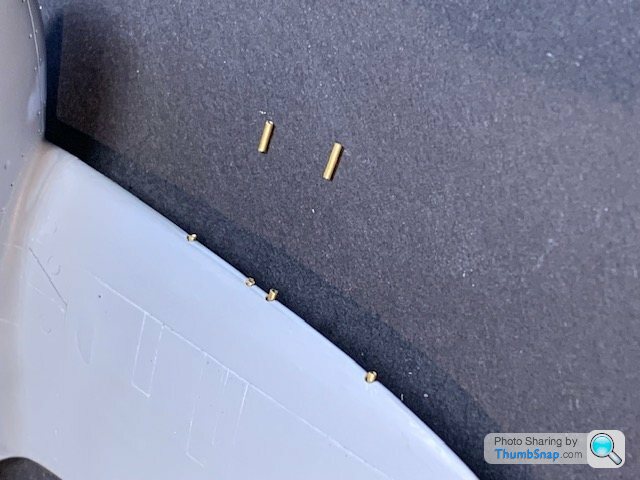
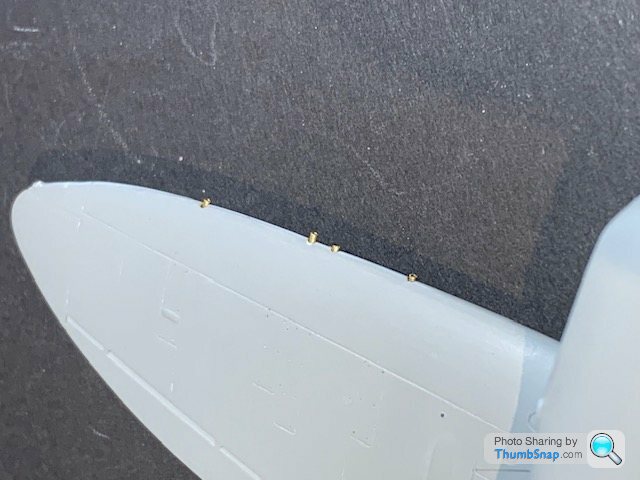
Also made some gun barrels from brass tube:
If I actually get to fit these I'll be very happy, becasue that will mean it's finished to an acceptable standard...
Looking at the above, it shows just how mch more work I've got to do to get the bullet-hole cowling fasteners to be consistent. Pffff.
Also made some gun barrels from brass tube:
If I actually get to fit these I'll be very happy, becasue that will mean it's finished to an acceptable standard...
Edited by dr_gn on Saturday 23 September 14:22
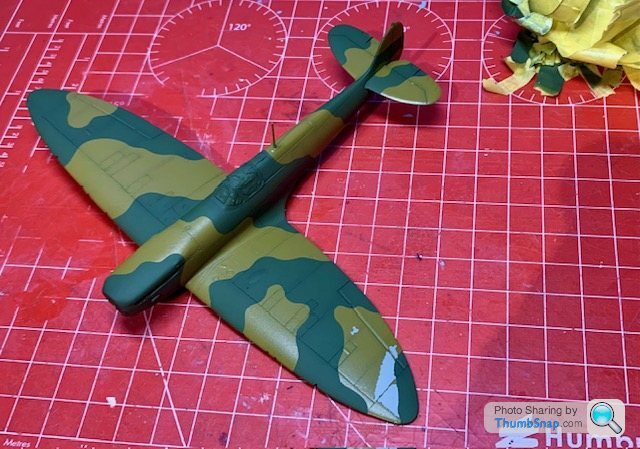
Slow, slow progress repeating all this. I've painted the undersides black and white again; at least I got to experiment with thinning the Tamiya grey pre-shade with Lacquer thinners, which does seem to make much finer lines possible, with reduced spattering:


The Klear has obscured the pre-shade on the black, but hopefully it will make an appearance again once it's got a final matt coat on.
The Klear has obscured the pre-shade on the black, but hopefully it will make an appearance again once it's got a final matt coat on.
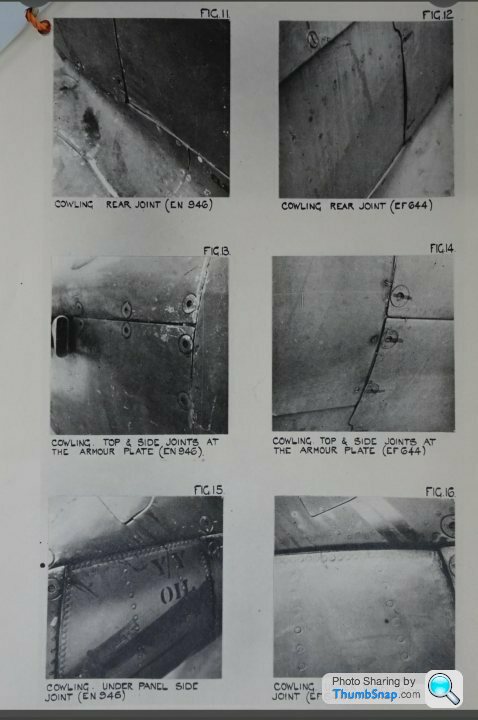
I’ve no doubt you have tonnes of reference sources and may have indeed seen this, if not there’s loads of detail and it shows how every thing works as opposed to to just photos Spitfire daily inspection.
wolfracesonic said:
I’ve no doubt you have tonnes of reference sources and may have indeed seen this, if not there’s loads of detail and it shows how every thing works as opposed to to just photos Spitfire daily inspection.
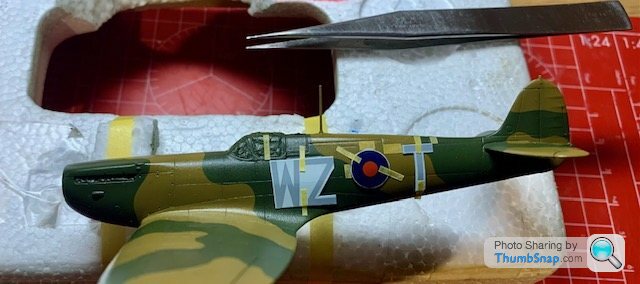
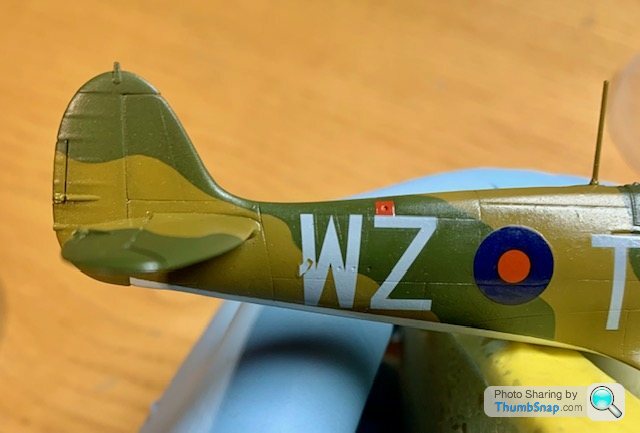
Thanks. TBH I’d be happy to just finish this one to a good standard and be done with it (along with the other three models that have currently been on the bench for the past 2 years).Masked the painted undersides, this time making the fuselage demarcation line 1mm lower. Hopefully this will allow the roundel and code lettering to sit better, and mean less messing about / risk of screwing up with positioning. I'm not convinced the code letters are the right size, but they are what they are:
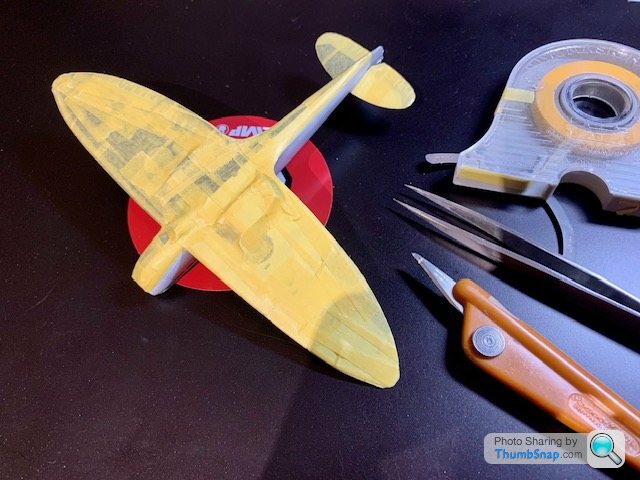
Got the "Green Brown on, and pre-shaded with NATO Black:
It actually looks better than the previous attempt. I'd obscured the pre-shading too much before, probably due to being out of practice. Small consolation I guess:
I'll leave the Klear to harden for another day, and hopefully by this time tomorrow, I'll be back to where I was 6 months ago.
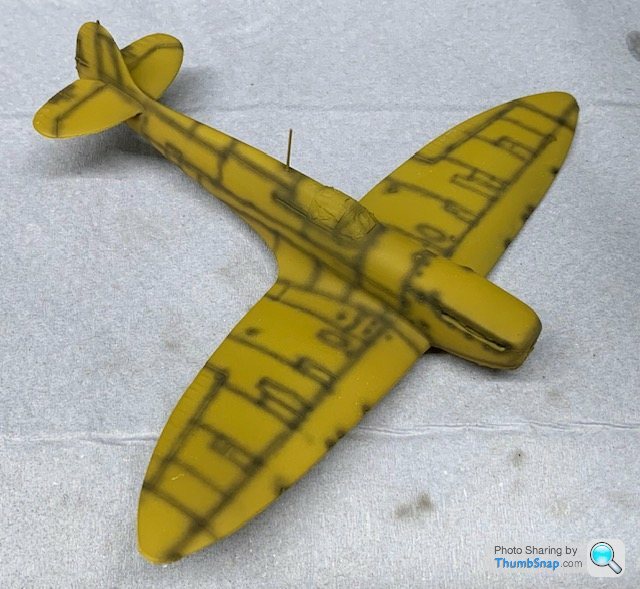
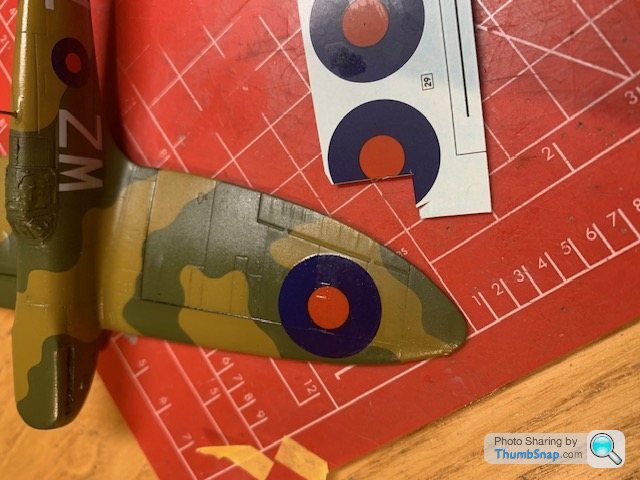
I took a lot of time to make sure that the codes fitted within the camo area, and didn't overlap the underside demarcations this time:
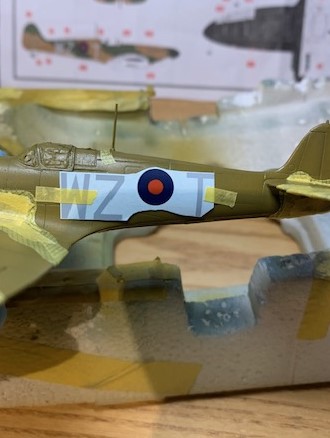
Masking done:
Preshaded Reflective Green done:
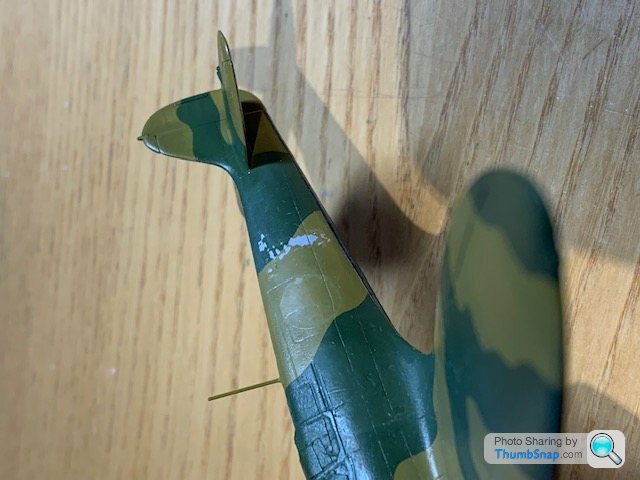
It was going great until literally the last bit of masking was removed...
Balls.
Seems like it's possible it might be correctable (the roundel covers some of it, and I can flat back to some panel lines, but I've had poor luck trying to feather acrylics back into flat surfaces, in order to avoid an edge.
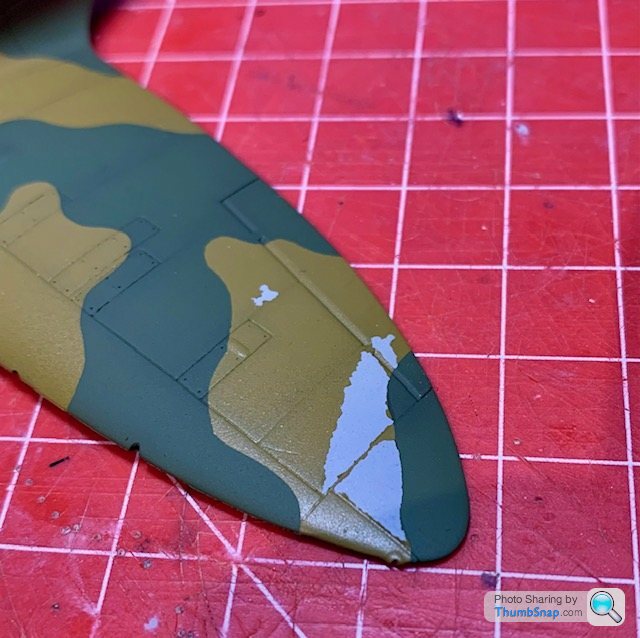
Wondering whether I should brush paint up to the ragged edges to build up the levels, then flat back in a coulple of days and re-airbrush the pre-shaded colours.
Masking done:
Preshaded Reflective Green done:
It was going great until literally the last bit of masking was removed...
Balls.
Seems like it's possible it might be correctable (the roundel covers some of it, and I can flat back to some panel lines, but I've had poor luck trying to feather acrylics back into flat surfaces, in order to avoid an edge.
Wondering whether I should brush paint up to the ragged edges to build up the levels, then flat back in a coulple of days and re-airbrush the pre-shaded colours.
dr_gn said:
Balls.
Sometimes it would be handy to be able to pay some money and go back 30 seconds...dr_gn said:
Wondering whether I should brush paint up to the ragged edges to build up the levels, then flat back in a coulple of days and re-airbrush the pre-shaded colours.
Plan B: Create a dispersal scene diorama and convert the affected area into battle damage?Simpo Two said:
dr_gn said:
Balls.
Sometimes it would be handy to be able to pay some money and go back 30 seconds...Simpo Two said:
dr_gn said:
Wondering whether I should brush paint up to the ragged edges to build up the levels, then flat back in a coulple of days and re-airbrush the pre-shaded colours.
Plan B: Create a dispersal scene diorama and convert the affected area into battle damage?Edited by dr_gn on Sunday 19th November 20:10
So I scraped off the damaged areas up to the panel lines as best I could, using a cocktail stick:
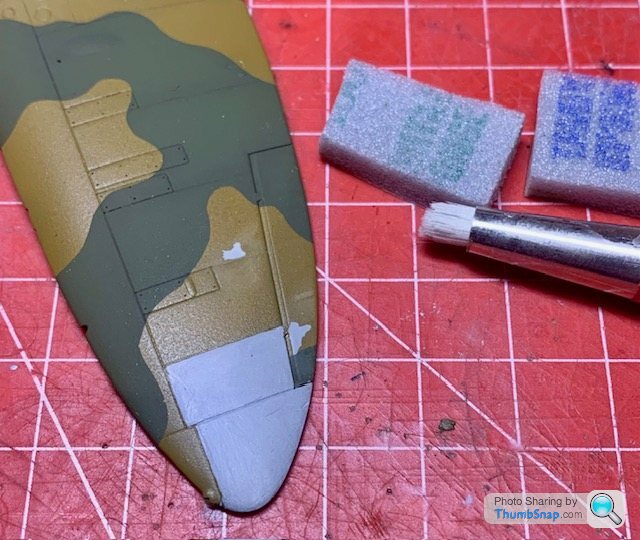
Then carefully masked the adjacent demarcation, and abraded the edges of the damaged areas with Tamiya sanding sponges and a fibreglass pencil:
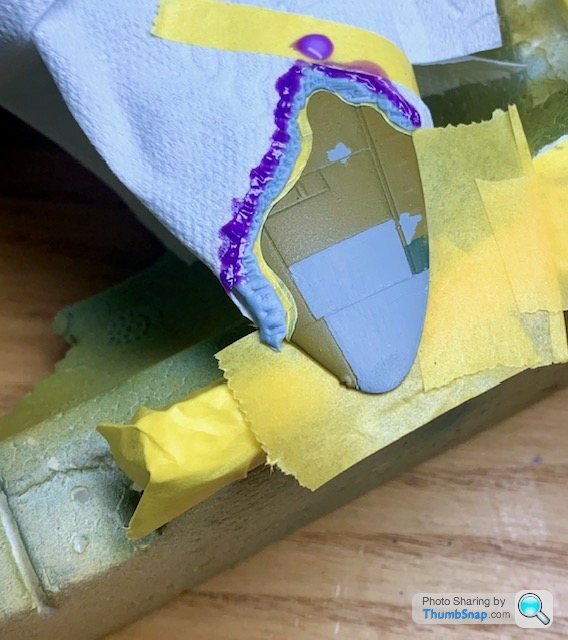
After repainting and preshading, it looks OK, but I couldn't get feathered edges - this Vallejo paint seems to peel rather than sand:
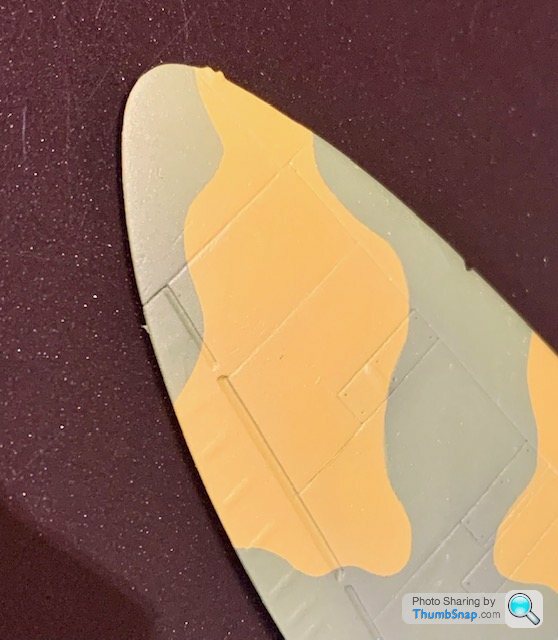
I suppose I got a bit lucky becasue the decal partially covers the worst repair:
The colours seem to be a bit off under my desk llight, but they're ok in reality.
So now it's in the airing cupboard. I'll do the other minor corrections some other time.

Then carefully masked the adjacent demarcation, and abraded the edges of the damaged areas with Tamiya sanding sponges and a fibreglass pencil:
After repainting and preshading, it looks OK, but I couldn't get feathered edges - this Vallejo paint seems to peel rather than sand:
I suppose I got a bit lucky becasue the decal partially covers the worst repair:
The colours seem to be a bit off under my desk llight, but they're ok in reality.
So now it's in the airing cupboard. I'll do the other minor corrections some other time.
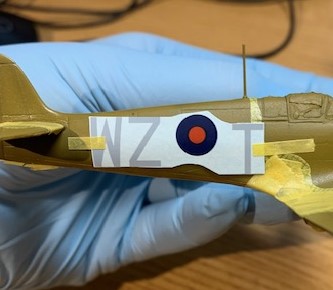
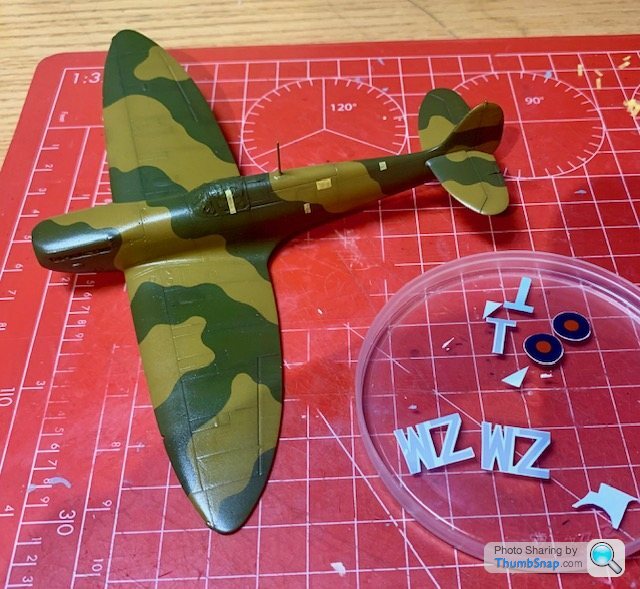
With some trepidation, I made a start on the decals. Again. This time I took some time to position them "dry":
Then cut as much carrier film away as I dare:
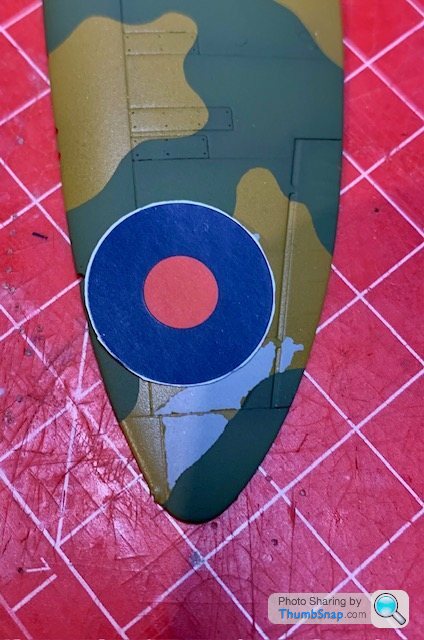
The fuselage codes went fine this time, but I got a nasty blister on the port wing, that no amount of Microsol would flatten. After some head scratching, I flatted the blister down with some sanding sponge, and cut a spare roundel to fit the damaged section, ending the cuts at convenient panel lines:
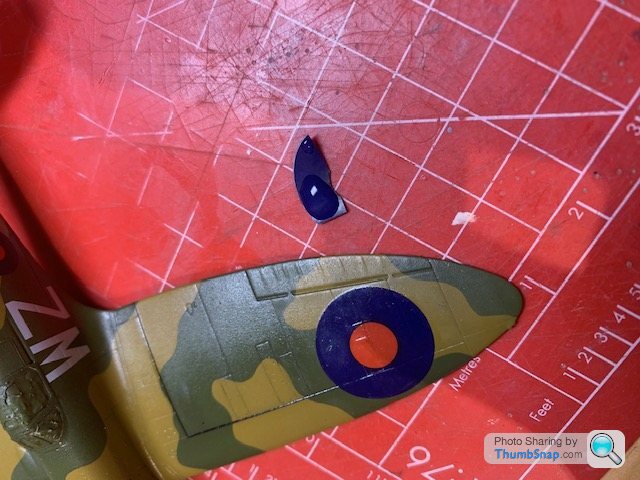
It worked "OK", but the other side also needed work. It's not going to be perfect, but I guess better than binning it at this stage:
One of the codes did crack, probably due to age. I managed to stick the damaged bit back on:
The next risky challenge is simulating the painted-out yellow band on the fuselage roundels, which - I think - applies to this aircraft. I made a test piece, and tried masking the roundel and overspraying with Tamiya Smoke (left), and Tamiya Clear Yellow (right):

I think the yellow looks better.
So this is current situation - main decals on, and overcoated with Klear in preparation for the roundel work:
Then cut as much carrier film away as I dare:
The fuselage codes went fine this time, but I got a nasty blister on the port wing, that no amount of Microsol would flatten. After some head scratching, I flatted the blister down with some sanding sponge, and cut a spare roundel to fit the damaged section, ending the cuts at convenient panel lines:
It worked "OK", but the other side also needed work. It's not going to be perfect, but I guess better than binning it at this stage:
One of the codes did crack, probably due to age. I managed to stick the damaged bit back on:
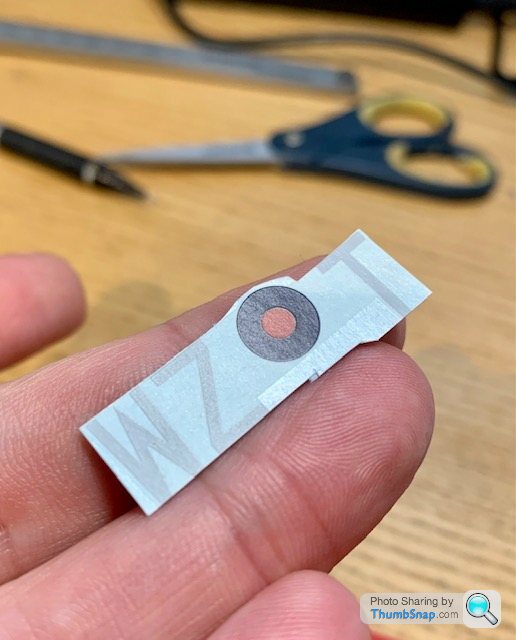
The next risky challenge is simulating the painted-out yellow band on the fuselage roundels, which - I think - applies to this aircraft. I made a test piece, and tried masking the roundel and overspraying with Tamiya Smoke (left), and Tamiya Clear Yellow (right):
I think the yellow looks better.
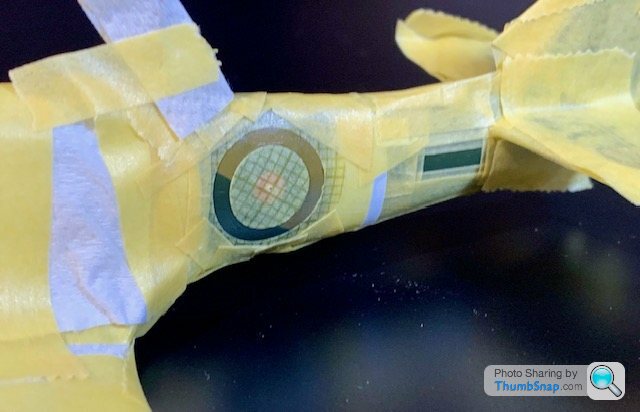
So this is current situation - main decals on, and overcoated with Klear in preparation for the roundel work:
Masked up the serials and roundels using the Olfa cutter:
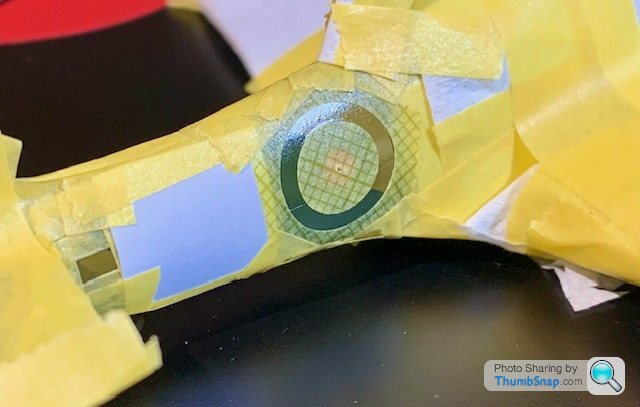
I opted for Tamiya Smoke rather than Clear Yellow, because I figured that if the yelow was covered up with paint...it wouldn't be yellow anymore.
It's pretty difficult to figure out exact shades, or dimensions of the painted-over bits, in fact some images don't seem to show it at all. I opted for as subtle a contrast as possible, hopefully without it looking like a mistake. I assumed that the stbd. side serial would have overlapped the code letters, bit in reality i have no idea how it actually looked. What with the letters being (I think) too large and conflicting position instructions in the kit, I've ended up positioning and shading everything with a large dose of modelling license. Anyhow, so far so good:
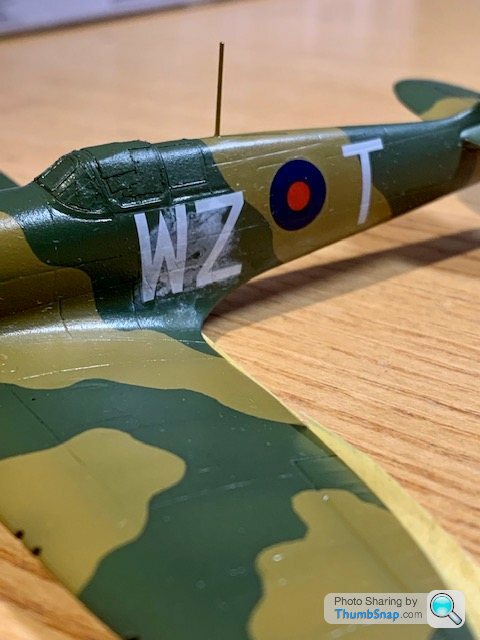
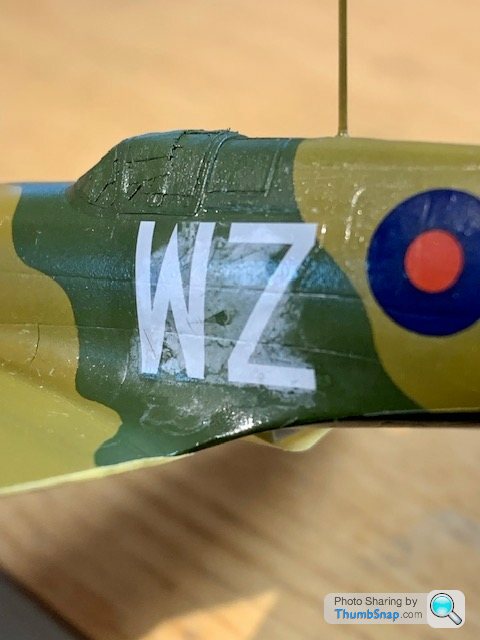
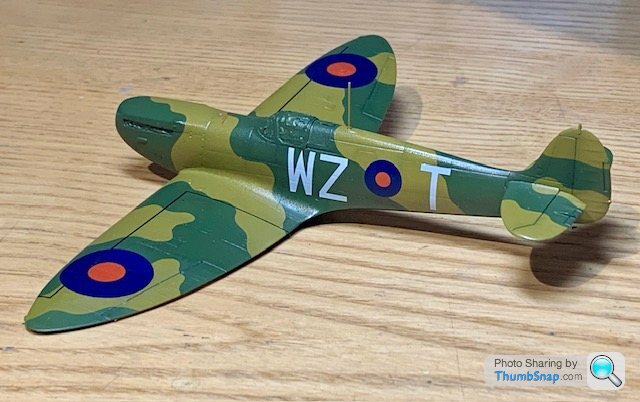
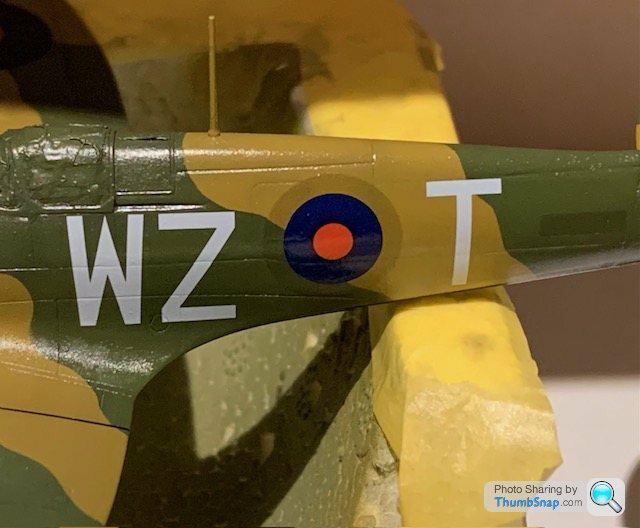
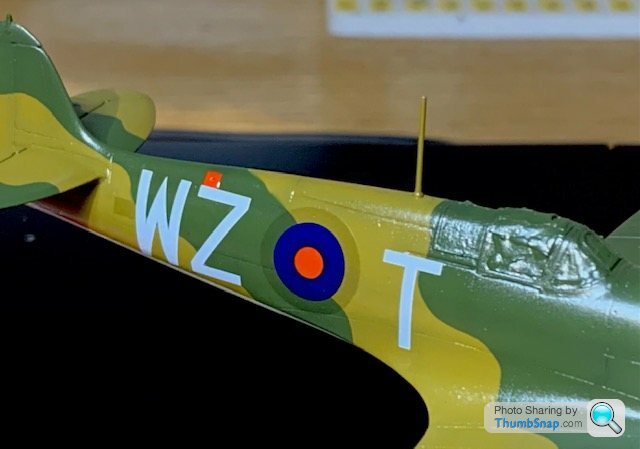
Decals and stencils all on now, and under another coat of Klear:

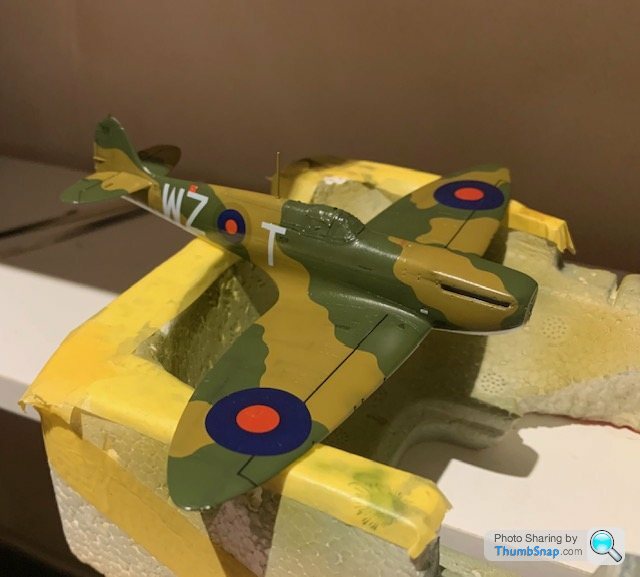
And made a start on painting and light weathering the exhausts. I drilled them out too to give them a bit of depth:
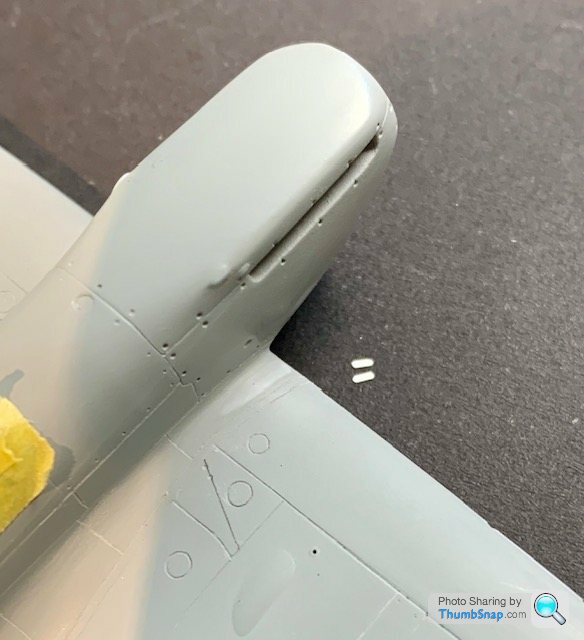
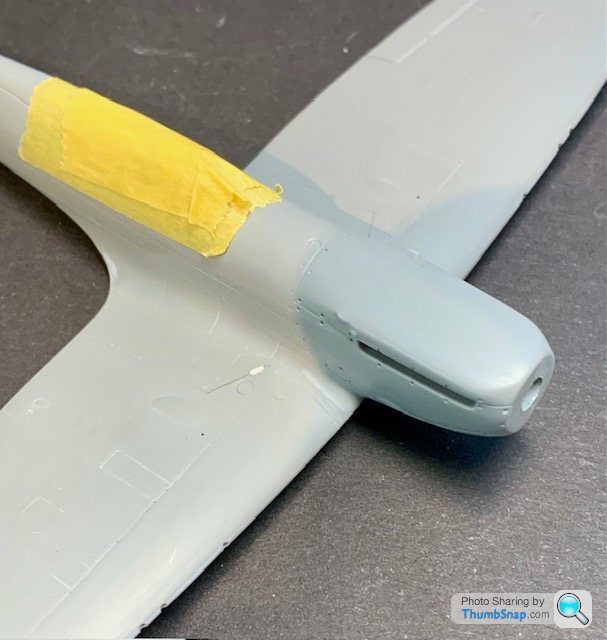
Smaller details were things like the pitot tube, which I modified with brass tube. I went for the version in the pre-war photos, rather than the earlier, rather odd looking double tube version:

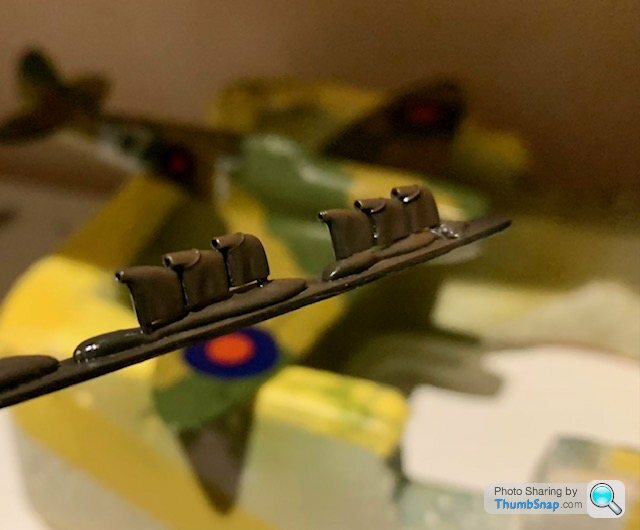
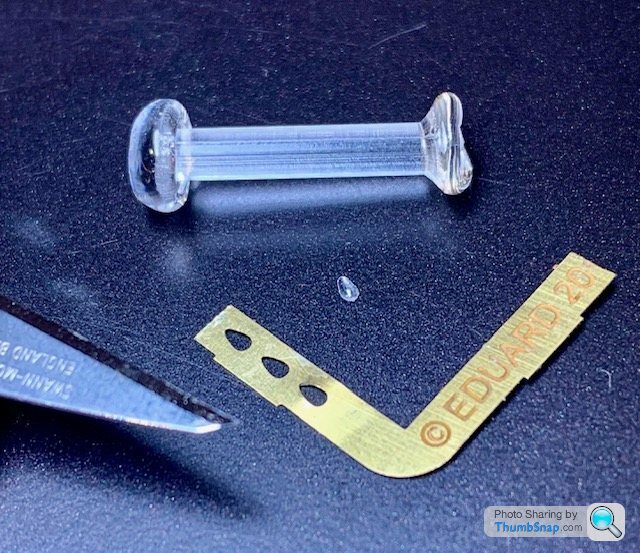
Also made the upper navigation light cover to fit behind the cockpit. I used an old Eduard p/e fret (which often have teardrop cut-outs around their edges). Heated some clear sprue in a flame, and pushed it through the fret, before cutting it off with a razor saw and dipping in Klear:
And made a start on painting and light weathering the exhausts. I drilled them out too to give them a bit of depth:
Smaller details were things like the pitot tube, which I modified with brass tube. I went for the version in the pre-war photos, rather than the earlier, rather odd looking double tube version:
Also made the upper navigation light cover to fit behind the cockpit. I used an old Eduard p/e fret (which often have teardrop cut-outs around their edges). Heated some clear sprue in a flame, and pushed it through the fret, before cutting it off with a razor saw and dipping in Klear:
Good idea with the transparent PS. I will give a try.
I am following your builds with interest. What is remarkable is that you are using Klear as an intermediate gloss layer for sealing and decal covering. Do you ever have issues with cleaning the airbrush afterwards? I haven't dared to try it myself yet in the fear of ruining the airbrush pistol.
I am following your builds with interest. What is remarkable is that you are using Klear as an intermediate gloss layer for sealing and decal covering. Do you ever have issues with cleaning the airbrush afterwards? I haven't dared to try it myself yet in the fear of ruining the airbrush pistol.
alleggeria said:
Good idea with the transparent PS. I will give a try.
I am following your builds with interest. What is remarkable is that you are using Klear as an intermediate gloss layer for sealing and decal covering. Do you ever have issues with cleaning the airbrush afterwards? I haven't dared to try it myself yet in the fear of ruining the airbrush pistol.
Been using Klear for a decade or more without any cleaning issues. I just run some Tamiya or Vallejo thinners through afterwards and that’s it. Occasionally clean the needle and jet with airbrush cleaner, but no problem. Isopropyl alcohol seems to remove it from plastic in the event I need to strip and re-apply to a dipped canopy.I am following your builds with interest. What is remarkable is that you are using Klear as an intermediate gloss layer for sealing and decal covering. Do you ever have issues with cleaning the airbrush afterwards? I haven't dared to try it myself yet in the fear of ruining the airbrush pistol.
Gassing Station | Scale Models | Top of Page | What's New | My Stuff