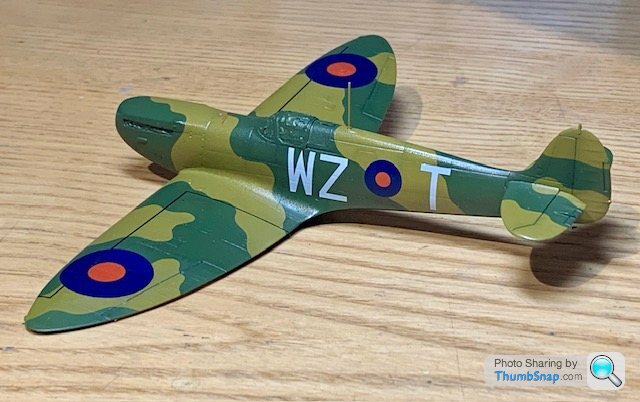
Airfix 1:72 Spitfire Mk.I
Discussion


wolfracesonic said:
I’ve no doubt you have tonnes of reference sources and may have indeed seen this, if not there’s loads of detail and it shows how every thing works as opposed to to just photos Spitfire daily inspection.
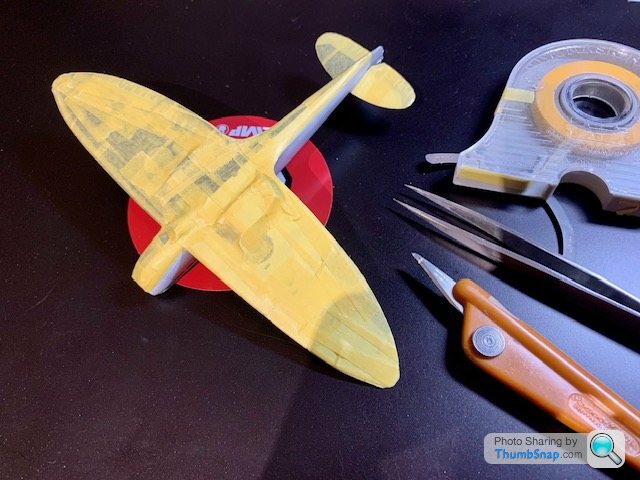
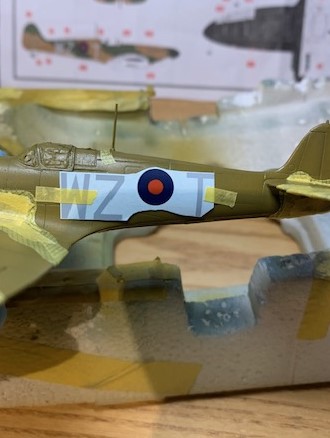
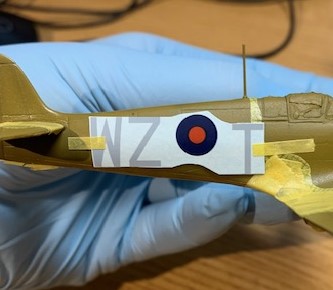
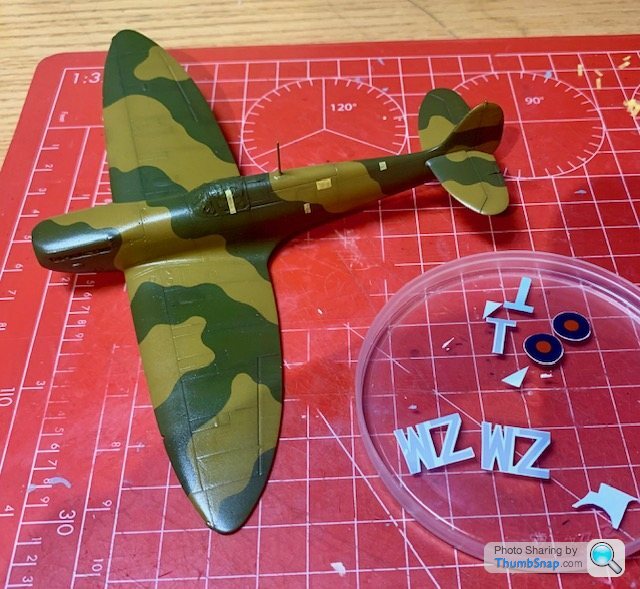
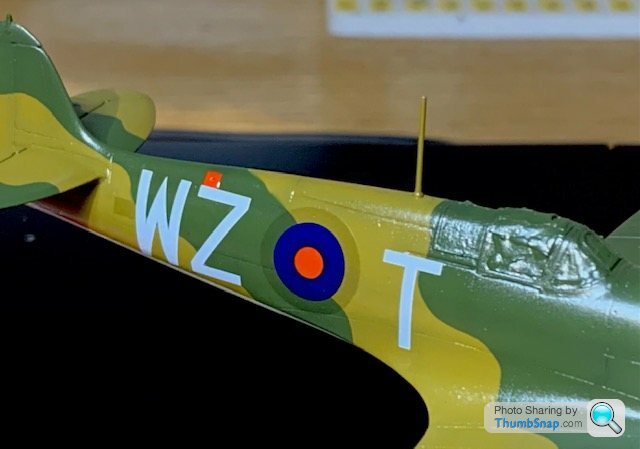
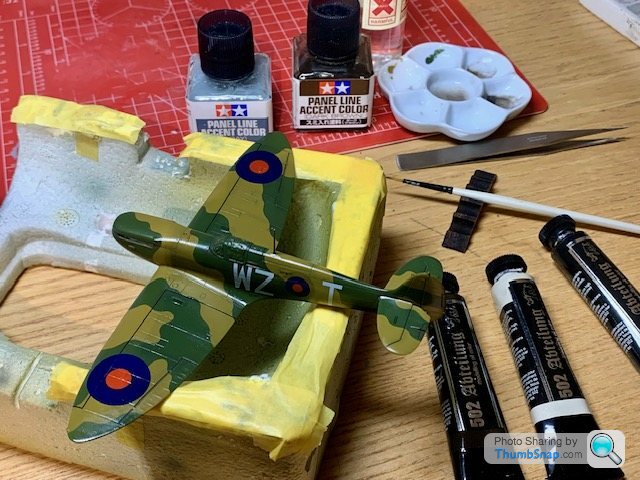
Thanks. TBH I’d be happy to just finish this one to a good standard and be done with it (along with the other three models that have currently been on the bench for the past 2 years).Masked the painted undersides, this time making the fuselage demarcation line 1mm lower. Hopefully this will allow the roundel and code lettering to sit better, and mean less messing about / risk of screwing up with positioning. I'm not convinced the code letters are the right size, but they are what they are:
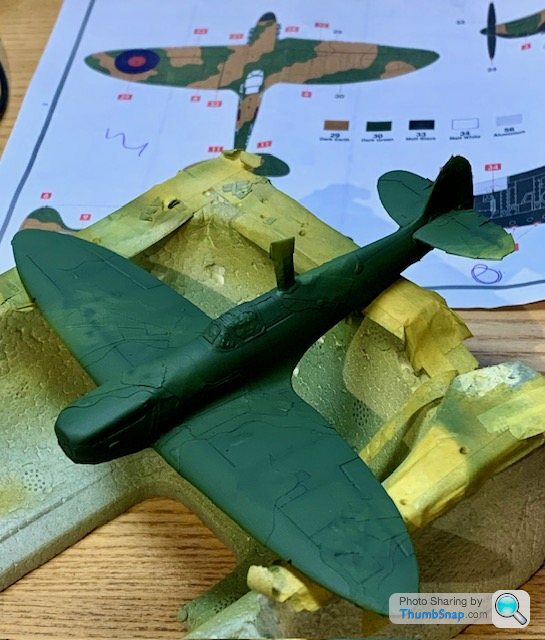
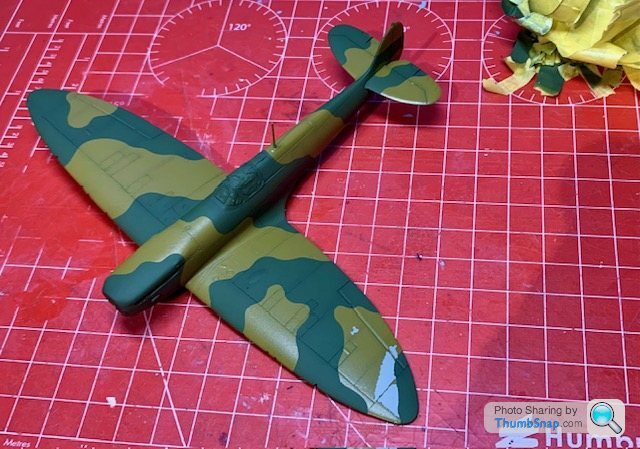
Got the "Green Brown on, and pre-shaded with NATO Black:
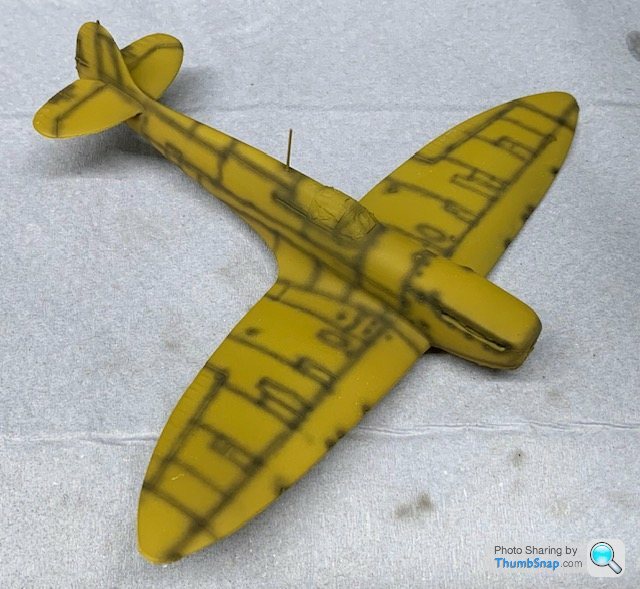
It actually looks better than the previous attempt. I'd obscured the pre-shading too much before, probably due to being out of practice. Small consolation I guess:
I'll leave the Klear to harden for another day, and hopefully by this time tomorrow, I'll be back to where I was 6 months ago.
Got the "Green Brown on, and pre-shaded with NATO Black:
It actually looks better than the previous attempt. I'd obscured the pre-shading too much before, probably due to being out of practice. Small consolation I guess:
I'll leave the Klear to harden for another day, and hopefully by this time tomorrow, I'll be back to where I was 6 months ago.
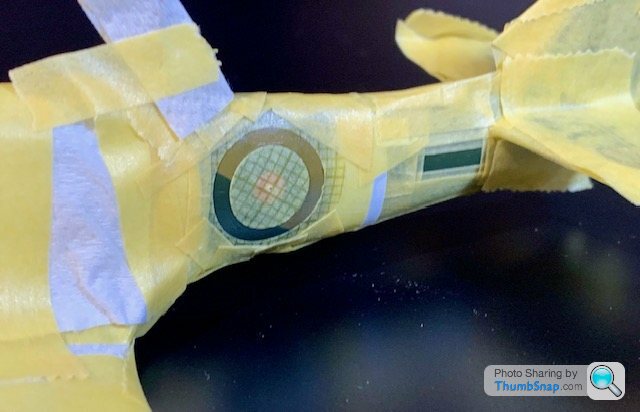
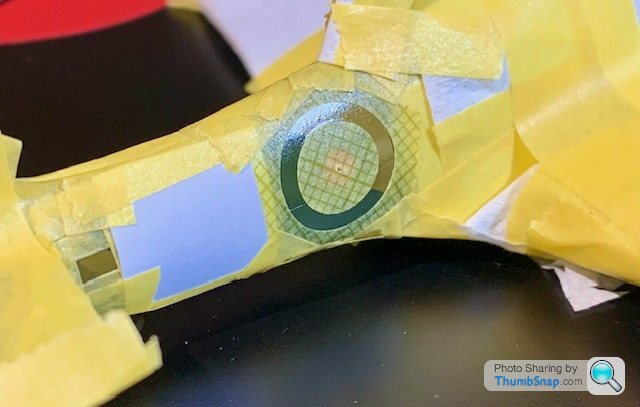
I took a lot of time to make sure that the codes fitted within the camo area, and didn't overlap the underside demarcations this time:
Masking done:
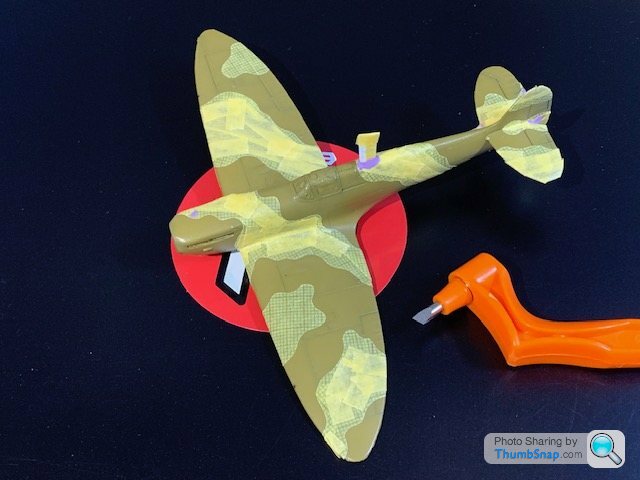
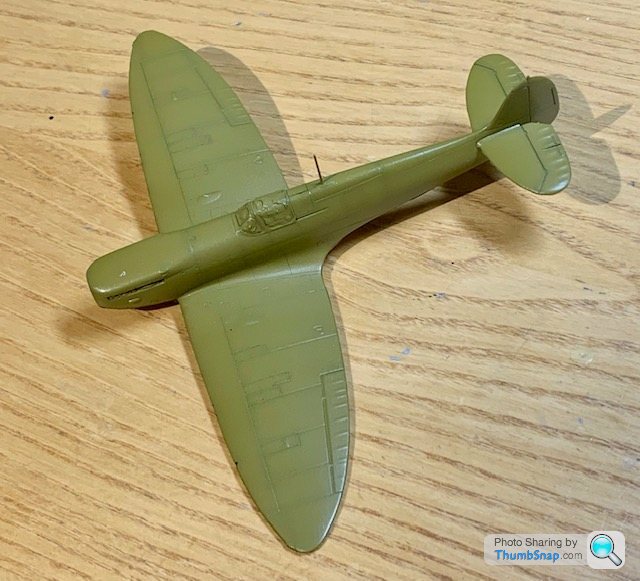
Preshaded Reflective Green done:
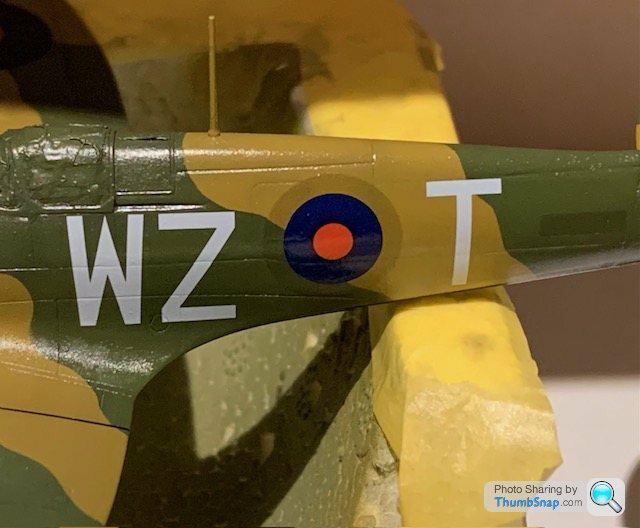
It was going great until literally the last bit of masking was removed...
Balls.
Seems like it's possible it might be correctable (the roundel covers some of it, and I can flat back to some panel lines, but I've had poor luck trying to feather acrylics back into flat surfaces, in order to avoid an edge.
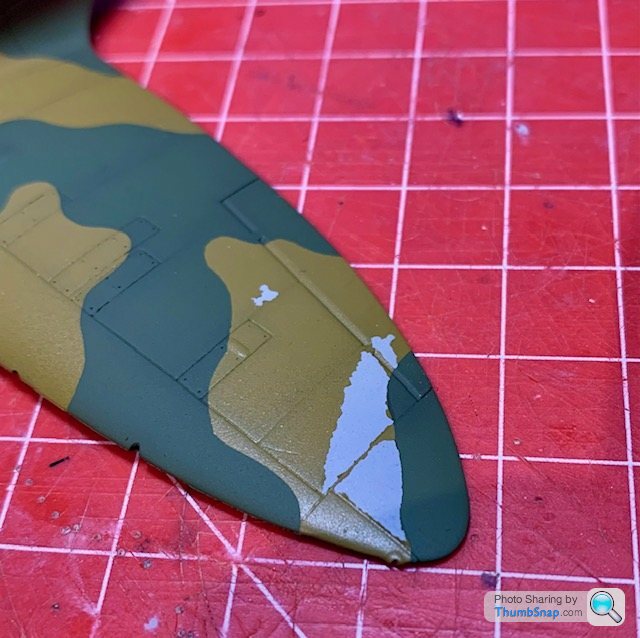
Wondering whether I should brush paint up to the ragged edges to build up the levels, then flat back in a coulple of days and re-airbrush the pre-shaded colours.
Masking done:
Preshaded Reflective Green done:
It was going great until literally the last bit of masking was removed...
Balls.
Seems like it's possible it might be correctable (the roundel covers some of it, and I can flat back to some panel lines, but I've had poor luck trying to feather acrylics back into flat surfaces, in order to avoid an edge.
Wondering whether I should brush paint up to the ragged edges to build up the levels, then flat back in a coulple of days and re-airbrush the pre-shaded colours.
Simpo Two said:
dr_gn said:
Balls.
Sometimes it would be handy to be able to pay some money and go back 30 seconds...Simpo Two said:
dr_gn said:
Wondering whether I should brush paint up to the ragged edges to build up the levels, then flat back in a coulple of days and re-airbrush the pre-shaded colours.
Plan B: Create a dispersal scene diorama and convert the affected area into battle damage?Edited by dr_gn on Sunday 19th November 20:10
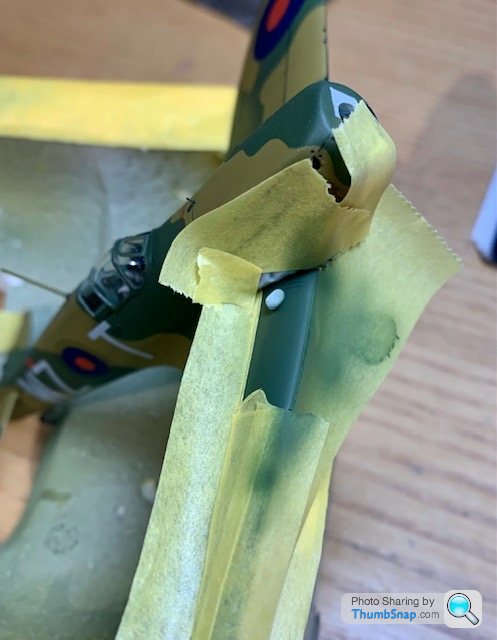
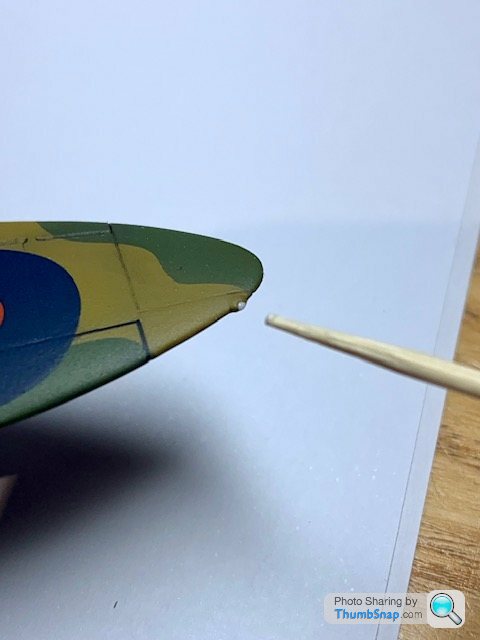
So I scraped off the damaged areas up to the panel lines as best I could, using a cocktail stick:
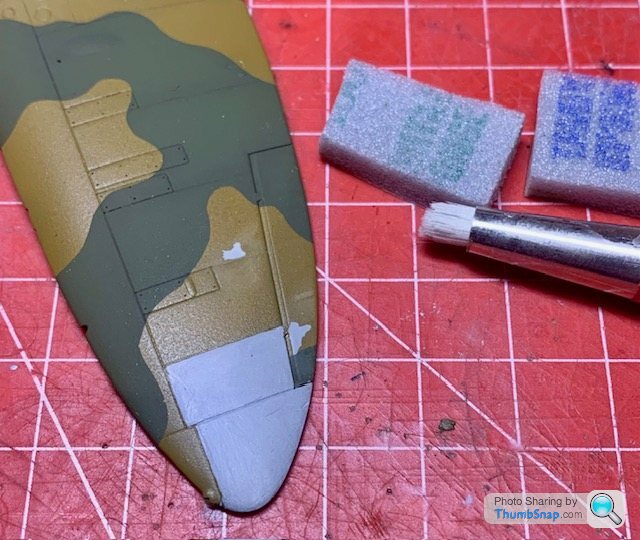
Then carefully masked the adjacent demarcation, and abraded the edges of the damaged areas with Tamiya sanding sponges and a fibreglass pencil:
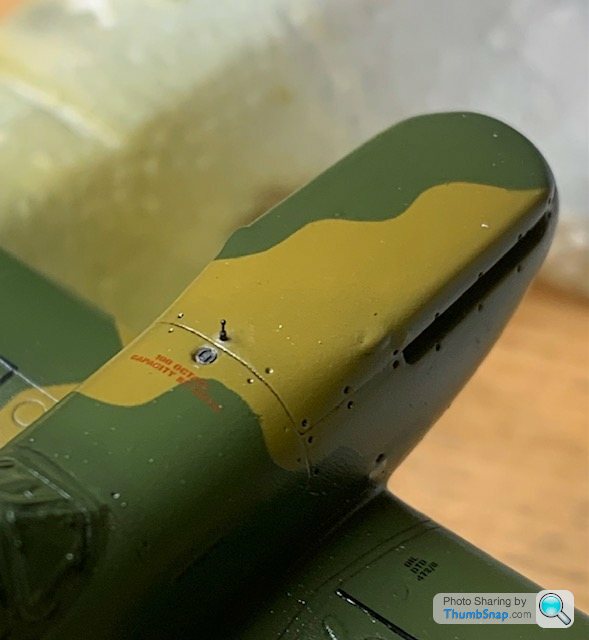
After repainting and preshading, it looks OK, but I couldn't get feathered edges - this Vallejo paint seems to peel rather than sand:
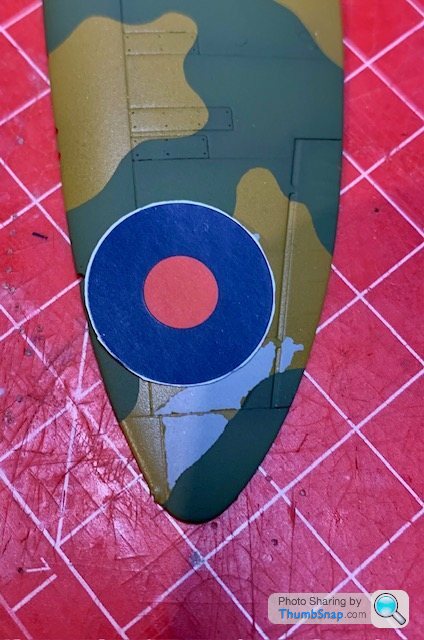
I suppose I got a bit lucky becasue the decal partially covers the worst repair:
The colours seem to be a bit off under my desk llight, but they're ok in reality.
So now it's in the airing cupboard. I'll do the other minor corrections some other time.

Then carefully masked the adjacent demarcation, and abraded the edges of the damaged areas with Tamiya sanding sponges and a fibreglass pencil:
After repainting and preshading, it looks OK, but I couldn't get feathered edges - this Vallejo paint seems to peel rather than sand:
I suppose I got a bit lucky becasue the decal partially covers the worst repair:
The colours seem to be a bit off under my desk llight, but they're ok in reality.
So now it's in the airing cupboard. I'll do the other minor corrections some other time.
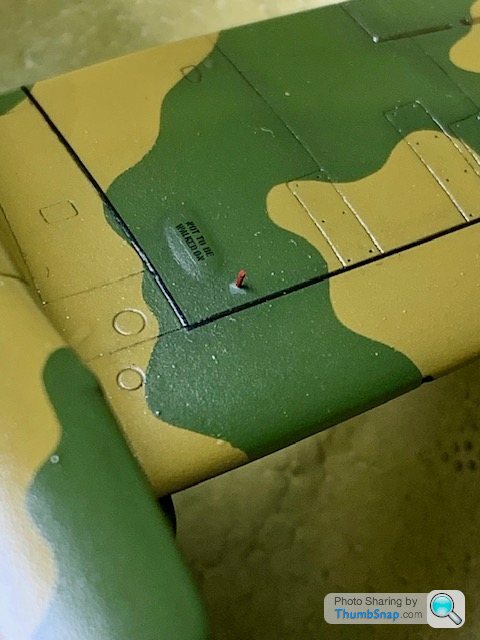
With some trepidation, I made a start on the decals. Again. This time I took some time to position them "dry":
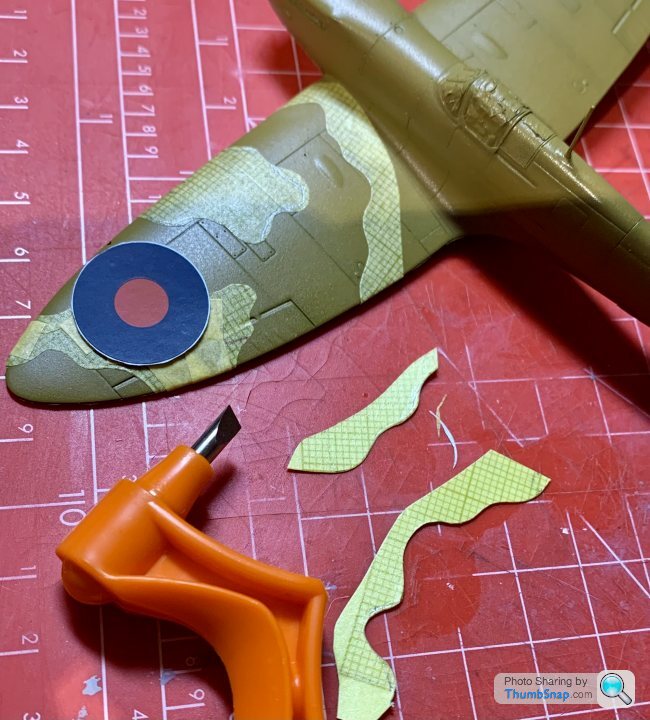
Then cut as much carrier film away as I dare:
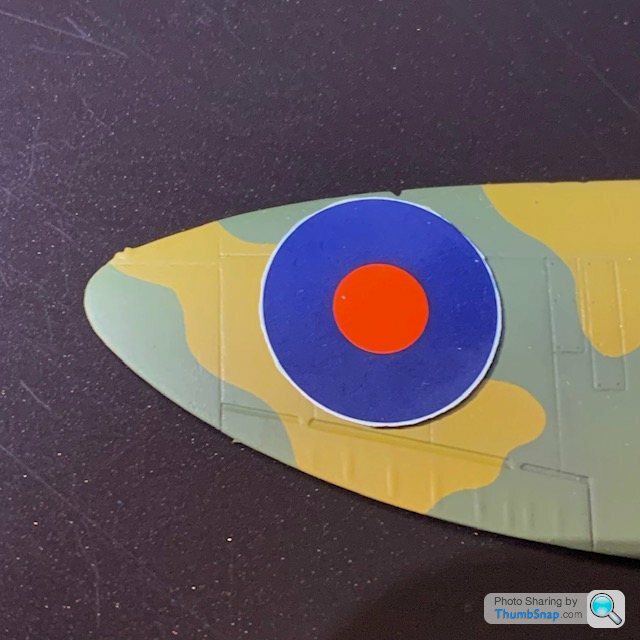
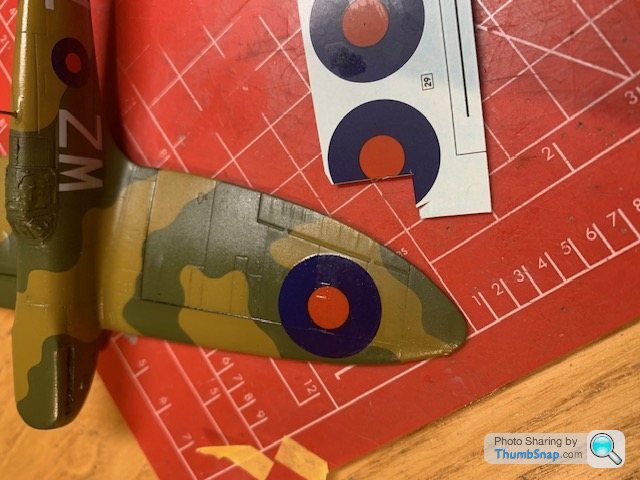
The fuselage codes went fine this time, but I got a nasty blister on the port wing, that no amount of Microsol would flatten. After some head scratching, I flatted the blister down with some sanding sponge, and cut a spare roundel to fit the damaged section, ending the cuts at convenient panel lines:
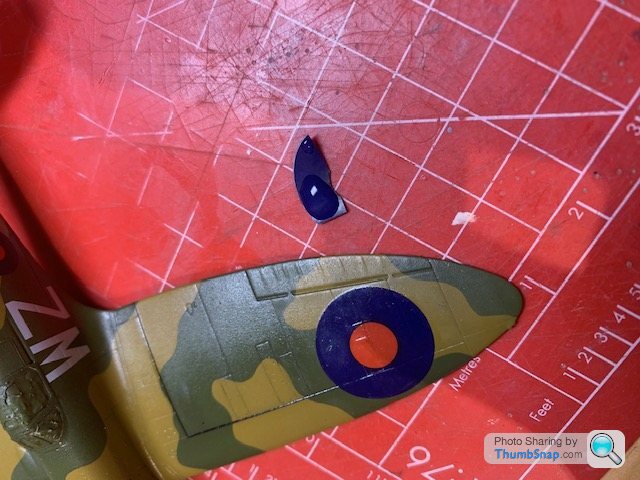
It worked "OK", but the other side also needed work. It's not going to be perfect, but I guess better than binning it at this stage:
One of the codes did crack, probably due to age. I managed to stick the damaged bit back on:
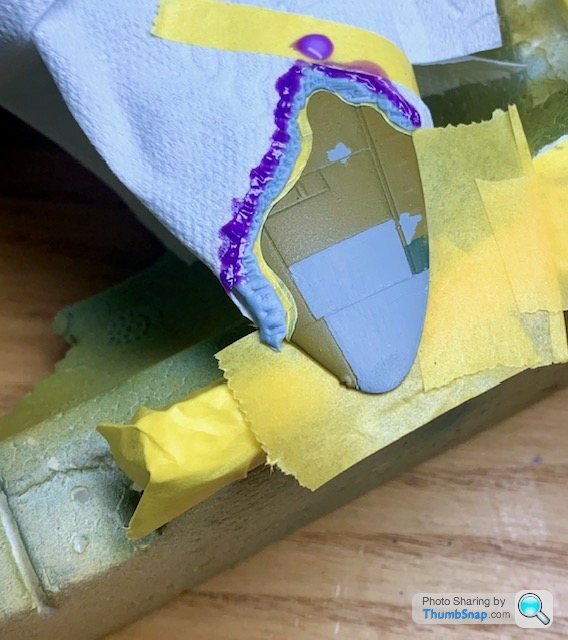
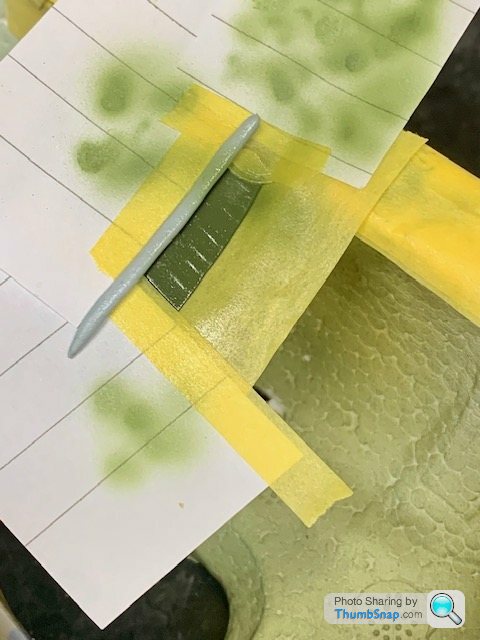
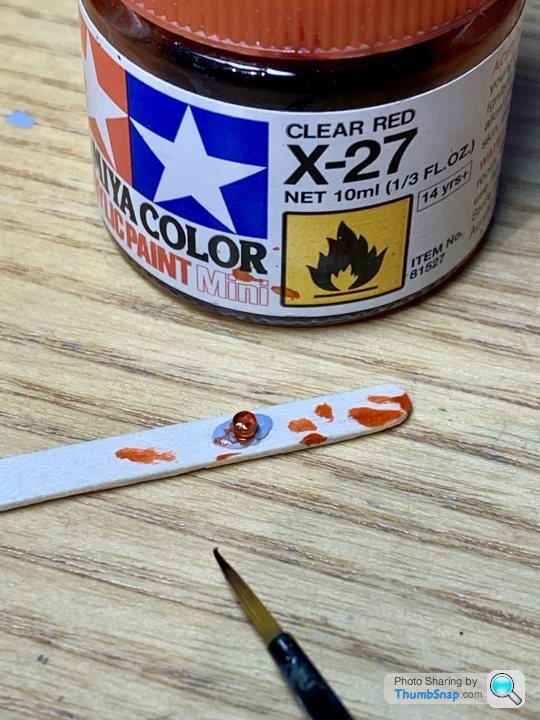
The next risky challenge is simulating the painted-out yellow band on the fuselage roundels, which - I think - applies to this aircraft. I made a test piece, and tried masking the roundel and overspraying with Tamiya Smoke (left), and Tamiya Clear Yellow (right):

I think the yellow looks better.
So this is current situation - main decals on, and overcoated with Klear in preparation for the roundel work:
Then cut as much carrier film away as I dare:
The fuselage codes went fine this time, but I got a nasty blister on the port wing, that no amount of Microsol would flatten. After some head scratching, I flatted the blister down with some sanding sponge, and cut a spare roundel to fit the damaged section, ending the cuts at convenient panel lines:
It worked "OK", but the other side also needed work. It's not going to be perfect, but I guess better than binning it at this stage:
One of the codes did crack, probably due to age. I managed to stick the damaged bit back on:
The next risky challenge is simulating the painted-out yellow band on the fuselage roundels, which - I think - applies to this aircraft. I made a test piece, and tried masking the roundel and overspraying with Tamiya Smoke (left), and Tamiya Clear Yellow (right):
I think the yellow looks better.
So this is current situation - main decals on, and overcoated with Klear in preparation for the roundel work:
Masked up the serials and roundels using the Olfa cutter:
I opted for Tamiya Smoke rather than Clear Yellow, because I figured that if the yelow was covered up with paint...it wouldn't be yellow anymore.
It's pretty difficult to figure out exact shades, or dimensions of the painted-over bits, in fact some images don't seem to show it at all. I opted for as subtle a contrast as possible, hopefully without it looking like a mistake. I assumed that the stbd. side serial would have overlapped the code letters, bit in reality i have no idea how it actually looked. What with the letters being (I think) too large and conflicting position instructions in the kit, I've ended up positioning and shading everything with a large dose of modelling license. Anyhow, so far so good:
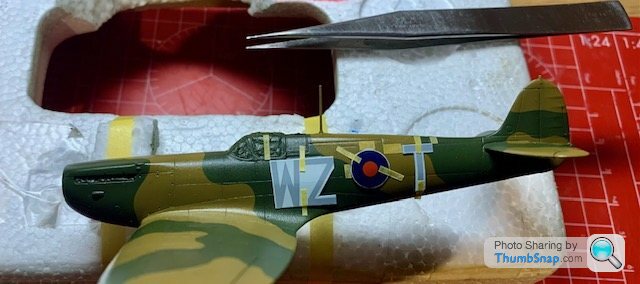
Decals and stencils all on now, and under another coat of Klear:

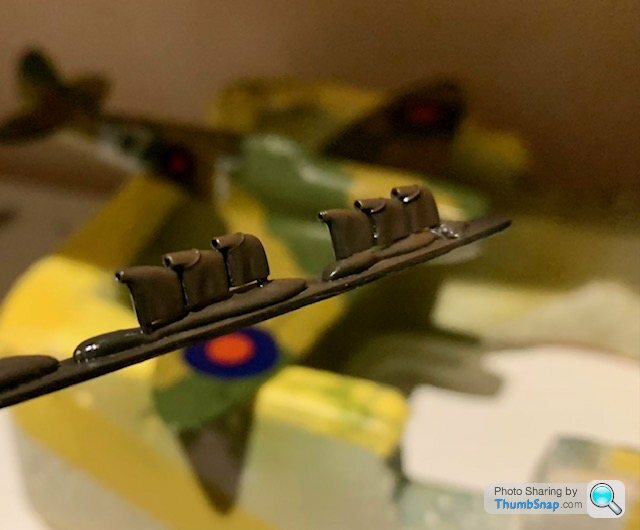
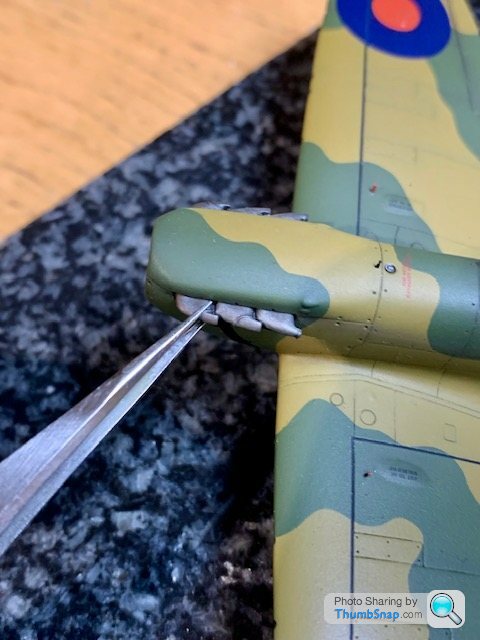
And made a start on painting and light weathering the exhausts. I drilled them out too to give them a bit of depth:
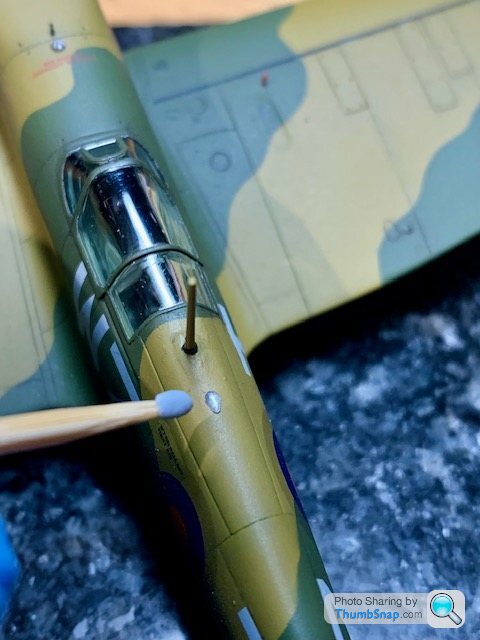
Smaller details were things like the pitot tube, which I modified with brass tube. I went for the version in the pre-war photos, rather than the earlier, rather odd looking double tube version:

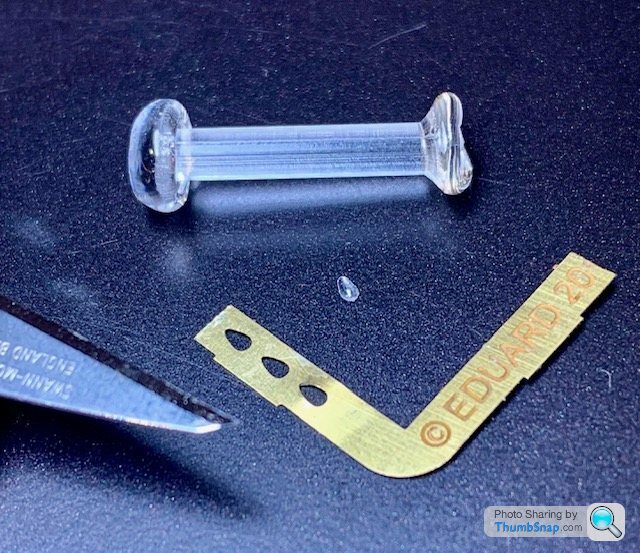
Also made the upper navigation light cover to fit behind the cockpit. I used an old Eduard p/e fret (which often have teardrop cut-outs around their edges). Heated some clear sprue in a flame, and pushed it through the fret, before cutting it off with a razor saw and dipping in Klear:
And made a start on painting and light weathering the exhausts. I drilled them out too to give them a bit of depth:
Smaller details were things like the pitot tube, which I modified with brass tube. I went for the version in the pre-war photos, rather than the earlier, rather odd looking double tube version:
Also made the upper navigation light cover to fit behind the cockpit. I used an old Eduard p/e fret (which often have teardrop cut-outs around their edges). Heated some clear sprue in a flame, and pushed it through the fret, before cutting it off with a razor saw and dipping in Klear:
alleggeria said:
Good idea with the transparent PS. I will give a try.
I am following your builds with interest. What is remarkable is that you are using Klear as an intermediate gloss layer for sealing and decal covering. Do you ever have issues with cleaning the airbrush afterwards? I haven't dared to try it myself yet in the fear of ruining the airbrush pistol.
Been using Klear for a decade or more without any cleaning issues. I just run some Tamiya or Vallejo thinners through afterwards and that’s it. Occasionally clean the needle and jet with airbrush cleaner, but no problem. Isopropyl alcohol seems to remove it from plastic in the event I need to strip and re-apply to a dipped canopy.I am following your builds with interest. What is remarkable is that you are using Klear as an intermediate gloss layer for sealing and decal covering. Do you ever have issues with cleaning the airbrush afterwards? I haven't dared to try it myself yet in the fear of ruining the airbrush pistol.
alleggeria said:
Good idea with the transparent PS. I will give a try.
I am following your builds with interest. What is remarkable is that you are using Klear as an intermediate gloss layer for sealing and decal covering. Do you ever have issues with cleaning the airbrush afterwards? I haven't dared to try it myself yet in the fear of ruining the airbrush pistol.
BTW if you end up using the more conventional alternatives to Klear, I'd be happy to buy a bottle off you - difficult to find these days!I am following your builds with interest. What is remarkable is that you are using Klear as an intermediate gloss layer for sealing and decal covering. Do you ever have issues with cleaning the airbrush afterwards? I haven't dared to try it myself yet in the fear of ruining the airbrush pistol.
Continued with applying a wash. It's OK-ish, the partially filled panel line experiment has - as expected - made retaining a wash difficult. The bits I had to re-scribe are fine though, so it's a bit of a mish-mash:
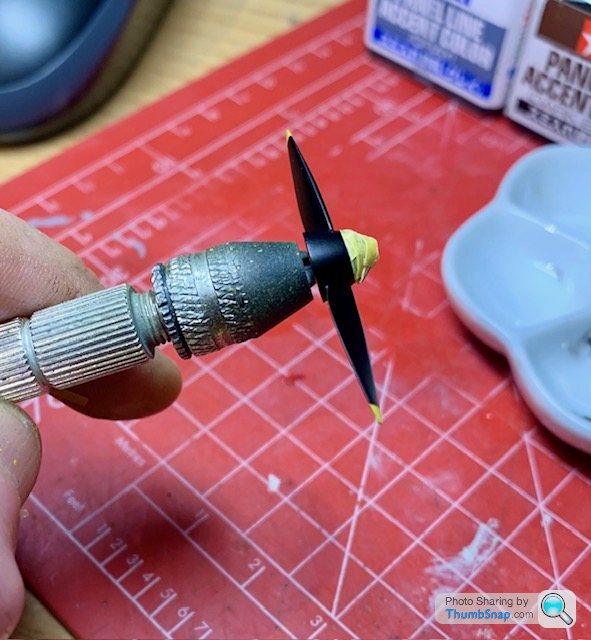
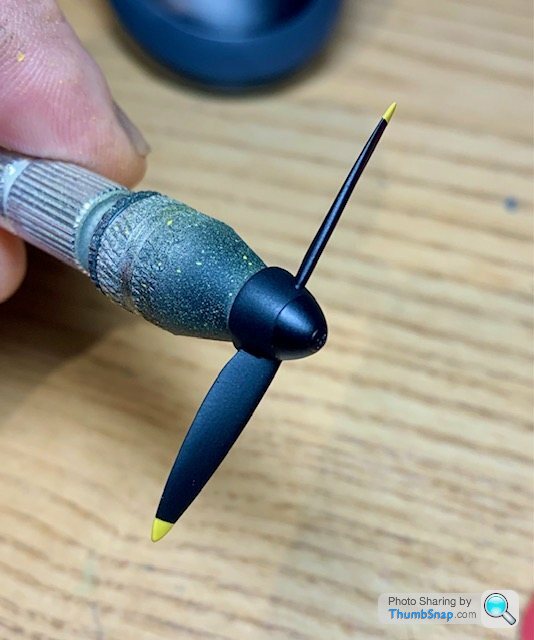
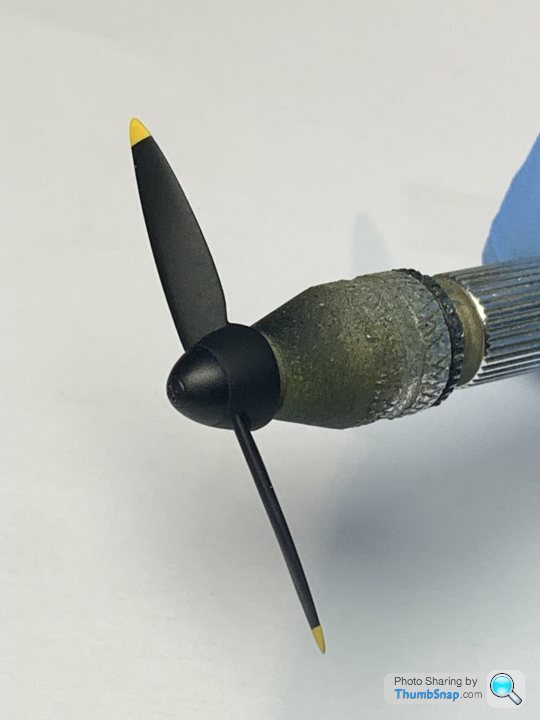
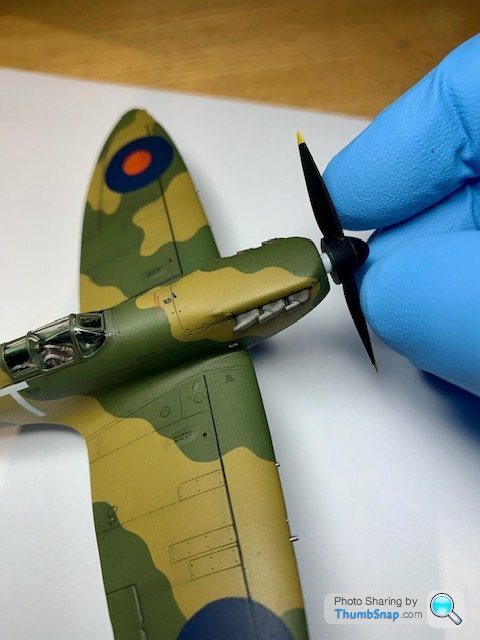
Did some work on the propeller. Looking at original photographs, in some there seemed to be a very slight difference in reflectivity between the propeller and spinner cap, which I've tried to replicate by using satin black for the spinner cap, and the same overcoated with matt for the propeller. I suppose the wood/metal construction might have caused the difference (if it's there at all):
Painted the base of the upper light cover with gunmetal:
Added lead wire hydraulic lines to the u/c legs:
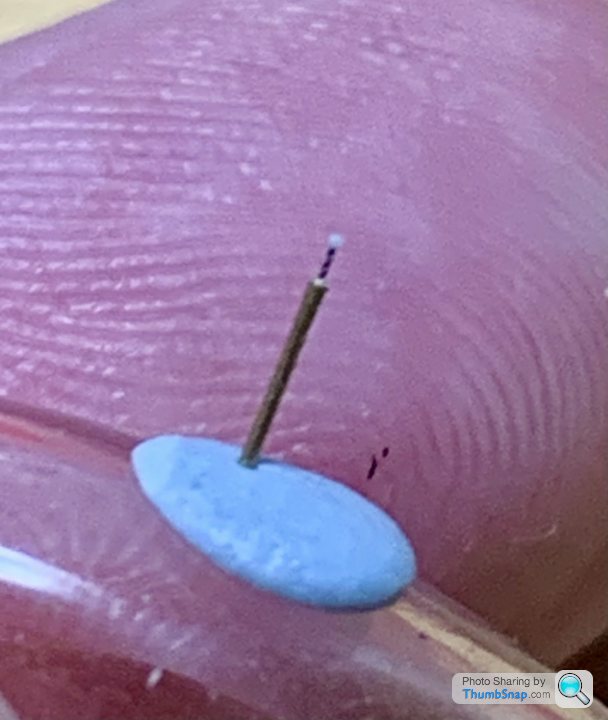
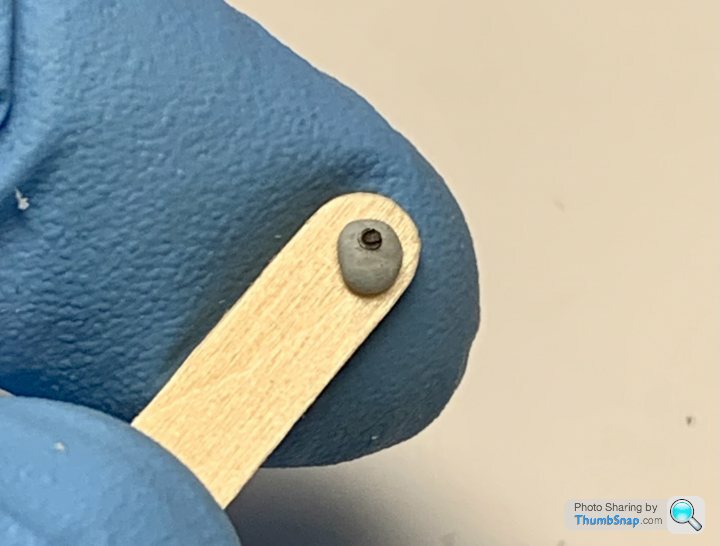
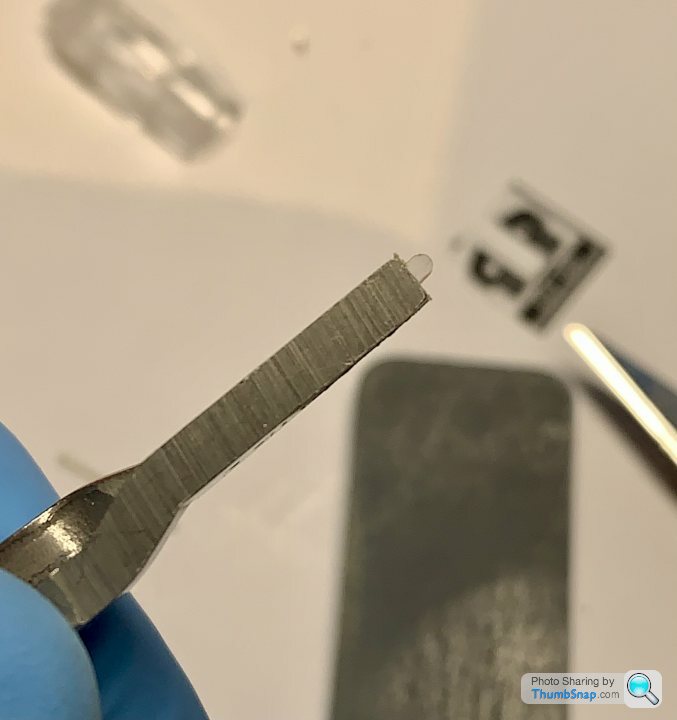
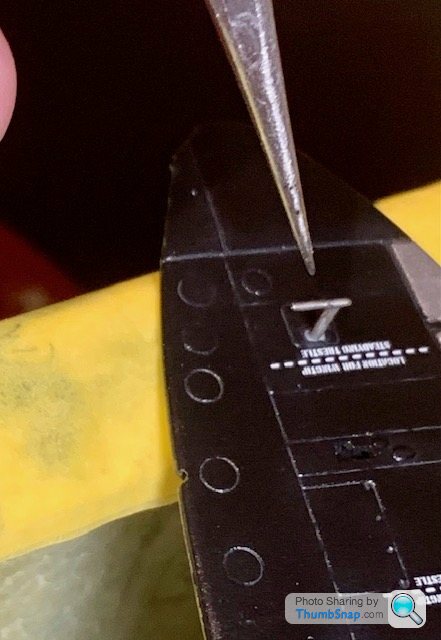
Made a bead sight out of brass tube, the drill that jammed in it while I was opening it up (every cloud), and a dot of PVA:
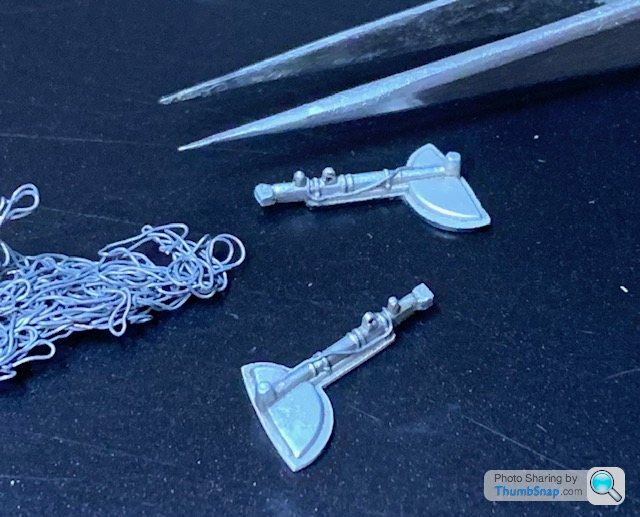
And finally a pir of undercarriage indicators out of brass tube, flattened at one end:

Also had to do a small repair on the sbd. aileron that had got some pooled Klear on it:
The vast majority of my time spent on models is correcting tricky to correct errors that I somehow don't seem to be able to avoid these days. Takes its toll on the motivation.
Did some work on the propeller. Looking at original photographs, in some there seemed to be a very slight difference in reflectivity between the propeller and spinner cap, which I've tried to replicate by using satin black for the spinner cap, and the same overcoated with matt for the propeller. I suppose the wood/metal construction might have caused the difference (if it's there at all):
Painted the base of the upper light cover with gunmetal:
Added lead wire hydraulic lines to the u/c legs:
Made a bead sight out of brass tube, the drill that jammed in it while I was opening it up (every cloud), and a dot of PVA:
And finally a pir of undercarriage indicators out of brass tube, flattened at one end:
Also had to do a small repair on the sbd. aileron that had got some pooled Klear on it:
The vast majority of my time spent on models is correcting tricky to correct errors that I somehow don't seem to be able to avoid these days. Takes its toll on the motivation.
Edited by dr_gn on Wednesday 29th November 22:45
alleggeria said:
dr_gn said:
BTW if you end up using the more conventional alternatives to Klear, I'd be happy to buy a bottle off you - difficult to find these days!
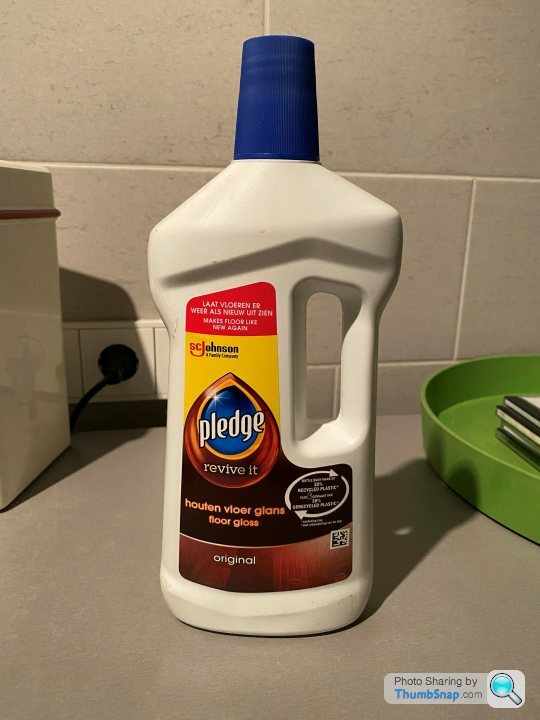
I am using this stuff. It appears milky from the bottle but dries fully transparent. Viscosity is comparable to water.It is not that these are available everywhere, I had to do some searching before I found these bottles for sale at our local wholesale, €5 per bottle or so.
Edited by alleggeria on Thursday 30th November 20:54
Edited by alleggeria on Thursday 30th November 21:45
I've always been wary of using it - I've only ever used Klear.
alleggeria said:
I am not sure how to define the smell. I asked my wife but we did not get any further than indeterminate smell. I guess if you would do the parquet floor the entire house would smell fabulous, but that is not really an anwser to your question.
You know what? I will do some experiments tomorrow to see how it airbrushes. I also need to dip a canopy of the 1/48 Monogram YF16 I couldn't resist at last week IPMS NL and started in advance of the upcoming holiday period.
I’d be interested in the results. A very experienced modelling pal of mine uses it, and says it’s effectively identical to Klear. I can’t get past the fact it’s cloudy, somehow it seems unlikely it can dry as clear as…well…Klear, but if it does, great.You know what? I will do some experiments tomorrow to see how it airbrushes. I also need to dip a canopy of the 1/48 Monogram YF16 I couldn't resist at last week IPMS NL and started in advance of the upcoming holiday period.
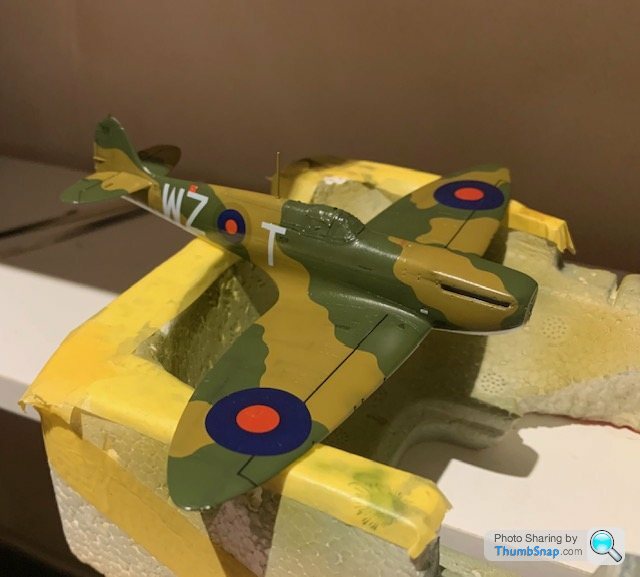
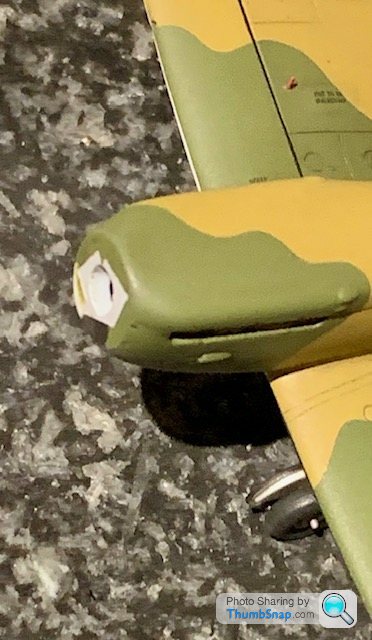
I made some card jigs to get the u/c legs fitted about right:
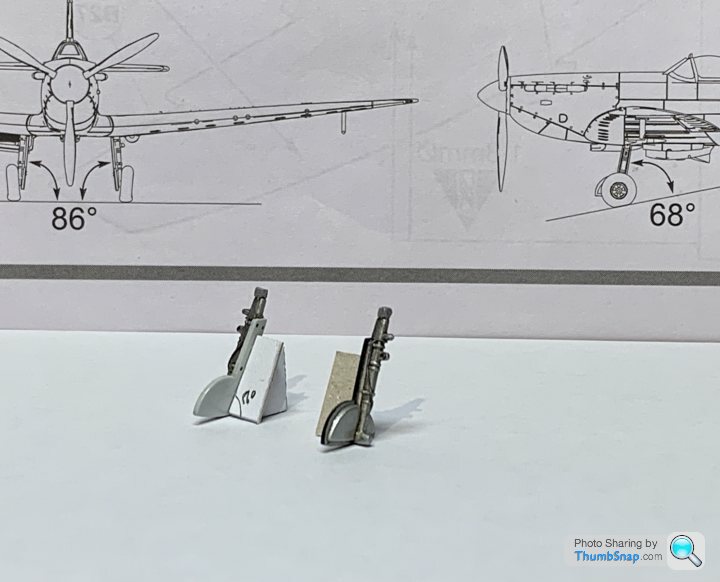
Took a bit of trigonometry to get it right, but seemed to work:
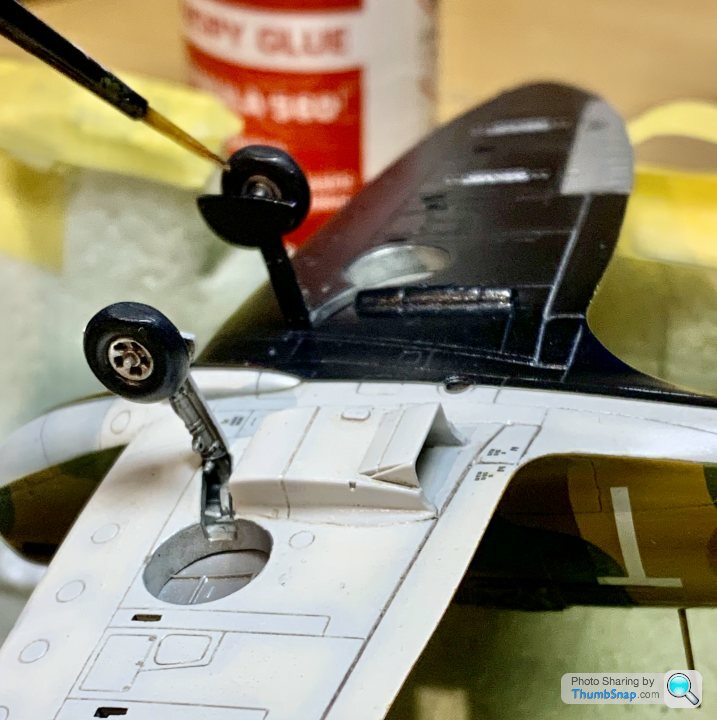
Secured with a combination of Tamiya cement, PVA and cyano:
Found some scrap p/e to use as a fuel filler cap, just needed a dark wash:
Also painted the signal lamp lens:
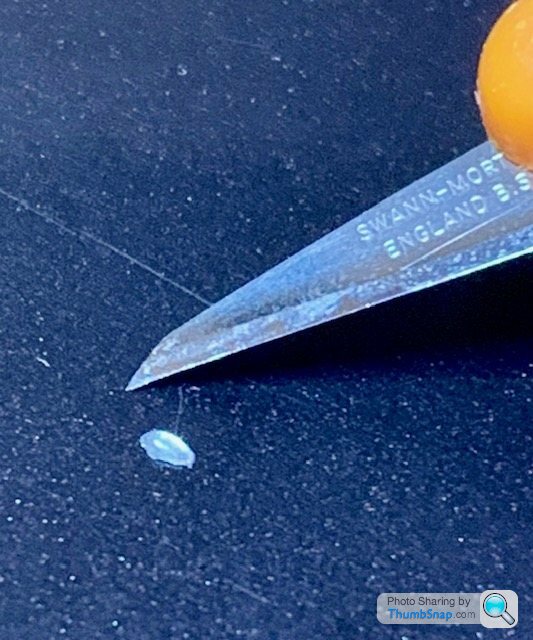
And made the oblong shaped canopy panel (whatever it’s called):
This is how the propeller ended up with a wash and Matt varnish:
Took a bit of trigonometry to get it right, but seemed to work:
Secured with a combination of Tamiya cement, PVA and cyano:
Found some scrap p/e to use as a fuel filler cap, just needed a dark wash:
Also painted the signal lamp lens:
And made the oblong shaped canopy panel (whatever it’s called):
This is how the propeller ended up with a wash and Matt varnish:
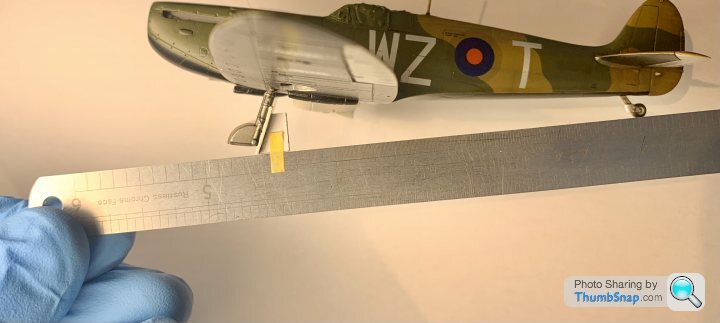
Flatted the wheels on a strip of wet and dry to make it sit level and to tweak the weighted tyres:

Then gave it a coat of Winsor & Newton Galeria matt varnish:

Always makes a Kleared model look much more refined.
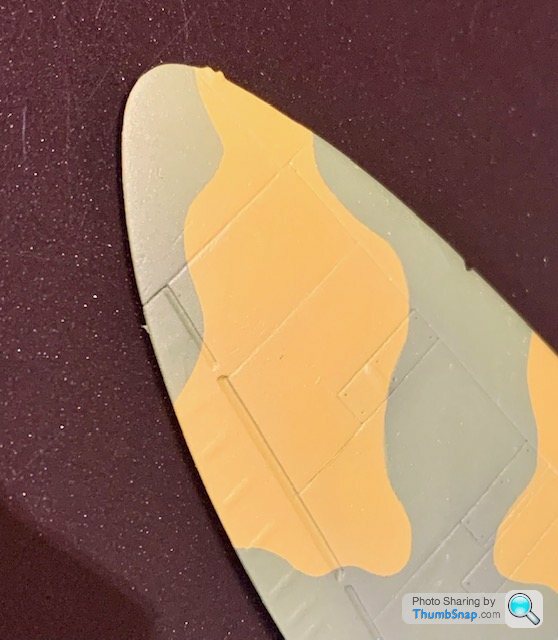
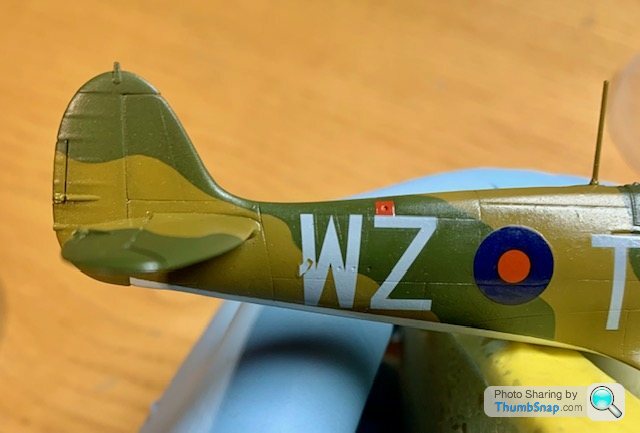
Unfortunately, it revealed that I've got the white demarcation a bit wrong (about 0.5mm too high) on the stbd. wing. I missed it, probably becasue the glossy surface gave a highlight right along the leading edge. I'll have to wait a few days (W&N matt seems to take ages to fully dry) and then re-mask and re-airbrush green along it, and hope it doesn't screw anything up.
But overall it looks OK so far.
Then gave it a coat of Winsor & Newton Galeria matt varnish:
Always makes a Kleared model look much more refined.
Unfortunately, it revealed that I've got the white demarcation a bit wrong (about 0.5mm too high) on the stbd. wing. I missed it, probably becasue the glossy surface gave a highlight right along the leading edge. I'll have to wait a few days (W&N matt seems to take ages to fully dry) and then re-mask and re-airbrush green along it, and hope it doesn't screw anything up.
But overall it looks OK so far.
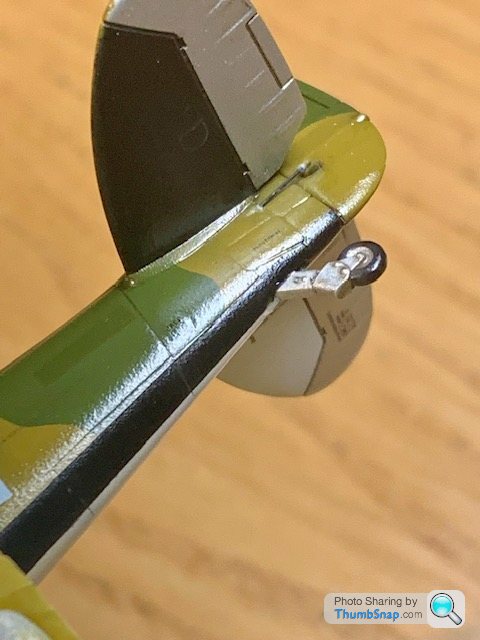
Masked and corrected the leading edge:
Fitted the exhausts (after very lightly staining the fuselage behind them:
Upper light:
Signalling light:
and guns:
I'mnot very happy with the upper wing roundels, especially the panel line along the leading edge which cuts them. When I filled the lines, they weren't very consistent, and in trying to make them look better by adding a pencil line, I've made them worse. I guess I'll end up masking them and overspraying dark blue to make the repairs less obvious.
It's been a series of corrections, and correction of corrections to get this thing to look anything like right, and it's still not over. A thoroughly miserable experience which I can't wait to put behind me. Trouble is, the more hours spent, the more risk in correcting things that could go very wrong...
So I masked and re-sprayed the blue bits of the roundels, and it has improved things a bit.
Keen to actually finish a model, I cracked on and added the small oval window I'd made:
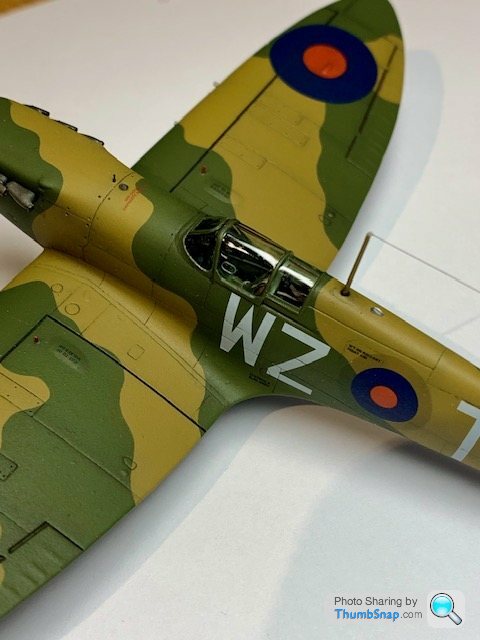
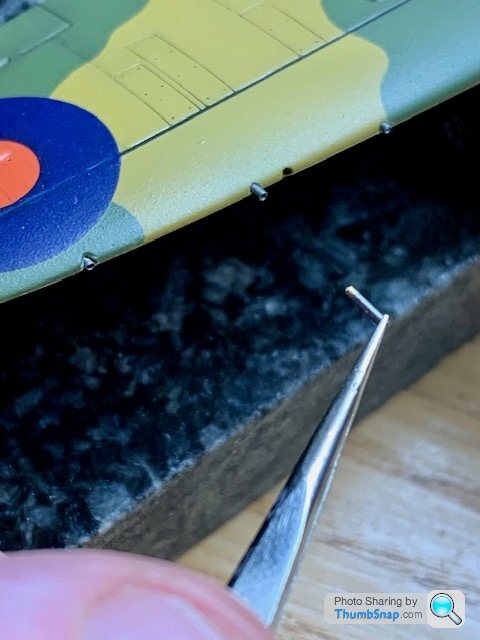
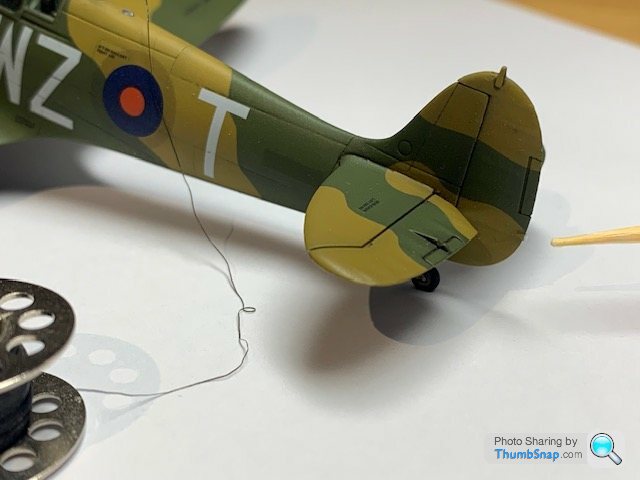
and the aerial, out of EzLine:
The insulator is a dot of PVA, painted buff.
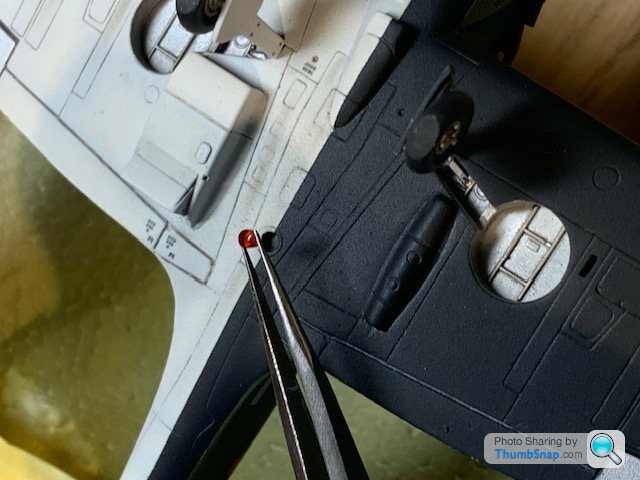
And the rudder and wingtip light covers out of PVA, painted clear red or green as appropriate:
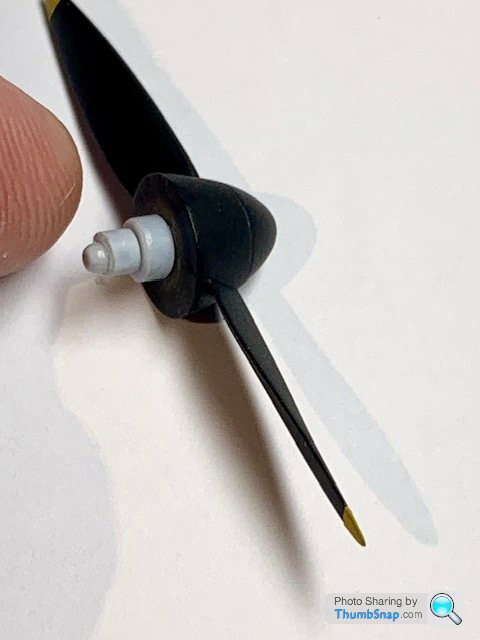
Finally, the propeller, that I modified so I could fit it last, but it would still spin:
And barring any errors that become apparent in daylight, that's that.
Keen to actually finish a model, I cracked on and added the small oval window I'd made:
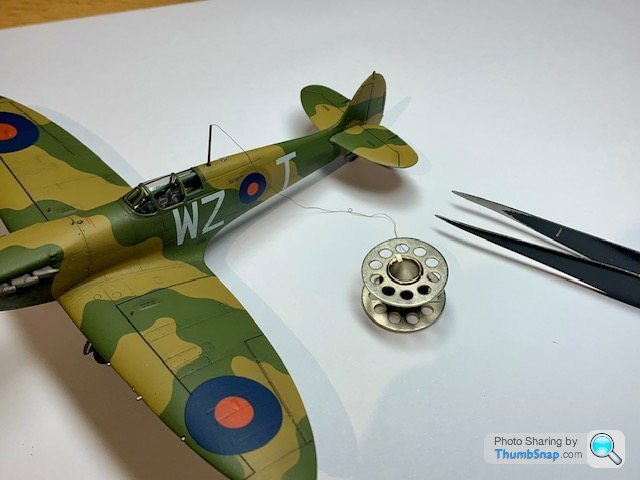
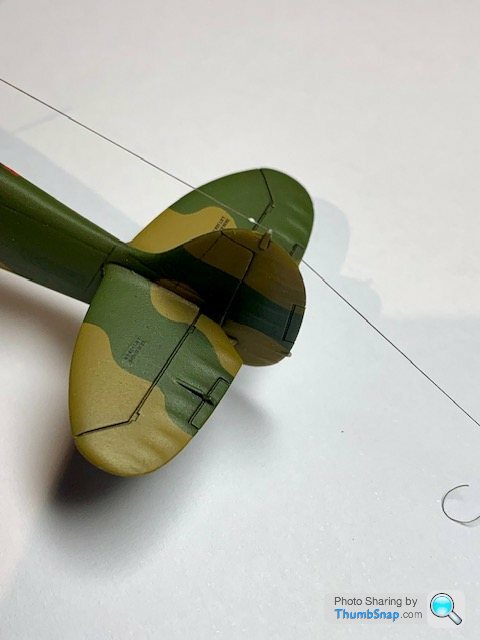
and the aerial, out of EzLine:
The insulator is a dot of PVA, painted buff.
And the rudder and wingtip light covers out of PVA, painted clear red or green as appropriate:
Finally, the propeller, that I modified so I could fit it last, but it would still spin:
And barring any errors that become apparent in daylight, that's that.
sharkfan said:
AlfaCool said:
Top notch once again Doc.
I cant help but feel you are beating yourself up a bit.
I know its hard with your high standards and keen eye for mistakes to make every build a nightmare.
But lets not forget modelling is supposed to be fun and relaxing.
Definitely this. Your models are incredible and the skill involved is of such an amazing standard. All of us are our own worse critics, but please be kind to yourself when you can. At the very least keep building. It would be such a shame if you stopped when so many of us get such enjoyment out of watching you do things we could only dream about!I cant help but feel you are beating yourself up a bit.
I know its hard with your high standards and keen eye for mistakes to make every build a nightmare.
But lets not forget modelling is supposed to be fun and relaxing.
Next up is to finish the Spitfire 22, then the Viggen, then Vulcan. Then reset and start afresh, hopefully with more motivation.
Gassing Station | Scale Models | Top of Page | What's New | My Stuff