Pocher 1/4 scale Ducati
Discussion


It’s Saturday and raining so got a bit more done.
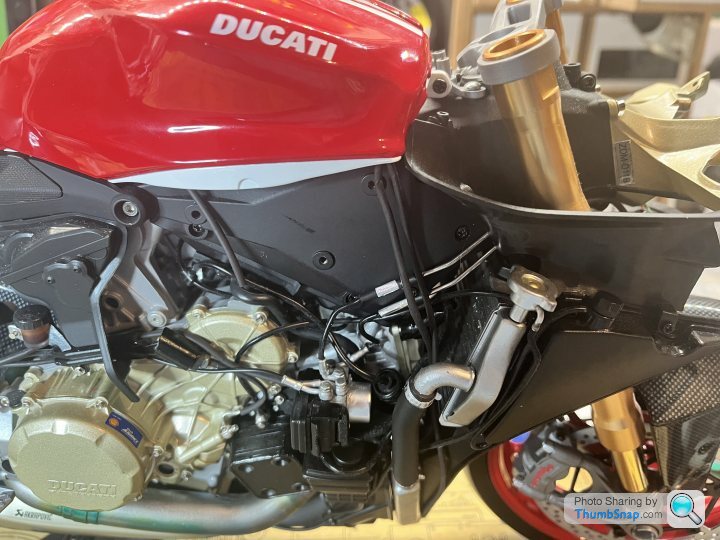
I’ve been slowly filling in the ejector pin marks in the front break disk supports, repainted Tamiya NATO black followed by a couple of gloss coats, these were then attached to the disk by a metal pin and PE washer and circle clip. A bit fiddly, but only lost one clip, luckily Pocher provide a spare.
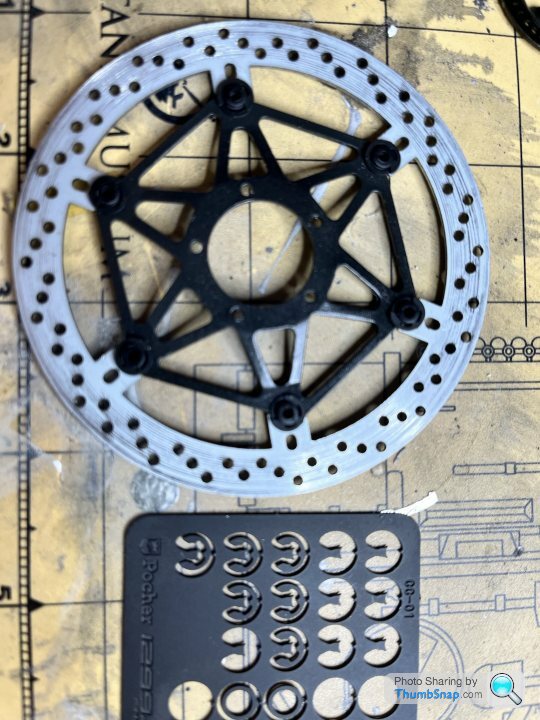
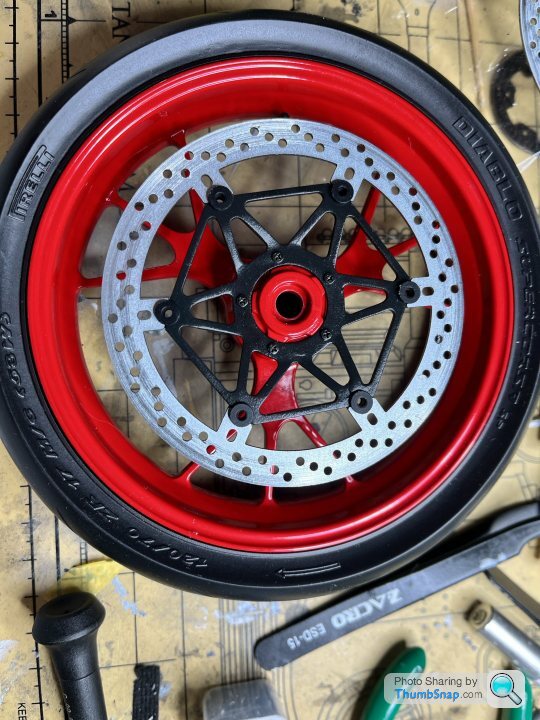
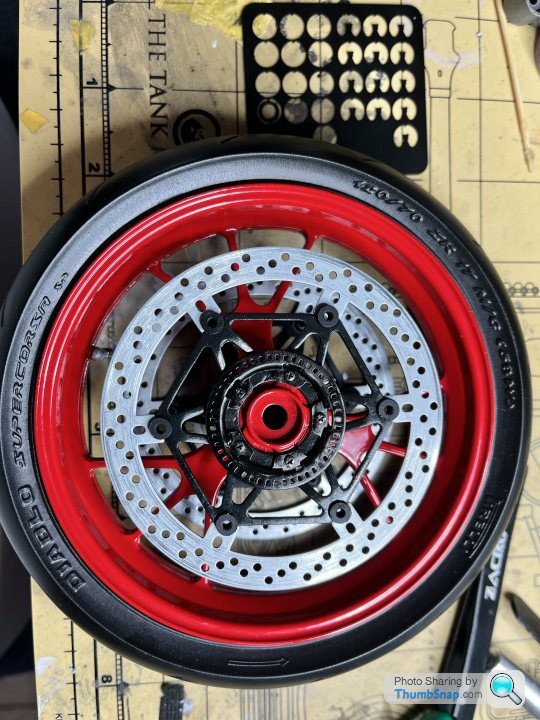
These were then screwed to the previously assembled wheel and tyre, together with the ABS ring, repainted black.
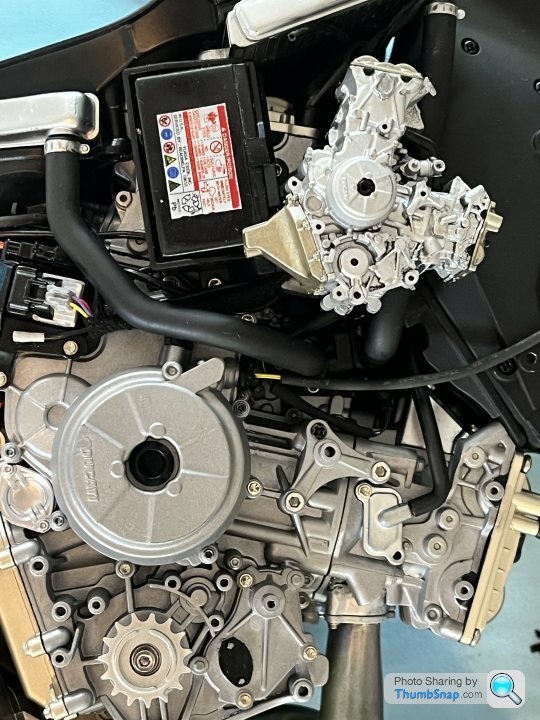
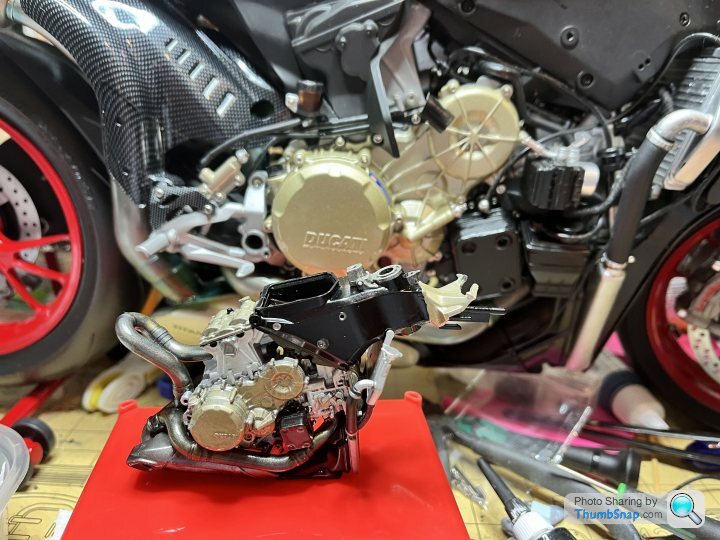
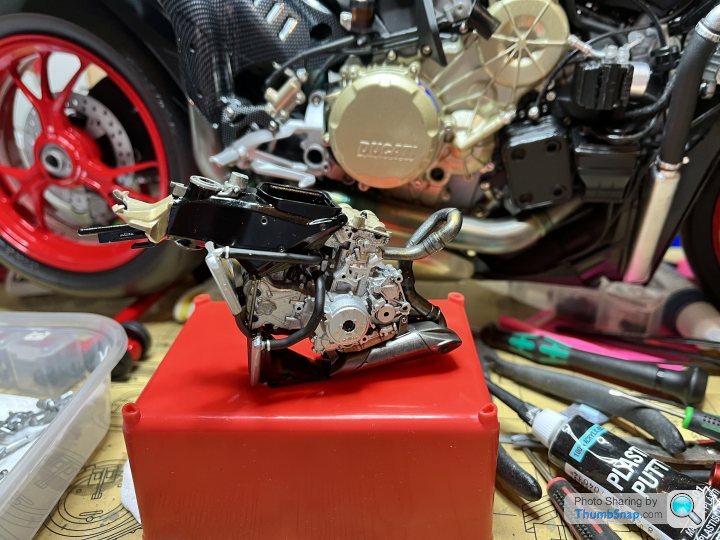
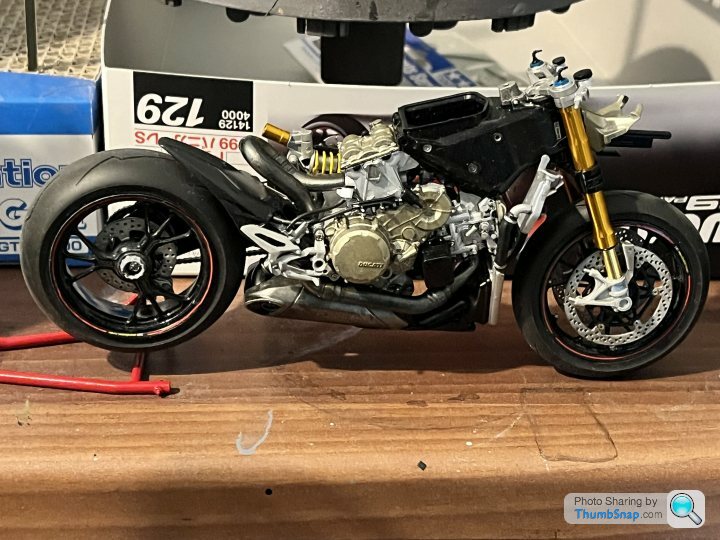
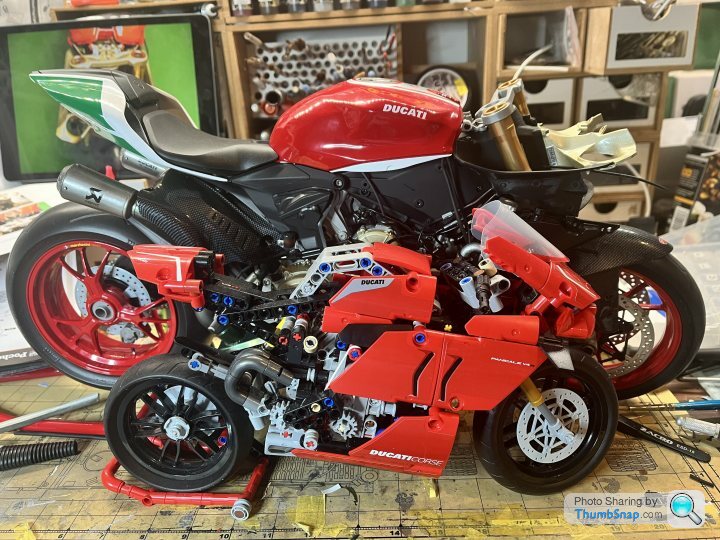
Somehow the engine seems to have shrunk
Joking, I’ve started the Tamiya 1/12 scale version.
Difference between 1/12 and 1/4 scale
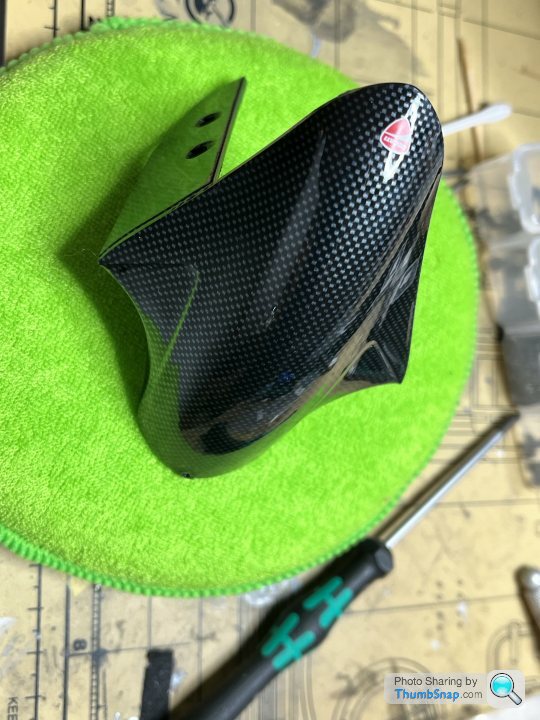
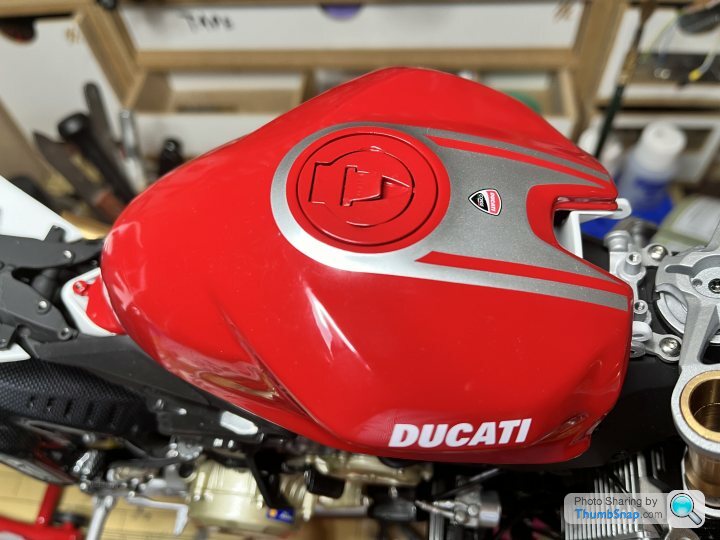
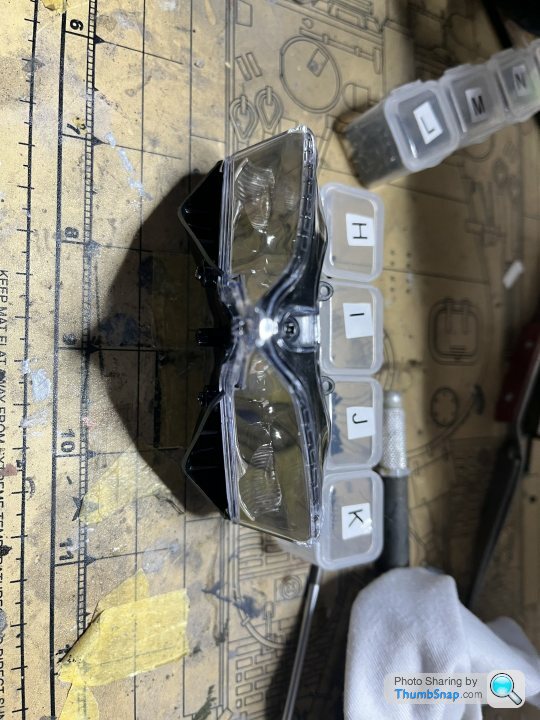
Last thing was assembling the front mudguard, nicely painted to look like carbon fibre by Pocher
I’ve been slowly filling in the ejector pin marks in the front break disk supports, repainted Tamiya NATO black followed by a couple of gloss coats, these were then attached to the disk by a metal pin and PE washer and circle clip. A bit fiddly, but only lost one clip, luckily Pocher provide a spare.
These were then screwed to the previously assembled wheel and tyre, together with the ABS ring, repainted black.
Somehow the engine seems to have shrunk
Joking, I’ve started the Tamiya 1/12 scale version.
Difference between 1/12 and 1/4 scale
Last thing was assembling the front mudguard, nicely painted to look like carbon fibre by Pocher
Time for another weekend update 
Rear wheel and swing arm assembled and attached, starting to look like a bike now, it’s also big and heavy and starting to fill my workbench. Must do some tidying up.
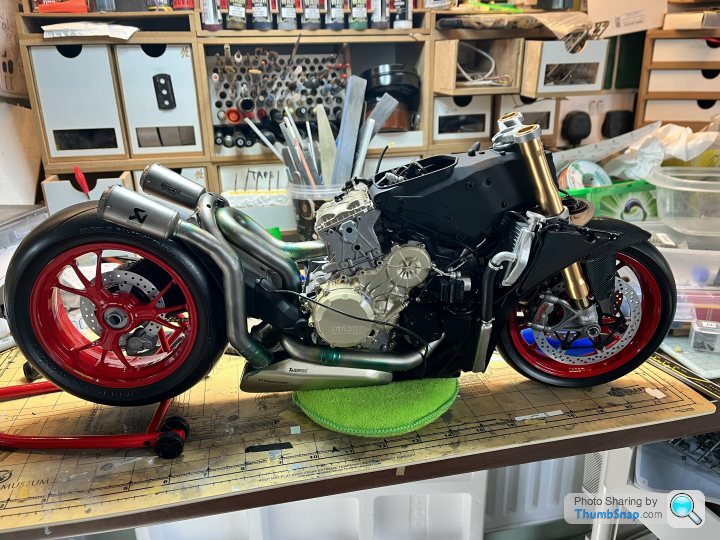
I was expecting the chain to be a pain, but it went together surprisingly easily.
Note the front suspension doesn’t have any springs installed yet.
Rear wheel and swing arm assembled and attached, starting to look like a bike now, it’s also big and heavy and starting to fill my workbench. Must do some tidying up.
I was expecting the chain to be a pain, but it went together surprisingly easily.
Note the front suspension doesn’t have any springs installed yet.
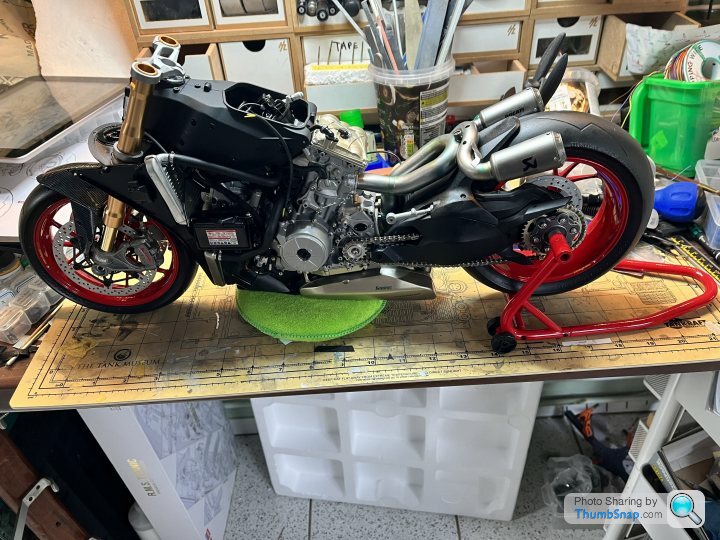
Put the rear suspension together, most of this is metal.
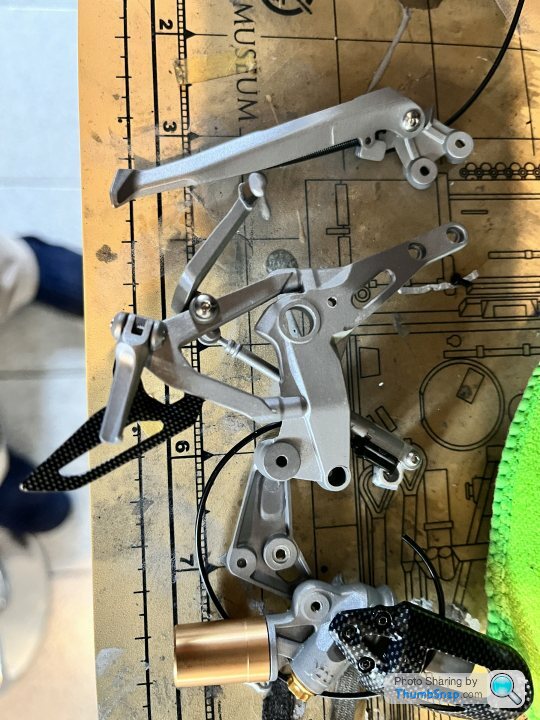
And installed on the bike using a mixture of kit supplied screws and scale hardware. I also added some of the missing wiring.
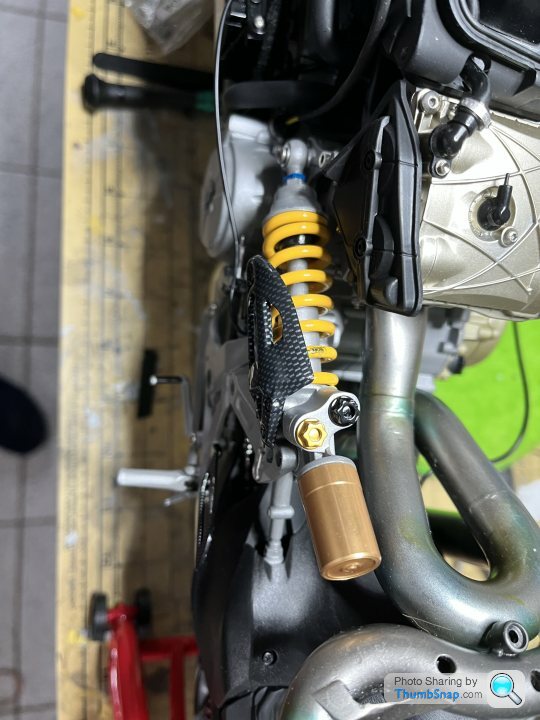
Replacement front springs have also been received from Hornby and installed. If anyone else is a numpty like me and loses theirs do not order from the Pocher website as these are not the same as the original model, but Hornby customer services were able to send out the correct ones in under a week.
And installed on the bike using a mixture of kit supplied screws and scale hardware. I also added some of the missing wiring.
Replacement front springs have also been received from Hornby and installed. If anyone else is a numpty like me and loses theirs do not order from the Pocher website as these are not the same as the original model, but Hornby customer services were able to send out the correct ones in under a week.
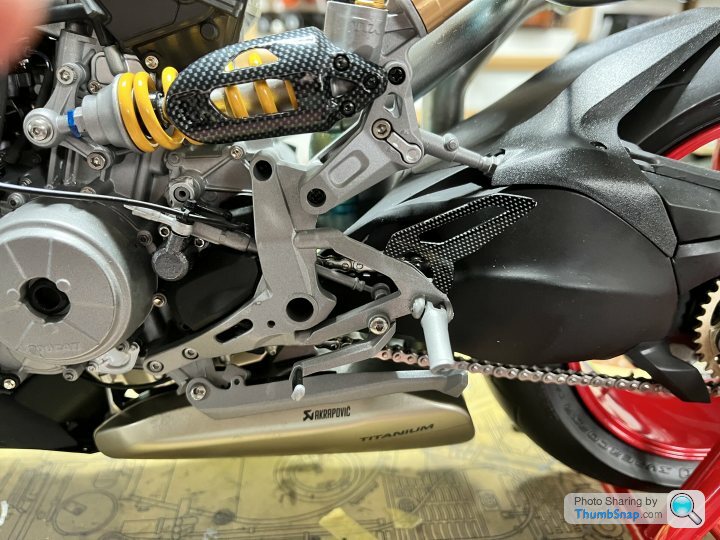
Apologies for the lack of updates, but onto the other side and the foot brake
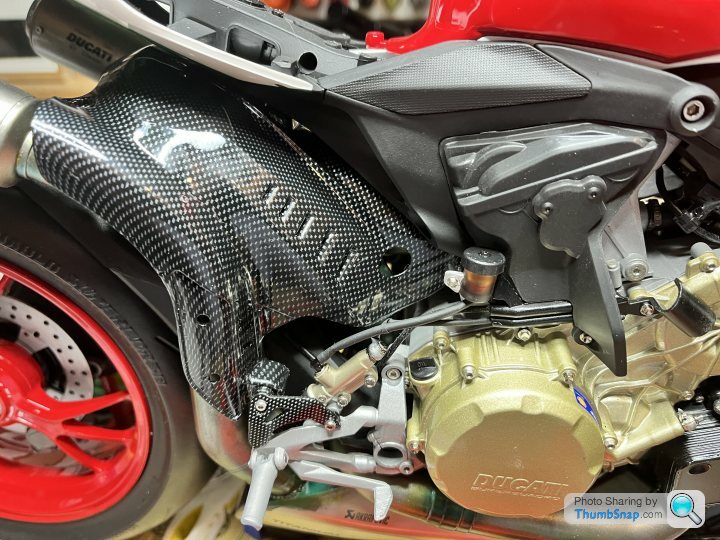
I also found I had to disassemble the rear suspension as the exhaust pipes screw into the exhaust shield. This fact is poorly documented in the instructions, which have the screw going into thin air in one stage with the rear frame not being attached until the next step. It doesn’t help that I’m not exactly following the Pocher instructions either.
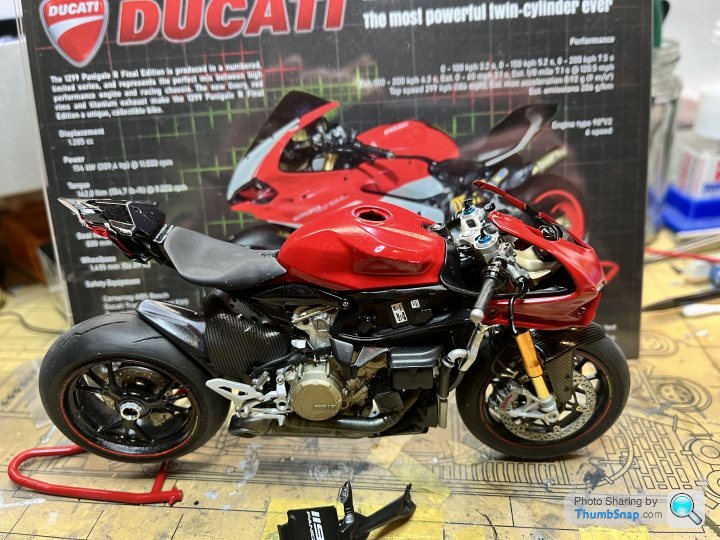
Also made up the fuel cap, it comes pre-painted red, but some sources suggest it should be silver or bare metal, any Ducati owners care to confirm either way?
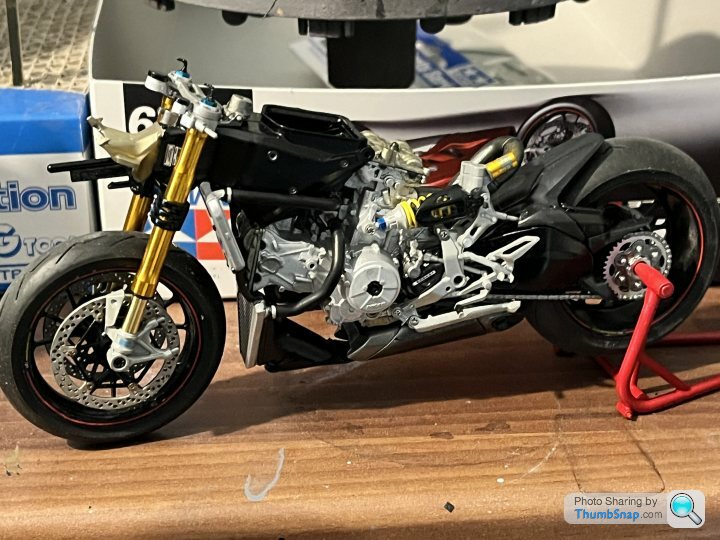
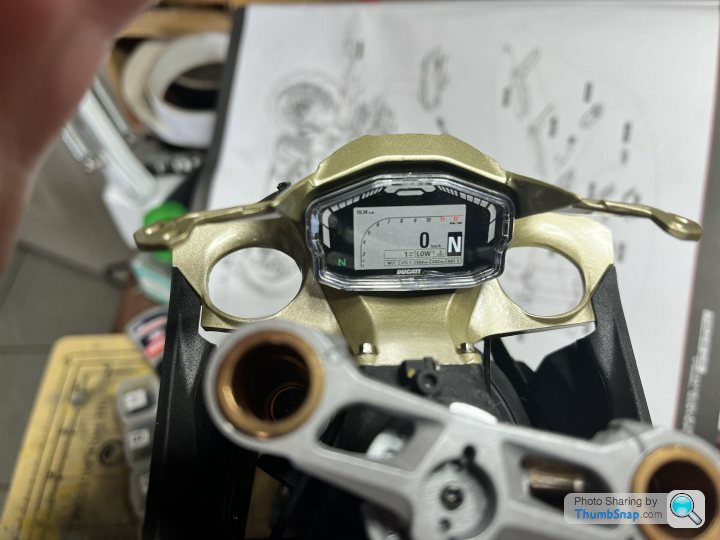
I’ve also been getting on with the 1/12 version, it’s tiny in comparison.
Been painting up some of the smaller bits, base coats of titanium silver and semi-gloss black applied.

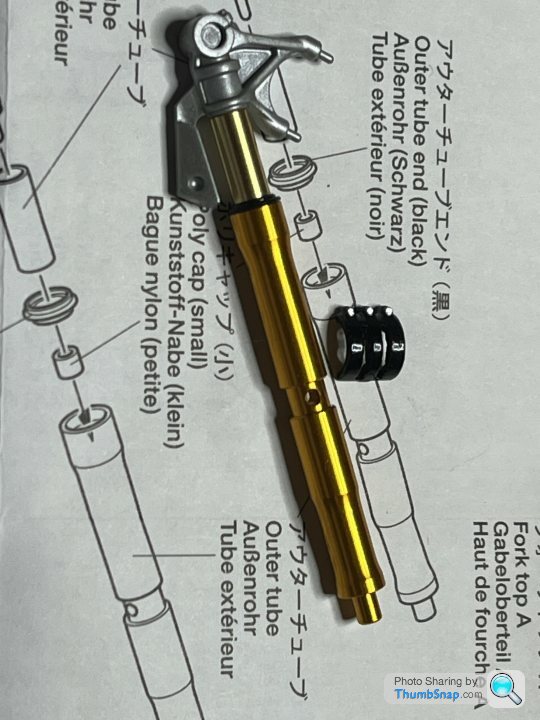
Only aftermarket is the Tamiya front forks set, which includes some rather tasty turned metal in the correct colour, so minimal painting required. I cut out the slots in the lower triple clamps.
I also found I had to disassemble the rear suspension as the exhaust pipes screw into the exhaust shield. This fact is poorly documented in the instructions, which have the screw going into thin air in one stage with the rear frame not being attached until the next step. It doesn’t help that I’m not exactly following the Pocher instructions either.
Also made up the fuel cap, it comes pre-painted red, but some sources suggest it should be silver or bare metal, any Ducati owners care to confirm either way?
I’ve also been getting on with the 1/12 version, it’s tiny in comparison.
Been painting up some of the smaller bits, base coats of titanium silver and semi-gloss black applied.
Only aftermarket is the Tamiya front forks set, which includes some rather tasty turned metal in the correct colour, so minimal painting required. I cut out the slots in the lower triple clamps.
Definitely doesn't have a red filler cap, silver as far as I am aware (that's what is on my 1299S). However, have a look at the link below and scroll through the images (track photo) you can see it's silver.
https://www.bennetts.co.uk/bikesocial/reviews/bike...
https://www.bennetts.co.uk/bikesocial/reviews/bike...
Freakuk said:
Definitely doesn't have a red filler cap, silver as far as I am aware (that's what is on my 1299S). However, have a look at the link below and scroll through the images (track photo) you can see it's silver.
https://www.bennetts.co.uk/bikesocial/reviews/bike...
Thanks, it’s nice that Pocher do a good job on pre painting the parts, less good when they use the wrong colour.https://www.bennetts.co.uk/bikesocial/reviews/bike...
One advantage of a screw together kit is I can easily disassemble it to correct any mistakes.

Signed off work at the moment, so got the big bike down and finished off the break pipe detailing
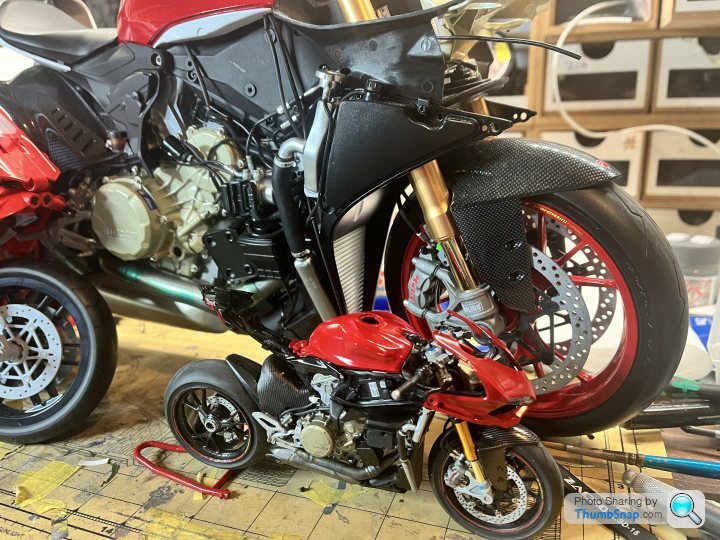
For those interested in the size of the thing, here it is next to the Lego equivalent
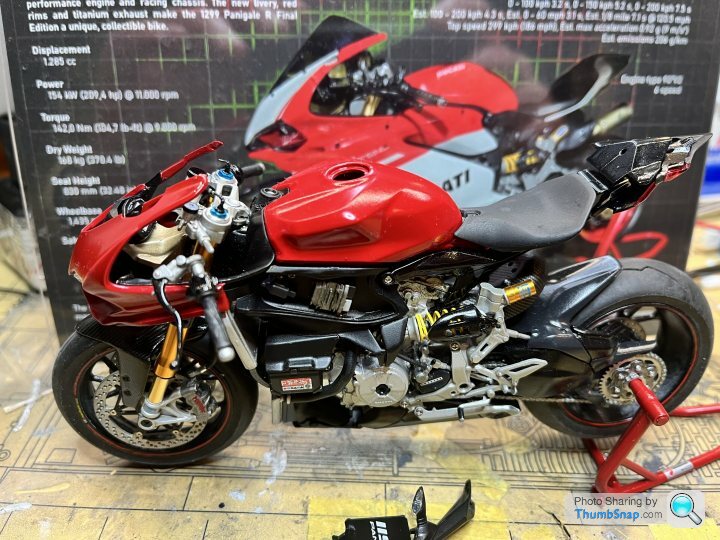
And making the 1/12 Tamiya look tiny
Unfortunately moments later I managed to knock the Tamiya bike off my workbench
Main damage was snapping off the paddock stand at the point it goes inside the hub, except I can’t get the stub out.
For those interested in the size of the thing, here it is next to the Lego equivalent
And making the 1/12 Tamiya look tiny
Unfortunately moments later I managed to knock the Tamiya bike off my workbench
Main damage was snapping off the paddock stand at the point it goes inside the hub, except I can’t get the stub out.
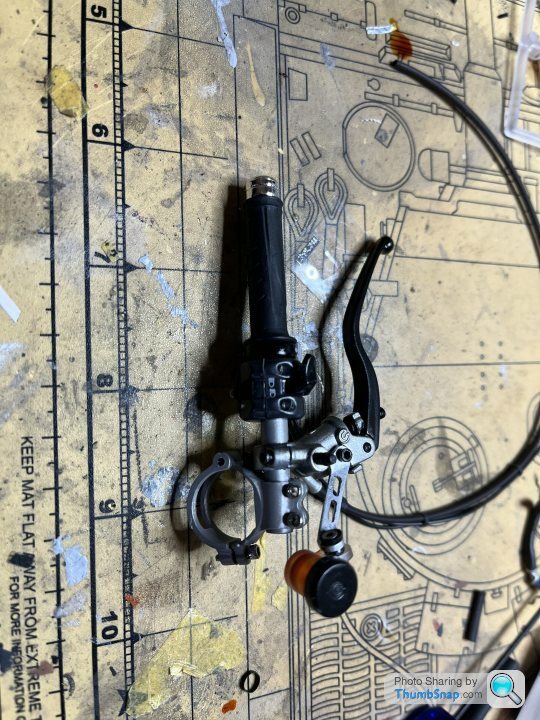


Other handlebar painted, decalled and assembled, only 2 tiny decals this side.
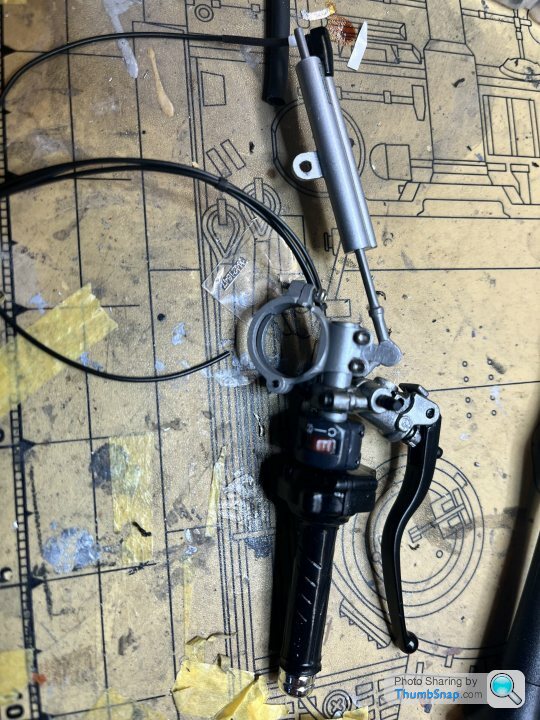
Installed together with the steering damper, a little bit fiddly especially with the extra wiring.
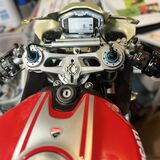
The eagle eyed might notice the brake fluid reservoirs are missing, managed to break one, waiting for the glue to dry, the others waiting for the touch up paint to dry.
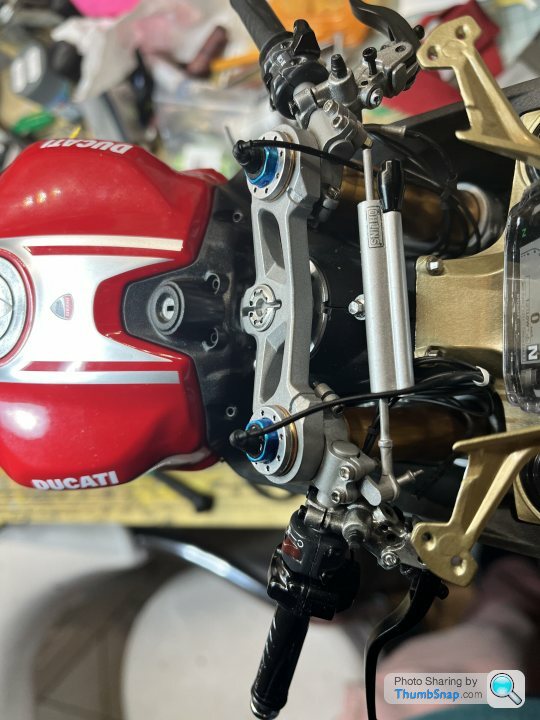
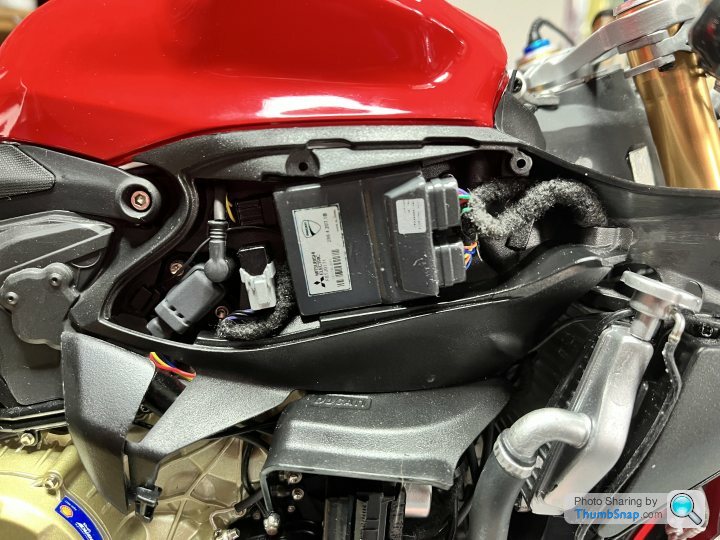
Getting towards the end, just the electrical panels and final fairings to install. Bit of scratch building on the wiring to do there. The enormous pile of sprues has been reduced to a couple, and the last of the metal bits have been fitted. I need to start thinking where & how I display the beast.
Installed together with the steering damper, a little bit fiddly especially with the extra wiring.
The eagle eyed might notice the brake fluid reservoirs are missing, managed to break one, waiting for the glue to dry, the others waiting for the touch up paint to dry.
Getting towards the end, just the electrical panels and final fairings to install. Bit of scratch building on the wiring to do there. The enormous pile of sprues has been reduced to a couple, and the last of the metal bits have been fitted. I need to start thinking where & how I display the beast.
Great attention to detail mbblat, how are you finding the fit of the parts? I have a rolls Royce bought in 1972 and still unfinished I made the mistake of looking at a modellers forum and a contributor did as you.
Made me strip it down and start again! Many parts do not fit together and need holes re drilled, in particular the body mounting.
Hope newer kits are a better fit, fascinating to watch your progress
Made me strip it down and start again! Many parts do not fit together and need holes re drilled, in particular the body mounting.
Hope newer kits are a better fit, fascinating to watch your progress
The fit can be a bit iffy in places, mainly due to the thickness of the paint used, a bit of dry fitting followed by filling the high spots usually solves that. Using the scale hardware has added some complexity, but the instructions that came with them cover most of the changes required which is mainly enlarging and tapping the existing screw hole, although I have found a couple of times where the suggested size to drill out is slightly too large.
Having said that I’ve only built the Hornby Pocher, so no experience with the classic kits.
Having said that I’ve only built the Hornby Pocher, so no experience with the classic kits.
Gassing Station | Scale Models | Top of Page | What's New | My Stuff