Unusual job on the bench today
Discussion


s2tommi said:
Wow, that is incredible!
Do you cater for the man with a more modest budget?
I'm not exactly minted but Eddie has made a ring and a pair of earrings for my Mrs, she loves them and I've got the great pictures provided to see it all being made which I think is pretty cool!Do you cater for the man with a more modest budget?
ecain63 said:
So long as you're not in a rush, ha!
Work is absolutely bonkers at the moment. Lots on and even a waiting list. Send me a message and I'll take a look. Might take me a day or two to respond so apologies in advance if that's the case. I will respond though.
Thank you, no problem on the wait, I have dropped you an emailWork is absolutely bonkers at the moment. Lots on and even a waiting list. Send me a message and I'll take a look. Might take me a day or two to respond so apologies in advance if that's the case. I will respond though.
HotJambalaya said:
do you do, or know anyone that does intricate engraving?
friend wants to have some intricate artwork added to a watch band, I'm assuming thats pretty niche
We use a very good hand engraver for most of the intricate stuff. Much like any highly skilled worker he's not cheap, but you get what you paid for. Alternatively, we also use a machine engraver from time to time. Really depends on what you want to achieve friend wants to have some intricate artwork added to a watch band, I'm assuming thats pretty niche

HotJambalaya said:
do you do, or know anyone that does intricate engraving?
friend wants to have some intricate artwork added to a watch band, I'm assuming thats pretty niche
I know someone who can do laser engraving.friend wants to have some intricate artwork added to a watch band, I'm assuming thats pretty niche
This type of thing can be achieved:
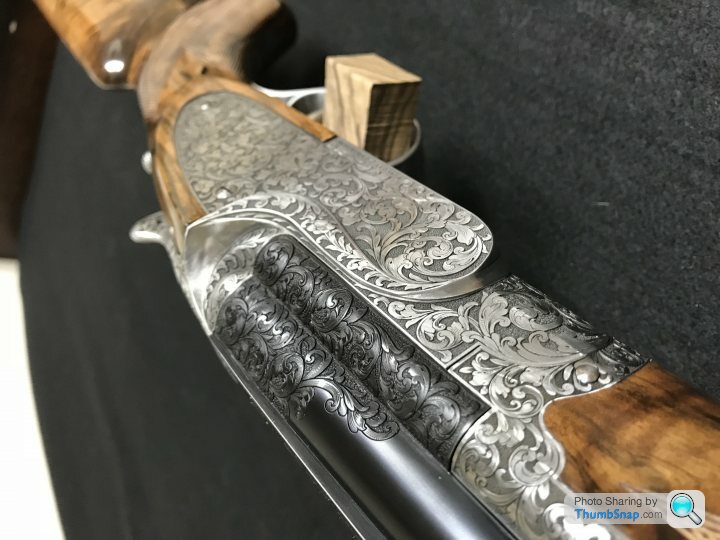
Several hundred hours for an experienced engraver. A day or so for the laser.
You'd still want the craftsmanship but the it's 80% of the result for 10% of the price.
Edited by AstonZagato on Thursday 20th June 21:18
this is ultimately the goal:
https://www.highsnobiety.com/p/rolex-oyster-perpet...
But strap only not the case since it will invalidate the warranty
https://www.highsnobiety.com/p/rolex-oyster-perpet...
But strap only not the case since it will invalidate the warranty
Morning men, starboard 10............ etc
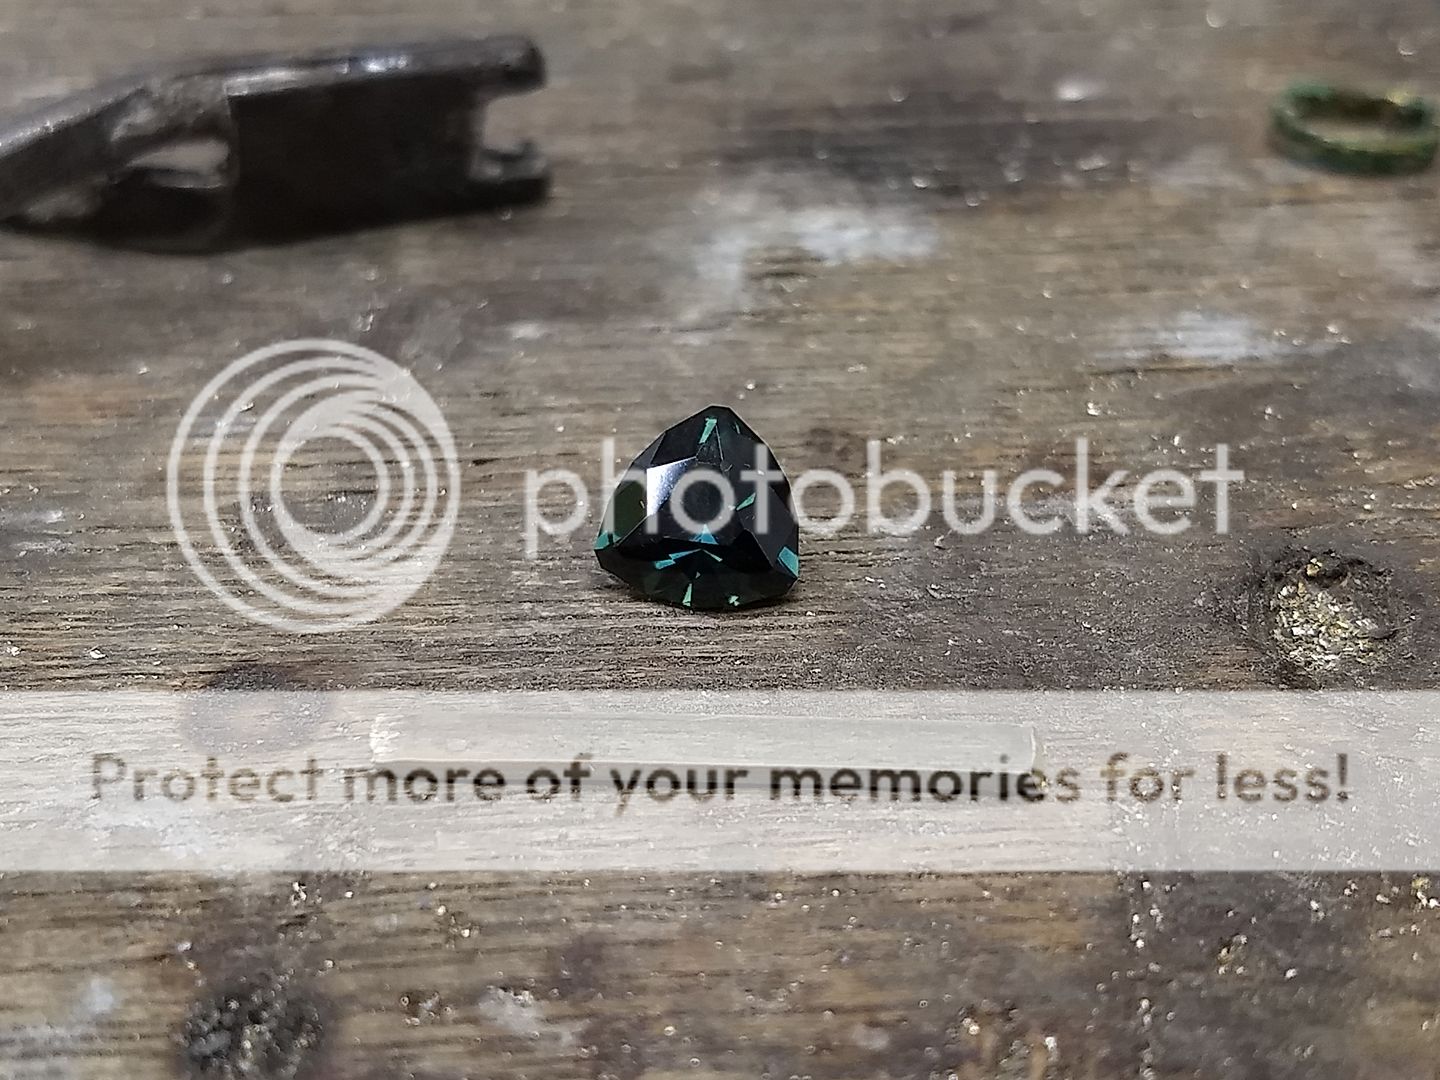
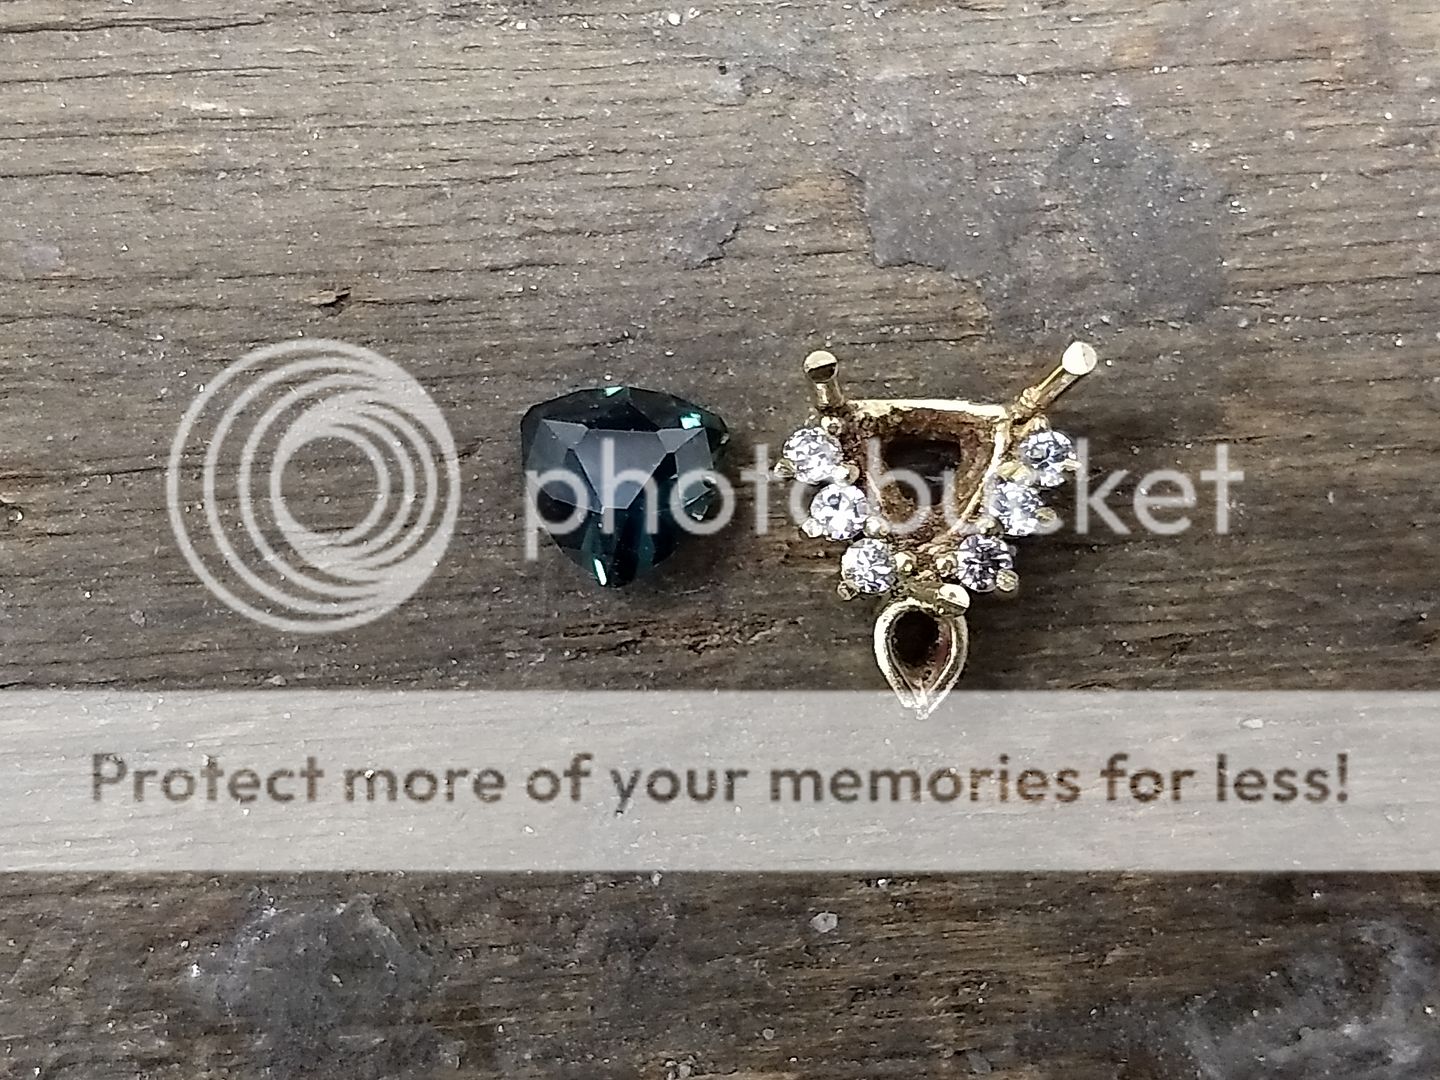
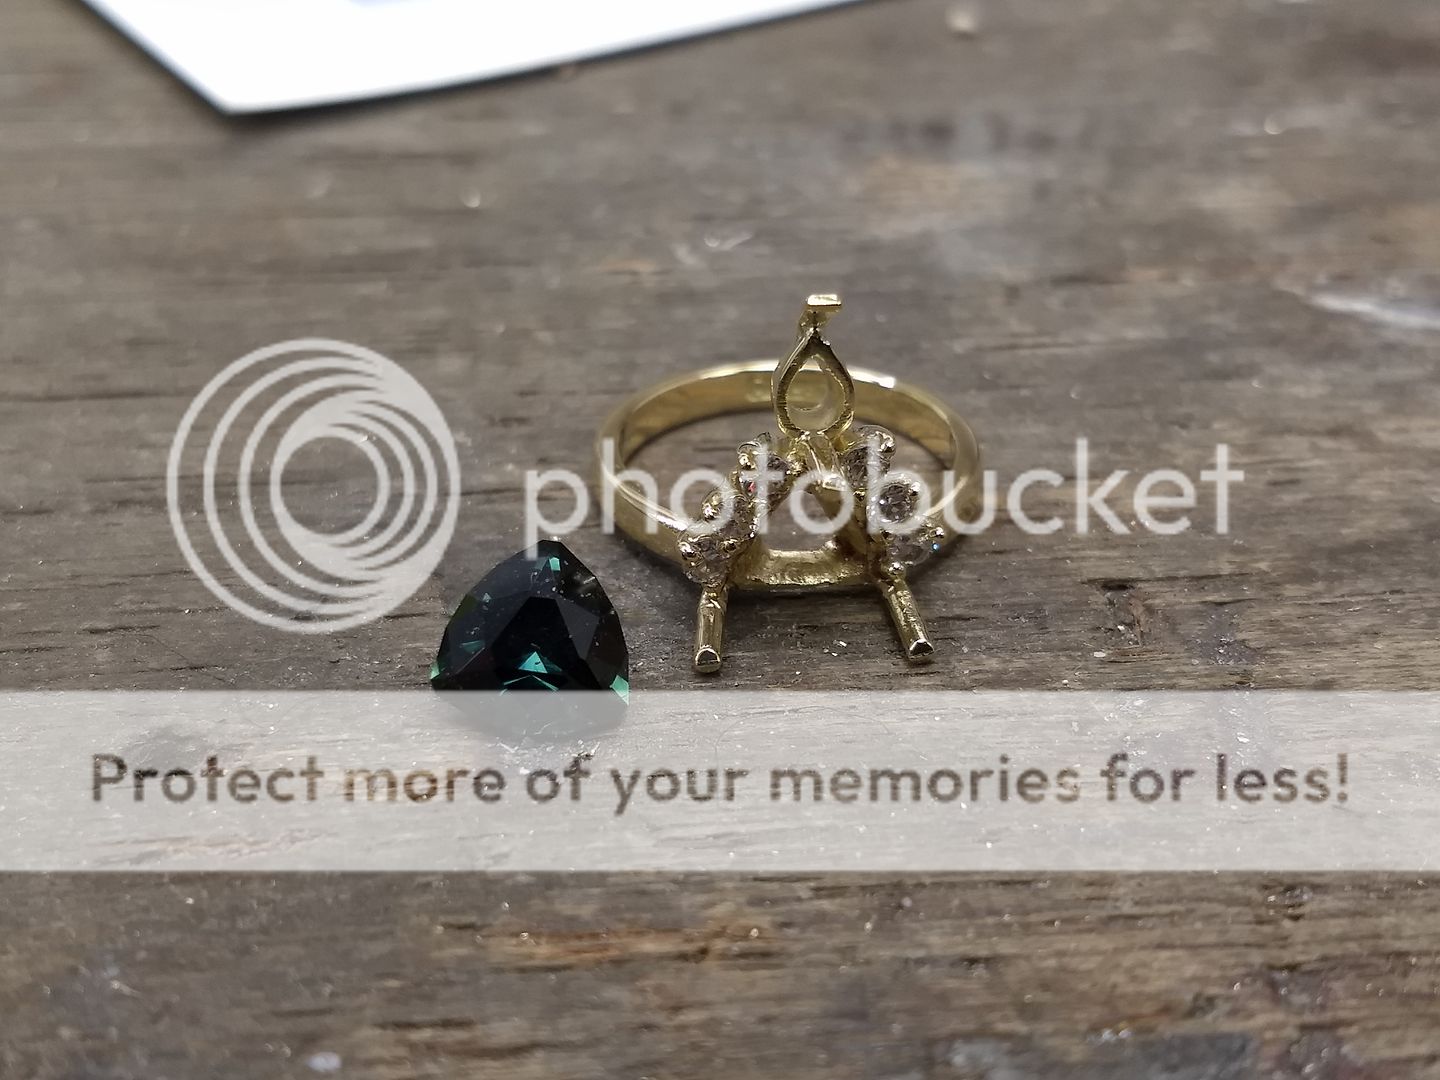
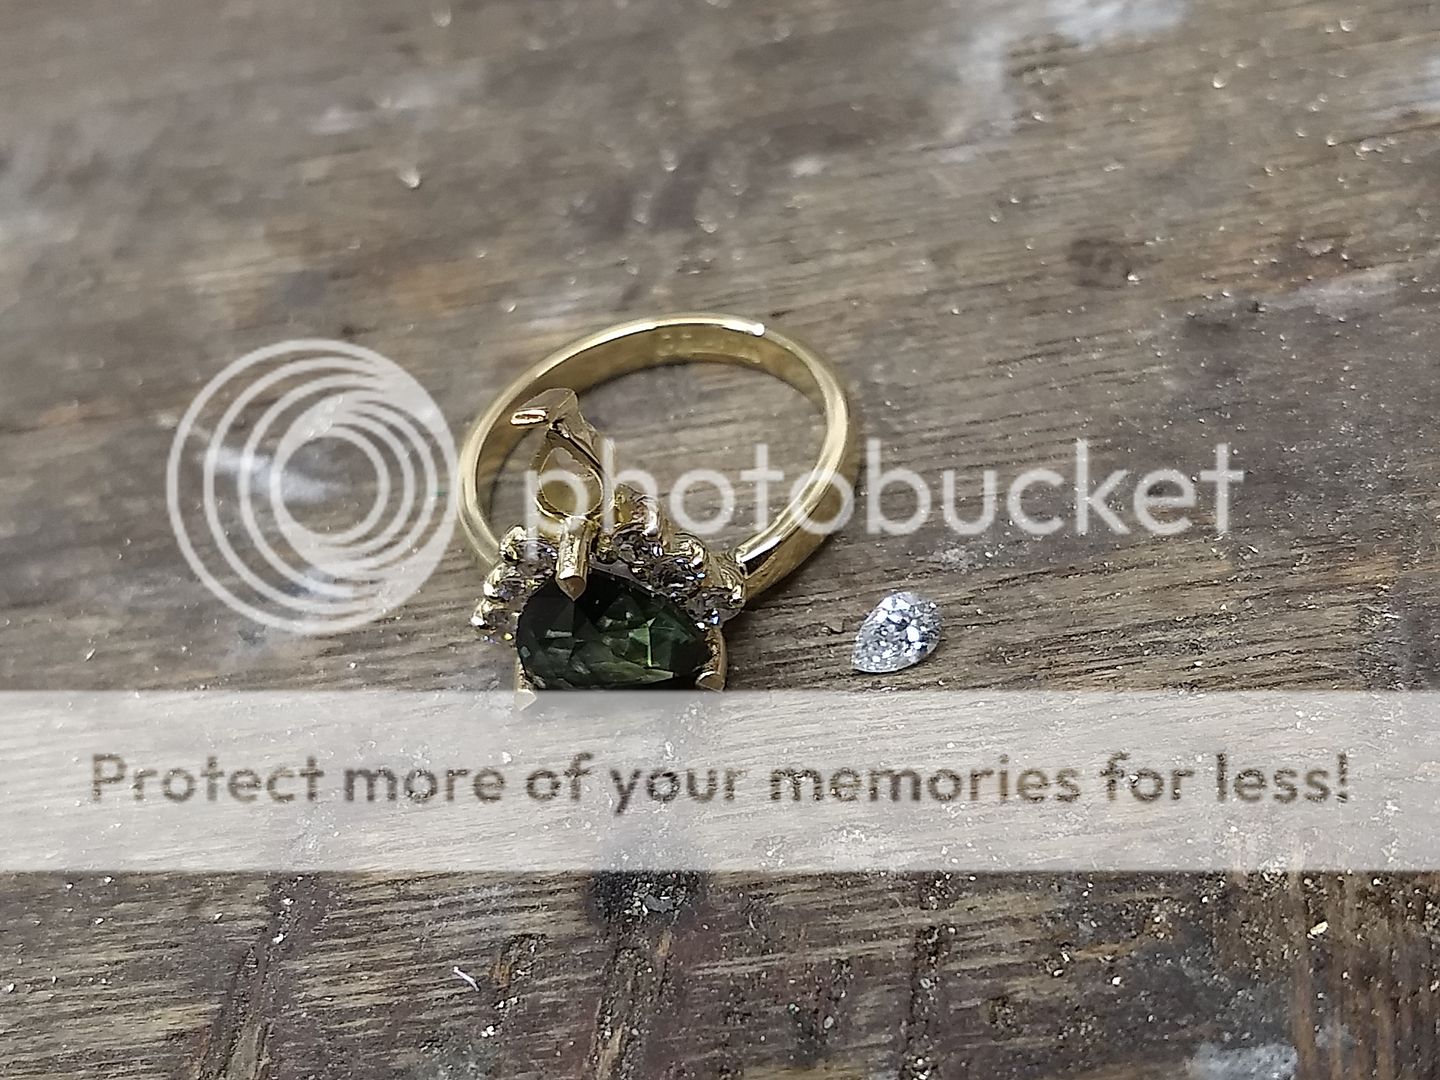
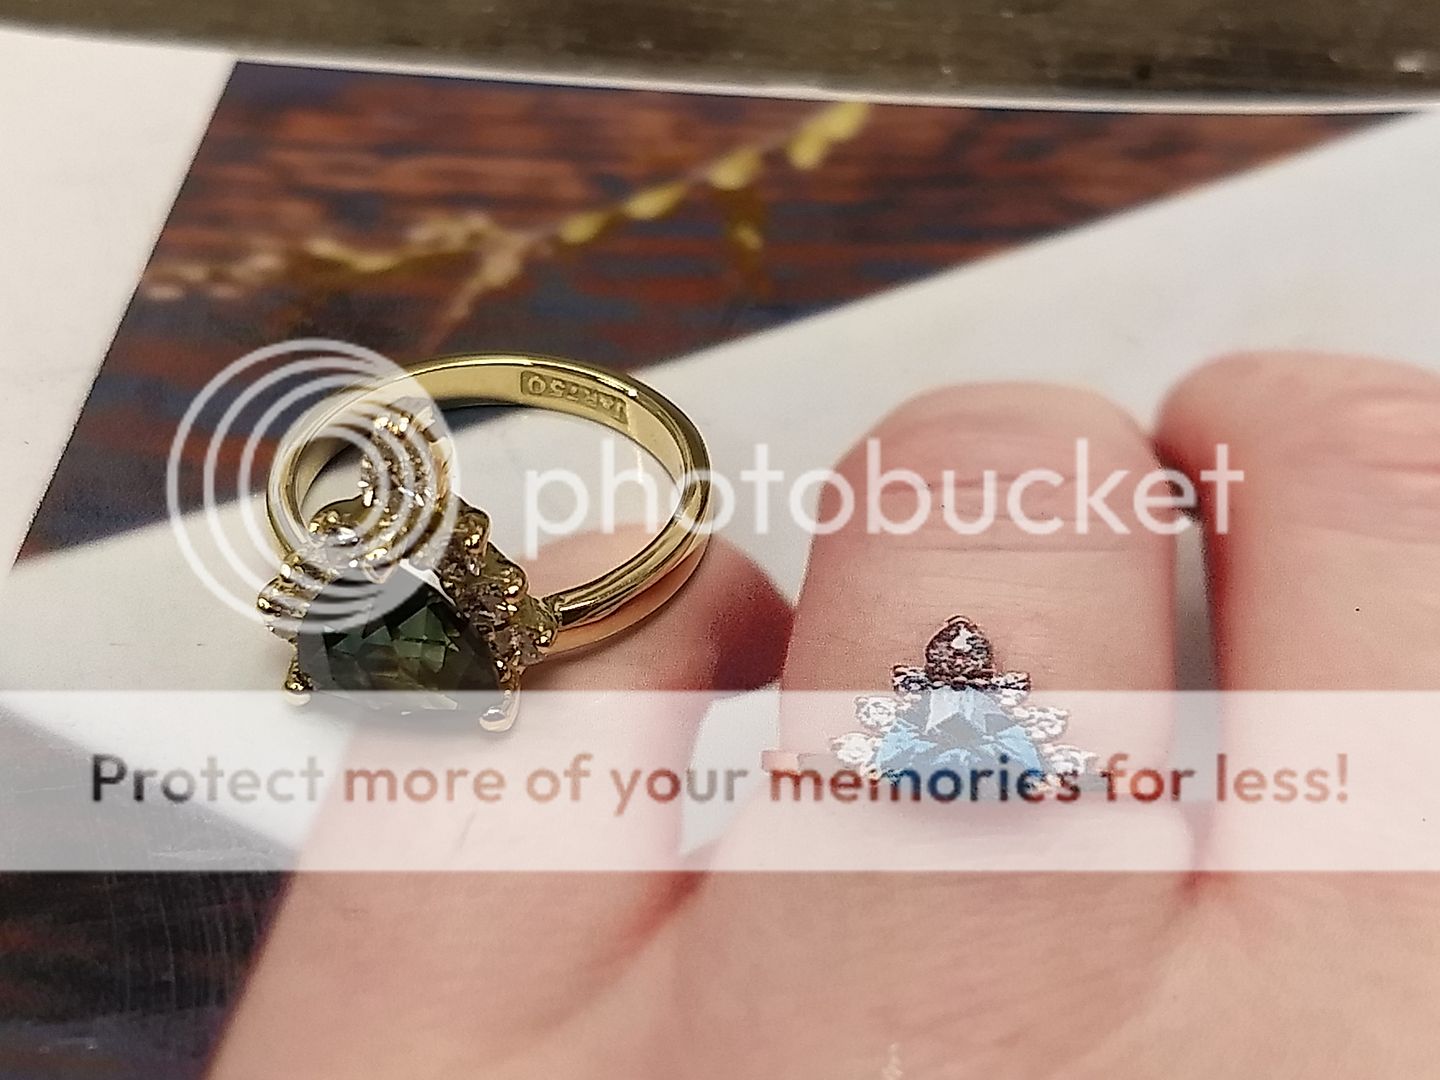
Today's build came to me from a jeweller that I regularly make and repair / alter items for. The son lives in Oz and has had cut an Australian green sapphire. It was cut by a specialist cutter over there and is a custom shape with what is almost a serrated edge / girdle to it. Sent with the stone was a photograph, a bunch of loose round diamonds and a request to make this or as near as possible in 18ct yellow gold and supply a pear shaped stone of nice quality to suit.
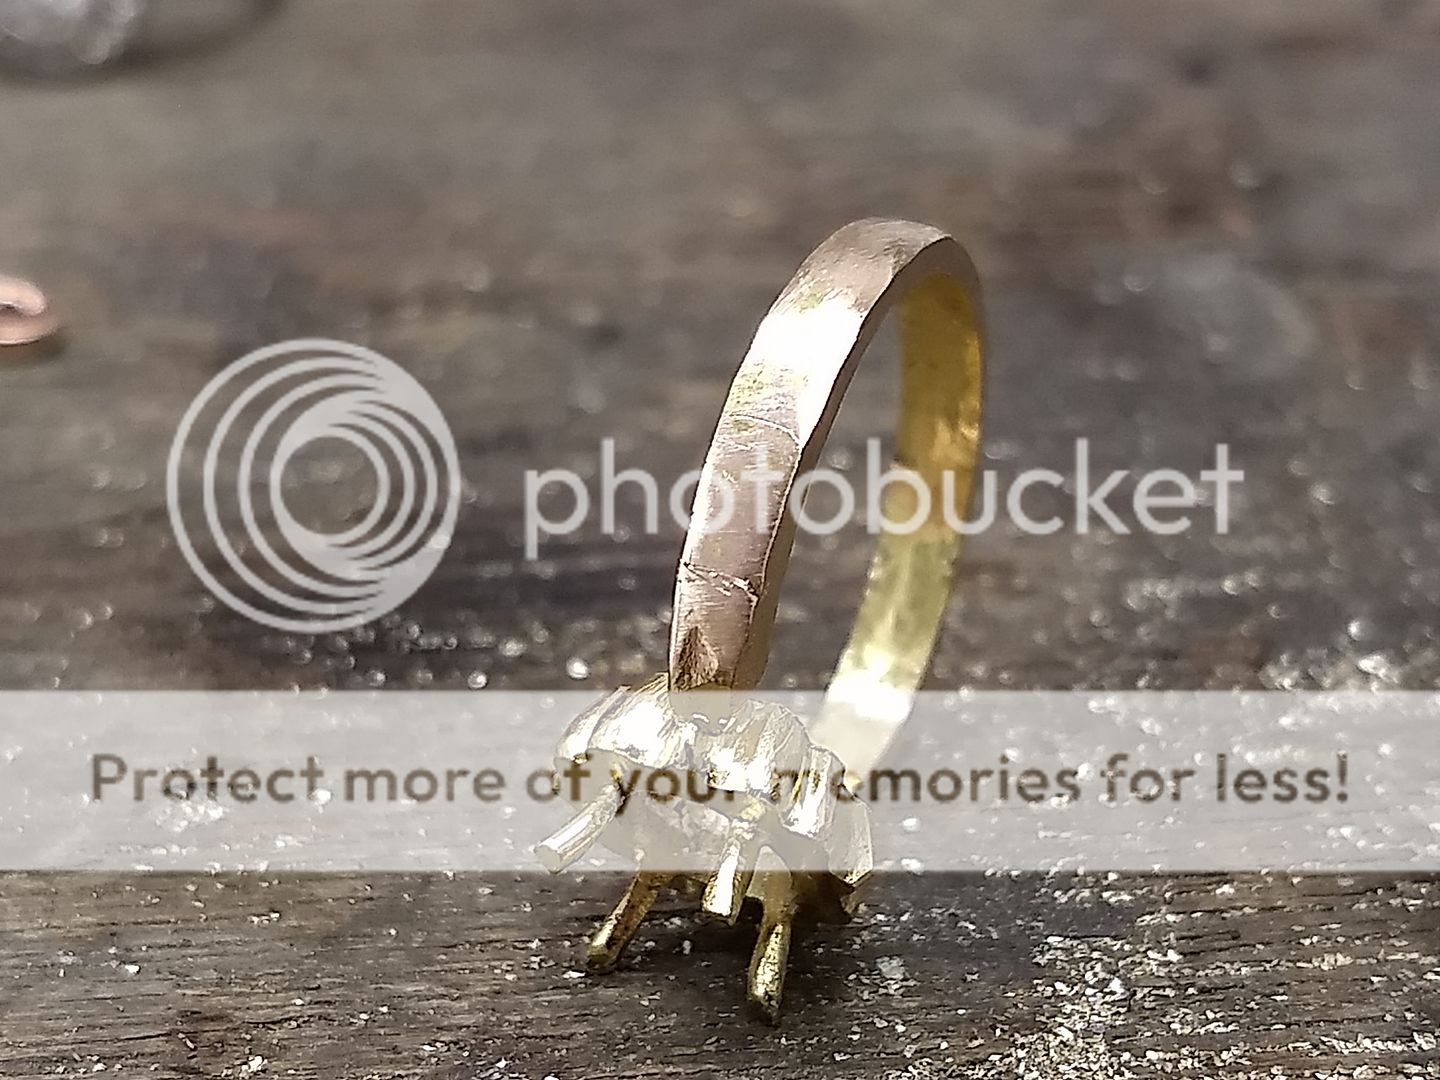
It's a complicated design again and will require a few individual pieces to complete the jigsaw. Best policy is to make the head first and see where we are with it. First up, some 18ct yellow bar to make the lower part of the centre setting:

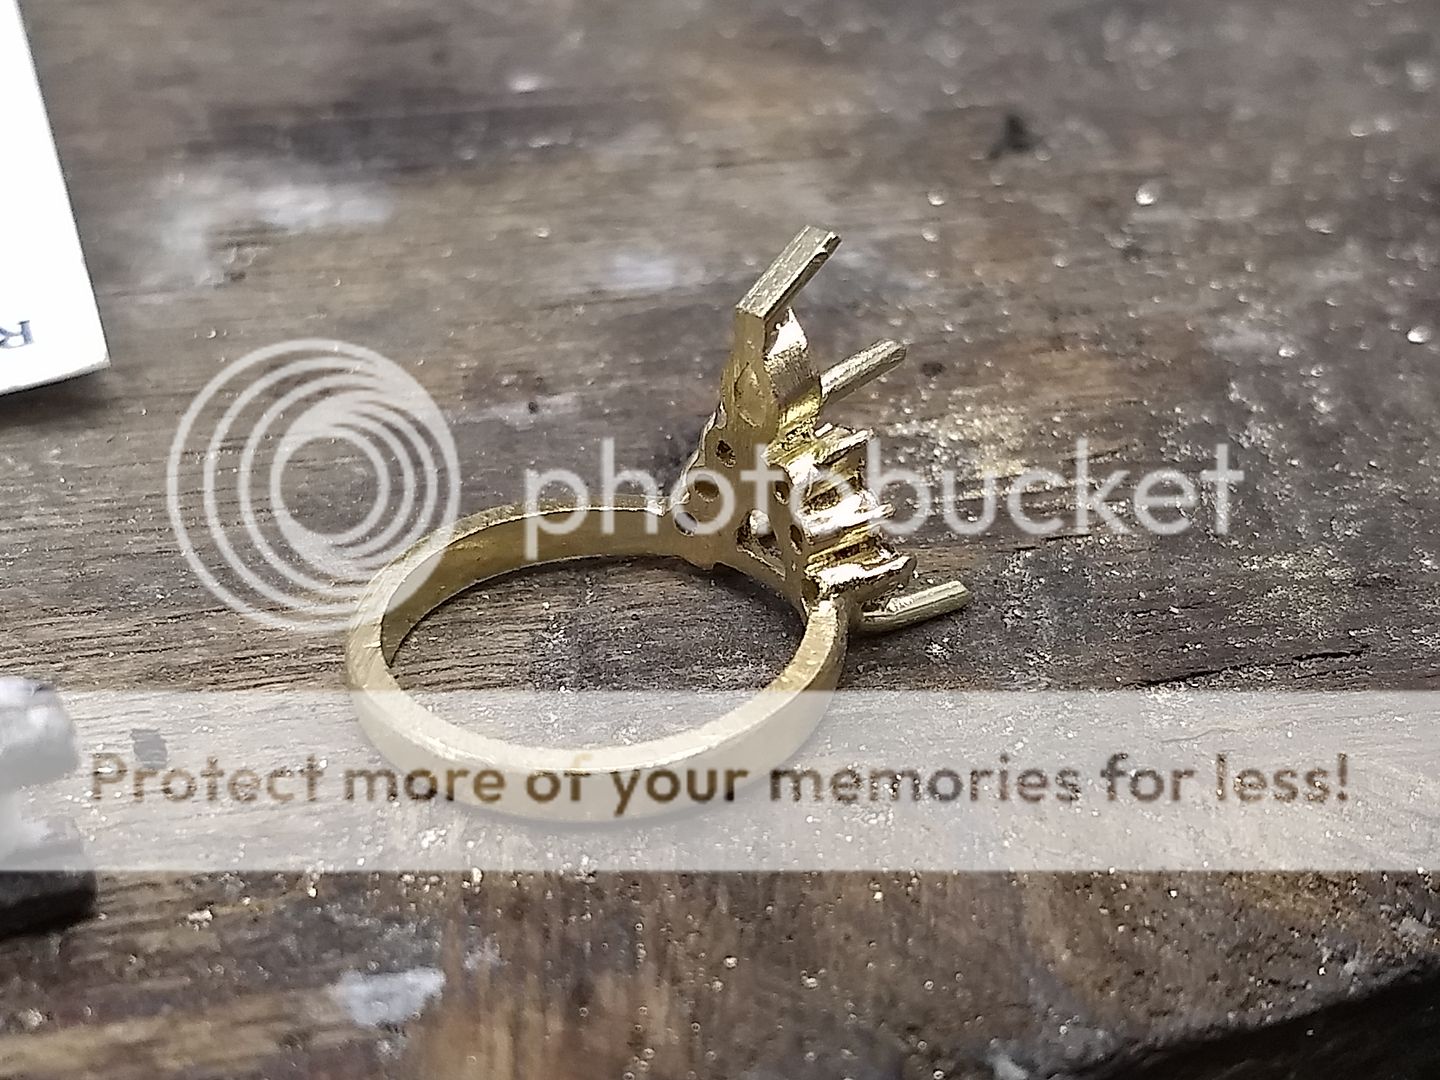
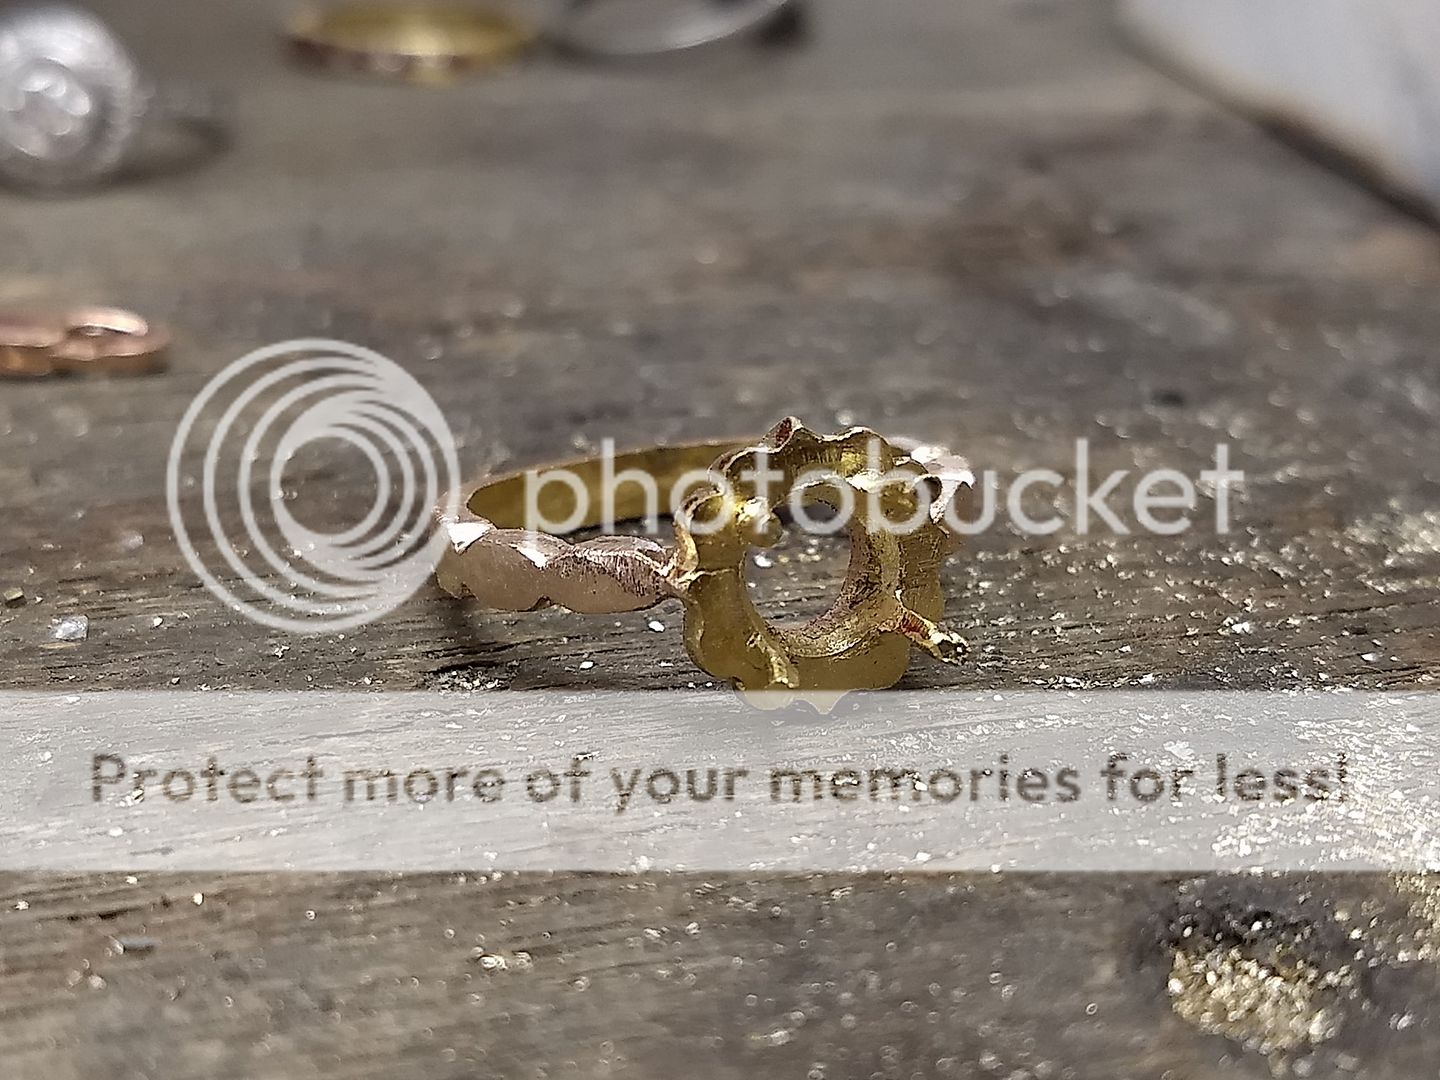
Now the lower section is the right size and shape it's time to fit the claws:
The outer stones effectively sit on top of tubes and are secured with claws on the outer edge and between on the inside. I have some 18ct yellow gold tube in stock so got cutting. This was actually a right royal pain in the arse as the available space and low tolerance meant it was easy to loosen a tube you'd just soldered due to the heat applied when soldering the next. We got there in the end though:
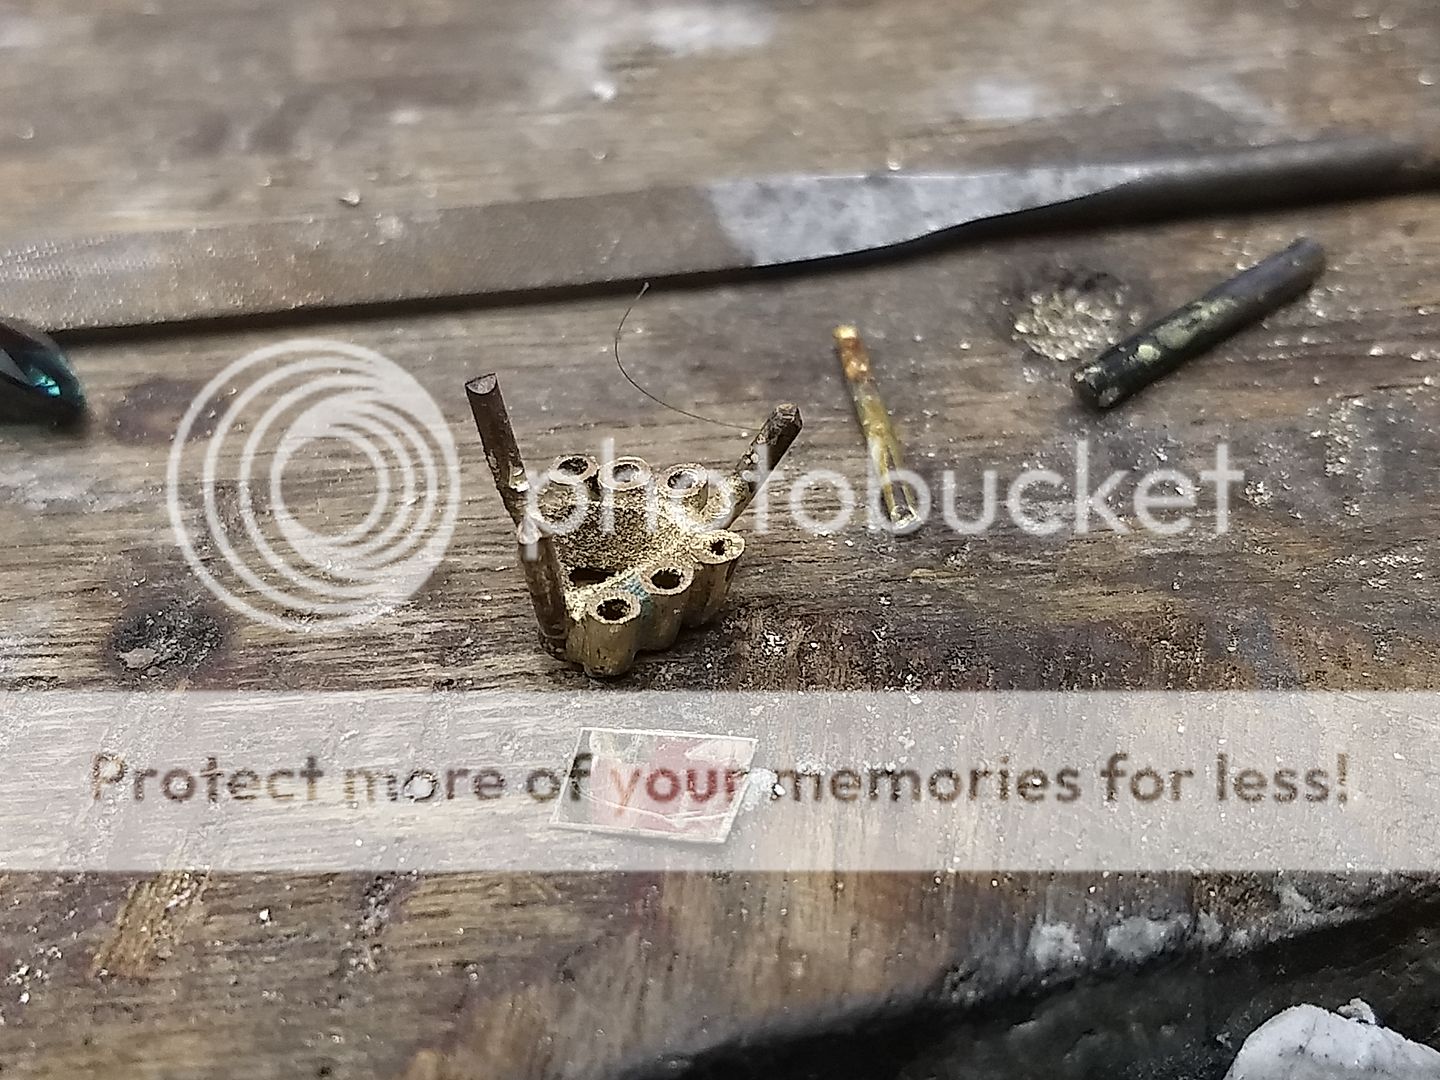
The tubes were cut to length and now the time comes to do the really bloody annoying bit of fitting the claws. The easiest way is to drill the claws into the setting and solder them into the holes. That gives strength and security but also there's that risk with the heat again:
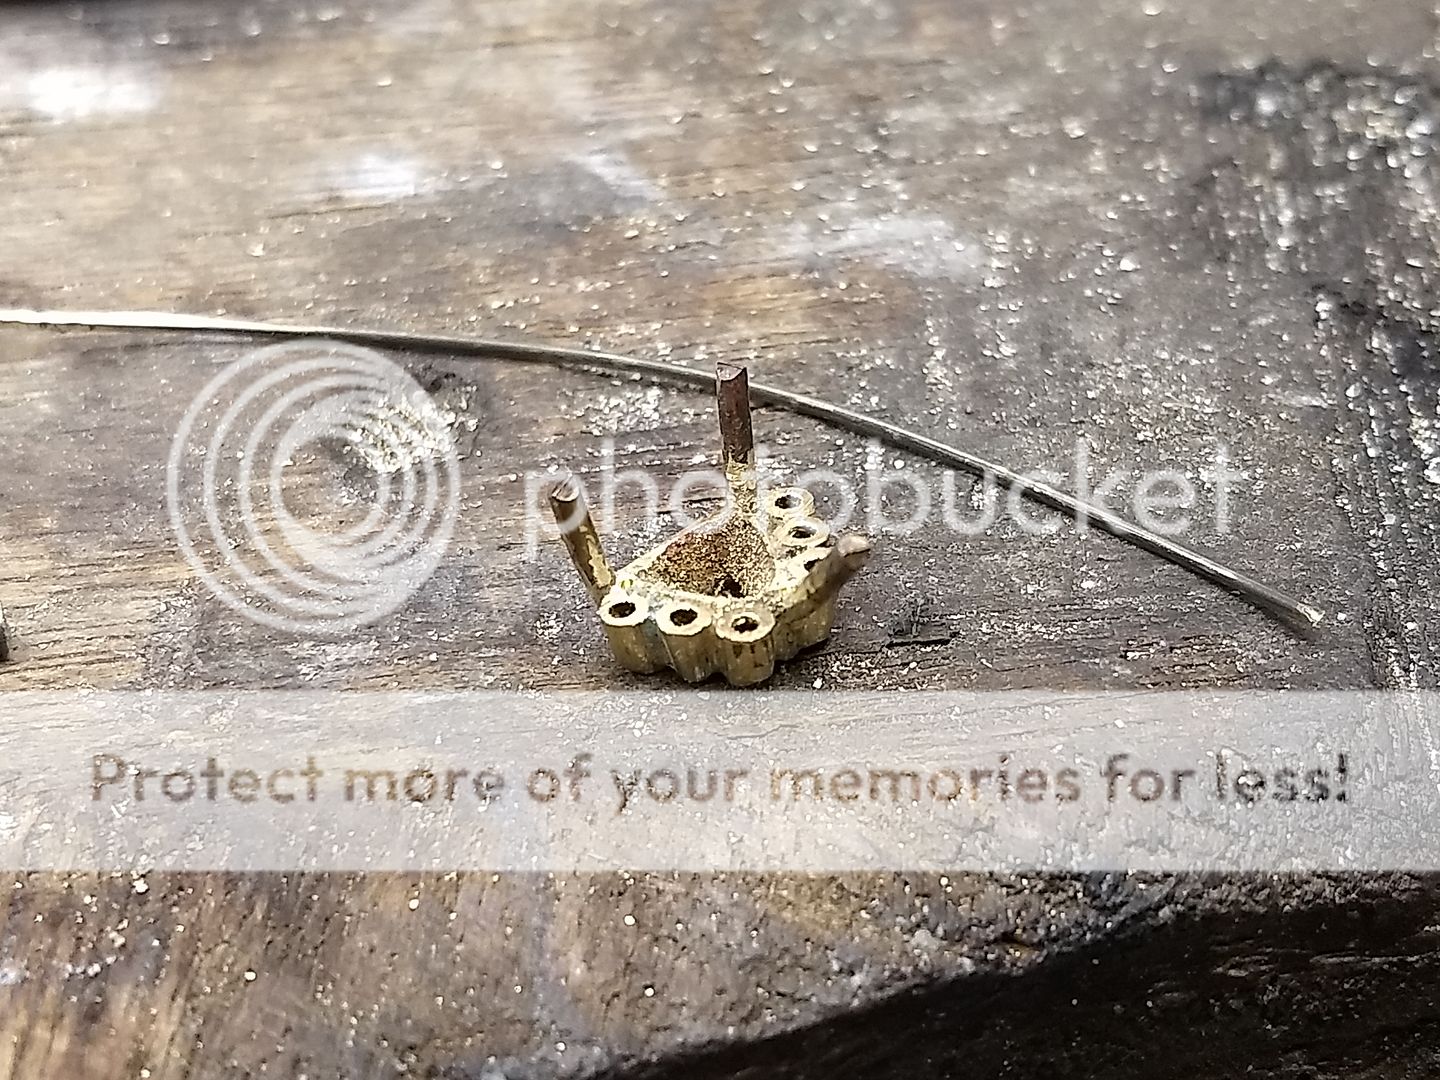
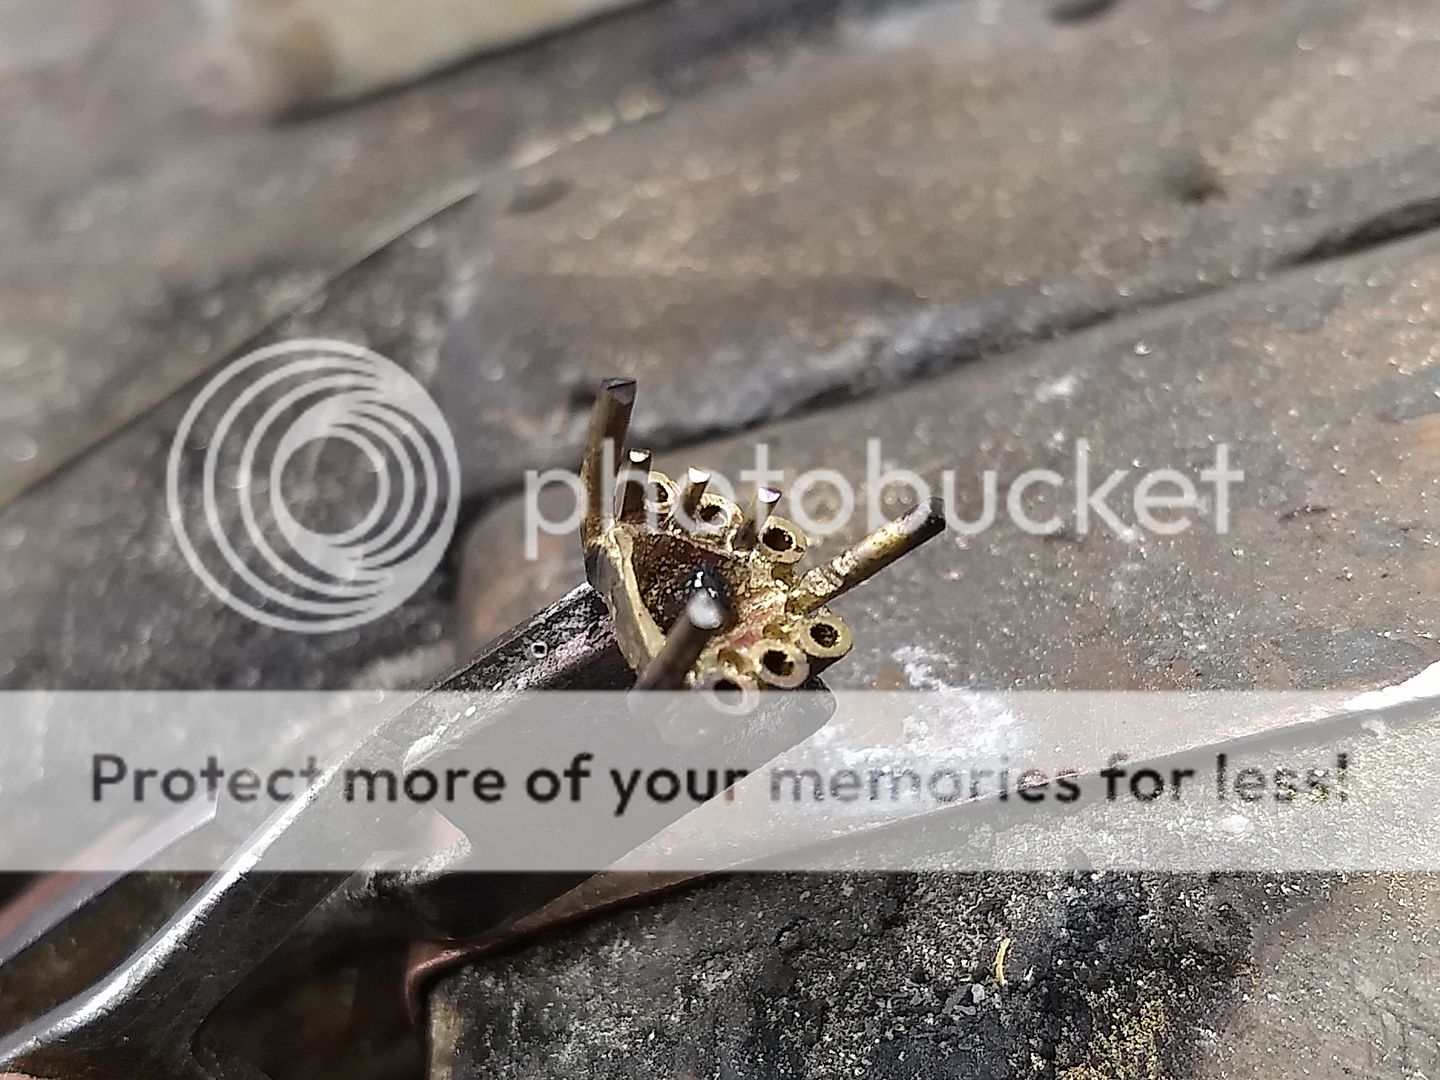
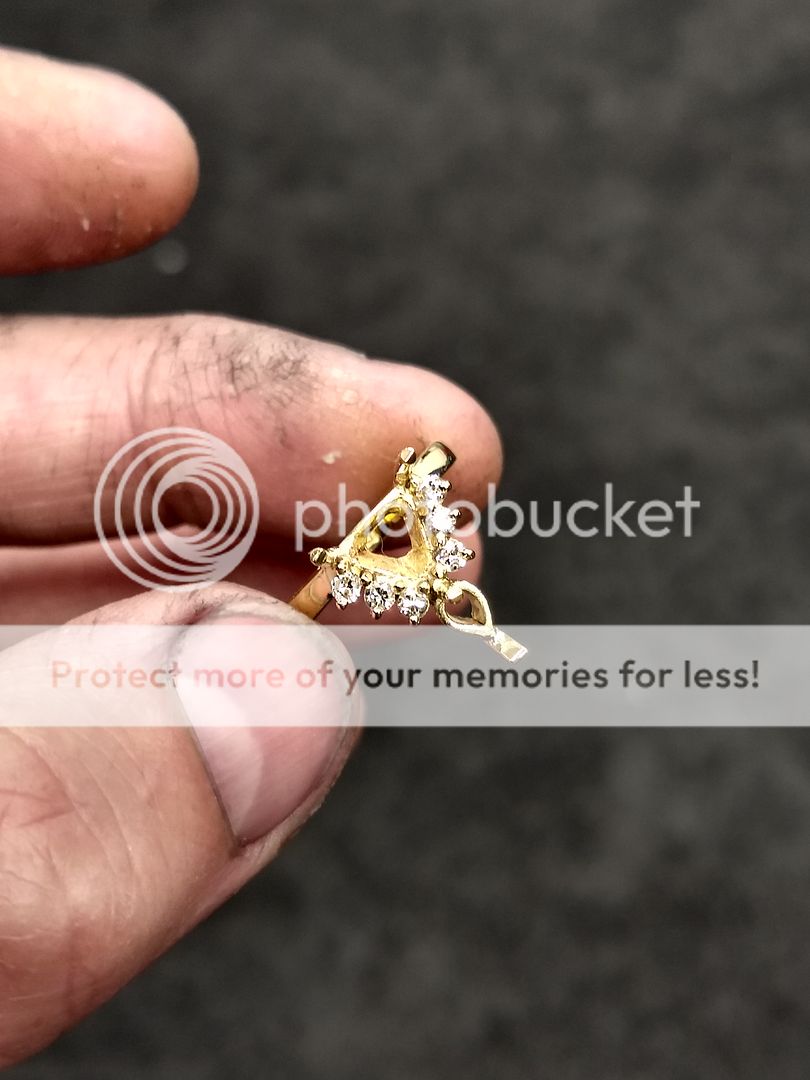
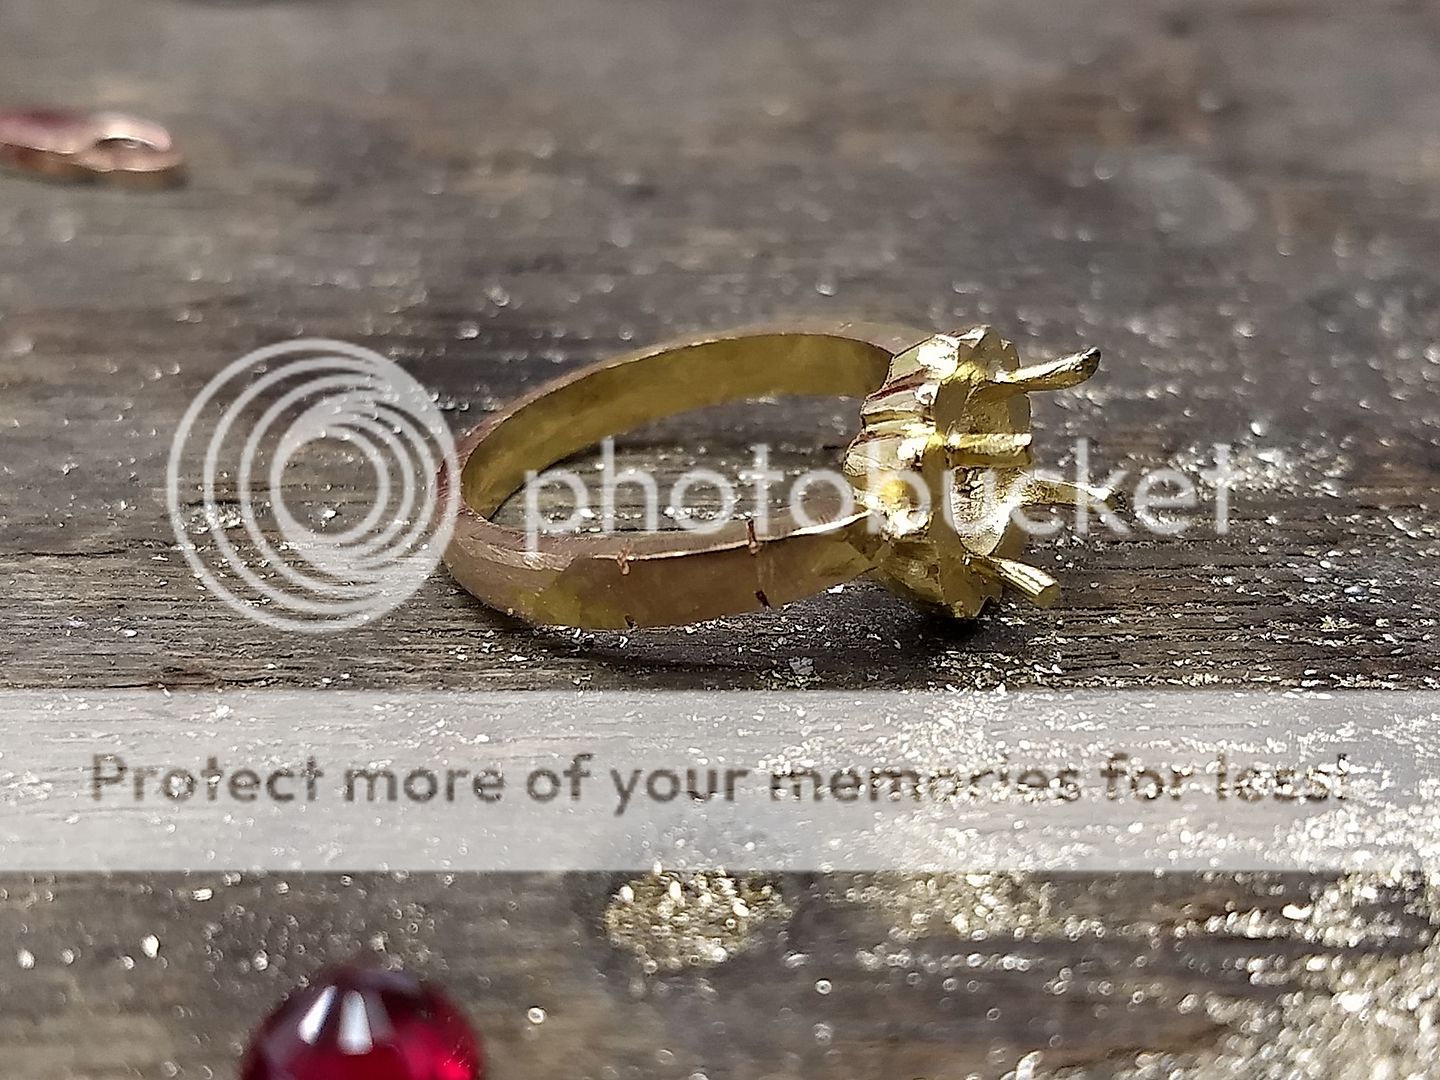
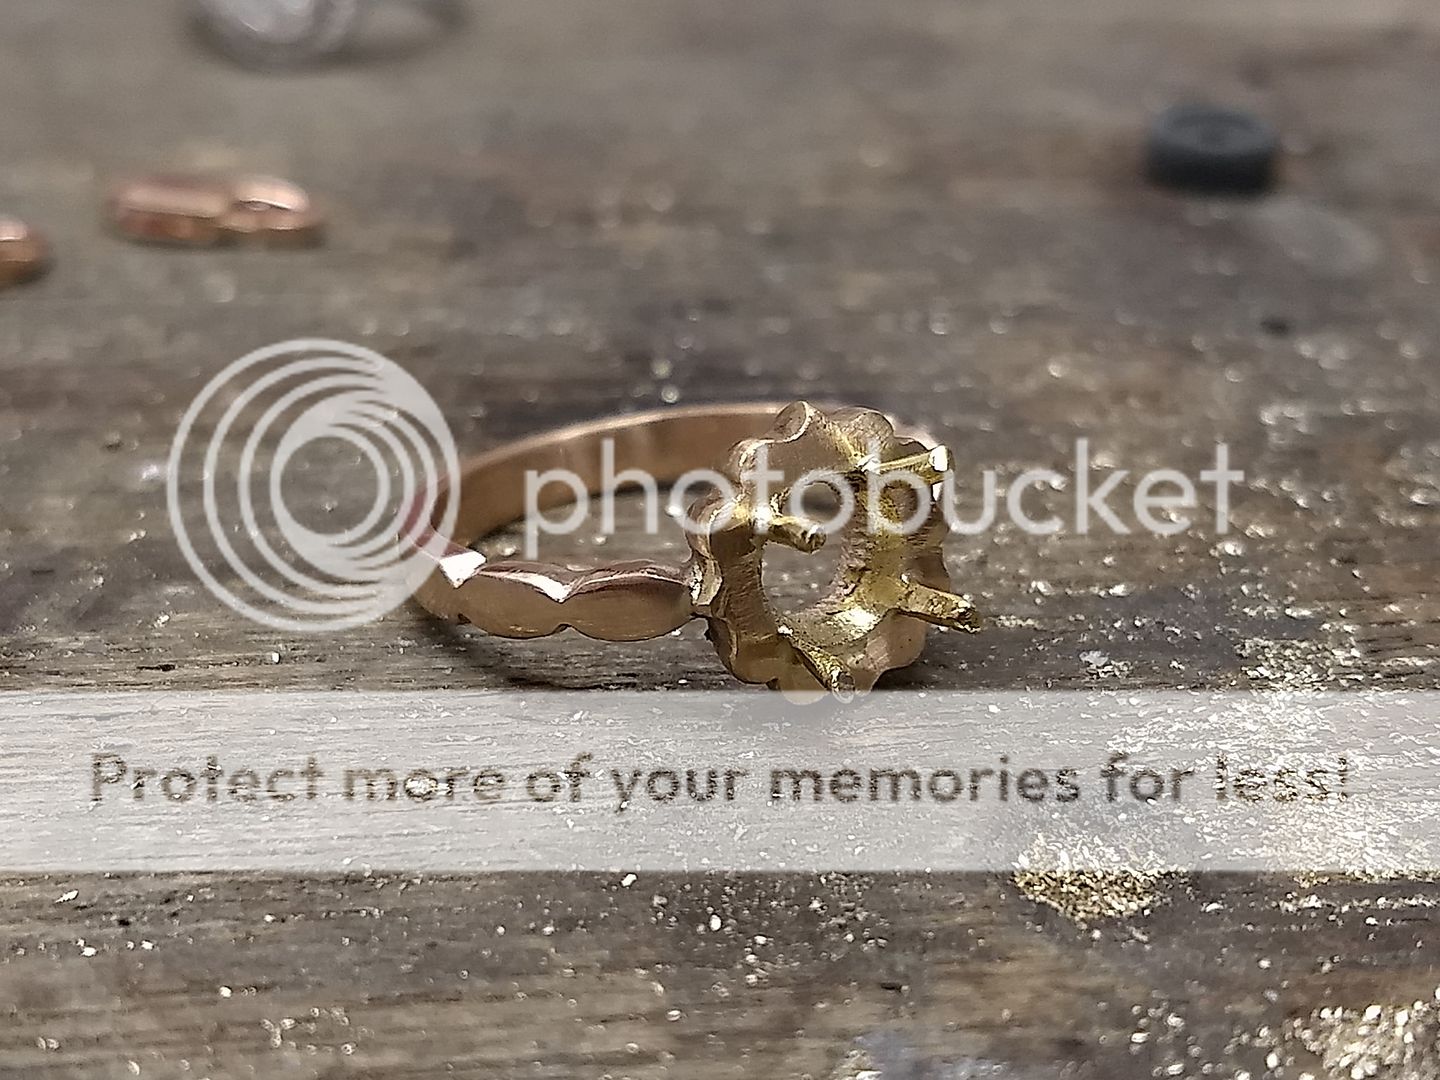
The claws are then soldered on the outside and then I can get on with making the setting for the pear shape:
Which is then soldered in place (i think there are some pics of the stone setting missing, i do apologise).
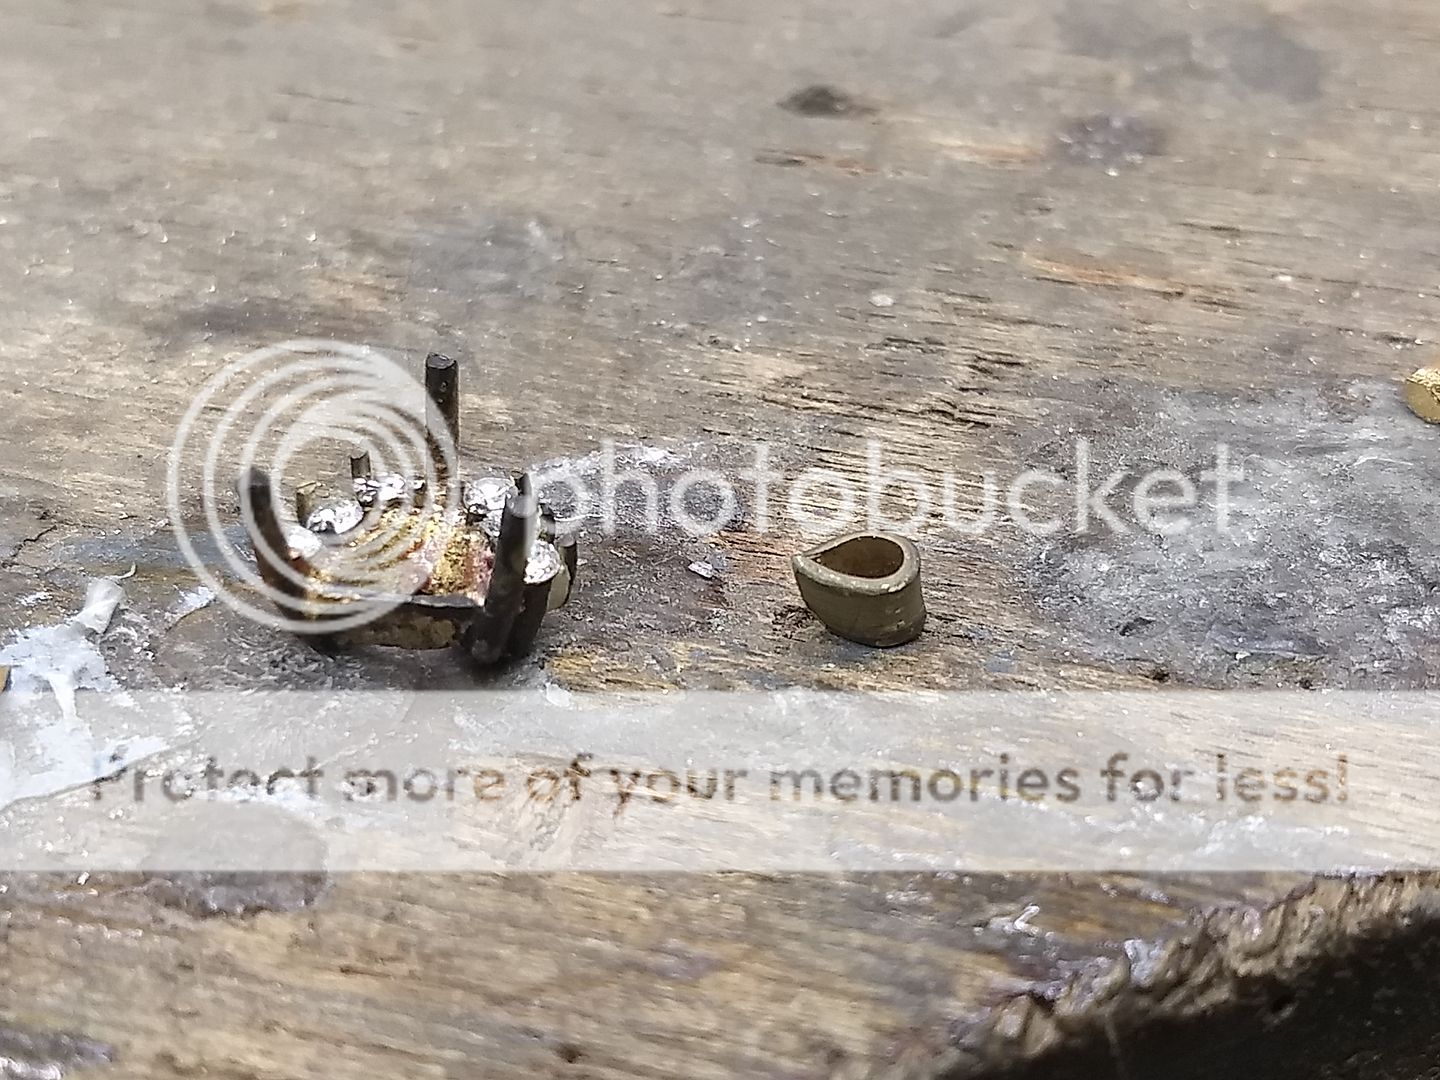
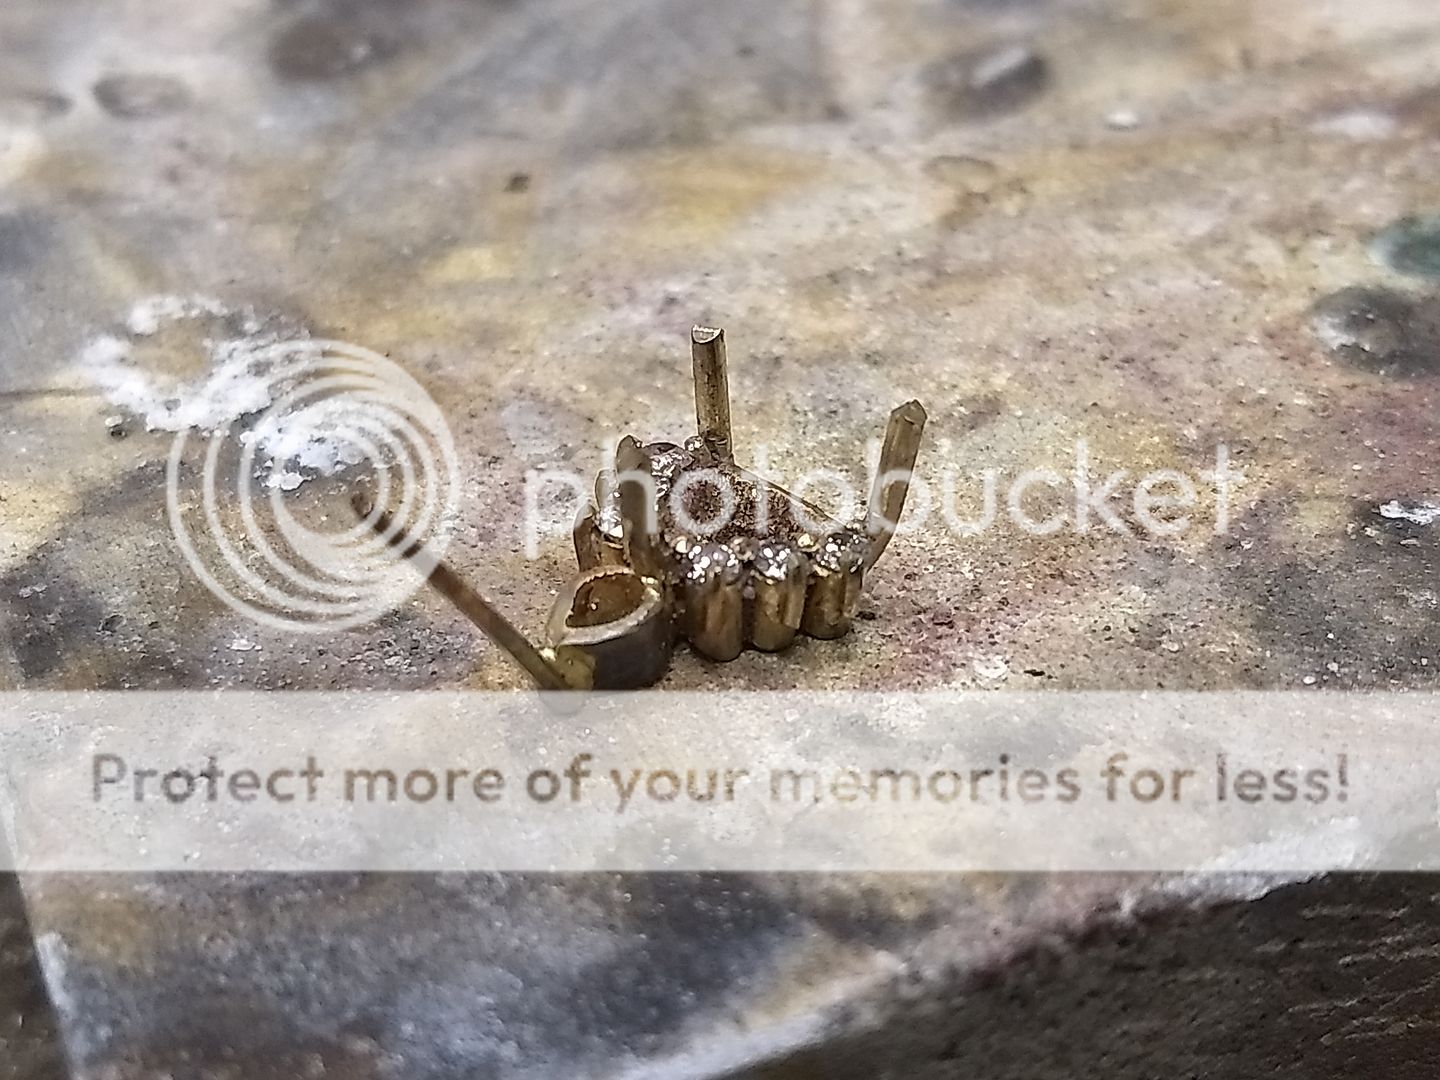
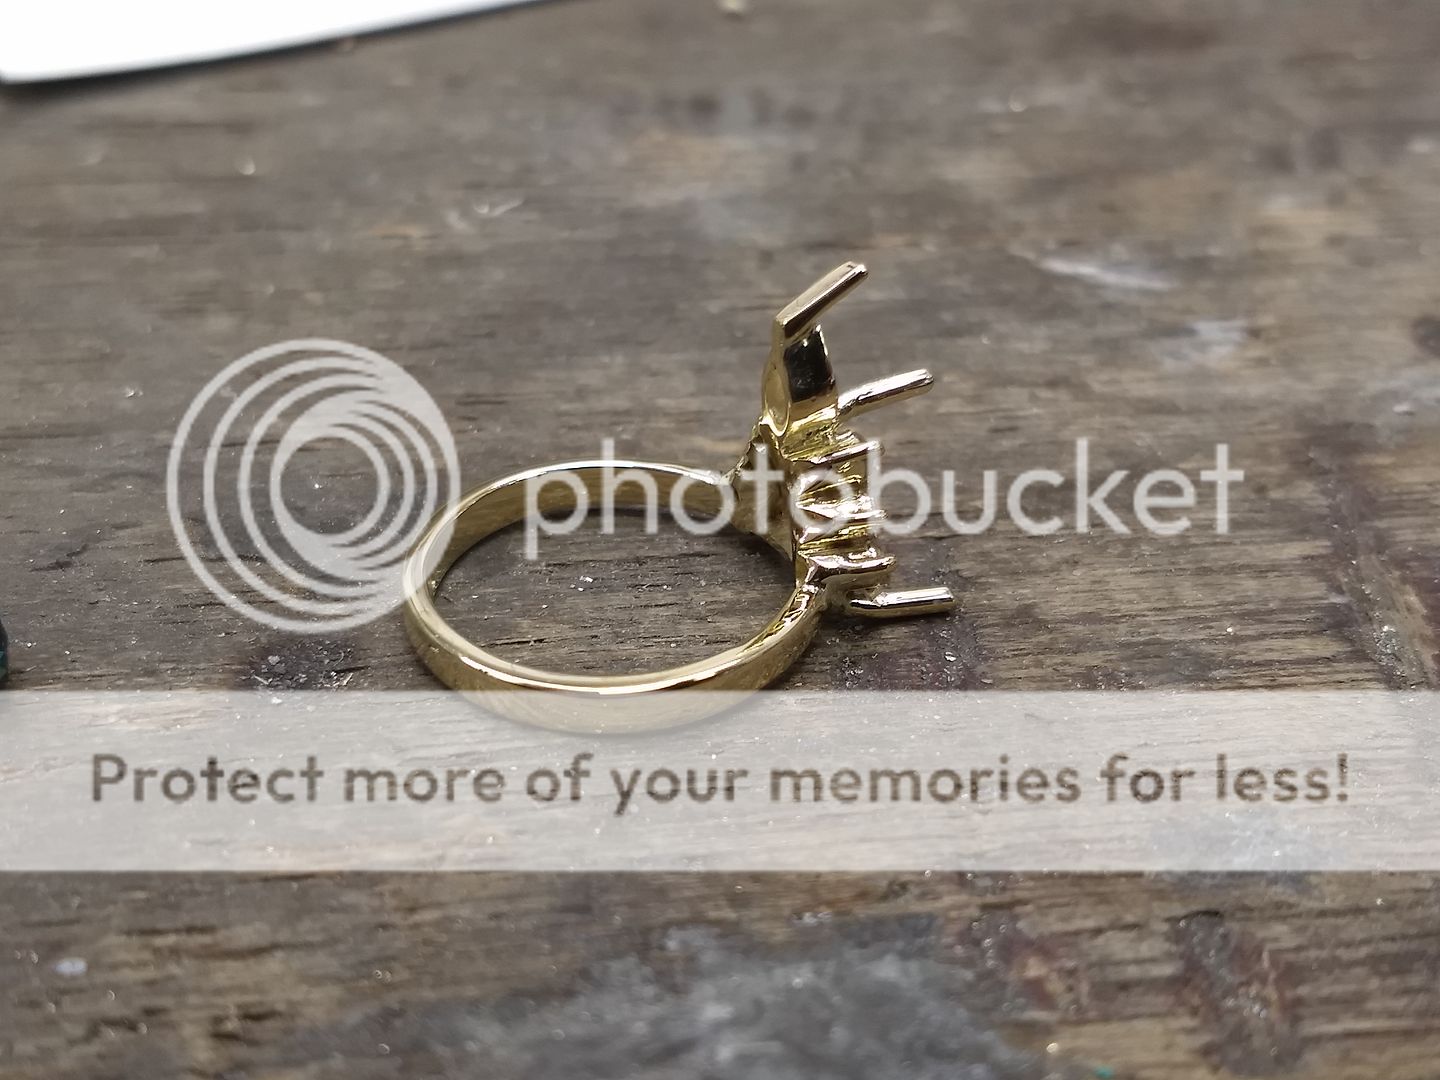
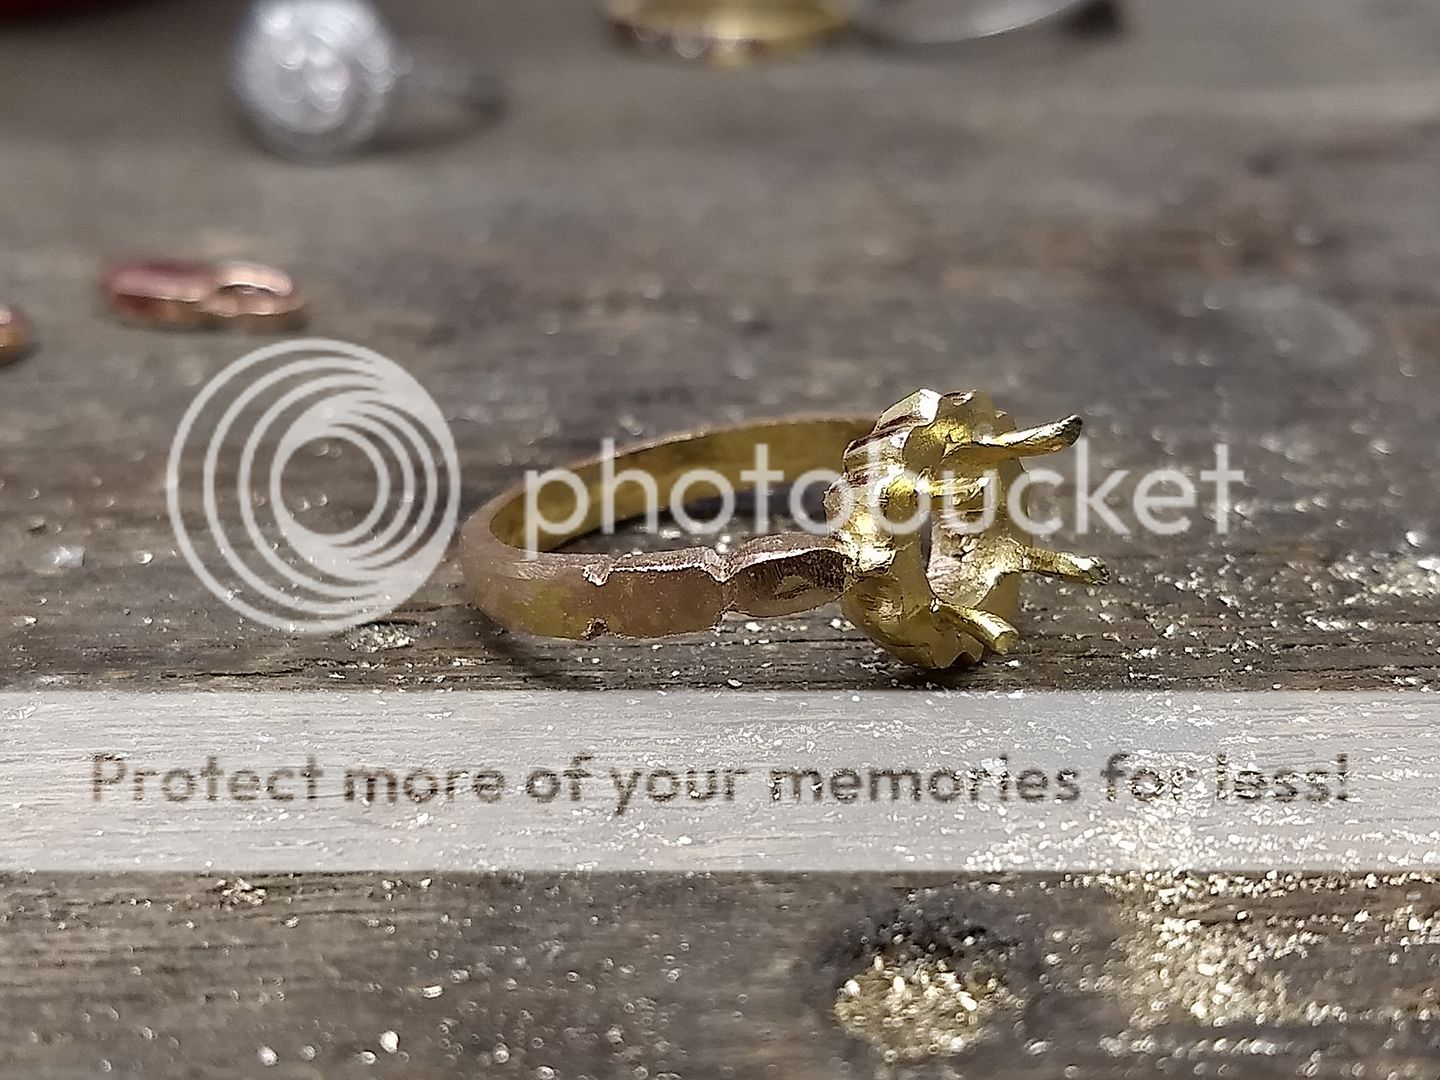
The setting is cleaned up and you can see it starting to take shape:
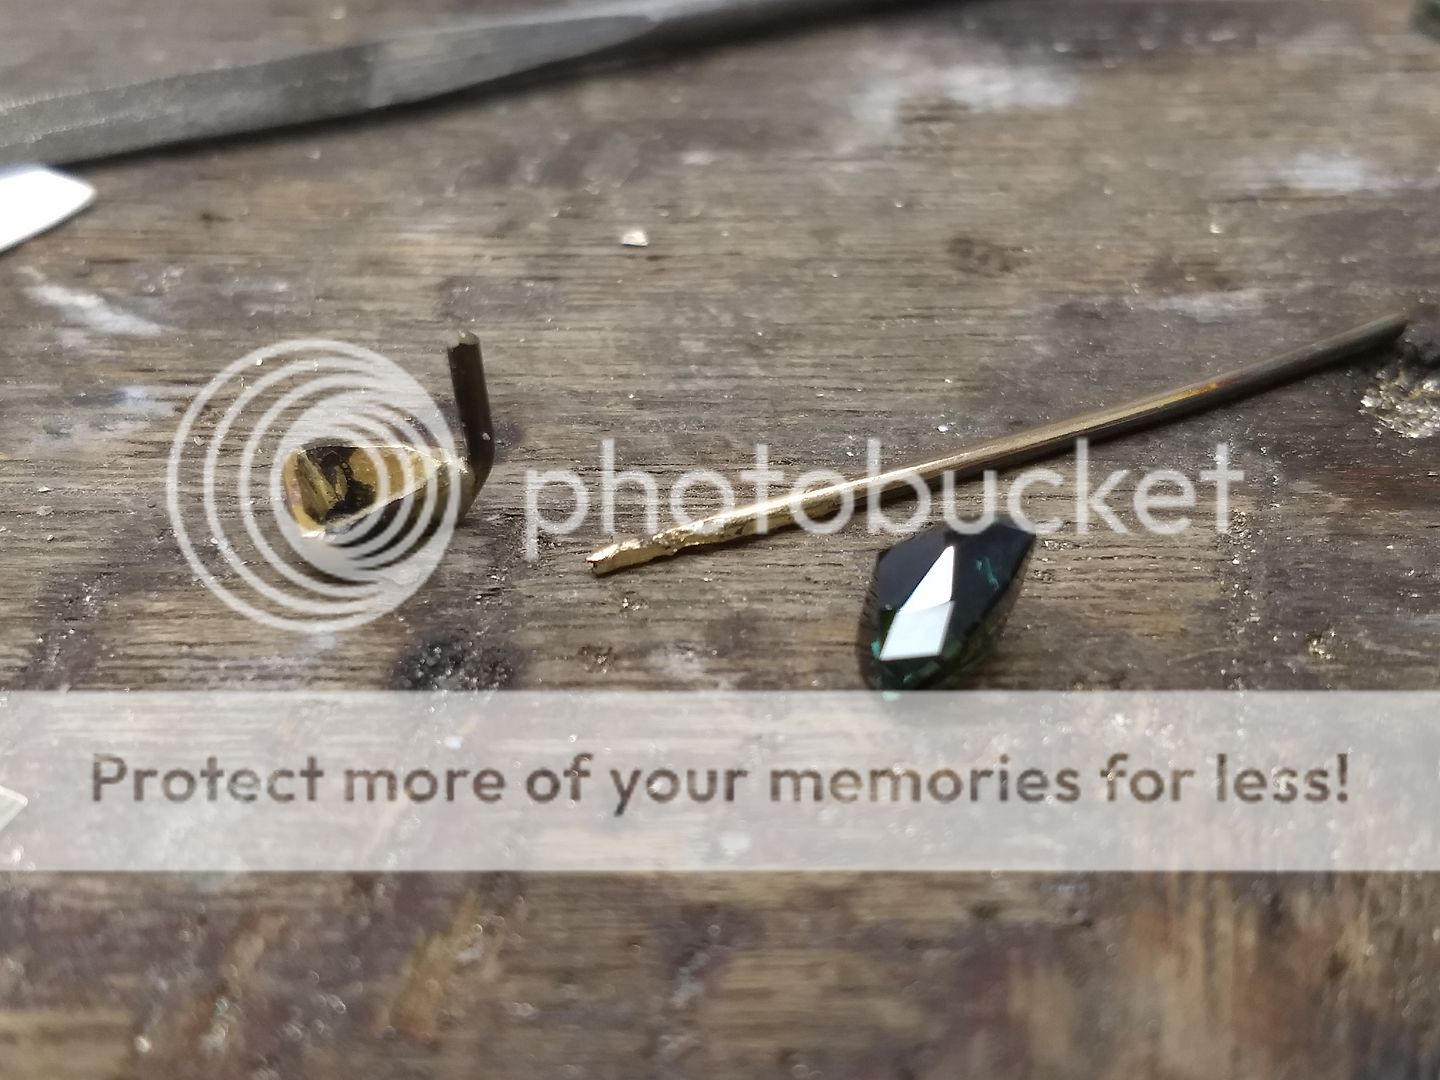
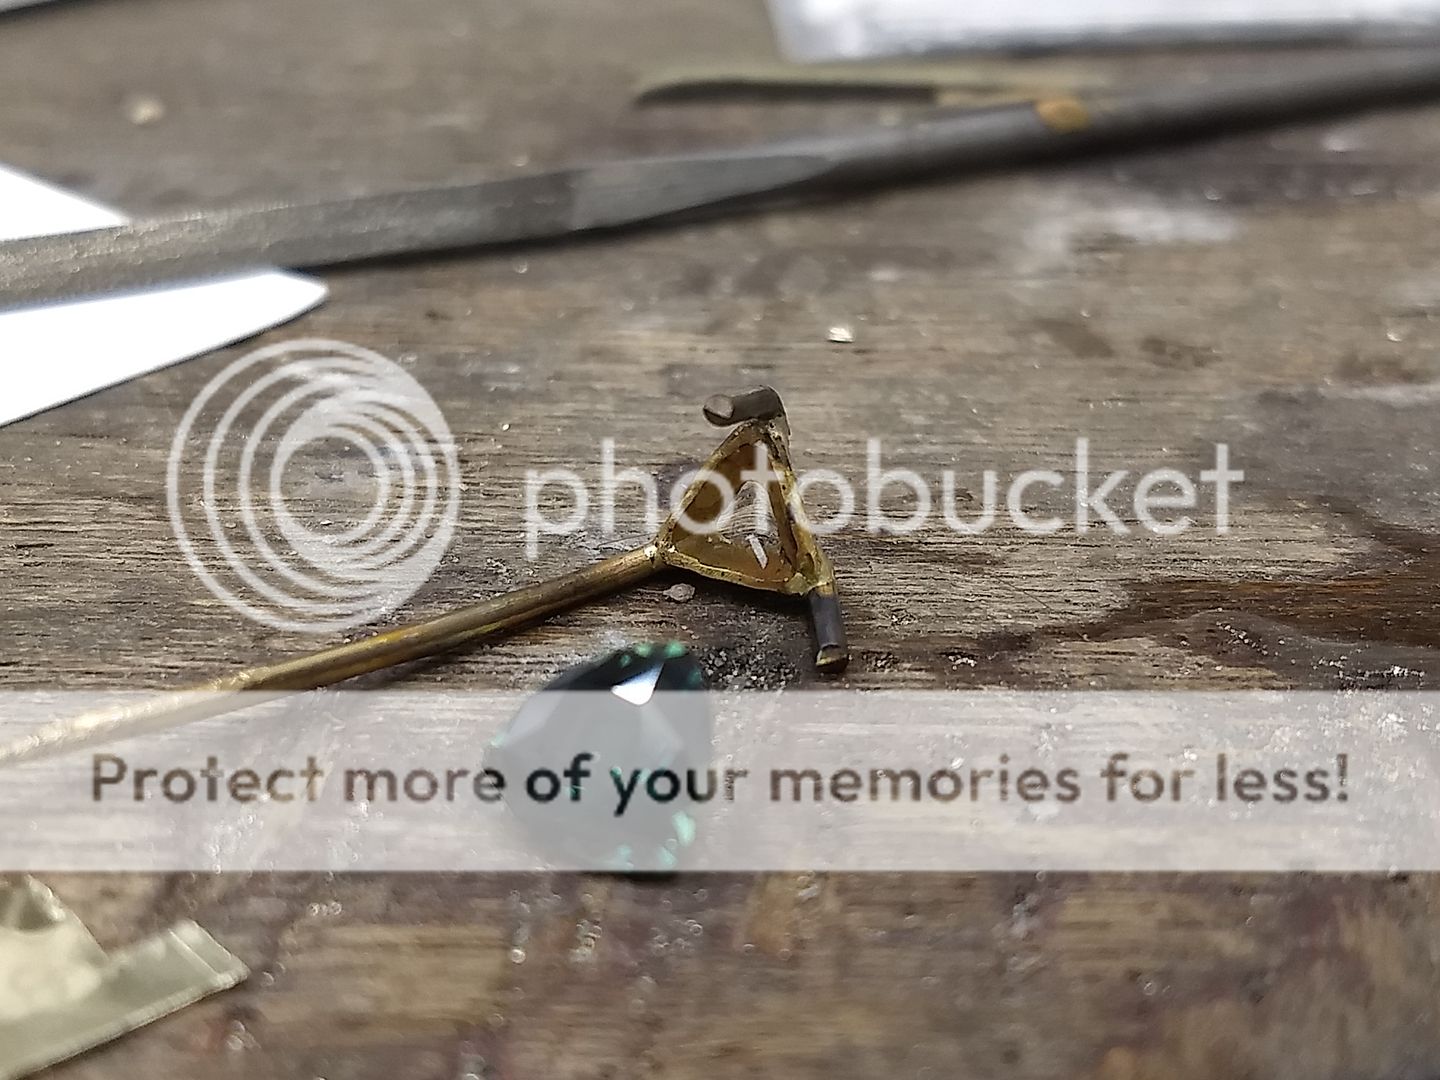
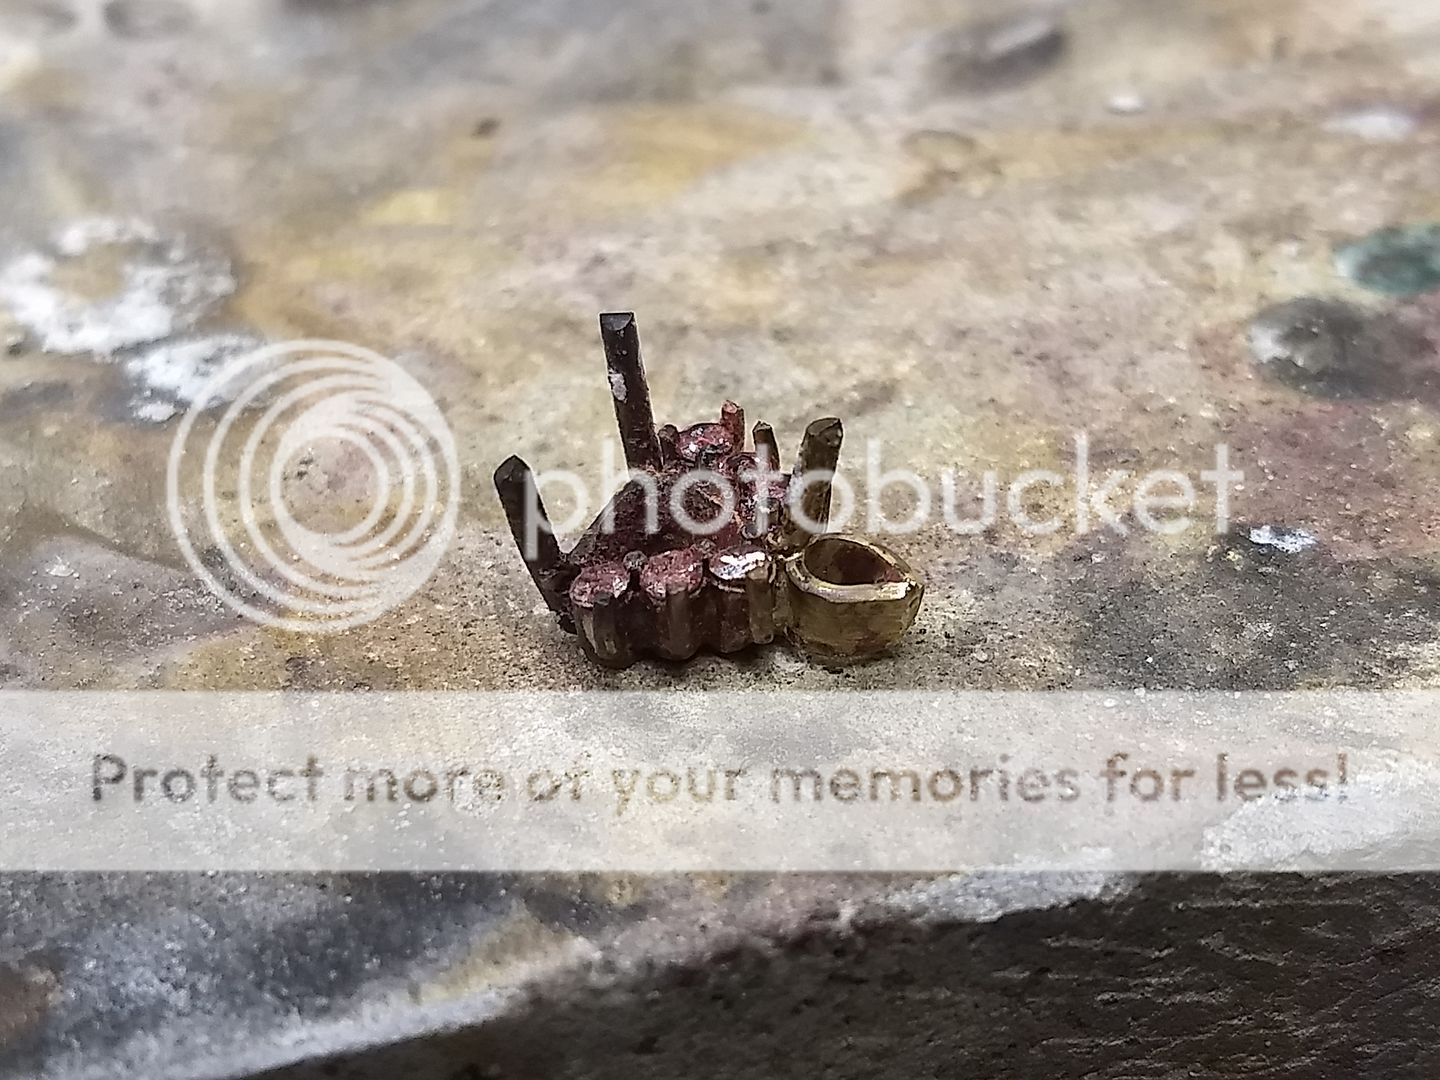
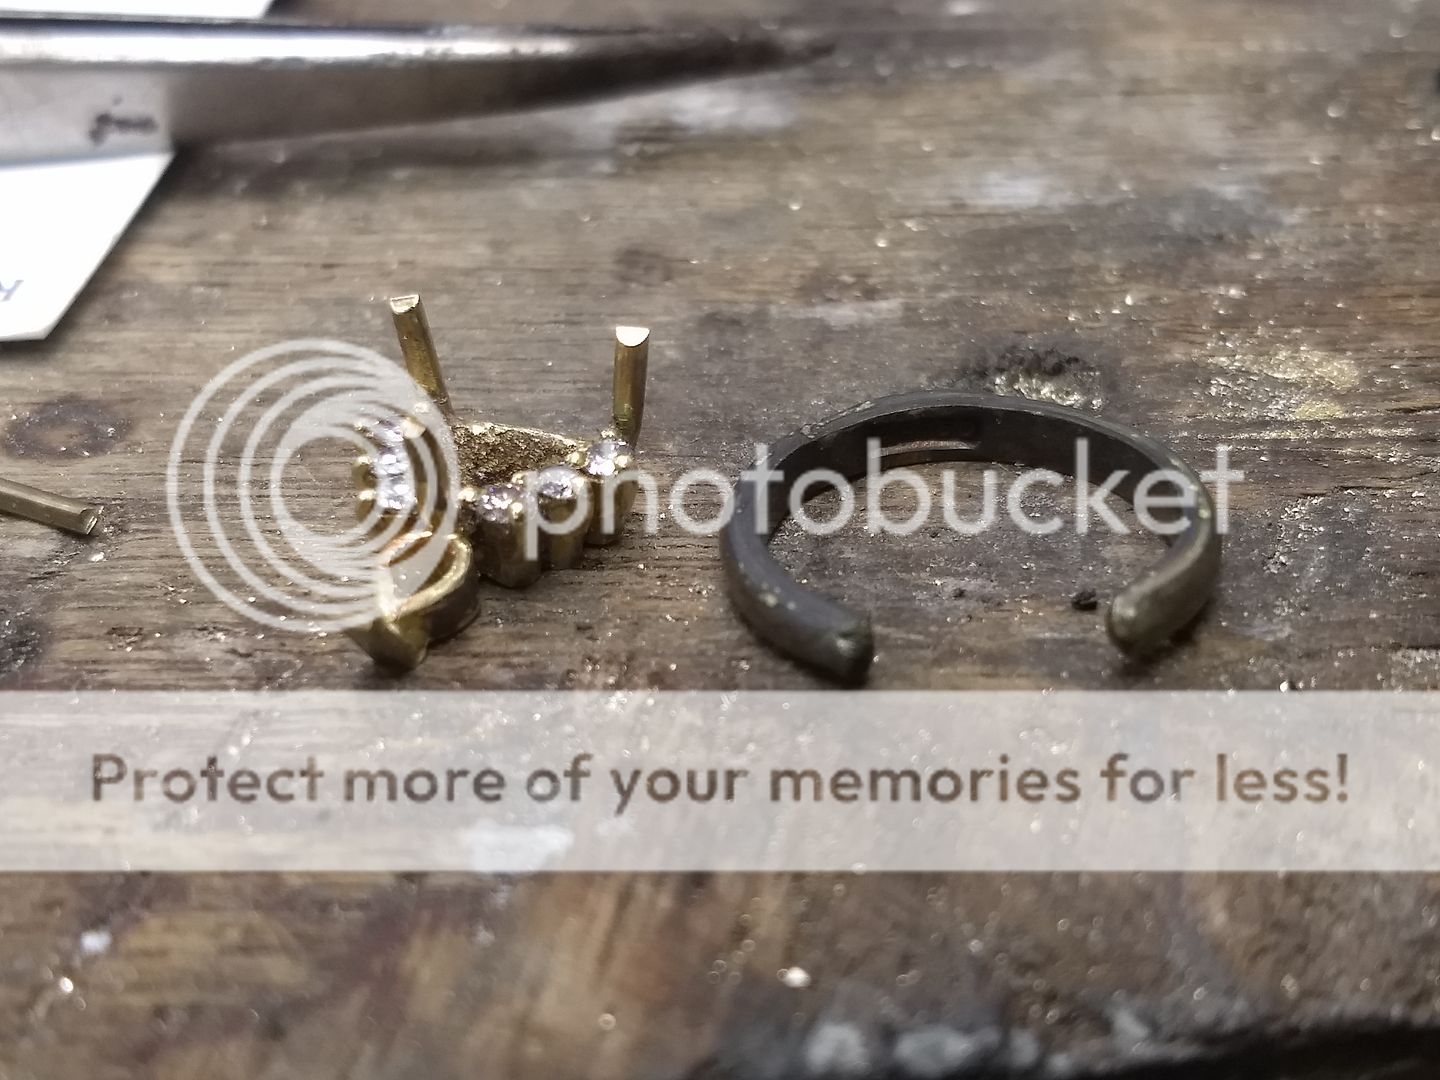
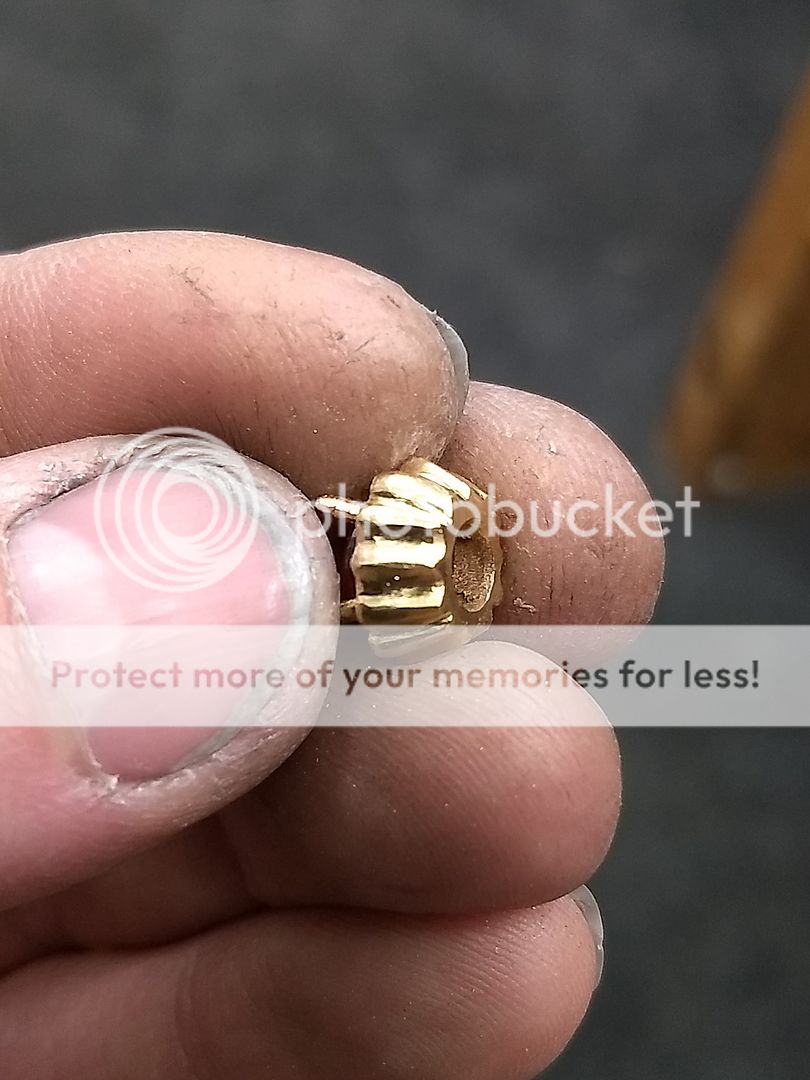
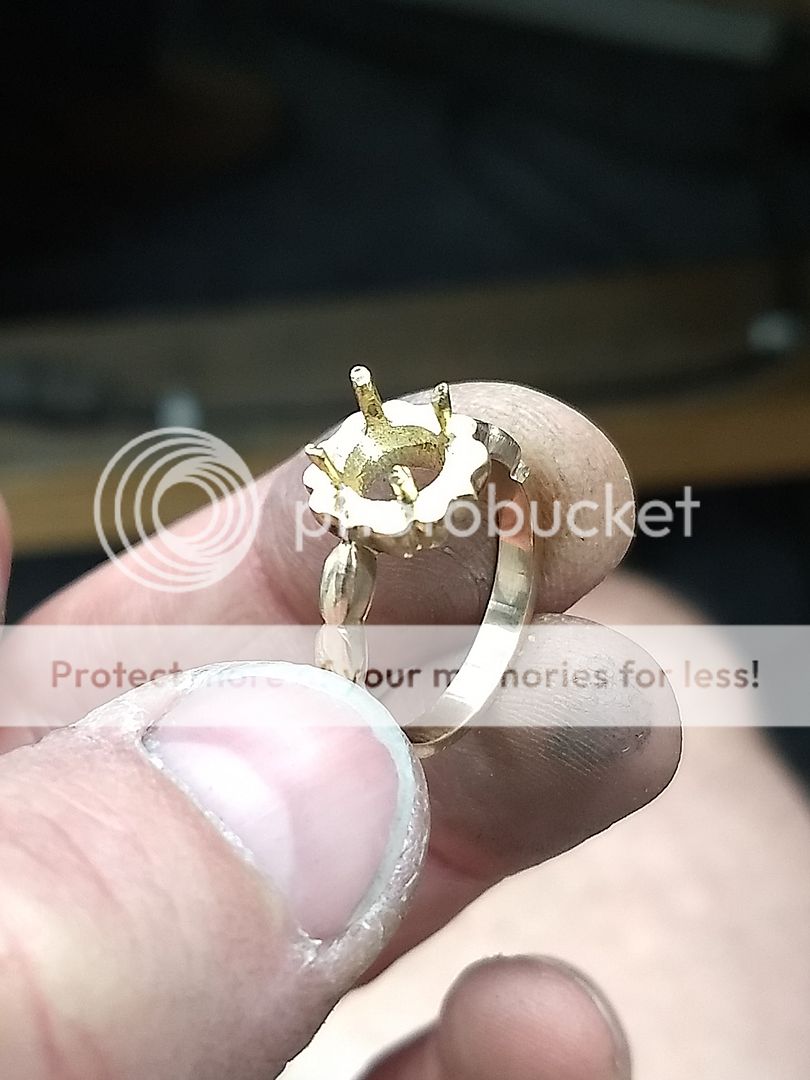
The claw to secure the pear shape is added next. I decided to go for a split claw (further along the build) to reduce the risk of breaking the sharp end off the diamond:
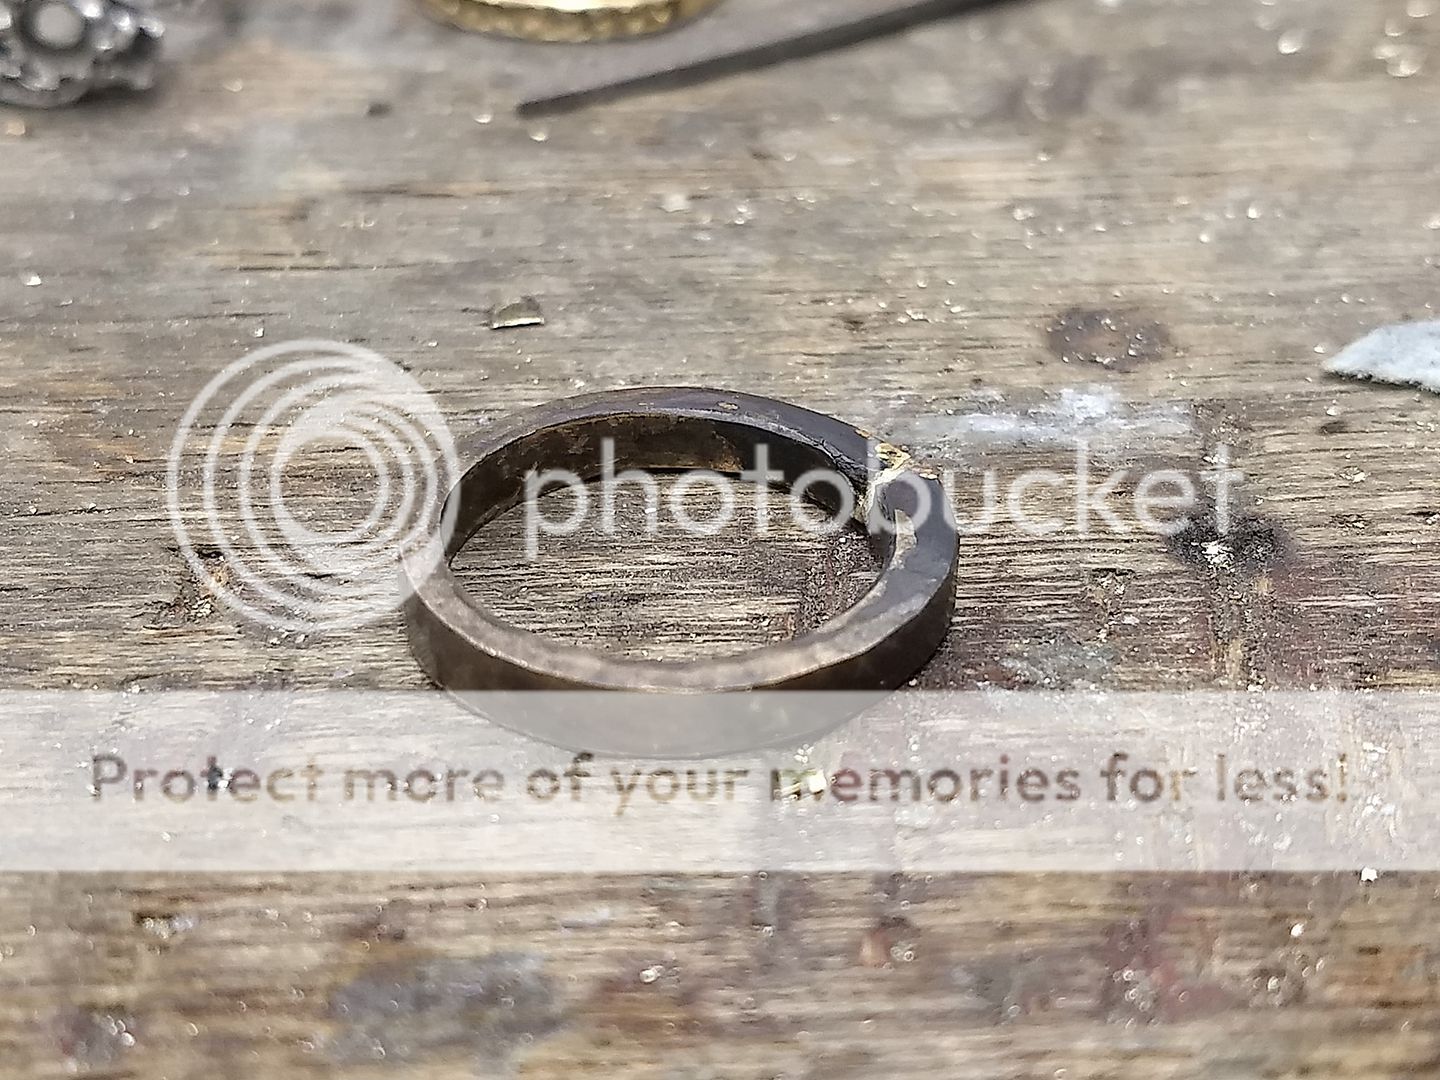
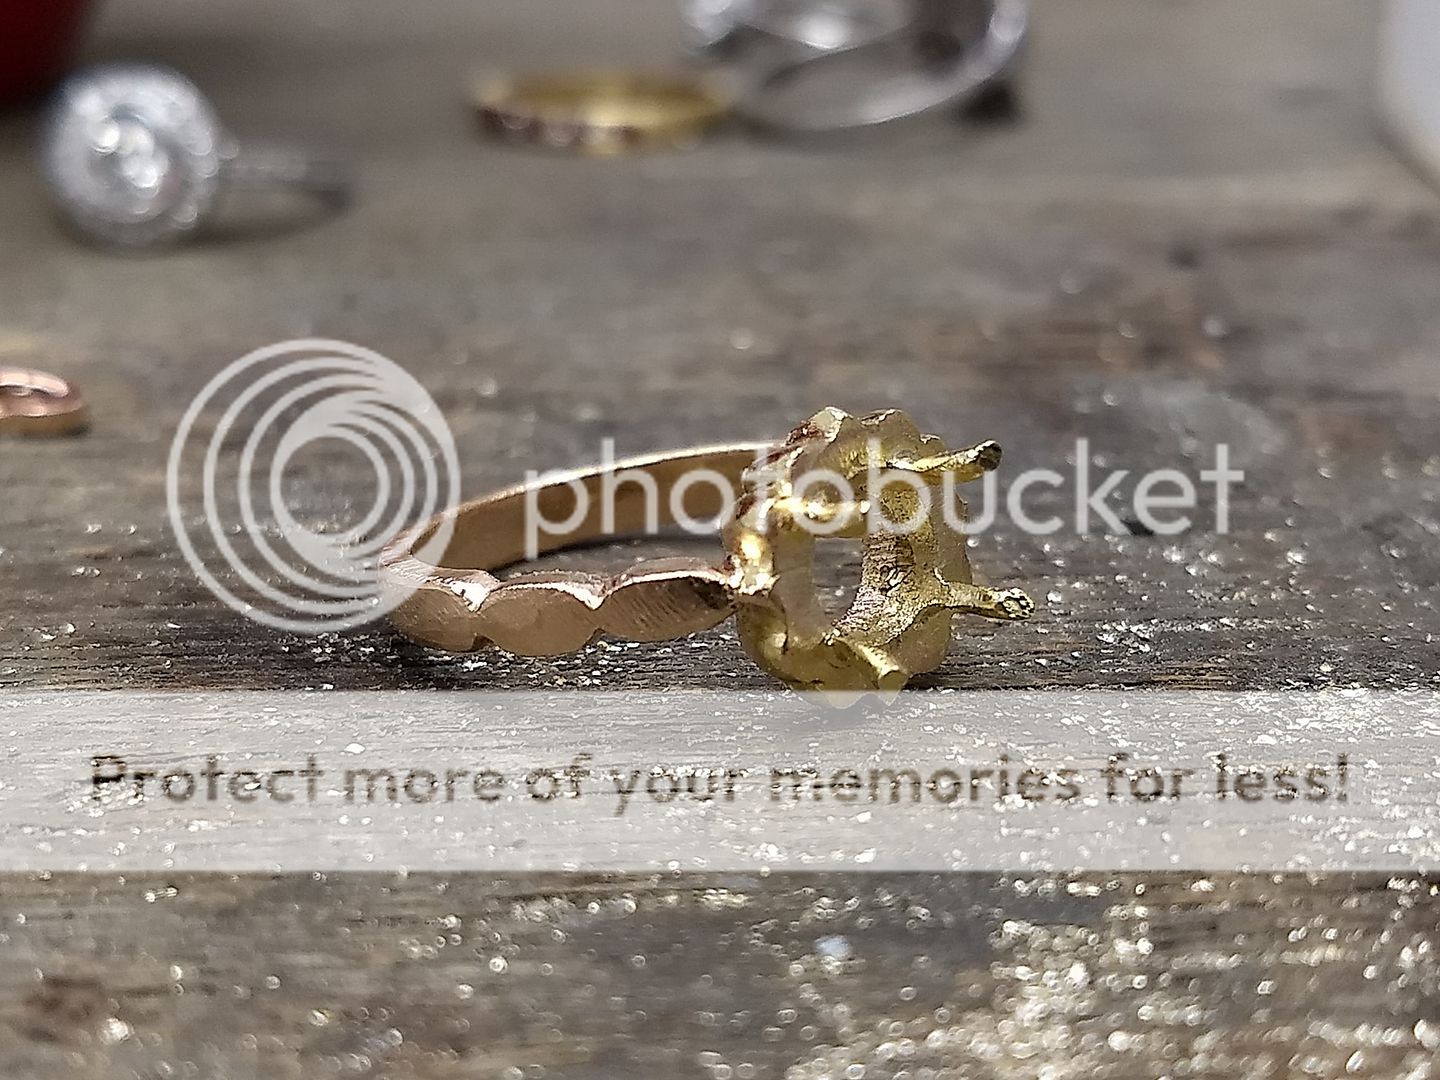
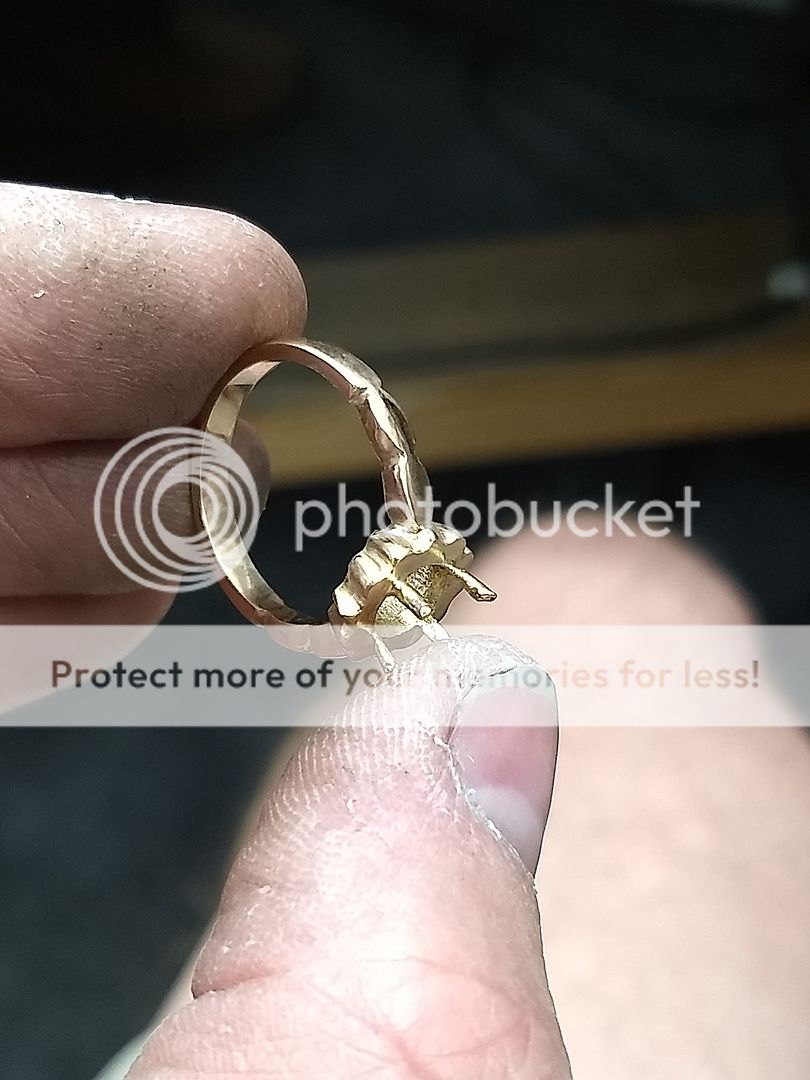
The head is all but finished so now I make the shank. More 18ct yellow bar:
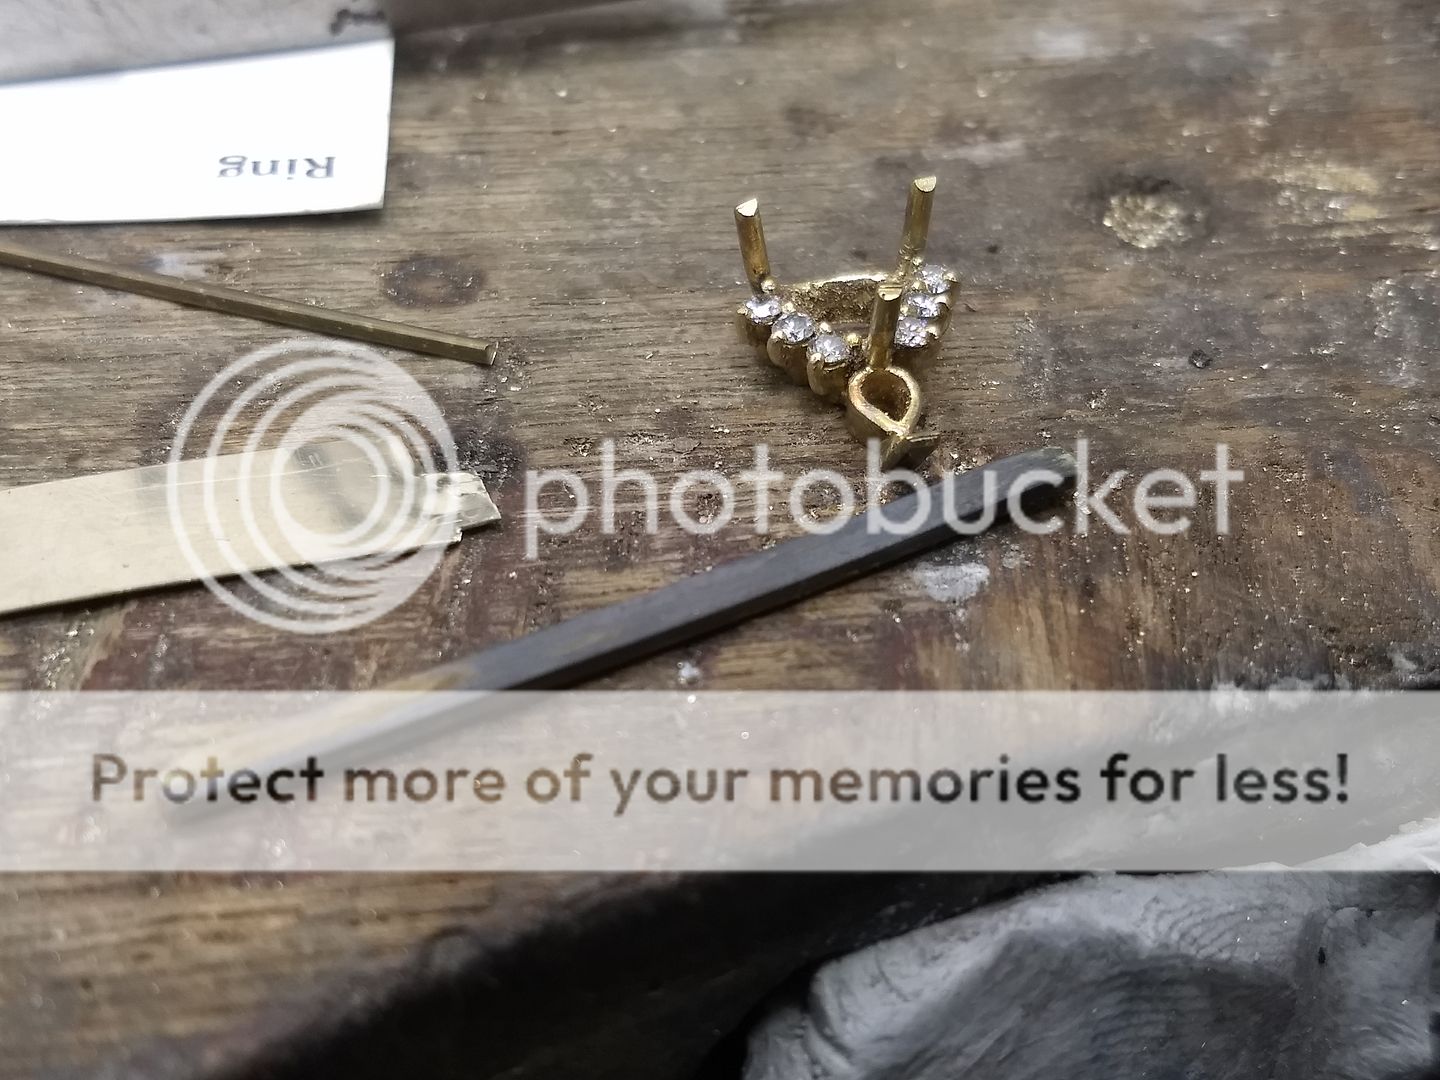
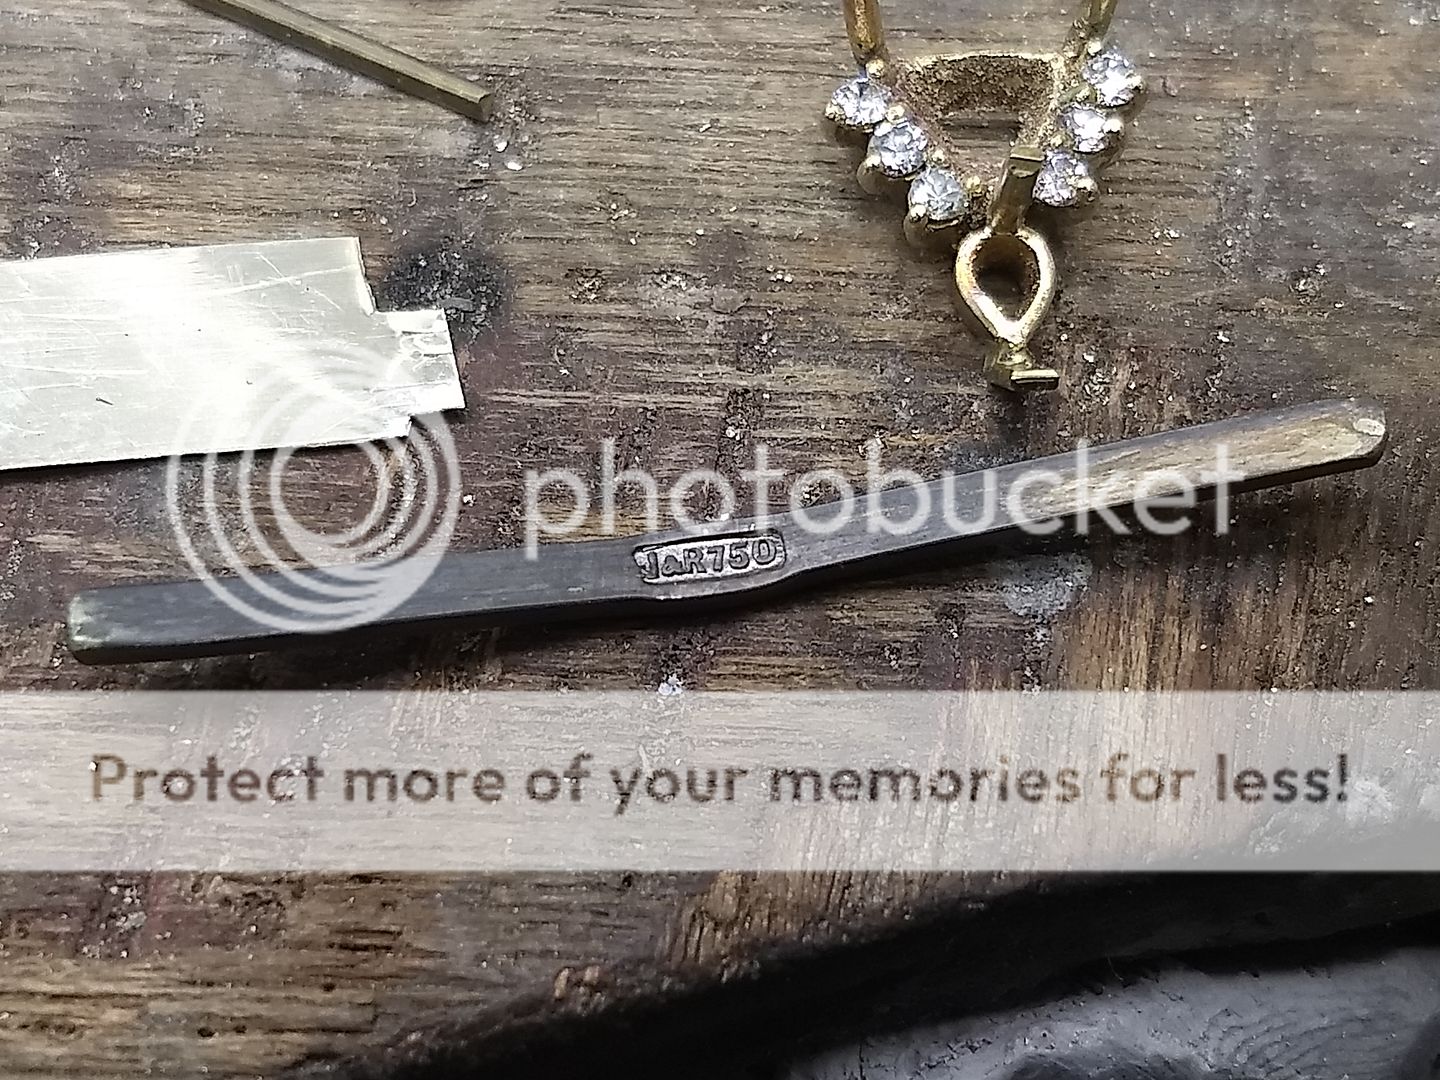
The shank is measured up against the head, cut and then soldered in place. Again, with so many individual parts to this ring the risk of solder moving is very high:

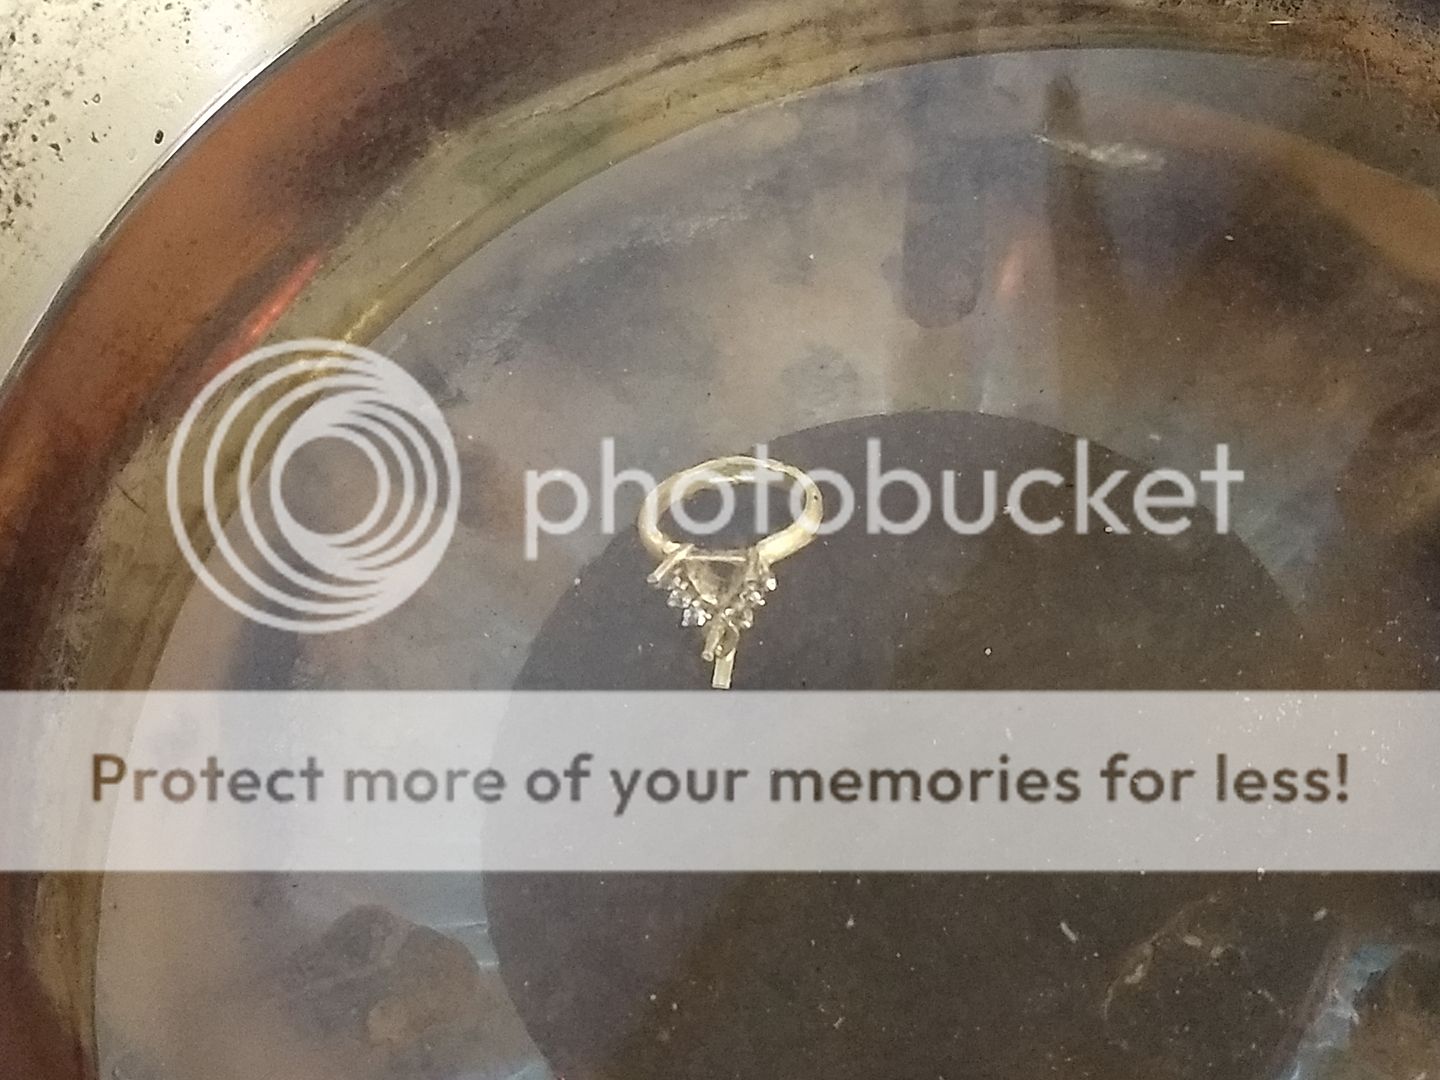
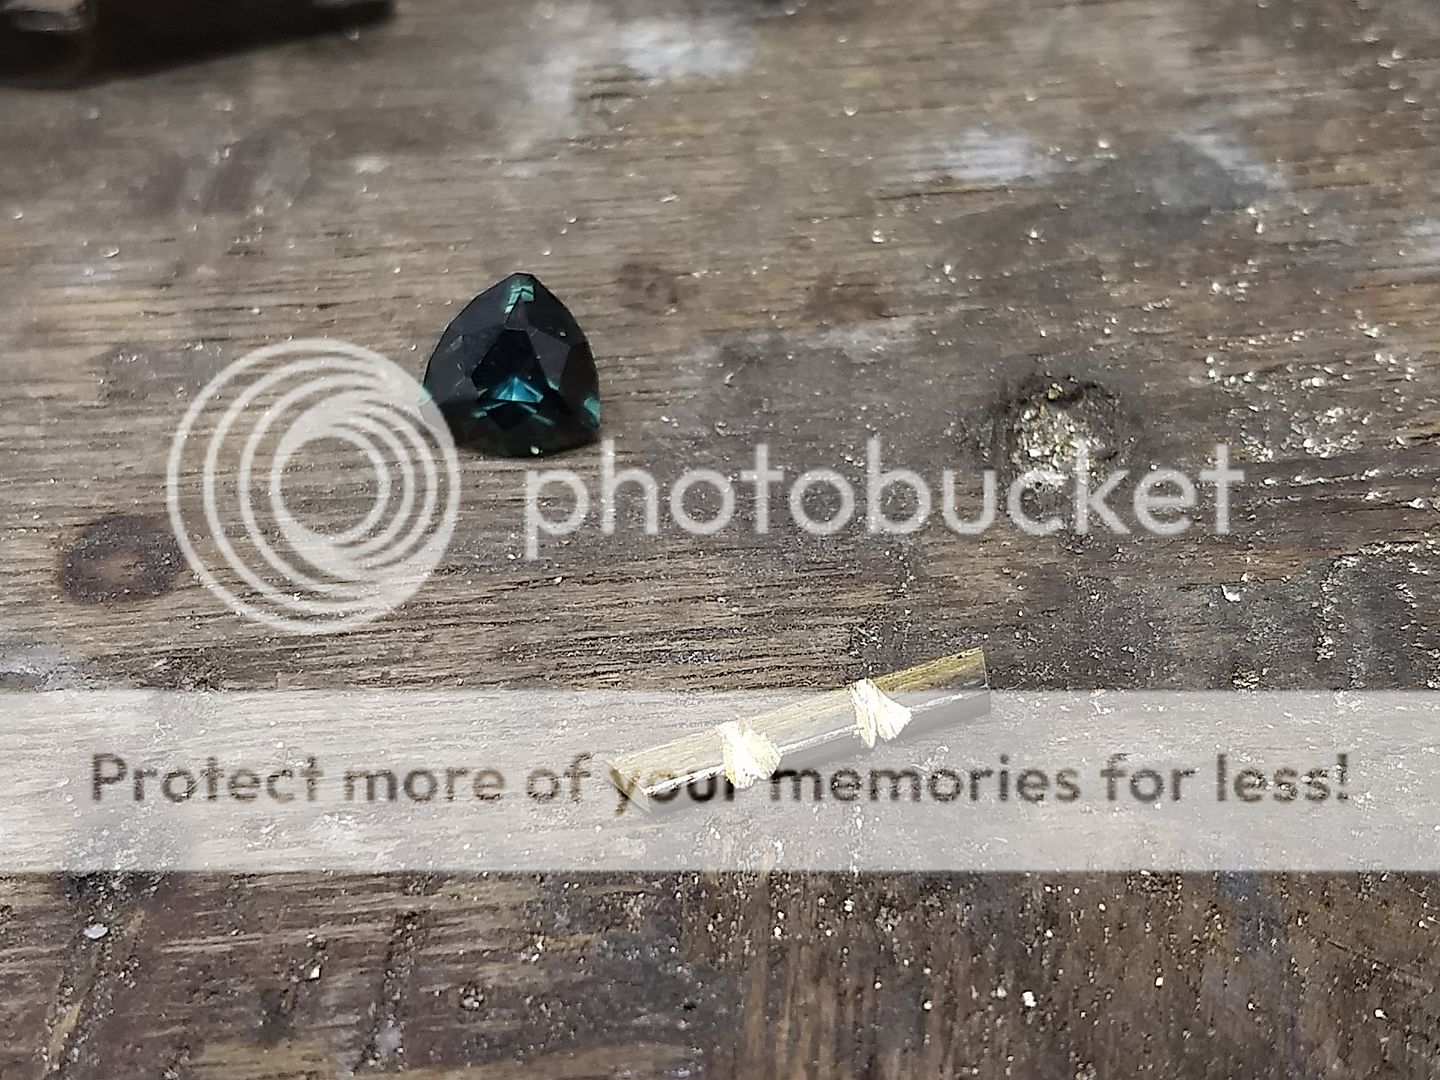
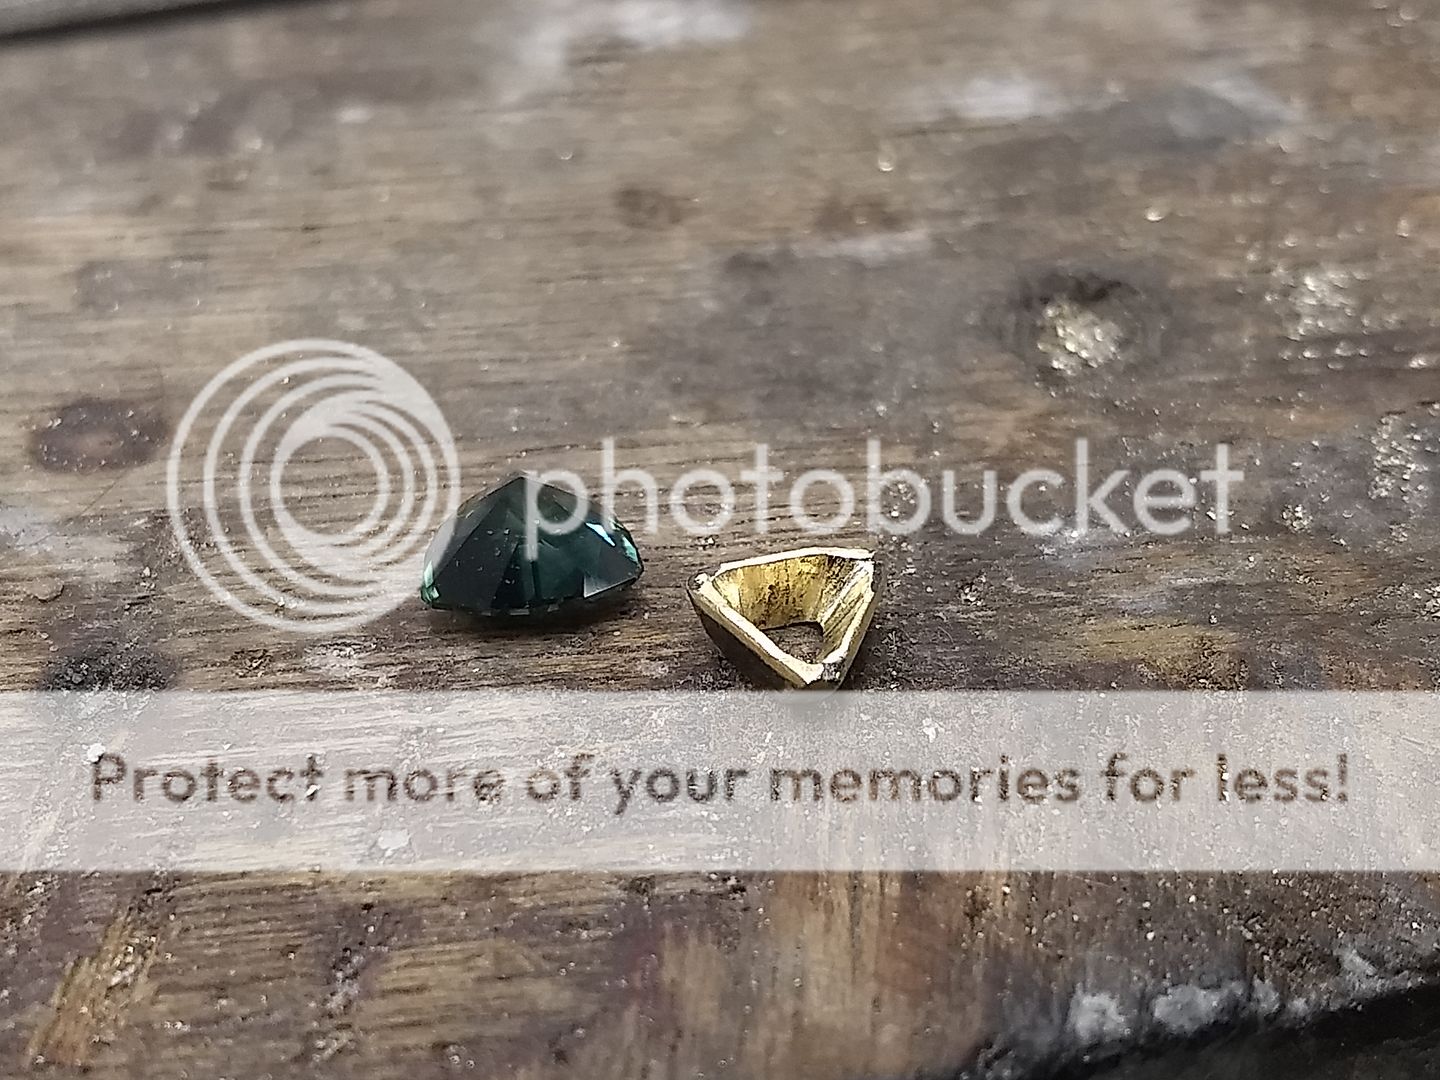
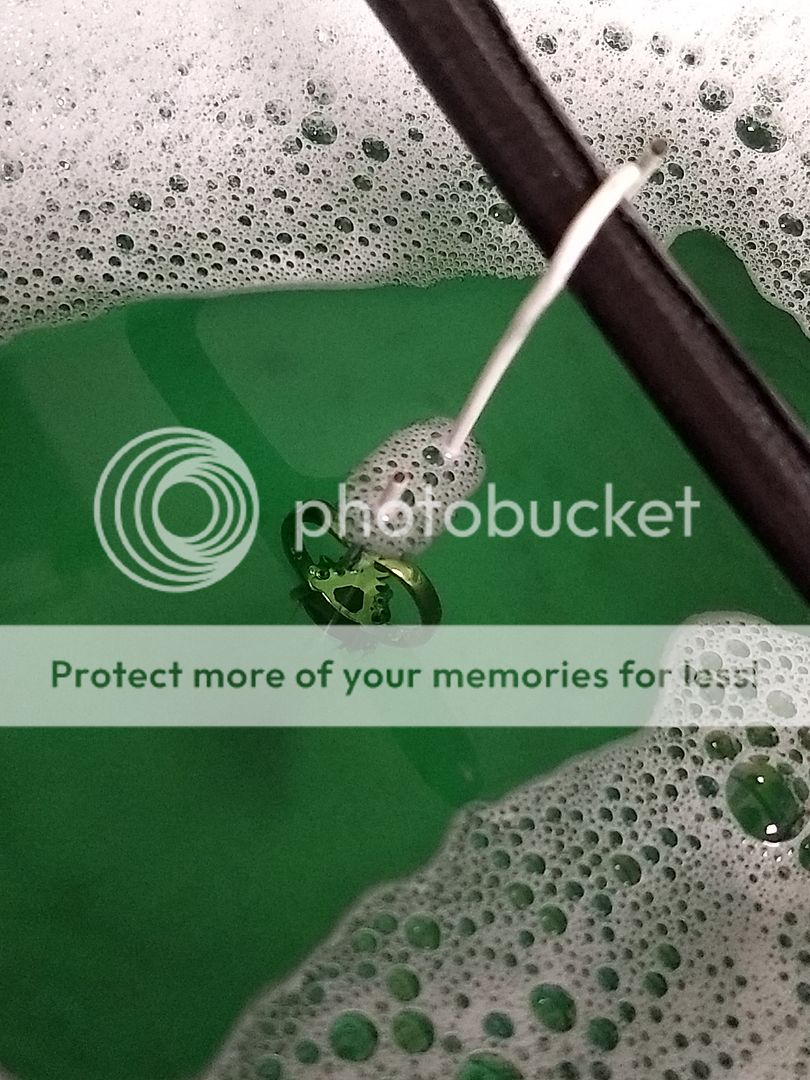
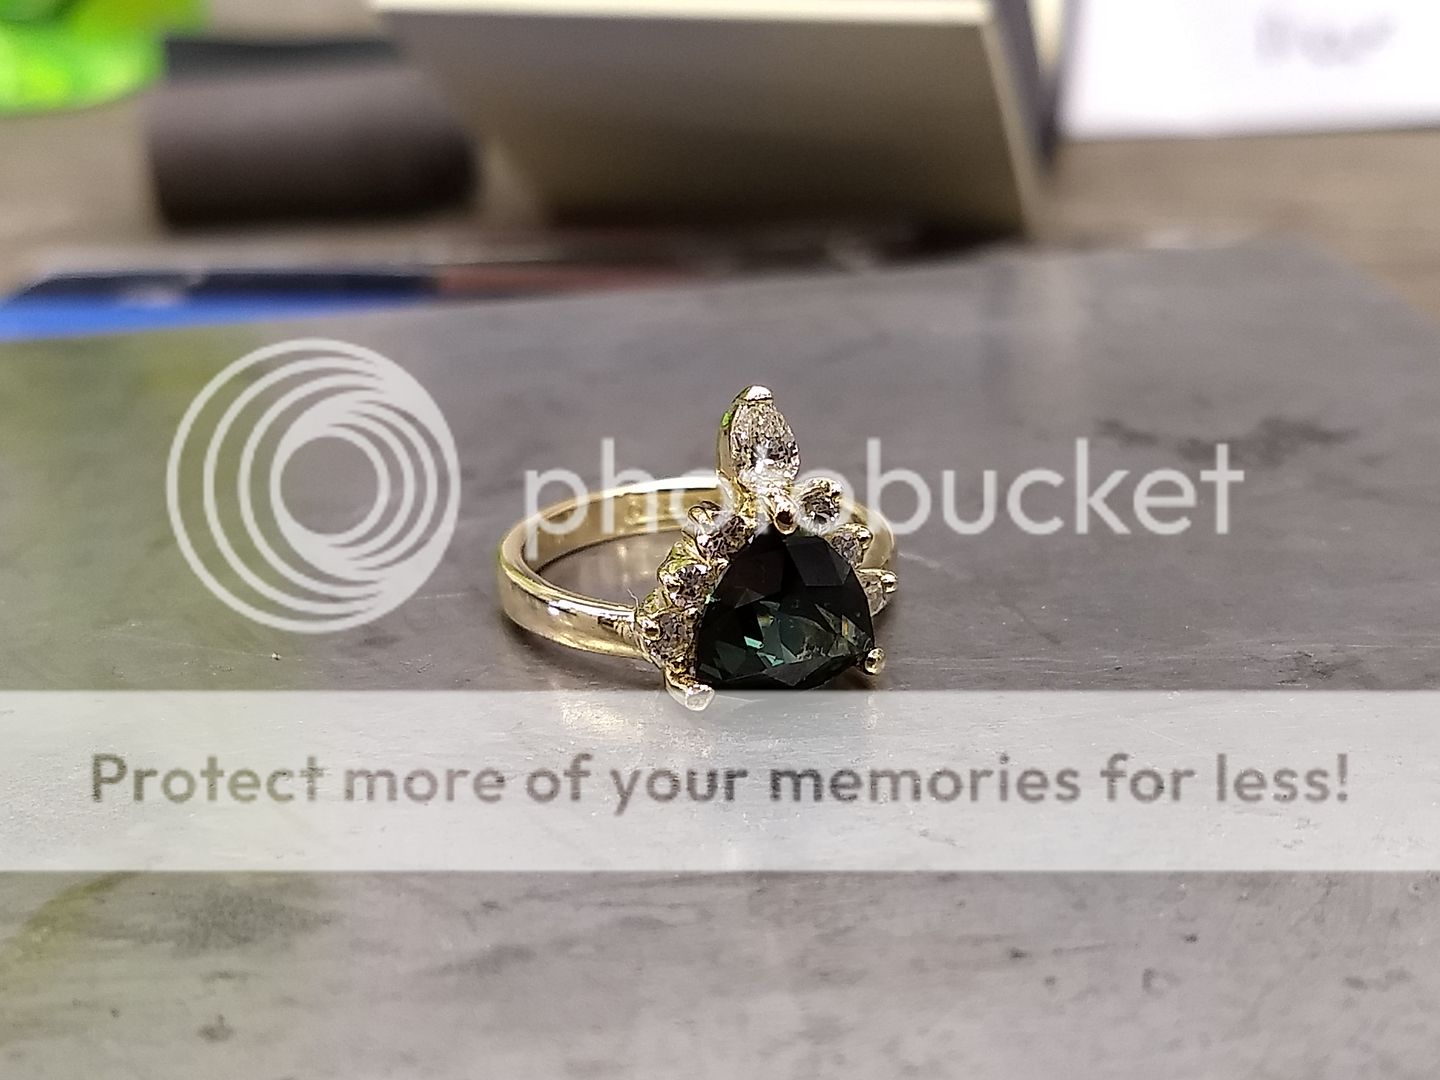
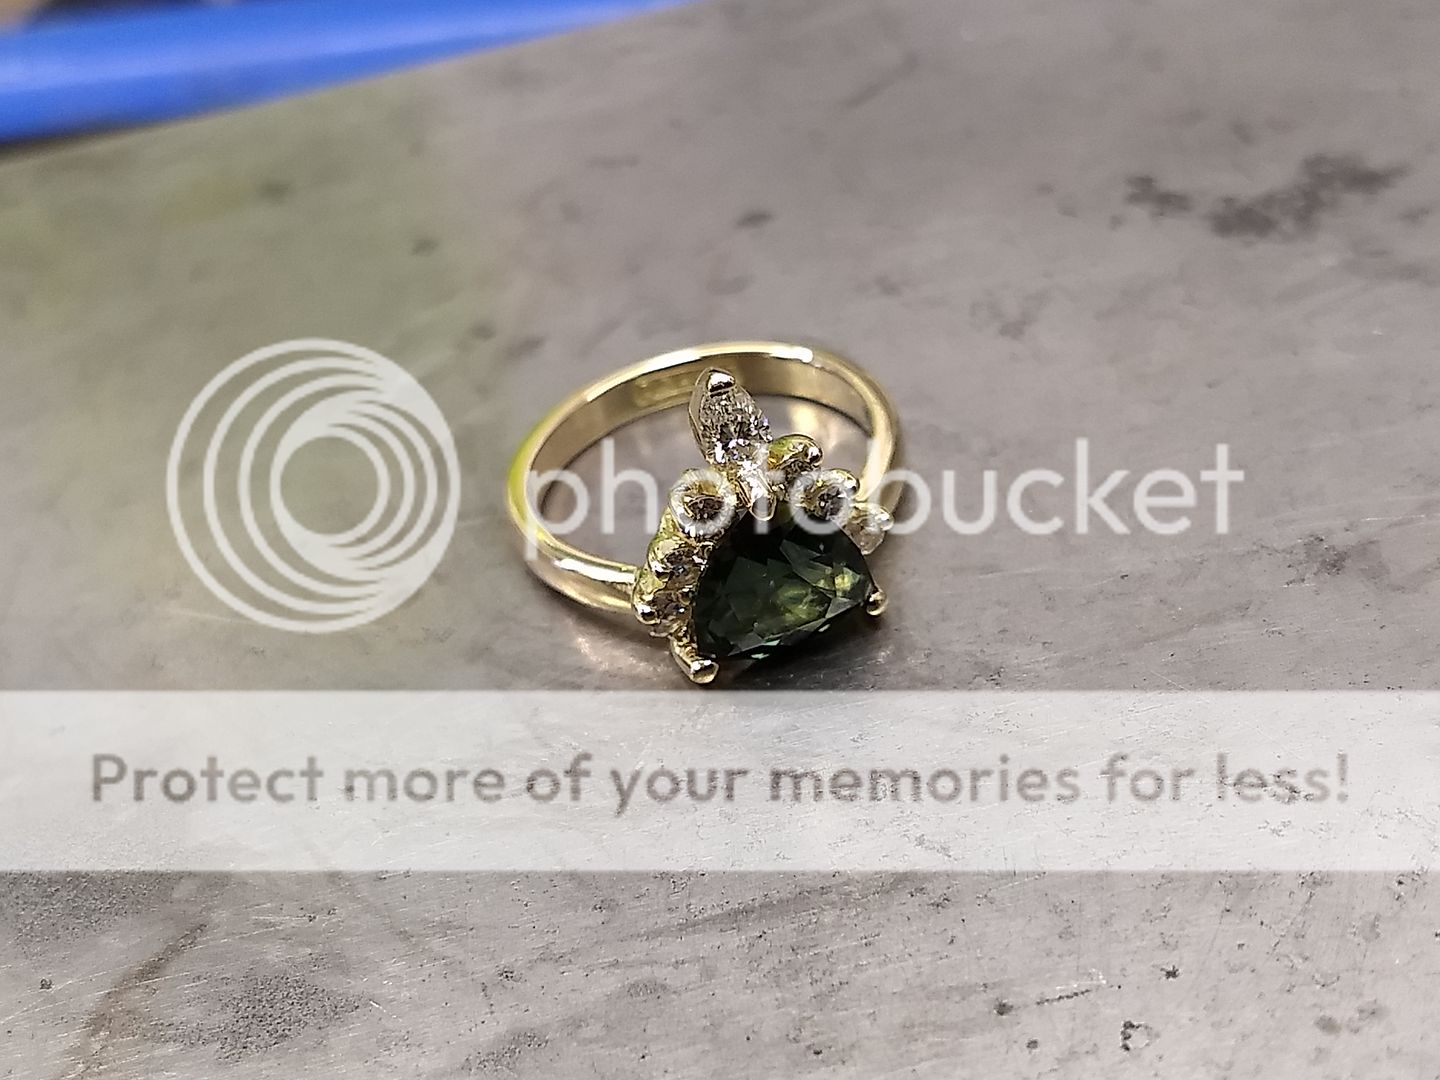
After a bit of a clean up the sapphire is ready to go in. We needed to be extra careful here too as it's unlikely we could replace or recut the stone as it's come from a very specific source:
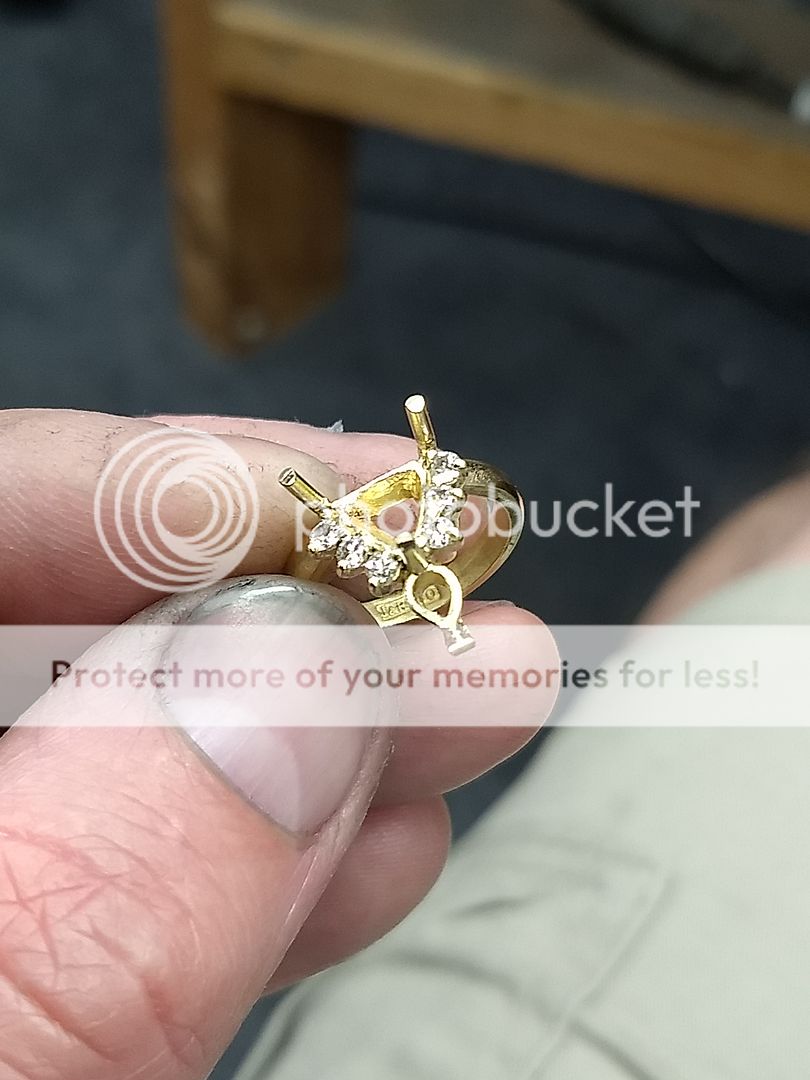

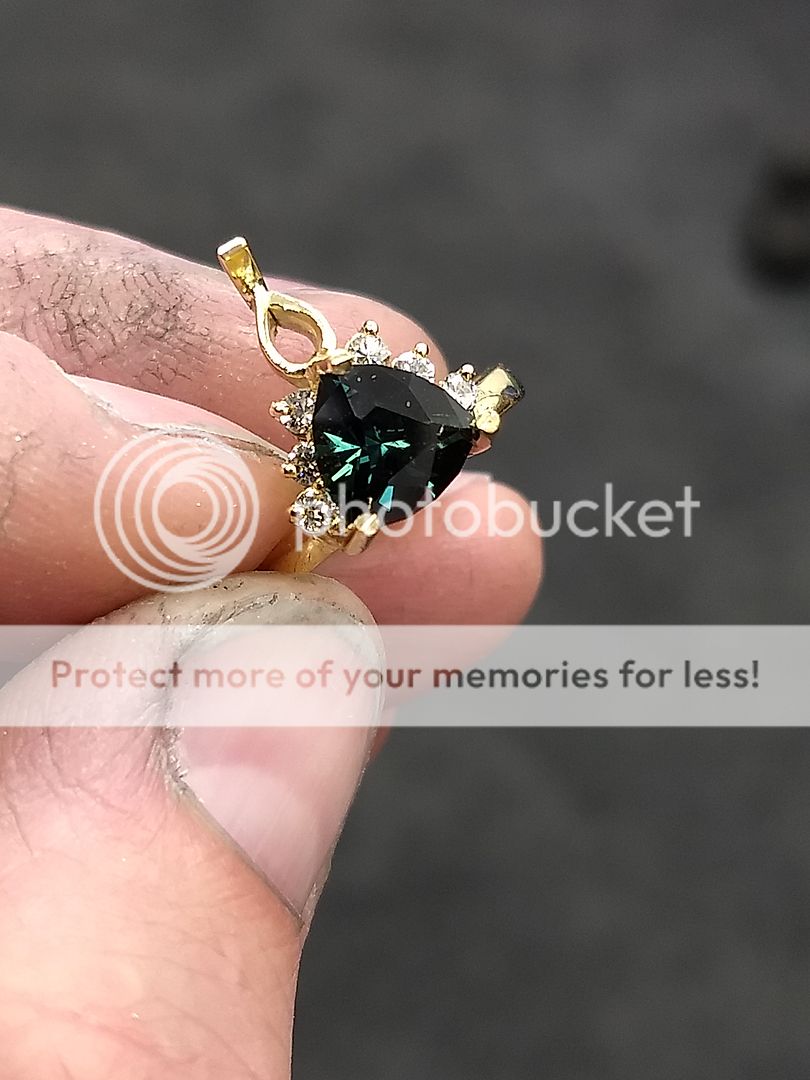
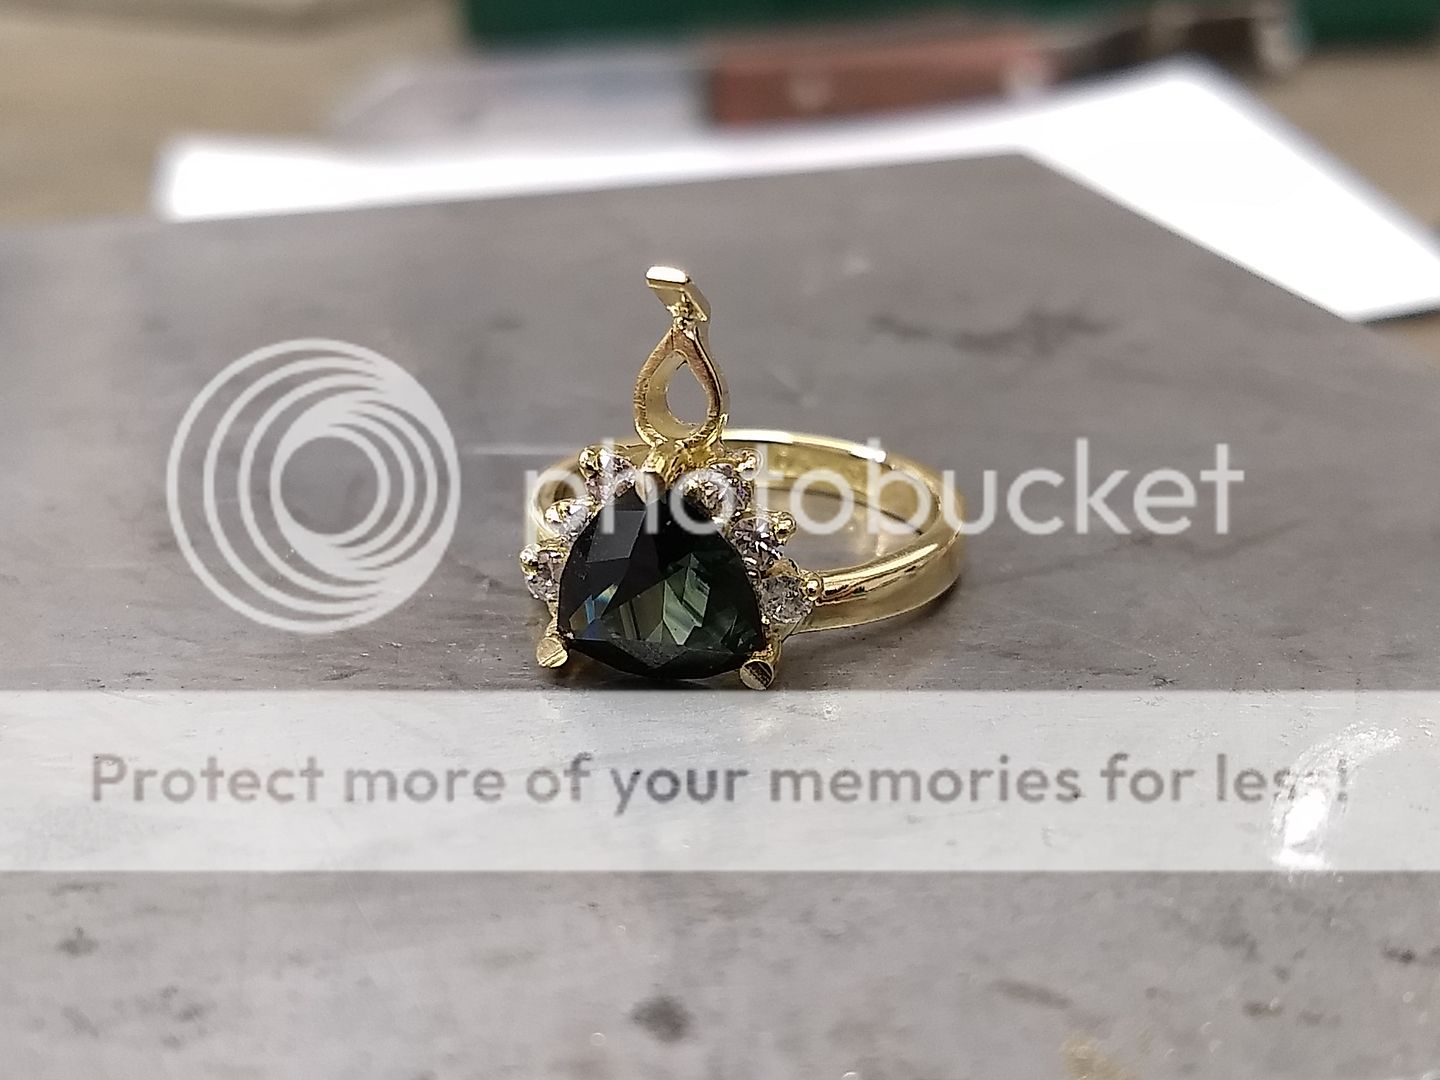
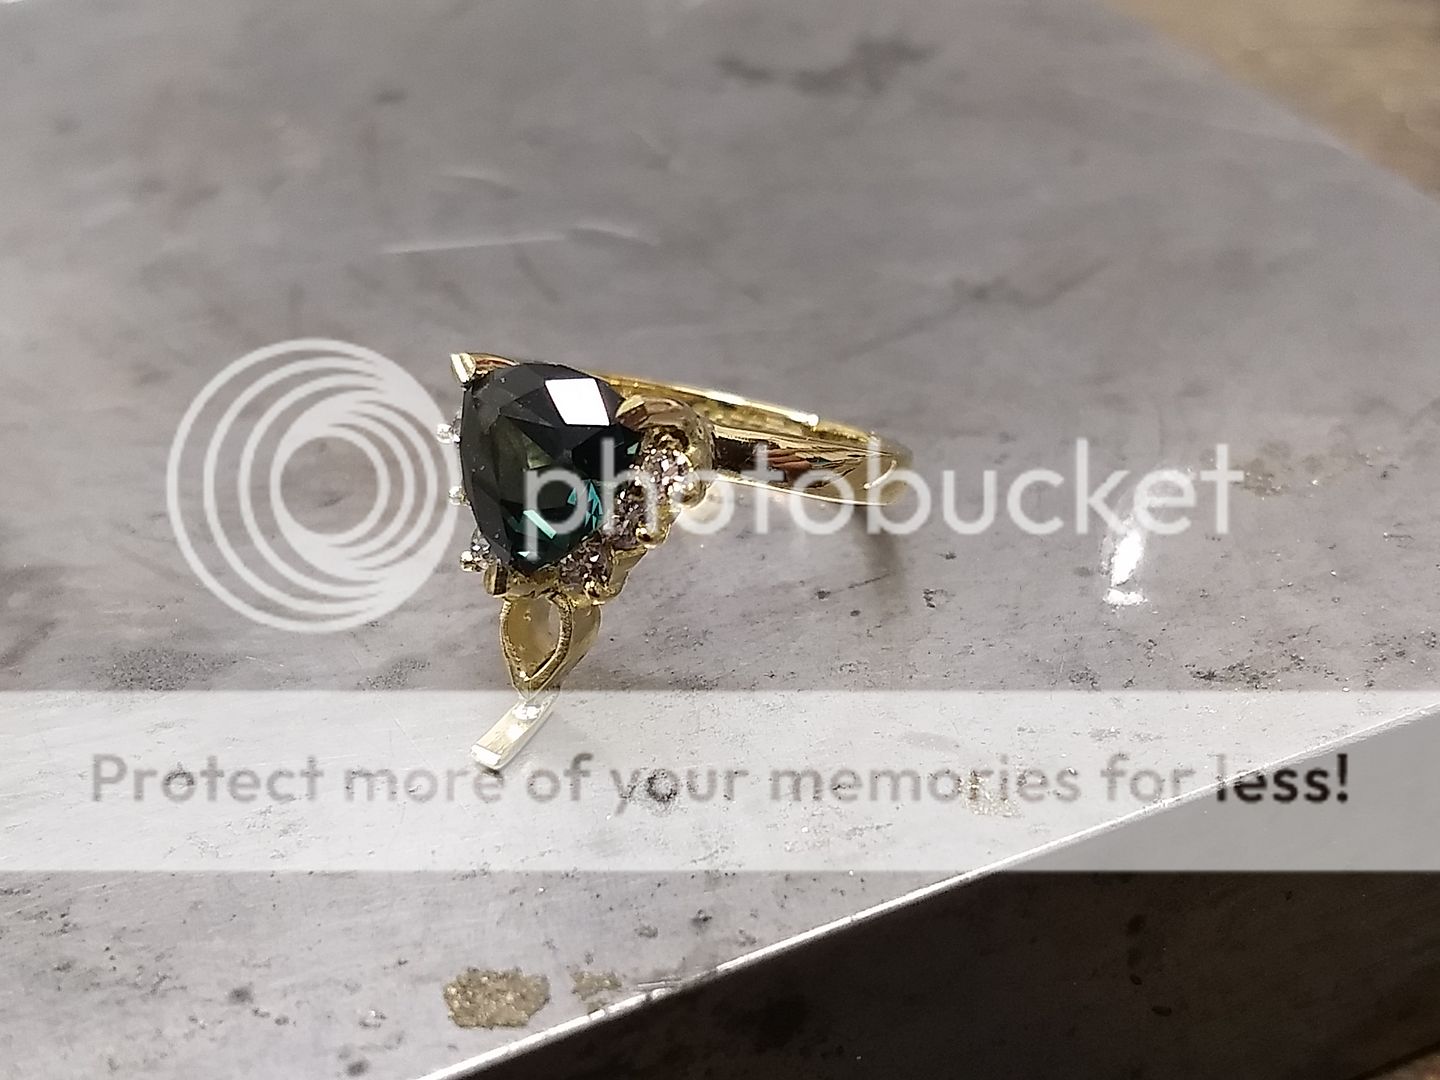
The final jobs are to: set the pear shaped diamond. Tidy the claws without damaging the sapphire or diamond:
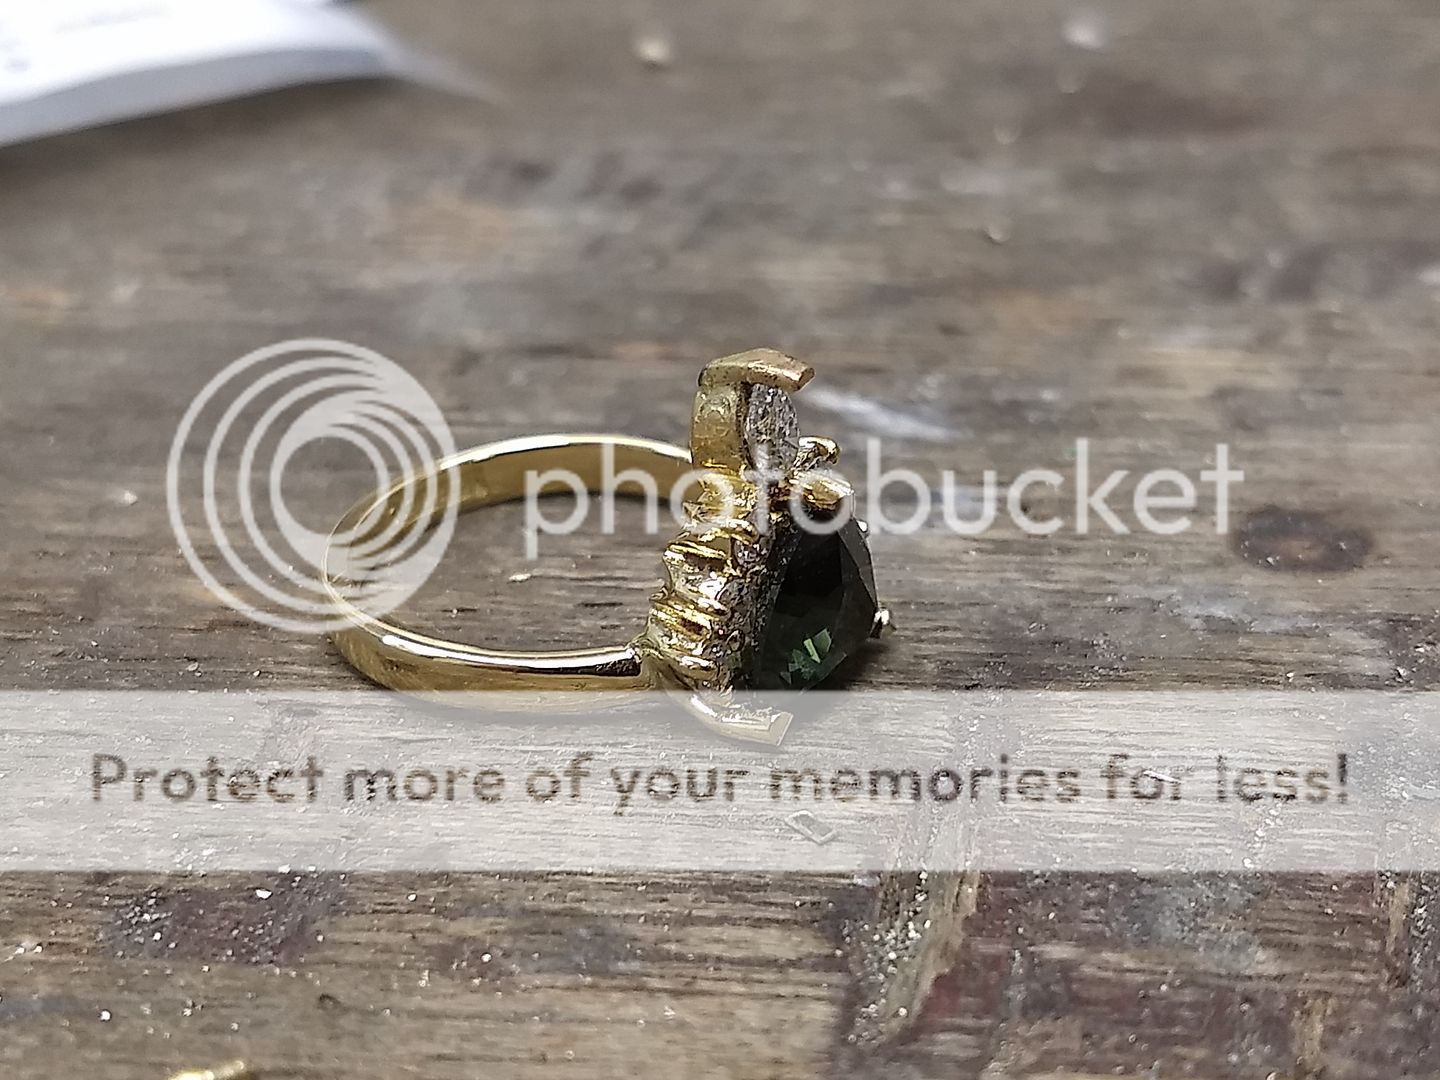
The claw is split before pressure is applied to secure the stone:
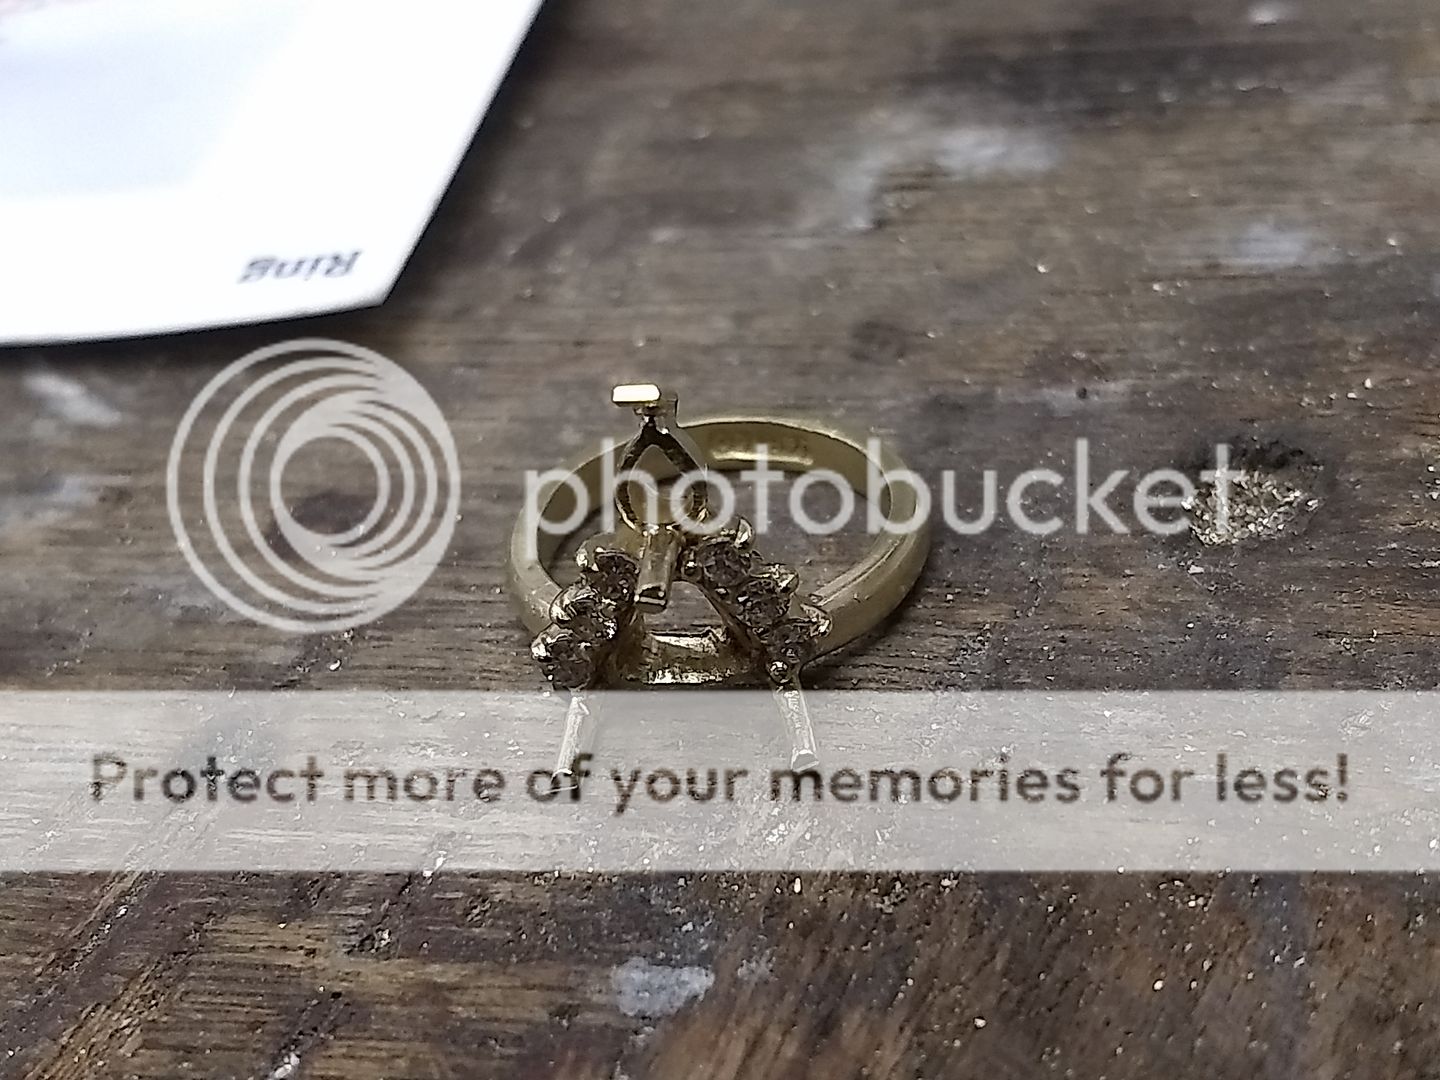
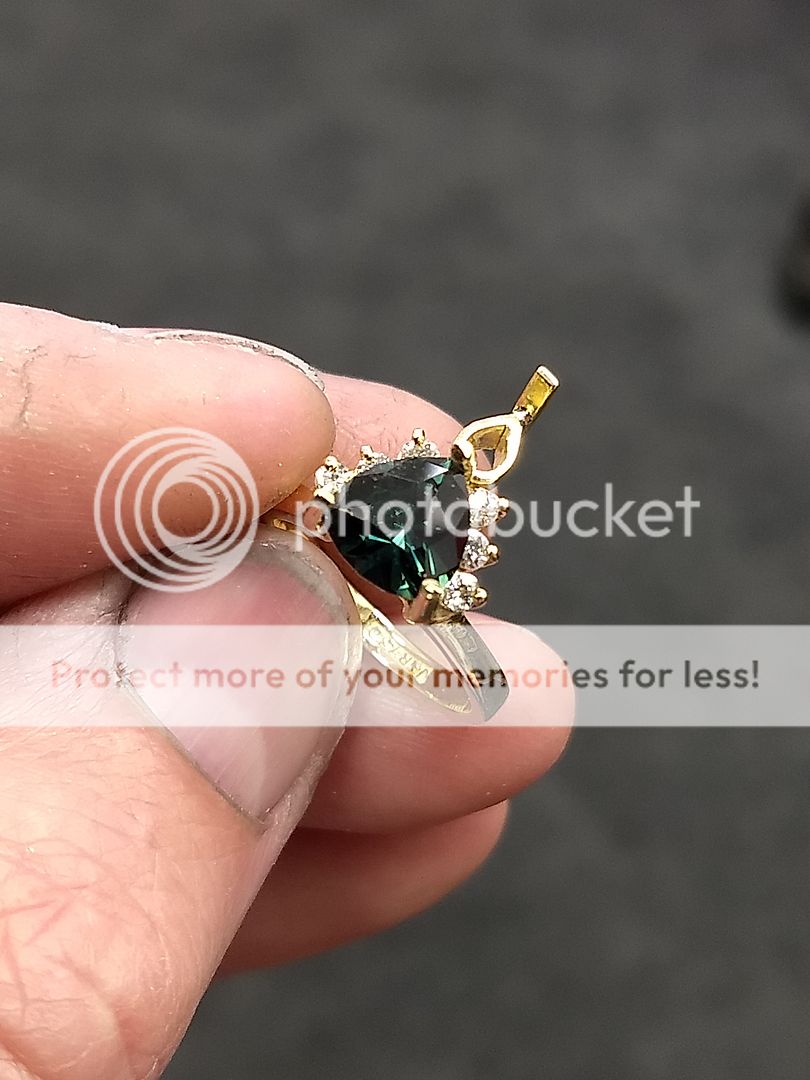
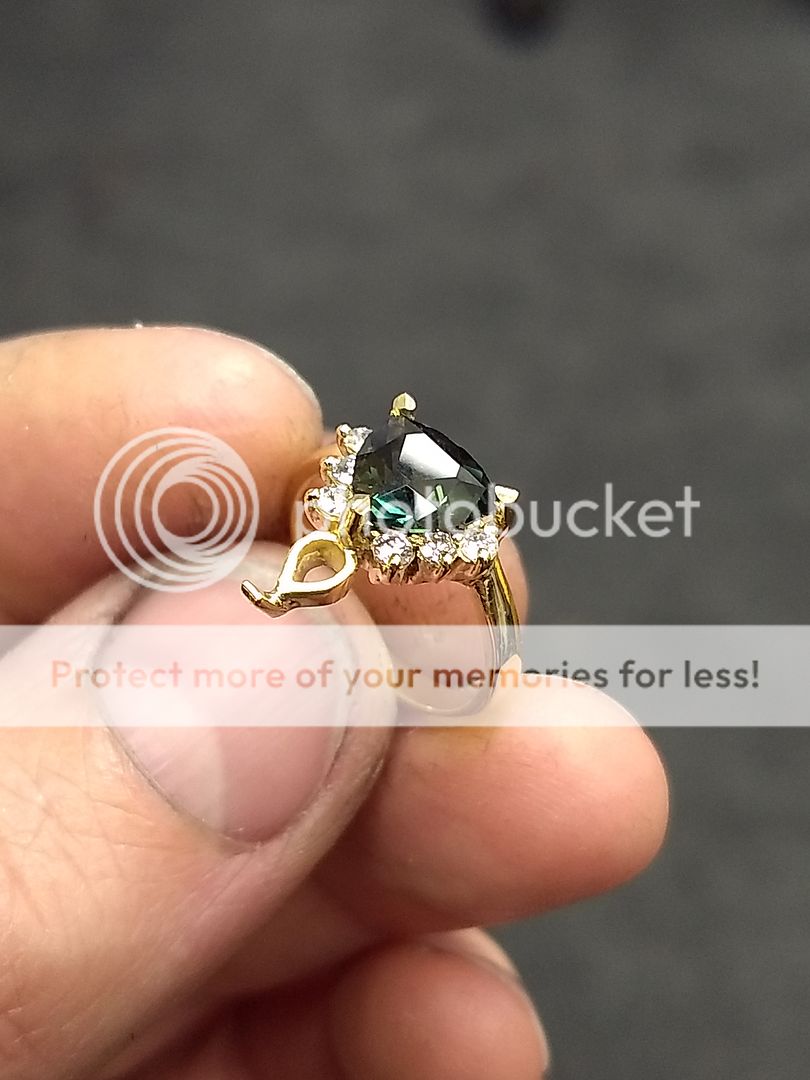
Some more cleaning up:
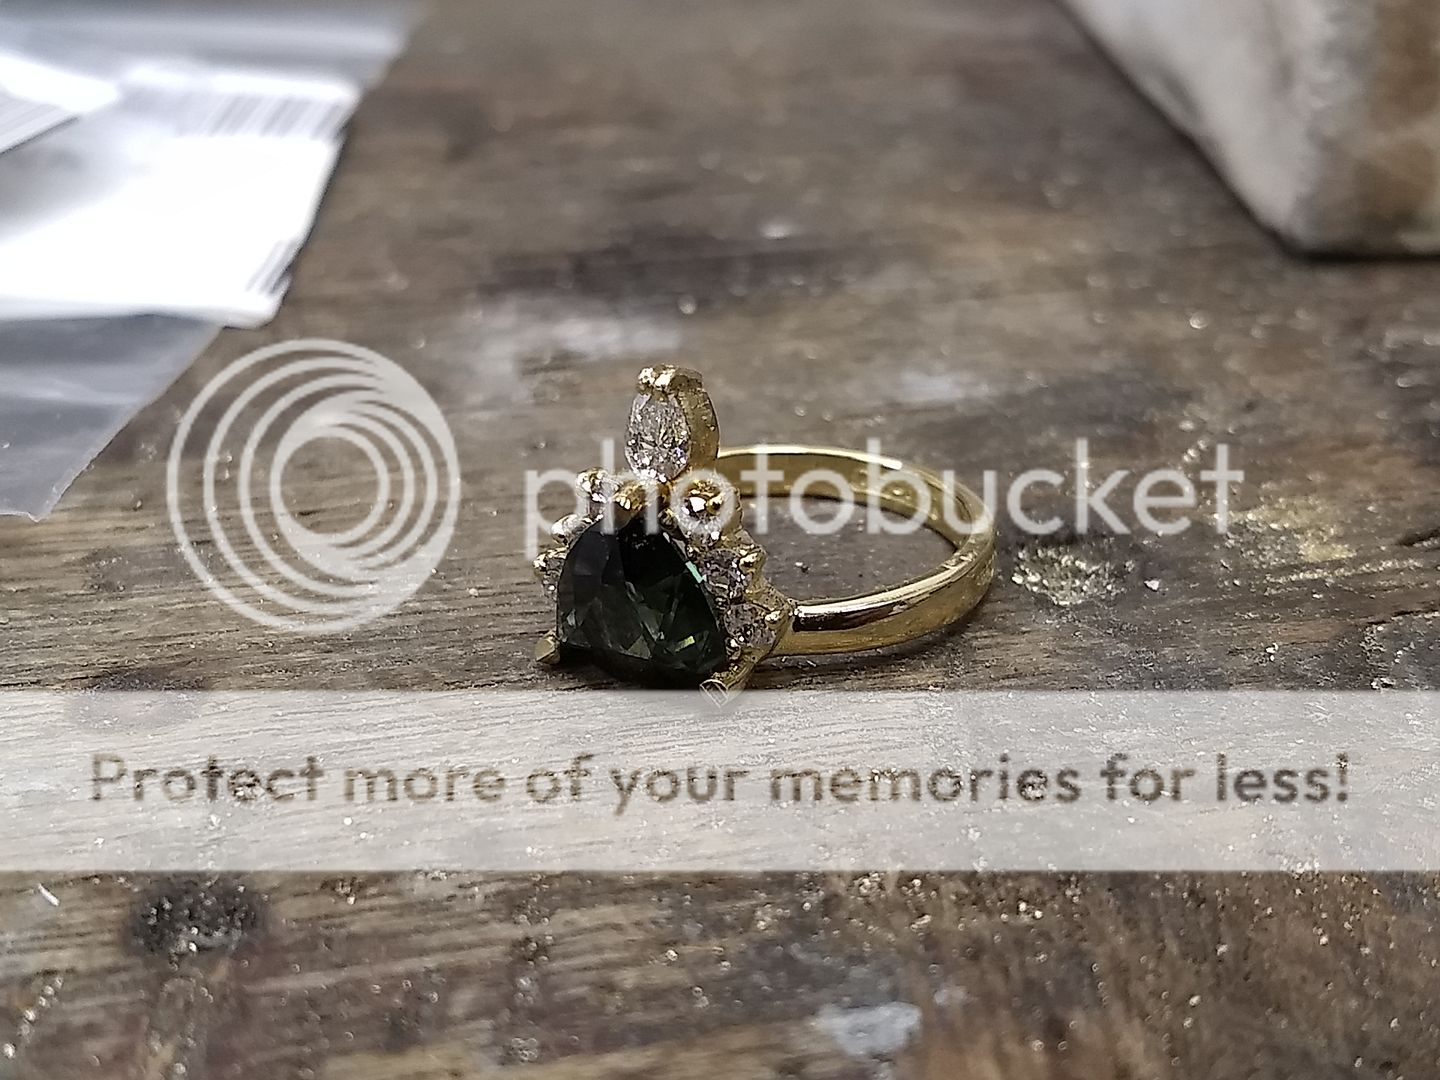
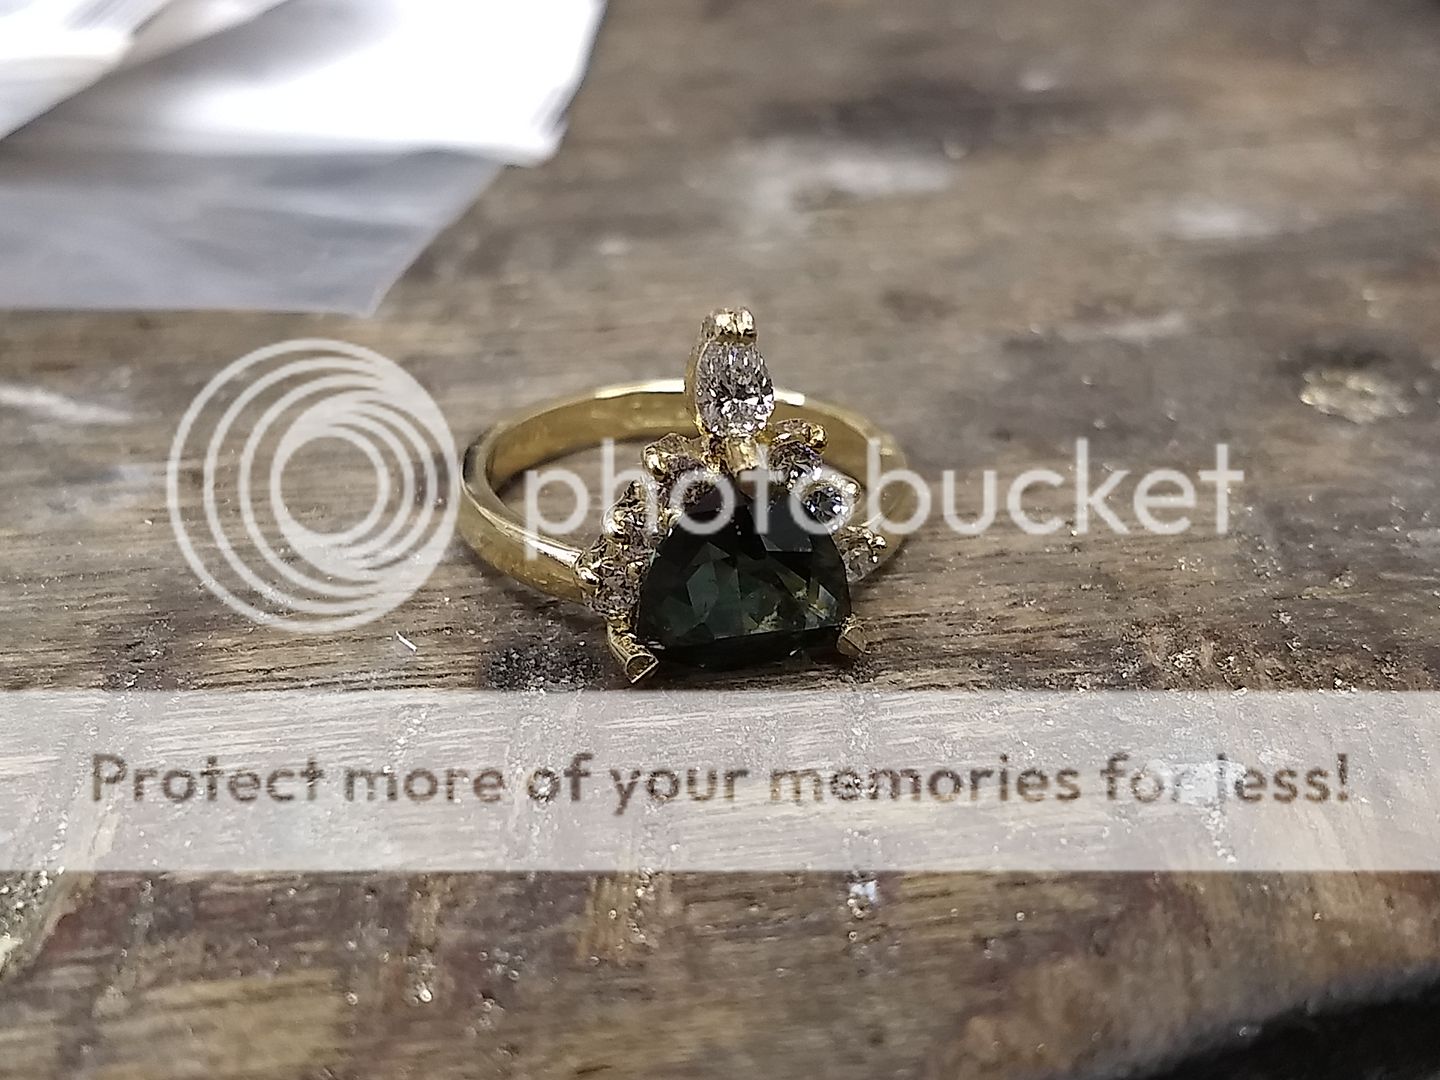
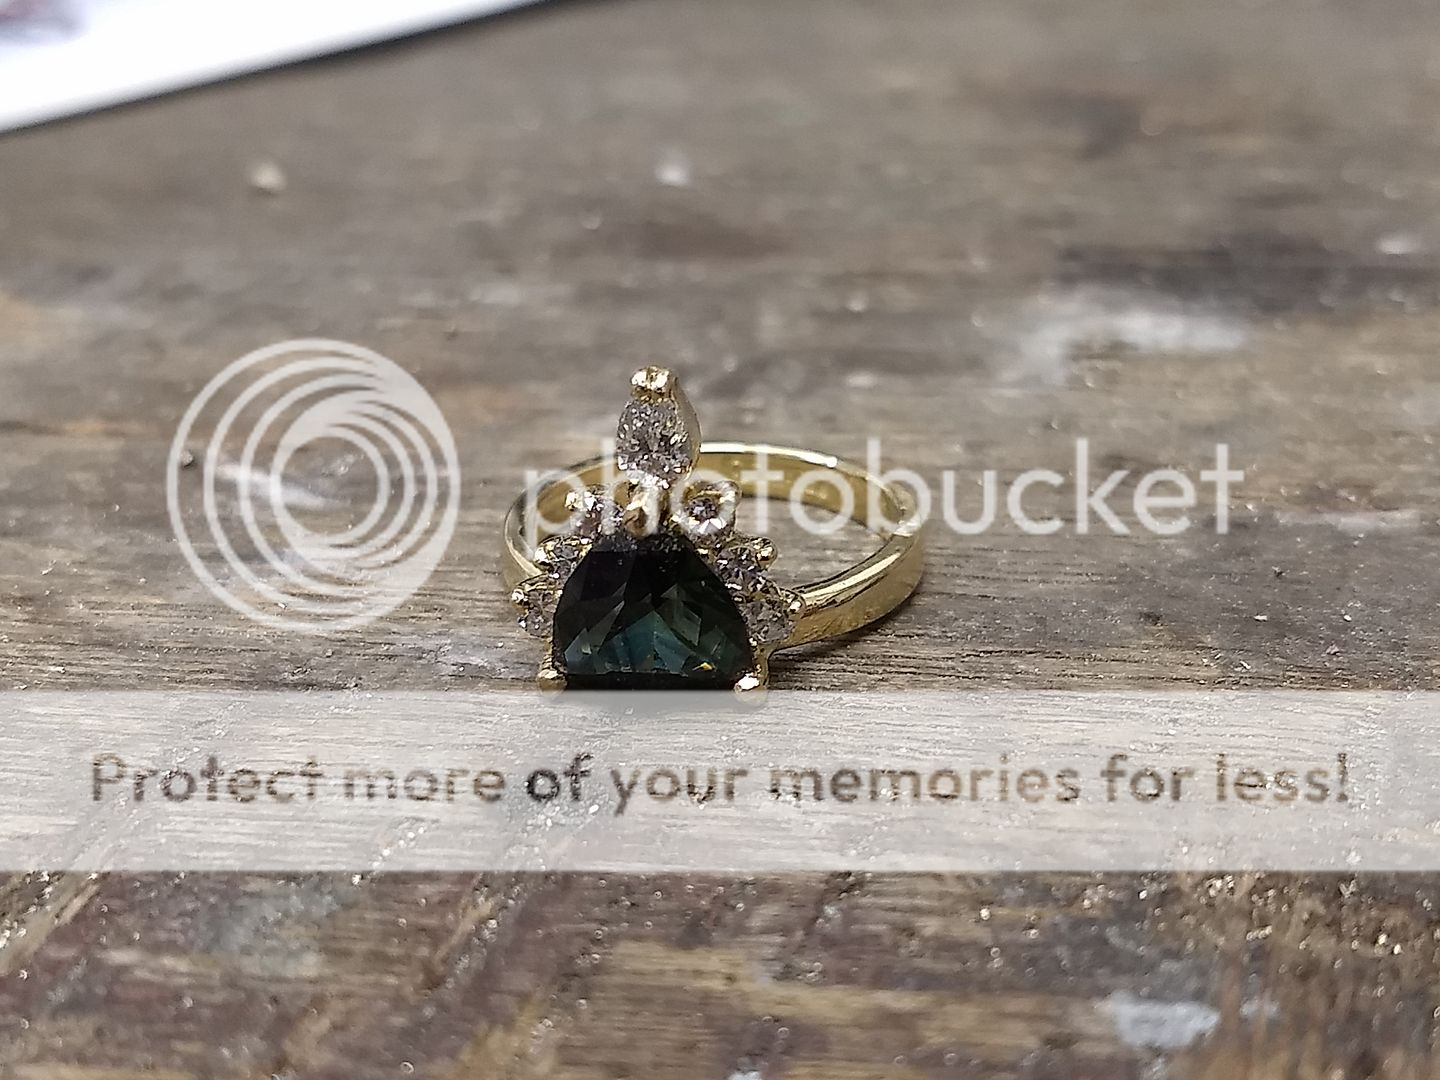
Done:
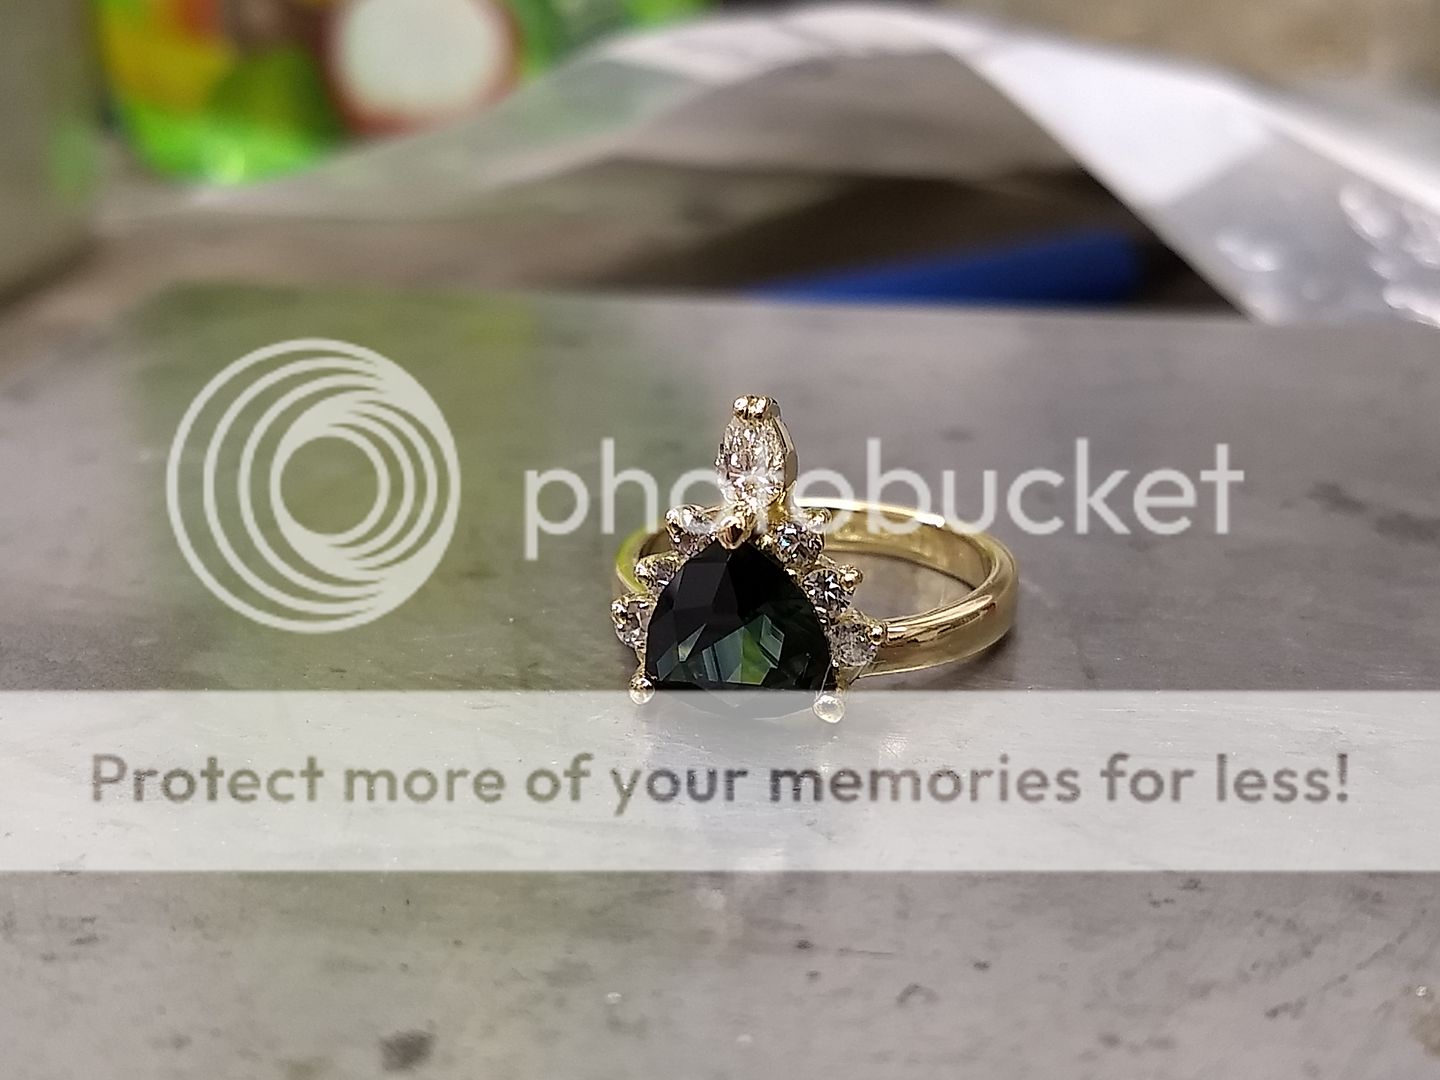
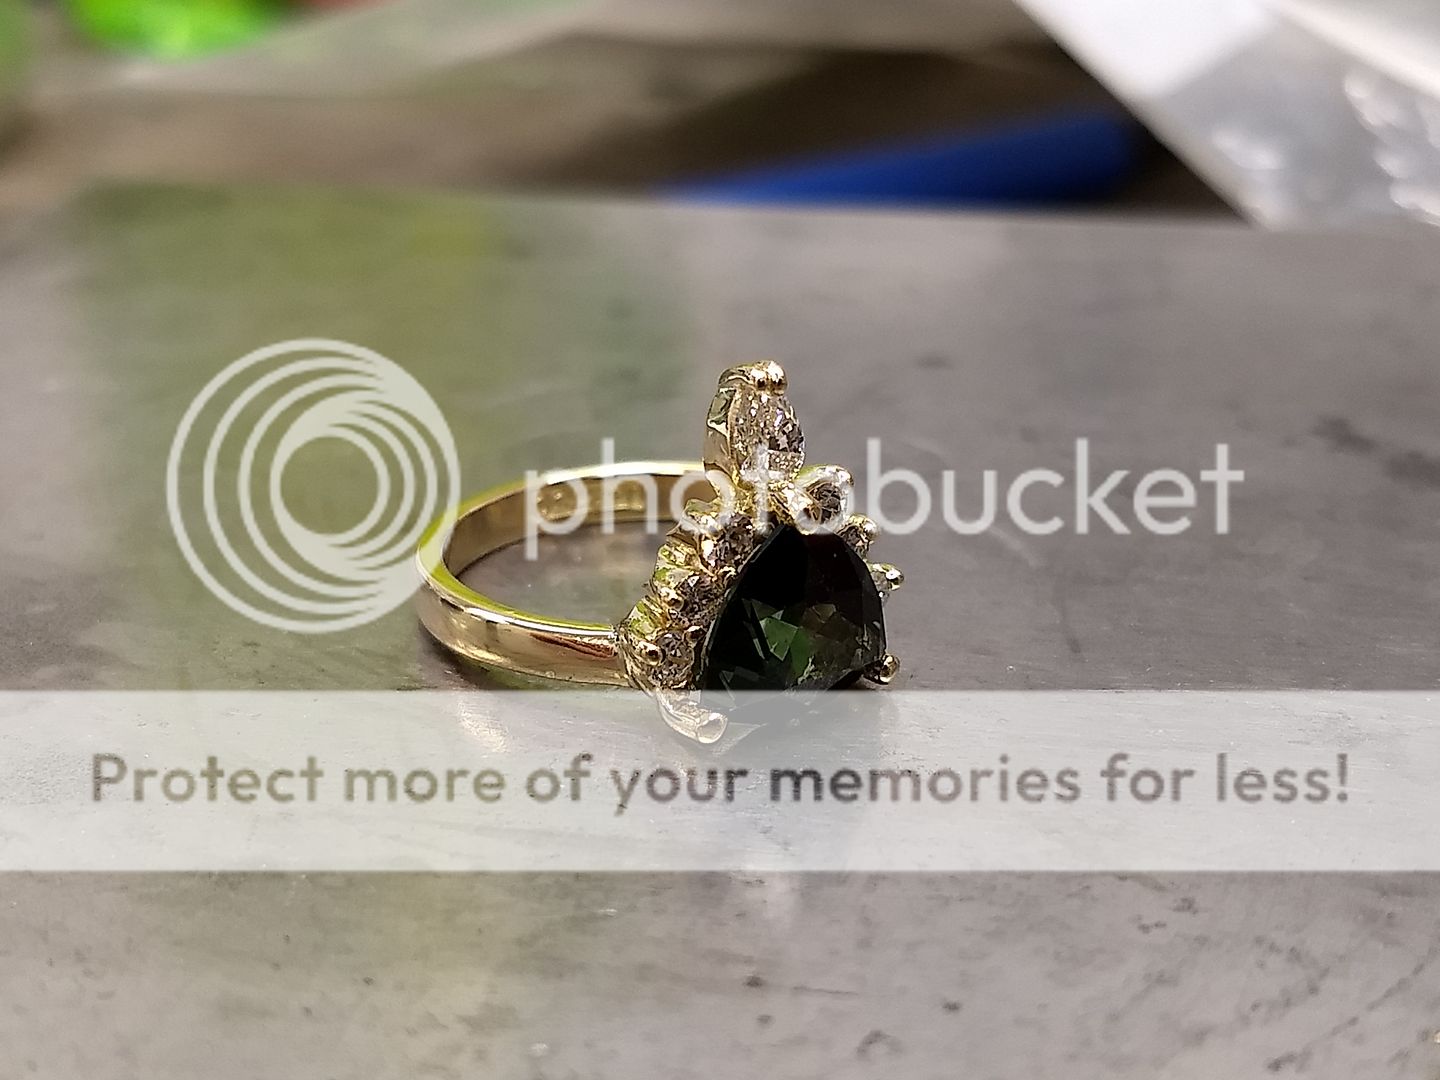
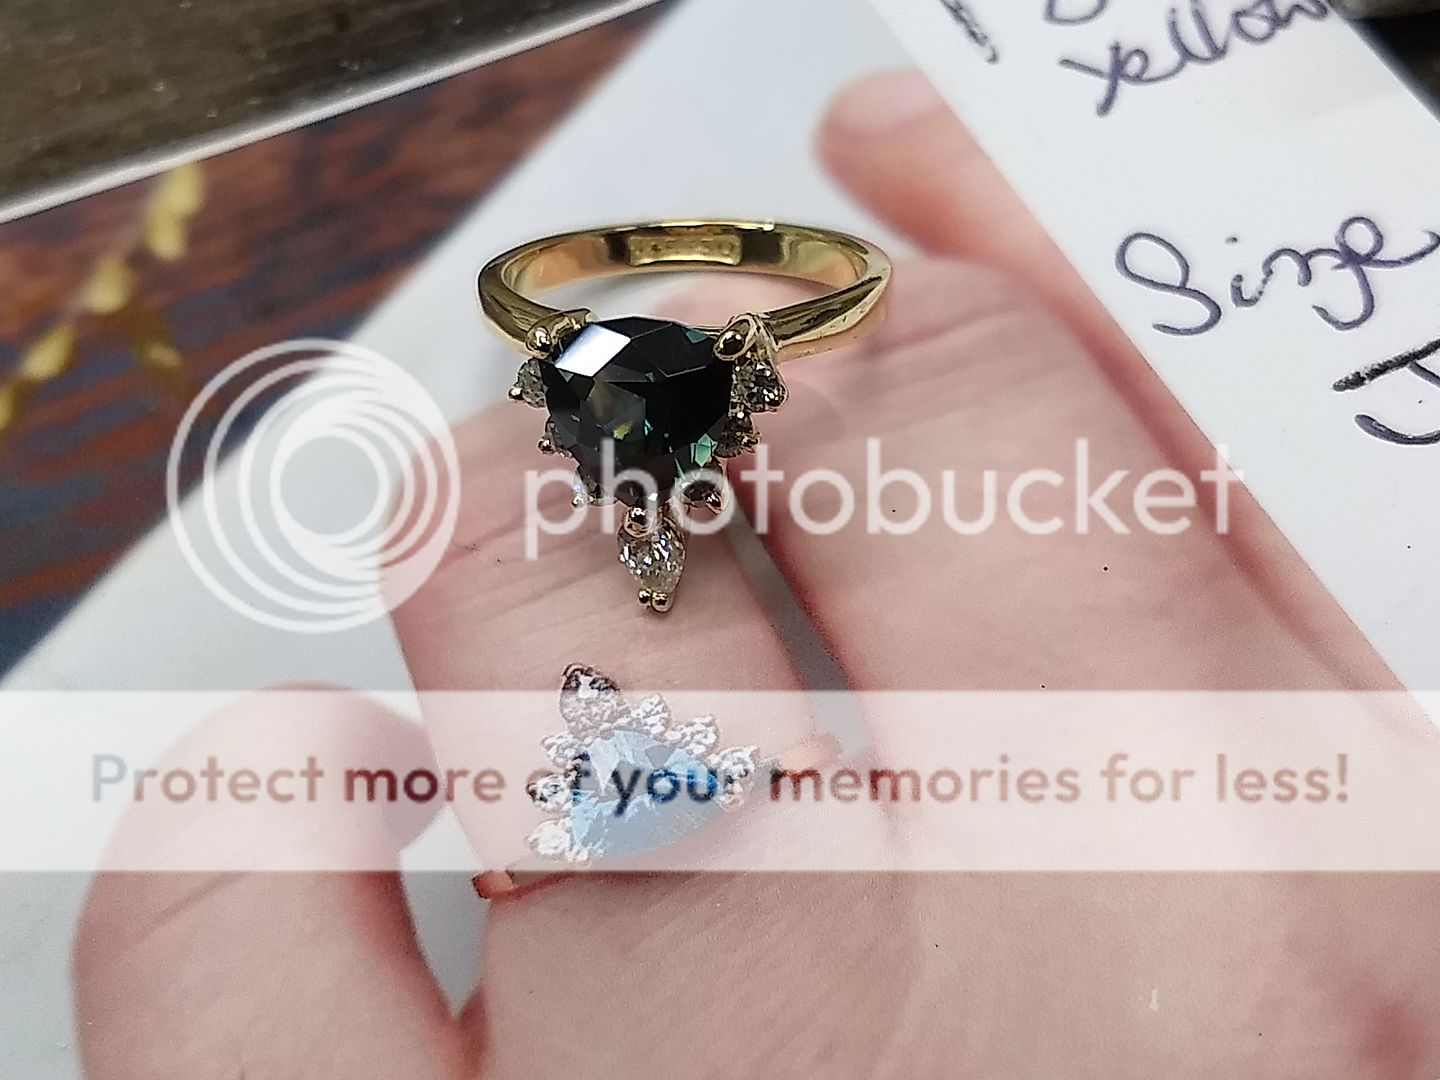
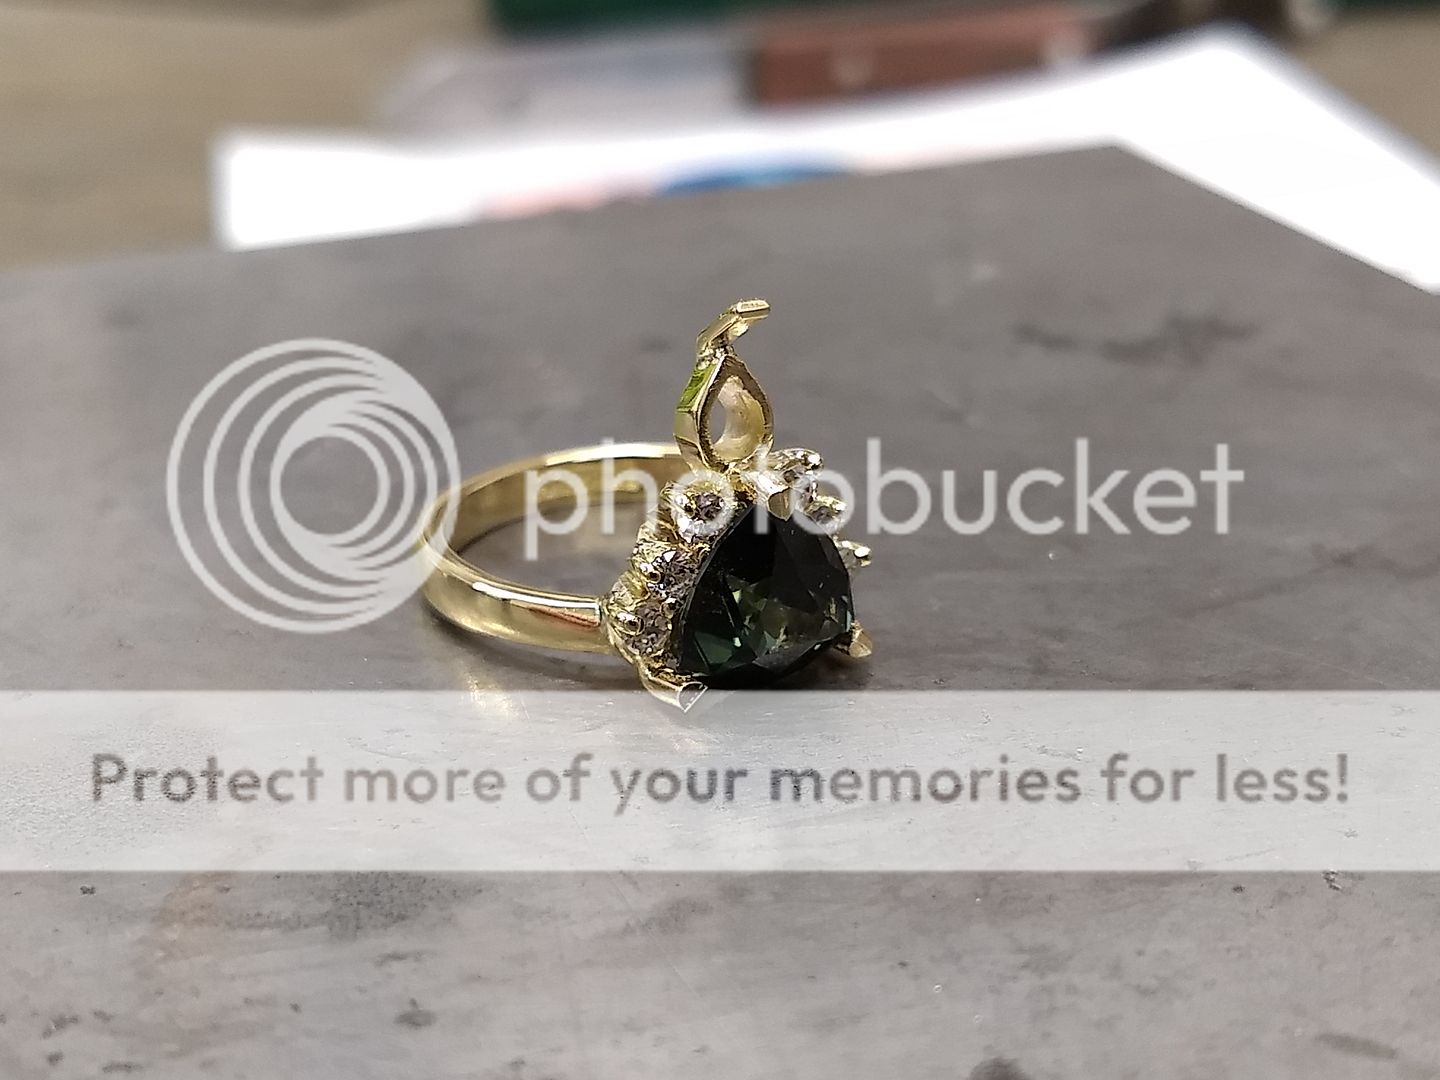
Or so I thought.......
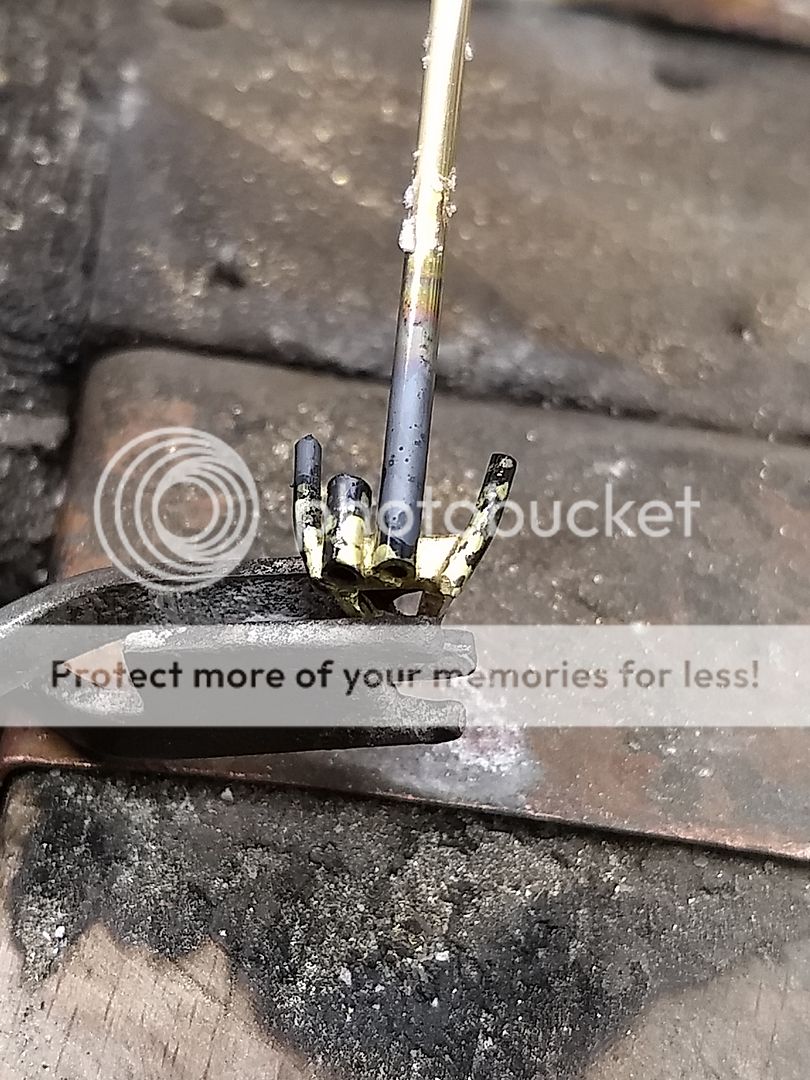
The customer then decided that they wanted a solid end claw, so whilst crossing my fingers I managed to apply some hard solder to the claw without melting it or letting the heat get as far as the sapphire. Phew!
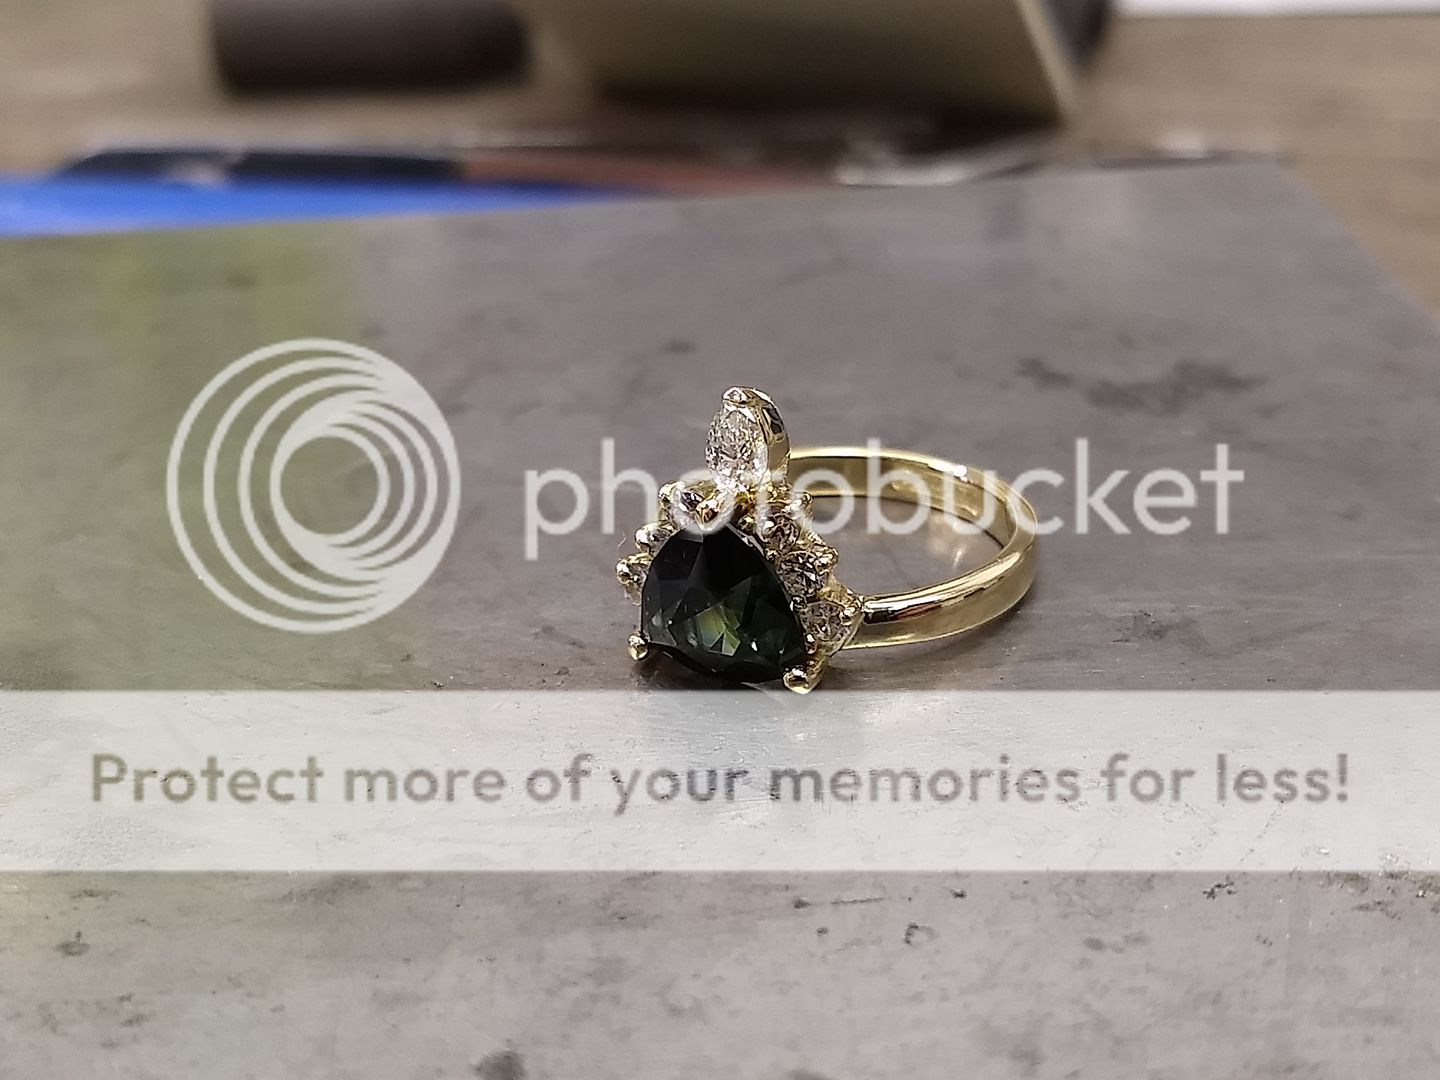
Job done
Today's build came to me from a jeweller that I regularly make and repair / alter items for. The son lives in Oz and has had cut an Australian green sapphire. It was cut by a specialist cutter over there and is a custom shape with what is almost a serrated edge / girdle to it. Sent with the stone was a photograph, a bunch of loose round diamonds and a request to make this or as near as possible in 18ct yellow gold and supply a pear shaped stone of nice quality to suit.

It's a complicated design again and will require a few individual pieces to complete the jigsaw. Best policy is to make the head first and see where we are with it. First up, some 18ct yellow bar to make the lower part of the centre setting:


Now the lower section is the right size and shape it's time to fit the claws:


The outer stones effectively sit on top of tubes and are secured with claws on the outer edge and between on the inside. I have some 18ct yellow gold tube in stock so got cutting. This was actually a right royal pain in the arse as the available space and low tolerance meant it was easy to loosen a tube you'd just soldered due to the heat applied when soldering the next. We got there in the end though:


The tubes were cut to length and now the time comes to do the really bloody annoying bit of fitting the claws. The easiest way is to drill the claws into the setting and solder them into the holes. That gives strength and security but also there's that risk with the heat again:


The claws are then soldered on the outside and then I can get on with making the setting for the pear shape:

Which is then soldered in place (i think there are some pics of the stone setting missing, i do apologise).

The setting is cleaned up and you can see it starting to take shape:

The claw to secure the pear shape is added next. I decided to go for a split claw (further along the build) to reduce the risk of breaking the sharp end off the diamond:

The head is all but finished so now I make the shank. More 18ct yellow bar:


The shank is measured up against the head, cut and then soldered in place. Again, with so many individual parts to this ring the risk of solder moving is very high:


After a bit of a clean up the sapphire is ready to go in. We needed to be extra careful here too as it's unlikely we could replace or recut the stone as it's come from a very specific source:


The final jobs are to: set the pear shaped diamond. Tidy the claws without damaging the sapphire or diamond:


The claw is split before pressure is applied to secure the stone:


Some more cleaning up:

Done:


Or so I thought.......
The customer then decided that they wanted a solid end claw, so whilst crossing my fingers I managed to apply some hard solder to the claw without melting it or letting the heat get as far as the sapphire. Phew!


Job done
Edited by ecain63 on Saturday 13th July 10:05
Edited by ecain63 on Saturday 13th July 10:08
Gargamel said:
Beautiful work as ever ecain.
What is the situation in the unlikely event you had chipped a corner off the sapphire ?
Insured ?
In order of event:What is the situation in the unlikely event you had chipped a corner off the sapphire ?
Insured ?
Get sweat on.
Call customer.
Swear and sweat some more.
Find solution at my cost.
Not worth claiming on the insurance unless it's a biggy. Luckily I've never had to claim.

HotJambalaya said:
this is ultimately the goal:
https://www.highsnobiety.com/p/rolex-oyster-perpet...
But strap only not the case since it will invalidate the warranty
Own taste etc , but that is horrific lol.https://www.highsnobiety.com/p/rolex-oyster-perpet...
But strap only not the case since it will invalidate the warranty
Howdy
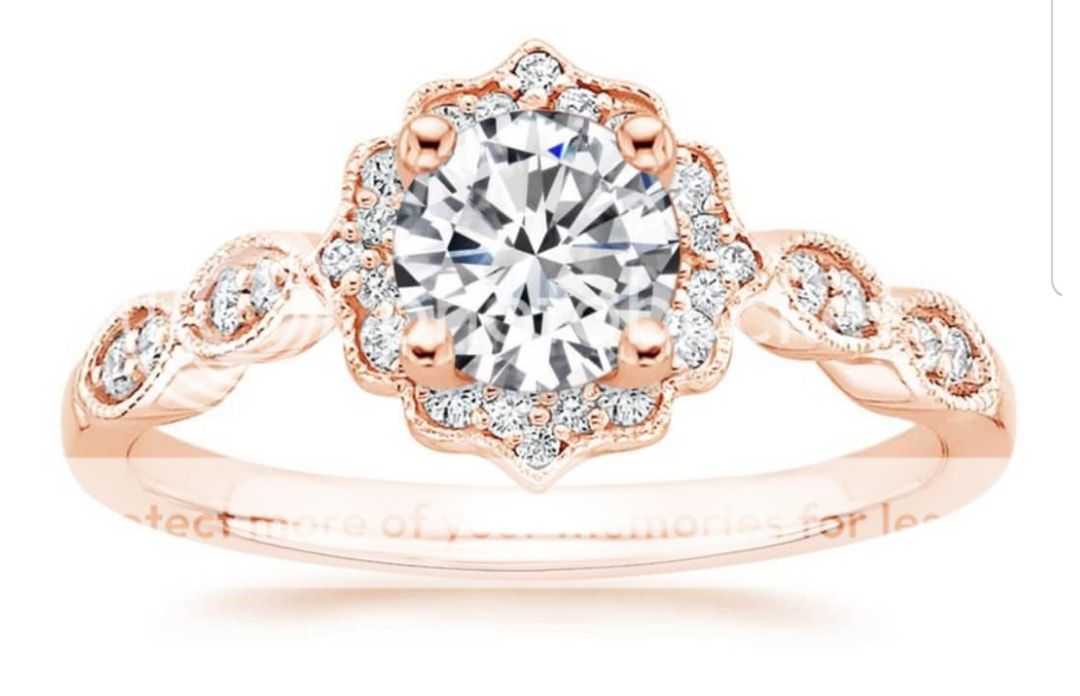
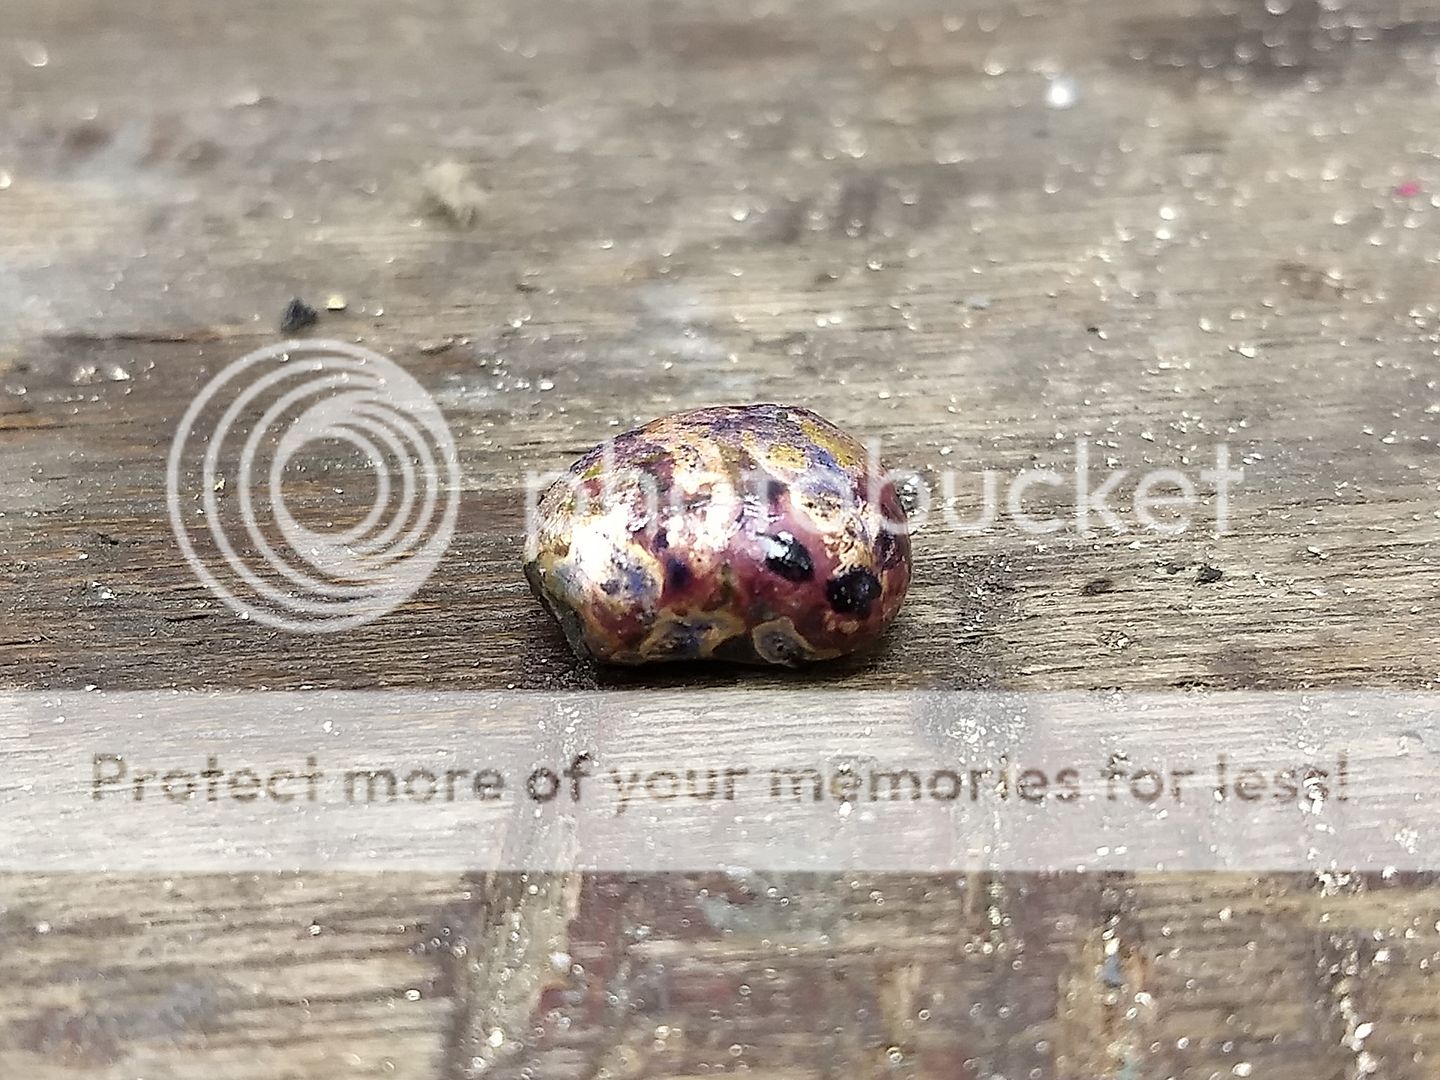
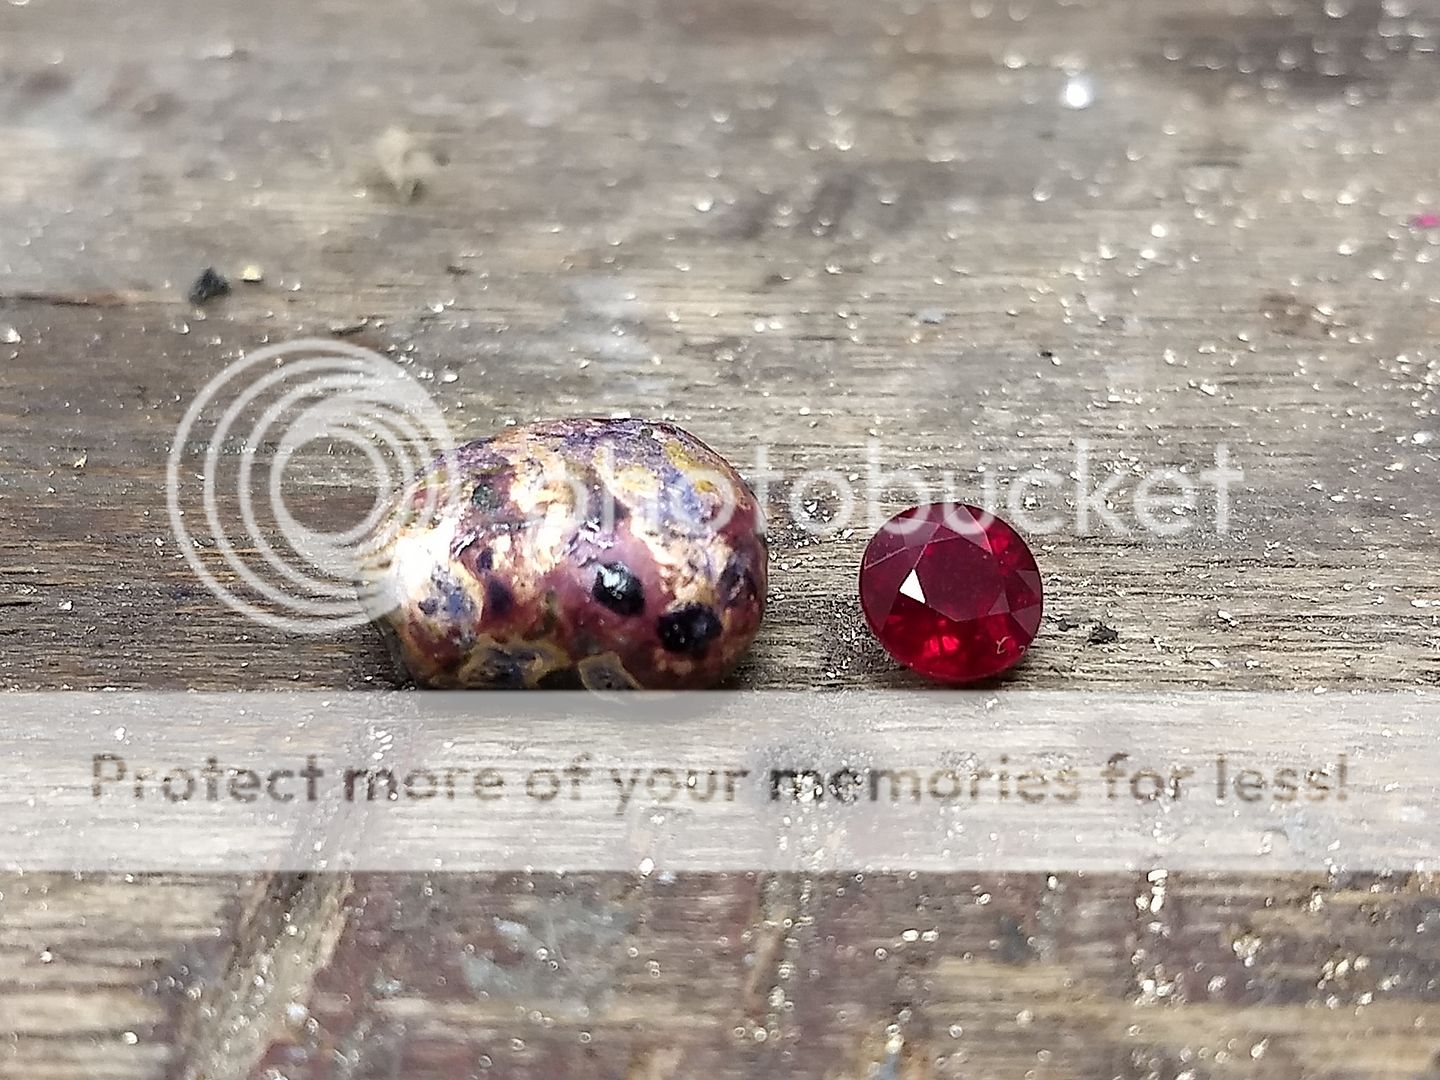
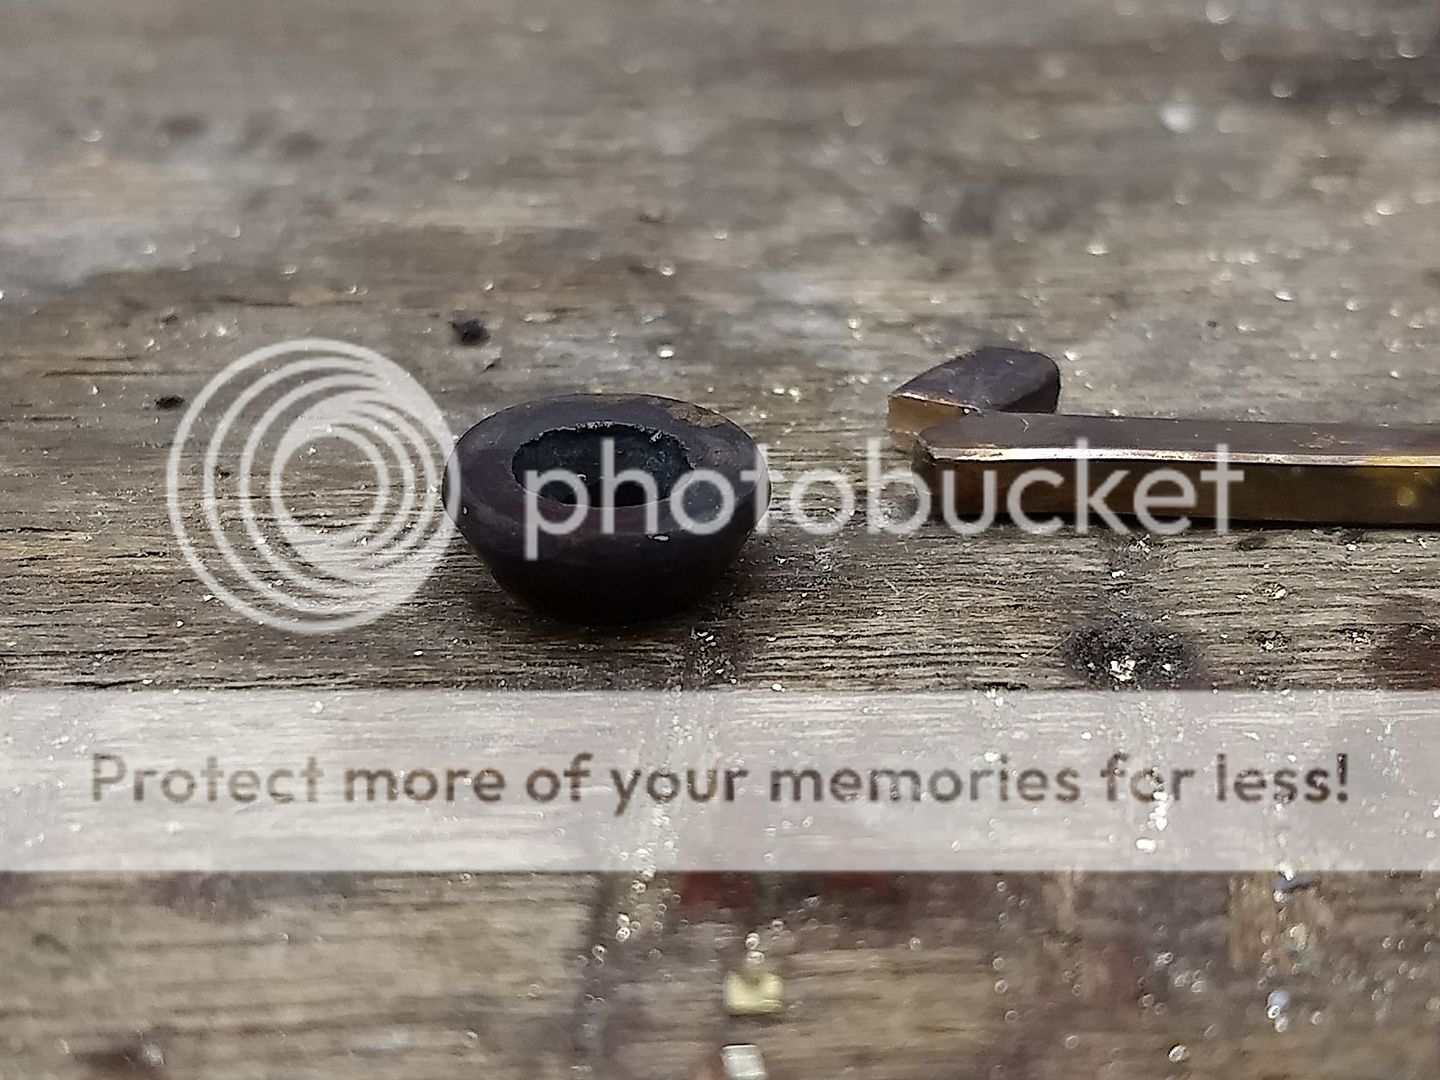
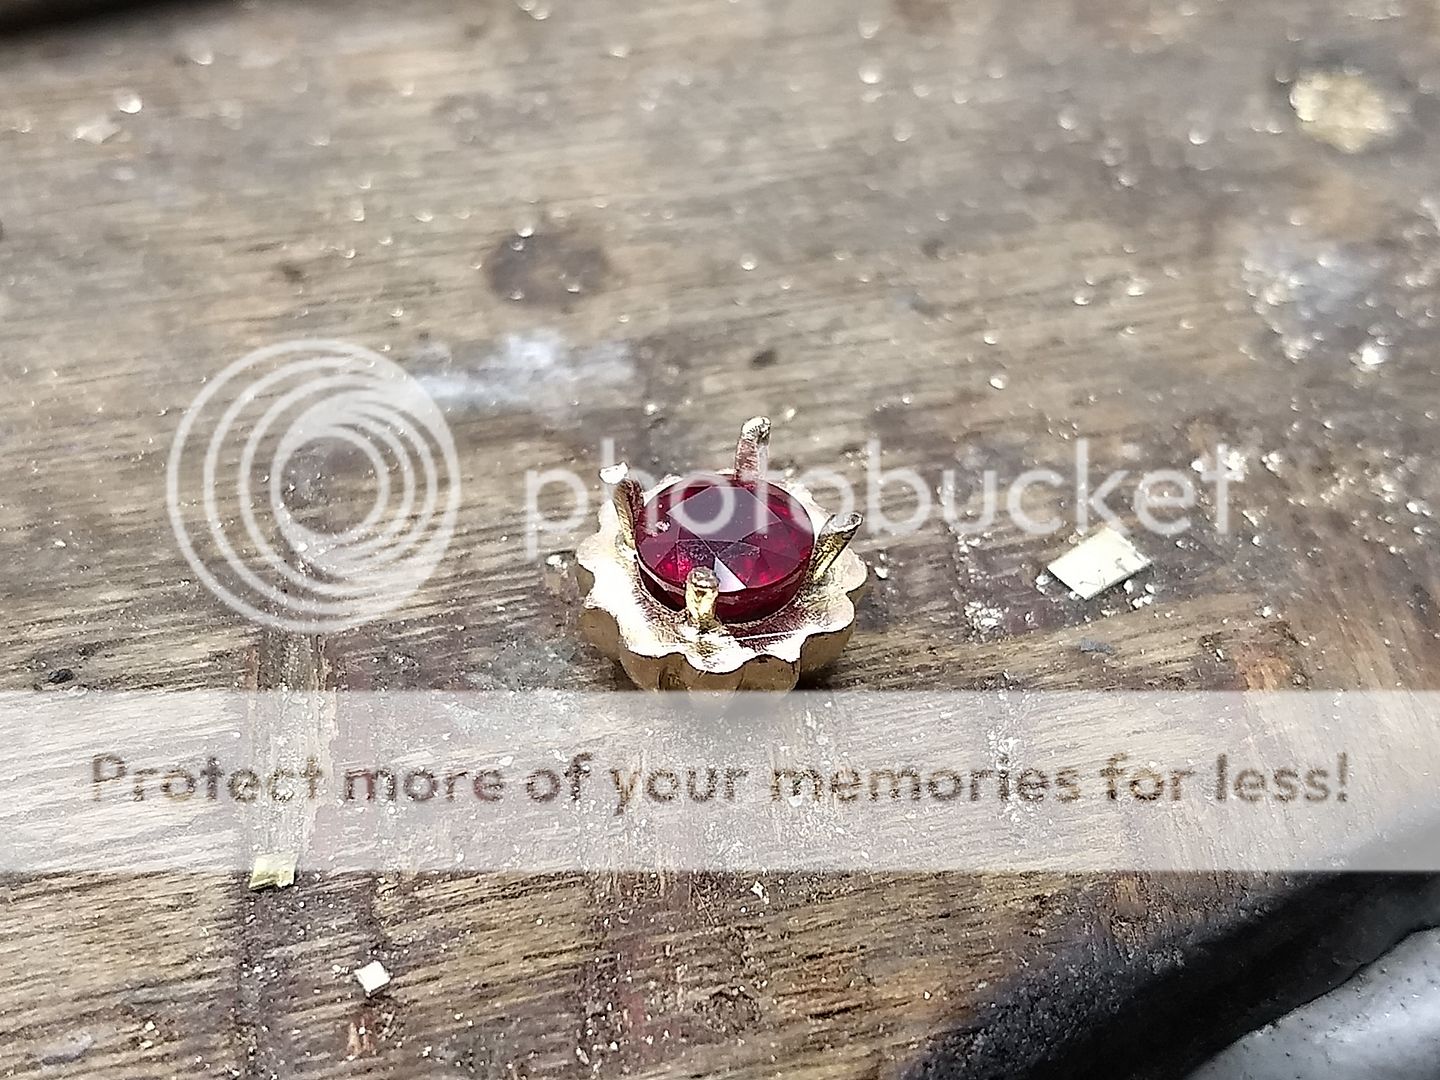
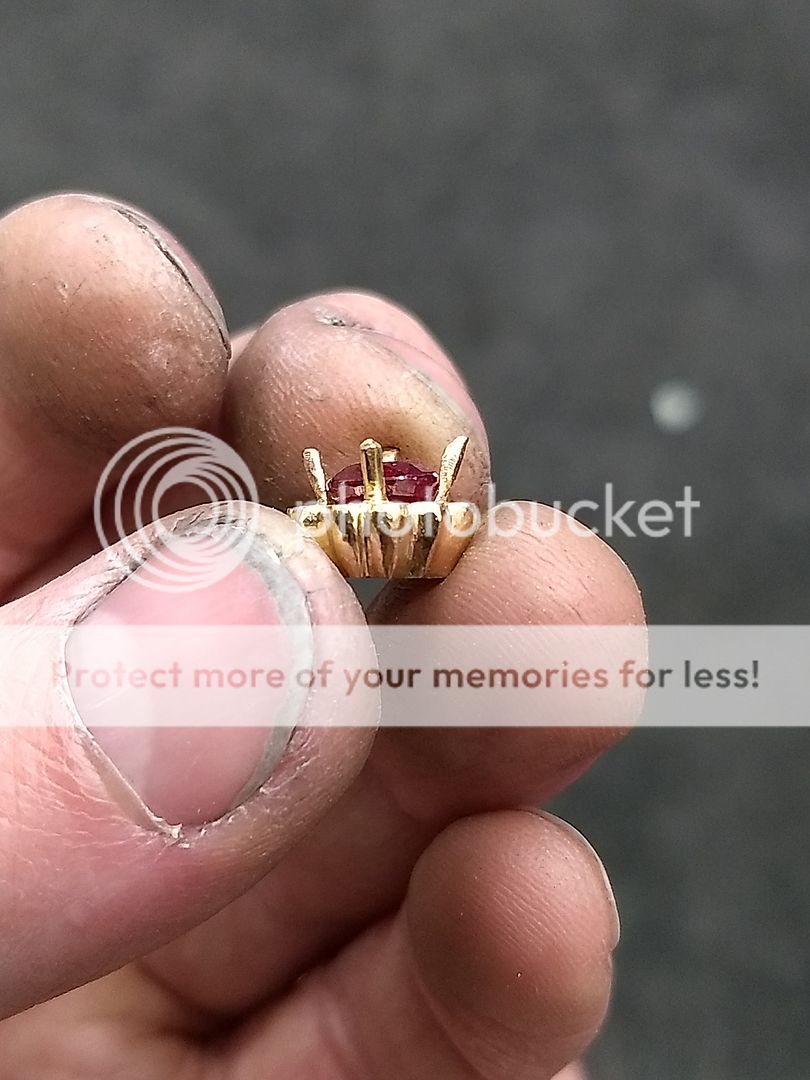
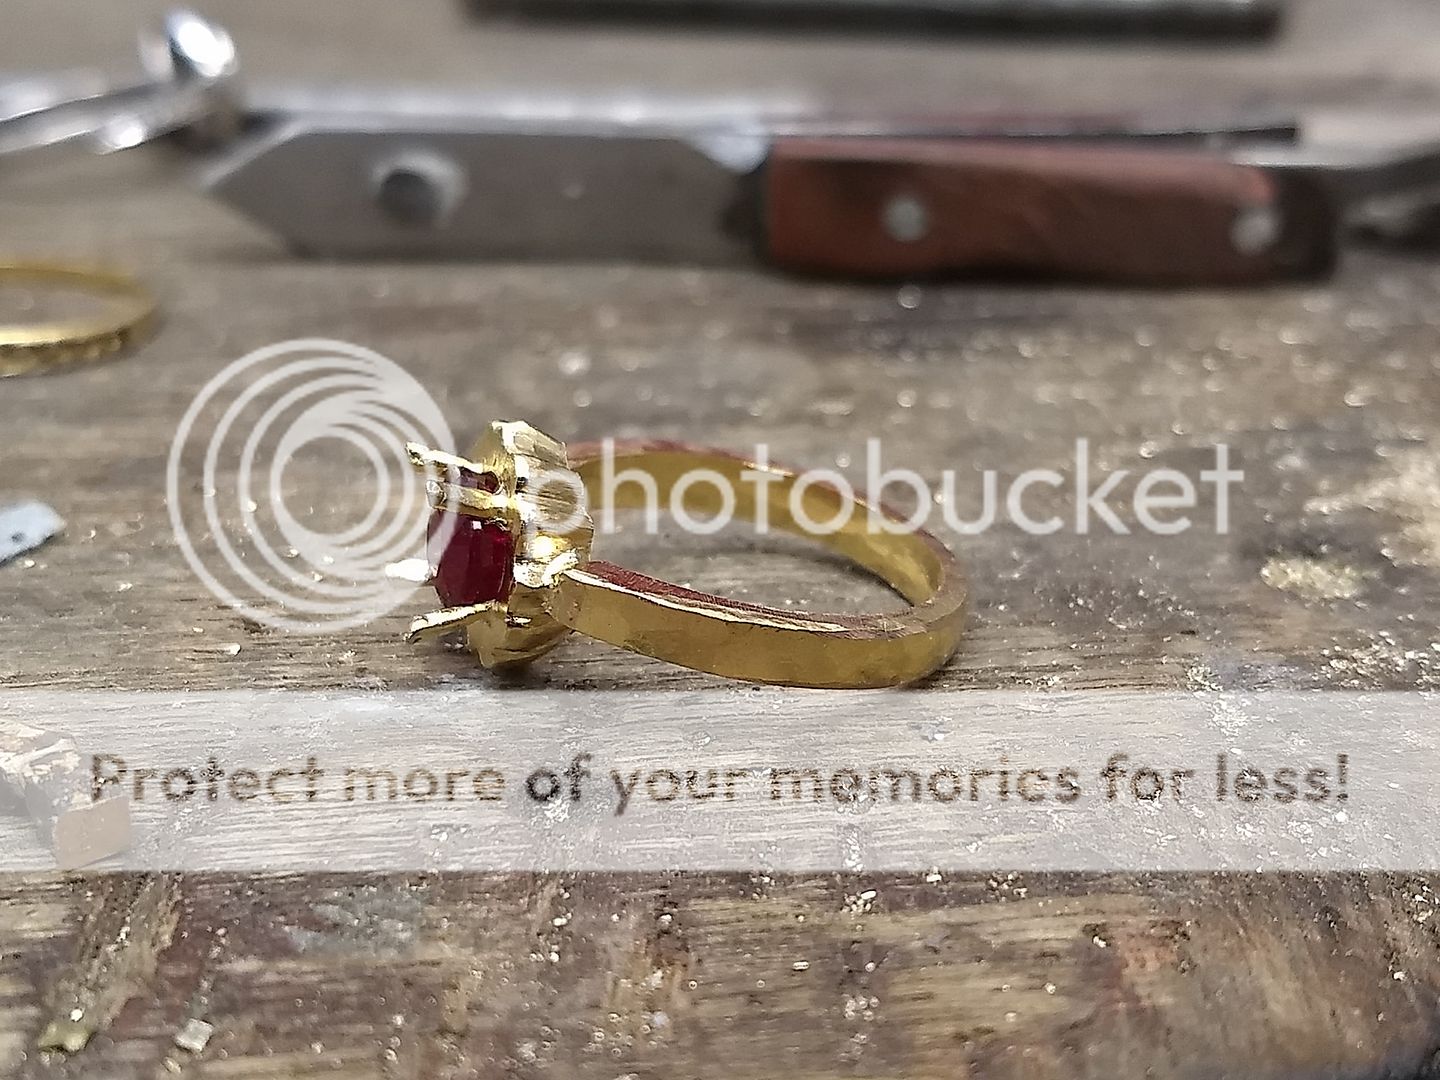
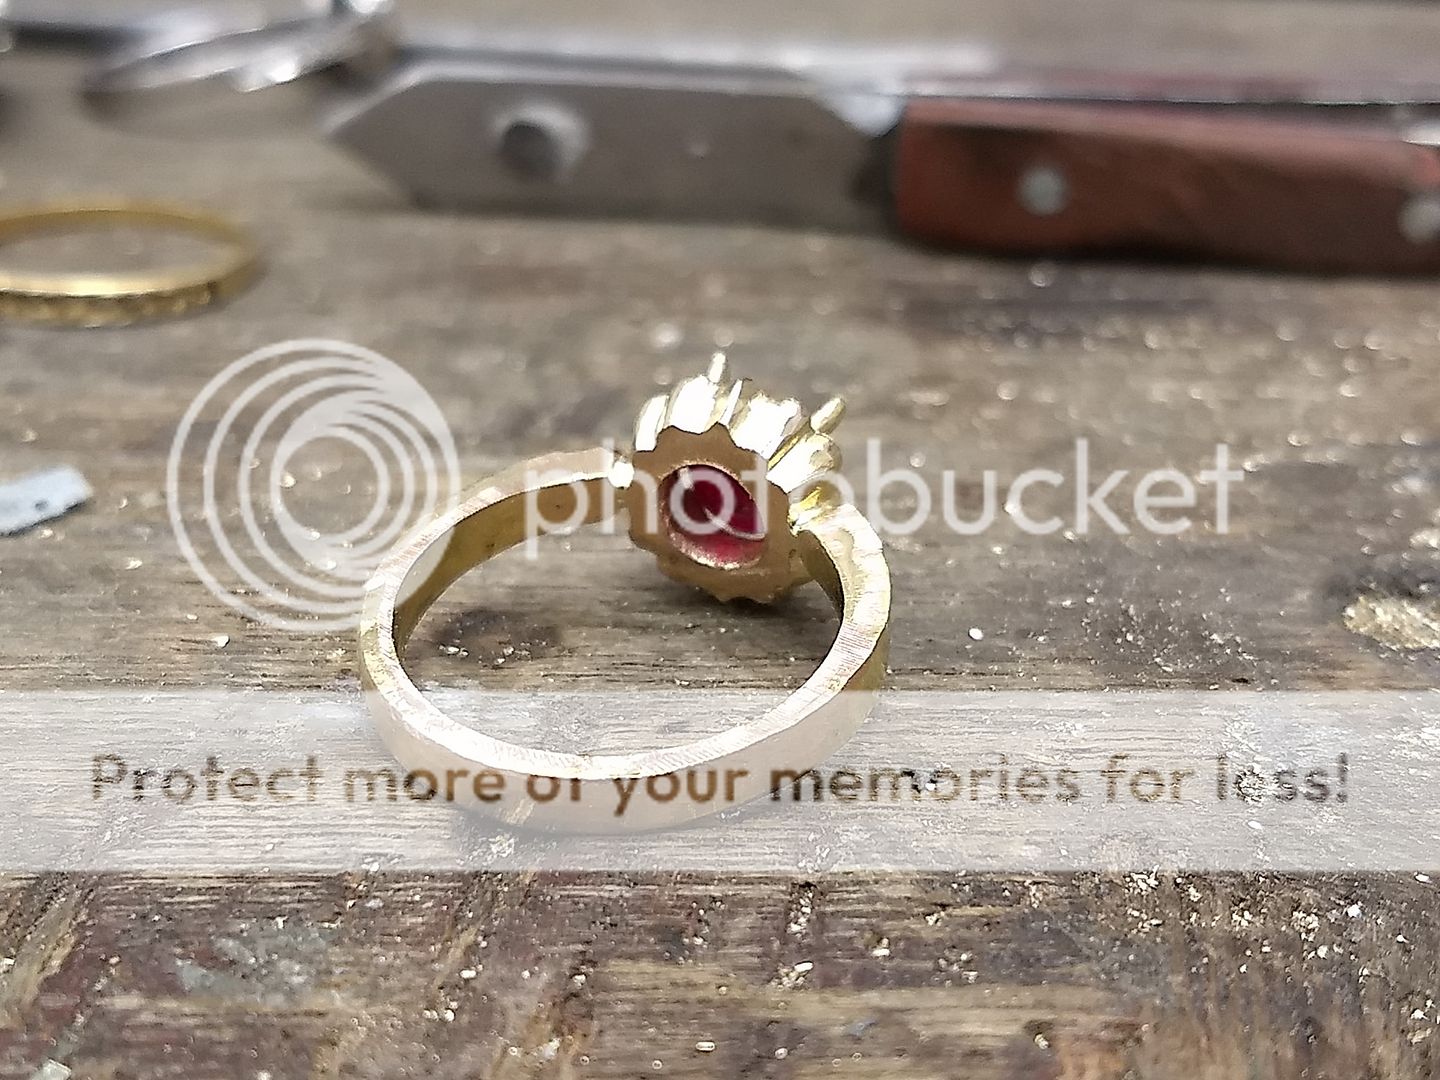
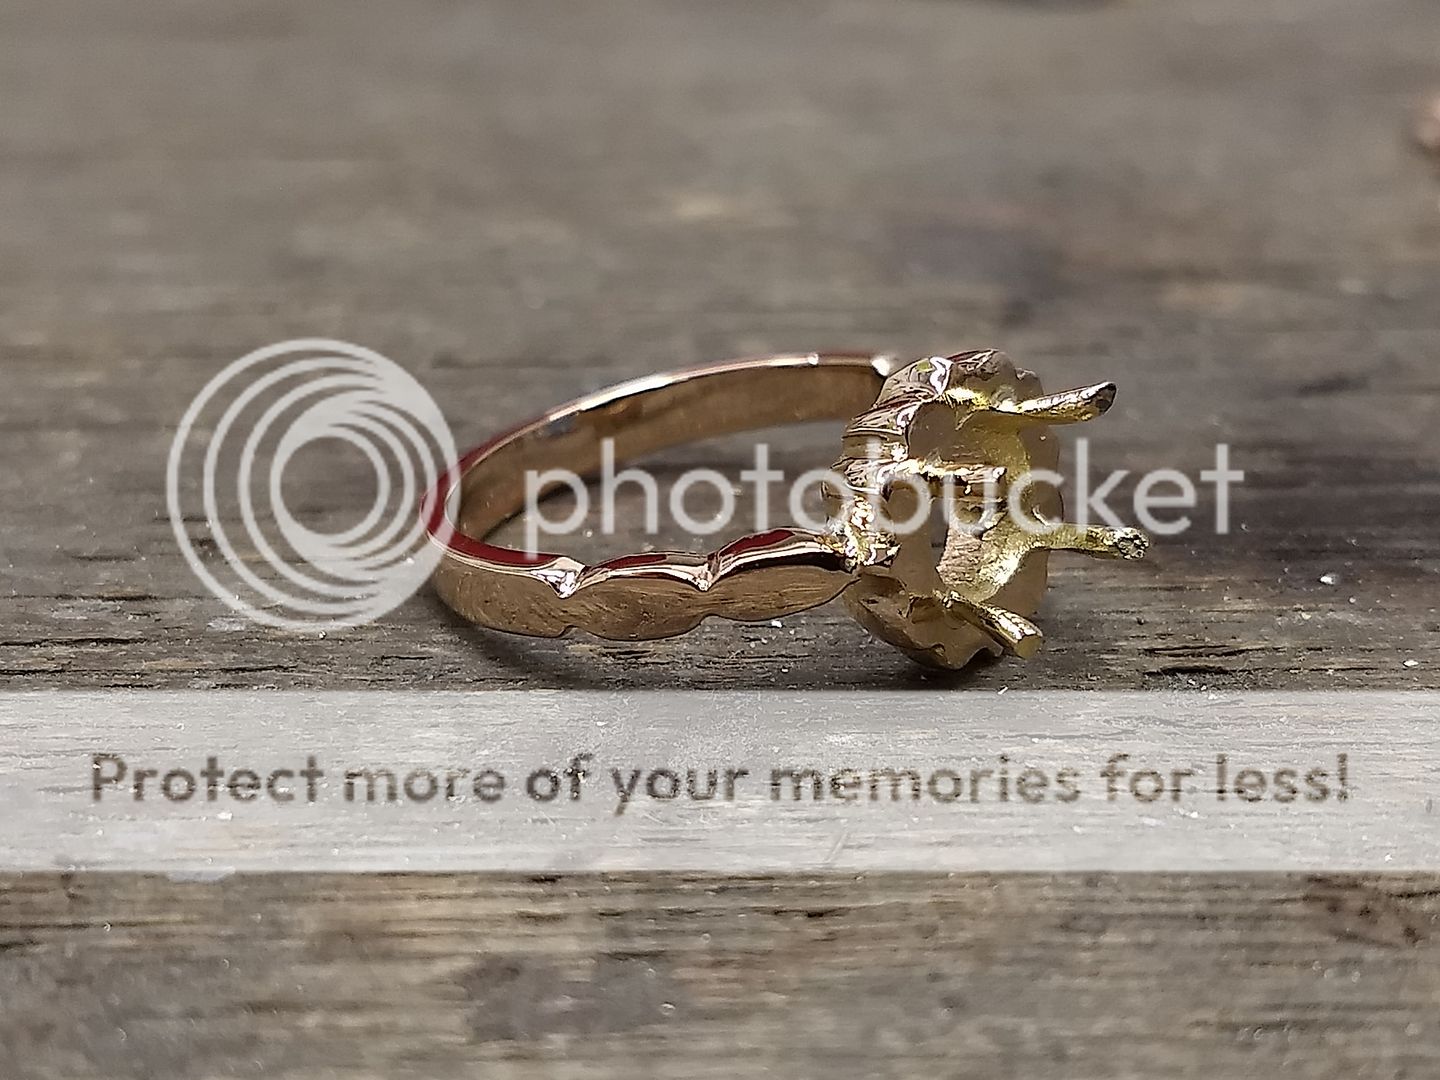
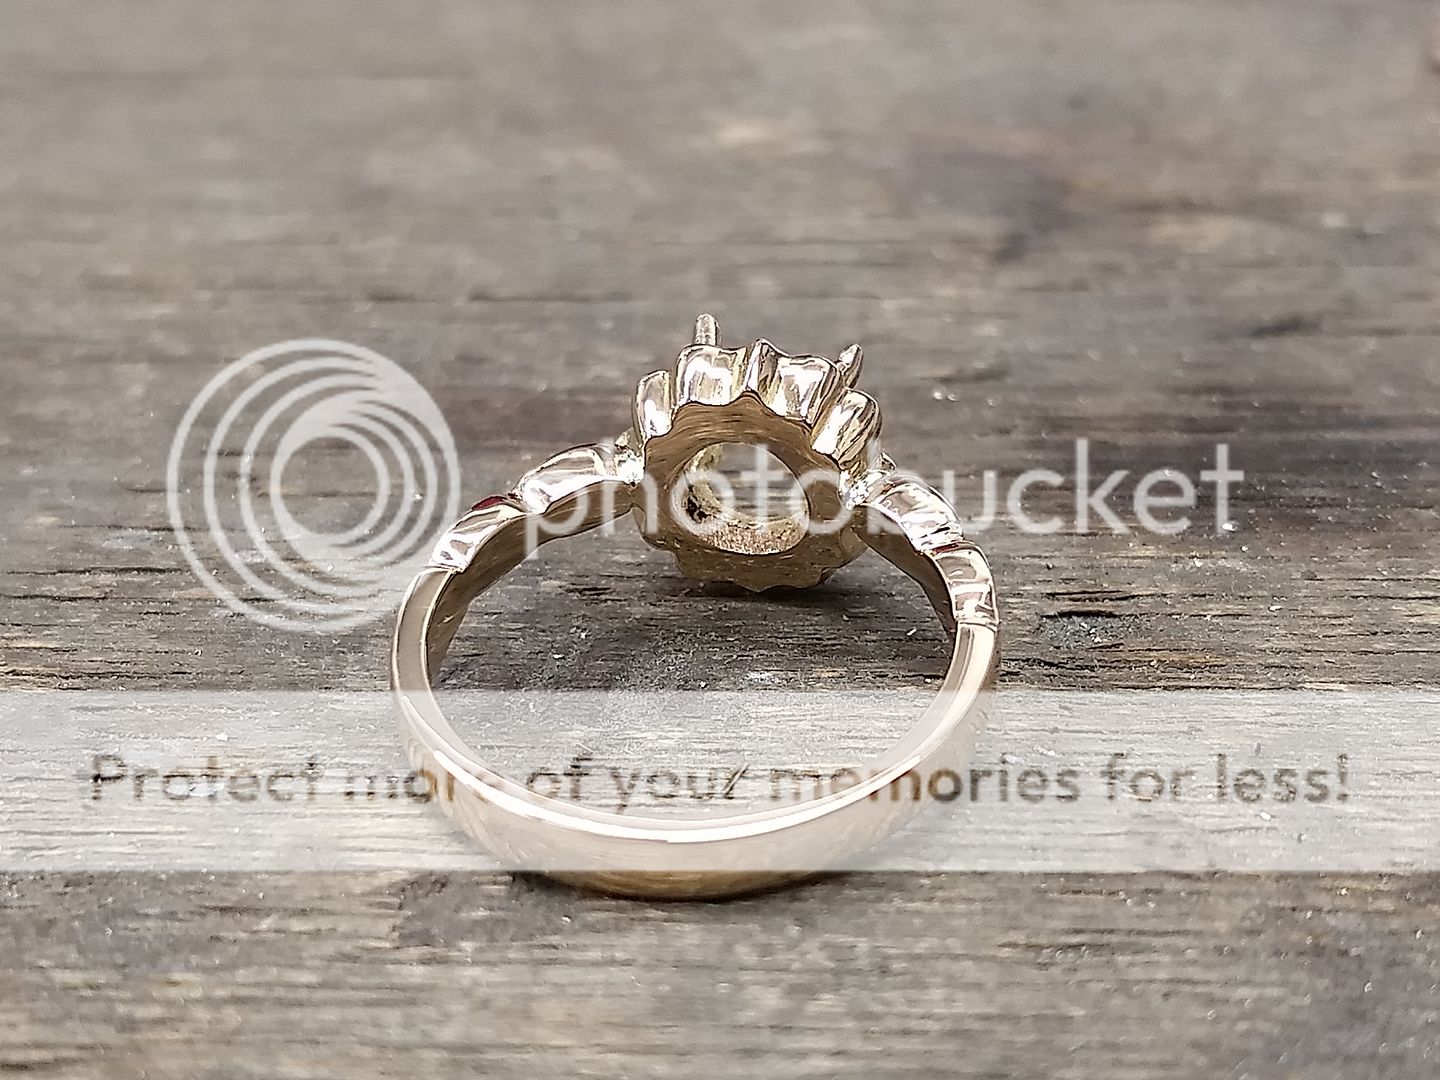
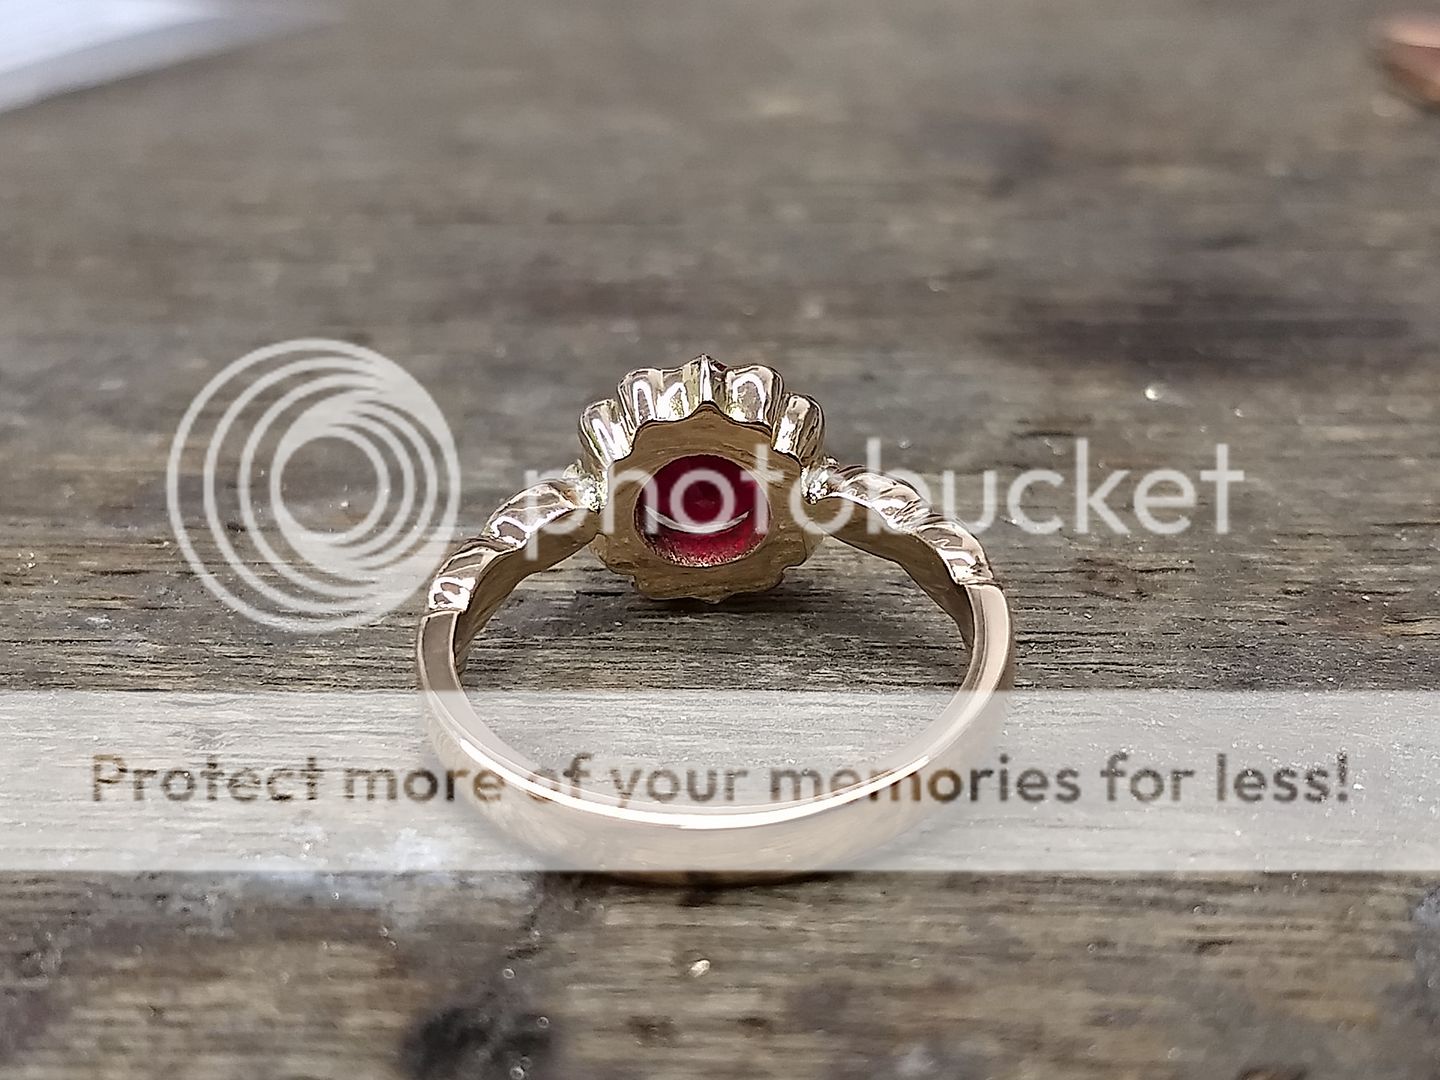
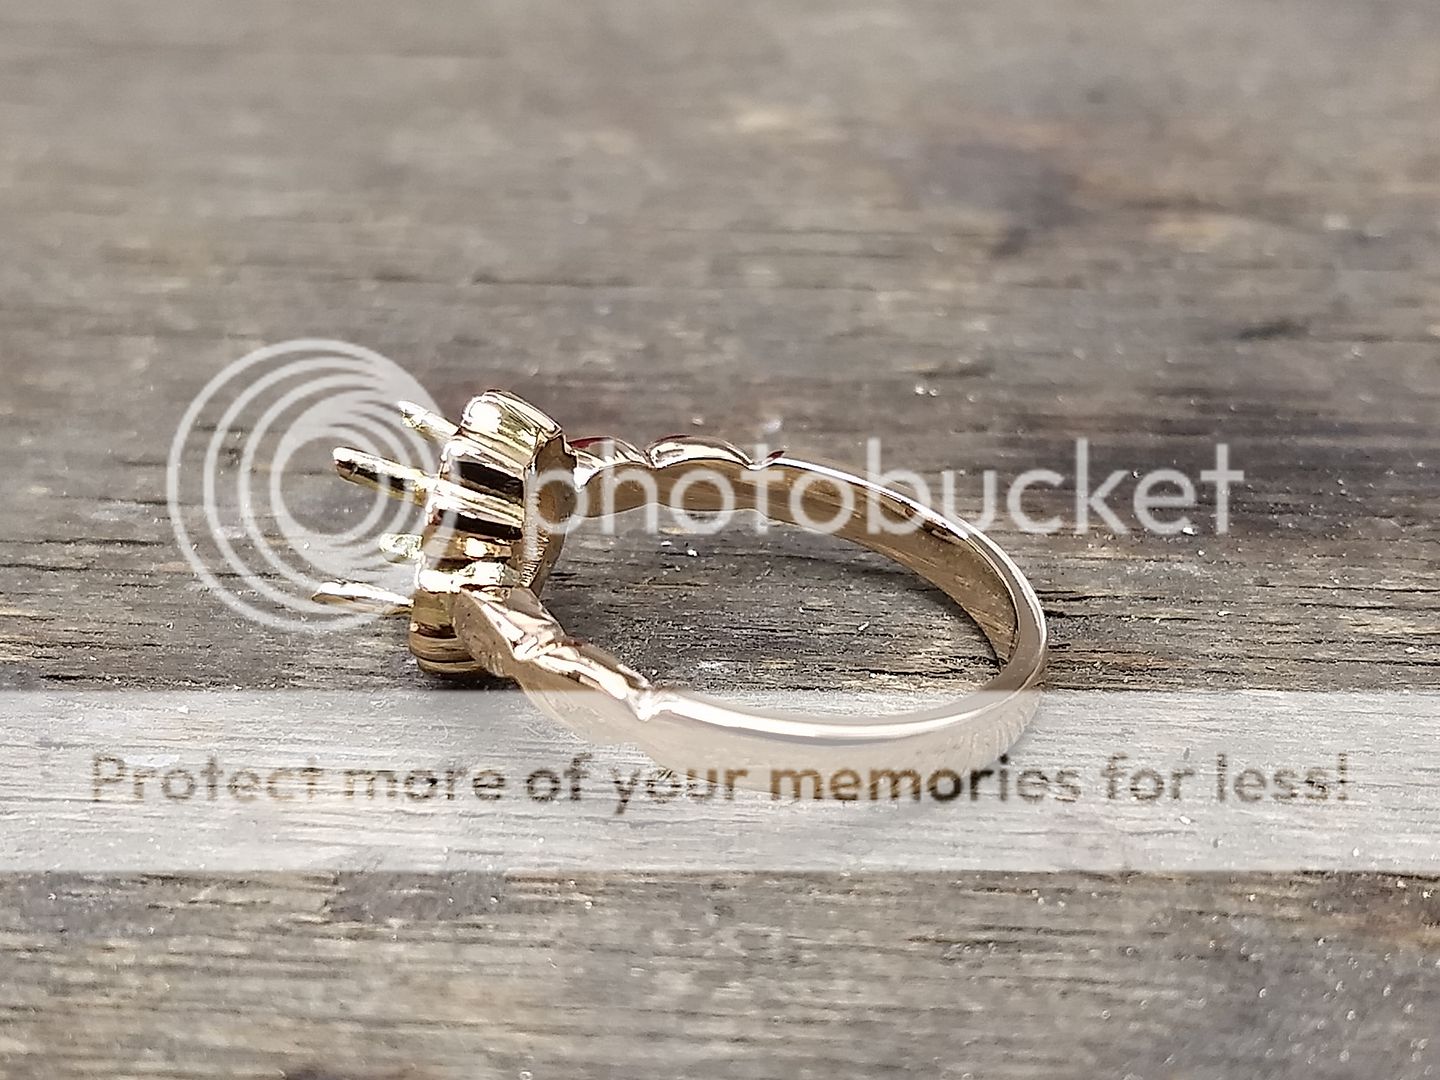
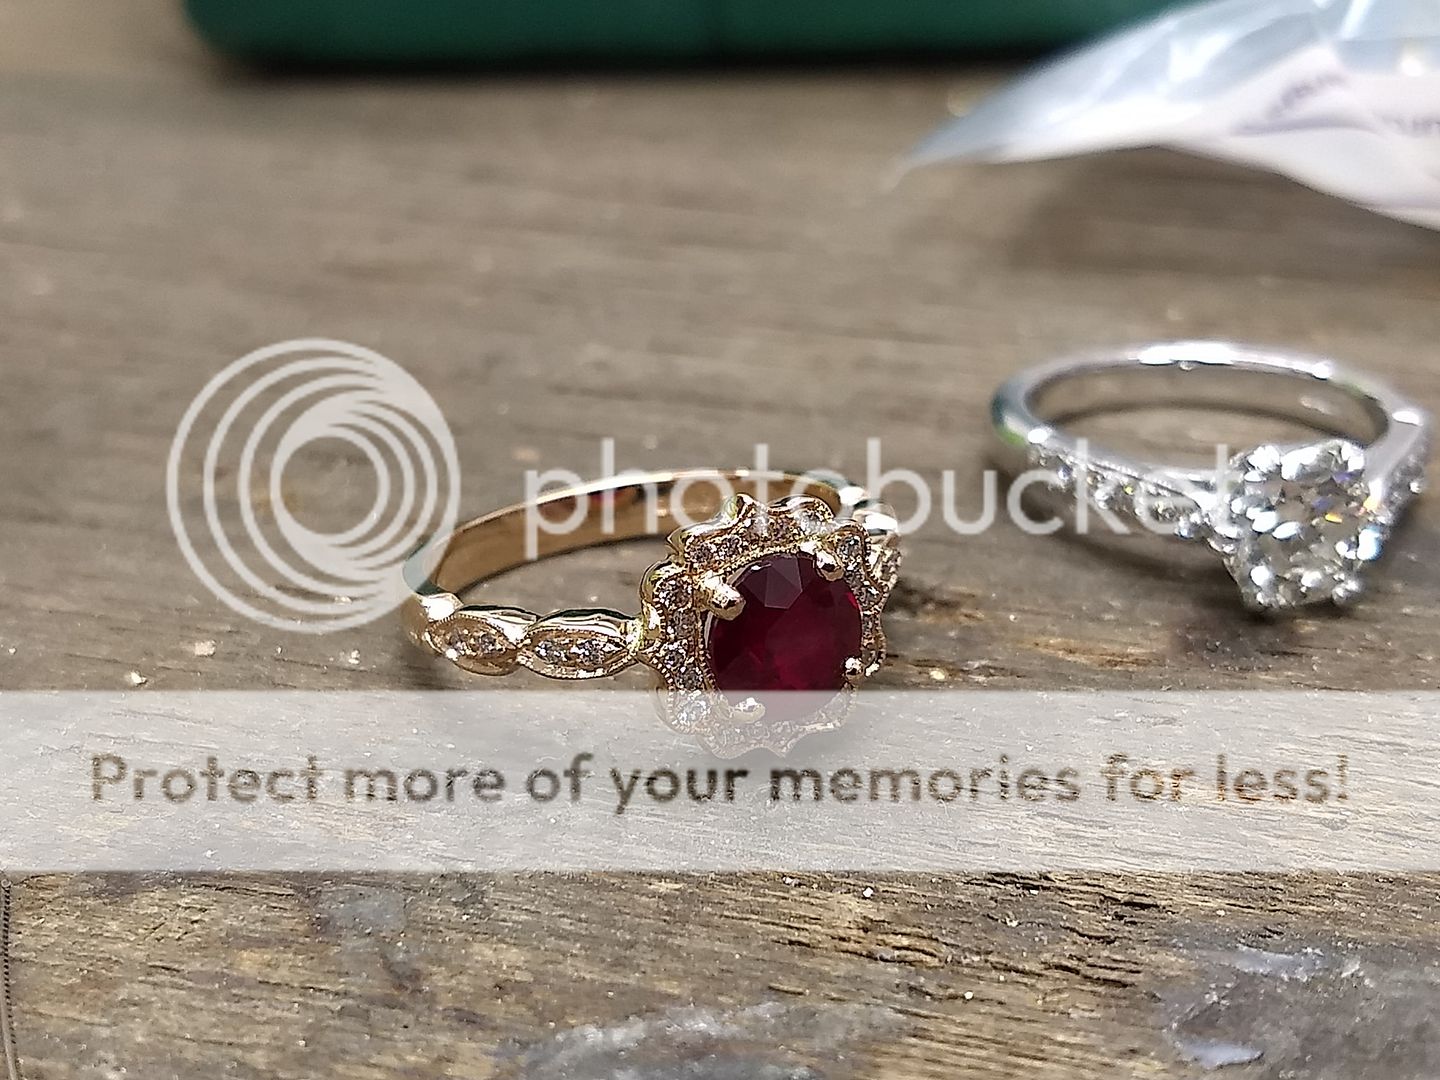
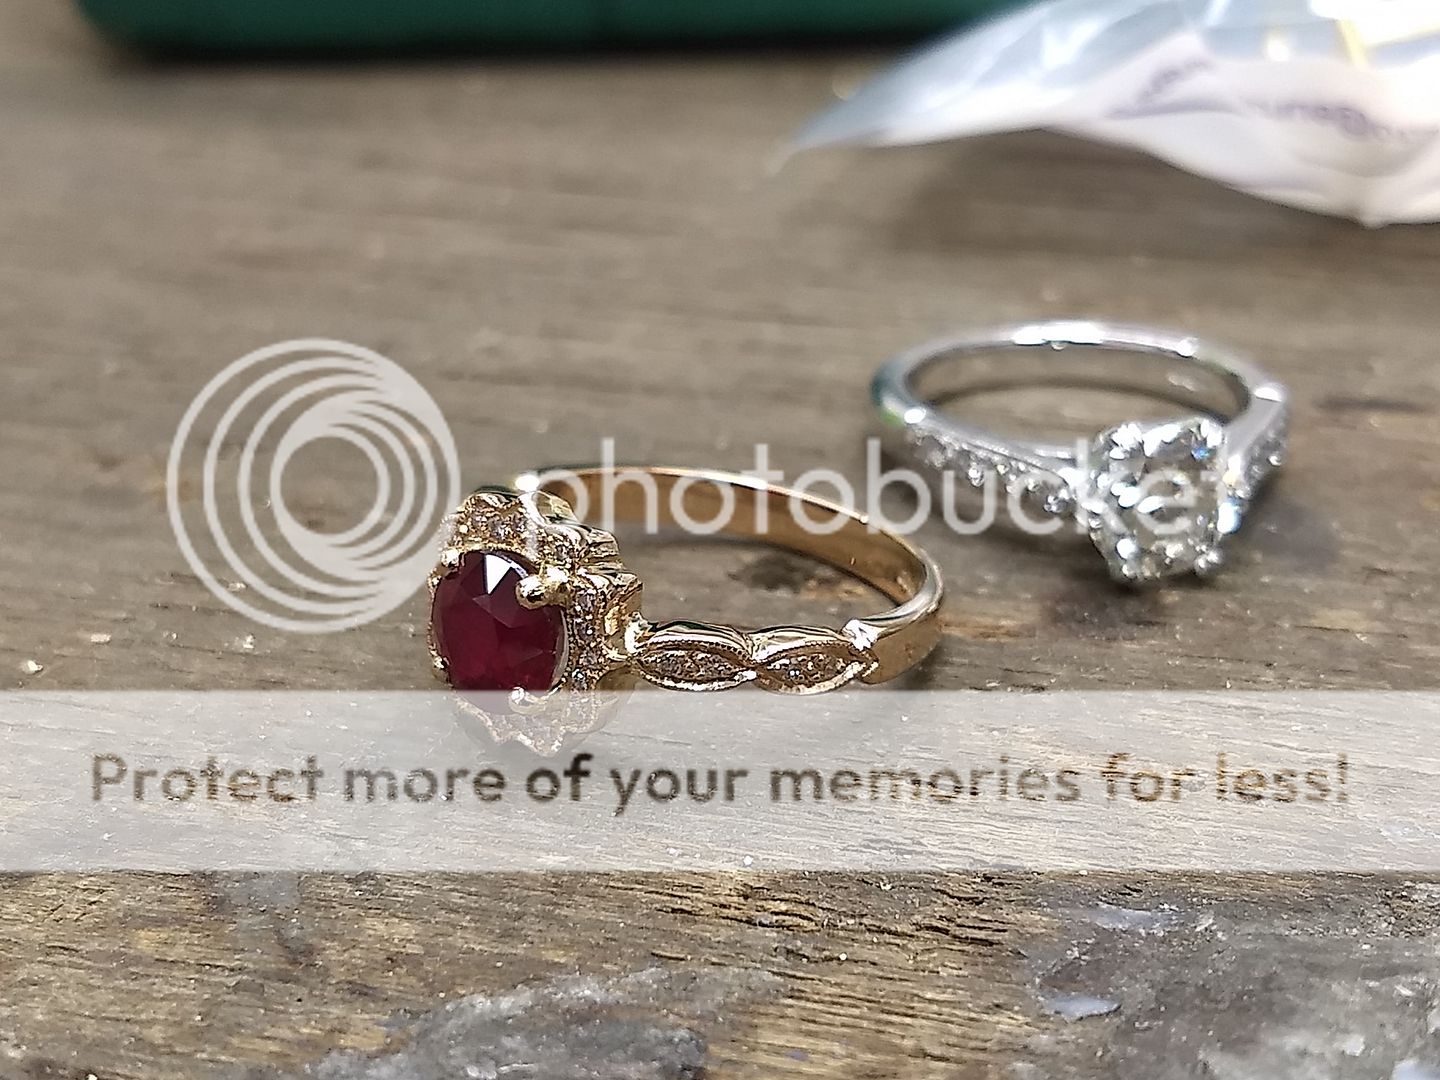
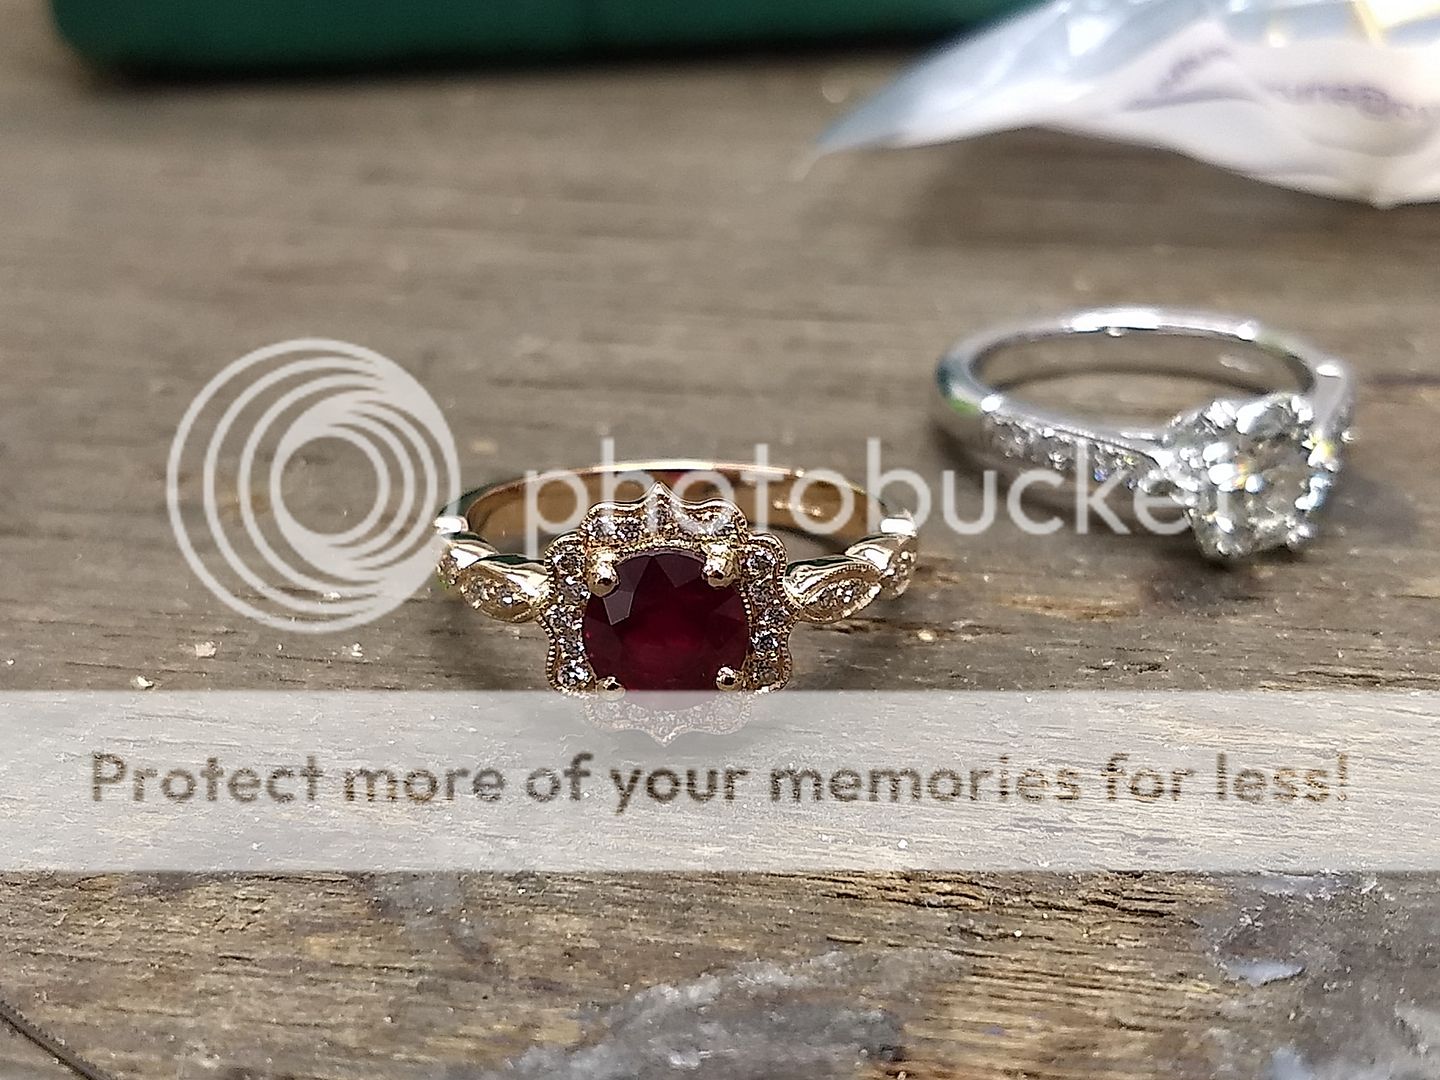
This is a good one. A Russian couple came to see me a few weeks back and asked if I could make a ring to match the one in the picture, but with a large ruby instead of a diamond. The ring is to be made in 18ct rose gold and with a view that we'd make a wedding band to match at a later date. We got a selection of rubies in for the lady to choose from and in the end settled for a stunning 1.66ct round stone that had pretty much perfect colour and clarity.
The idea:
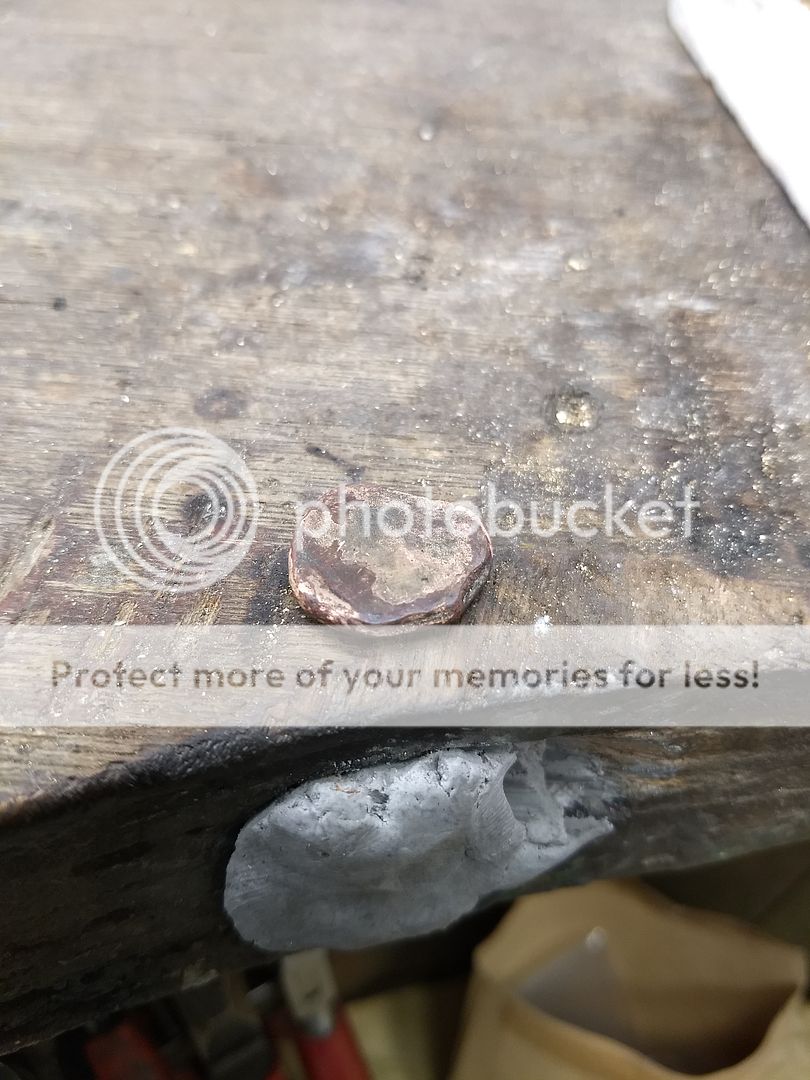
I had a decent amount of 18ct rose gold left over from previous projects so set about preparing the metal.
It looks yellow at this point due to the surface oxidation of the gold:

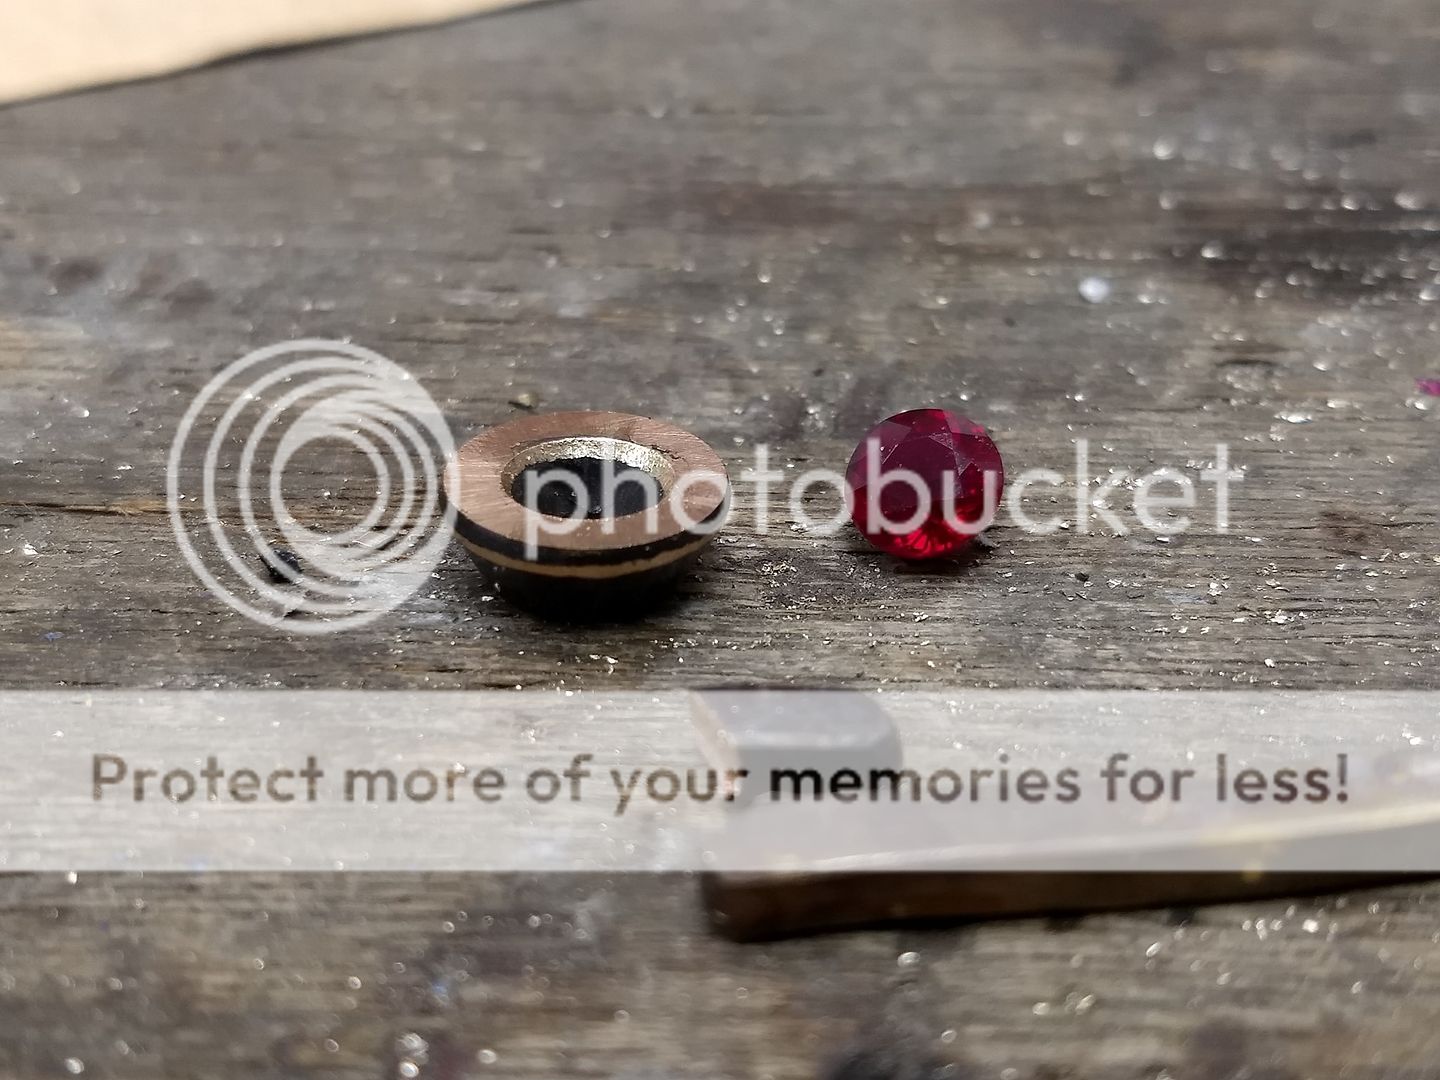
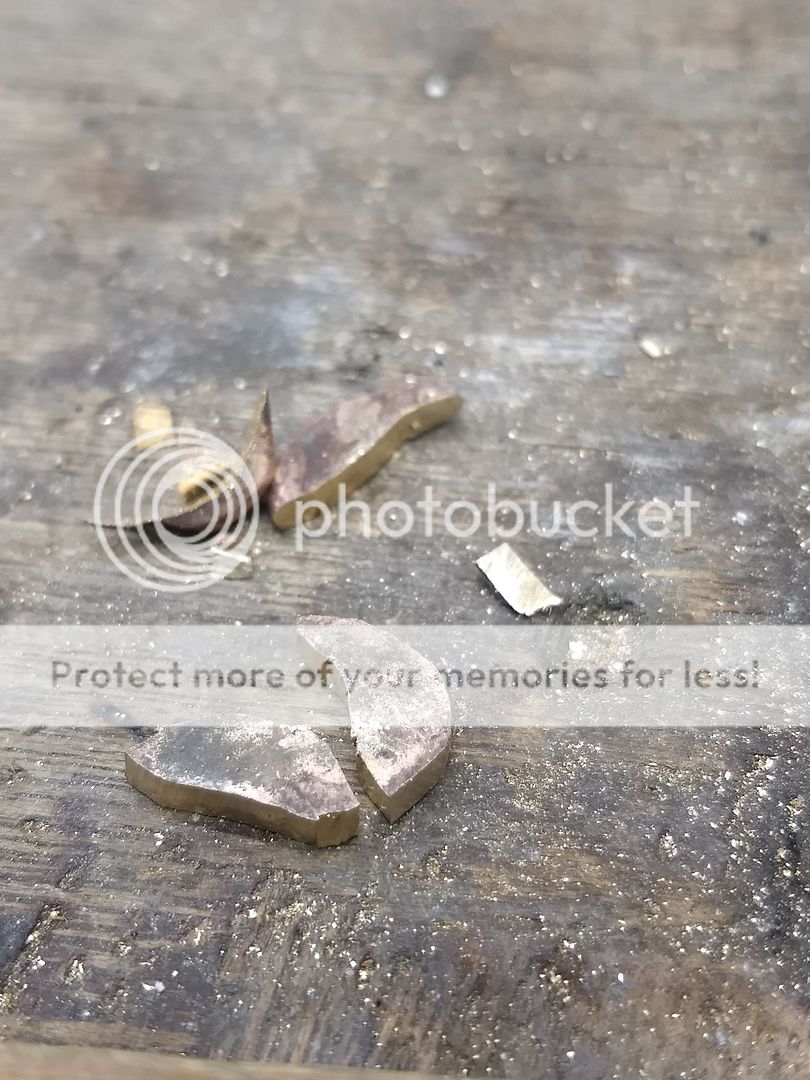
Making the head is the first step and because of the design it was important that I made it as strong as possible while keeping the delicate look. The main part of the head is constructed from a compressed ring of gold, soldered with a high temperature 18ct solder.
Once compressed to the correct size the shape it's then cut / filed:
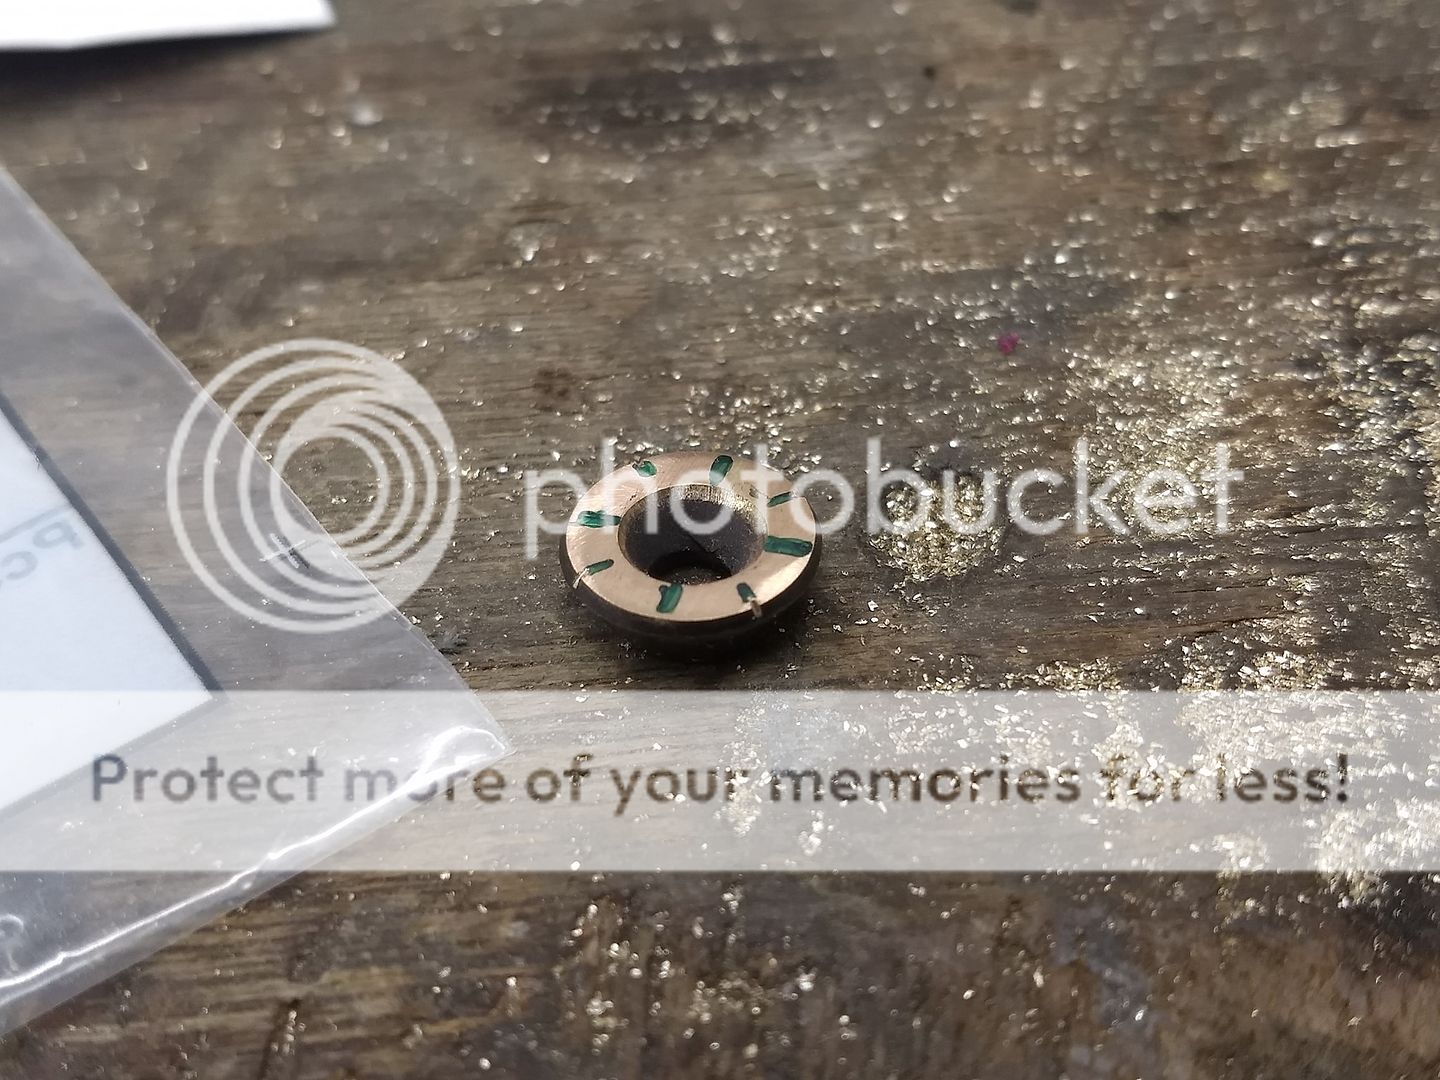
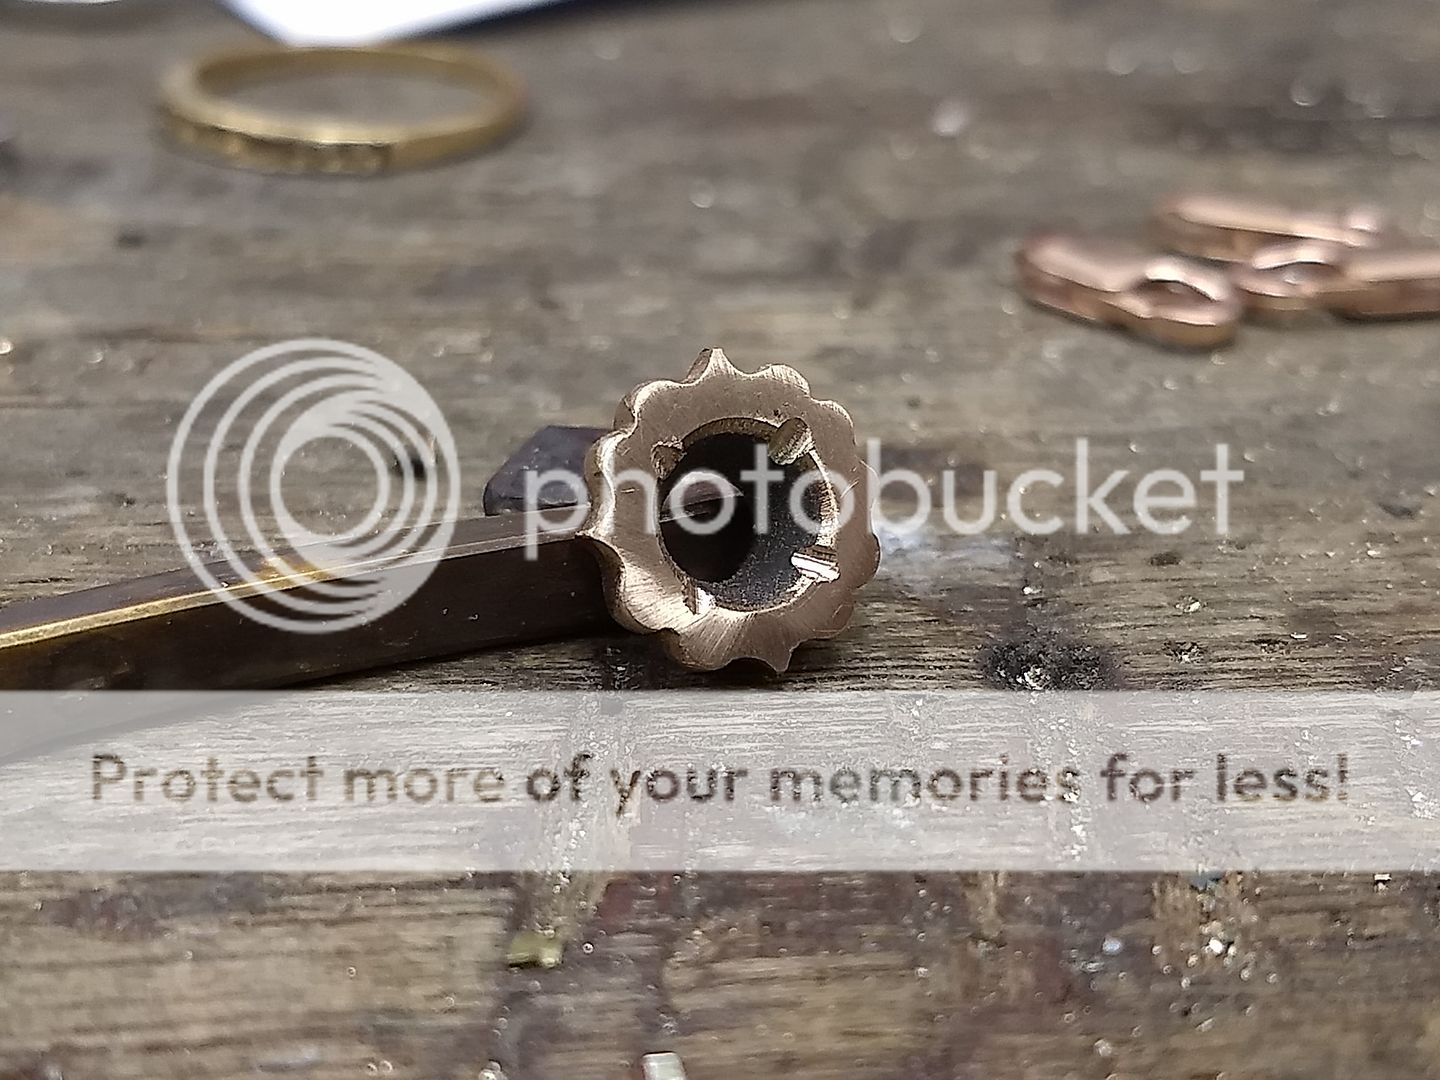
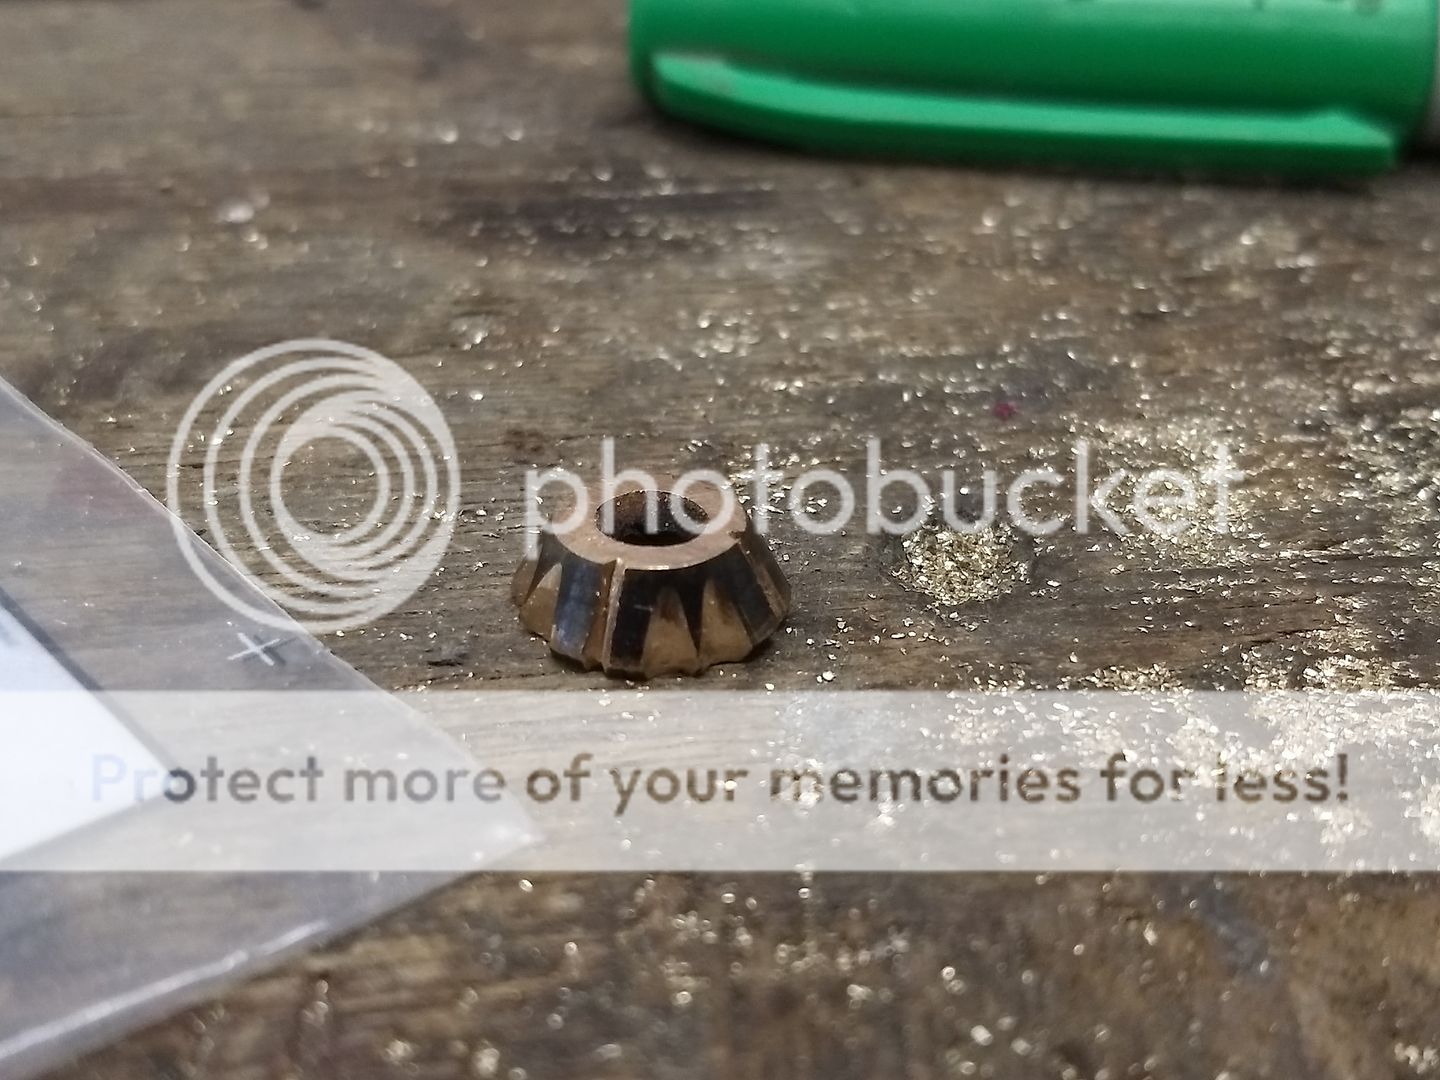
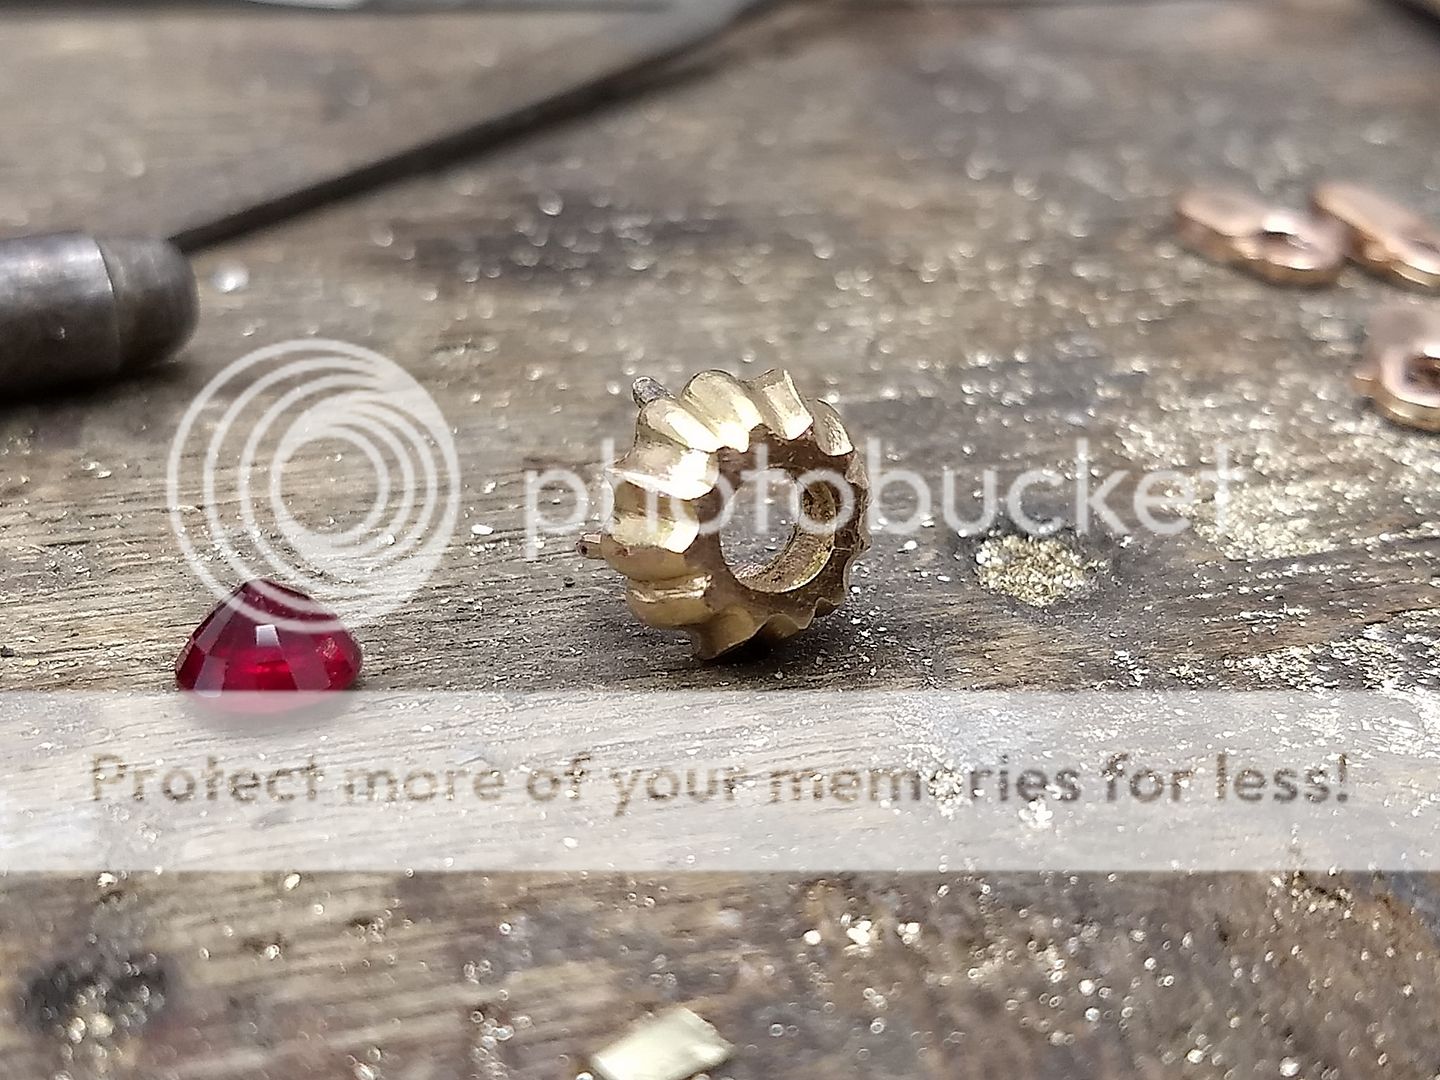
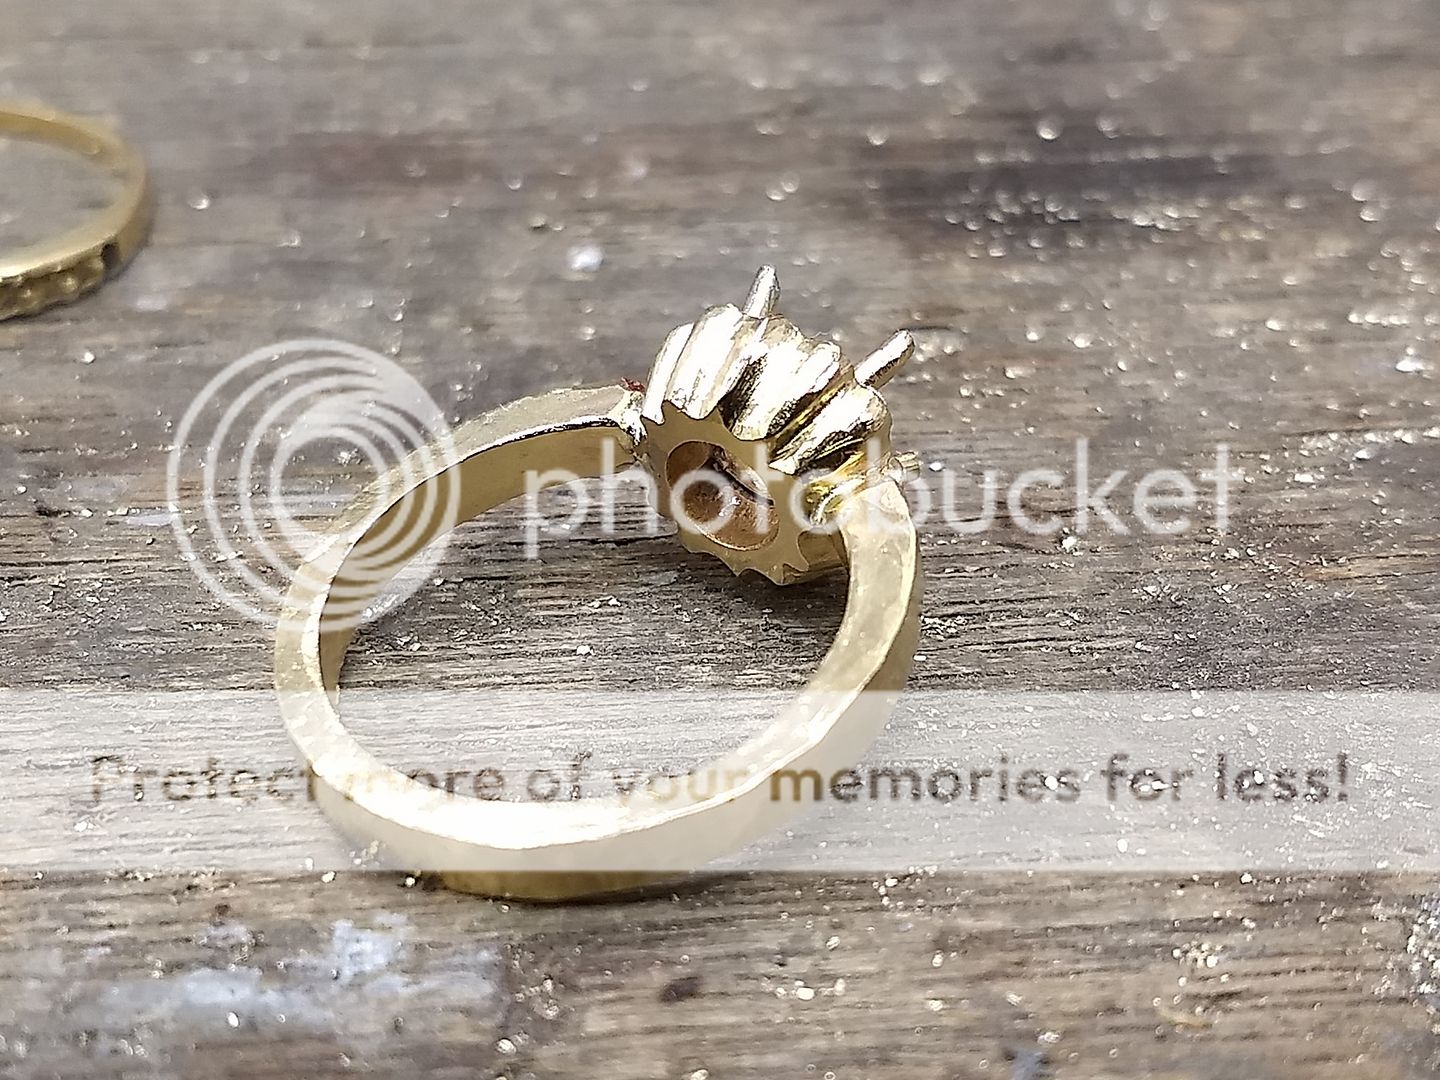
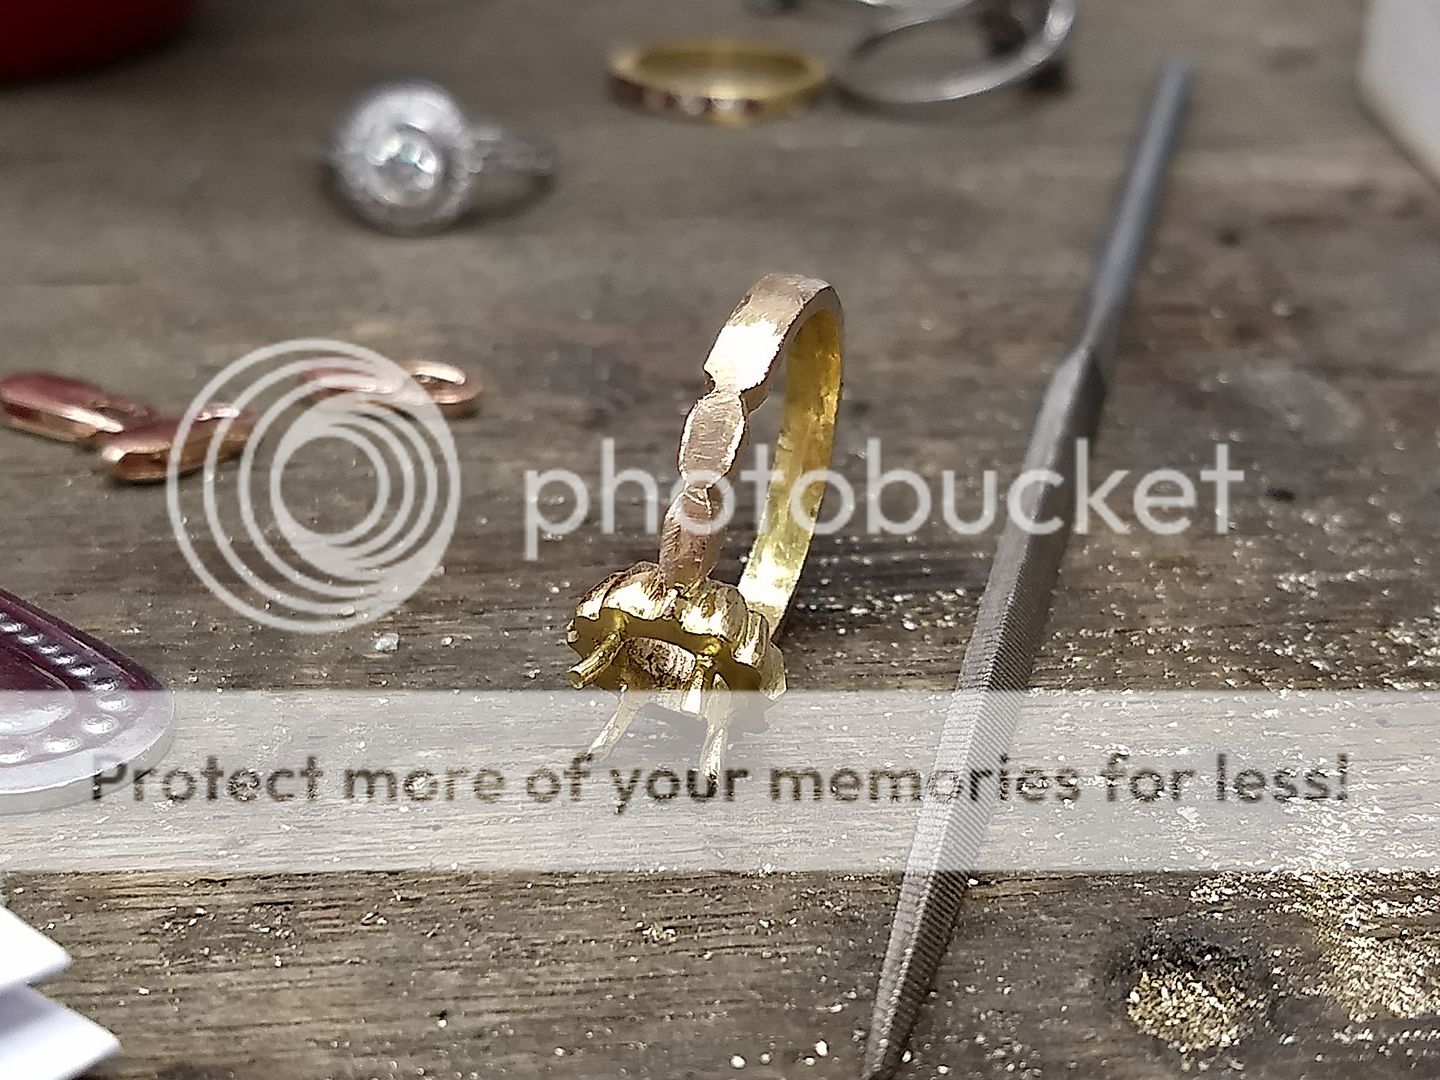
The centre stone needs to be securely held so I fit 4 claws in 18ct rose to match. They are drilled into the head and then the head bored out to suit:
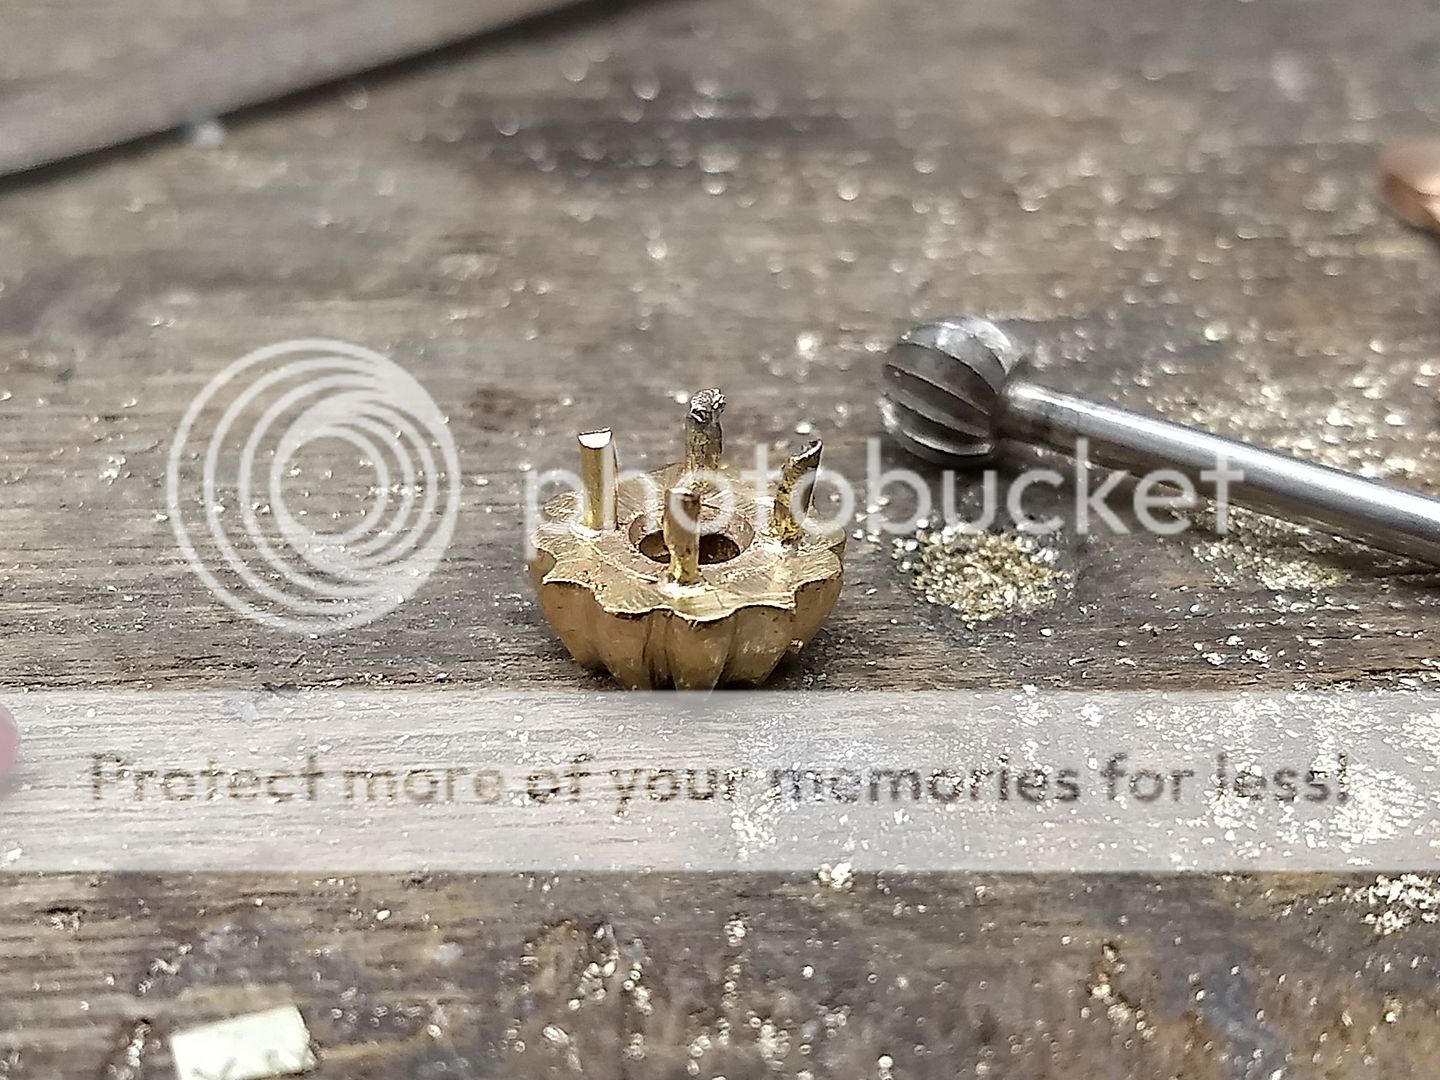

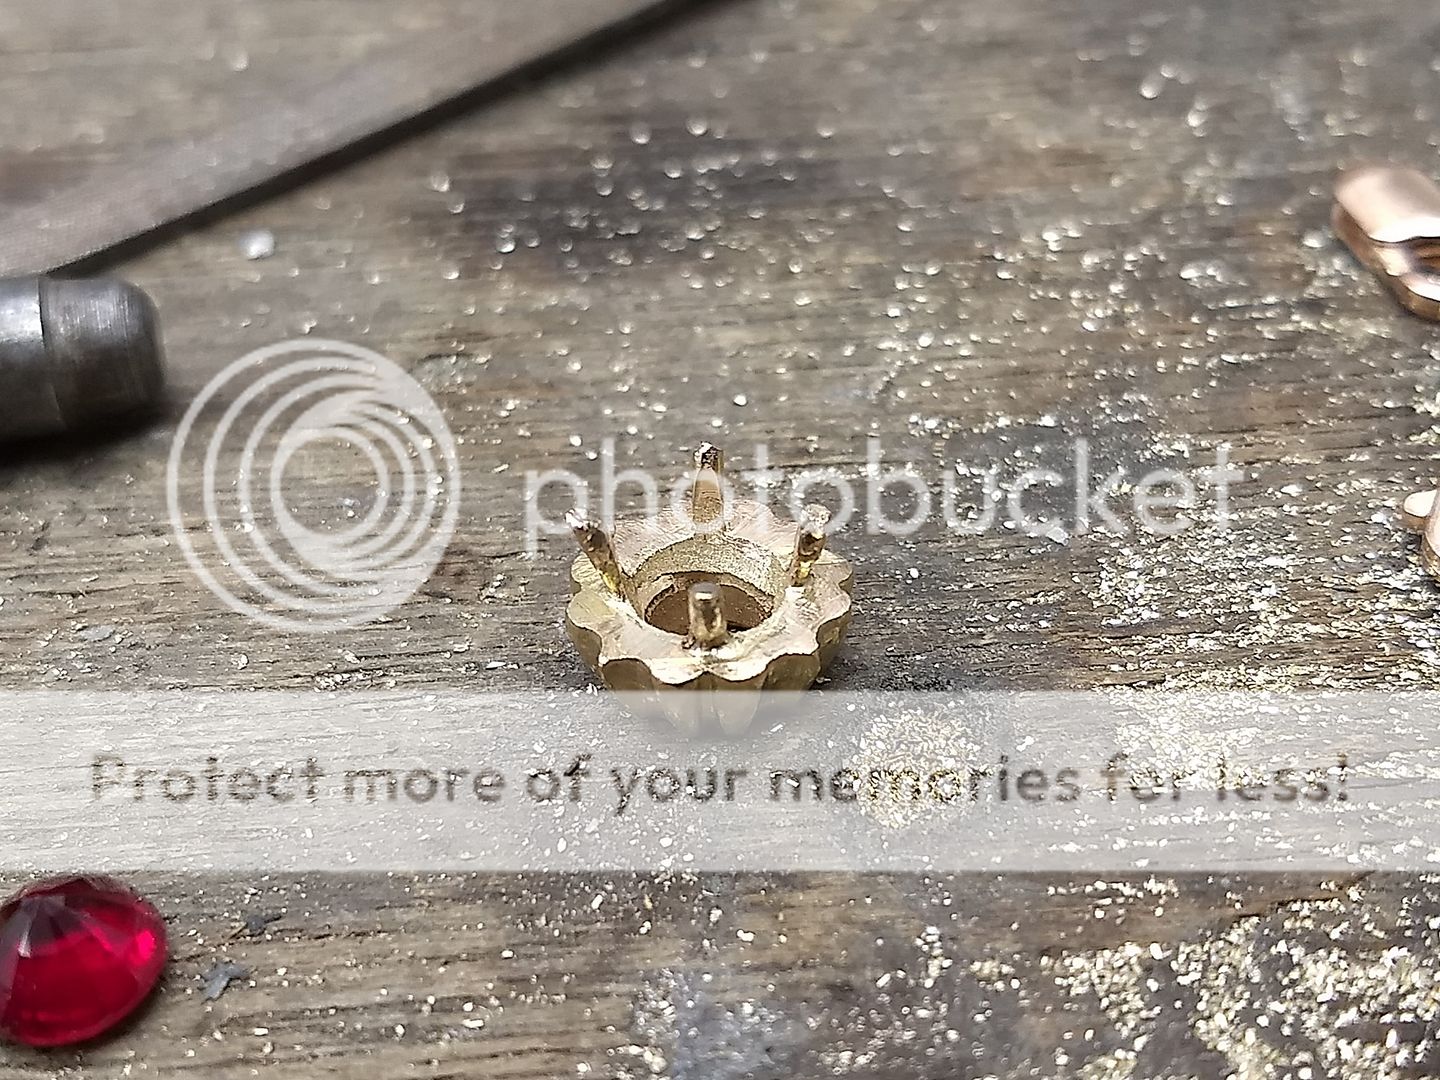
And the underside tidied up:
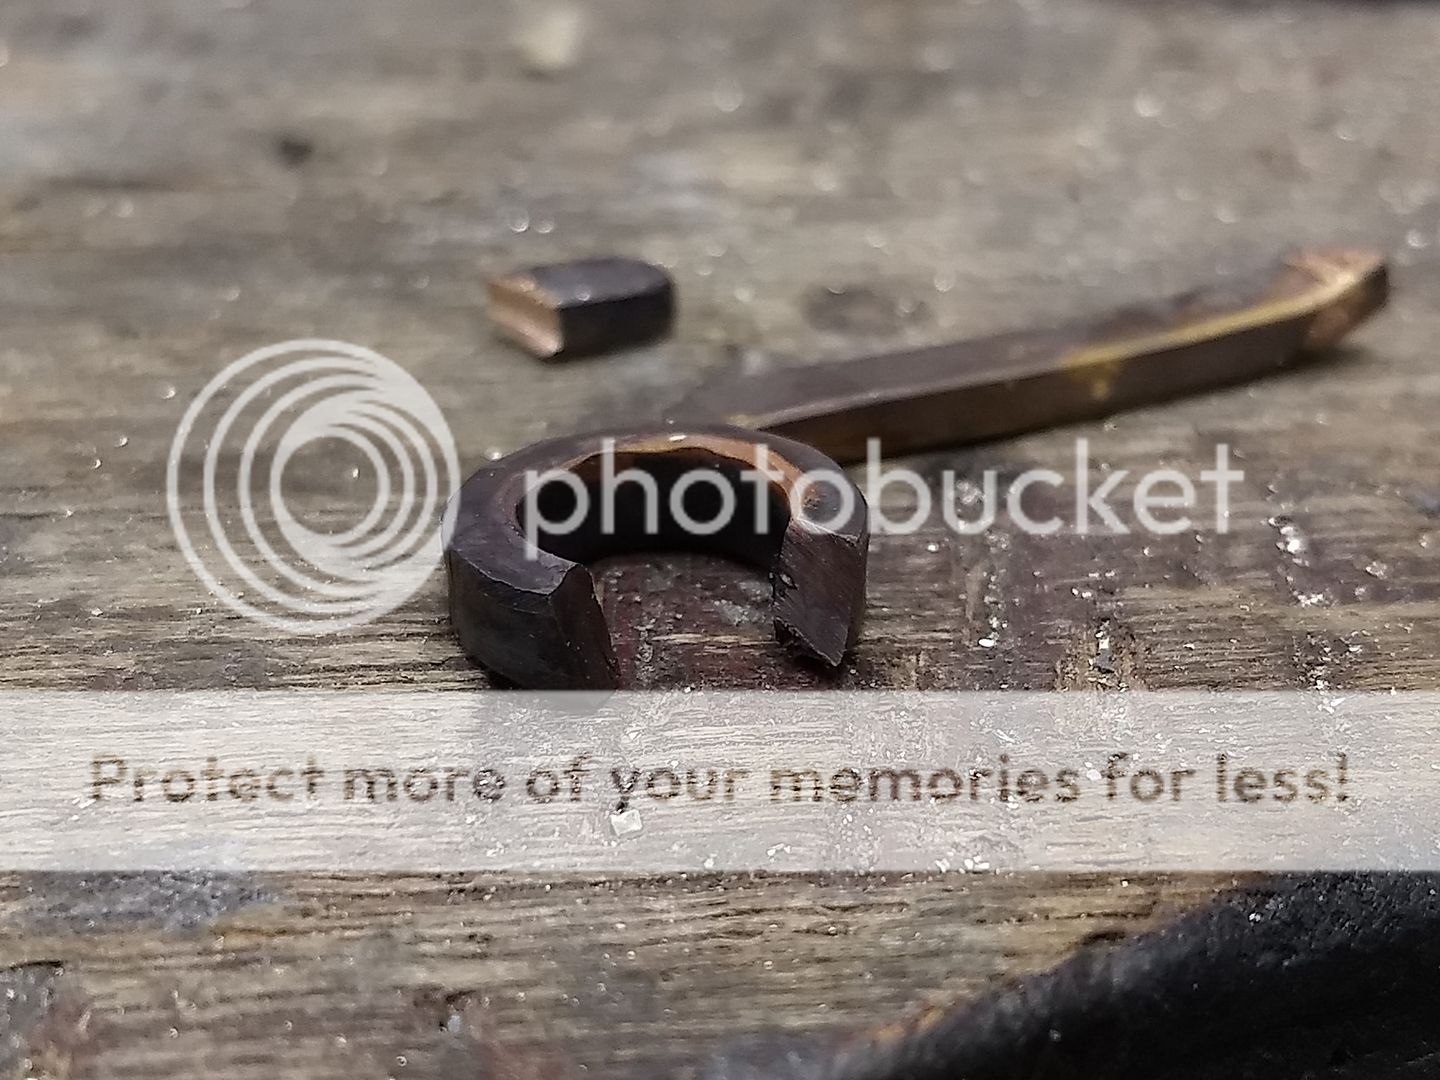
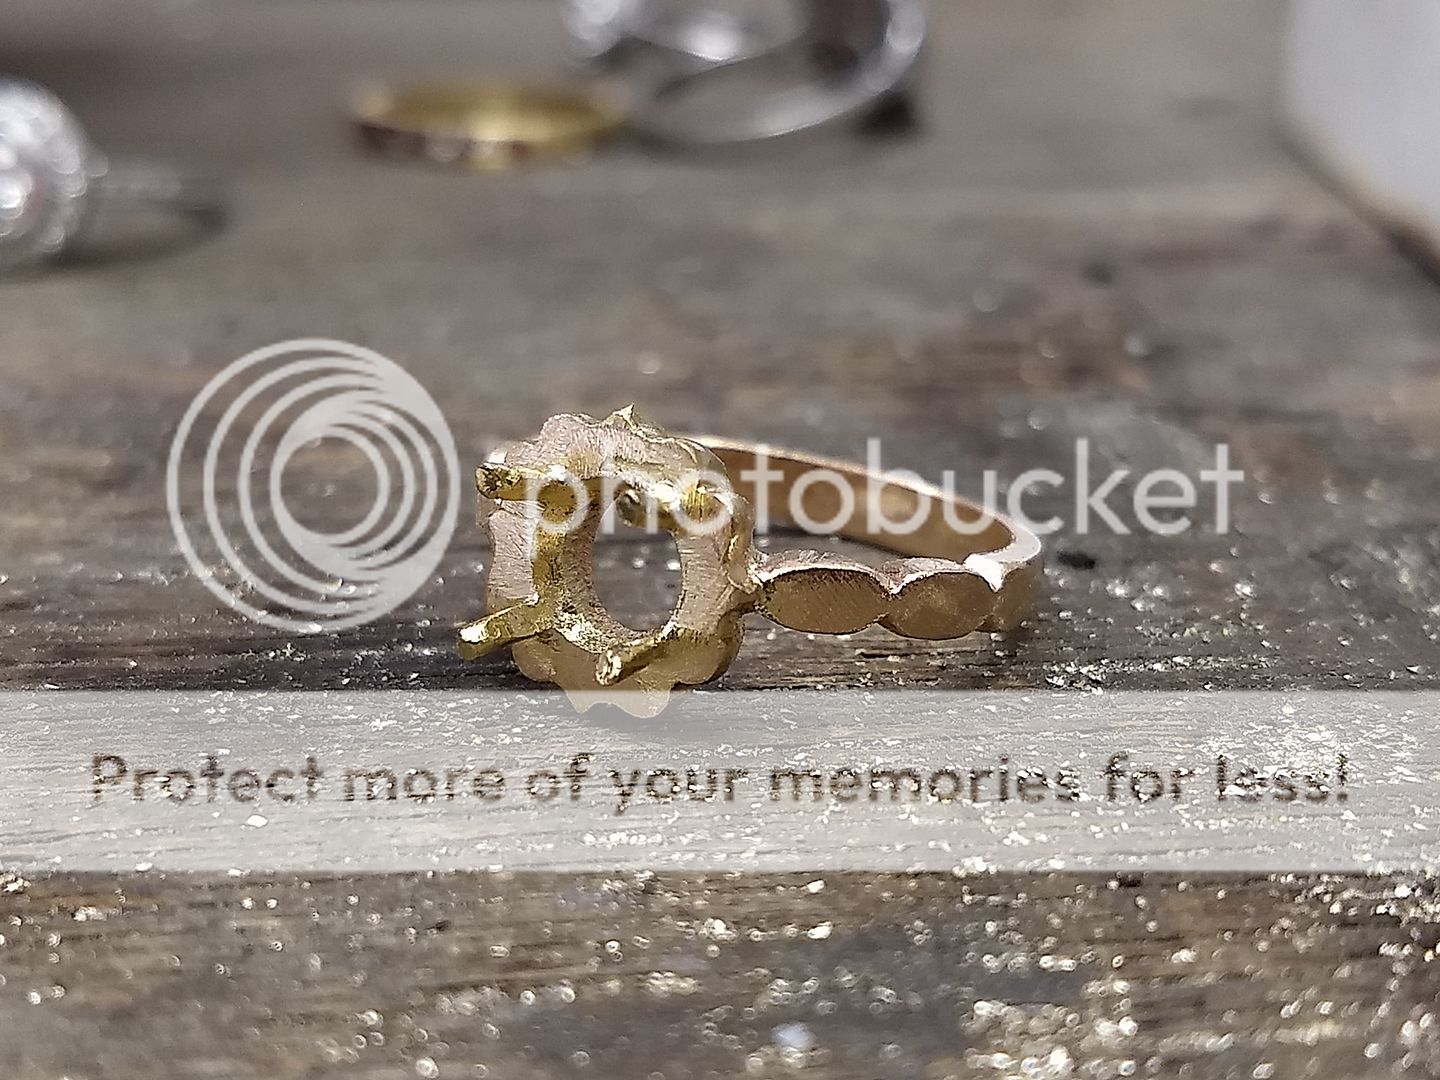
With the head getting there the next job is to make the shank. The spare gold is remelted and rolled to suit:
And then cut to size and soldered to the head:
This is then filed to the correct profile and shape:
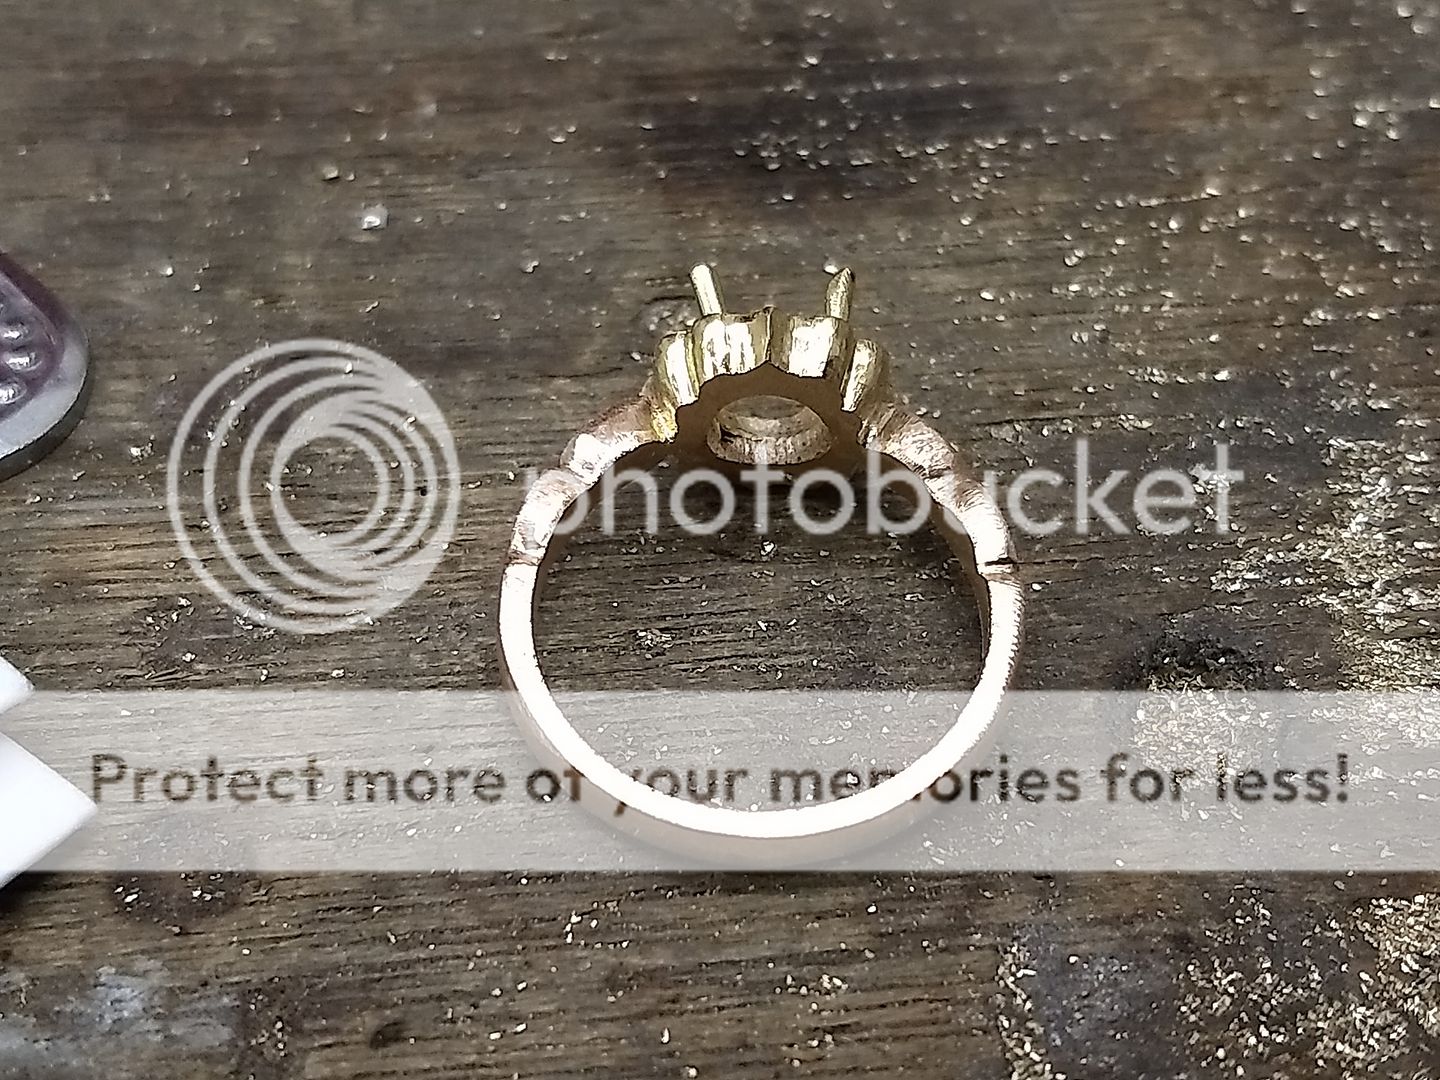
The ring blank is then cleaned up and readied for polishing:
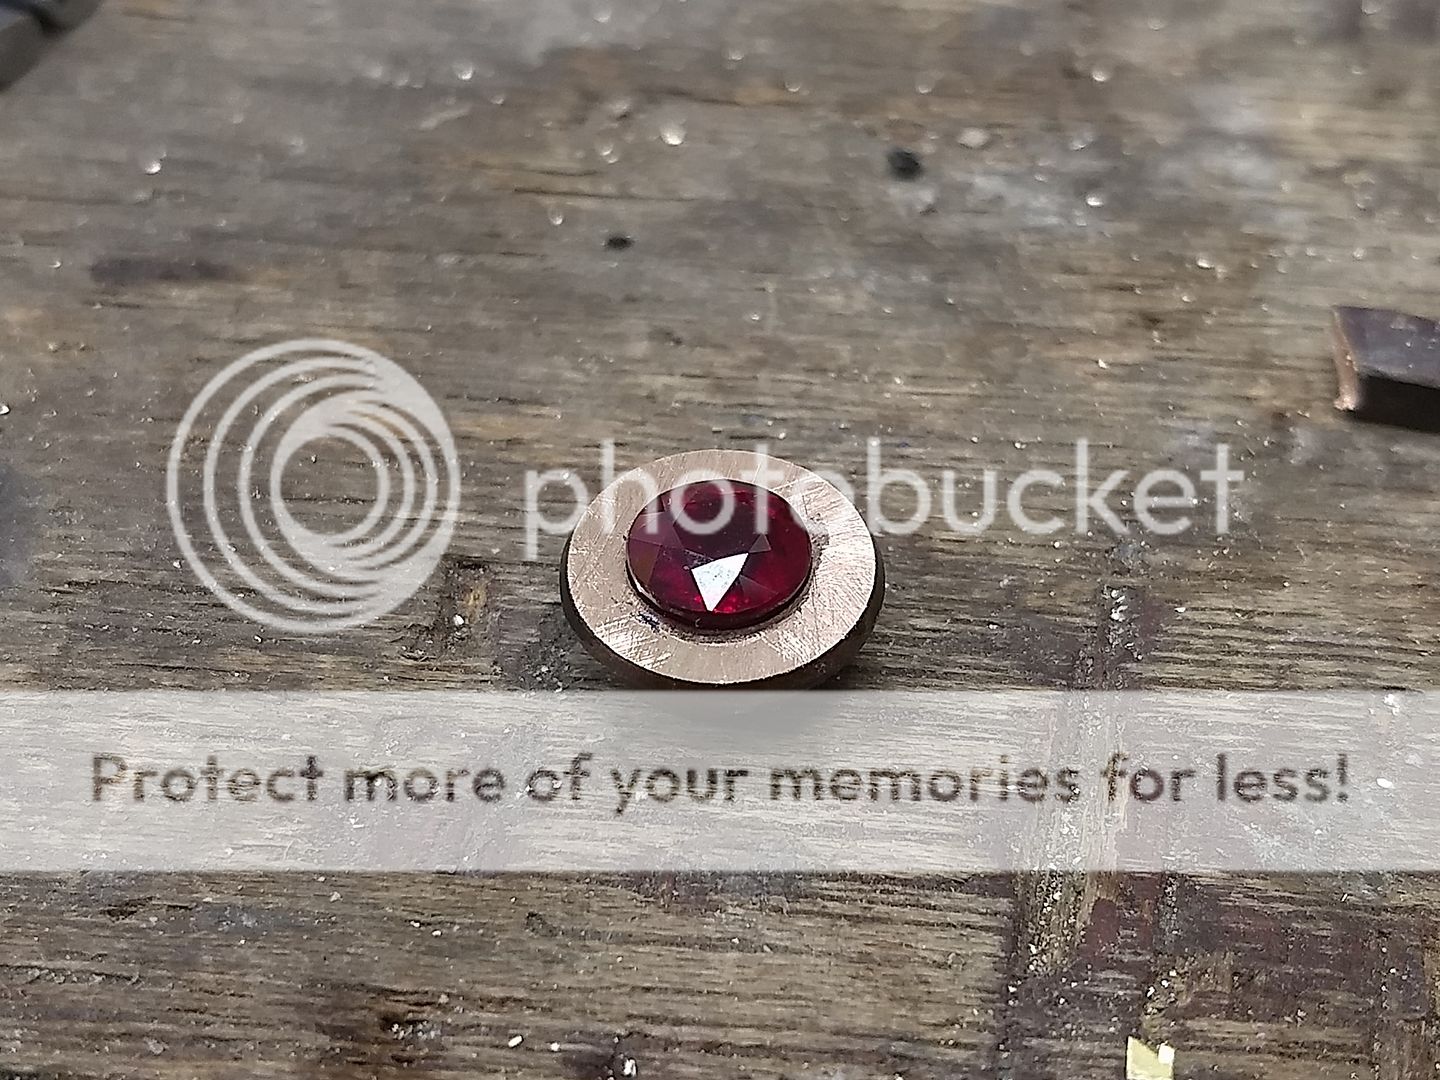
Test fit. You can see the colour change in the metal now it's polished too:

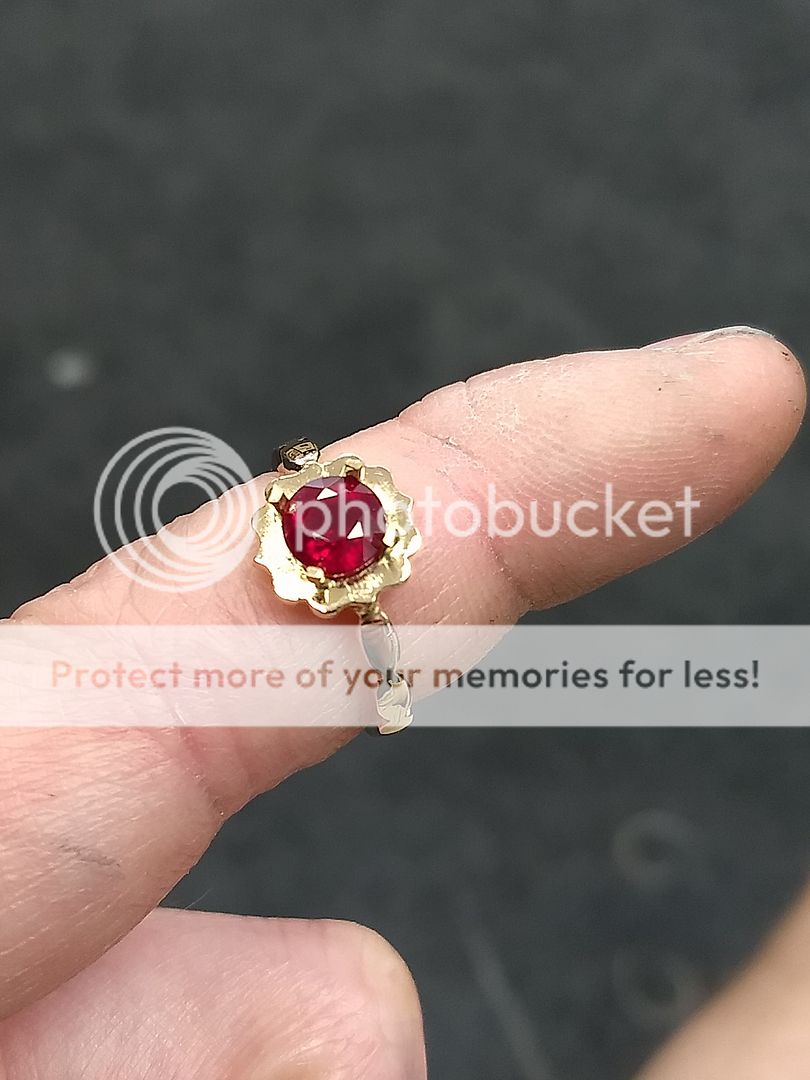
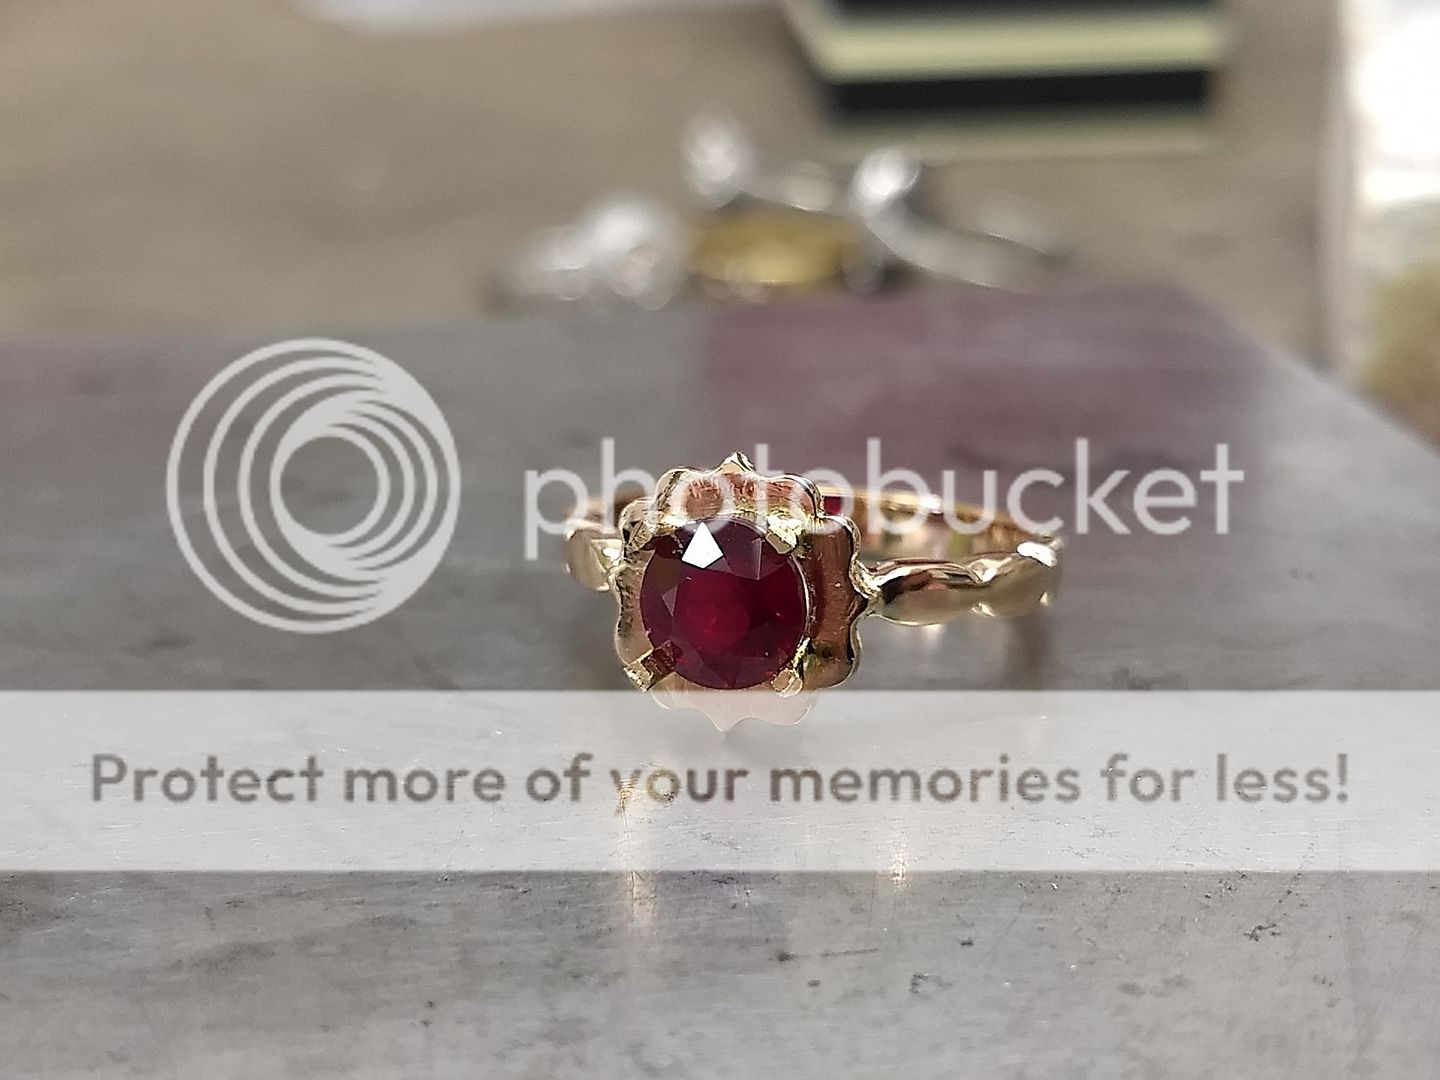
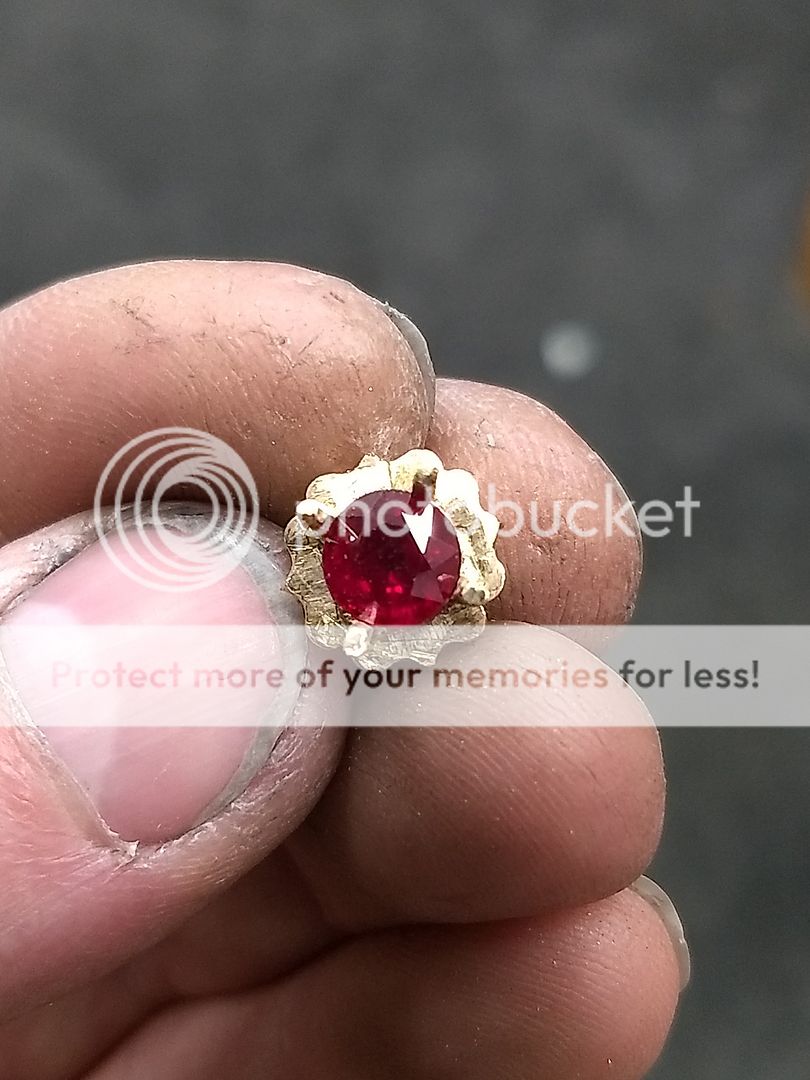
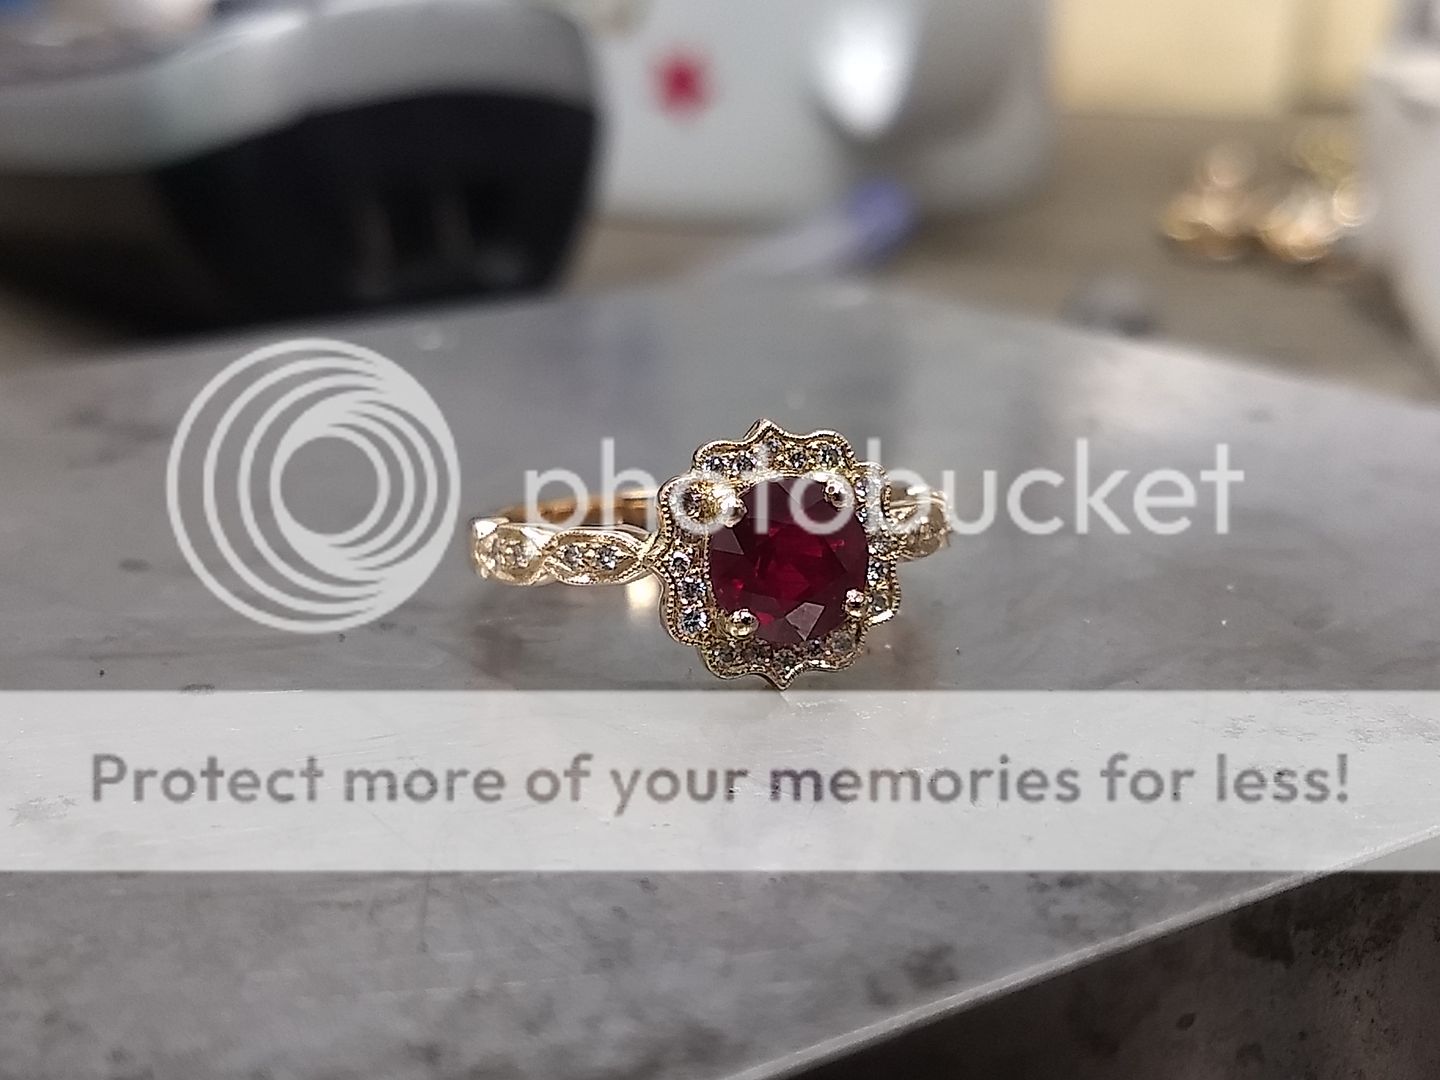
The ring then needs to go for hallmarking. This takes a couple of weeks but happily it passed and we could get on with the stone setting and finishing. Here's the finished product:
There was a not so happy end to this story however........
The customer collected her item last week, overjoyed at the prospect of wearing her dream engagement ring, designed and made for her in traditional materials. Sadly, less than 24hrs after putting it on it became apparent that she has an allergy to gold or copper (gives rose gold its colour). She'd never worn gold before and unfortunately it looks like she'll have to find an alternative in the future. Pure bad luck!!
This is a good one. A Russian couple came to see me a few weeks back and asked if I could make a ring to match the one in the picture, but with a large ruby instead of a diamond. The ring is to be made in 18ct rose gold and with a view that we'd make a wedding band to match at a later date. We got a selection of rubies in for the lady to choose from and in the end settled for a stunning 1.66ct round stone that had pretty much perfect colour and clarity.
The idea:

I had a decent amount of 18ct rose gold left over from previous projects so set about preparing the metal.


It looks yellow at this point due to the surface oxidation of the gold:

Making the head is the first step and because of the design it was important that I made it as strong as possible while keeping the delicate look. The main part of the head is constructed from a compressed ring of gold, soldered with a high temperature 18ct solder.


Once compressed to the correct size the shape it's then cut / filed:


The centre stone needs to be securely held so I fit 4 claws in 18ct rose to match. They are drilled into the head and then the head bored out to suit:


And the underside tidied up:


With the head getting there the next job is to make the shank. The spare gold is remelted and rolled to suit:

And then cut to size and soldered to the head:


This is then filed to the correct profile and shape:


The ring blank is then cleaned up and readied for polishing:


Test fit. You can see the colour change in the metal now it's polished too:


The ring then needs to go for hallmarking. This takes a couple of weeks but happily it passed and we could get on with the stone setting and finishing. Here's the finished product:


There was a not so happy end to this story however........
The customer collected her item last week, overjoyed at the prospect of wearing her dream engagement ring, designed and made for her in traditional materials. Sadly, less than 24hrs after putting it on it became apparent that she has an allergy to gold or copper (gives rose gold its colour). She'd never worn gold before and unfortunately it looks like she'll have to find an alternative in the future. Pure bad luck!!
Edited by ecain63 on Thursday 8th August 08:20

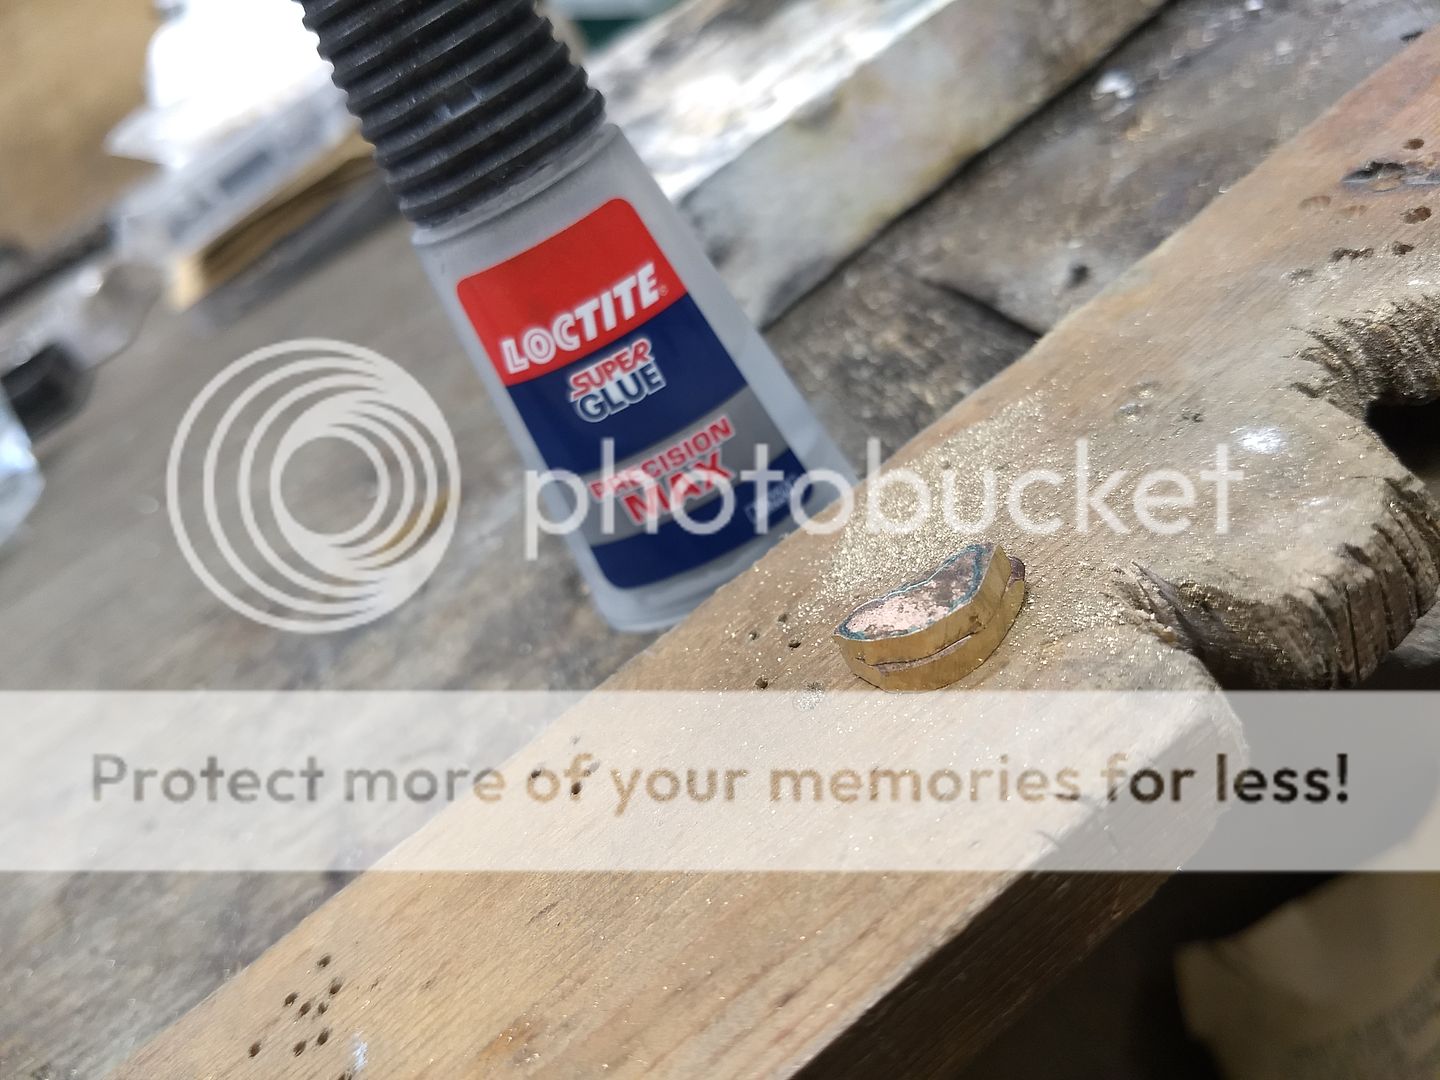
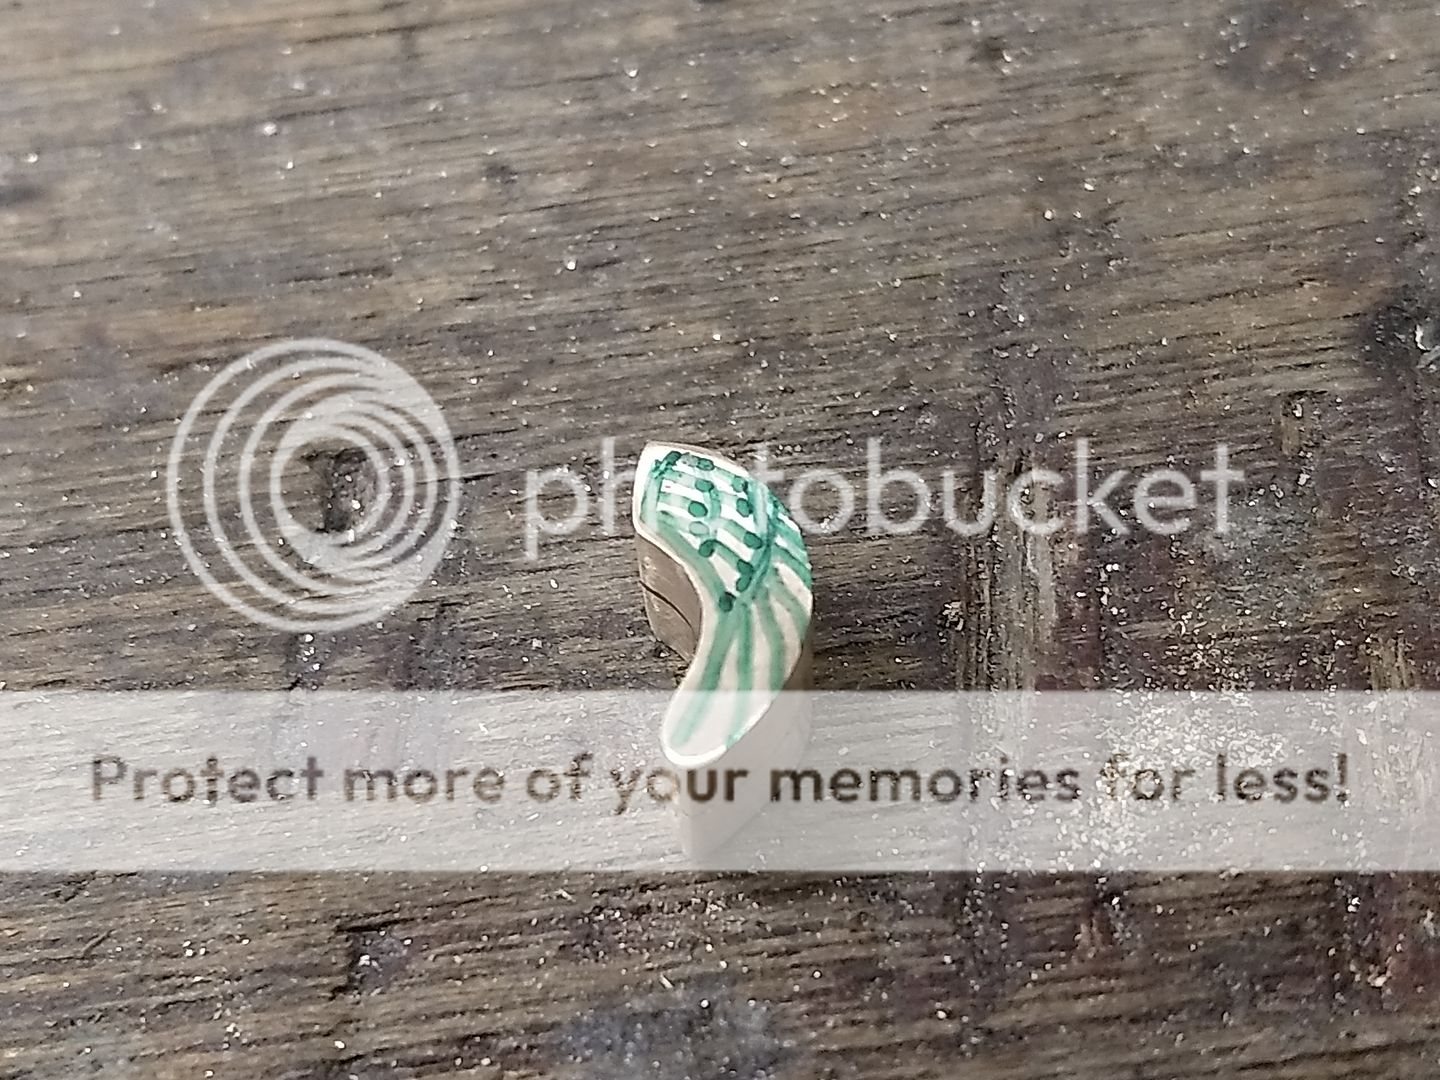
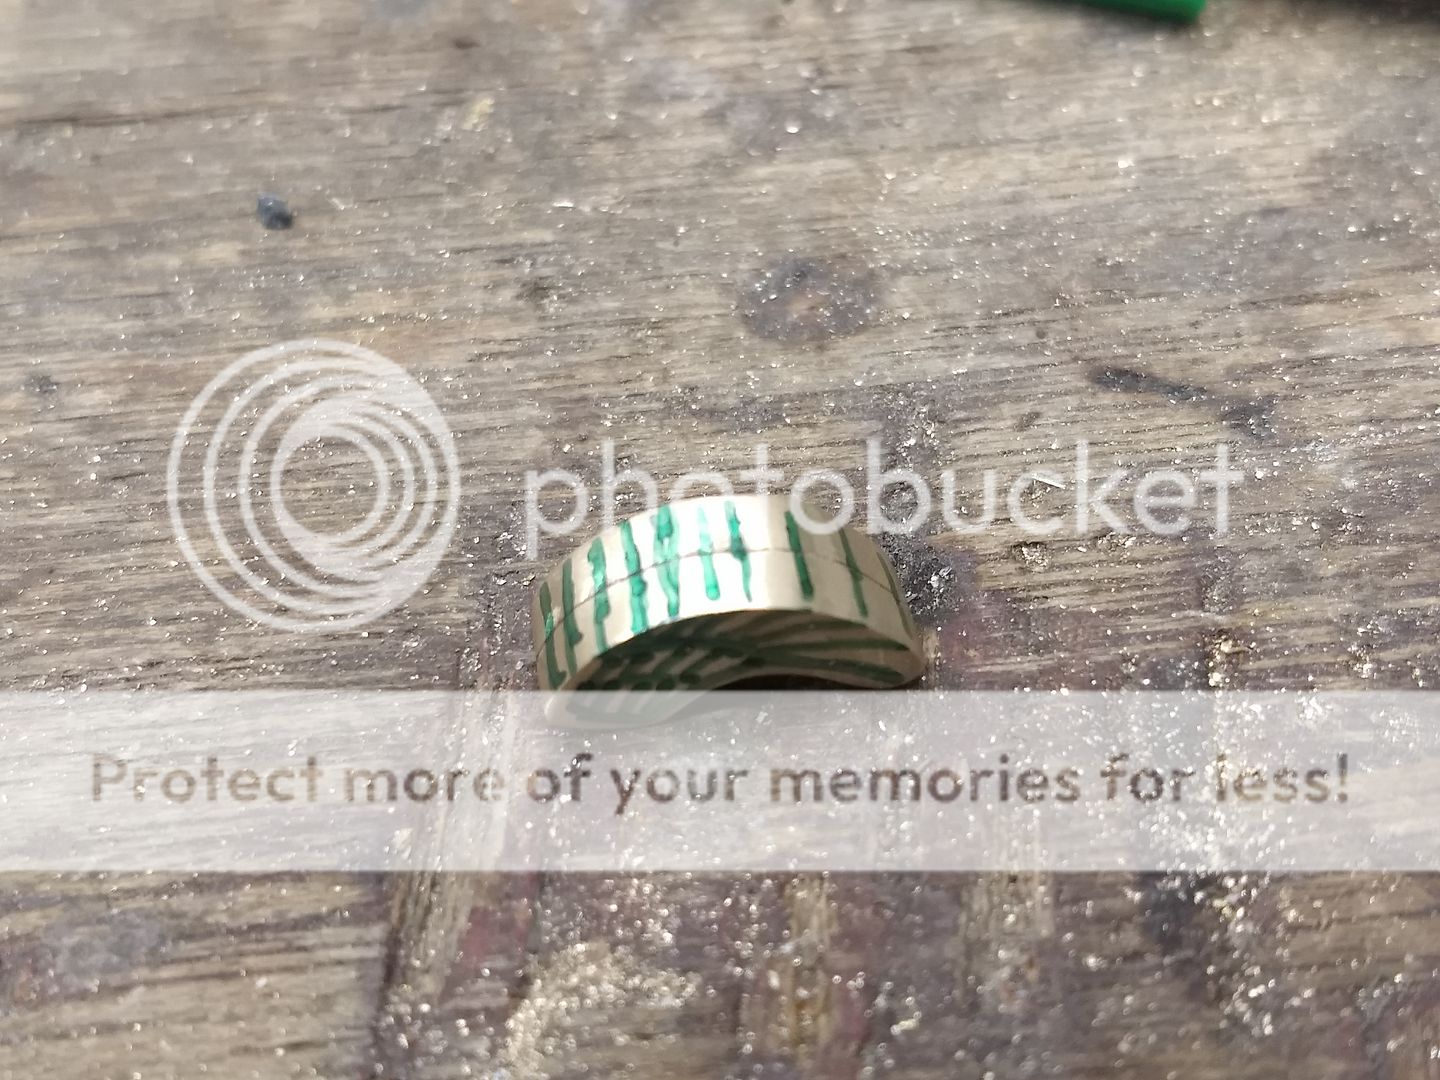
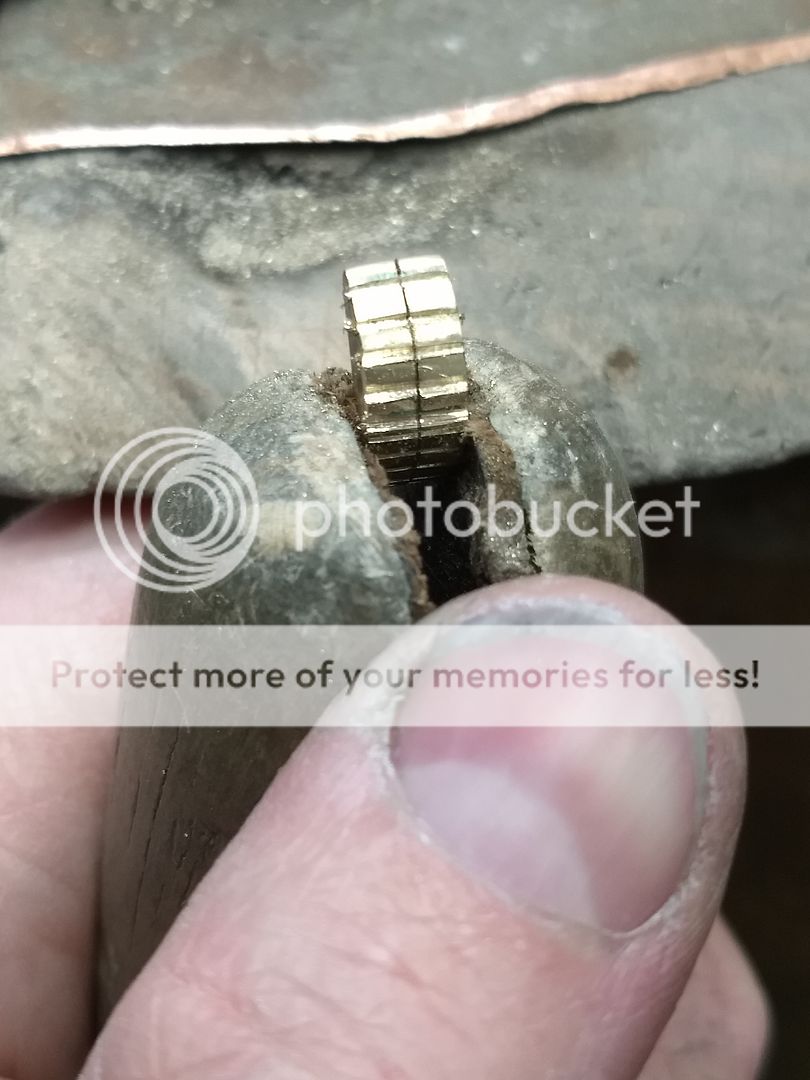
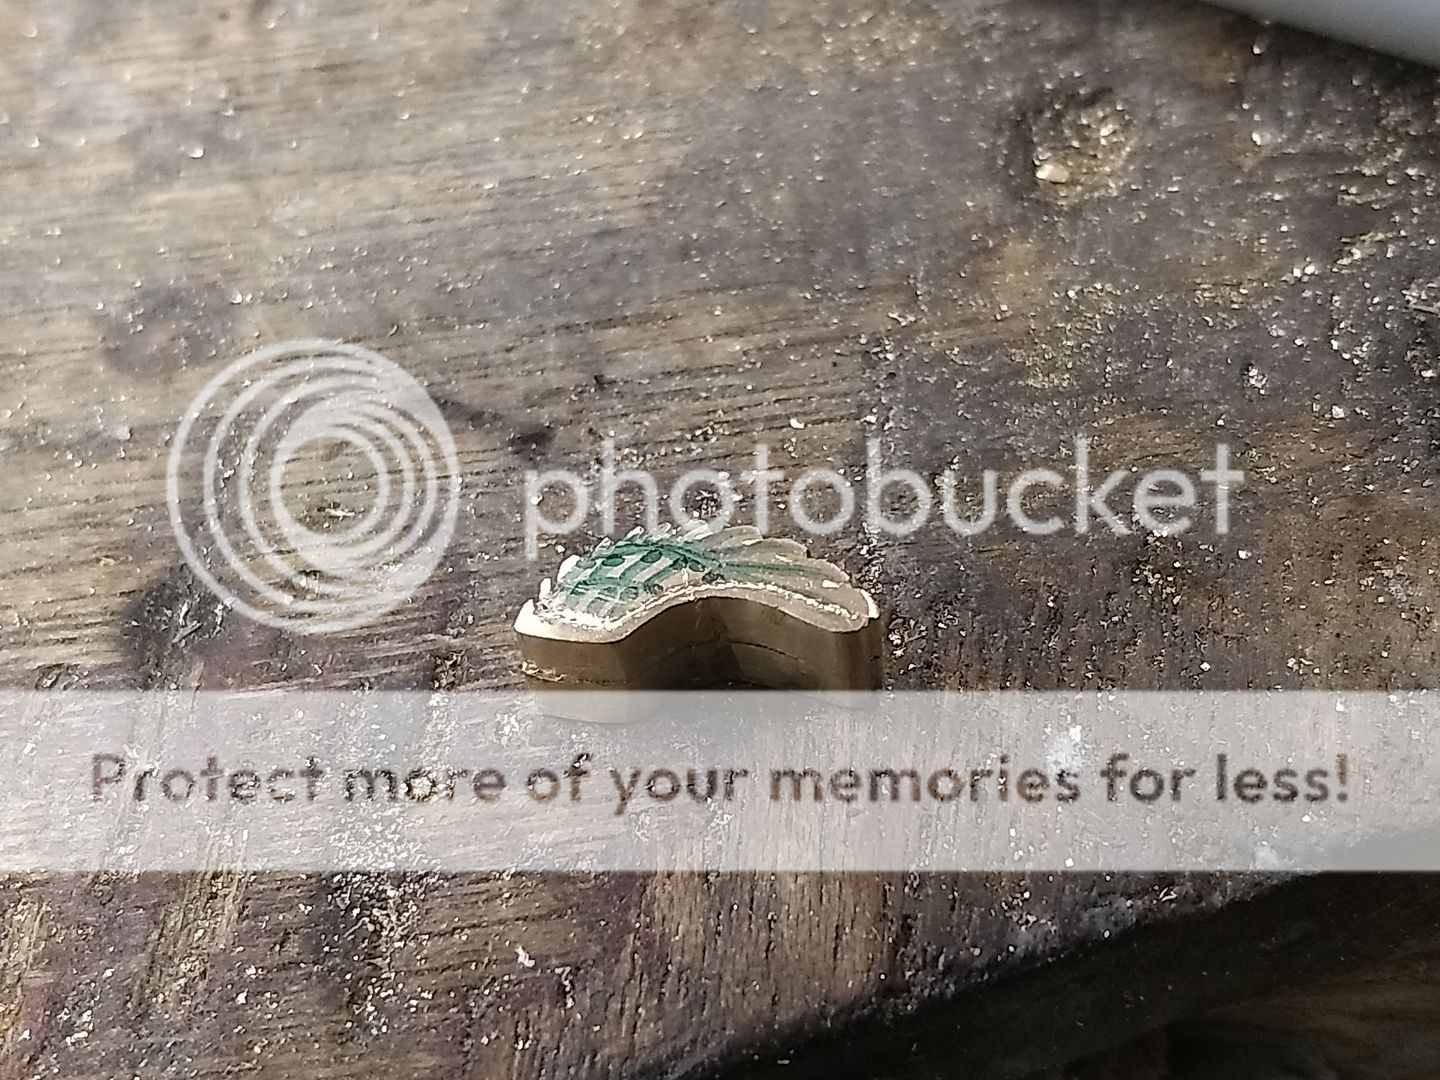
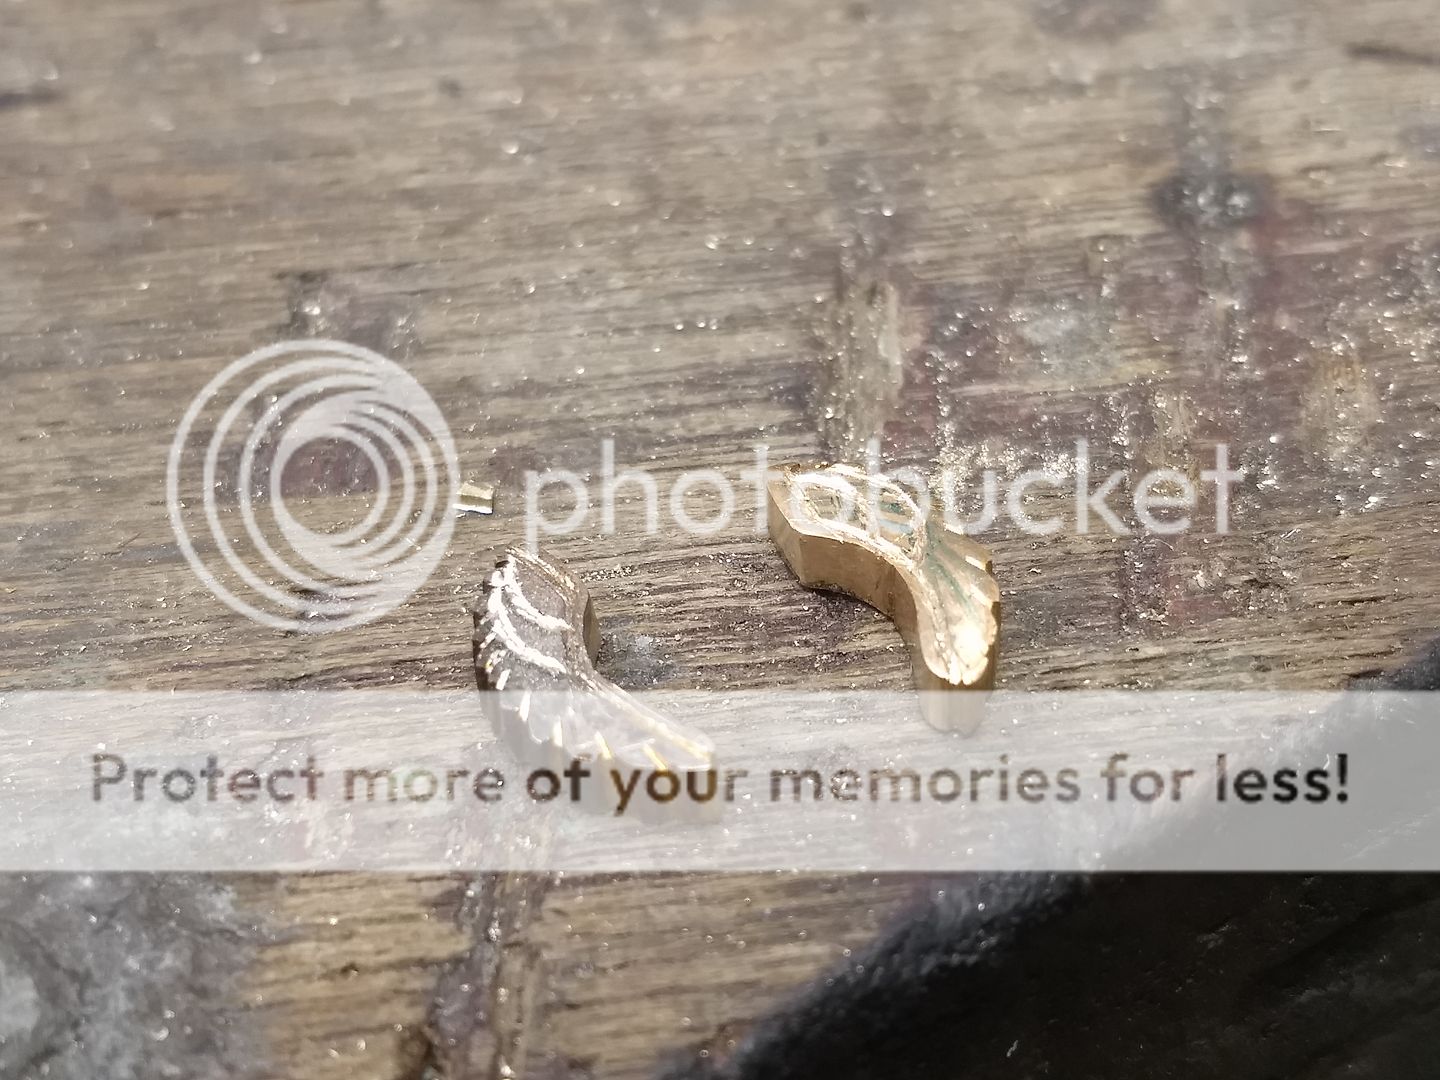
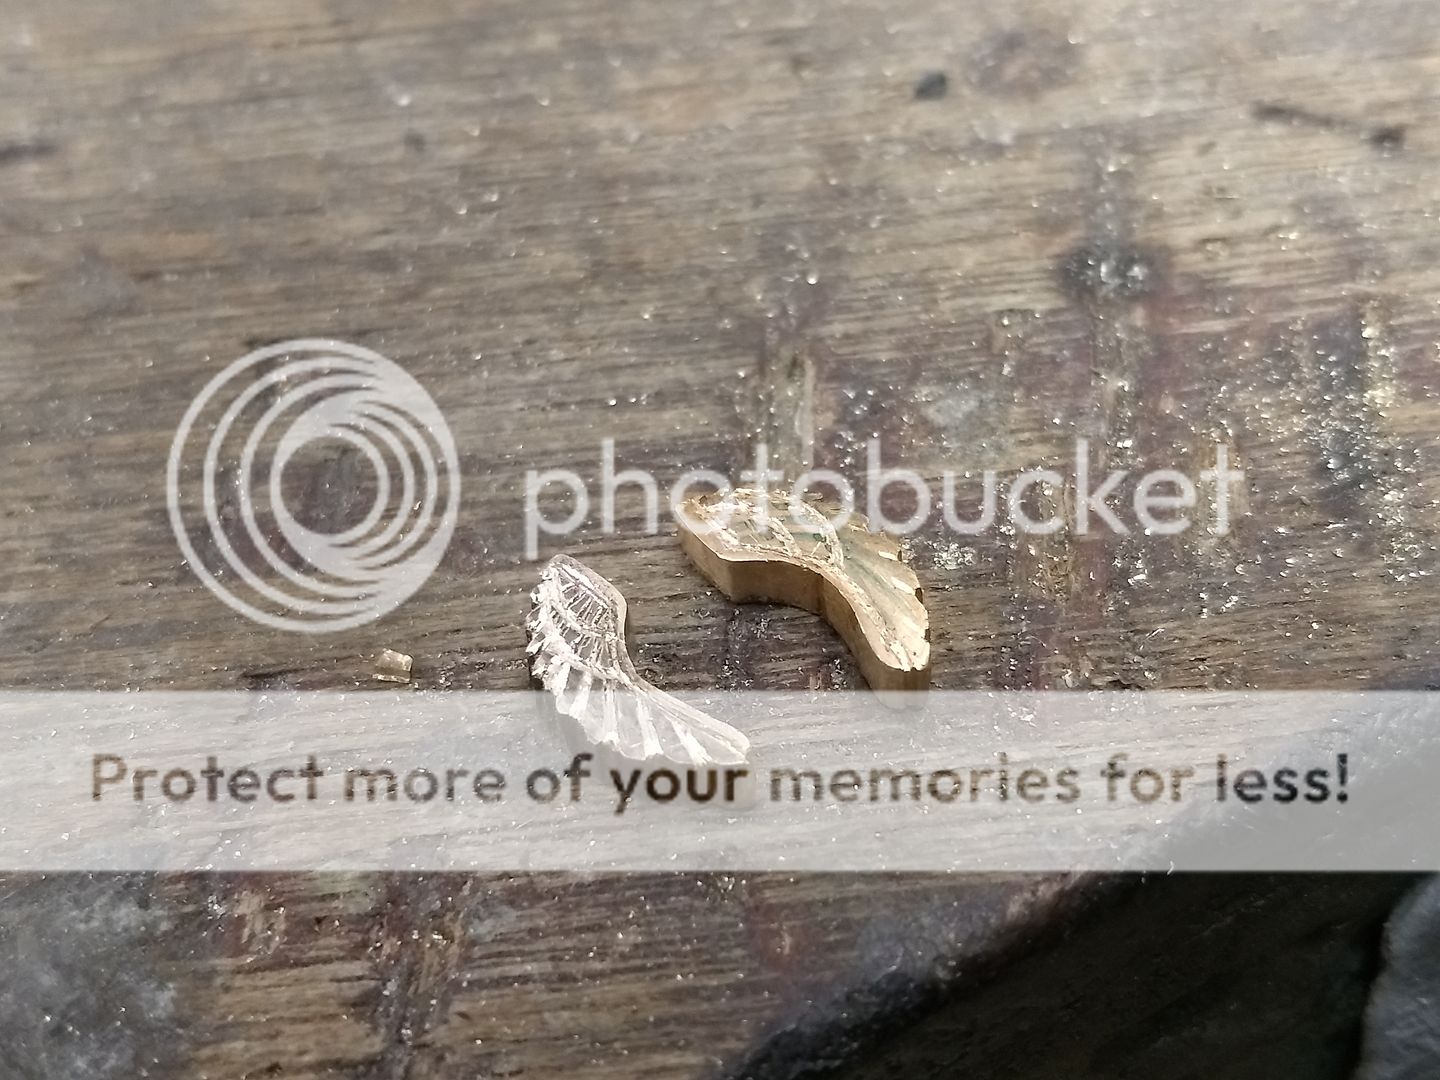
Morning all. This wasn't a hugely difficult job, but a nice one nonetheless. Made using the customers own gold. 9ct yellow gold angel wings.
Take one lump of 9ct yellow gold and roll it to make a plate:
From that I cut 2 x rough shapes:
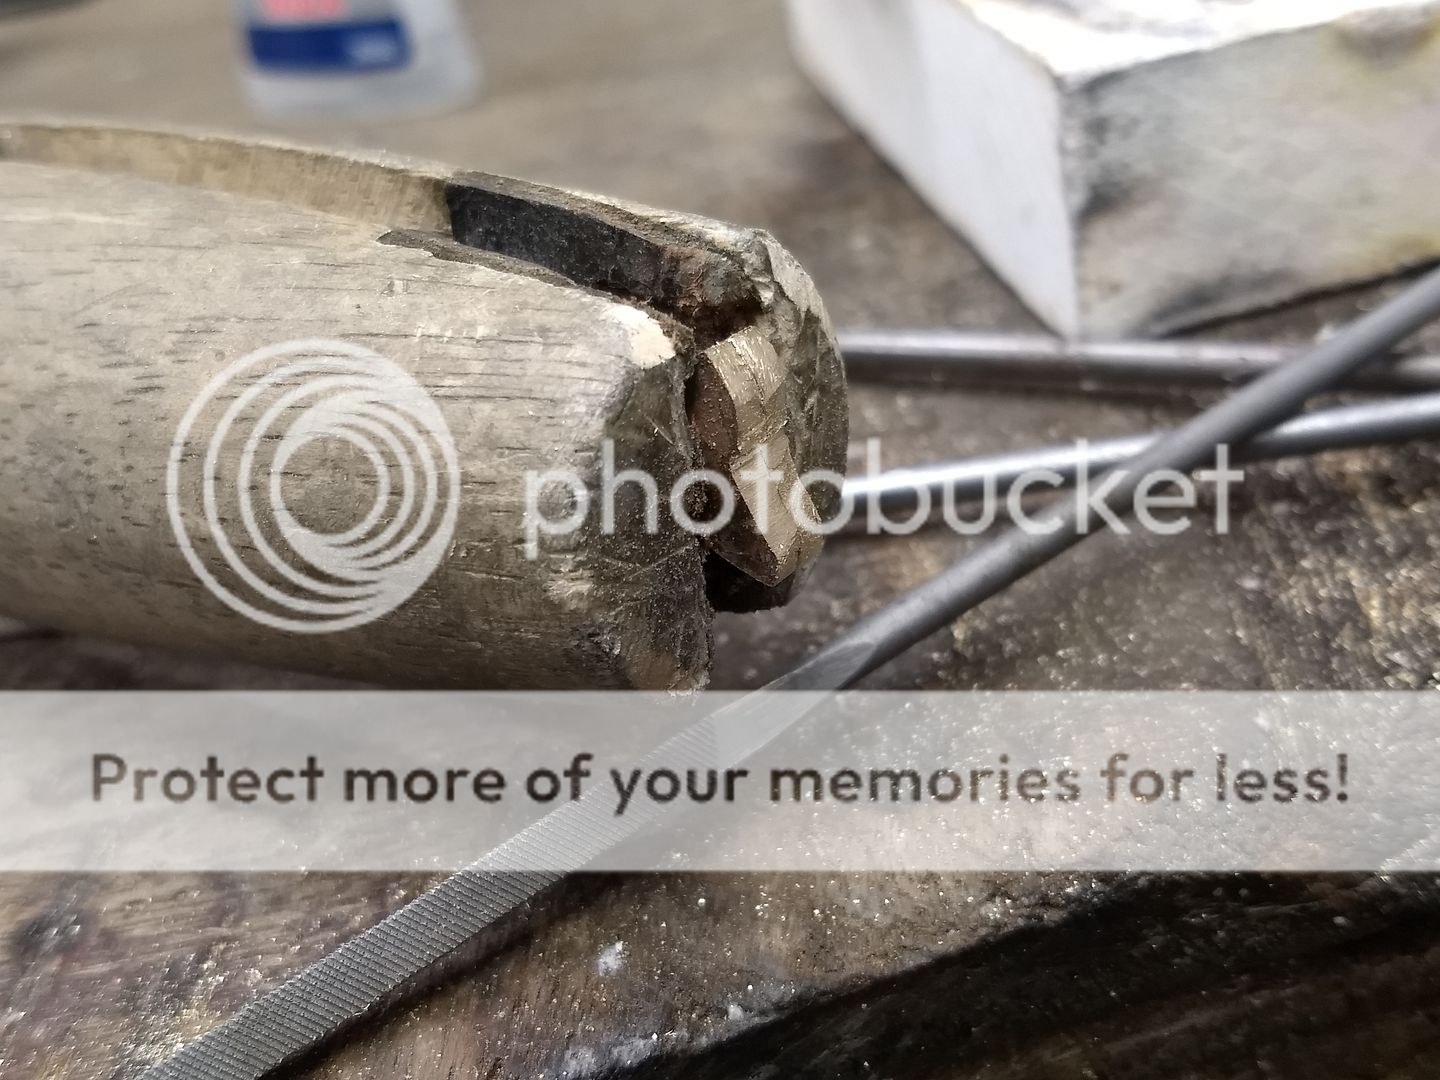
Application of hi-tech bonding substance:
The two plates are clamped in a ring clamp and using fine hand files a more easily recognised shape is produced:
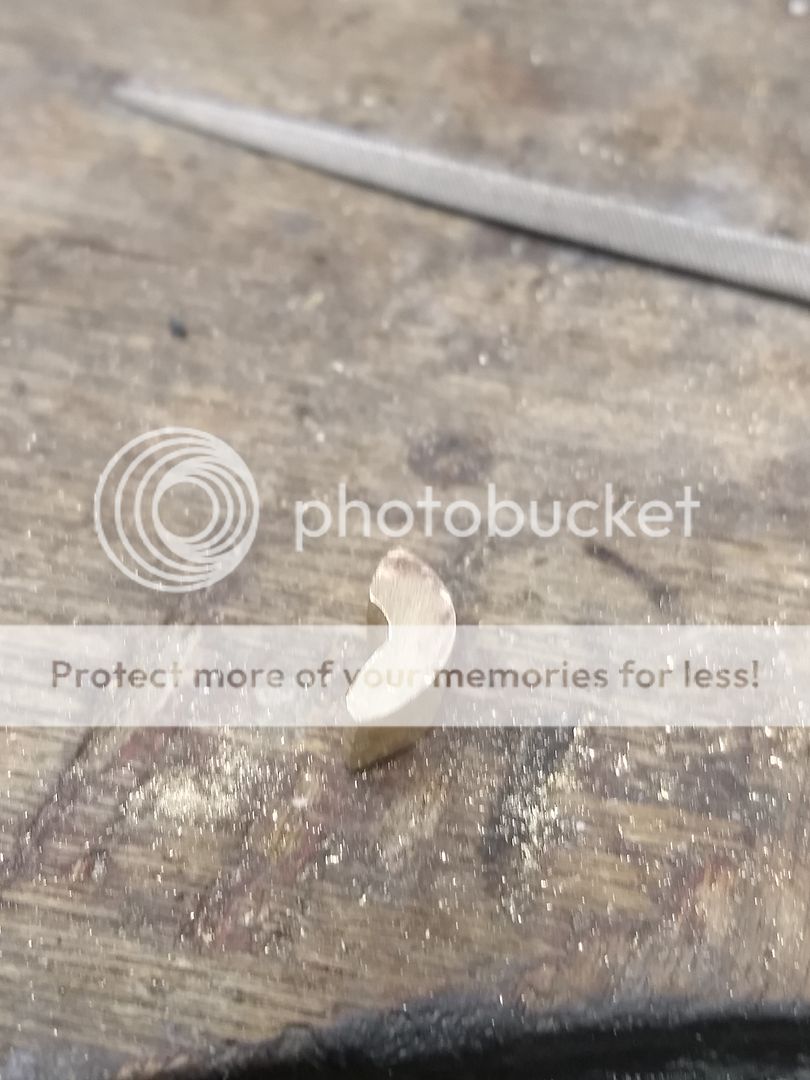
Another hi-tech item. Green permanent marker to mark out the rough placement of the details:
Ring clamp back in play and some more filing takes place:
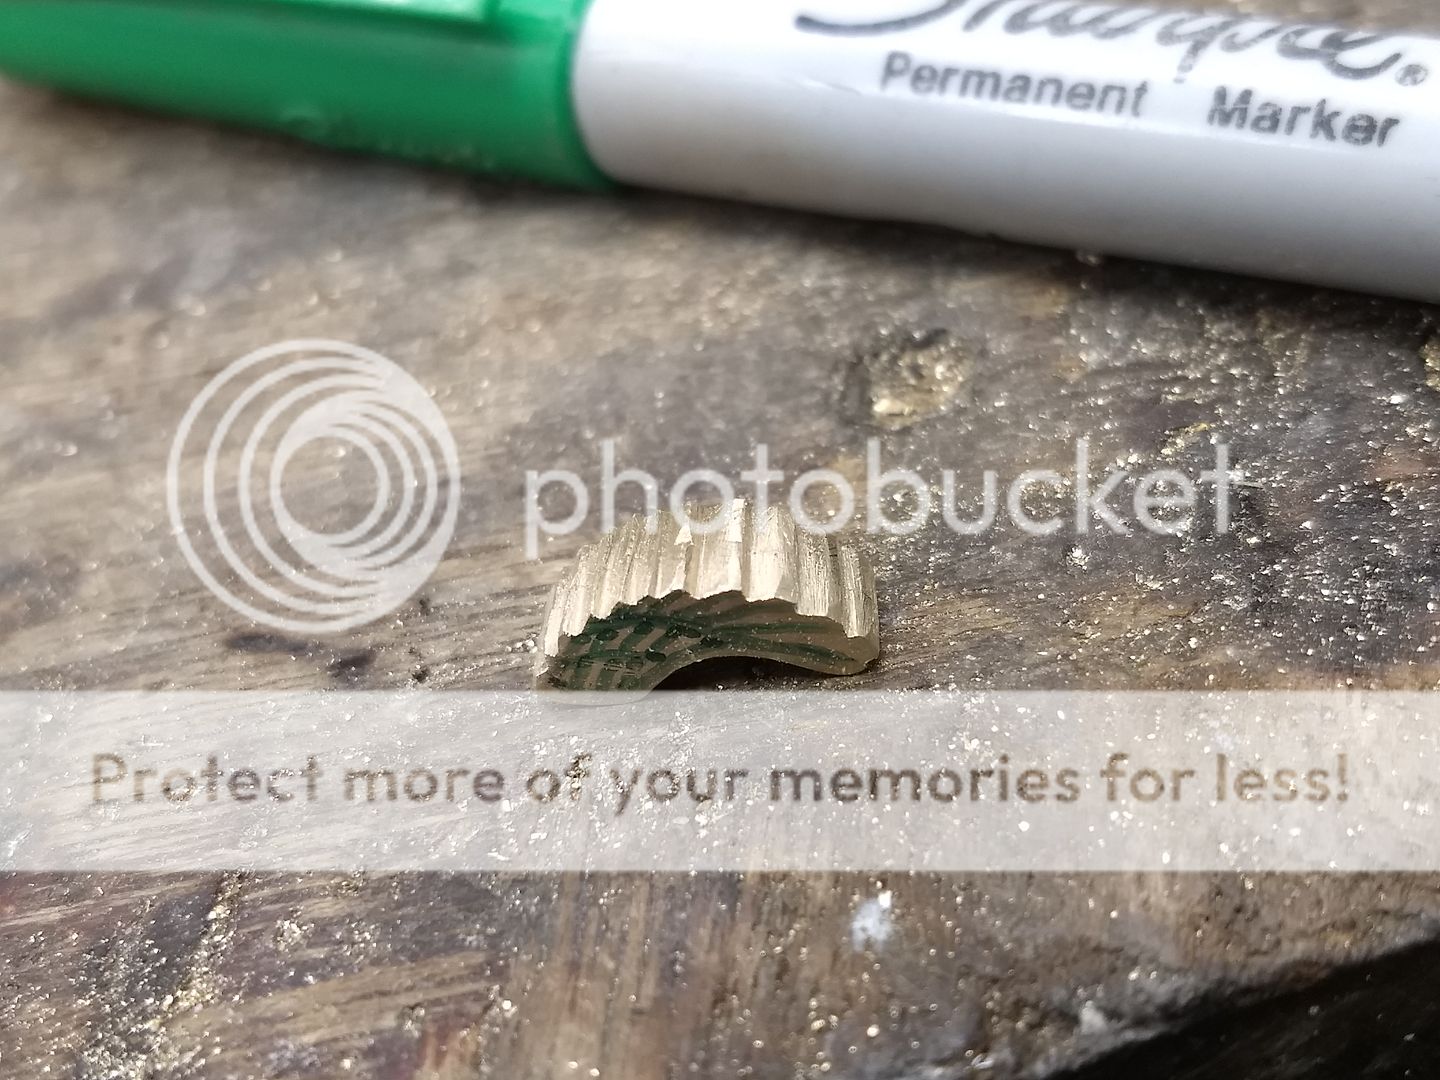
The surface details now need to be engraved / ground out. I use a saw, drill and scorper to create the effect:
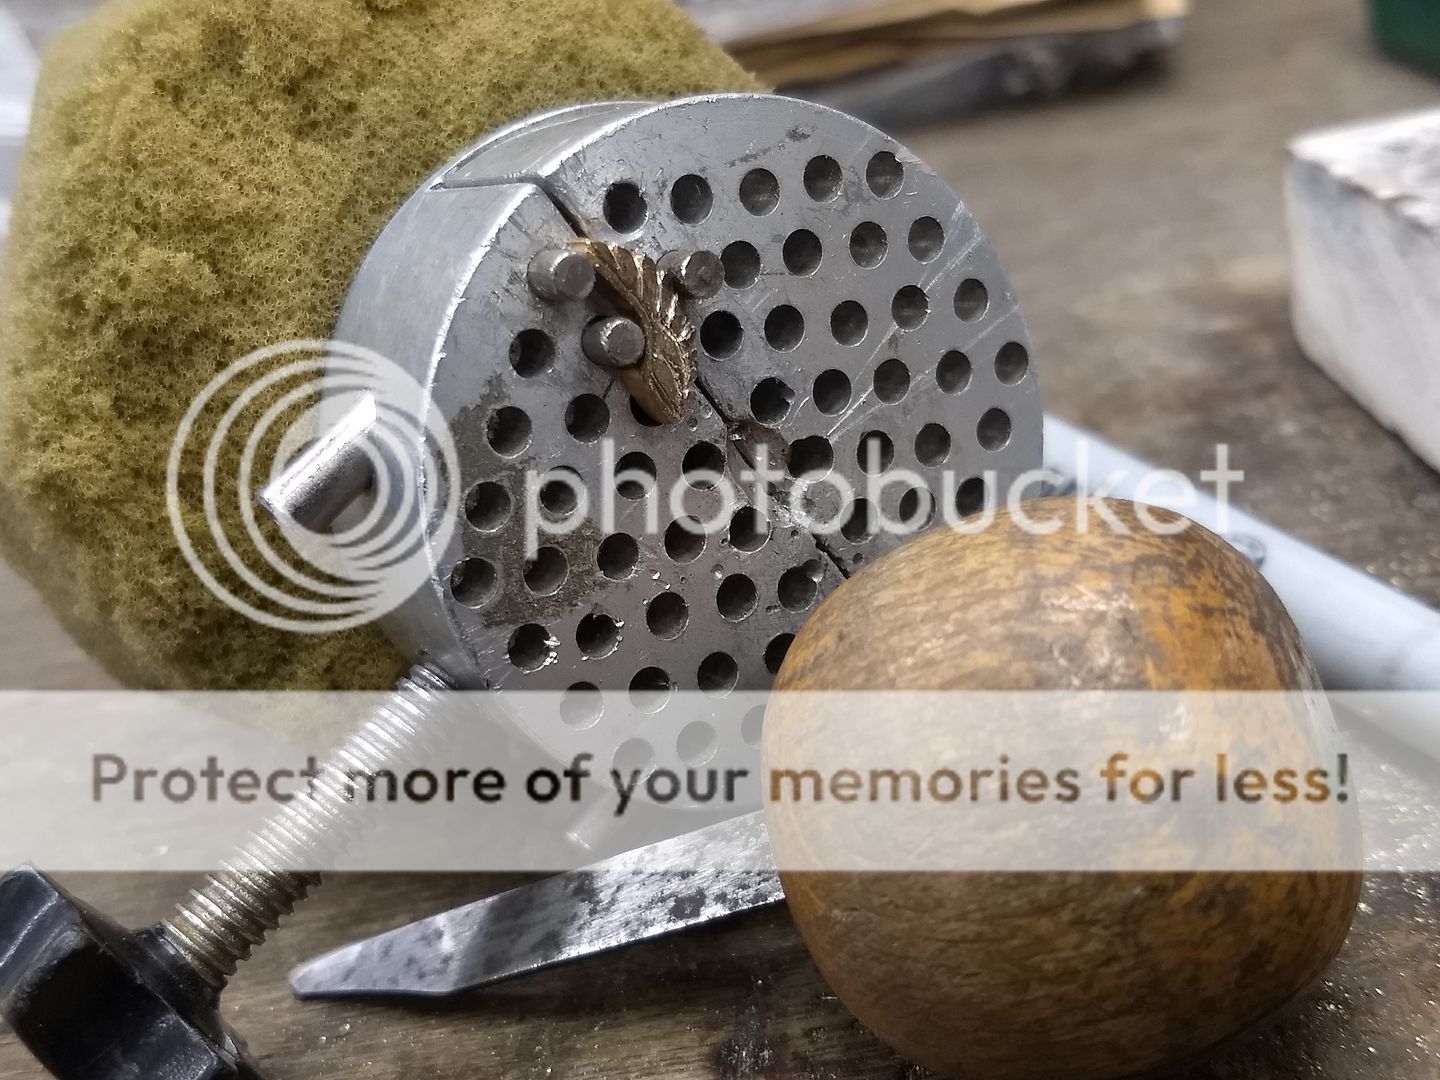
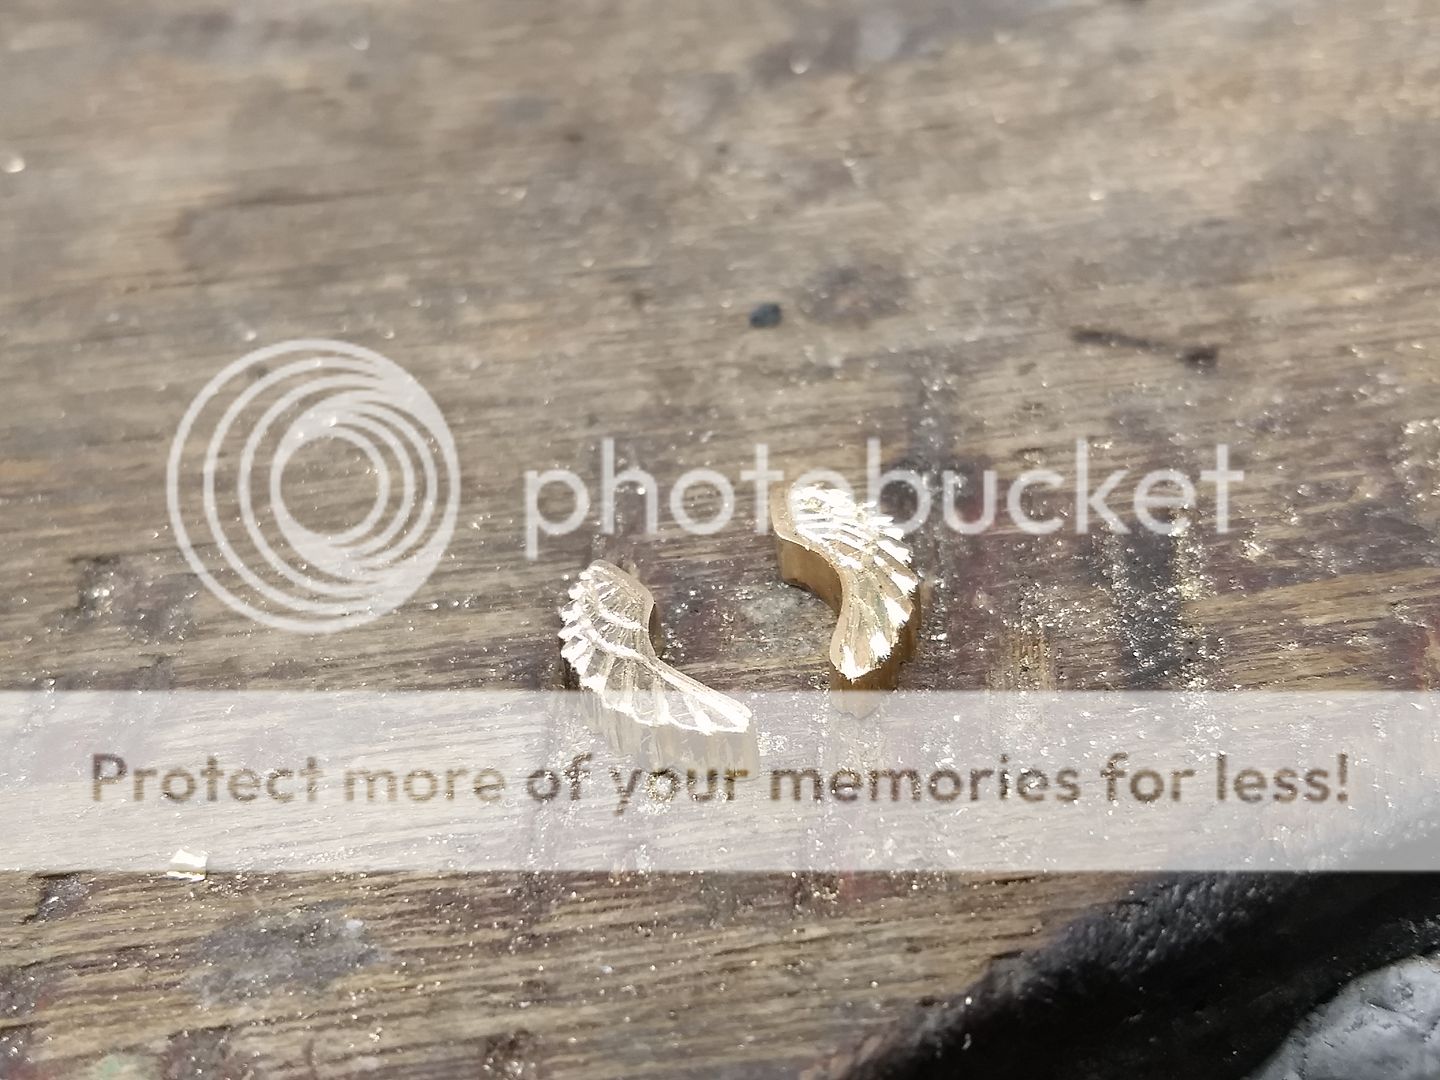
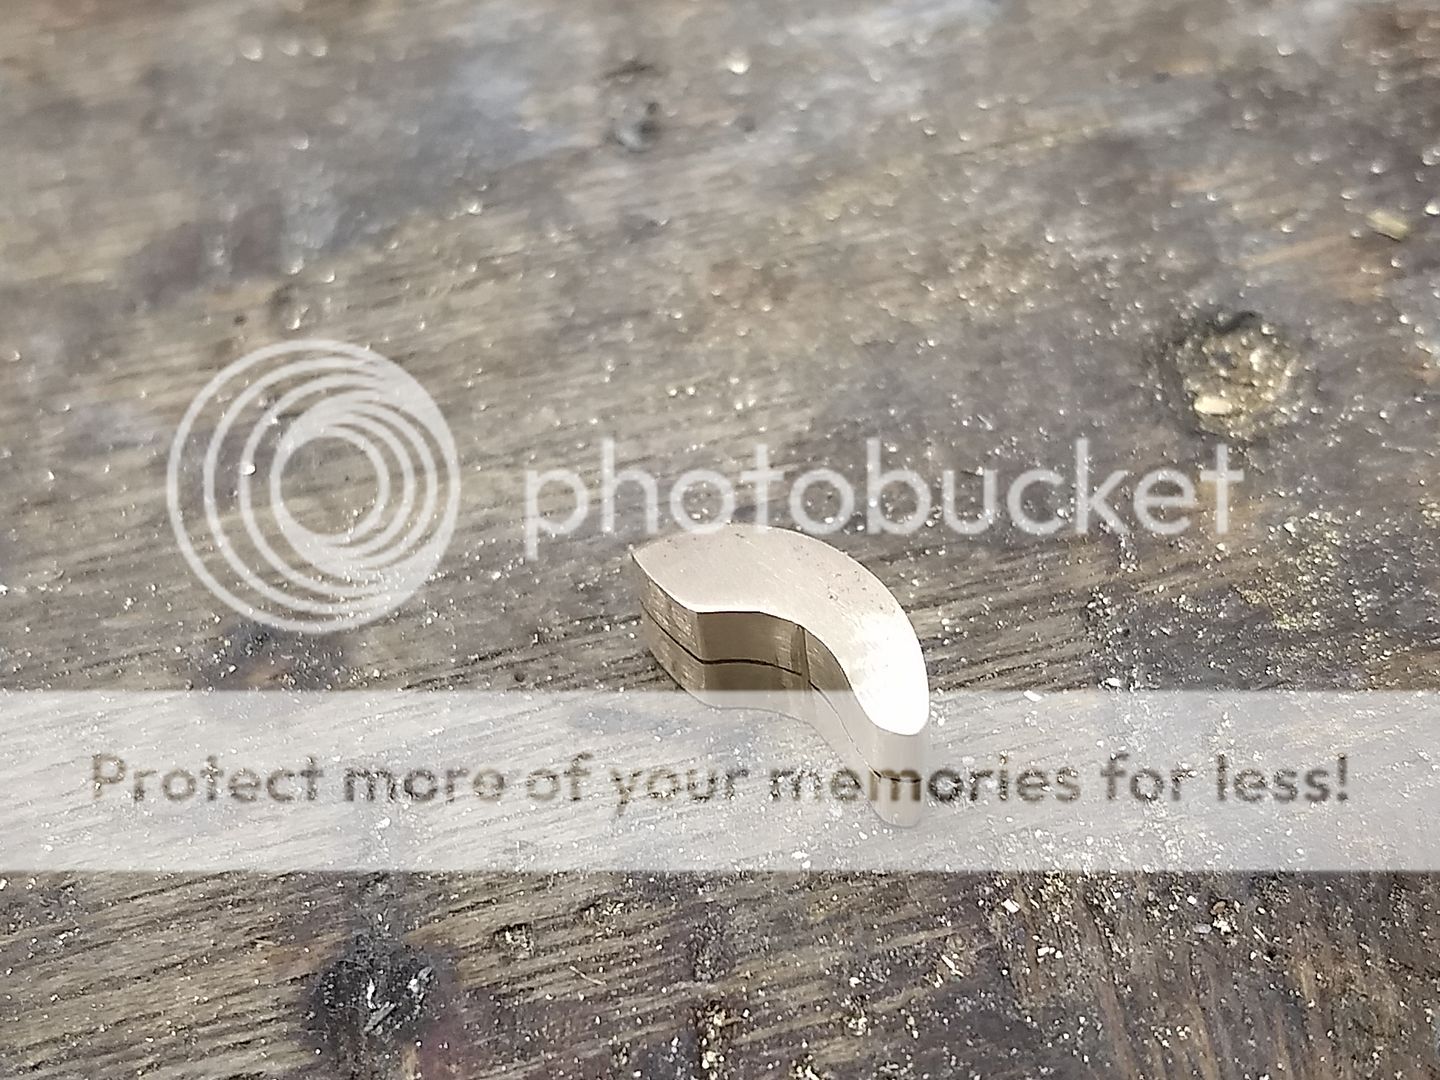
With the details added in rough I move on to turning the items into a pendant. 2 x small jumprings are added with a view that they'll overlap nicely:
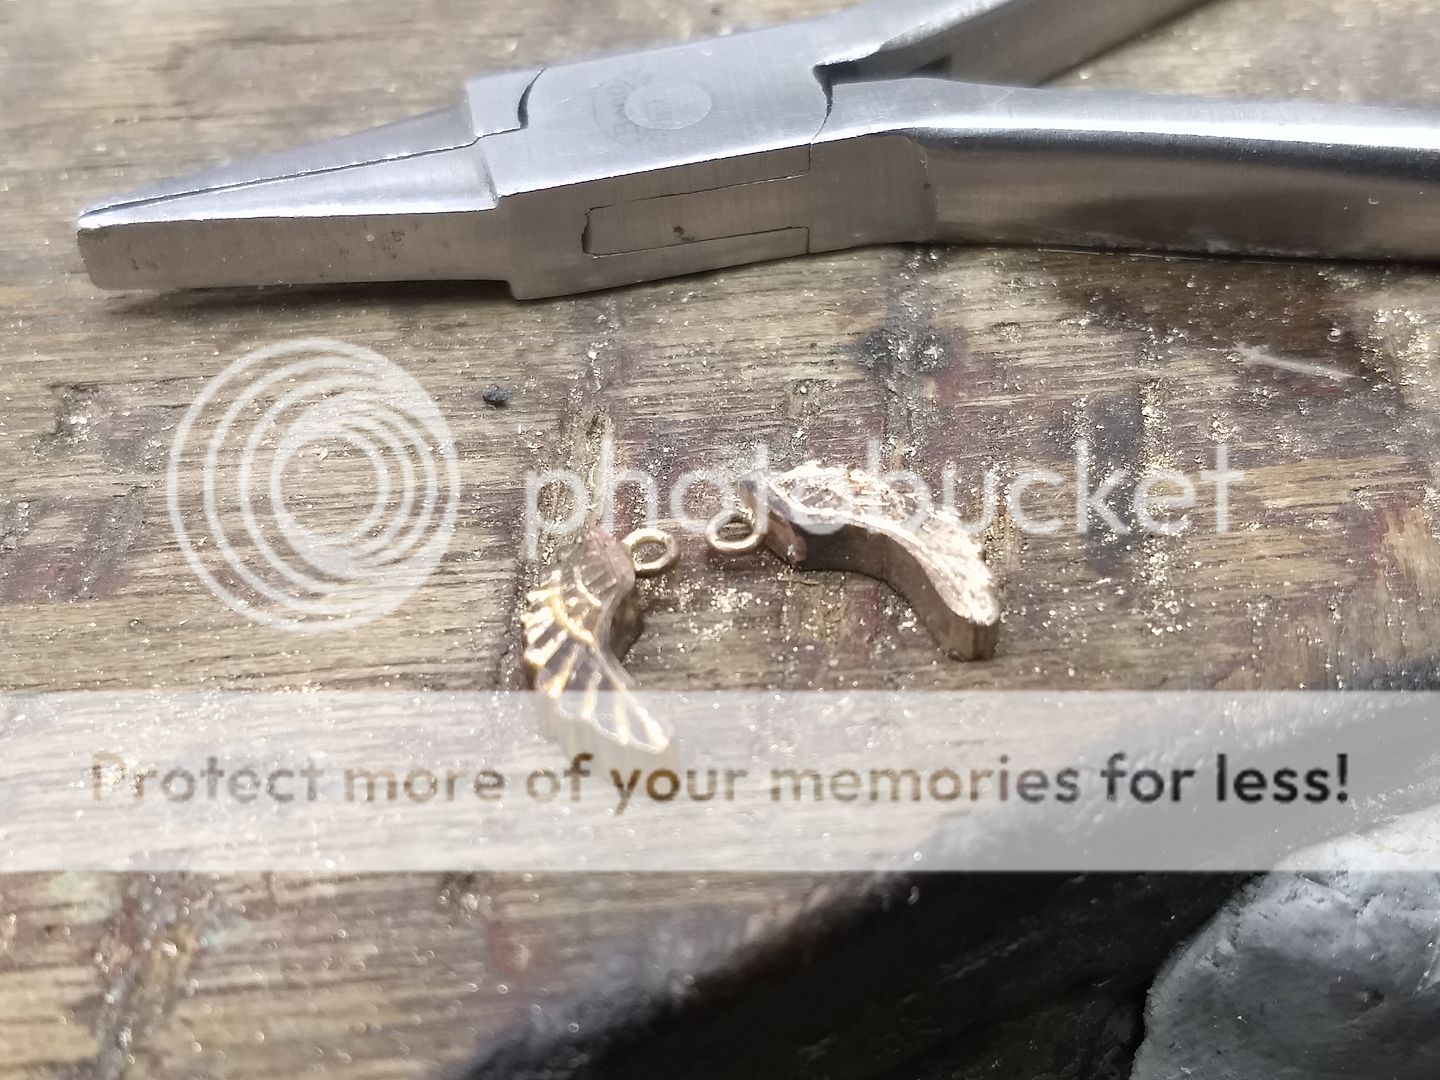

They are then tidied up and the details made more obvious:
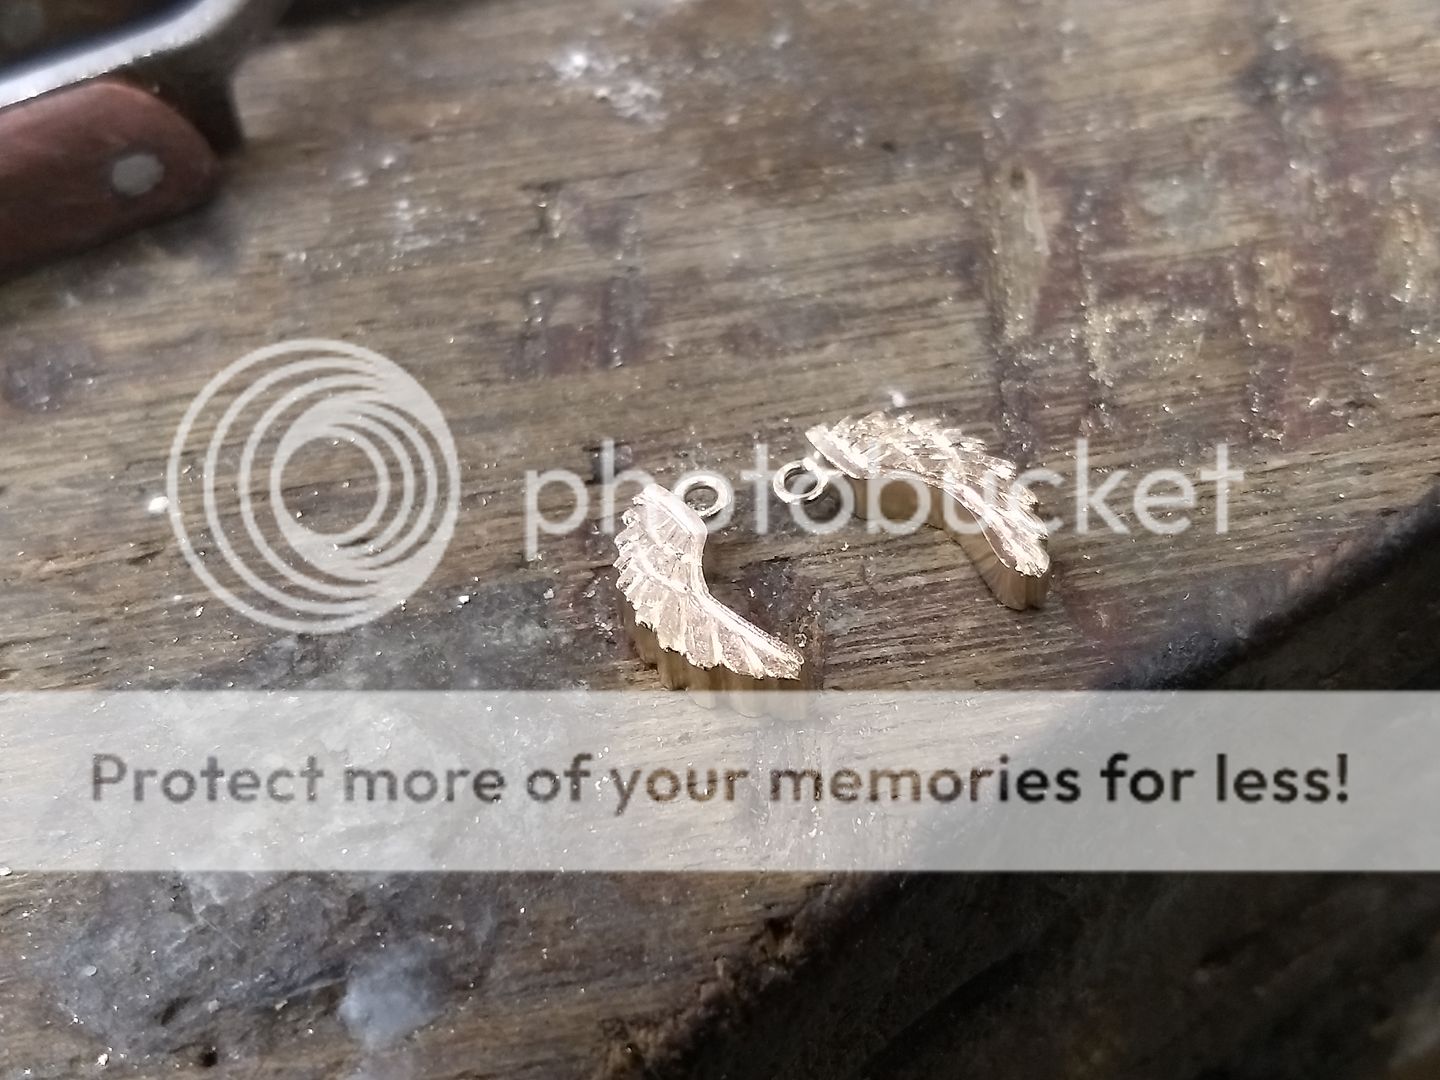
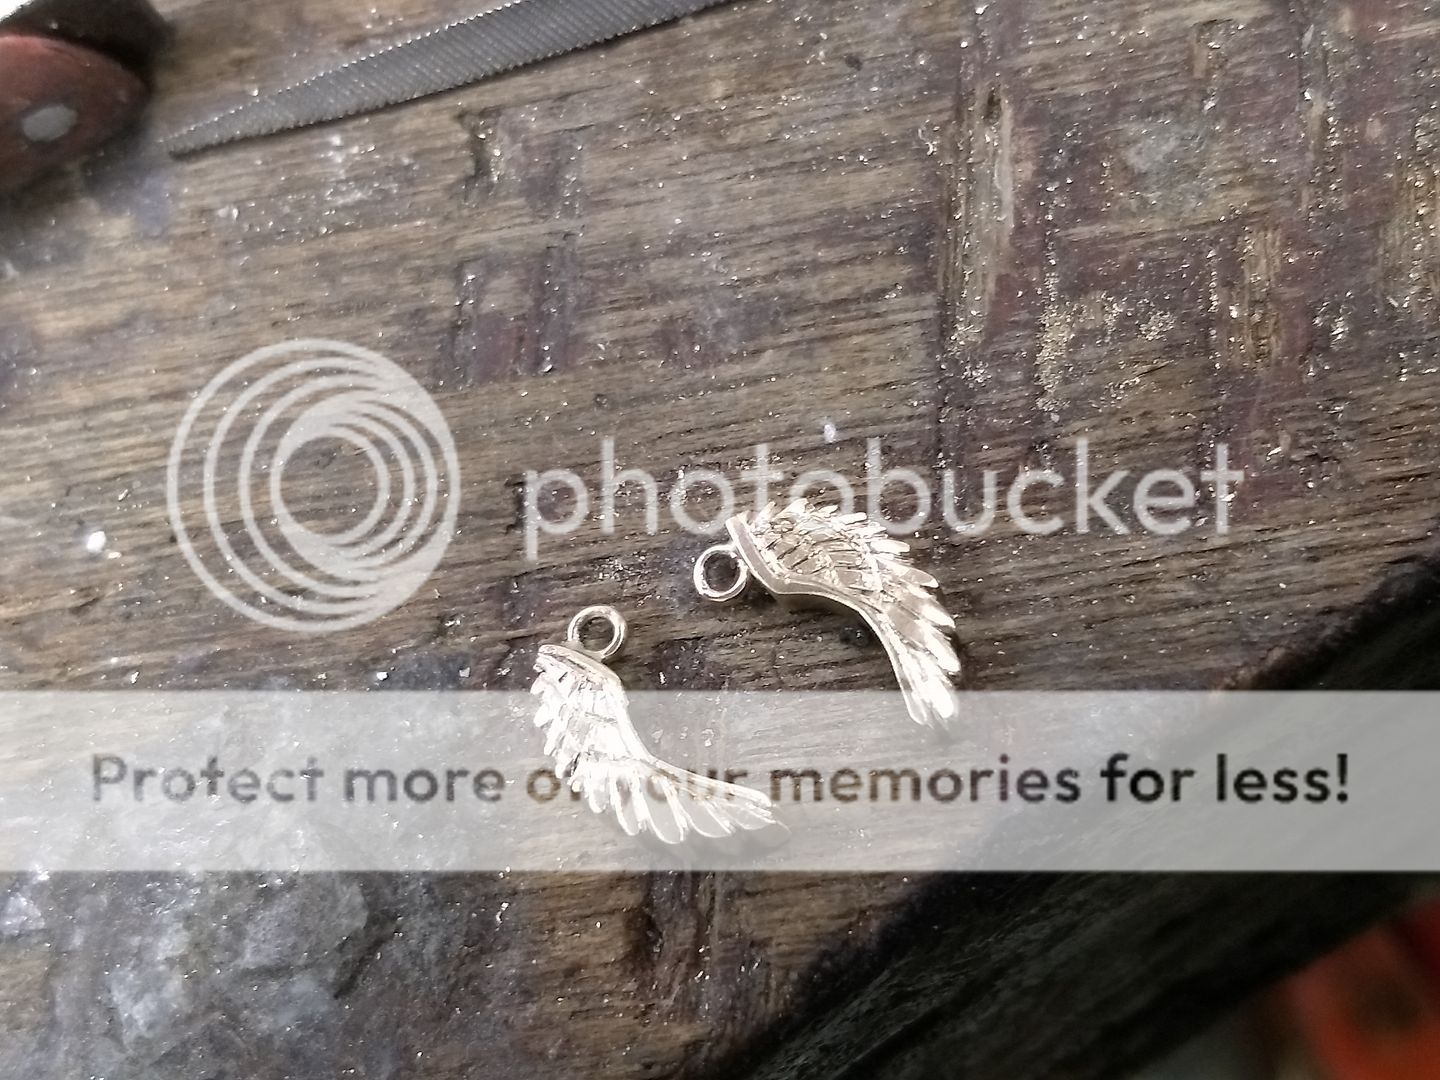
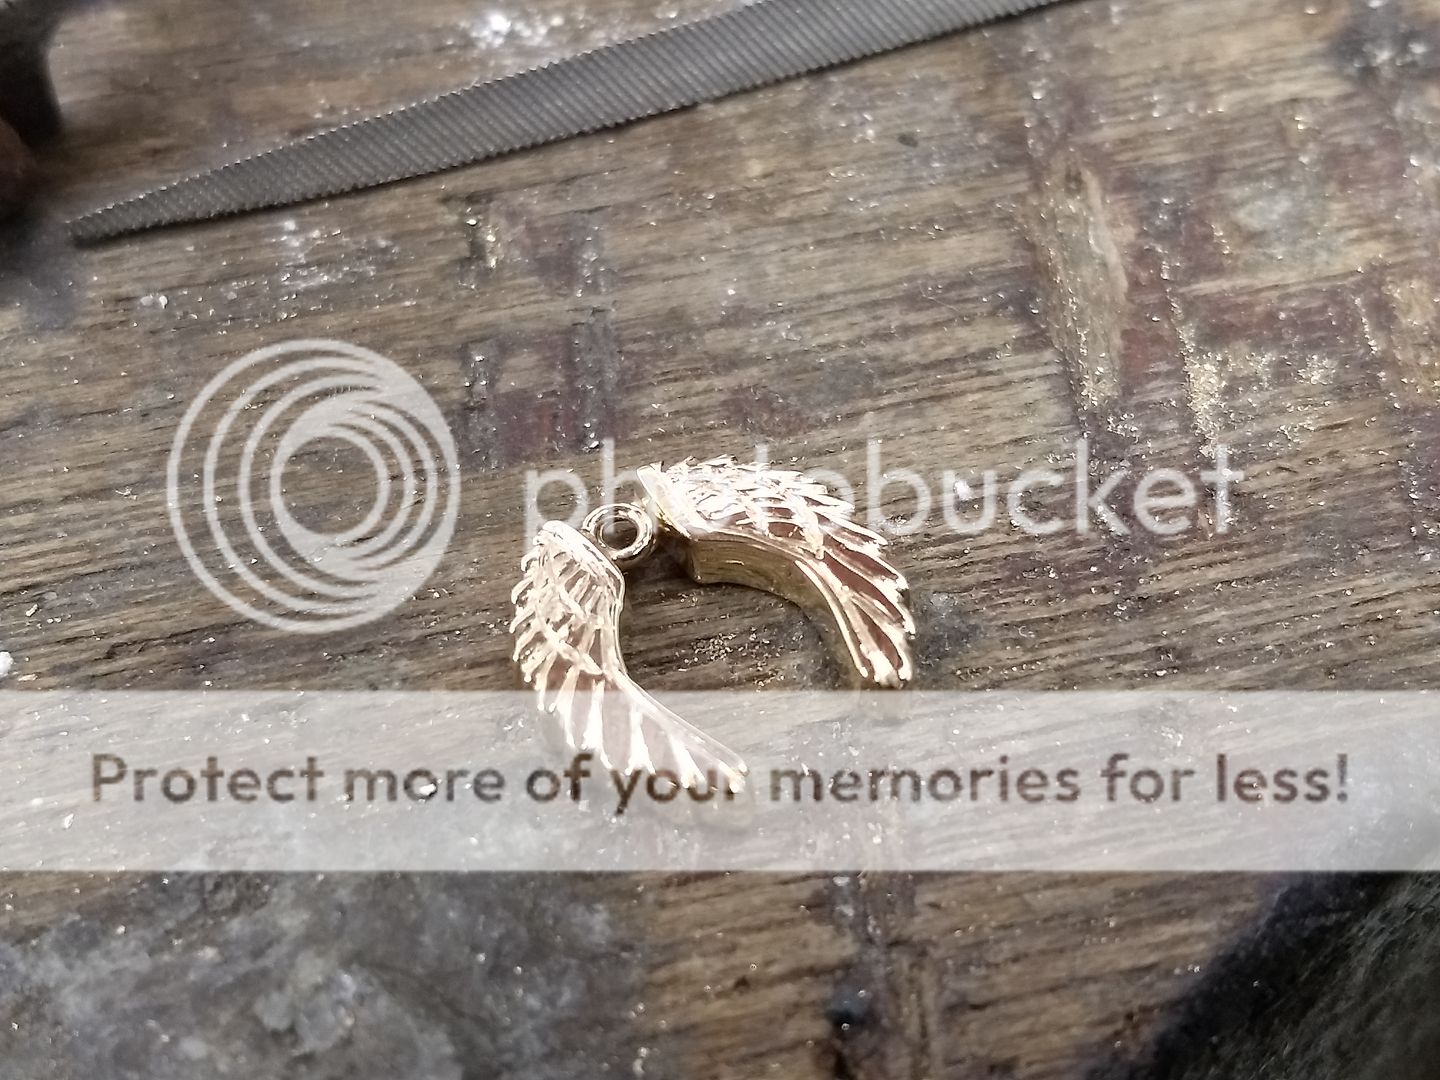
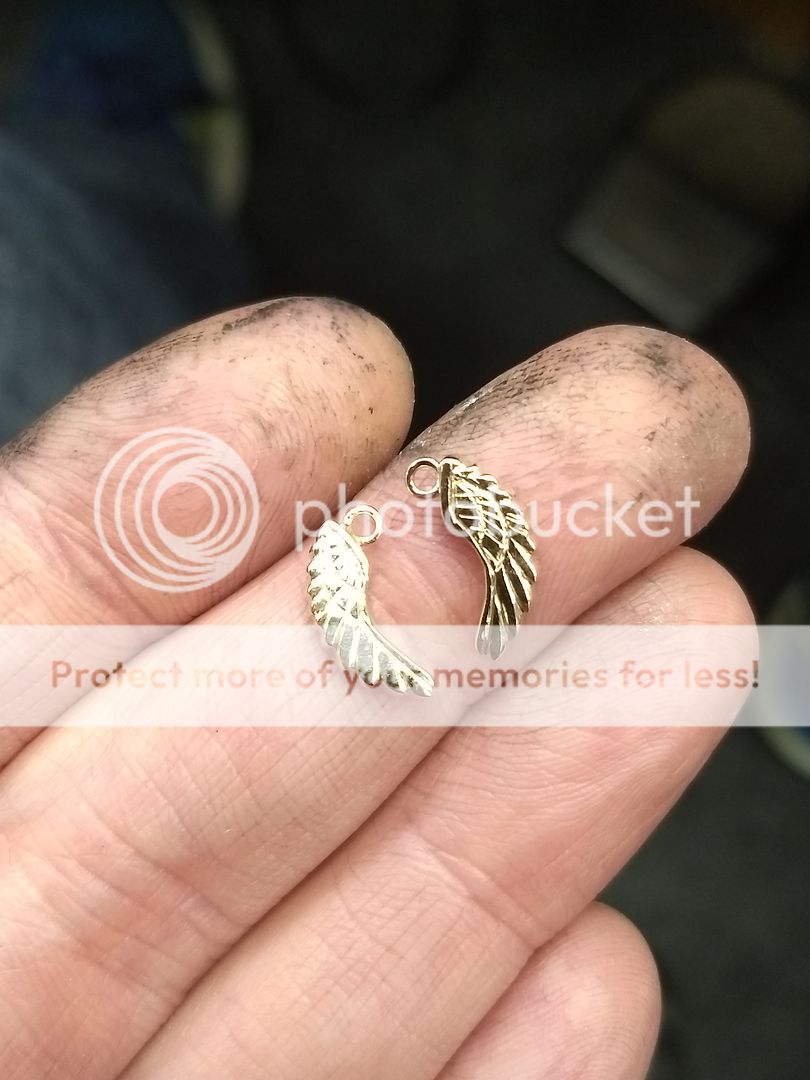
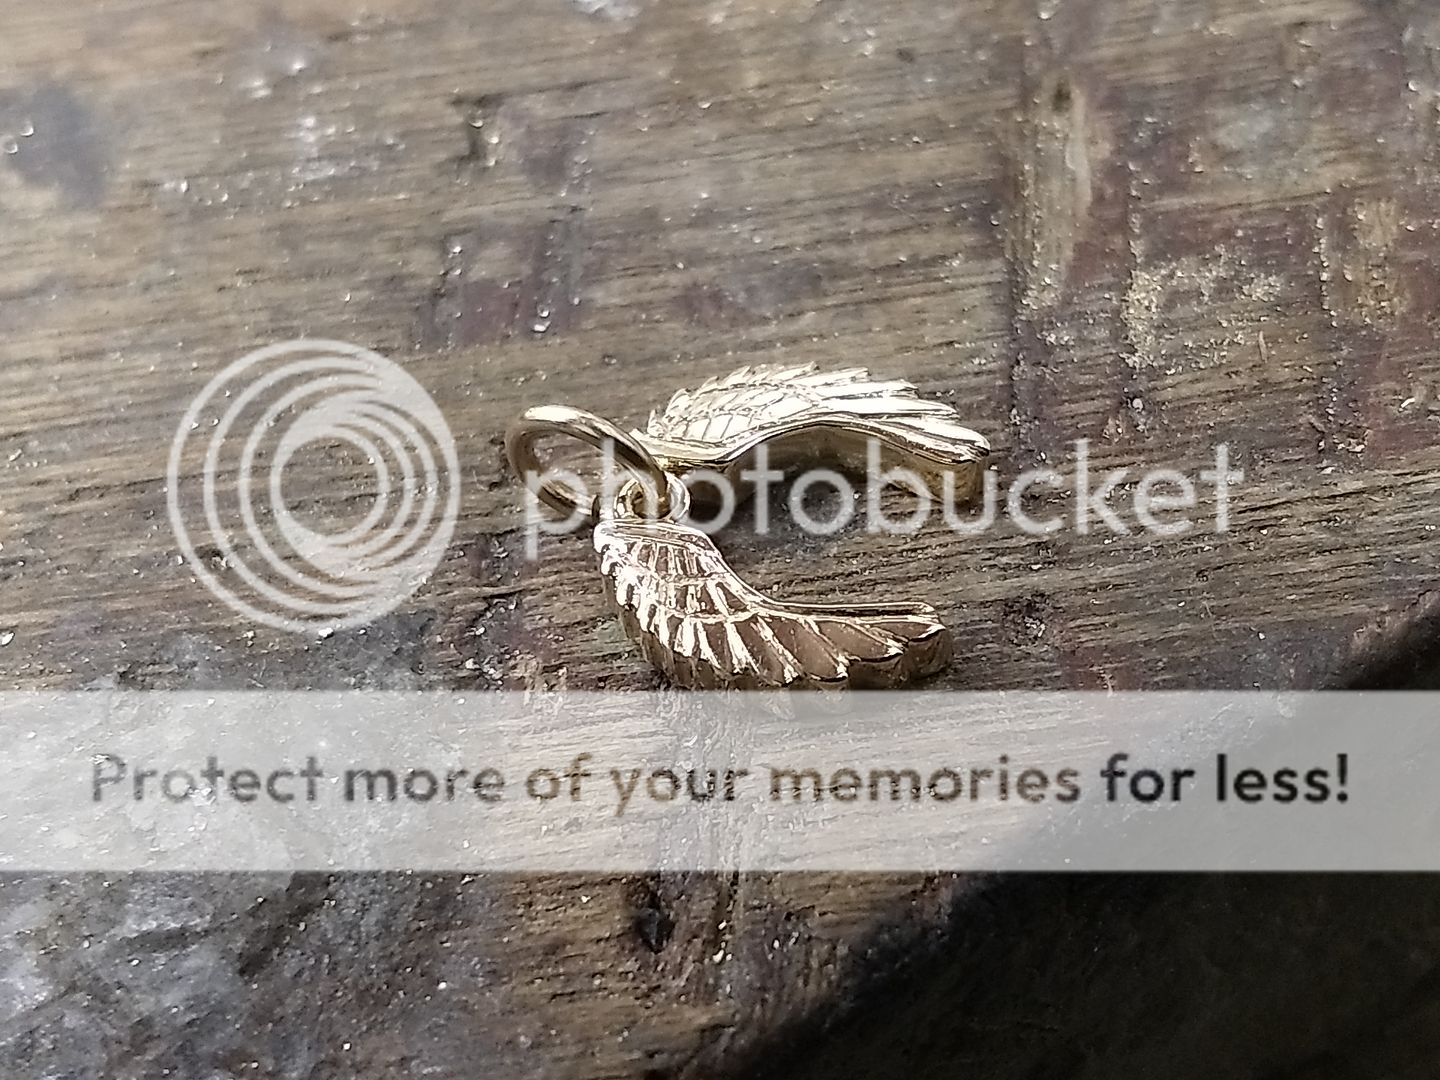
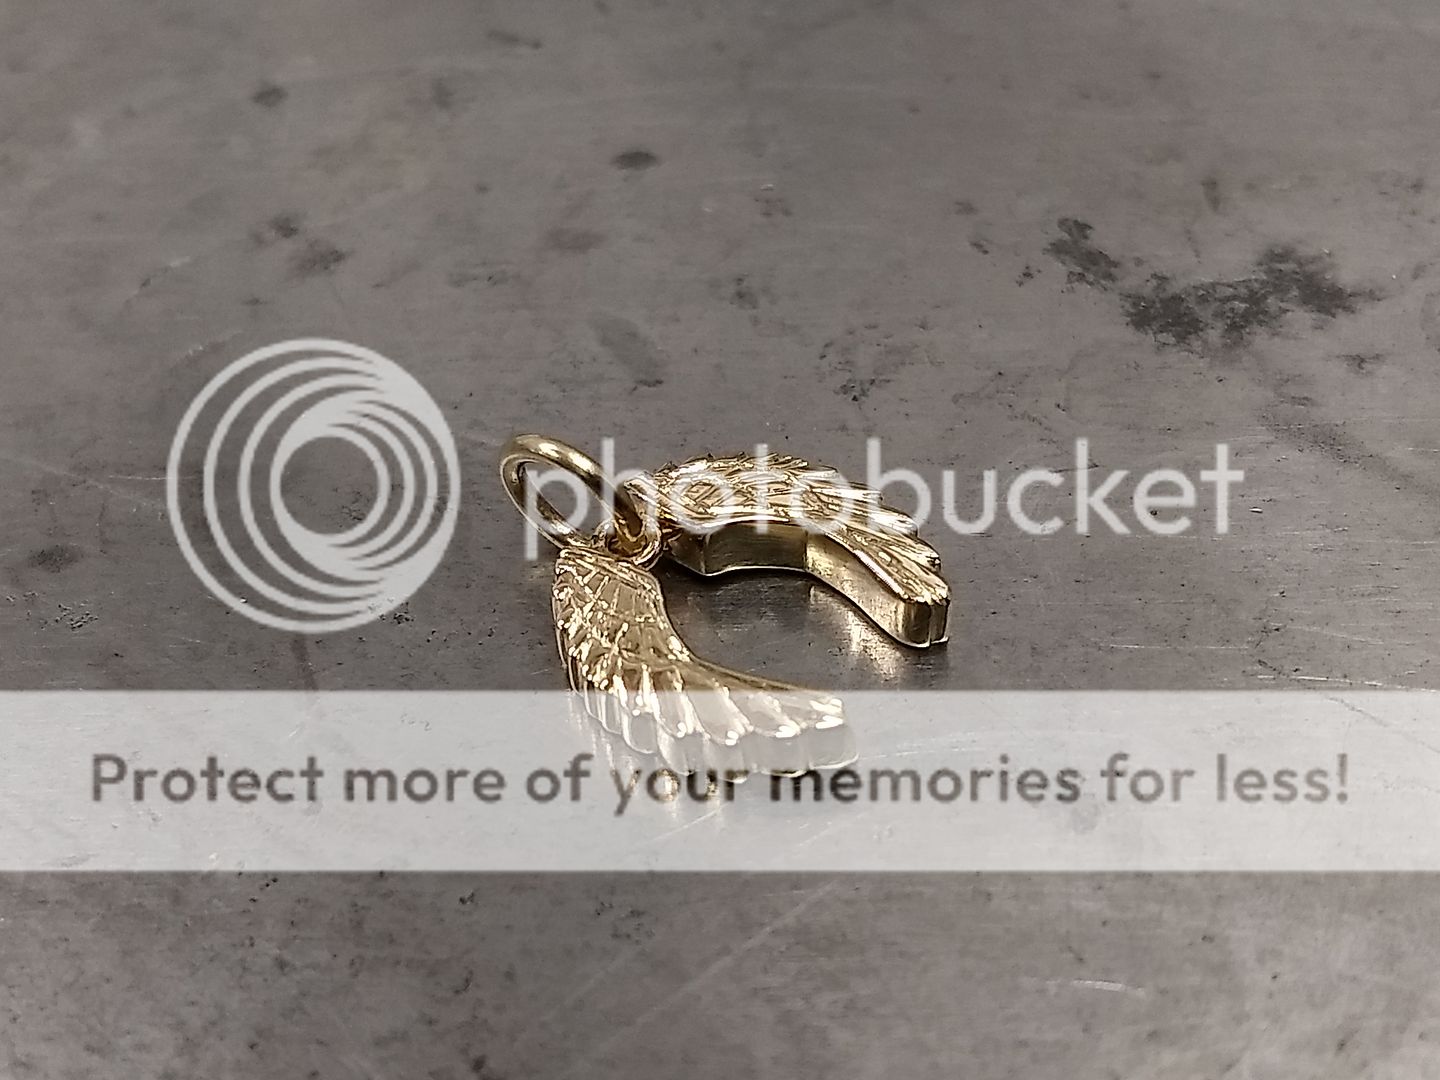
The main running ring is then added, and hey presto. An angel wings pendant
Take one lump of 9ct yellow gold and roll it to make a plate:

From that I cut 2 x rough shapes:

Application of hi-tech bonding substance:

The two plates are clamped in a ring clamp and using fine hand files a more easily recognised shape is produced:


Another hi-tech item. Green permanent marker to mark out the rough placement of the details:


Ring clamp back in play and some more filing takes place:


The surface details now need to be engraved / ground out. I use a saw, drill and scorper to create the effect:


With the details added in rough I move on to turning the items into a pendant. 2 x small jumprings are added with a view that they'll overlap nicely:


They are then tidied up and the details made more obvious:


The main running ring is then added, and hey presto. An angel wings pendant


Gassing Station | Watches | Top of Page | What's New | My Stuff