Project Top Gun
Discussion


So my kids and I decided we're going to document the build via a series of YouTub videos, much like Will McDonald did on his Blunicorn Evo Coupe project. My son (turning 12 next month) will be the primary camera man and we started shooting some footage over the weekend...he's really good at it! I need to carve some time to edit/produce the video but some good content in "the can" already. Part-1 will include delivery of the kit, engine, unboxing, initial engine test fit and associated rear chassis modifications. Anyway, here's a quick update on this weekends action via some pics:
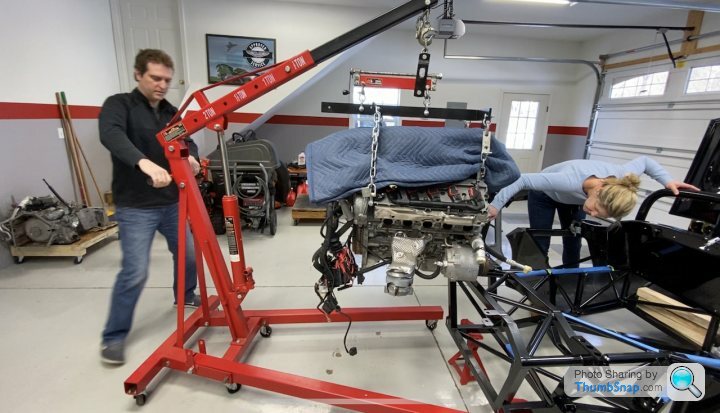
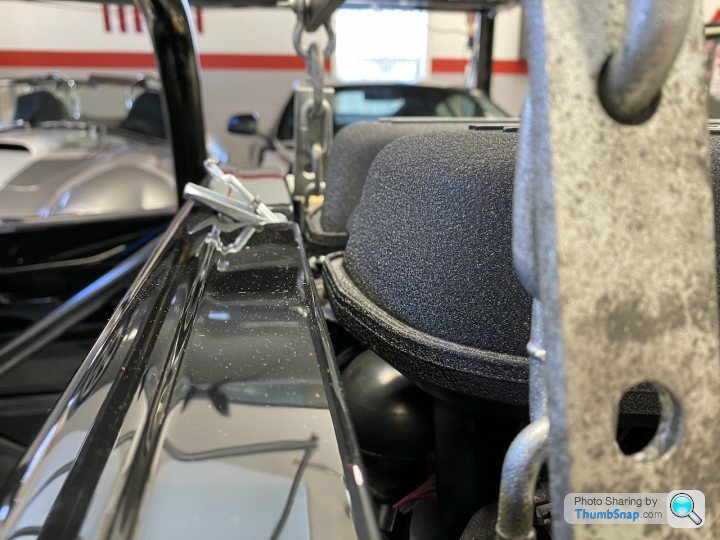
You can see below why I need to lower the engine...After measuring 100 different ways, checking rear clam clearances, etc., this should fit perfectly (with not much room to spare!) once I finish lowering the lower sub-frame/engine mounts:

Oh, and while I was in front of the TV last night, I mocked up a set of exhaust header flanges for the motor...Based on the test fit above, there's NO WAY the OEM headers will fit so I will be making my own. Here's the start of that process:
First: traced the OEM header flange onto a piece of construction paper so I could get basic dimensions and layout:

I then modeled it out in Fusion360:
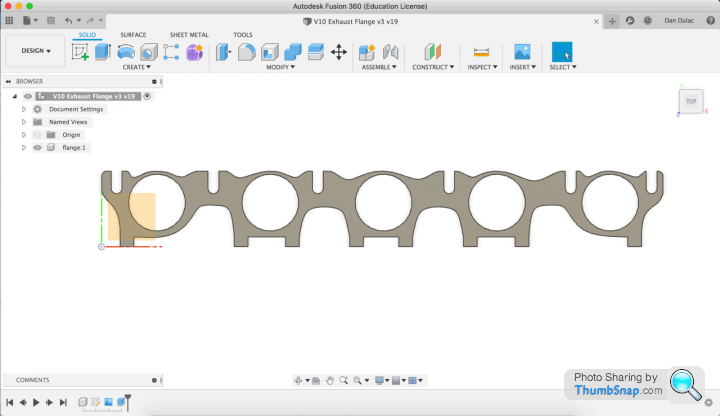
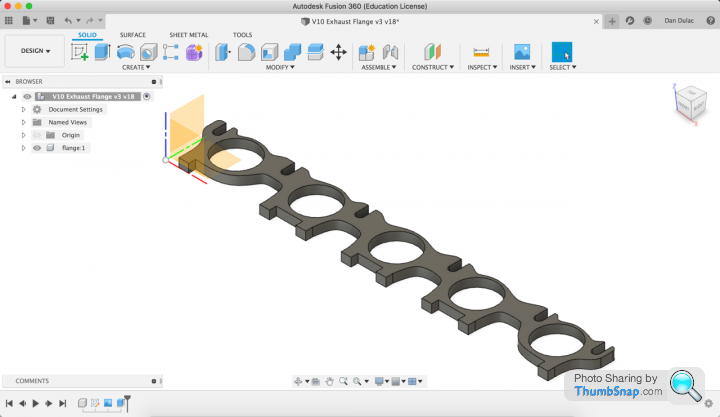
I will then cut this on a CNC plasma table using 3/8" stainless plate. The flange will then require some basic machining at the bolt holes and lower 'wedge' fingers to replicate how the OEM header mounts to the engine. But this work is still a few months out. ;-) (Yes, I get bored in front of the TV so this kind of thing keeps me occupied...)
Next up: I'm awaiting a shipment of rectangle and round chromoly tube so I can continue modifying the engine bay frame...Stay tuned!
-Dan
PS. This will be *the* thread where all my build updates will go so you're safe to bookmark this one. Here's the first thread where I received delivery for those interested: https://www.pistonheads.com/gassing/topic.asp?h=0&...
You can see below why I need to lower the engine...After measuring 100 different ways, checking rear clam clearances, etc., this should fit perfectly (with not much room to spare!) once I finish lowering the lower sub-frame/engine mounts:
Oh, and while I was in front of the TV last night, I mocked up a set of exhaust header flanges for the motor...Based on the test fit above, there's NO WAY the OEM headers will fit so I will be making my own. Here's the start of that process:
First: traced the OEM header flange onto a piece of construction paper so I could get basic dimensions and layout:
I then modeled it out in Fusion360:
I will then cut this on a CNC plasma table using 3/8" stainless plate. The flange will then require some basic machining at the bolt holes and lower 'wedge' fingers to replicate how the OEM header mounts to the engine. But this work is still a few months out. ;-) (Yes, I get bored in front of the TV so this kind of thing keeps me occupied...)
Next up: I'm awaiting a shipment of rectangle and round chromoly tube so I can continue modifying the engine bay frame...Stay tuned!
-Dan
PS. This will be *the* thread where all my build updates will go so you're safe to bookmark this one. Here's the first thread where I received delivery for those interested: https://www.pistonheads.com/gassing/topic.asp?h=0&...
Edited by supraholic on Tuesday 25th February 14:53
TR3B said:
Definitely an ‘Iceman’ taking a sawzall to a brand new chassis!
Thanks for posting this here instead of just on FBIbook.
With the saw in hand, gloves and safety glasses on and earplugs in, I must have stood there staring at what I was about to do for about 5 minutes. Then I said to myself, “oh what the f@$k, I can’t do anything my welder can’t fix. Here we go!” After the first cut, it got easier. Thanks for posting this here instead of just on FBIbook.
Edited by TR3B on Monday 24th February 22:38

Edited by supraholic on Tuesday 25th February 14:47
Scrump said:
I had your other thread bookmarked as looks like it will be an interesting build. Nearly missed this new thread.
Any reason why you keep starting new threads rather than update your existing one?
I figured the first thread was just for delivery. The official build starts with this one. ;-) But to your point, I edited the first post in both threads to cross-link them. All my future build updates will be added to this thread so you're safe to bookmark this one. Any reason why you keep starting new threads rather than update your existing one?
Wow, how the world has changed since my last post. I hope everyone is taking care and have fine tuned your social distancing...Spending time on this project has certainly been a great way for me to 'escape' the stress of the world lately.
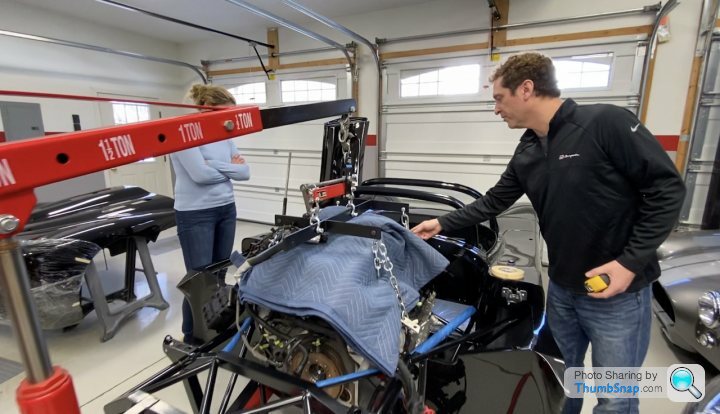
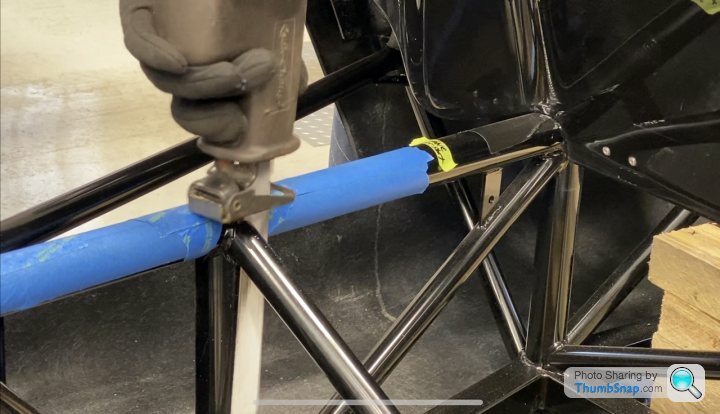
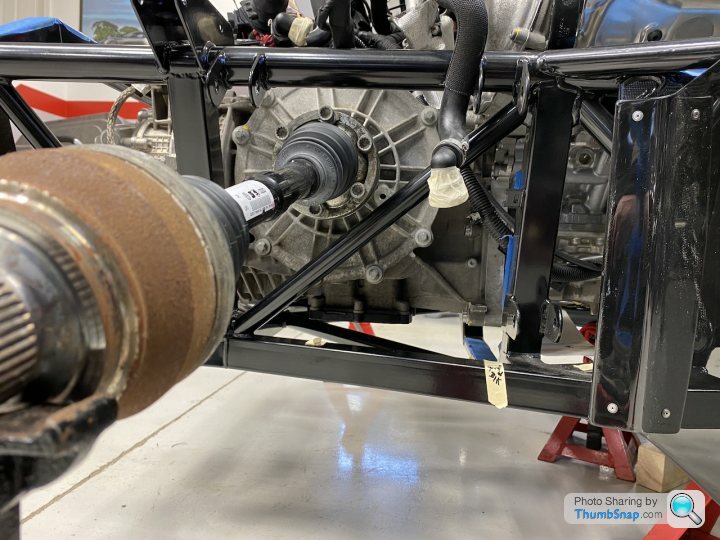
Speaking of fine tuning, I've had the engine and transmission in and out of the car about a dozen times already--getting the pre-fit just right so I don't have to worry about it when it comes time for final installation in the latter stages of the build. I've had to notch the frame in a few places to make clearance to allow for slight engine/trans movement, but nothing major. I decided to NOT lower the engine bay frame, given the height of the engine, as it would have turned into fairly major surgery. I will deal with the engine height challenge by modifying the rear clam when the time comes. Here are some pics of the aforementioned progress.
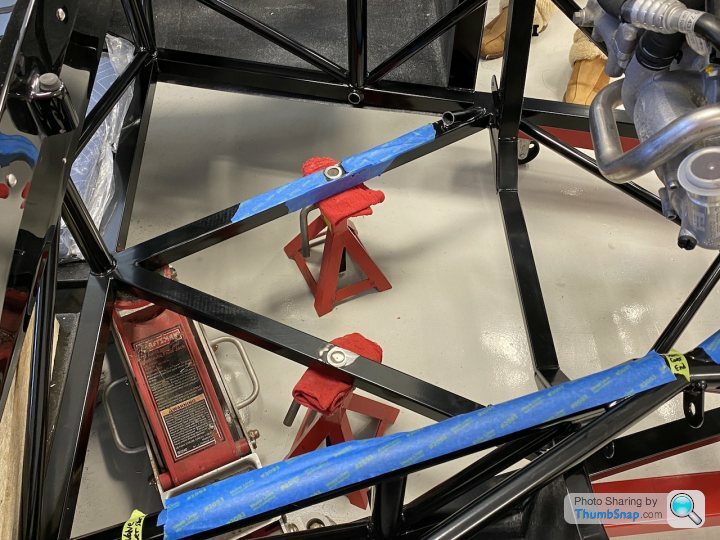
Had to notch the upper trans tunnel crossmember to make extra clearance. I was able to fit the trans in the tunnel without modification but there was zero tolerance for movement. I will box-in the notch to recoup some strength:
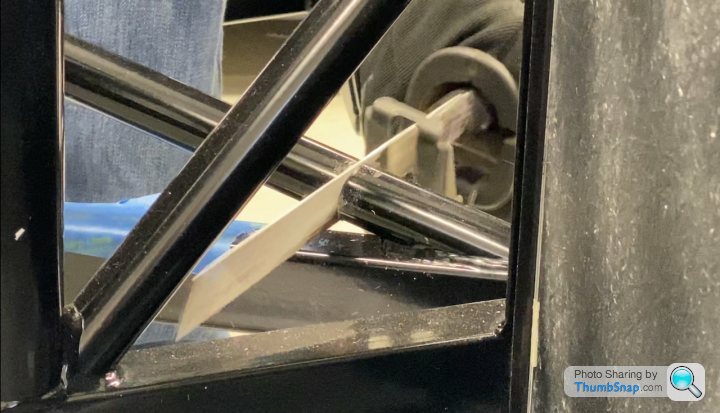
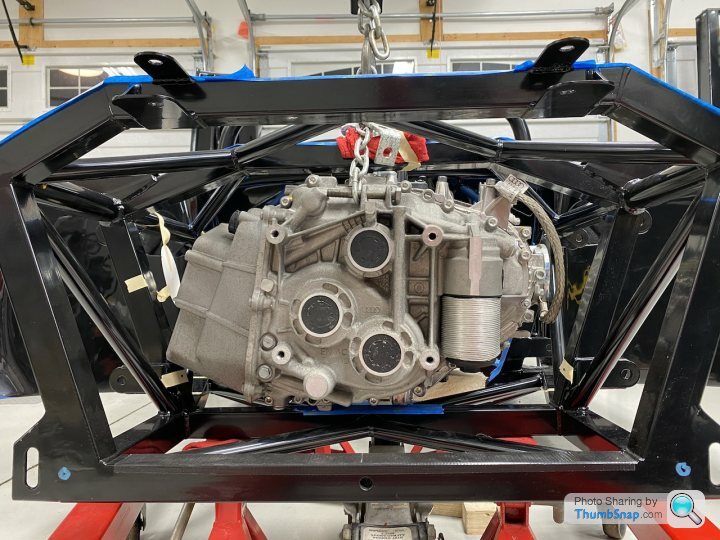
There's certainly not much extra room to spare in the trans tunnel! This trans is w-i-d-e yet fairly short:
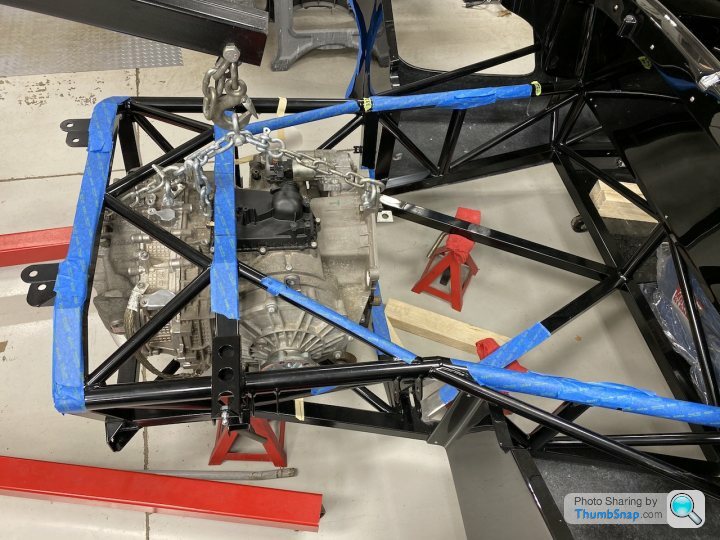
Installation of engine and trans requires choreography: trans goes in first, dropped into the engine bay and slide back into the tunnel. Then the motor is dropped in and mated to the trans. Here's the drivetrain in its resting position:
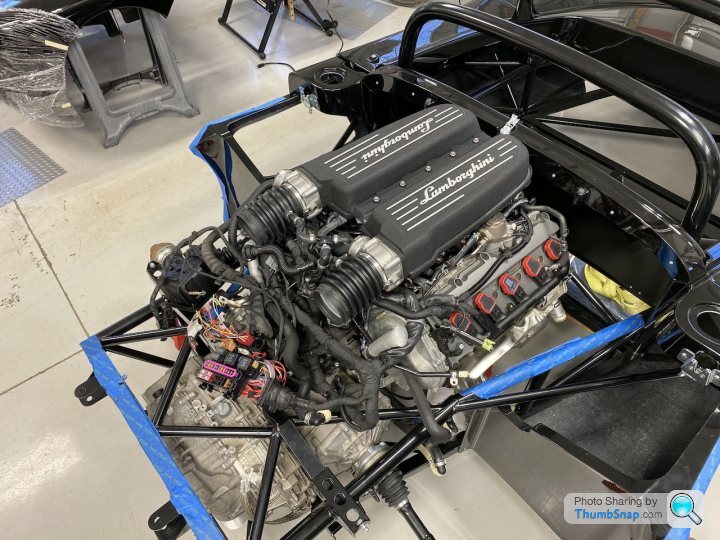

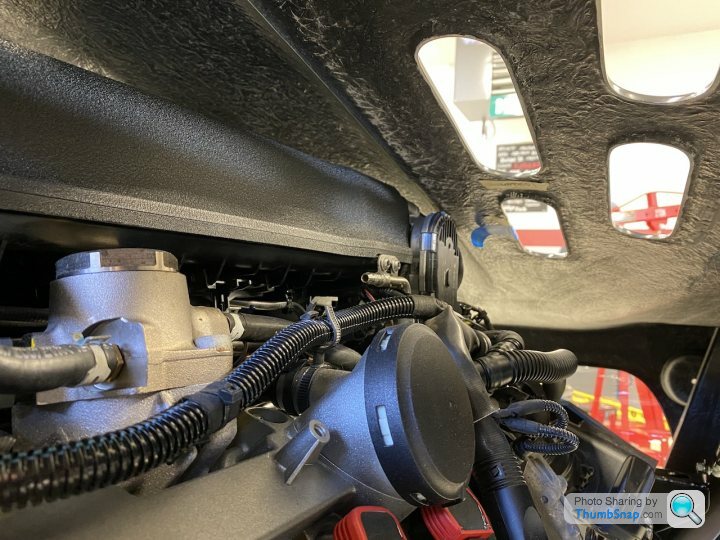
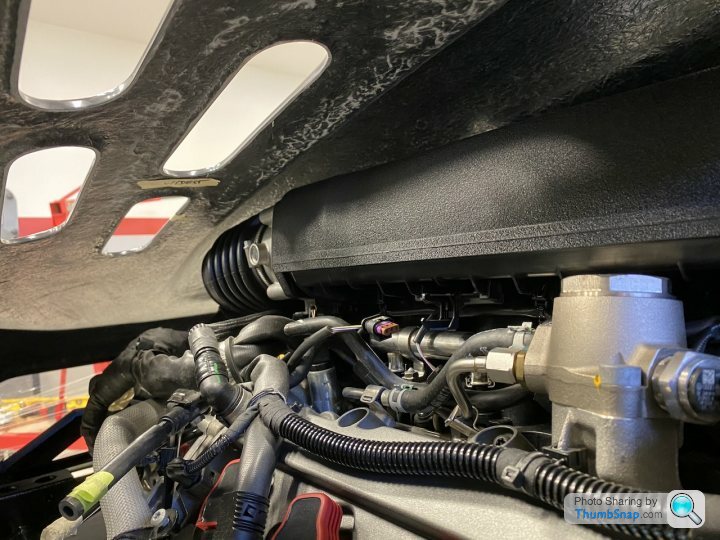
I installed the rear clam to check how bad clearance will be...not *too* bad but will definitely require some massaging of the GRP:

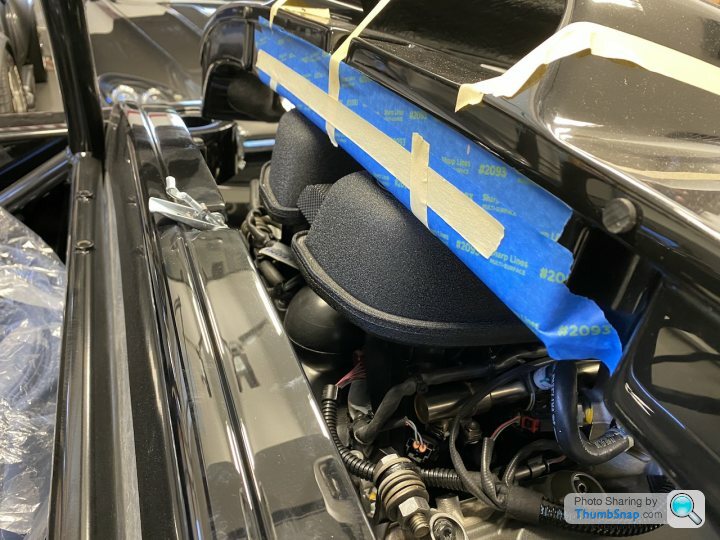
Once I trim the front edge of the clam so it will close, here are the next areas where I will having body/engine interference: the rear edge of the intake manifold at the throttle bodies. I'm undecided on how i will deal with this when the time comes; i may cut some extra vent slots...we'll see.
Next up: I need fabricate the motor and transmission mounts in the chassis and do another pre-fit. Once that's done, i will remove the rest of the bodywork, box-in/weld the frame notches I had to make and scuff/re-paint the rear section of the frame. More to come!
-Dan
Speaking of fine tuning, I've had the engine and transmission in and out of the car about a dozen times already--getting the pre-fit just right so I don't have to worry about it when it comes time for final installation in the latter stages of the build. I've had to notch the frame in a few places to make clearance to allow for slight engine/trans movement, but nothing major. I decided to NOT lower the engine bay frame, given the height of the engine, as it would have turned into fairly major surgery. I will deal with the engine height challenge by modifying the rear clam when the time comes. Here are some pics of the aforementioned progress.
Had to notch the upper trans tunnel crossmember to make extra clearance. I was able to fit the trans in the tunnel without modification but there was zero tolerance for movement. I will box-in the notch to recoup some strength:
There's certainly not much extra room to spare in the trans tunnel! This trans is w-i-d-e yet fairly short:
Installation of engine and trans requires choreography: trans goes in first, dropped into the engine bay and slide back into the tunnel. Then the motor is dropped in and mated to the trans. Here's the drivetrain in its resting position:
I installed the rear clam to check how bad clearance will be...not *too* bad but will definitely require some massaging of the GRP:
Once I trim the front edge of the clam so it will close, here are the next areas where I will having body/engine interference: the rear edge of the intake manifold at the throttle bodies. I'm undecided on how i will deal with this when the time comes; i may cut some extra vent slots...we'll see.
Next up: I need fabricate the motor and transmission mounts in the chassis and do another pre-fit. Once that's done, i will remove the rest of the bodywork, box-in/weld the frame notches I had to make and scuff/re-paint the rear section of the frame. More to come!
-Dan

hi,
I build a GTR with a lambo/audi v10
and my exhaust was made by https://celeritech.nl
Good luck and have fun building
KR Joop / donkeasy
I build a GTR with a lambo/audi v10
and my exhaust was made by https://celeritech.nl
Good luck and have fun building
KR Joop / donkeasy
Edited by donkeasy on Thursday 26th March 20:10
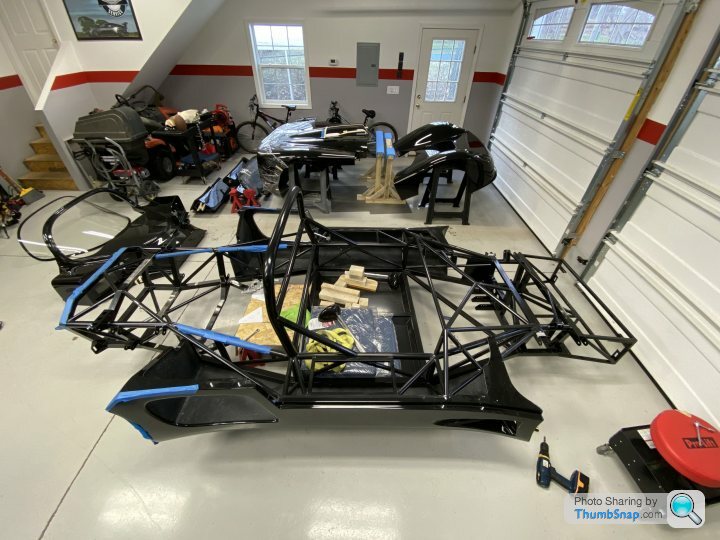
UPDATE time!
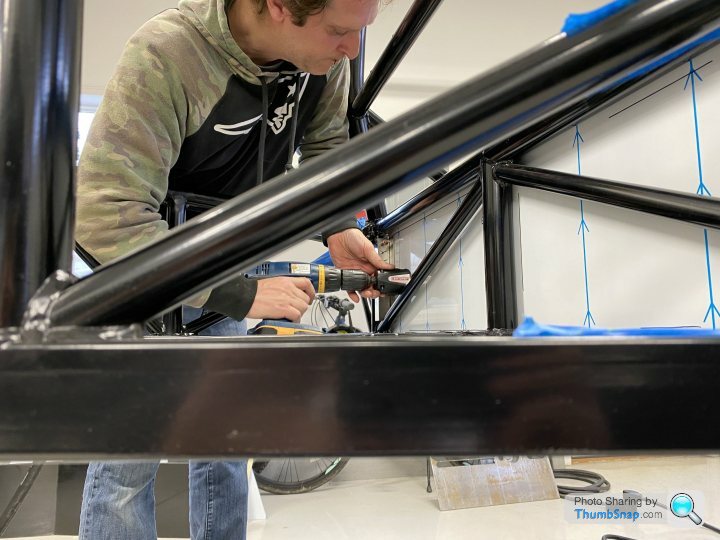
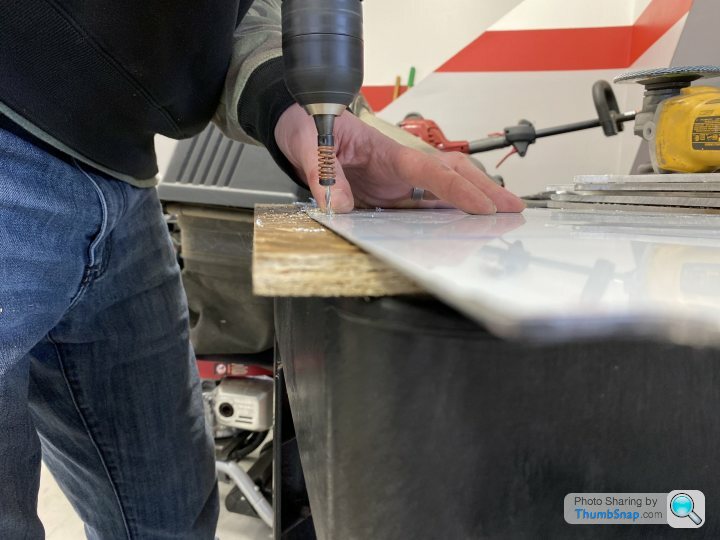
I'm elbows deep in aluminum panel fitting, drilling and de-burring...in some strange way, it's therapeutic once the tedious panel fitting is achieved. Cardboard templates are your friends for this stage! Anyway, on to the pics...
With the engine and trans pre-fit completed, stripped the chassis to begin aluminum panel installation:
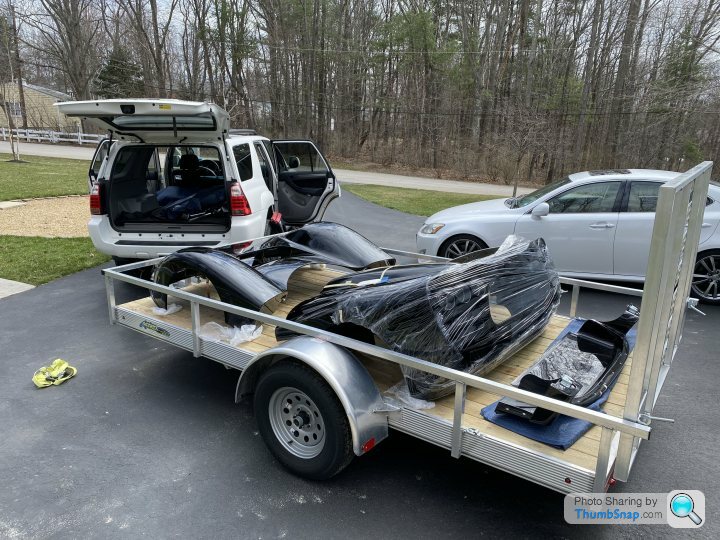
I borrowed my neighbors trailer and moved all the body panels to an offsite storage unit it's time for body installation. Now that spring has arrived, the other cars came out of winter hibernation so i need all the space I can get in the garage!
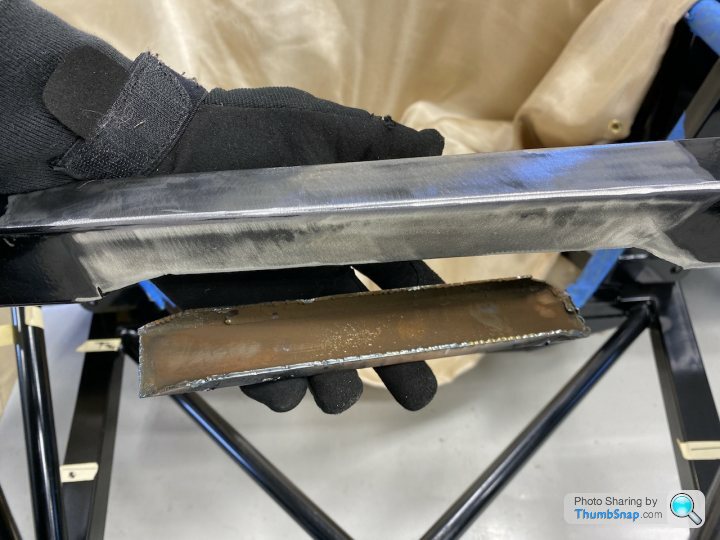
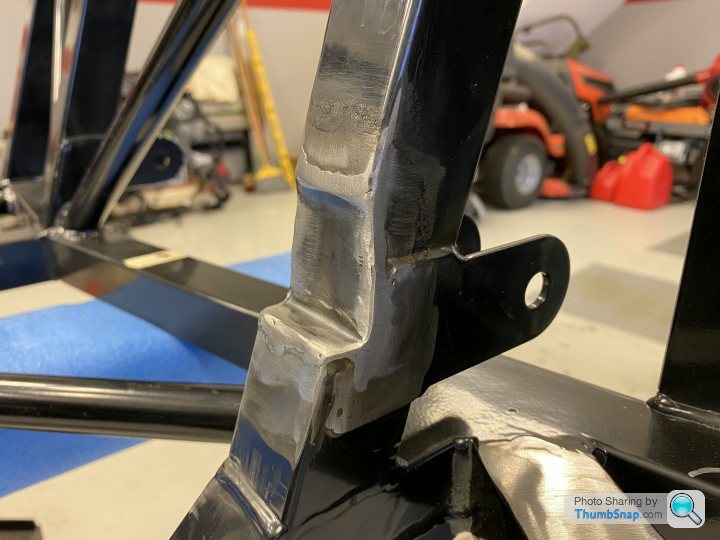
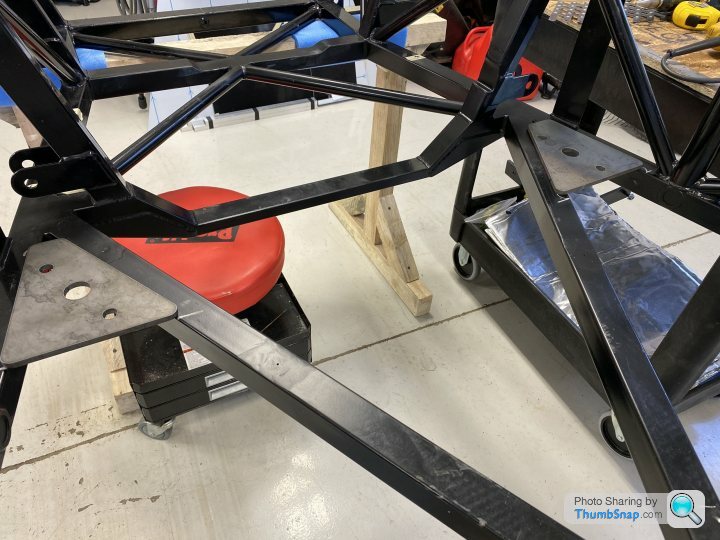
Here's one of the frame notches i had to make to provide necessary clearance for the engine...The location of the notch is fortuitous as the suspension arm bracket provides excellent strength to the square down tube.
When I need a break from paneling, I fire up my Langmuir Systems Crossfire CNC plasma table to cut some parts. Here's the rear transmission mount bracket I made that will bolt to the rear of the trans that will ultimately mount to the Ultima chassis hangers:
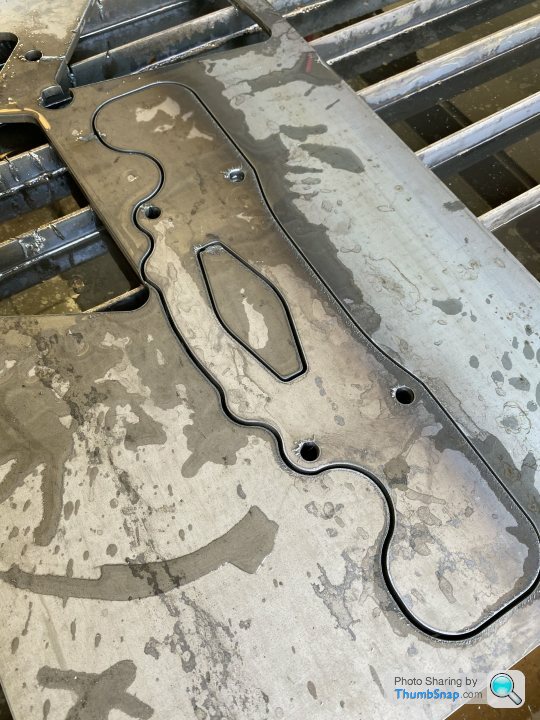
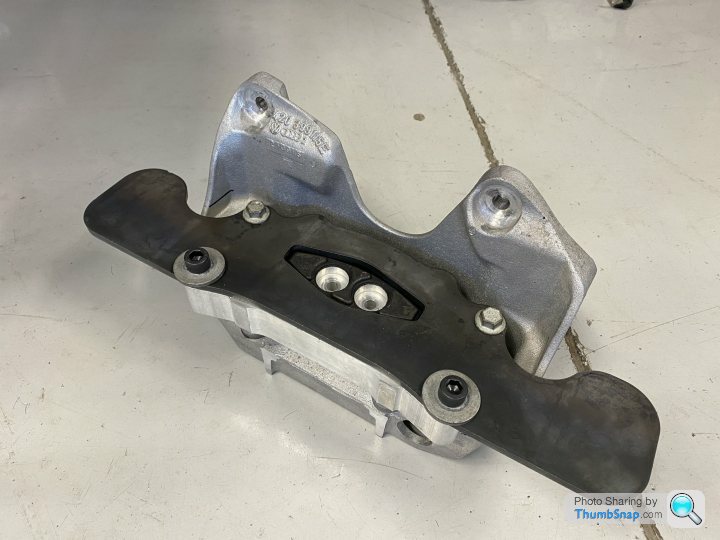
Here's my custom bracket bolted to the OEM aluminum mount/isolator...once i install the engine/trans for the final time, i'll weld up some brackets to bolt it to the chassis hanger points:
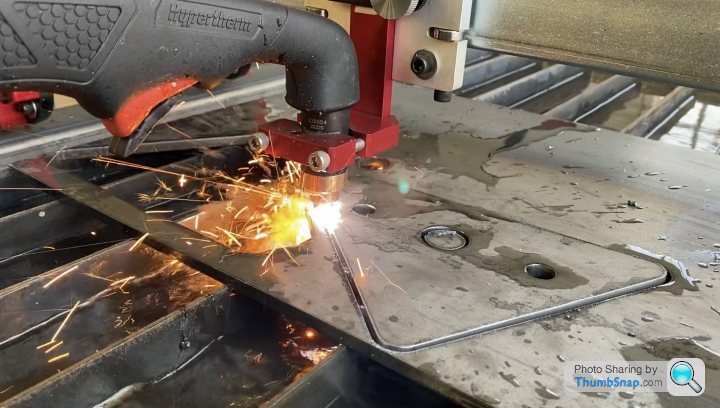
Here's a shot of my CNC plasma table in action, cutting custom motor mounts out of 1/4" mild steel...like butter!
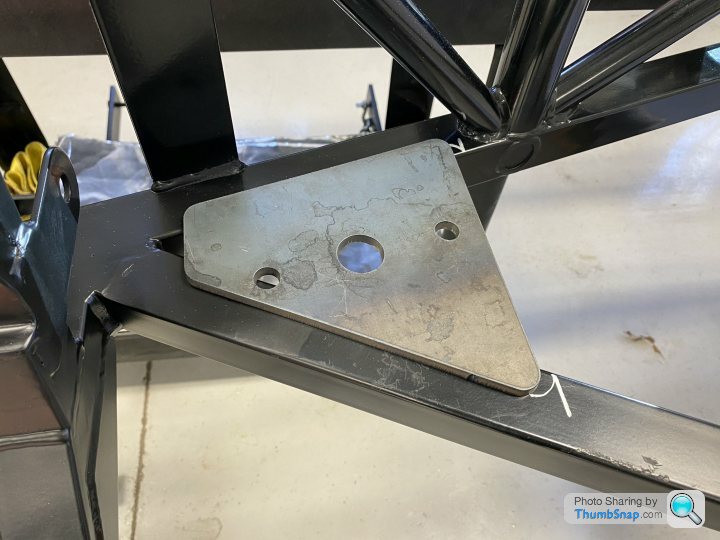
And here's where the custom motor mounts will weld into place:
...and back to more paneling!
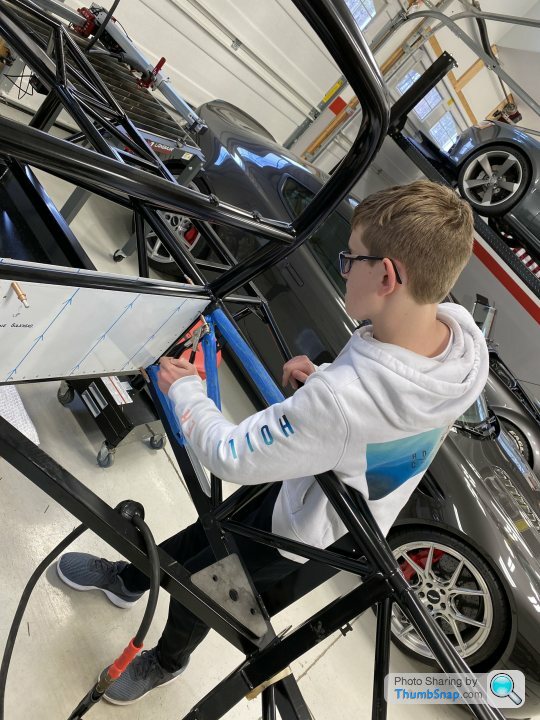
My son doesn't get to escape the fun! Lol.
Anyway, off to do more paneling! :-)
-Dan
I'm elbows deep in aluminum panel fitting, drilling and de-burring...in some strange way, it's therapeutic once the tedious panel fitting is achieved. Cardboard templates are your friends for this stage! Anyway, on to the pics...
With the engine and trans pre-fit completed, stripped the chassis to begin aluminum panel installation:
I borrowed my neighbors trailer and moved all the body panels to an offsite storage unit it's time for body installation. Now that spring has arrived, the other cars came out of winter hibernation so i need all the space I can get in the garage!
Here's one of the frame notches i had to make to provide necessary clearance for the engine...The location of the notch is fortuitous as the suspension arm bracket provides excellent strength to the square down tube.
When I need a break from paneling, I fire up my Langmuir Systems Crossfire CNC plasma table to cut some parts. Here's the rear transmission mount bracket I made that will bolt to the rear of the trans that will ultimately mount to the Ultima chassis hangers:
Here's my custom bracket bolted to the OEM aluminum mount/isolator...once i install the engine/trans for the final time, i'll weld up some brackets to bolt it to the chassis hanger points:
Here's a shot of my CNC plasma table in action, cutting custom motor mounts out of 1/4" mild steel...like butter!
And here's where the custom motor mounts will weld into place:
...and back to more paneling!
My son doesn't get to escape the fun! Lol.
Anyway, off to do more paneling! :-)
-Dan
TR3B said:
No offense but using a CNC plasma table is totally cheating. 
Awesome work! Looking forward to seeing how you deal with the height difference on the rear shell.
The right tool makes all the difference! :-)Awesome work! Looking forward to seeing how you deal with the height difference on the rear shell.
And I'm with you, I too can't wait to see how i deal with the height difference in the rear clam. Lol.
Gassing Station | Ultima | Top of Page | What's New | My Stuff