Our Little Durham Restoration Project...
Discussion


I've just read the entire thread from the start too. Did you fully solve the damp issues you were having 2-3 years ago? Pretty much every wall had damp on it and you said you only had limited results with removing bricks and hand scooping out crud from the cavity.
Also do you not have concerns about the quality and safety of the wiring? You found that the electrician had not done either of the tasks asked (loft lighting & extractor outlet not connected to anything) so personally I'd be worried about the quality of his workmanship elsewhere.
I may have missed it but why do you have a random cheapo white plastic double gang socket 6' up the wall in every room with some other device stuck below it? Completely ruins the look of your rooms imho.
I'm personally not a fan of your clash of contemporary fixtures and fittings with period decor - particularly the overkill of dark varnished oak doors/furniture and ash everywhere, also the chandeliers in every room! It all looks rather bizarre, especially when the white uPVC windows are in the background of the shots but the quality of workmanship and attention to detail by you and your father is very impressive indeed.
Oh and one more thing! What make and model is that gas hob you've got? I'm interested to know as that looks really easy to clean for a gas hob. There's been a bit of a raging debate in the 'induction hobs' thread on here about which is best and there's a few of us in the 'gas is more controllable and so is better' camp, but we all concur that they're more of a pain in the arse to clean vs induction tops, however that design you have looks good. Do the 'supports' for the pans come off for easy cleaning of the hob top?
Also do you not have concerns about the quality and safety of the wiring? You found that the electrician had not done either of the tasks asked (loft lighting & extractor outlet not connected to anything) so personally I'd be worried about the quality of his workmanship elsewhere.
I may have missed it but why do you have a random cheapo white plastic double gang socket 6' up the wall in every room with some other device stuck below it? Completely ruins the look of your rooms imho.
I'm personally not a fan of your clash of contemporary fixtures and fittings with period decor - particularly the overkill of dark varnished oak doors/furniture and ash everywhere, also the chandeliers in every room! It all looks rather bizarre, especially when the white uPVC windows are in the background of the shots
but the quality of workmanship and attention to detail by you and your father is very impressive indeed. Oh and one more thing! What make and model is that gas hob you've got? I'm interested to know as that looks really easy to clean for a gas hob. There's been a bit of a raging debate in the 'induction hobs' thread on here about which is best and there's a few of us in the 'gas is more controllable and so is better' camp, but we all concur that they're more of a pain in the arse to clean vs induction tops, however that design you have looks good. Do the 'supports' for the pans come off for easy cleaning of the hob top?
Lemming Train said:
I've just read the entire thread from the start too. Did you fully solve the damp issues you were having 2-3 years ago? Pretty much every wall had damp on it and you said you only had limited results with removing bricks and hand scooping out crud from the cavity.
Also do you not have concerns about the quality and safety of the wiring? You found that the electrician had not done either of the tasks asked (loft lighting & extractor outlet not connected to anything) so personally I'd be worried about the quality of his workmanship elsewhere.
I may have missed it but why do you have a random cheapo white plastic double gang socket 6' up the wall in every room with some other device stuck below it? Completely ruins the look of your rooms imho.
I'm personally not a fan of your clash of contemporary fixtures and fittings with period decor - particularly the overkill of dark varnished oak doors/furniture and ash everywhere, also the chandeliers in every room! It all looks rather bizarre, especially when the white uPVC windows are in the background of the shots but the quality of workmanship and attention to detail by you and your father is very impressive indeed.
Oh and one more thing! What make and model is that gas hob you've got? I'm interested to know as that looks really easy to clean for a gas hob. There's been a bit of a raging debate in the 'induction hobs' thread on here about which is best and there's a few of us in the 'gas is more controllable and so is better' camp, but we all concur that they're more of a pain in the arse to clean vs induction tops, however that design you have looks good. Do the 'supports' for the pans come off for easy cleaning of the hob top?
Sorry, only just seen this, so you'll probably miss the reply but:Also do you not have concerns about the quality and safety of the wiring? You found that the electrician had not done either of the tasks asked (loft lighting & extractor outlet not connected to anything) so personally I'd be worried about the quality of his workmanship elsewhere.
I may have missed it but why do you have a random cheapo white plastic double gang socket 6' up the wall in every room with some other device stuck below it? Completely ruins the look of your rooms imho.
I'm personally not a fan of your clash of contemporary fixtures and fittings with period decor - particularly the overkill of dark varnished oak doors/furniture and ash everywhere, also the chandeliers in every room! It all looks rather bizarre, especially when the white uPVC windows are in the background of the shots
but the quality of workmanship and attention to detail by you and your father is very impressive indeed. Oh and one more thing! What make and model is that gas hob you've got? I'm interested to know as that looks really easy to clean for a gas hob. There's been a bit of a raging debate in the 'induction hobs' thread on here about which is best and there's a few of us in the 'gas is more controllable and so is better' camp, but we all concur that they're more of a pain in the arse to clean vs induction tops, however that design you have looks good. Do the 'supports' for the pans come off for easy cleaning of the hob top?
The damp seems to be sortedish now, but I basically had bricks out on one side for two years and worked at the rubbish in the cavity every few months. As it dried out more, more came out. I still have one of the windows that needs rerendering that is leaking a little bit and next time I have my scaffold out I want to check all the mortar for any small holes as I know there's one on the opposite side of the cavity tot he vents in my loft, so I suspect that's been part of the issue. I have effluorescence on the other gable that broadly matches where I haven't cleared, but the tanking that went in when we bought the house means that hasn't come through inside, so I'm fairly relaxed about it. I might sort it one day.
No concerns with the wiring, the loft lights had been done, just not in a sensible place. I suspect the reason was that he couldn't get a ladder under the ridge easily enough and thought it didn't matter. Not sure what you mean about the extractor though, probably something I've forgotten. When the work was done there were no floor boards etc, so I've seen everything that was done and I saw most of what went into it and that everything was tested, so as sure as you can be that it's right.
You're right about the chimneys, the reason they're there is so you can put a TV on the walls, it's the only place you can put a TV in those three rooms and I wanted the flexibility. You're right about the appearance, the plan was/is to put pictures over them. I'd like to say I've done that now, but the truth is I still have two rooms to sort. At least the wife has stopped noticing, they'll be done eventually.......
You're right about the windows, that was inevitable as there isn't really a style that works with the house and uPVC windows. All the windows are to replace in time with wooden ones. I disagree with the style, we like it a lot, perhaps the photos make the wood look more dominant than it is, it's not something that stares you int he face with furniture etc in the house I don't think. The ceilings are 8' high, so some sort of suspended light is necessary, we like these, but again they're so high you don't really notice them. I was actually trying to find the same ones to put in some of the other rooms, but BHS went under didn't they.
I presume you've sorted your hob, but it's a Zanussi, nothing posh or expensive, but you're right that it's easy to clean. Everything lifts off, wipe it down and you're done. I'm a big fan, especially with the extra width. If you look carefully in the kitchen the hob location is wrong, it should be centred on the 600 oven, but we had to make a compromise to get everything in and decided to go that way. Still super happy with the kitchen and learned a lot that will carry over to the design for the new one in a few years. My favourite feature is that the dishwasher door opens within a foot of the pan/plate/cutlery drawers.
I'll do a proper update sometime in the next few months, the loft has progressed slowly but is gathering pace now. Building Control have signed off my new floor today, so we're on to hacking the King Truss out and what not. If I don't update it in the next 2-3 months it's because the roof fell in........
paulrockliffe said:
Sorry, only just seen this, so you'll probably miss the reply but:
The damp seems to be sortedish now, but I basically had bricks out on one side for two years and worked at the rubbish in the cavity every few months. As it dried out more, more came out. I still have one of the windows that needs rerendering that is leaking a little bit and next time I have my scaffold out I want to check all the mortar for any small holes as I know there's one on the opposite side of the cavity tot he vents in my loft, so I suspect that's been part of the issue. I have effluorescence on the other gable that broadly matches where I haven't cleared, but the tanking that went in when we bought the house means that hasn't come through inside, so I'm fairly relaxed about it. I might sort it one day.
No concerns with the wiring, the loft lights had been done, just not in a sensible place. I suspect the reason was that he couldn't get a ladder under the ridge easily enough and thought it didn't matter. Not sure what you mean about the extractor though, probably something I've forgotten. When the work was done there were no floor boards etc, so I've seen everything that was done and I saw most of what went into it and that everything was tested, so as sure as you can be that it's right.
You're right about the chimneys, the reason they're there is so you can put a TV on the walls, it's the only place you can put a TV in those three rooms and I wanted the flexibility. You're right about the appearance, the plan was/is to put pictures over them. I'd like to say I've done that now, but the truth is I still have two rooms to sort. At least the wife has stopped noticing, they'll be done eventually.......
You're right about the windows, that was inevitable as there isn't really a style that works with the house and uPVC windows. All the windows are to replace in time with wooden ones. I disagree with the style, we like it a lot, perhaps the photos make the wood look more dominant than it is, it's not something that stares you int he face with furniture etc in the house I don't think. The ceilings are 8' high, so some sort of suspended light is necessary, we like these, but again they're so high you don't really notice them. I was actually trying to find the same ones to put in some of the other rooms, but BHS went under didn't they.
I presume you've sorted your hob, but it's a Zanussi, nothing posh or expensive, but you're right that it's easy to clean. Everything lifts off, wipe it down and you're done. I'm a big fan, especially with the extra width. If you look carefully in the kitchen the hob location is wrong, it should be centred on the 600 oven, but we had to make a compromise to get everything in and decided to go that way. Still super happy with the kitchen and learned a lot that will carry over to the design for the new one in a few years. My favourite feature is that the dishwasher door opens within a foot of the pan/plate/cutlery drawers.
I'll do a proper update sometime in the next few months, the loft has progressed slowly but is gathering pace now. Building Control have signed off my new floor today, so we're on to hacking the King Truss out and what not. If I don't update it in the next 2-3 months it's because the roof fell in........
I don’t want to worry you but....... The damp seems to be sortedish now, but I basically had bricks out on one side for two years and worked at the rubbish in the cavity every few months. As it dried out more, more came out. I still have one of the windows that needs rerendering that is leaking a little bit and next time I have my scaffold out I want to check all the mortar for any small holes as I know there's one on the opposite side of the cavity tot he vents in my loft, so I suspect that's been part of the issue. I have effluorescence on the other gable that broadly matches where I haven't cleared, but the tanking that went in when we bought the house means that hasn't come through inside, so I'm fairly relaxed about it. I might sort it one day.
No concerns with the wiring, the loft lights had been done, just not in a sensible place. I suspect the reason was that he couldn't get a ladder under the ridge easily enough and thought it didn't matter. Not sure what you mean about the extractor though, probably something I've forgotten. When the work was done there were no floor boards etc, so I've seen everything that was done and I saw most of what went into it and that everything was tested, so as sure as you can be that it's right.
You're right about the chimneys, the reason they're there is so you can put a TV on the walls, it's the only place you can put a TV in those three rooms and I wanted the flexibility. You're right about the appearance, the plan was/is to put pictures over them. I'd like to say I've done that now, but the truth is I still have two rooms to sort. At least the wife has stopped noticing, they'll be done eventually.......
You're right about the windows, that was inevitable as there isn't really a style that works with the house and uPVC windows. All the windows are to replace in time with wooden ones. I disagree with the style, we like it a lot, perhaps the photos make the wood look more dominant than it is, it's not something that stares you int he face with furniture etc in the house I don't think. The ceilings are 8' high, so some sort of suspended light is necessary, we like these, but again they're so high you don't really notice them. I was actually trying to find the same ones to put in some of the other rooms, but BHS went under didn't they.
I presume you've sorted your hob, but it's a Zanussi, nothing posh or expensive, but you're right that it's easy to clean. Everything lifts off, wipe it down and you're done. I'm a big fan, especially with the extra width. If you look carefully in the kitchen the hob location is wrong, it should be centred on the 600 oven, but we had to make a compromise to get everything in and decided to go that way. Still super happy with the kitchen and learned a lot that will carry over to the design for the new one in a few years. My favourite feature is that the dishwasher door opens within a foot of the pan/plate/cutlery drawers.
I'll do a proper update sometime in the next few months, the loft has progressed slowly but is gathering pace now. Building Control have signed off my new floor today, so we're on to hacking the King Truss out and what not. If I don't update it in the next 2-3 months it's because the roof fell in........

https://www.pistonheads.com/gassing/topic.asp?h=0&...
Little Lofty said:
Thanks, I saw that and hoped it wouldn't transpire that he was taking his King Truss out and it all went to s t!
t!Anyway, I lifted the whole roof 2mm upwards and off the King Truss yesterday with a mix of acrow props and scaffold. Nothing has fallen down overnight, despite the storm, so I think we'll be OK.
paulrockliffe said:
Little Lofty said:
Thanks, I saw that and hoped it wouldn't transpire that he was taking his King Truss out and it all went to st!Anyway, I lifted the whole roof 2mm upwards and off the King Truss yesterday with a mix of acrow props and scaffold. Nothing has fallen down overnight, despite the storm, so I think we'll be OK.
I should really update the thread properly, but there's work to do.........
Right, it's time.
I've finally got round to sorting out 250 photos to the right size and in chronological order so they can easily be uploaded to PH and I need to start updating this thread as if I wait until the end I'll never find time to work through them all.
This approach means I can ask questions and look like I'm being incredibly organised getting everything sorted well in advance, rather than the more realistic oh st last minute panic as I realise I haven't sorted x, y and z out yet and it's going to stop progress.
So here goes and starting towards the end of January this year......
I've finally got round to sorting out 250 photos to the right size and in chronological order so they can easily be uploaded to PH and I need to start updating this thread as if I wait until the end I'll never find time to work through them all.
This approach means I can ask questions and look like I'm being incredibly organised getting everything sorted well in advance, rather than the more realistic oh s
t last minute panic as I realise I haven't sorted x, y and z out yet and it's going to stop progress.So here goes and starting towards the end of January this year......
First up we need some stuff. Big order placed, then the usual rigmarole of trying to find a random gap between the overhead wires that'll let the hiab arm go up, coupled with a driver on his first day and we ended up down the side of the house, about as far away form my workshop as possible and like this:
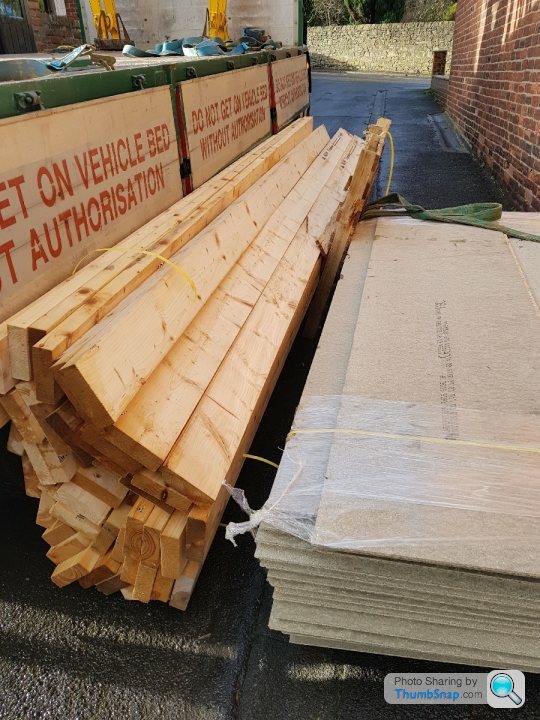
Quick stack so cars can get past,t hen a couple of hours graft getting this all under shelter:

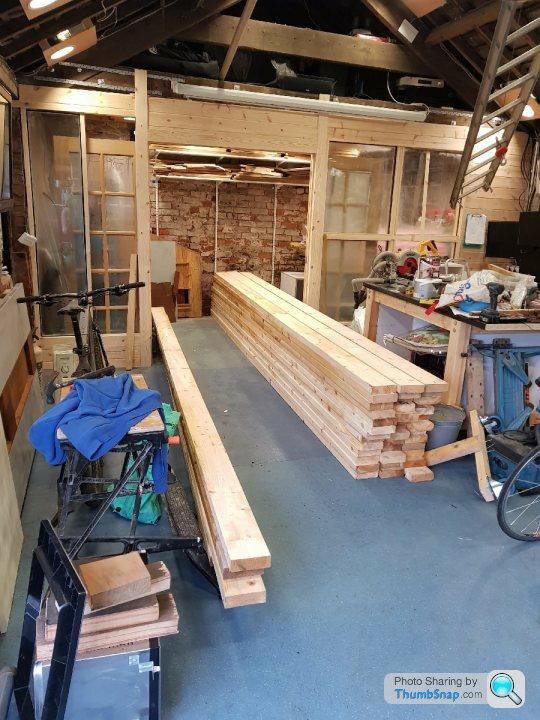
Quick stack so cars can get past,t hen a couple of hours graft getting this all under shelter:
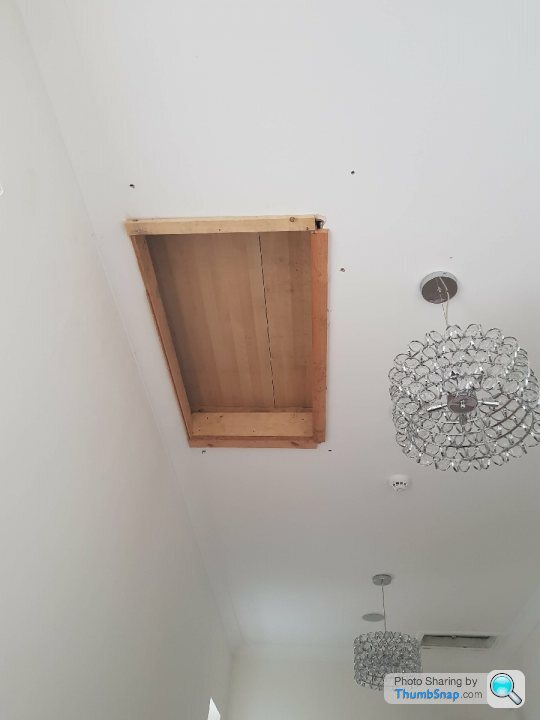
Problem with all this timber is that it doesn't fit through the existing loft hatch and into the loft, it's too long, so.....
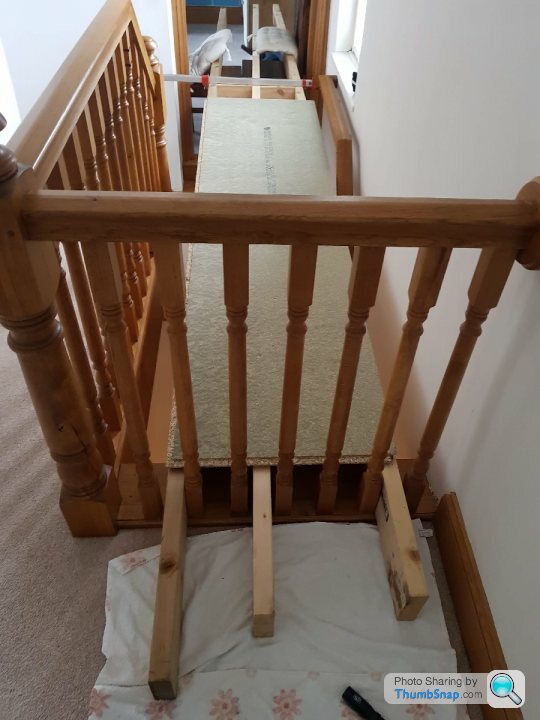
Yes those are the dining room chairs:

Max (3) came to help:
 |https://thumbsnap.com/uItKtMAZ[/url]
Ladder and a sheet:
 [url]
[url]
Saw out, hole lined, board over the top:

Yes those are the dining room chairs:
Max (3) came to help:
|https://thumbsnap.com/uItKtMAZ[/url]Ladder and a sheet:
[url]Saw out, hole lined, board over the top:
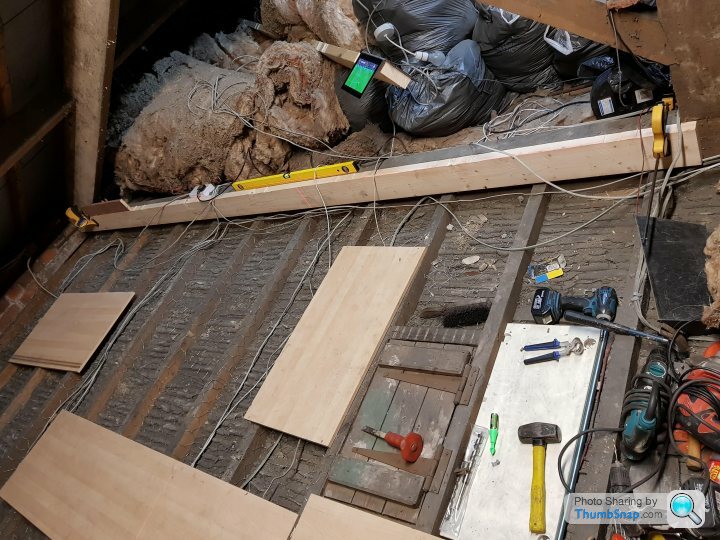
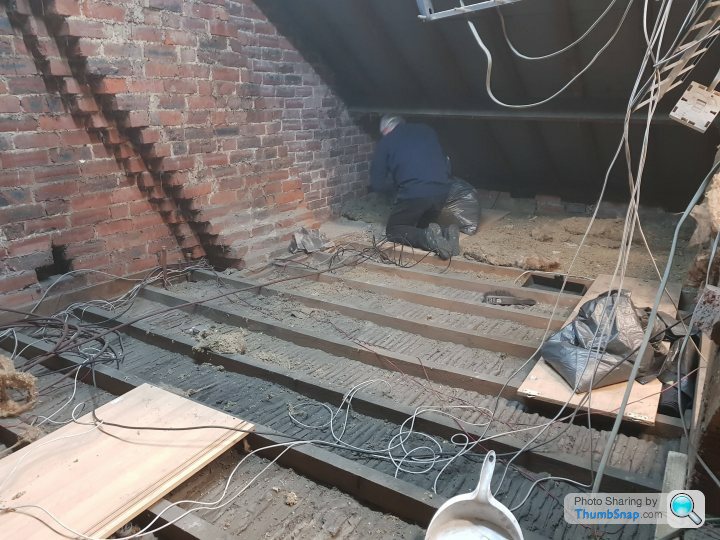
First things first, I needed to clear 110 years worth of rubbish from the ceiling, this is a mix of filth, soot and loose fill insulation. It was horrific.
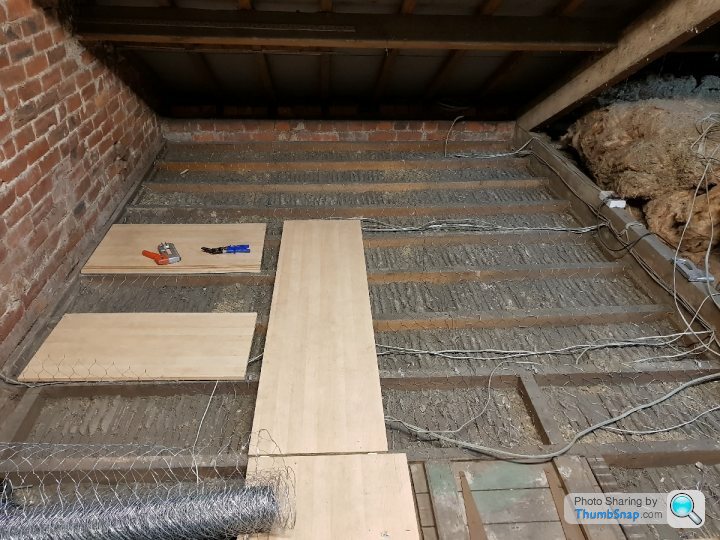
I am wrapping the ceiling joists with chicken wire to retain the insulation in the event of ceiling collapse if there's a fire to upgrade the ceiling to 30+mins fire resistance. This is quite a tedious job, but quite satisfying as the ceiling looks so much neater when it's cleared.
You can see the steady accumulation of full bin bags in this pic:
I started by clearing a quarter of the ceiling and then moved on to getting some of the new floor in so I'd have somewhere solid to work from and so I could get various bits of metal into the roof without it falling through the ceiling.
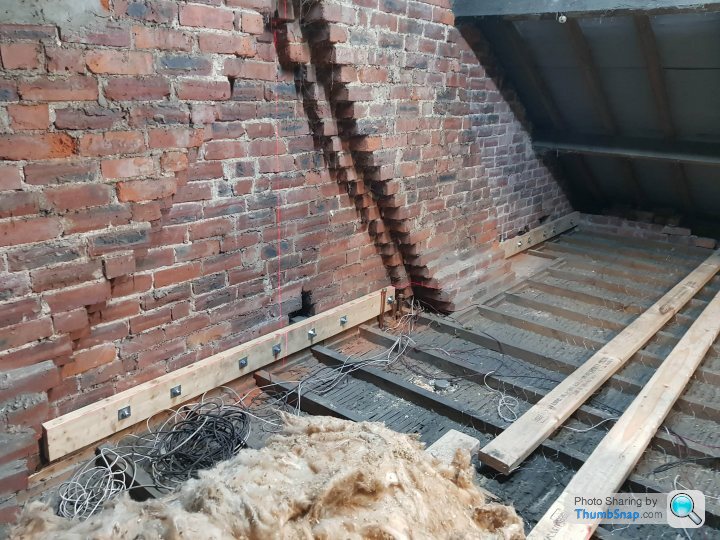
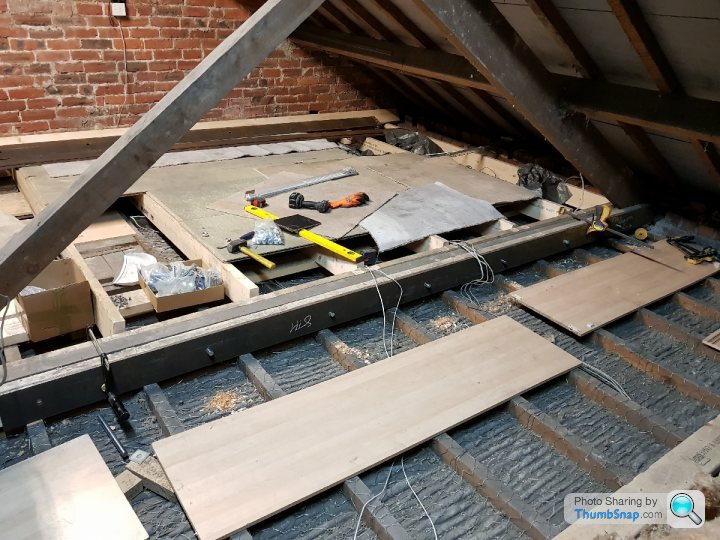
First up, some new wall plates.
We're retaining the bottom chord of the King Truss, so the top of that is the reference for our finished floor height. Timber clamped in place and levelled up:
I used a laser level to transfer the level across tot he gable wall and then used a pair of frame fixings in a slot to hold timber to the gable in the right spot:

The timber was marked to brick centres and pre-drilled with 20mm holes so that once in place the bricks could be drilled in exactly the right place, holes banged in and threaded bar fixied in with resin. Awesome stuff.
Joist hangers on, joists cut and dropped in on one side:
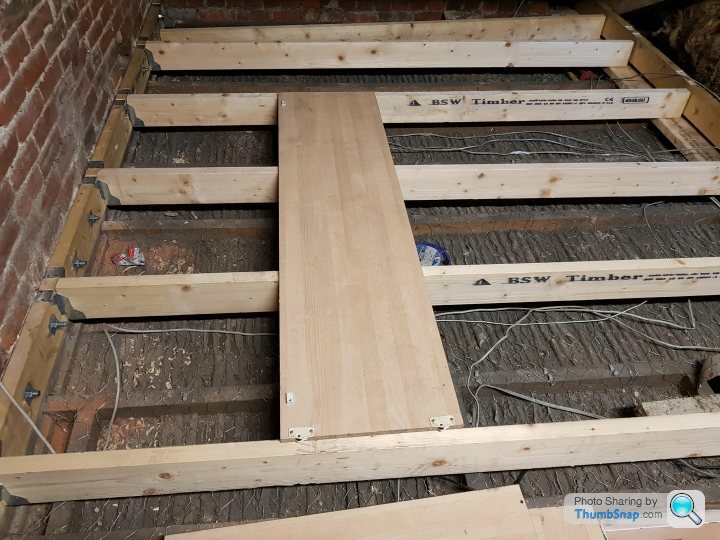
I can't fix the joists at the other end yet as there's some messing about with the King Truss bottom chord to do first, so the ends are resting on a joist sat on the existing ceiling joists. Not ideal, but it's over a stud wall below, so should be fine.
Chucked up some floor boards to give me a relatively quick platform to put material on and to work off.

At this point the rest of the floor is still to tidy up and clear, fit chicken wire etc, so still loads to do.....
We're retaining the bottom chord of the King Truss, so the top of that is the reference for our finished floor height. Timber clamped in place and levelled up:
I used a laser level to transfer the level across tot he gable wall and then used a pair of frame fixings in a slot to hold timber to the gable in the right spot:
The timber was marked to brick centres and pre-drilled with 20mm holes so that once in place the bricks could be drilled in exactly the right place, holes banged in and threaded bar fixied in with resin. Awesome stuff.
Joist hangers on, joists cut and dropped in on one side:
I can't fix the joists at the other end yet as there's some messing about with the King Truss bottom chord to do first, so the ends are resting on a joist sat on the existing ceiling joists. Not ideal, but it's over a stud wall below, so should be fine.
Chucked up some floor boards to give me a relatively quick platform to put material on and to work off.
At this point the rest of the floor is still to tidy up and clear, fit chicken wire etc, so still loads to do.....


 |https://thumbsnap.com/0eTedYZc[/url]

Next job was to remove a section of this here ceiling joist:

That's because it's sat on top of the spine wall doing precisely nothing. And it's in the way of my steel beams.
Then, I trimmed some timber to fit inside a UB152, routed the edges to the flange profile and everything. Mainly because I was twiddling my thumbs a bit waiting for the steel:

While I was getting these cut to length and in roughly the right place I smacked the back of one of the ceiling speakers, so this is the view of our bedroom floor from above, with the speaker on the floor looking sorry for itself:
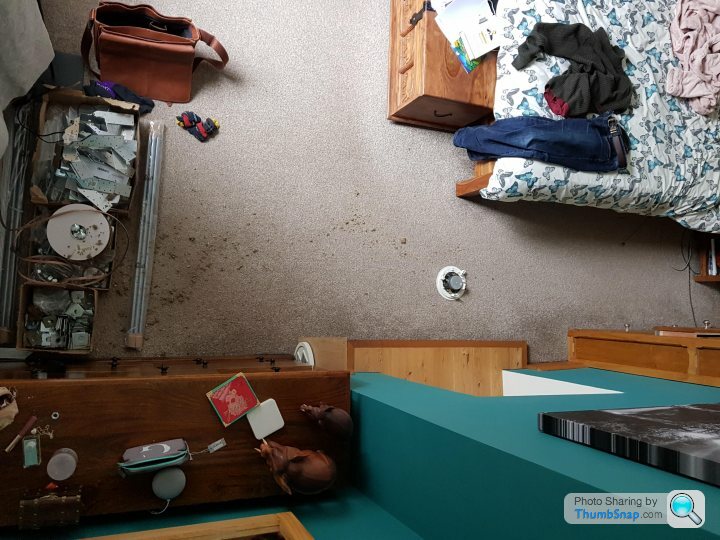
That's because it's sat on top of the spine wall doing precisely nothing. And it's in the way of my steel beams.
Then, I trimmed some timber to fit inside a UB152, routed the edges to the flange profile and everything. Mainly because I was twiddling my thumbs a bit waiting for the steel:
While I was getting these cut to length and in roughly the right place I smacked the back of one of the ceiling speakers, so this is the view of our bedroom floor from above, with the speaker on the floor looking sorry for itself:
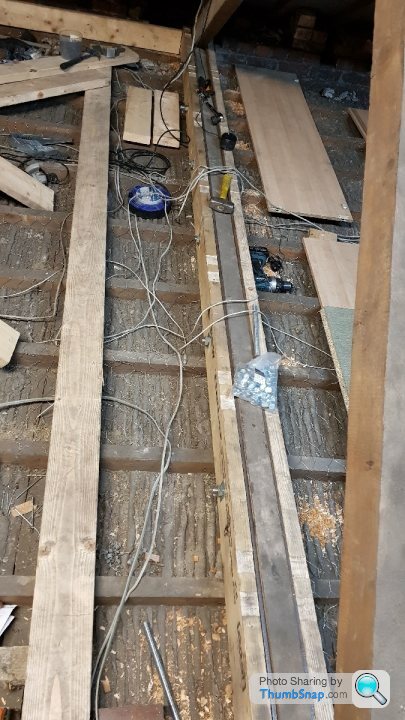
The some steel showed up, and three of us dragged them off the side of the truck, up the stairs, through my new hole and onto my platform:

This is 4 lengths of 160mm x 10mm plate, to be bolted either side of the king truss bottom chord.
Then we yoinked up a pair of UB152s to run wall to spine to wall:

Dragged these roughly into place to make sure they were the right length, but need padstones fitting before they can go in properly:

This is 4 lengths of 160mm x 10mm plate, to be bolted either side of the king truss bottom chord.
Then we yoinked up a pair of UB152s to run wall to spine to wall:
Dragged these roughly into place to make sure they were the right length, but need padstones fitting before they can go in properly:
paulrockliffe said:
Apologies about the pictures, any hints on how to stop the uploady thing from picking random orientations?
Turn your heads.
I load mine into a picture editor and re-save them, seems to sort out orientation. I think it's that the iphone doesn't embed the data correctly with the image or something.Turn your heads.
Interesting seeing your way of doing this, I remember you mentioning it on my thread.
Steel Padstones and some clamping brackets made up:

Drilled and threaded bar sorted:
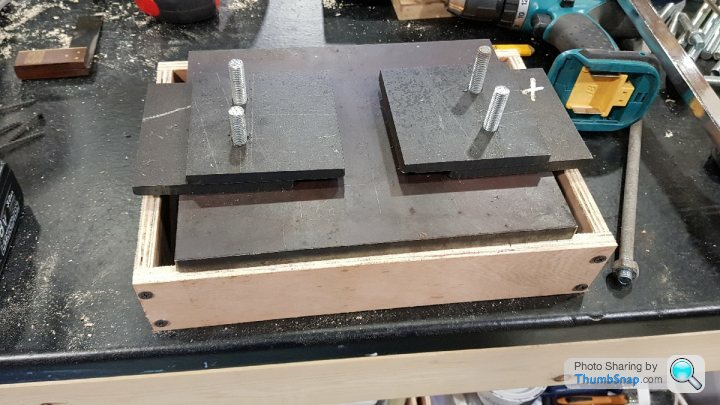
These will be set onto cast-concrete front and back and at the spine wall, with the threaded rod allowing the steel beams to be bolted down.
This approach means that I don't need to hack into the walls below to fit concrete padstones, which would have been 200mm deep.
Drilled and threaded bar sorted:
These will be set onto cast-concrete front and back and at the spine wall, with the threaded rod allowing the steel beams to be bolted down.
This approach means that I don't need to hack into the walls below to fit concrete padstones, which would have been 200mm deep.
Next job is reinforcing the bottom chord of the existing King Truss. This is to be plated with 12mm steel plates and have timber either side of that for joist hangers to be nailed into. As a result I need to drill close to perfectly perpendicular to the plate to hit both 22mm holes in the steel plate as we go through the wallplates and the chord.
Guide jig made up:

Chord and timber built up, steel plate fixed and the guide used to drill through the lot - hopefully the second steel plate will then line up!
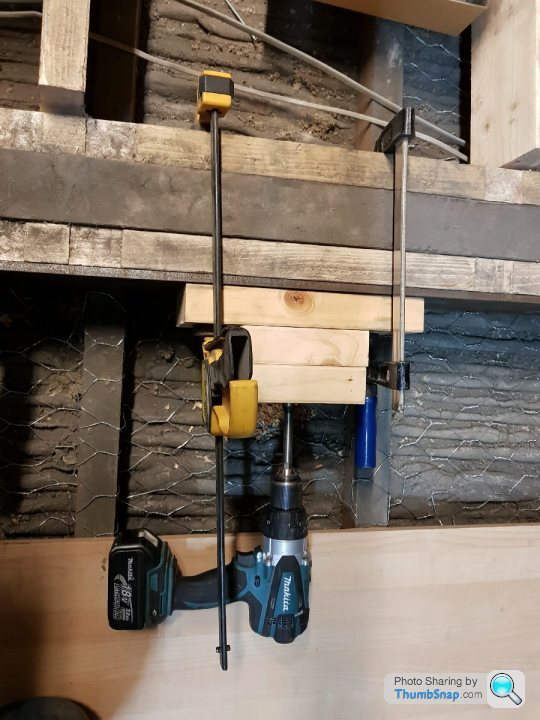
Front half all drilled and bolts through:
Steel moved next to the chord and bolts back through, all fits!

Looks like this when it's all bolted up:
Guide jig made up:
Chord and timber built up, steel plate fixed and the guide used to drill through the lot - hopefully the second steel plate will then line up!
Front half all drilled and bolts through:
Steel moved next to the chord and bolts back through, all fits!
Looks like this when it's all bolted up:
Gassing Station | Homes, Gardens and DIY | Top of Page | What's New | My Stuff