Help with butchered old staircase
Discussion


It's update time as a fair bit has happened since last time I updated the thread
Bear with me a lot of what has happened is whilst I have been away working, and I'm relying on what my partner sends me through whatsapp. Her photography skills are not the best, but it will not be difficult to see at what point I left to work
I recently set to work on the part I was dreading. Sorting out the bullnose step at the bottom of the main flight. Which was badly damaged and looking like this

Using cut up bits of plastic from an old 25l paint tub I squared off the edge of the inside of the bullnose with resin.This gave me a square edge to seal against with quite an elaborate mould with the rest of the pieces of plastic.

Poured in the resin and left it to set, after setting and removing the plastic I was left with this:

For the next full day I shaped it by eye using a multi tool with a rasp attachment as nothing else would touch it due to the hardness. This was slow and back breaking but it's 100% better than what was there before. I will be putting an edge to the bottom step as got separate resin mould cut to size and ready tofix in place.


I managed to keep the small step detail under the curve too

Wanting to push things on I employed my trusty builder to move back the bathroom wall to remove this carbuncle of plasterwork where it goes under the half landing. We also planned to replace the horrid cupboard underneath with something much more fitting.

Other works included 3 new radiators installing instead of the one tiny one that is always glowing and open up the doorway between the hall and the dining room, to try and open things out a little. RSJ ordered after a little investigation work, revealing that the wall was not original. Also the doorway architrave was beyond repair having got wet at some time in its life and rotted.

On the way back from picking my partner from the airport I get a phone call in the car from the builder explaining that there is a slight problem with the wall between the dining room and hall. On removing the plaster the wall was found to be bowed and could be moved by leaning against it On the plus side it was not a structural wall and it was the plaster that was doing a good job of holding it up!
He couldn't leave it like that and on our return we arrived to 3 rather dusty builders and a skip completely full of bricks we didn't expect to have to remove. The opening though was an unexpected surprise and has changed the direction the hallway and steps were to go.
I have no pictures of the aftermath, as I was so shocked by the difference, but this gives an idea of how things changed

View from the toilet

Also found a use for that RSJ, this was the passage between the hall and the kitchen. The 8" square beam was so rotten the builder pulled it down with his hands. I've learnt never to under estimate how many surprises an old building can throw up.

We didn't want to simply clear up where the old wall had been and wanted to create the look that the dining area is a different part of the hall. So the builder made up frames and then plasterboarded up. The plasterers came and did their thing and this is how it looks now

Decided to leave the stairs open, just looks so much better and we have gained a cupboard by blanking off the silly small double doors and making a cupboard out of it

Gone for raw metal radiators. The colours and tones really appeal to me

Not so sure on the radiators with the pipework coming out of the walls. I'll reserve judgement till I return home.There is practical advantages to it I guess


With us wanting to put down wooden flooring we were informed that the entire area was unsurprisingly way out of level. So the whole area was levelled out using a latex self levelling scree. That is now dried out and we are just about ready for Christmas.

A Christmas I will miss as I'll be doing a 12 hour shift in the middle of the North Sea!
Merry Christmas everyone
Bear with me a lot of what has happened is whilst I have been away working, and I'm relying on what my partner sends me through whatsapp. Her photography skills are not the best, but it will not be difficult to see at what point I left to work
I recently set to work on the part I was dreading. Sorting out the bullnose step at the bottom of the main flight. Which was badly damaged and looking like this
Using cut up bits of plastic from an old 25l paint tub I squared off the edge of the inside of the bullnose with resin.This gave me a square edge to seal against with quite an elaborate mould with the rest of the pieces of plastic.
Poured in the resin and left it to set, after setting and removing the plastic I was left with this:
For the next full day I shaped it by eye using a multi tool with a rasp attachment as nothing else would touch it due to the hardness. This was slow and back breaking but it's 100% better than what was there before. I will be putting an edge to the bottom step as got separate resin mould cut to size and ready tofix in place.
I managed to keep the small step detail under the curve too
Wanting to push things on I employed my trusty builder to move back the bathroom wall to remove this carbuncle of plasterwork where it goes under the half landing. We also planned to replace the horrid cupboard underneath with something much more fitting.
Other works included 3 new radiators installing instead of the one tiny one that is always glowing and open up the doorway between the hall and the dining room, to try and open things out a little. RSJ ordered after a little investigation work, revealing that the wall was not original. Also the doorway architrave was beyond repair having got wet at some time in its life and rotted.
On the way back from picking my partner from the airport I get a phone call in the car from the builder explaining that there is a slight problem with the wall between the dining room and hall. On removing the plaster the wall was found to be bowed and could be moved by leaning against it
On the plus side it was not a structural wall and it was the plaster that was doing a good job of holding it up!He couldn't leave it like that and on our return we arrived to 3 rather dusty builders and a skip completely full of bricks we didn't expect to have to remove. The opening though was an unexpected surprise and has changed the direction the hallway and steps were to go.
I have no pictures of the aftermath, as I was so shocked by the difference, but this gives an idea of how things changed
View from the toilet
Also found a use for that RSJ, this was the passage between the hall and the kitchen. The 8" square beam was so rotten the builder pulled it down with his hands. I've learnt never to under estimate how many surprises an old building can throw up.
We didn't want to simply clear up where the old wall had been and wanted to create the look that the dining area is a different part of the hall. So the builder made up frames and then plasterboarded up. The plasterers came and did their thing and this is how it looks now
Decided to leave the stairs open, just looks so much better and we have gained a cupboard by blanking off the silly small double doors and making a cupboard out of it
Gone for raw metal radiators. The colours and tones really appeal to me
Not so sure on the radiators with the pipework coming out of the walls. I'll reserve judgement till I return home.There is practical advantages to it I guess
With us wanting to put down wooden flooring we were informed that the entire area was unsurprisingly way out of level. So the whole area was levelled out using a latex self levelling scree. That is now dried out and we are just about ready for Christmas.
A Christmas I will miss as I'll be doing a 12 hour shift in the middle of the North Sea!
Merry Christmas everyone
Edited by Uggers on Saturday 23 December 17:14
That's some superb work on that bullnose. Kudos for taking the time on that!
Uggers said:
A Christmas I will miss as I'll be doing a 12 hour shift in the middle of the North Sea!
Merry Christmas everyone
I'm just tucking into breakfast offshore. With any luck I'm home on the 28th so feel your pain.Merry Christmas everyone
Thanks, it's slowly getting there but now we are starting to push for it completed end of January.
It has been ongoing for nearly 2 years now, but I've been hampered by my (possibly misguided) refusal to borrow money against the house to pay for it all.
But can see the end game now as before was a constant slog of sanding, stripping and sorting bodges.

It has been ongoing for nearly 2 years now, but I've been hampered by my (possibly misguided) refusal to borrow money against the house to pay for it all.
But can see the end game now as before was a constant slog of sanding, stripping and sorting bodges.
samdale said:
I'm just tucking into breakfast offshore. With any luck I'm home on the 28th so feel your pain.
I cannot complain 3rd time in 11 years is good going. I get off on the 5th Jan just in time to take the decorations down and carry on from where I left off a week ago 

Wow!
Just came across this thread and finished reading from start to finish - your efforts in repairing the Photobucket much appreciated! Your house is absolutely beautiful externally and will be internally, too. It makes me happy to see it being returned to its former glory.
Best of luck with it all!
Just came across this thread and finished reading from start to finish - your efforts in repairing the Photobucket much appreciated! Your house is absolutely beautiful externally and will be internally, too. It makes me happy to see it being returned to its former glory.
Best of luck with it all!
Still plugging away at this. To be fair it has expanded into a staircase/hallway refurbishment and all the extra work that entails.
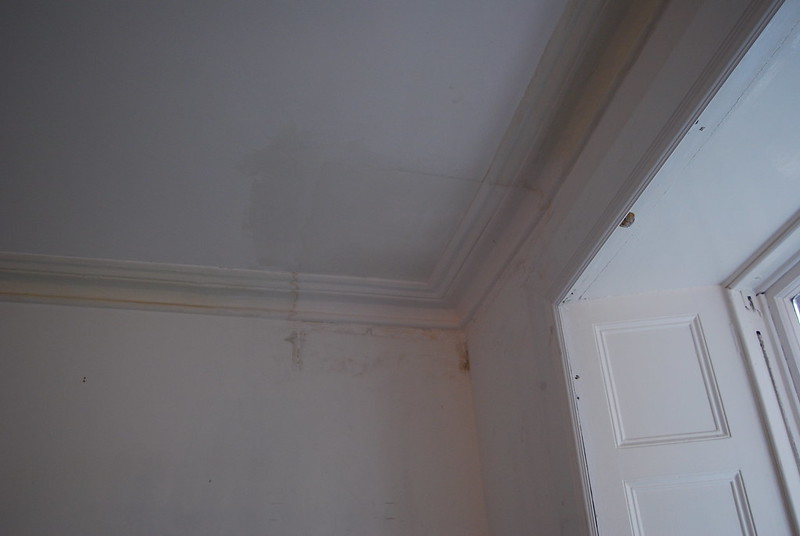
We had to get a lot of cornicing replaced/repaired, luckily I used a man who does it old school whereby the cornicing is moulded in situ. Makes a hell of a mess but the end results are great.
Before
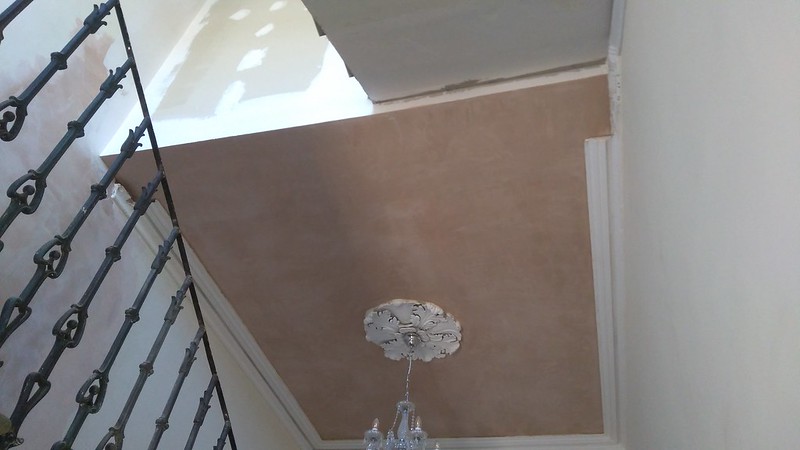 IMG_20180529_094944 by Lee Watkinson, on Flickr
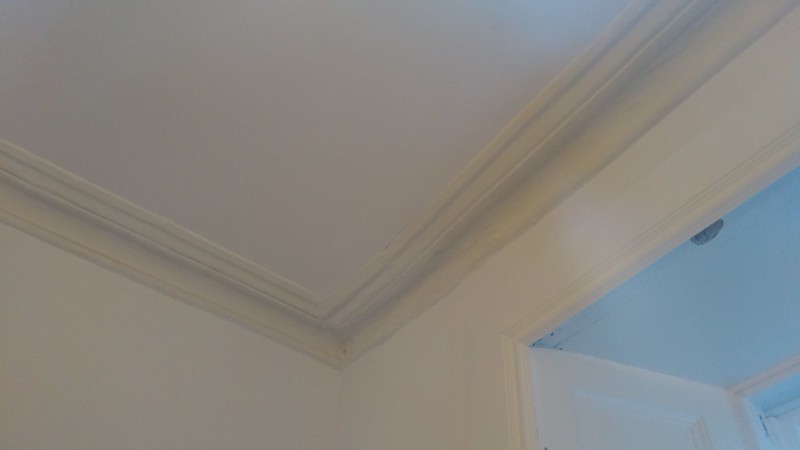
After
 IMG_20180601_113730 by Lee Watkinson, on Flickr
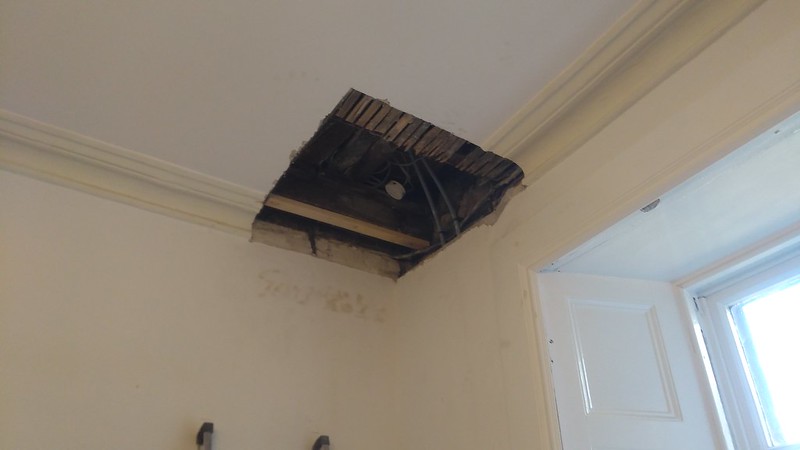
This area had water damage and had been bodged. Also the plaster on the ceiling was beginning to come away from the laths
 IMG_20180529_094620 by Lee Watkinson, on Flickr
So pulled it all down and replaced the rotten lats and dodgy cornicing
 IMG_20180529_132402 by Lee Watkinson, on Flickr
And let the cornicing guy do his thing
 DSC_0005 by Lee Watkinson, on Flickr
Where there used to be a wall there is now an area missing a lot of cornicing, so that was all replaced
 IMG_20180531_220655 by Lee Watkinson, on Flickr
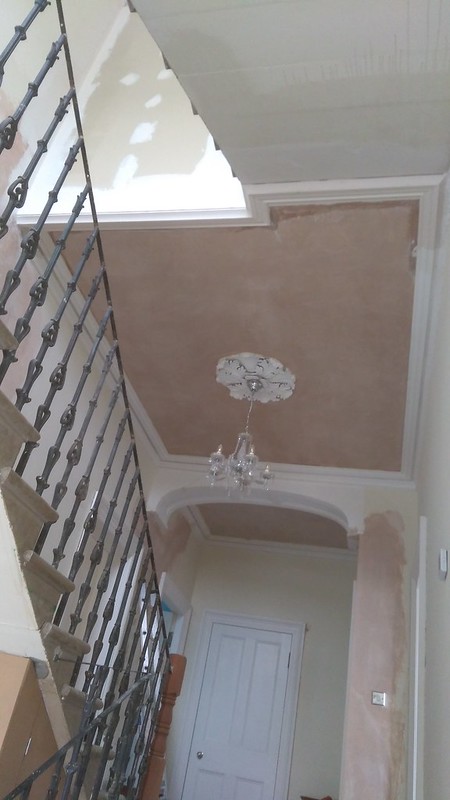
And the area over the ground floor stairs
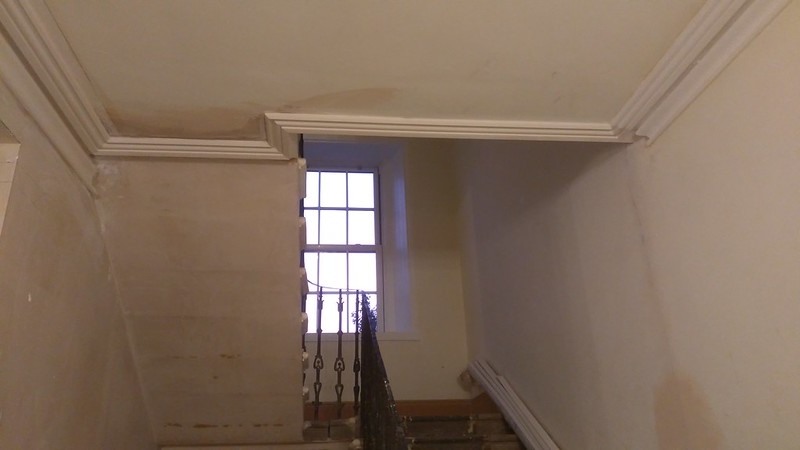 IMG_20180531_220729 by Lee Watkinson, on Flickr
I've spent quite a long time, repairing walls, stripping/painting doors, repairing ceilings and now starting on the painting, finally!
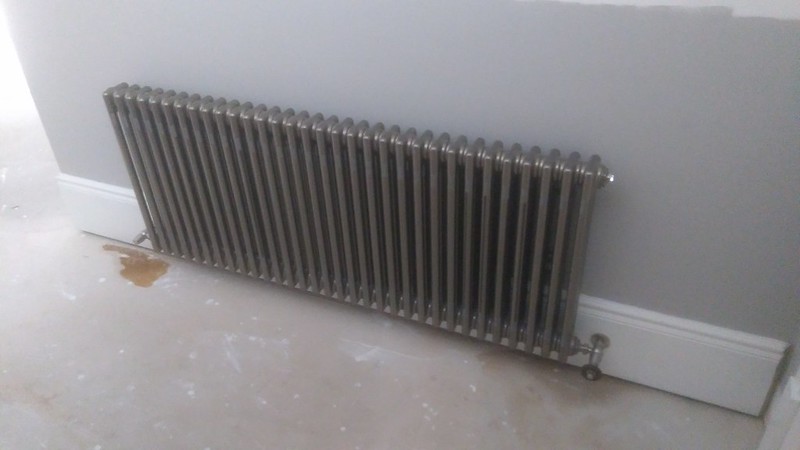
I've put the skirting down behind the radiators and painted behind them, I'm still not sold on the grey for below the dado rail to be honest but it's the other halfs choice. Still love the raw metal radiators, I'd have preferred the valves to be vertical, but it would have meant digging up solid stone floors and I guess less places for fluff to accumulate around.
 IMG_20180722_180548 by Lee Watkinson, on Flickr
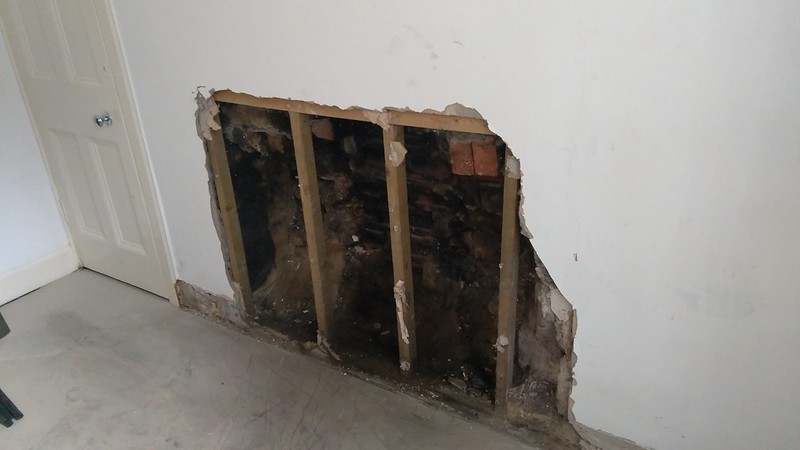
One day whilst taking time out, I talked myself into doing a bit of exploratory work to see if there was still remnants of the old fireplace that must have been there at one time. There wasn't much left, but there is a big hole now where a wood burner and fire surround will go. The sweep has been in and miraculously the chimney is clear right to the cap and is good for lining.
 IMG_20180425_105351 by Lee Watkinson, on Flickr
Idea been as this is the centre of the house, it will really keep the core of the house warm leaving the central heating to heat the rooms. Hopefully find a source of cheap wood as there is a lot of worked forests around us.
And finally paint is going down on the stairs, suprised myself how well the resin pieces have worked, absolutely rock solid.
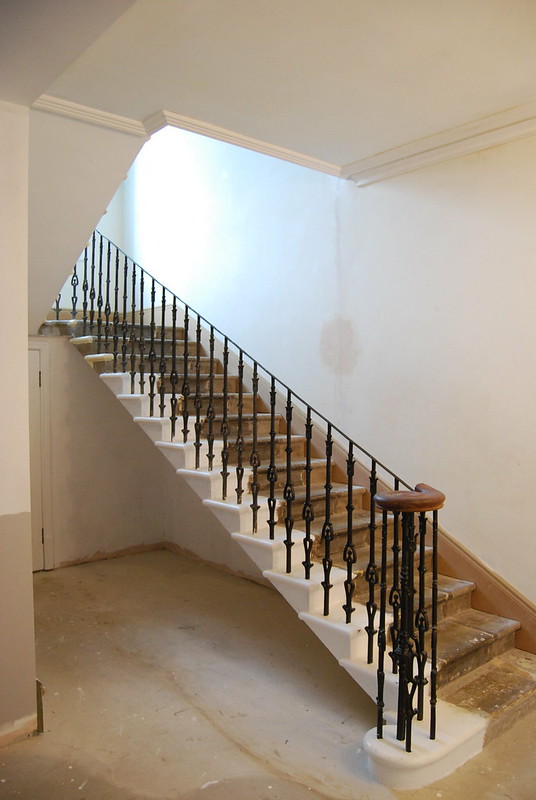 DSC_0001 by Lee Watkinson, on Flickr
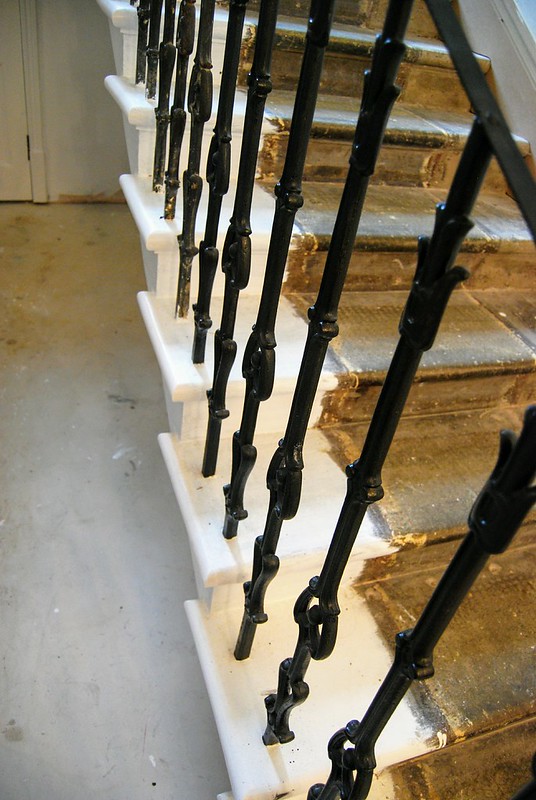 DSC_0008 by Lee Watkinson, on Flickr
Wood burner will be in early Oct. Flooring down after everything is painted. Attach new skirting and hopefully the hallway and stairs will be ready for Christmas!
I really hope so, this coming up on 3 years of on and off work and I really miss proper floors and a banister!
We had to get a lot of cornicing replaced/repaired, luckily I used a man who does it old school whereby the cornicing is moulded in situ. Makes a hell of a mess but the end results are great.
Before
IMG_20180529_094944 by Lee Watkinson, on FlickrAfter
IMG_20180601_113730 by Lee Watkinson, on FlickrThis area had water damage and had been bodged. Also the plaster on the ceiling was beginning to come away from the laths
IMG_20180529_094620 by Lee Watkinson, on FlickrSo pulled it all down and replaced the rotten lats and dodgy cornicing
IMG_20180529_132402 by Lee Watkinson, on FlickrAnd let the cornicing guy do his thing
DSC_0005 by Lee Watkinson, on FlickrWhere there used to be a wall there is now an area missing a lot of cornicing, so that was all replaced
IMG_20180531_220655 by Lee Watkinson, on FlickrAnd the area over the ground floor stairs
IMG_20180531_220729 by Lee Watkinson, on FlickrI've spent quite a long time, repairing walls, stripping/painting doors, repairing ceilings and now starting on the painting, finally!
I've put the skirting down behind the radiators and painted behind them, I'm still not sold on the grey for below the dado rail to be honest but it's the other halfs choice. Still love the raw metal radiators, I'd have preferred the valves to be vertical, but it would have meant digging up solid stone floors and I guess less places for fluff to accumulate around.
IMG_20180722_180548 by Lee Watkinson, on FlickrOne day whilst taking time out, I talked myself into doing a bit of exploratory work to see if there was still remnants of the old fireplace that must have been there at one time. There wasn't much left, but there is a big hole now where a wood burner and fire surround will go. The sweep has been in and miraculously the chimney is clear right to the cap and is good for lining.
IMG_20180425_105351 by Lee Watkinson, on FlickrIdea been as this is the centre of the house, it will really keep the core of the house warm leaving the central heating to heat the rooms. Hopefully find a source of cheap wood as there is a lot of worked forests around us.
And finally paint is going down on the stairs, suprised myself how well the resin pieces have worked, absolutely rock solid.
DSC_0001 by Lee Watkinson, on FlickrDSC_0008 by Lee Watkinson, on FlickrWood burner will be in early Oct. Flooring down after everything is painted. Attach new skirting and hopefully the hallway and stairs will be ready for Christmas!
I really hope so, this coming up on 3 years of on and off work and I really miss proper floors and a banister!
Gassing Station | Homes, Gardens and DIY | Top of Page | What's New | My Stuff