Our French farmhouse build thread.
Discussion


Another job that we had to get the professionals in for was the septic tanks. We are not on mains sewerage so had to have a study done to make sure we could fit them and where they could go. Fortunately we could put them and the filter bed where we wanted so as not to mess about with our plans for the land.
Quotes in, once again 4 people contacted as we needed to use approved people and 2 responses. The guys showed up and went away to work out their quotes. Once of the guys came back to us with his quote and 2 bottles of his homemade pineau for us to sample. This was on a par with moonshine with the amount of alcohol content, but was very nice! Chased up the second guy who finally came through with his quote, but couldn’t do anything for at least 3 months. With the bribe in our minds we went with the first guy and got another bottle, plus to make his access easier he wanted to dig out a new driveway for us. This was all part of our finished plan and meant a saving on some of the groundworks later on.

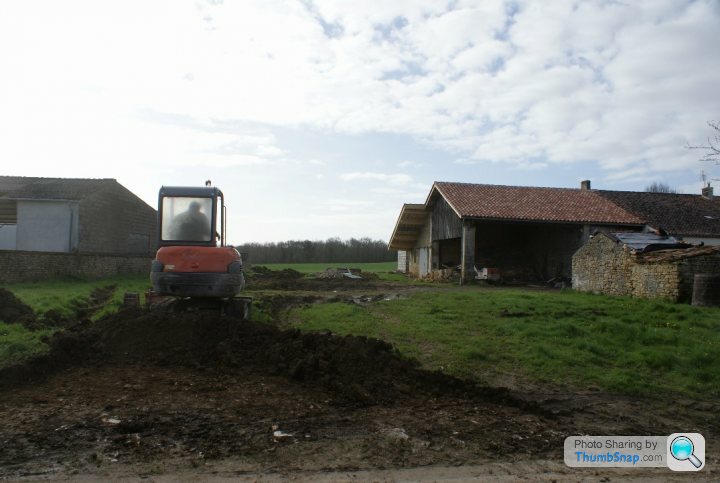
It took a lot longer to dig the holes than expected as we sit on a stone and clay base.

The filter beds made a great hole to put Millie in to play and know that she couldn’t escape. Shame her partner in crime (the dog) could jump in and out at will.

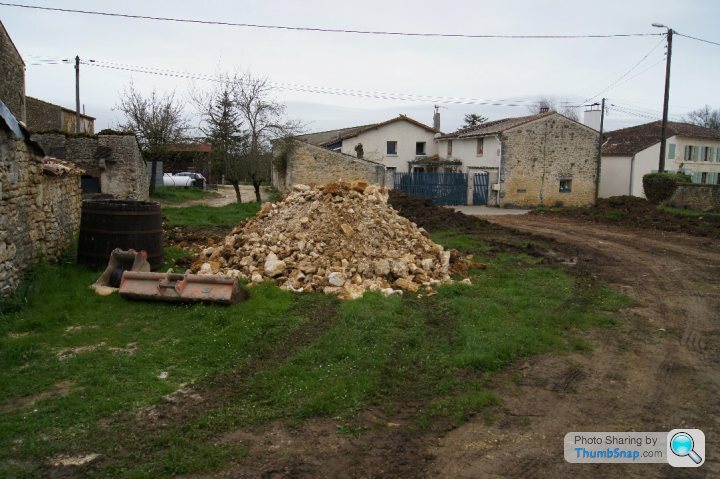
When all was done we were left with a pile of stones that we are slowly getting rid of.
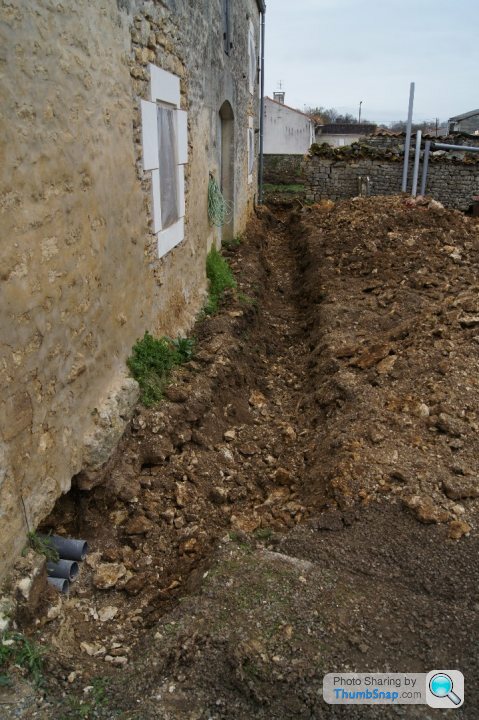
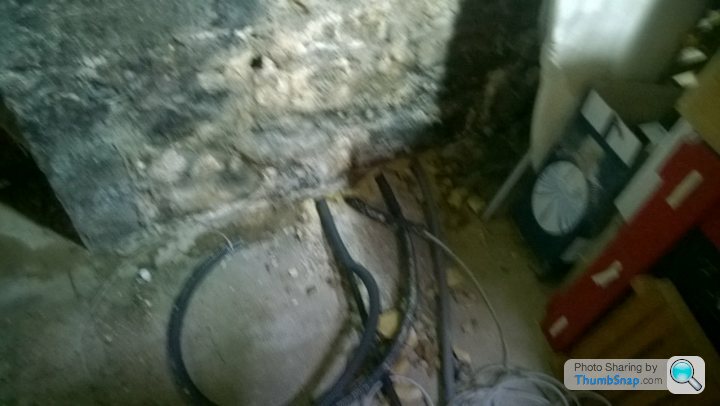
While the tanks were being installed we got him to dig the trench for the waste pipes along the front of the big barn. I did the very end as we knew there was a water pipe exiting the barn somewhere but I didn’t find it. He did so we needed to repair this.
Quotes in, once again 4 people contacted as we needed to use approved people and 2 responses. The guys showed up and went away to work out their quotes. Once of the guys came back to us with his quote and 2 bottles of his homemade pineau for us to sample. This was on a par with moonshine with the amount of alcohol content, but was very nice! Chased up the second guy who finally came through with his quote, but couldn’t do anything for at least 3 months. With the bribe in our minds we went with the first guy and got another bottle, plus to make his access easier he wanted to dig out a new driveway for us. This was all part of our finished plan and meant a saving on some of the groundworks later on.
It took a lot longer to dig the holes than expected as we sit on a stone and clay base.
The filter beds made a great hole to put Millie in to play and know that she couldn’t escape. Shame her partner in crime (the dog) could jump in and out at will.
When all was done we were left with a pile of stones that we are slowly getting rid of.
While the tanks were being installed we got him to dig the trench for the waste pipes along the front of the big barn. I did the very end as we knew there was a water pipe exiting the barn somewhere but I didn’t find it. He did so we needed to repair this.
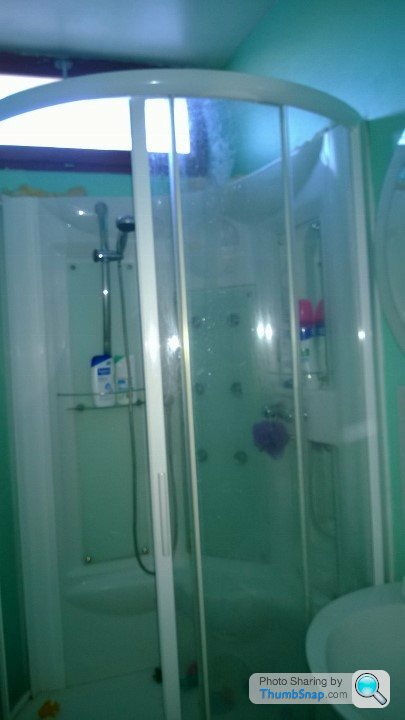
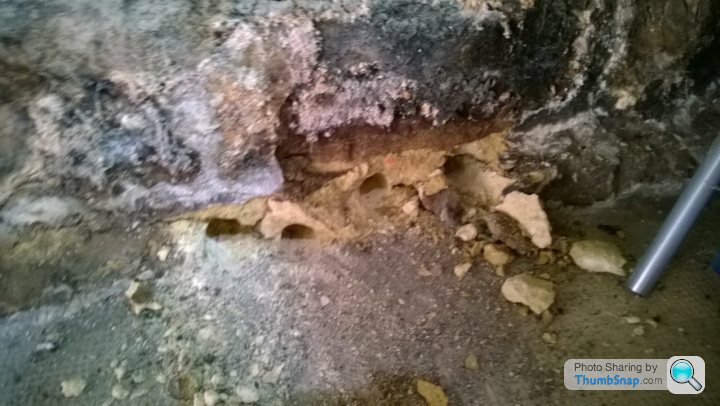
While the septic’s were being fitted I had the opportunity to get rid of the shower in our house and fit the bath we had bought six months ago. The shower unit had a broken floor and the taps leaked so would have a constant drip. First up was to disconnect the old shower from behind. This was blockwork sat behind a closed door from the workshop. The door was removed from its hinges to reveal this “lovely” blockwork wall.
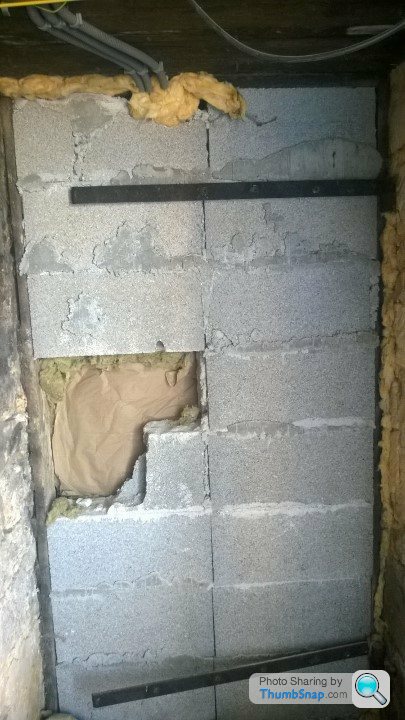
The hole that was there for access had been stuffed with a piece of insulation. This is the only piece of insulation in the whole construction. Water turned off and water supply disconnected and plugged so we could have the water back on. Now the race starts to get this sorted in a day so we can get clean in the morning.
Having no idea how it is put together it is just ripped apart to get it out of the door.
2 hours down and now we can see the damage from the long standing leak that it had at the water connection at the back. We need to replace a section of the wall. One of the DIY places sold a 600 x 600 board that would do the job perfectly. Off we go to get this. Now to screw this to the supports and start plumbing in the taps. This is where the problem of just stacking the blocks on top of each other rears its head and I have to chip out the centre of a block instead of removing the whole thing in case the wall collapsed. Now with my new access the pipe work can be fitted. With this in place it is time to put the bath in. Support battens attached to wall and bath in. Waste pipes fitted and ready for tiling. First up we tile the wall with the taps in and drill the holes for the pipes to protrude through for the taps. It is now getting late and I still have 2 walls to tile and grout then seal the bath.

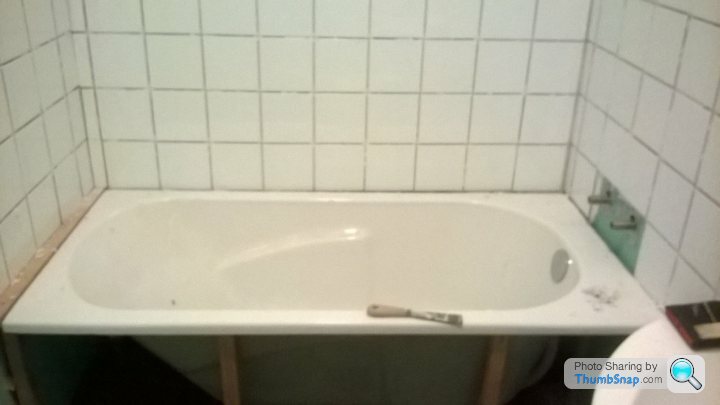
With the walls tiled I could grout. Powder poured into bucket and the amount of water required added and mixed in. From previous experience (not a lot) I thought it was rather a runny mixture. It went on though and it has remained waterproof so can’t complain, but think I will use a little less water next time. With this finished it was time to drill the holes to mount the shower head rail. I spent about an hour trying different drill bits to get the best option for drilling the tiles without cracking. Time well spent though as had no wish to replace a tile.
Last thing to do now is connect the taps, fill the bath and seal the edge. Water off for 5 minute while connecting up. Crawled into bed at 4am but we now have a bath that is more suited to our needs.
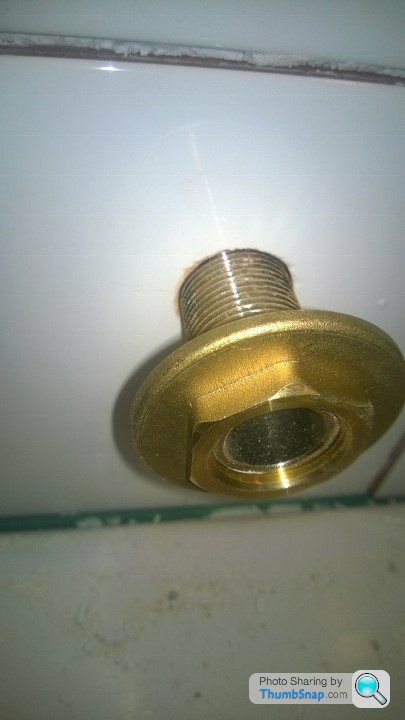
Was really happy with it for the first couple of months but then the temperature control seemed to be losing it as we had to keep turning it down to the point that it was cold and turn it 1mm more to get the right temperature, 1mm more and it was burning. Will not be buying a cheap tap again to tide us over. Tap replaced and working perfect ever since.
The hole that was there for access had been stuffed with a piece of insulation. This is the only piece of insulation in the whole construction. Water turned off and water supply disconnected and plugged so we could have the water back on. Now the race starts to get this sorted in a day so we can get clean in the morning.
Having no idea how it is put together it is just ripped apart to get it out of the door.
2 hours down and now we can see the damage from the long standing leak that it had at the water connection at the back. We need to replace a section of the wall. One of the DIY places sold a 600 x 600 board that would do the job perfectly. Off we go to get this. Now to screw this to the supports and start plumbing in the taps. This is where the problem of just stacking the blocks on top of each other rears its head and I have to chip out the centre of a block instead of removing the whole thing in case the wall collapsed. Now with my new access the pipe work can be fitted. With this in place it is time to put the bath in. Support battens attached to wall and bath in. Waste pipes fitted and ready for tiling. First up we tile the wall with the taps in and drill the holes for the pipes to protrude through for the taps. It is now getting late and I still have 2 walls to tile and grout then seal the bath.
With the walls tiled I could grout. Powder poured into bucket and the amount of water required added and mixed in. From previous experience (not a lot) I thought it was rather a runny mixture. It went on though and it has remained waterproof so can’t complain, but think I will use a little less water next time. With this finished it was time to drill the holes to mount the shower head rail. I spent about an hour trying different drill bits to get the best option for drilling the tiles without cracking. Time well spent though as had no wish to replace a tile.
Last thing to do now is connect the taps, fill the bath and seal the edge. Water off for 5 minute while connecting up. Crawled into bed at 4am but we now have a bath that is more suited to our needs.
Was really happy with it for the first couple of months but then the temperature control seemed to be losing it as we had to keep turning it down to the point that it was cold and turn it 1mm more to get the right temperature, 1mm more and it was burning. Will not be buying a cheap tap again to tide us over. Tap replaced and working perfect ever since.
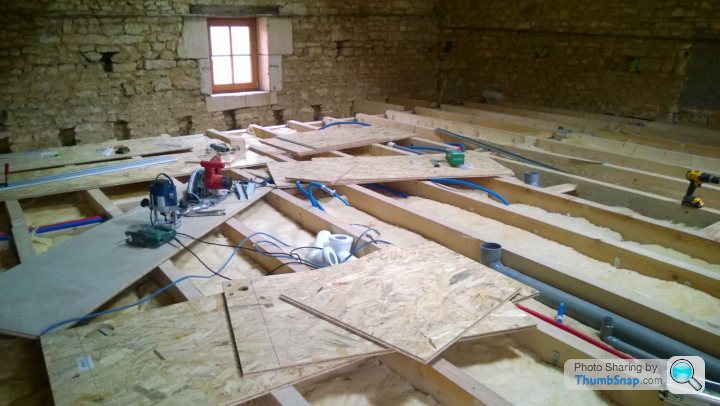
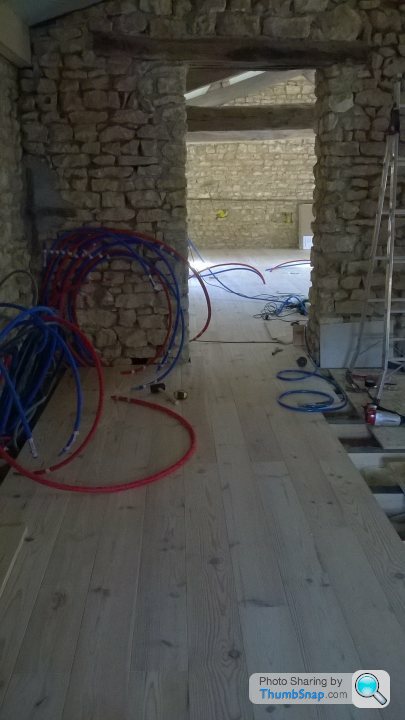
Now we have all the structure in place it is time to plumb in the wastes in the bathrooms. I did a lot of measuring and testing on this before starting to cut my pipes. I have my plan and now time to put it into action. The 2 ensuites are in my sights first. Termination points are marked on the joists upstairs for each system so I know where I am aiming for. Back downstairs to start measuring and then upstairs again to start cutting holes in the ceiling to pass my waste pipes through. In with the first one and happy with the fit. On to the second and we have a problem. The soil pipe that is protruding out of the concrete floor is angled towards the wall. This is a little awkward as I have no wish to force the pipes together with a very small sealing area.
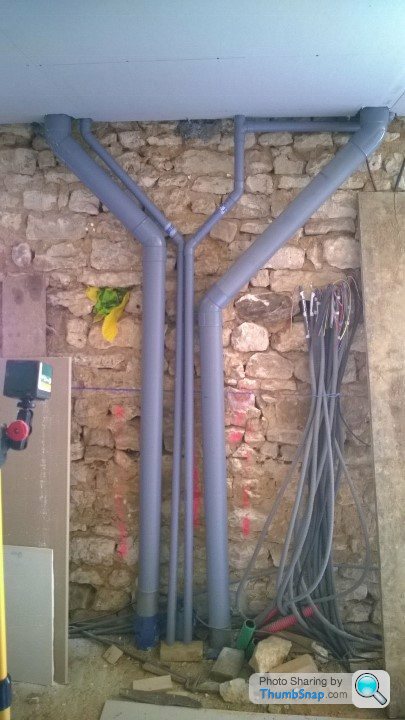

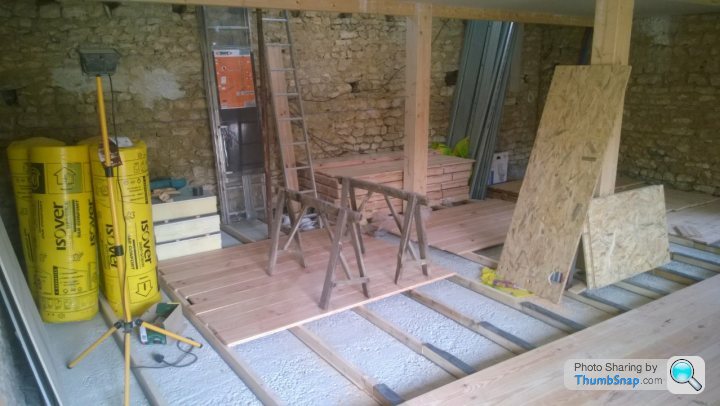
I grabbed a piece of 100mm waste pipe and off to the workshop. The term workshop is very loose as it is more like a furniture and stuff we haven’t unboxed store. I do have a bench in there with a vice on it. Now I searched through our wine bottles to find a bottle that would slide inside the waste pipe with the snuggest fit. A bottle of prosecco was our winner. Now my plan was to heat up the pipe with the heat gun and then bend it near the base so the top did not distort. First pipe was overcooked a little but it was a sound principle and the top stayed in shape. The idea had legs so I just had to get the heat setting right so as not to cause a problem. After 2 more tests I was happy with the setting and then actioned it and got my pipe in the right direction. With all the pipes now laid in place it was time to cut and lay the OSB board. With careful measurements I got almost all of the floor down and then proudly showed it to cargeekswife when she came out with coffee.
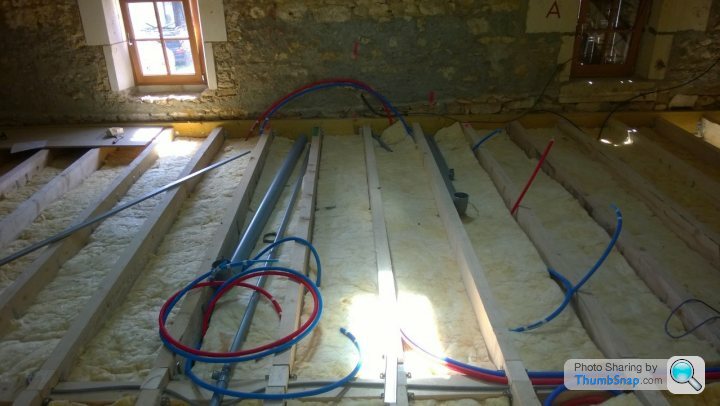
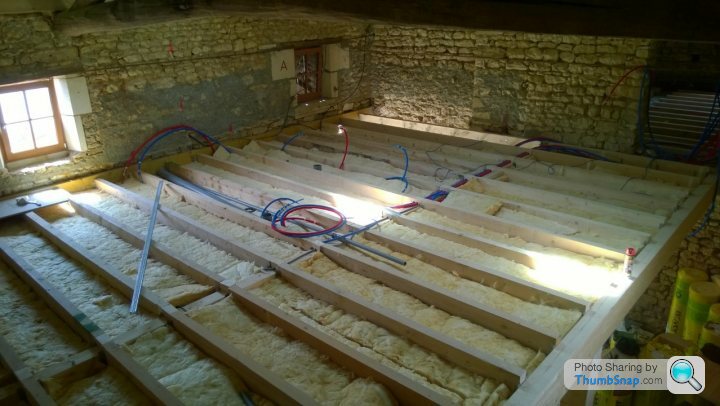
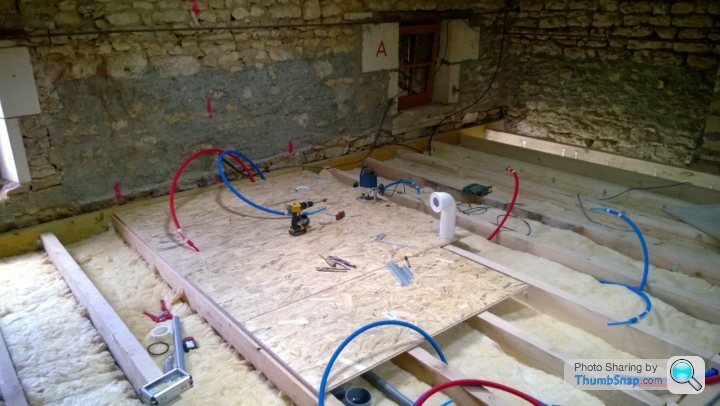
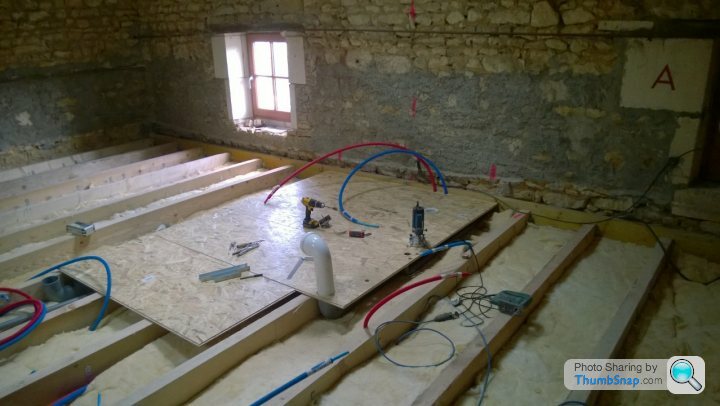
As I walked on it she noticed a bit of flexing in the boards. This was not good as we were planning on tiling the floor and the flex would have cracked the grout. We couldn’t go with thicker board as this would have caused a step into the bathrooms which didn’t fit with the master plan. So now all my carefully measured and cut boards needed lifting to be scrapped.
We now are going with floorboards throughout and protecting the bathroom boards with a yacht varnish. Will lead to a much more cohesive finish I think and warmer under foot.
As the building is not straight and we have certain areas where we want the lines of the boards to run straight with walls we started over the other side of this area so the hallway looks right to us.
I grabbed a piece of 100mm waste pipe and off to the workshop. The term workshop is very loose as it is more like a furniture and stuff we haven’t unboxed store. I do have a bench in there with a vice on it. Now I searched through our wine bottles to find a bottle that would slide inside the waste pipe with the snuggest fit. A bottle of prosecco was our winner. Now my plan was to heat up the pipe with the heat gun and then bend it near the base so the top did not distort. First pipe was overcooked a little but it was a sound principle and the top stayed in shape. The idea had legs so I just had to get the heat setting right so as not to cause a problem. After 2 more tests I was happy with the setting and then actioned it and got my pipe in the right direction. With all the pipes now laid in place it was time to cut and lay the OSB board. With careful measurements I got almost all of the floor down and then proudly showed it to cargeekswife when she came out with coffee.
As I walked on it she noticed a bit of flexing in the boards. This was not good as we were planning on tiling the floor and the flex would have cracked the grout. We couldn’t go with thicker board as this would have caused a step into the bathrooms which didn’t fit with the master plan. So now all my carefully measured and cut boards needed lifting to be scrapped.
We now are going with floorboards throughout and protecting the bathroom boards with a yacht varnish. Will lead to a much more cohesive finish I think and warmer under foot.
As the building is not straight and we have certain areas where we want the lines of the boards to run straight with walls we started over the other side of this area so the hallway looks right to us.
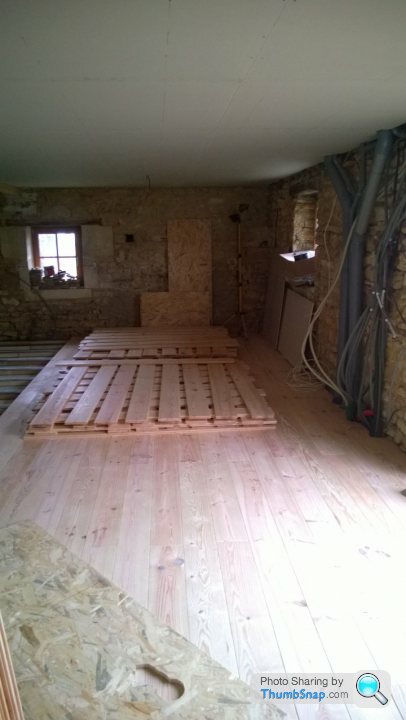
Now we are going with wooden floors everywhere but the kitchen, we were a little short on the flooring we had. This is our original stack.

Packets opened up and then boards passed upstairs and spread about to allow it to acclimatise to the conditions in the barn.

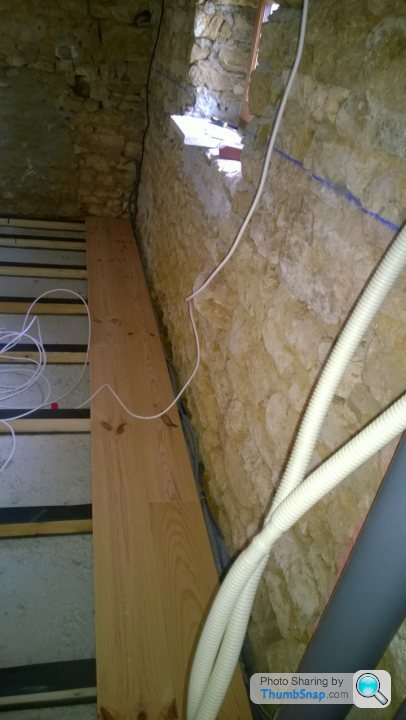
While this is breathing on the other side it was time to have one of our novice mistakes rear its head. While we made a big effort to hang everything level downstairs (ceiling) the beams should have been measured from above as this is what the floor was going straight onto and the ceiling is suspended. Oh well, who would of thought that 2mm differences over the floor would be so annoying. Especially as the bathroom area was flat. Electric planer out and we had a flatter base to work with. Now to stick the tape on to stop squeaking when the floor is laid.
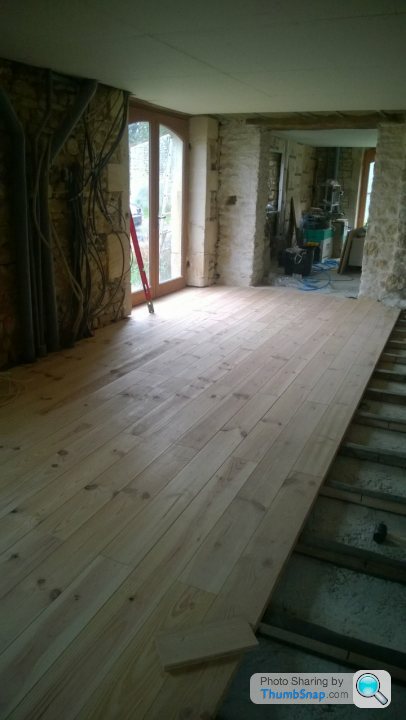
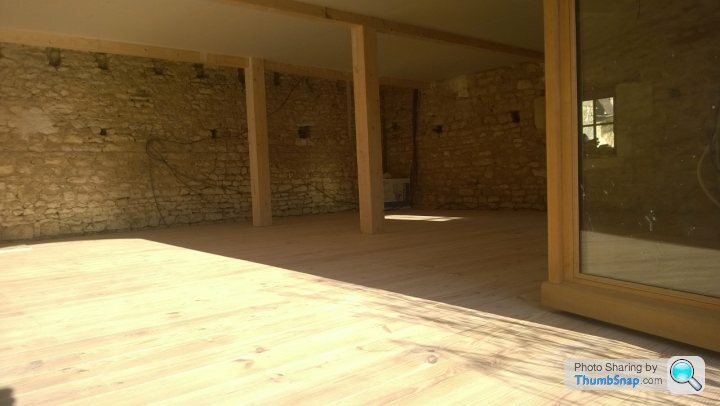
We are wanting to move in over the winter so concentrate on laying the floor jut over the living and half of the area over the kitchen. This is where the water heaters are going so needs to be floored.
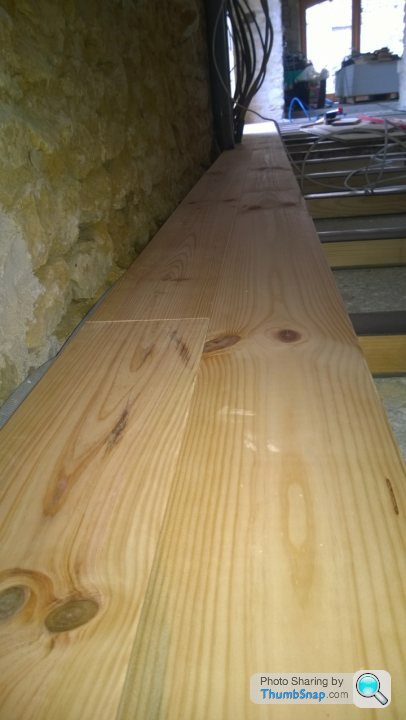
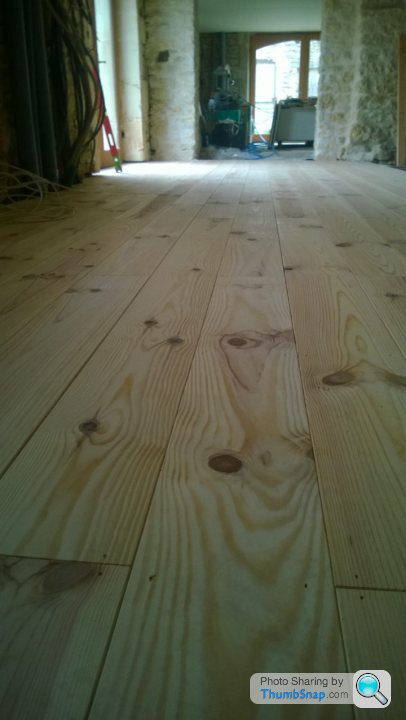
With the first few boards laid the length it is nice to stand back, squint, get the right angle to look at and imagine how it is going to look when finished.
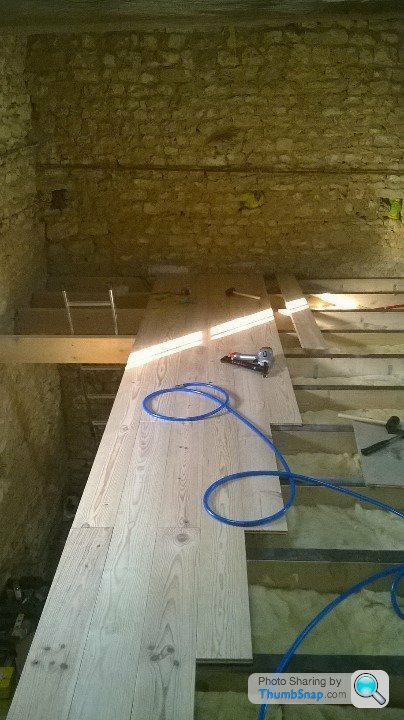

Having measured out where the bathroom plumbing was going when we laid the OSB, it was time to do it again. Not quite so easy when you have 2 boards to go over the loo pipe. The solution was to cut a section of pipe so it could be fitted in the waste pipe and a board can be slid through it. Then we could mark its exact position. Then we had to complete that run of floorboards and do the next row. Then the centre could be marked in the right position in the 2 boards. Then lift the whole lot up again, line the two boards up and drill the big hole. Fit them back together and carry on. This needed to be done for the showers and the loos.
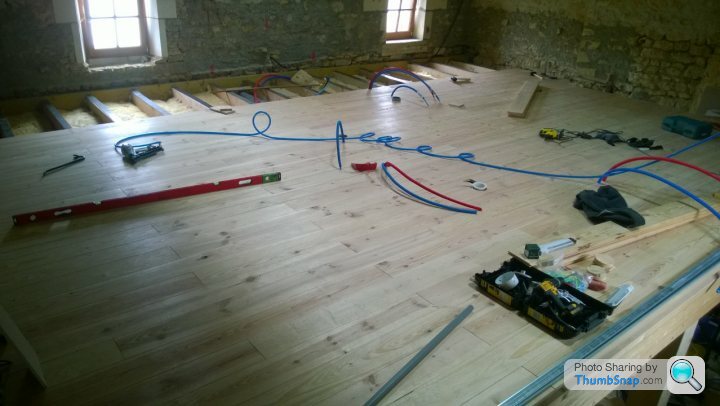
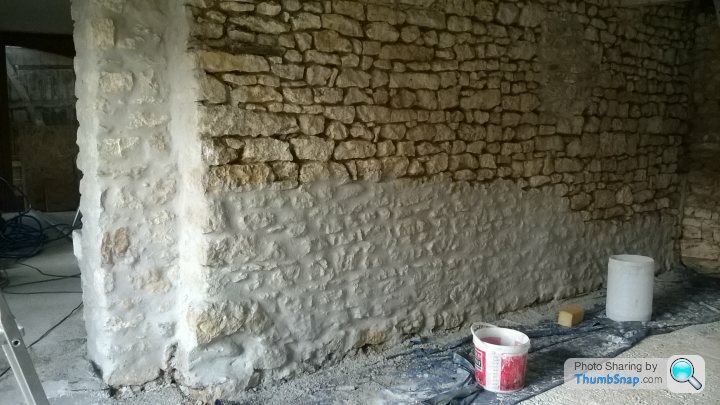
Also after we did the first 6 or so rows we decided it might be a sensible thing to do some re-pointing of the exposed stone wall to avoid damaging the floor. This was our first attempt that turned out well. The only thing we didn’t do very well was protect our hands. We wore gloves but they weren’t waterproof so the lime mortar had done a great job of de-hydrating them! Not a thing I wish to repeat. Happy with the result we received at our first attempt and the flooring that was laid came through unscathed.


Floor went down relatively quickly and looks great. Now the electrician was back and was checking out our work. Guess what? He was happy with how we had done. Hallelujah!!!
Packets opened up and then boards passed upstairs and spread about to allow it to acclimatise to the conditions in the barn.
While this is breathing on the other side it was time to have one of our novice mistakes rear its head. While we made a big effort to hang everything level downstairs (ceiling) the beams should have been measured from above as this is what the floor was going straight onto and the ceiling is suspended. Oh well, who would of thought that 2mm differences over the floor would be so annoying. Especially as the bathroom area was flat. Electric planer out and we had a flatter base to work with. Now to stick the tape on to stop squeaking when the floor is laid.
We are wanting to move in over the winter so concentrate on laying the floor jut over the living and half of the area over the kitchen. This is where the water heaters are going so needs to be floored.
With the first few boards laid the length it is nice to stand back, squint, get the right angle to look at and imagine how it is going to look when finished.
Having measured out where the bathroom plumbing was going when we laid the OSB, it was time to do it again. Not quite so easy when you have 2 boards to go over the loo pipe. The solution was to cut a section of pipe so it could be fitted in the waste pipe and a board can be slid through it. Then we could mark its exact position. Then we had to complete that run of floorboards and do the next row. Then the centre could be marked in the right position in the 2 boards. Then lift the whole lot up again, line the two boards up and drill the big hole. Fit them back together and carry on. This needed to be done for the showers and the loos.
Also after we did the first 6 or so rows we decided it might be a sensible thing to do some re-pointing of the exposed stone wall to avoid damaging the floor. This was our first attempt that turned out well. The only thing we didn’t do very well was protect our hands. We wore gloves but they weren’t waterproof so the lime mortar had done a great job of de-hydrating them! Not a thing I wish to repeat. Happy with the result we received at our first attempt and the flooring that was laid came through unscathed.
Floor went down relatively quickly and looks great. Now the electrician was back and was checking out our work. Guess what? He was happy with how we had done. Hallelujah!!!


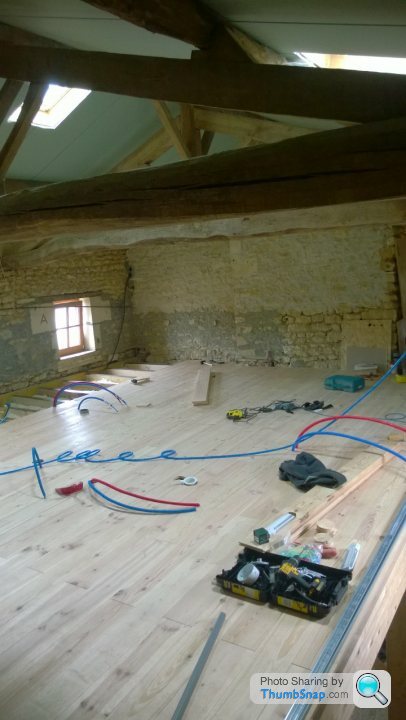
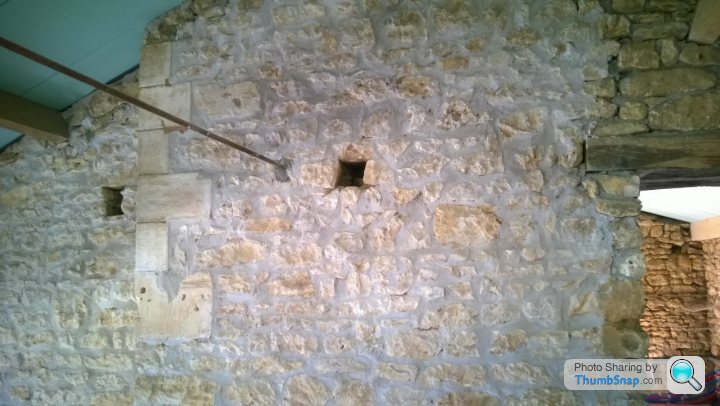
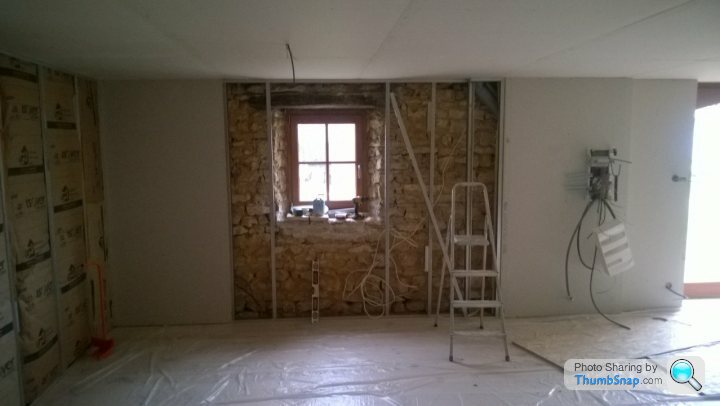
Going back to an earlier picture of the doorway between the 2 halves of the barn upstairs you will see 2 metal tie bars that stretch across from one side to the other. As we are not planning to just rent this out to pygmies we had to move these.
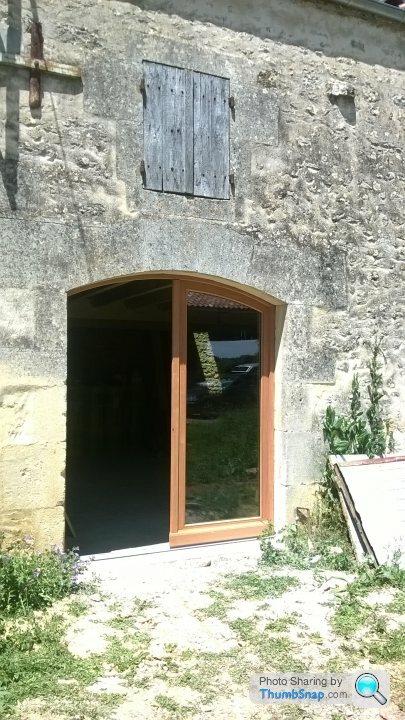
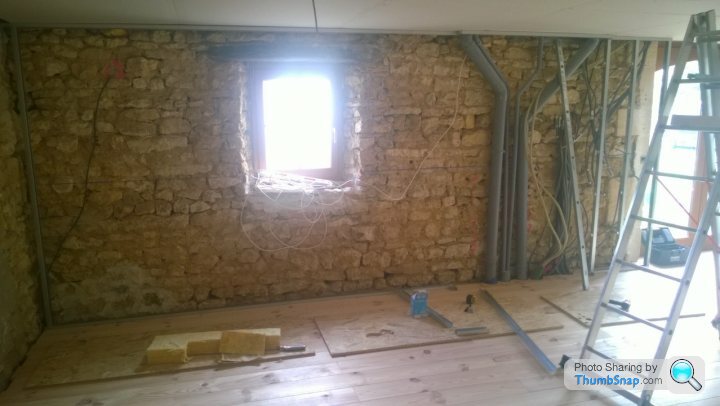
Several months ago we spoke to the local agricultural place about getting new ones made up so we could run them through the floors. After chasing 3 times we are still waiting on them to come back to us. In the meantime I have been looking at the route that they needed to take. If we went with the idea of running through the floor they would of exited the wall just to the left and above of the central door. This would have meant going through the stones surrounding the door way and I think would have been a messy finish. So the hunt was on for solutions plus we had another tie bar to move up as it was over one of the windows.
Just to the left and above this door by about 10cm would have been the placement.
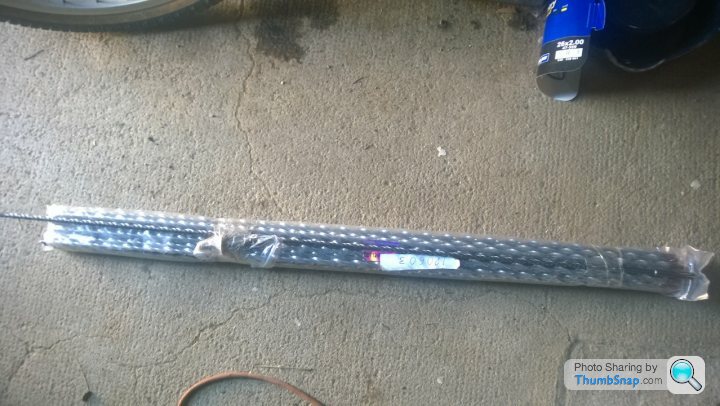
After lots of searching I came across 900mm long helical ties that were ideal for our kind of construction. Photos were taken and mailed over to Twistfix to ask for their confirmation that it was an appropriate solution. They couldn’t have been more helpful and would highly recommend speaking to them if you are in a similar position. We ordered 20 and waited. The wait was only 3 days! You can’t get anything delivered from within France that quickly!
During the intervening period we had a visit from the original owner of the farm, Henri, who sold it to the English couple when he retired. We were very lucky that our roofer/stonemason is his cousin, so we have had quite a few conversations about the place. He was the man that put the ties in due to damage caused when they were bringing water into the village and dug up the road to close to one corner. Henri is very much a belt and braces man. He has looked at the crack as well as our stonemason who has known the place all his life and it hasn’t moved. Witnessed by the fact that the tie bars were so loose you can lift them up about 20cm. Decision made, the tie bars are being cut out and we will pin the building if necessary.
With removing 3 tie bars we still have 8 “tensioning” the whole building. Now they are gone we have free movement between the 2 halves upstairs, and no ugly replacements as we were looking at having big bars running up the outside of the building in the centre.
Several months ago we spoke to the local agricultural place about getting new ones made up so we could run them through the floors. After chasing 3 times we are still waiting on them to come back to us. In the meantime I have been looking at the route that they needed to take. If we went with the idea of running through the floor they would of exited the wall just to the left and above of the central door. This would have meant going through the stones surrounding the door way and I think would have been a messy finish. So the hunt was on for solutions plus we had another tie bar to move up as it was over one of the windows.
Just to the left and above this door by about 10cm would have been the placement.
After lots of searching I came across 900mm long helical ties that were ideal for our kind of construction. Photos were taken and mailed over to Twistfix to ask for their confirmation that it was an appropriate solution. They couldn’t have been more helpful and would highly recommend speaking to them if you are in a similar position. We ordered 20 and waited. The wait was only 3 days! You can’t get anything delivered from within France that quickly!
During the intervening period we had a visit from the original owner of the farm, Henri, who sold it to the English couple when he retired. We were very lucky that our roofer/stonemason is his cousin, so we have had quite a few conversations about the place. He was the man that put the ties in due to damage caused when they were bringing water into the village and dug up the road to close to one corner. Henri is very much a belt and braces man. He has looked at the crack as well as our stonemason who has known the place all his life and it hasn’t moved. Witnessed by the fact that the tie bars were so loose you can lift them up about 20cm. Decision made, the tie bars are being cut out and we will pin the building if necessary.
With removing 3 tie bars we still have 8 “tensioning” the whole building. Now they are gone we have free movement between the 2 halves upstairs, and no ugly replacements as we were looking at having big bars running up the outside of the building in the centre.
Edited by Neilsfirst on Tuesday 3rd November 23:46
As we are getting close to putting the flooring in downstairs it was time to do another re-pointing exercise on the exposed stone wall. With a quick lesson on how the professionals do it from one of our stonemasons we have another crack. It involved a lot more water this time but was so much easier to wash off the excess instead of wire brushing the whole lot. Once cleaned up then we could wade in with wire brushes to tidy it up.

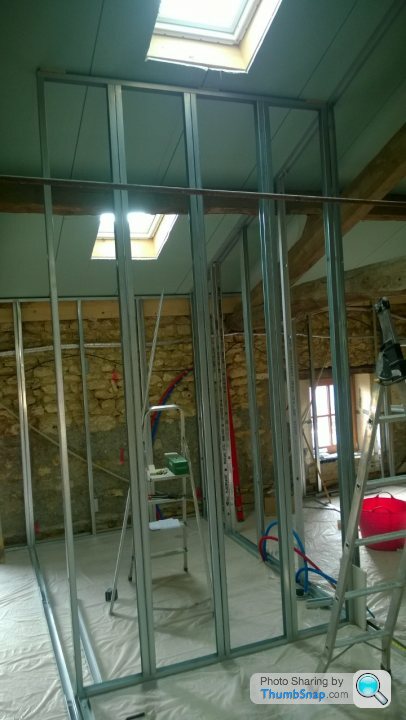
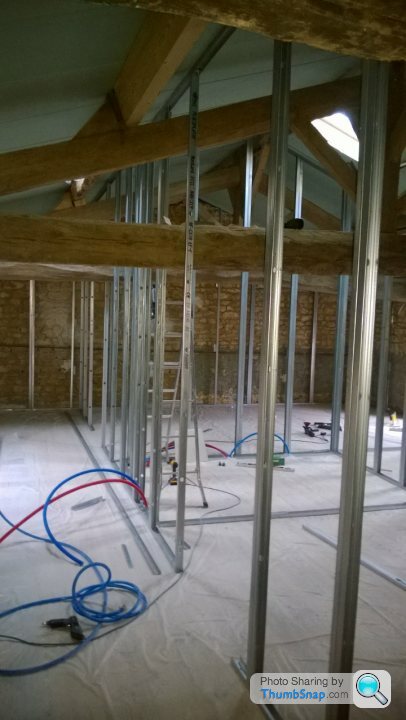
With our lovely spacious floor done upstairs it was time to put some rooms in. Bathrooms were the first to be done. With the taps that we have bought for it we needed thicker walls where they are to be mounted as they are too wide for a single wall. So we have opposing walls that are double width and were good fun to get in just the right place. We are going with vaulted ceilings in the bathrooms but with spots going in we still needed to create a false ceiling to have the space to fit them. Our electrician does not understand this concept of space and thinks we are mad (probably right) but will make the bathrooms airier. I think it will be quite a complex job doing the ceilings as need to keep as much headroom in the shower, but higher up we need good clearance for the moisture extraction system.
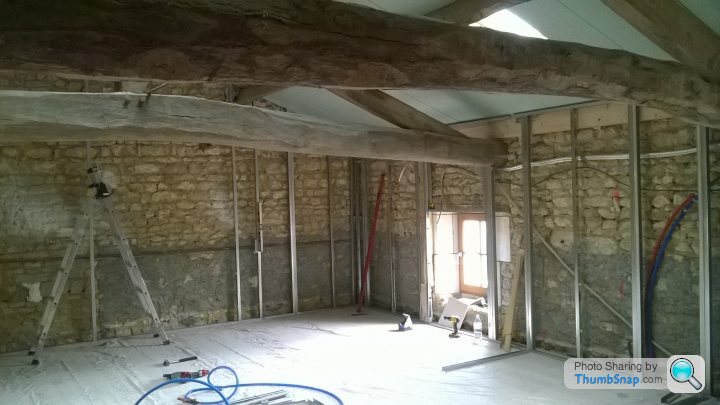
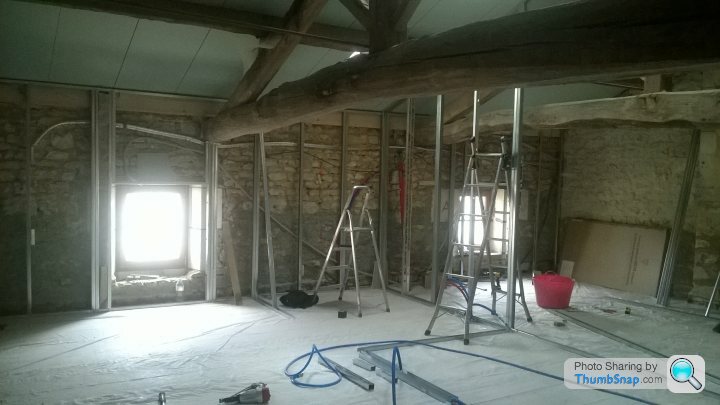
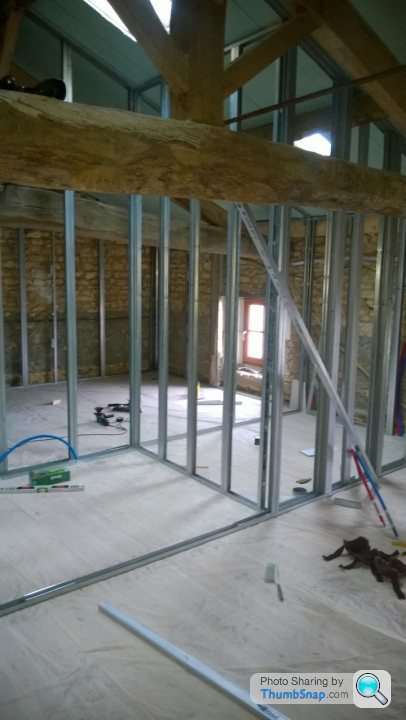
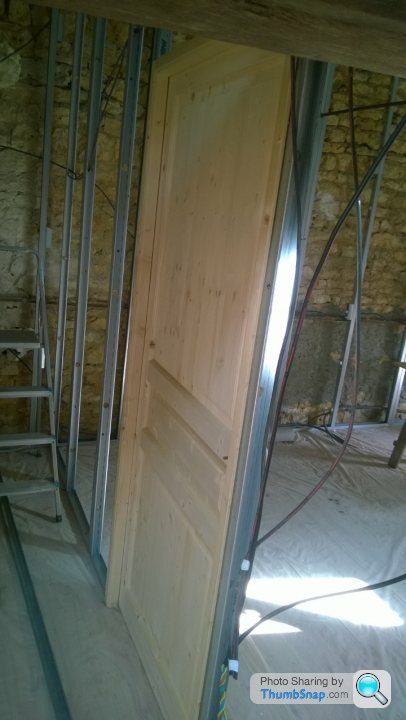
With the bathroom shell done it was time to put the bedroom walls in place. We would have finished the bathroom but needed to order the doors in as they had none in stock. I made some wedges so we could mount the rail straight on the sloping ceiling and we cracked on with lining everything up and cutting the uprights to the correct size.

At the same time we were doing this the electrician was in laying his cables. After a bit more coaching from him we needed to put a few more rails in. He didn’t seem too keen on the idea of me undoing all his cabling to thread through the holes when I had finished my framing and said we could just cut the edge and push them in. In this instance I didn’t bow to his superior experience in these things and chose to re-do the cabling. I have made it easier to identify my work as he tied the cables together with white insulating tape and I have used red.
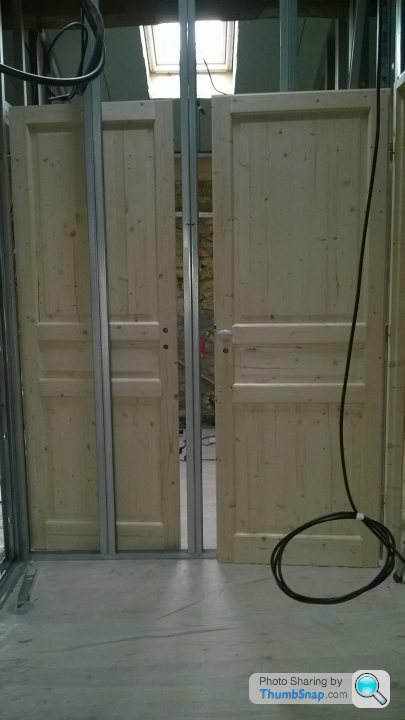
Doors are in stock now so we can make moving stuff around upstairs even more difficult by fitting them. It is all coming together now and moving me ever closer to the dreaded plumbing.

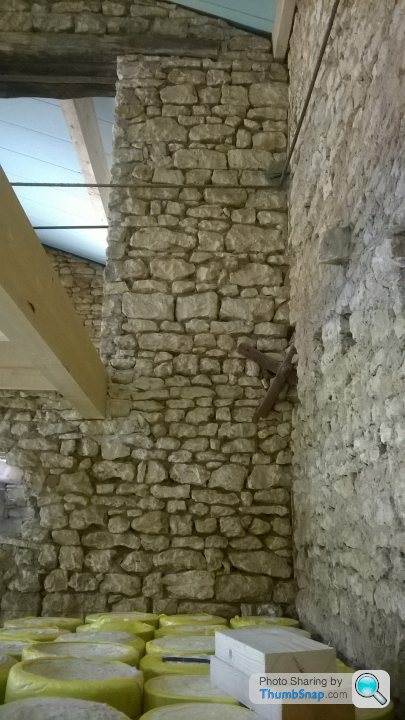
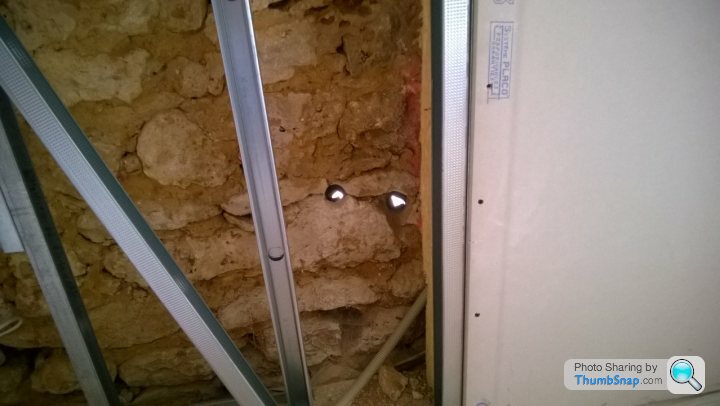
With all the framing done upstairs on one side we tidied up and shifted all the tools back downstairs so we have space to bring the insulation up and start cutting and fitting. This is the fateful moment when cargeekswife took the tumble from the top of the ladder while putting in a piece of insulation.
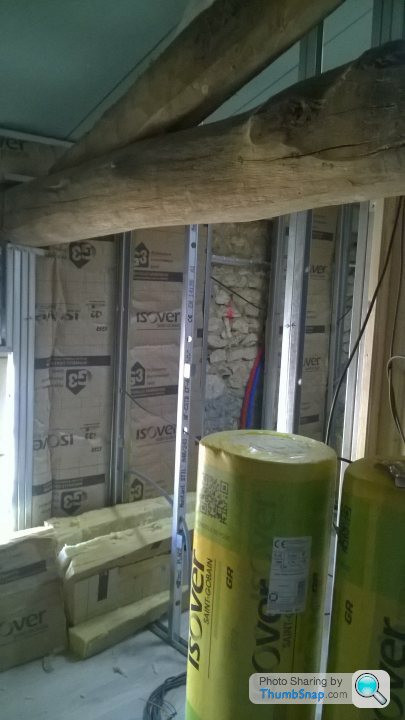
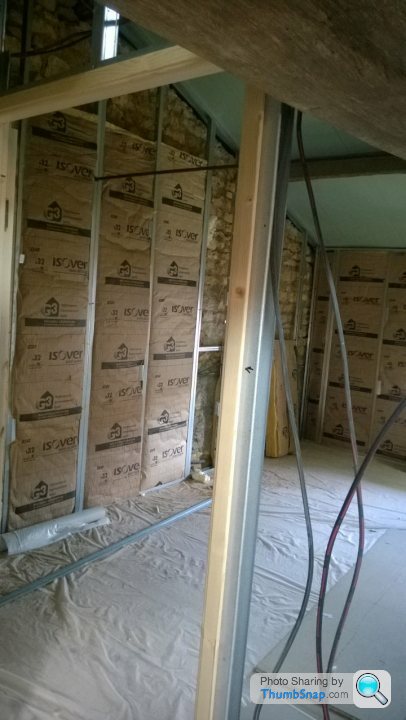
The picture above shows the tie rod and to the right of that is the tumble piece.
Luckily she managed to grab one of the tie rods as she fell and changed the angle that she hit the floor at. Favourite hairclip was smashed as she fell on her back and leg and 3 ribs injured when crashing into the tie. After an hour or so it was off to hospital and explain that we had no medical care and have been messed about for the past year with the social services asking forever more weird bits of paperwork to be supplied. This the UK have responded to every request but send it out 2nd class to France and takes 4 to 6 weeks to arrive each time.
They see us and also point us in the direction of someone who might be able to help with our predicament. 8 hours later and one very understanding friend who has been having Millie in half term while we work and is now keeping her overnight, I am going back to hospital to collect cargeekswife. Blood test, scans, cardiogram and drips during the course and a prescription for 4 different medicines we can just see the bill we are going to receive just climbing and eating our budget!
We have since seen the lady that helps out in our situation. She has been hung up on by the social services as they are being rather obstructive but she is not dissuaded from fighting our cause. The bill also arrives and is for €200. I was amazed at how low it was, but not arguing. For the next while I am on my own while the patient heals. Yesterday was cargeekswifes birthday and the night before she had been in pain so took the tramadol that was part of the pain killing cocktail that they had described. She had just about every adverse side effect and birthday was spent in cold sweats and me worrying. One really good present was delivered in the form of a phone call to say we are now covered for medical issues and as we are not working should be able to get everything for free instead of having to top up any shortfall.
With the bathroom shell done it was time to put the bedroom walls in place. We would have finished the bathroom but needed to order the doors in as they had none in stock. I made some wedges so we could mount the rail straight on the sloping ceiling and we cracked on with lining everything up and cutting the uprights to the correct size.
At the same time we were doing this the electrician was in laying his cables. After a bit more coaching from him we needed to put a few more rails in. He didn’t seem too keen on the idea of me undoing all his cabling to thread through the holes when I had finished my framing and said we could just cut the edge and push them in. In this instance I didn’t bow to his superior experience in these things and chose to re-do the cabling. I have made it easier to identify my work as he tied the cables together with white insulating tape and I have used red.
Doors are in stock now so we can make moving stuff around upstairs even more difficult by fitting them. It is all coming together now and moving me ever closer to the dreaded plumbing.
With all the framing done upstairs on one side we tidied up and shifted all the tools back downstairs so we have space to bring the insulation up and start cutting and fitting. This is the fateful moment when cargeekswife took the tumble from the top of the ladder while putting in a piece of insulation.
The picture above shows the tie rod and to the right of that is the tumble piece.
Luckily she managed to grab one of the tie rods as she fell and changed the angle that she hit the floor at. Favourite hairclip was smashed as she fell on her back and leg and 3 ribs injured when crashing into the tie. After an hour or so it was off to hospital and explain that we had no medical care and have been messed about for the past year with the social services asking forever more weird bits of paperwork to be supplied. This the UK have responded to every request but send it out 2nd class to France and takes 4 to 6 weeks to arrive each time.
They see us and also point us in the direction of someone who might be able to help with our predicament. 8 hours later and one very understanding friend who has been having Millie in half term while we work and is now keeping her overnight, I am going back to hospital to collect cargeekswife. Blood test, scans, cardiogram and drips during the course and a prescription for 4 different medicines we can just see the bill we are going to receive just climbing and eating our budget!
We have since seen the lady that helps out in our situation. She has been hung up on by the social services as they are being rather obstructive but she is not dissuaded from fighting our cause. The bill also arrives and is for €200. I was amazed at how low it was, but not arguing. For the next while I am on my own while the patient heals. Yesterday was cargeekswifes birthday and the night before she had been in pain so took the tramadol that was part of the pain killing cocktail that they had described. She had just about every adverse side effect and birthday was spent in cold sweats and me worrying. One really good present was delivered in the form of a phone call to say we are now covered for medical issues and as we are not working should be able to get everything for free instead of having to top up any shortfall.
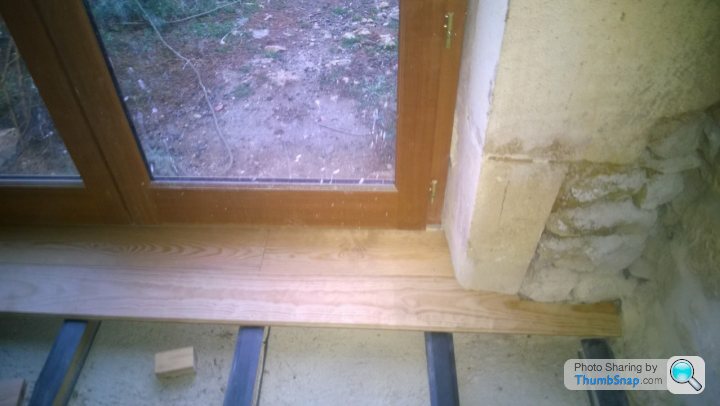
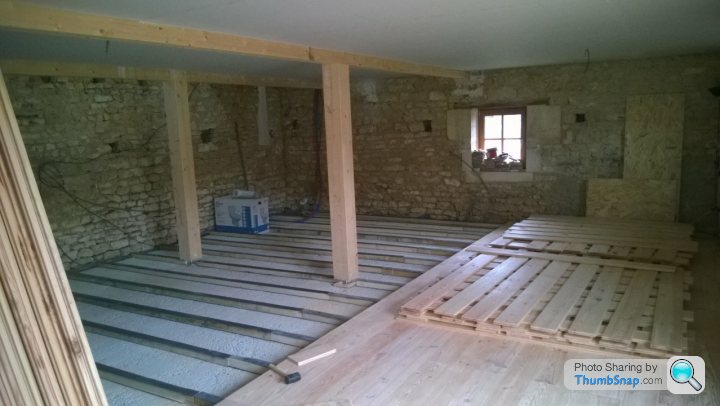
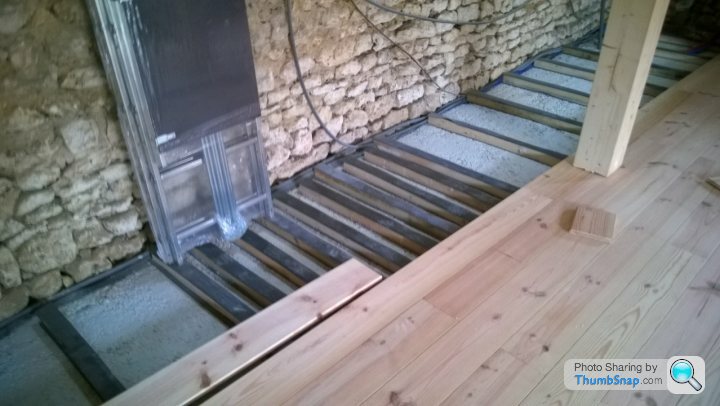
This is the last catch-up post and brings me up to today. For the wooden floor boards to go down we needed a frame to nail them too. We have had the wood for quite some time and it all nicely acclimatised but when going through it 8 of the pieces were warped. Luckily we had over ordered. I moved the pillar drill out to the barn so I could drill my holes easily with more space than I have in my workshop.
Backing tape was stuck to the base of each piece to stop it rotting as will be in contact with the concrete. I cut 2 pieces of wood as guides so I could just stick them in between the pieces as I laid them instead of measuring each time. Time to now see how level the concrete slab was poured. It is amazingly straight. I had to chisel out 7 different pieces to get the whole frame secured and flat.


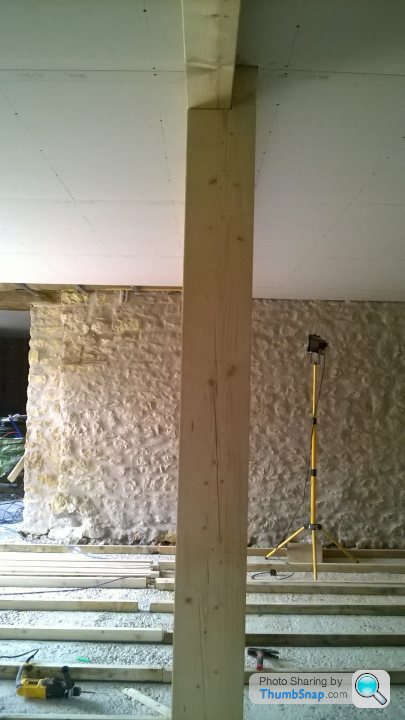
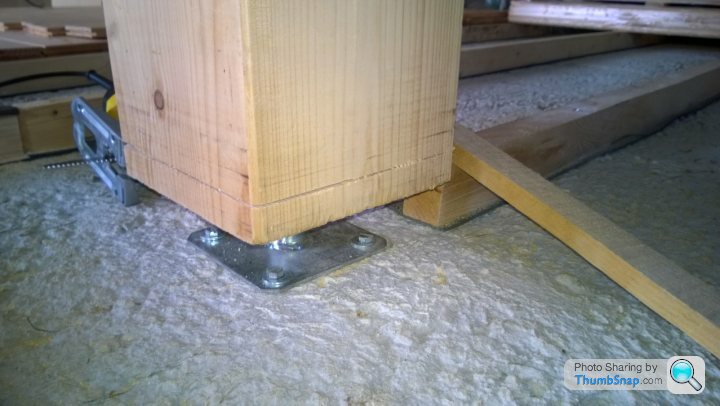
With the floor height changing my main support posts were too low to the ground as the plan was to lay the floor under these and leave a small expansion gab about credit card depth. Hopefully my measuring is good as the wife will not be impressed if I mess with this part of her vision. Measurements taken and the cutting starts. I can only do 1 of the 2 support posts as we have a pile of floorboards obstructing access to the other one. As it was this one cut very nicely and happy to say I cleared the bolts underneath and did not hit them with the jigsaw blade.
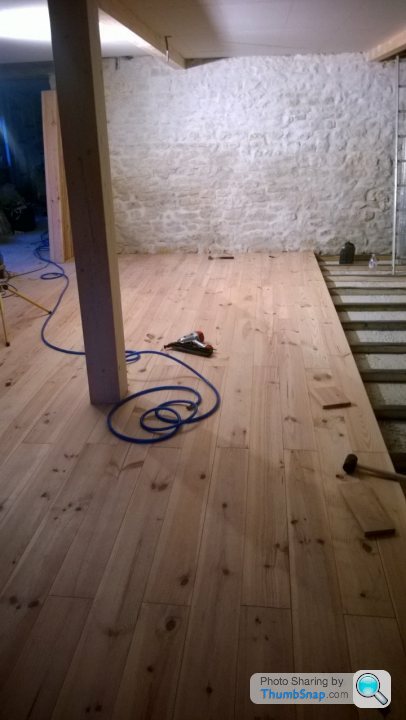
With that out of the way I can now start laying the floor. I’m starting by the entrance door and working my way towards the back. Yesterday I managed to get 2 pieces in. Not a lot but it was a short working day and one end was at the exposed stone wall so needed shaping.
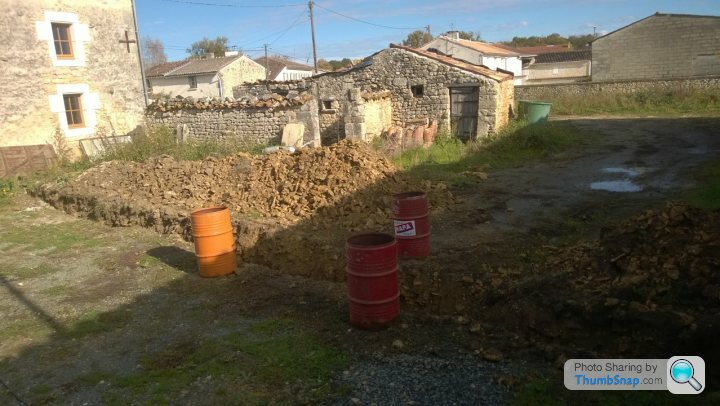
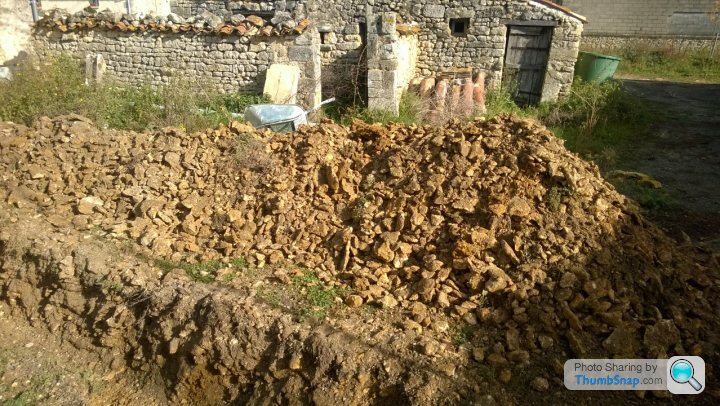
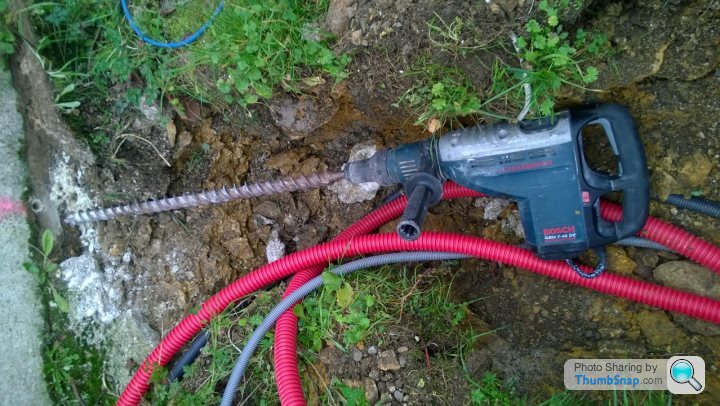
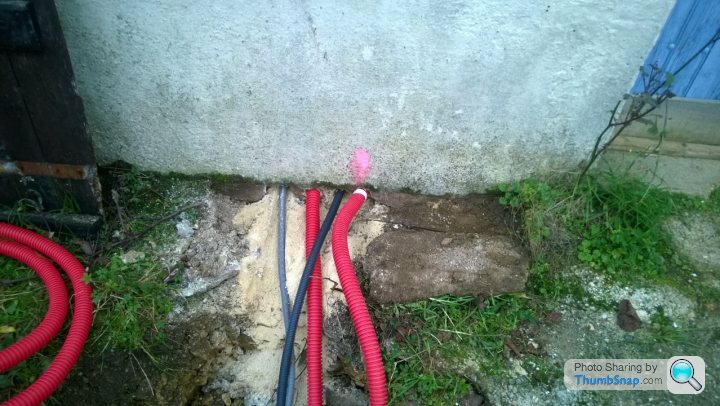
While we were leaving the house yesterday morning our stone mason had turned up with Super Mario to dig our trench to run electrics to the barn. Been chasing him for over a month and then he turns up a day early when we finally pinned him down. As you can see by the rubble from the ditch it is mostly stone, hence we haven’t done it ourselves.

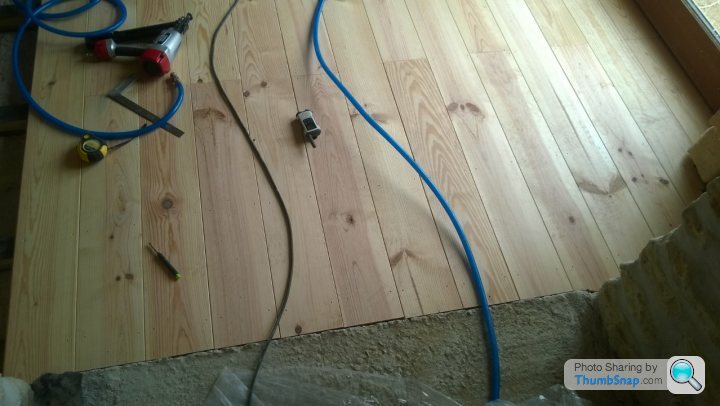
Now on to todays progress. Wednesday is half day at school so only got a mornings work in. Have laid 2 whole runs of boards working around exposed stone wall and pipes coming in.

Backing tape was stuck to the base of each piece to stop it rotting as will be in contact with the concrete. I cut 2 pieces of wood as guides so I could just stick them in between the pieces as I laid them instead of measuring each time. Time to now see how level the concrete slab was poured. It is amazingly straight. I had to chisel out 7 different pieces to get the whole frame secured and flat.
With the floor height changing my main support posts were too low to the ground as the plan was to lay the floor under these and leave a small expansion gab about credit card depth. Hopefully my measuring is good as the wife will not be impressed if I mess with this part of her vision. Measurements taken and the cutting starts. I can only do 1 of the 2 support posts as we have a pile of floorboards obstructing access to the other one. As it was this one cut very nicely and happy to say I cleared the bolts underneath and did not hit them with the jigsaw blade.
With that out of the way I can now start laying the floor. I’m starting by the entrance door and working my way towards the back. Yesterday I managed to get 2 pieces in. Not a lot but it was a short working day and one end was at the exposed stone wall so needed shaping.
While we were leaving the house yesterday morning our stone mason had turned up with Super Mario to dig our trench to run electrics to the barn. Been chasing him for over a month and then he turns up a day early when we finally pinned him down. As you can see by the rubble from the ditch it is mostly stone, hence we haven’t done it ourselves.
Now on to todays progress. Wednesday is half day at school so only got a mornings work in. Have laid 2 whole runs of boards working around exposed stone wall and pipes coming in.
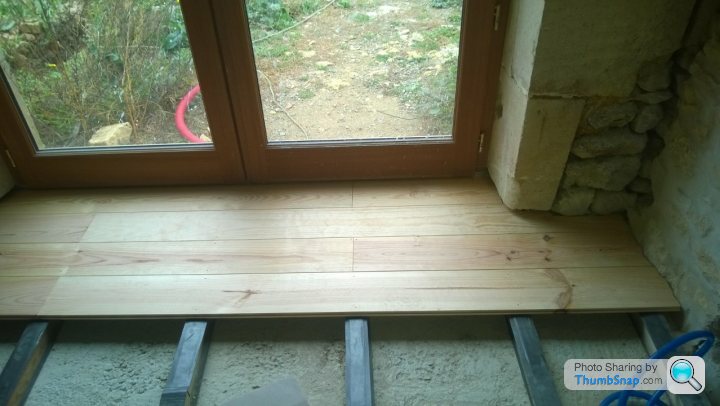
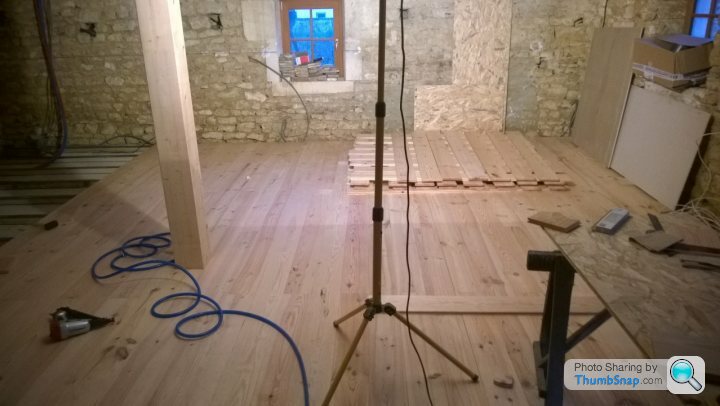
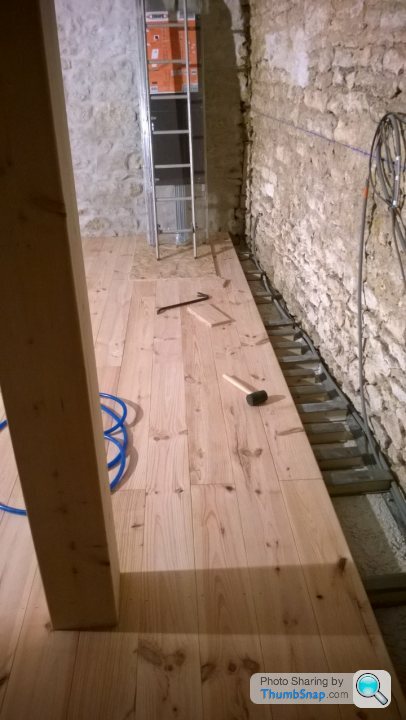
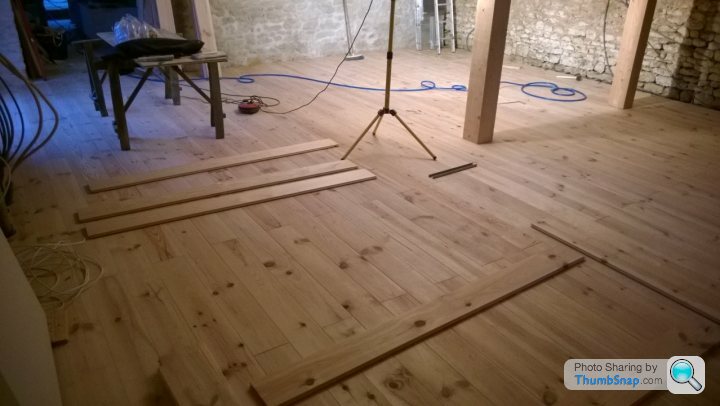
Continuing with laying flooring today. I have managed to complete a third of the floor area. Most of it was laid this morning as we are having a step between the kitchen and living area so there was a nice straight edge to lay the boards up to.
This afternoon I got 2 runs down as was back against the exposed stone wall. As the rest of the flooring is against this wall I think my progress is going to be a lot slower than I wanted. It does mean I have time to spread more wood out to acclimatise as had to get supplies from upstairs as wasn’t quite prepared for this morning’s marathon effort.

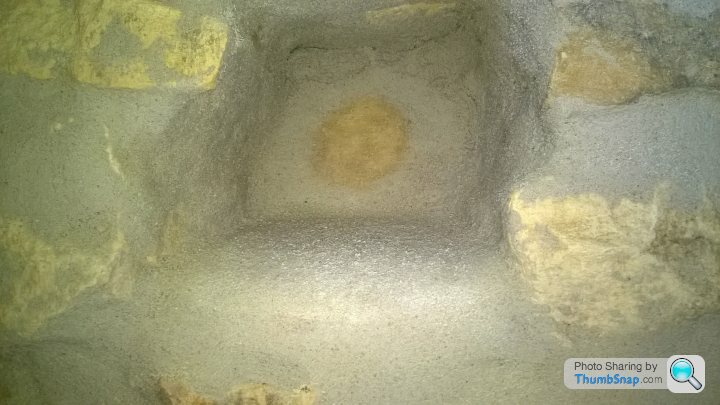
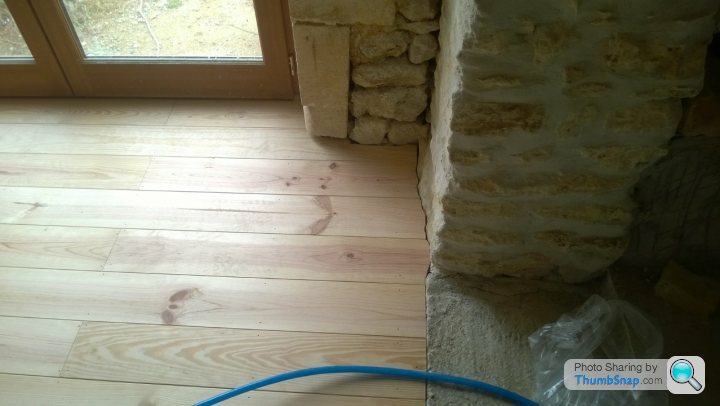
Not quite happy with the last board against the wall as the stone underneath has led to a big gap. Will have to fill it with mortar when I do some more re-pointing.

This afternoon I got 2 runs down as was back against the exposed stone wall. As the rest of the flooring is against this wall I think my progress is going to be a lot slower than I wanted. It does mean I have time to spread more wood out to acclimatise as had to get supplies from upstairs as wasn’t quite prepared for this morning’s marathon effort.
Not quite happy with the last board against the wall as the stone underneath has led to a big gap. Will have to fill it with mortar when I do some more re-pointing.
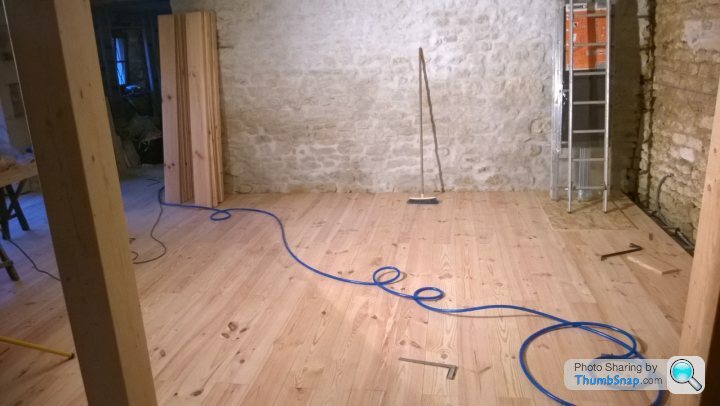
Ran out of flooring to lay before lunch. Time to clear out the other side of the room, open up enough packets of flooring to finish the job and drag the rest up a ladder to finish off upstairs. With the space now open I can crack on on Monday to get the flooring finished.
We also found out today that the fall from the ladder has done more damage to cargeekswife. She has damaged her sternum too, so we won’t be getting on with the plaster boarding upstairs as all the boarding is sitting in the kitchen at the moment. IF she is out of action for too long I might have to stick it on the plasterboard lifter and crank it up that way.
After a weekend off where we managed to go to a car meet just down the road, pictures here http://www.pistonheads.com/gassing/topic.asp?h=0&a... and this is Millie explaining how I should frame the shot of her mums least favourite car!


After laying the first 2 runs I was now on the run that was to go under the support beam. My measuring when cutting the support beam on this side had been spot on and the board would have slid straight under had I not made the rookie mistake of nailing the boards down on the previous run.

No problem I thought, and cut a test board out to see if it would slide under with the clearance it had. Now when I had made my cut I had left the cut part of the support beam on the floor as it was in 1 piece and thought it would be fun to leave it there for any future generation to discover if they ever lift the floor. This was spoiled as I needed the space underneath to angle my board to slot it in.
The test worked, champion I thought and got on with cutting out the hole to slide the full board in. Alas it didn’t work as hadn’t taken into consideration that it would be making contact with all the support beams that it was due to sit on. There was a possibility that I could twist it in so cut the hole 2cm longer. I picked it up and the damn board snapped at the end. Not what I had planned for but the board slid in neatly and as it had snapped fitted very snuggly back in place. With an extra batten in place to support the broken piece on with the work. Great progress for today with one of the piles of floor boards used up.
We also found out today that the fall from the ladder has done more damage to cargeekswife. She has damaged her sternum too, so we won’t be getting on with the plaster boarding upstairs as all the boarding is sitting in the kitchen at the moment. IF she is out of action for too long I might have to stick it on the plasterboard lifter and crank it up that way.
After a weekend off where we managed to go to a car meet just down the road, pictures here http://www.pistonheads.com/gassing/topic.asp?h=0&a... and this is Millie explaining how I should frame the shot of her mums least favourite car!
After laying the first 2 runs I was now on the run that was to go under the support beam. My measuring when cutting the support beam on this side had been spot on and the board would have slid straight under had I not made the rookie mistake of nailing the boards down on the previous run.
No problem I thought, and cut a test board out to see if it would slide under with the clearance it had. Now when I had made my cut I had left the cut part of the support beam on the floor as it was in 1 piece and thought it would be fun to leave it there for any future generation to discover if they ever lift the floor. This was spoiled as I needed the space underneath to angle my board to slot it in.
The test worked, champion I thought and got on with cutting out the hole to slide the full board in. Alas it didn’t work as hadn’t taken into consideration that it would be making contact with all the support beams that it was due to sit on. There was a possibility that I could twist it in so cut the hole 2cm longer. I picked it up and the damn board snapped at the end. Not what I had planned for but the board slid in neatly and as it had snapped fitted very snuggly back in place. With an extra batten in place to support the broken piece on with the work. Great progress for today with one of the piles of floor boards used up.
SydneyBridge said:
excellent thread, very interesting..
If you have time to reply, what is your long-term plan for all the buildings and the rest of your land?
For the barn we are doing at the moment, this will be a 4 bed gite. The next barn will be split in 2 and the larger side will be a 2 bed gite and the smaller side will be a maison d'ami which will basically be a studio with a mezzanine bedroom. This will be for friends to stay in so they can do their own thing and we won't get on each others nerves. The 3 pig sty's will probably house chickens in 1, garden tools in another and the third which is closest to the bread oven might turn into an outdoor kitchen kind of thing. If you have time to reply, what is your long-term plan for all the buildings and the rest of your land?
The small forge at the back will be knocked down as it blocks the view from the back barns. The barns over the road, at the moment, the plan is to knock them into one and have what we will describe as a big room. Could be used for conferences or dining for large amounts of people.
With regard to the land, the orchard is destined to house some pigs and other stuff that we can eat, so potentially the chickens could go in here and free up a pig sty. The original plan for the field and may still end up like that eventually was to fence off for horses. Present thinking though during the summer months is it would make a great place for a kind of Sunday Service. Great roads to get here and would help us meet like minded people!
IF demand is strong for what we are planning the back barn could be increased in size to accommodate more bedrooms by building under the hangar and would still leave enough space to park 4 to 6 cars underneath. Also should we need more undercover parking there used to be a large barn on the other side of our front entrance that still appears on the cadastre so we could potentially build another hangar there.
Almost finished the flooring and have 2.5 runs left to do. Need a couple of bits of plumbing fittings before I can finish and tomorrow is a bank holiday so will be left with about three boards that I can’t fit in place. I would have probably reached this point today but we went to look at another school for Millie this morning. We are not impressed with the school she is at so the decision has been made to shift her to a school in one of the towns. We are hoping this will stretch her as she isn’t very engaged with the whole schooling thing at the moment.
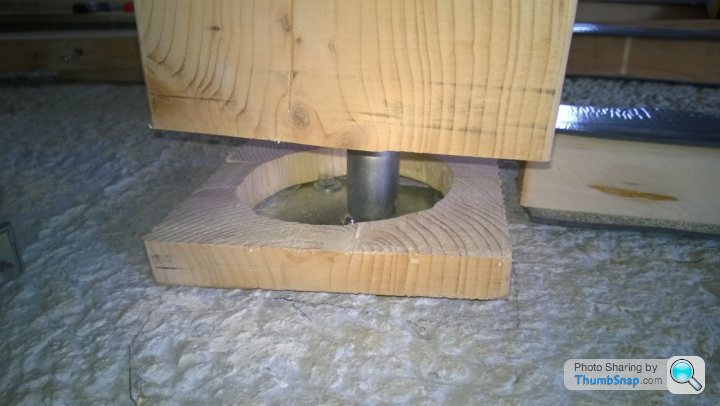
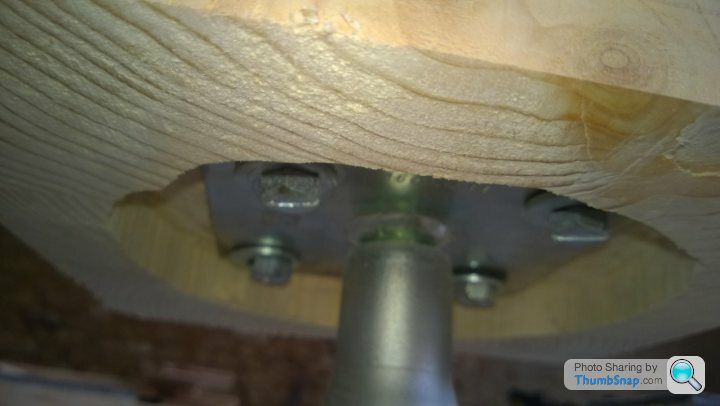
While laying the boards this afternoon I reached my second support pillar that I had cut for the boards to slide underneath. Alas this cut was not bob on like the first and it was a little too low. A quick search around and all I could find was a very fine grade sandpaper. So I wrapped this around a block and started sanding it down. A bit of a pointless exercise as I wasn’t making any inroads into fitting my boards. A bit of scratching head and I came up with the solution below.
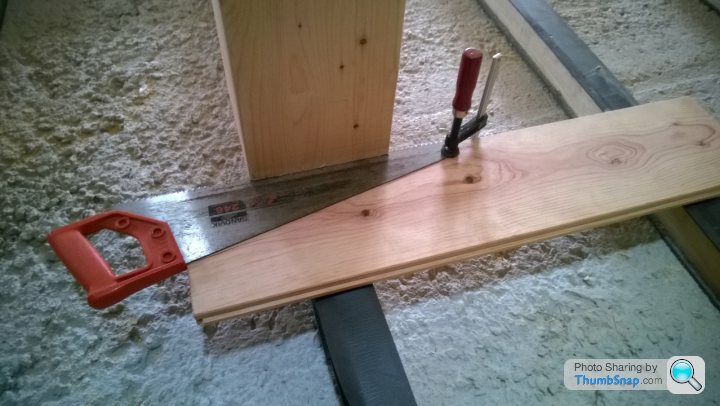
Now, had the saw been sharp I would have breezed through this in about 5 minutes I reckon, but as a power tool junkie I have, up to now, never needed to resort to a hand saw. Half an hour later I have a perfect fit and can slide boards underneath to my heart’s content.

Pleased with this job and learning from yesterday’s mistake nothing was nailed down until it was completely surrounded by flooring.
A quick tidy up of wood off cuts to light tonight’s fire and sweeping up the sawdust ended my day. Photos of where it ended today.
While laying the boards this afternoon I reached my second support pillar that I had cut for the boards to slide underneath. Alas this cut was not bob on like the first and it was a little too low. A quick search around and all I could find was a very fine grade sandpaper. So I wrapped this around a block and started sanding it down. A bit of a pointless exercise as I wasn’t making any inroads into fitting my boards. A bit of scratching head and I came up with the solution below.
Now, had the saw been sharp I would have breezed through this in about 5 minutes I reckon, but as a power tool junkie I have, up to now, never needed to resort to a hand saw. Half an hour later I have a perfect fit and can slide boards underneath to my heart’s content.
Pleased with this job and learning from yesterday’s mistake nothing was nailed down until it was completely surrounded by flooring.
A quick tidy up of wood off cuts to light tonight’s fire and sweeping up the sawdust ended my day. Photos of where it ended today.
Happy Jim said:
Looking great - have your knees given up yet ??
Thanks. Knees have been in knee pads since the start! I takes me 5 minutes to get ready in the morning. It's go outside, take jacket off. Put 2 elbow supports on as they are knackered now, put jacket back on. Put knee pads on, change footwear so as not to walk on un-protected boards with outdoor shoes. Turn radio on and power up saw. Oil nail gun and then can start working. The worst part at the moment is having to change shoes to come in and pee! It really interrupts the flow.Flooring done and nailed down. Took an extra day as sent cargeekswife off to get me a reducer for the plumbing soil pipe and she came back with the wrong diameter. So off we went today to show her the error of her ways. This chump should have checked it out beforehand as they don’t do what I wanted so just got a reducer to go from 40 to 32 and it all fitted snuggly under the boards.
This afternoon we made a start on putting the top and bottom rails in for the wall studs.
Tomorrow I get to abdicate my duties of being dad to get the uprights in as the electrician is in on Monday morning to mount the consumer unit and start wiring it up. We might even be able to ditch the extension lead then that runs between the house and the barn for power. This has worked well so far for us but I was greeted earlier on in the week by bird poo on my newly laid floor but no sign of the phantom poopers. The following day I walked out and saw a small flock of birds fly away from under the kitchen window. This is on tilt to leave the cable running through it so guessed this is where they had been accessing the barn to keep warm over night! Rounded the corner and arrived at the kitchen door to be met with the site of a bird sitting on the floor inside.
Tried to coax him out but he flew everywhere apart from out the open doors and then settled upstairs. Gave up trying to aide his escape and just opened the windows and cracked on. Checked later and with no sign of him I closed up and pulled the kitchen window to close the gap. No further poop so think we have vacant possession again.
Uprights done and a couple of pieces of insulation in for good measure. The floor has been covered in polythene and awaiting the electrician to arrive tomorrow. Hopefully he doesn’t find anything he is not pleased with.
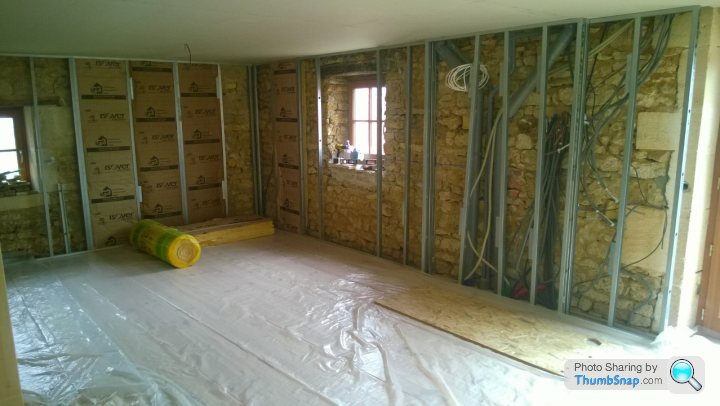
Now for the afternoon job, I had to move 30m2 of travertine stone as it is blocking where the power cables need to come in to my workshop to connect up. Fingers crossed he gets that far tomorrow as will be a big moment.
There they are
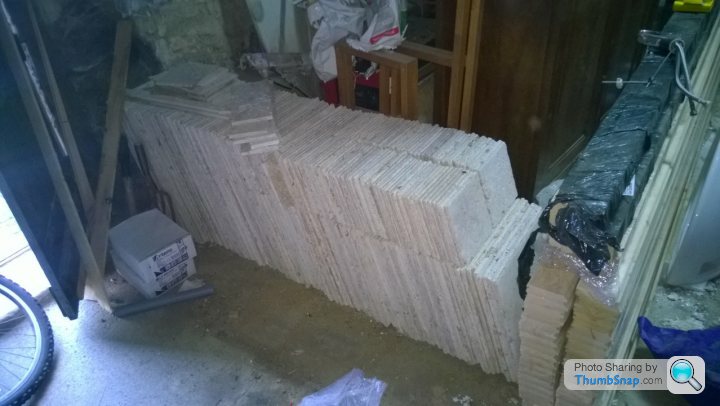
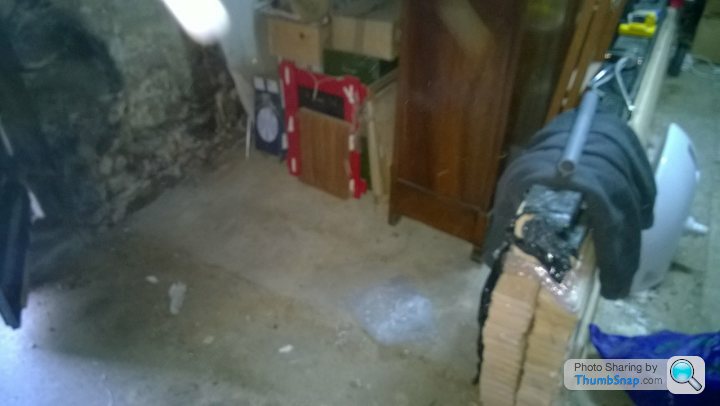
Space to make a hole in the wall now
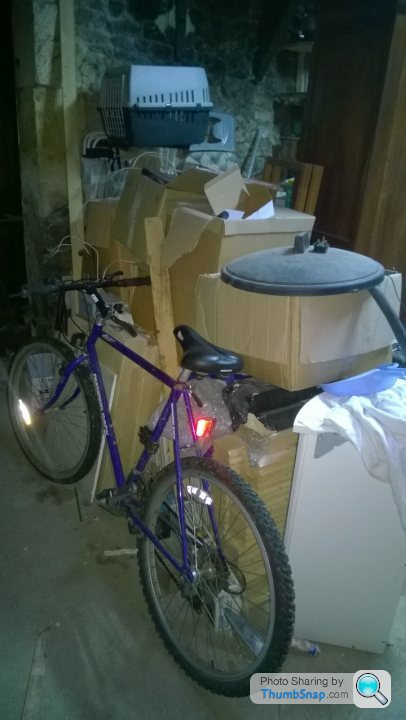
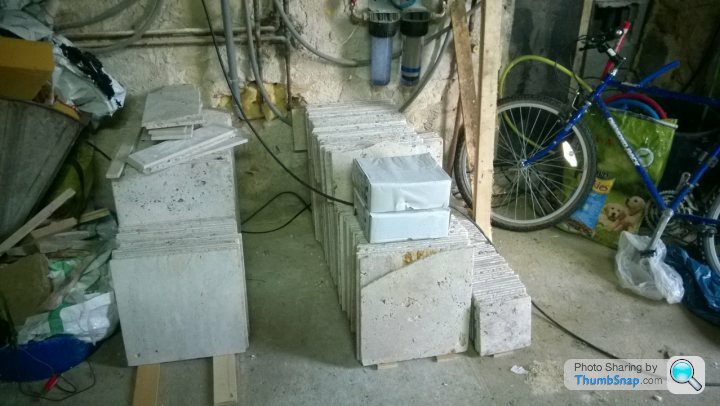
Their temporary home
Having moved them the space left behind gives me a good indication of how spacious my workshop will be! Also hiding behind them was a box with 15 bottles of wine in. Great result.
The next big thing is to get the framework on the double height back wall. It is about 8 metres long by 5 metres high and a different system to what we have been using as it will be secured to the wall instead of floor and ceiling. It should be straight forward once we start but a little daunting at the moment. Once done and plastered we get busy making the stairs and can move stuff upstairs, like the water heaters.
So much needs doing still and it all seems to be the most important part. Could be worse though. The sky this evening looked good.

Now a question for anyone reading, is this thread going into too much detail or narrative and would less regular updates be better?
Now for the afternoon job, I had to move 30m2 of travertine stone as it is blocking where the power cables need to come in to my workshop to connect up. Fingers crossed he gets that far tomorrow as will be a big moment.
There they are
Space to make a hole in the wall now
Their temporary home
Having moved them the space left behind gives me a good indication of how spacious my workshop will be! Also hiding behind them was a box with 15 bottles of wine in. Great result.
The next big thing is to get the framework on the double height back wall. It is about 8 metres long by 5 metres high and a different system to what we have been using as it will be secured to the wall instead of floor and ceiling. It should be straight forward once we start but a little daunting at the moment. Once done and plastered we get busy making the stairs and can move stuff upstairs, like the water heaters.
So much needs doing still and it all seems to be the most important part. Could be worse though. The sky this evening looked good.
Now a question for anyone reading, is this thread going into too much detail or narrative and would less regular updates be better?
First thing this morning the electrician turned up. All day he has been walking on my floor and no comments about it. I am glad it has passed without mention. As he is here doing electrics I was charged with drilling holes to run the cables into my workshop.
But first he needed a plasterboard to mount the consumer unit on. Bugger we had moved them all upstairs 2 weeks ago with quite considerable effort as there are no stairs. So up the ladder to fetch a board and hang it over the edge for cargeekswife to hold until I can run down the ladder and we could lay it on the floor for cutting. Managed it without crippling the wife and then we looked at it. I brought the wrong type down. It had 4 thin sides and we needed one with 2 thin sides. Up the ladder again to get the right board. Board was cut and the electrician can crack on.
Now onto my hole drilling. Started off breaking more concrete off so we could start the holes lower and go up to come out above the concrete slab. It all started out so promising! I have noticed that my SDS drill has been getting slower but has still completed everything I have asked it to do, albeit a little slower. Today drill said no. After struggling for half an hour I hadn’t even got half way through drilling the first hole and was dripping in sweat.
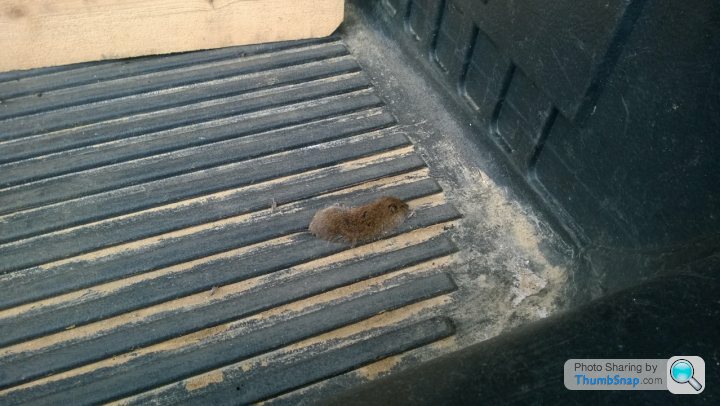
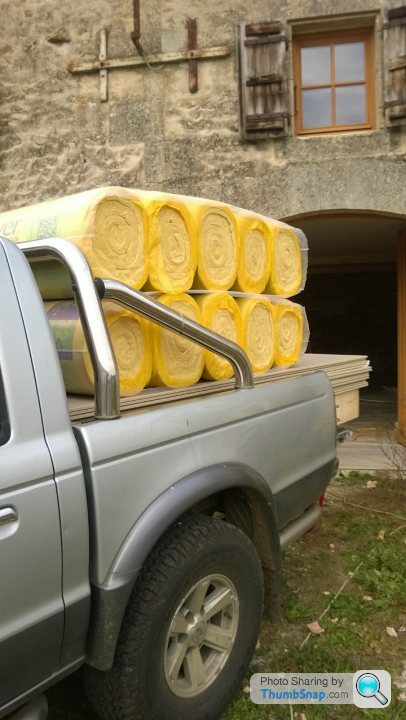
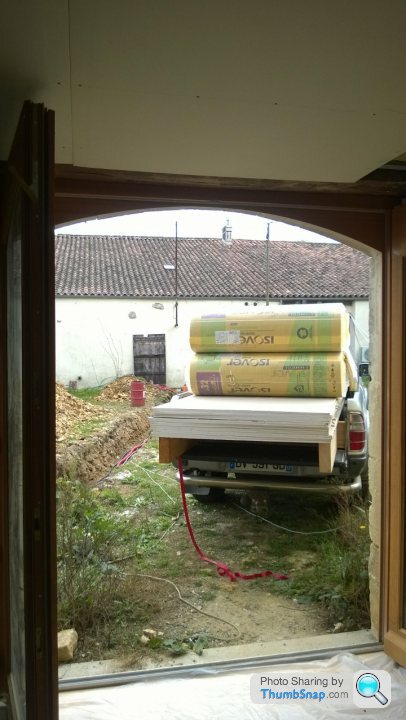
Shall start referring to the electrician as Wilfrid now as that’s his name, so Wilfrid came to laugh at my progress and told me he would bring a proper sized drill back with him after lunch. Thank heavens for that as I think I would still be there now or sulking that my drill had completely died. Without a job to do and the probability that we can board out the living room around Wilfrid we trundled off to the builder’s merchant to get some more plasterboard and insulation. Time to put my plasterboard carrying framework in the back of the truck. Found a dead furry thing on the flatbed, so I guess one of our owls didn’t like the look of it.
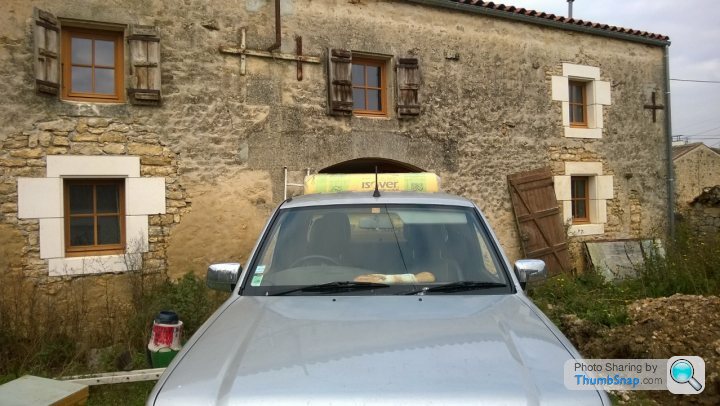
Turning French with our baguette on the dash!
After lunch Wilfrid turns up with the proper sized drill and bit. What a difference the proper tool makes.
In half an hour I had drilled all 4 holes and to my amazement they all came out at floor level.
Feeling very happy I thank Wilfrid for the drill and start putting it away. Then he stops me as he wants 2 more holes drilling for the aircon drain tubes.
Drill packed away and time to help cargeekswife with some plaster boarding and insulating.
As we sit here tonight we have the cables fed into the workshop awaiting connection and some plasterboards attached to the frame work.
But first he needed a plasterboard to mount the consumer unit on. Bugger we had moved them all upstairs 2 weeks ago with quite considerable effort as there are no stairs. So up the ladder to fetch a board and hang it over the edge for cargeekswife to hold until I can run down the ladder and we could lay it on the floor for cutting. Managed it without crippling the wife and then we looked at it. I brought the wrong type down. It had 4 thin sides and we needed one with 2 thin sides. Up the ladder again to get the right board. Board was cut and the electrician can crack on.
Now onto my hole drilling. Started off breaking more concrete off so we could start the holes lower and go up to come out above the concrete slab. It all started out so promising! I have noticed that my SDS drill has been getting slower but has still completed everything I have asked it to do, albeit a little slower. Today drill said no. After struggling for half an hour I hadn’t even got half way through drilling the first hole and was dripping in sweat.
Shall start referring to the electrician as Wilfrid now as that’s his name, so Wilfrid came to laugh at my progress and told me he would bring a proper sized drill back with him after lunch. Thank heavens for that as I think I would still be there now or sulking that my drill had completely died. Without a job to do and the probability that we can board out the living room around Wilfrid we trundled off to the builder’s merchant to get some more plasterboard and insulation. Time to put my plasterboard carrying framework in the back of the truck. Found a dead furry thing on the flatbed, so I guess one of our owls didn’t like the look of it.
Turning French with our baguette on the dash!
After lunch Wilfrid turns up with the proper sized drill and bit. What a difference the proper tool makes.
In half an hour I had drilled all 4 holes and to my amazement they all came out at floor level.
Feeling very happy I thank Wilfrid for the drill and start putting it away. Then he stops me as he wants 2 more holes drilling for the aircon drain tubes.
Drill packed away and time to help cargeekswife with some plaster boarding and insulating.
As we sit here tonight we have the cables fed into the workshop awaiting connection and some plasterboards attached to the frame work.
Gassing Station | Homes, Gardens and DIY | Top of Page | What's New | My Stuff