Brand new house built in 12 weeks
Discussion


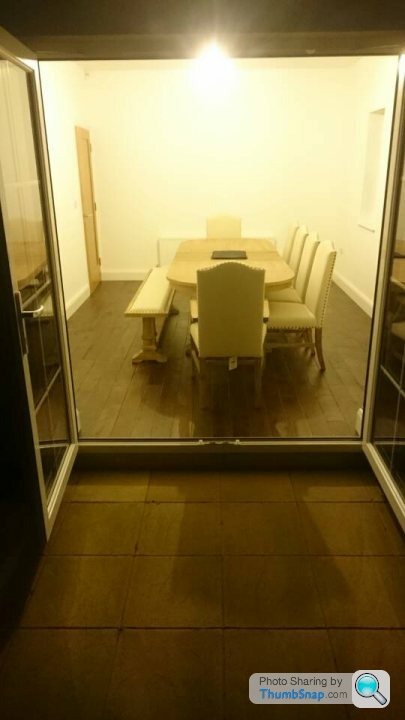
Next up is the formal dining room. In hindsight, I would loved to have made the movie room and dining room into one big room. It's a 33ft long section split into 2 rooms. With already having island seating and the sunroom semi formal dining options, a 3rd dining option just isn't necessary. I can count on 2 hands how many times we used it in the 3 years since we've moved in. My son uses it as a place to do his homework though, so at least someone actually goes in there once in a while. Oh, and the cat likes it too. She goes in there for a huff sometimes and tries to rip the curtains off 
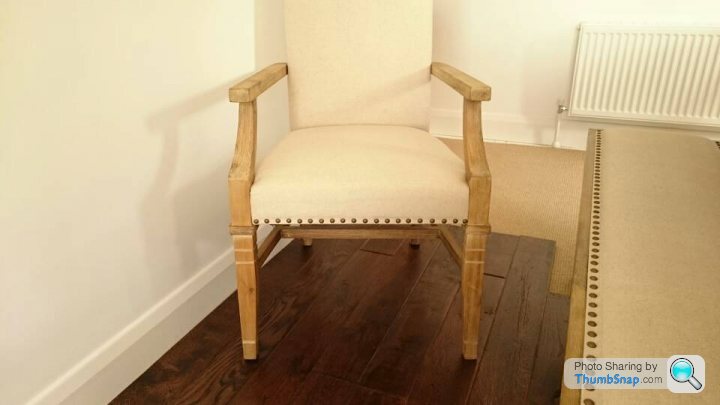
The table and chairs arrived not long after moving in. No lights or flooring or window coverings at this point, just sort of thrown in there. Different style to the main living area, a distressed wood type finish to it and we liked the idea of this bench for the kids/visitors kids to sit on.
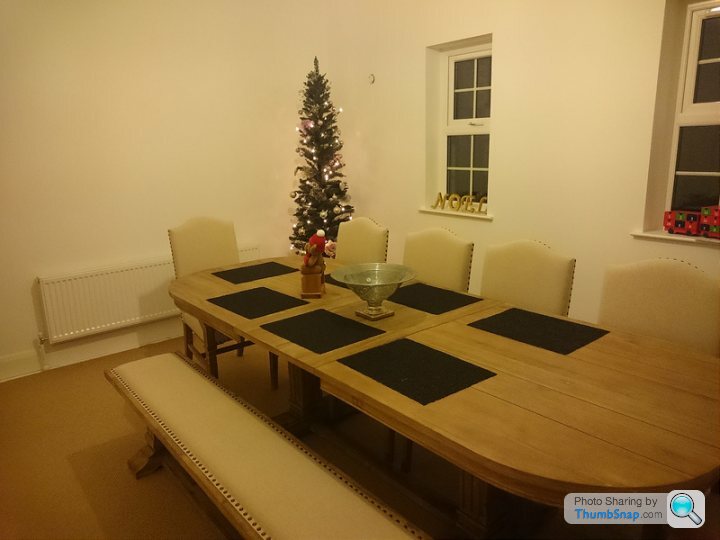
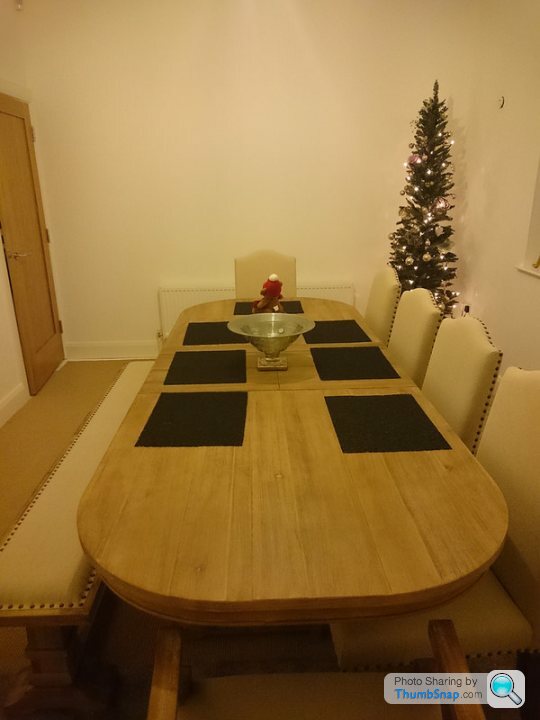
It's seating for 10, with 4 on the bench, 4 regular chairs and 2 chairs with arms for either end. Mixes it up a bit with not just having 10 identical chairs.
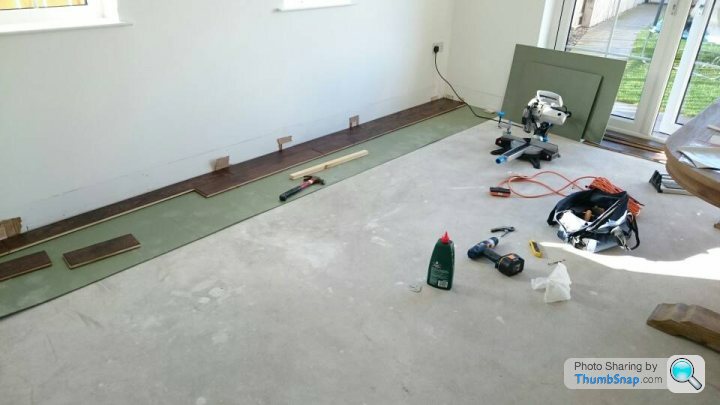
Flooring was a tough choice. Originally we were going for a limestone tile in an opus pattern but we accidentally came across this floor when we weren't even looking. The missus and I both seen it separately and then when we met up again, we both basically said to each other 'come have a look at this flooring '
So we got a box dry layed on the floor to see how it would match in.
We both loved the 'battered' looking finish.

Because it was me laying it, I went for underlay boards rather than glueing it to the concrete , simply because I thought it would be easier.
I'm not the fastest. After a day and a half I still wasn't finished.
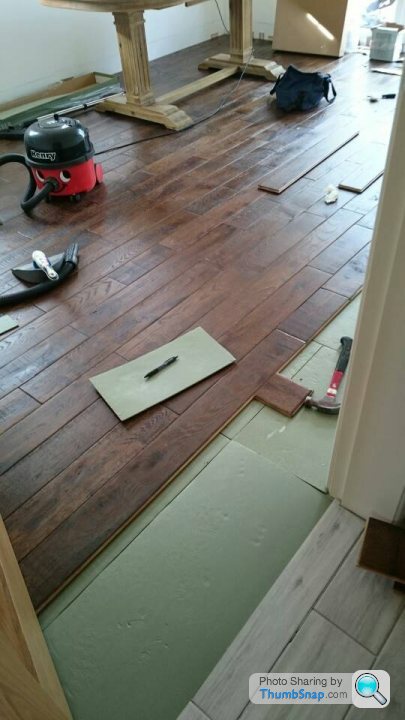
But this bit is the best, the last piece
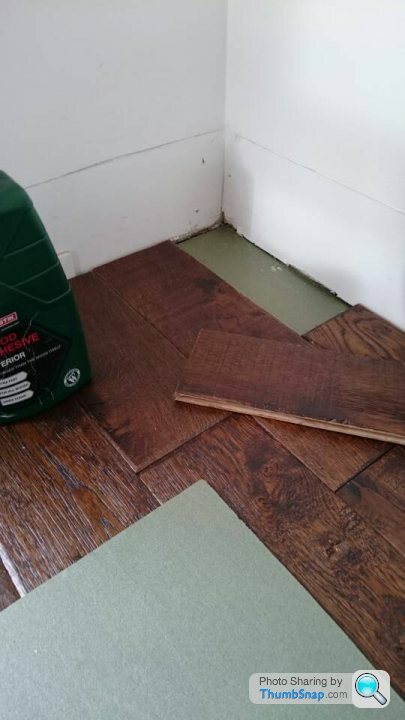
Turned out quite well

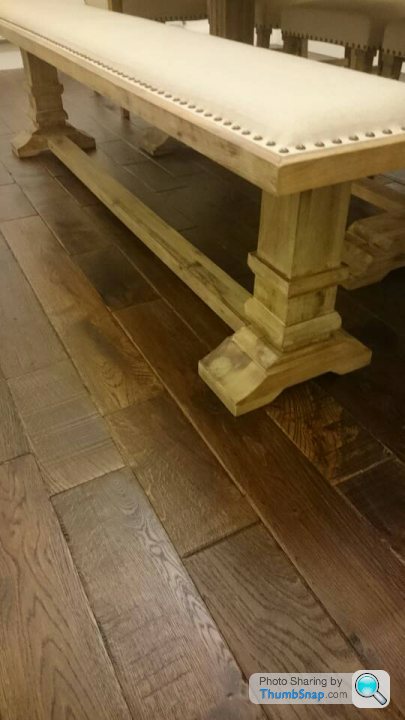
Love the grain in this

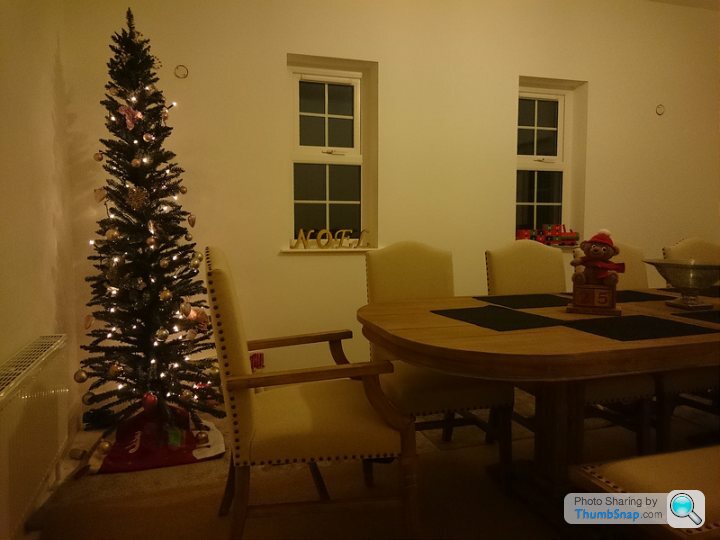
Double doors leading to back garden
Then got the shutters in (DIY job as described earlier in the thread)
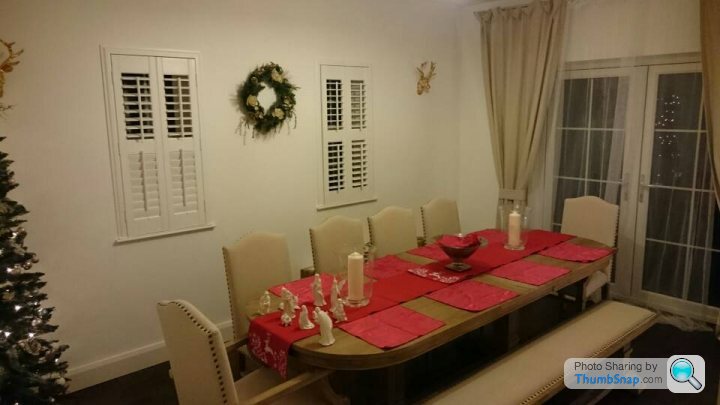
Then we got light in, wall lights flanking the windows, and dressed the table. It's a bit over dressed in this picture to be honest though, not really in keeping with the minimalistic tone to the rest of the house.
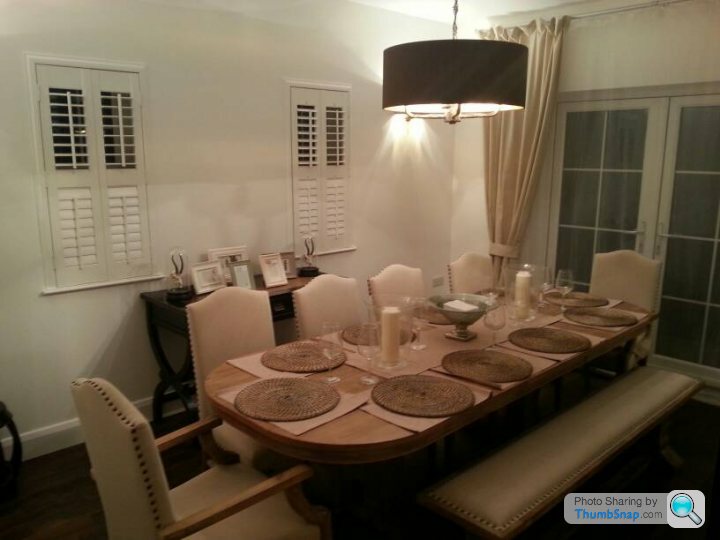
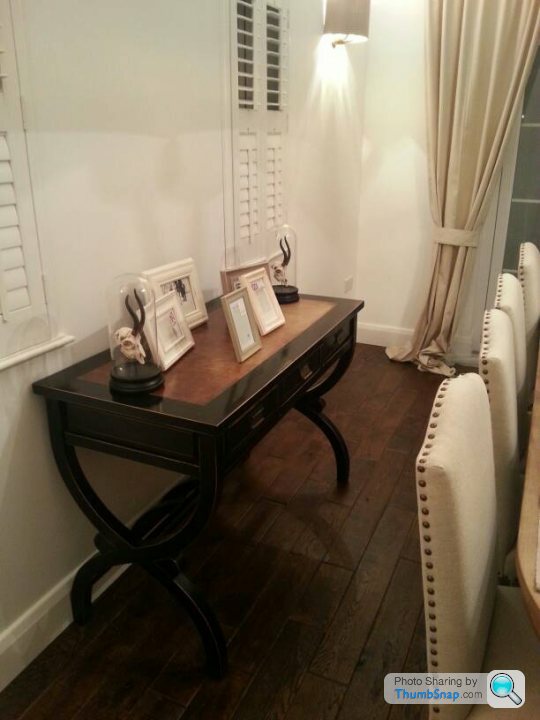
This writing desk type table was from our old house, but I like it in here too, just a really attractive piece of furniture in my opinion.
So we're approaching the end of the thread now. All's left to do is the movie room, the exterior/fencing/garden work, the outhouse plan and then a few little extra decor updates to the rooms previously posted.
Will do those over the next few days
The table and chairs arrived not long after moving in. No lights or flooring or window coverings at this point, just sort of thrown in there. Different style to the main living area, a distressed wood type finish to it and we liked the idea of this bench for the kids/visitors kids to sit on.
It's seating for 10, with 4 on the bench, 4 regular chairs and 2 chairs with arms for either end. Mixes it up a bit with not just having 10 identical chairs.
Flooring was a tough choice. Originally we were going for a limestone tile in an opus pattern but we accidentally came across this floor when we weren't even looking. The missus and I both seen it separately and then when we met up again, we both basically said to each other 'come have a look at this flooring '
So we got a box dry layed on the floor to see how it would match in.
We both loved the 'battered' looking finish.
Because it was me laying it, I went for underlay boards rather than glueing it to the concrete , simply because I thought it would be easier.
I'm not the fastest. After a day and a half I still wasn't finished.
But this bit is the best, the last piece
Turned out quite well
Love the grain in this
Double doors leading to back garden
Then got the shutters in (DIY job as described earlier in the thread)
Then we got light in, wall lights flanking the windows, and dressed the table. It's a bit over dressed in this picture to be honest though, not really in keeping with the minimalistic tone to the rest of the house.
This writing desk type table was from our old house, but I like it in here too, just a really attractive piece of furniture in my opinion.
So we're approaching the end of the thread now. All's left to do is the movie room, the exterior/fencing/garden work, the outhouse plan and then a few little extra decor updates to the rooms previously posted.
Will do those over the next few days
_dobbo_ said:
we have what looks like the exact same floor in our kitchen/diner, it has been down about 7 years and looks like new, primarily because it doesn't look new when you first put it down.
We went with the battered effect for precisely that reason!
That's good to know We went with the battered effect for precisely that reason!
We learn from our mistakes and in our last house, we had a walnut floor which had a very shiny/glossy finish. Stunning floor for a few weeks, but so so easily scratched. A stone stuck in your sole and it was scratch city. Floor looked quite poor very quickly hence this floor choice - it's already battered looking but in a good way
Glad to know yours has held up well after 7 years!
Shakermaker said:
I haven't seen any mention of cost yet, you invited guesses earlier on?
Based on all my experience (18 years Grand Designs, 4 years Amazing Spaces, 1 episode of "Love it or List It") I am going to suggest that you have spent in the region of £1200/sq metre, to give total cost of c. £280,000 if you have about 230sq metres.
The finish would suggest more, but I think your attention to how you have used the space and the choice of materials/build technique will have kept costs down
You don't have to answer me yet if others are still guessing. Or you can point back to a post I missed where you have told us the cost and I missed it.
Your right, no mention of costs yet. I was going to do a final summary, 1 pic of each room and the groundwork and patios and then invite some guesses Based on all my experience (18 years Grand Designs, 4 years Amazing Spaces, 1 episode of "Love it or List It") I am going to suggest that you have spent in the region of £1200/sq metre, to give total cost of c. £280,000 if you have about 230sq metres.
The finish would suggest more, but I think your attention to how you have used the space and the choice of materials/build technique will have kept costs down
You don't have to answer me yet if others are still guessing. Or you can point back to a post I missed where you have told us the cost and I missed it.
Edited by Shakermaker on Thursday 12th October 16:41
Big regional variations on site costs, and electrical water connections can be hugely expensive in some situations so to make it relevant, I'll only include cost of the house fully turnkey finished (ie, Inc bathrooms, kitchen, flooring, tiling, the full painting of walls and architrave painted, lighting plumbing etc) so basically, everything you see but not including sofas, beds etc. And the outside works too, patios, lawns, paths, walls.
Total size is 215sq m (about 23/2400 sq ft?) and the outhouse/garage is 25sq m or about 270/280 sq ft and it's also finished like the inside, spotlights, skirting, insulation etc so 240sq m if you include that.
Based on that, happy for people to take a guess at any point but I'll do the actual cost breakdown once I finish the thread
Du1point8 said:
Just saw this, what flooring is that?
Im trying to work out what to use in my place in London and that looks rather nice.
Which flooring?Im trying to work out what to use in my place in London and that looks rather nice.
The dining room is Schreiber Caramel flooring but its a delisted product - I had a google and can't find it for sale anymore.
Here is the main tiled floor, if thats what you are talking about?
http://www.porcelainsuperstore.co.uk/oslo-white.ht...
Du1point8 said:
Sorry I meant the weathered look wood.
Ah, it's delisted now. You could try your local homebase and see if they are doing an end of line sale. I seen it in my local one only 2 weeks ago. Normally sells around £45per m but you might pick it up on sale if you are quick. It's called Schreiber caramel. NickCW said:
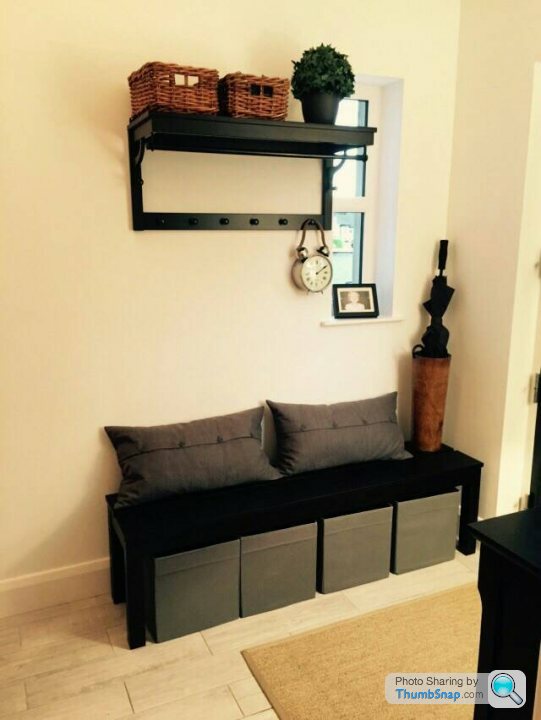
Great thread and a lovely house, can I ask where you got the large spiral light from you have in your entrance hall and your bedroom table lights from?
Look forward to seeing the final updates!
We got nearly all of our lights in the house from our local Yesss electrical showroom. A scottish lass in my local ballymena store, very great in design ideas and could source all sorts of stuff that wasn't in the showroom. Lots of variations of this light, 10w, 20w, number and size of cubes etc. Look forward to seeing the final updates!
The beside lamps were from ikea. Only £20 or £25 each so despite their bargain basement price, they are actually one of my favourite lights in the whole house - lovely ambient glow off them with a warm colour temp, medium wattage bulb
Chicken Chaser said:
Looks like you've done a great job in sorting a lovely home for your family.
Thanks!That was the best part of it - its not an off the shelf, cookie cut out standard 4 bed house - but being able to put our own design elements into it meant we could design the house in a way that suited our own family. And it worked out really well. The family all love it. Missus likes the fact that she has her master suite with dressing room - I like the fact I've got a movie room and an outhouse too (just this weekend I was out there having a drink and playing my guitar loudly while the kids were asleep) And the kids love it too - we can all be together in the open plan area, which is the main focal point of our home now.
I never really got round to finishing the thread and completely forgot about it.
Anyway, to cut a long story short, about £180k was the approx build cost (excluding land, just house and exterior groundworks) which works out about £837 per m2, for 215sqm. Although that doesn't include the outhouse, which is about 25m2 which was also specced out like an interior finish, full plasterboard, spotlights, insulated etc.
I had previously mentioned having to do bits of DIY myself, which I'll touch on now.
The fence design I had previously done was a take on a Japanese style fence, bamboo and framed with wood. It's nigh on impossible to get a bespoke fence in the UK so I ended up importing fake bamboo screening from Germany, with the view that faux (aka plastic) would stand the test of time better.
That didn't work however. Too many stormy winters damaged it and after one too many repairs, I had to rip it down, much to my dismay.
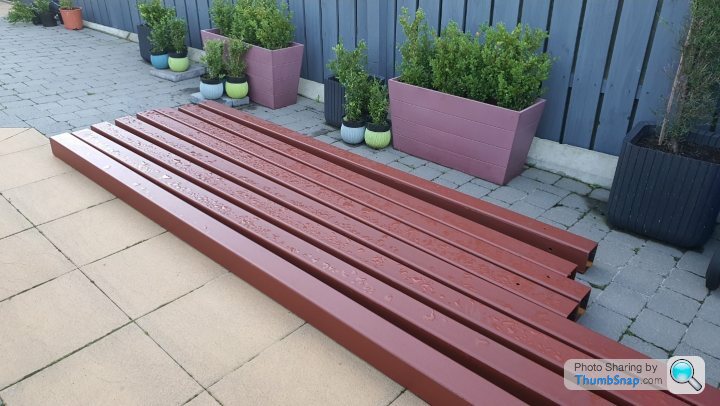
I replaced it with standard fence boards, painted, and framed with standard decking boards.
Not quite the same effect as the faux bamboo but still a bit different from a standard fence.
You can see in these pics how I went about it


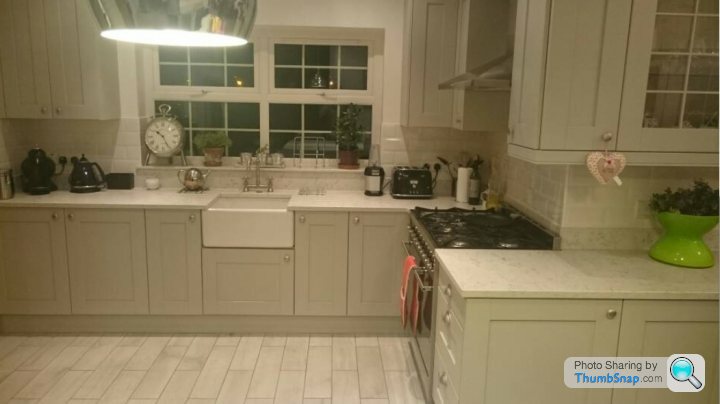
I also done some finishing touches in kitchen and utility by installing some metro tiles. Pretty straightforward DIY job to be honest.
Utility room

Kitchen above the worktops

Its 5 years this summer from moving in and we've completely redone our movie room (got rid of the curved seating) and also replaced the sofas on the lounge which I'll update with shortly.
We're also considering some major remodeling works, a possible loft conversion or a loft conversion with a difference - vaulting the ceilings upstairs mixed with some mezzanine floors. Will update on that too.
Anyway, to cut a long story short, about £180k was the approx build cost (excluding land, just house and exterior groundworks) which works out about £837 per m2, for 215sqm. Although that doesn't include the outhouse, which is about 25m2 which was also specced out like an interior finish, full plasterboard, spotlights, insulated etc.
I had previously mentioned having to do bits of DIY myself, which I'll touch on now.
The fence design I had previously done was a take on a Japanese style fence, bamboo and framed with wood. It's nigh on impossible to get a bespoke fence in the UK so I ended up importing fake bamboo screening from Germany, with the view that faux (aka plastic) would stand the test of time better.
That didn't work however. Too many stormy winters damaged it and after one too many repairs, I had to rip it down, much to my dismay.
I replaced it with standard fence boards, painted, and framed with standard decking boards.
Not quite the same effect as the faux bamboo but still a bit different from a standard fence.
You can see in these pics how I went about it
I also done some finishing touches in kitchen and utility by installing some metro tiles. Pretty straightforward DIY job to be honest.
Utility room
Kitchen above the worktops
Its 5 years this summer from moving in and we've completely redone our movie room (got rid of the curved seating) and also replaced the sofas on the lounge which I'll update with shortly.
We're also considering some major remodeling works, a possible loft conversion or a loft conversion with a difference - vaulting the ceilings upstairs mixed with some mezzanine floors. Will update on that too.
I somehow missed these replies but as a very late response, the Fridge was a Samsung (now discontinued) but plenty of similar types you can get. No issues in 5.5 years - so hint of built up ice anywhere - its all fine and my beer is still very cold when I take it out so all seems to be good. Would recommend.
Gixermark - maybe a bit too late lol but drop me a PM if you are still interested in the contractor. He's well into his 60's now so not sure if he's hung up his trowel or not but I can give you his contact details if you like.
Anyway, the reason for the thread bump is, well, after 5.5 years with young kids - some of the walls are looking a bit tired/grubby so its time to decorate. Our last 3 houses have been new builds and the previous 2 we sold up and left after approx 5 years but not this time. I don't know whether these house moves can be subconsciously linked to my hatred of decorating but the missus is putting the pressure on.
We get a lot of traffic in the hall and stairs and the missus wants to install wall panelling - like half way up sort of panelling, just above waist height.
We've never done anything like this before so I'm about to undertake a bit of research into it. It seems an appropriate time to throw the question out there on PH - anything to look out for - pitfalls or general advice?
My plan is to attach some thin (6mm) MDF sheets to the walls, then add some planed timber strips in a shaker style framing (to sort of match the existing house doors which are shaker style) - then maybe add a finishing rail at the top.
The things is, bar the dirty marks, the walls are in great condition and I've seen people do this panelling without the MDF sheets behind, just using the existing walls then using wood to create the panelling effect. This is cheaper, however, if the overall finish isn't as good, I would prefer to spend a little extra and do it correctly. The downside is - some people say this is a fire risk....I'm not convinced though as I thought MDF isn't very flammable.
Would appreciate any general thoughts on this please
I followed through re: the above post about panelling. I did a trial in our downstairs loo to see how it would turn out, before tackling the main hallway.

Simple affair. Just attached the wood to the wall, sanded it all down and then finished in gloss paint.

However, lockdown happened and priorities moved a little, so didn't make it into the main hallway. Instead, outdoors areas took priority- 2 projects on the go - back garden and side garden/patio area.
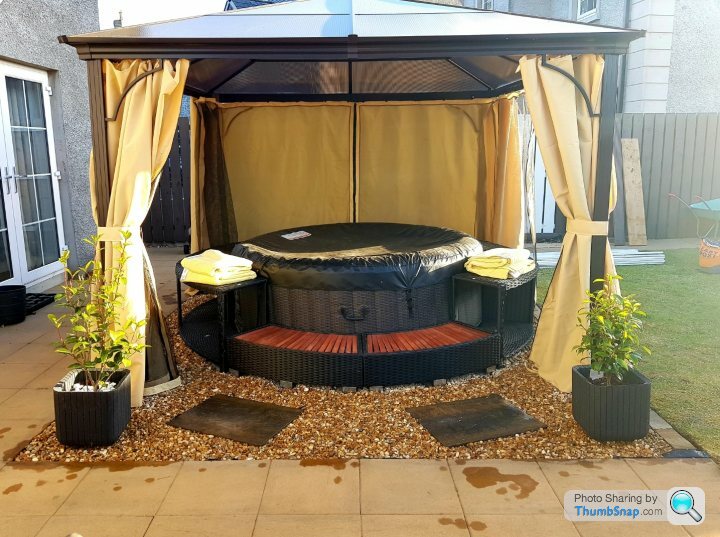
The missus was dead keen on a hot tub and eventually talked me into it. I wasn't keen on the look of it standing alone, and it ended up turning into a much bigger project.
I bought a permanent gazebo as the pop up one I had was a real pain putting up and down everytime the wind picked up. And I also got a surround for the tub to dress it up a bit.....and then a load of ground works to finish it off.
So a £380 hot tub ended up costing me quite a few shillings more to get it to look right.

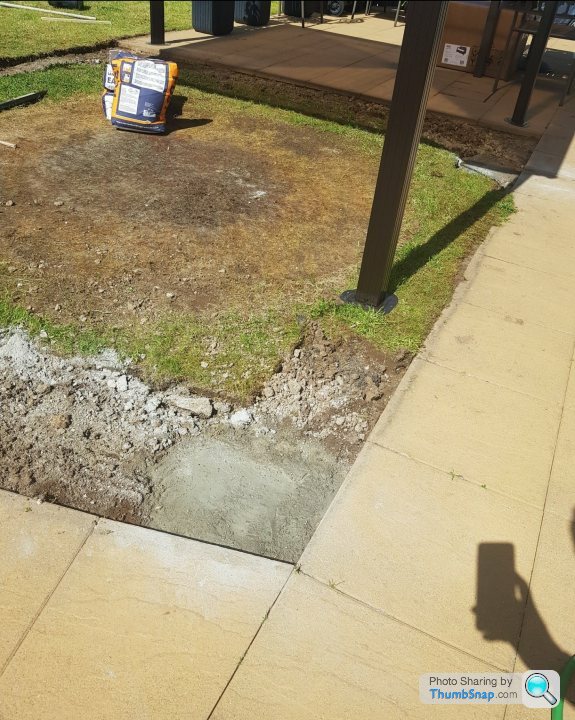
I dug 4 enormous holes for ground anchoring. Over engineered to be honest, as the weak point will be the plate at the bottom of each post. Fixed to the concrete with 3 x 7mm anchor bolts in each post.
In considered sinking the posts into the concrete for more strength, but would have lost headroom. It's taken 50pmh winds and held up well, including the polycarbonate roof which is good, so far so good. Let's see what winter brings.
This pic shows the foot plates which is definitely a weak point in terms of long term durability.
And fully installed:
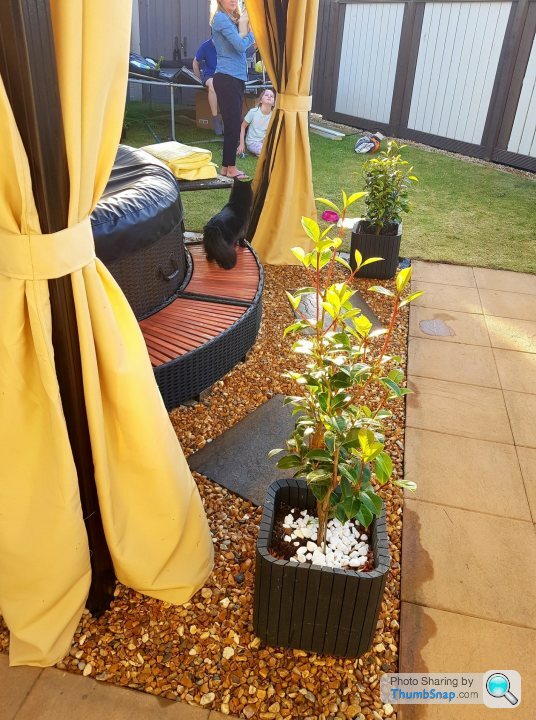
I had bought 1 tonne of stones and 1 tonne of quarry dust so I used the leftovers against the fence to make mowing the grass a bit easier. Needed some blocks to keep the stones in place.


In amongst all this, we also introduced a new puppy into our life - a little pug called Leia.

So how we spend our time has changed a bit recently. Spending more time in the garden, and out walking too with our new pup.
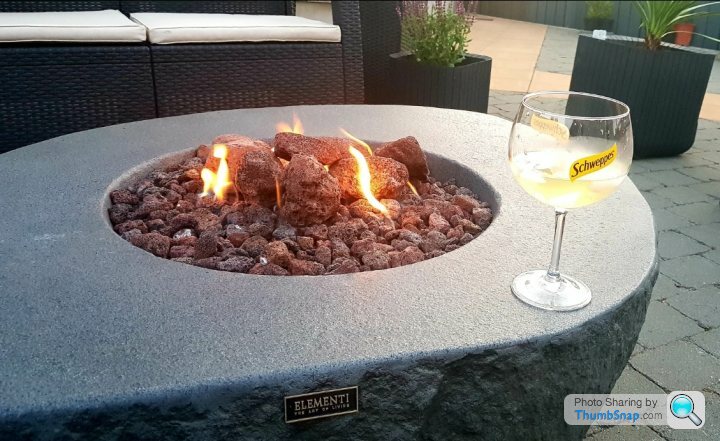
The side patio got an upgrade too, with some new furniture and an amazing gas fire pit, which I really love. This one here.

Some evenings I'll chill in the hot tub with a wee drink, then make my way round to the side and fire up the fire pit.
We like it so much, very social and a nice ambience when you have guests round, that we discussed how we could use it during the colder seasons.
So another gazebo construction is underway.
There is a slope in that patio, which makes things trickier. I considered an off the shelf gazebo, like we have over the hot tub, which would have needed a riser at the low end, about 15cm. Had a few ideas on how to make it look ok cosmetically but in the end, we've decided to go all out and build something thats both bespoke and also bomb proof.
It'll be 4x4 heavy duty steel frame with a tiled roof. Mire on that in the next post.
Simple affair. Just attached the wood to the wall, sanded it all down and then finished in gloss paint.
However, lockdown happened and priorities moved a little, so didn't make it into the main hallway. Instead, outdoors areas took priority- 2 projects on the go - back garden and side garden/patio area.
The missus was dead keen on a hot tub and eventually talked me into it. I wasn't keen on the look of it standing alone, and it ended up turning into a much bigger project.
I bought a permanent gazebo as the pop up one I had was a real pain putting up and down everytime the wind picked up. And I also got a surround for the tub to dress it up a bit.....and then a load of ground works to finish it off.
So a £380 hot tub ended up costing me quite a few shillings more to get it to look right.
I dug 4 enormous holes for ground anchoring. Over engineered to be honest, as the weak point will be the plate at the bottom of each post. Fixed to the concrete with 3 x 7mm anchor bolts in each post.
In considered sinking the posts into the concrete for more strength, but would have lost headroom. It's taken 50pmh winds and held up well, including the polycarbonate roof which is good, so far so good. Let's see what winter brings.
This pic shows the foot plates which is definitely a weak point in terms of long term durability.
And fully installed:
I had bought 1 tonne of stones and 1 tonne of quarry dust so I used the leftovers against the fence to make mowing the grass a bit easier. Needed some blocks to keep the stones in place.
In amongst all this, we also introduced a new puppy into our life - a little pug called Leia.
So how we spend our time has changed a bit recently. Spending more time in the garden, and out walking too with our new pup.
The side patio got an upgrade too, with some new furniture and an amazing gas fire pit, which I really love. This one here.
Some evenings I'll chill in the hot tub with a wee drink, then make my way round to the side and fire up the fire pit.
We like it so much, very social and a nice ambience when you have guests round, that we discussed how we could use it during the colder seasons.
So another gazebo construction is underway.
There is a slope in that patio, which makes things trickier. I considered an off the shelf gazebo, like we have over the hot tub, which would have needed a riser at the low end, about 15cm. Had a few ideas on how to make it look ok cosmetically but in the end, we've decided to go all out and build something thats both bespoke and also bomb proof.
It'll be 4x4 heavy duty steel frame with a tiled roof. Mire on that in the next post.
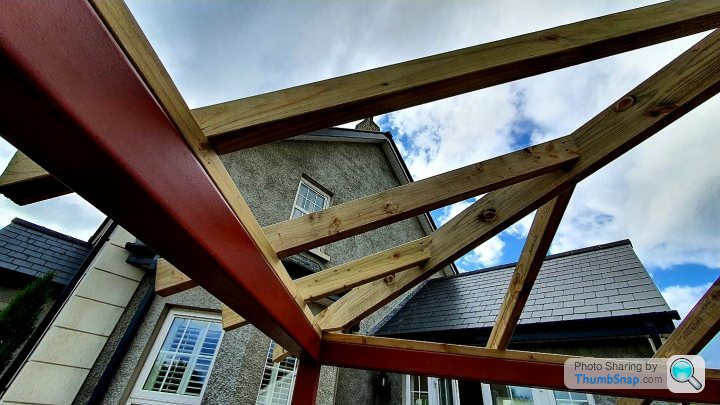
This gazebo project has just started, and should be finished in a fortnight, pending the availability of the roofer.
Its 12ft x 12ft, with 4 posts, being made of 4x4 steel. We then have same 4x4 steel beams to make a square at the top, on which the wooden rafters will sit.
The 8 beams
The steel fabricator also put little plates inside - just in case you drop a bolt while securing it - the plate will catch it. Nice touch!

The roof design will be all 4 sides going up into a point, a pent design I think you call it?
The wood will overhang the steel and be exposed a little bit, as part of the overall aesthetic design.
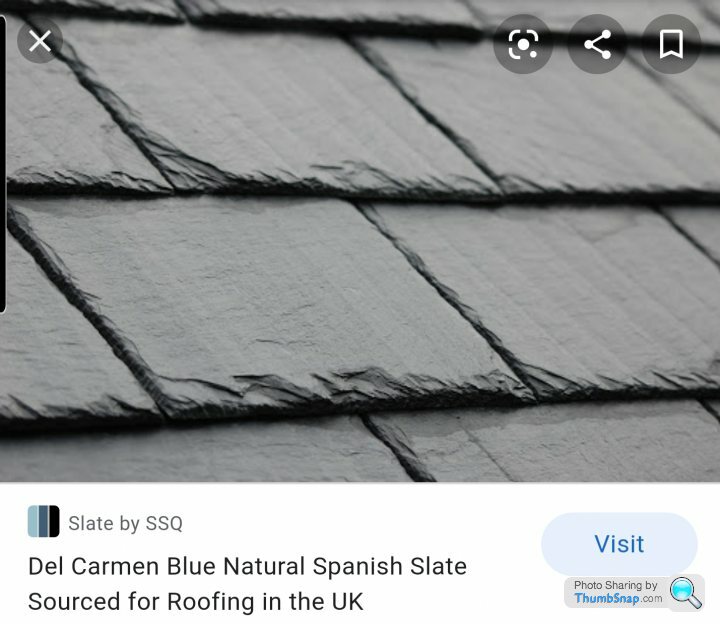
And the roof tiles will match those used on the rest of the house, to tie it all in. These tiles here

So all the wood and steel has been got, and just started digging the holes yesterday. Going 40cm deep.
There is just nothing fun about digging holes, although this mini jack hammer i got a loan of helps a bit.

So won't be long till this project is done. Couple of weeks hopefully and I'll update the thread as I go along. Stay tuned if you want to see how it turns out. I have a picture in my head of what I 'think' it'll look like. Fingers crossed it turns out that way!
Its 12ft x 12ft, with 4 posts, being made of 4x4 steel. We then have same 4x4 steel beams to make a square at the top, on which the wooden rafters will sit.
The 8 beams
The steel fabricator also put little plates inside - just in case you drop a bolt while securing it - the plate will catch it. Nice touch!
The roof design will be all 4 sides going up into a point, a pent design I think you call it?
The wood will overhang the steel and be exposed a little bit, as part of the overall aesthetic design.
And the roof tiles will match those used on the rest of the house, to tie it all in. These tiles here
So all the wood and steel has been got, and just started digging the holes yesterday. Going 40cm deep.
There is just nothing fun about digging holes, although this mini jack hammer i got a loan of helps a bit.
So won't be long till this project is done. Couple of weeks hopefully and I'll update the thread as I go along. Stay tuned if you want to see how it turns out. I have a picture in my head of what I 'think' it'll look like. Fingers crossed it turns out that way!
I almost forgot about some interior upgrades.
When we moved in, we put off the shelf IKEA roller blinds in the bedroom windows as a stop gap until we knew what we wanted.
6 years later, we eventually changed them!
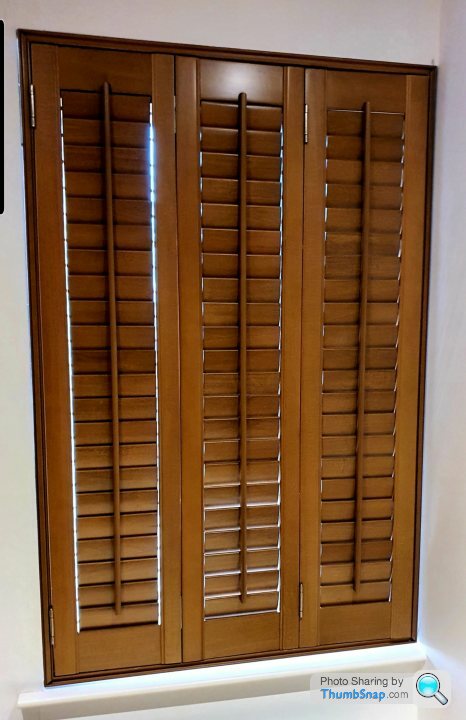
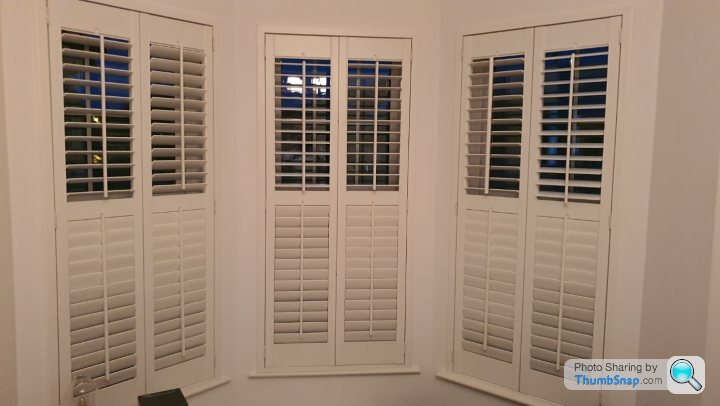
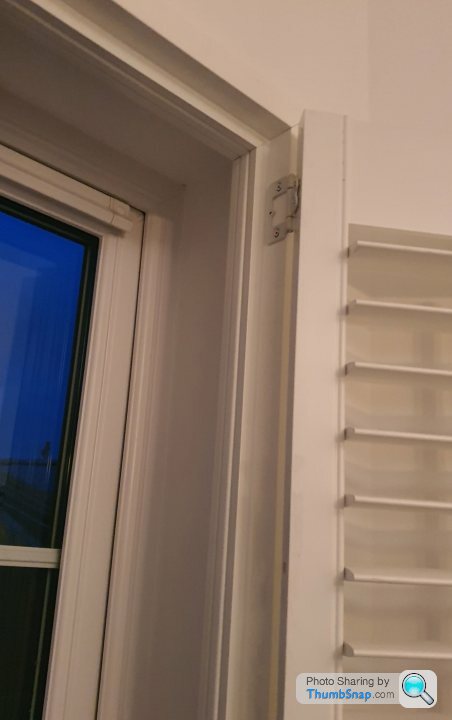
I had documented earlier in the thread about installing shutters downstairs and upstairs, they were done a month or 2 ago. Went for oak coloured shutters, in a z frame design, so they sit flush to the wall. Worked out about £300 a window, so much cheaper doing it DIY.
Open

Closed
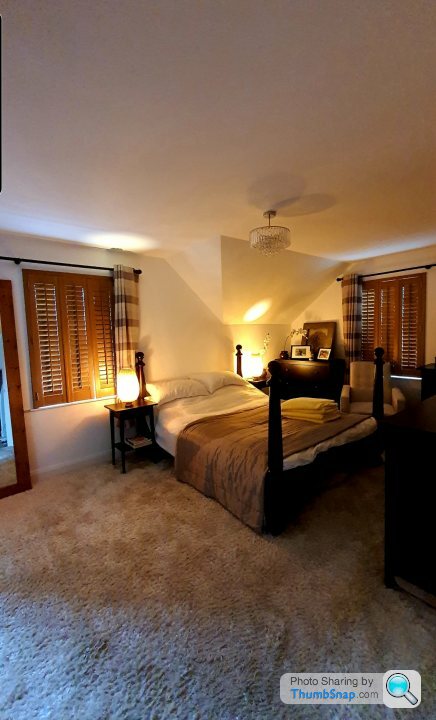
Close up

The dressing room window couldn't take a z frame due to being flush to the adjoining wall, so we had to put it in the recess - I just had to bring it out as far as possible to make it sort of look similar to the rest of the other windows.
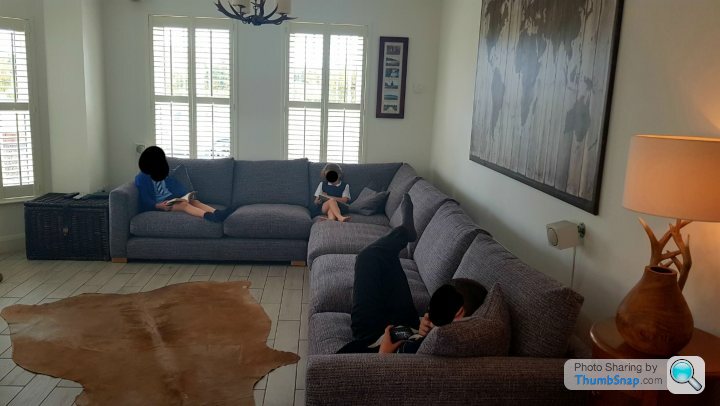
And lastly, after 6 years, we wanted to change the sofa. Took a bit of a leap ordering this, as its basically full wall length in both directions of the L shape. Its a huge sofa but turned out to be great. So much space on it and plenty of room when visitors call.
I've also upgraded the projector (not ceiling mounted yet so no pics) and its a 4k DLP which is great for 4k HDR. Just need to move my ceiling mount as its throw distance is a bit different to the outgoing JVC projector. Its currently sitting on our puppy's dog crate temporarily but still enjoyed some football and movies on it. Picture is stunning!
Will get some pics of that up too next time I fire it up.
When we moved in, we put off the shelf IKEA roller blinds in the bedroom windows as a stop gap until we knew what we wanted.
6 years later, we eventually changed them!
I had documented earlier in the thread about installing shutters downstairs and upstairs, they were done a month or 2 ago. Went for oak coloured shutters, in a z frame design, so they sit flush to the wall. Worked out about £300 a window, so much cheaper doing it DIY.
Open
Closed
Close up
The dressing room window couldn't take a z frame due to being flush to the adjoining wall, so we had to put it in the recess - I just had to bring it out as far as possible to make it sort of look similar to the rest of the other windows.
And lastly, after 6 years, we wanted to change the sofa. Took a bit of a leap ordering this, as its basically full wall length in both directions of the L shape. Its a huge sofa but turned out to be great. So much space on it and plenty of room when visitors call.
I've also upgraded the projector (not ceiling mounted yet so no pics) and its a 4k DLP which is great for 4k HDR. Just need to move my ceiling mount as its throw distance is a bit different to the outgoing JVC projector. Its currently sitting on our puppy's dog crate temporarily but still enjoyed some football and movies on it. Picture is stunning!
Will get some pics of that up too next time I fire it up.
Back to the gazebo.
Steel frame is up.

You can see here the steel fabricator has all the bolt joins internal, so that nothing is visible.
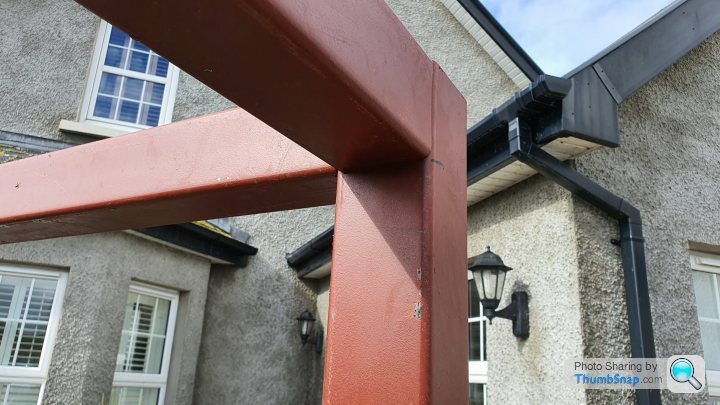
Wood for the roof structure getting done this morning. It's going to overshoot/overhang the steel for aesthetics and then finished with the same roof slates that are on the house.
Steel frame is up.
You can see here the steel fabricator has all the bolt joins internal, so that nothing is visible.
Wood for the roof structure getting done this morning. It's going to overshoot/overhang the steel for aesthetics and then finished with the same roof slates that are on the house.
S6PNJ said:
soupdragon1 said:
This gazebo project has just started, and should be finished in a fortnight, pending the availability of the roofer.
Its 12ft x 12ft, with 4 posts, being made of 4x4 steel. We then have same 4x4 steel beams to make a square at the top, on which the wooden rafters will sit.
The 8 beams
The steel fabricator also put little plates inside - just in case you drop a bolt while securing it - the plate will catch it. Nice touch!
Do you mind me asking what the steel and fabrication cost please? I might be looking to do similar but I'm weighing up using railway sleepers (100mm x 200mm) as posts at the moment! PM me if you don't want to post it on here.Its 12ft x 12ft, with 4 posts, being made of 4x4 steel. We then have same 4x4 steel beams to make a square at the top, on which the wooden rafters will sit.
The 8 beams
The steel fabricator also put little plates inside - just in case you drop a bolt while securing it - the plate will catch it. Nice touch!
4 x posts are 3.6m for the top square, and the 4 posts are 2.3m long. All of it, 4in x 4in.
So that gives you a rough idea of cost per m if you want to add all those lengths up.
The bolt fixings built into the steel probably cost a bit more, no idea what it would be without as it wasn't suitable for me anyway.
The steel was for 2 reasons. Rot is the 1st. Its on a little slope so lots of water run off and I was worried about rot.
2 was the size of 3.6m x 3.6m. Getting quality straight wood isn't easy, plus at that length and such a heavy roof, it all pointed towards steel. The forces on a wooden structure was a concern in that respect.
Granted, my concerns might be unfounded but peace of mind and all that!
I'll document all cost as we progress. £170 on the wood beams for the roof, which I'll picture as I go along.
Labour so far is 4 hrs digging holes and 2 x people for 8 hrs putting up the steel frame, concreting it in, plus started the roof structure. Literally only took 1 hr to get the steel frame done, so that bit was super fast.
Pics


Not bad for a days work, 2 people.
You can see the rafters coming past the steel. The roof will also come past a little too, just part of the design. Ends need to be trimmed still, but that'll be Thursday as its going to rain all day tomorrow.
This is the roof tiles that will go on.
Pics
Not bad for a days work, 2 people.
You can see the rafters coming past the steel. The roof will also come past a little too, just part of the design. Ends need to be trimmed still, but that'll be Thursday as its going to rain all day tomorrow.
This is the roof tiles that will go on.
Notreallymeeither said:
Loving the build thread. Not seen it before today.
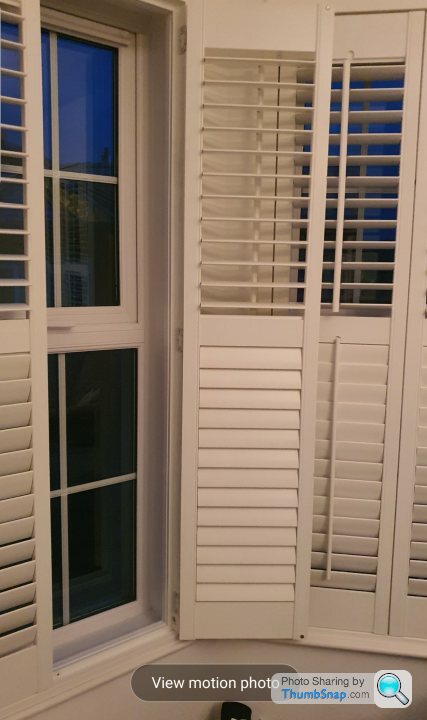
Please can you take a pic of the shutters (both the Z one and the other one) “open” (I.e. pulled back). We’re just trying to decide whether to put shutters instead of roller blinds.
I’m just trying to work out how they look when they are open / how much light they let in / How easy it is to get access to the window.
Can you also confirm supplier?
We like you had Ikea blackout blinds for the past five years!
Thanks v much
Yes, we used shutters direct on this occasion as they had the colour option we were after.Please can you take a pic of the shutters (both the Z one and the other one) “open” (I.e. pulled back). We’re just trying to decide whether to put shutters instead of roller blinds.
I’m just trying to work out how they look when they are open / how much light they let in / How easy it is to get access to the window.
Can you also confirm supplier?
We like you had Ikea blackout blinds for the past five years!
Thanks v much
Edited by Notreallymeeither on Thursday 27th August 14:21
Will take some more pics later when I get a chance.
ComStrike said:
Love the gazebo.
Were did you get the slate tiles ?
They should be widely available as they're from a huge supplier in Spain, tile is called Del Carmen Prime.Were did you get the slate tiles ?
My eyes are watering at the price though. Didn't realise that 60% is overlap. I've about 16m2 to do so I need 40m2 worth of tile. So not far off £700, and that's before felt, ridges and the actual labour.
I looked at shingles but not a huge amount to save after labour is added so an extra couple of hundred pounds for something that is reportedly good for 100 years makes sense. Doubt the rafters would last that long though
Edited by soupdragon1 on Thursday 27th August 21:18
Notreallymeeither said:
Loving the build thread. Not seen it before today.
Please can you take a pic of the shutters (both the Z one and the other one) “open” (I.e. pulled back). We’re just trying to decide whether to put shutters instead of roller blinds.
I’m just trying to work out how they look when they are open / how much light they let in / How easy it is to get access to the window.
Can you also confirm supplier?
We like you had Ikea blackout blinds for the past five years!
Thanks v much
Sitting watching the golf on TV here but these are basically the same but in white. Had these in for a few years now.Please can you take a pic of the shutters (both the Z one and the other one) “open” (I.e. pulled back). We’re just trying to decide whether to put shutters instead of roller blinds.
I’m just trying to work out how they look when they are open / how much light they let in / How easy it is to get access to the window.
Can you also confirm supplier?
We like you had Ikea blackout blinds for the past five years!
Thanks v much
Edited by Notreallymeeither on Thursday 27th August 14:21
Shutters block light, no question, however less impact with white shutters. I would say the upstairs feels like about a 40% light loss when slats are open. But of course, no light loss when fully open.
The only difference with standard frame and z frame is the little edge bit which you can see comes flush to the wall internally and externally.
Gassing Station | Homes, Gardens and DIY | Top of Page | What's New | My Stuff