Toms Garden Shed / Workshop / Office Build
Discussion


thebraketester said:
Any reason why you chose not to use furrings? Makes framing a load easier as you just build it all square.
It wasn't really any hassle not to use them, and they don't sell them in Wickes. I have a compound mitre saw, so it was quite easy to build 3 sides of the panel, use a straight edge to mark off the intermediate studs, set the saw to just under 2 degrees and get a decent finish. 
Had a delivery this morning
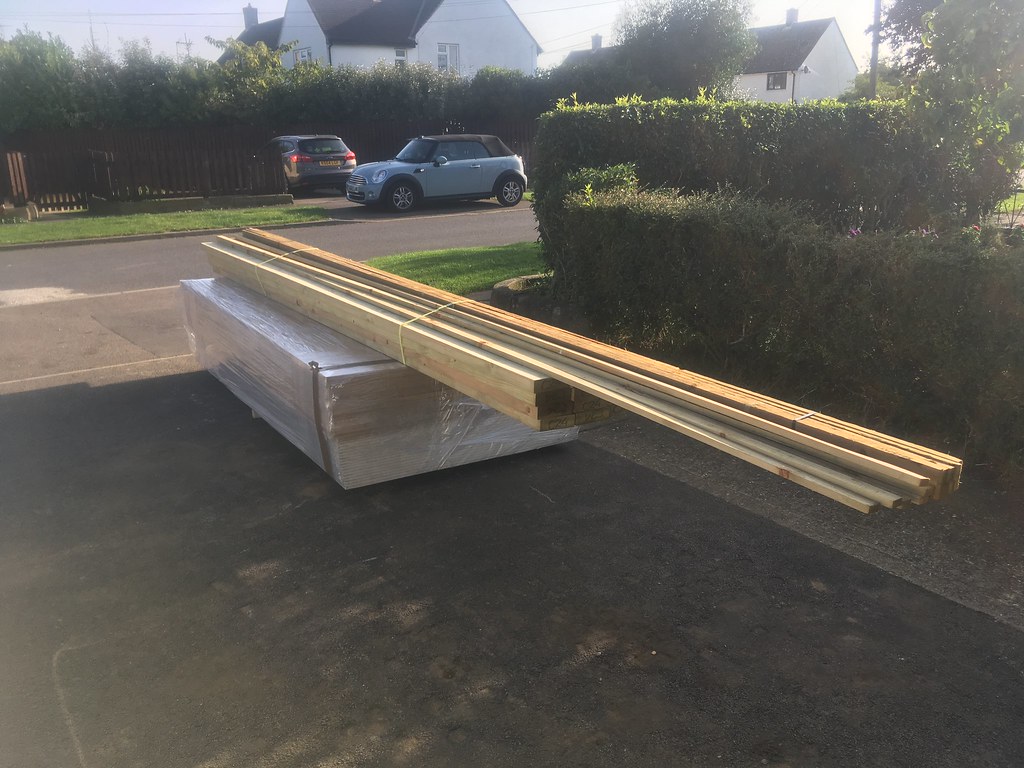 IMG_2929 by Tomoose85, on Flickr
Doesn't really look like £700 worth does it
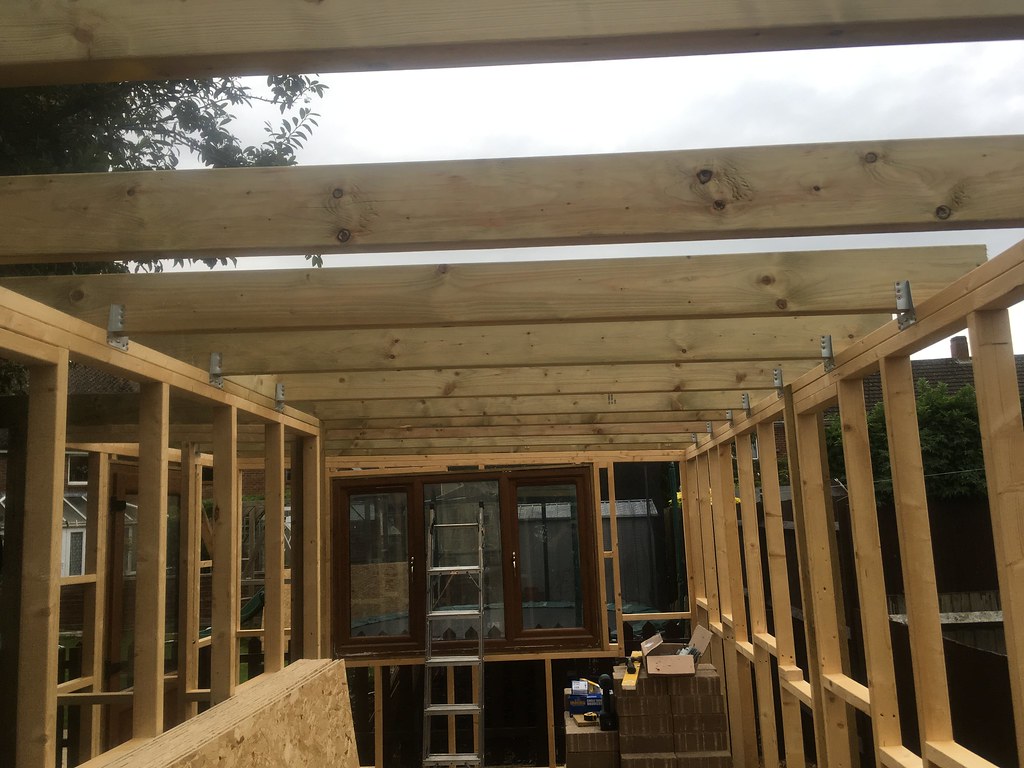
After handballing it all round into the back garden I got cracking with the roof joists. I went for treated 47x150 C24 at 600mm between centres, which should be just fine.
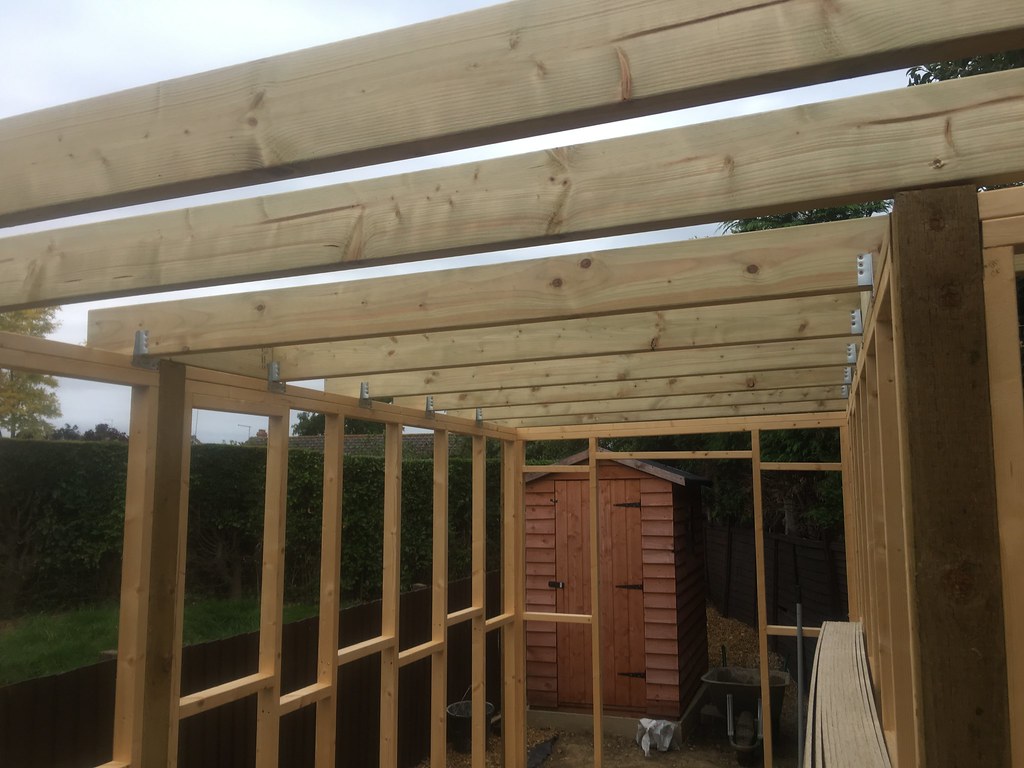 IMG_2936 by Tomoose85, on Flickr
Screws instead of nails, just because I bought a Makita impact driver for the project and want to get my money's worth out of it
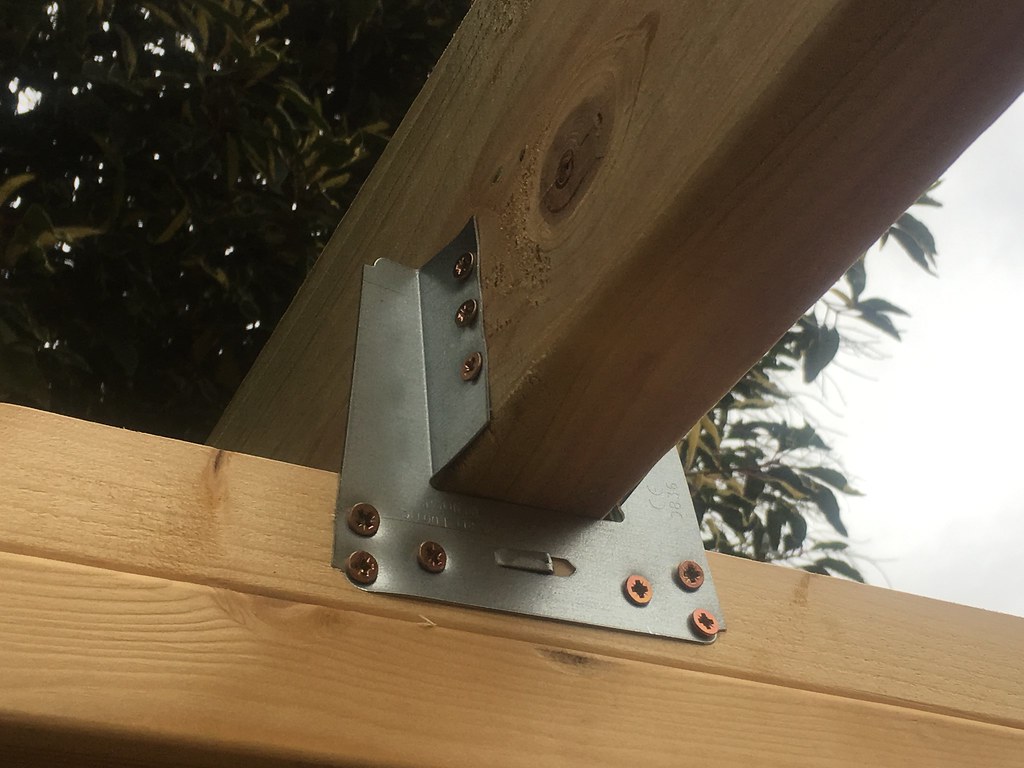 IMG_2937 by Tomoose85, on Flickr
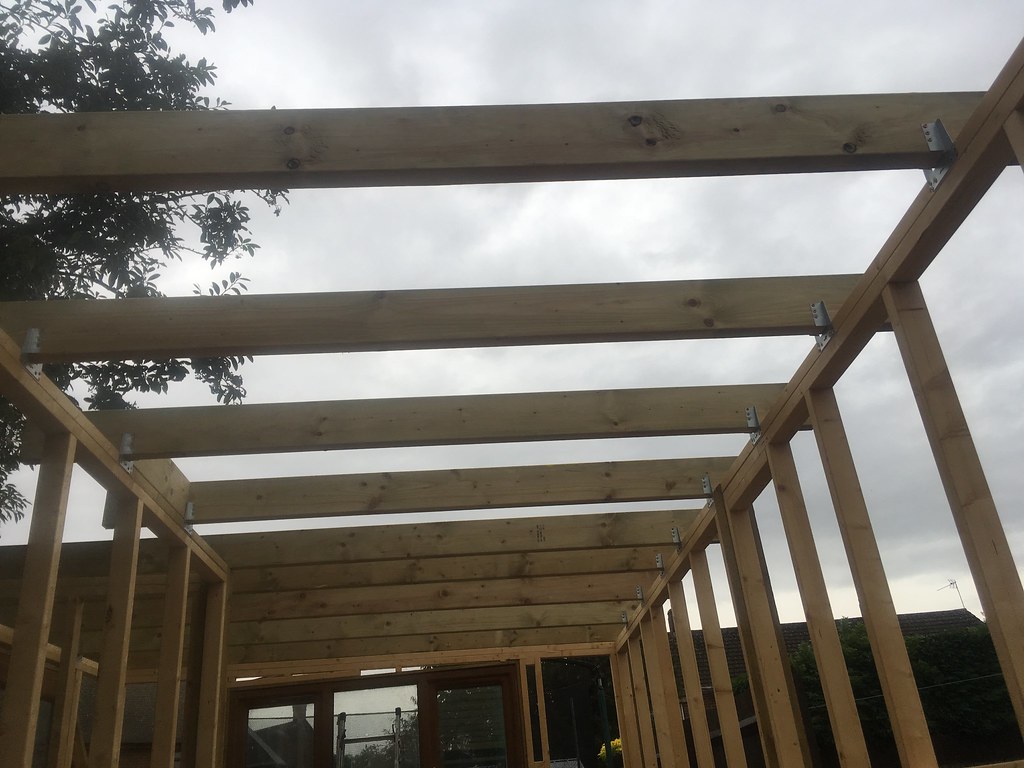 IMG_2939 by Tomoose85, on Flickr
 IMG_2940 by Tomoose85, on Flickr
 IMG_2942 by Tomoose85, on Flickr
 IMG_2943 by Tomoose85, on Flickr
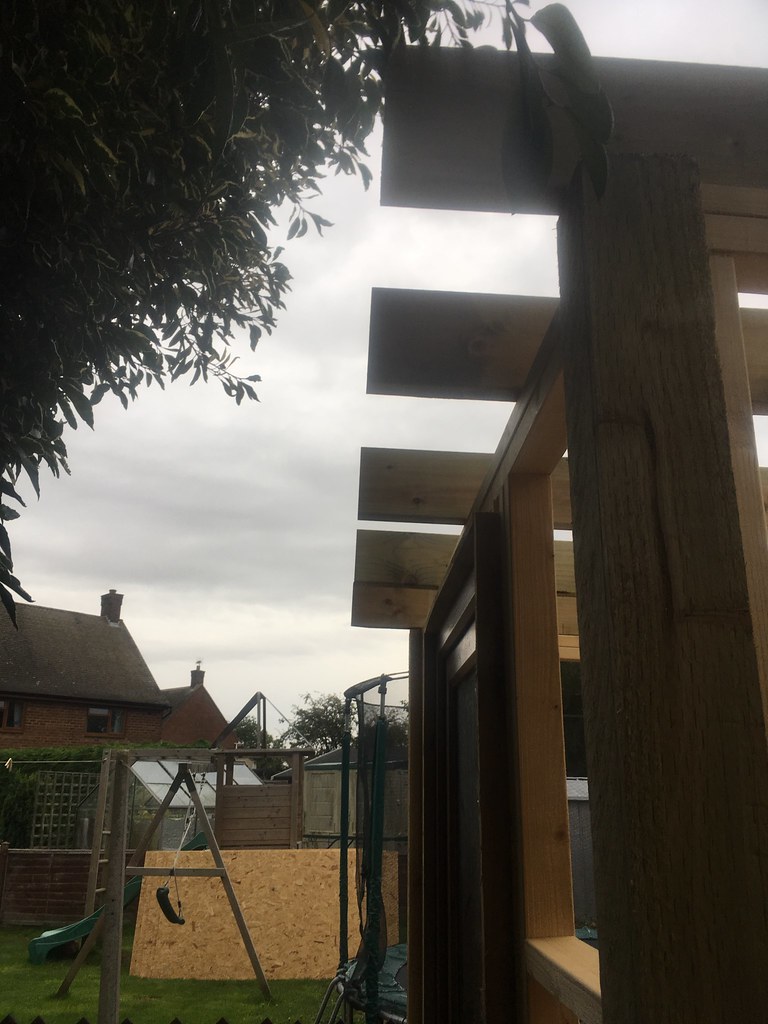
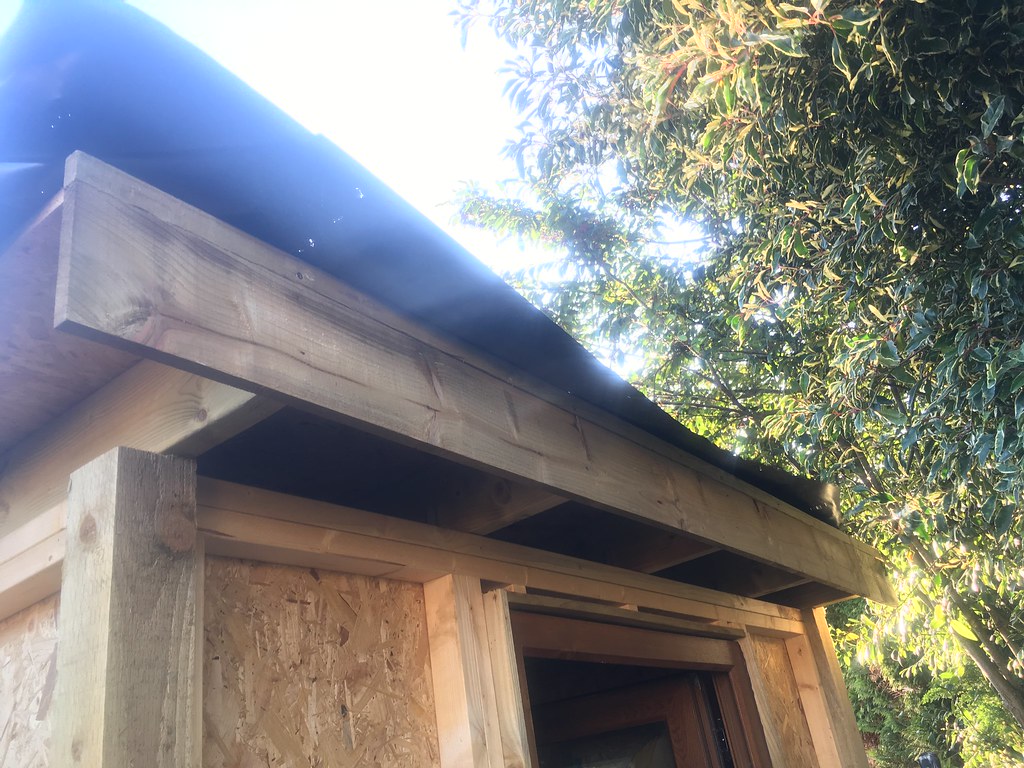
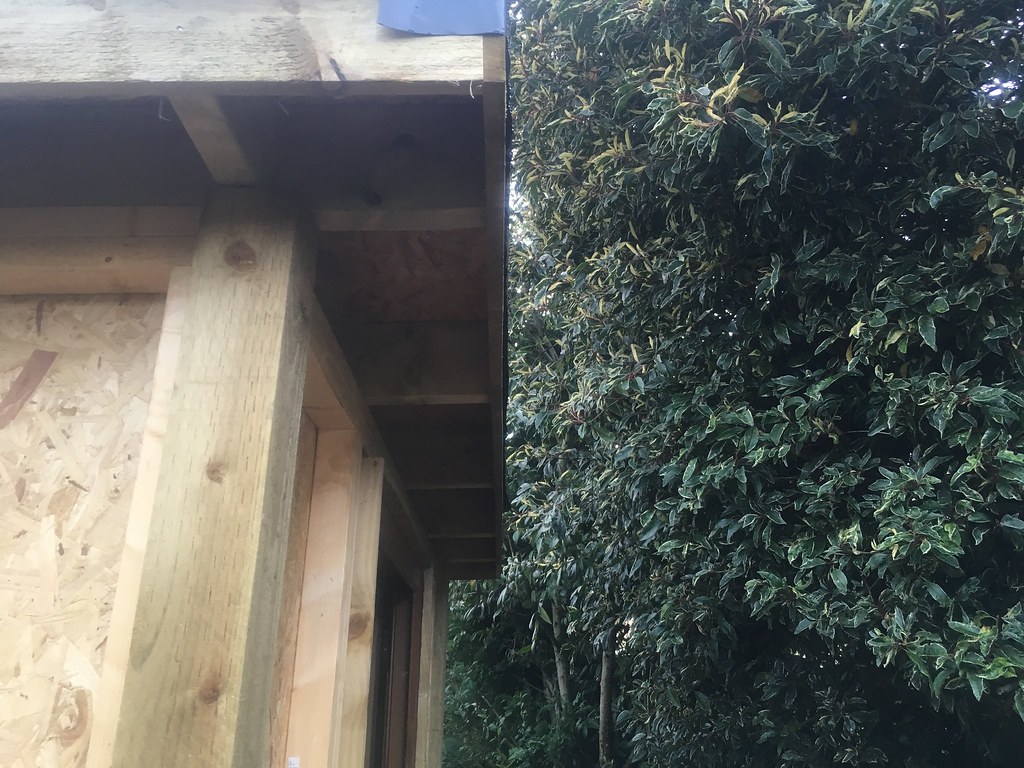
I will build off the side of the end joists to make an overhang to match the front.
I am however struggling with what to do for fascia and soffit boards. I think uPVC will look a bit naff, but I can't find any suitably sized timber. Any ideas?
Thanks all
IMG_2929 by Tomoose85, on FlickrDoesn't really look like £700 worth does it
After handballing it all round into the back garden I got cracking with the roof joists. I went for treated 47x150 C24 at 600mm between centres, which should be just fine.
IMG_2936 by Tomoose85, on FlickrScrews instead of nails, just because I bought a Makita impact driver for the project and want to get my money's worth out of it
IMG_2937 by Tomoose85, on FlickrIMG_2939 by Tomoose85, on FlickrIMG_2940 by Tomoose85, on FlickrIMG_2942 by Tomoose85, on FlickrIMG_2943 by Tomoose85, on FlickrI will build off the side of the end joists to make an overhang to match the front.
I am however struggling with what to do for fascia and soffit boards. I think uPVC will look a bit naff, but I can't find any suitably sized timber. Any ideas?
Thanks all
Eddieslofart said:
You could get some 7 or 8x1 cut for fascia, leaving an exposed rafter end ? I see you have used tanalised 6x1 so they will come to no harm.
Just carry your wall panel up between to close the gap. If that makes sense ?
I always use twist nails for bracket work, but i'm old
I'd have used twist nails if I didn't have screws that were fine for the job, twist nails are the correct way really.Just carry your wall panel up between to close the gap. If that makes sense ?
I always use twist nails for bracket work, but i'm old
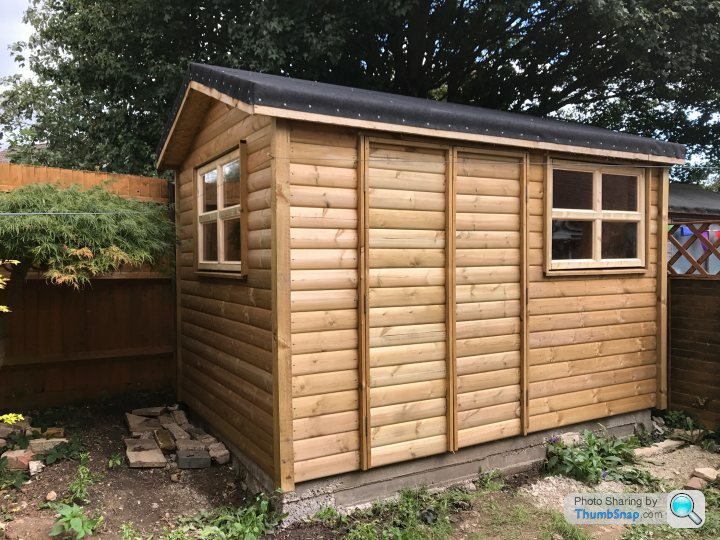
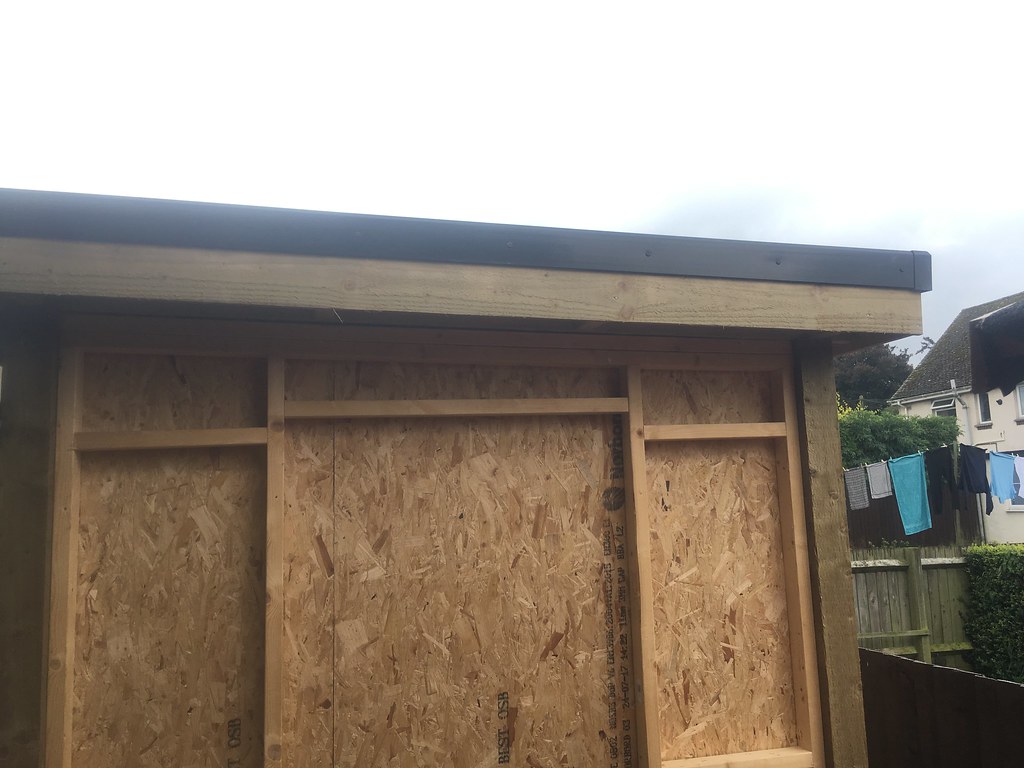
I am not sure I saw the question, but if you are pondering about fascias, use gravel boards. This is a shed/workshop I built recently for a friend and we used 150mm gravel boards for the fascias. You can also normally get 75mm gravel boards as well so you can produce a stepped fascia if you want.
Log lap cladding on this one too with insulated 'solid' doors and home made double glazing.
Log lap cladding on this one too with insulated 'solid' doors and home made double glazing.
Skodasupercar said:
... use gravel boards.
I had the same idea, but unfortunately my joists are 145mm deep, which doesn't give enough overlap really. Ideally it needs to be atleast 175mm or preferably 225mm so there is an overhang to protect my soffit lights, and come up flush with the top of the OSB roof deck (18mm). Your shed looks great!
What roof covering are you planning to install? You could fit 75mm gravel boards at the top and then 150mm below them to give a 225 fascia and then lap the roof covering over the front to cover the 75mm board. That way it looks like you have a deep fascia but its made out of two small bits and the joint is hidden.
Gravel boards are also a good choice as they are generally well treated so should last a long time. You could also do as above and then install a 150mm board over the face of the membrane lapped down the 75mm and 150mm board to hide the edge of the membrane and give a stepped decorative finish. Although that can act as a water trap.
Edited to add, the above shed used 145 rafters, but to cheat some extra space we overhung the OSB and butted the fascias to the underside of the OSB deck rather than in front of it.
Or you could use a combination of the above and 200mm feather edge boards. You wouldn't really see that they are feather edge and would be deep enough to cover your joists and soffits.
https://countrysupplies.uk.com/feather-edge-green-...
Edited by anonymous-user on Friday 8th September 21:56
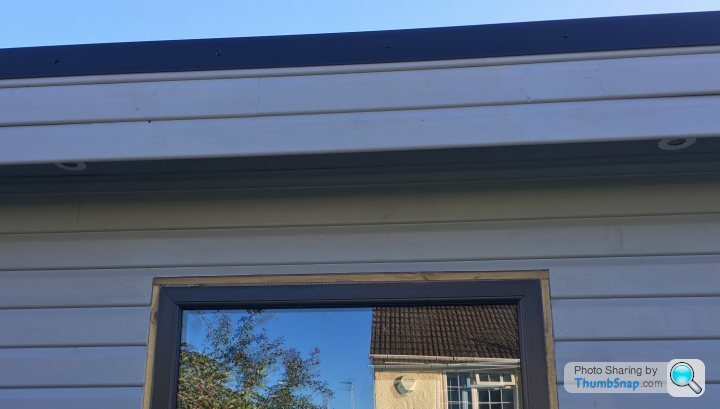
Thanks Superskodacar, I went with gravel boards. As they weren't deep enough on their own I used a roofing batten the same width which is totally covered by the roof trims. It looks great
So, a bit of an update.
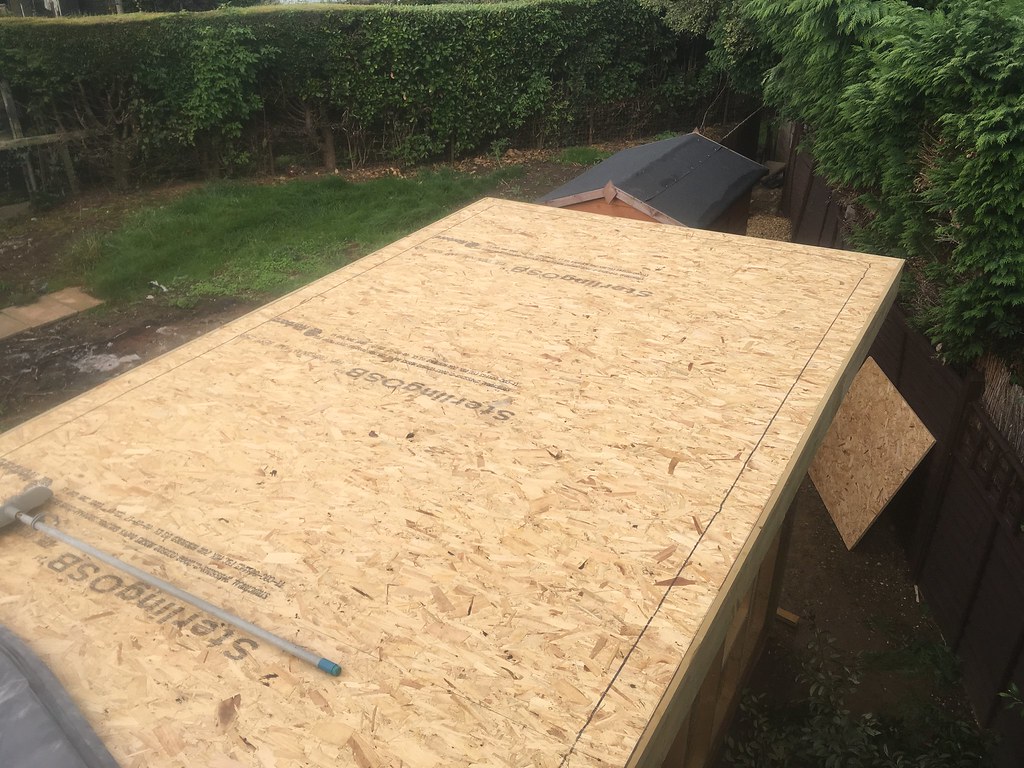
Roof sheeting on and screwed down (18mm OSB3).
 IMG_2958 by Tomoose85, on Flickr
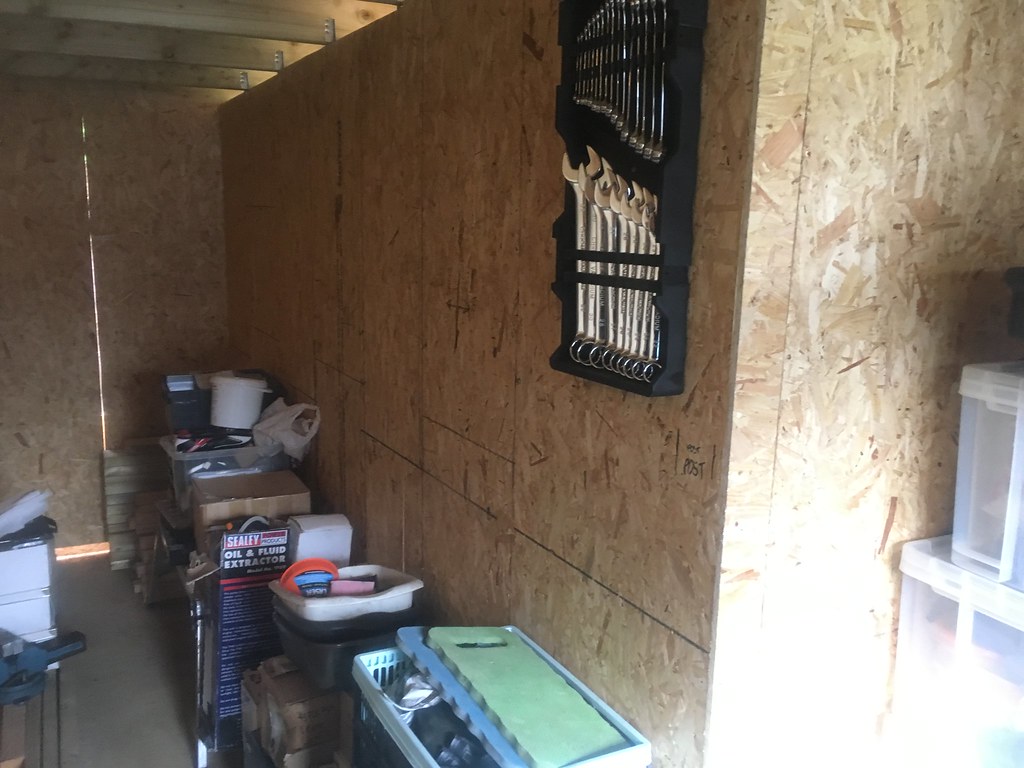
Started to sheet the walls too (11mm OSB2). I used this inside the stud work to stiffen the structure up, but also to give something for screws to bit into behind the plasterboard.
 IMG_2966 by Tomoose85, on Flickr
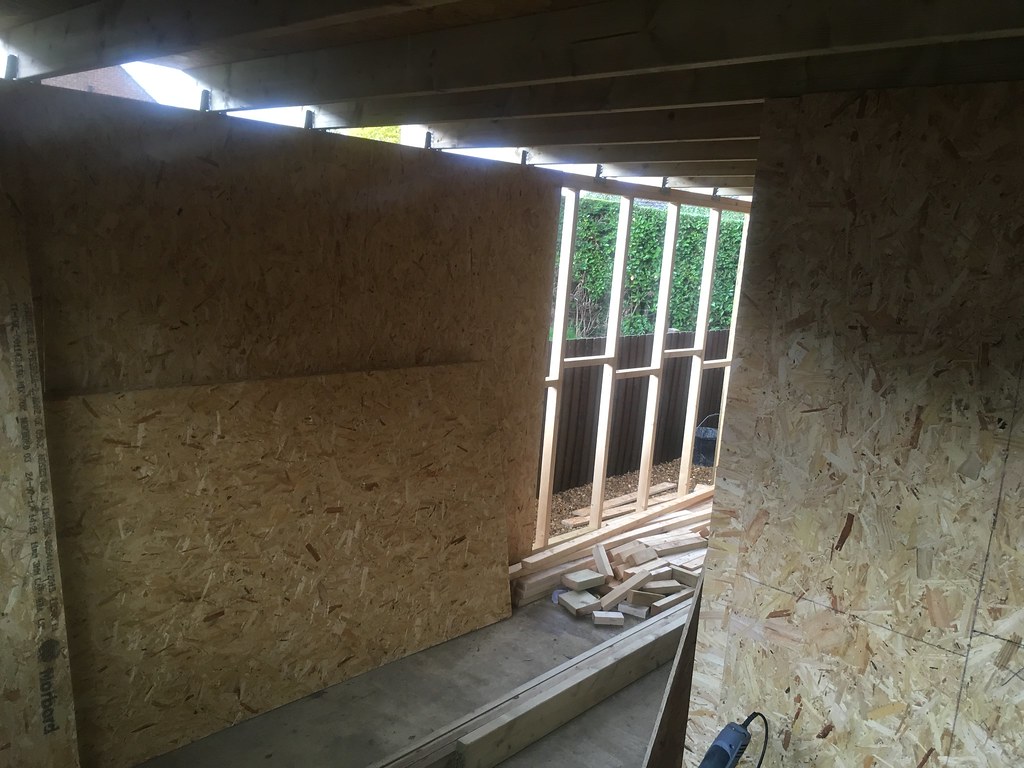 IMG_2969 by Tomoose85, on Flickr
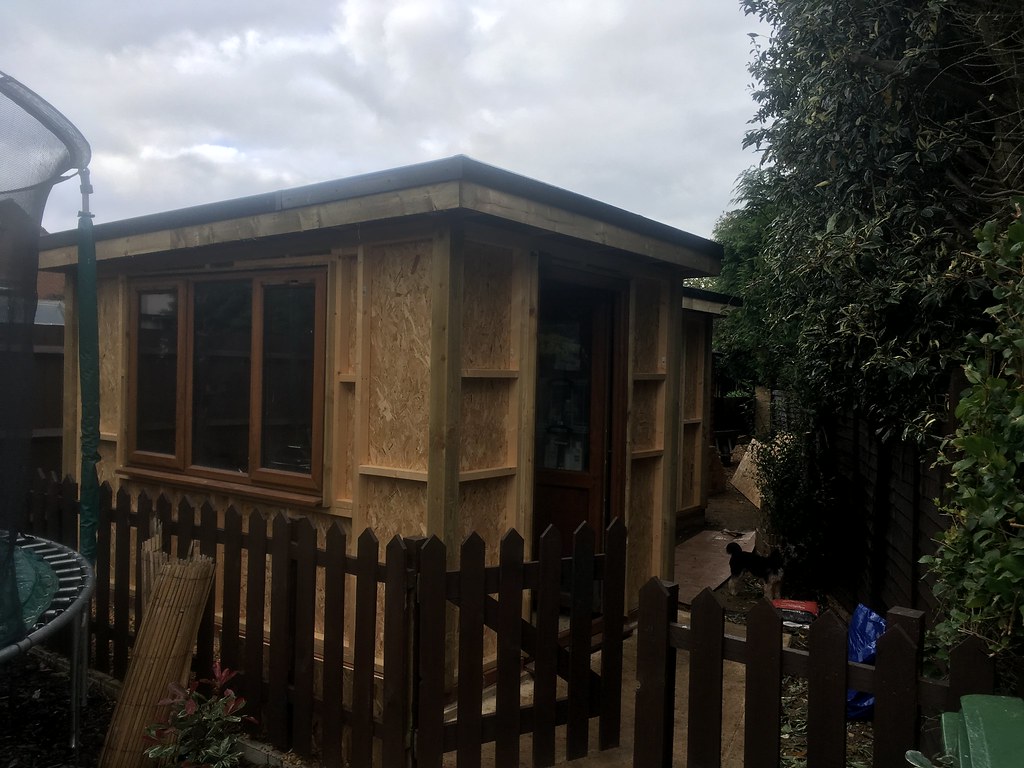
And starting to look like a building!
 IMG_2963 by Tomoose85, on Flickr
This started to provoke thoughts of 'this is a bit overkill for a shed', so a small change of plan and discussion with my family resulted in the following plan. COMMENTS WELCOME!!
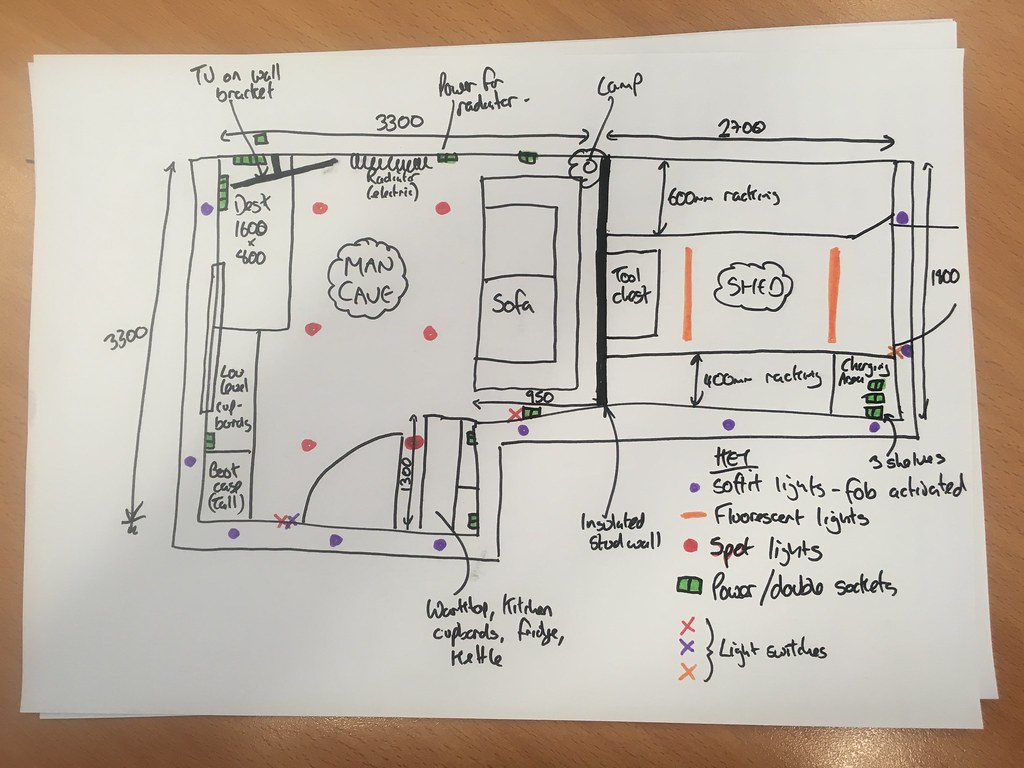 fullsizeoutput_4583 by Tomoose85, on Flickr
So, a bit of an update.
Roof sheeting on and screwed down (18mm OSB3).
IMG_2958 by Tomoose85, on FlickrStarted to sheet the walls too (11mm OSB2). I used this inside the stud work to stiffen the structure up, but also to give something for screws to bit into behind the plasterboard.
IMG_2966 by Tomoose85, on FlickrIMG_2969 by Tomoose85, on FlickrAnd starting to look like a building!
IMG_2963 by Tomoose85, on FlickrThis started to provoke thoughts of 'this is a bit overkill for a shed', so a small change of plan and discussion with my family resulted in the following plan. COMMENTS WELCOME!!
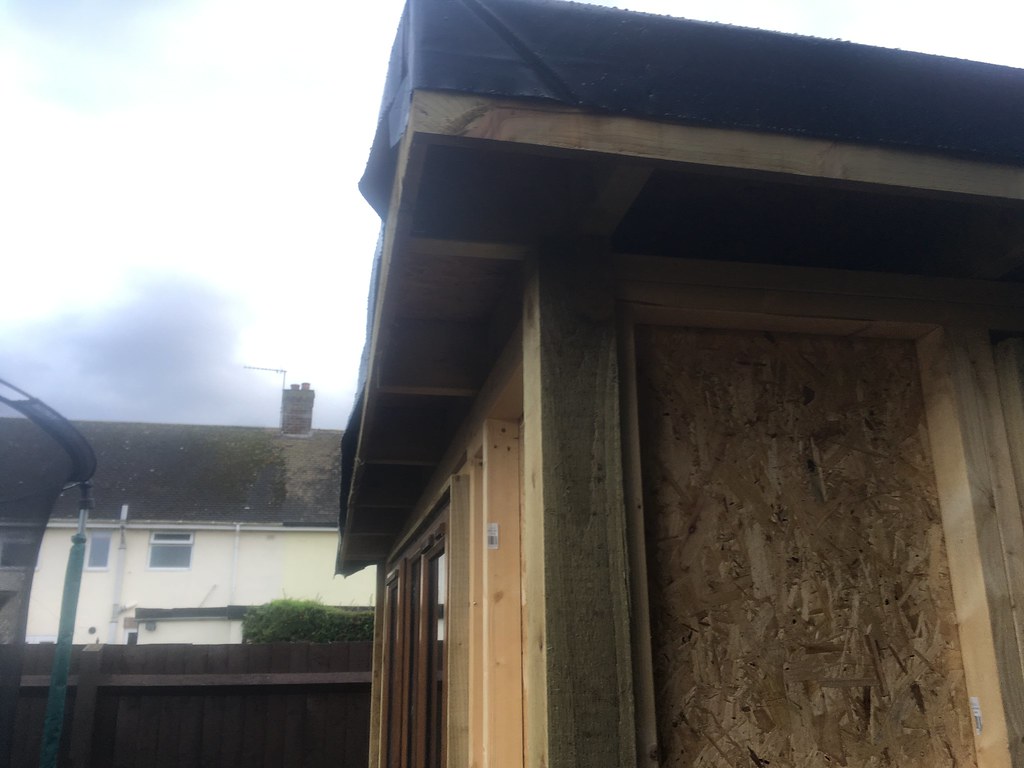
fullsizeoutput_4583 by Tomoose85, on FlickrNext up was the outriggers for the overhang, and fascia boards. As mentioned earlier, I used a roofing batten 19mmx38mm, and a 19mmx150mm gravel board. It looks great to my eyes. I also put a spare bit of DMP on the roof just to keep the damp out until the roof goes on.
 IMG_3009 by Tomoose85, on Flickr
 IMG_3012 by Tomoose85, on Flickr
 IMG_3020 by Tomoose85, on Flickr
 IMG_3023 by Tomoose85, on Flickr
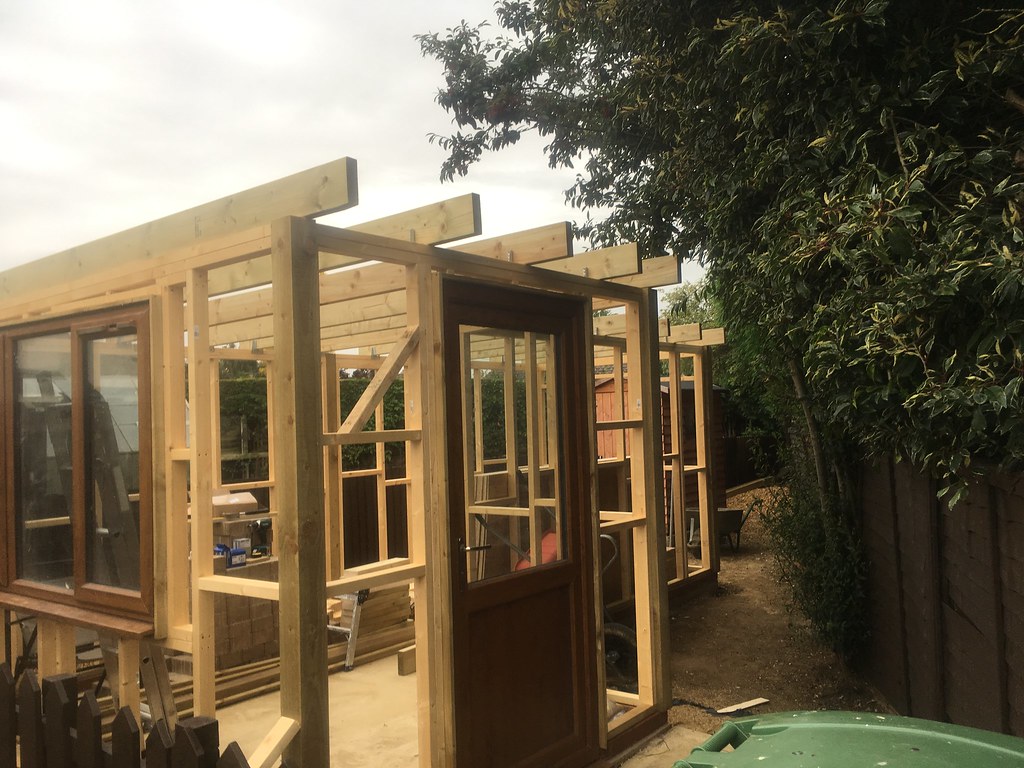
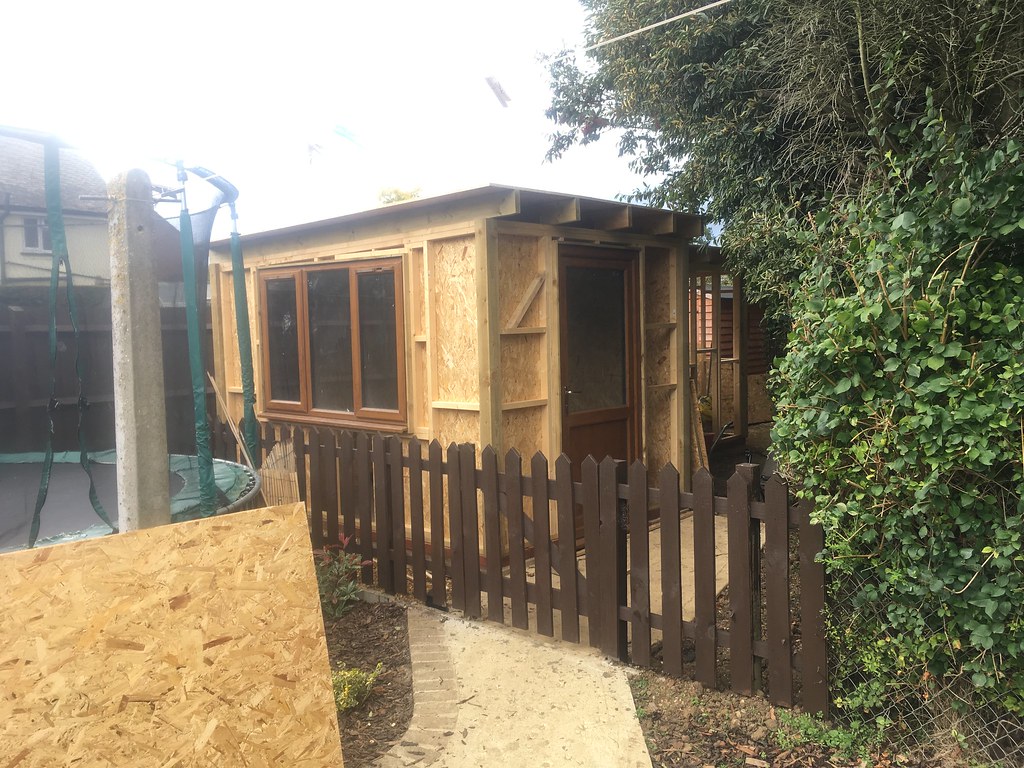
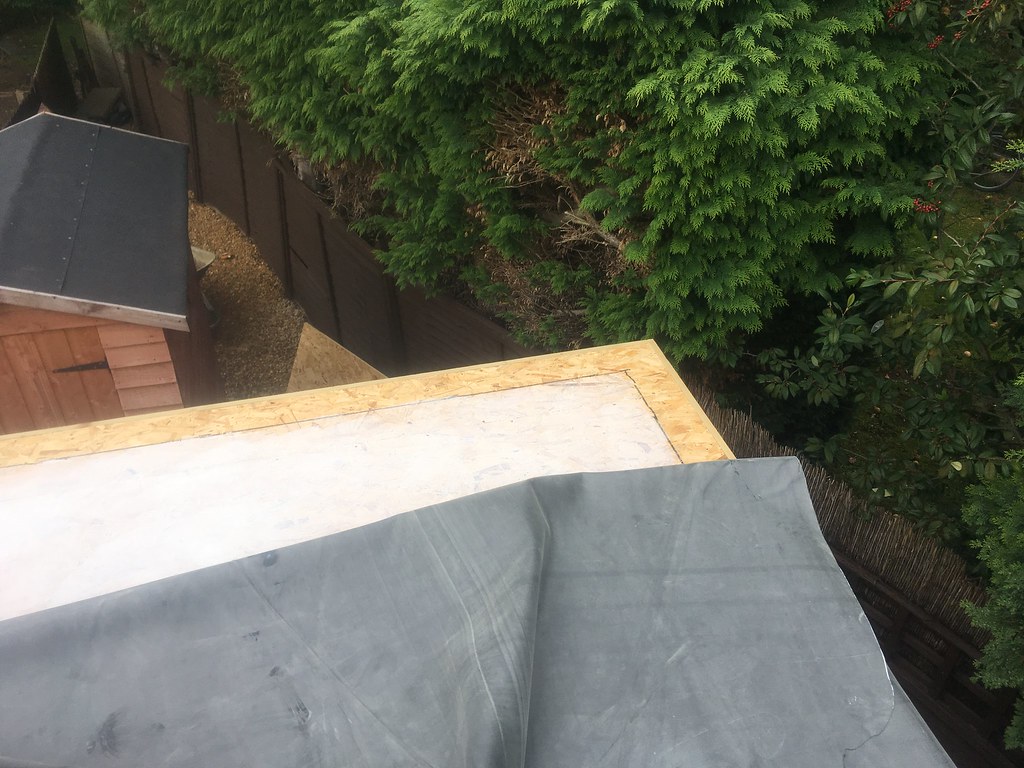
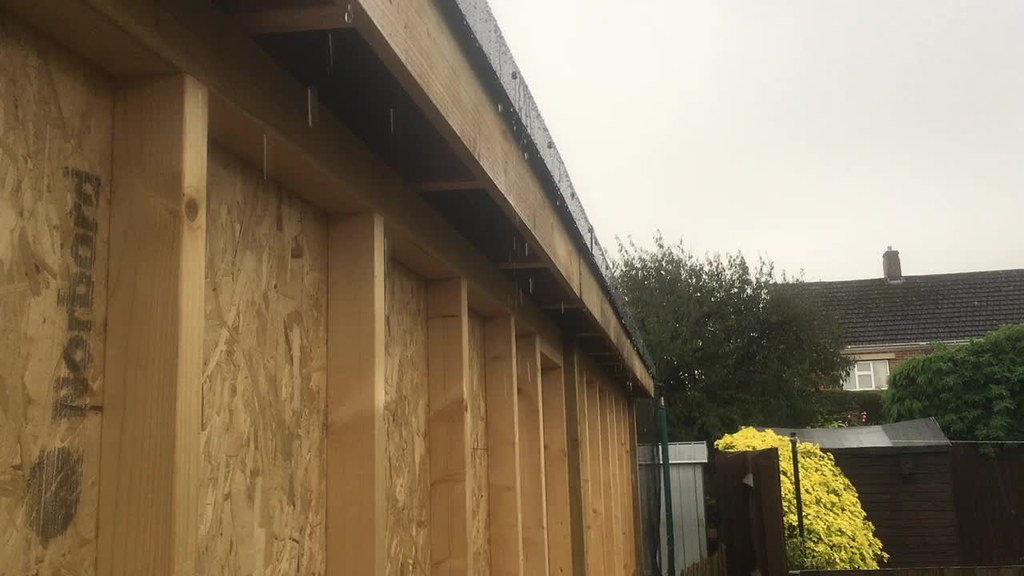
All walls sheeted with OSB too, albeit temporarily at the wall that needs a door cutting in.
 IMG_3007 by Tomoose85, on Flickr
Next job - roofing!!
IMG_3009 by Tomoose85, on FlickrIMG_3012 by Tomoose85, on FlickrIMG_3020 by Tomoose85, on FlickrIMG_3023 by Tomoose85, on FlickrAll walls sheeted with OSB too, albeit temporarily at the wall that needs a door cutting in.
IMG_3007 by Tomoose85, on FlickrNext job - roofing!!
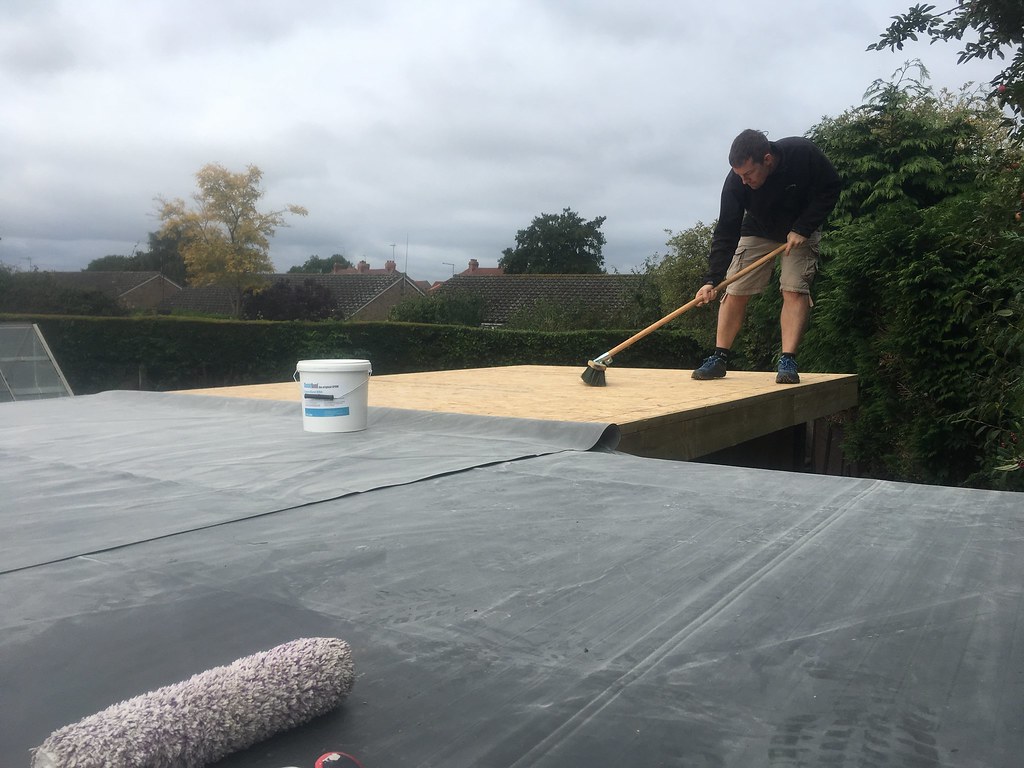
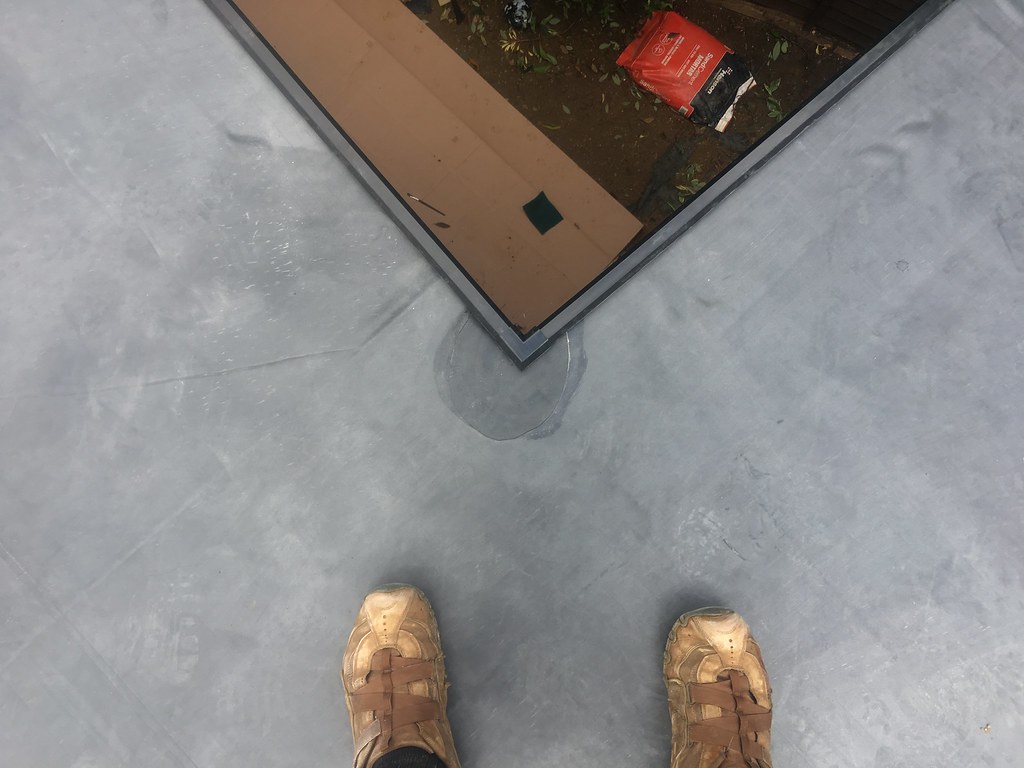
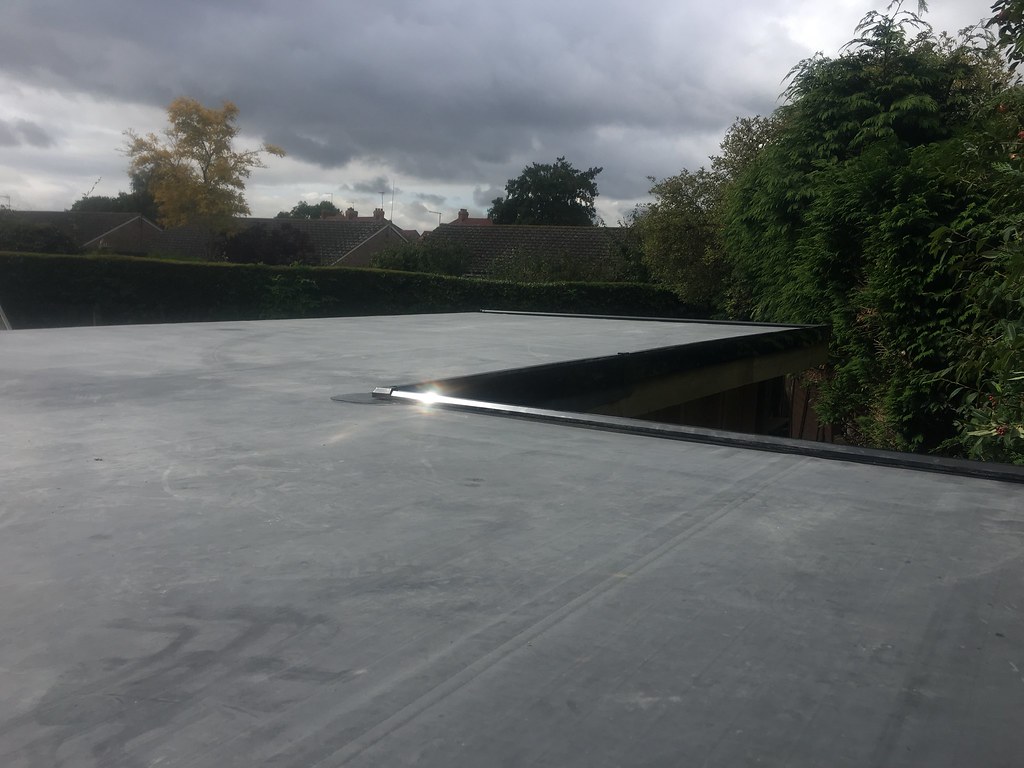
So, after pricing up decent quality felt at £350+, I decided I could justify an EPDM roof. Supposedly good for 50+ years, and appeared simple to install (it was). £470 for everything including the membrane, adhesives and trims, but it was done in 3 hours and looks great! Finished just in time for the rain too.
First step was to sweep the roof and mark out 100mm from the perimeter. Water based adhesive is used inside the line, contact adhesive outside the line.
 IMG_3026 by Tomoose85, on Flickr
After rolling out the membrane to relax for 30 minutes, it was folded back in half to allow the adhesive to be spread.
 IMG_3028 by Tomoose85, on Flickr
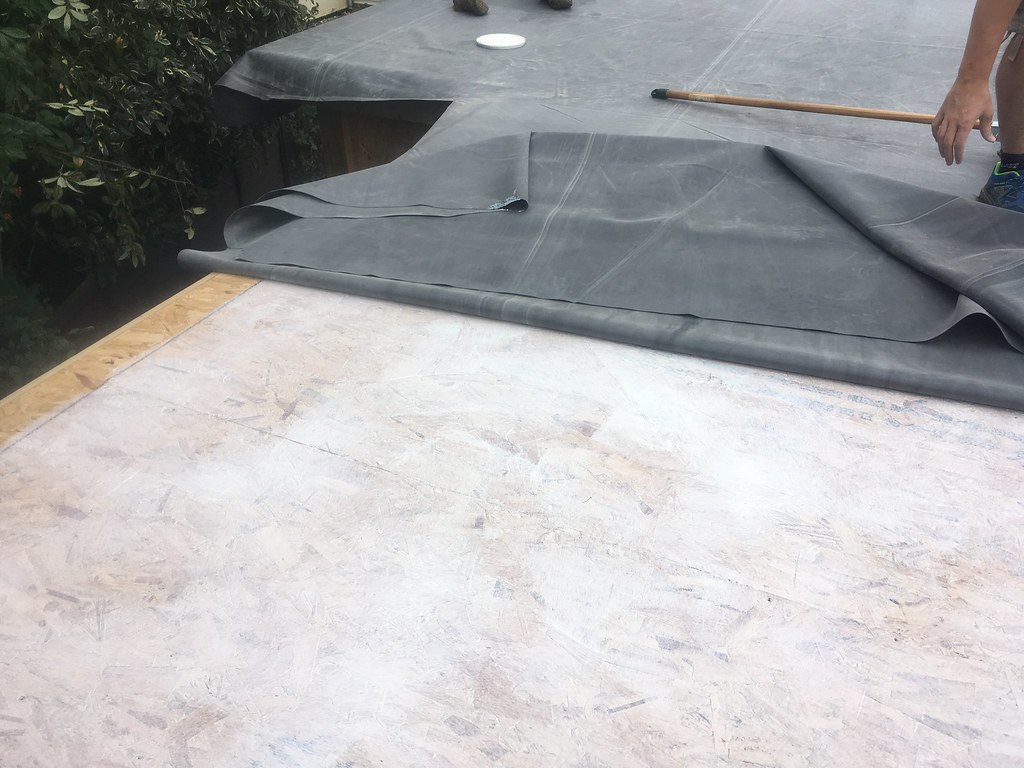 IMG_3031 by Tomoose85, on Flickr
The membrane is then carefully rolled over the adhesive, and the membrane bushed to ensure good contact. You can then fold the other half over to finish the WBA.
 IMG_3038 by Tomoose85, on Flickr
 IMG_3032 by Tomoose85, on Flickr
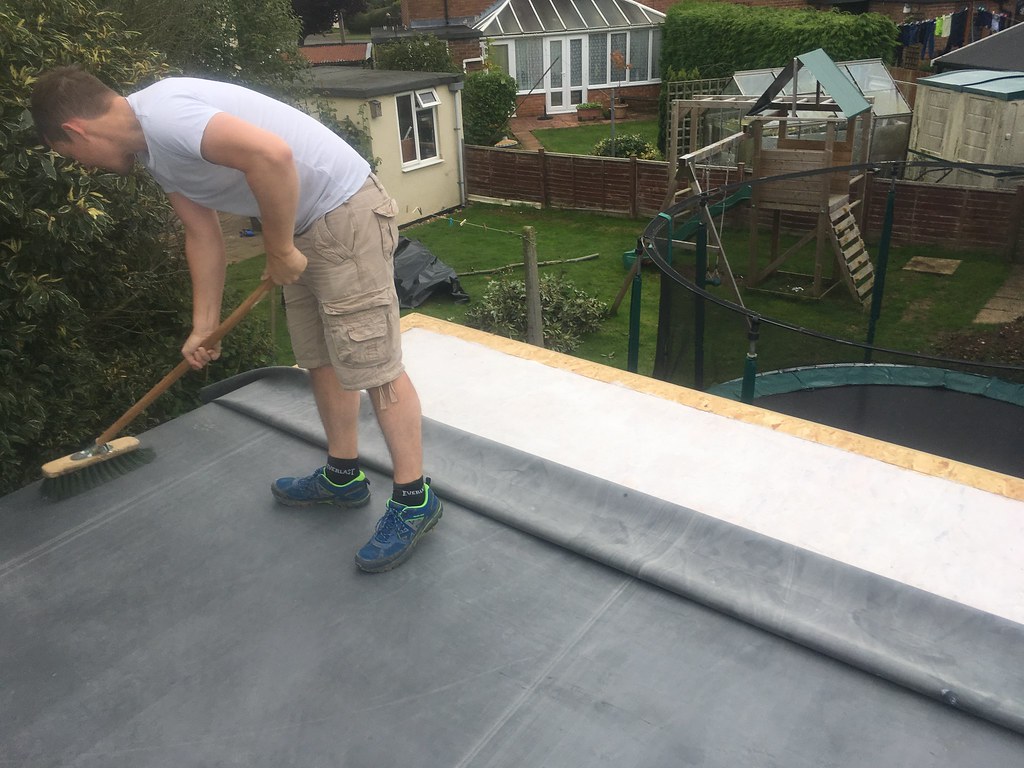
Next is the contact adhesive. Working on opposite edges the contact adhesive is applied to the deck and the membrane, being sure to allow it to tack off to ensure no bubbles form under the membrane.
 IMG_3047 by Tomoose85, on Flickr
This is then rolled with a foam roller to ensure good adhesion.
The trickiest bit is the internal corner for the L. This needs to be primed and a rubber strip cut to shape and stretched into place. Not perfect but quite acceptable I think. its certainly water tight!
Primed
 IMG_3057 by Tomoose85, on Flickr
Patch cut with rounded corners for strength.
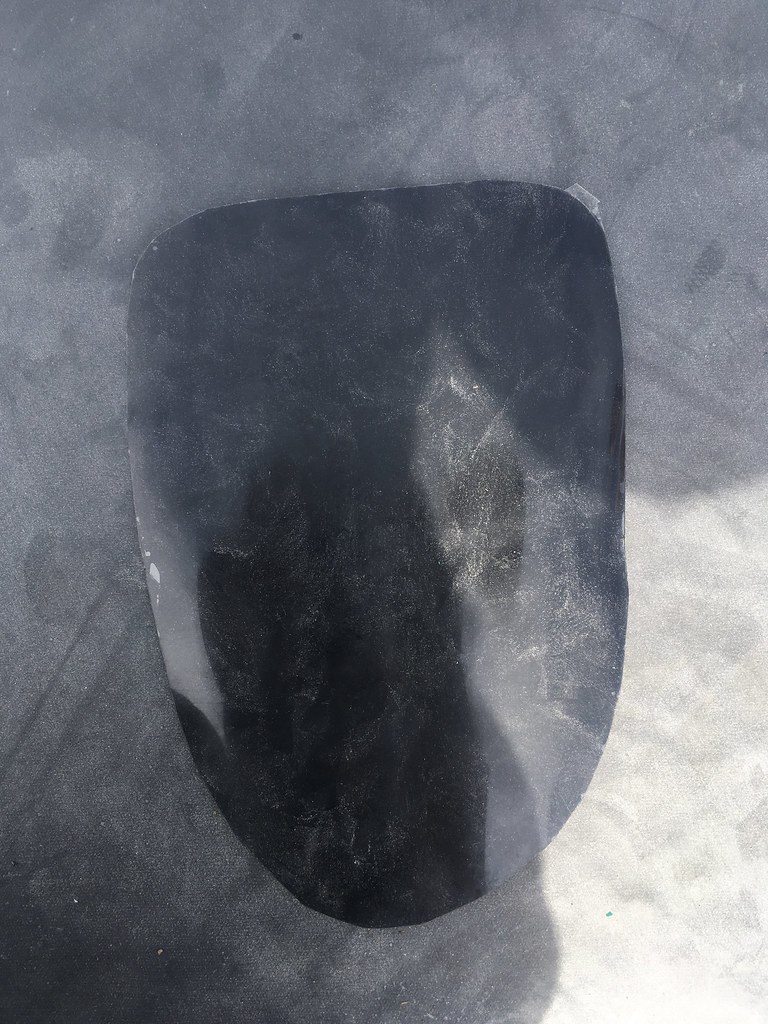 IMG_3058 by Tomoose85, on Flickr
Patch stretched on and rolled down.
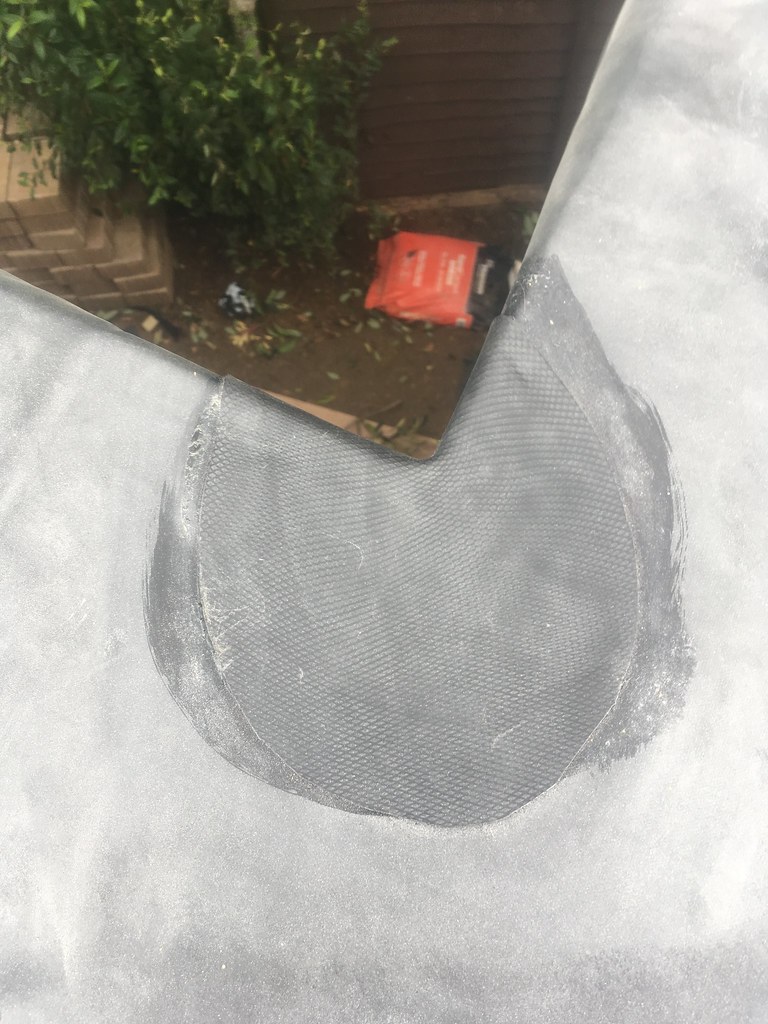 IMG_3059 by Tomoose85, on Flickr
 IMG_3063 by Tomoose85, on Flickr
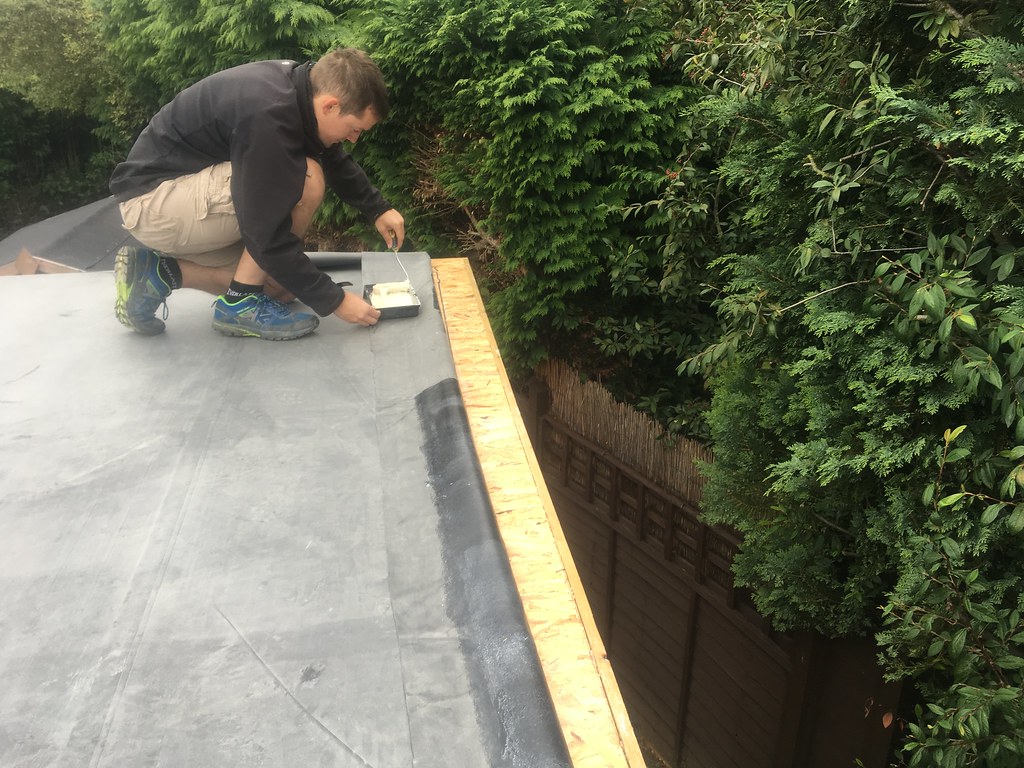
Then the trims are nailed on to finish, a drip trim for the gutter edge, and kerb trims everywhere else. The corner and joining trims are clipped on and superglued in place.
 IMG_3064 by Tomoose85, on Flickr
 IMG_3070 by Tomoose85, on Flickr
 IMG_3076 by Tomoose85, on Flickr
I used Rubber4Roofs, and I'd recommend them. The tutorial videos on their website helped inspire confidence, and it really was quite straightforward.
Comments positive or negative welcome
First step was to sweep the roof and mark out 100mm from the perimeter. Water based adhesive is used inside the line, contact adhesive outside the line.
IMG_3026 by Tomoose85, on FlickrAfter rolling out the membrane to relax for 30 minutes, it was folded back in half to allow the adhesive to be spread.
IMG_3028 by Tomoose85, on FlickrIMG_3031 by Tomoose85, on FlickrThe membrane is then carefully rolled over the adhesive, and the membrane bushed to ensure good contact. You can then fold the other half over to finish the WBA.
IMG_3038 by Tomoose85, on FlickrIMG_3032 by Tomoose85, on FlickrNext is the contact adhesive. Working on opposite edges the contact adhesive is applied to the deck and the membrane, being sure to allow it to tack off to ensure no bubbles form under the membrane.
IMG_3047 by Tomoose85, on FlickrThis is then rolled with a foam roller to ensure good adhesion.
The trickiest bit is the internal corner for the L. This needs to be primed and a rubber strip cut to shape and stretched into place. Not perfect but quite acceptable I think. its certainly water tight!
Primed
IMG_3057 by Tomoose85, on FlickrPatch cut with rounded corners for strength.
IMG_3058 by Tomoose85, on FlickrPatch stretched on and rolled down.
IMG_3059 by Tomoose85, on FlickrIMG_3063 by Tomoose85, on FlickrThen the trims are nailed on to finish, a drip trim for the gutter edge, and kerb trims everywhere else. The corner and joining trims are clipped on and superglued in place.
IMG_3064 by Tomoose85, on FlickrIMG_3070 by Tomoose85, on FlickrIMG_3076 by Tomoose85, on FlickrI used Rubber4Roofs, and I'd recommend them. The tutorial videos on their website helped inspire confidence, and it really was quite straightforward.
Comments positive or negative welcome
The roof got a good try out within an hour of downing tools. Excuse the heavy breathing.
 IMG_3080 by Tomoose85, on Flickr
 IMG_3082 by Tomoose85, on Flickr
A small amount of my neighbours tree was removed (with his consent) as this was overhanging the roof. My neighbour will be trimming the rest of the vegetation in the next few weeks with my assistance
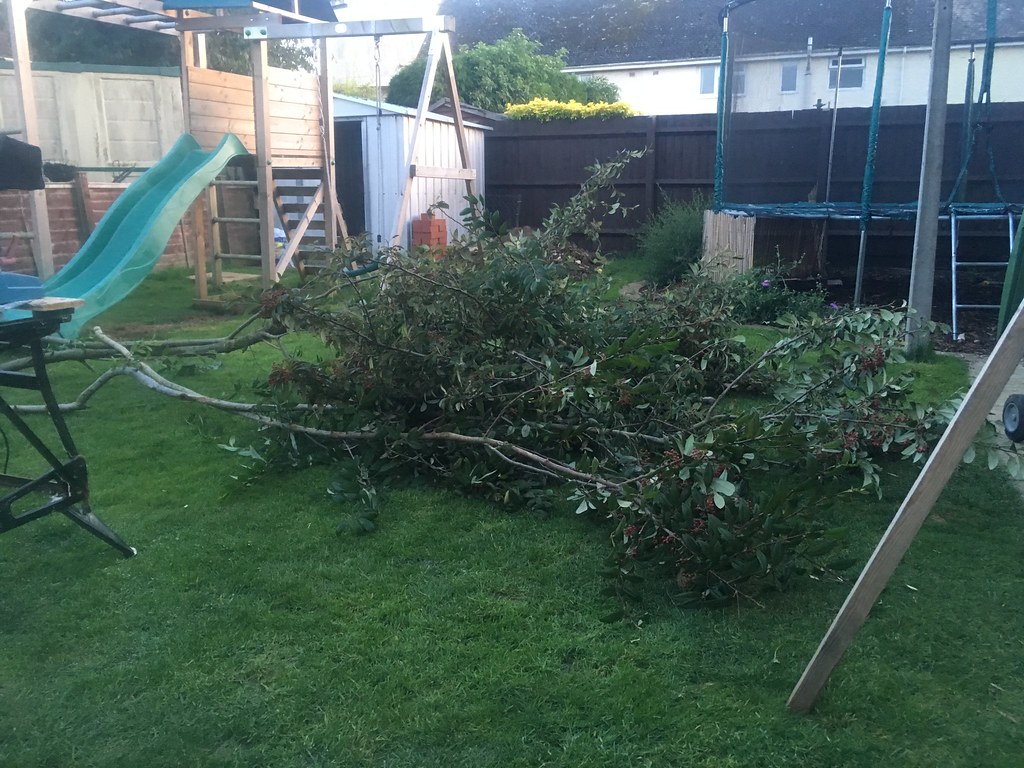 IMG_3010 by Tomoose85, on Flickr
IMG_3080 by Tomoose85, on FlickrIMG_3082 by Tomoose85, on FlickrA small amount of my neighbours tree was removed (with his consent) as this was overhanging the roof. My neighbour will be trimming the rest of the vegetation in the next few weeks with my assistance
IMG_3010 by Tomoose85, on FlickrEdited by PartOfTheProblem on Saturday 16th September 23:11
Gassing Station | Homes, Gardens and DIY | Top of Page | What's New | My Stuff