Toms Garden Shed / Workshop / Office Build
Discussion


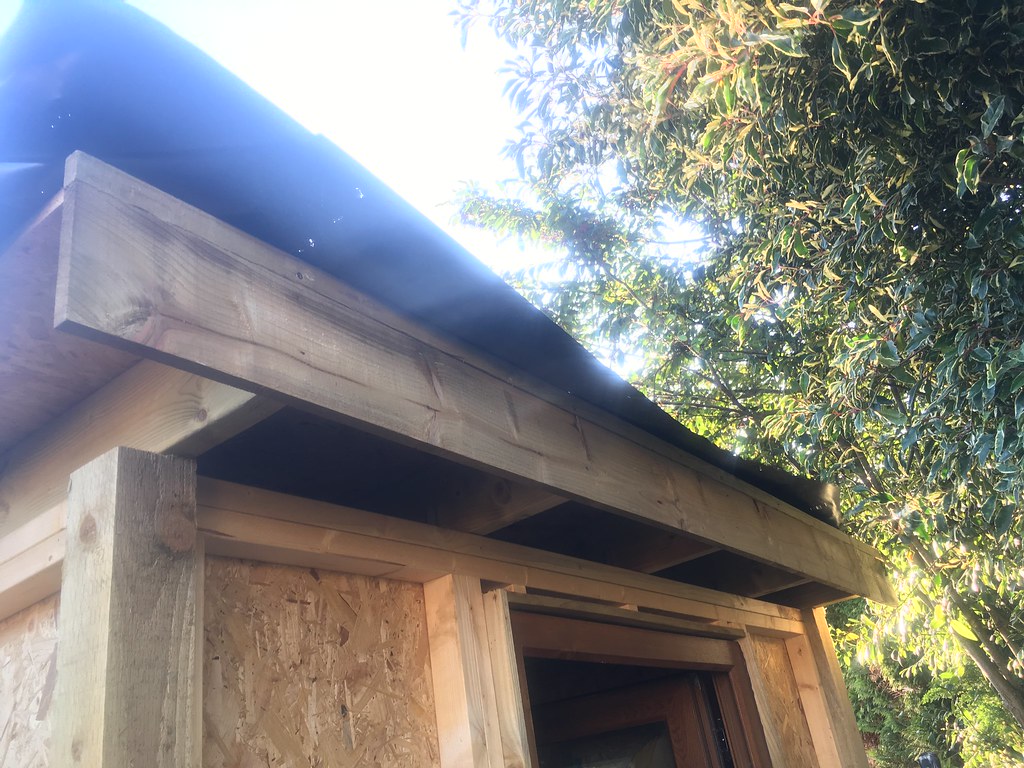
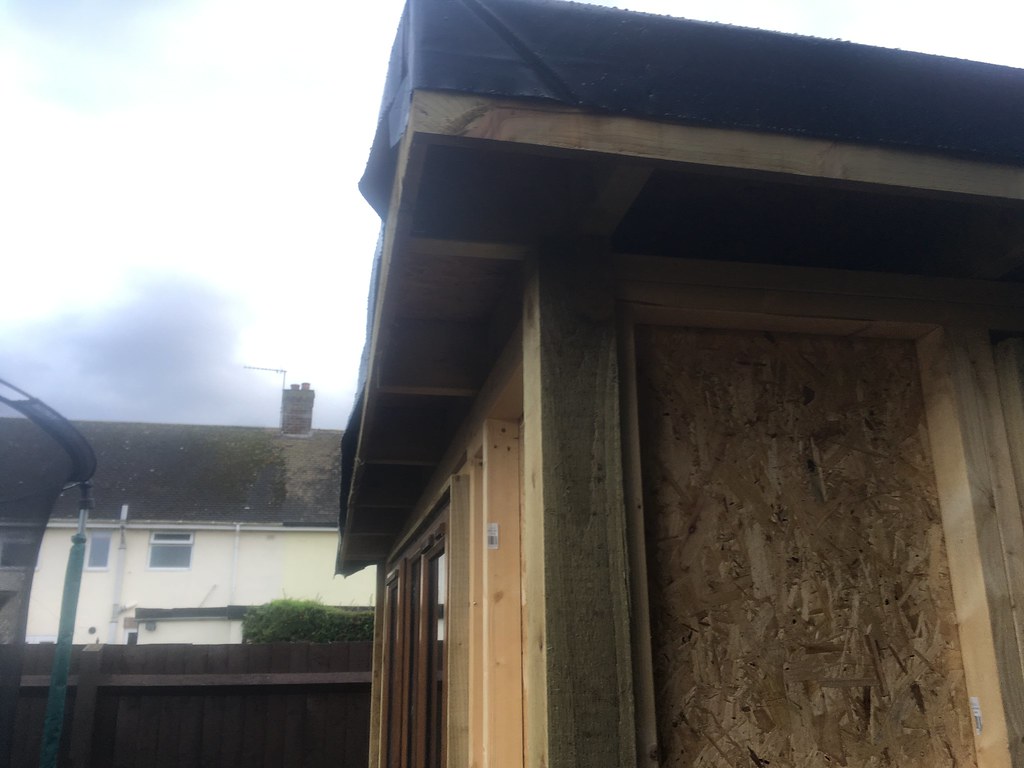
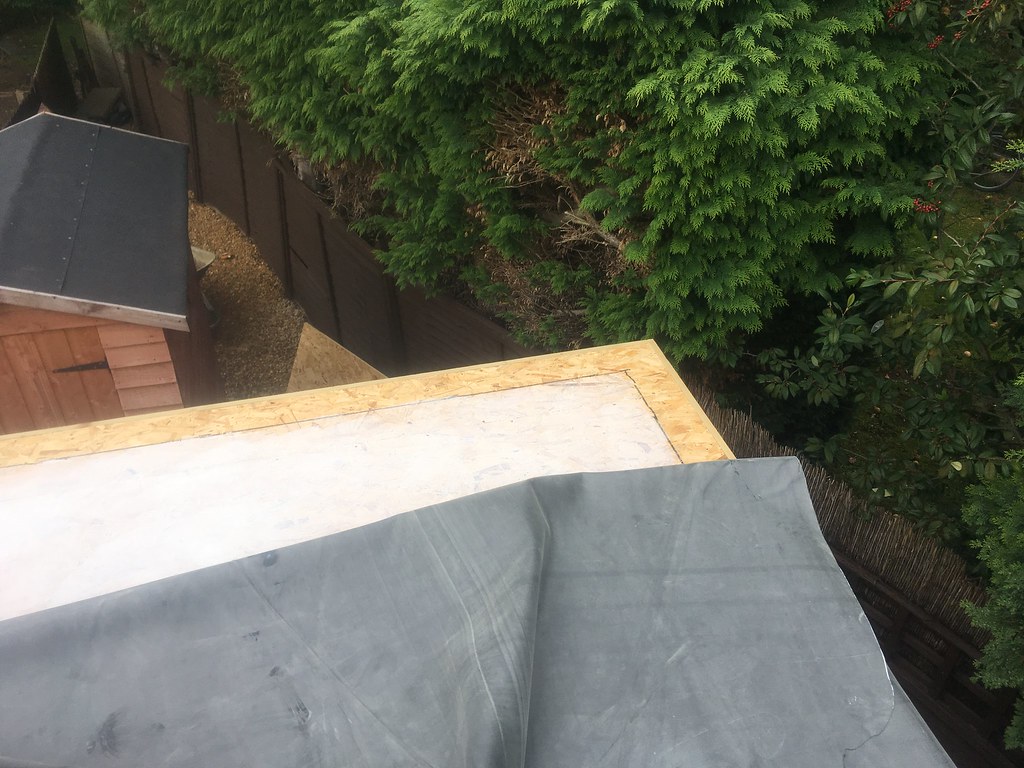
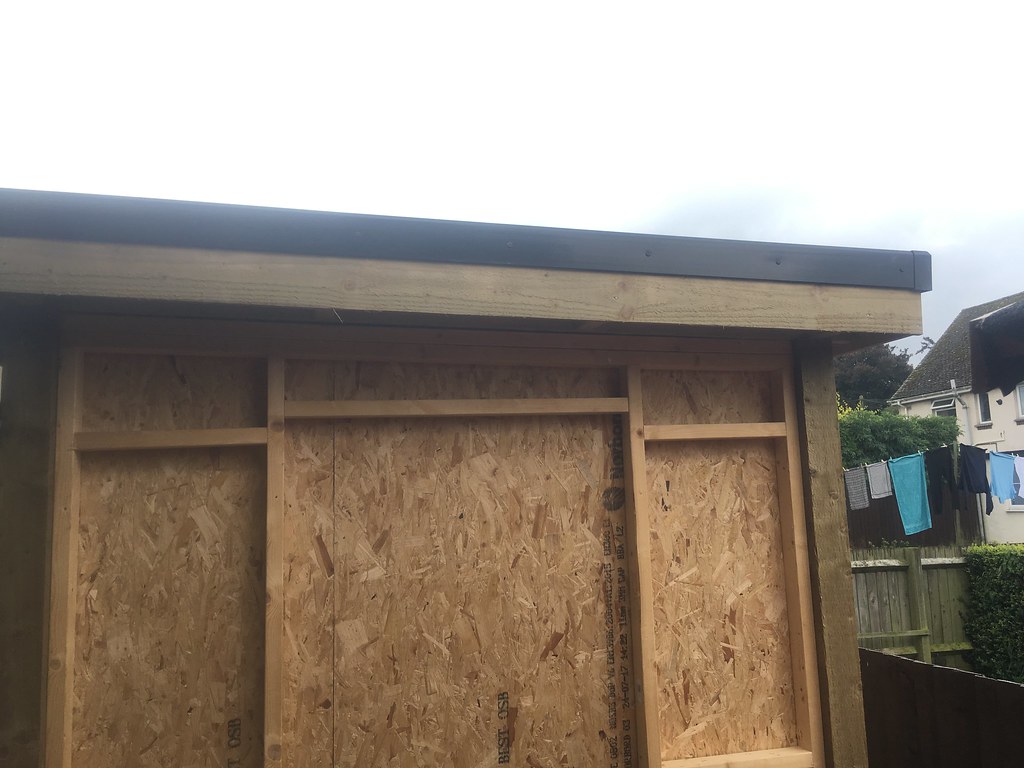
Next up was the outriggers for the overhang, and fascia boards. As mentioned earlier, I used a roofing batten 19mmx38mm, and a 19mmx150mm gravel board. It looks great to my eyes. I also put a spare bit of DMP on the roof just to keep the damp out until the roof goes on.
 IMG_3009 by Tomoose85, on Flickr
 IMG_3012 by Tomoose85, on Flickr
 IMG_3020 by Tomoose85, on Flickr
 IMG_3023 by Tomoose85, on Flickr
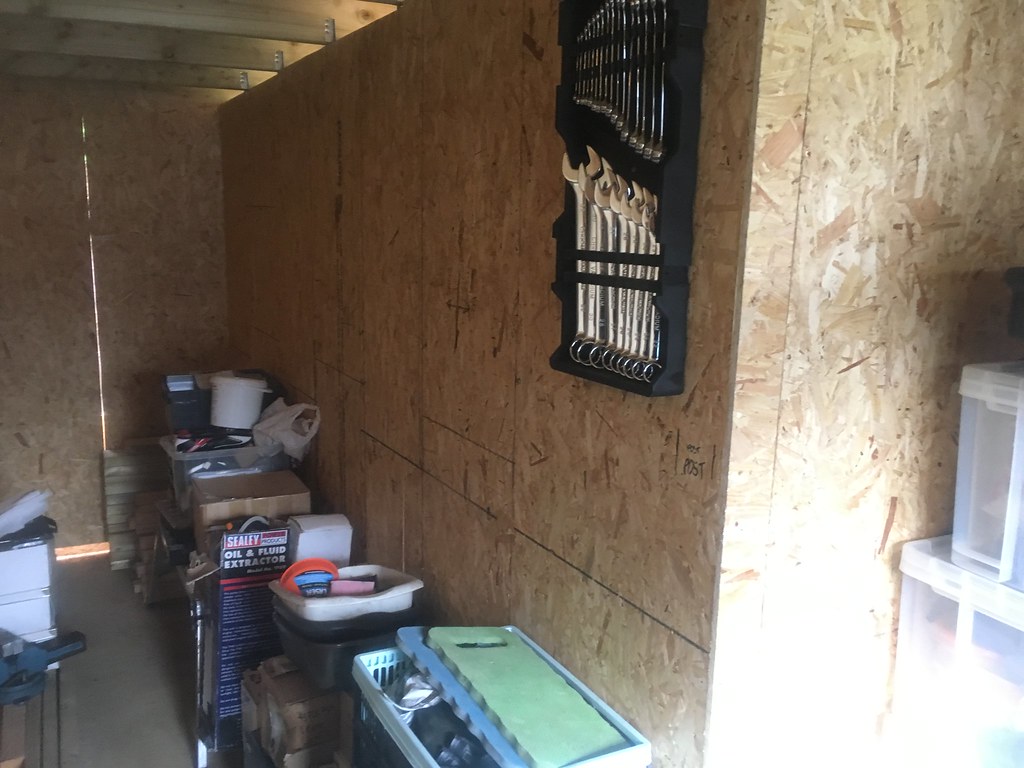
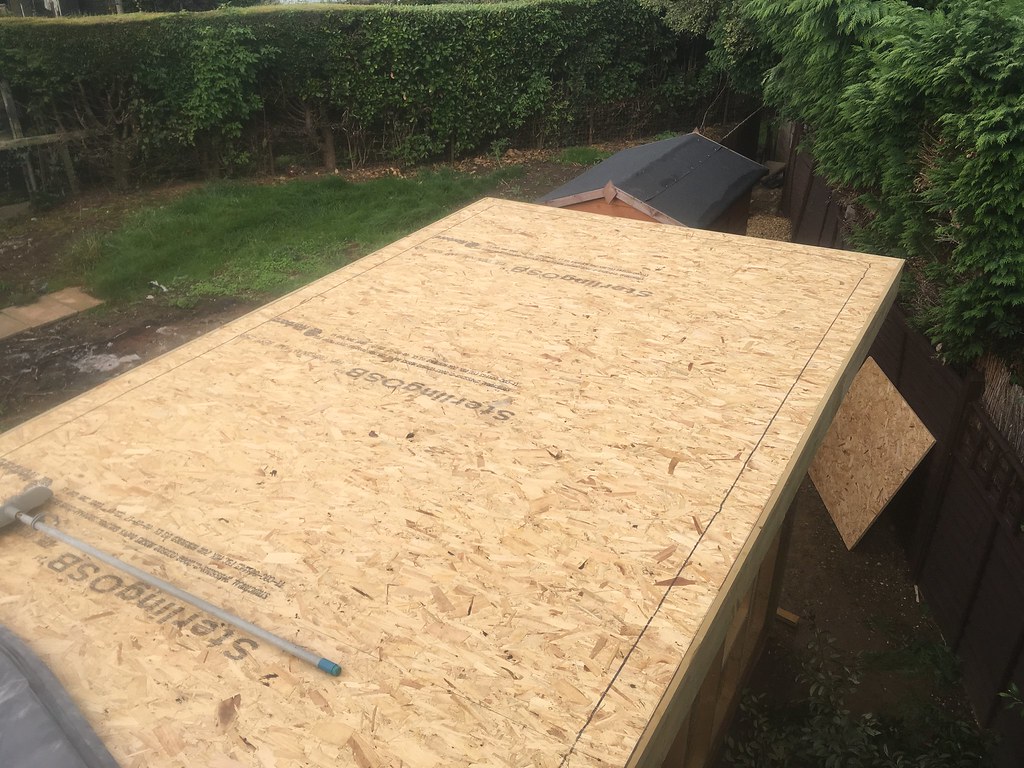
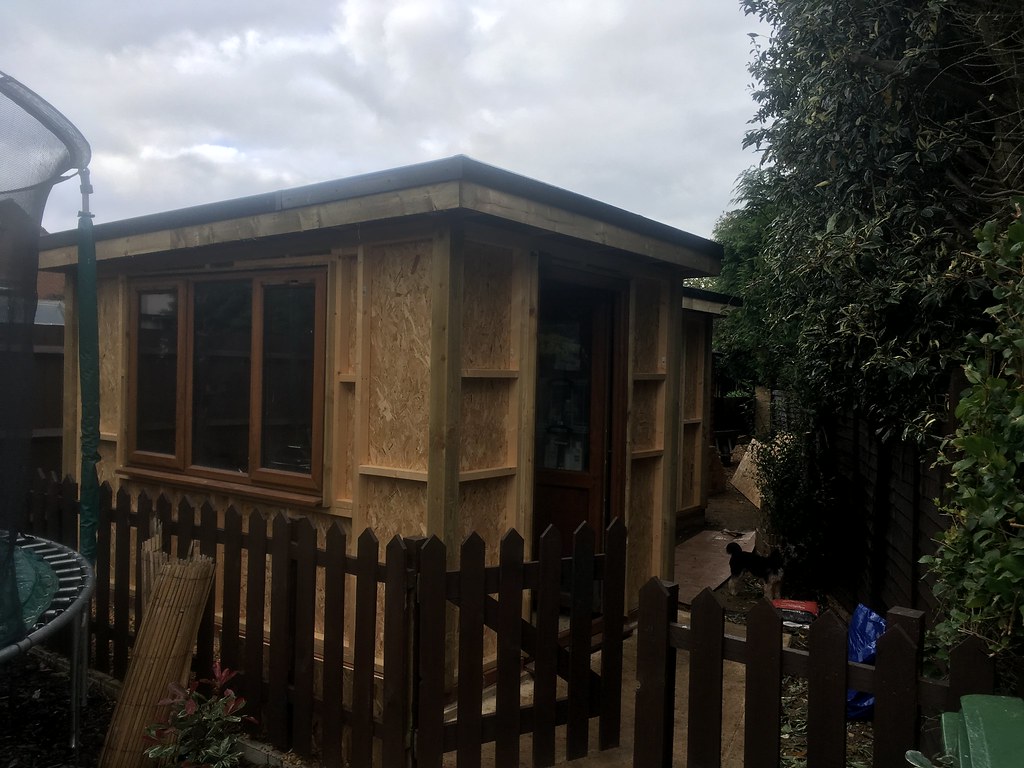
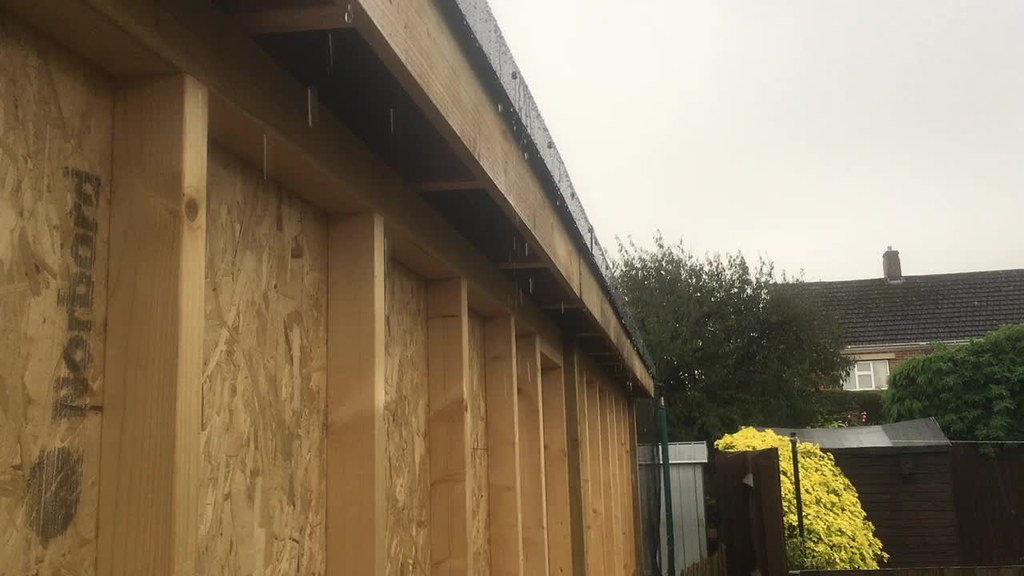
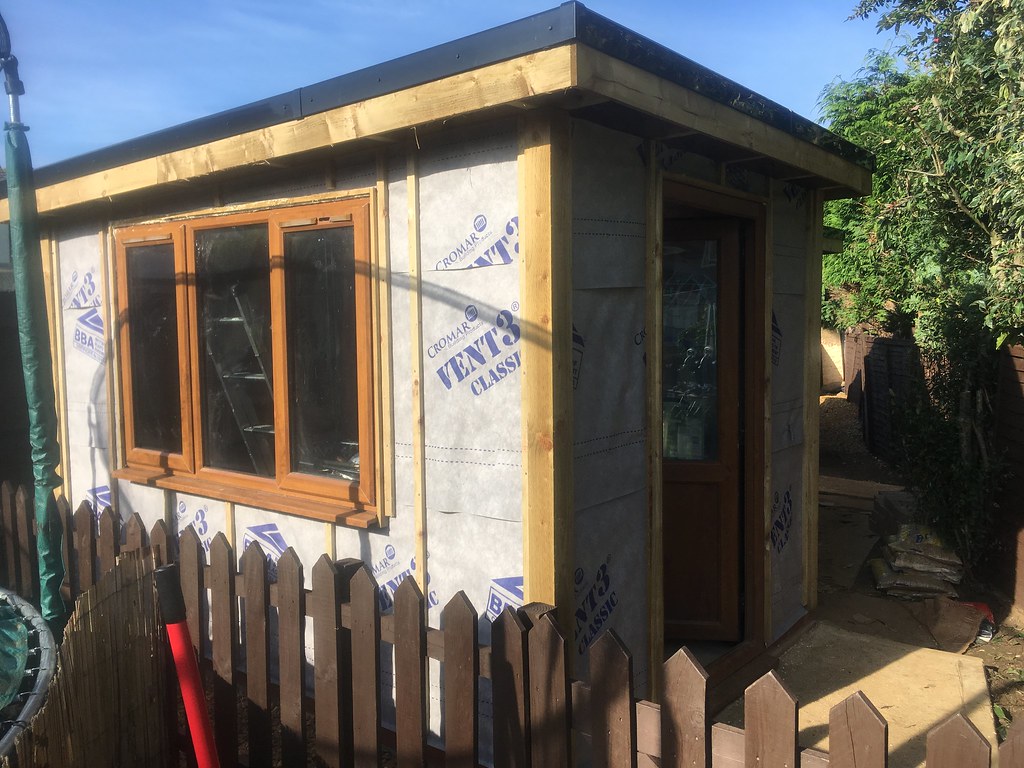
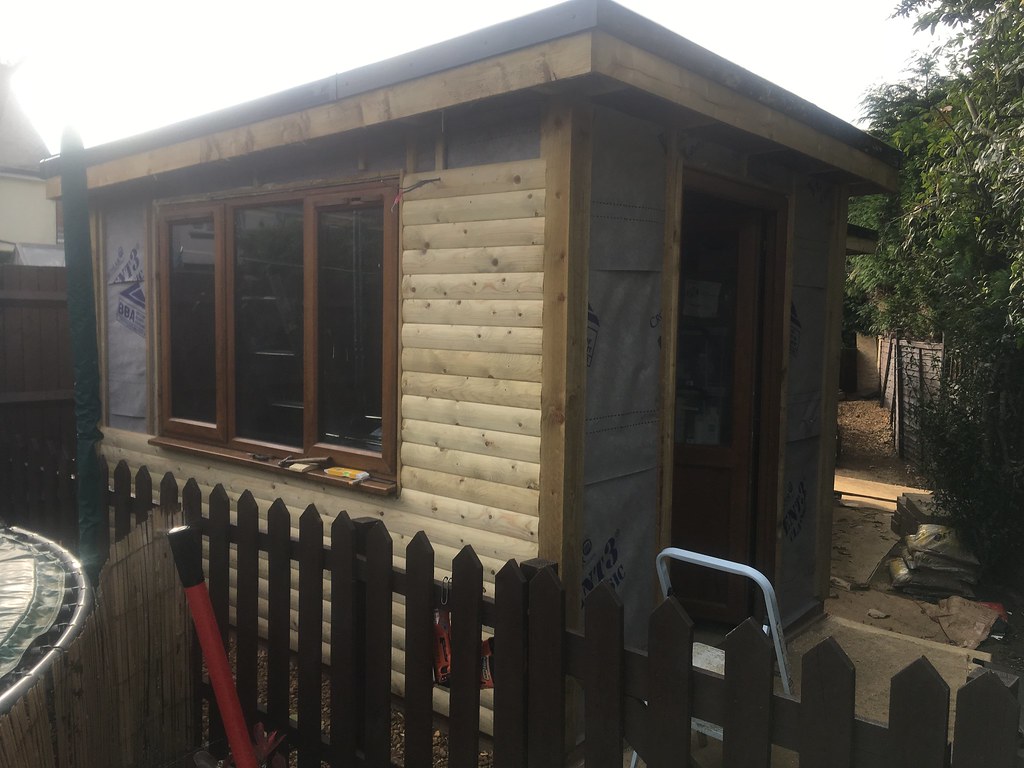
All walls sheeted with OSB too, albeit temporarily at the wall that needs a door cutting in.
 IMG_3007 by Tomoose85, on Flickr
Next job - roofing!!
IMG_3009 by Tomoose85, on FlickrIMG_3012 by Tomoose85, on FlickrIMG_3020 by Tomoose85, on FlickrIMG_3023 by Tomoose85, on FlickrAll walls sheeted with OSB too, albeit temporarily at the wall that needs a door cutting in.
IMG_3007 by Tomoose85, on FlickrNext job - roofing!!
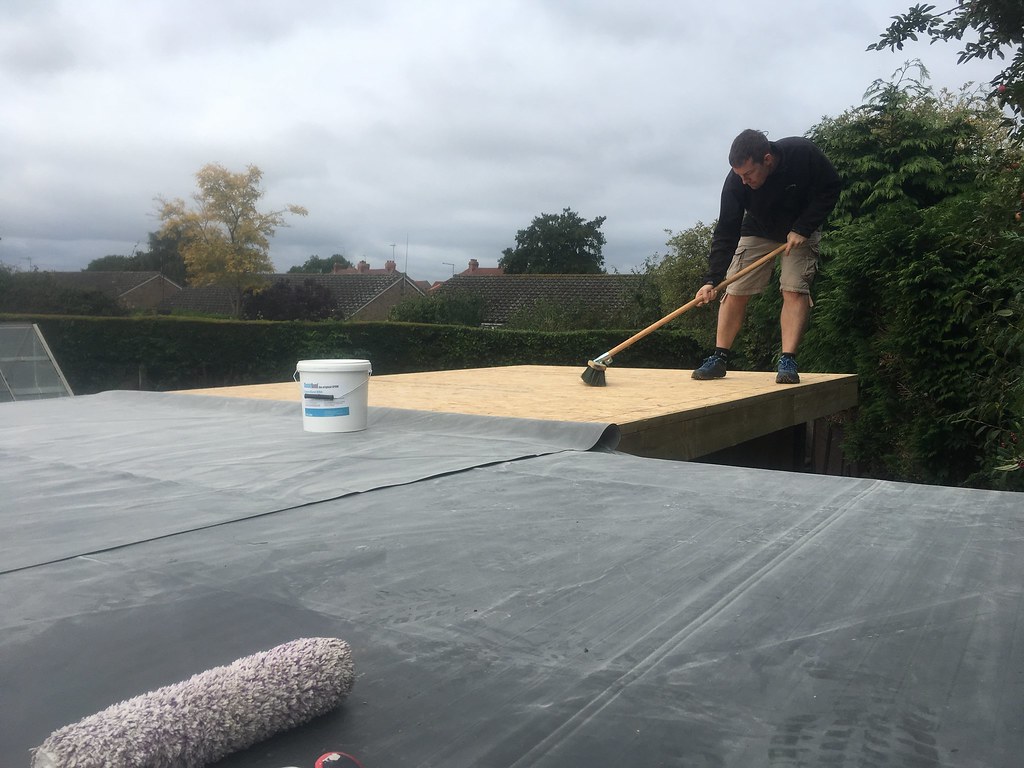
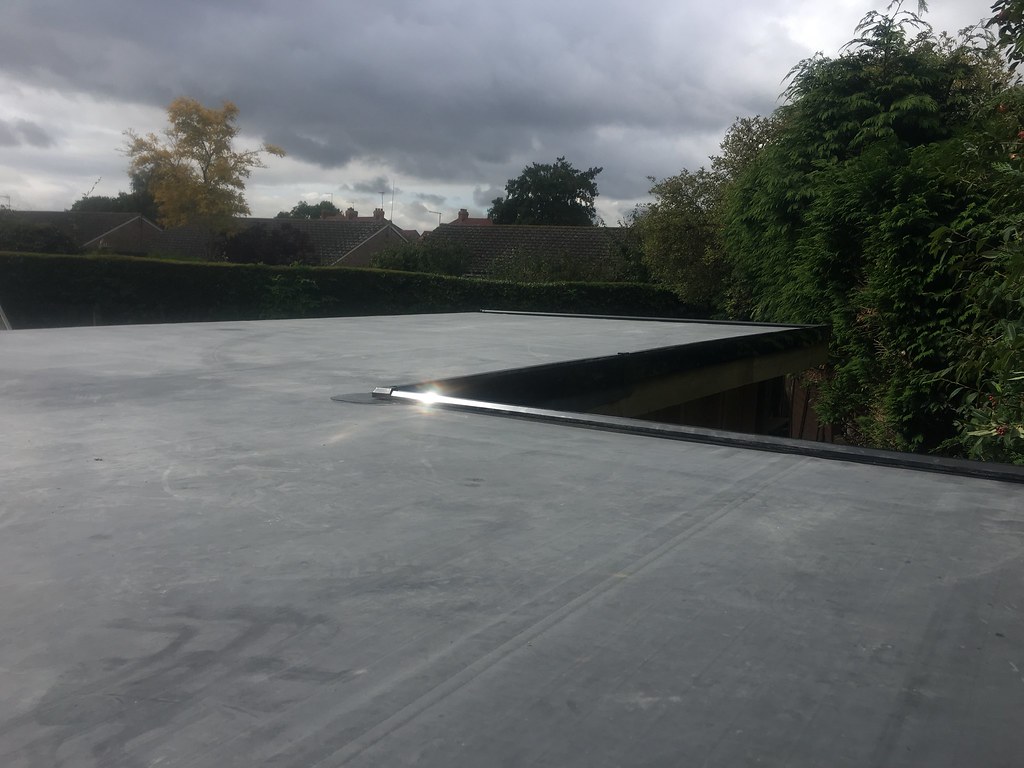
So, after pricing up decent quality felt at £350+, I decided I could justify an EPDM roof. Supposedly good for 50+ years, and appeared simple to install (it was). £470 for everything including the membrane, adhesives and trims, but it was done in 3 hours and looks great! Finished just in time for the rain too.
First step was to sweep the roof and mark out 100mm from the perimeter. Water based adhesive is used inside the line, contact adhesive outside the line.
 IMG_3026 by Tomoose85, on Flickr
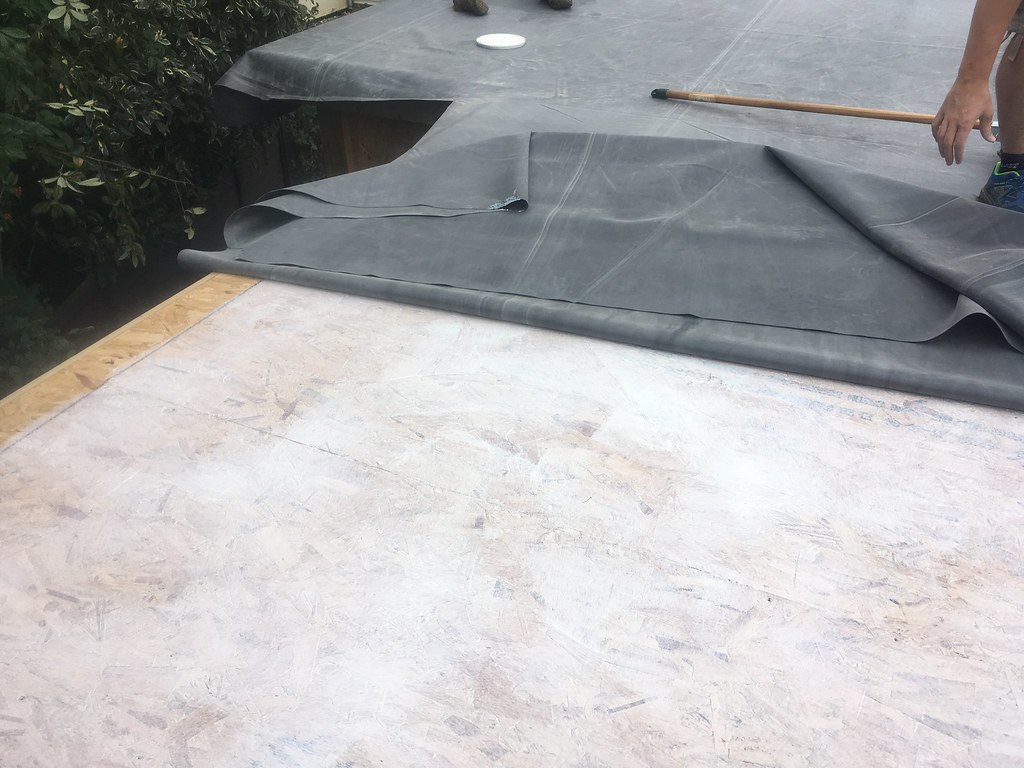
After rolling out the membrane to relax for 30 minutes, it was folded back in half to allow the adhesive to be spread.
 IMG_3028 by Tomoose85, on Flickr
 IMG_3031 by Tomoose85, on Flickr
The membrane is then carefully rolled over the adhesive, and the membrane bushed to ensure good contact. You can then fold the other half over to finish the WBA.
 IMG_3038 by Tomoose85, on Flickr
 IMG_3032 by Tomoose85, on Flickr
Next is the contact adhesive. Working on opposite edges the contact adhesive is applied to the deck and the membrane, being sure to allow it to tack off to ensure no bubbles form under the membrane.
 IMG_3047 by Tomoose85, on Flickr
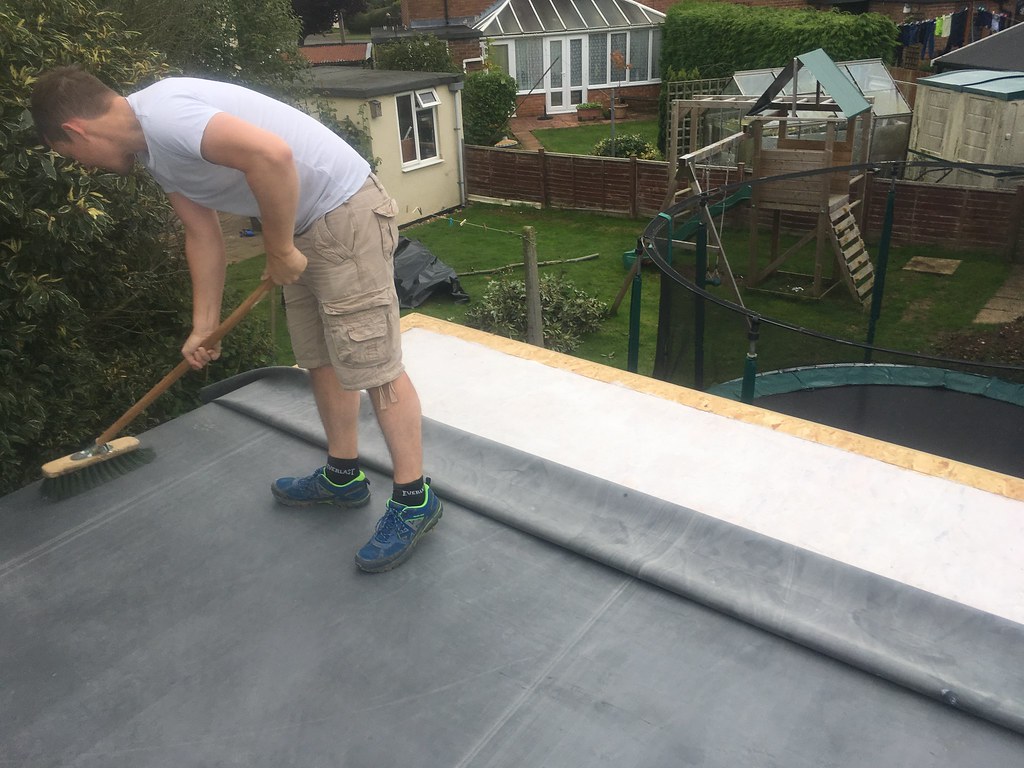
This is then rolled with a foam roller to ensure good adhesion.
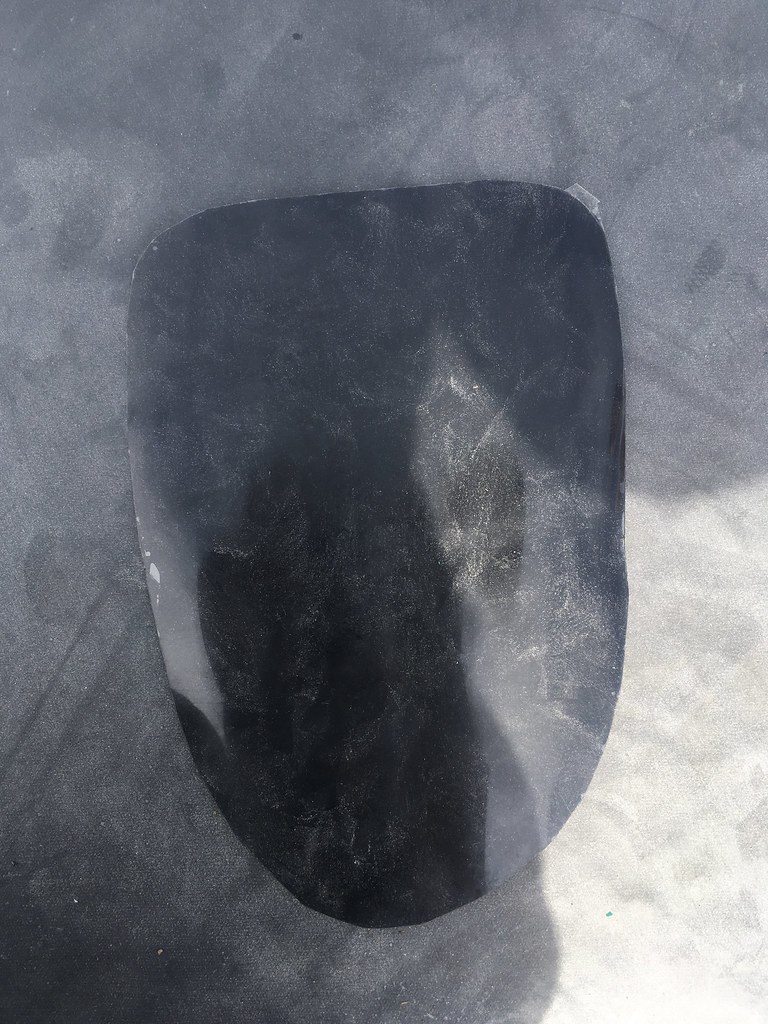
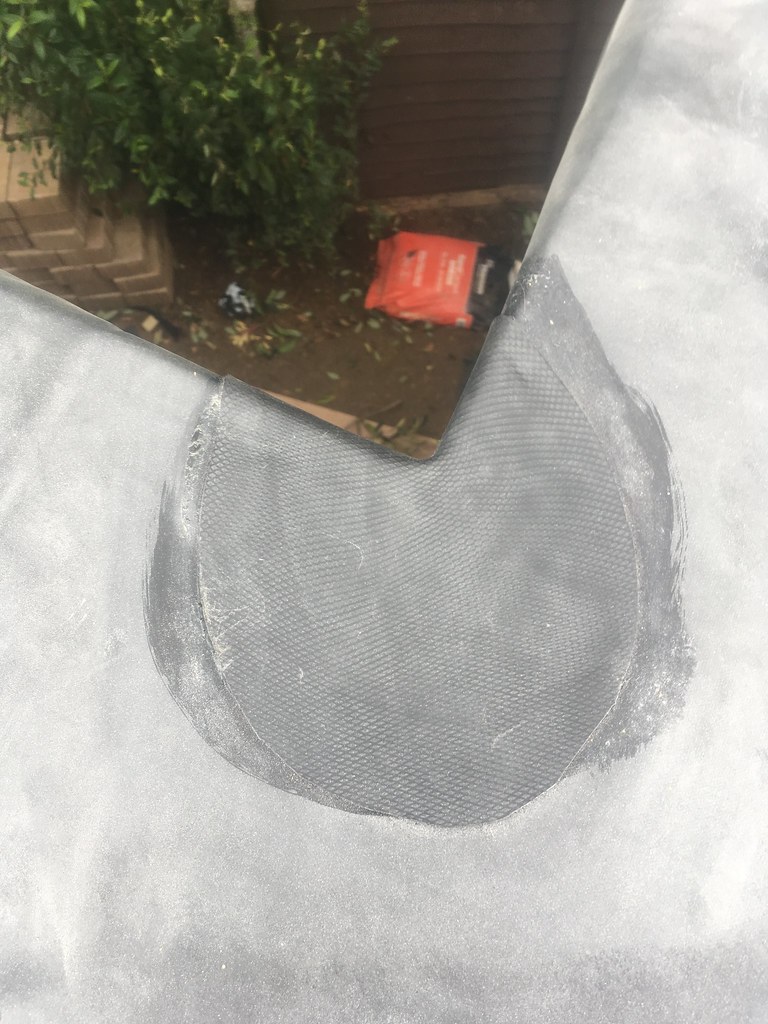
The trickiest bit is the internal corner for the L. This needs to be primed and a rubber strip cut to shape and stretched into place. Not perfect but quite acceptable I think. its certainly water tight!
Primed
 IMG_3057 by Tomoose85, on Flickr
Patch cut with rounded corners for strength.
 IMG_3058 by Tomoose85, on Flickr
Patch stretched on and rolled down.
 IMG_3059 by Tomoose85, on Flickr
 IMG_3063 by Tomoose85, on Flickr
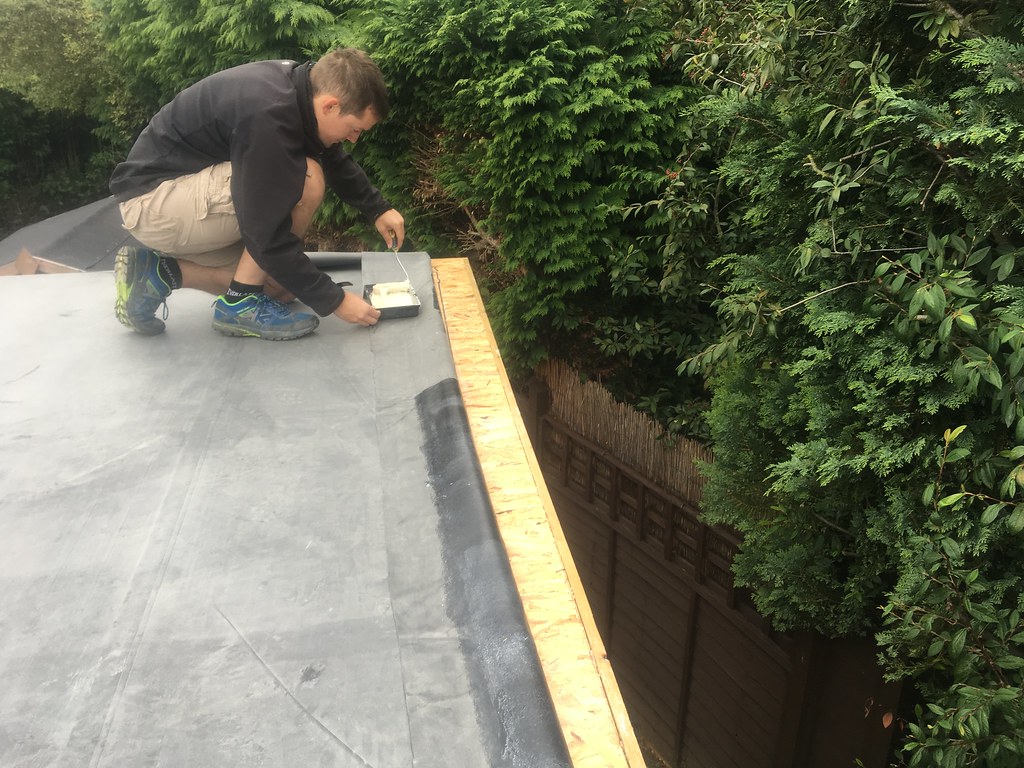
Then the trims are nailed on to finish, a drip trim for the gutter edge, and kerb trims everywhere else. The corner and joining trims are clipped on and superglued in place.
 IMG_3064 by Tomoose85, on Flickr
 IMG_3070 by Tomoose85, on Flickr
 IMG_3076 by Tomoose85, on Flickr
I used Rubber4Roofs, and I'd recommend them. The tutorial videos on their website helped inspire confidence, and it really was quite straightforward.
Comments positive or negative welcome
First step was to sweep the roof and mark out 100mm from the perimeter. Water based adhesive is used inside the line, contact adhesive outside the line.
IMG_3026 by Tomoose85, on FlickrAfter rolling out the membrane to relax for 30 minutes, it was folded back in half to allow the adhesive to be spread.
IMG_3028 by Tomoose85, on FlickrIMG_3031 by Tomoose85, on FlickrThe membrane is then carefully rolled over the adhesive, and the membrane bushed to ensure good contact. You can then fold the other half over to finish the WBA.
IMG_3038 by Tomoose85, on FlickrIMG_3032 by Tomoose85, on FlickrNext is the contact adhesive. Working on opposite edges the contact adhesive is applied to the deck and the membrane, being sure to allow it to tack off to ensure no bubbles form under the membrane.
IMG_3047 by Tomoose85, on FlickrThis is then rolled with a foam roller to ensure good adhesion.
The trickiest bit is the internal corner for the L. This needs to be primed and a rubber strip cut to shape and stretched into place. Not perfect but quite acceptable I think. its certainly water tight!
Primed
IMG_3057 by Tomoose85, on FlickrPatch cut with rounded corners for strength.
IMG_3058 by Tomoose85, on FlickrPatch stretched on and rolled down.
IMG_3059 by Tomoose85, on FlickrIMG_3063 by Tomoose85, on FlickrThen the trims are nailed on to finish, a drip trim for the gutter edge, and kerb trims everywhere else. The corner and joining trims are clipped on and superglued in place.
IMG_3064 by Tomoose85, on FlickrIMG_3070 by Tomoose85, on FlickrIMG_3076 by Tomoose85, on FlickrI used Rubber4Roofs, and I'd recommend them. The tutorial videos on their website helped inspire confidence, and it really was quite straightforward.
Comments positive or negative welcome
The roof got a good try out within an hour of downing tools. Excuse the heavy breathing.
 IMG_3080 by Tomoose85, on Flickr
 IMG_3082 by Tomoose85, on Flickr
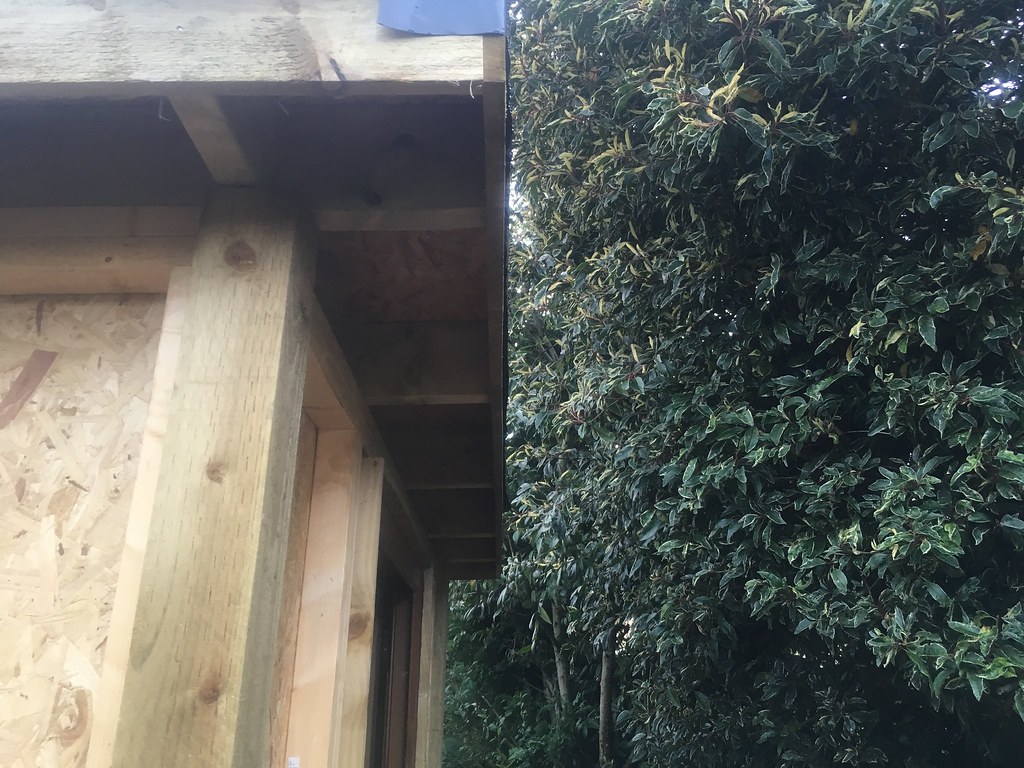
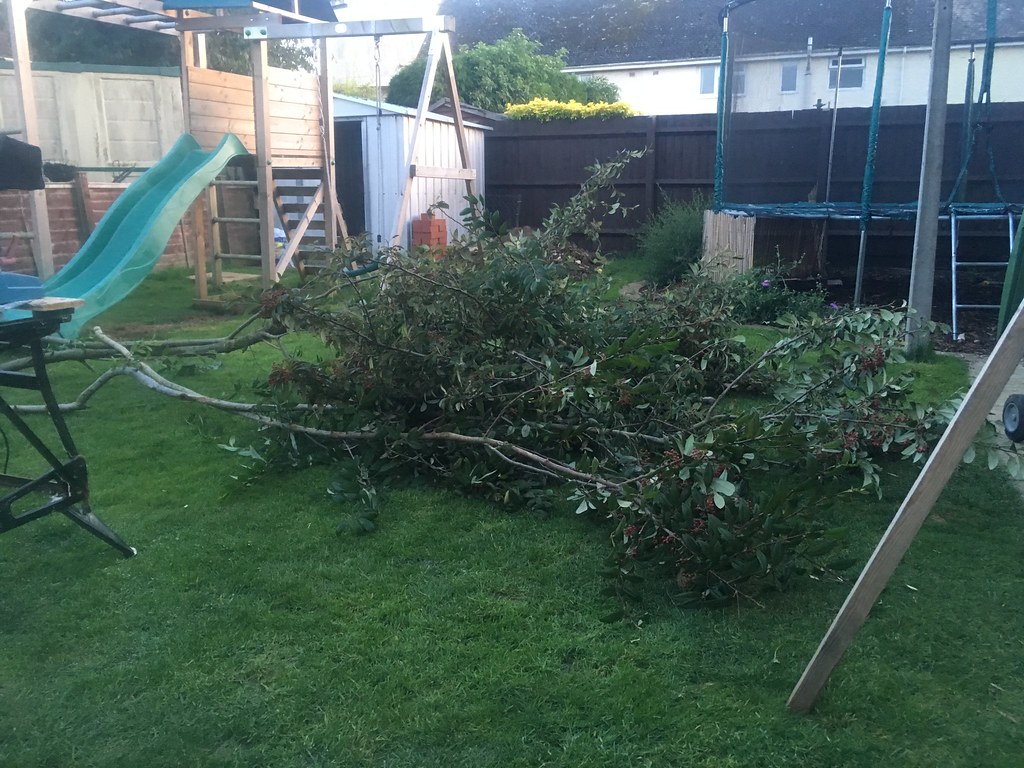
A small amount of my neighbours tree was removed (with his consent) as this was overhanging the roof. My neighbour will be trimming the rest of the vegetation in the next few weeks with my assistance
 IMG_3010 by Tomoose85, on Flickr
IMG_3080 by Tomoose85, on FlickrIMG_3082 by Tomoose85, on FlickrA small amount of my neighbours tree was removed (with his consent) as this was overhanging the roof. My neighbour will be trimming the rest of the vegetation in the next few weeks with my assistance
IMG_3010 by Tomoose85, on FlickrEdited by PartOfTheProblem on Saturday 16th September 23:11
HairyMaclary said:
Great job!
You know that bit at the back of the man cave could make an ideal space for a sauna!
A mate paid about £3k for a 8 by 6 shed on a concrete base so yours is very good value. If I had the space to do this.
Thanks. I don't fancy a sauna much to be honest. Our oft frequented holiday lodge has a hot tub so we'd like to keep that as a treat rather than the norm. You know that bit at the back of the man cave could make an ideal space for a sauna!
A mate paid about £3k for a 8 by 6 shed on a concrete base so yours is very good value. If I had the space to do this.
Mine is near as dammit 10ft x 20ft and the build cost would have been the same had it been a rectangle instead of an L shape. I'll be at £4200 fully insulated with electrics and plastered etc. It's been a lot of hard work so far though.
Insulation going in today!
thebraketester said:
Good job!
I think I got mine from them too.
What are you doing about the exterior walls? More osb? Tyveck?
No more OSB, just Tyvek (well, cheap equivalent), battens and cladding to go. I did consider more OSB but the building is very rigid and the membrane will do the secondary water stop job perfectly well I hope!I think I got mine from them too.
What are you doing about the exterior walls? More osb? Tyveck?
Edited by thebraketester on Sunday 17th September 08:49
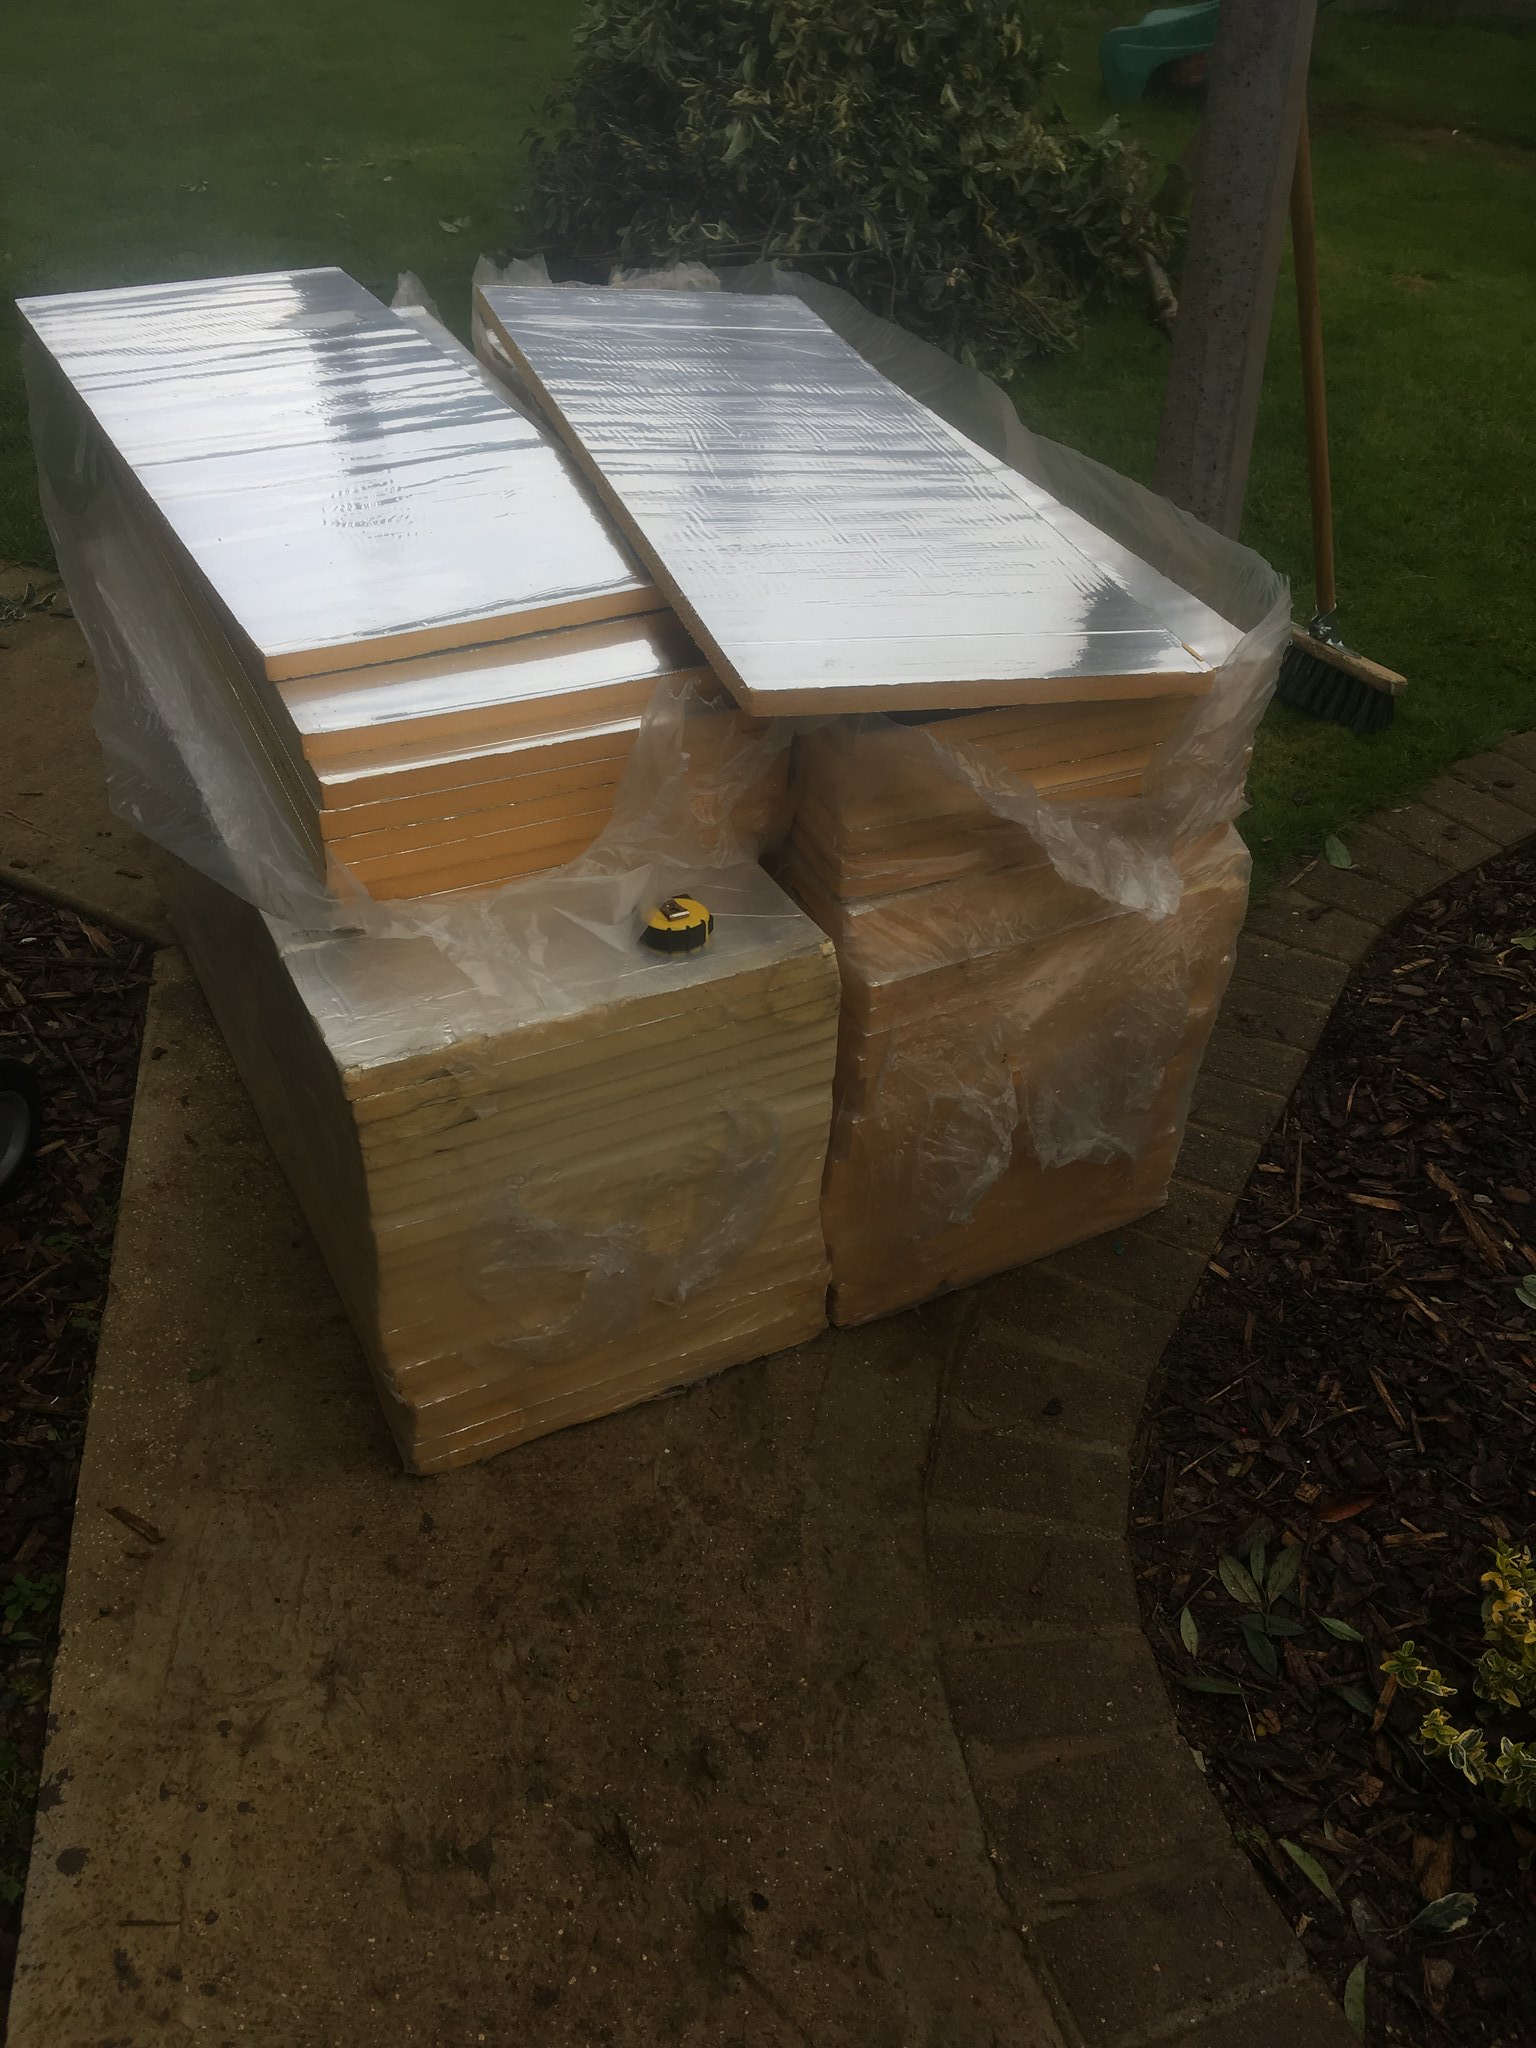
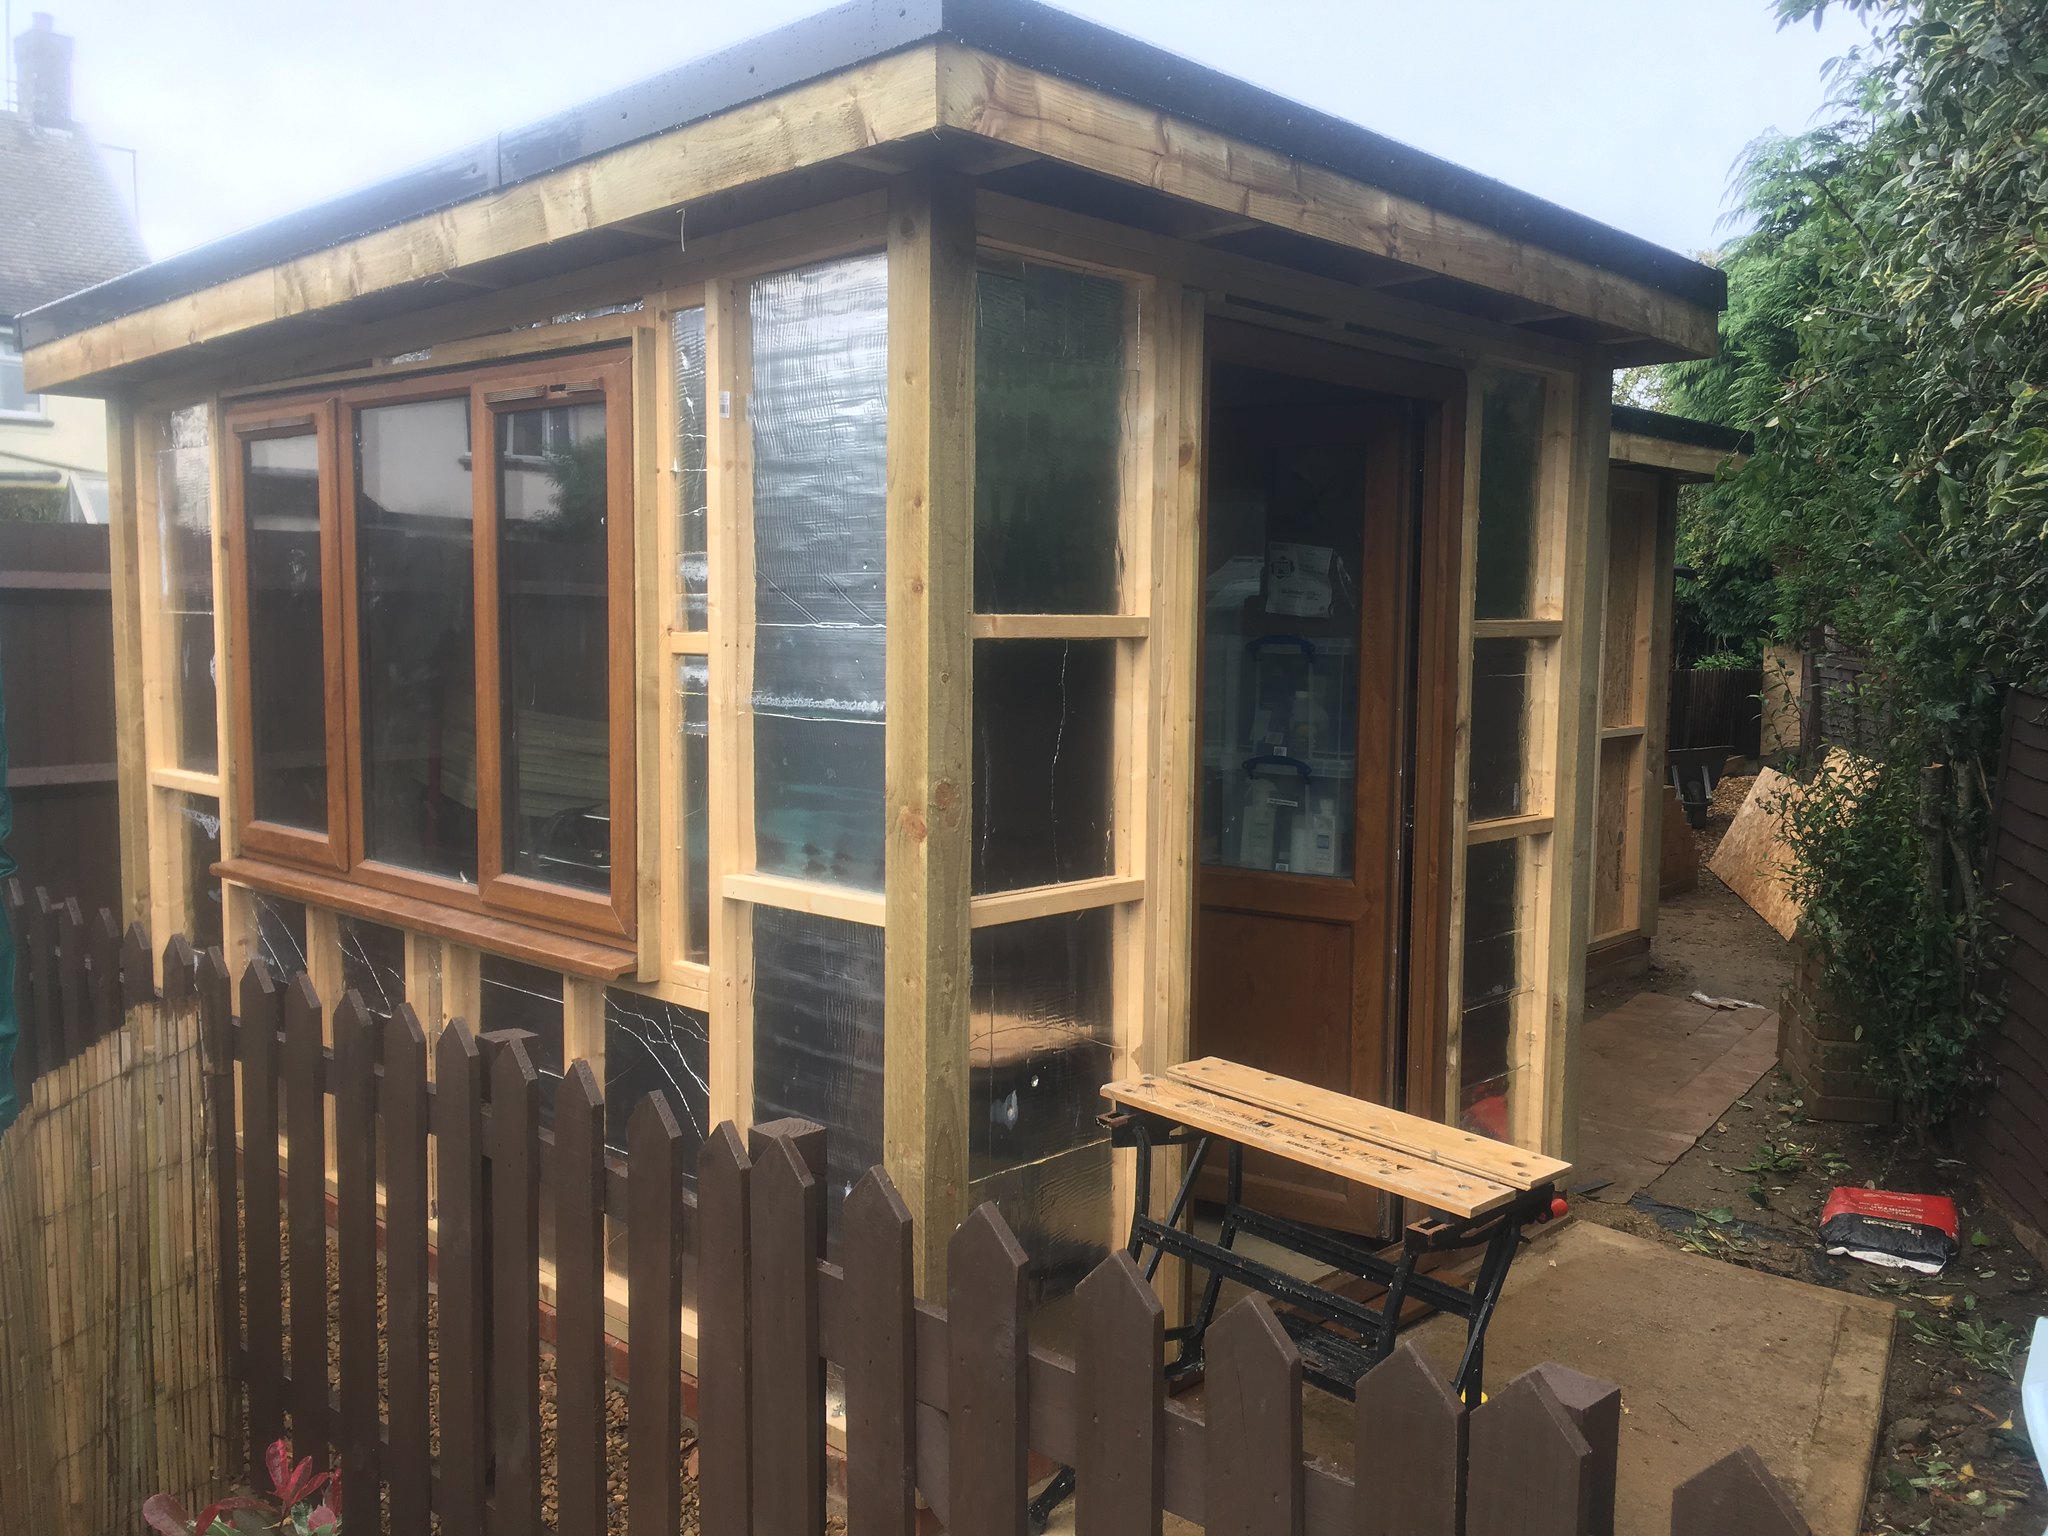
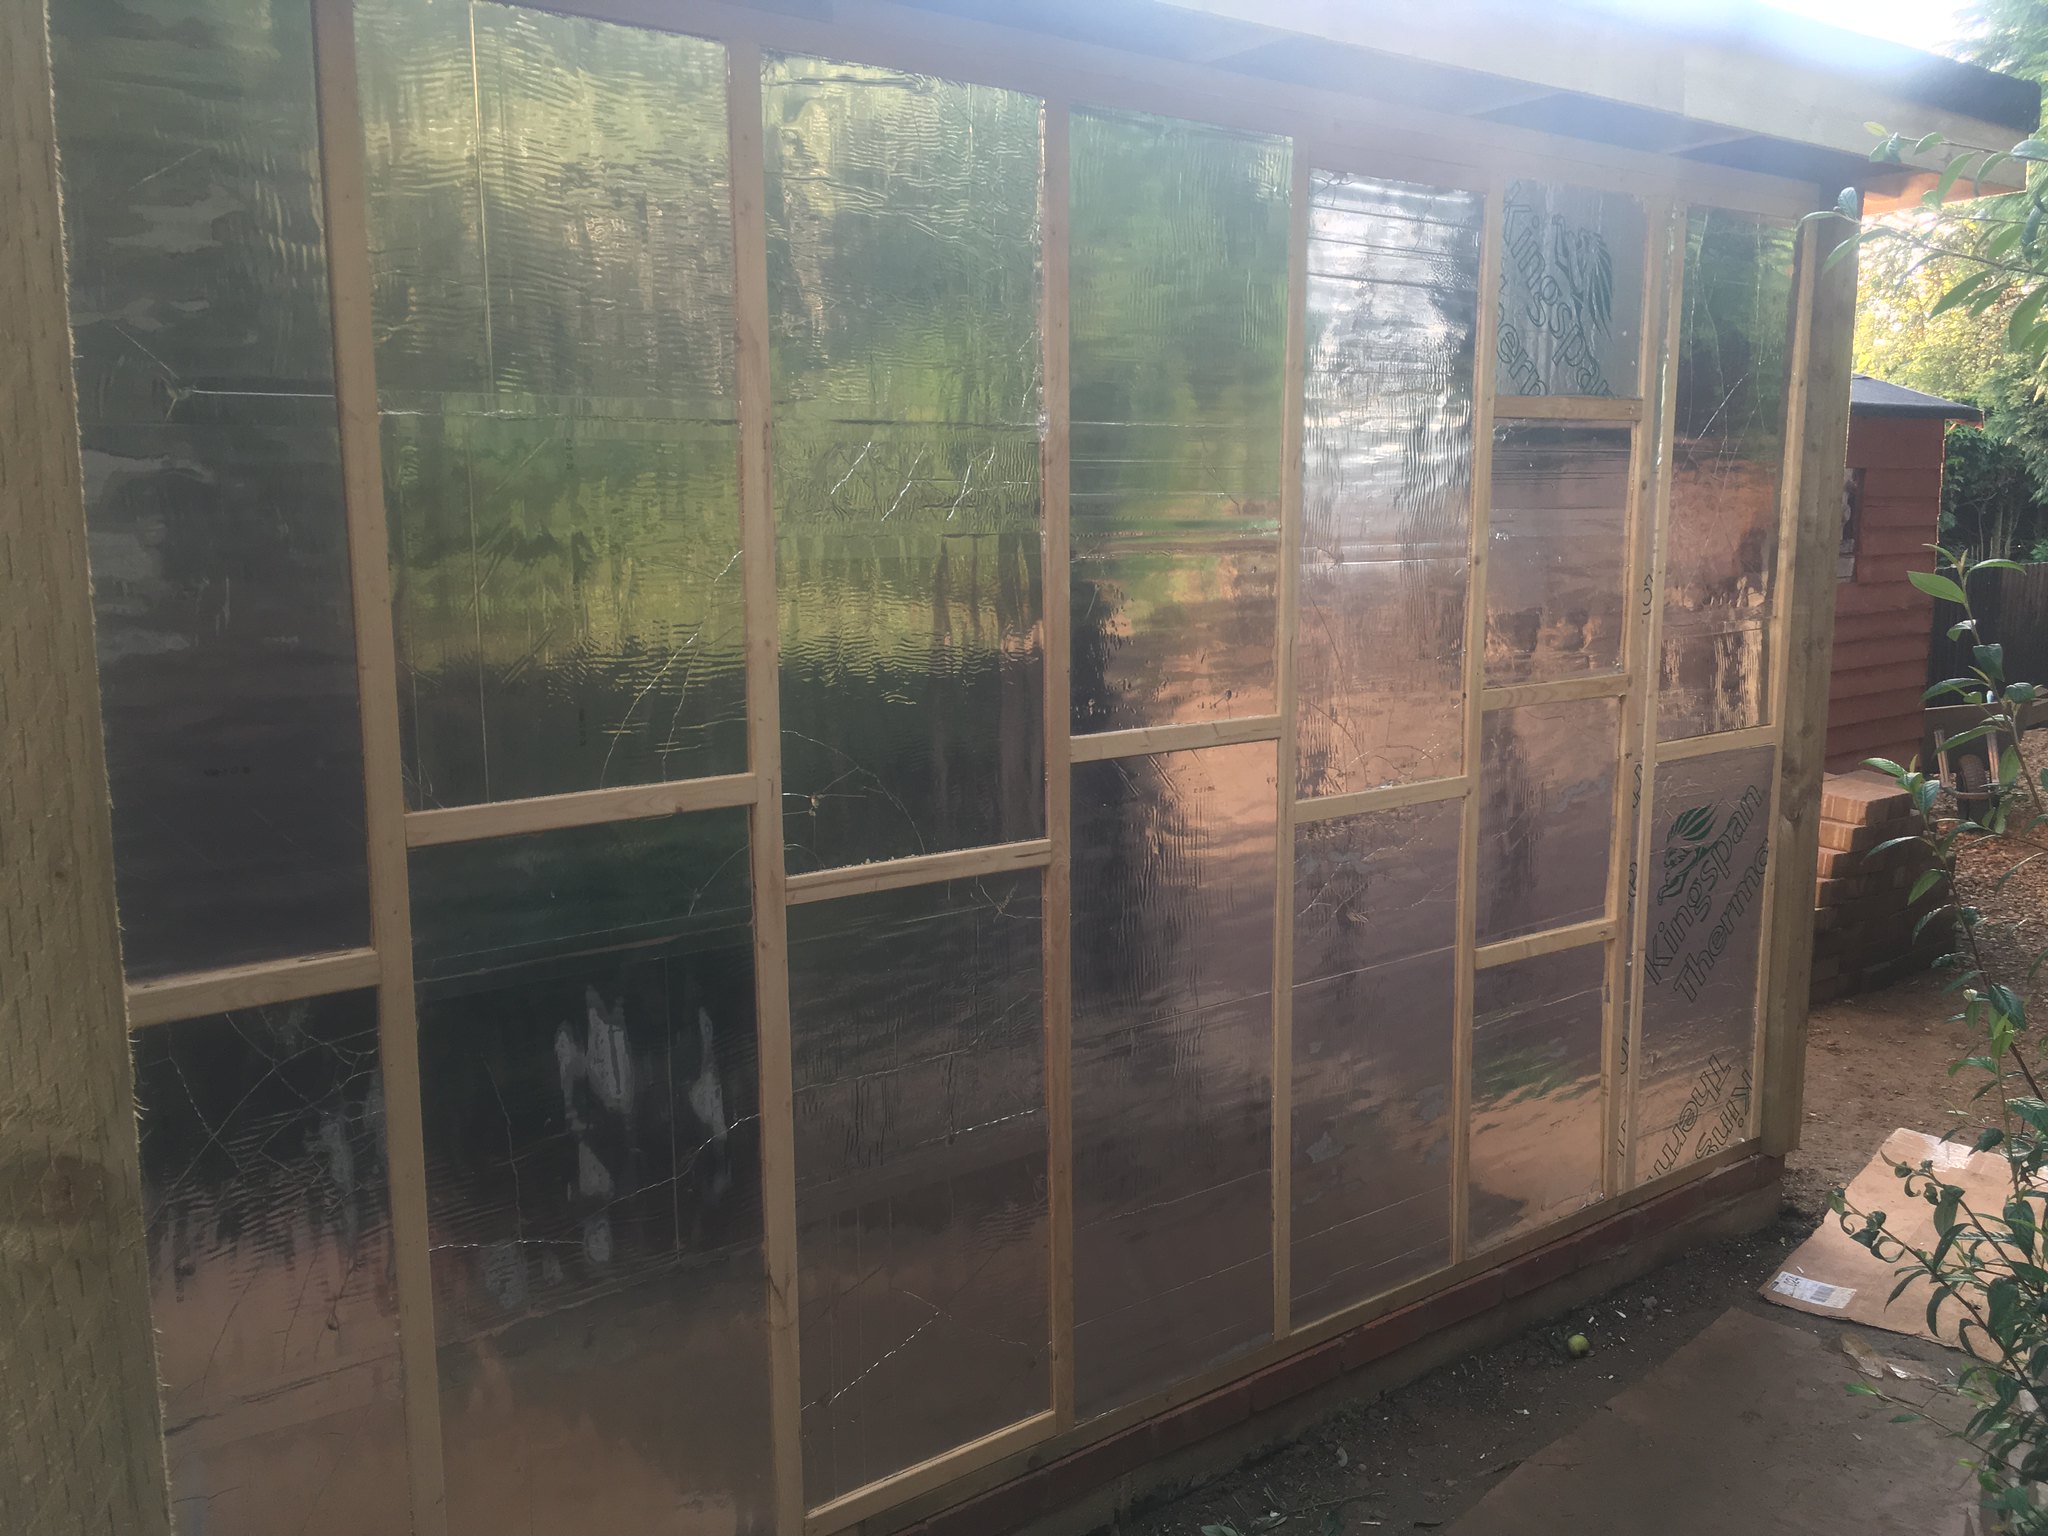
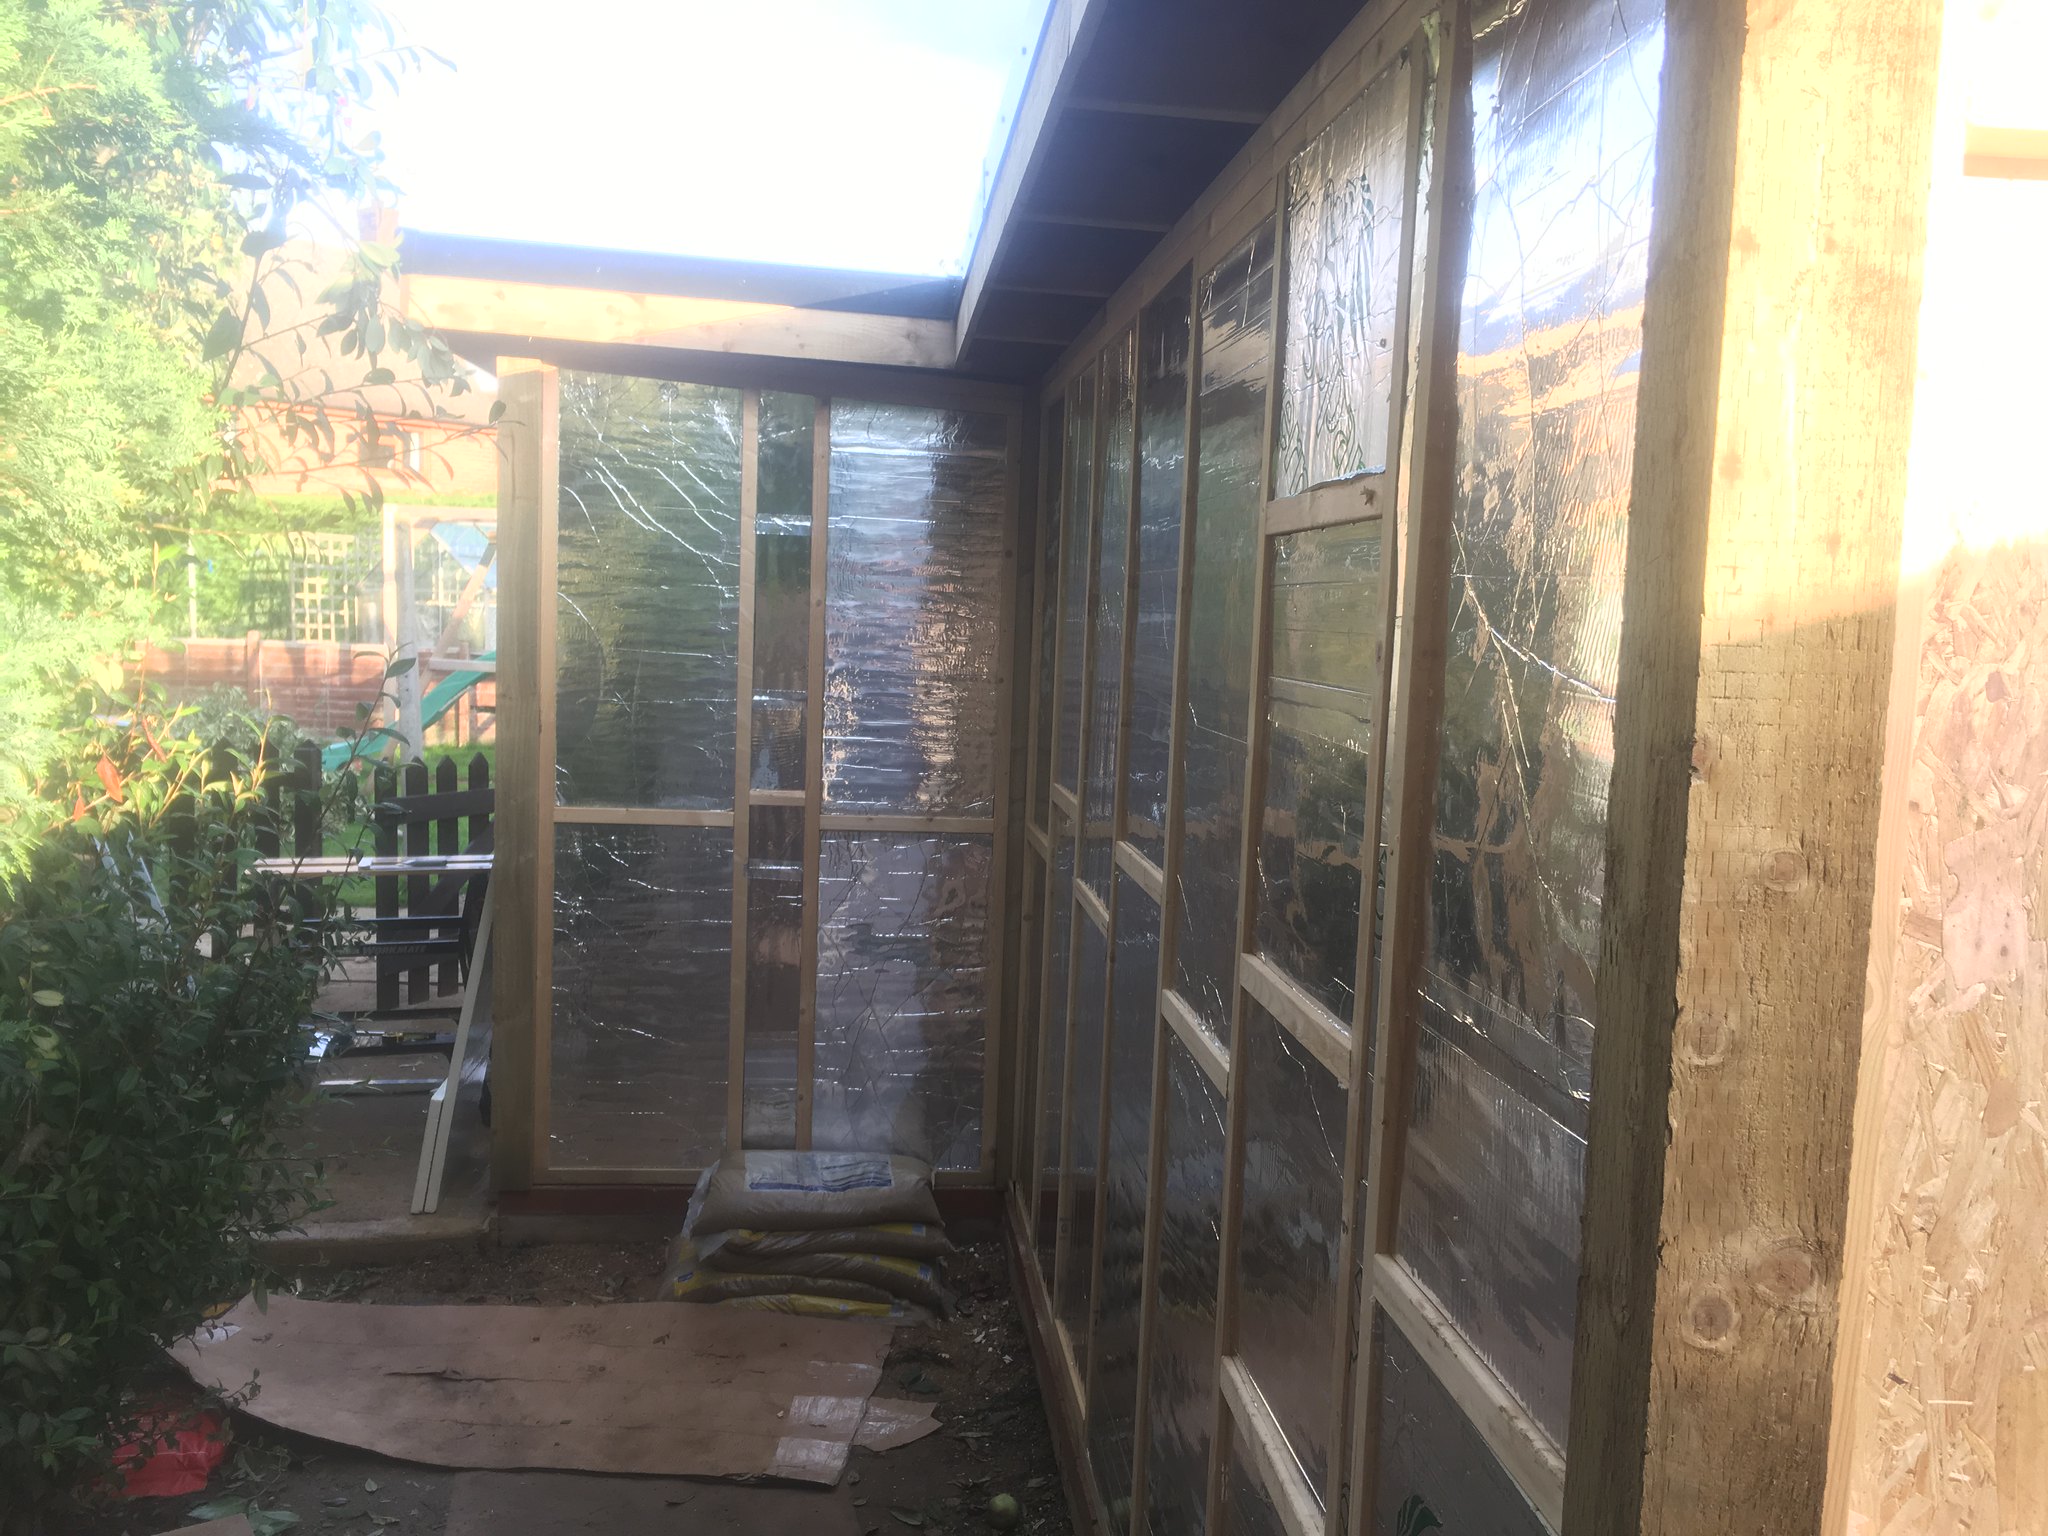
Well I made a bit more progress - insulation this time!
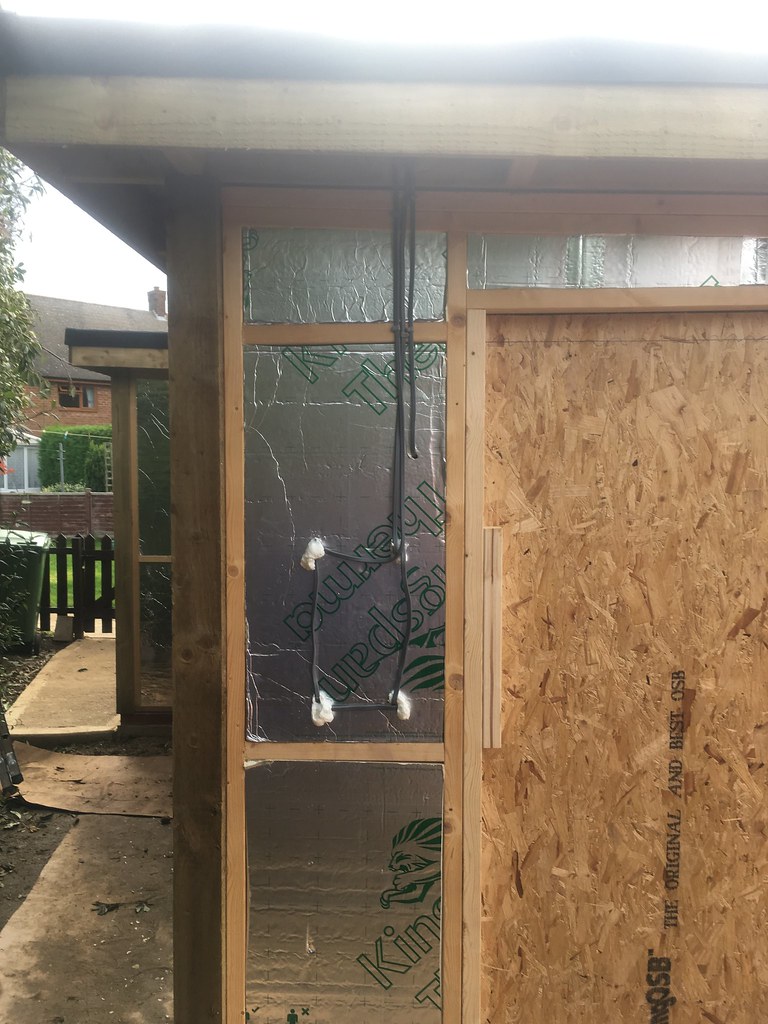
I blagged enough 30mm foil faced boards to do the whole building for £100 from a chap in the next village.
 IMG_3079 by Tomoose85, on Flickr
Annoyingly despite being advertised at 450mm wide, and my studs being spaced to exactly 450mm, most of the boards were 440mm or 470mm , meaning almost every single one had to be cut. Very tedious work. I also jumped quickly on an eBay listing local to me which meant I could double it all up for 60mm throughout the whole building, meaning twice as much cutting, but oh well.
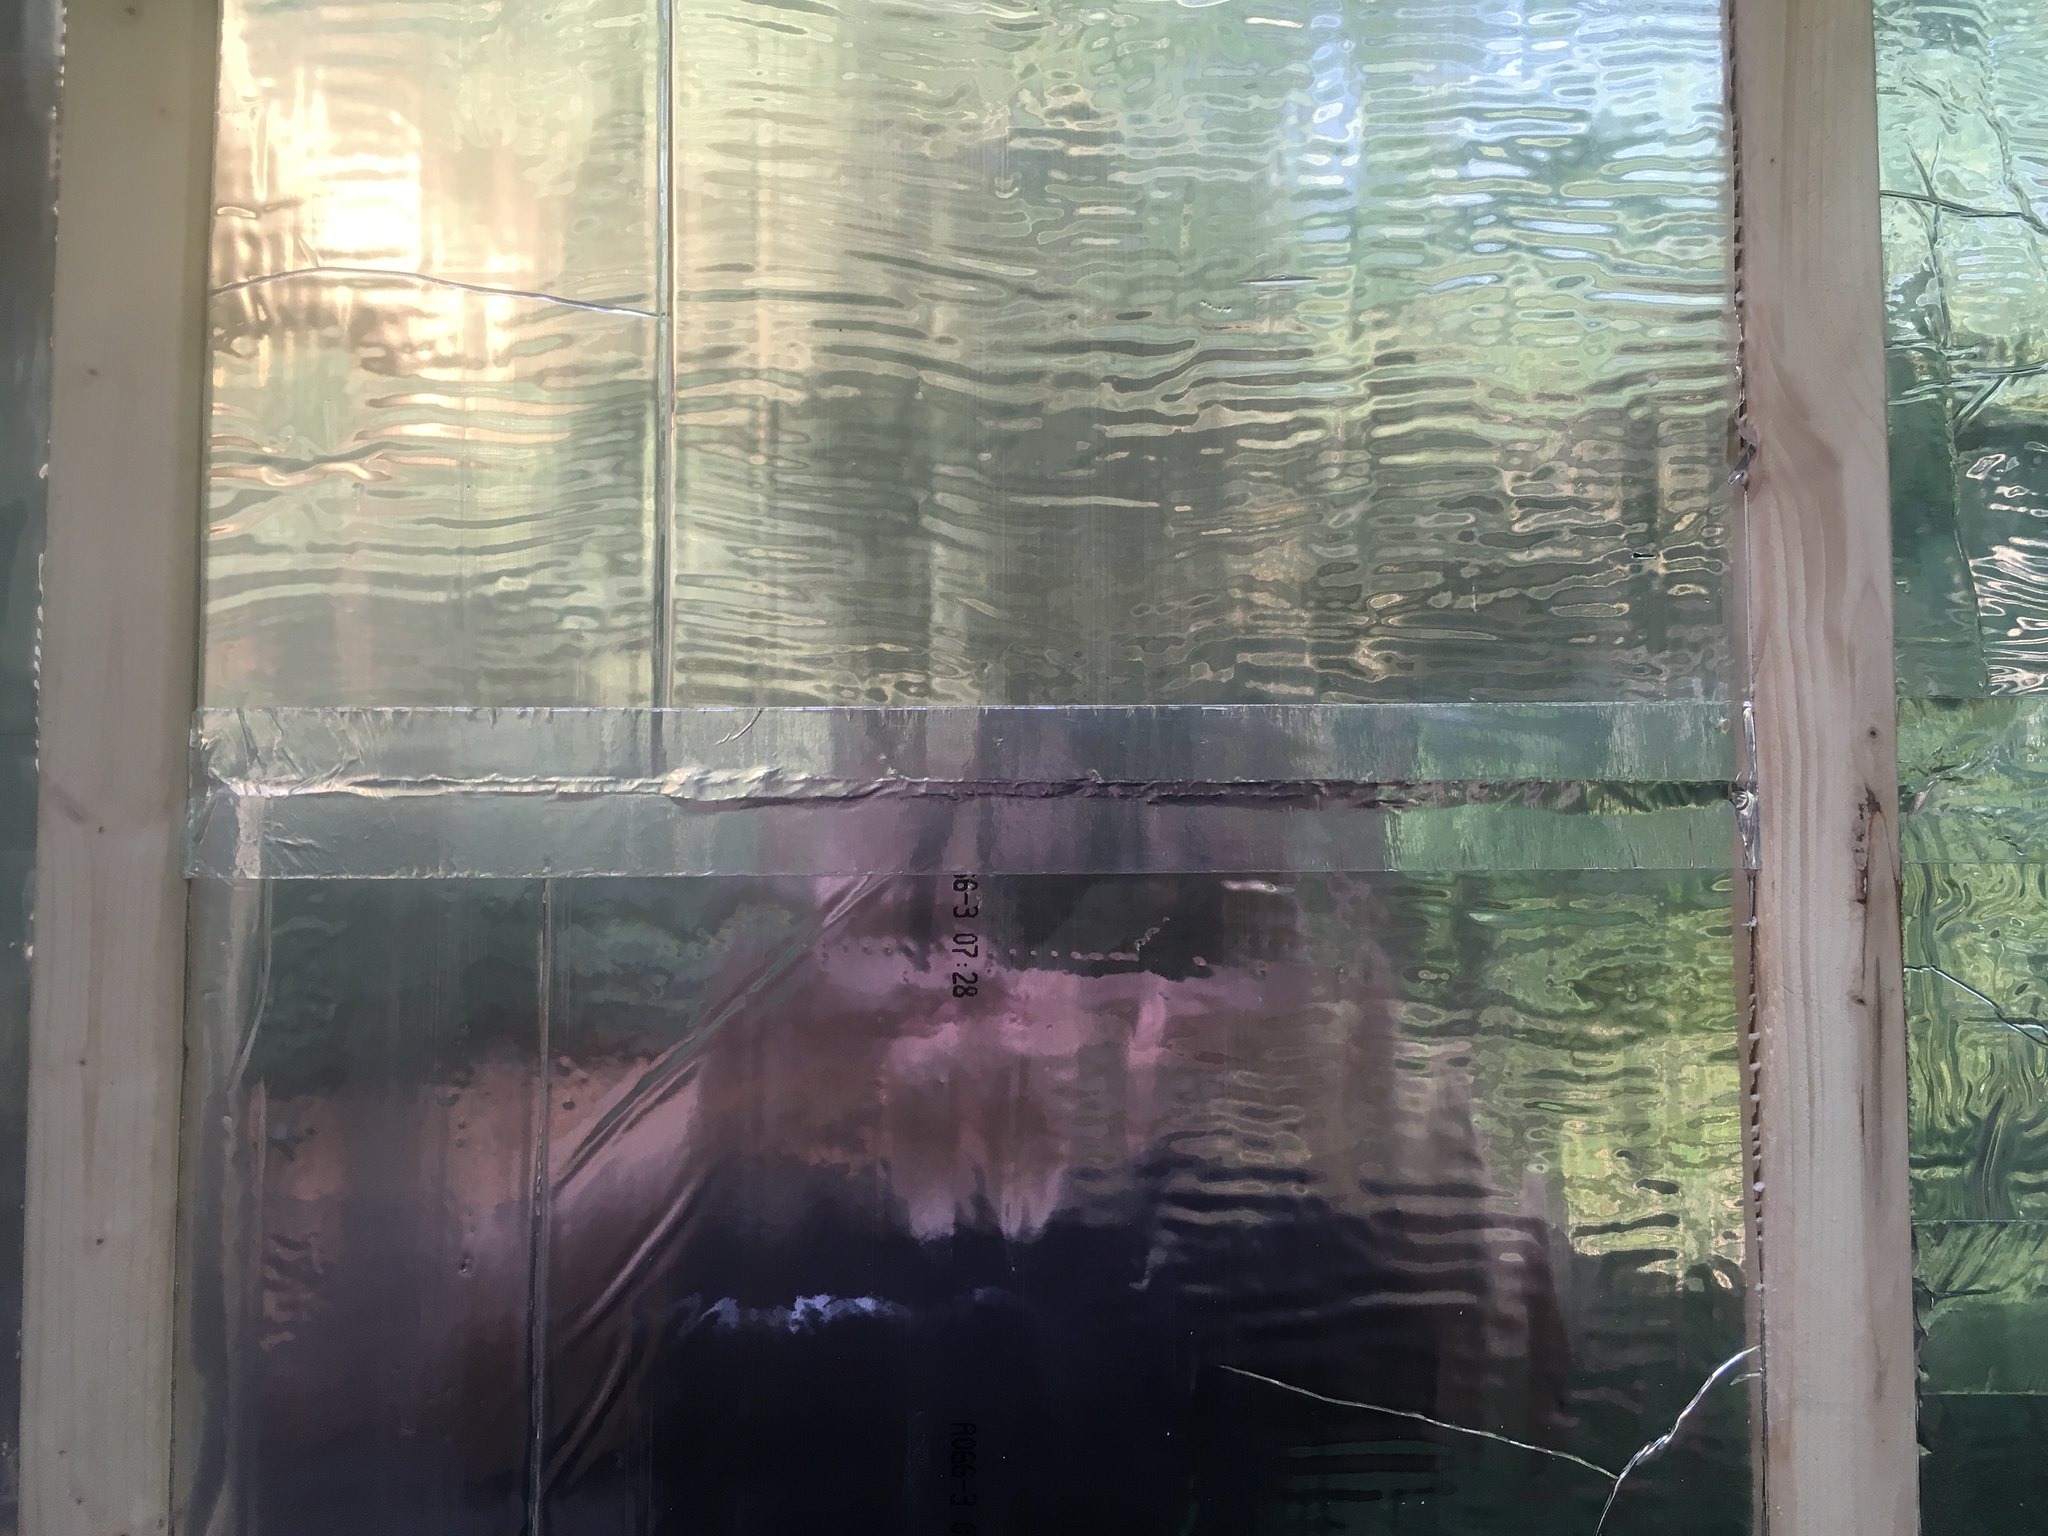
All joints were foil taped too. It took a whole day to do 3 sides, 1 side left to go.
1 layer in
 IMG_3087 by Tomoose85, on Flickr
and 2nd layer in
 IMG_3102 by Tomoose85, on Flickr
 IMG_3100 by Tomoose85, on Flickr
and joints foil taped. Very tedious, and it cut my fingers to shreds . I thought this would be a fun part of the build, but it certainly wasn't, and I've still got one wall to go  .
.
 IMG_3103 by Tomoose85, on Flickr
Hopefully the cladding will arrive in the next couple of days!
I blagged enough 30mm foil faced boards to do the whole building for £100 from a chap in the next village.
IMG_3079 by Tomoose85, on FlickrAnnoyingly despite being advertised at 450mm wide, and my studs being spaced to exactly 450mm, most of the boards were 440mm or 470mm
, meaning almost every single one had to be cut. Very tedious work. I also jumped quickly on an eBay listing local to me which meant I could double it all up for 60mm throughout the whole building, meaning twice as much cutting, but oh well.All joints were foil taped too. It took a whole day to do 3 sides, 1 side left to go.
1 layer in
IMG_3087 by Tomoose85, on Flickrand 2nd layer in
IMG_3102 by Tomoose85, on FlickrIMG_3100 by Tomoose85, on Flickrand joints foil taped. Very tedious, and it cut my fingers to shreds
. I thought this would be a fun part of the build, but it certainly wasn't, and I've still got one wall to go .IMG_3103 by Tomoose85, on FlickrHopefully the cladding will arrive in the next couple of days!
Pheo said:
You've picked the same roof system I was considering - looked to go really well!
Groundworks for mine would be a bit challenging - on a hill with a slope so would need to figure out how to level it all out (or potentially project the home office part out on piers or something, I dunno!)
However would be over the building regs size limits I think and within 1m of the boundary so would have to clad in something like Hardiboard for fire regs...
Anyway keep it coming!!
The roof was great, no regrets at all.Groundworks for mine would be a bit challenging - on a hill with a slope so would need to figure out how to level it all out (or potentially project the home office part out on piers or something, I dunno!)
However would be over the building regs size limits I think and within 1m of the boundary so would have to clad in something like Hardiboard for fire regs...
Anyway keep it coming!!
How much of a slope? Get some photos up in a new thread and I'm sure the Pistonheads collective will be able to give you some ideas!
fuzzymonkey said:
What was the plastic sheeting for that was laid on the sand before concrete?
Also how is the wood frame attached to the bricks?
Damp proof membrane. Mine was 1500ga but that's probably overkill. Its to stop the ground sucking all the moisture out of the concrete whilst it cures, and to prevent damp ingress through the floor.Also how is the wood frame attached to the bricks?
The wood frame is attached to the bricks and concrete with 150mm frame fixings. Its arguably not necessary due to the self weight of the building, but I did it for peace of mind. Don't do what I did and buy screw head fixings, go with hex or torx as they take a lot of welly to tighten up and they are easy to round off.
 IMG_3089 by Tomoose85, on Flickr
Thanks for the kind words everyone, it's appreciated.
Daniel, the office will be plasterboard over OSB to give lots of bite for screws etc when hanging shelves and the like. The office end will also be fitted with skirtings, decent flooring etc. I want it to feel like it could be inside the house.
The shed end will remain OSB for durability.
Daniel, the office will be plasterboard over OSB to give lots of bite for screws etc when hanging shelves and the like. The office end will also be fitted with skirtings, decent flooring etc. I want it to feel like it could be inside the house.
The shed end will remain OSB for durability.
cylon said:
so what has the cost come in at? so far..
£3400 including the plasterboard, cladding and electric stuff. I still need to pay for an electrician, flooring, lighting and of course furniture, plus sundries like paint and skirtings etc. I hope to be at £4200 ish for the building once done, which I think is incredibly good value for the spec.
I'll upload a breakdown once it's all finished and everything is accounted for, but I've been logging all my receipts as I go.
I am seriously bored of cutting and installing insulation. Over 200 individual pieces, but hey at least it was cheap. *sigh*.
I'm pleased to say that it is done!
I'm also delighted to say that I've got wood!
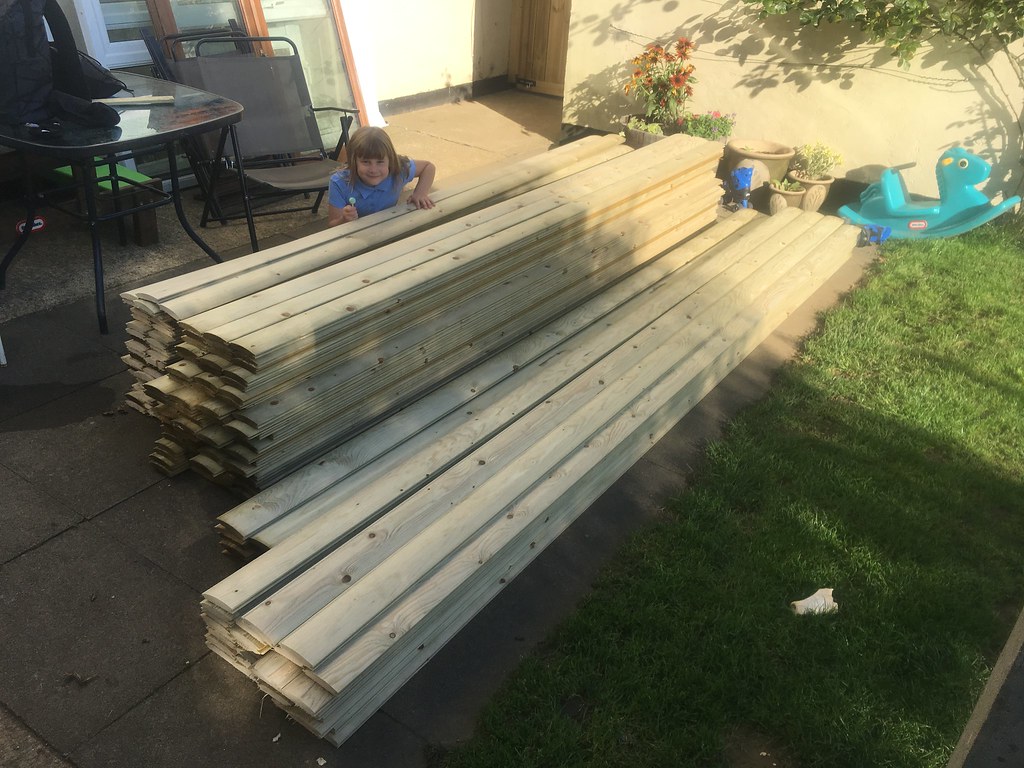 IMG_3110 by Tomoose85, on Flickr
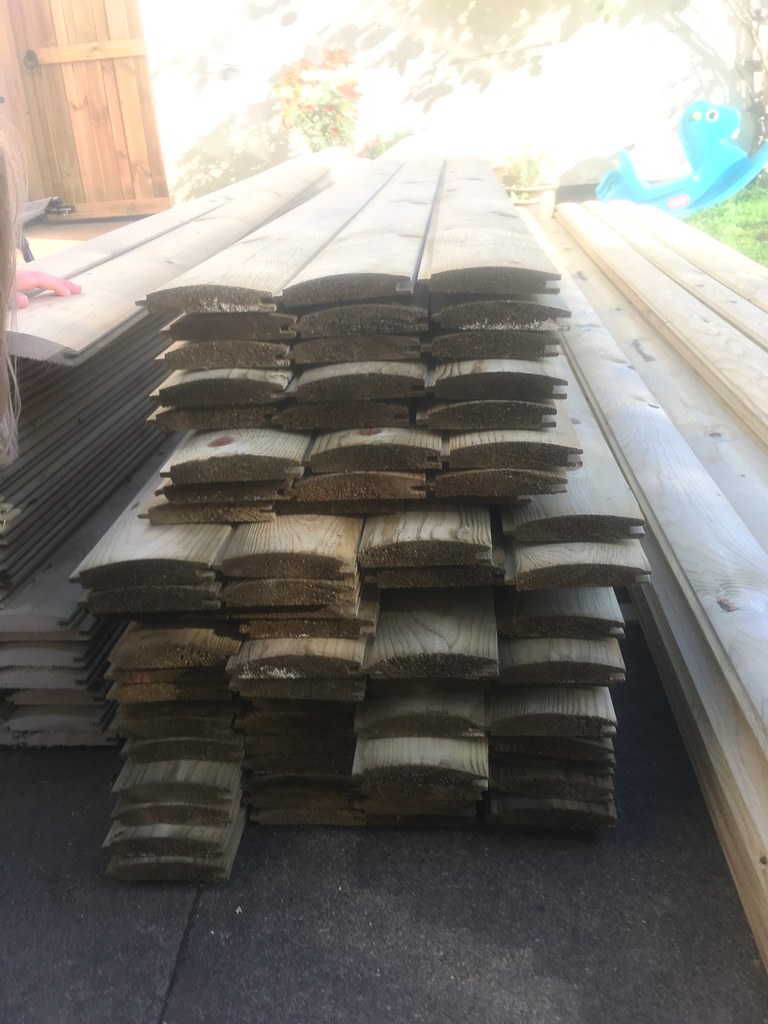 IMG_3112 by Tomoose85, on Flickr
I'm very pleased with the quality and the service from York Timber.
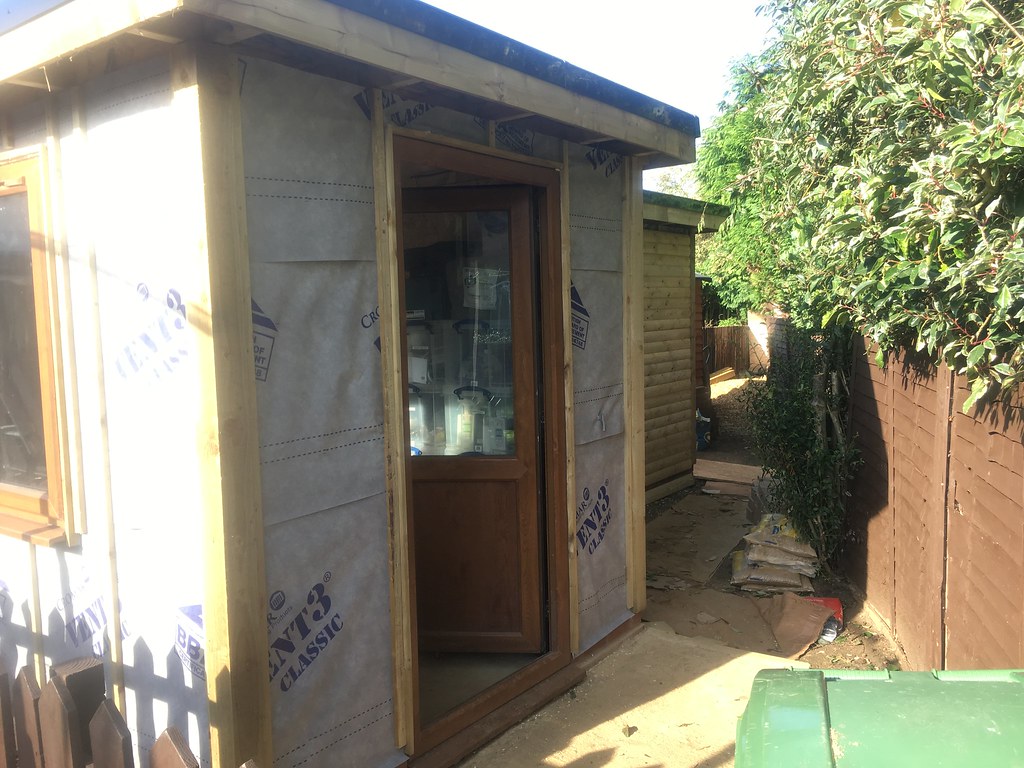
I have also cut through the end wall and fitted a door frame. I think I am going to construct the 'shed' door in the same way as the walls to make it easy to block off in the future, but any other ideas are welcomed
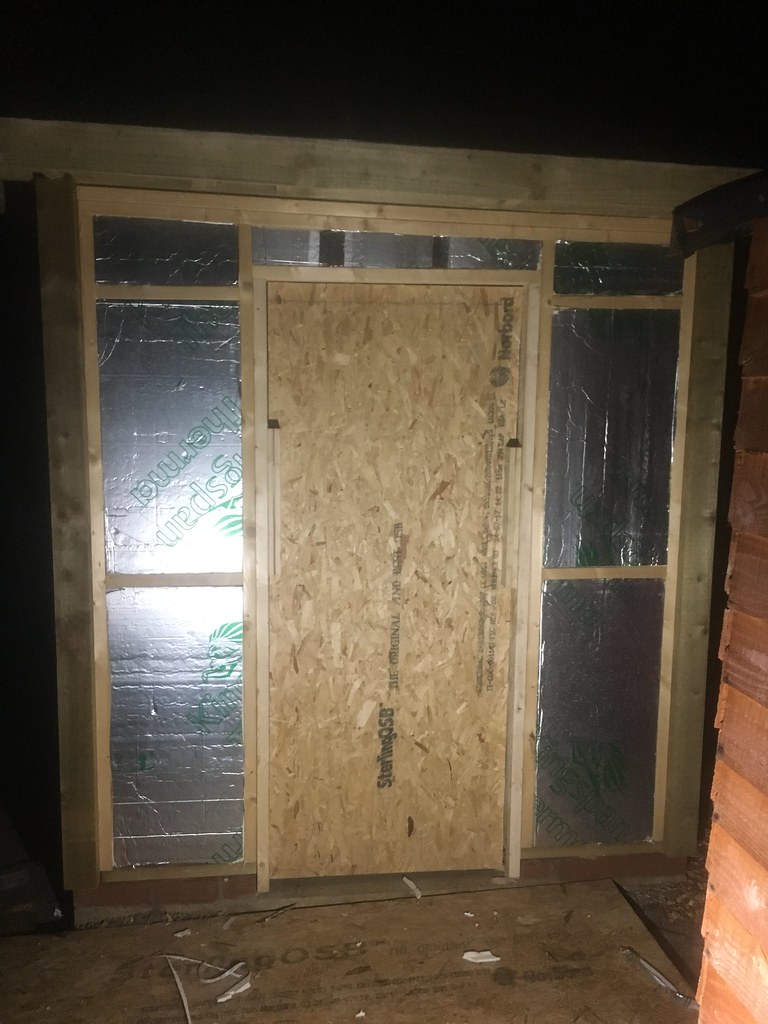 IMG_3116 by Tomoose85, on Flickr
And finally, I have made a start on the electrics. This will be my charging area.
 IMG_3117 by Tomoose85, on Flickr
I need to run all the cables in before I can install the breather membrane and the cladding. I've got a Paslode gun on hire starting tomorrow, so 1 week to get the cladding on. Full steam ahead!
Also, if anyone knows a friendly electrician in the Northamptonshire/Bedfordshire area then please do put them/me in touch, as I do want it all to be connected up and signed off by a pro. Thanks!
I'm pleased to say that it is done!
I'm also delighted to say that I've got wood!
IMG_3110 by Tomoose85, on FlickrIMG_3112 by Tomoose85, on FlickrI'm very pleased with the quality and the service from York Timber.
I have also cut through the end wall and fitted a door frame. I think I am going to construct the 'shed' door in the same way as the walls to make it easy to block off in the future, but any other ideas are welcomed
IMG_3116 by Tomoose85, on FlickrAnd finally, I have made a start on the electrics. This will be my charging area.
IMG_3117 by Tomoose85, on FlickrI need to run all the cables in before I can install the breather membrane and the cladding. I've got a Paslode gun on hire starting tomorrow, so 1 week to get the cladding on. Full steam ahead!
Also, if anyone knows a friendly electrician in the Northamptonshire/Bedfordshire area then please do put them/me in touch, as I do want it all to be connected up and signed off by a pro. Thanks!
Crumpet said:
Great thread! Might be a silly question but how did you fix and set the 4x4 corner (fence) posts?
No such thing as a stupid question, just stupid people 
The wall frames are screwed into the brick with frame fixings, the frames simply screw into the fence posts to hold them in place and square etc.
Crumpet said:
 I can't argue with that!
I had envisaged that the fence posts were set into the base somehow and provided most of the support and strength! Is it the boarding that provides rigidity and strength? (Sorry another stupid question - I've got tons of 'em!)
The framework is screwed down into the brickwork and slab. The roof joists then tie the walls together to stiffen things up. The OSB on the walls is the icing on the cake in making everything rigid. The cladding will only add to the rigidity of the structure.
I hope this helps?
Tom
So, a bit more progress has been made.
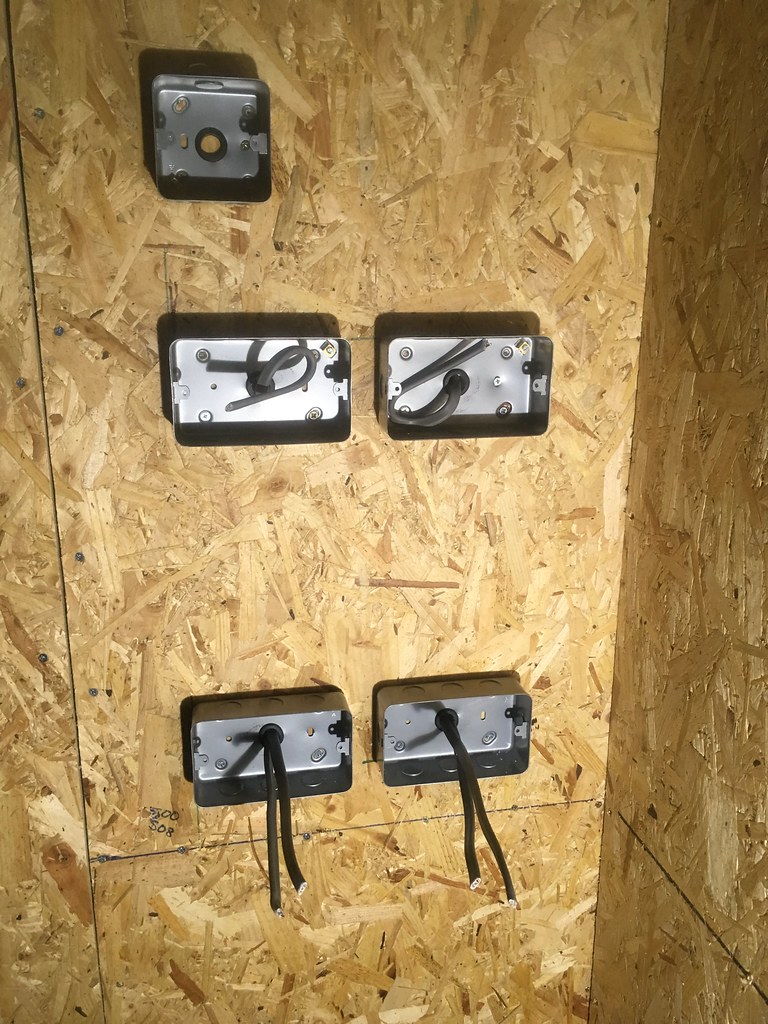
All first fix electrics are done. I ran the ring main cables around the wall plate dropping them down to each socket. Cables have been clipped to the outside of studs, but under the breather membrane. I squirted a bit of expanding foam in all of the holes to keep the building nice and toasty as far as possible.
 IMG_3146 by Tomoose85, on Flickr
 IMG_3187 by Tomoose85, on Flickr
Charging area:
 IMG_3150 by Tomoose85, on Flickr
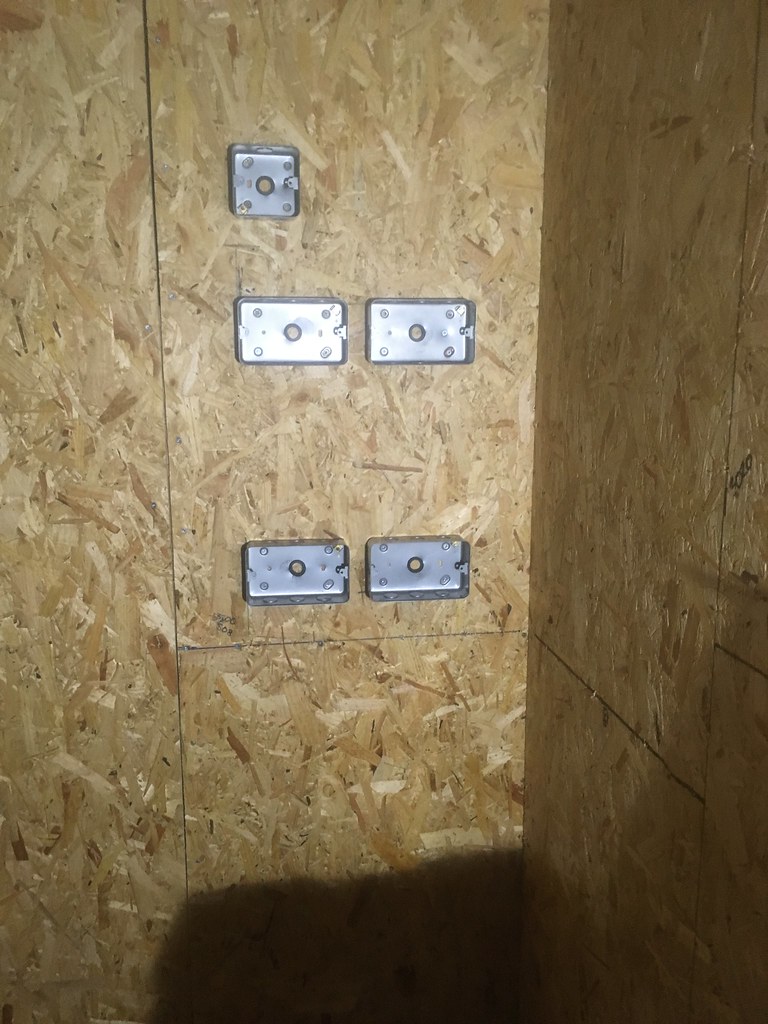
Metal clad sockets wired up.
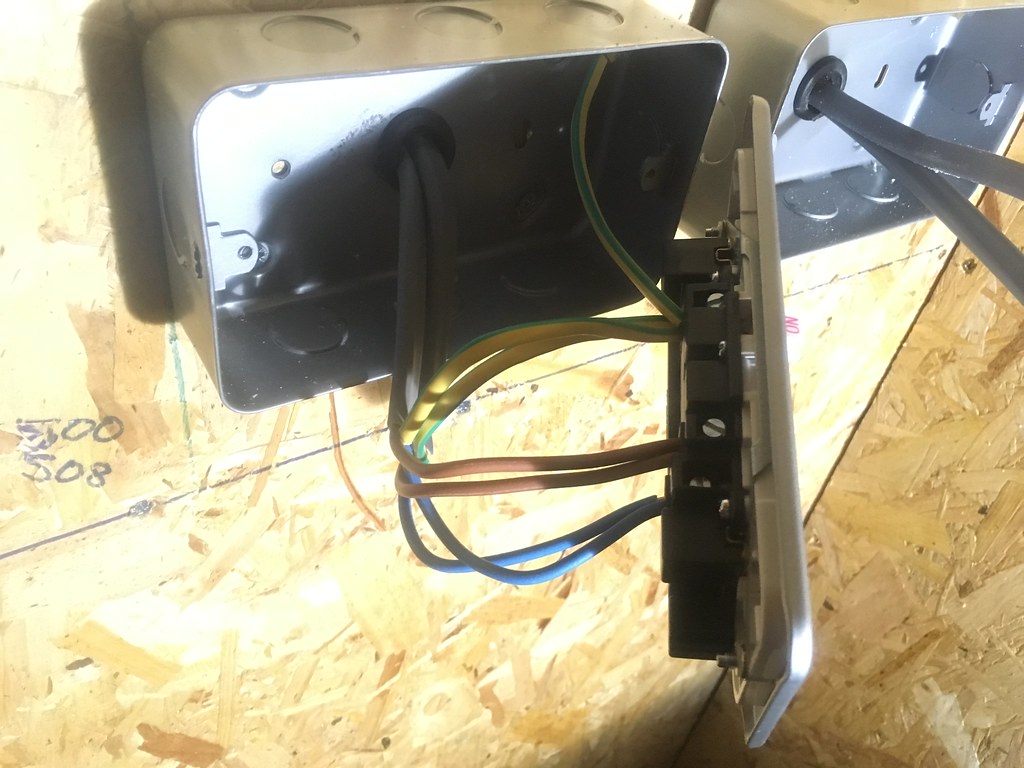 IMG_3152 by Tomoose85, on Flickr
And a couple of face plates on
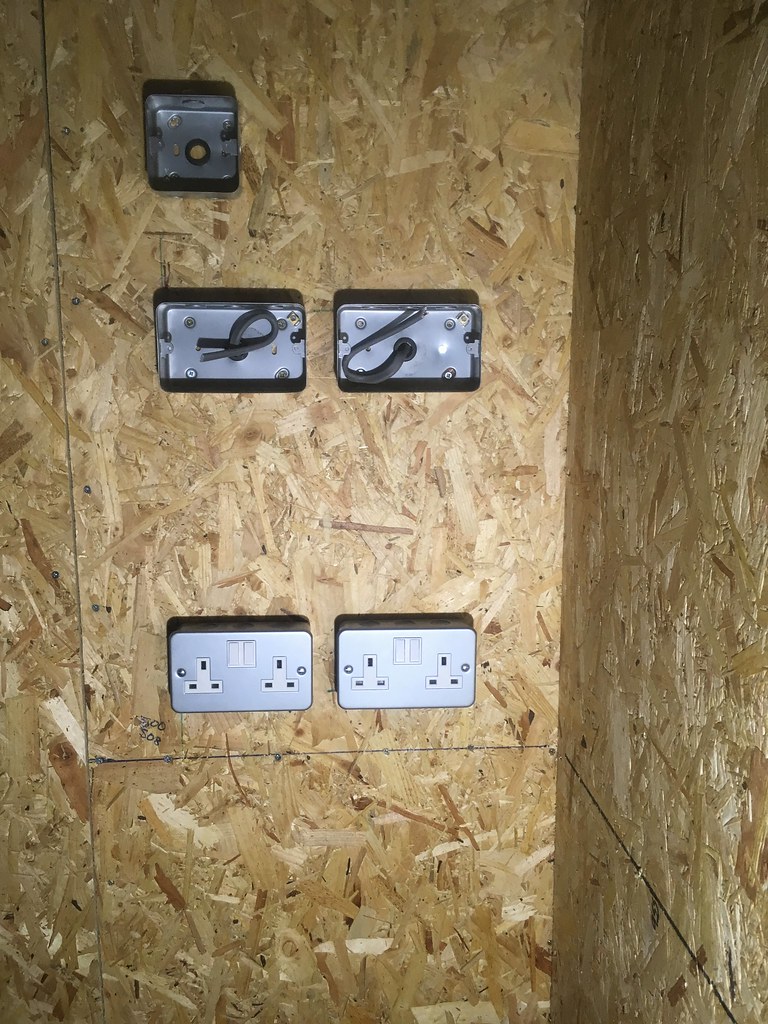 IMG_3154 by Tomoose85, on Flickr
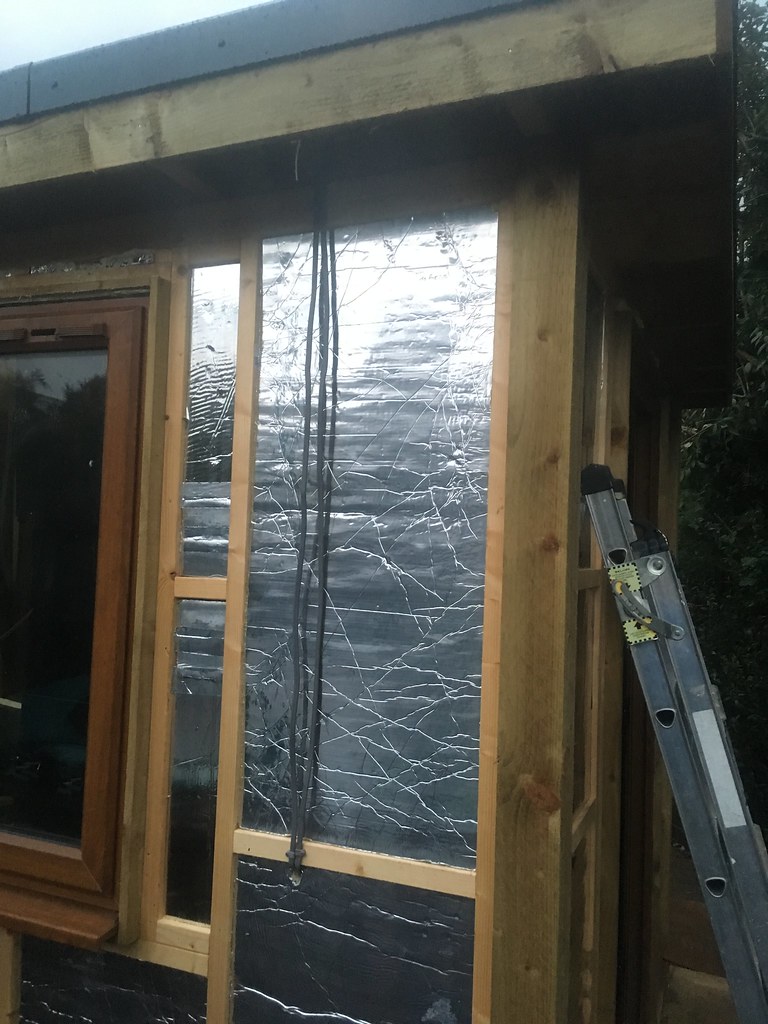
Next up was breather membrane:
 IMG_3195 by Tomoose85, on Flickr
 IMG_3198 by Tomoose85, on Flickr
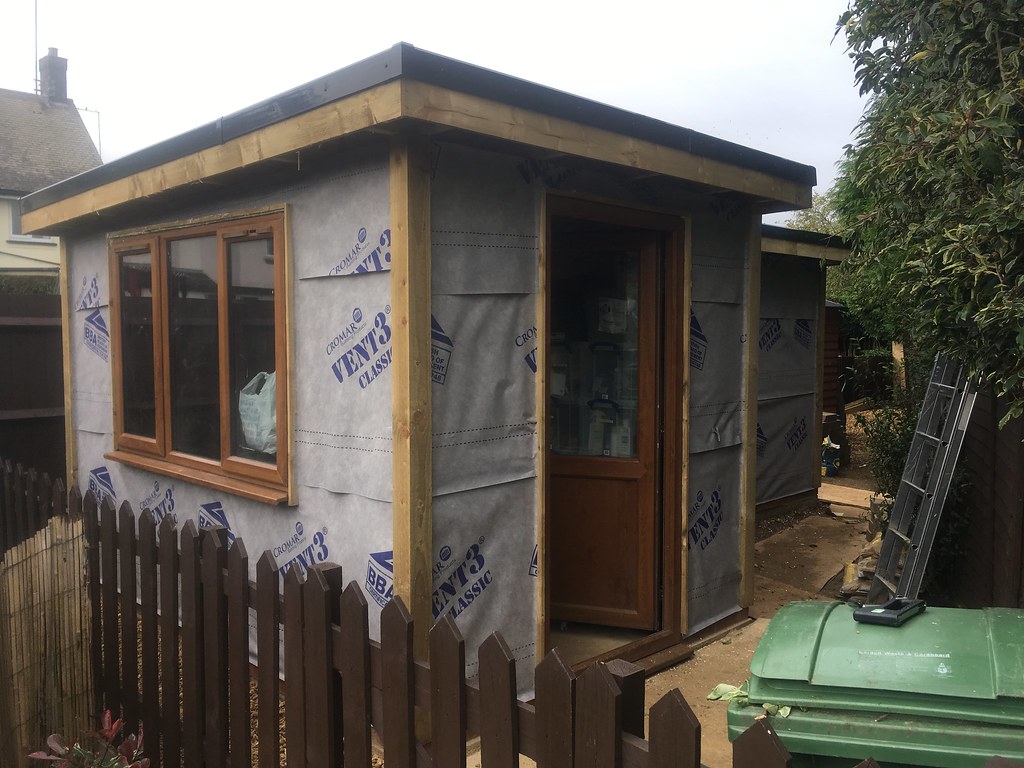
And then some cladding at last! This is mounted on roofing battens but I didn't get a photo of those
 IMG_3208 by Tomoose85, on Flickr
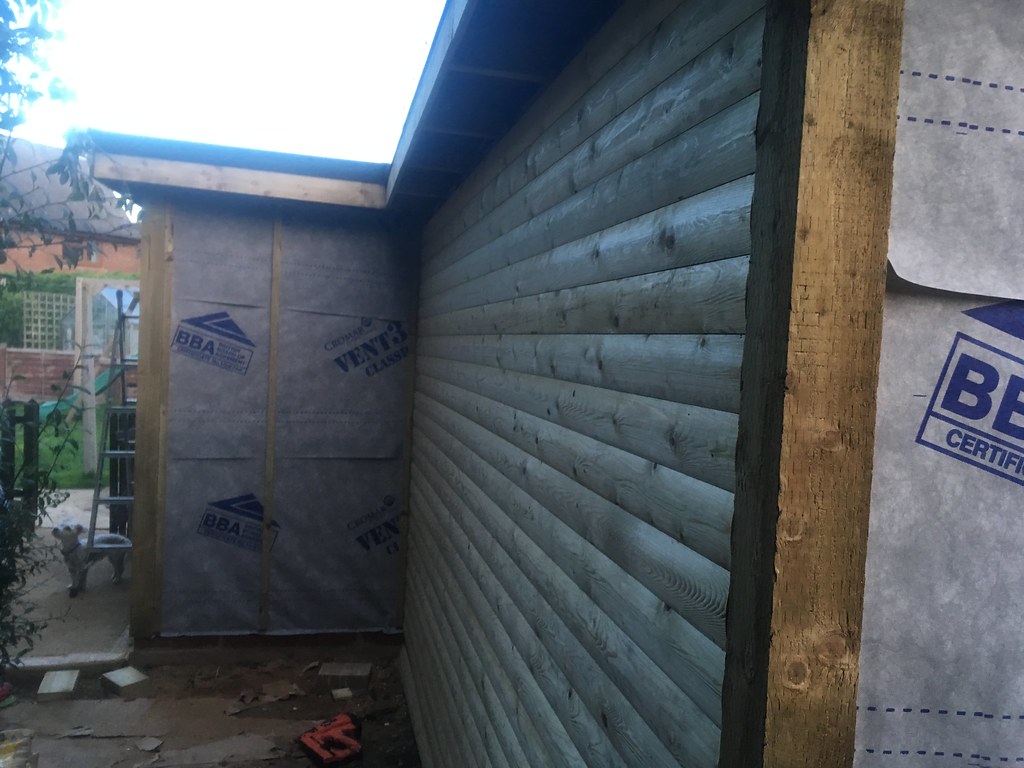 IMG_3209 by Tomoose85, on Flickr
 IMG_3212 by Tomoose85, on Flickr
I'm really pleased the cladding ended up flush with the posts too!
 IMG_3213 by Tomoose85, on Flickr
 IMG_3214 by Tomoose85, on Flickr
I'm hoping to finish the cladding tomorrow.
Comments or questions welcome as usual, thanks
All first fix electrics are done. I ran the ring main cables around the wall plate dropping them down to each socket. Cables have been clipped to the outside of studs, but under the breather membrane. I squirted a bit of expanding foam in all of the holes to keep the building nice and toasty as far as possible.
IMG_3146 by Tomoose85, on FlickrIMG_3187 by Tomoose85, on FlickrCharging area:
IMG_3150 by Tomoose85, on FlickrMetal clad sockets wired up.
IMG_3152 by Tomoose85, on FlickrAnd a couple of face plates on
IMG_3154 by Tomoose85, on FlickrNext up was breather membrane:
IMG_3195 by Tomoose85, on FlickrIMG_3198 by Tomoose85, on FlickrAnd then some cladding at last! This is mounted on roofing battens but I didn't get a photo of those
IMG_3208 by Tomoose85, on FlickrIMG_3209 by Tomoose85, on FlickrIMG_3212 by Tomoose85, on FlickrI'm really pleased the cladding ended up flush with the posts too!
IMG_3213 by Tomoose85, on FlickrIMG_3214 by Tomoose85, on FlickrI'm hoping to finish the cladding tomorrow.
Comments or questions welcome as usual, thanks
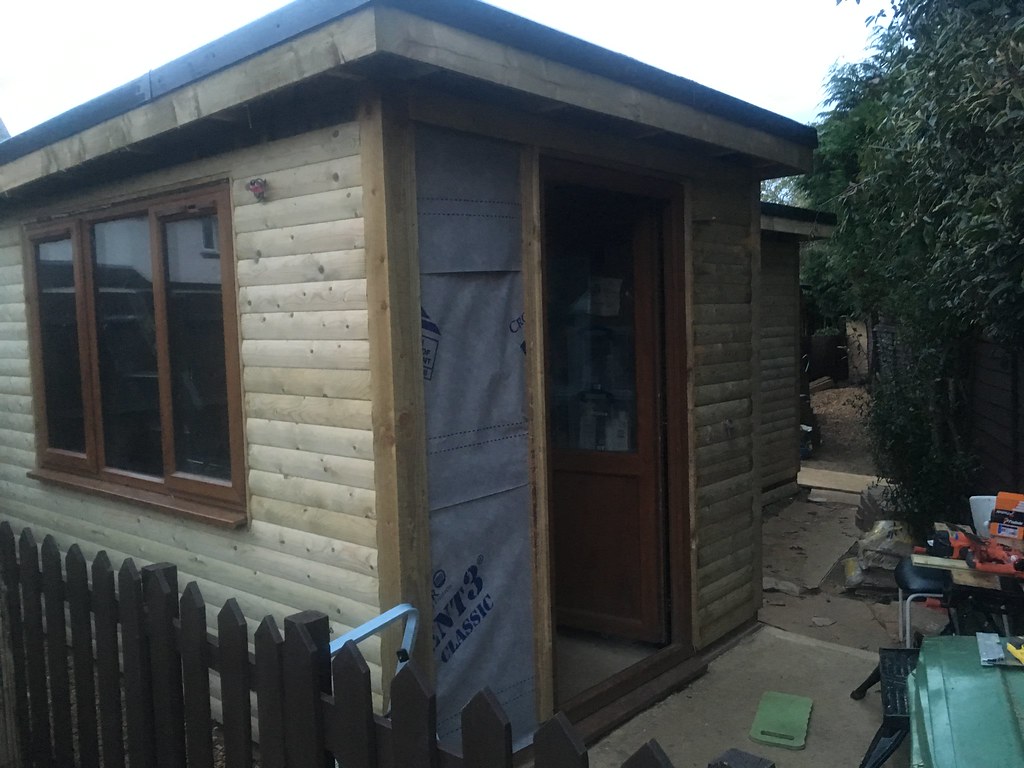
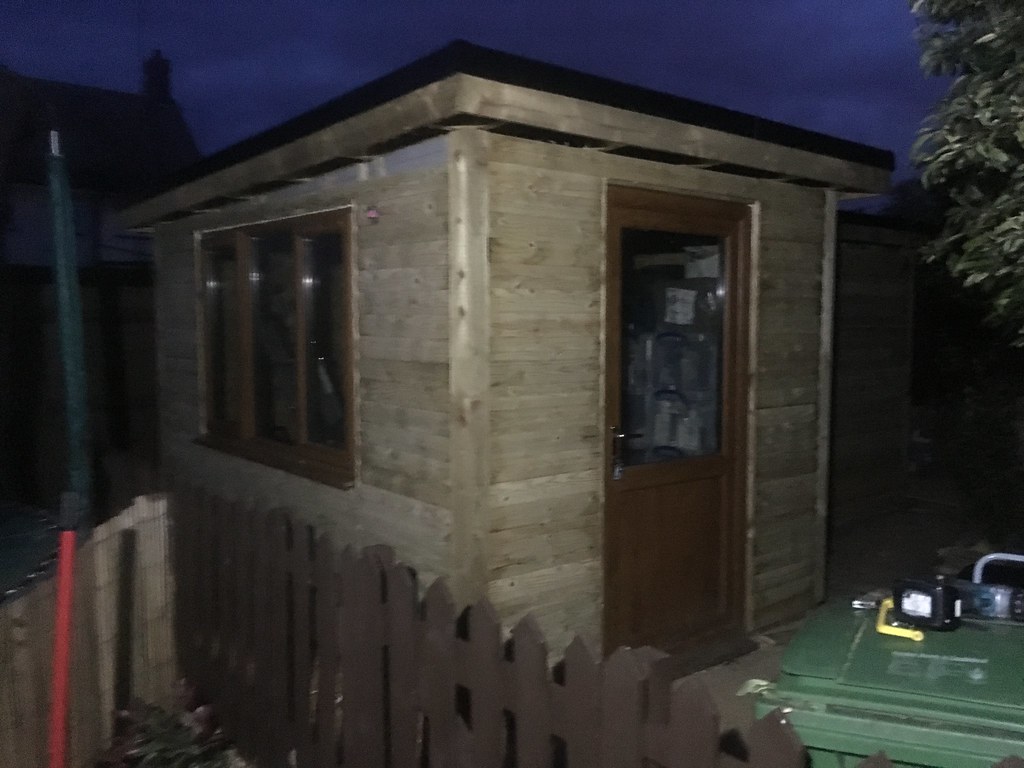
So, some good progress was made today with the cladding. I got it all done other than the top pieces which need cutting to match the roof pitch.
I got very frustrated with the Paslode brad gun I hired from HSS. To start with they gave me the wrong charger cable, luckily I had a lead that worked, but all day the firing has been very intermittent I've wanted to smash the thing to pieces. It really held up progress.
Oh well, on to some pics!
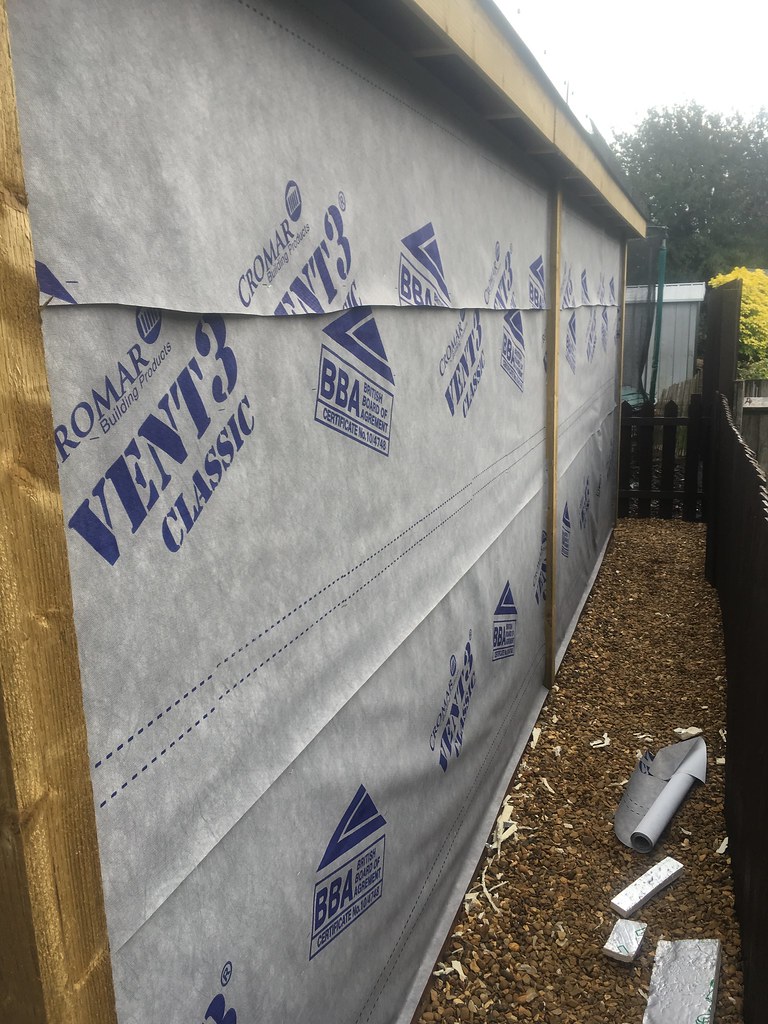
Battens screwed on. Note the breather membrane overlaps the brick slightly so any moisture can run down the back of the cladding without the stud work getting wet
 IMG_3222 by Tomoose85, on Flickr
 IMG_3221 by Tomoose85, on Flickr
 IMG_3224 by Tomoose85, on Flickr
 IMG_3223 by Tomoose85, on Flickr
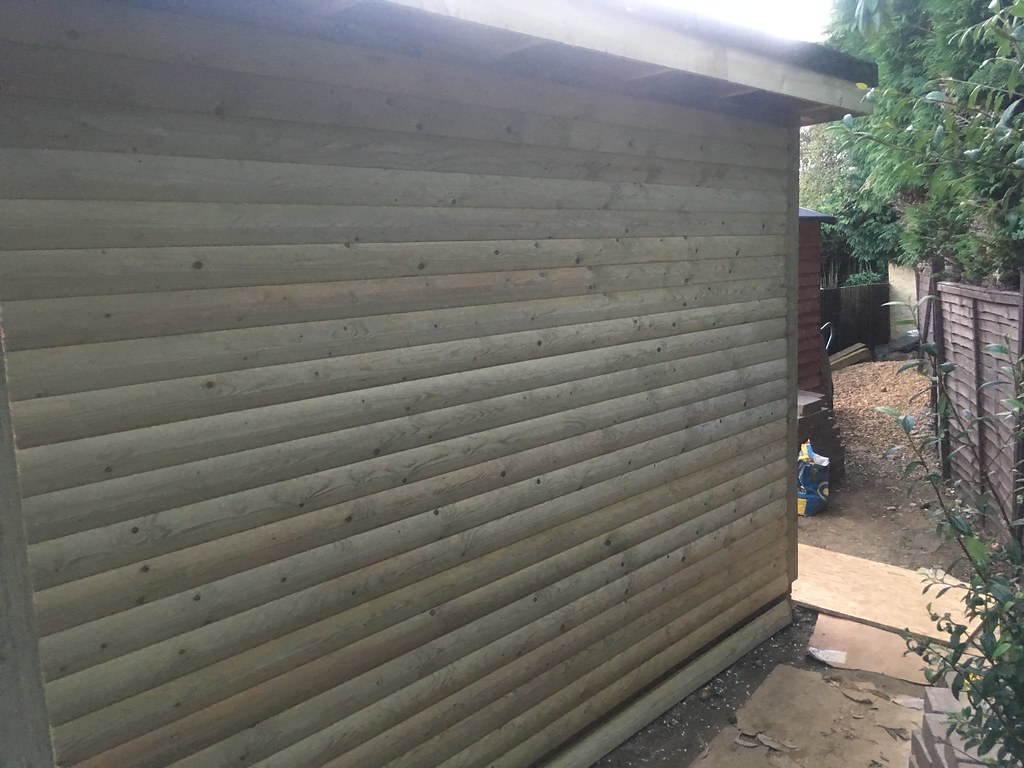
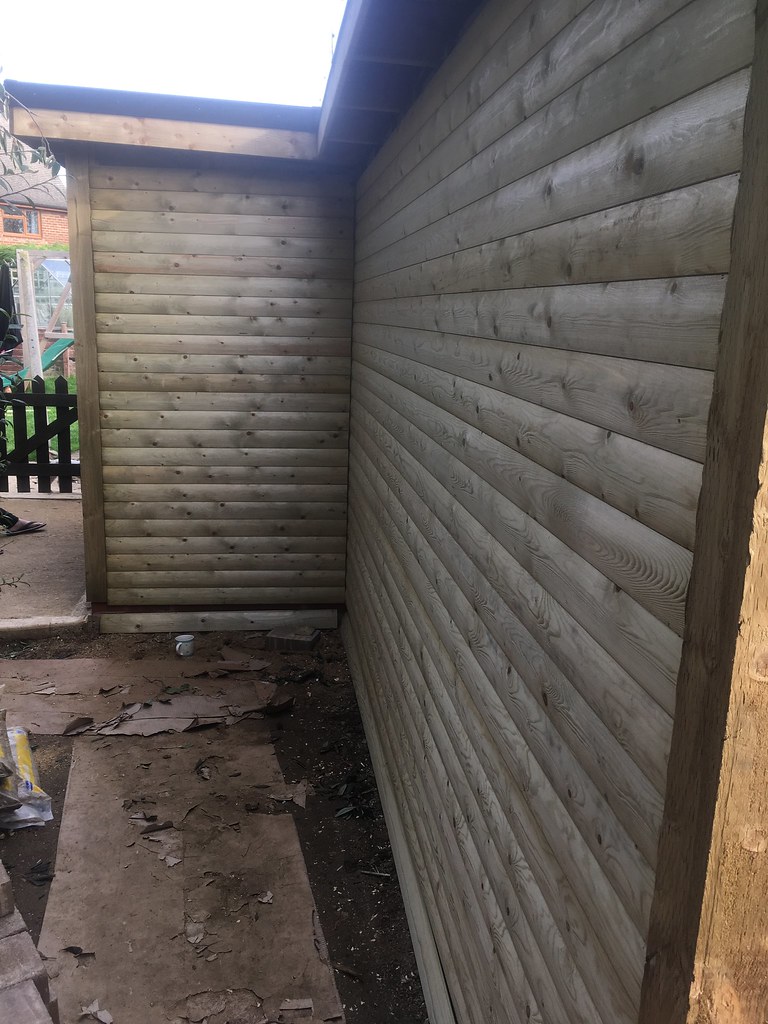
Then on with the cladding!
 IMG_3229 by Tomoose85, on Flickr
 IMG_3228 by Tomoose85, on Flickr
 IMG_3234 by Tomoose85, on Flickr
 IMG_3235 by Tomoose85, on Flickr
 IMG_3243 by Tomoose85, on Flickr
 IMG_3245 by Tomoose85, on Flickr
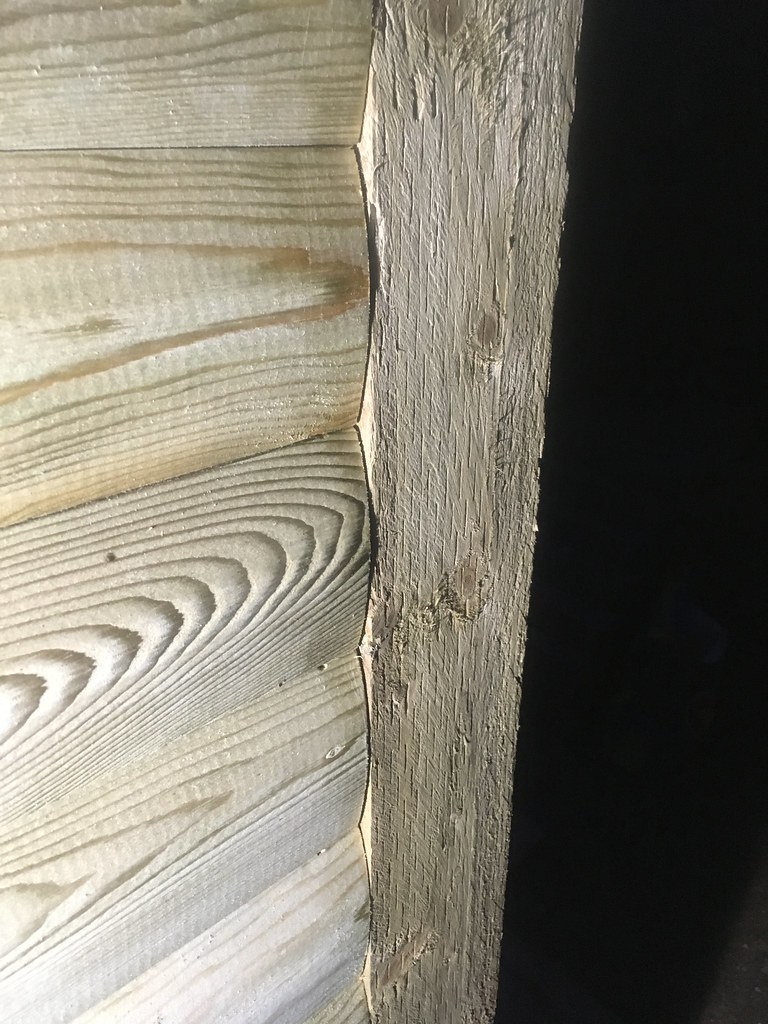
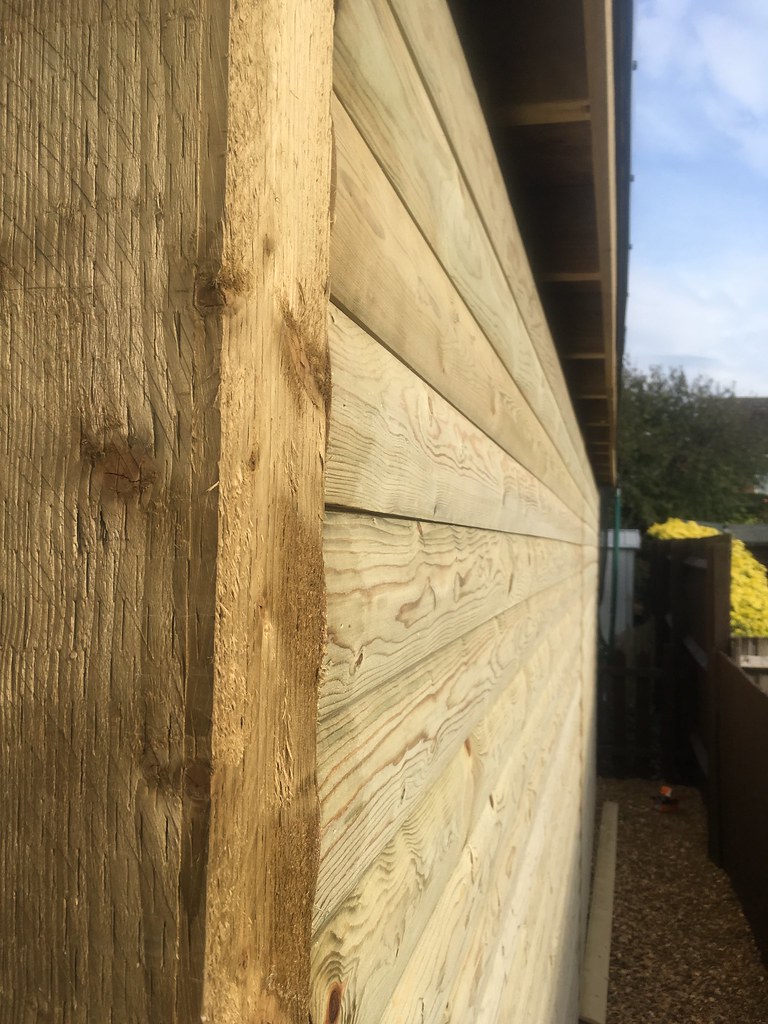
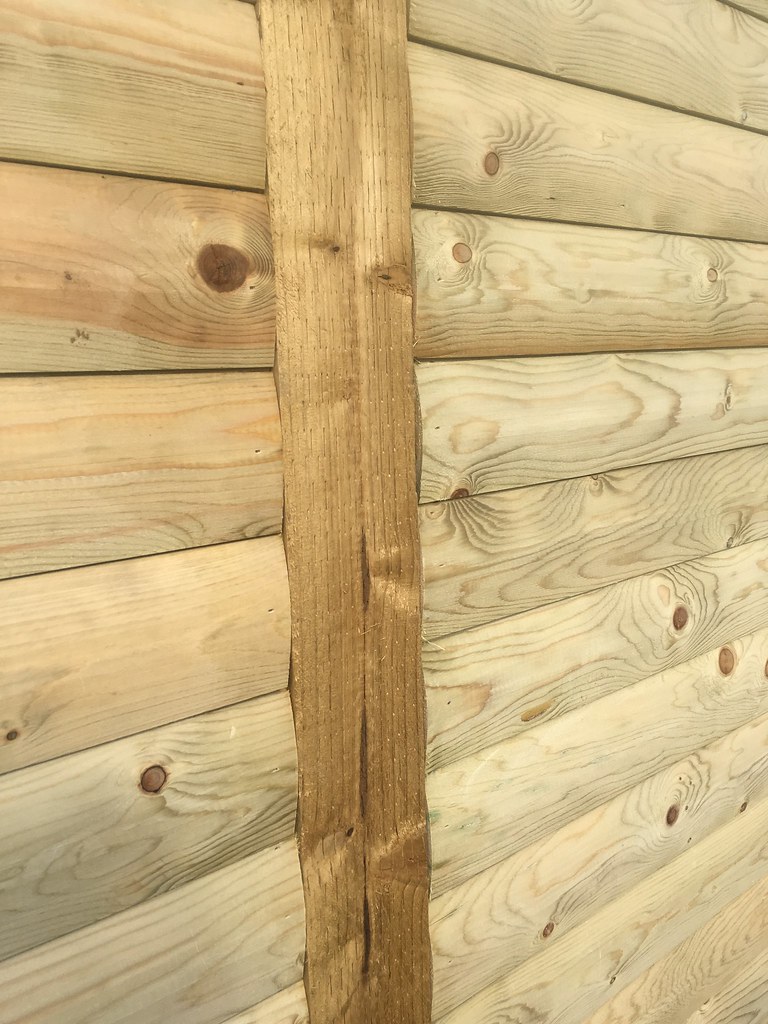
I'm really pleased with the detailing too, it worked out great.
Cladding end grain protected by the corner posts
 IMG_3231 by Tomoose85, on Flickr
And the intermediate post on the long wall to avoid needing to have any joints in the cladding.
 IMG_3232 by Tomoose85, on Flickr
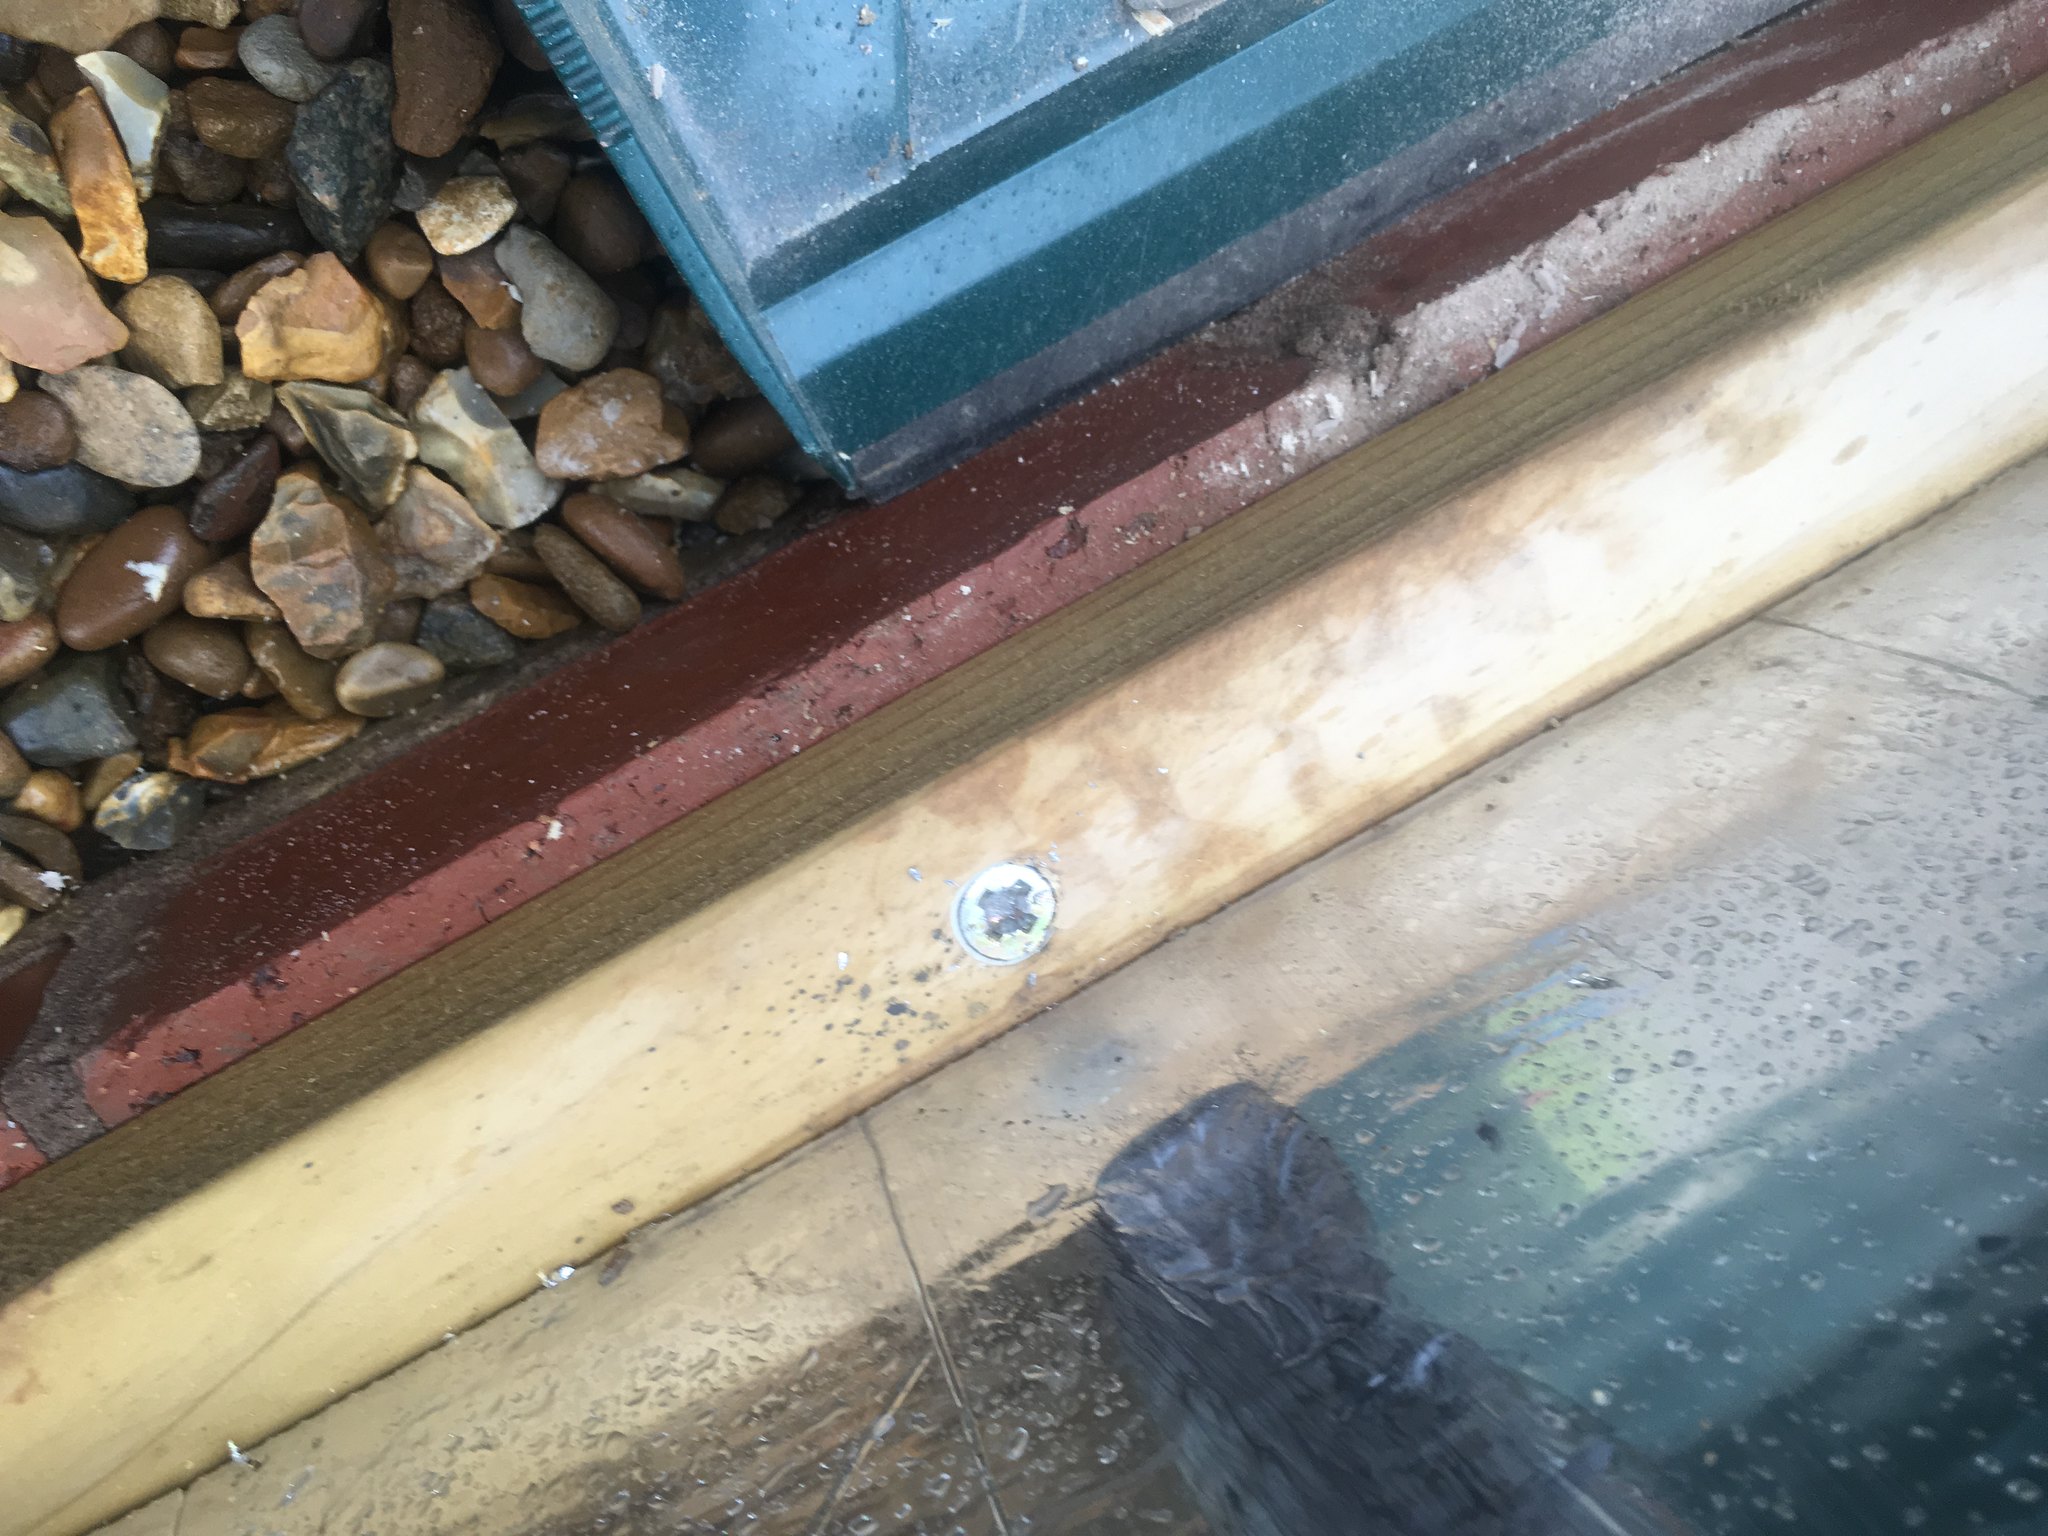
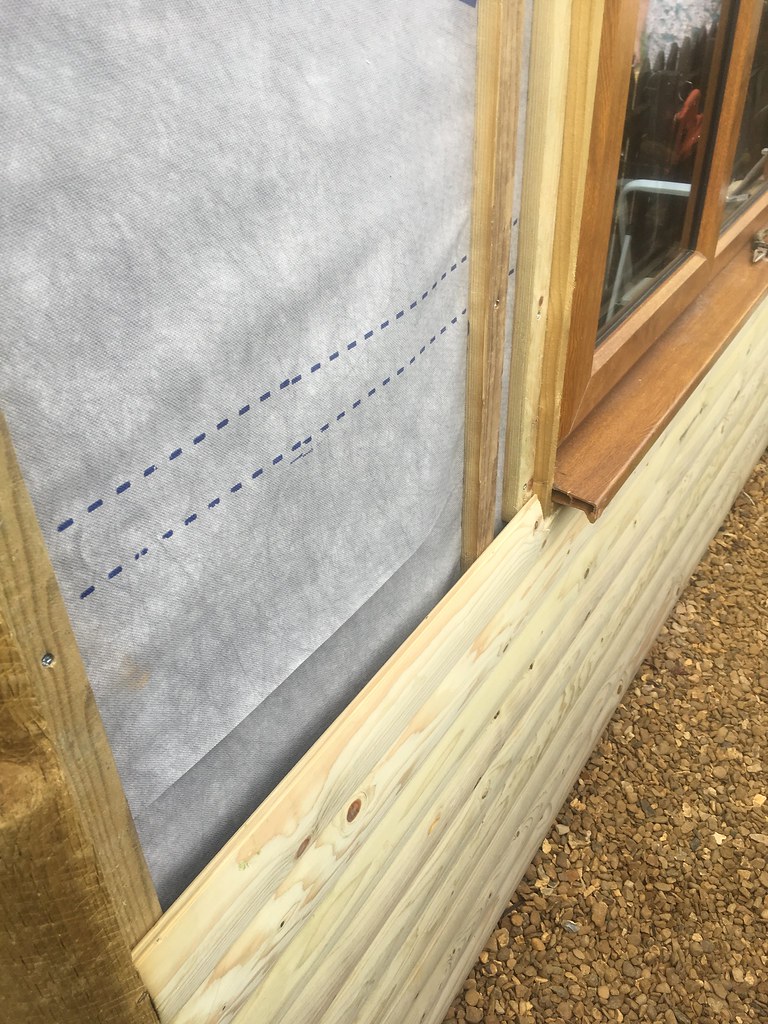
The gravel board around the window frame seems to do the job nicely.
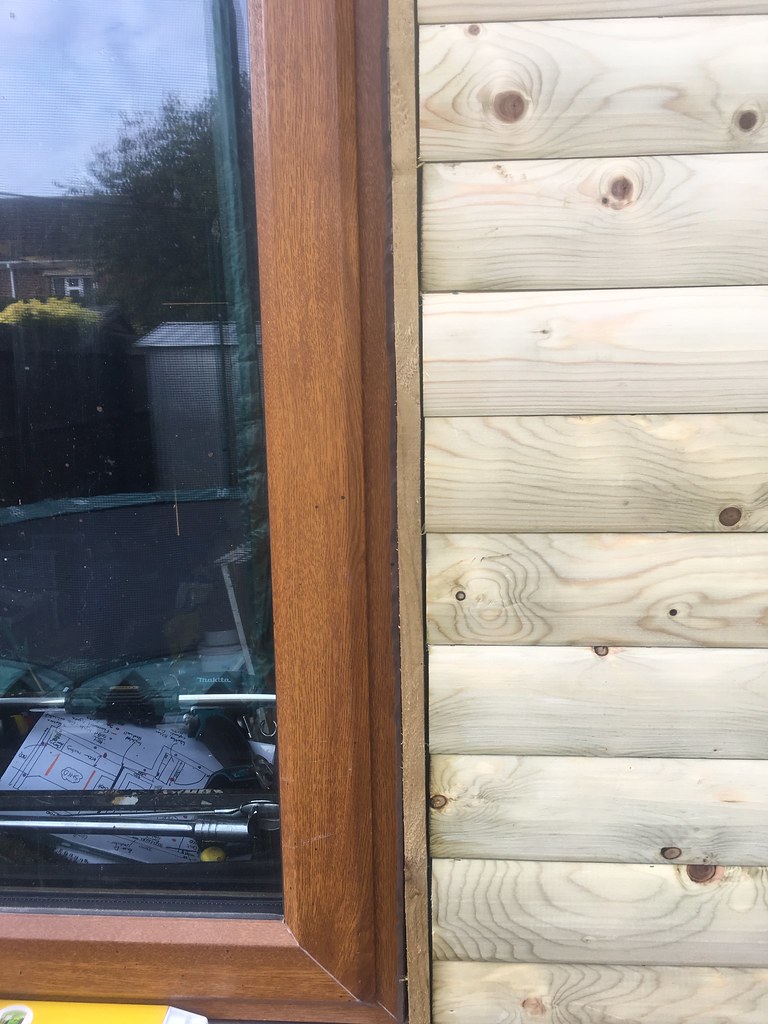 IMG_3236 by Tomoose85, on Flickr
So the next jobs are to cut the top boards to fit and get them on, make a door for the end wall, find some way of doing the soffits (probably with gravel boards), and get the electrics finished off.
As for paint, I think I'm going to try and find a colour to match the windows for the soffits and fascias, but the rest will be something like Sadolin 'Autumn Leaf'.
I got very frustrated with the Paslode brad gun I hired from HSS. To start with they gave me the wrong charger cable, luckily I had a lead that worked, but all day the firing has been very intermittent I've wanted to smash the thing to pieces.
It really held up progress.Oh well, on to some pics!
Battens screwed on. Note the breather membrane overlaps the brick slightly so any moisture can run down the back of the cladding without the stud work getting wet
IMG_3222 by Tomoose85, on FlickrIMG_3221 by Tomoose85, on FlickrIMG_3224 by Tomoose85, on FlickrIMG_3223 by Tomoose85, on FlickrThen on with the cladding!
IMG_3229 by Tomoose85, on FlickrIMG_3228 by Tomoose85, on FlickrIMG_3234 by Tomoose85, on FlickrIMG_3235 by Tomoose85, on FlickrIMG_3243 by Tomoose85, on FlickrIMG_3245 by Tomoose85, on FlickrI'm really pleased with the detailing too, it worked out great.
Cladding end grain protected by the corner posts
IMG_3231 by Tomoose85, on FlickrAnd the intermediate post on the long wall to avoid needing to have any joints in the cladding.
IMG_3232 by Tomoose85, on FlickrThe gravel board around the window frame seems to do the job nicely.
IMG_3236 by Tomoose85, on FlickrSo the next jobs are to cut the top boards to fit and get them on, make a door for the end wall, find some way of doing the soffits (probably with gravel boards), and get the electrics finished off.
As for paint, I think I'm going to try and find a colour to match the windows for the soffits and fascias, but the rest will be something like Sadolin 'Autumn Leaf'.
Gassing Station | Homes, Gardens and DIY | Top of Page | What's New | My Stuff