Discussion


There's a bit of an idea nibbling at the back of my brain - basically using a piano hinge, wooden batten on the back wall cut into a 45° angle, back edge of the workbench cut the same, so when it's folded up the work top is flat to the wall.
The gaping flaw in the plan is that the hinge valley will fill up with crap and then you won't be able to close it.
The gaping flaw in the plan is that the hinge valley will fill up with crap and then you won't be able to close it.


wsurfa said:
Found some rotten bits of oak under a tarp I 'stored' a few years ago and made a shelf - first bow tie and epoxy effort.
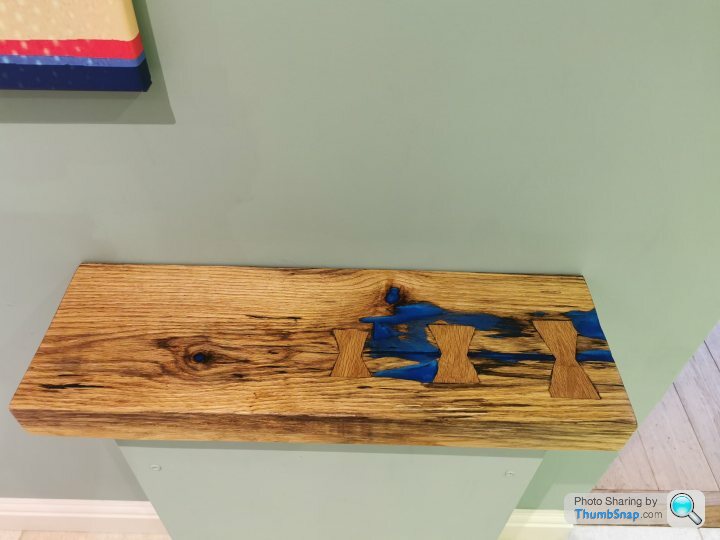
Very nice, ive just bought a length of timber that has a crack in the end specifically for making a charcuterie board with bow ties inserted in the end. will look at clear epoxy to fill the remaining gap. Ill post pictures.illmonkey said:
Quick Q:
I want to make a folding workbench for my garage. Plan to run a bit of 2x4 across a 2m span then hinge a worktop to it. I'd really like the hinge to be hidden, the workbench to fold upward and also not have a gap between workbench and wall when folded down. Is there such a hinge? Or smart way to do it?
I will have fold out legs also, to support the front.
Only thing I can think is to use a flush hinge to the wall from the top of the worktop.
I have no idea if this is what either of you have/had in mind but I used (vaguely) Jack Olsen's plans for a fold away bench. Just don't get caught up in the rest of the site or you'll never get it done!I want to make a folding workbench for my garage. Plan to run a bit of 2x4 across a 2m span then hinge a worktop to it. I'd really like the hinge to be hidden, the workbench to fold upward and also not have a gap between workbench and wall when folded down. Is there such a hinge? Or smart way to do it?
I will have fold out legs also, to support the front.
Only thing I can think is to use a flush hinge to the wall from the top of the worktop.
https://www.12-gaugegarage.com/blog-11/index.html
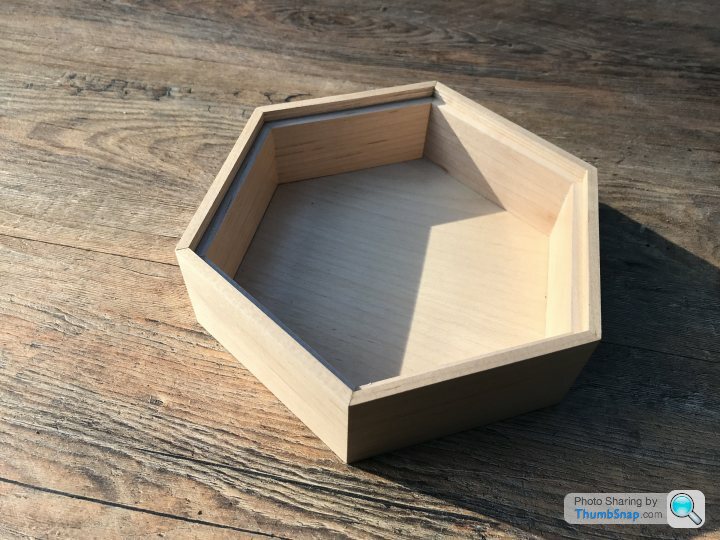
The box-making continues, and (apart from a mildly disastrous sliding-lid pencil box attempt) progresses. My first hexagonal box; maple sides, ply base, walnut top. Some tearout on the lid and a few scrappy details, but I'm quite pleased overall. Finished with polyacrylic with a little wipe of beeswax to make it feel and smell like a more expensive/tricky finish.

Sporky said:
The box-making continues, and (apart from a mildly disastrous sliding-lid pencil box attempt) progresses. My first hexagonal box; maple sides, ply base, walnut top. Some tearout on the lid and a few scrappy details, but I'm quite pleased overall. Finished with polyacrylic with a little wipe of beeswax to make it feel and smell like a more expensive/tricky finish.
Very nice indeed. Sporky said:
The box-making continues, and (apart from a mildly disastrous sliding-lid pencil box attempt) progresses. My first hexagonal box; maple sides, ply base, walnut top. Some tearout on the lid and a few scrappy details, but I'm quite pleased overall. Finished with polyacrylic with a little wipe of beeswax to make it feel and smell like a more expensive/tricky finish.
I like it. I know how tricky it is to make all those cuts accurately enough so everything comes together nicely... and then fit the top. 
In other news, I'm afraid to say that Textrol, the oil finish I chose for my garden bench, the oil finish to end all oil finish conversations.... has underperformed.
I can honestly say it's been the most hopeless oil finish I've ever used. I even recoated the arms a month ago but the lack of UV protection really shows.
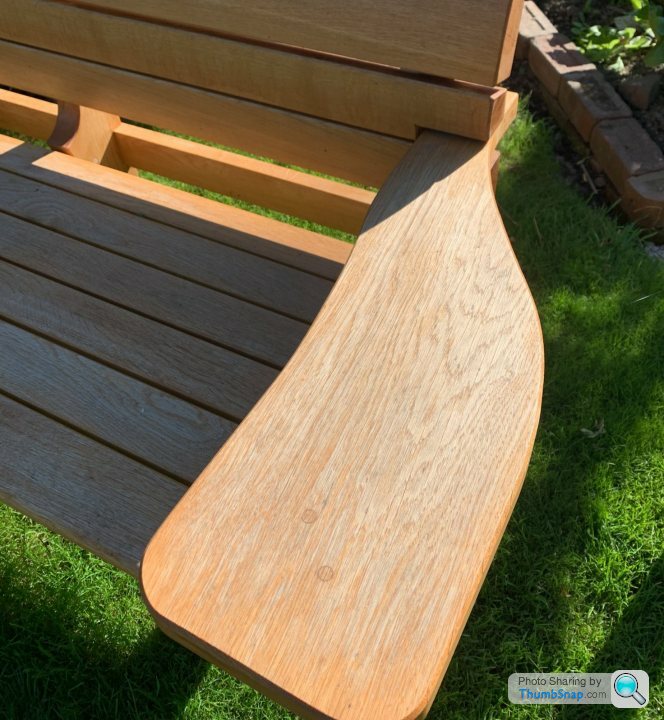
I'd have been better off using Hawaiian Tropic, at least it would have smelled nice.

loughran said:
I like it. I know how tricky it is to make all those cuts accurately enough so everything comes together nicely... and then fit the top.
Thank you - it did take a while setting up the angles. Tablesaw for the rough mitre cuts, then I have a mitre guillotine for getting it exact.The top was surprisingly straightforward - resaw and book matched a bit of scrap walnut, rough cut it to the outer dimensions of the box, then with the tablesaw mitre set accurately I got the sides all to the right angles and then snuck up on the final measurements. Lots of checking and retrimming, but not much head scratching.
The other really good tip I picked up (from 52 Boxes 52 Weeks) is to size the mitres with a 50-50 glue/water mix - the joints end up really string even without cutting keys into them.
thebraketester said:
Sadly not fine carpentry but I needed to make a baby gate for somewhere where the bought ones just would not work.
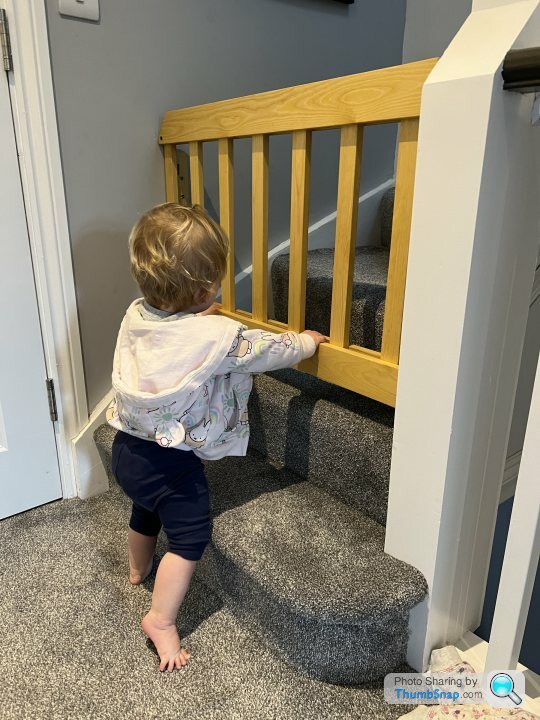
Its kind of a parallelogram design and folds up flat against the walk.

All the dowel/pivots come through the back so are not visible from the front.
Truly excellent work!Its kind of a parallelogram design and folds up flat against the walk.
All the dowel/pivots come through the back so are not visible from the front.
loughran said:
That does look lovely. Does it fix/hinge to the wall ?
Yes it does. There is a batton on the left hand wall which attaches to the left most vertical.
I need to redo the wall fixing/batton as its a bit of a mess but it works and is mostly hidden from view. Note the spacers I had to glue on to get it off the wall a fraction of an inch.
Thanks guys. I cant take credit for the idea (ideal stolen from Matthias Wandel) but I designed it as I went along. Took way too long as all these things tend to.
gtidriver said:
wsurfa said:
Very nice, ive just bought a length of timber that has a crack in the end specifically for making a charcuterie board with bow ties inserted in the end. will look at clear epoxy to fill the remaining gap. Ill post pictures.Have you managed to do your charcuterie board yet?
Gassing Station | Homes, Gardens and DIY | Top of Page | What's New | My Stuff